
In this tutorial I will show you how the graphic designs of a video game is made, from research to finalization of the game, and marketing. I will explain my thinking process and decision making.
First of all, creating a video game is a team work, as a graphic designer you have to keep in mind the needs of game designers to make their gameplay ideas look good, and clear (example: platforms, enemies ...).
For a VR game like this one, you must also know the technical constraints related to this support ( number of polygon and particles, lighting).
I will also give you some tips and tricks that you can use when working on your own piece. I will cover aspects like concept, modelling, lighting and marketing. I hope you will find it useful and interesting.
Concept
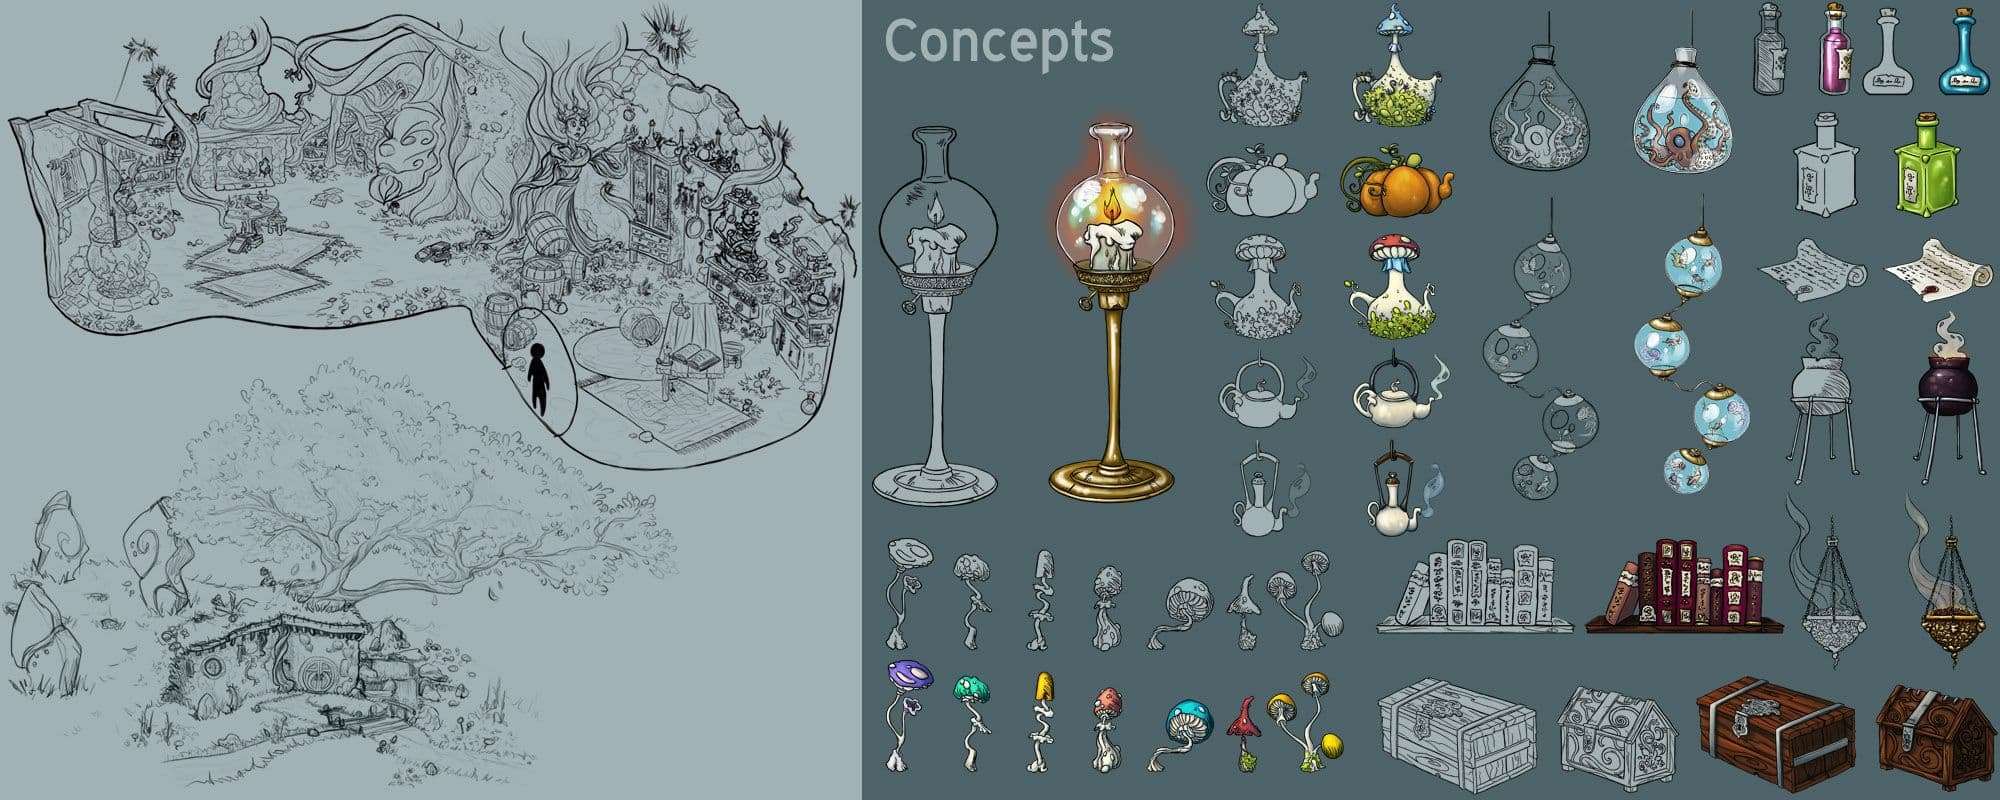
I start by making research on the universe/theme that we chose for the game. Here for the hut of an old druid, so a Celtic, and medieval fantasy atmosphere. I wanted to add an original and colourful floral touch to add an aspect of total symbiosis between the druid, and the nature but while remaining coherent. I took Japan, and its gardens as a reference.
We then chose the graphic charter. I am always inspired by video games, artists and films whose aesthetics I appreciate. For the forms I take as reference the game "Heroes of the Storm", to have shapes that make the place welcoming. For this project I want to have an aspect of painting as in the game "League of Legends", I also chose the colourful range of this game that match the atmosphere we are looking for, welcoming but mysterious.

Once I have this base, I do the concepts arts, research ambience, environment and props.
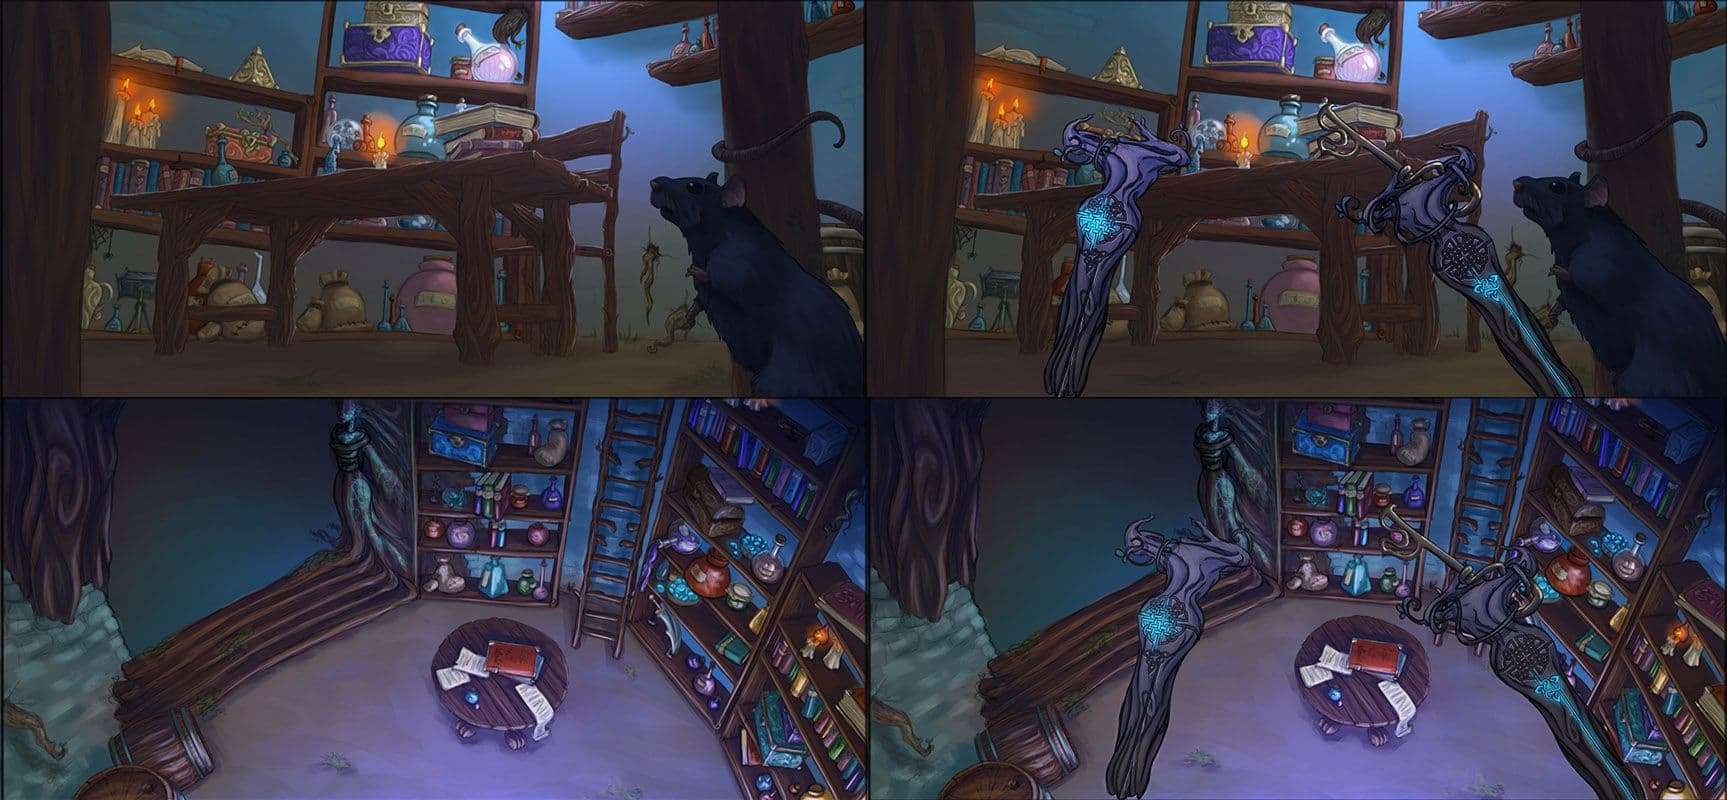
I also realize fake Screens. For this game it's necessary to show 2 aspects of the game, the player when he is very small, and when he is very big because he can change size to pass in certain places or to find certain ingredients.
During the creation of a game of new ideas appears, and others
disappear. Do not hesitate to make new concepts fast especially for props and organize well for timing. Time is very important to make a game, we never have enough! We must adapt, and always seek the fastest method to work.
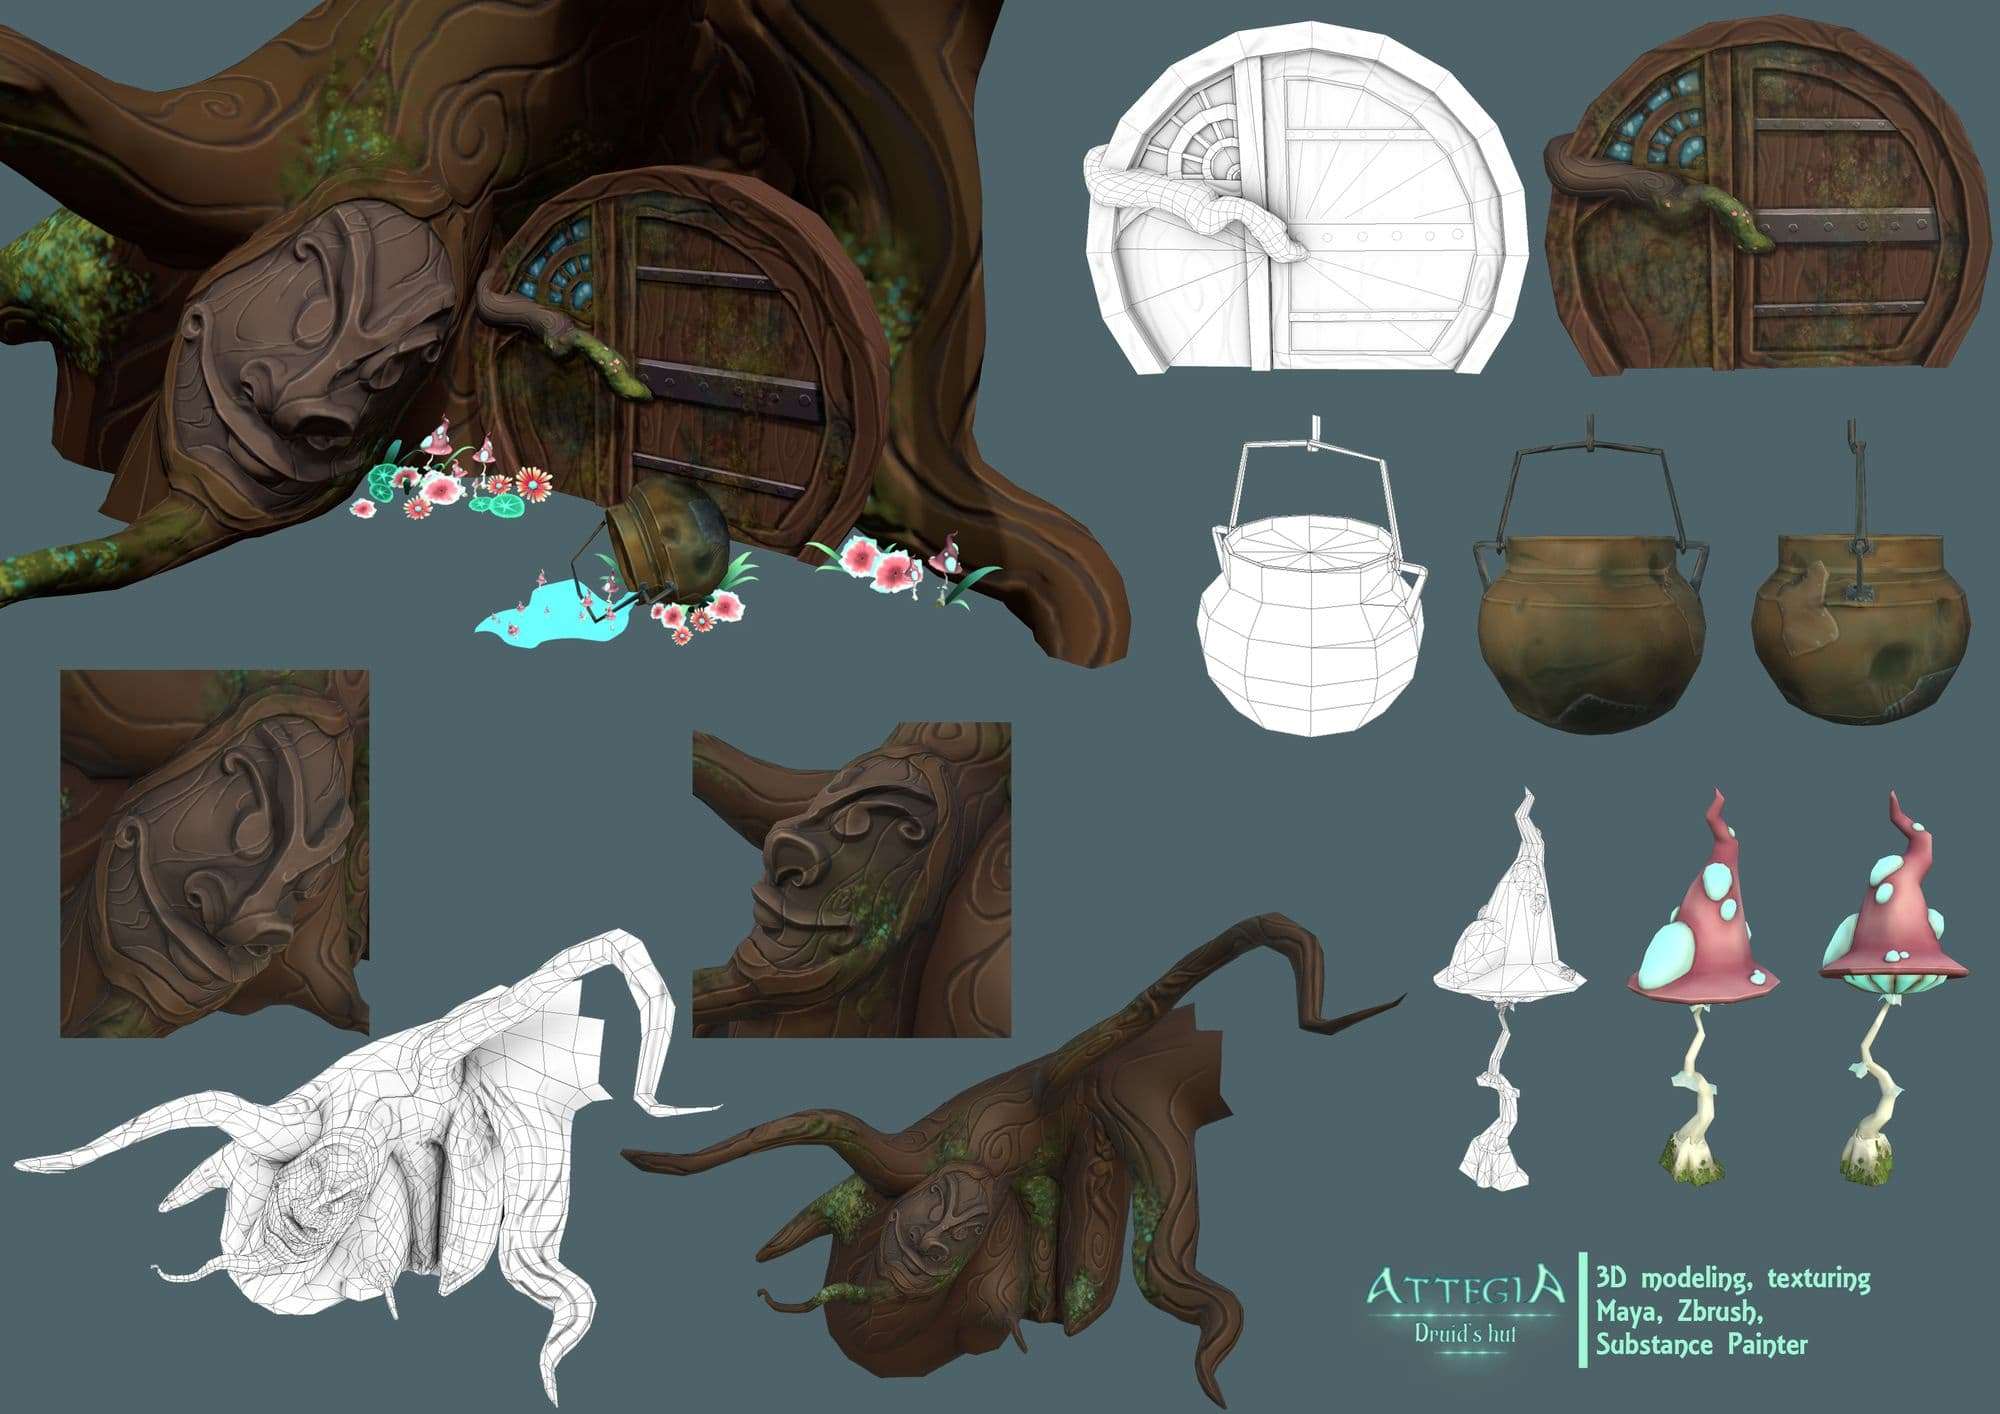
Modelling
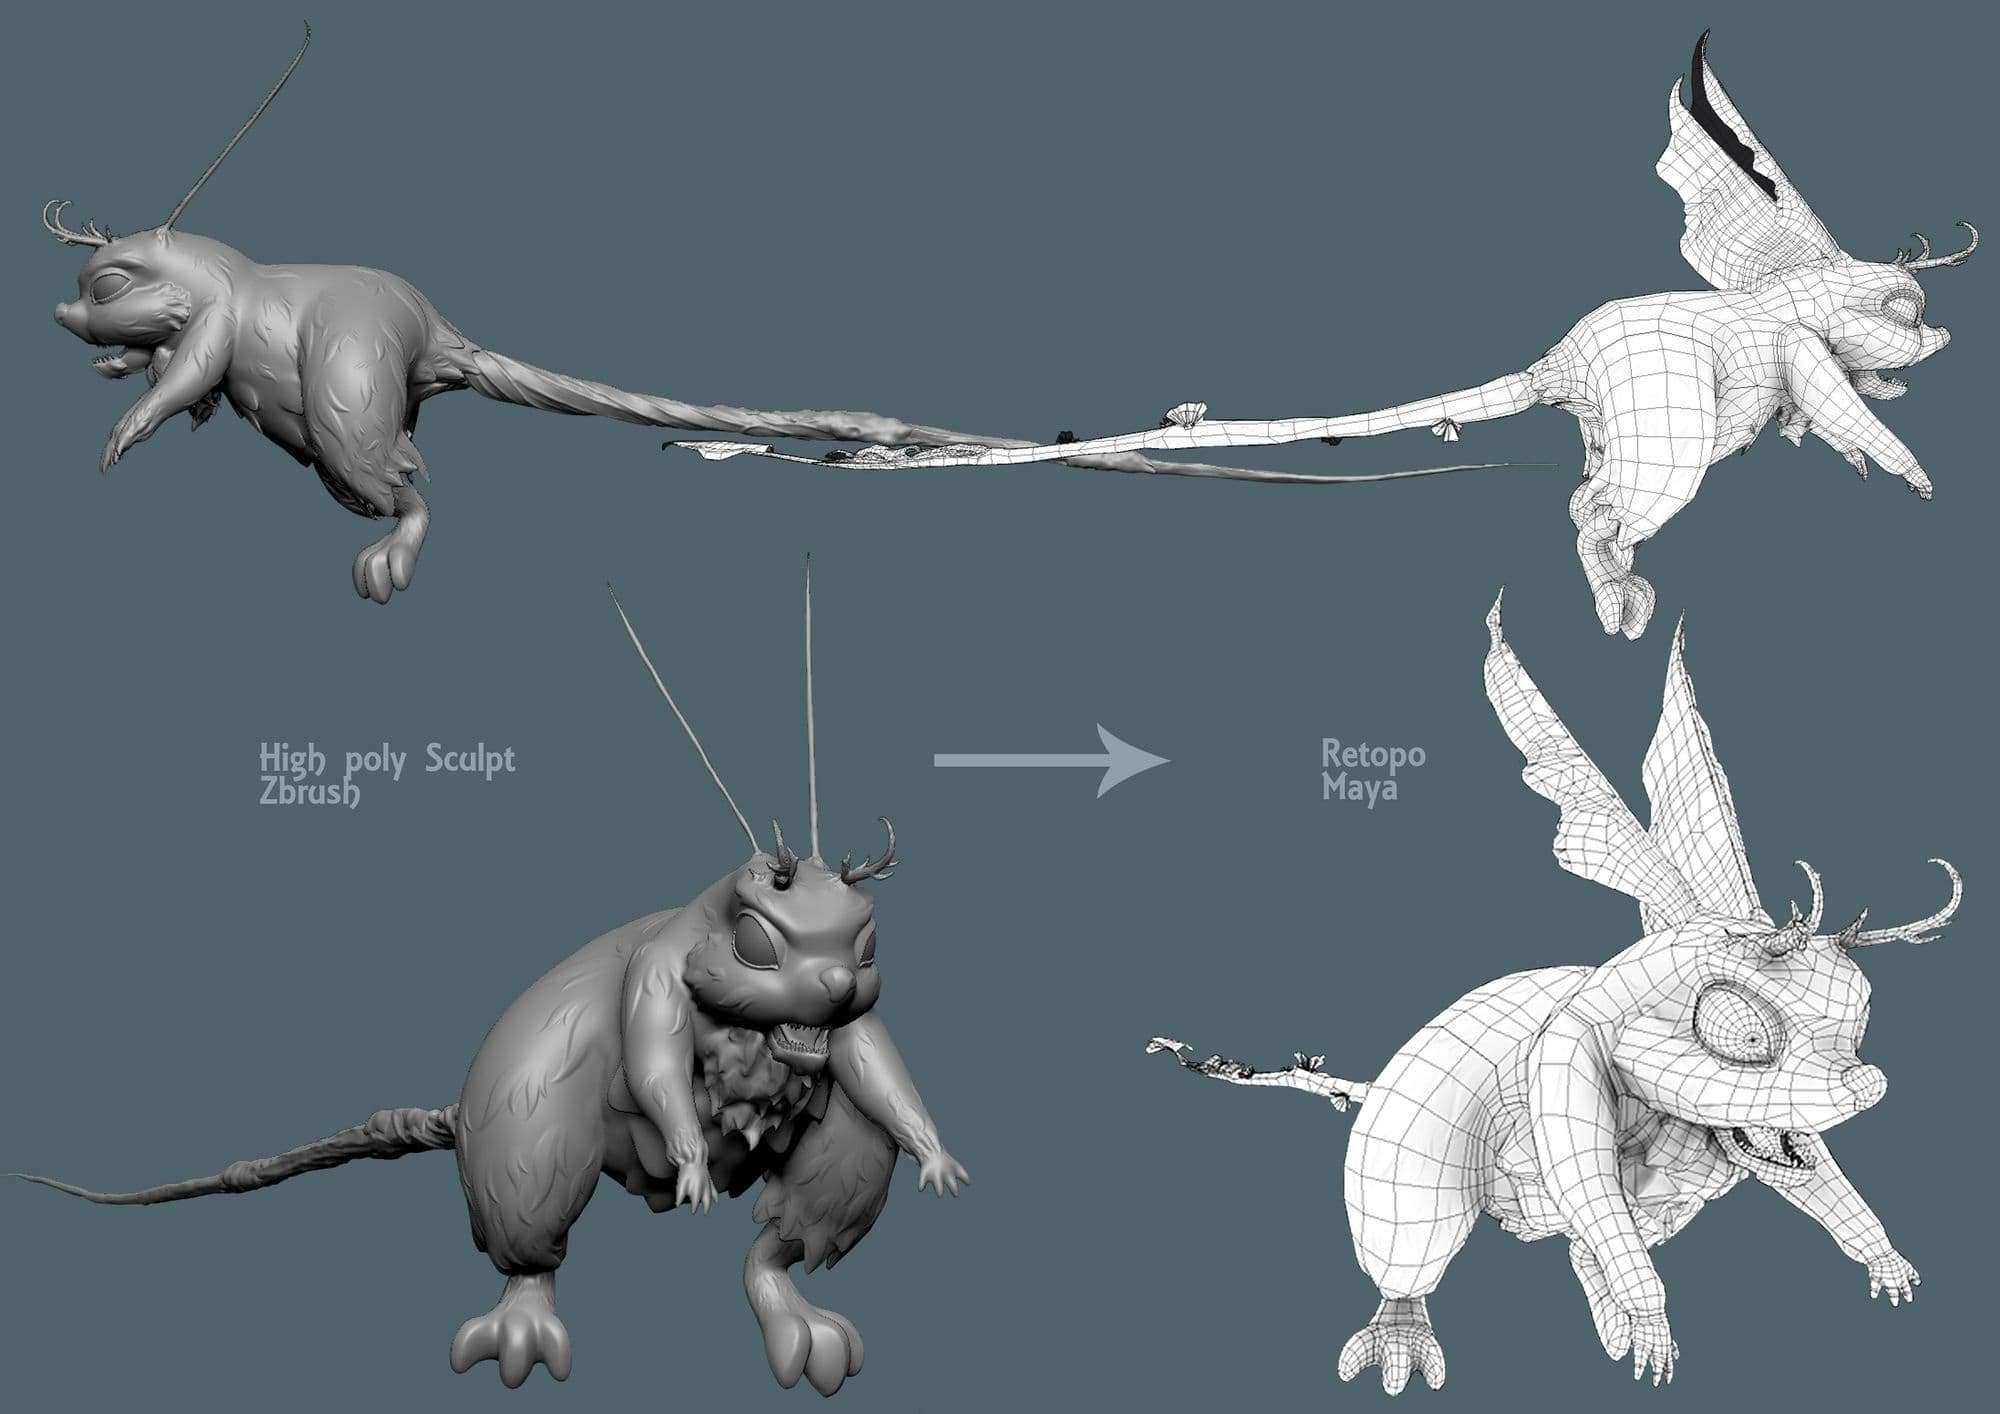
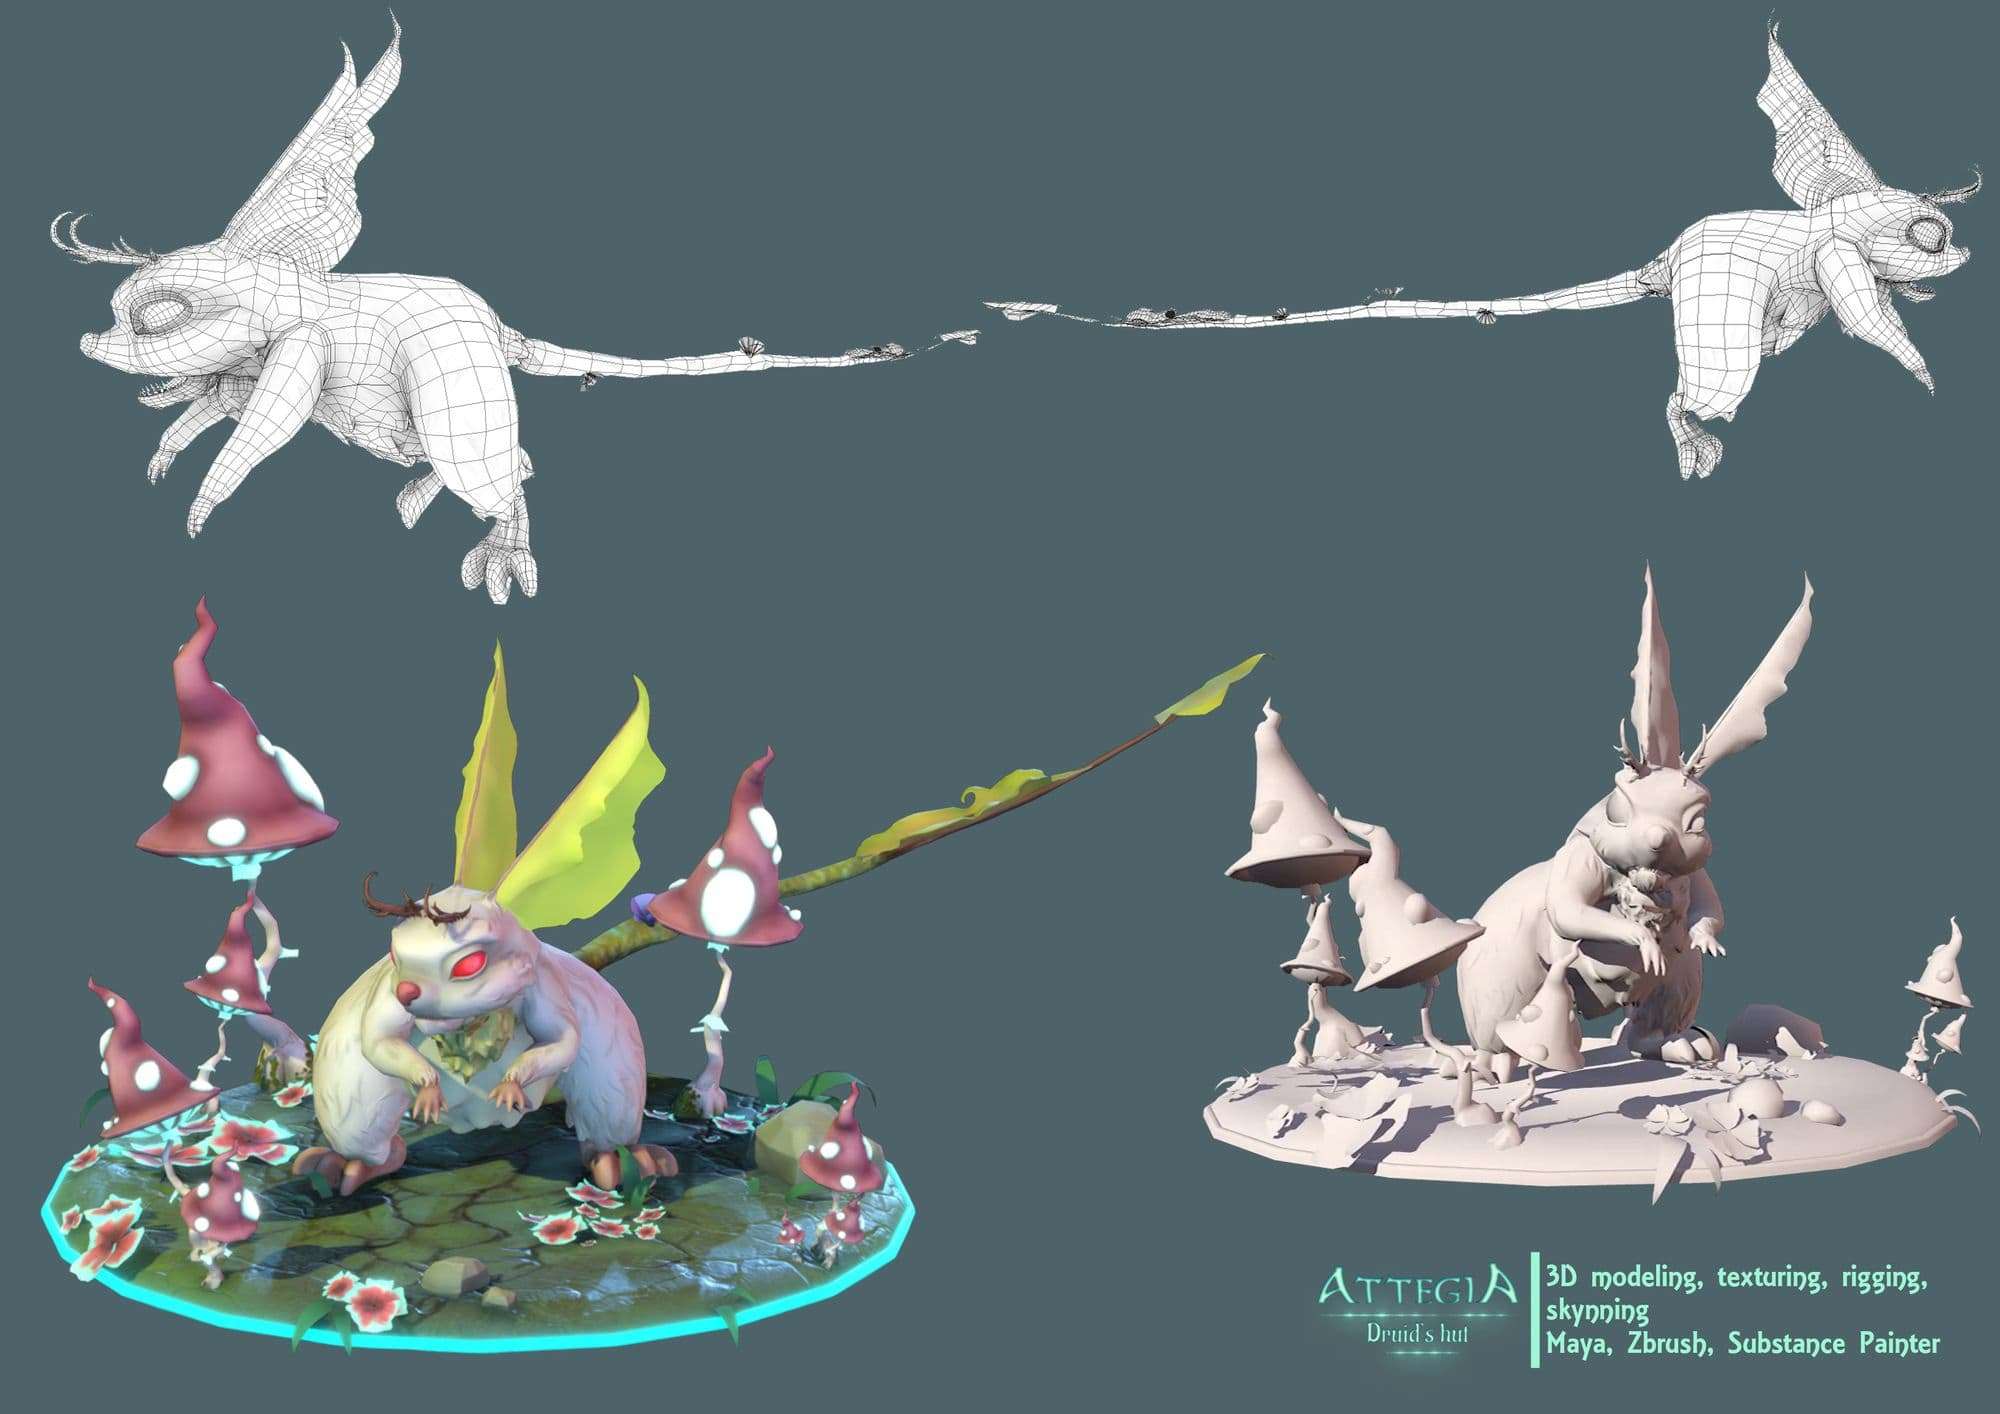
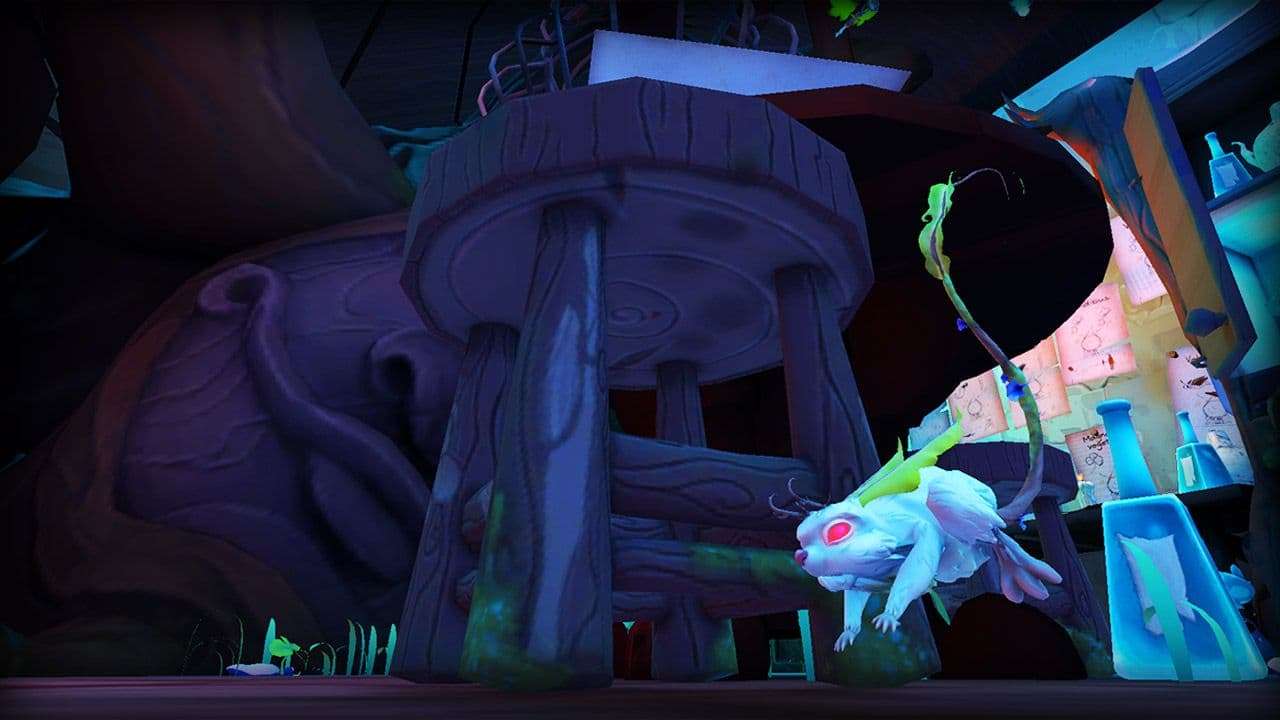
I work on Maya and ZBrush to model and animate. We were 3 game artists on the project which allowed to divide the work of modelling and allowed us to create more things in less time. For the creatures that populate the hut I create a high poly model on ZBrush, then I make the retopo in Maya. For this step it’s always necessary to keep in mind that the character is going to be animated.
Once the retopo is made, it's necessary to create the setup of the character (his skeleton), which will allow the character to move, as in reality. We follow the same principle by simplifying and adapting the skeleton at each morphology.
After this step I make the rig to create controllers that allow to move the body more easily. I finish by skinning the character (paint the skin so that it follows smoothly the movements of the skeleton). Know the character is ready to be animate.

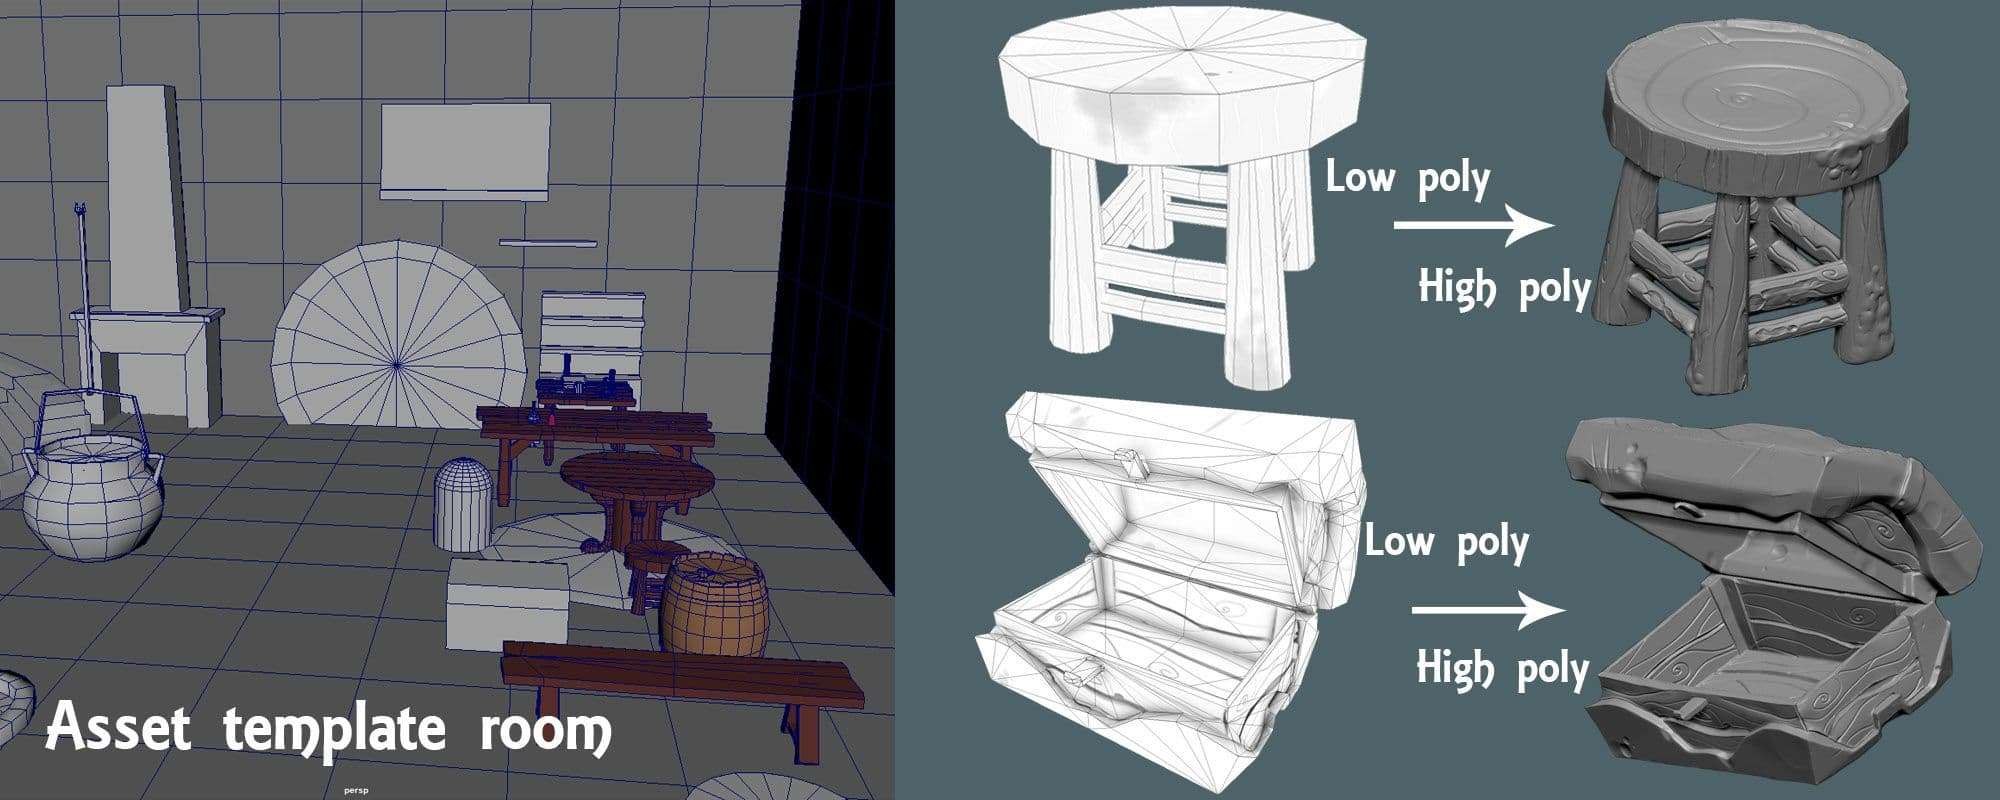
For the environment it's necessary to know the dimensions of the room in which the person playing moves to manage the distance, and allow the player to move as much as possible by walking rather than teleporting. To solve this problem I create an asset template room, based on the dimensions given by the game designers.
I integrate the elements like a table and chairs to be sure that the piece is at a realistic size compared to the player when he is on normal size. For all the environment, and props I first create a low poly asset in Maya.
Then I create a high poly asset on ZBrush with the low poly asset as a basis to add the details, and create a normal map for the textures.
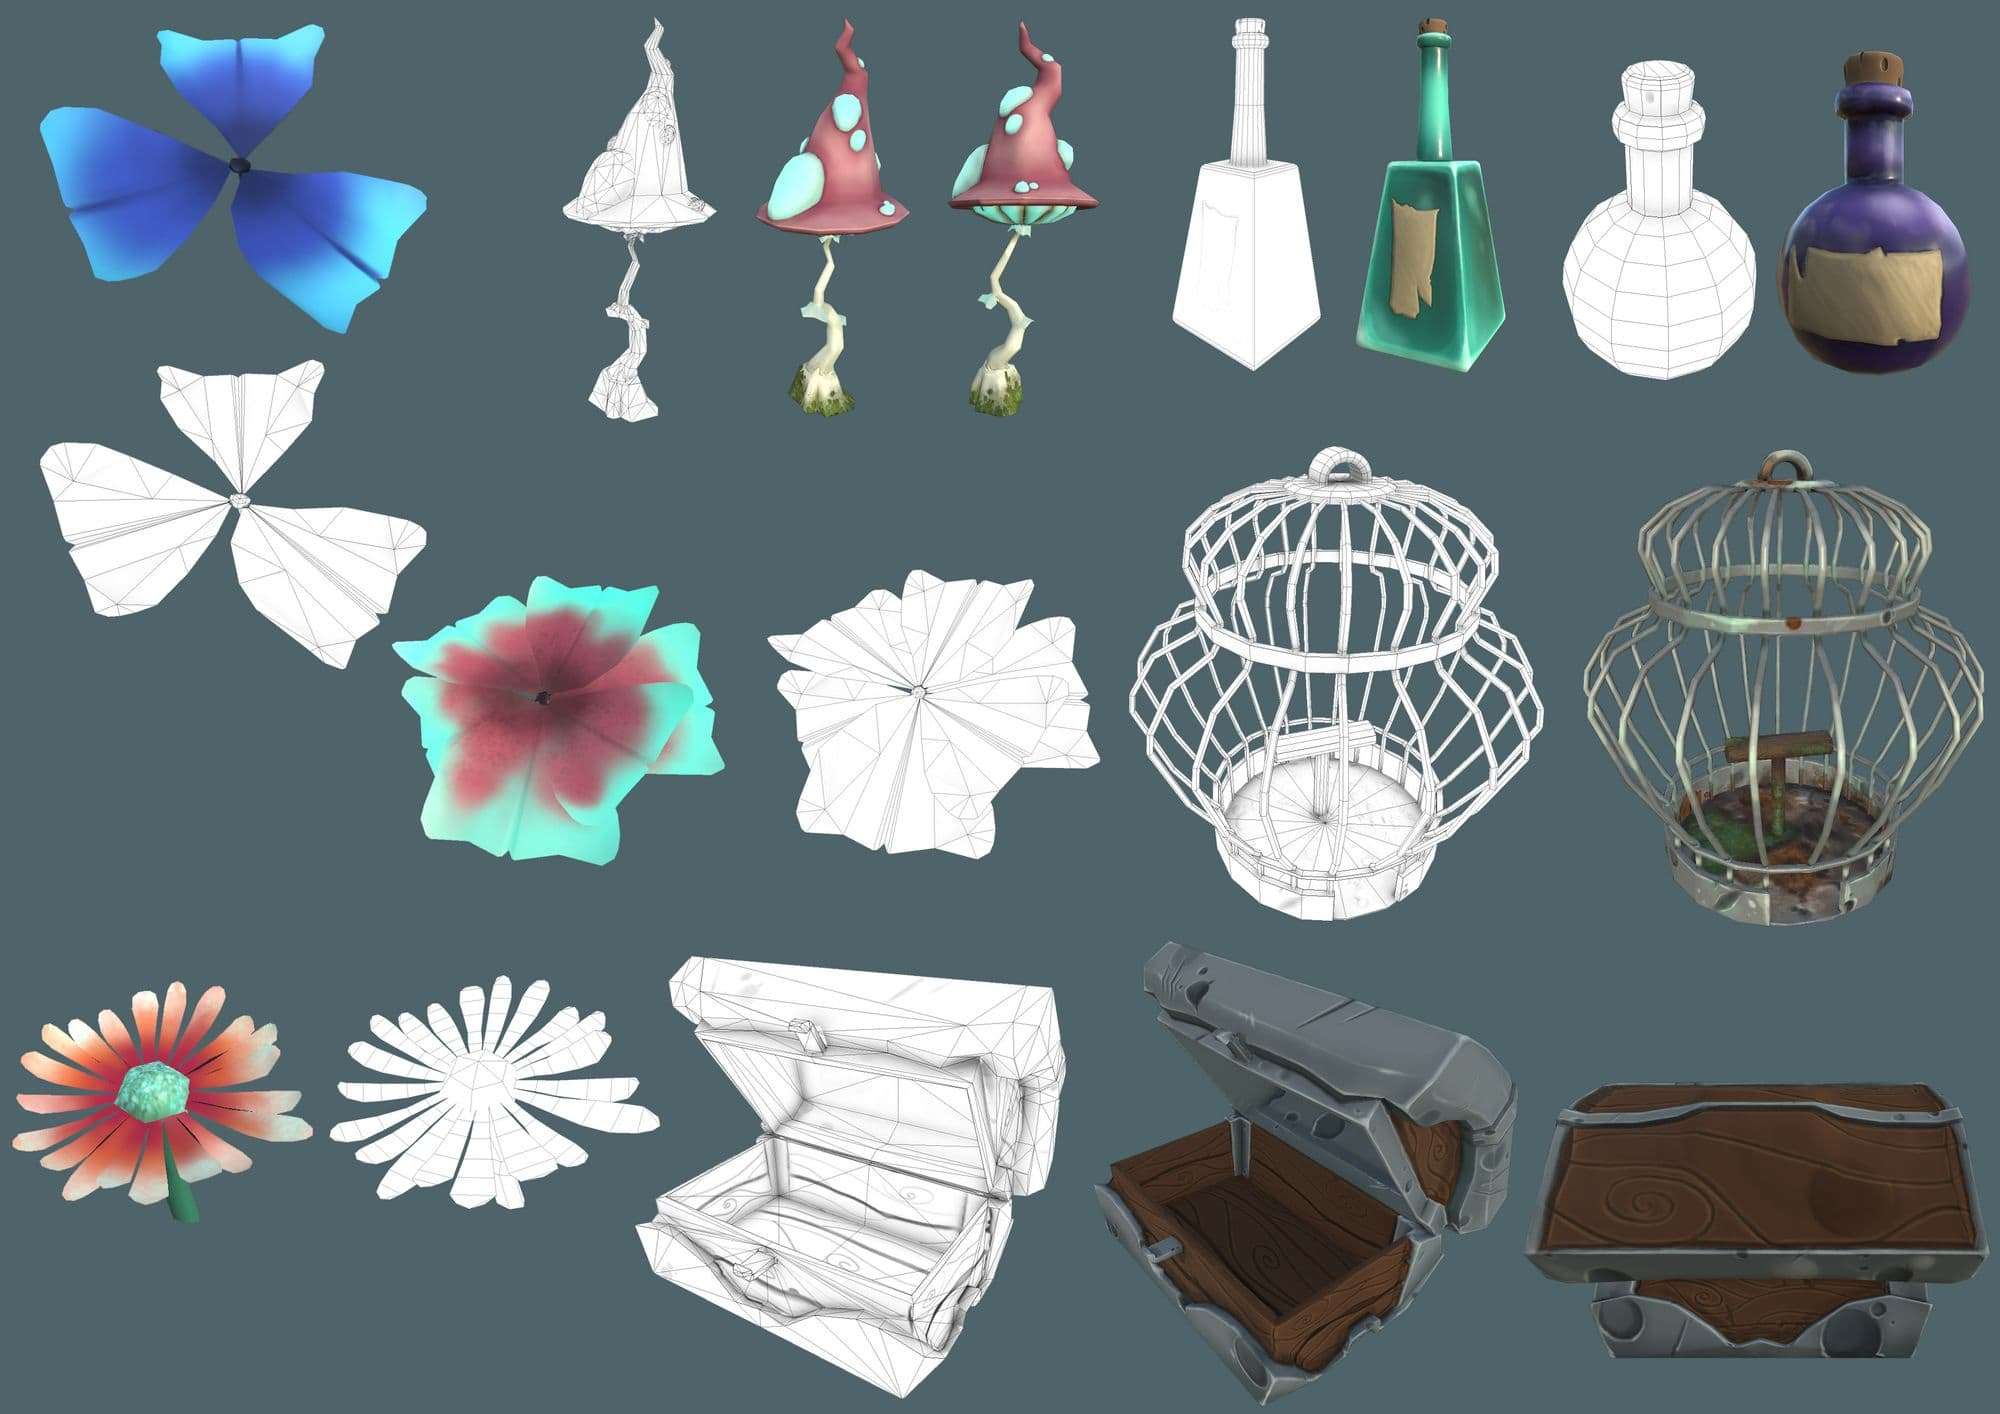
Unlike a game on console/PC, for VR the player can approach all the environment, take objects and inspect them from every angle. So we must create objects in their entirety and detail them (in the modelling to keep the volume and not having a flat feeling and with the normal map for more details). So you need more polygons than normal, but you have less leeway than for a console/PC game. We must balance aesthetics and technical problems.
I always start by creating the base of the decor and the objects necessary for the gameplay for a matter of time. if there is more time I can add elements, more and more small objects to add details and life to the environment. It‘s a very funny part because I can give free rein to my imagination.
Texture
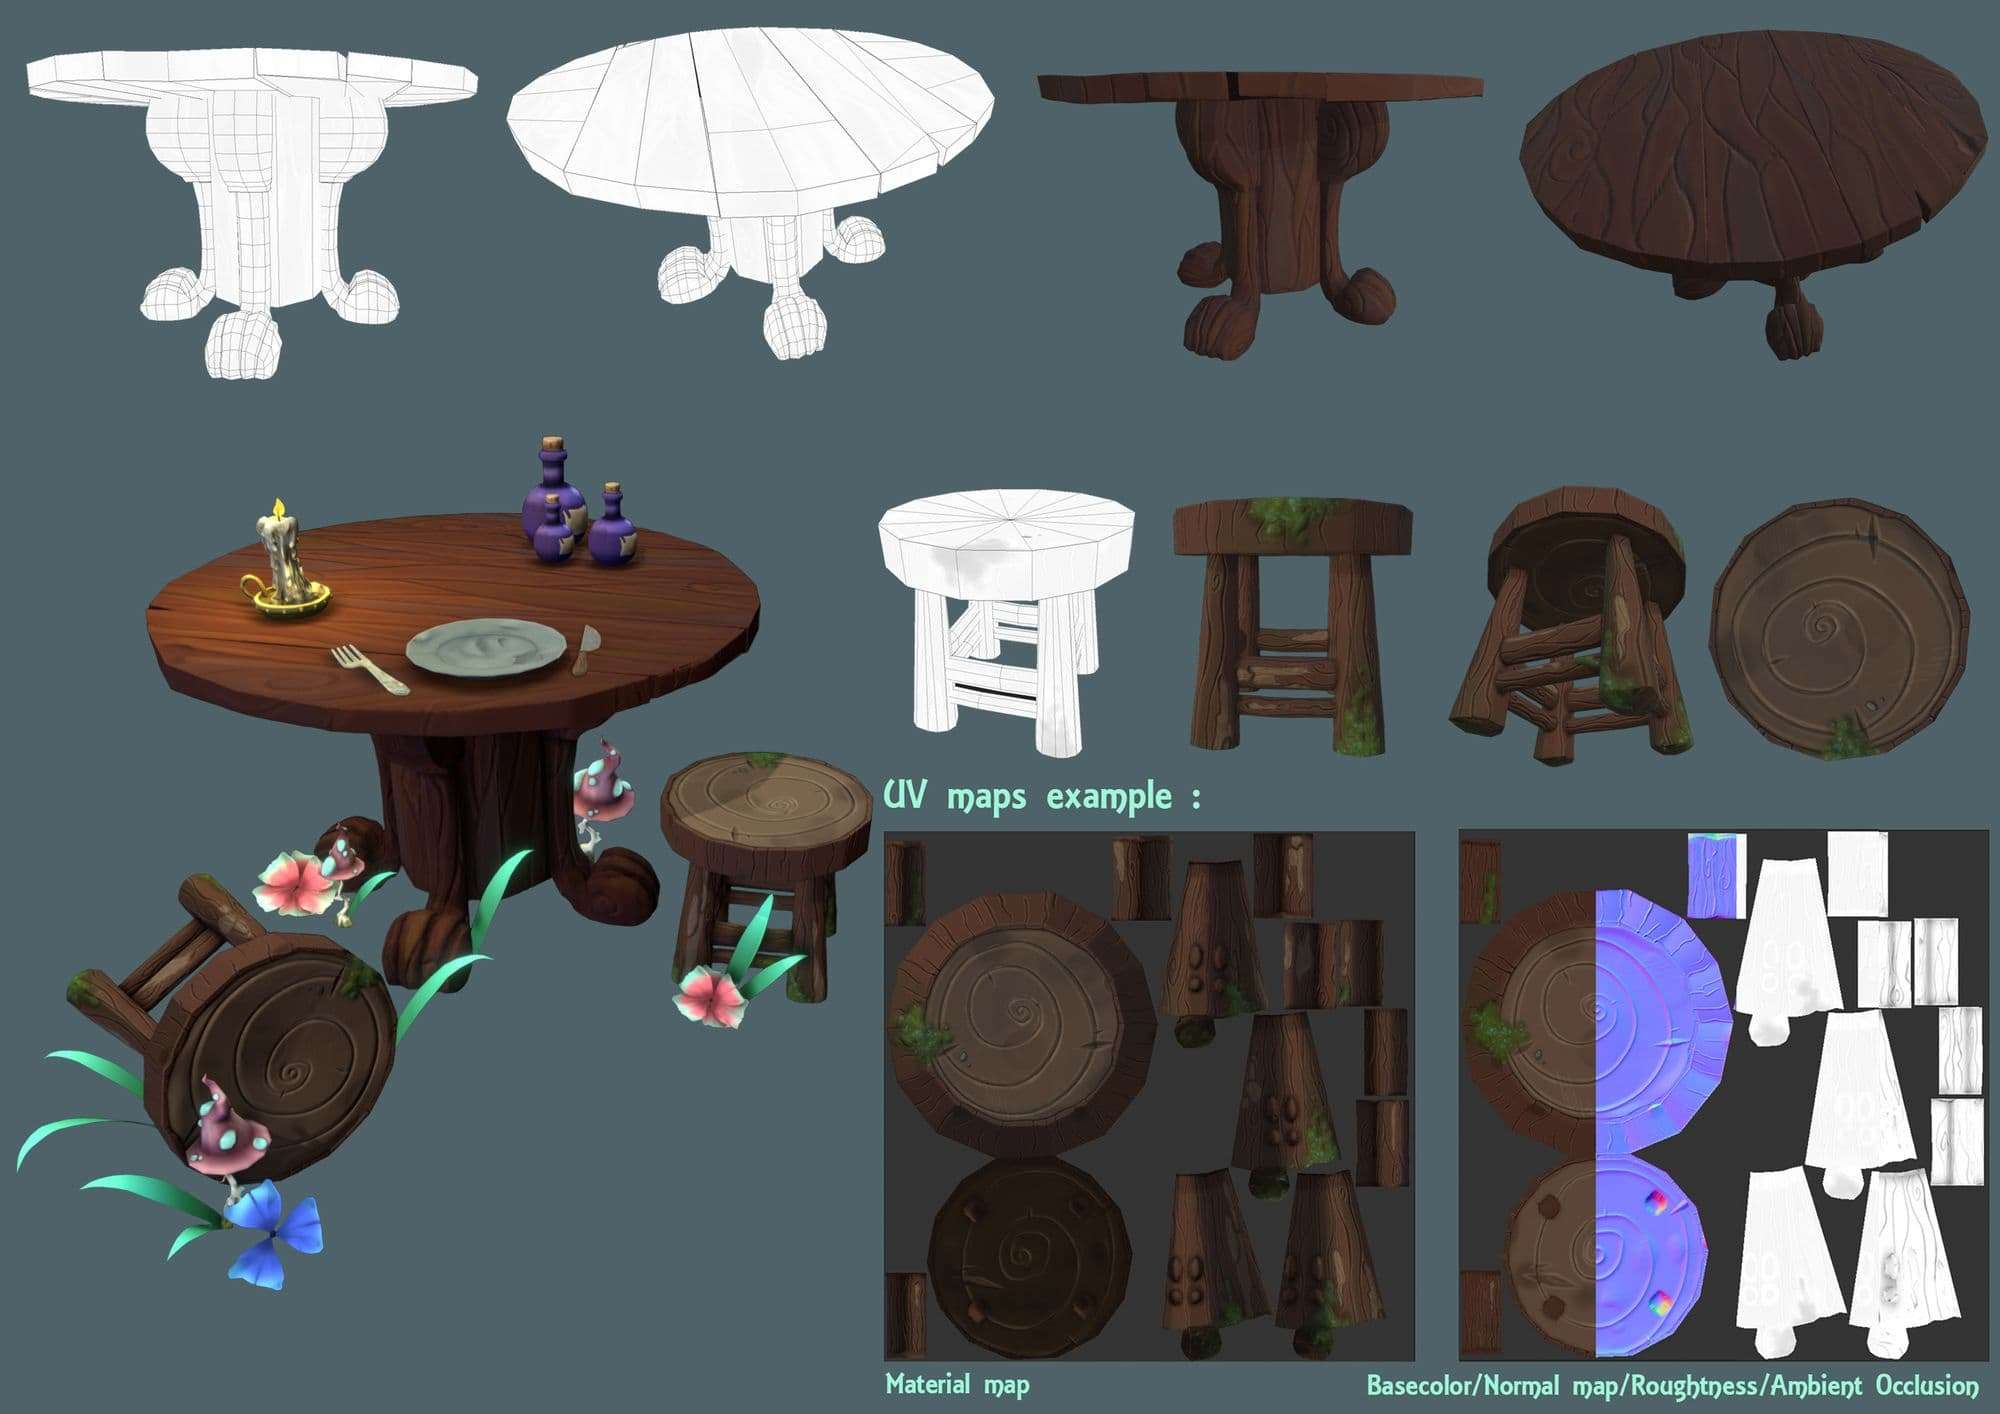
First I unfold UVs, they should never pass on each other unless it's the same part of the object and you want them to be in same colour.
For example if the object must be duplicated it's better to create the UV before, it avoids repeating the same work 10 times, I put them with the same material and so there is only 1 texture to make in Substance Painter and she will be the same on all objects.
You can also create variants and change the material and output different maps that can create variations in Unity or Unreal.
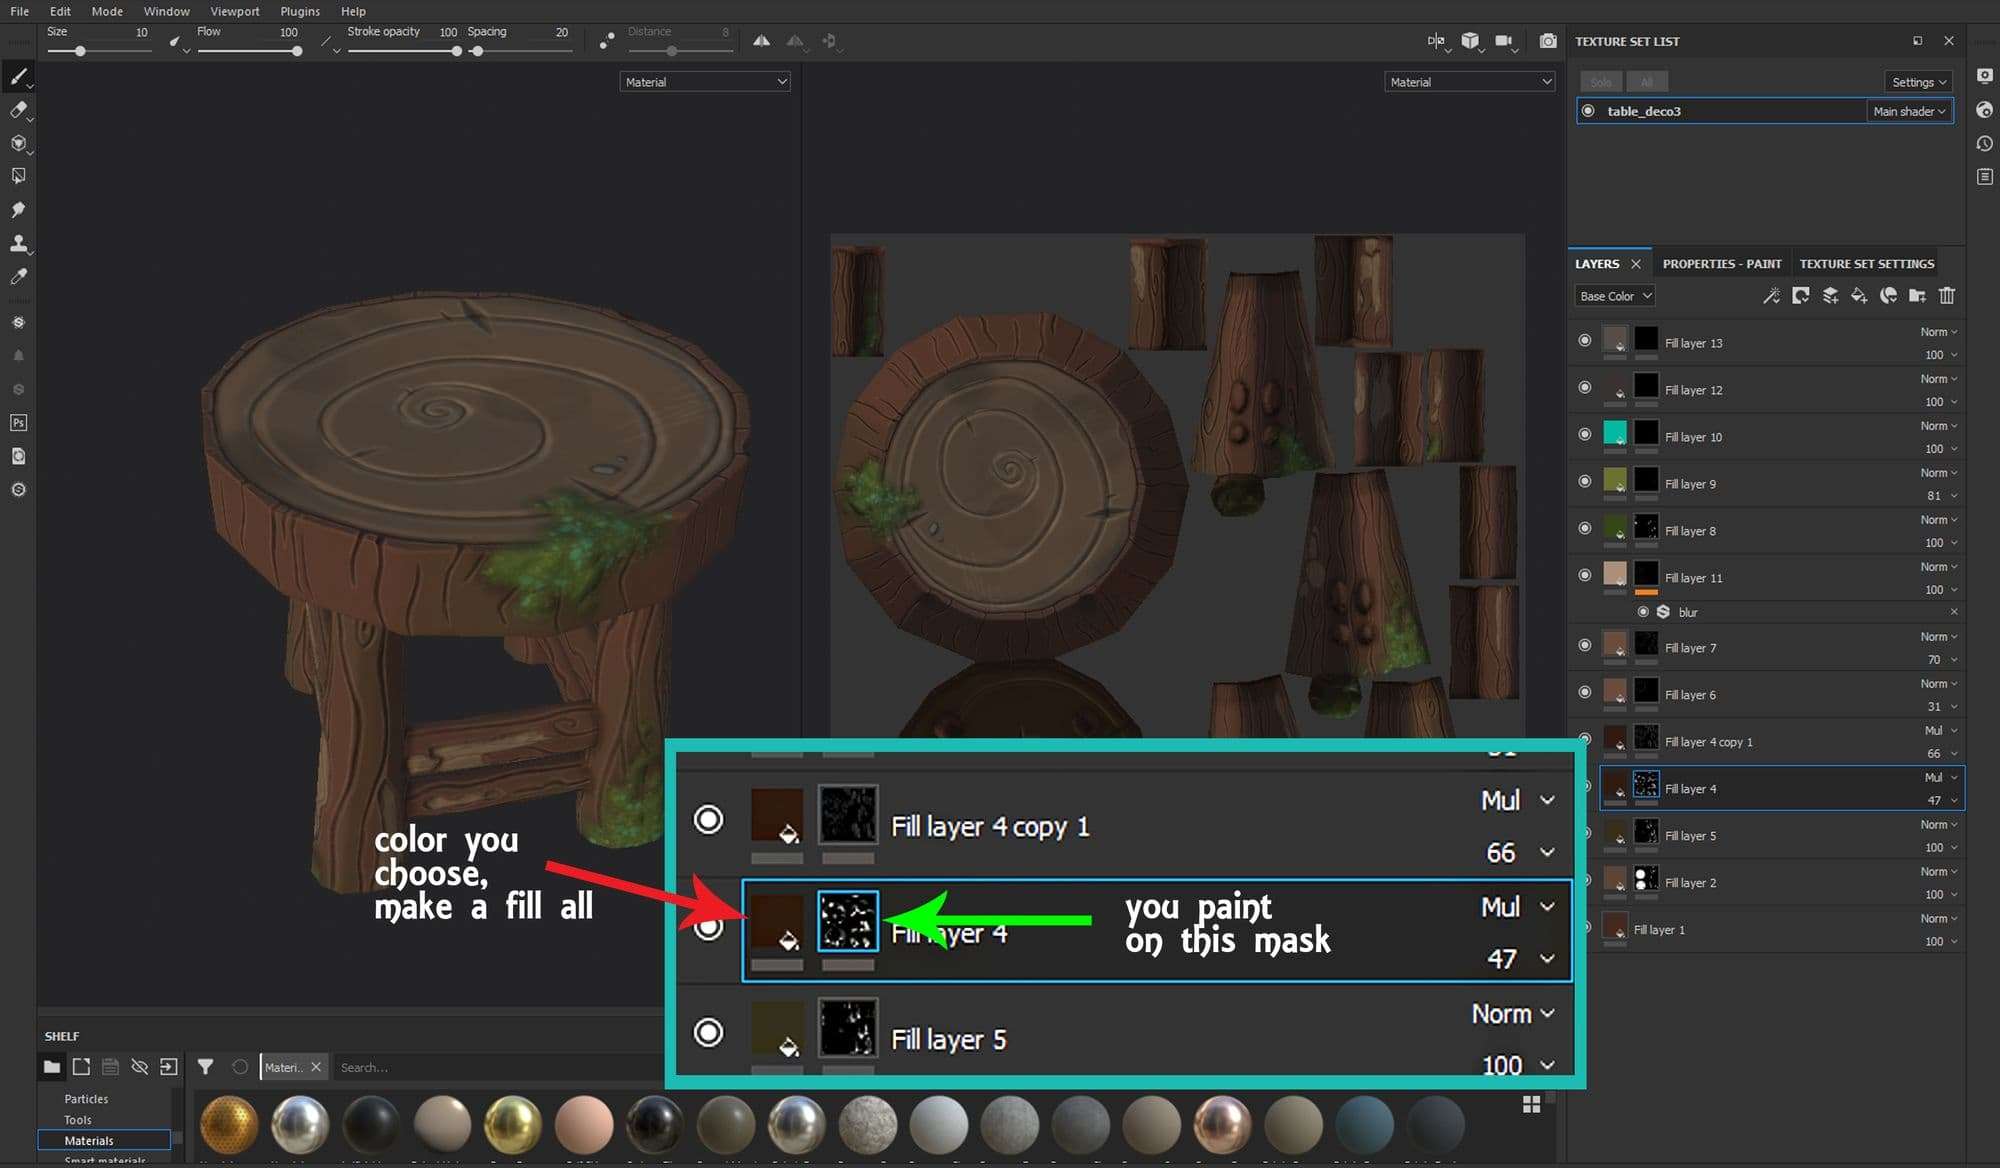
The textures are hand-painted but there are time-saving tips, especially to make texture variations on Substance Painter : I create a fill layer on which I choose the colour used, then I add a black mask and I paint the mask in white where I want to see the colour appear. It works for colours as the basis of each element but also for shadows, lights and patterns.
This technique makes it possible to test different colours and to be able to change them easily if you changes your mind without having to redo the painting. The maps generated by the High Poly asset make it easy to create realistic effects such details with the normal map and shadow with ambient occlusion.
For this project the graphic chart was cartoon with a painting effect, so I painted the shadows, lights and colour variations by hand. I still generated the Normal map and the Ambient Occlusion, for a better result.
Compositing and Lighting
The next step is to import 3D assets, textures and animations in Unreal Engine 4 or Unity, for this project we chose Unreal Engine 4.
To simplify the work of everyone I compose the scene from the export basic environment and we add with the game designers the gameplay objects and the aesthetic objects. Once the composition of the scene is done we duplicate it twice, so the game designer and the programmers could work quietly on a stage while I'm working on the lighting.
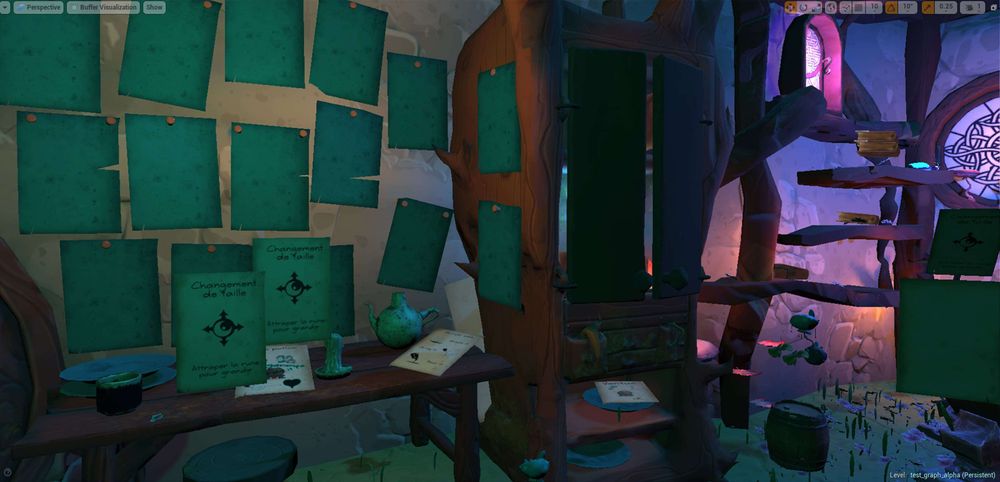
I tested the atmosphere in game with concepts arts, it's used as a reference for the lighting of the 3D scene. To focus on the atmosphere of the hut I first uncheck the texture option of the scene, which allow me to focus only on lighting. From time to time I check the scene with texture to know what gives the lighting with, then I remove the textures to focus on the lighting.

We chose a night scene, so I put a global light blue/purple, then I put big colored point lights, enough to define gameplay areas defined by the game designers and attract the player to these areas.
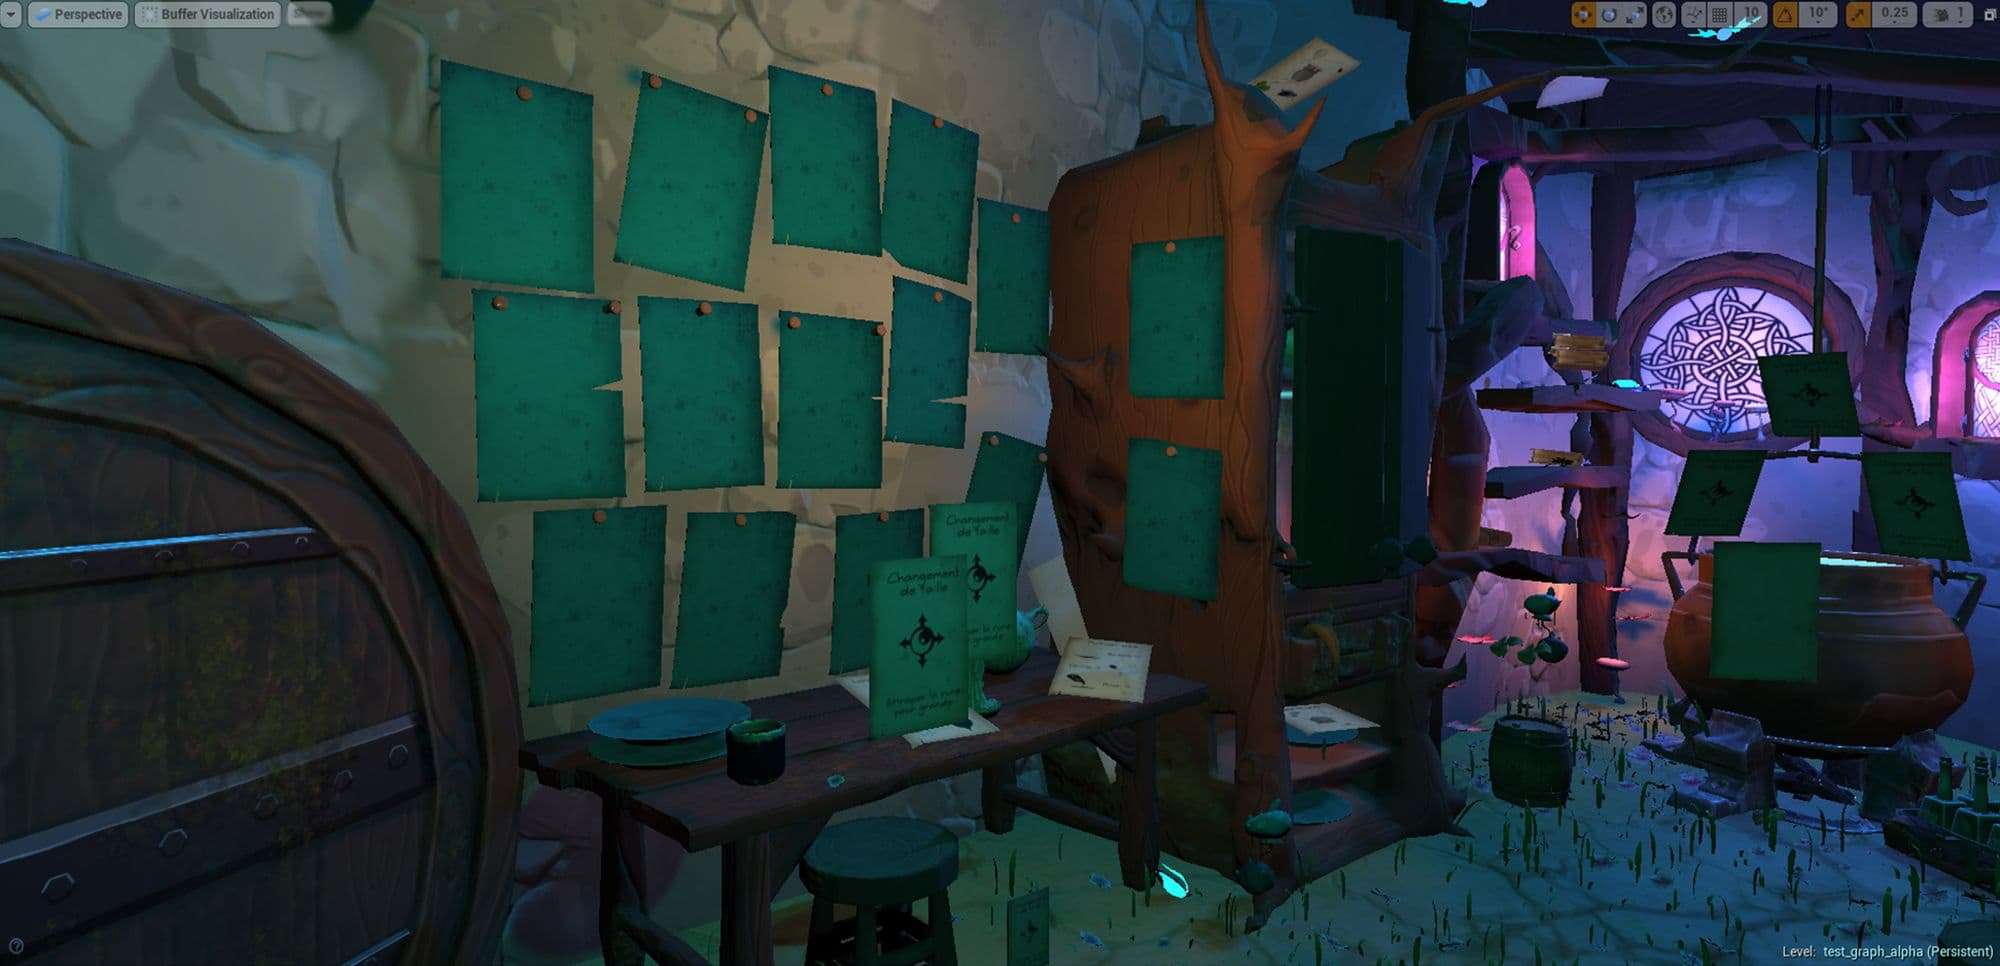
For example : in the cupboard there is a labyrinth with a key hidden at the end. I put a warm light at the bottom of the cabinet intense enough for the player to notice it through the door between open, and be curious to become very small and access the labyrinth to find the key.
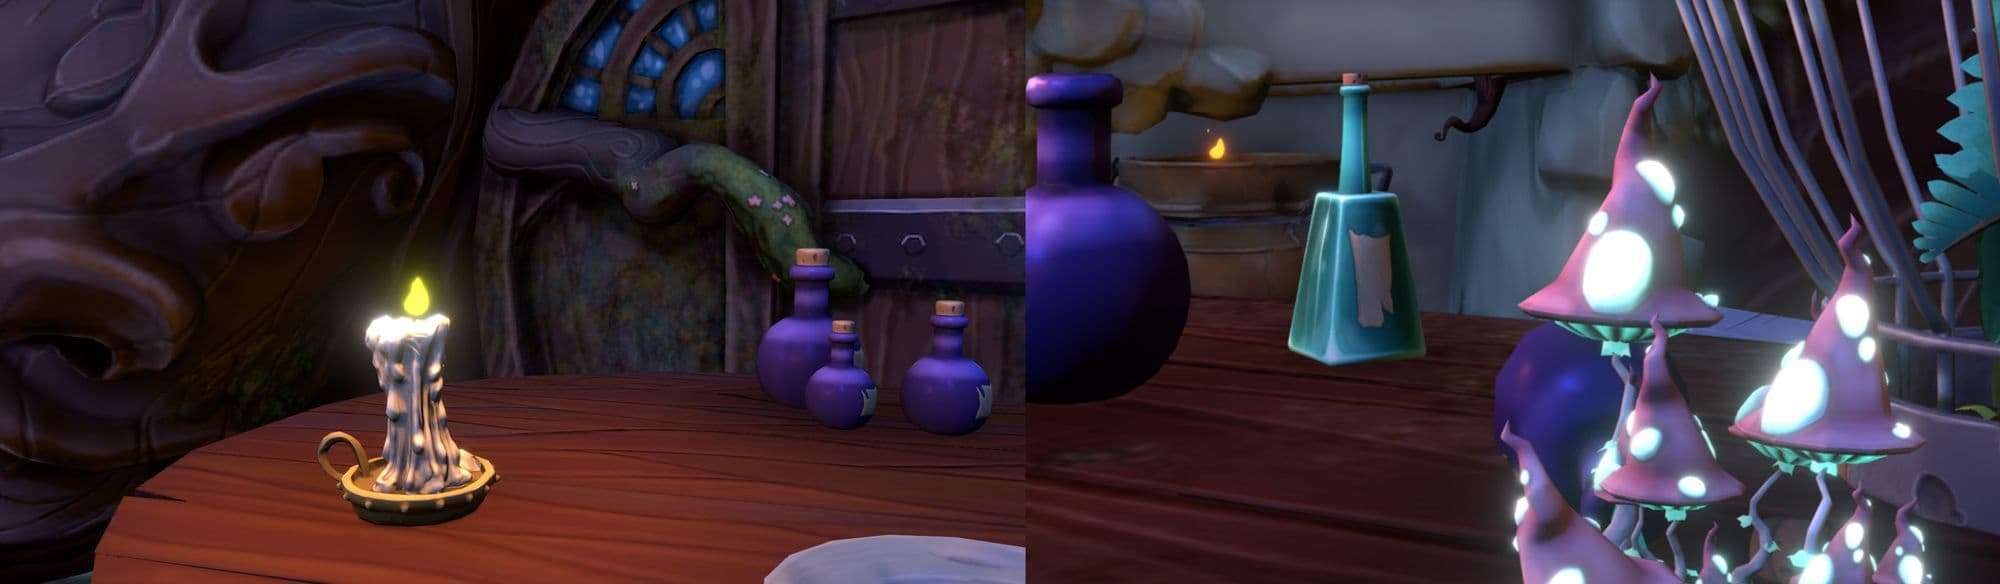
Once this basis is done, I add the small dot lights, especially candles, it gives life, and a more magical aspect to the scene. Some textures are also emissive, they shine but don't emit light on the objects around them. To give them this effect I add point lights to give a luminous effect.
Once it's done, I copy the lighting on the final stage, the one of the game designers.
When the lighting is finished, we place the reflection box and we bake the lights in general to gain fluidity of the game.
The problem on this project is that many objects can move, especially when the player takes them. That's 95% of the environment, so I only bake the everything that couldn’t move. A shadow can't stay there in the void, it’s important when you bake the lights to always be sure which object can move or not to avoid creating an error.
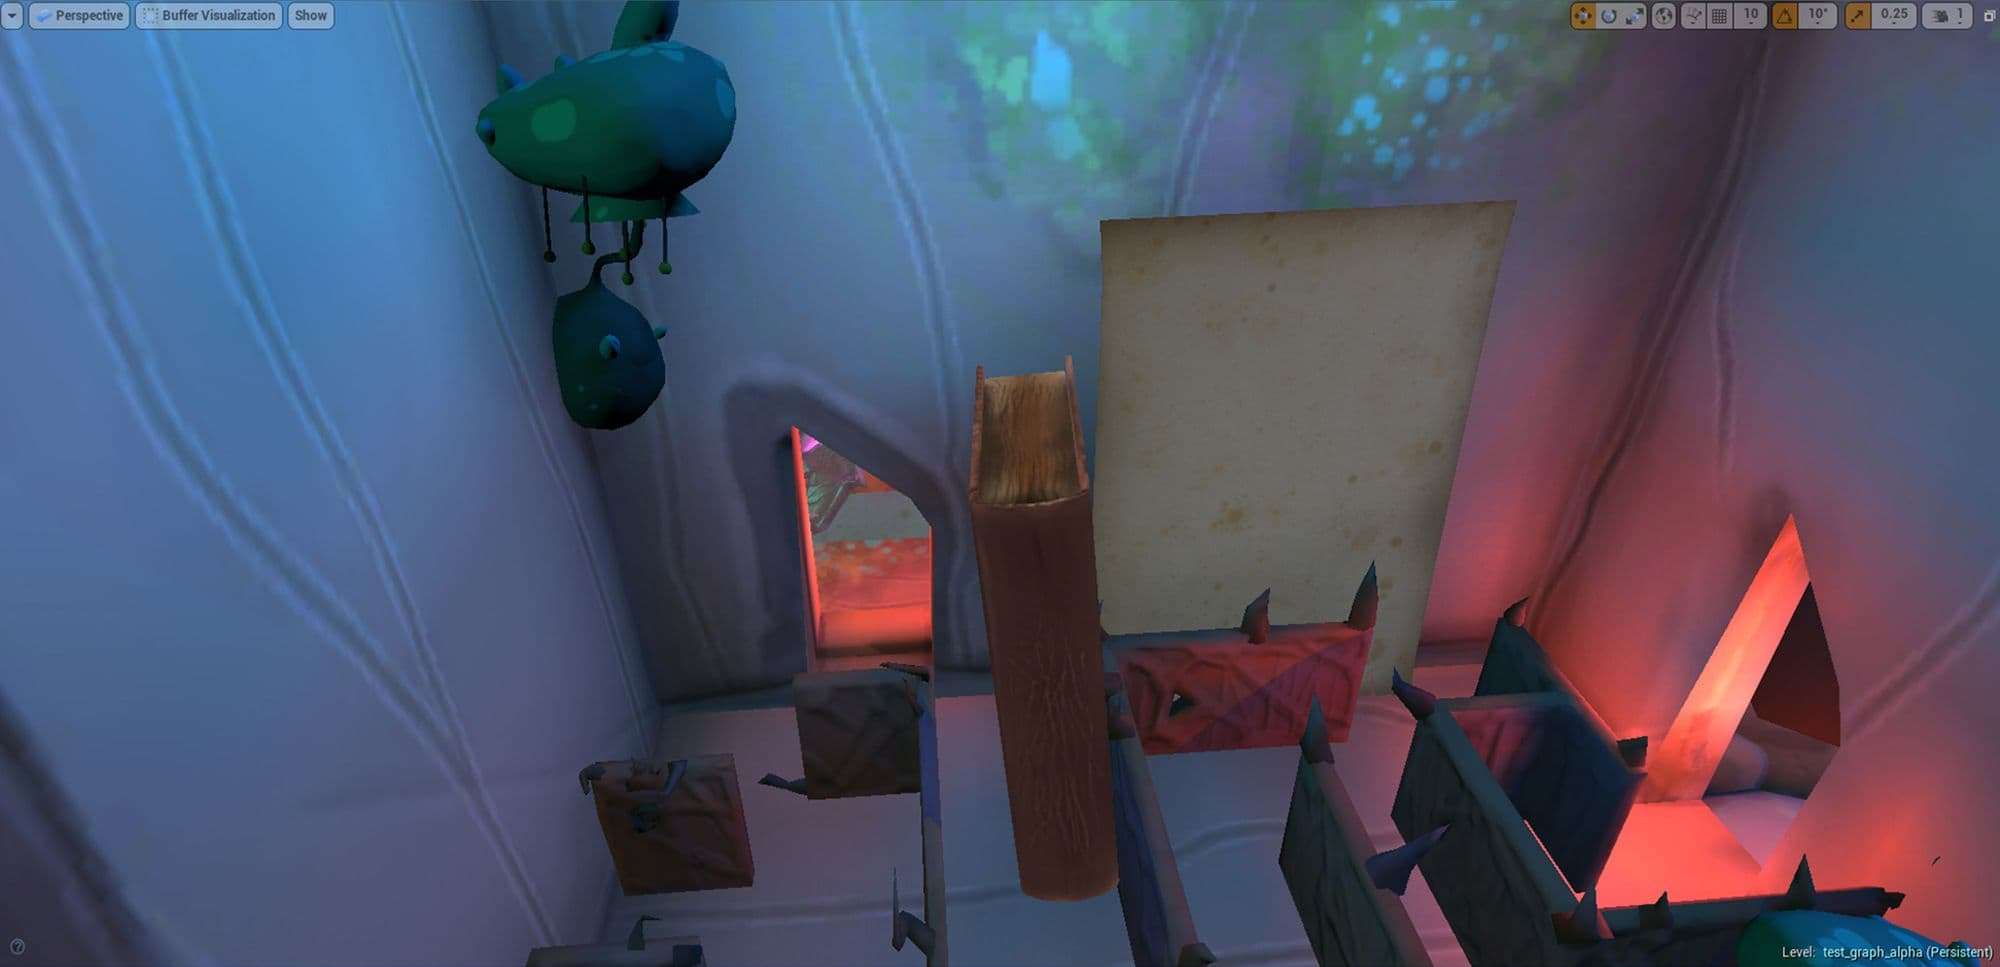
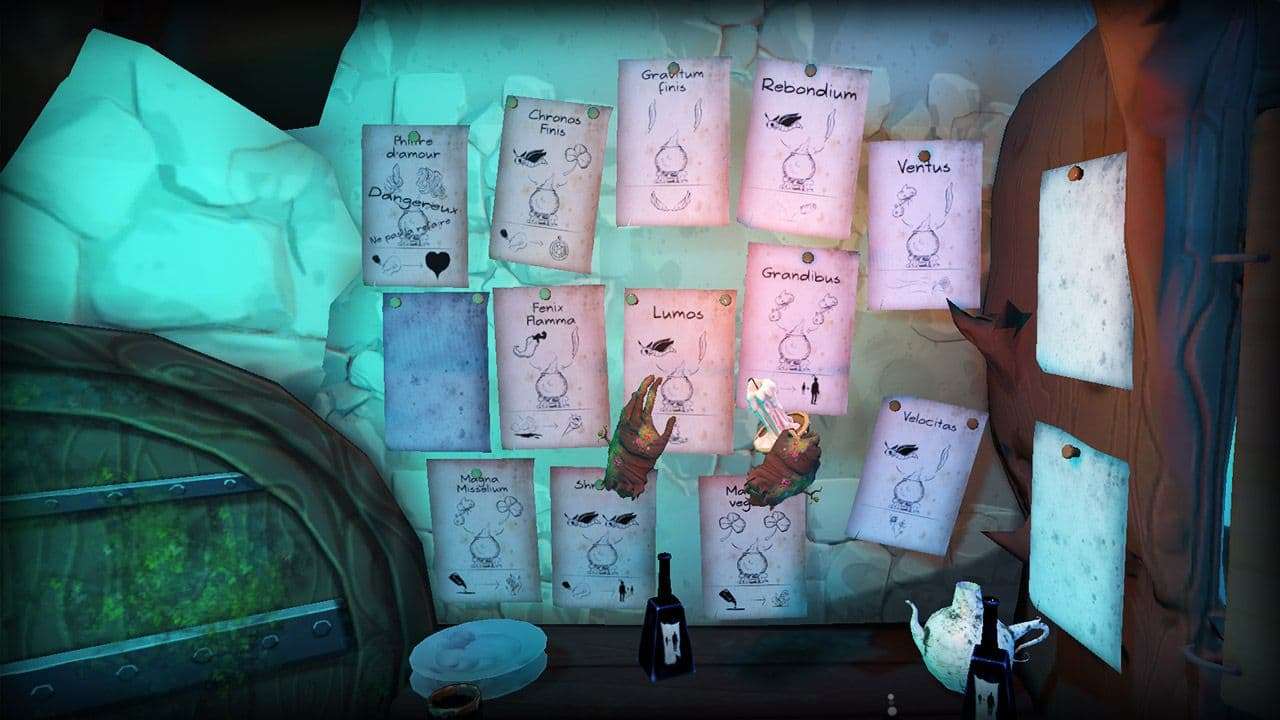
Here are some screen in game to show you the final rendering:
Marketing
Creating the graphics of the game is the most important part of the project, but never forget marketing is what will allow your game to be known and sell. This step is made at the same time of the lighting because the communication media must be ready at the same time as the game is finished. Some in game screens will appear in the communication so they will arrive at the end of the project.
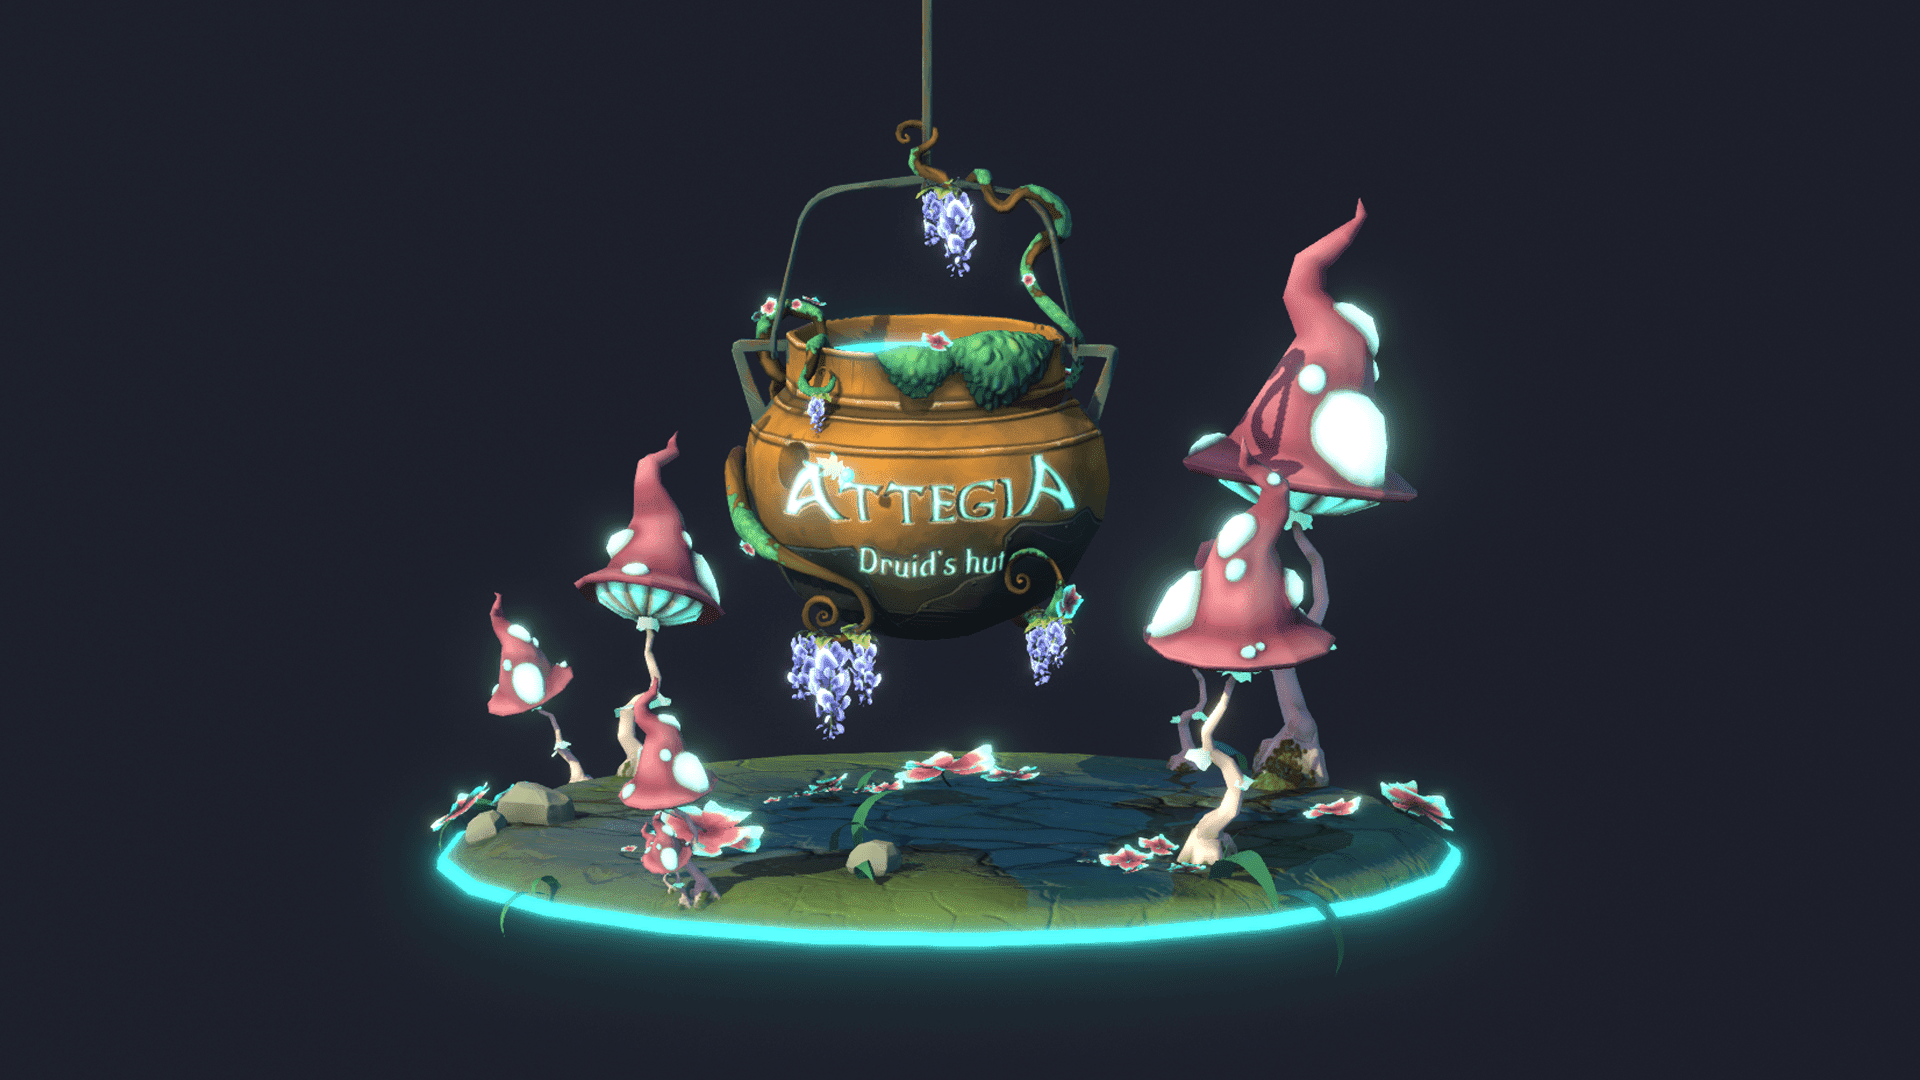
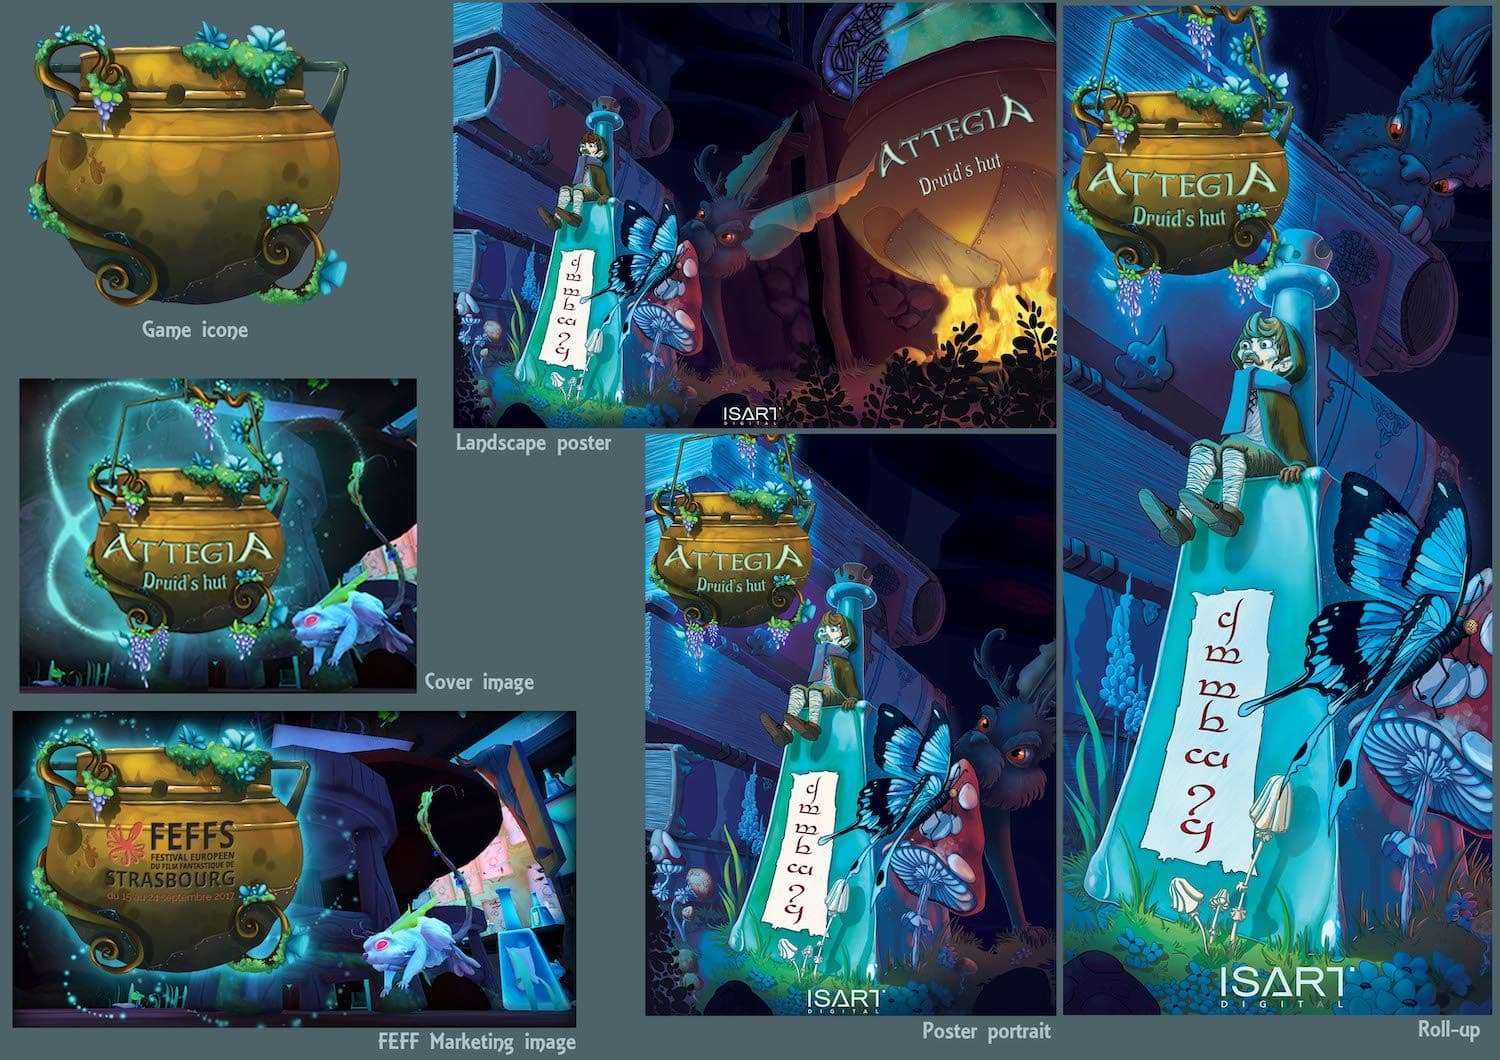
I first create the logo, in 2D then in 3D to put it in the launcher of the game. I chose the shape of the cauldron because it's the central element of the game. To recognize your game immediately, and that it's impacting, you must know what represent your game, what is the element who will make you know which game you play immediately.
For research I often use either in game views or I create a scene with 3D models to test camera plans to save time and find quickly a view that suits me. This technique works whether I'm doing a 2D illustration or a poster that shows the retouched 3D.
To save time, and keep the posters coherent, I create the largest landscape poster in Photoshop, in this poster I create the frame of the portrait poster, and the one of the roll-up (which I copy in another Photoshop file at the actual size of the roll-up).
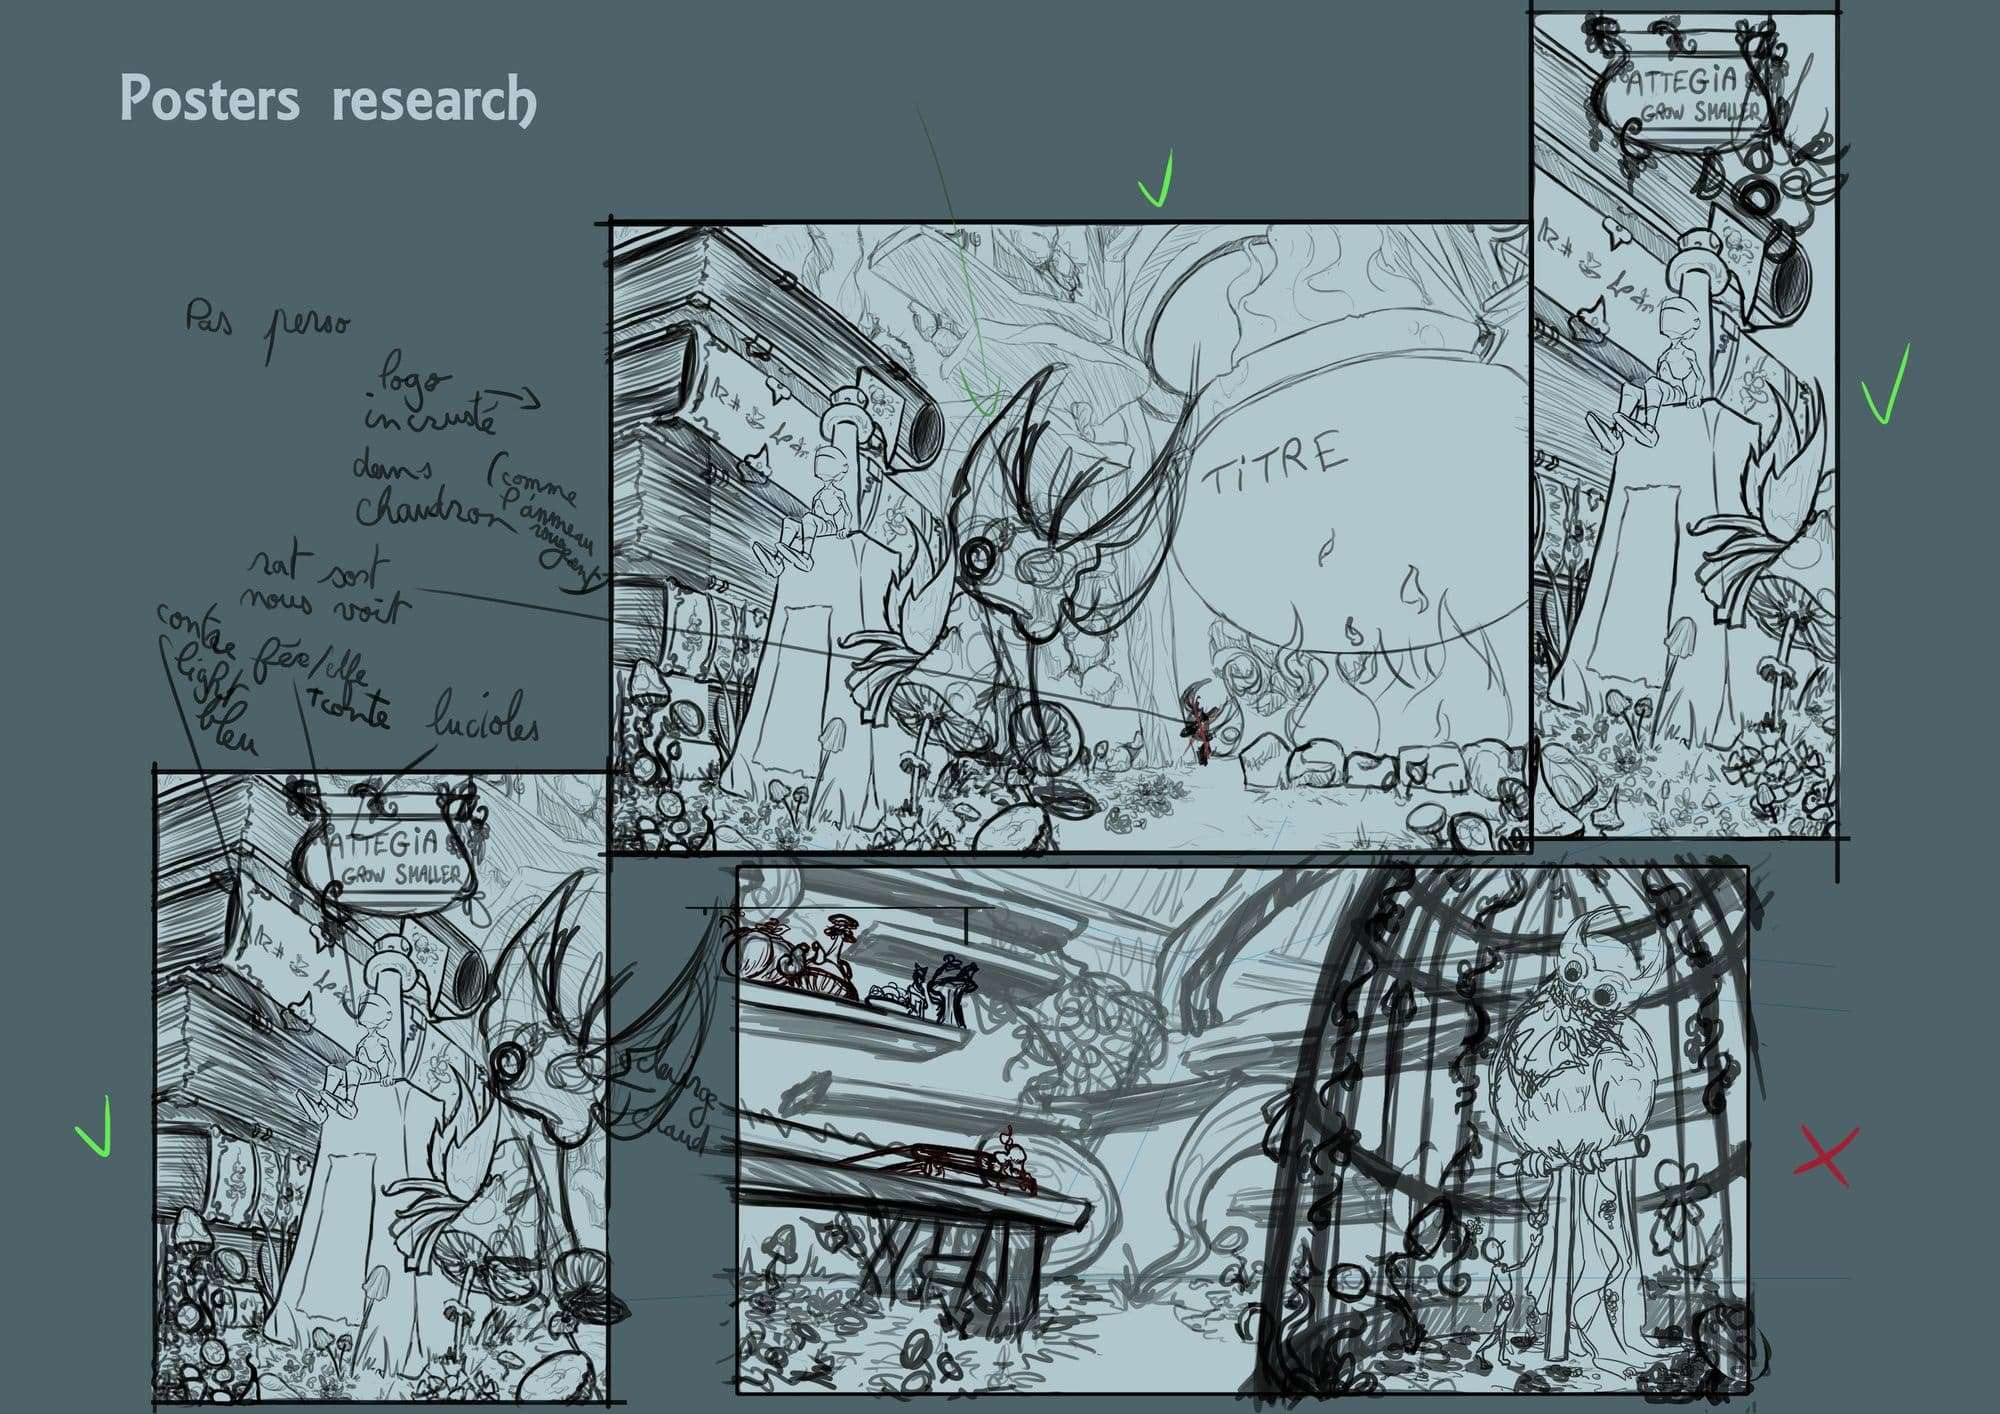
Once the choice of the view is made, I create the illustrations. I start by making a line for the landscape and portrait poster, I also partially change some parts in the sketch of the roll-up to create a more impactful scene with the rat behind the books watching the player.
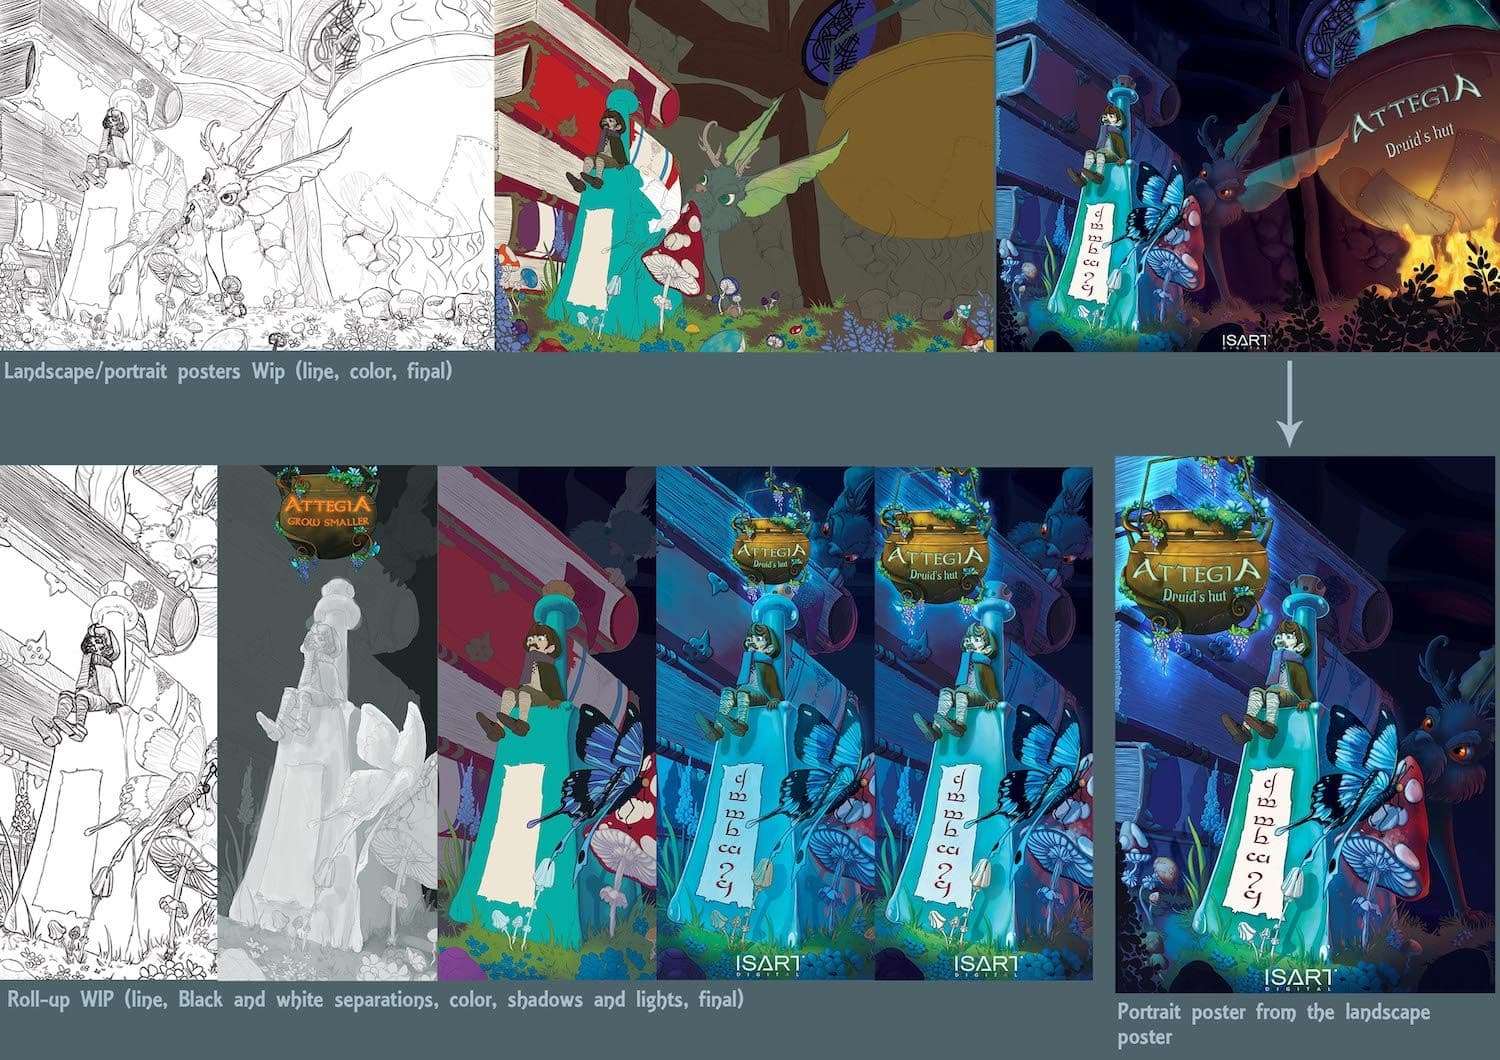
Once I finish the line I colorize the illustrations, laying the base of the colors, then the shades and the lights. Then I put the logo of the game on the posters. For the landscape poster as the cauldron is already present on the poster we have made the choice to embed the title only in this cauldron.
Conclusion: Here is a tip that I have to experiment with the creation of games: it's always necessary to start from a global ambience to go step by step in the details, it is the base for each stage of the project, it’s the best method to keep a universe always coherent and not to scatter which is wasting time.
I hope my tutorial will help you. You want to create a game too? So find a good team and the most important thing is to have fun!