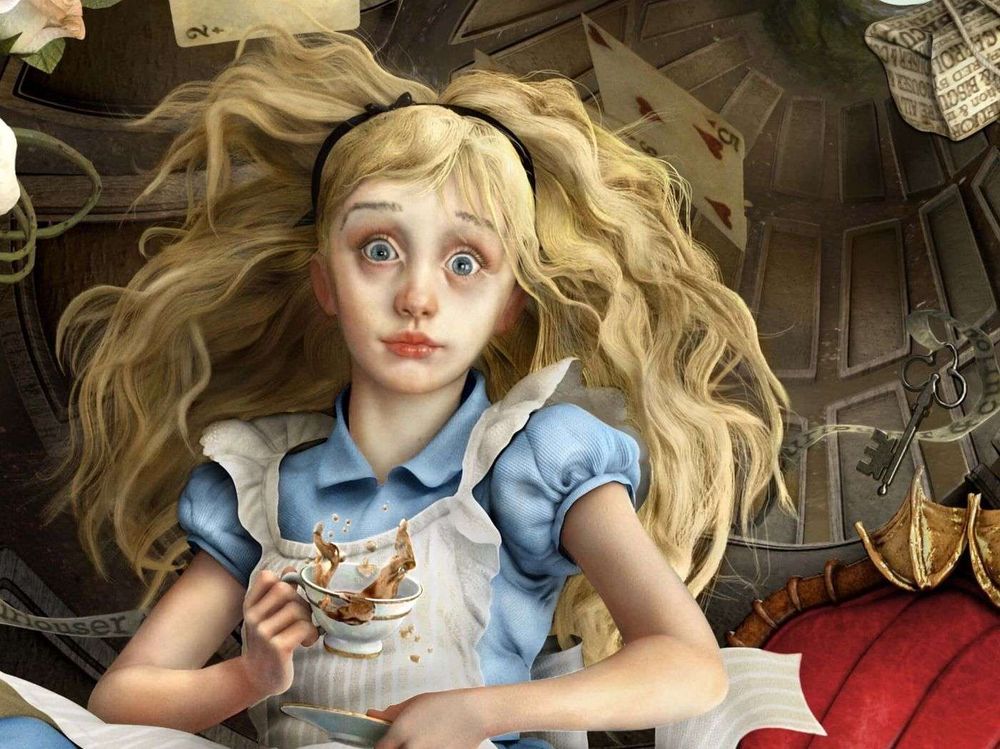

For my term project at Think Tank Training Centre I re-created Heather Theurer's piece in 3D. In this post I'll share tips about lighting, making hair, fabric, liquids, and composing a large piece like this.
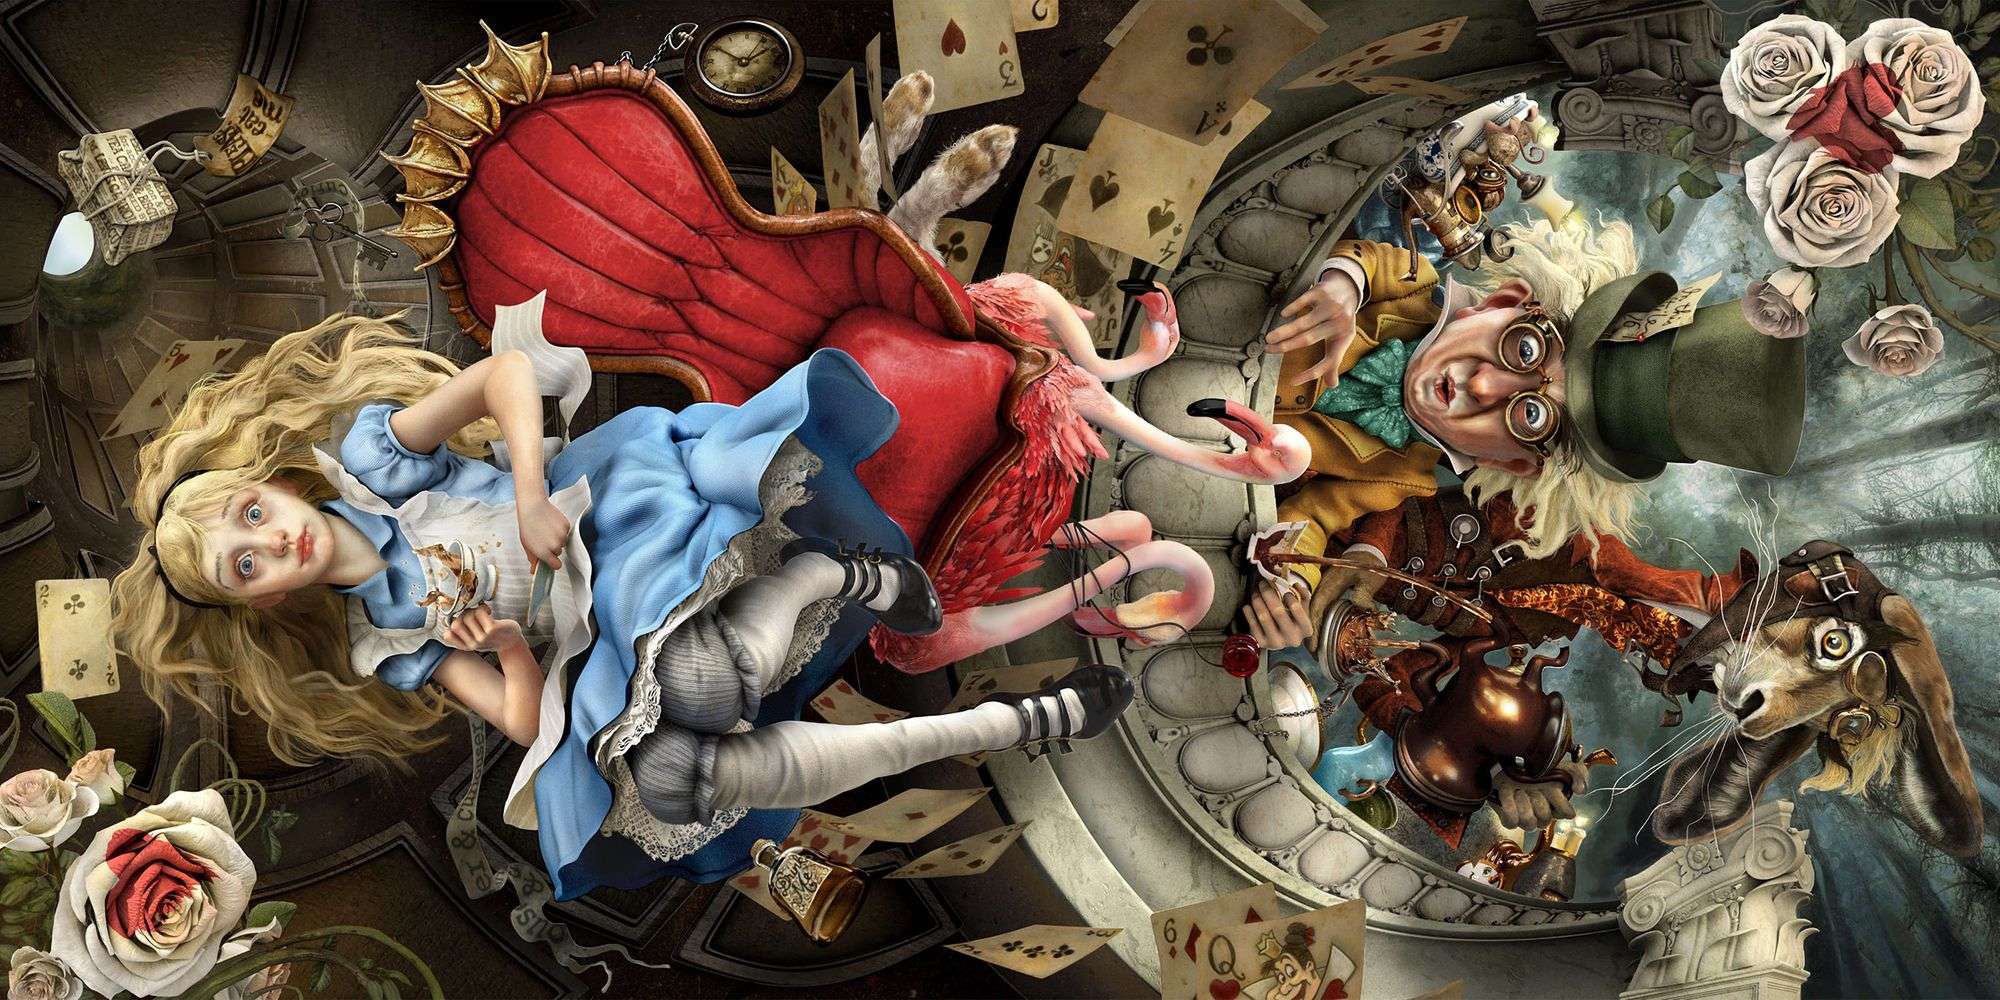
View the full 3D render here.
The software tools I used
- Maya for modeling
- Mudbox for sculpting
- Substance Painter for tileable textures e.g. balcony marble, tunnel soil, chair leather
- Photoshop for hand-painted textures e.g. playing cards, notes such as “Please eat me” and “Drink me”, hair cards for the flamingo feathers.
- Mari for projecting and hand-painting textures such as displacement and diffuse maps for the face, arms and hands of Alice and the Hatter.
- XGen Interactive Groom for all hair and fur
- Maya V-Ray for lighting and rendering
- Photoshop for post-processing
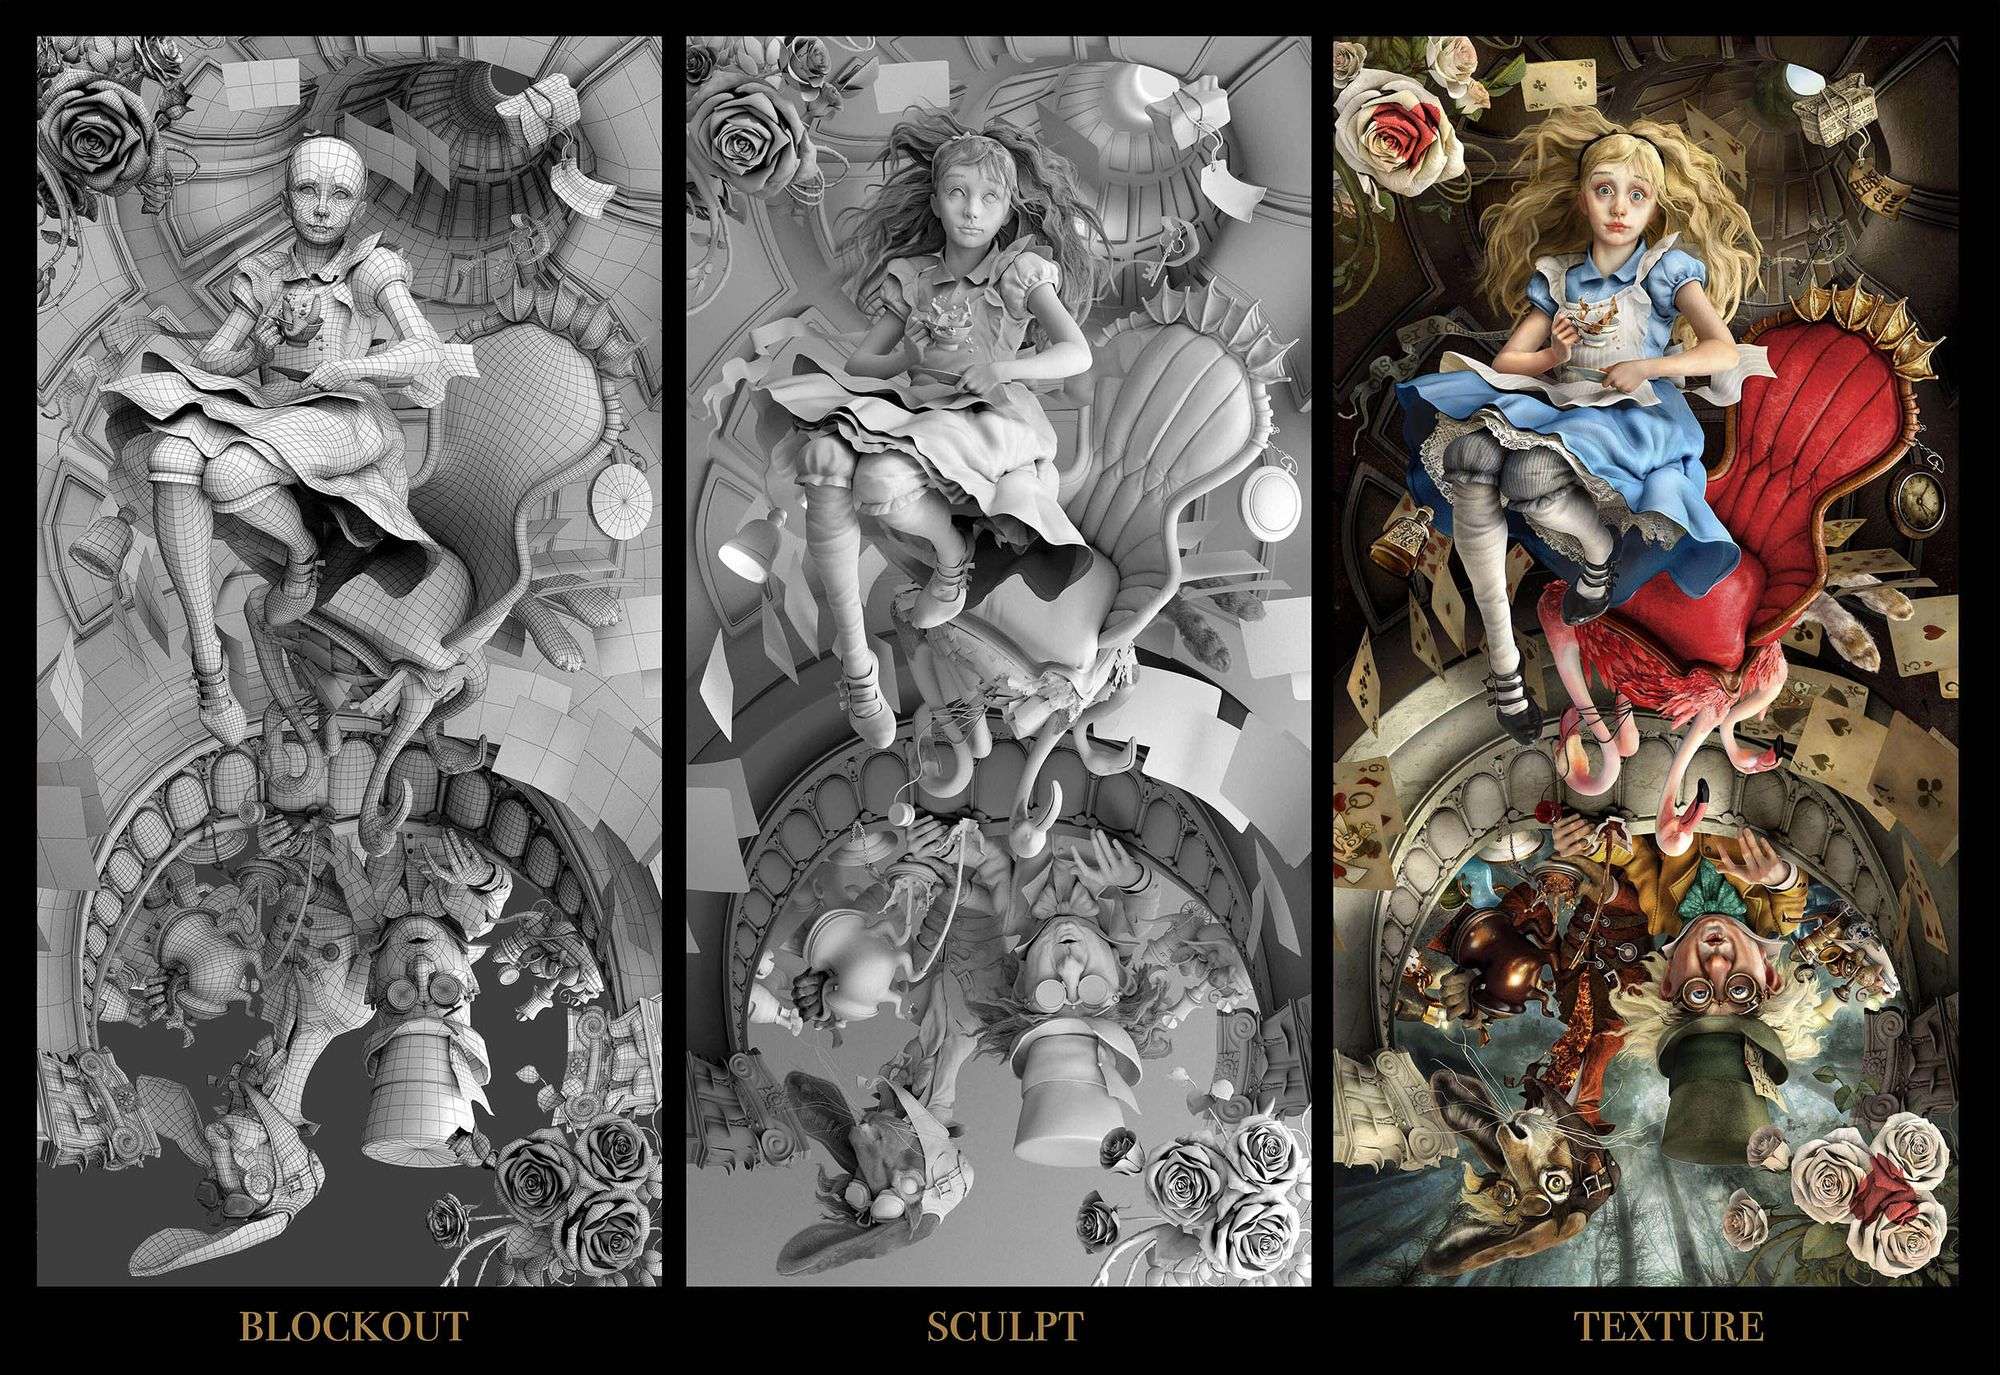
Phases of work
- 1.25 weeks on model blockout
- 1 week on sculpting
- 1.75 weeks on texturing
- .5 weeks on lighting
- .5 weeks on post-processing
This isn’t a perfect estimate, as I found myself fixing lights throughout the entire 5 weeks after each render, or going back to fix the sculpt after applying textures.
Dividing the work
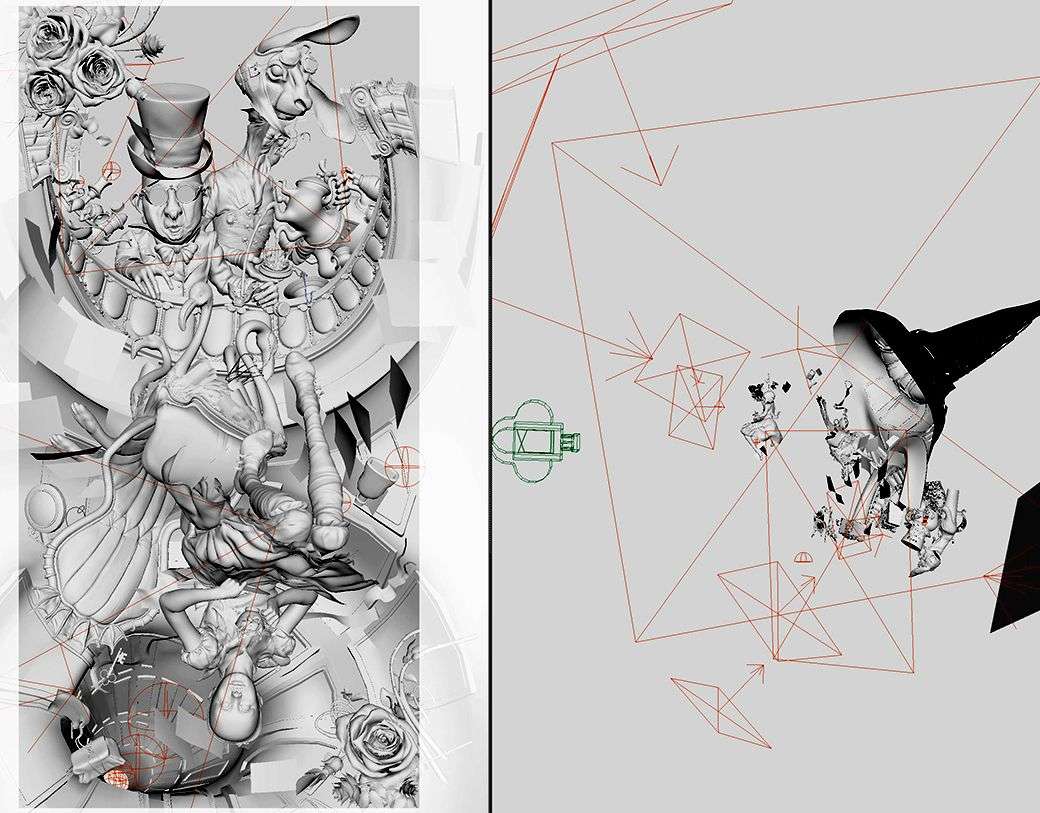
There were over 200 objects to model, sculpt, texture, and light. I was able to have all the objects (including the highly subdivided sculpts imported directly from Mudbox) in one scene, without using V-Ray proxies.
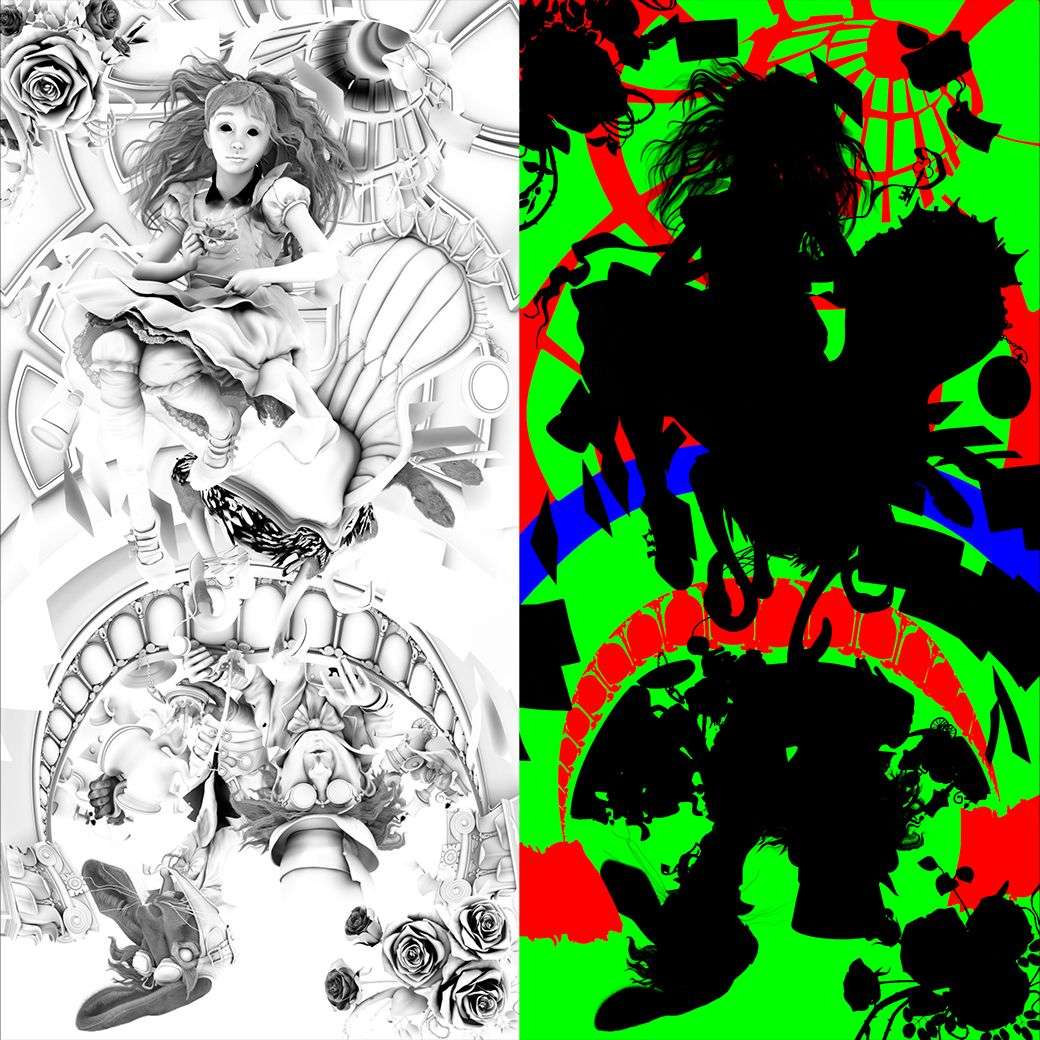
Grouping objects in Maya’s channel box made it easy to hide things I wasn’t working on. Here’s how I divided up the work:
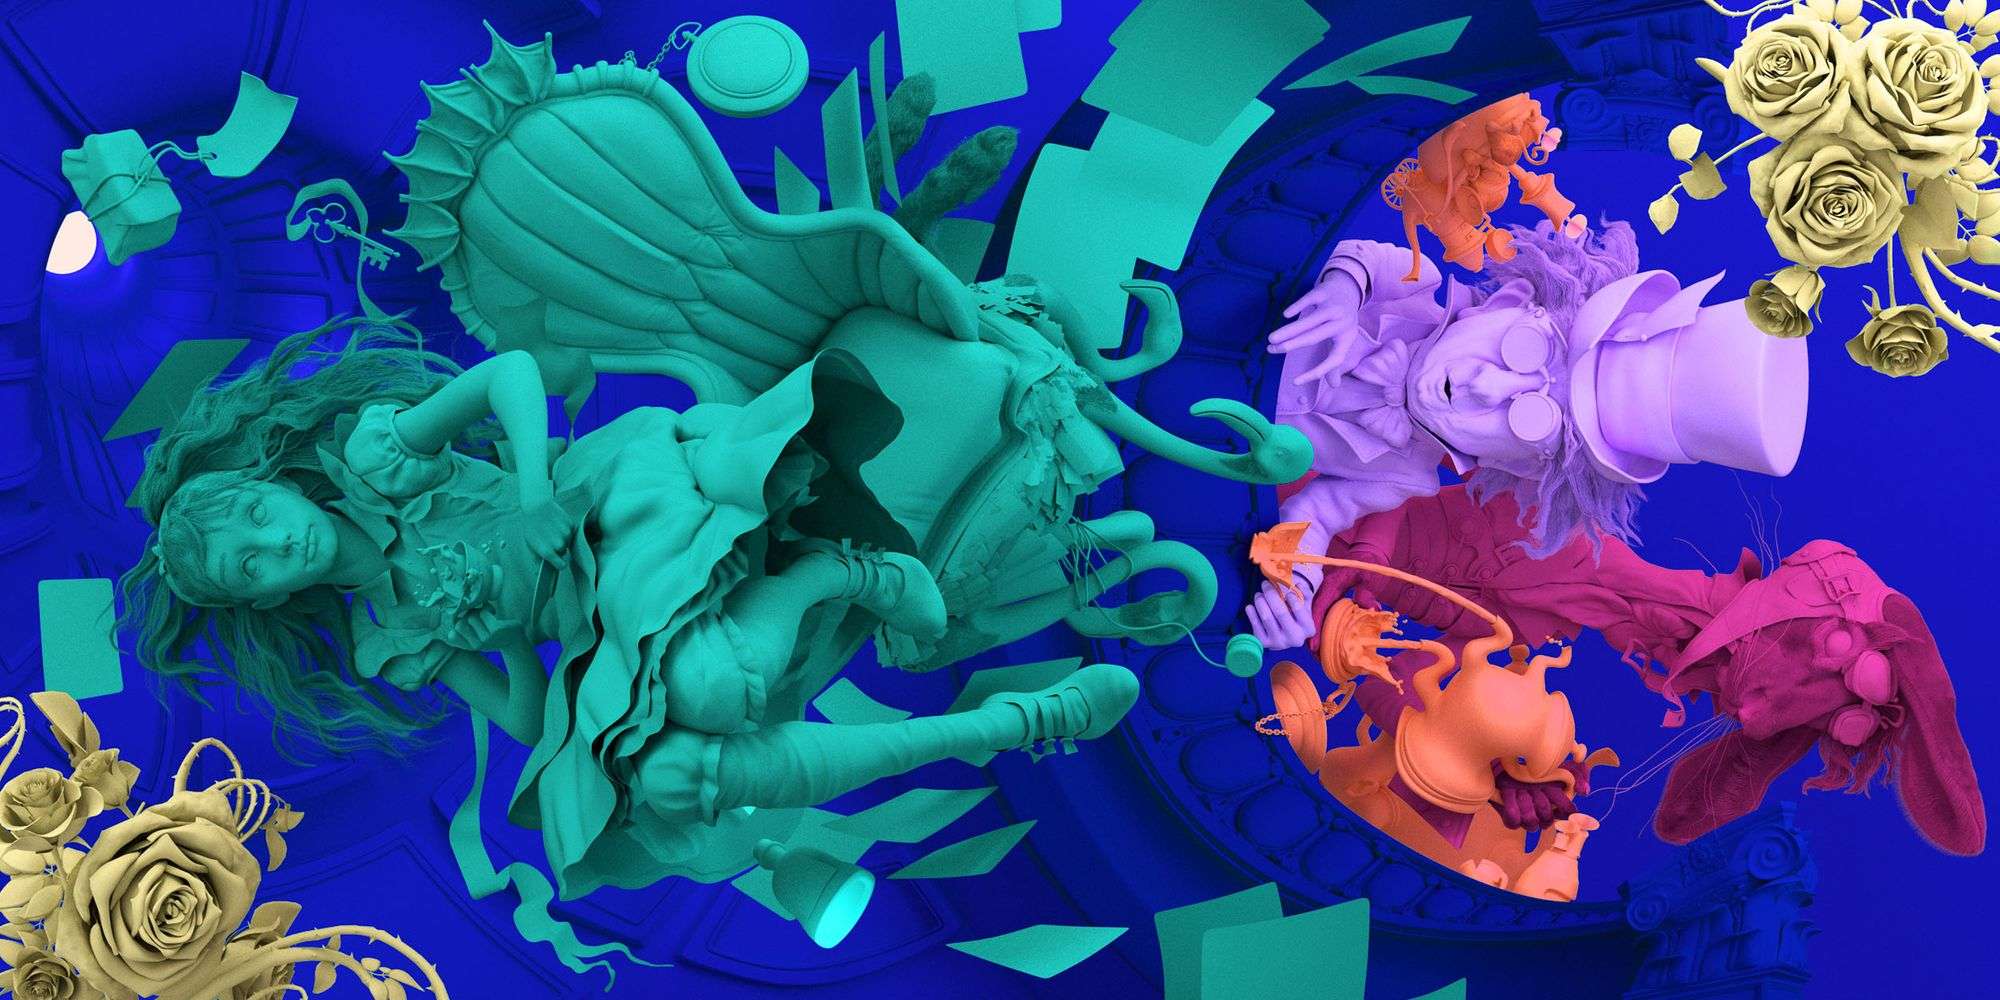
During the model blockout phase, for instance, I created things in order of largest object on screen:
- Alice (green)
- Environment (blue)
- Mad Hatter (purple)
- Hare (pink)
- Small things (orange)
- Roses (yellow)
When I was modelling the roses, for instance, I hid everything else from the scene using the channel box editor to reduce viewport processing time. I did this for every group I worked on—hiding everything else but the one group. I followed this same format when sculpting and texturing too.
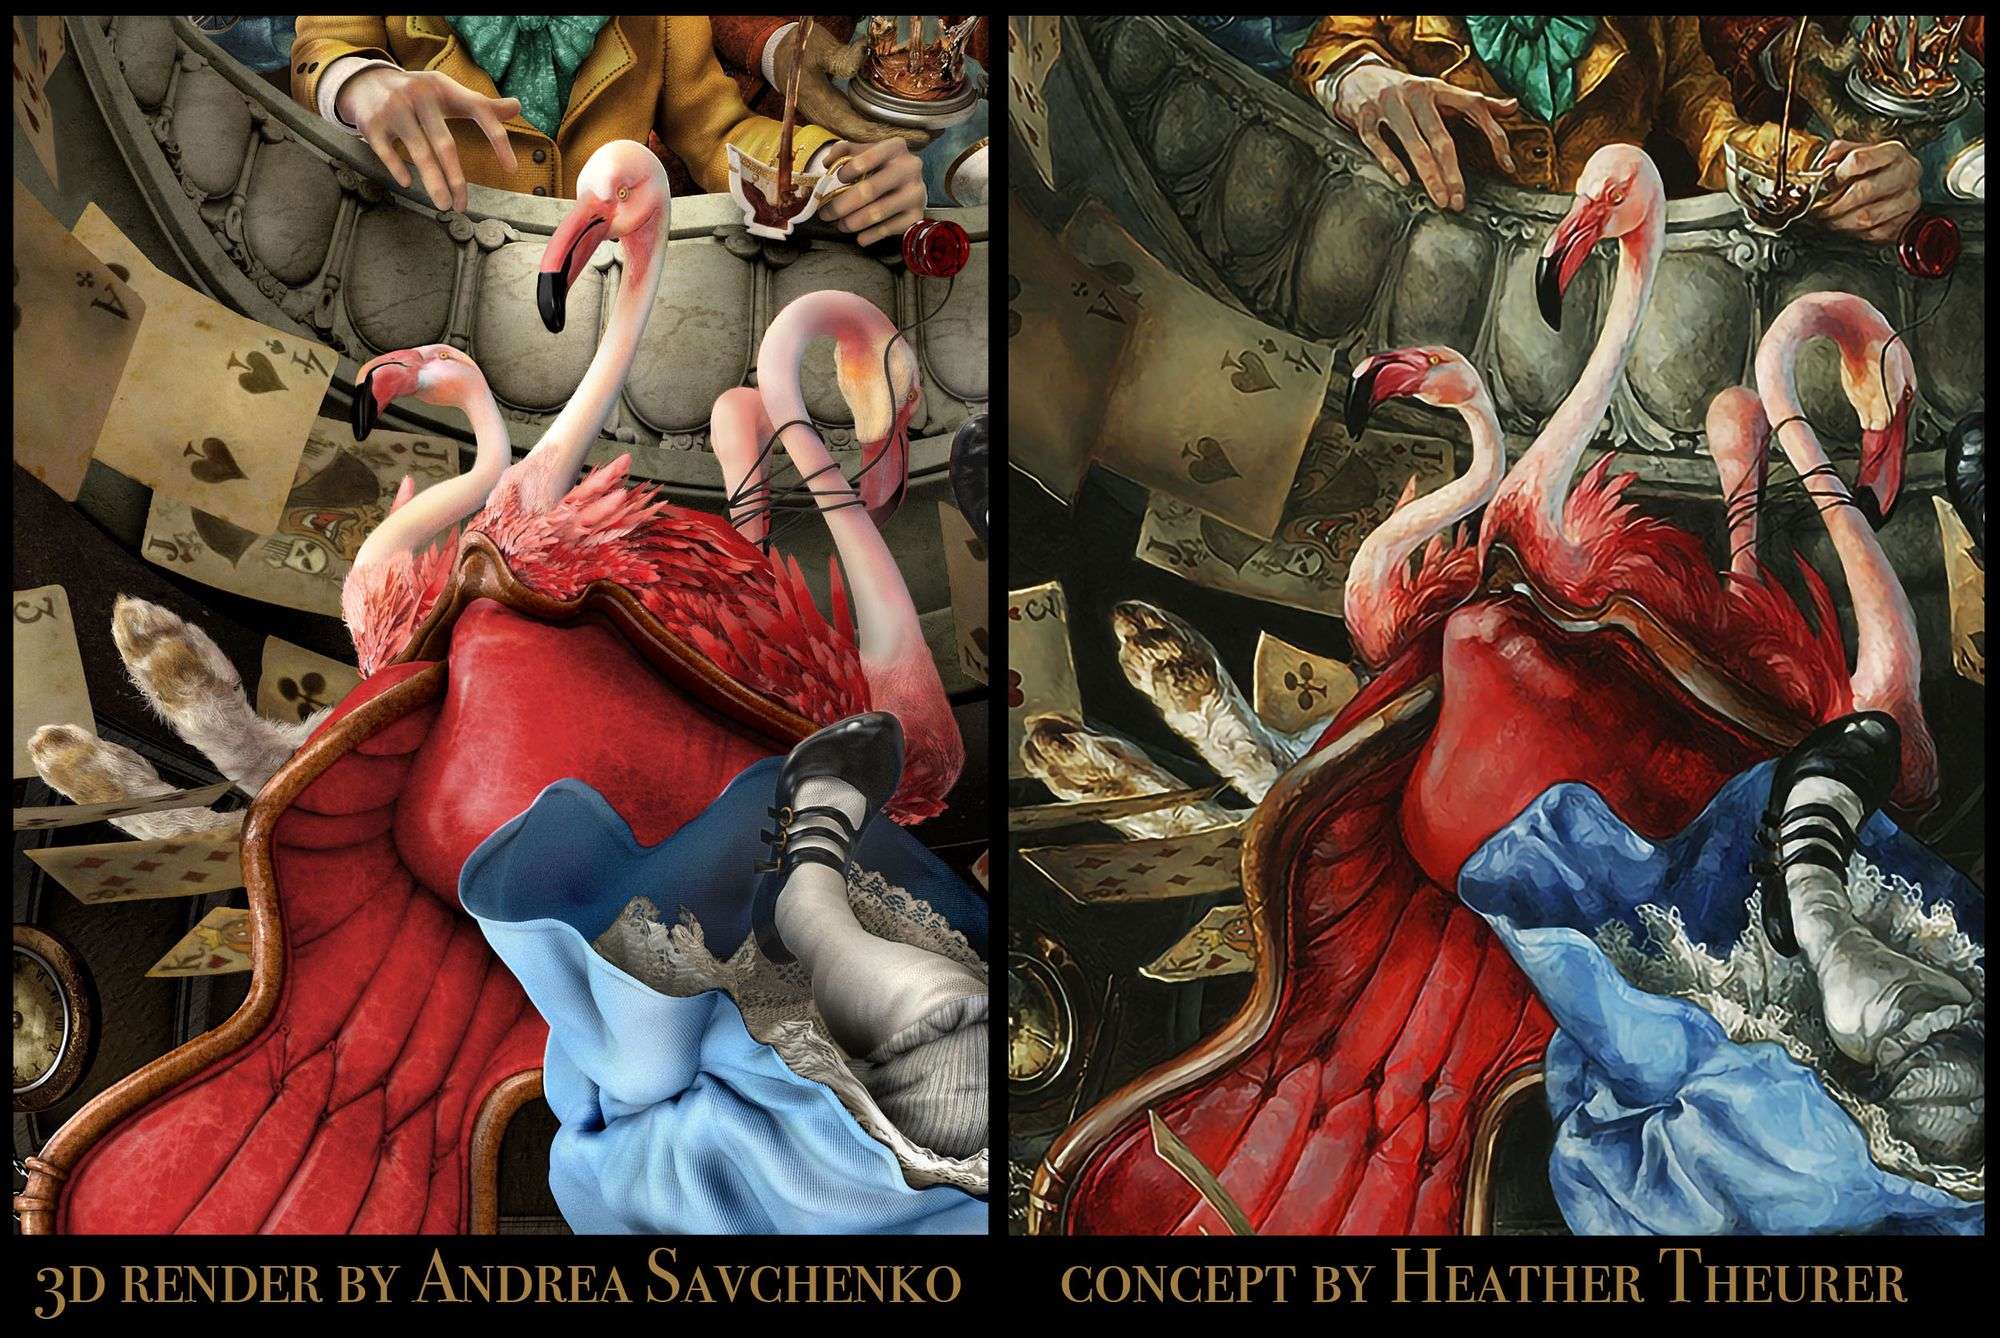
Sculpting fabric and liquid
With fabric there are options to simulate or sculpt directly. Simulating would be important for a motion film, but since this was just a single frame, sculpting was slightly more time efficient.
Simulation would mean having to model Alice in T pose, rigging and posing her, and playing with constraints until the cloth shape was achieved—that seemed like too much work for a single frame.
I modelled Alice in the exact position as what you see in the concept. I then sculpted the fabric and liquids in Mudbox.
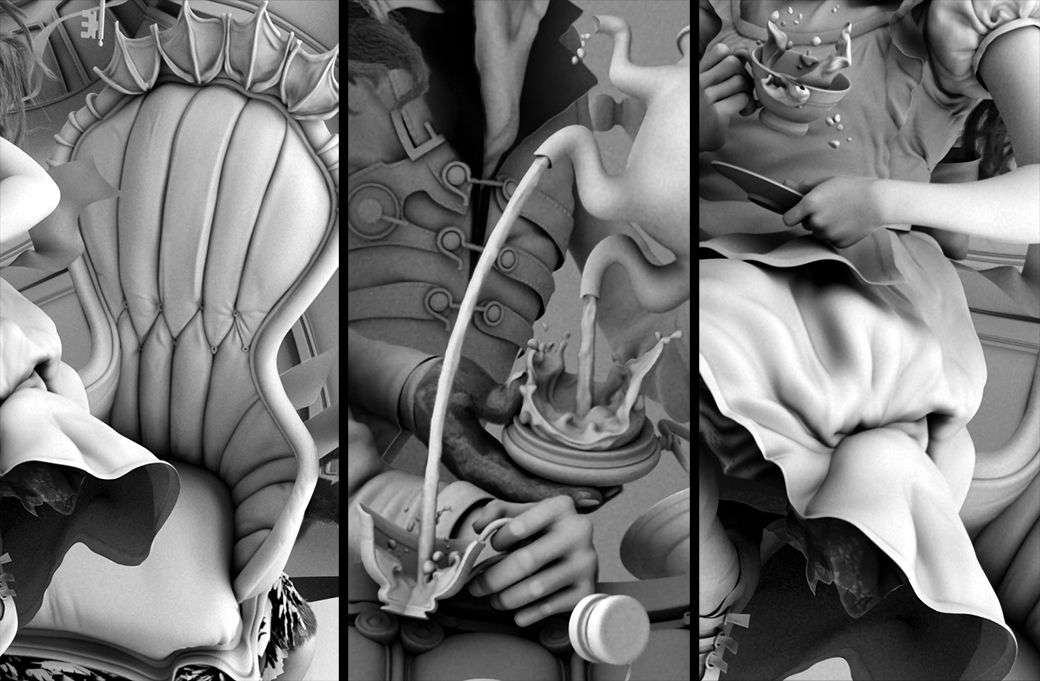
When sculpting the fluids and fabric, I noticed early on I needed to be more confident in my strokes—that is how I got the best outcome. Chipping at something, just like sketching with light timid strokes, looked cheap.
Hair and fur with XGen Interactive Groom
Maya’s XGen Interactive Groom, though a relatively new tool, is easy to learn and use. Watch this video to help you get started if you have not used the Interactive Groom before.
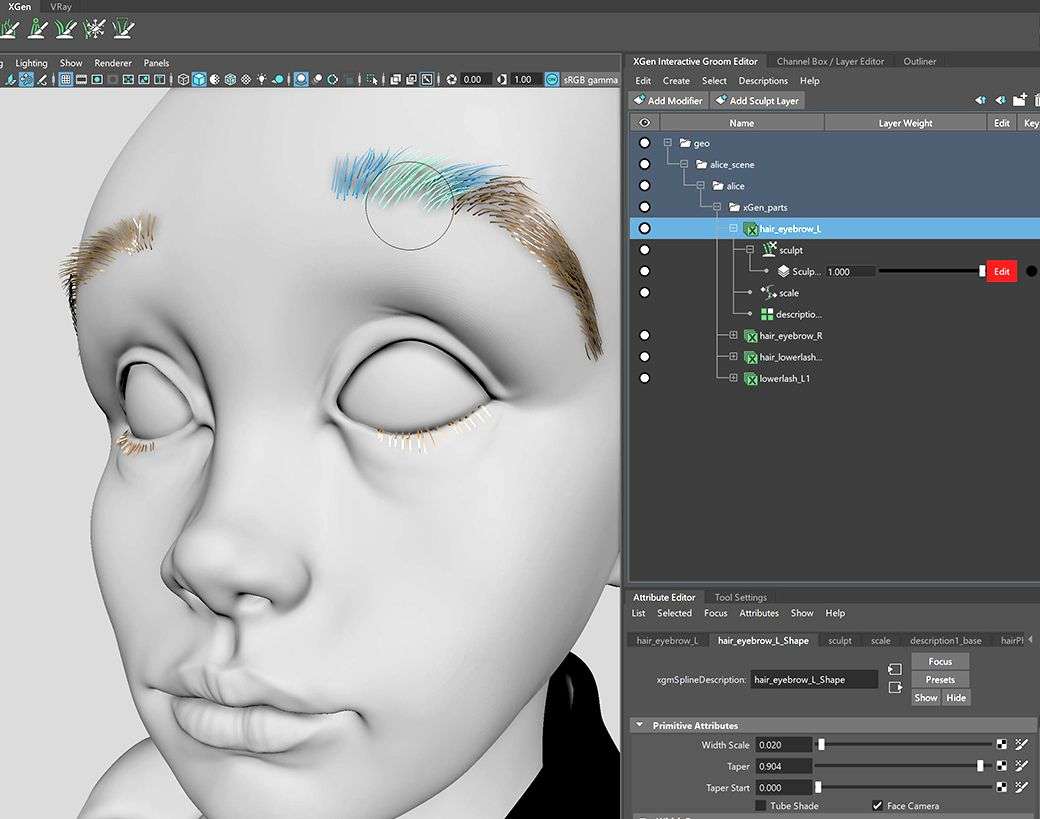
What’s nice is that each brush stroke appears in real-time, providing an interactive workflow that does not require preview generation. What the video does not mention is how to export and save your work properly. After each incremental save, be sure to export the hair description as a preset so you do not lose your work: XGen Interactive Groom—> Descriptions—> Preset—> Export—> save as an xgip file.
I created the hair and fur in XGen during the sculpting phase, prior to texturing. When creating hair on Alice’s head, I imported a lower sub-divided version of Alice’s head mesh from Mudbox, selected the faces that would be the base of her hair scalp, and extracted it. I delete the rest of the low subdivided mesh, and used just the scalp mesh for the XGen hair base.
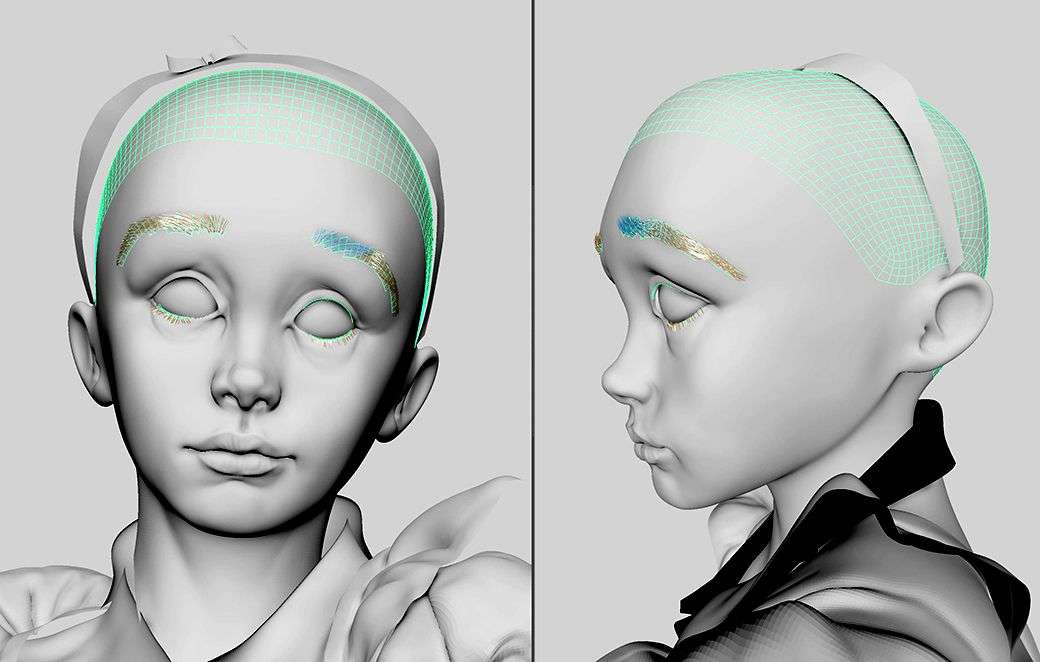
It is not necessary to use a highly subdivided mesh for hair as you can always adjust hair density in XGen and the lower poly will be easier for XGen to deal with. It is important to name all of the scalp meshes properly prior to starting XGen.
Do not mess with renaming or deleting history after you have created an XGen Interactive Groom—this will delete the hair created. Fortunately, you can re-import the hair to the base mesh if you have properly saved out your work as mentioned before.
Lighting
Take time to really study where the light sources are in the concept. Lighting is often overlooked when it is the one thing that can make or break your final render. When creating my piece, I thought about how things should be lit with every render, throughout the entire project, and did not hesitate to constantly adjust my lights.
I ended up with 26 V-Ray lights in my scene, and for me, name management was key. I used a system of names for all my lights, especially the three point lights for each of the characters and grouped them together. This made it much easier to debug and understand which lights affect which object.
I also did not hesitate to create artificial sources of lights and shadows to achieve the look I was going for. Creating mesh lights, breaking light links, and creating artificial shadows have all helped in this piece.
For specific objects such as the “Drink Me” bottle, I have lights that only affect the one object. While I intentionally broke light links for other objects such as the tunnel, so that the lights would affect the entire scene except for the tunnel, helping Alice stand out. Artificial shadows were added by creating invisible objects, and putting them in front of light sources.
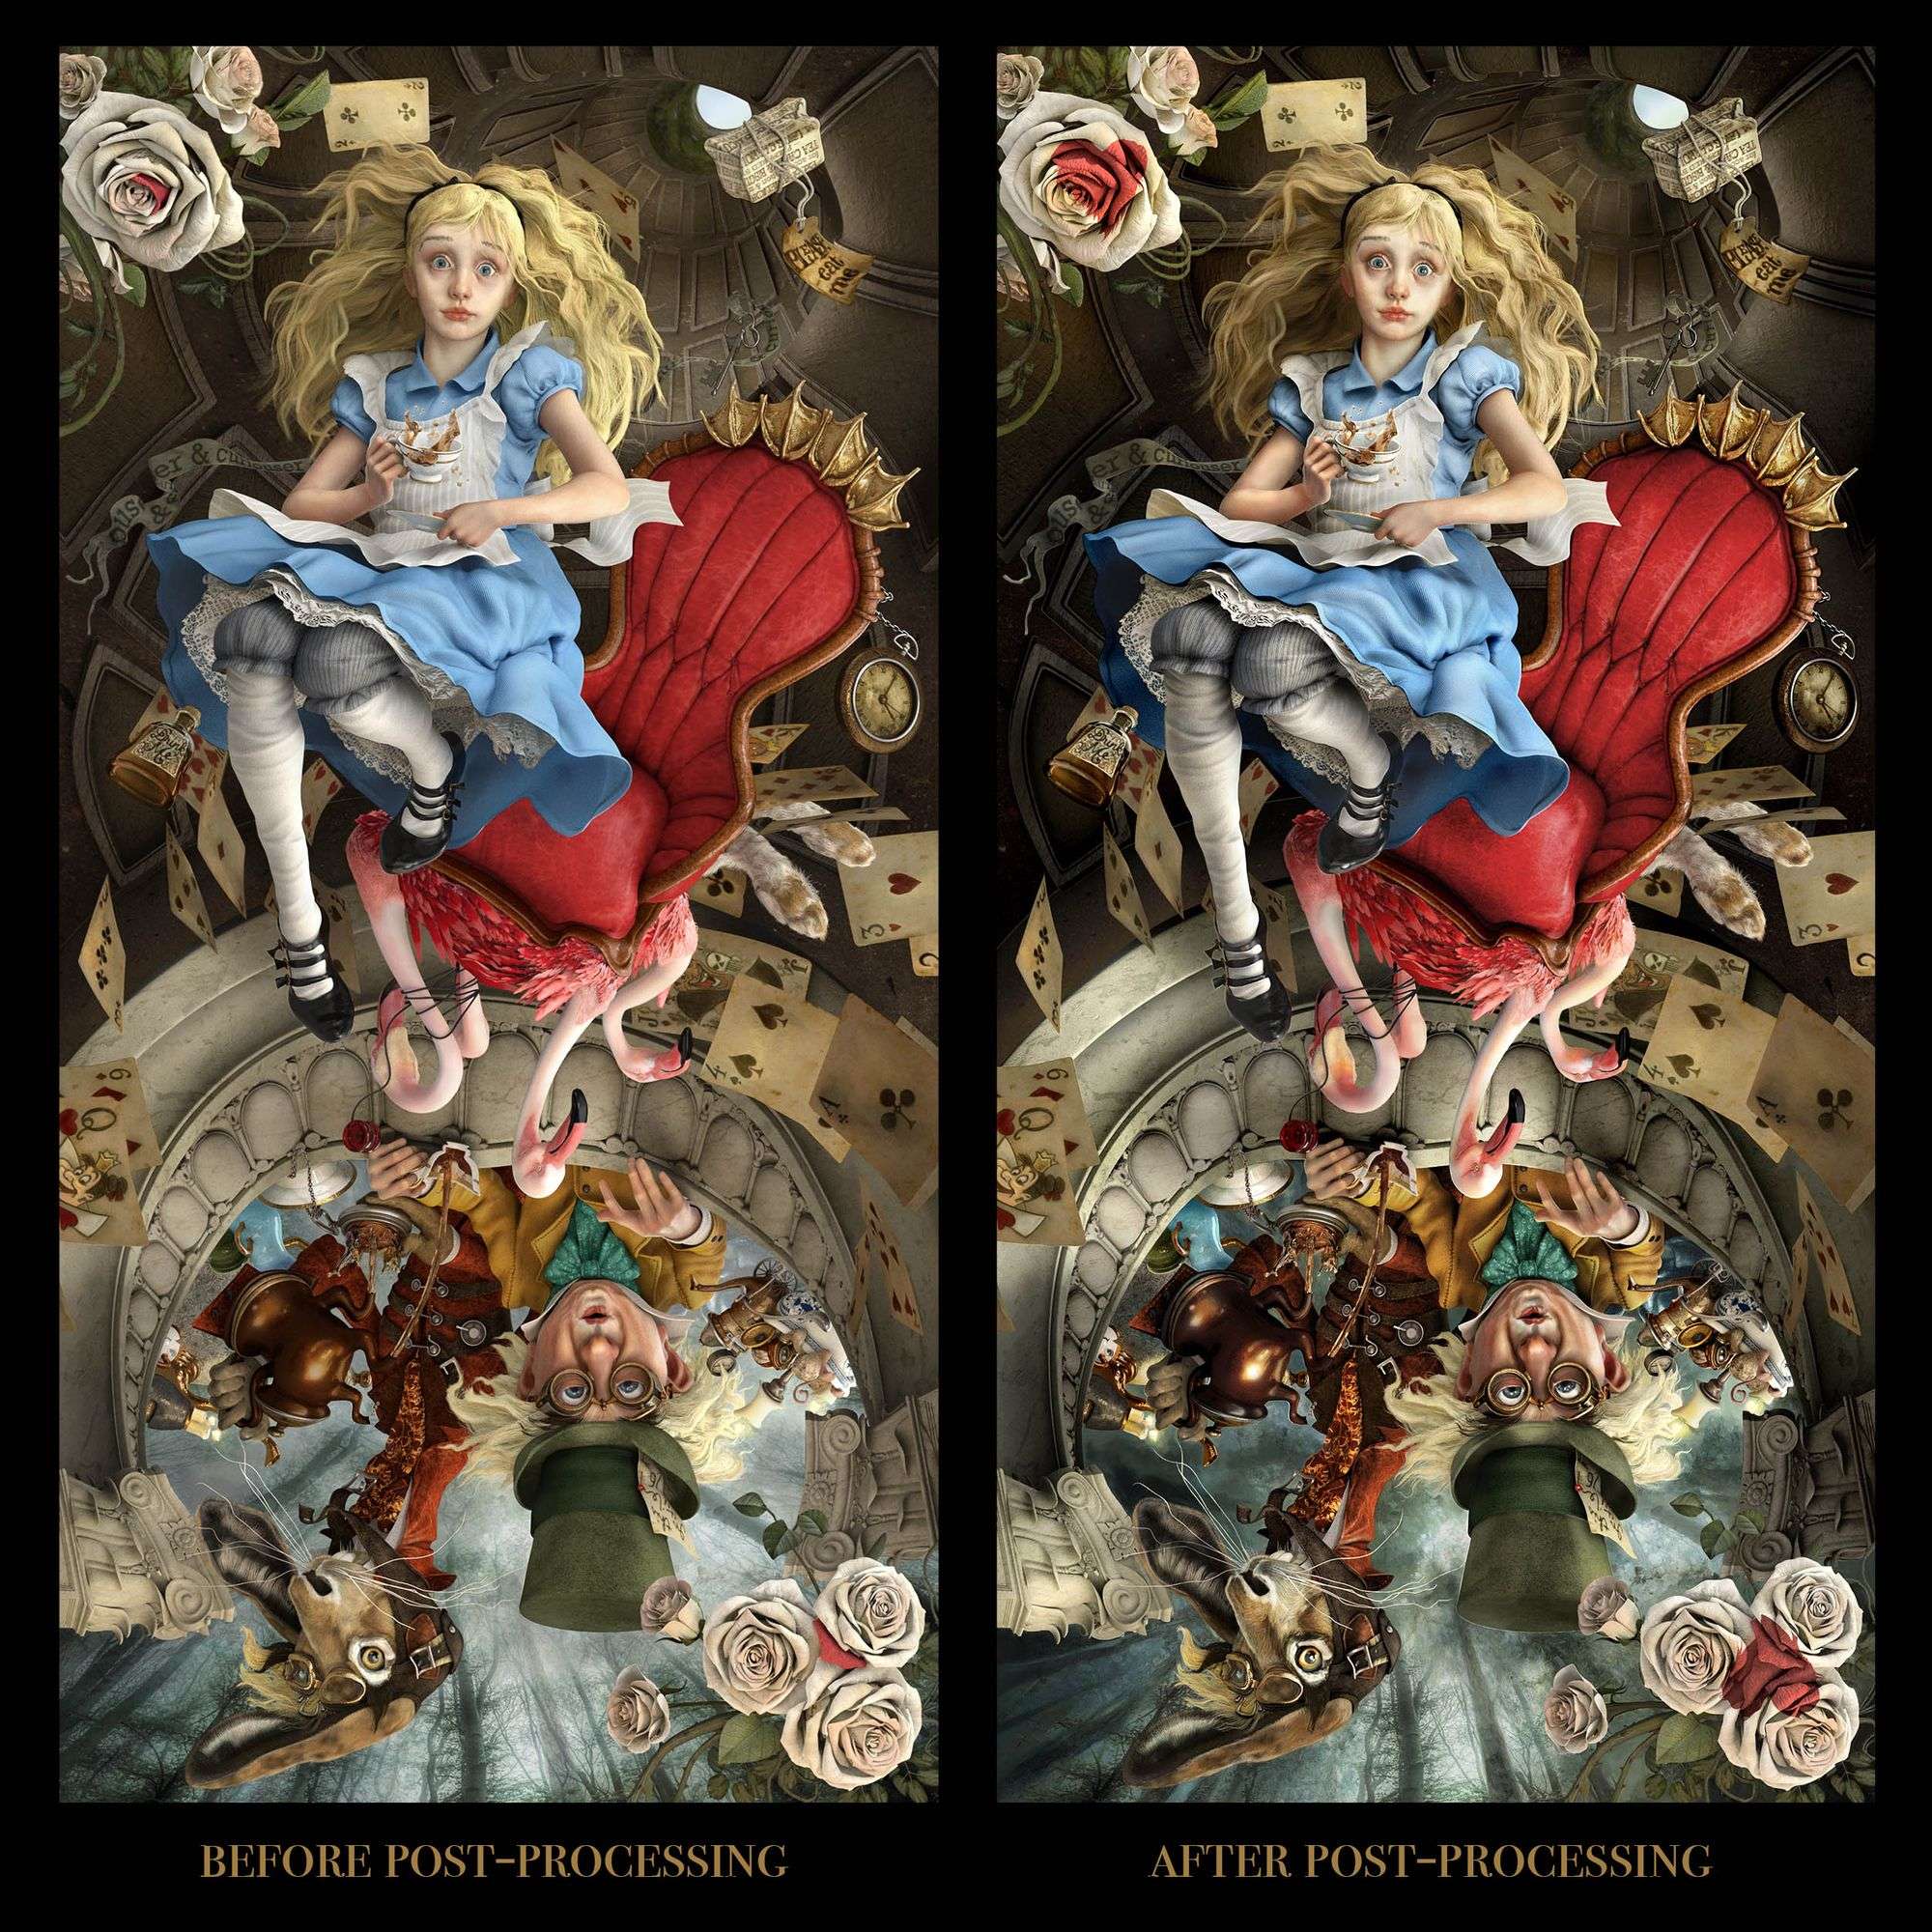
Approaching rendering and post-processing
The two maps that were most helpful to render out in V-Ray were the AO (V-Ray Extra Tex) and Multi Matte.
For every single object, I used the multi-matte feature to custom adjust the AO amount, levels and hue/saturation to the likeness of the concept.
These three adjustments were my best friends in getting my 3D render as close to the concept as possible. A pitfall I’ve seen from other works from other young artists is that we tend to compare our 3D render too close up with the concept and only see the details but miss the big picture. By not looking at the big picture first, you may get the entire time of day wrong. For instance, if the concept is set a golden hour, the entire piece should be treated with levels, hue/saturation, and maybe even brightness/contrast to get the overall look right esp. if you already know it was hard to get the exact lighting right in the final render.
When I was doing post-processing on my piece, I viewed my 3D render next to the concept zoomed out and made adjustments starting from the largest eye-sore until I reached the smallest object. Because I had lots of objects to work on, I kept my photoshop file nimble by merging layers whenever I was satisfied with how it looked. I also tend to save many versions of my files as I go—the history features are great, but sometimes it's not enough.
Publishing
If you're thinking about your next piece, I learned that it starts with how you choose or design your concept and whether you can visualise how it will look on various media platforms.
- Research. In my spare time prior to the start of my project, I spent roughly 30 minutes each day for two weeks looking at 2D illustrations and paintings on ArtStation.com and Pinterest.com. My objective was to 1) save art that resonates and 2) analyse what is generally trending day-to-day. When browsing artwork, I applied the 3 second rule and saved only the pieces that instantly took my interest.
- Narrow your options based what is not trending. Once I had a compilation of works saved from the research phase, I looked at all the images together. Typically, there is a clear pattern of works that look similar. What I’ve learned is that many 2D artists tend to create work in the style that is popular or trending at the moment. For instance, when Mass Effect came out, a lot of the SciFi works at the time were all of a similar style with clean, polished looking spaceships. When I created my Mass Effect looking spaceship, it was clear to me why my work sort of went unnoticed. Learning from this, I now look to identify trends and find concepts people have not seen before.
- Think in “outputs” for publishing. From the saved works I had left that go against what was trending, I spent time visualising how I would publish each piece on social media communities e.g. The Rookies, ArtStation, Instagram, Twitter, Facebook, etc. where my work will be noticed. Taking time to think in terms of outputs helped me understand the presentation versatility of the piece.
Each social media site has an ideal social media image size in which art will look best. Often times, certain concepts may only look good as a landscape image, but not cropped as a square—this limits my presentation across key platforms like Instagram where uploads look best as a 1080x1080px square. On Twitter, things look best as a 1200x675px horizontal rectangle. On Facebook, a square or portrait size image typically do better. These sizes apply to both images and video. It’s helpful to mention that ArtStation offers higher resolution images to be uploaded with a 10MB limit, so take advantage of this aspect by planning for a higher res render output.
Based on the ideal social media image size for each platform I planned to publish my work on, I also thought about how I would frame each cut of my work to stand out. I applied the golden ratio and considered ways to create aesthetically pleasing cuts of my work. This exercise also helped me understand where to invest more of my time perfecting areas of my work in 3D because I knew a certain a segment of the piece will be seen close-up vs. the areas that I did not plan to publish close-up at all.
Of course, there are many other things to consider such as the clarity of the piece. A concept with large brush strokes where you can’t tell if the object is a tree or lump of soil or an animal is not a good concept as it is not clear what you would build in 3D.
It took me about 2 weeks of research to find Heather's piece as my concept on Pinterest.
If you apply any of these techniques on your latest 3D works, please tag me on social media—I’d love to see your work, hear your lessons learned and grow together. My socials:
Rookies
Artstation
Instagram
Facebook
Twitter
Thanks to all the instructors at Think Tank Training Centre for sharing your knowledge. What an incredible experience thus far! Special thanks to my mentor, Christian Peck, for all the neat tricks and tips that helped make this piece possible.