Concept Art: How to Create a Mountain Mosque Scene
Reuben Lane is an aspiring concept artist. In this article he shows us his process that he goes through for his ‘Mountain Mosque’ piece.
Reuben Lane is an aspiring concept artist. In this article he shows us his process that he goes through for his ‘Mountain Mosque’ piece.
Reuben Lane is an aspiring concept artist. In this article he shows us the process he goes through for his ‘Mountain Mosque’ piece.
The important step to every project is research. For my environment pieces, I always try to combine interesting scenery with cool architecture. In this case, I was inspired by the Tianzishan forests in China. They have tall rock pillars which makes the scenery really unique and I imagined a temple on the side or on top of one of them would look super cool.
After the idea, it's important to gather reference! I like to separate out my reference into groups of scenery, architecture and mood. A super recent addition to this work flow I have started doing is cutting out pieces from images of props and architecture, and then placing them on a Photoshop document which I keep in the cloud.
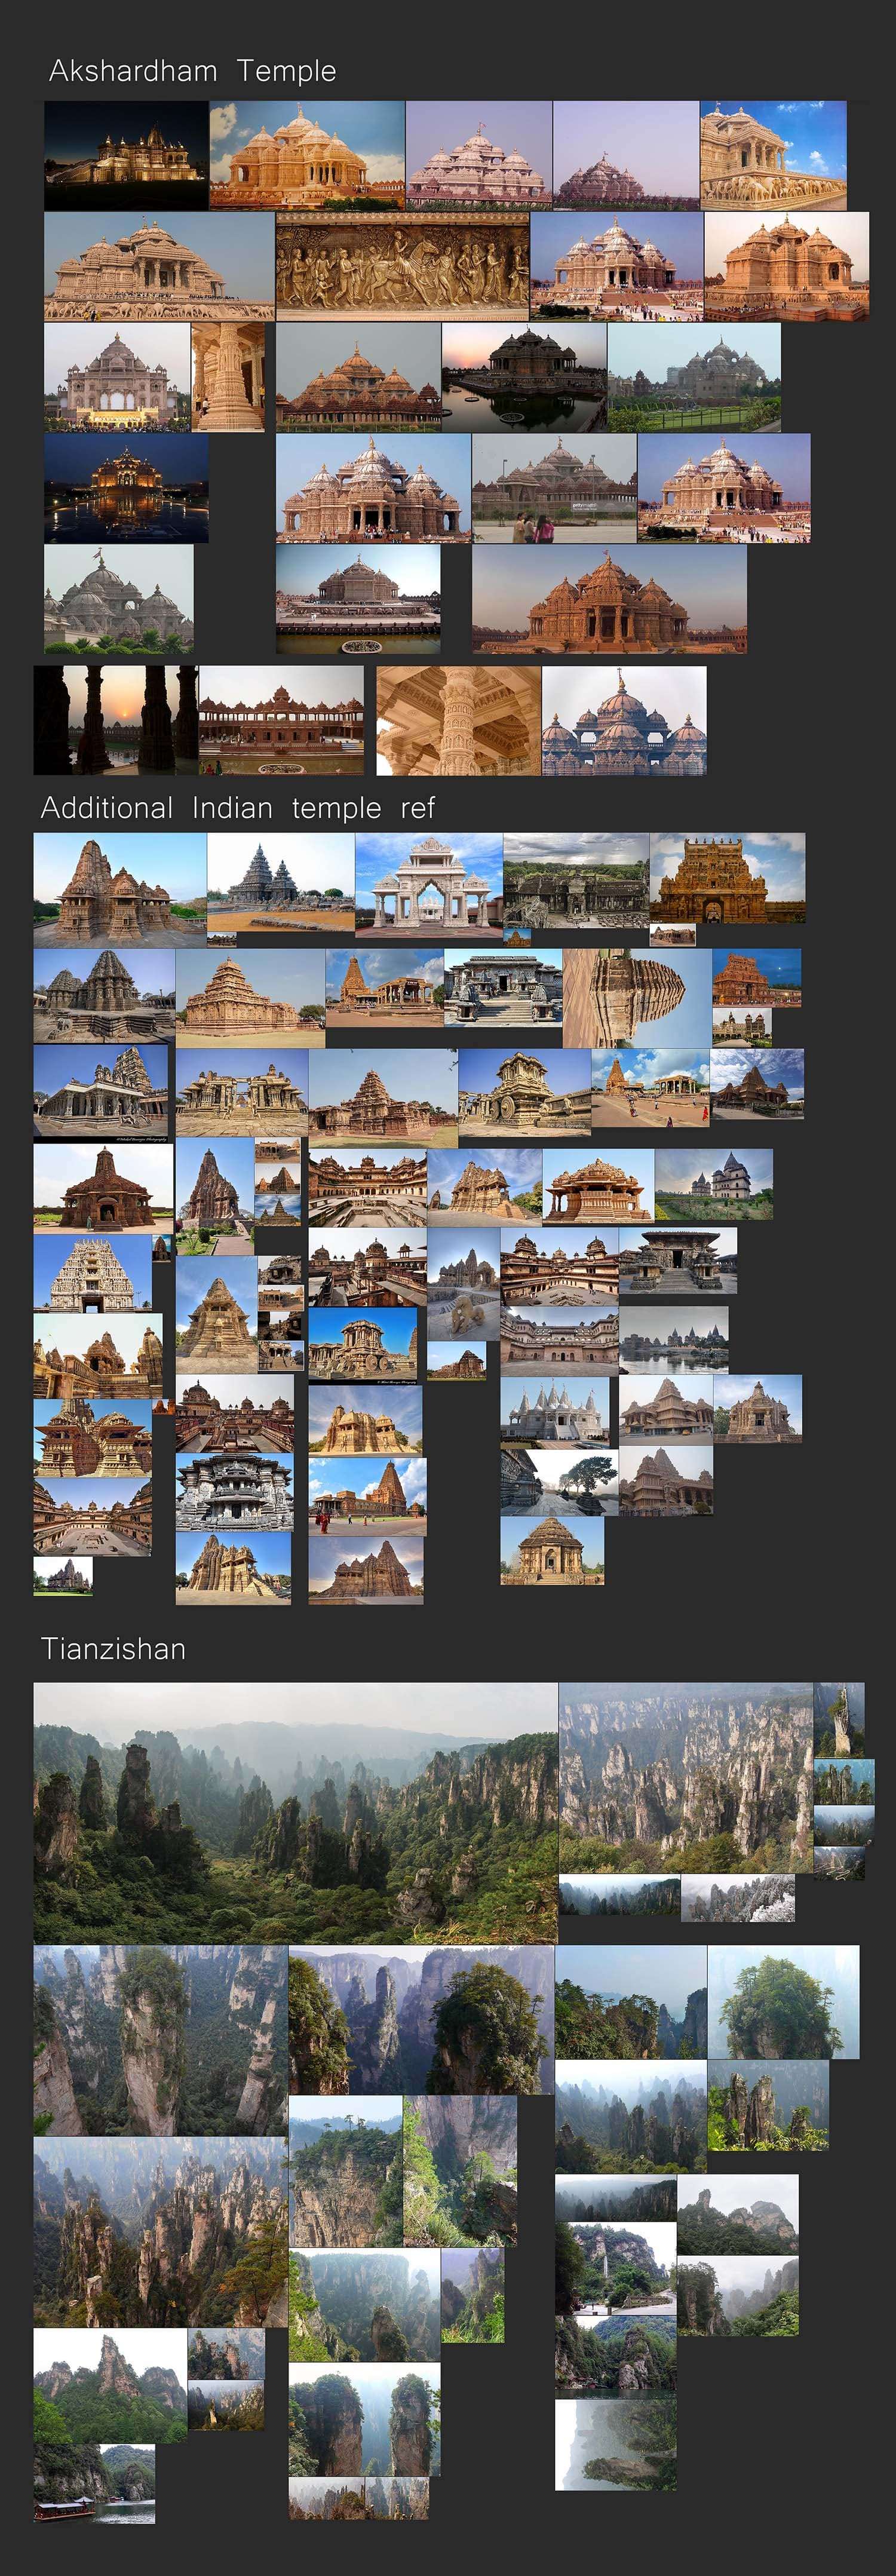
This means I can drag and drop assets into scenes and quickly form sketches. It's okay to change your mind on architectural style or scenery or mood, but this is a great way to establish a solid foundation to the scene.
With reference gathered, I can start sketching! My sketch scenes are always in black and white, unless it's specifically to figure out mood...but even then I find it a lot quicker to do in Octane with HDRI’s or at least on top of a blank render. With my sketching, I combine photobashing, large brush strokes and lasso shapes to quickly establish a scene.
I use hard edge round brush and eraser to get nice shapes and a soft edge brush and eraser to establish values, light streaks, and shadows. At the end of a sketch I will always apply levels, and usually find that the image is too dark.
This is a personal correction I figured out for myself, but it's always good to check your levels on a sketch, as you want there to be a clear contrast and readable scene.

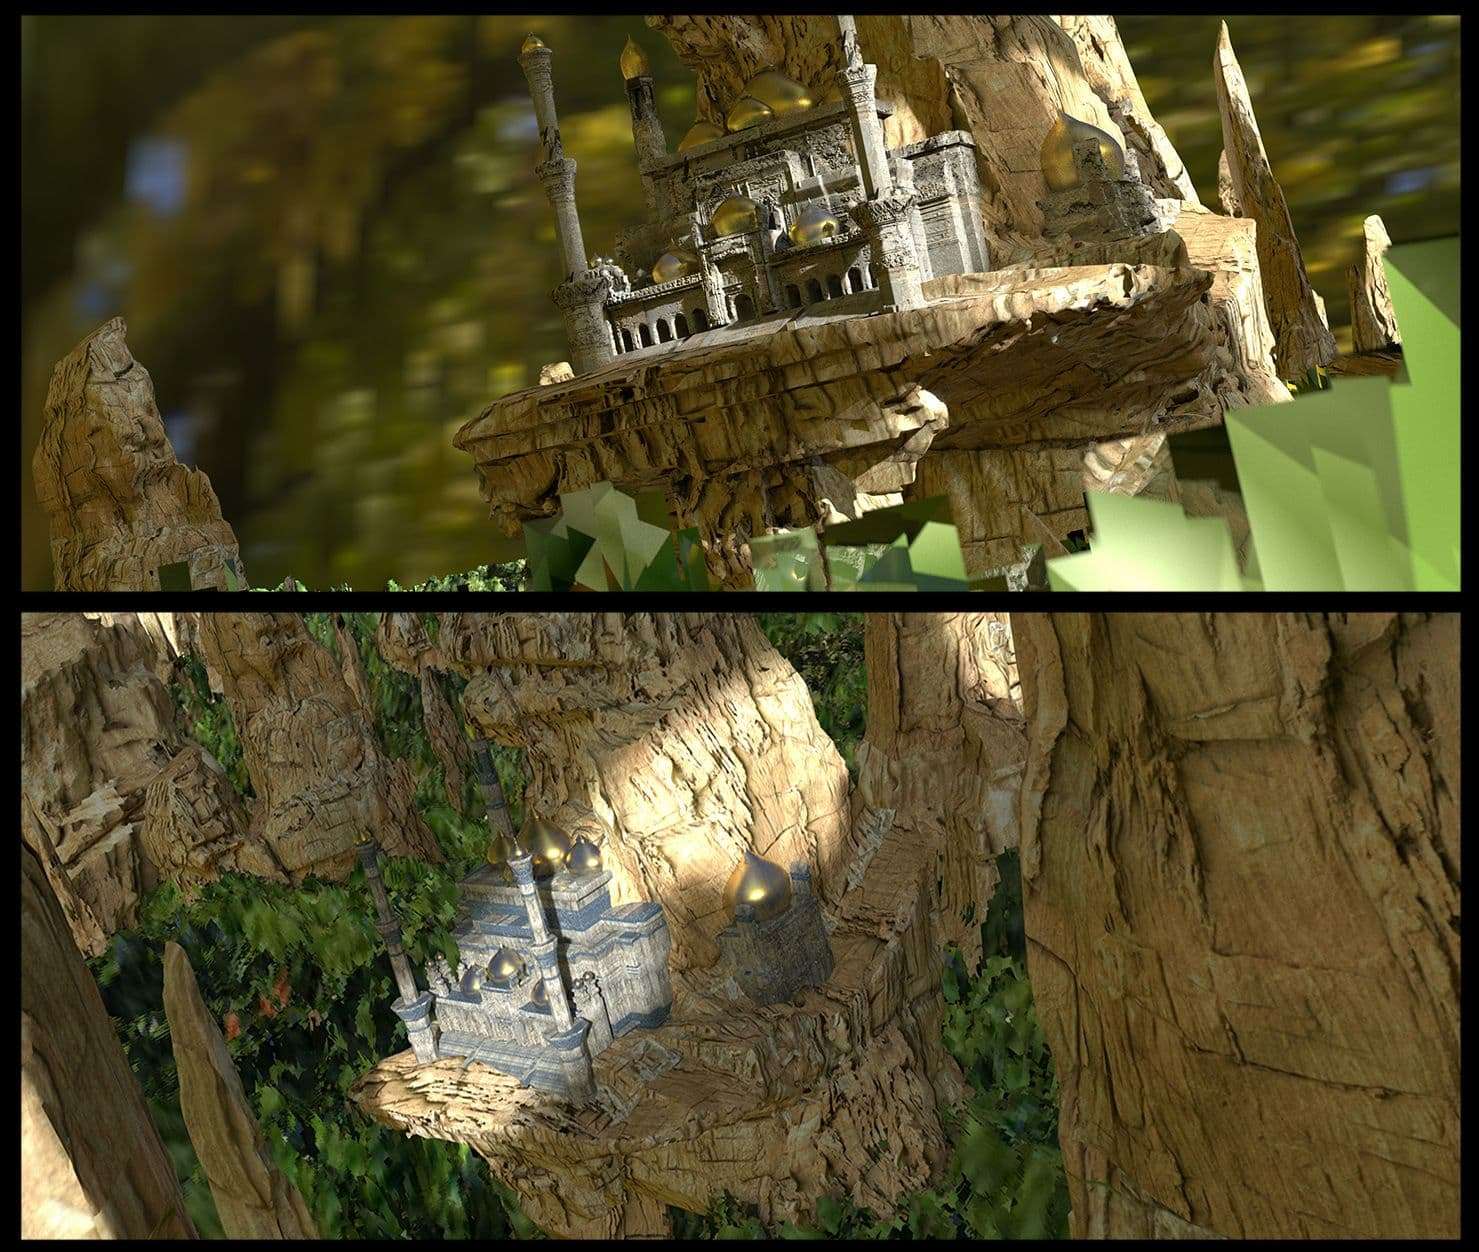
After this, I will usually aim to build the scene in 3D. I can colour up from a black and white sketch, but building a scene in 3D allows for a lot of versatility through different camera angles, and quick iterations through different textures and displacements.
Right now I am jumping around a lot of different programs to figure out what modelling I like most, and am yet to settle. However, when it comes to rendering software, I absolutely love octane. Within a day or 2 you can learn everything you need to make great looking scenes in octane.
On top of this, octane handles instancing really well, and so having vast landscapes or big crowds of people is handled effortlessly on octane, something that's important to me as I use a laptop with not great specs.
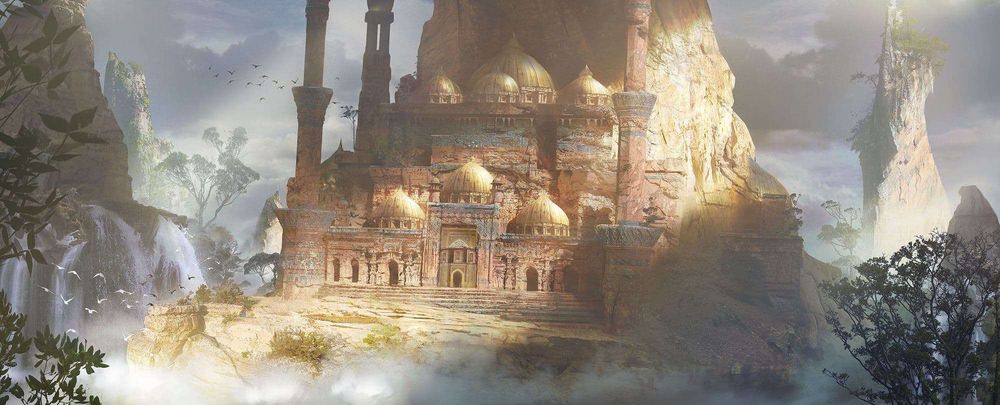
Once the render is made, I will photobash and paint on top, making a lot of softlight/overlay layers adjustments, and trying my best to make shapes look nice and contrast against whatever is behind it.
I also try to separate each layer of depth clearly in the scene. My final touches are to usually add birds to the scene (for scale), as well as some silhouetted foreground elements to help frame the focal point.

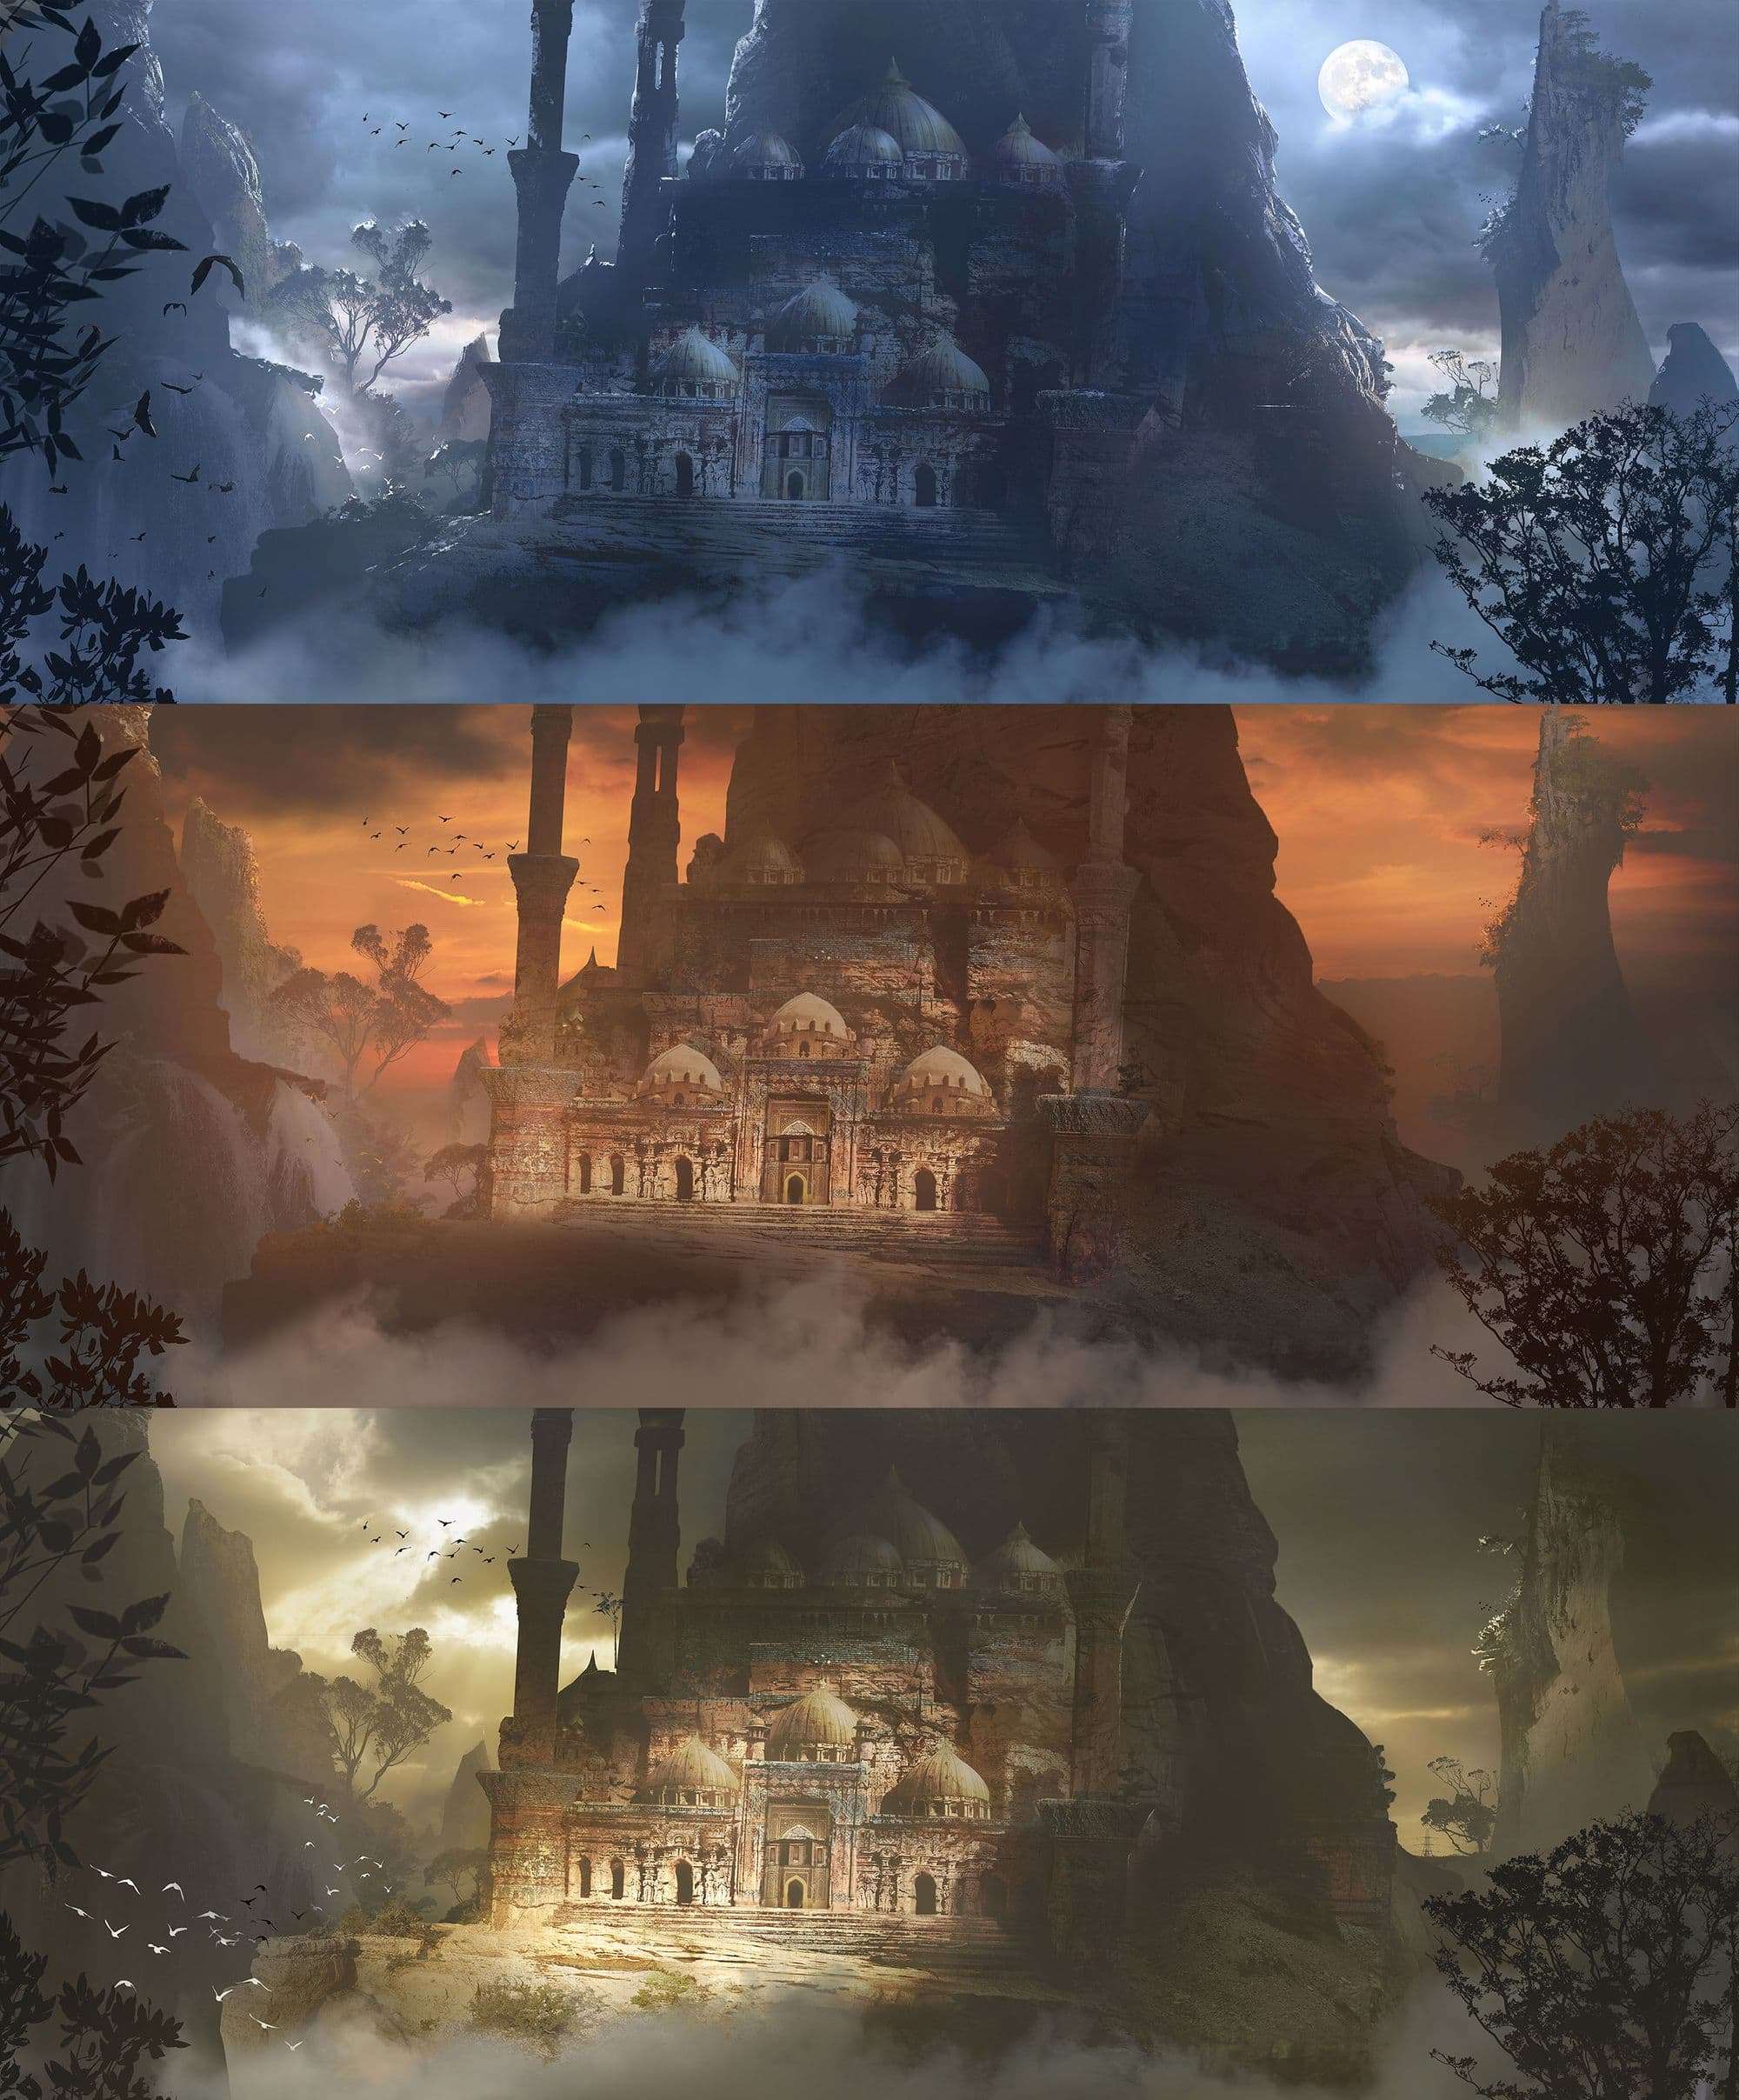
In this particular scene, I wanted to do some mood/weather variations afterwards, so I worked on top of the finished image, using the mask separations of the background, mid and foreground to help me make easy changes to the scene.
Because the scene and all of its assets are already established, It only took a few hours per image and took a day to produce the sheet of alternative moods.