Complete Workflow for creating a Stylized 3D Female Action Character
James Hyun is a Junior 3D Character Artist freelancing at Stalwart Games. He loves all kinds of CG work but is currently focusing on stylized 3D characters which is great for all of us here.
James Hyun is a Junior 3D Character Artist freelancing at Stalwart Games. He loves all kinds of CG work but is currently focusing on stylized 3D characters which is great for all of us here. James has been generous enough to share his workflow and some tips to help you create your own stylized 3D characters, so lets jump in an get started.
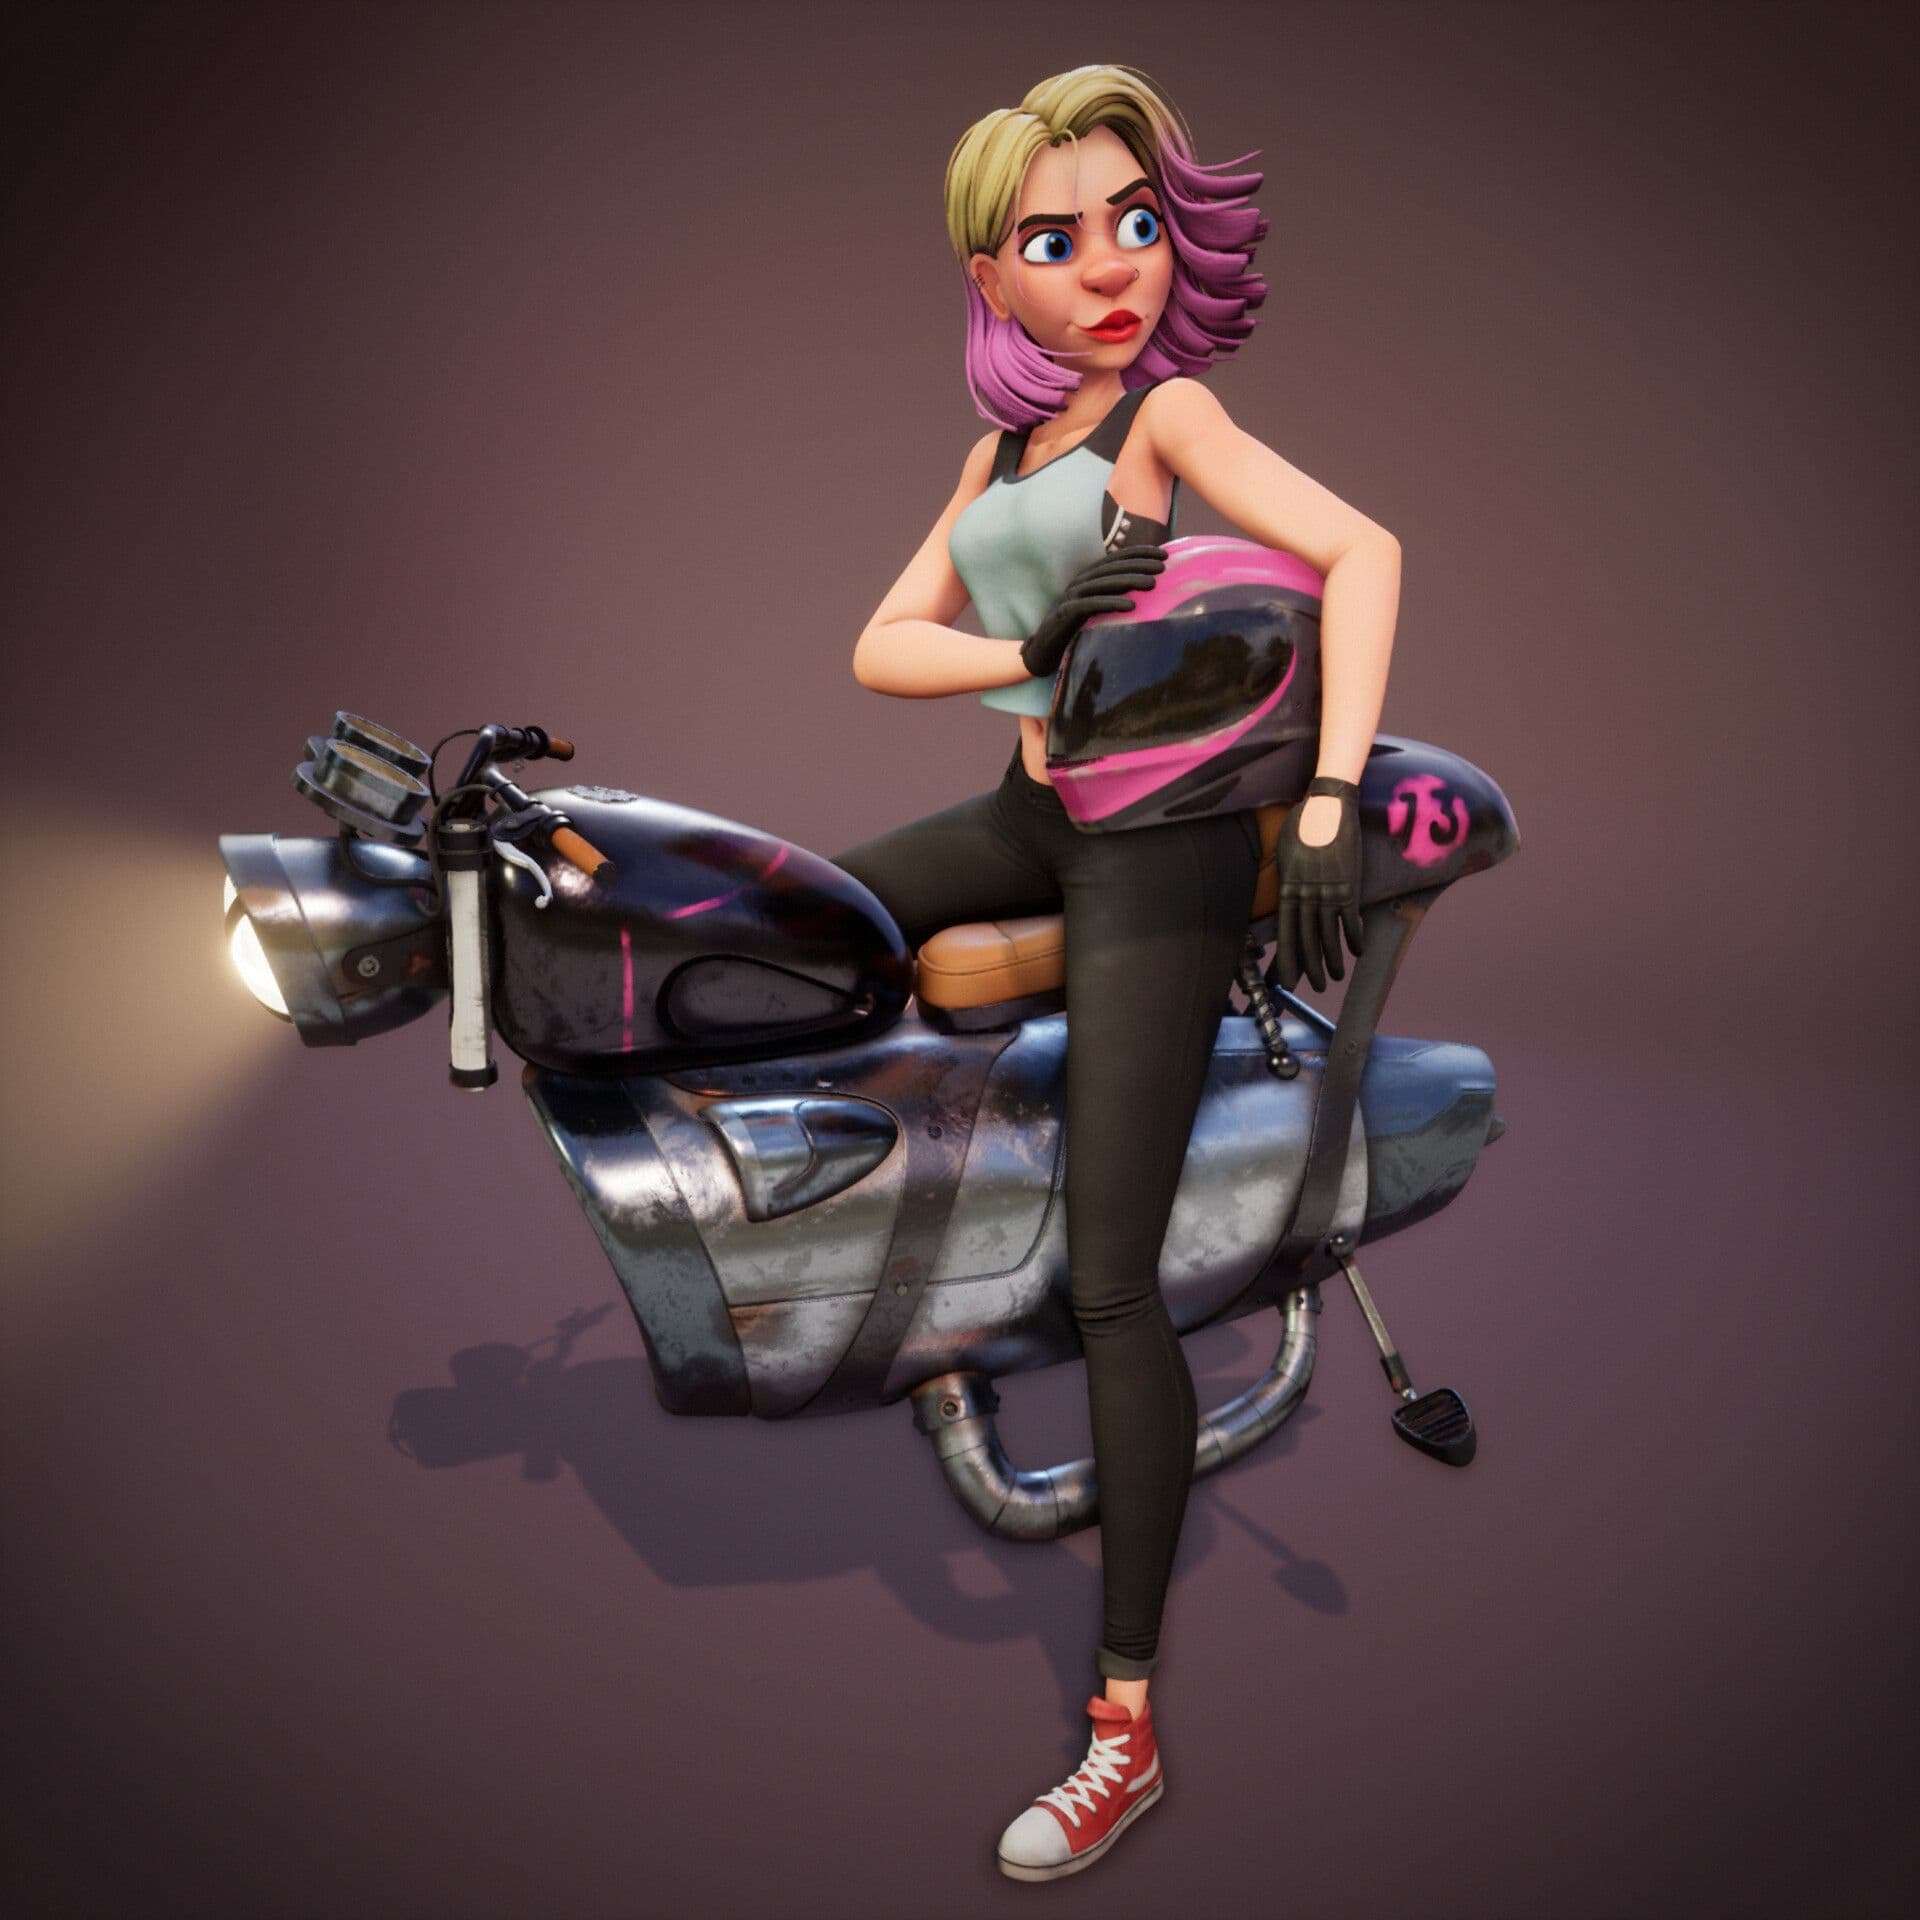
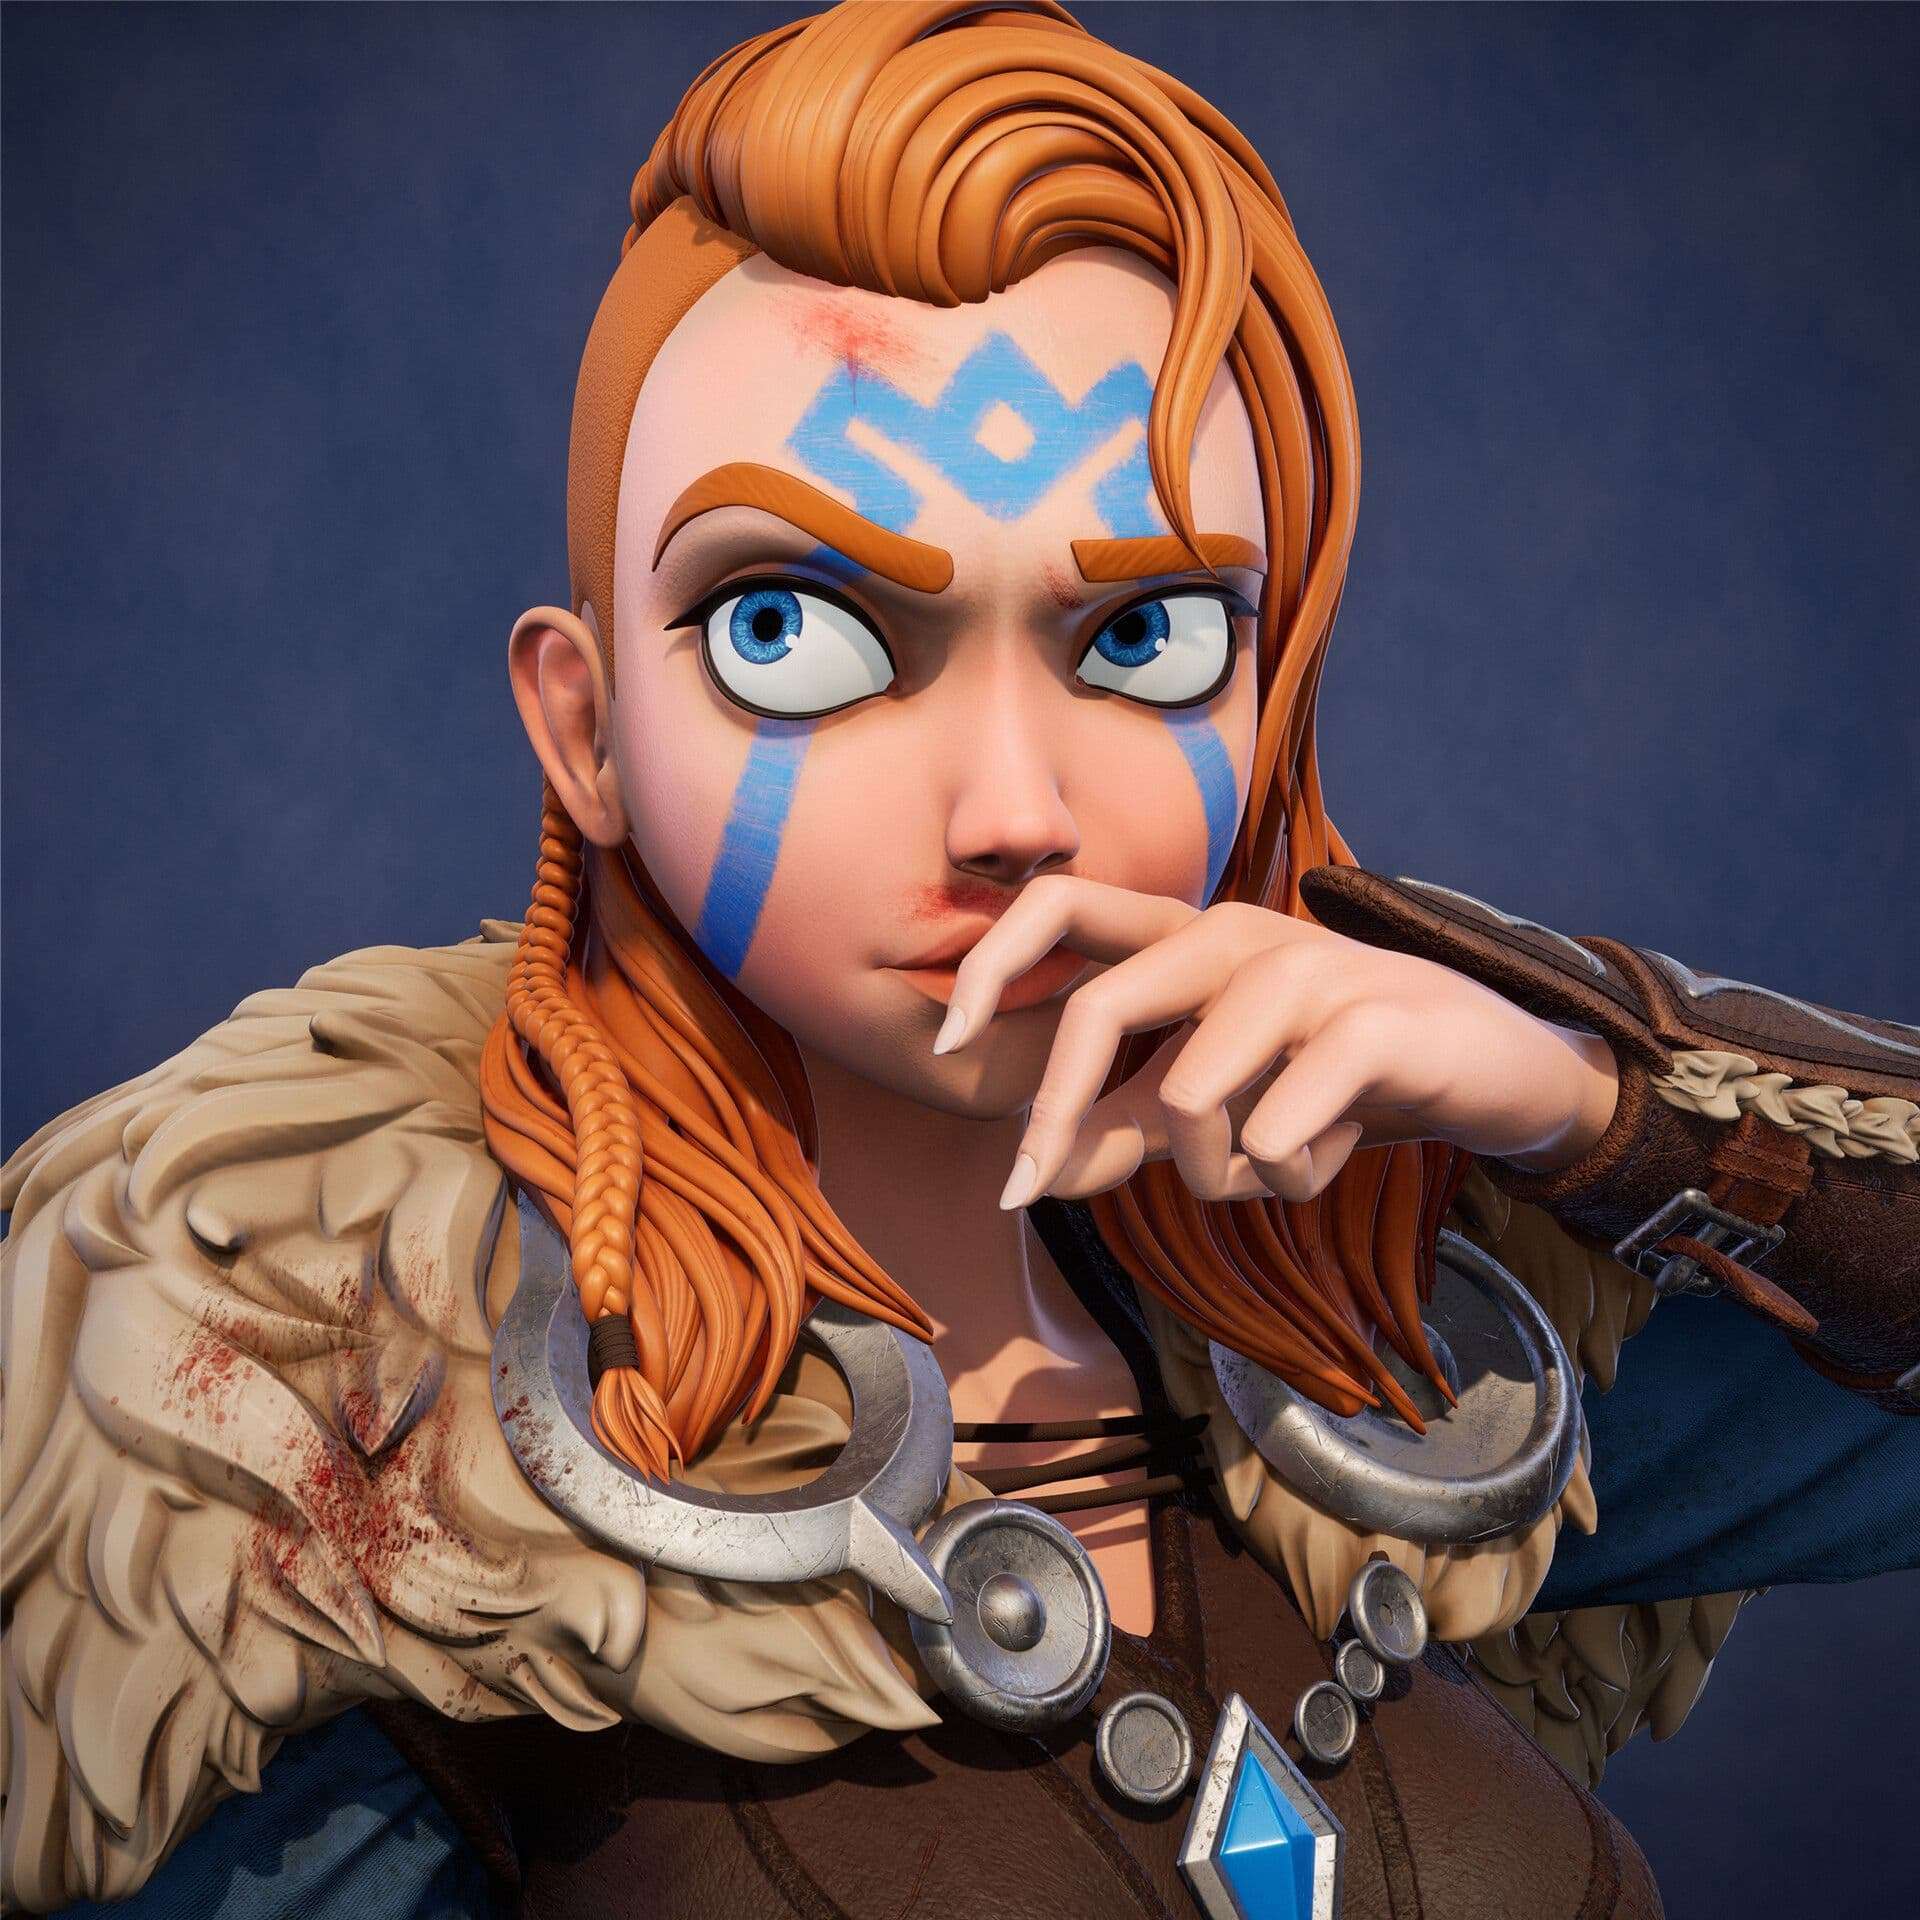
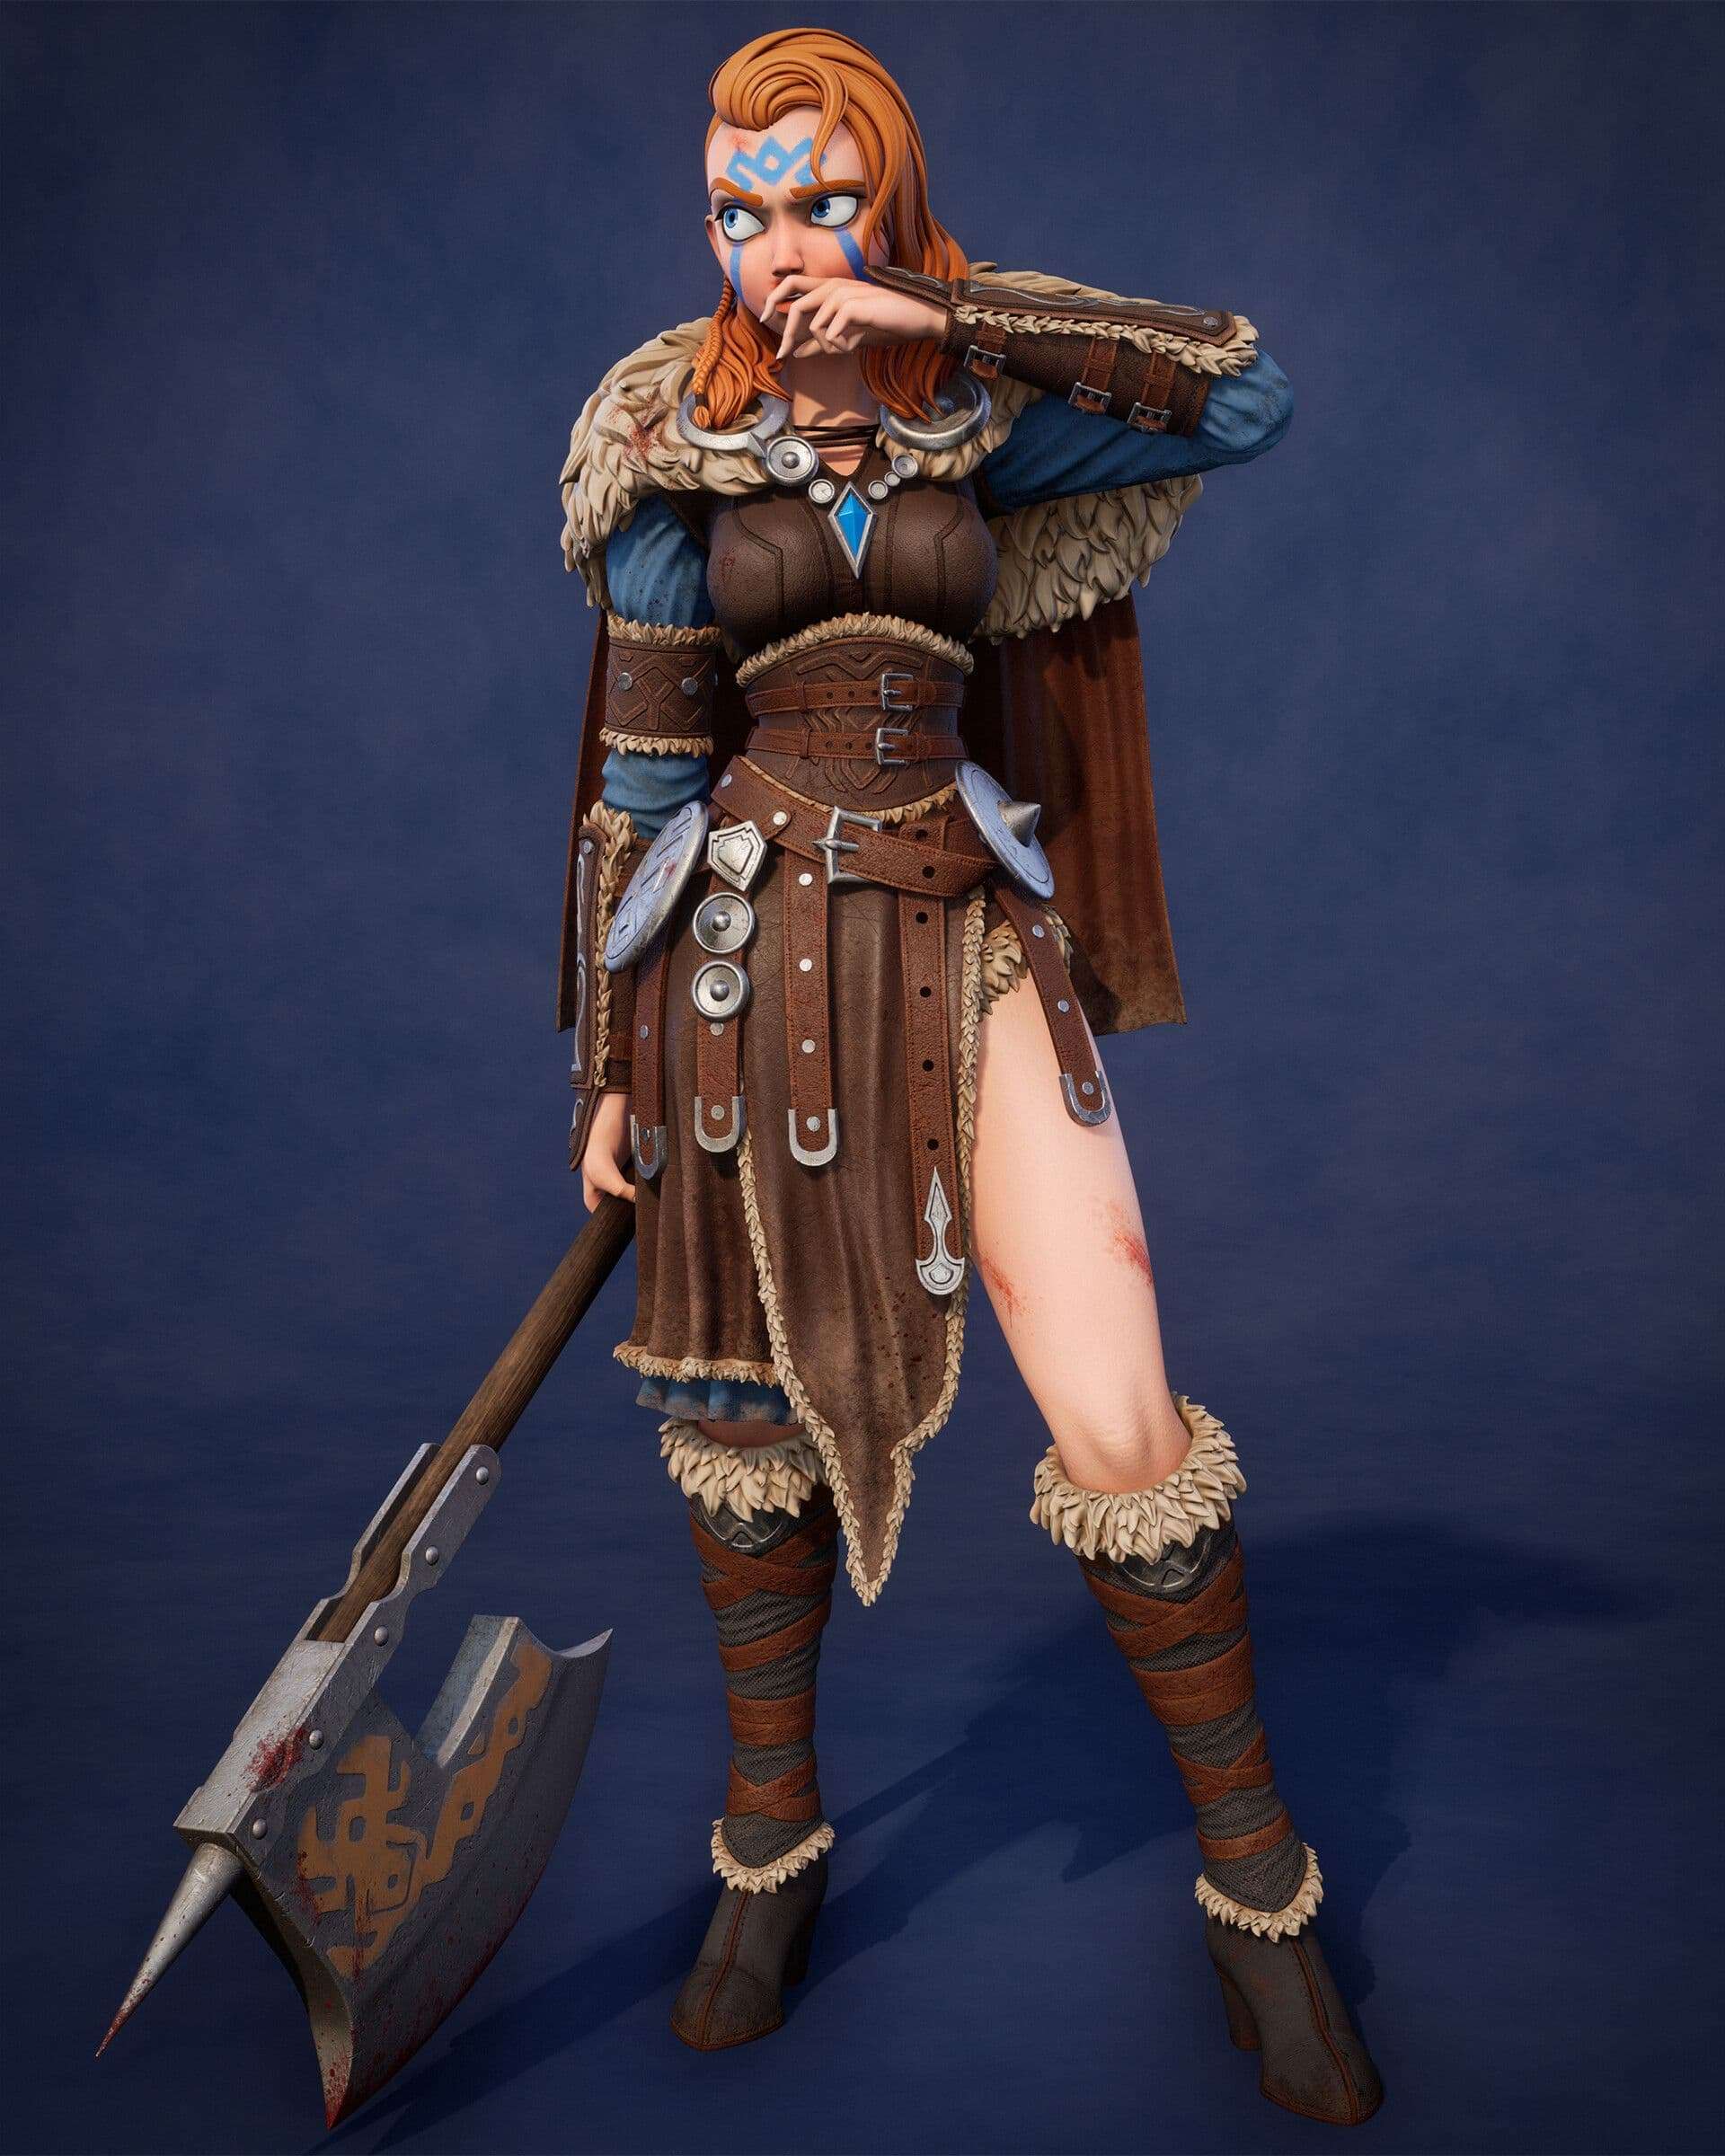
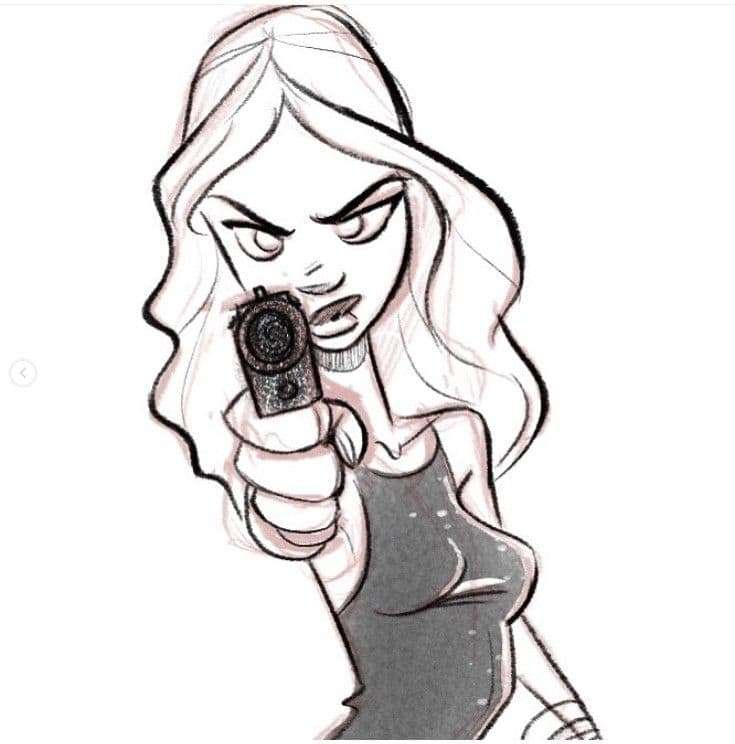
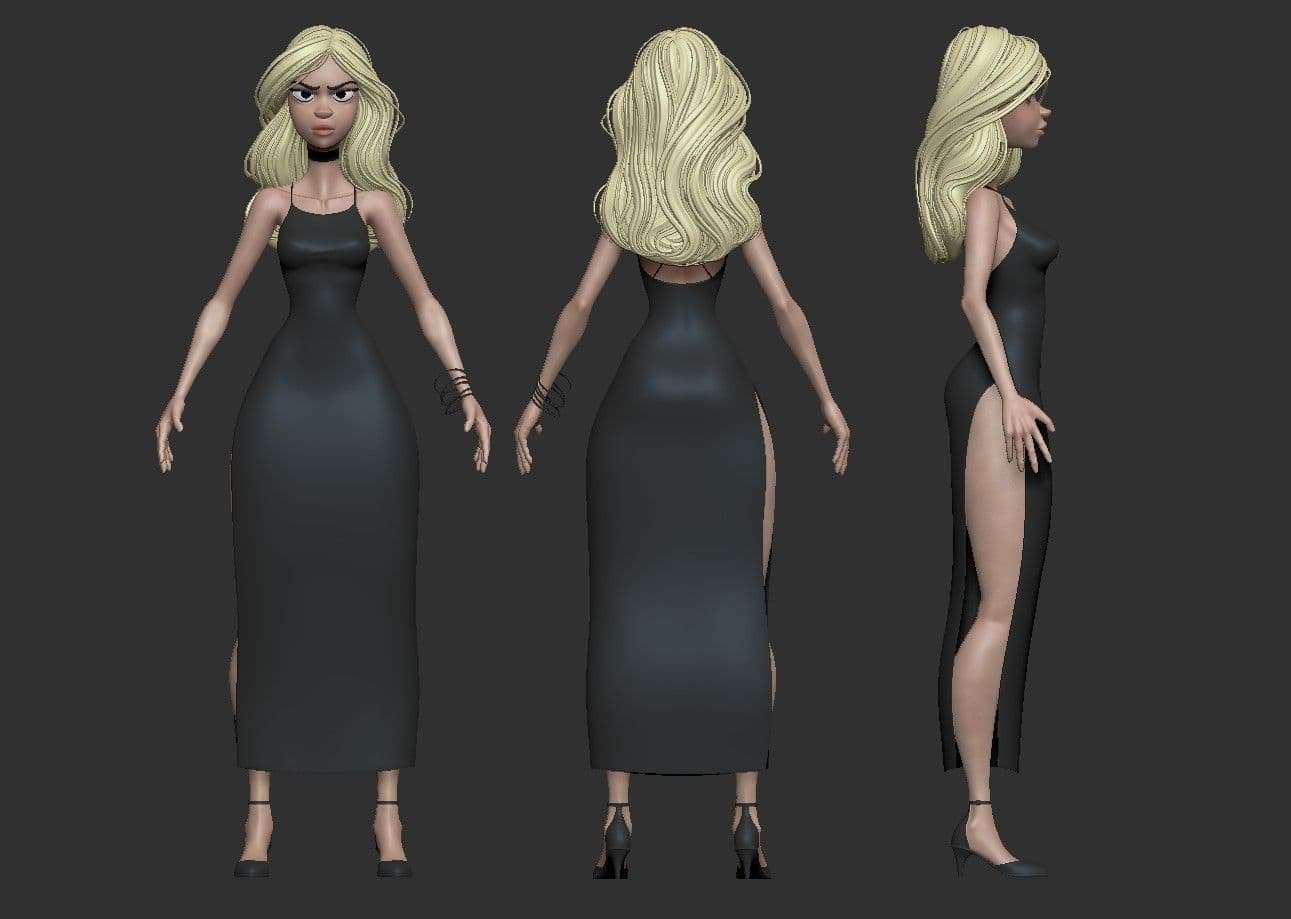
Examples of stylized character by James Hyun
Introduction
With this article, I want to give you an insight on how I made one of my recent personal projects. The steps taken vary depending on the style and needs of each piece (which is what keeps things interesting!), but for this article, I’ll focus on my latest: ‘Agent Veronica’.
My character making process is never linear. I end up going back and forth between steps all the time. So take this article as a loose template of what takes place, and not a step by step guide. There’s a lot to talk about, so I'll try to stick to the highlights.
I still have a ton more to learn and still get plenty of things wrong, but this is my workflow so far. For a quick background on me, in 2017 I graduated from Rochester Institute of Technology with a BFA in Film and Animation, focusing on 3D animation. There, I received a mostly generalist education covering the entire animated film production pipeline. In 2019, I took an online class at CGMA called ‘Stylized Characters in 3D’ taught by Hannah Kang to focus on 3D character art. Since that class, I’ve been remote freelancing for Stalwart Games in Los Angeles, making characters and props for their unannounced game.
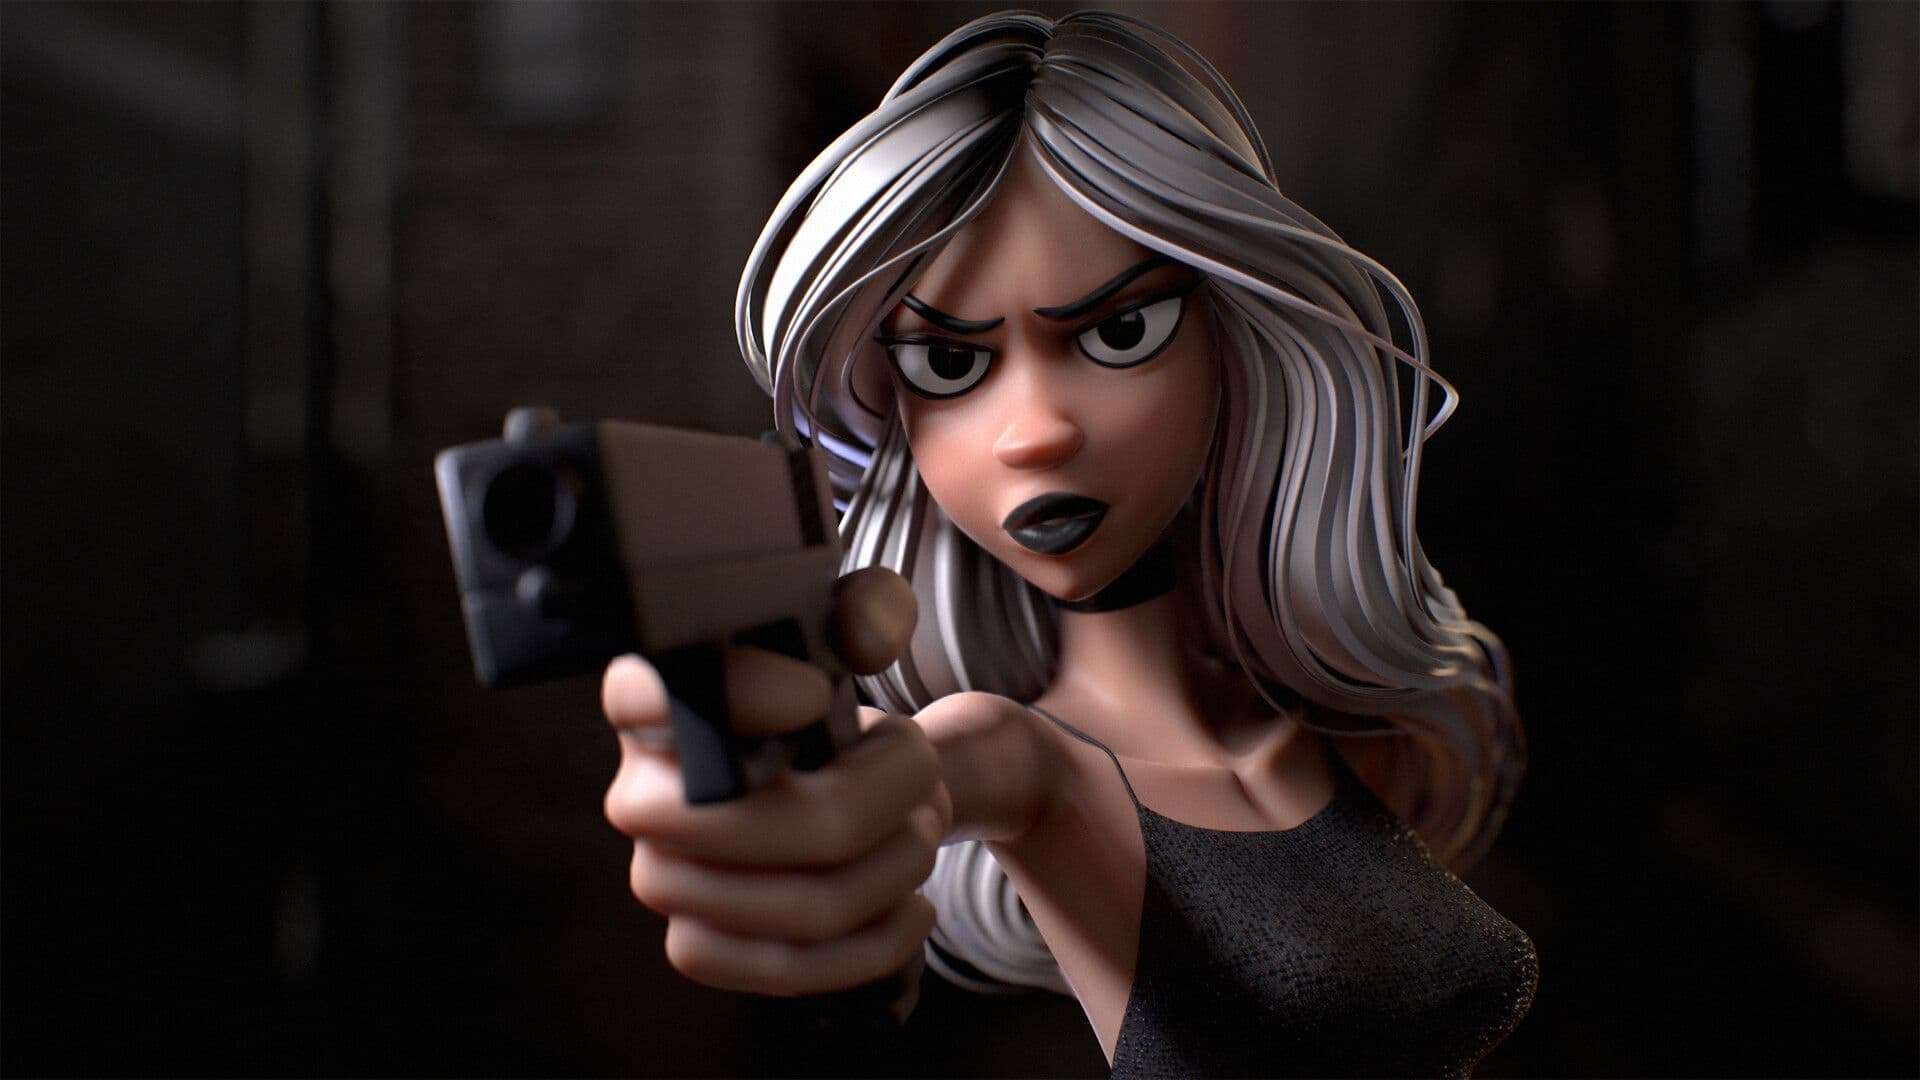
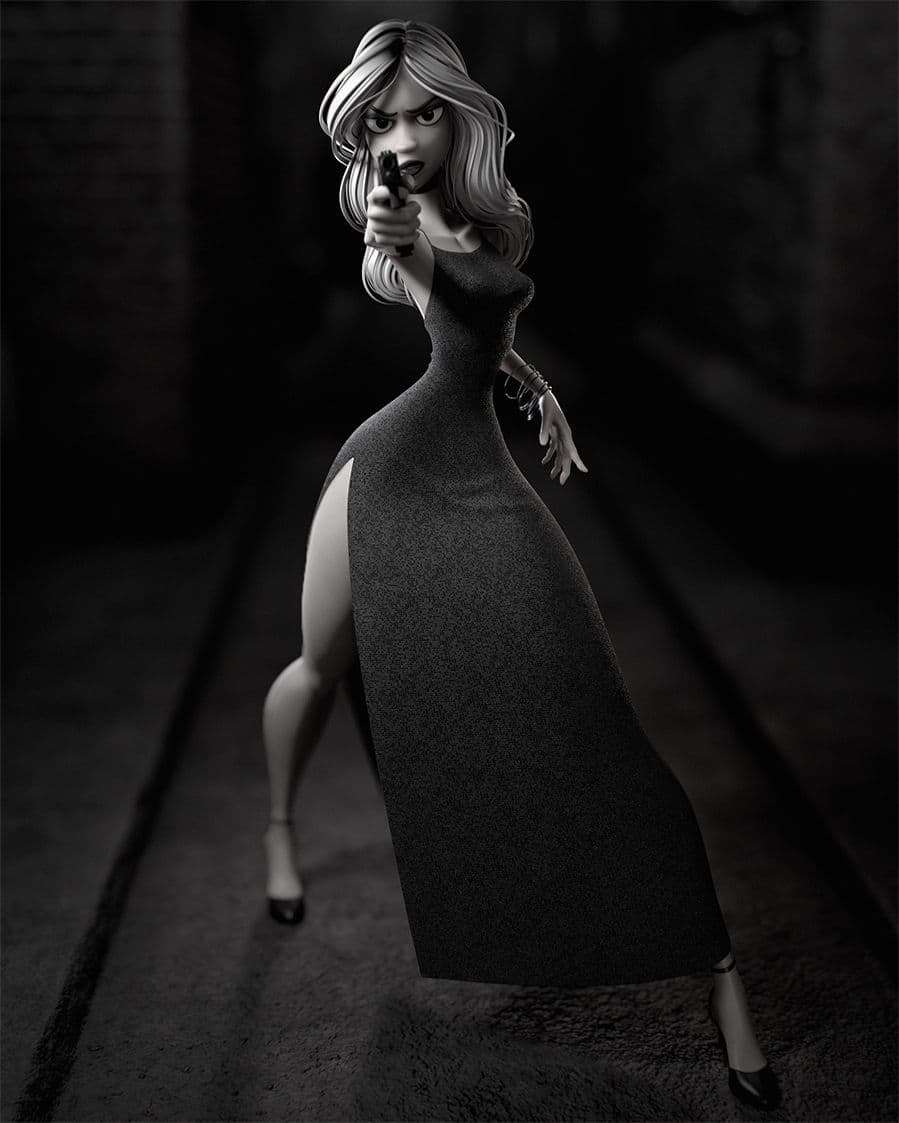
Agent Veronica - The featured female star of this article
Concept Art and Reference Gathering
First things first: you need a great concept. As much as I wish I was talented at everything so that I can come up with my own character designs, I am not. It’s tough enough to be good at 3D alone, but maybe one day! I usually spend a few hours going through ArtStation with the “2D” and “Characters” filters, or through my Instagram feed, where I keep it mostly art focused. At this point in my career where I am trying to build a dynamic portfolio, I give myself a few rule of thumbs when it comes to picking out a character concept:
‘Does it incorporate some kind of hard surface or environmental element?’
‘Is the pose of the character expressive enough?’
‘Do I personally find the character appealing?’
‘Is there an aspect of the character that will challenge me in the process of making it 3D?’
‘Have I already seen 3D versions of this character?’
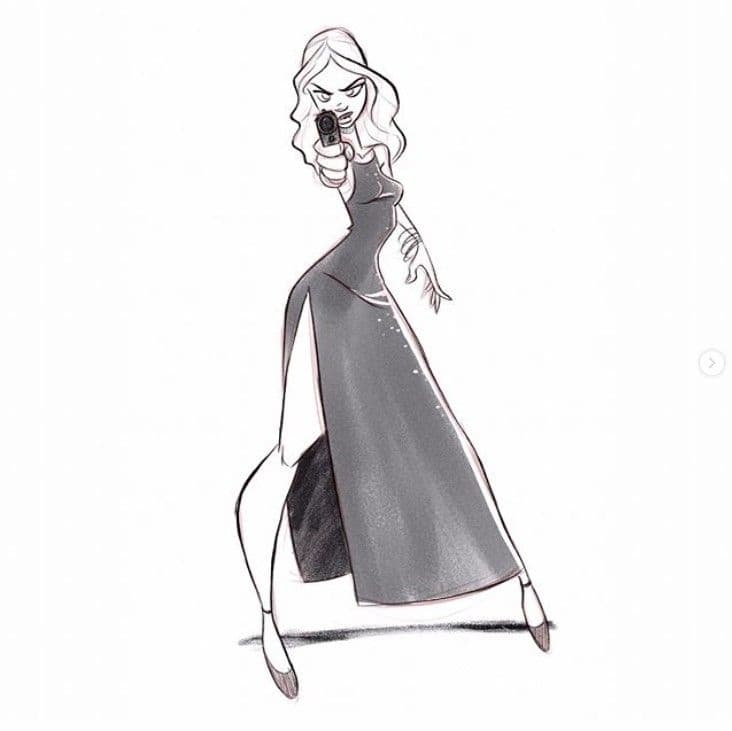
Concept by Matt Thorup.
Incorporating hard surface elements is important to show that I'm not a one trick pony. It's also important that you find personal appeal in the concept because you'll spend the next few months staring at it. Whether it's hair, props, or materials, I try to push myself in some aspect with every project. For Agent Veronica (concept by Matt Thorup), my main challenges were the hair, dress material, and making a small environment for her to be in.
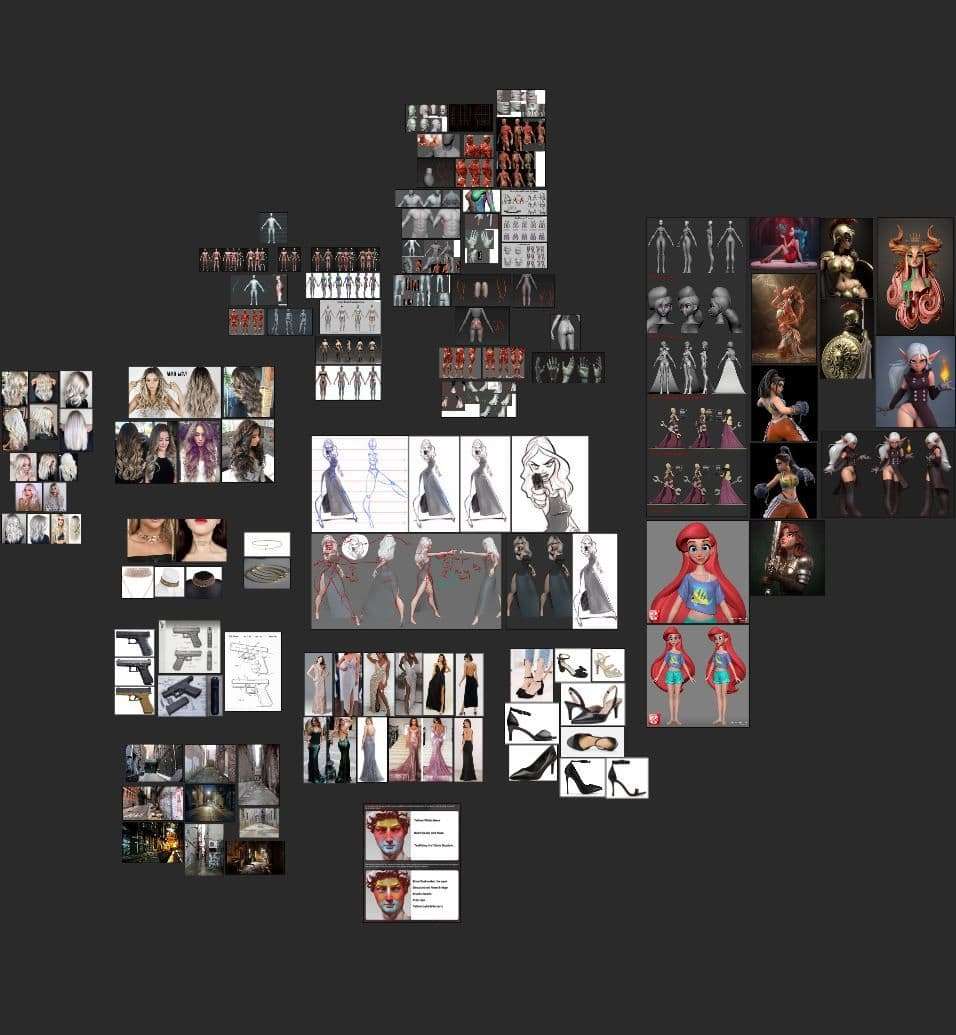
After finding the perfect concept that suits my picky needs, I start gathering reference images. I use the software ‘PureRef’ to dump all the reference images for hair, cloth, pose, anatomy references, etc. I sometimes also do quick and dirty draw overs to help understand what is going on with the character’s proportions and pose.
PureRef board for Agent Veronica.
ZBrush Blocking and Dynamesh
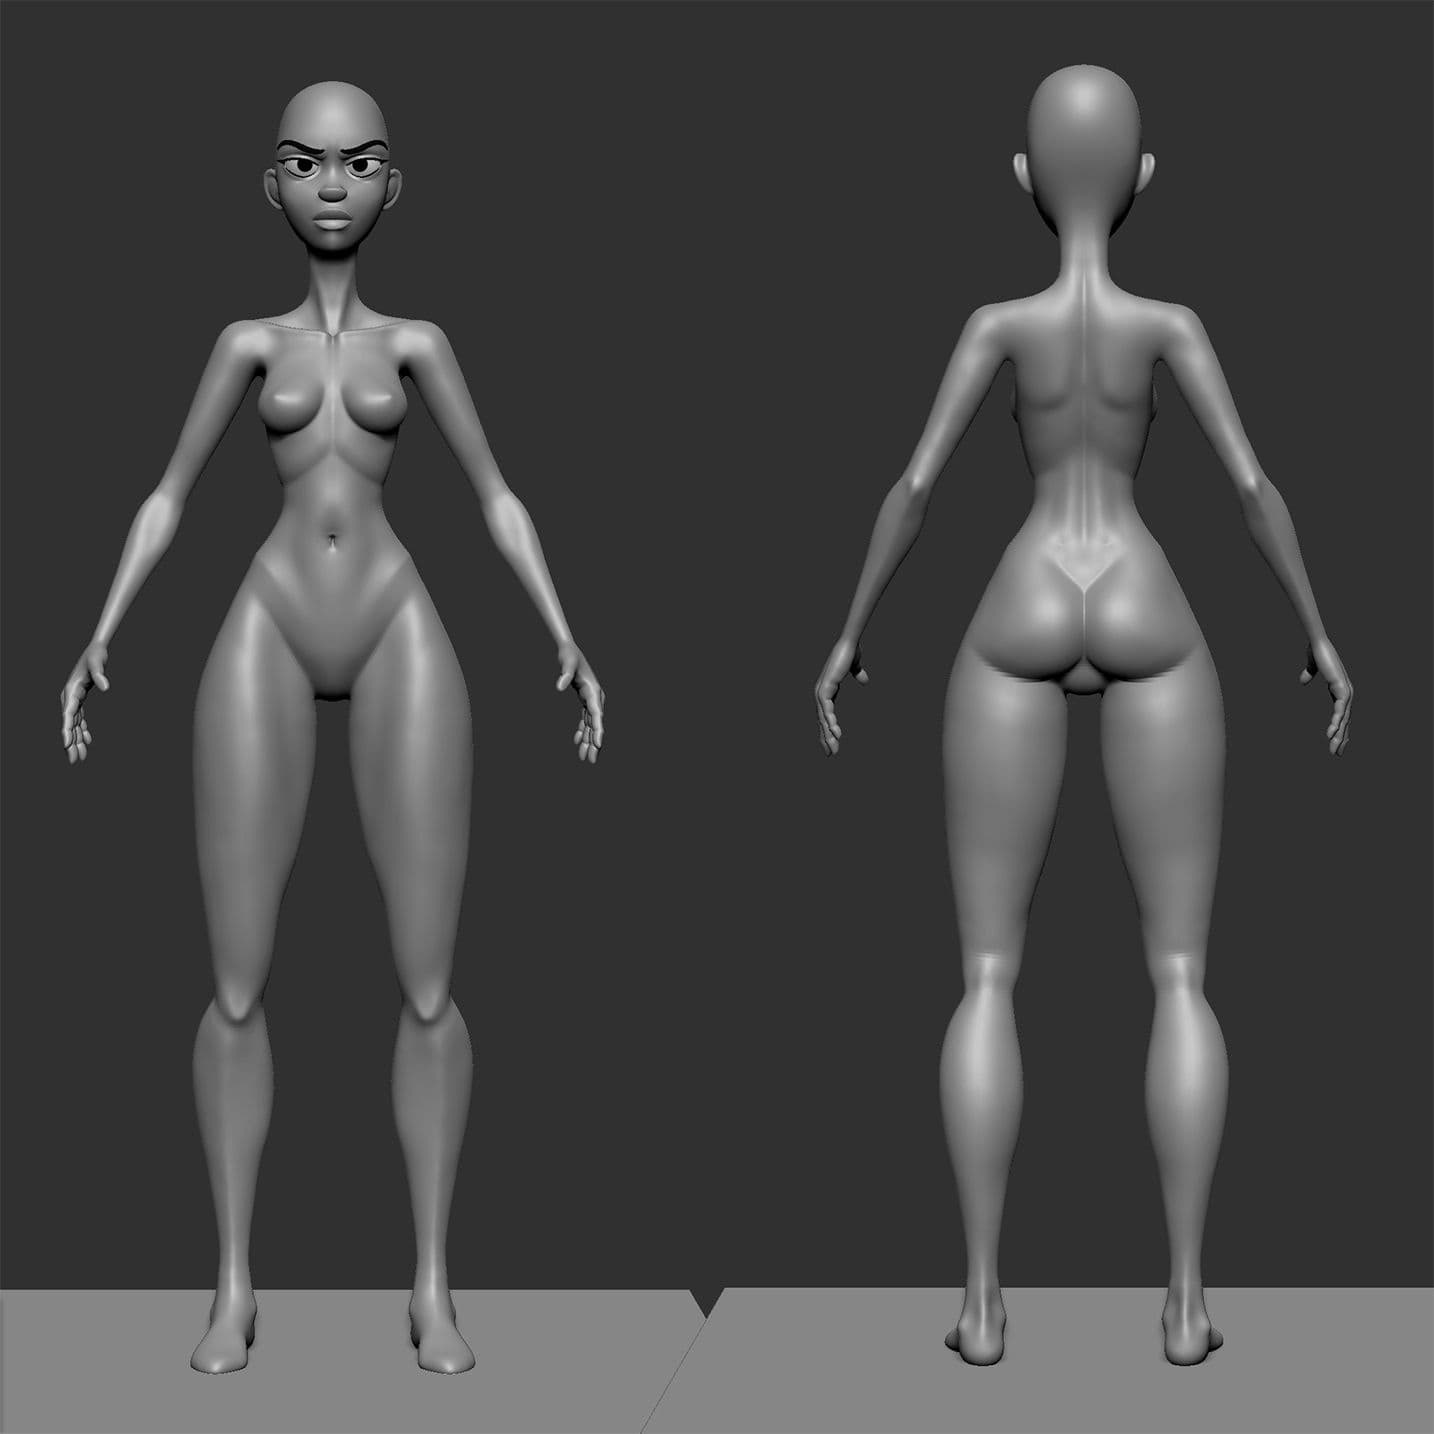
Next, I open up ZBrush to start blocking, and I usually begin with a very low poly base mesh. This base mesh is made up of near primitive shapes, and by keeping it low poly, I am able to morph the shapes easily. Also, since there are no pre-made details on the base mesh, it allows me to get in that extra little bit of sculpting practice. It's most beneficial to start with a primitive shape for learning and practice. However, I find that this low poly base mesh is a nice compromise between reaping educational benefits of starting off with a primitive, and the speed benefits of starting off with a base mesh.
For the shape of the head, I like to use Danny Mac 3D’s ‘How to sculpt a stylized head in Zbrush’ tutorial as a base, but that’s one of many, many ways to do it.
Due to the stylized nature, perfect anatomical accuracy is not required. But that’s no excuse to slack off on your anatomy studies. To make characters believable, you need to base them off reality and something we can relate to. Thus, at least a basic understanding of anatomy is necessary. Reference is key, and I always have anatomy references among others open on a separate screen when sculpting. You can see some of my anatomy references in the PureRef image above as well.
Once the adjusted base mesh is to my liking, I dynamesh limb by limb and start connecting the shapes. Here I would use my anatomy references and start building up or carving in where muscles, bone, and fat would go. I also like to give my characters a face early on, as it helps me see the life in the character I'm making. I need to be able to see this character living and breathing, because if I don’t believe in my own character, who will?
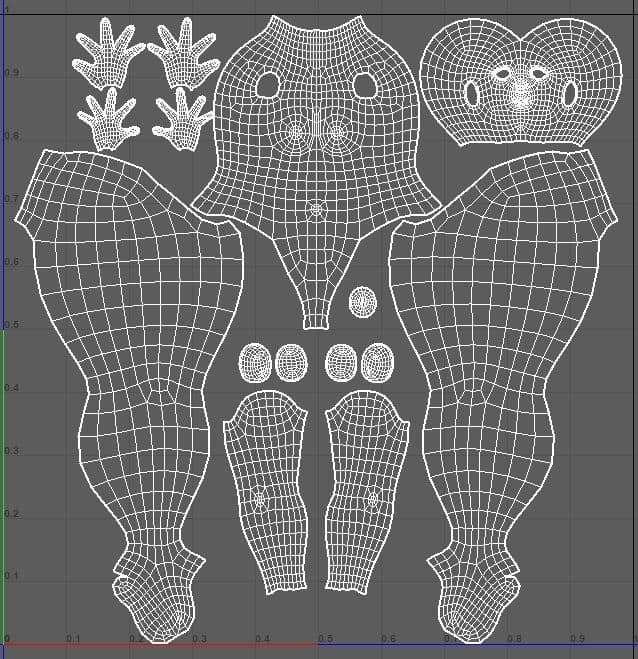
Maya Retopology, Projection, & Clothes
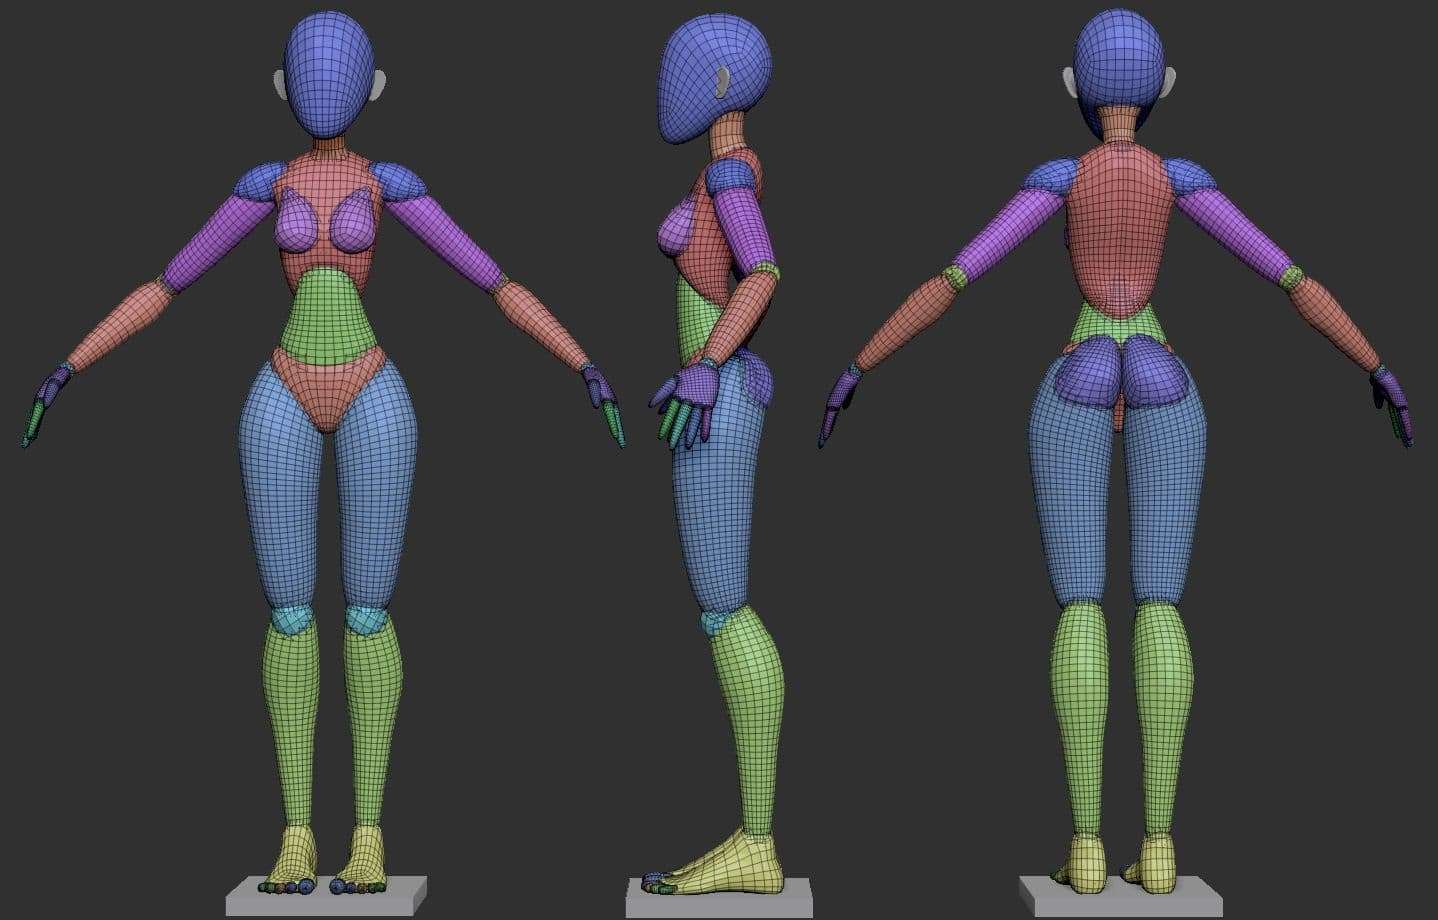
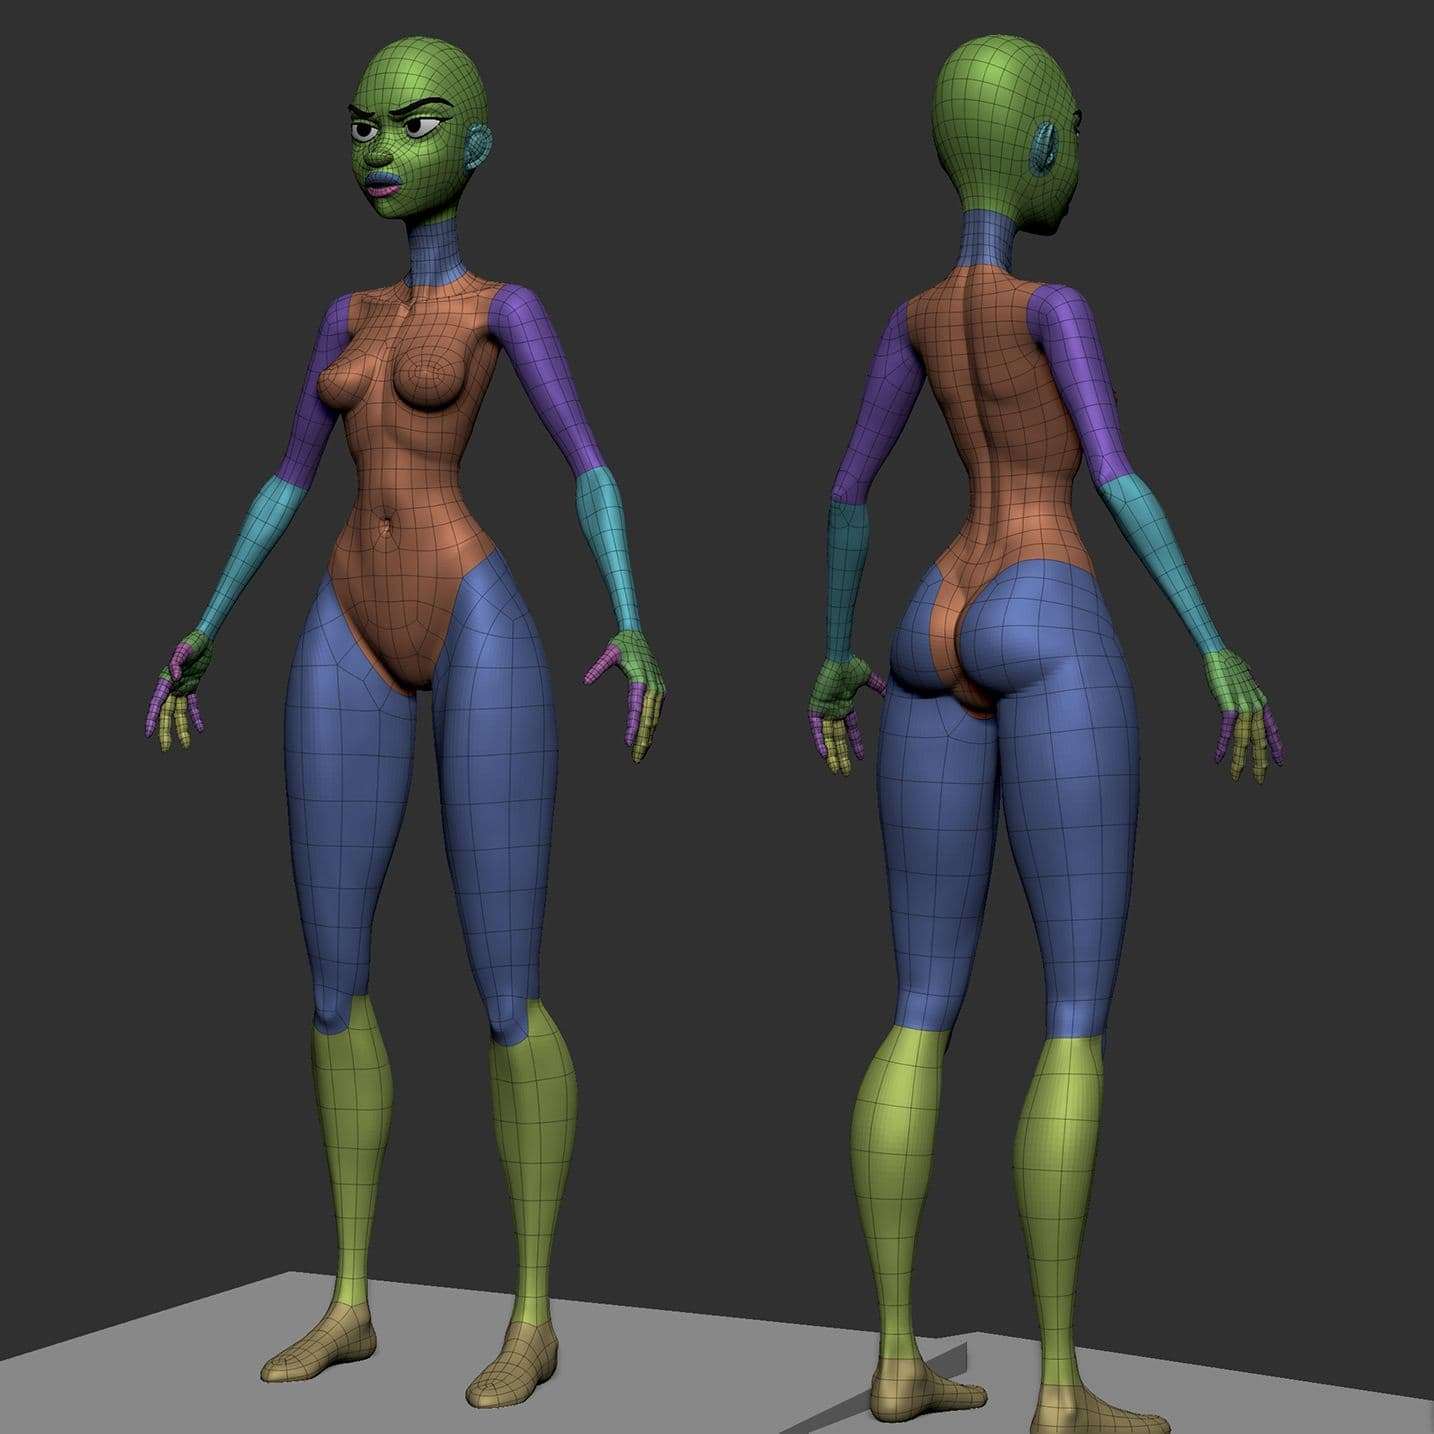
Once the dynameshed body has all the major features sculpted in, I retopologize in Maya. I've found Danny Mac 3D’s retopology guide to be useful. I try to keep everything in quads with animation friendly edge loops. Especially early on in your career, it's important to get in the habit of clean topology. It also helps later on when you make adjustments if you have clean and consistent edge flow. With a low poly retopologized mesh made in Maya, I bring it into ZBrush and extrude the faces connecting the upper and lower lips inwards to give it a mouth bag.
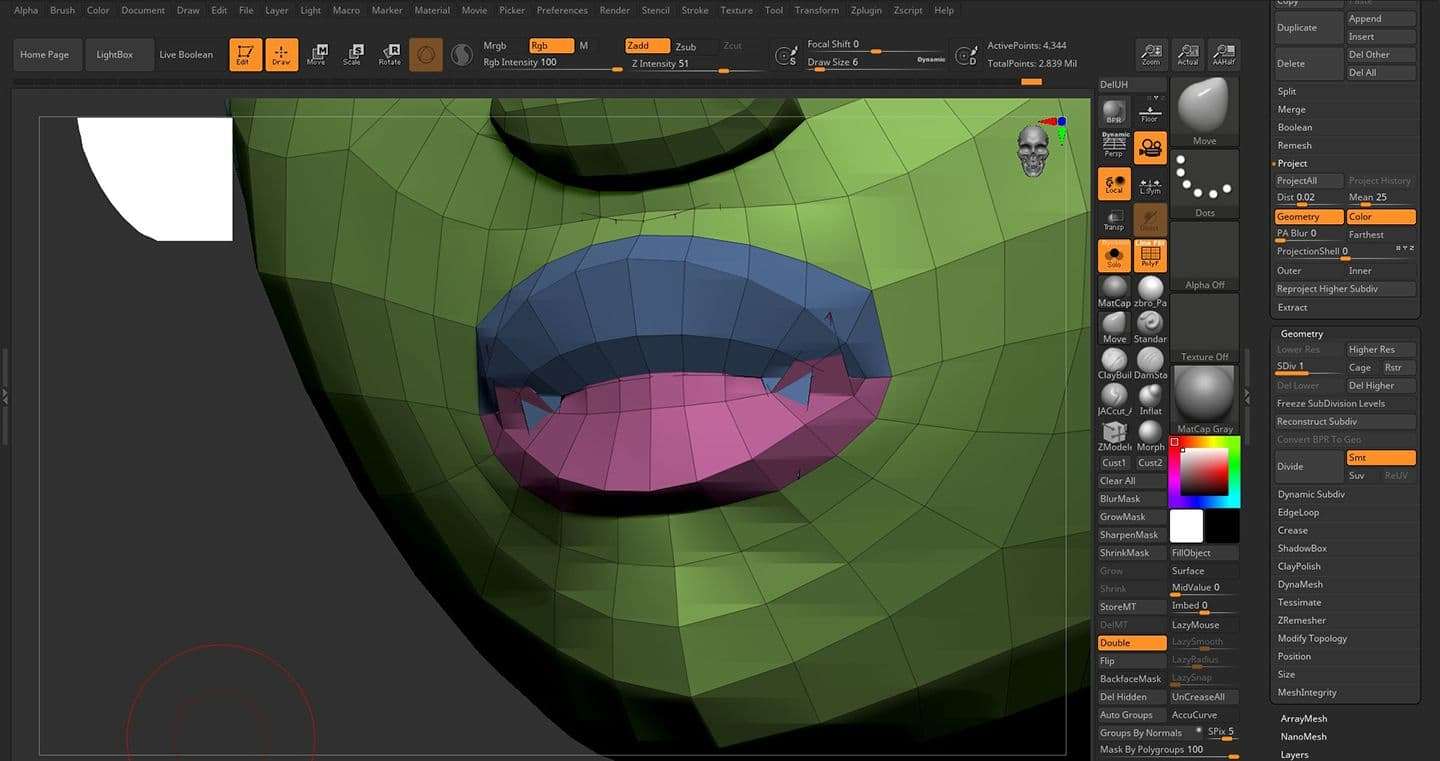
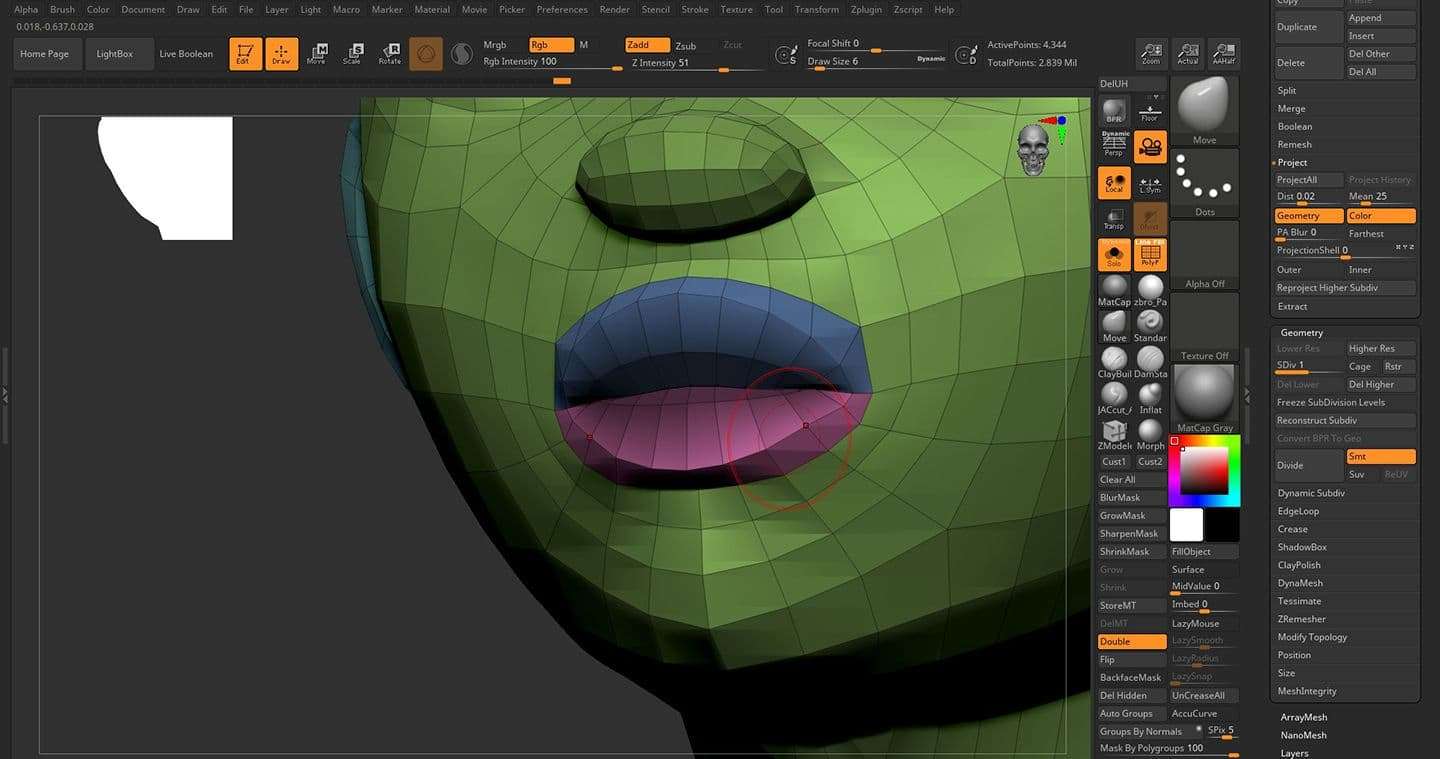
Then, I project the dynameshed high poly details onto the retopologized low poly mesh. After a projection, I subdivide the low poly mesh once, project again, and repeat this process until the low poly mesh reaches a similar poly count as the high poly mesh. There will often be some cleanup necessary after projection. Especially around the mouth since the high poly does not have a mouth bag and the low poly does. To avoid errors, I mask the low poly mouth bag when projecting.
In the images below, you can see on the left, projection errors I get with the mouth bag and no masking. On the right, no errors from masking the mouth bag and the inner parts of the lips before projecting.
Left: Projection without masking. Right: Projection with masking.
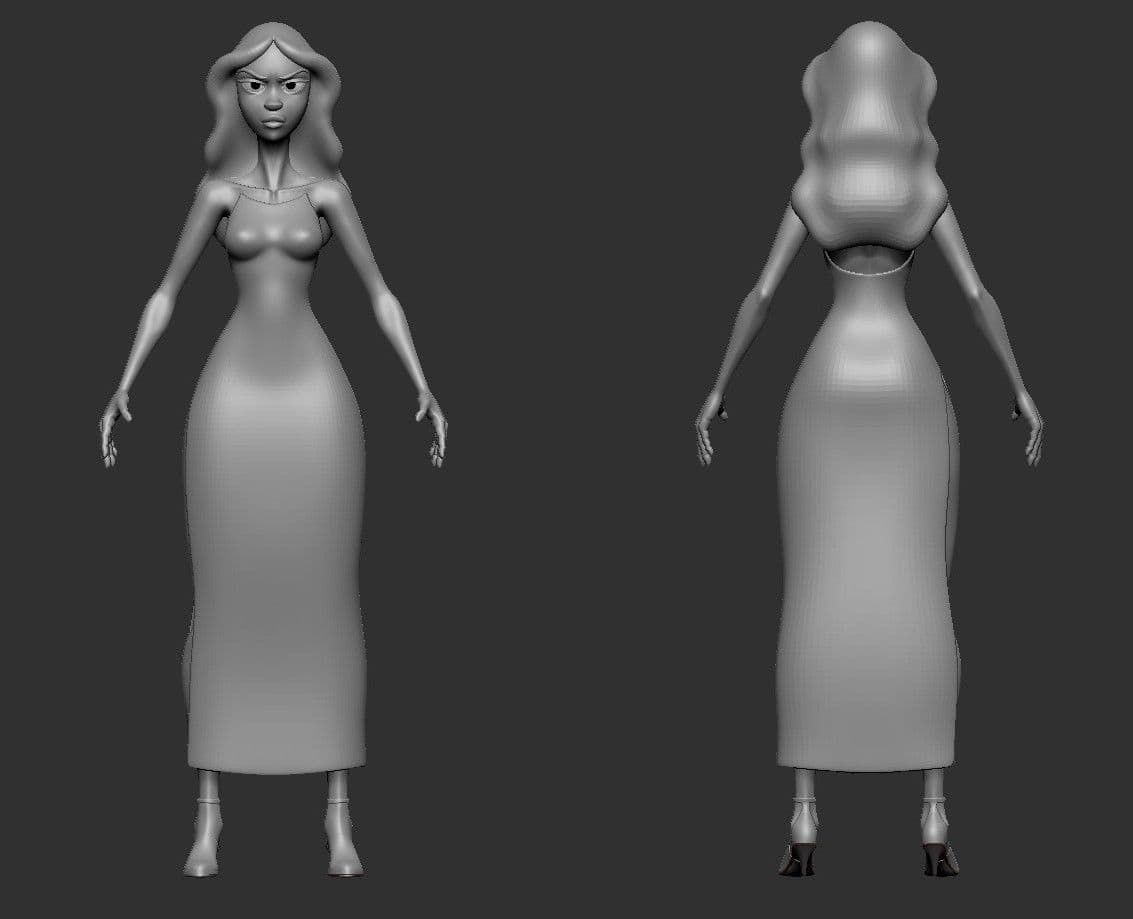
Once your retopologized body has the details projected, I block in clothes by masking the area of the body that the clothes would go on and extract. You don’t have to have your body retopologized before you block out your clothes, but that’s the order I do it in.
For her dress, you can see the torso part is tight on the body and the bottom skirt part is more loose. So, I only masked the shape of the dress’ torso half on the body mesh and extracted. Then, I deleted the inner faces of the extraction to have a shell that I polished a few times to smooth the jagged edges.
I retopologized this shell in Maya to a similar poly density as the body mesh and brought it back to ZBrush to project on the body. This is to gain back the shape for a tight fit and is like how the retopologized body was projected earlier. Next, I extruded down the bottom polygons to get the long skirt part of the dress with a split one side, and added edge loops along the extruded skirt. Once the shell has its base shape, I gave it thickness and added supporting edge loops and/or creases to help maintain edges when subdividing. I usually don't go very high poly yet, just enough to maintain the shape so far.
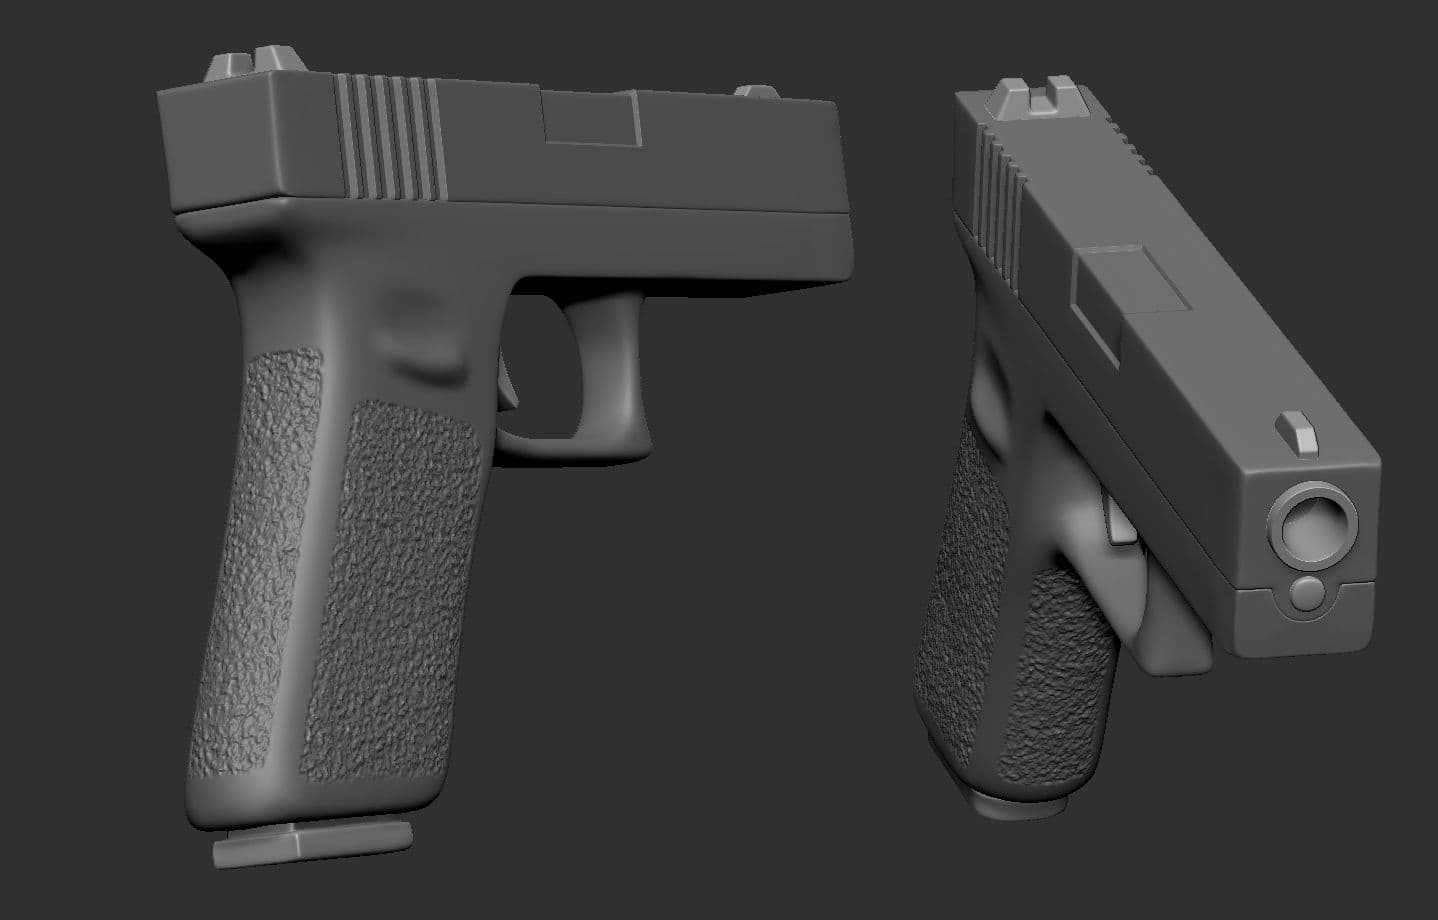
I also blocked out the shape of the gun and put in a placeholder shape for the hair.
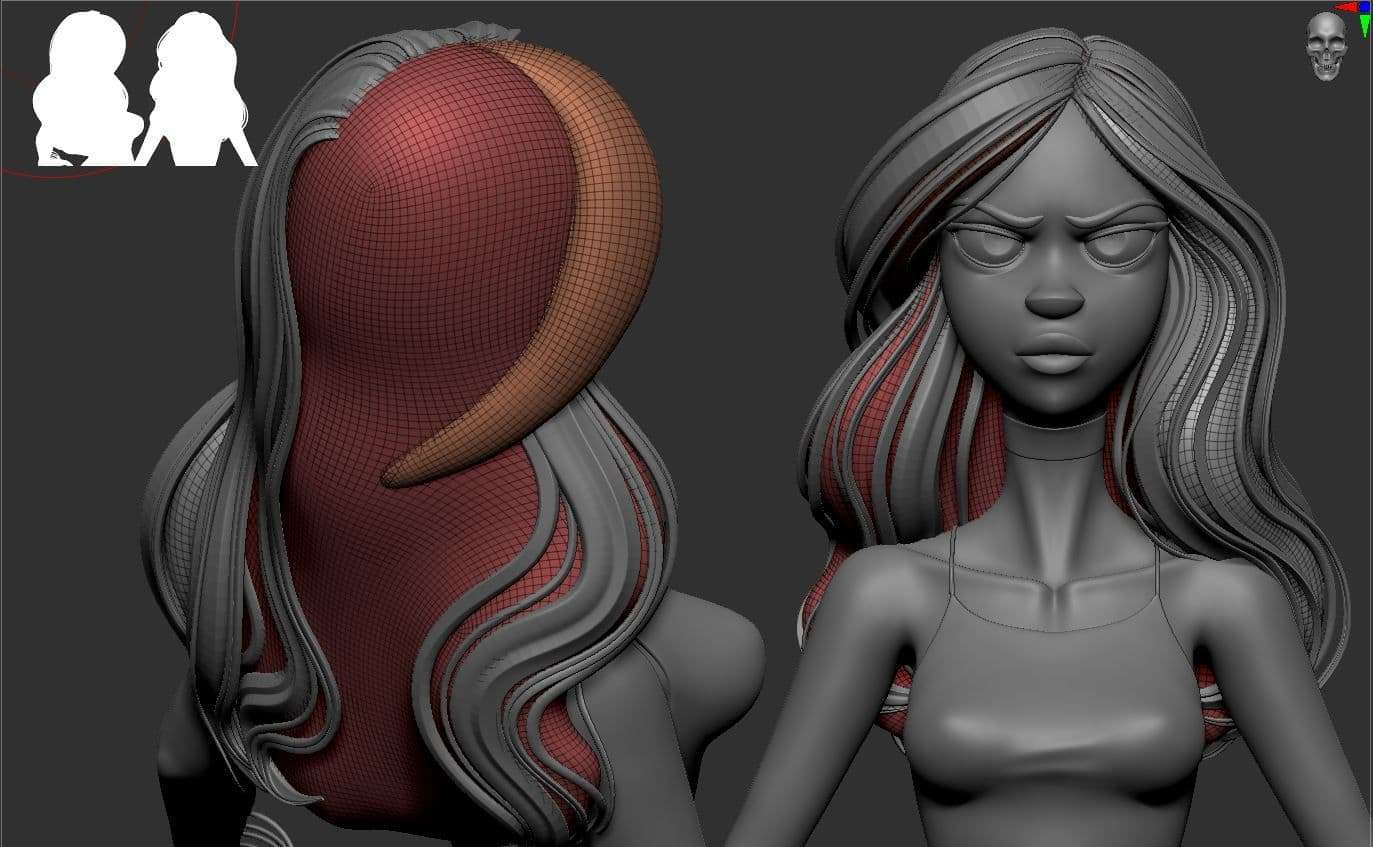
Hair & Groom System
For my typical personal projects, I’d make hair after the character has been posed. By modeling the hair in its pose, I don’t have to worry about making each strand in a base A or T pose and posing it afterwards. Yet, with Agent Veronica, because her final pose maintains a similar head position as the base A pose, I decided to add hair earlier on. This gave her the personality and feel of the character sooner and helped make her look "right".
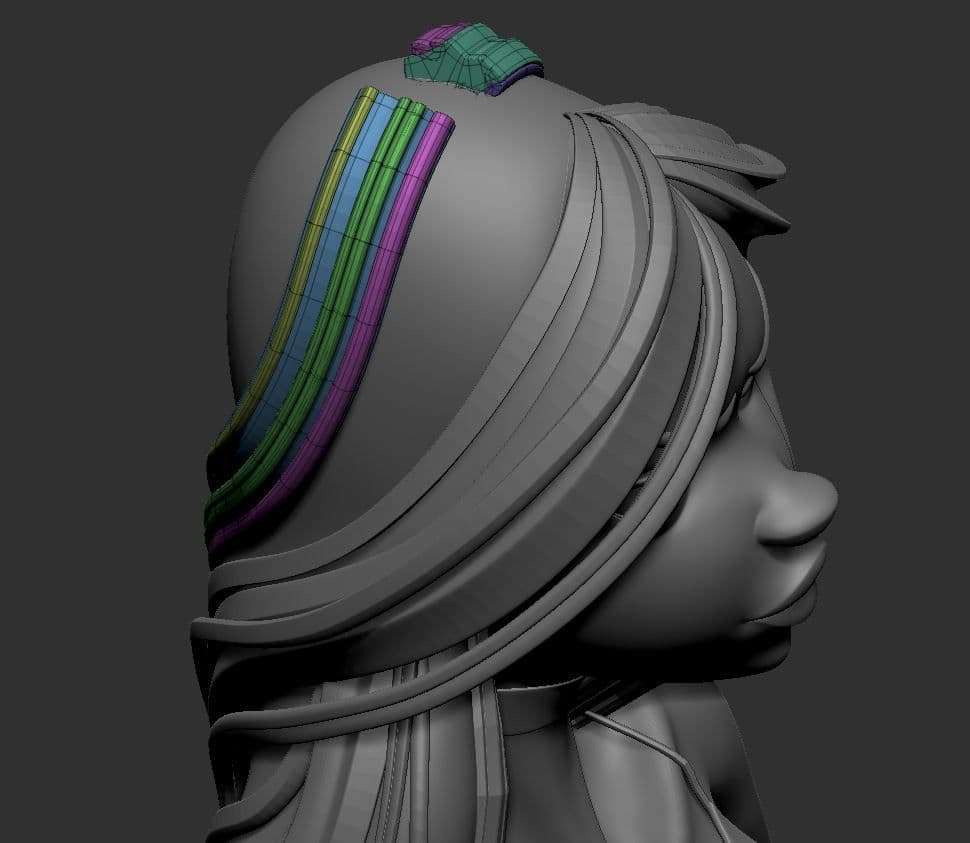
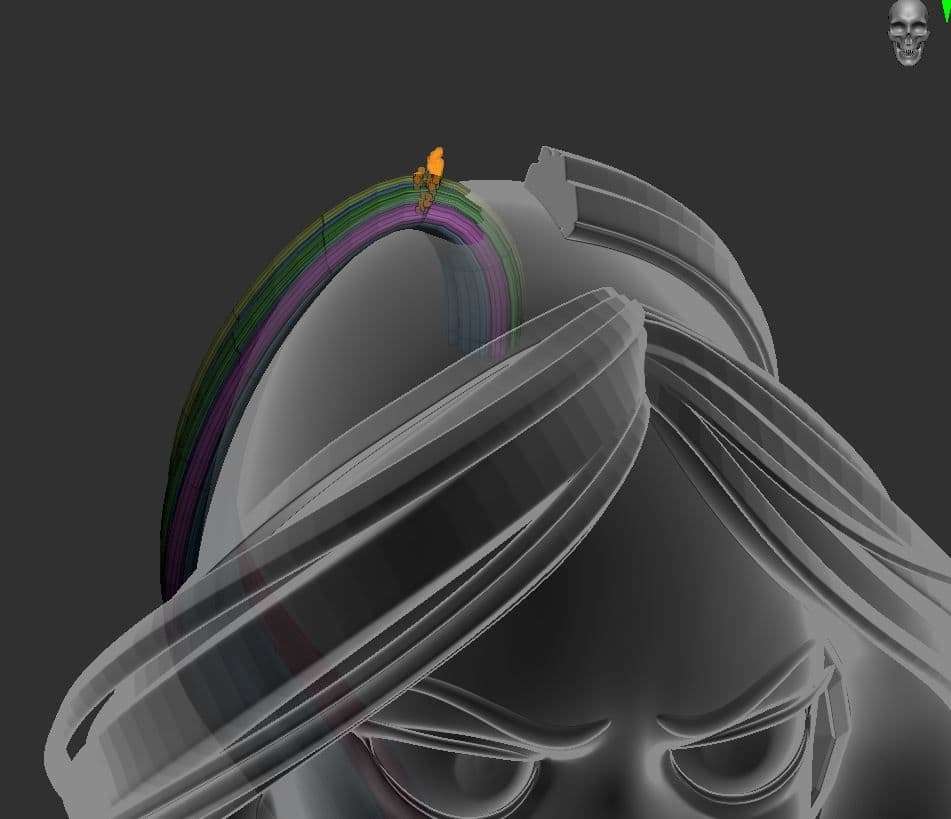
Because her hair has so much volume, filling it all with hair strands would be inefficient and difficult to manage. So, I smoothed the hair block out mesh, to use as a center mass that I can add hair strands around and give the illusion of full hair.
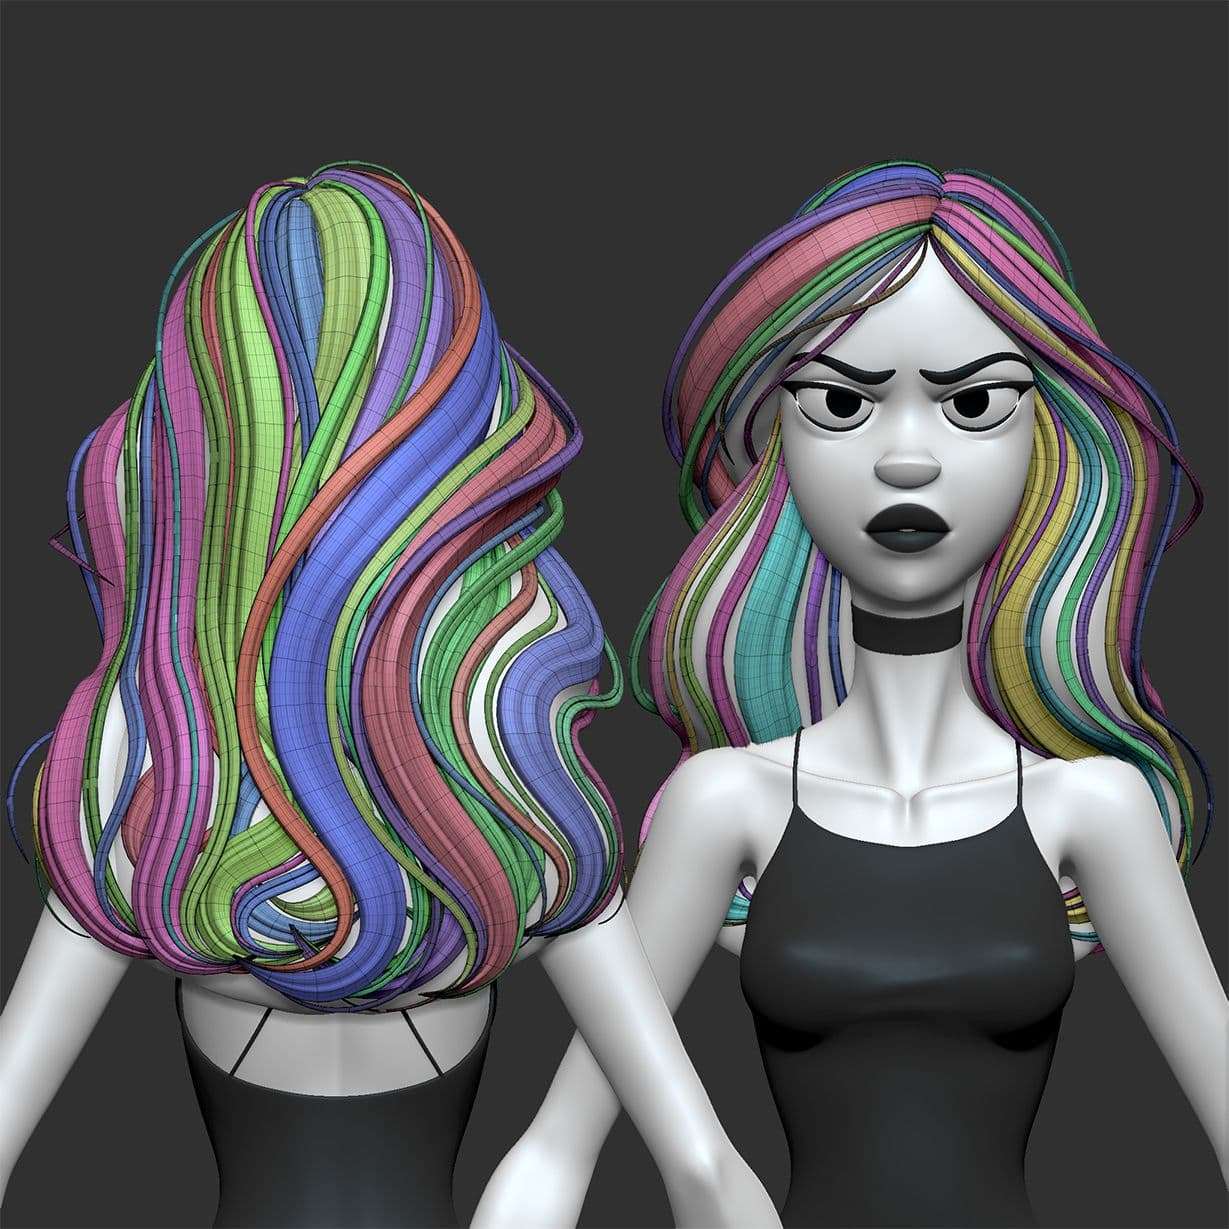
Making hair usually takes many attempts for me. I tried different hair brushes and different techniques, but I eventually decided with Dylan Ekren’s “DE HairTubes Brush” for her entire hair mesh. Most hair brushes, including the “DE HairTubes Brush”, come with multiple brush types that vary the shape and number of strands per brush stroke. I like to diversify the strand shapes throughout the hair so that you won’t notice repetition. The brush type that gives many strands per stroke help add flyaway and stray hairs for believably and silhouette breakup.
When placing the strokes, I turn on Lazy Mouse and adjust the brush curves to give some taper towards the ends and thicken the mid section of the strands. Then I start from the top of the hair mass and draw a curve that I want my hair to follow. For the strands that start from the top of the head, I rotated the roots so that it curved into the head and planted them inside to give a parted look.
Before moving any of the strands around, I use the pinch brush to add extra taper on both ends of the strands. The roots will be left thicker than the ends which will typically be given a sharp point.
To finish up the hair, I auto group the strands that were made with the multi-strand type so that I can select each individual strand. I use the move topological brush or select via polygroup to move around the mini-strands to help give volume and variation to her hair. Both Dylan Ekran and Danny Mac 3D have videos that explain how to use hair brushes and some of the fundamentals that helped me.
Hair is usually one of the most difficult but also most rewarding steps of making a character, as it helps add so much personality and life into a character. But the many strands and nuances of hair make it a labor and time intensive task.
Also, as you can see in the images above I blocked in some colors for the character. The concept was a black and white image, and at the time I wasn’t sure whether I should keep her black and white or to give her color (and if so, what colors?). So I kept her simple and clean. I actually liked how she looked in this pure black and white look.
Detailing, UV Mapping, & Polypainting
It’s time to start adding detail! This is probably my favorite stage. I try to add as many subdivision levels as I need to support any and all the sculpted detail I want to add. However, I have to keep in mind what details would be better off being added through texturing, as well as hardware limitations that come with my mid-ranged PC. I found that once I approach 50 million polygons in a single ZBrush tool, my PC starts to struggle and affects my work efficiency. I don’t go beyond 50 million often, but when I do, I try to split up the character into multiple files for better performance (and smaller save files, quicker loading times, etc.).
I like using layers when adding detail such as wrinkles, stitching, skin pores, etc. because they are non-destructive. But, layers also come with caveats that you need to be aware of. For example, you should not add new subdivision levels while using layers, and you cannot split or combine subtools or you will lose your existing layers. Also, mixing MRGB values in multiple layers can cause glitching with the color.
Sculpting natural looking wrinkles is still an area that I struggle with every time. I have alphas and brushes that I have collected over the years, but often I end up sculpting by hand as I did for Veronica.
For pores, I use free skin brushes provided by Rafael Souza. I kept the pore variation simple with a base pore shape throughout the body and then a few stretched pores where necessary sprinkled in (around the eyes, mouth, forehead, etc.). Intensity is kept low as I do not want too much micro surface details to muddy up the character.
This is also the stage where I added detail to the gun. To maintain the stylized simplistic look of the character, I kept the detail on the gun to a minimum. For the top chamber, I masked areas I wanted to push in, inverted the mask, and used the 3D gizmo to push in the areas, giving geometrical detail. For the bottom half, I sculpted where the finger moldings are, and used the surface noise feature with a mask to give a noise pattern on the grip.
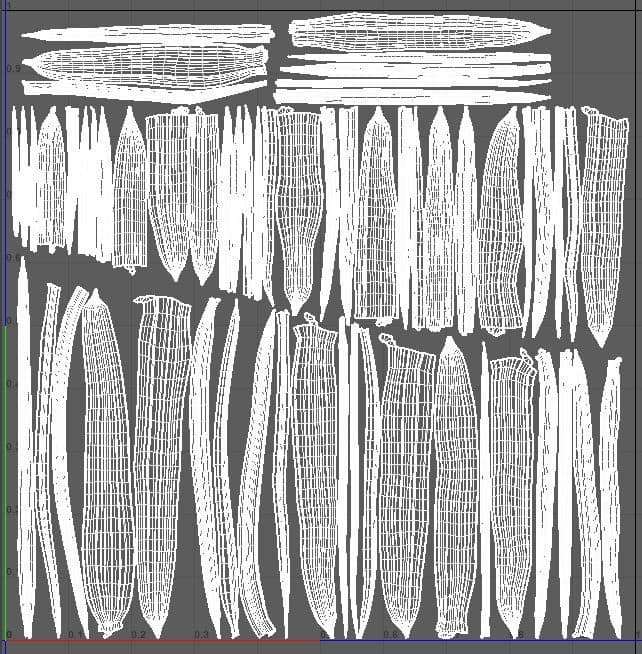
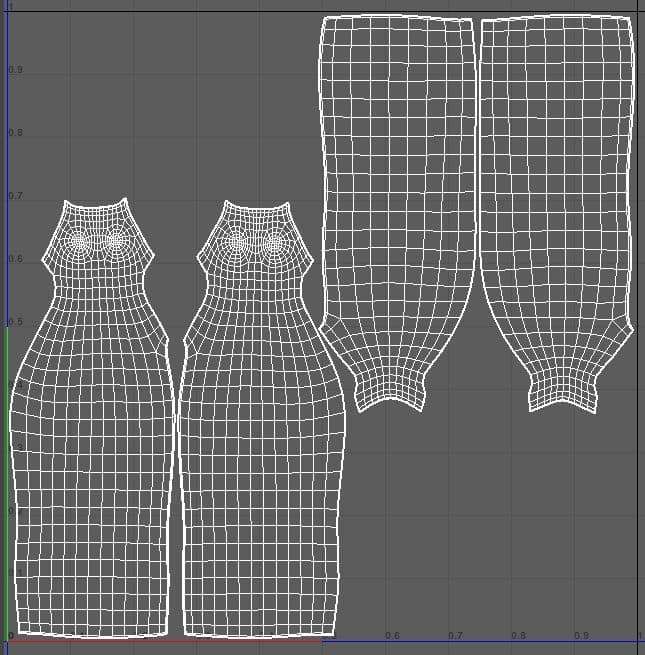
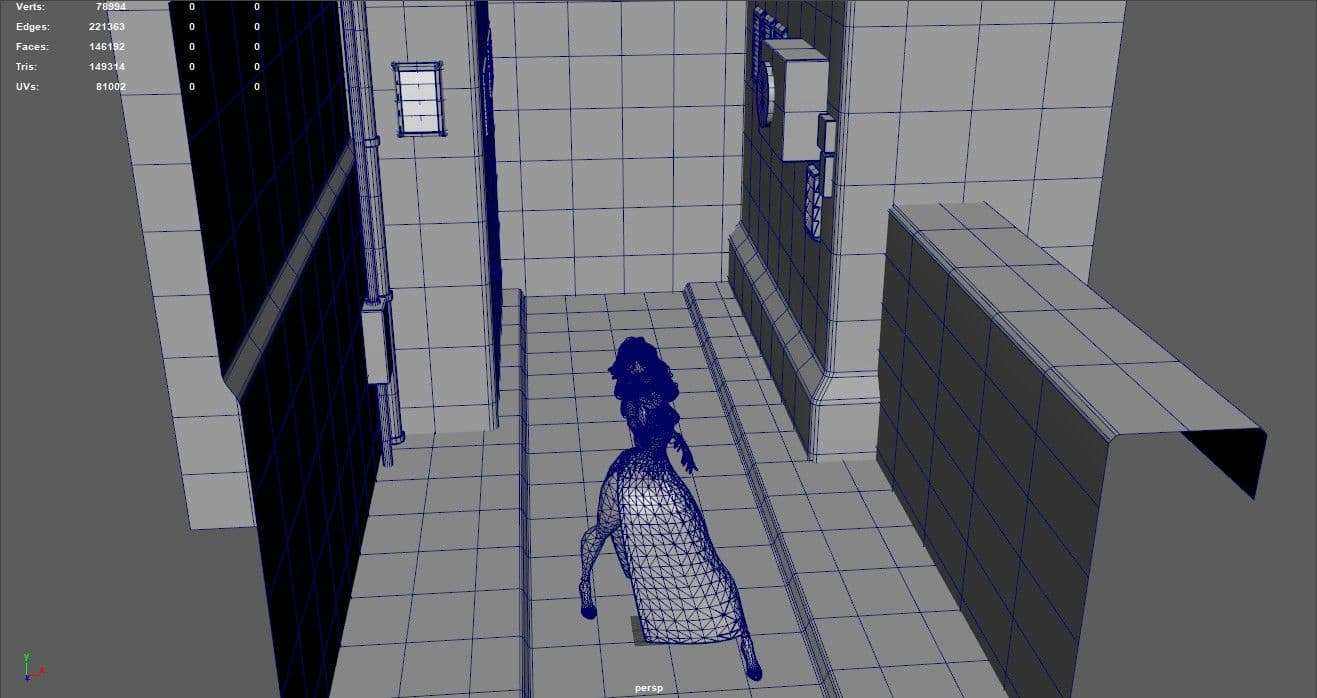
Once details are done, I UV map in Maya. With everything imported into Maya, I use the “3D Cut and Sew UV Tool” to start selecting which edges will be the UV seam. Typical UV rules apply here: keep them out of sight as much as possible and where seams would exist in its real life counterpart. The final mesh used in Marmoset Toolbag 3 was a feature animation level mesh, thus, I am not too worried about hard or soft edges as the higher amount of polygons will make hard and soft edges negligible.
Once the seams are all put into place, I open the UV Toolkit and start unwrapping. Under the “Unfold” tab, I use the “Unfold” and “Optimize” buttons to unfold the UV shells that were just made. Typically those 2 functions will be enough, but sometimes manual cutting, sewing, and manipulating is required to get it right.
To achieve accurate texture density, I select all the unwrapped UVs and go under the “Transform” tab and next to “Texel Density (px/unit)”, select the “Get” button, then “Set” button. I’m not worrying about UDIMS or the number of texture sets here. I used one UV set per ZBrush subtool that was created earlier and I try to keep the UV shells of the same geometry relatively close together within its 0-1 boundary.
Once UVs are mapped, I transfer all meshes from Maya back to ZBrush. I use the “UV master” tool to copy and paste the UVs from the Maya mesh to the high res ZBrush sculpts. Afterwards, I check that the UVs have been properly transferred with the “New from UV Check” function under the “Texture Map” tab.
I went over the character with a base pass of colors using Polypaint while the mesh is still symmetrical, and this was further refined in Substance Painter. The highest priority mesh to paint was the skin. Matt Thorup, Follygon, Flipped Normals, etc. all have resources online for painting skin in ZBrush which I have used myself. Using a spray brush with only RGB values turned on, I painted the skin by layering colors on top of each other based on facial color zones.
Posing and Polish
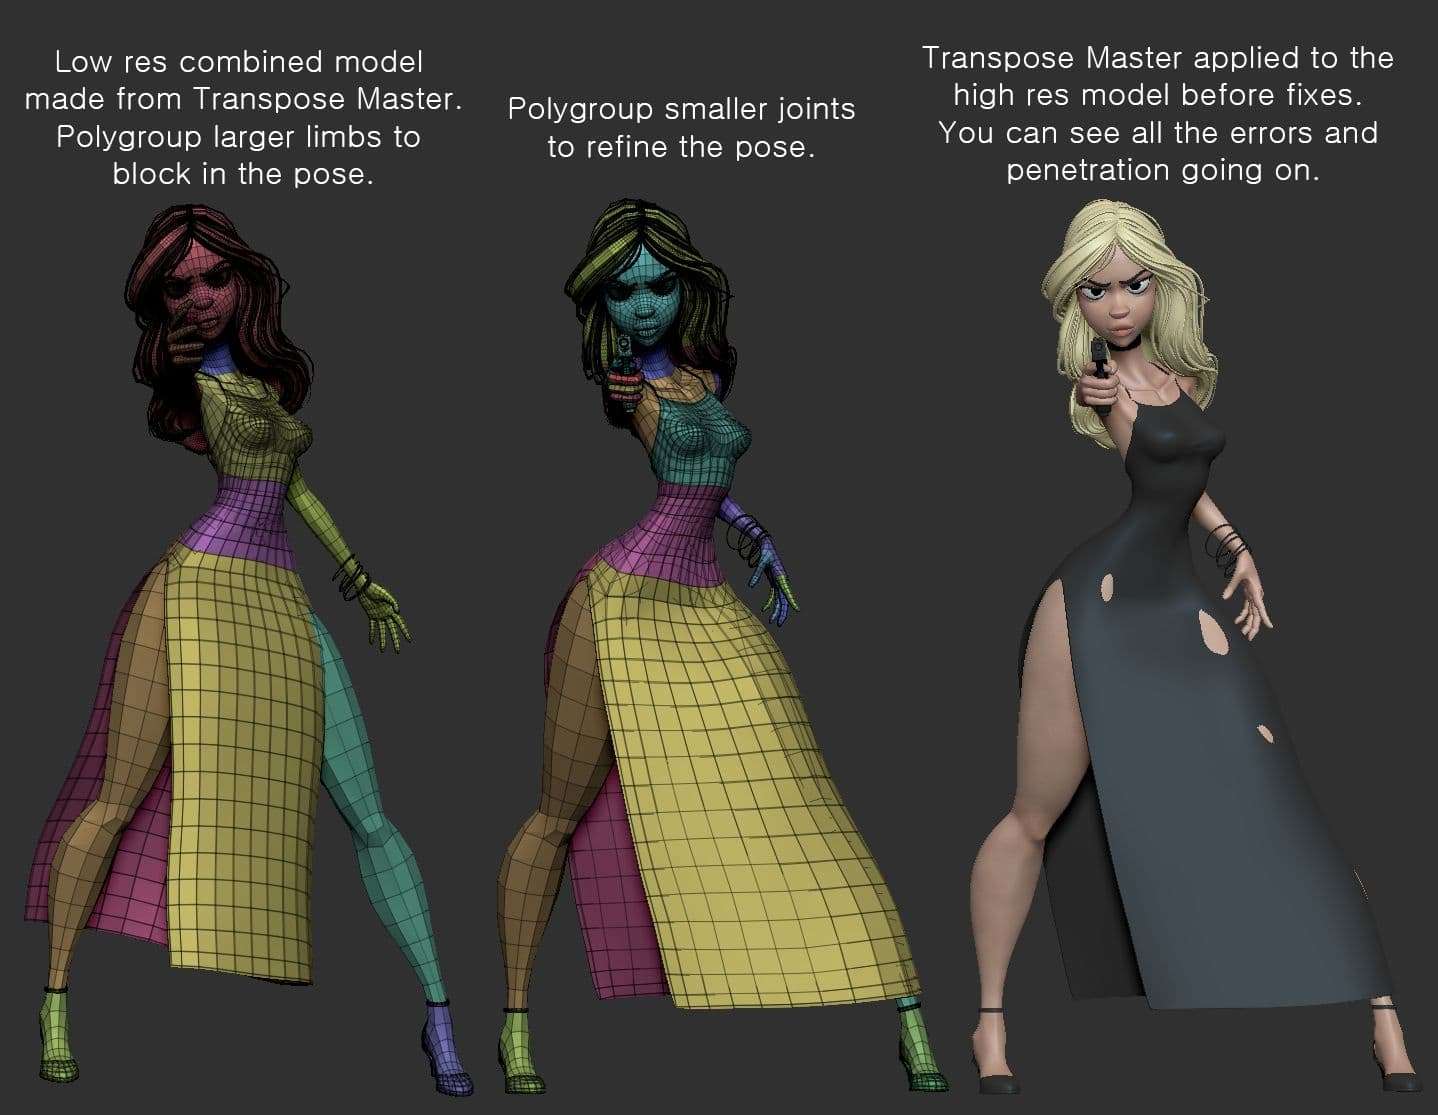
Finally, it’s time to pose! The pose is crucial in breathing life into the character. I use the “Transpose Master” tool when posing. Once the character is made into one low res mesh with the “TPoseMesh” button, I first start polygrouping limbs and props to make them easier to select. The polygroups will change over time as the pose gets implemented but starting off with larger polygroups around the head, arms, legs, hips, and chest are a good start to move the major joints. As the pose progresses, you will want to make more precise polygroups around the fingers, toes, neck, mouth, etc. to pose smaller body parts.
When posing my characters, I like to have the shoulder and hip lines opposite of each other to create more dynamism. This is one of the areas in the pose that I deviated from the concept. Matt’s original drawing had the character’s left shoulder and hip both positioned forward, I wanted them to be opposites. I positioned her left leg back and her right leg forward so the lines that go through the hips and shoulders are not parallel.
Once I'm happy with the low poly mesh’s pose, I press “T Pose-Sub T” to apply the low poly transformations onto the high poly meshes. Something to keep in mind here is that, if you have layers on your high poly mesh, you will need to be in layer recording mode during the Transpose Master process for the effects to stick.
With your pose applied to your high poly mesh, chances are your mesh is going to look messy and broken. But don’t fret! A polish pass will help iron out the lumpy and broken parts. Like hair, posing can be tricky and take many passes. Whether the mesh is stretched too thin or penetrates another, now you have to add back the mass you lost, re-sculpt the details that got blurry, and fix penetrating surfaces. I will often press “TPoseMesh” again to further adjust and tweak the pose during the polish stage. It’s a back and forth process between the low and high poly meshes.
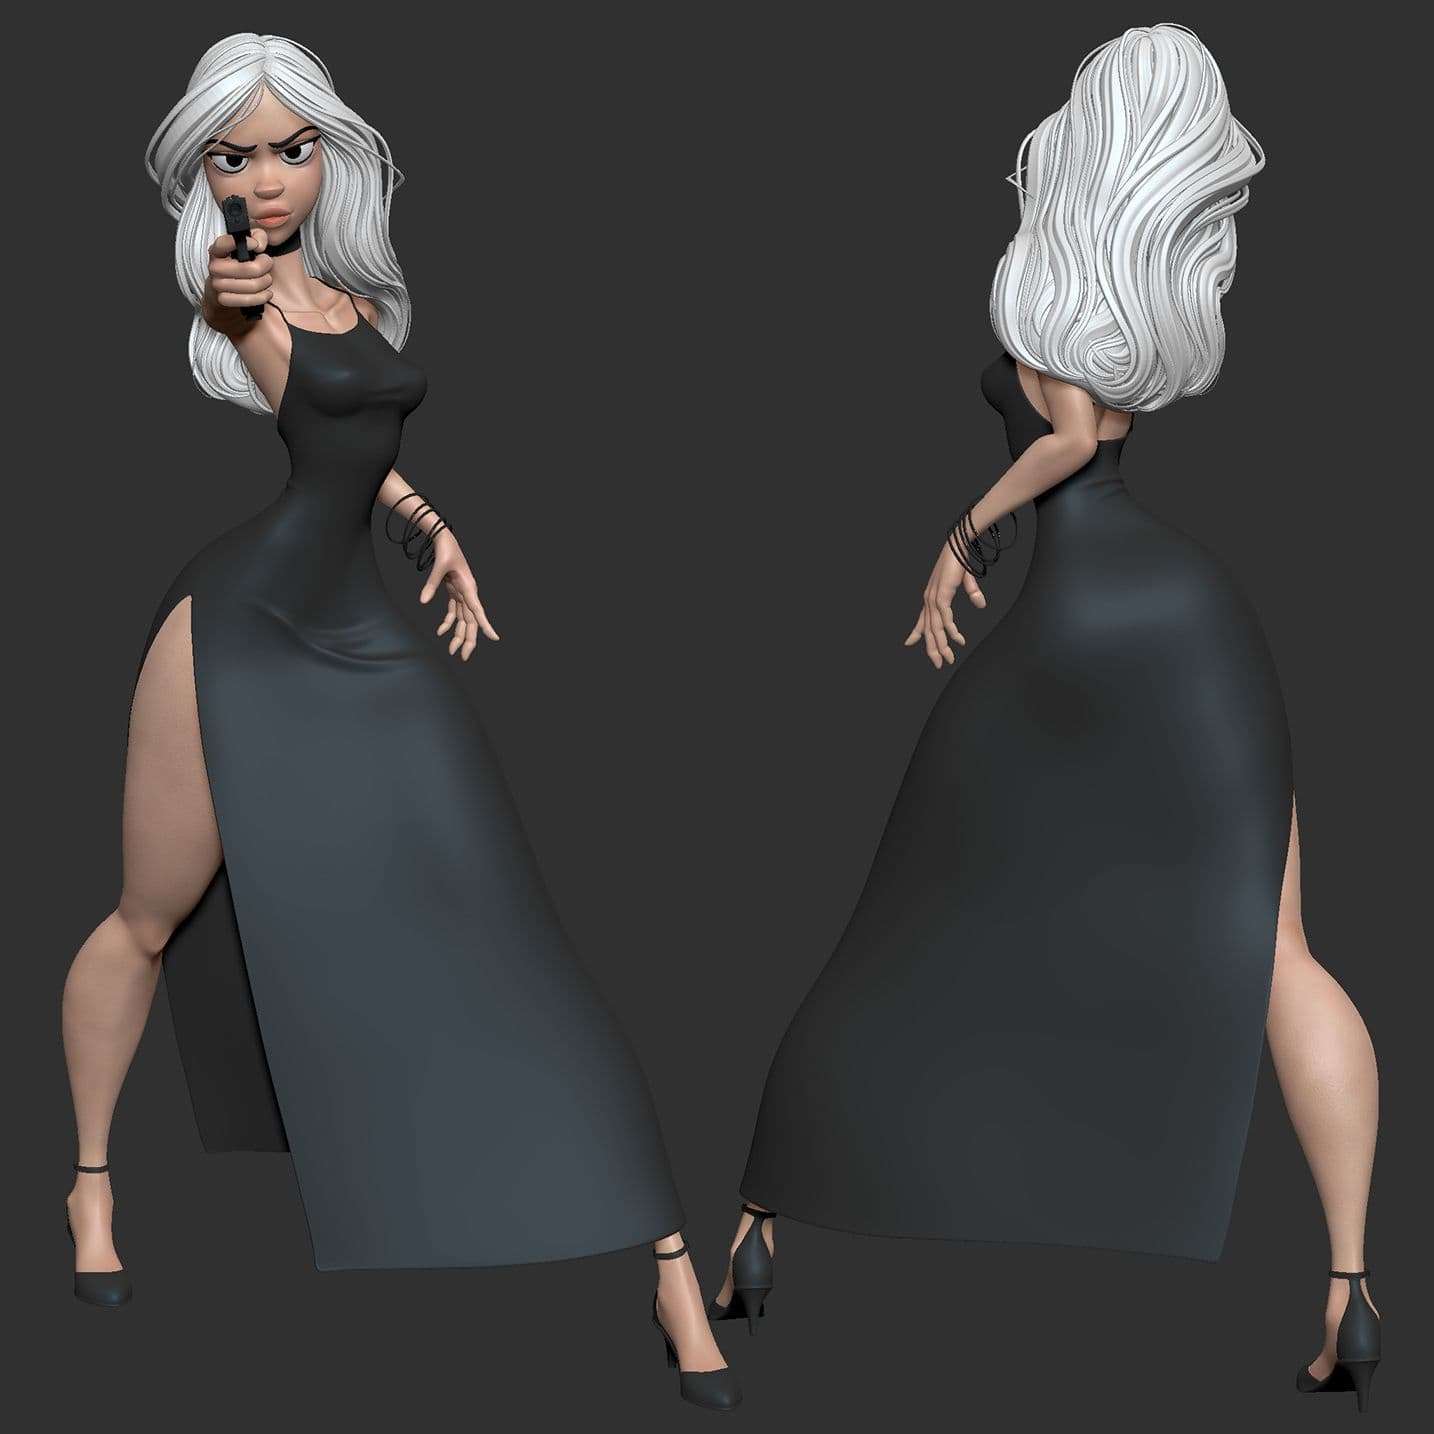
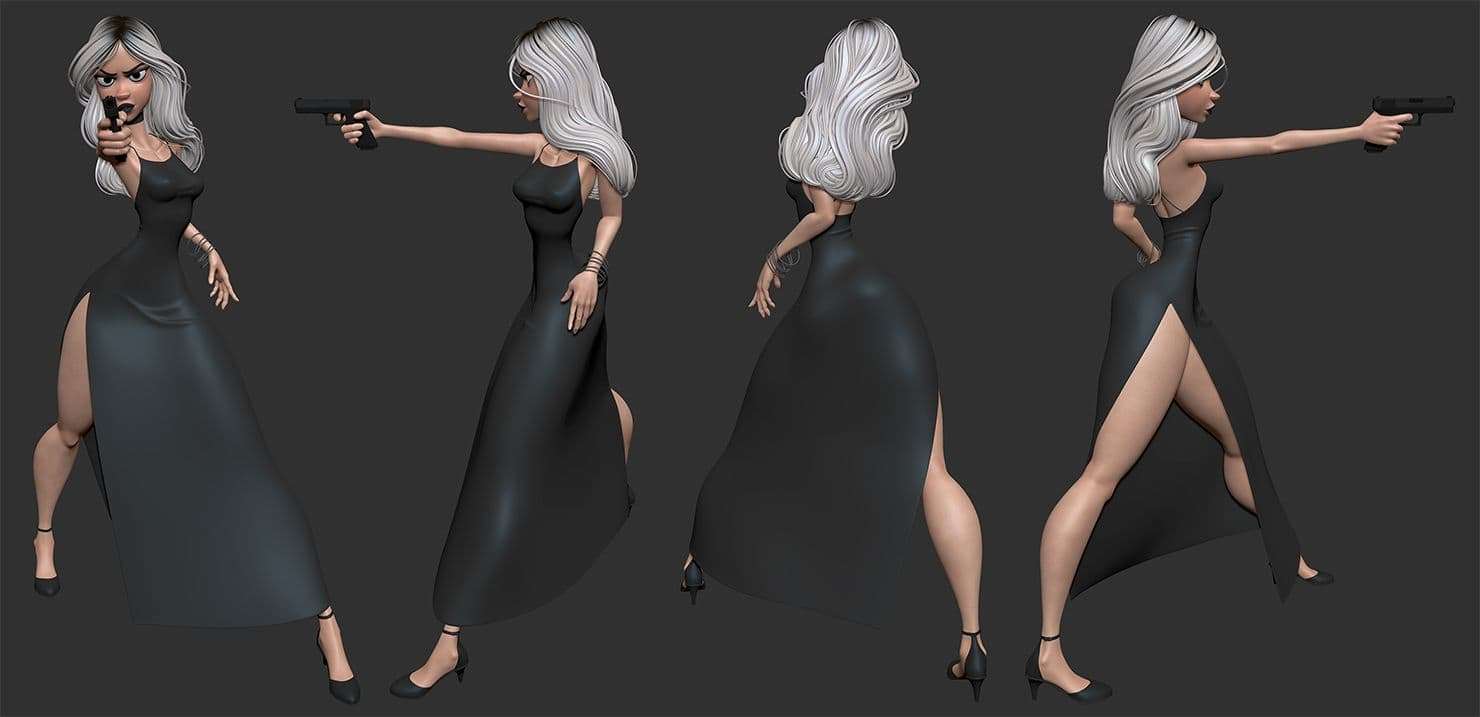
A look at one of the early posing passes. NOT final.
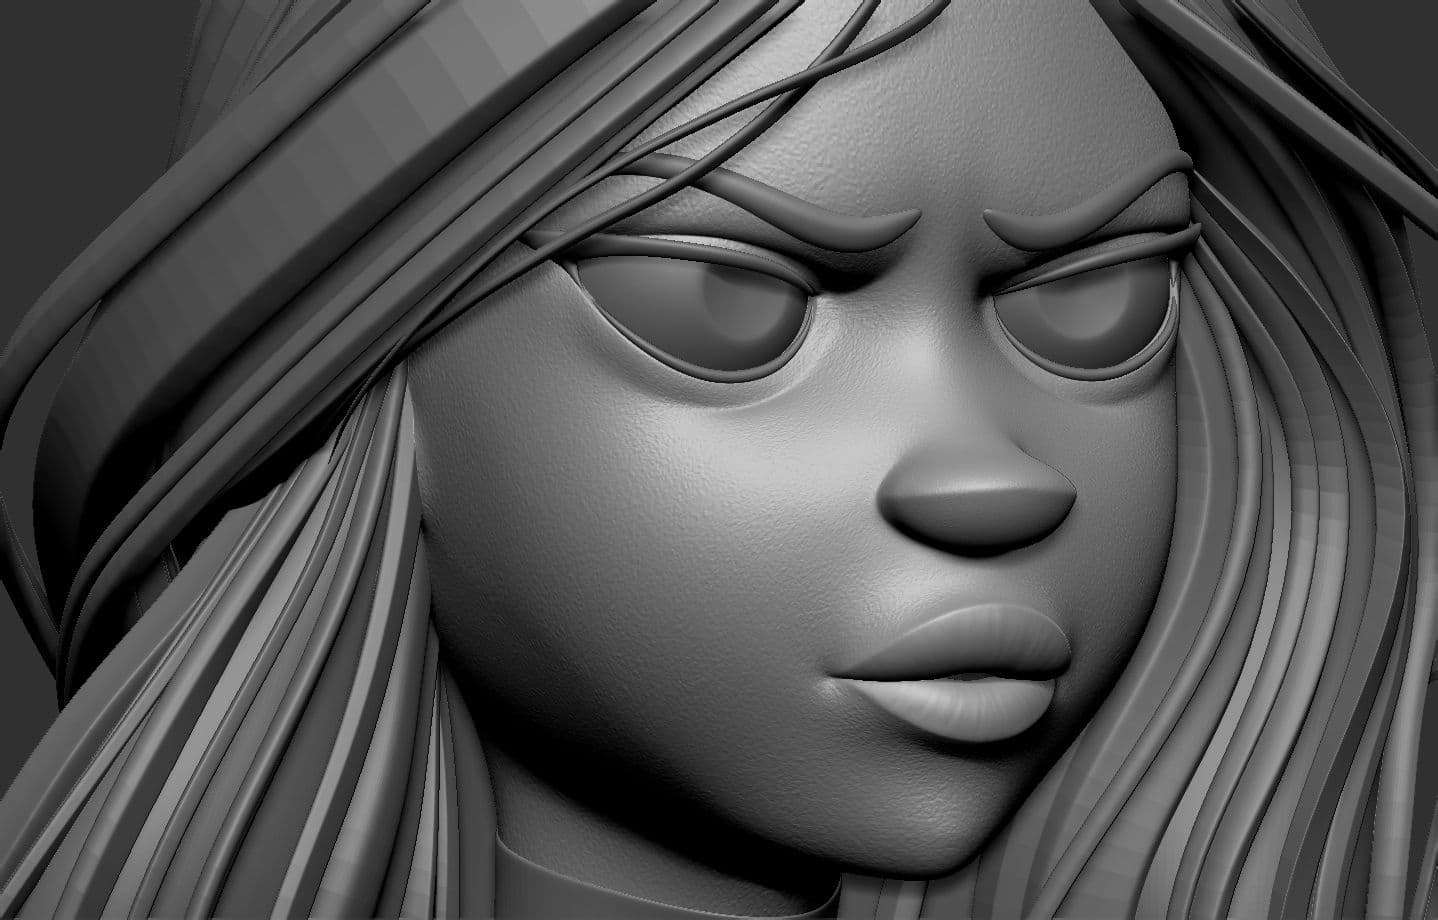
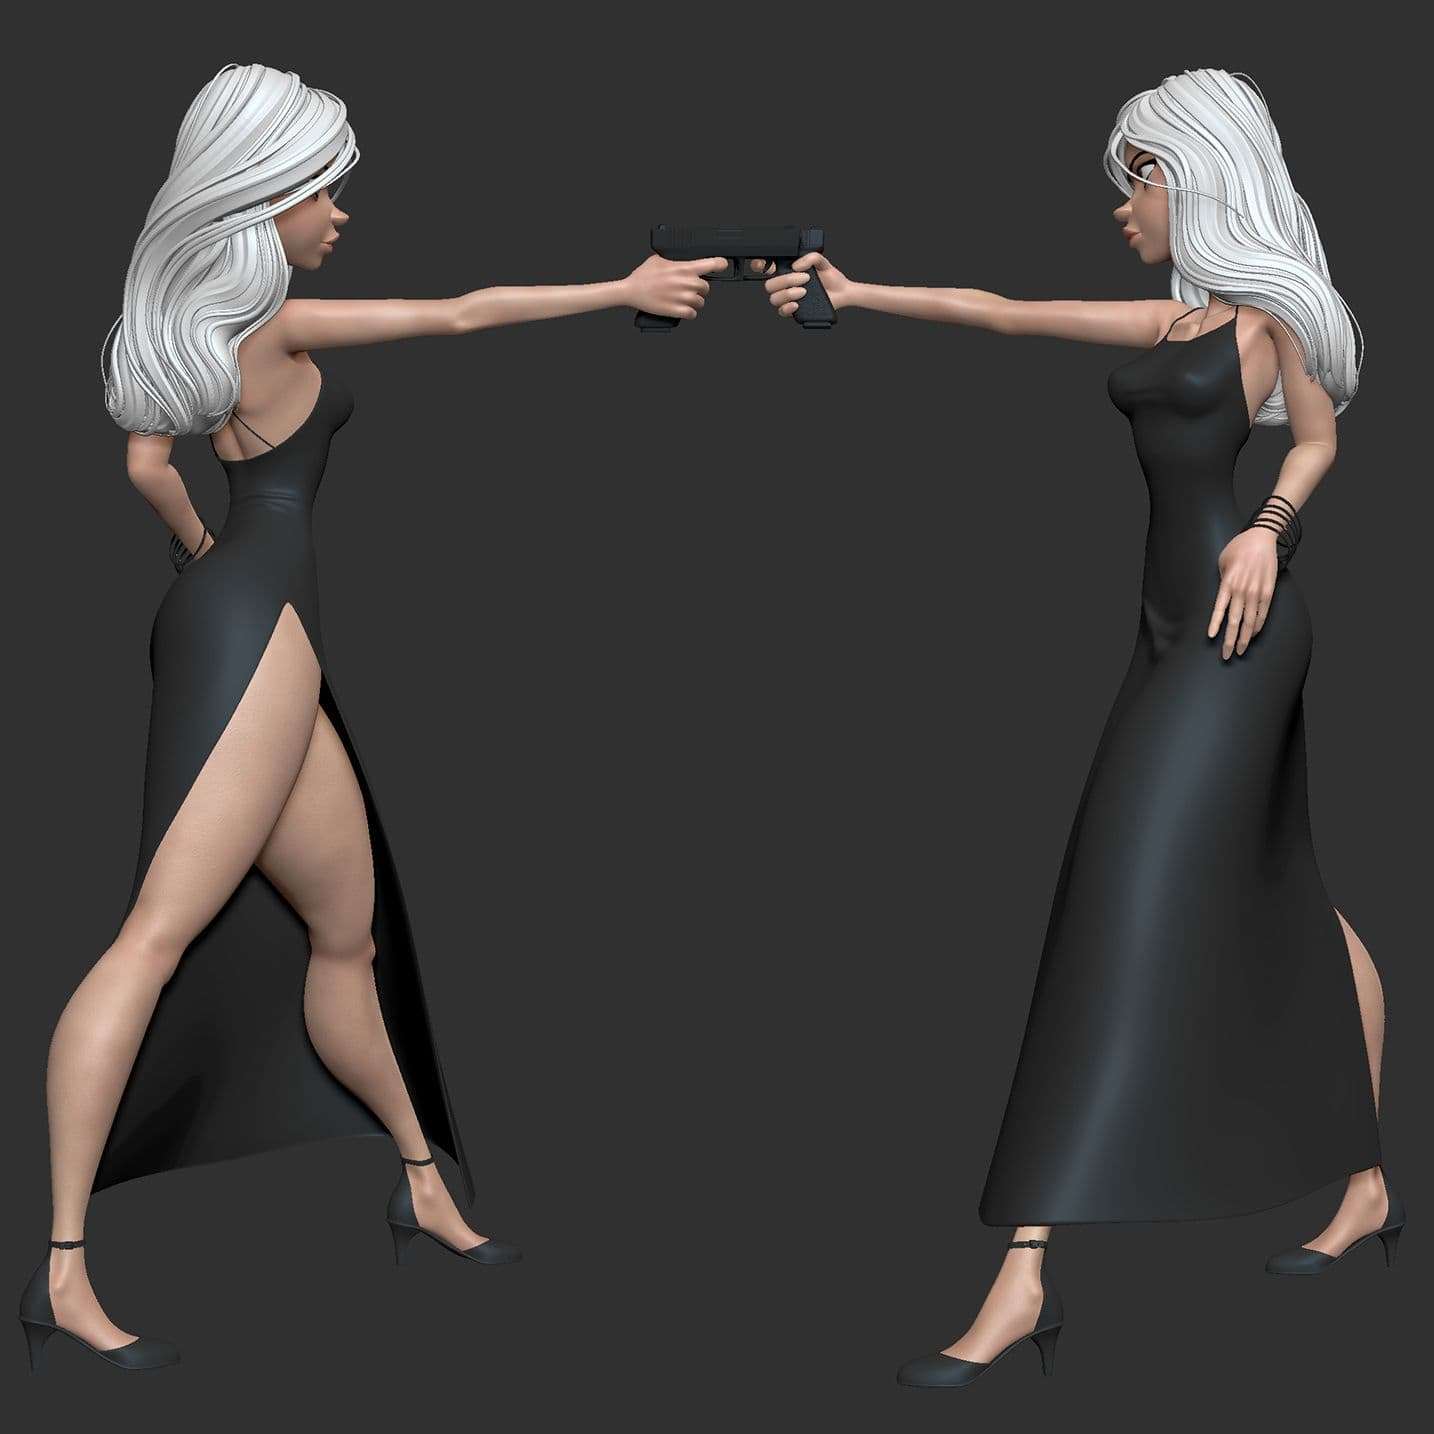
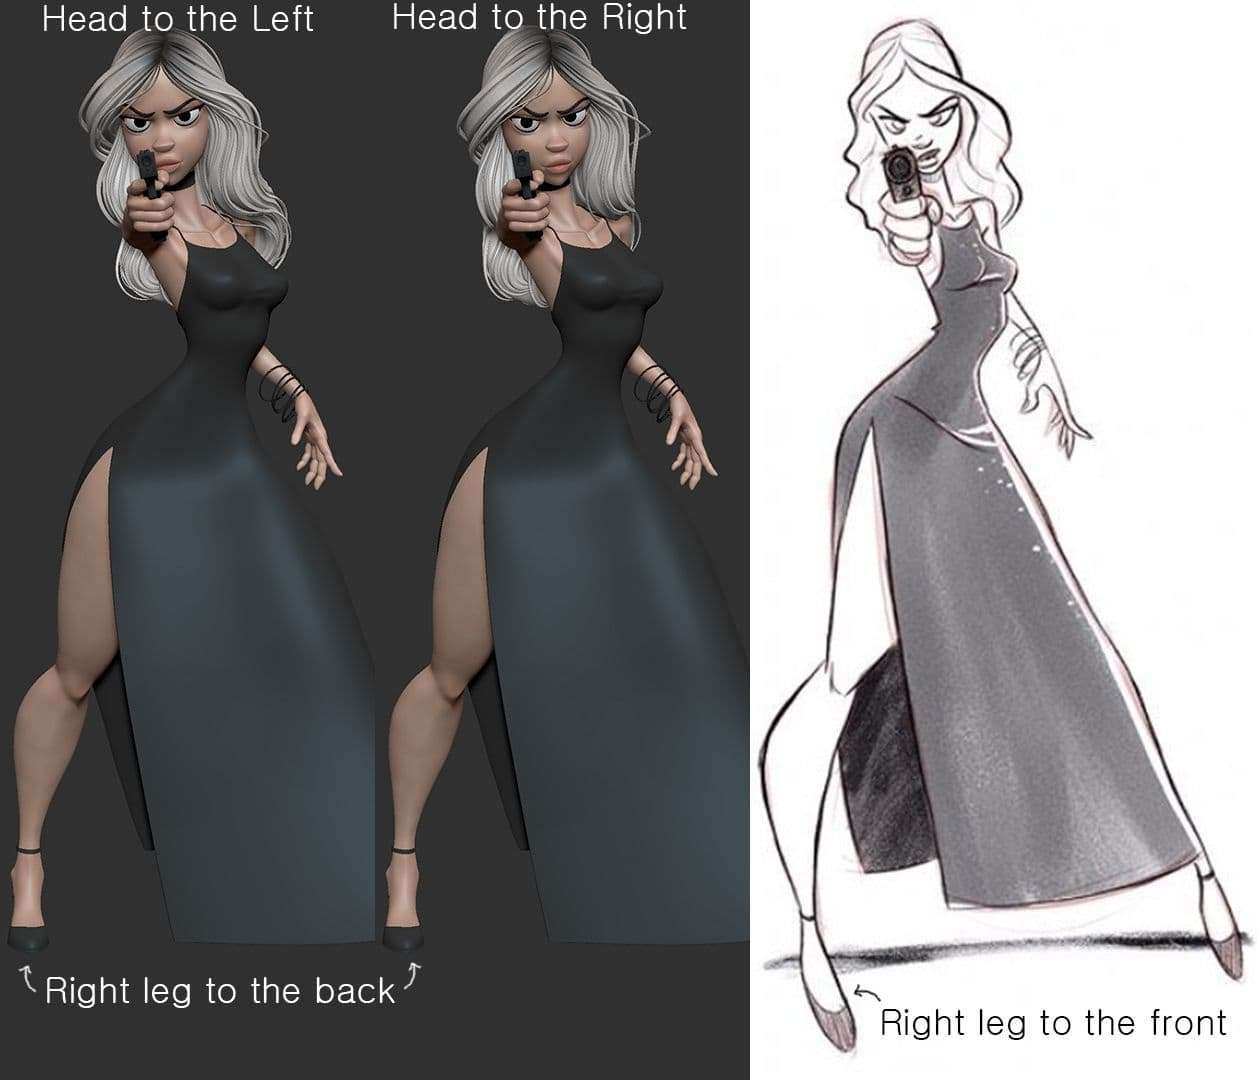
One thing that took a lot of deliberating was the positioning of her head. Whether to have her head slightly to the left (which made her look more focused and ready for action) or right (which gave a sense of pompousness and ease) created different personalities and moods. In the end, I decided with the head to the left for a more serious and on edge look, but I don't think I would have regretted either option.
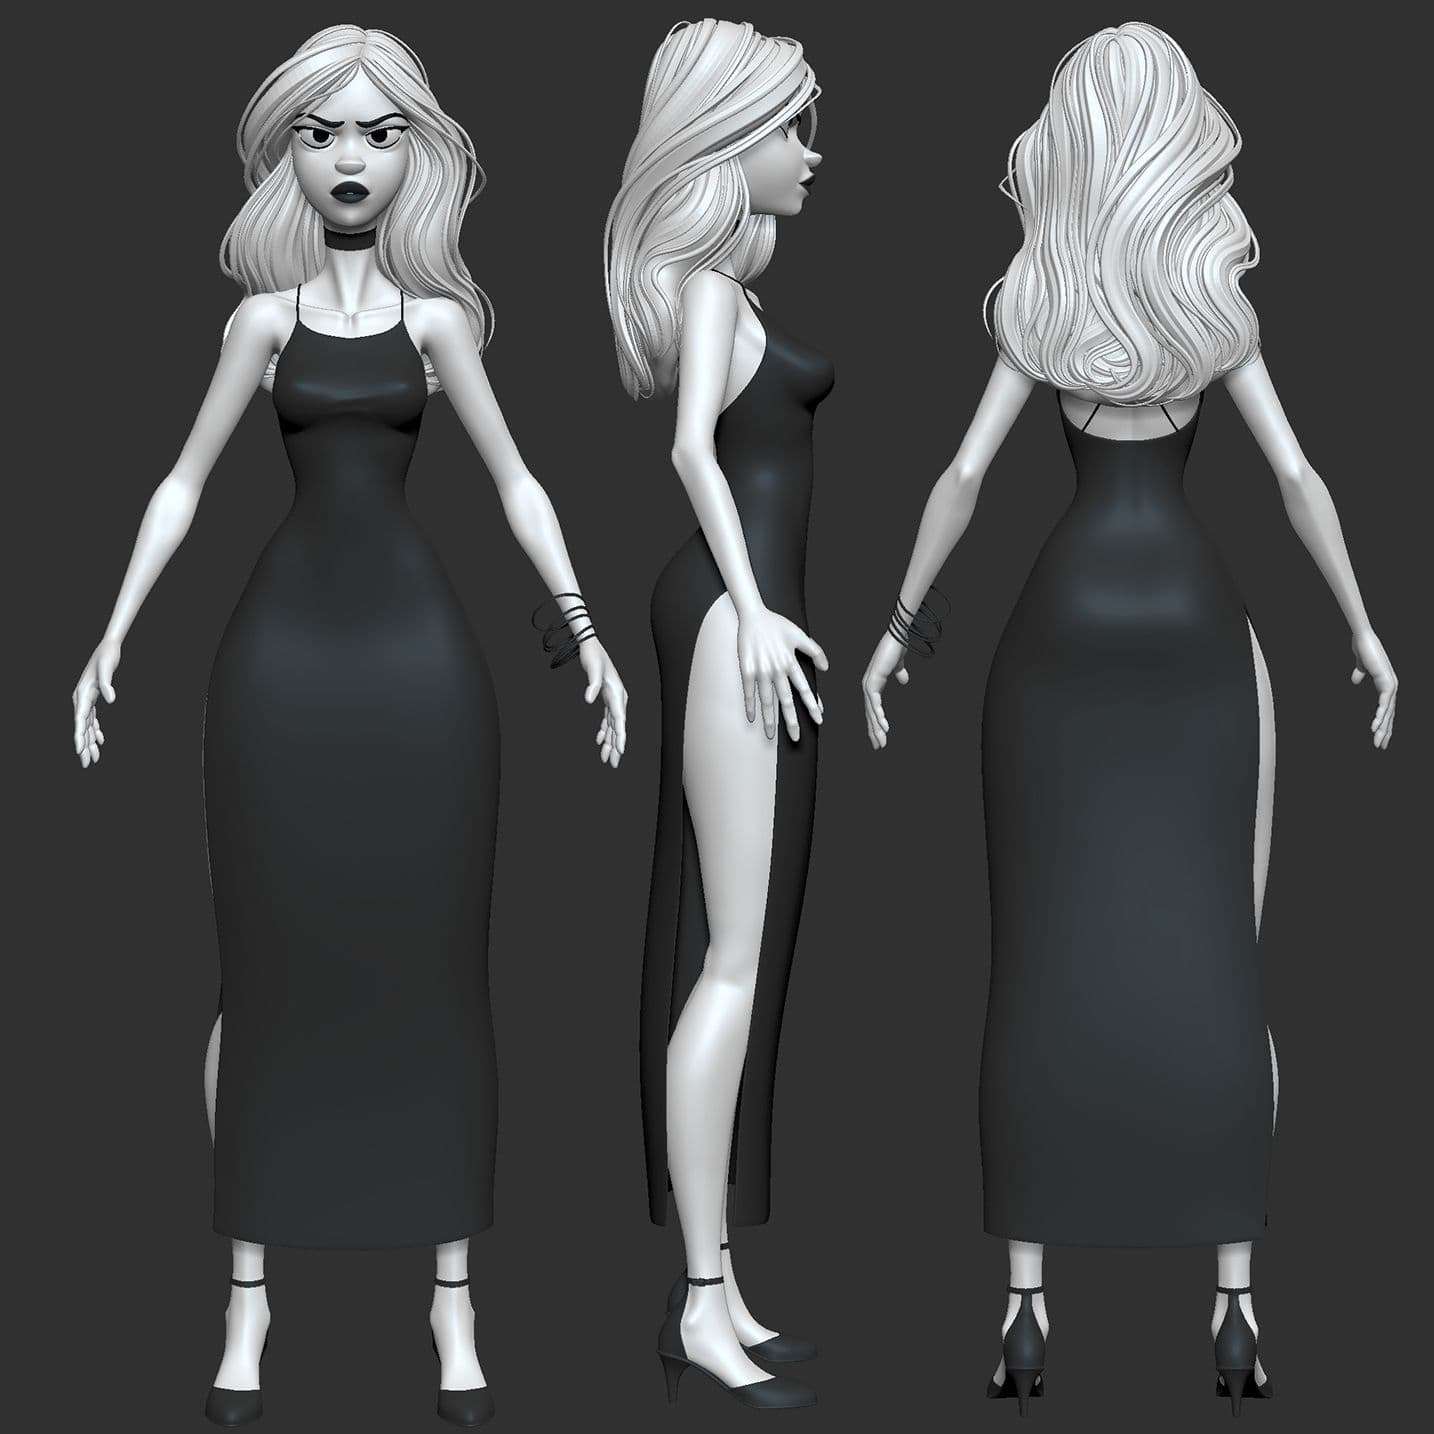
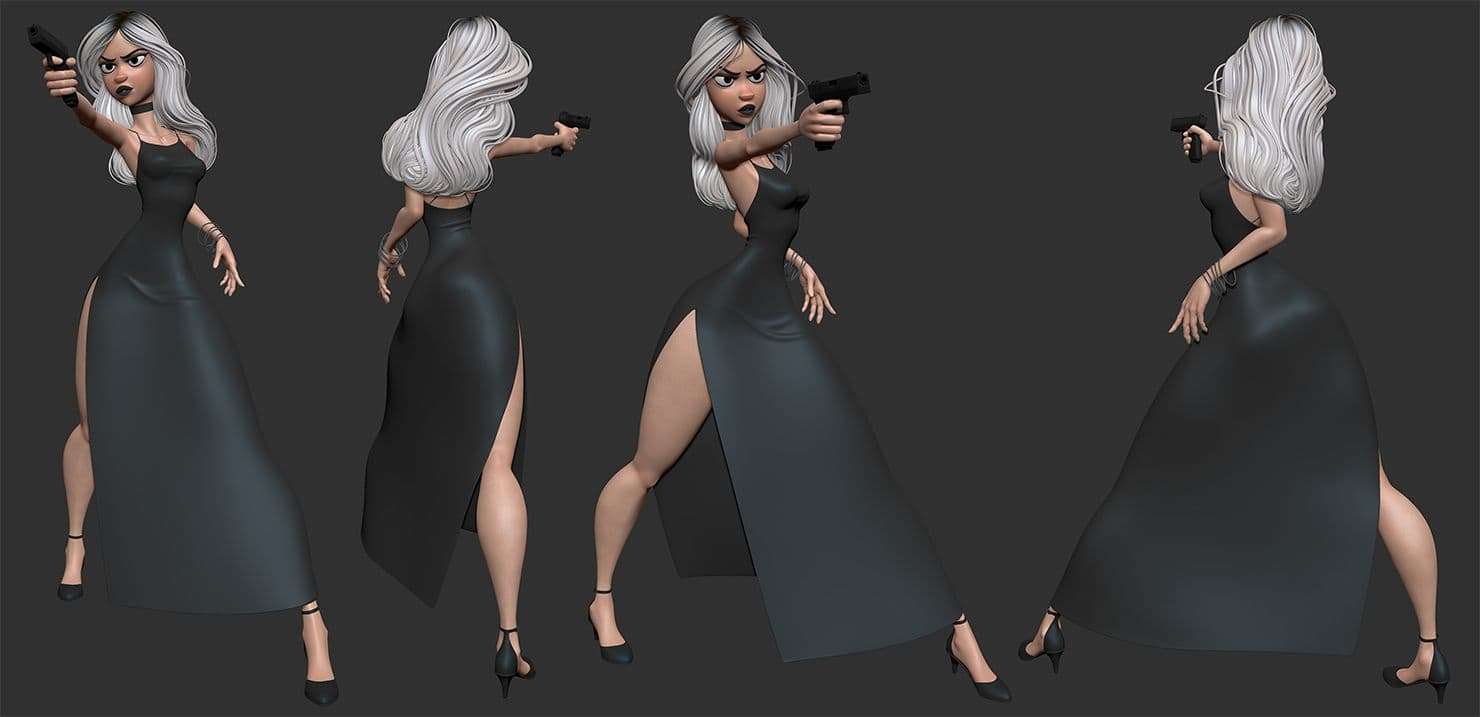
Eventually I was satisfied with the pose, which you can see below :
Substance Painter Texturing
Now that Veronica’s posed, it is time to texture in Substance Painter! When exporting to Substance Painter, I pick a subdivision level that is a mix of ‘not too low poly that you see blockiness’ and ‘not so high poly that the mesh files will be huge and will affect performance too much down the line’. This level of polygonal density is not enough to capture the smallest surface detail like pores. But, it's enough for medium sized details to break the silhouette. I export this low poly mesh (it’s not LOW but for the sake of this article, I will call it the low poly mesh) and the full resolution high poly mesh as separate FBX files for baking purposes. I also export any polypaint textures made in ZBrush.
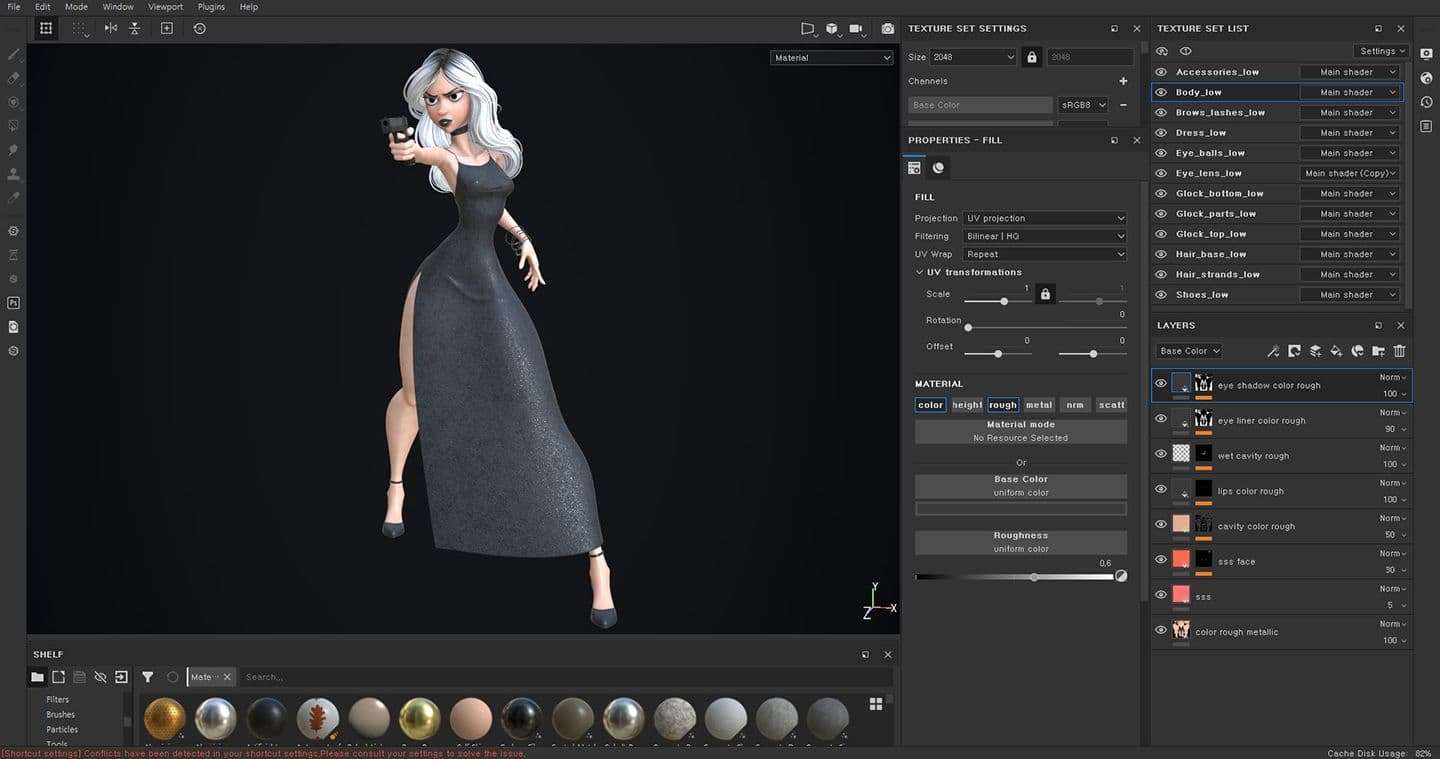
Inside Substance Painter, I create a “PBR Roughness Metallic” project with the low poly mesh. Then I bake all available maps with the high poly mesh. Major pieces of geometry such as the body or hair, dress are baked in 4K texture resolution, whereas smaller accessories, shoes, etc. are done in 2K. Once the baking is complete, I begin by plugging in the color maps that were exported from ZBrush first. As mentioned before, those will be used as a base. Texturing in Substance Painter is great as its layering system is like Photoshop and relatively easy to learn.
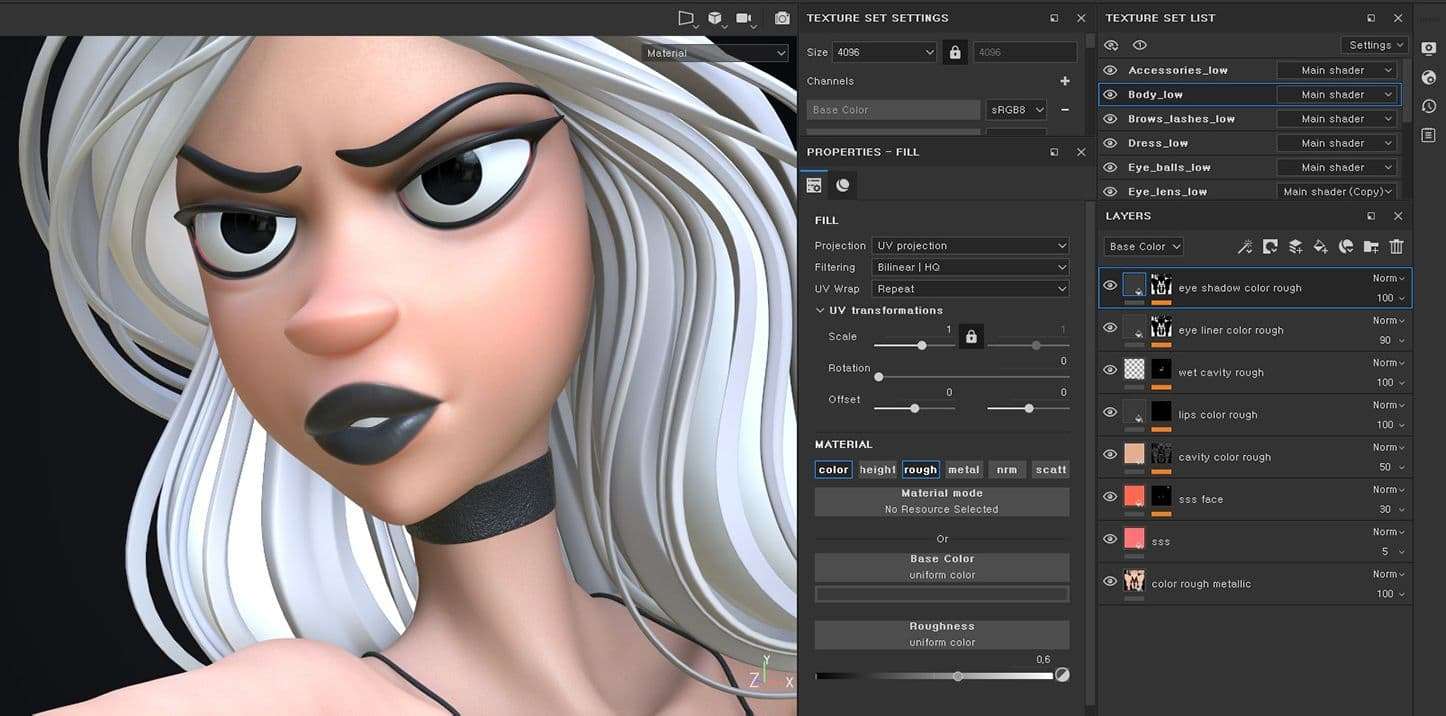
For skin, on top of the polypainted color texture layer, I made a fill layer with a cavity mask made in ZBrush with the “mask cavity” feature. With this layer, I darken the cavities with a darker skin color and slightly increase the roughness. I also lower the overall layer intensity to keep the effect subtle. In addition, I created separate layers for the lipstick, eye liner, and eye shadow which were hand painted. I made a layer for the insides of her eye sockets and mouth with a lower roughness value, and two sub-surface scattering layers.
To activate SSS in Substance Painter, you must add the “Scattering” channel in the texture set settings and you will find the “scatt” box in your layer material options. One of the SSS layers was applied to the entire body and the SSS value was set low for a tenuous effect with a light red/pink color.
The second SSS layer was for the face/head specifically. A SSS mask was hand painted focusing around the cheeks, ears, and nose, and given a similar red/pink/orange color. For both SSS layers, the color intensities were lowered for a subtle natural effect.
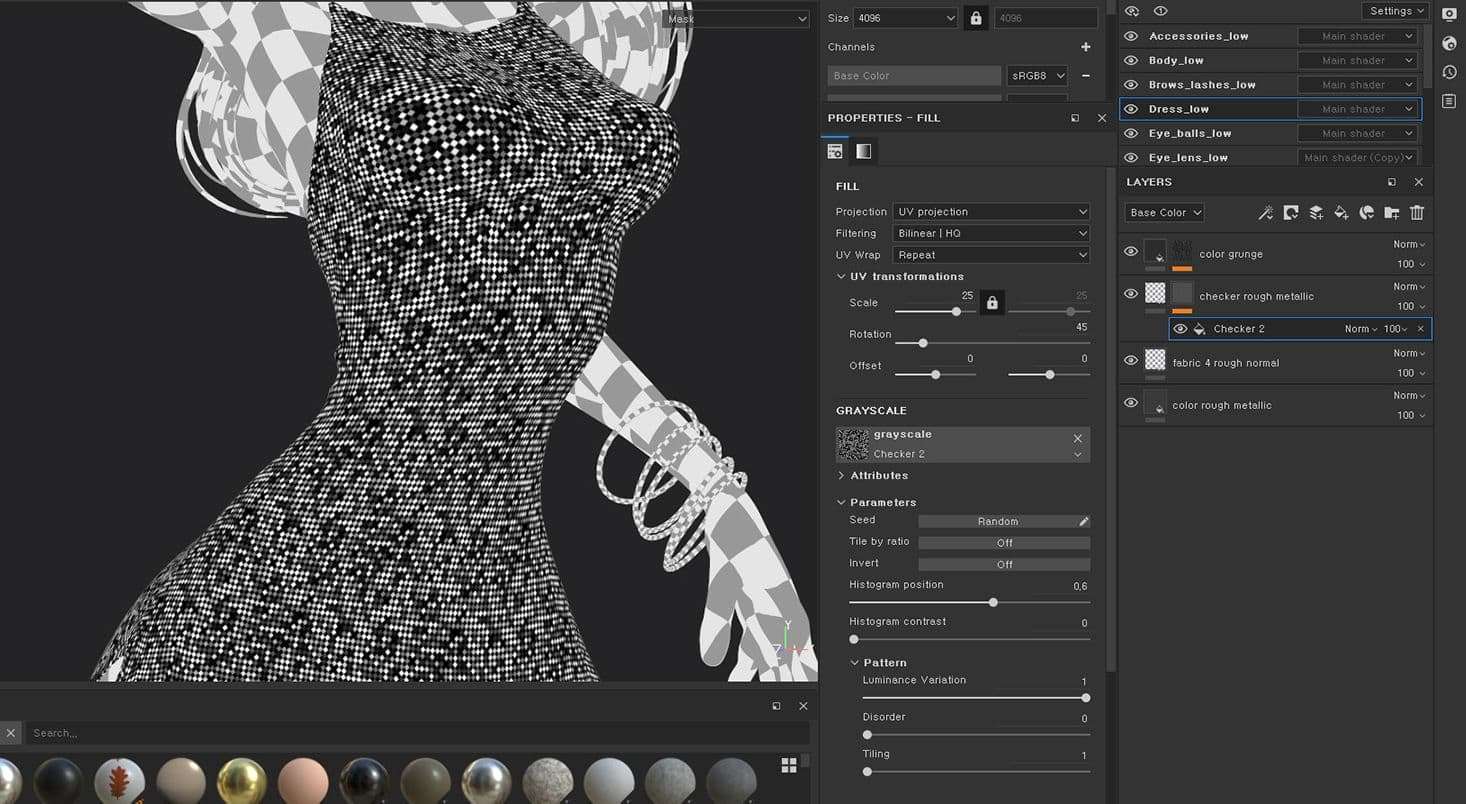
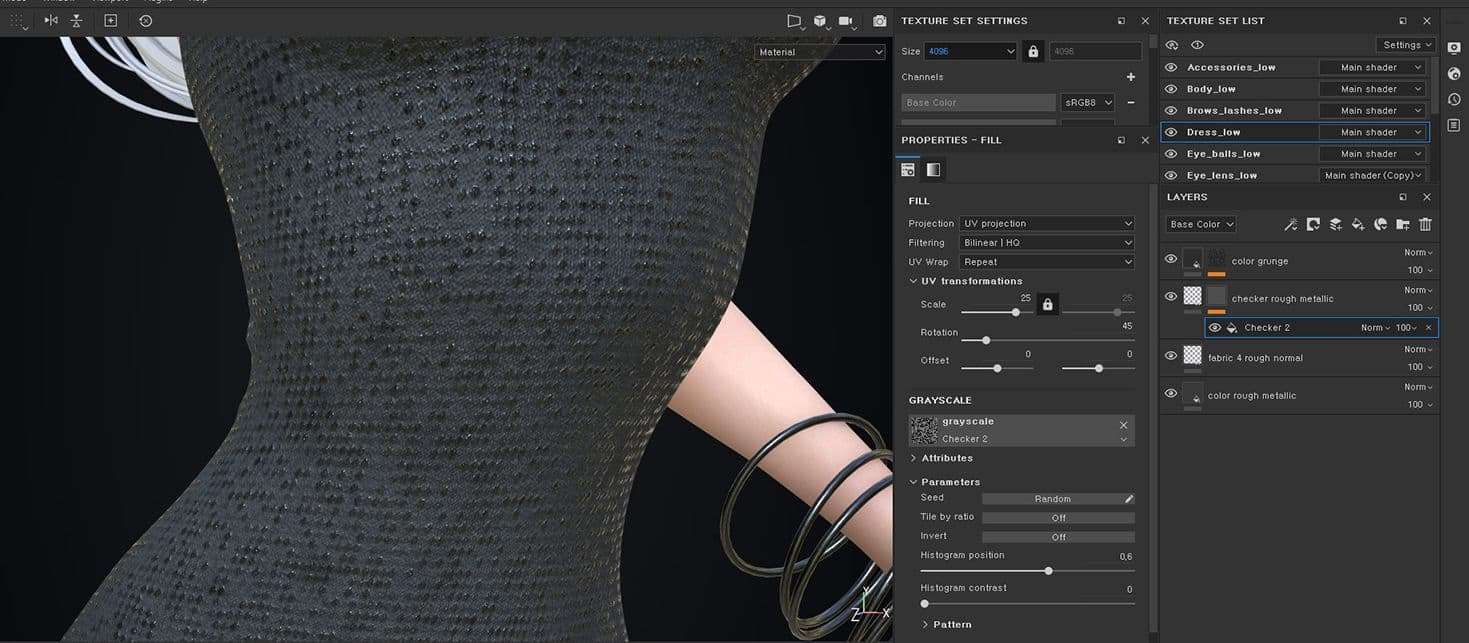
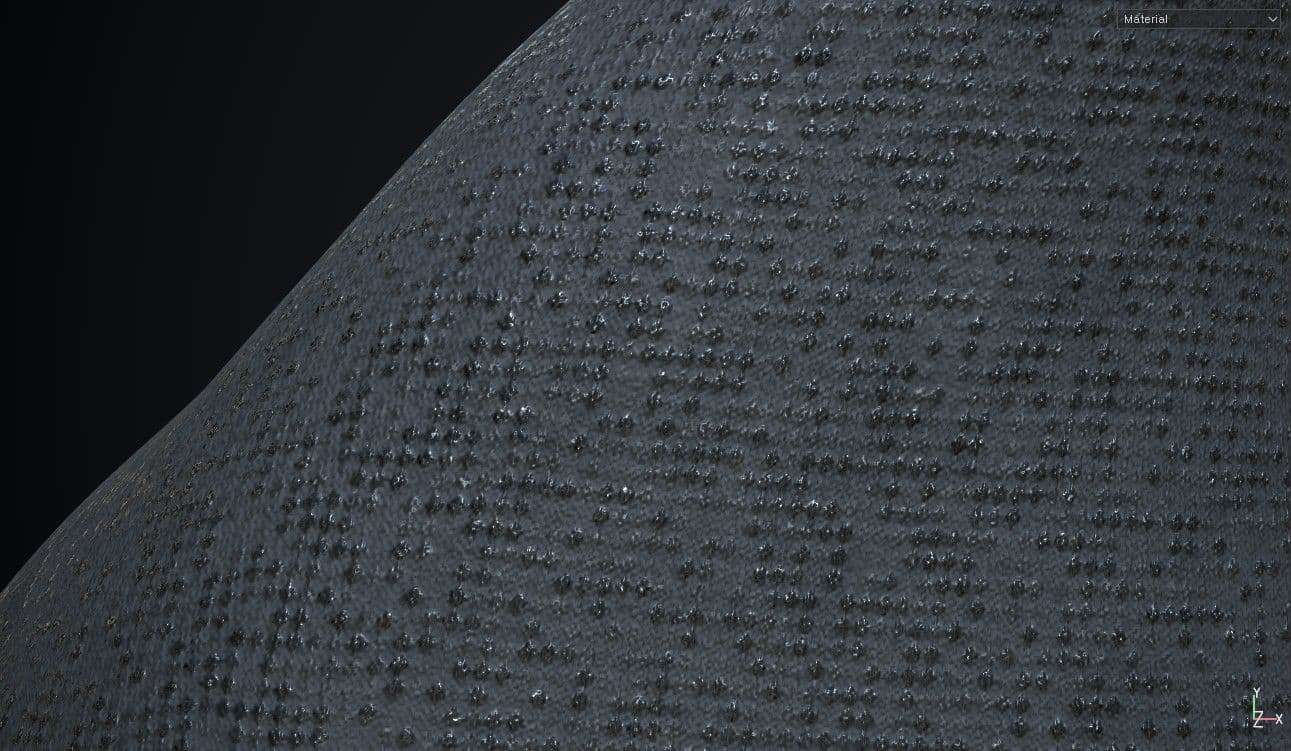
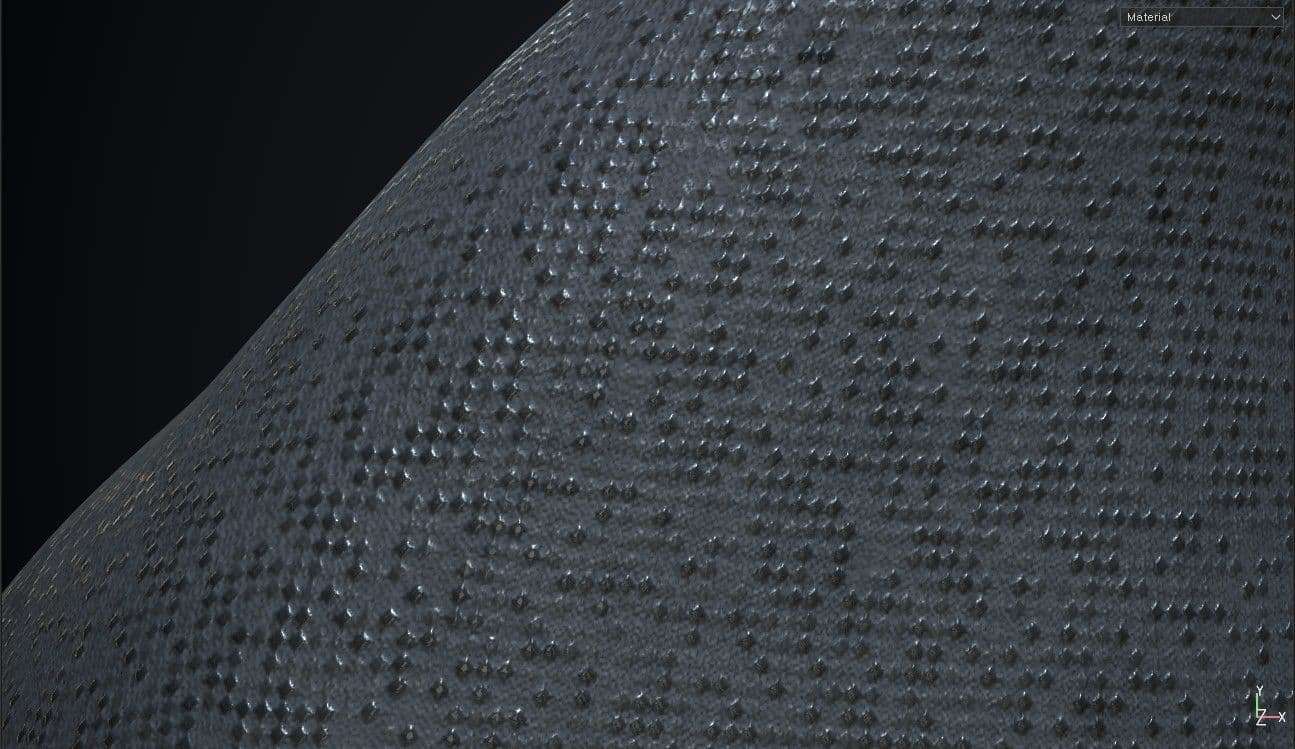
For the dress, I wanted a sequin-like material to recreate a sparkly look. I started off by looking for sequin or similar materials/textures available online to use as a base. I tried a few but in the end, none were to my satisfaction and I had to come up with my own solution. To simulate the sparkles, I made a new fill layer with the “Checker 2” alpha set as the mask. The parameters were adjusted so that the dress was covered in an irregular black and white dotted pattern, and the white dots would sparkle when light hit. The layer was set with a tiny amount of height, zero roughness, and some metallic to help substantiate the shine. I added a new layer with a fabric texture in the normal and roughness channels from a texture pack by Travis Davids, as well as a subtle grunge layer in the color channel to add a little variety.
In hindsight, I should have applied the fabric layer with an inverted “Checker 2” alpha that was used for the sparkles. This way, the sparkling areas on the dress would not be affected by the fabric normals and roughness. This could have produced a cleaner final image but considering how small each sparkle is, I do not think it would have made a large impact. Just a nice to have.
Left: Sparkles affected by cloth normal. Right: Sparkles not affected by cloth normal.
Overall, the creation of the final dress material turned out to be simpler than anticipated. If you remember, it was one of the main challenging looking aspects of the character I wanted to tackle when picking the concept.
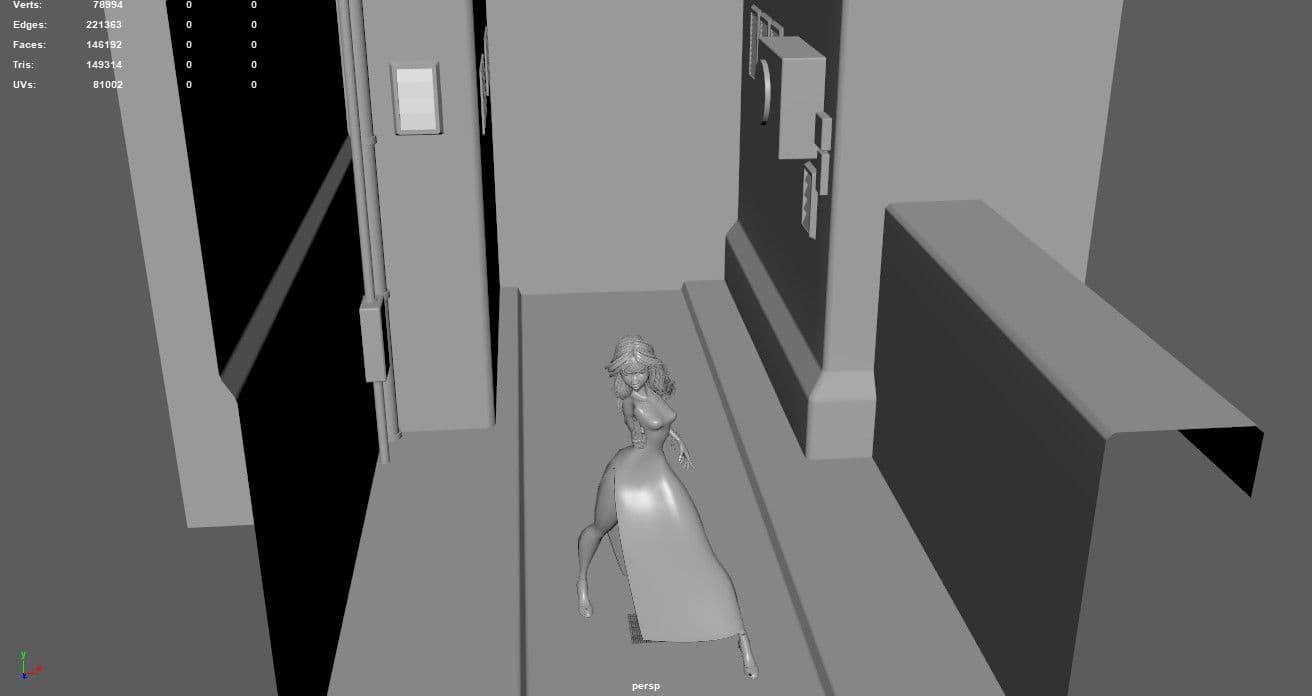
The Environment
For Agent Veronica, another aspect I wanted to tackle was to create a small environment for the character, kind of like a diorama. I envisioned a dark city alleyway, shallow depth of field, with a noir esque look to the image. Possibly de-saturated or gray scale all together. Since I knew the environment would be out of focus, I kept it as low poly as possible and relied on the textures for detail.
I blocked out the scene in Maya, and created a flat back wall with the intention of inserting an image to fake the alley continuing into the distance.
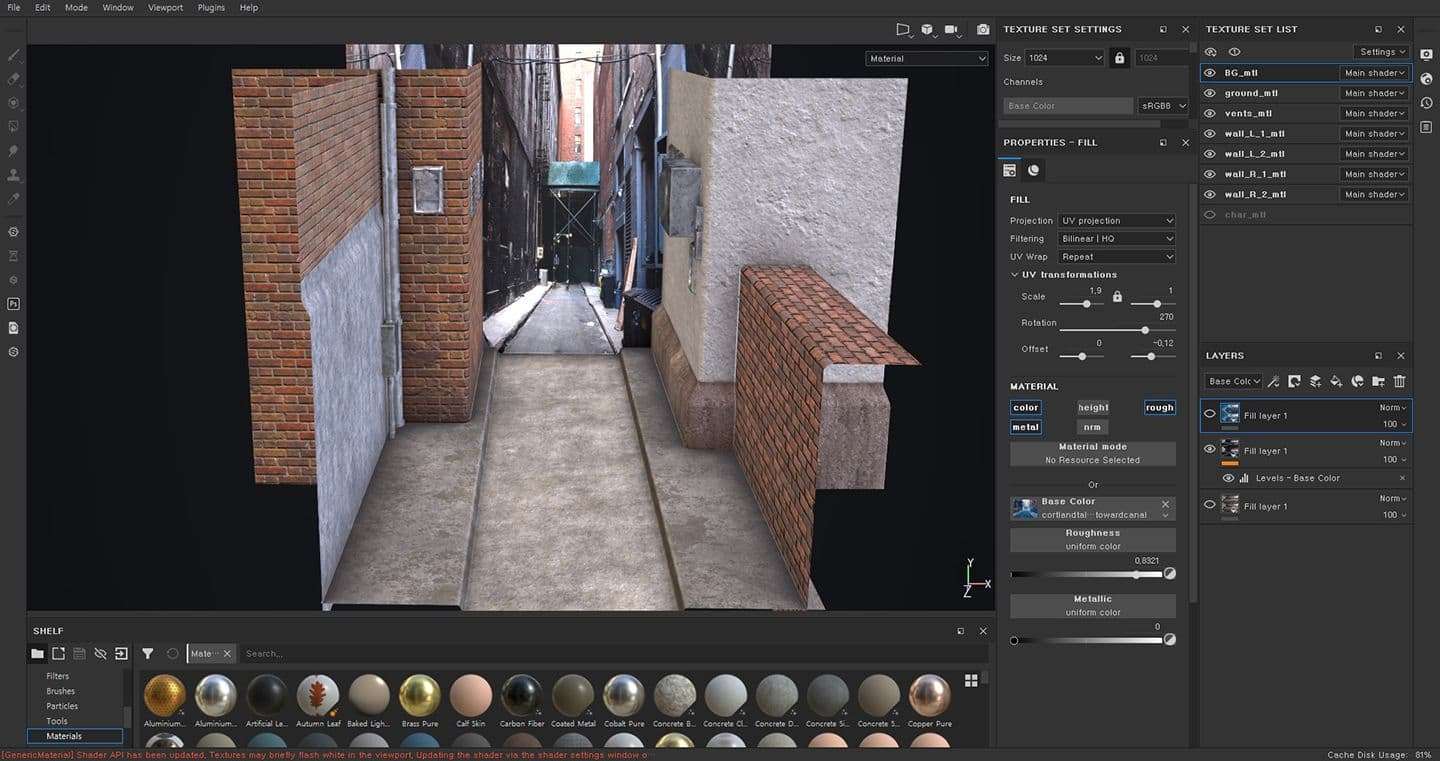
The block out was imported into Substance Painter for texturing. I relied on customizing procedural and smart materials for the scene. The materials and layout for the environment, similar to the character, was tweaked throughout the making of Veronica.
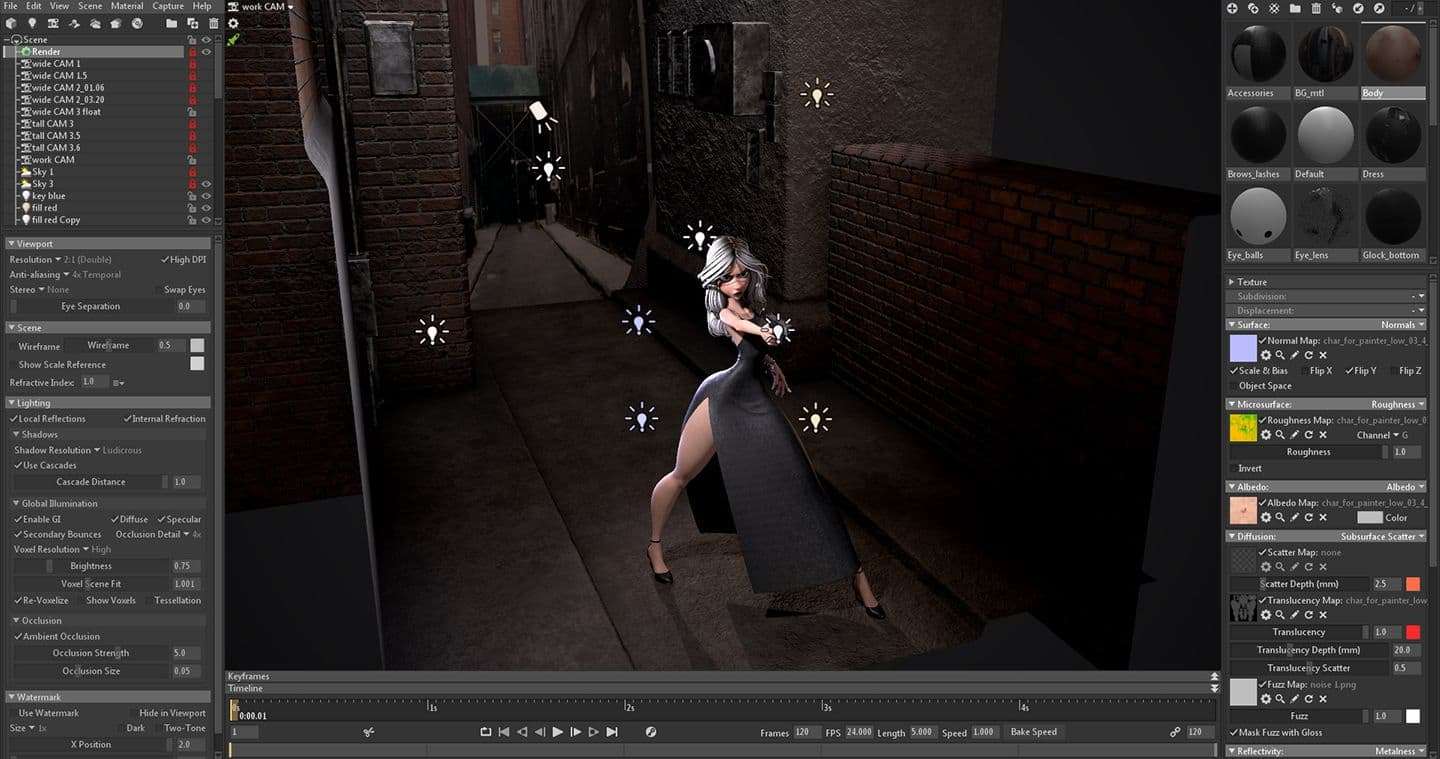
Marmoset Setup, Lighting, Post FX, & Rendering
Finally, time to bring everything together! This was my first time using Marmoset Toolbag 3, but I 've been familiar with real time rendering via Unreal Engine 4. Even though I am not making game optimized scenes, I enjoy real time rendering for its speed and convenience. In my opinion, the time savings with real time technology is worth the slight quality sacrifice required, compared to traditional rendering. I first tried rendering Veronica in UE4 but was not getting the results I was looking for. So I looked at alternative real time render engines and thought this would be a good opportunity for me to try out Toolbag 3.
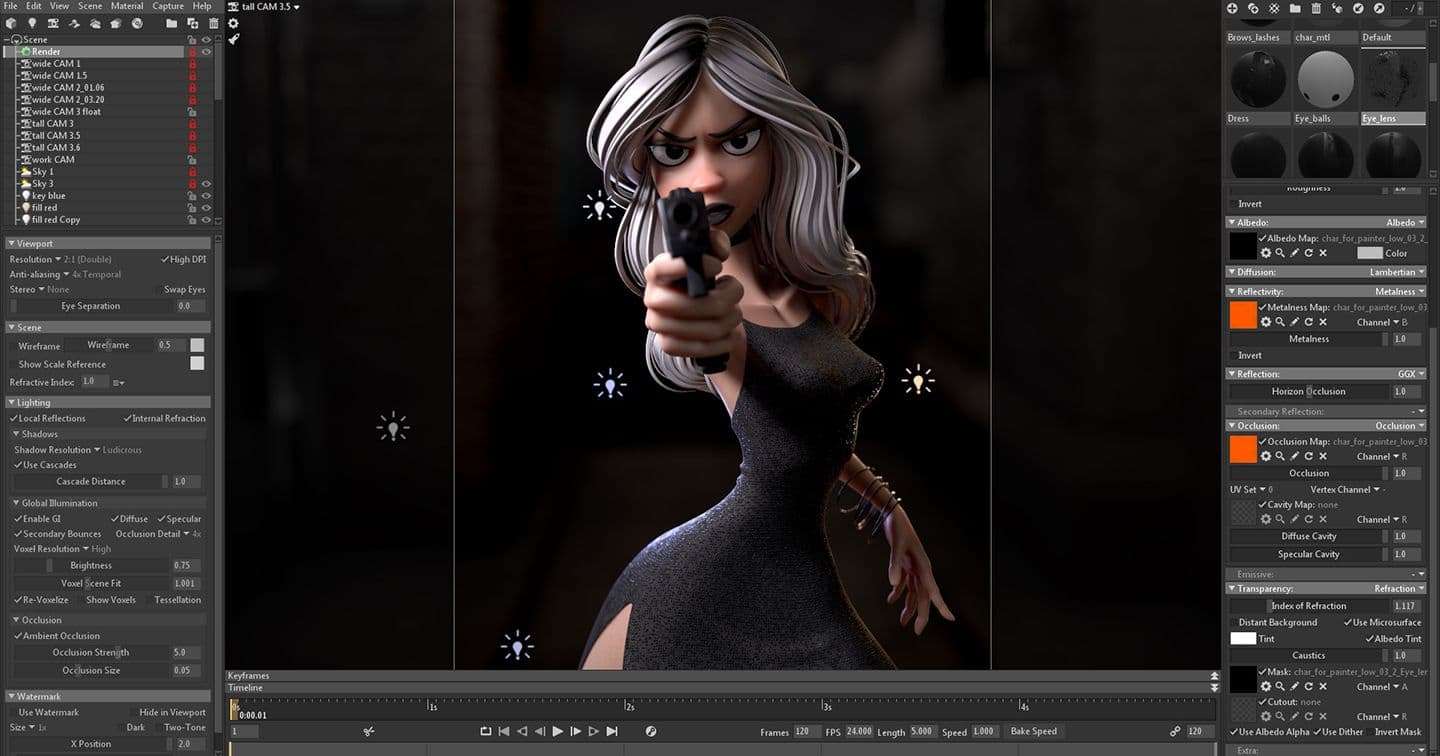
Export settings for Toolbag 3 can be interchangeable with UE4. This made my transition from UE4 to Toolbag 3 a breeze. Textures were exported with the “Unreal Engine 4 (Packed)” config in Substance Painter (and used the “Unreal Engine 4 SSS (Packed)” for the body). I used the UE4 configuration because I was already familiar with that format. You can also use “PBR SpecGloss from MetalRough” for a more straightforward texture import process in Toolbag 3, which will be discussed next.
Within Toolbag 3, importing the FBX mesh file is like any other software. The only noteworthy settings to change are for materials and textures. By default, Toolbag 3 uses a PBR spec gloss workflow, but I changed that in the drop down menu for each tab of the material. Changing from “Gloss” to “Roughness” in the Microsurface tab, and “Specular” to “Metalness” in the Reflectivity tab, I am able to now use a PBR metallic roughness workflow that is compatible with exports from Substance Painter that used the UE4 preset.
The “Unreal Engine 4 (Packed)” configuration gives you 4 texture files. One for base color, one for occlusion/roughness/metallic (in the R, G, and B channels respectively), one for a normal map, and one for emissive (if applicable). When plugging these images into Toolbag 3, you need a few adjustments to the texture settings:
Normal Map: make sure “Flip Y” is ON and “sRGB Color Space” is OFF in the gear icon.
Roughness Map: make sure the Channel is set to “G” and “sRGB Color Space” is OFF.
Albedo Map: make sure and “sRGB Color Space” is ON.
Metallic Map: make sure the Channel is set to “B” and “sRGB Color Space” is OFF.
Occlusion Map: make sure to activate the tab by selecting “Occlusion” in the drop down menu, the Channel is set to “R” and “sRGB Color Space” is OFF.
For SSS, you must select “Subsurface Scatter” in the drop down menu of the Diffusion tab. The SSS map from Substance Painter went into the “Translucency Map”. I also added a noise texture made in Photoshop in the “Fuzz Map” for a slight peach fuzz effect.
For transparent materials such as the eye cornea, there are a few options. Veronica’s eyes had a slight shadow painted on her cornea texture that I wanted to show. To display this, you can either select the “Dither” or “Refraction” with “Use Dither” turned ON in the drop down menu of the Transparency tab. I used the latter but that required more clean up later in Photoshop. I also turned ON “Use Albedo Alpha”.
Moving on from textures and materials, in the Scale & Units tab of the Scene settings (which can be selected in the outliner), make sure you change the scene scale to the proper scale units used when modeling.
For the HDRI, I used “Ennis House” at a low intensity, as I thought it gave a nice reflection on Veronica's eyes and the lighting fit the scene. A spot light was placed above the scene pointing down to provide subtle lighting behind Veronica. Another spot light pointed forward from behind for the rim light. A healthy amount of Omni lights were placed around the character for finer tuning of how the character was lit.
In the Render settings I was able to turn on all the bells and whistles I love. From ambient occlusion to global illumination and super sampling. All the settings in one handy place with straight forward controls. One thing to note when using dithered transparencies, you will need to increase samples in the Capture Settings. This will reduce the noise visible in the real time view port. This, along with the ramped up render settings, increased the time it takes to export an image or video from Toolbag 3. But we are still dealing with a few seconds at most per image/frame. A far cry from what traditional rendering takes and still massively time saving.
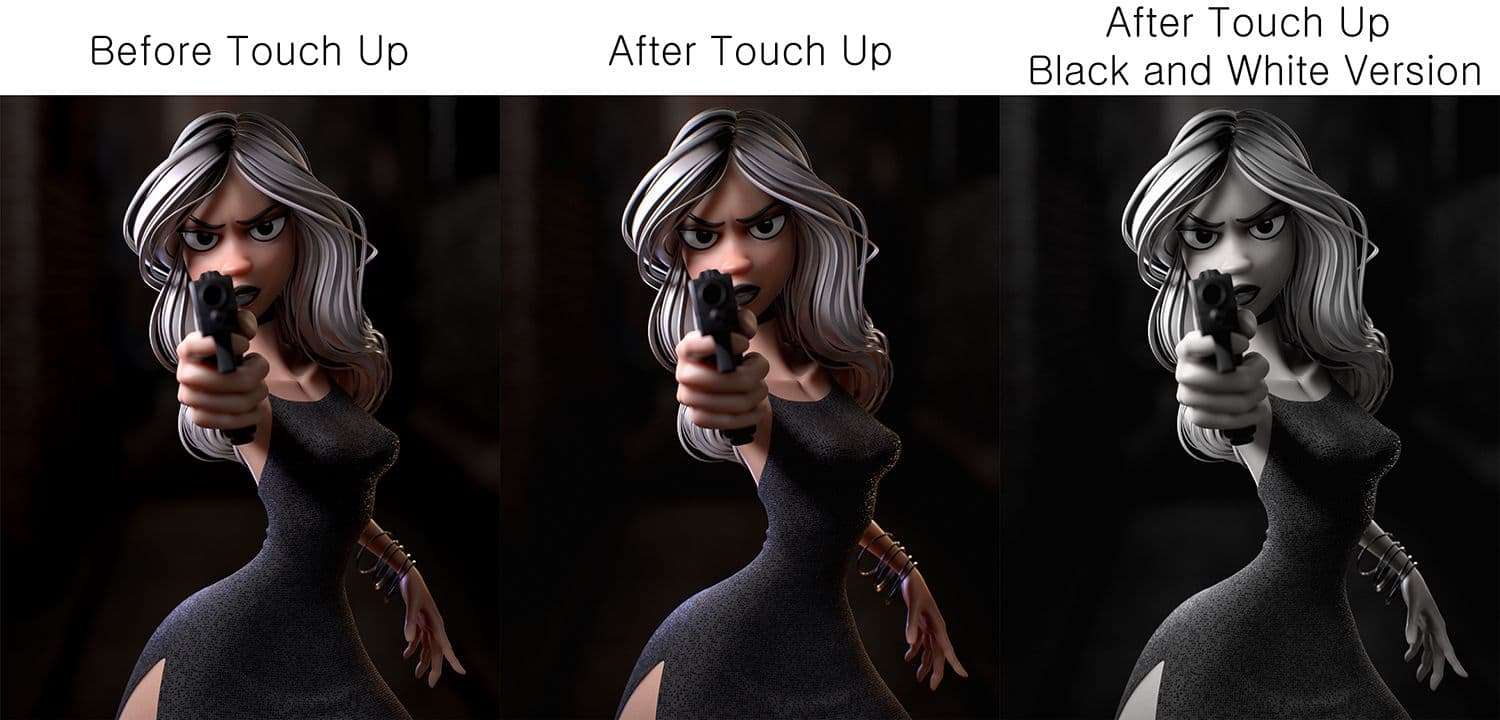
Photoshop Touch Up
Last but not least, I need to touch up the renders from Toolbag 3. Sometimes, you find small mistakes that would be faster and easier to fix in Photoshop. Or the renderer could be showing artifacting in a particular area. Maybe you want to add post process effects in the final image with full control.
For Agent Veronica, I painted over a little bit of artifacting that was visible when zoomed into her face. I also brightened the reflections in her eyes and brightened her left arm. I added a vignette, noise, chromatic aberration, and made a separate version of her in black and white with the curves slightly tweaked. All this might sound like a lot of changes. But most were done at a low intensity to keep changes subtle and only noticeable when not applied, maintaining the original render as much as possible. Furthermore, adding effects like chromatic aberration and making the image black and white helped enhance the noir effect. Noise helped make the image look more natural and less CG perfect.
Admittedly, the touch ups can be indistinguishable with overlaid comparisons, but I know they're there, and I know the final image would look worse without them.
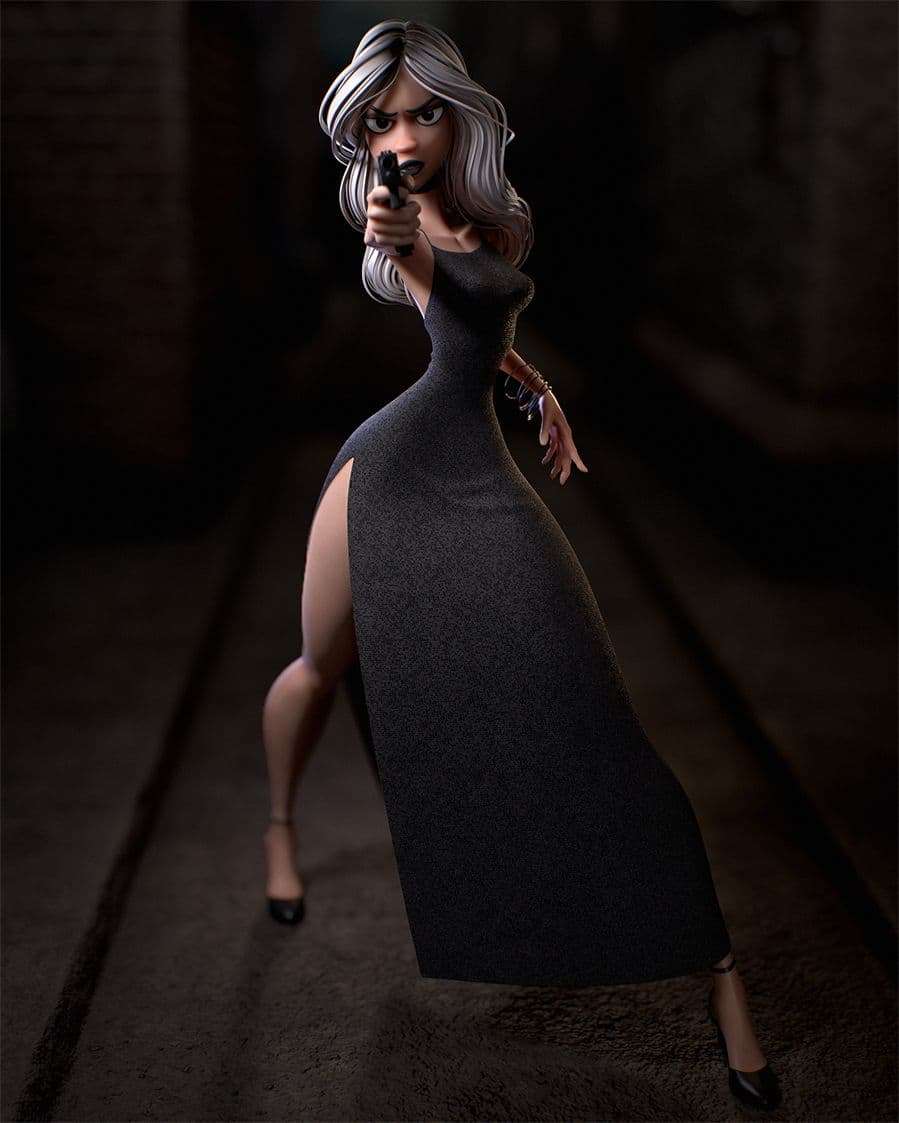
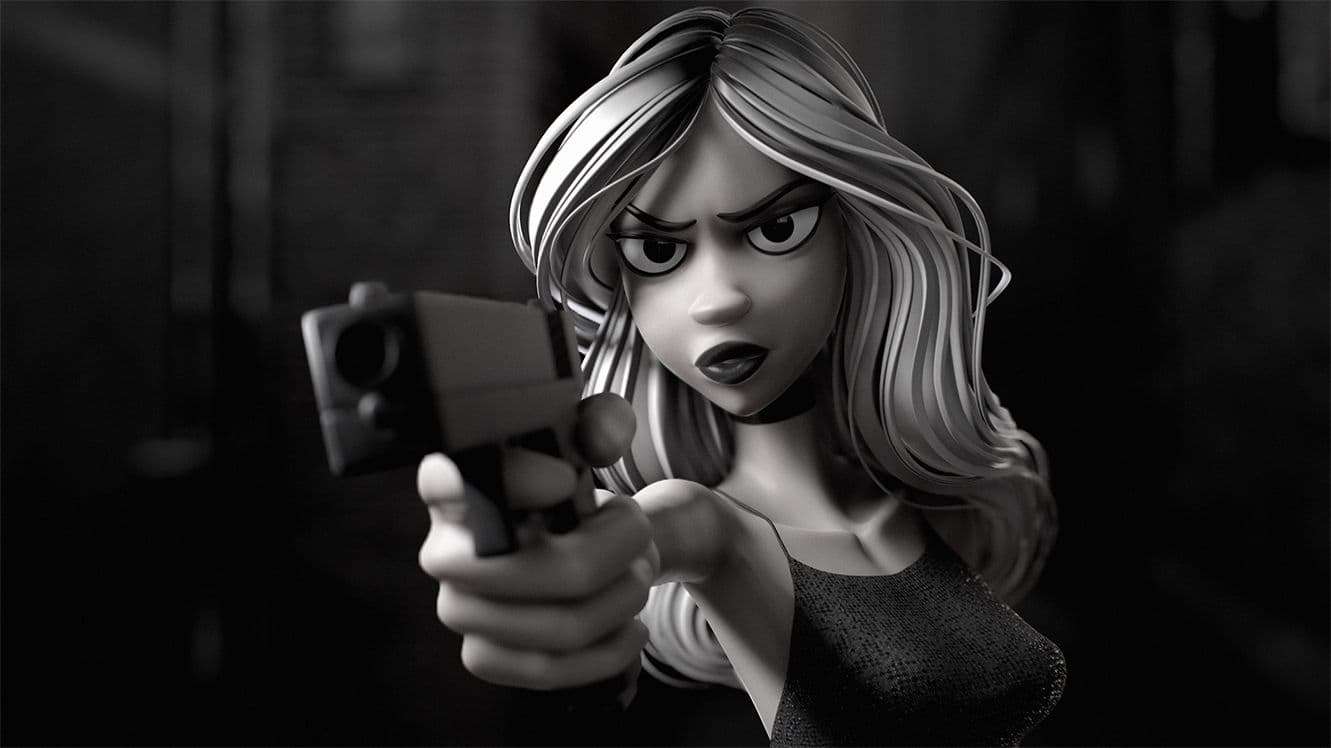
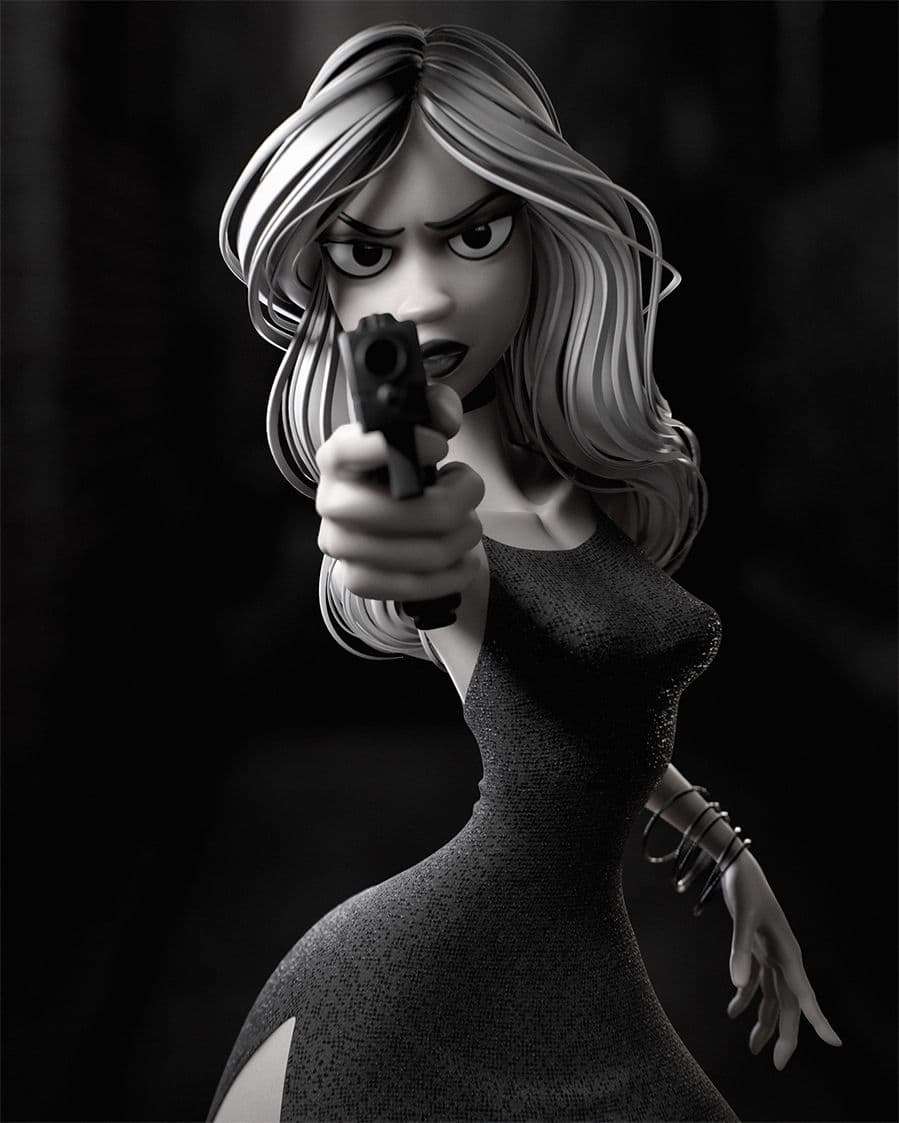
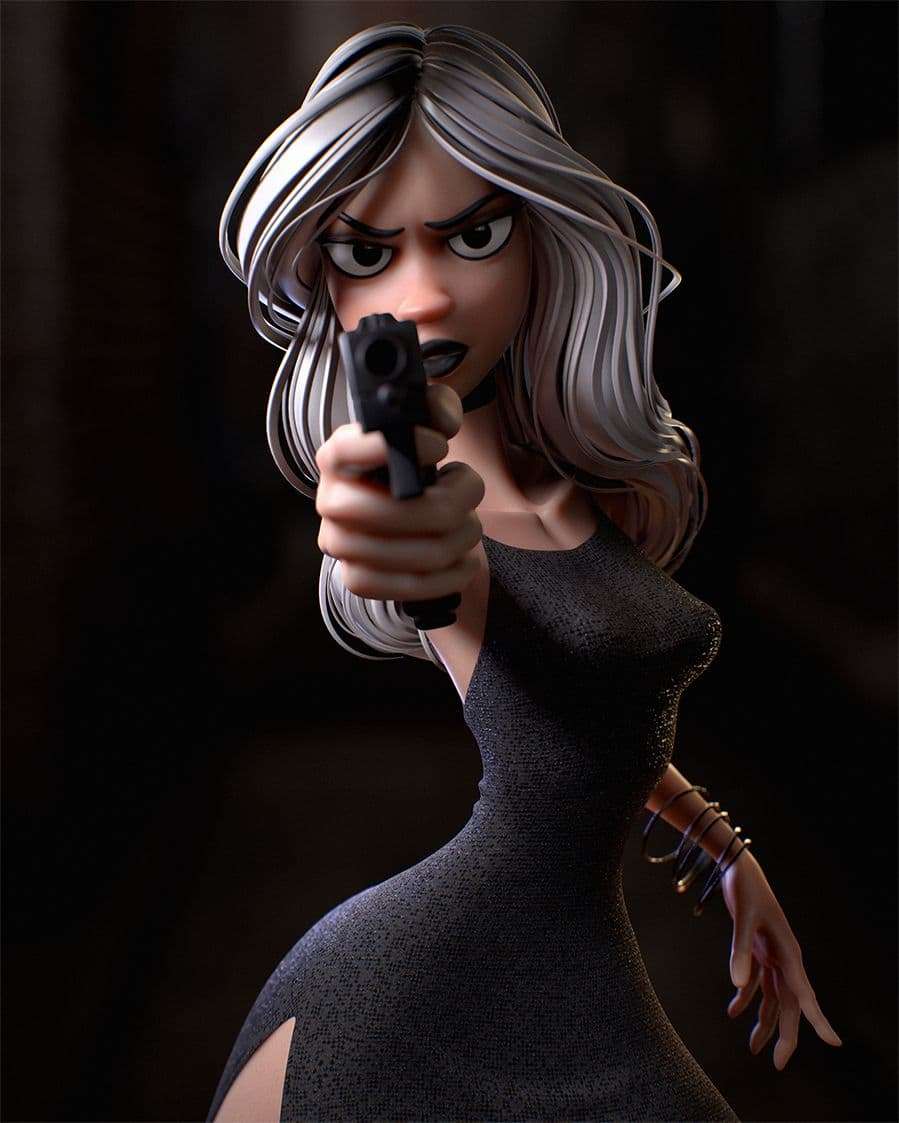
Below you can see the final rendered images made from this project. I was happy with both the colored and black and white versions.
Conclusion
Wow, you made it to the end! That was a lot of reading, thanks for your time. Again, this article is by no means something to follow step by step or a tutorial of some kind. Rather it’s a simplified version of my typical workflow, and a glimpse of how I make characters.
I’m a mere Junior Character Artist with so much more to learn and improve, I’m sure you’ve already found plenty of what I wrote that could be better. Please feel free to reach out and let me know what you think, of this article, of my projects, or to chat about 3D stuff! Good luck to everyone entering the Rookies 2020, and stay safe out there!