How to Create World of Warcraft Characters using ZBrush - Part 1
Tyler Lee a graduate of SF Film School in Korea, shows us how to create iconic World of Warcraft characters with the power of ZBrush.
Tyler Lee a graduate of SF Film School in Korea, shows us how to create iconic World of Warcraft characters with the power of ZBrush.
When Korean born Tyler Lee was younger, watching movies like The Avengers, Transformers, and Terminator, inspired him to seek out the knowledge to make the visual effects that made him love those movies so much. Tyler realised very early on he wanted to work in the entertainment industry and now he is realising his dreams. Graduate from the SF Film School, Tyler shares with us how to create iconic World of Warcraft characters using ZBrush.

Gathering references can help you make great work. An easy way to find great reference is to use sites like Google images, Pinterest and Youtube. You can also use Artstation to get inspiration from fellow artists who have created something similar. I use PureRef to display and manage my references.

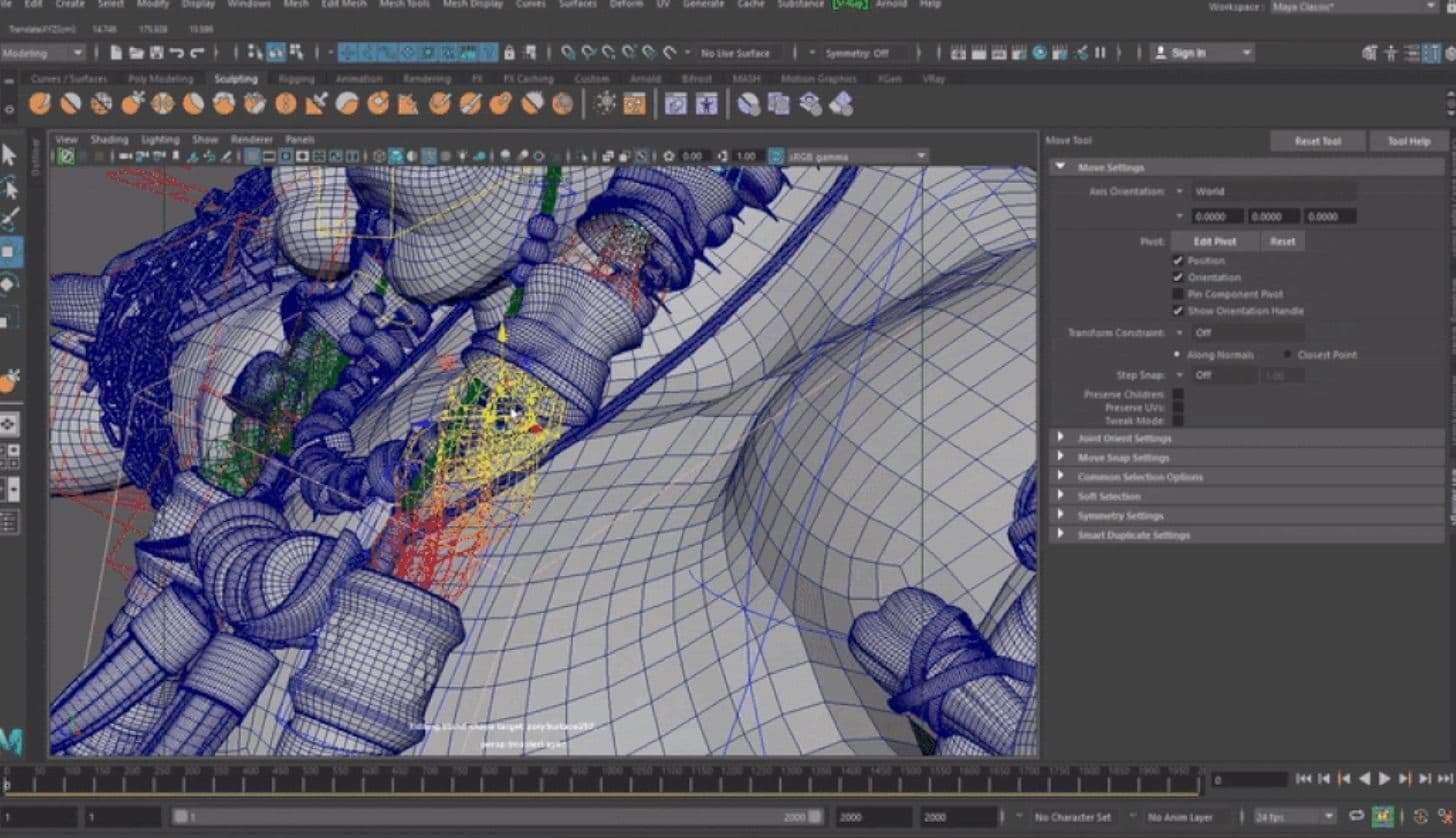
First I started by using DynaMesh for basic sculpting in ZBrush. DynaMesh is a basic sculpting function but it is hard to improve detail expression with that tool alone.
If you want to create more detail, I recommend using ZRemesher. It can help you increase polygon count when you raise the divide level on ZRemesh polygon.
I created the topology in 3D Coat after finishing expressions in Zremesher. I imported the topology that was created in 3D Coat to ZBrush again by using the project function.
I used the Layers and Morph target functions to help me divide the expressions and adjust each expression. The Morph target helped me to fix expression - using the target brush, you can address areas that need tweaking.
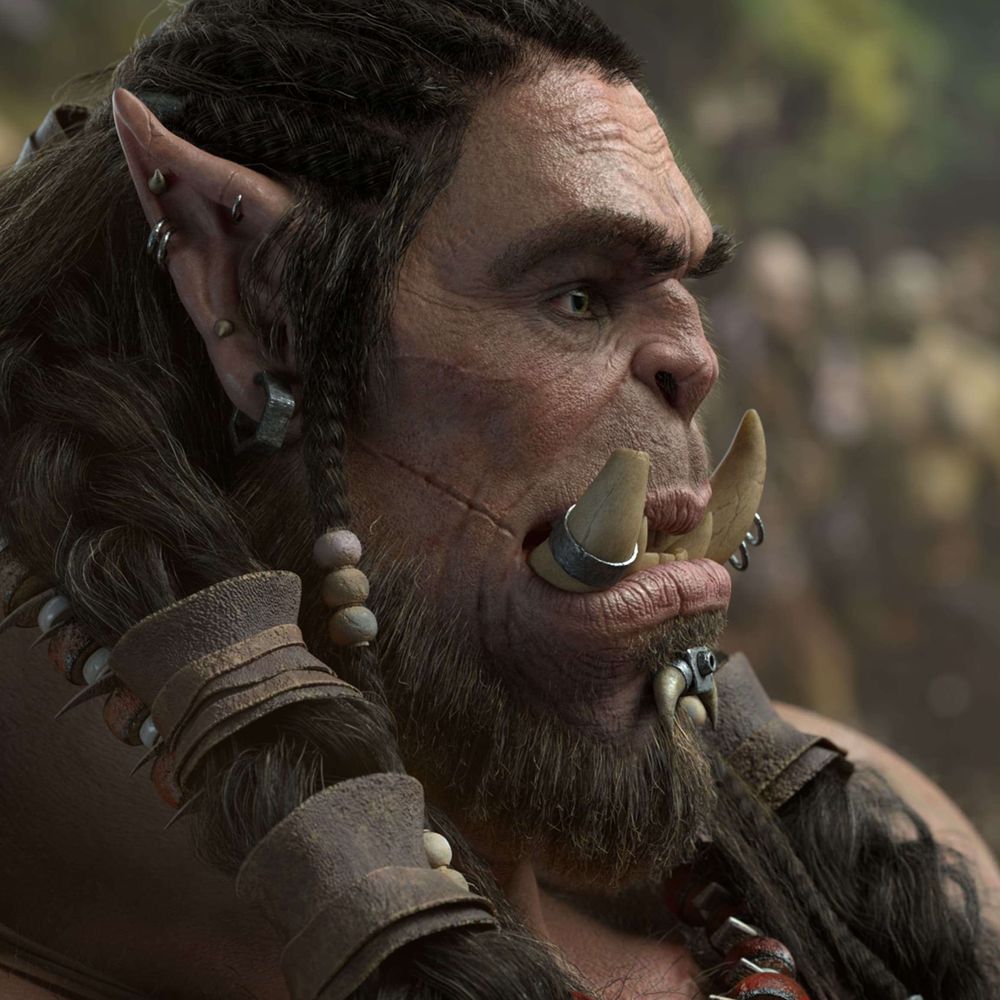
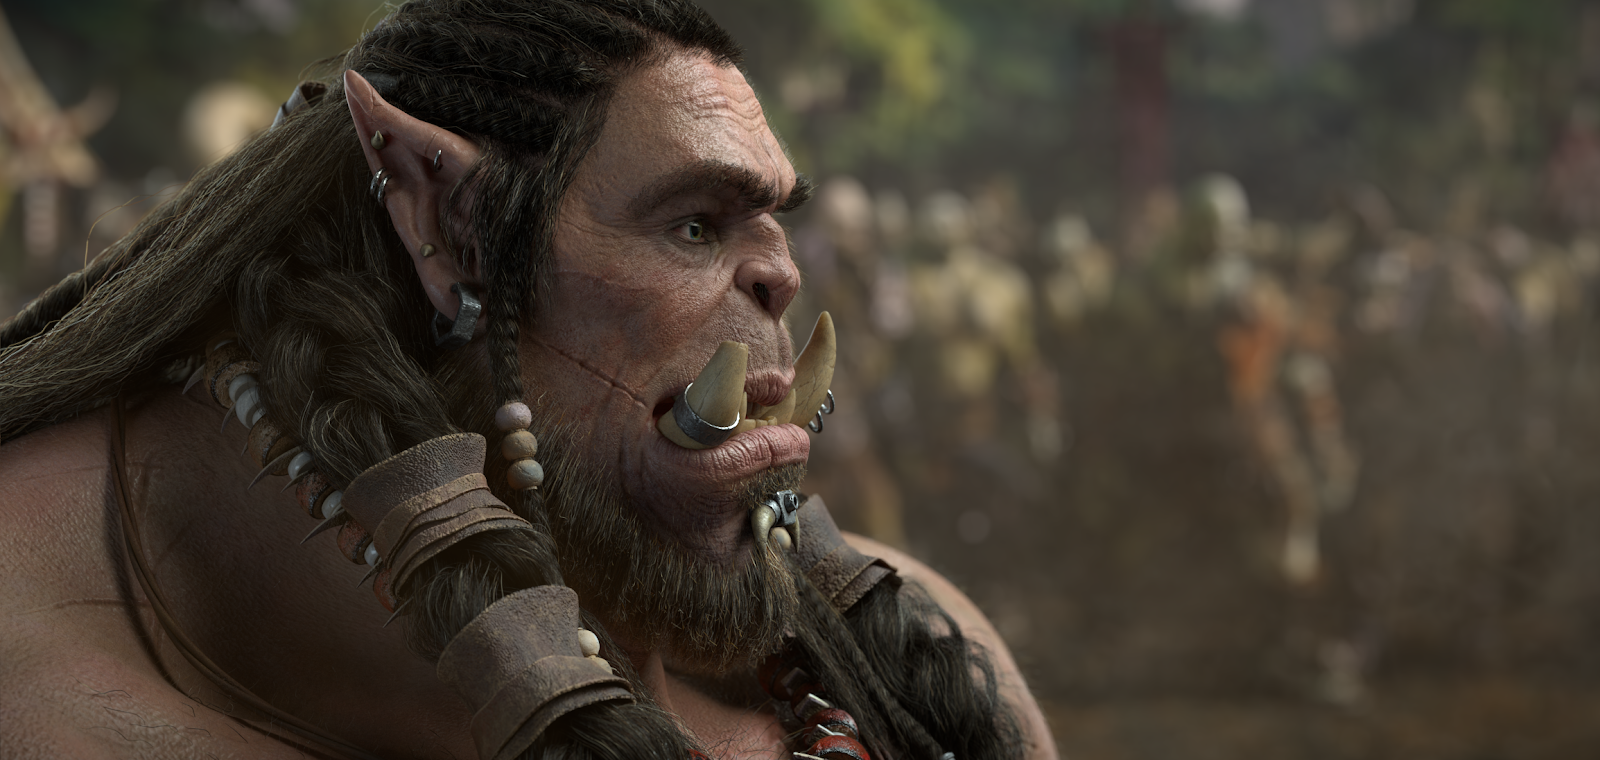
I sculpted features like wounds, wrinkle, pores and used the alpha that was exported from maleFace_40s_04 displacement map, and other displacement maps for various parts of the body.
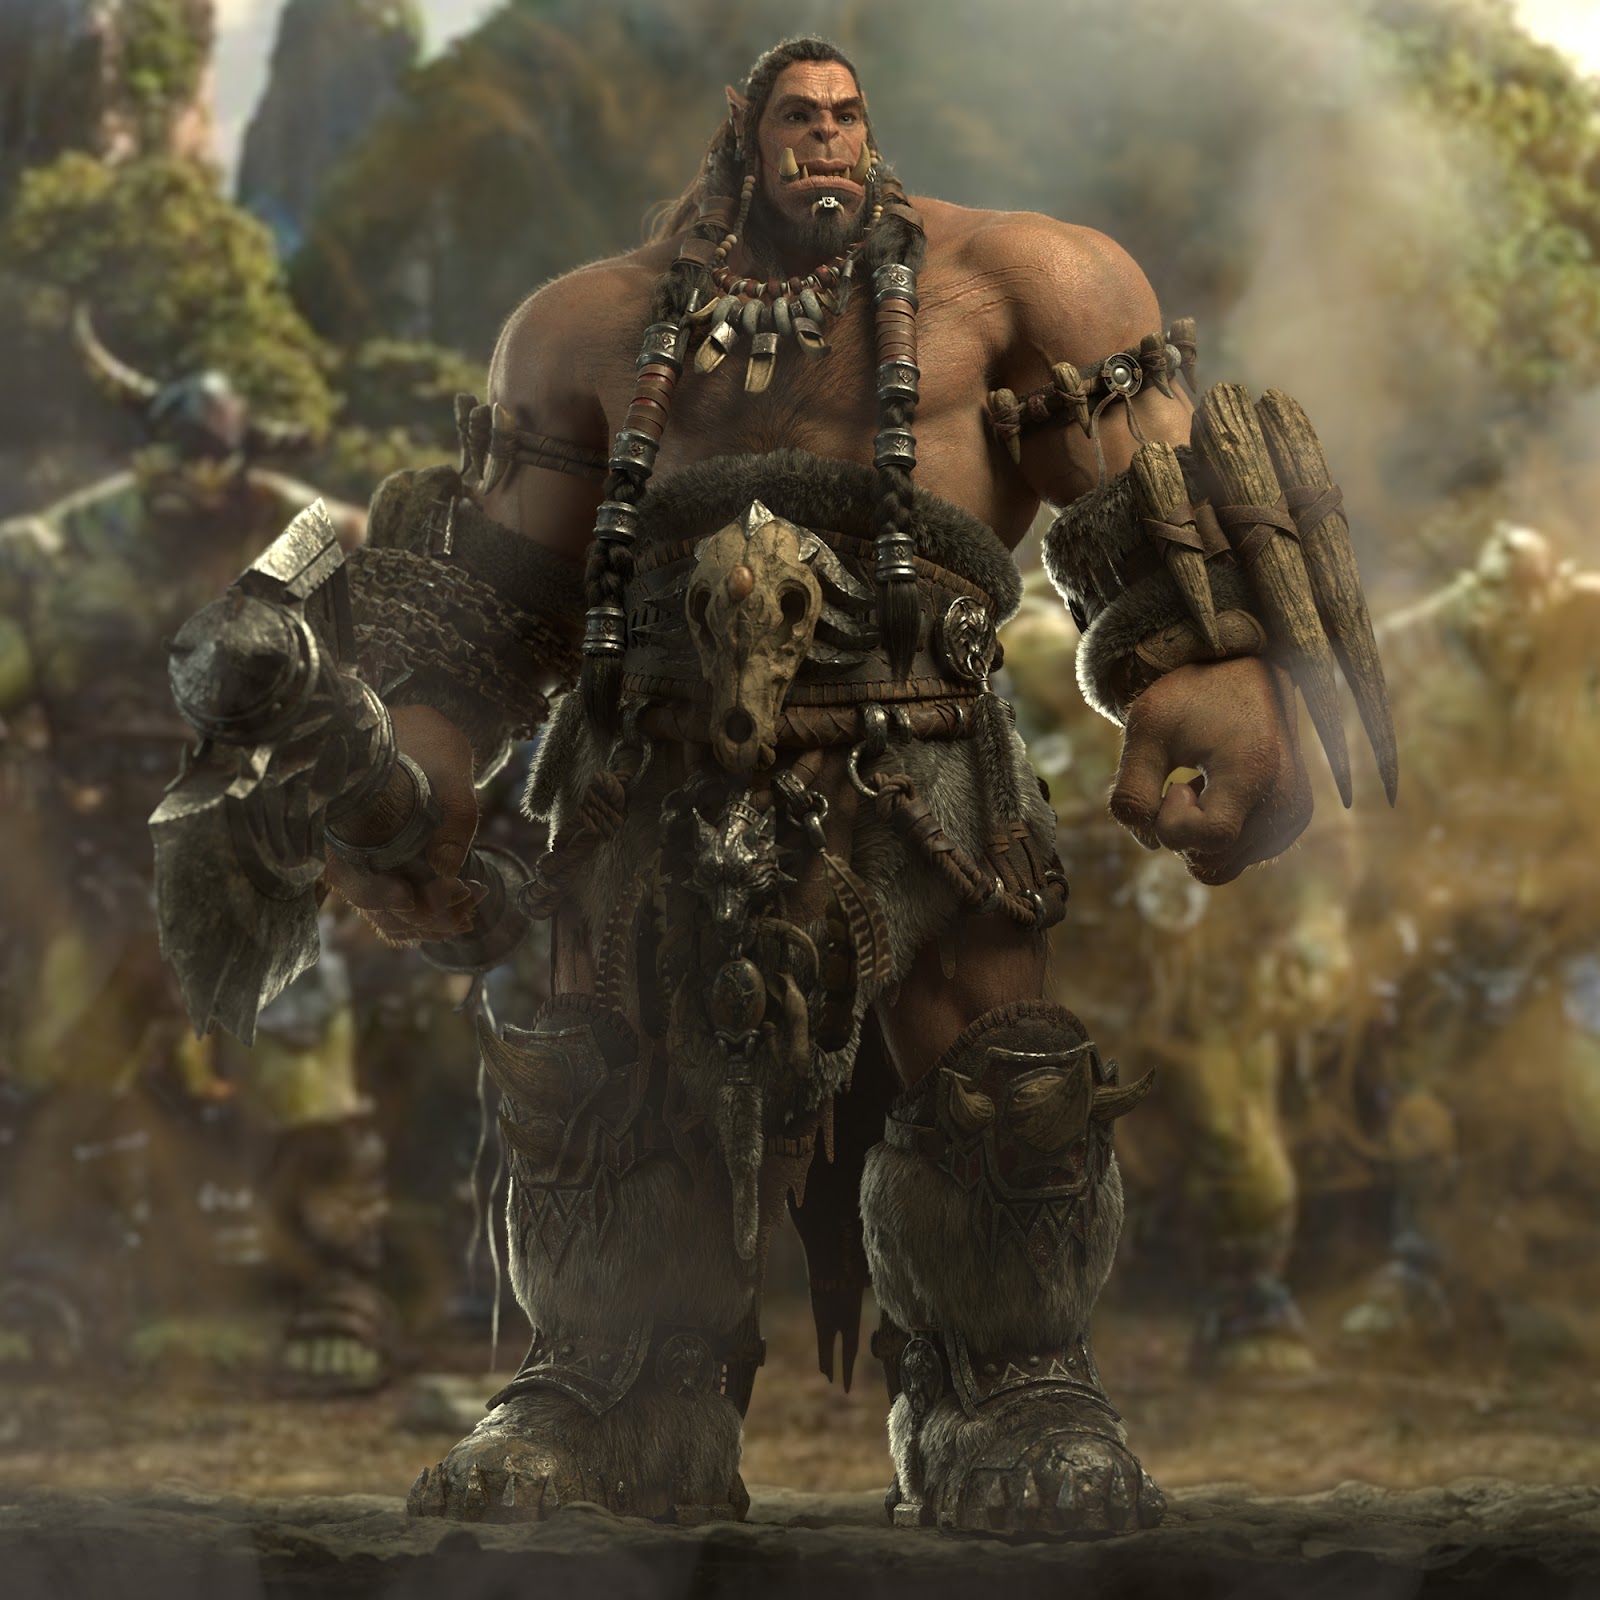
After working on facial features, I started to make Durotan's armour, accessories and weapons.
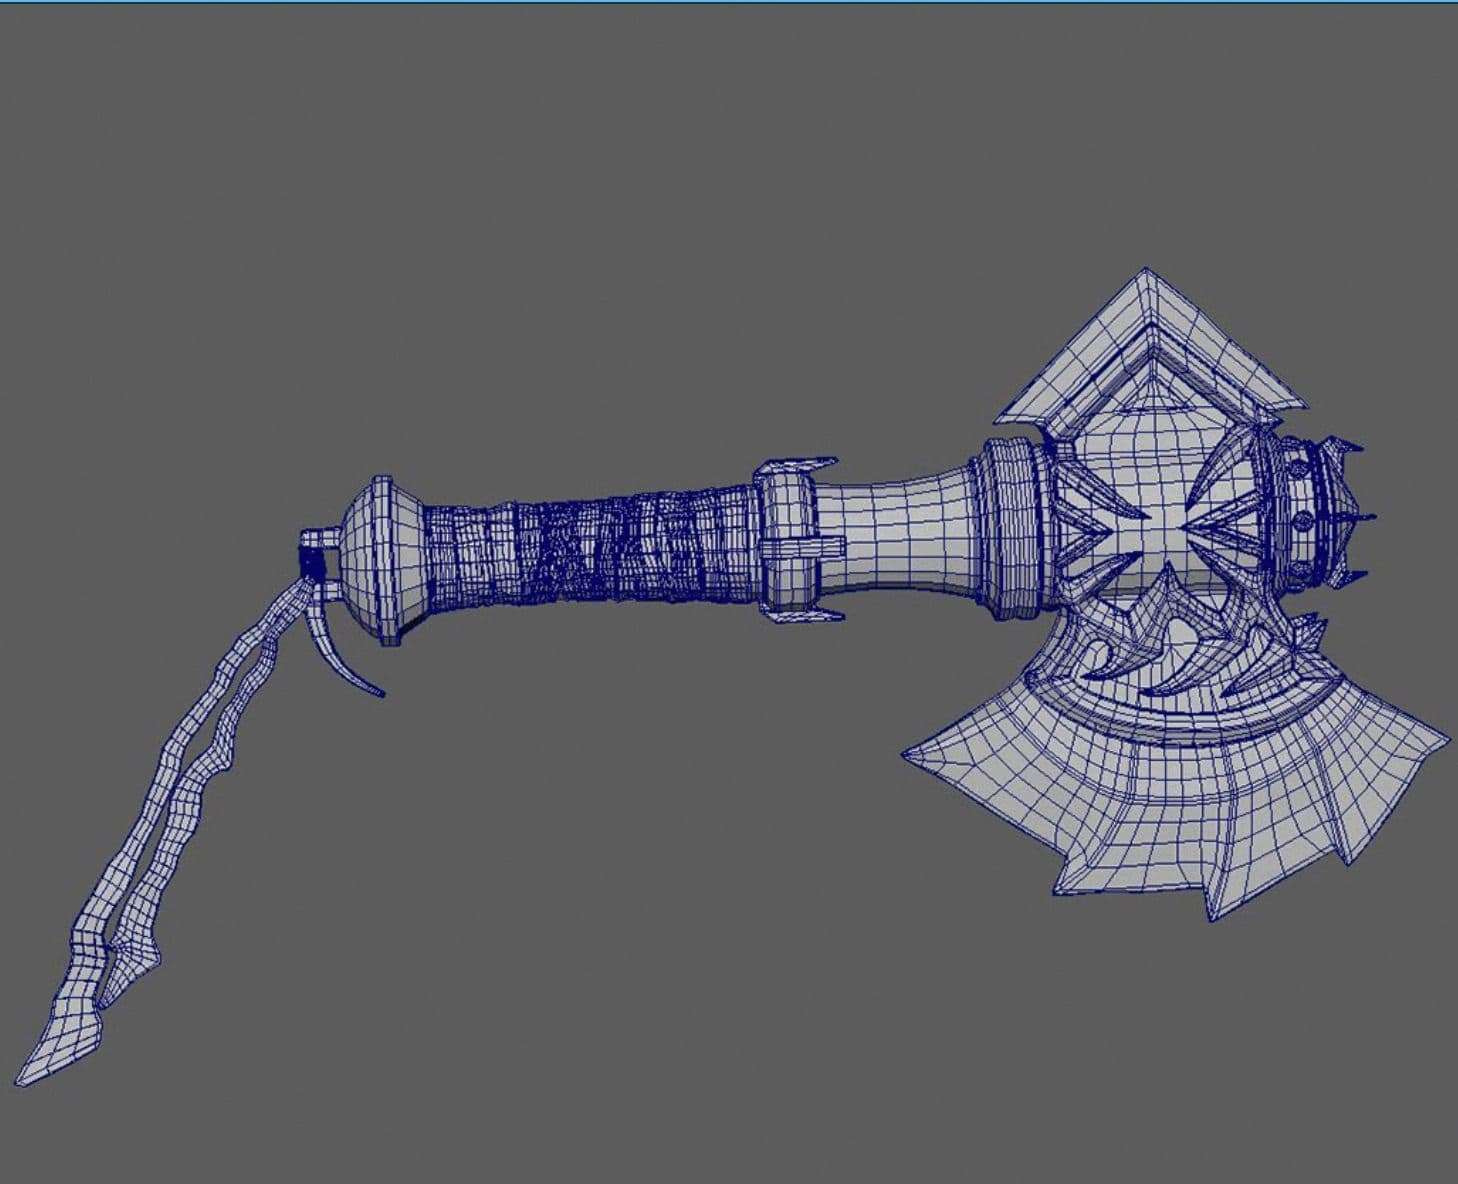
When I modeled the props for Durotan, I used both Maya and ZBrush to work up the various expressions and exact shapes.
I was able to express the warped surfaces of leg armour and belts by using Deform functions in Maya, and then created my own topology in Maya and moved to ZBrush for more detailing. I made the rope by using Quick-Pipe Plug-in and the curve function in Maya. As for details like the chains, I was able to do so by using the curve and Motion path in Maya.
Tip: In the case of ropes and chains, there are actually tied and twisted in real world, but it is more effective to make the objects overlap to look tied and twisted in Maya.
When you export the dismap, the overlapping or sticky parts of the objects are often broken or do not export well.
When this occurs, some people render objects that are separate shaders in Maya after separating objects, and then export dismap in ZBrush. I however, use Nuke to solve these issues.
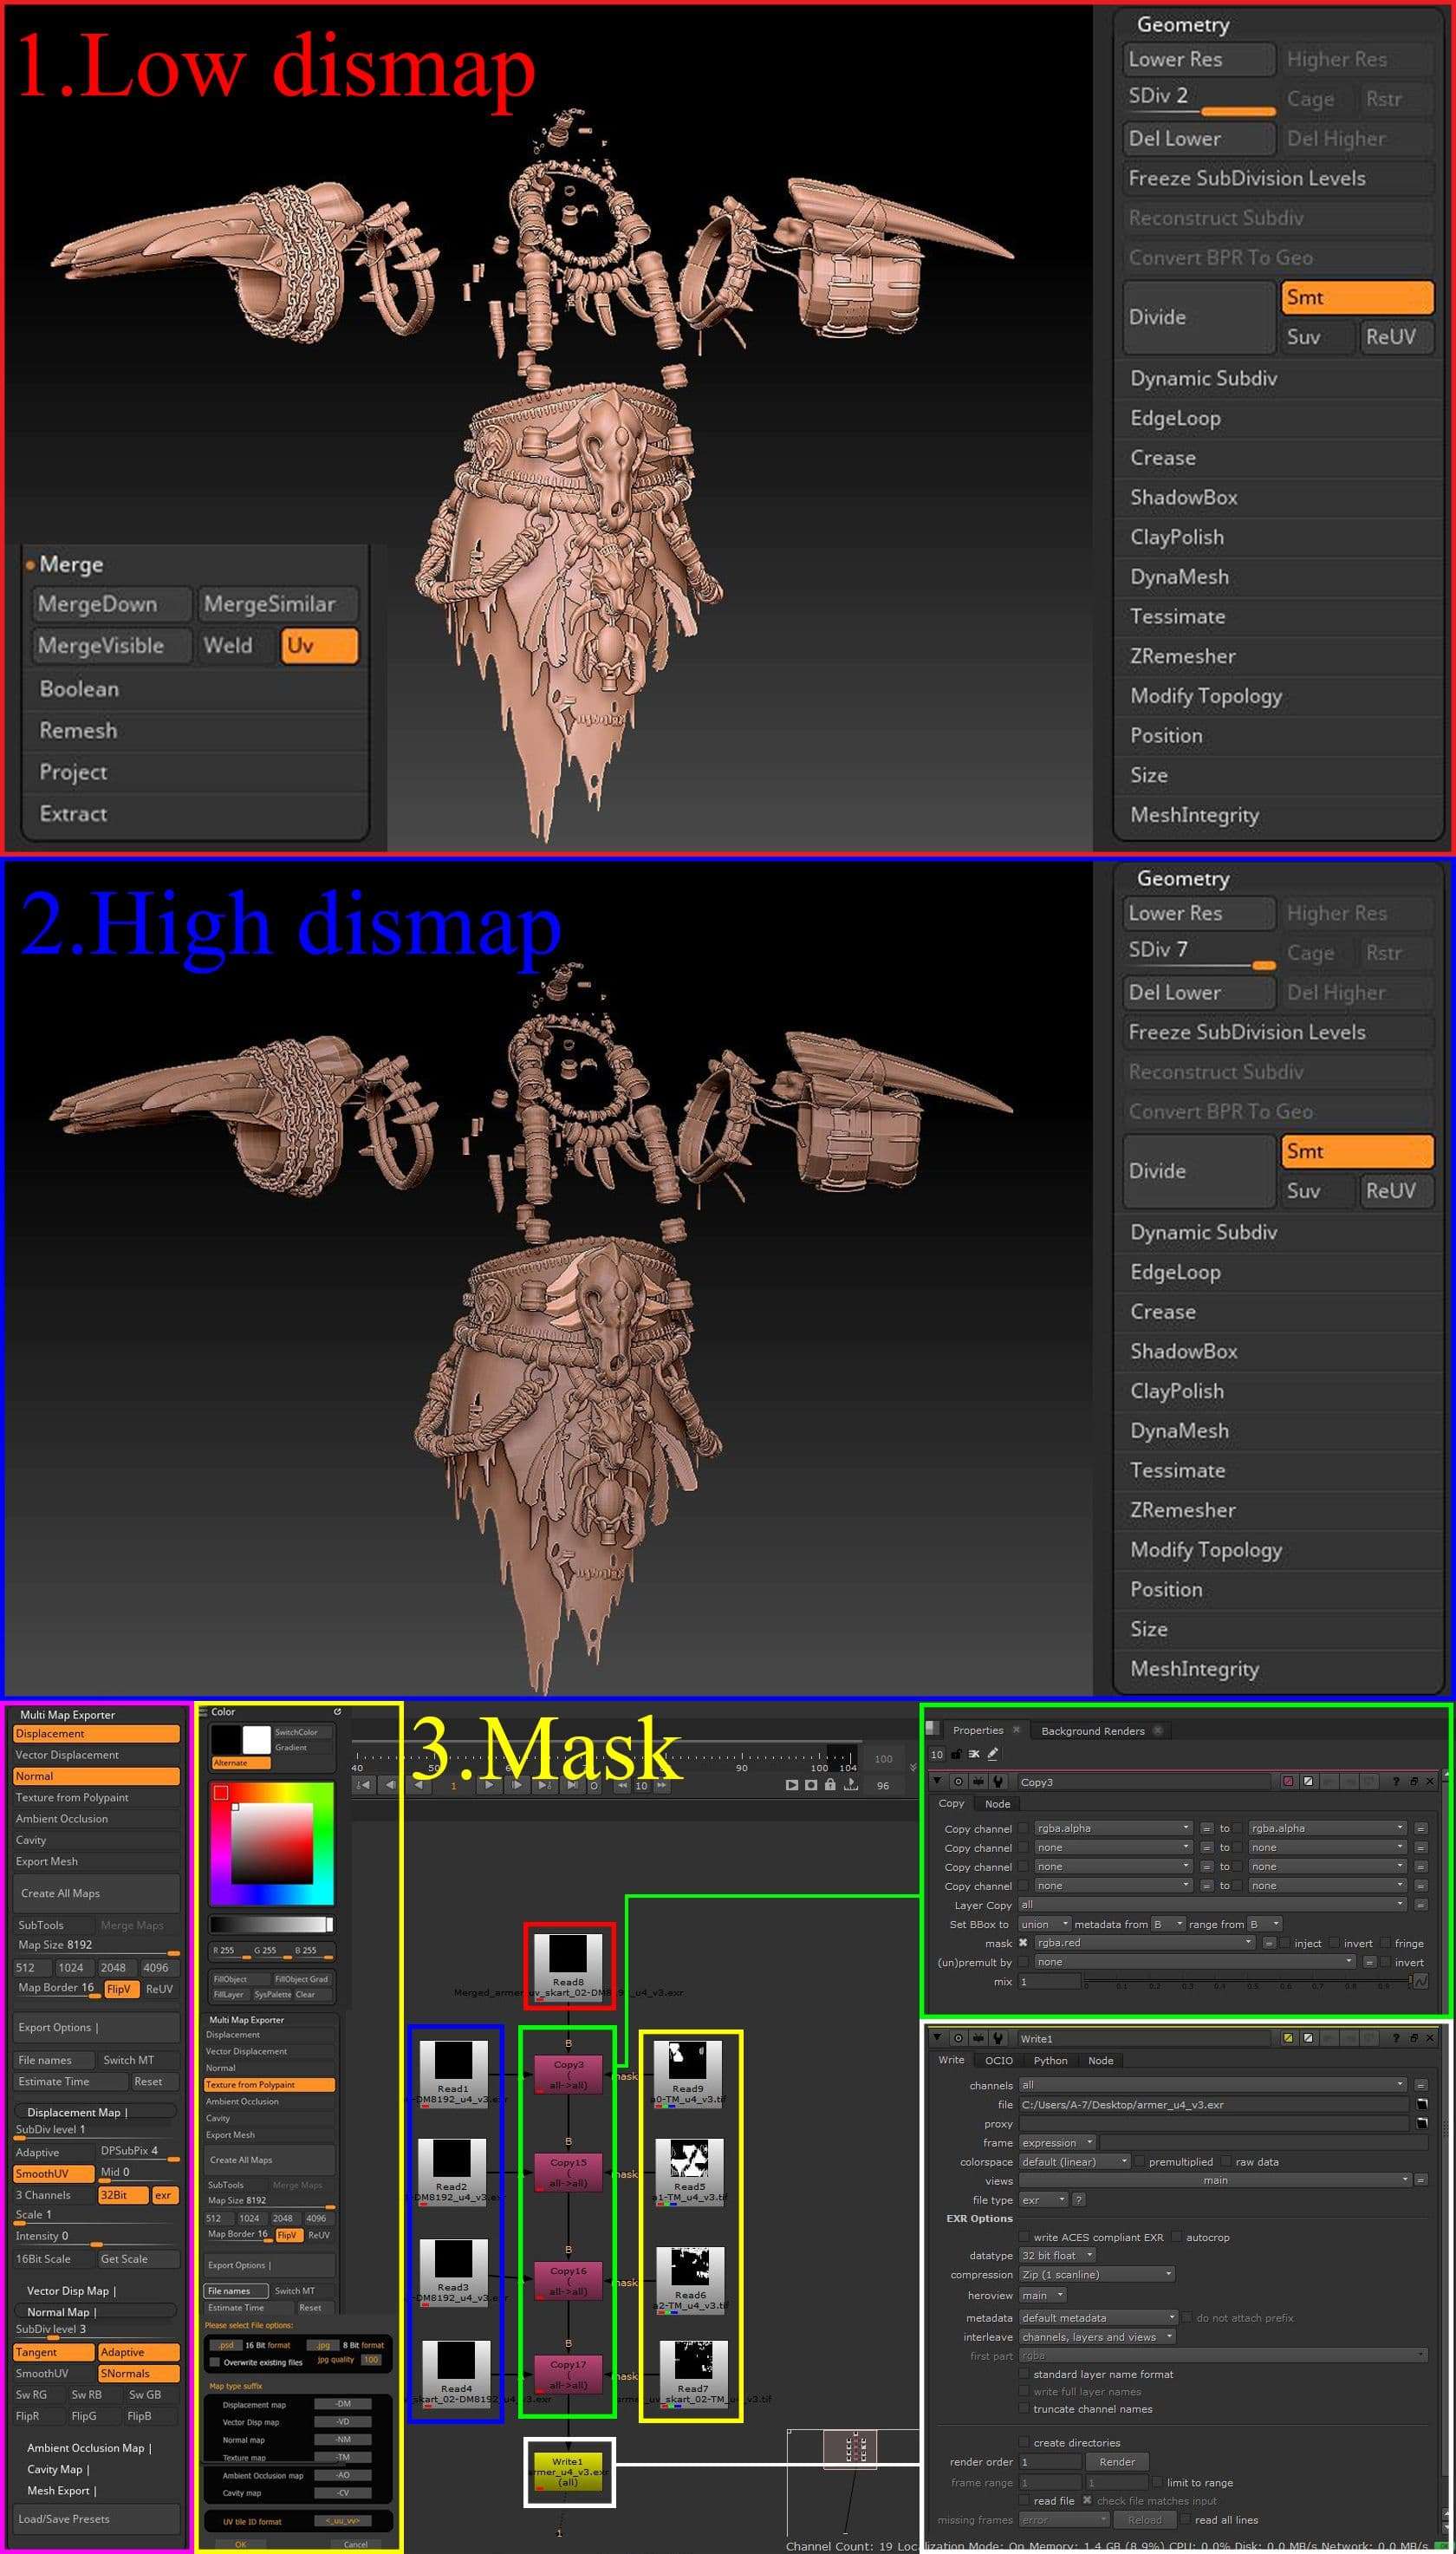
First, I unifiez-d all the prop objects into a first-level divide. Then I merged all of the objects in ZBrush. I raised the division one level up and exported the displacement map. I also exported the dismap and mask of high polygons that were sculpted.
I completely solved the dismap problem by using the mask, low dismap, and high dismaps that were exported from ZBrush using the copy node in Nuke.
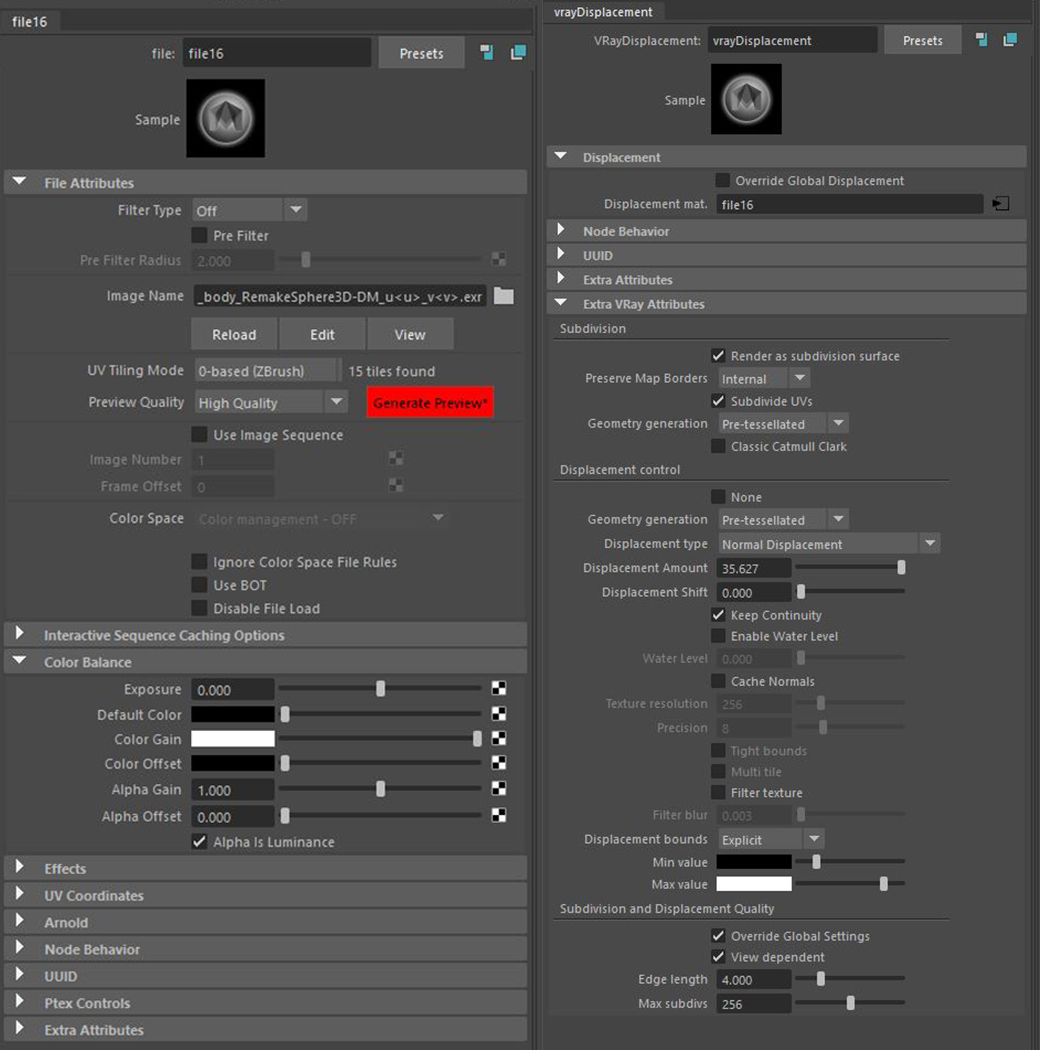
You don't need to share a lot of dismap shaders anymore, and object management becomes very easy. I used V-Ray render and applied a dismap with the same settings as the photo below.
I used the Albedo texture of 50s male_fullface in Mari to paint the diffuse map on Durotan. I used a variety of photo textures to express more detail on Durota, and used the Albedo texture of 50s male_fullface.

For reference, I imported Durotan's dismap to Knald, and I was able to make a lot of maps from Knald like concavity map, convexity map, curvature map, height map, and occlusion map.
I used maps exported from Knald, and was able to paint detail and various expressions using the diffuse map.
When I made various maps such as SSS, Roughness, Reflection, and Specular, I was able to make it easier, faster, and of higher quality by using maps exported from Knald.
I mainly used Substance Painter when I was working on various prop textures such as armour and accessories. Substance Painter makes maps through real-time rendering of various maps such as Roughness, Reflection, and Diffuse.
In my opinion it is more intuitive than Mari, so it can be very efficient for texture work. Also, if you use smart materials from Substance Share, you can express faster and make more high quality.
When I worked with Durotan hair I had a lot of difficulties to express his hair. I asked myself questions like, “How can I make braided hair?”, “How can I express hairs of various shapes?" I had a lot of troubles!
However, I have successfully completed the fur and hair of Orc through a lot of time and effort. Here is my process:
I used the XMD_Hair_Curls&Braids brush in ZBrush to create the braid hair of Durotan, and I expressed the braid hair in polygons on the Durotan head.
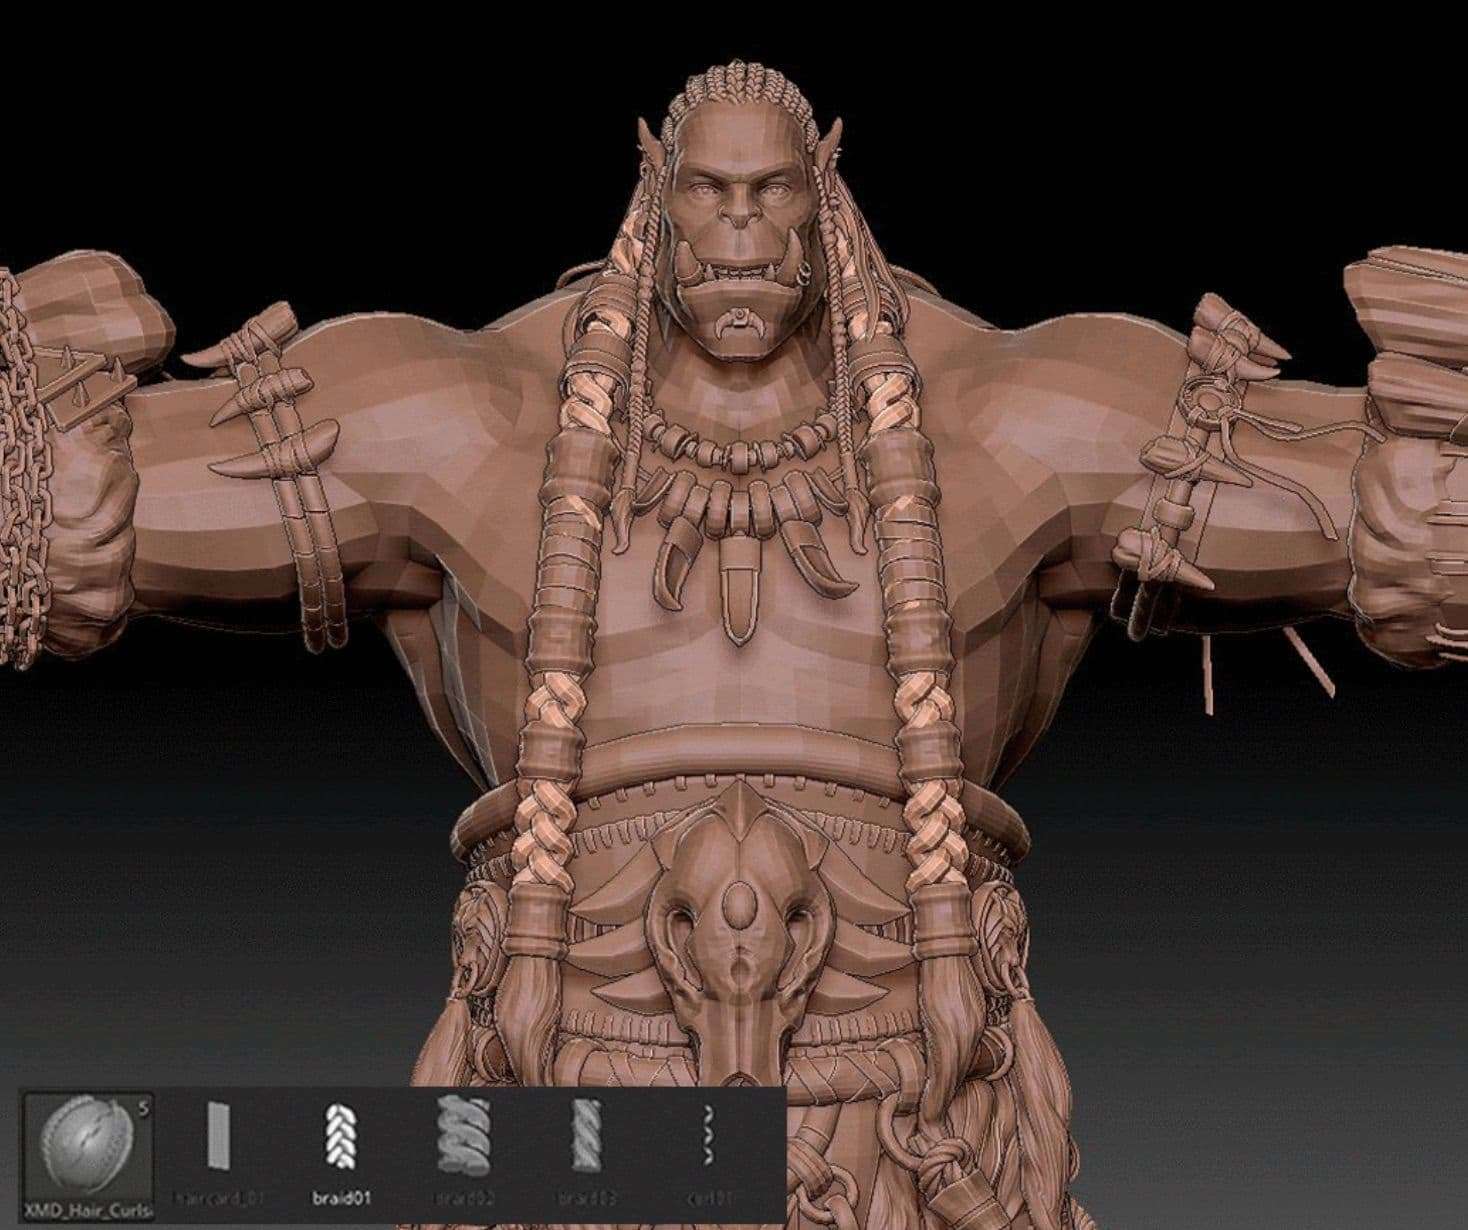
And I could fix the shape of braid hair to some extent using sculpt brush and modify function of the XMD_Hair_Curls&Braids brush in ZBrush.
If you use XMD_Hair_Curls&Braids brush, you can have a good effect in Maya for your work because the topology of polygon made by XMD_Hair_Curls&Braids brush is good.
I sent my hair made in ZBrush to Maya and I modified it more with Maya sculpting Tool and Soft select. For reference, if you work with BlendShare enabled, you can restore your work when you make a mistake, you can freely adjust the parts expressed sculpted.
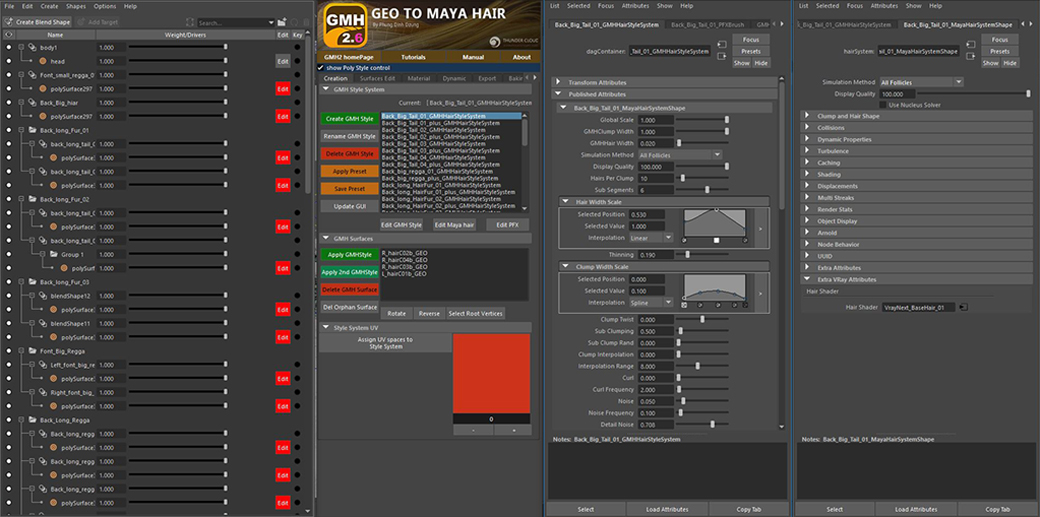
After that, I used a Maya plug-in called 'GMH2' to make polygons into hair, I used two or more layers in one polygon to express various patterns of hair.
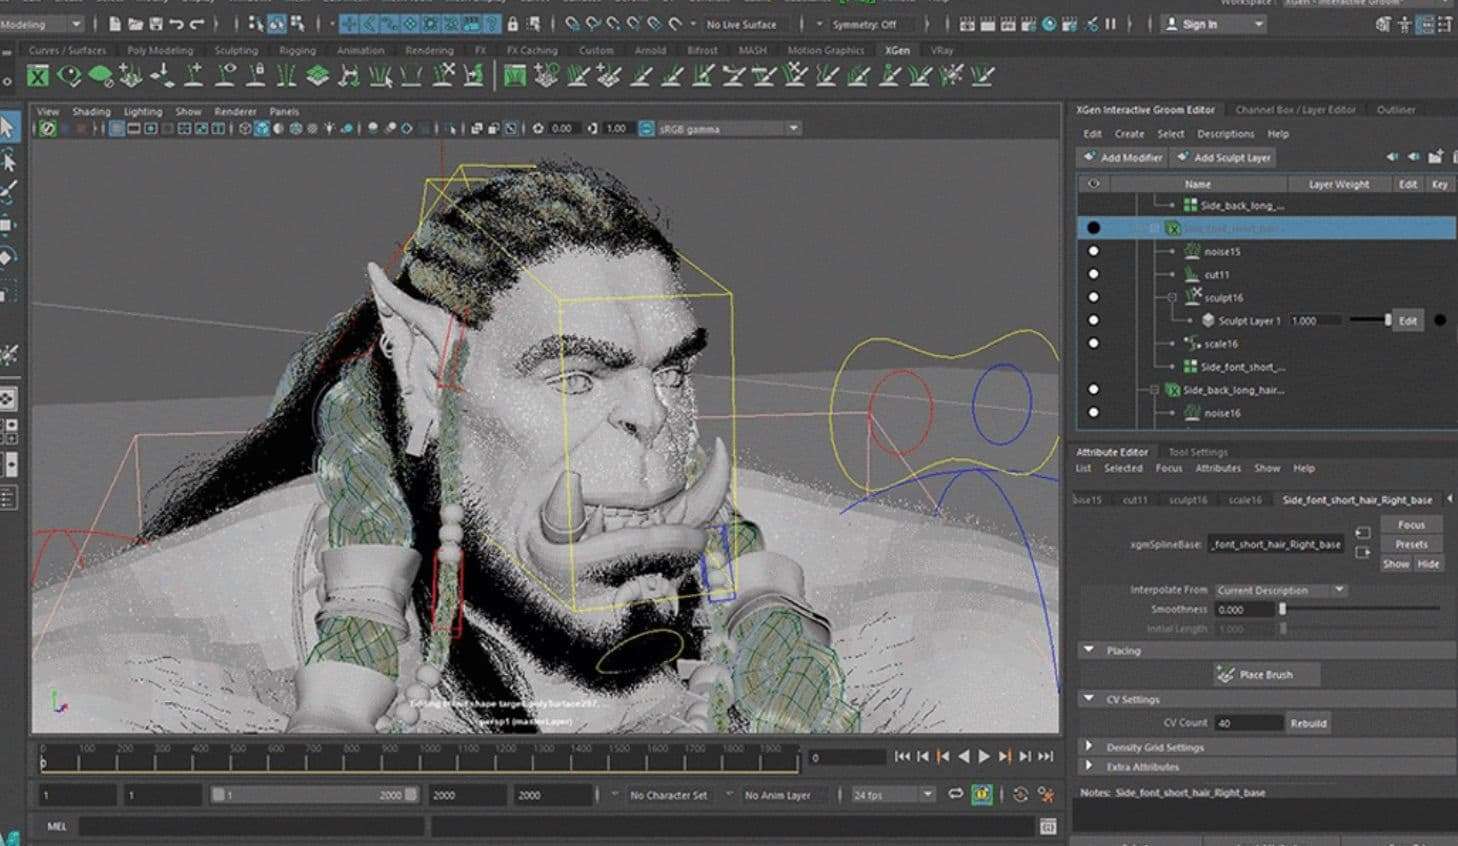
I used xgen interactive to make more hair and I made nose hair, fluffy hair, beard, eyebrows, and props fur and other things.
I used xgen interactive on the already braid hair expressed by 'GMH2' to make short hair and I expressed Durotan hair more reality.
I used several layers in xgen interactive to make the other hair parts look more diverse patterns, like when I made braided hair. I expressed the fur on the props to make it look natural, the same way.
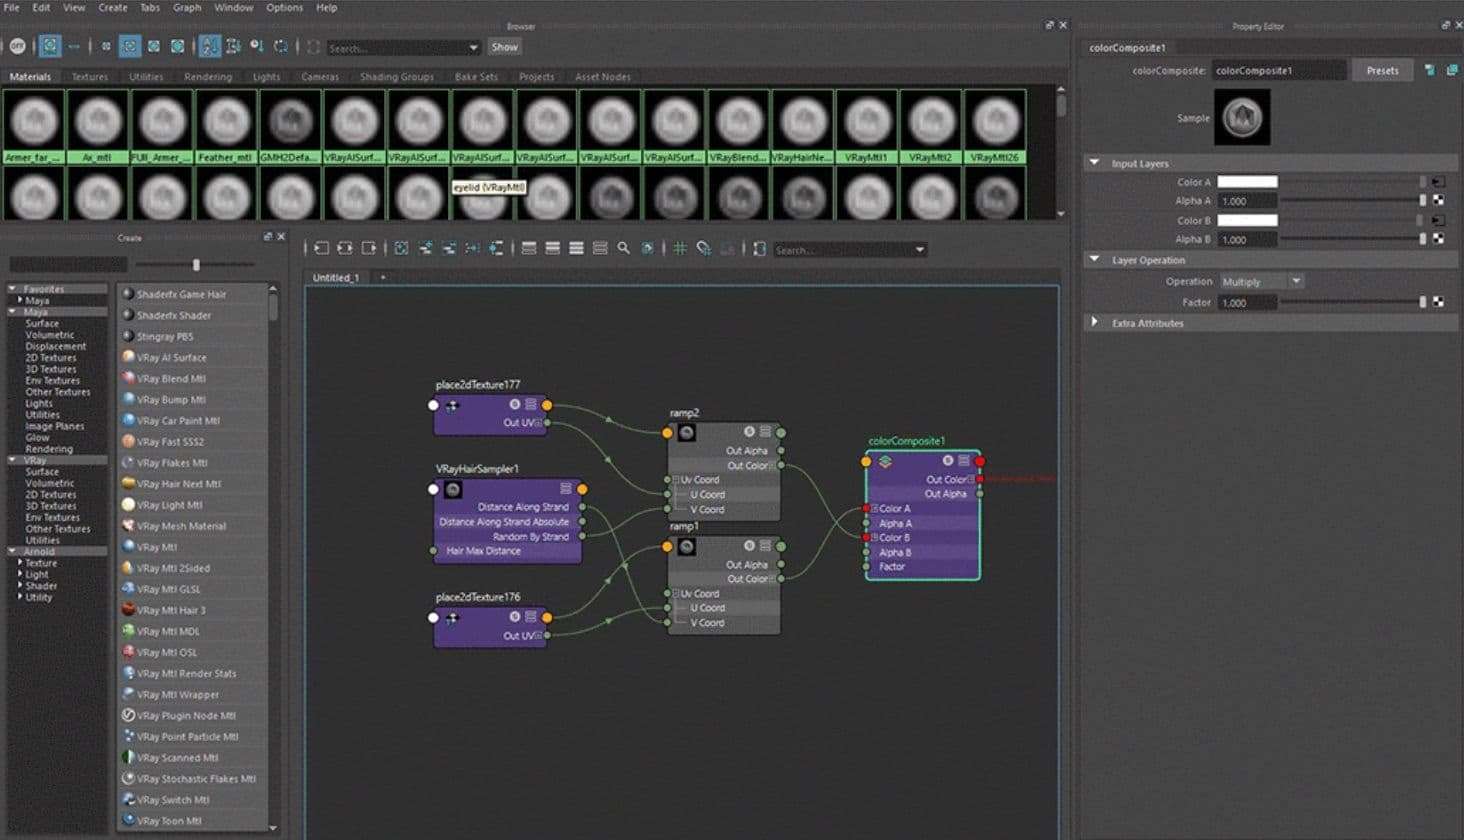
I used Vray hair Next to express the colour, texture and material of Durotan hair.
I wanted to express the fur on props more naturally, so I made the dirt of props using the same way as above pictures to express the dirt of props's fur.
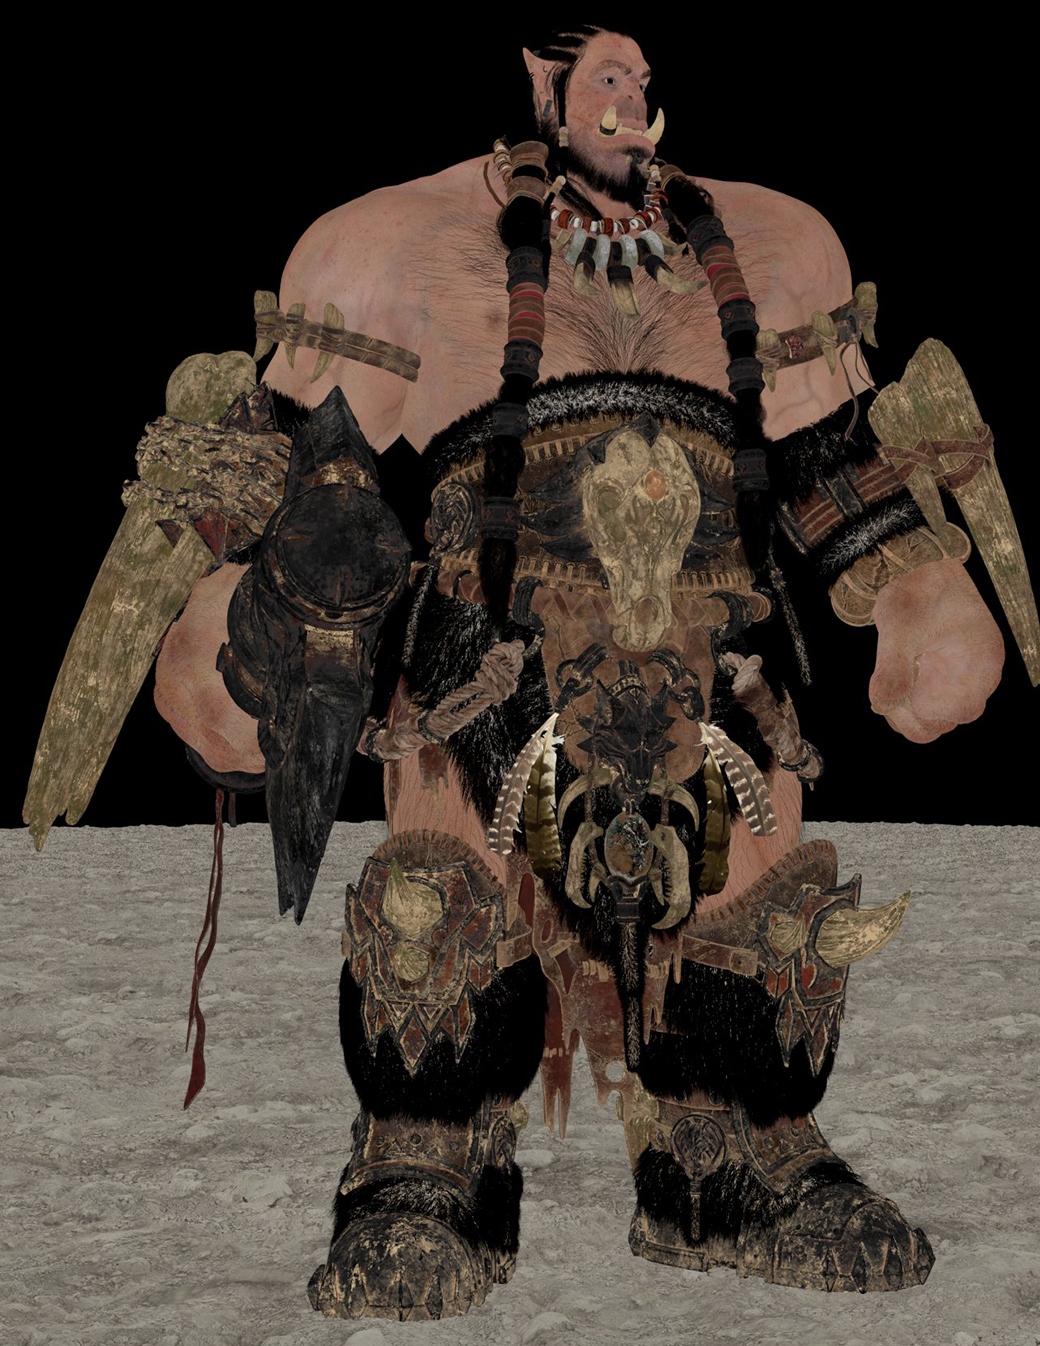
I used Vray Next and used three-point lighting to make the character stand out more. Here are the final renders below!
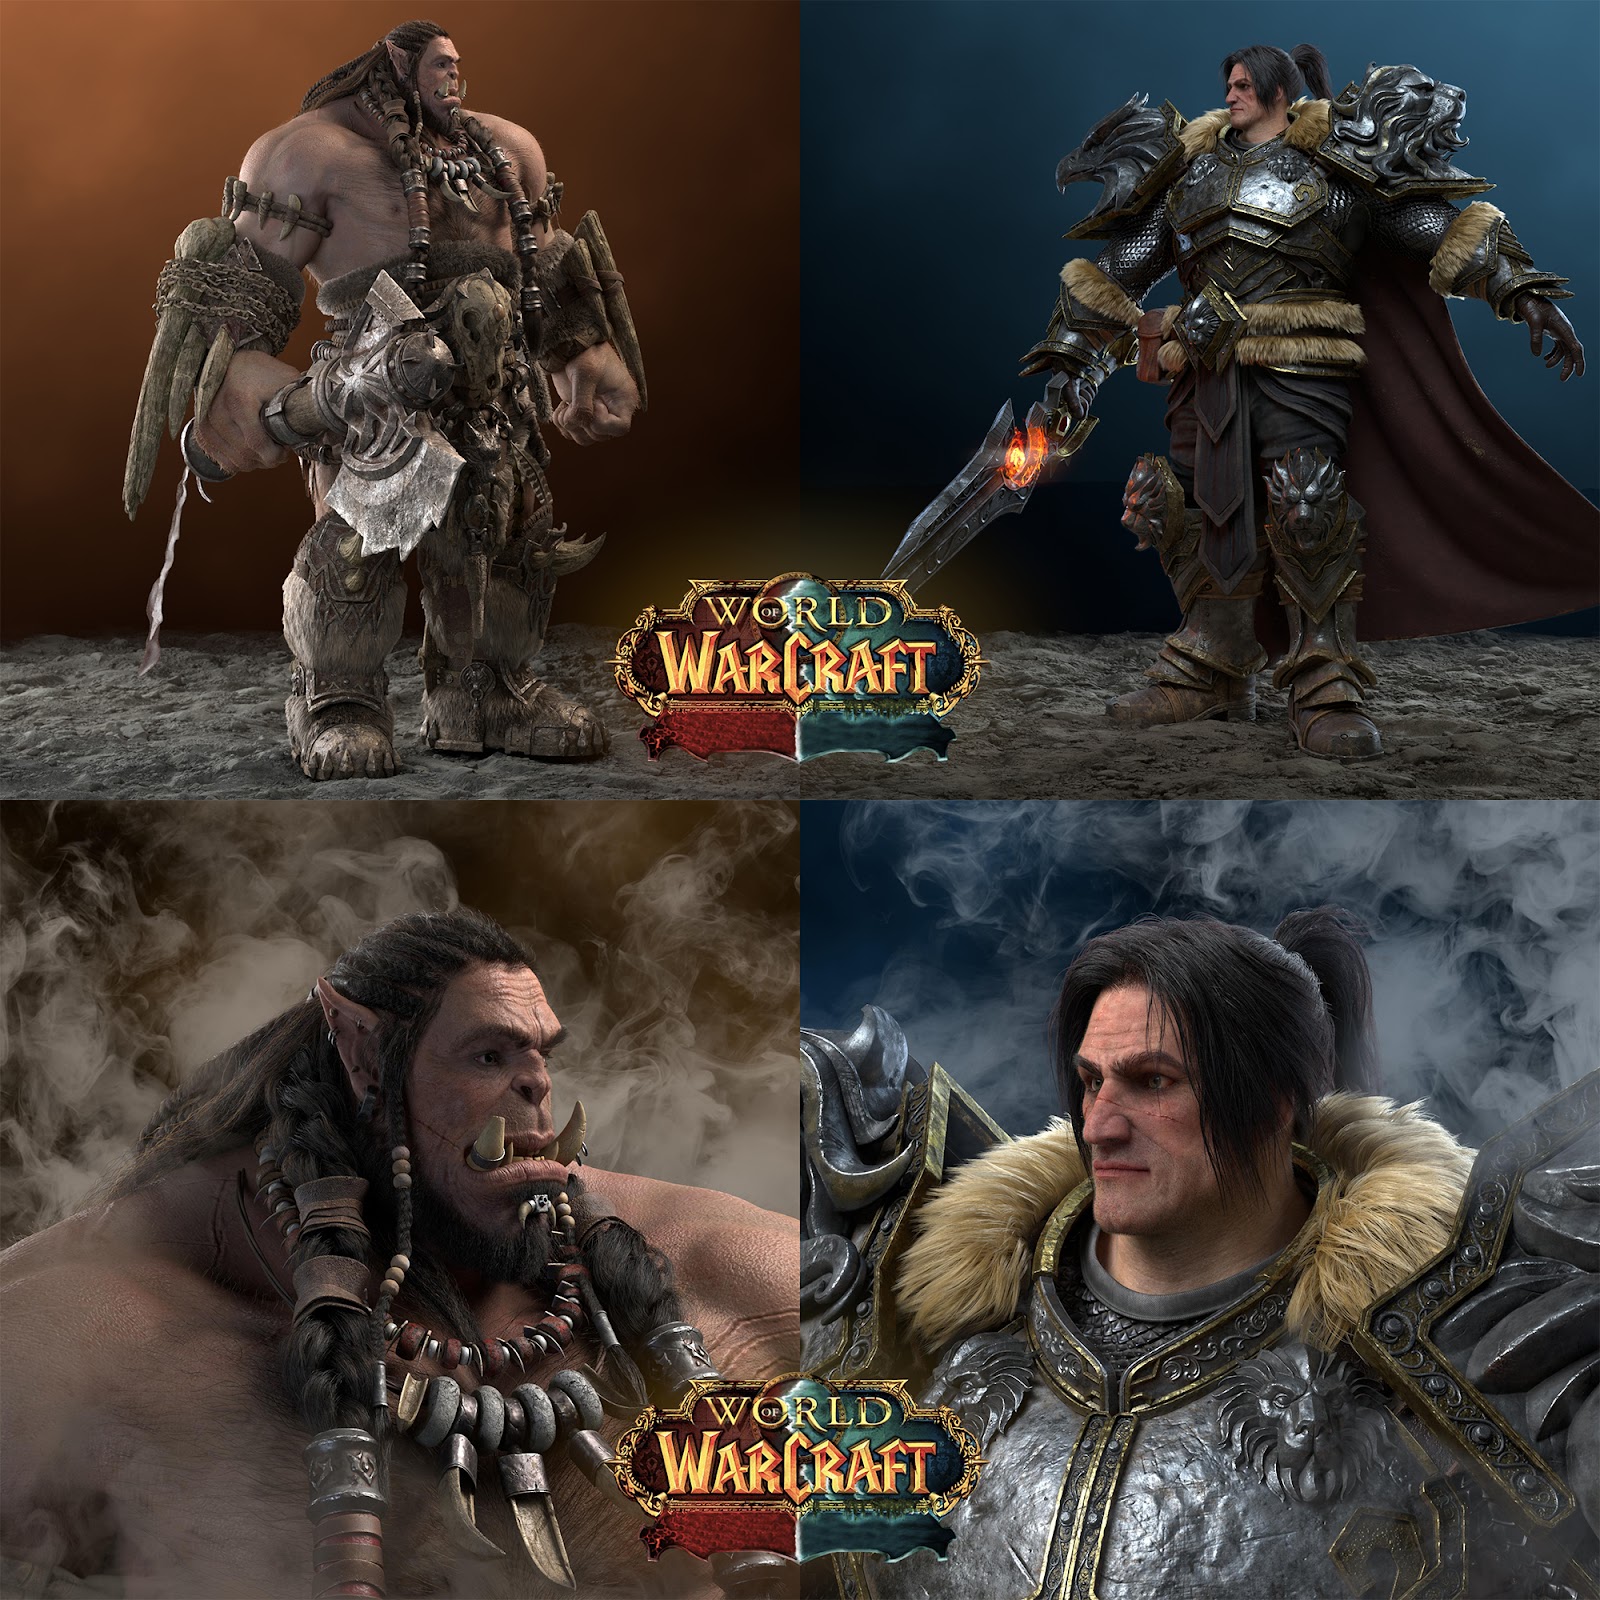
Thank you for reading my article and I hope it helped you. I still have a lot to learn about 3D, but I am doing my best. Stay tuned for part 2 as I take you through my process for creating another iconic character, Varian Wrynn.
I am looking forward to become a great artist someday. Lastlu, I really thank The Rookies for giving me this opportunity and thanks to the SF Film School, for helping with my portfolio.
If you want to know detail about me, you can find me on here, here, here, here and here.