Sparking Camp Nostalgia: UE4 Scene Production Breakdown
In this article Nicolette Battad, an aspiring game environment artist currently studying at Think Tank Training Centre, describes in detail how she created a nostalgic camp scene in Unreal Engine 4.
Nicolette Battad is an aspiring game environment artist currently studying at Think Tank Training Centre. She is also an illustrator and automotive engineer who’s working to make a career switch to the 3D industry.
In this article Nicolette describes in detail how she created a nostalgic camp scene in Unreal Engine 4.
Introduction
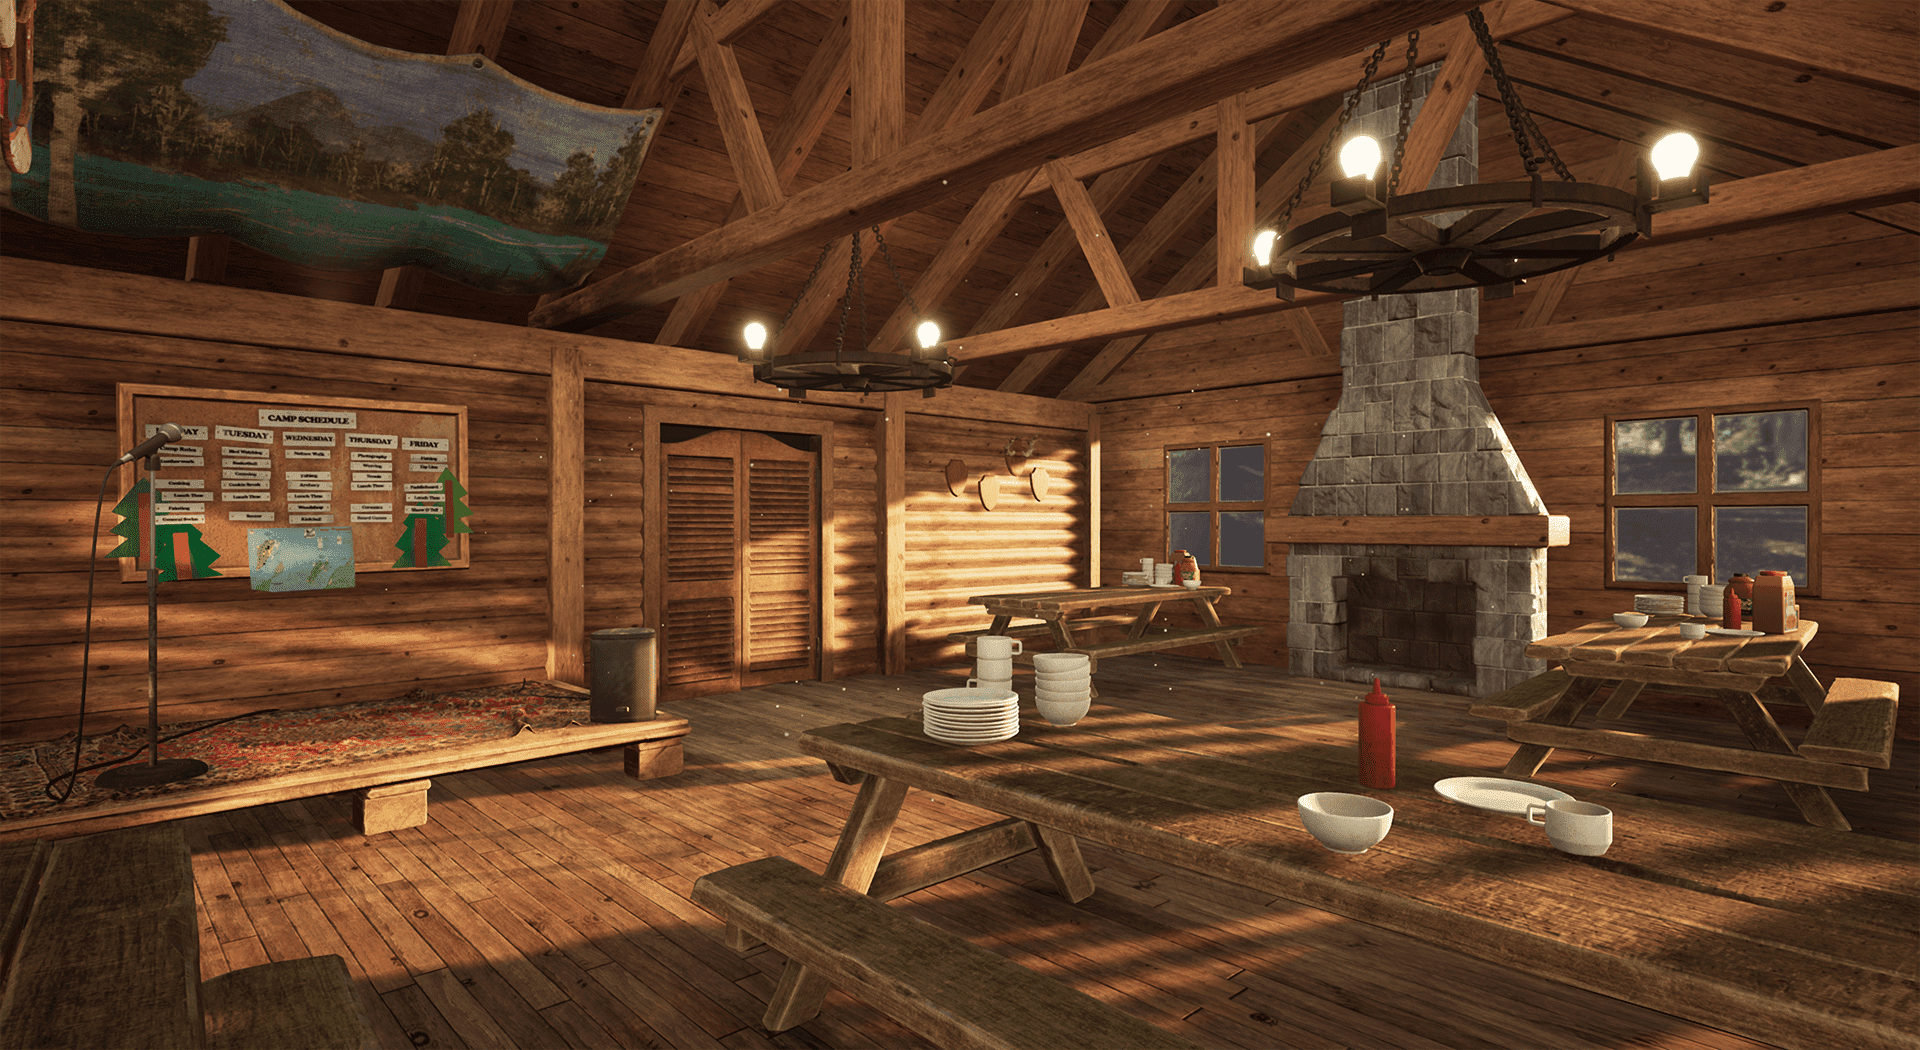
For my Advanced Term project at Think Tank Training Centre, I decided to create a scene aimed to invoke nostalgia and feeling. It’s one thing to make great looking art, but a successful scene should consider a viewer’s emotions and command a response.
Early on, I asked myself what emotion I wanted to capture and I landed on nostalgia and youthfulness, thus I chose to tackle a summer camp dining hall.
I knew I’d be working on this scene for several hours a day, so it was also important to choose a reference I was passionate about. This is to avoid losing motivation over the 16-weeks allotted to complete the project.
I never went to camp but the process of creating this piece involved chatting with many friends who had that experience and it was an honor to incorporate their stories into my artwork.
Reference Gathering and Scheduling
The next step is reference gathering and choosing a keyshot. I took to browsing many summer camp websites, like a mom ready to enroll her kid, searching for supporting references. Some websites even provided 360 interactive views for the camp facilities, which helped me imagine the size of the cabin main room and how explorable the scene can be.
I ultimately used a photo from Camp Kandalore in Ontario, Canada as my main keyshot. From there, I broke up my references into the sections you see below by dissecting what I saw in the keyshot. I laid out the prop references, material references, and layout support. I also made guides on what kind of trims/how many different types of wood I needed to create.
Remember to actually use your collected references and constantly refer back to it一the less you need to research at a later date, the more efficient you can be in your workflow.
I suggest trying to do the bulk of this work in the beginning. And while it seems like a time intensive chore, it will only get you more excited and inspired.
For the 16 weeks, there were milestones provided by the school to work towards, but ultimately it was up to me to keep track of my progress and priorities. Sixteen weeks for a Rookie can certainly fly by.
While PureRef is recommended by many for its simple UI, I took to Miro for more flexibility and additional features. I used an agile template for my progress chart and this was my main source for breaking up tasks and tracking completion. Each row in the chart represents a main step in the pipeline. Even though this progress chart seems rigid, I was constantly shifting things around while keeping in mind the entire creative process is iterative.
The last section of this Miro board was for submission tracking for school. My supervisor had a link to this board and I was able to leave screenshots of my project status and jot down questions. Overall, Miro helped keep everything in one place in a visually digestible way.
Modeling and Modularity
The blockout was started by creating the structure of the log cabin. To push realism here, I referenced a book called “Learn to Timber Frame: Craftsmanship, Simplicity, Timeless Beauty.” This helped me build the modular pieces based on real timber framing methods as I had access to the drawing plans and was able to understand the joints of the beams. Here’s an exploded view to visualize the timbers in the frame.
This was a good place to introduce modularity and to create a kit for the cabin. I broke up the structure into bays to be assembled in a UE4 blueprint, which could then be copied and snapped to make the structure as long as I saw fit. The walls and windows were made to fit the bays but, nonetheless, still functioned modularly.
After the main structure blockout was complete, I began blocking out the props from biggest to smallest while always checking it in engine. This is to ensure the mesh size and shape language read correctly and can help you decide if features need to be exaggerated.
Creating Unique Props
I quite enjoy the prop creation pipeline and wanted it to be a large focus of this project. Breathing life into a space with the support of props is essential. It’s not to say you need to clutter up your scene with everything you’d expect to see in the room, but to be intentional about what props make it in there. I used the standard methods for prop creation by:
Low poly in Maya: To create my low polys from the high, I mostly took the route of deleting edge loops instead of retopo-ing. This was mostly since my props were non-organic. The only props I retopo’d by hand were the bear statue and wood planks for the table and stage.
UV’s: I created prop atlases by grouping props by category (all cart props, stage props, wall props). Each of these props were at a texel density of 5.12 px/cm on a 2k texture. Below is one of low poly prop sets along with the UV’s on the right hand side.
5. Baking in Marmoset: From Maya, I exported all the high poly assets from the prop group into propGroup1_high.fbx and the same for the low poly propGroup1_low.fbx. On import of these (2) files into Marmoset, it will automatically recognise the individual assets that live in the .fbx files and break up the high and low poly geo on its own. I used the standard process of baking my maps out and adjusting the cage as necessary.
6. Time for texturing!
Texturing in Substance Painter
Upon opening a new file, here are the things I usually to do:
Since I was coming from baking in Marmoset, I use OpenGL on import and use Direct X for exporting into UE4. This is to keep normal direction consistent.
Import the ACES UE4 LUT created by Brian Leleux. This LUT will update your Painter viewport to better match how your assets will look in engine and you’ll see a bump in contrast.
Knowing I’d be using opacity for one of the props in a set, I set these options before texturing in Substance (changing the shader type to pbr-with-alpha-test and adding an opacity channel). Changing the shader type allows you to view the opacity in the viewport
Effects of ACES LUT in Substance PainterOpacity Settings
I brought in a set of props at a time to texture (all the props that lived on the same atlas sheet) so I can texture simultaneously. I found this helpful in maintaining the style and cohesiveness of the prop sets. I started each prop ‘as new’ and incrementally added wear and damage. Here’s an example using the corkboard and the food cart.
For adding grunge and wear, I heavily used mask layering with blend modes so I could build off of existing smart masks and also create my own using the mask editor. I also took advantage of the anchor point tool, which allows for referencing masks across different props and layers (thanks to Jay Cummings’ tutorial on Artstation Learning).
For props that required text, I created a simple alpha (shown below on the left) in Photoshop and followed the steps below to project the text onto the asset.
Lastly, don’t forget to save out your materials that can be reused for later assets or other future scenes. Since I had multiple wood props, I created these two wood materials and saved them out as Smart Materials.
Staging the Props
While working through the texturing process, I was keeping an updated Marmoset scene to stage all the props. I tried to pretend I was creating a set of props for Dekogon while referencing Artstation for how their prop packs are presented. Here are some benefits of doing this:
Having a second set of eyes on the textures, making sure they read correctly outside the engine under different HDRI presets available in Marmoset.
Checking style consistency and how the props function together as a kit.
Gives you a head start on preparing the final renders for the scene.
You can also export a scene into a Marmoset Viewer file, which is supported on Artstation and allows a viewer to see a 360 degree view. There will also be an option to view layers, revealing an overlay of your textures and topology.
Creating Hero Props
The table was considered one of the hero props for the scene. I started by creating base geometry in Maya and importing it into Zbrush. From there, I sculpted large form edge wear and used the decimation master to create a usable mesh for retopo in Maya. There were only 2 variations of the planks, since I was able to rotate/ flip them for reusability in the final table assembly. In Marmoset, I baked the table top planks away from the frame since I didn’t want any AO baked on the planks. Below shows the distance they were baked in Marmoset and the AO results.
Marmoset Viewport for Baking TableTable AO
The rest of the texturing process is standard as mentioned above, using the smart materials I created and saved out. All variations of the table were assembled in UE4 using the blueprint editor.
Creating Wood Textures
My scene was completely filled with wood, therefore I needed to create wood materials with flexibility for variation. I started in Substance Designer to create the floor wood, which was then modified to create the other procedural woods used for modular assets. I referenced the techniques in this tutorial to help get me started and simplified the creation into 4 main features:
The grain/ base wood: starting with anisotropic noise and warping.
2. The knots and circular patterns: consisted of directionally warping a striped pattern with a Perlin noise and masking out areas to subtract out information.
3. The Large knots: Created by warping a circular shape and scattering throughout with a splatter node (which can also control the amount and size of the knots). To get the ring effect, I added the pattern shown to a gradient map.
4. The plank pattern: This is the main difference between my floor and wall woods. I created a tile generator for each plank instance (no planks, non-staggered planks for walls, staggered planks for floors), shown in order below, that could easily be swapped in the graph when it’s time to export. With the addition of color variation, these three textures present enough uniqueness even when using the same base wood normal maps.
Initially, I meant to create a trim sheet for my procedural woods, but since the beams were the only asset that would benefit from it, I opted to keep the three as separate texture sets. This way, I could have enough variability on the large floor and wall faces without much tiling.
Knowing vertex painting would be necessary for added variation in engine, I created an alpha in Substance Designer to be used as the “brush” shape. This alpha was exported into the alpha channel of the Pak map.
The master material for the vertex paint was pretty straightforward. There are controls for lightening or darkening the wood, tinting the wood, and roughness. For each of these options, I had a switch for being able to choose what drove the height in the lerp node: the actual height map or the grunge alpha in the Pak map.
Lighting & Post Effects
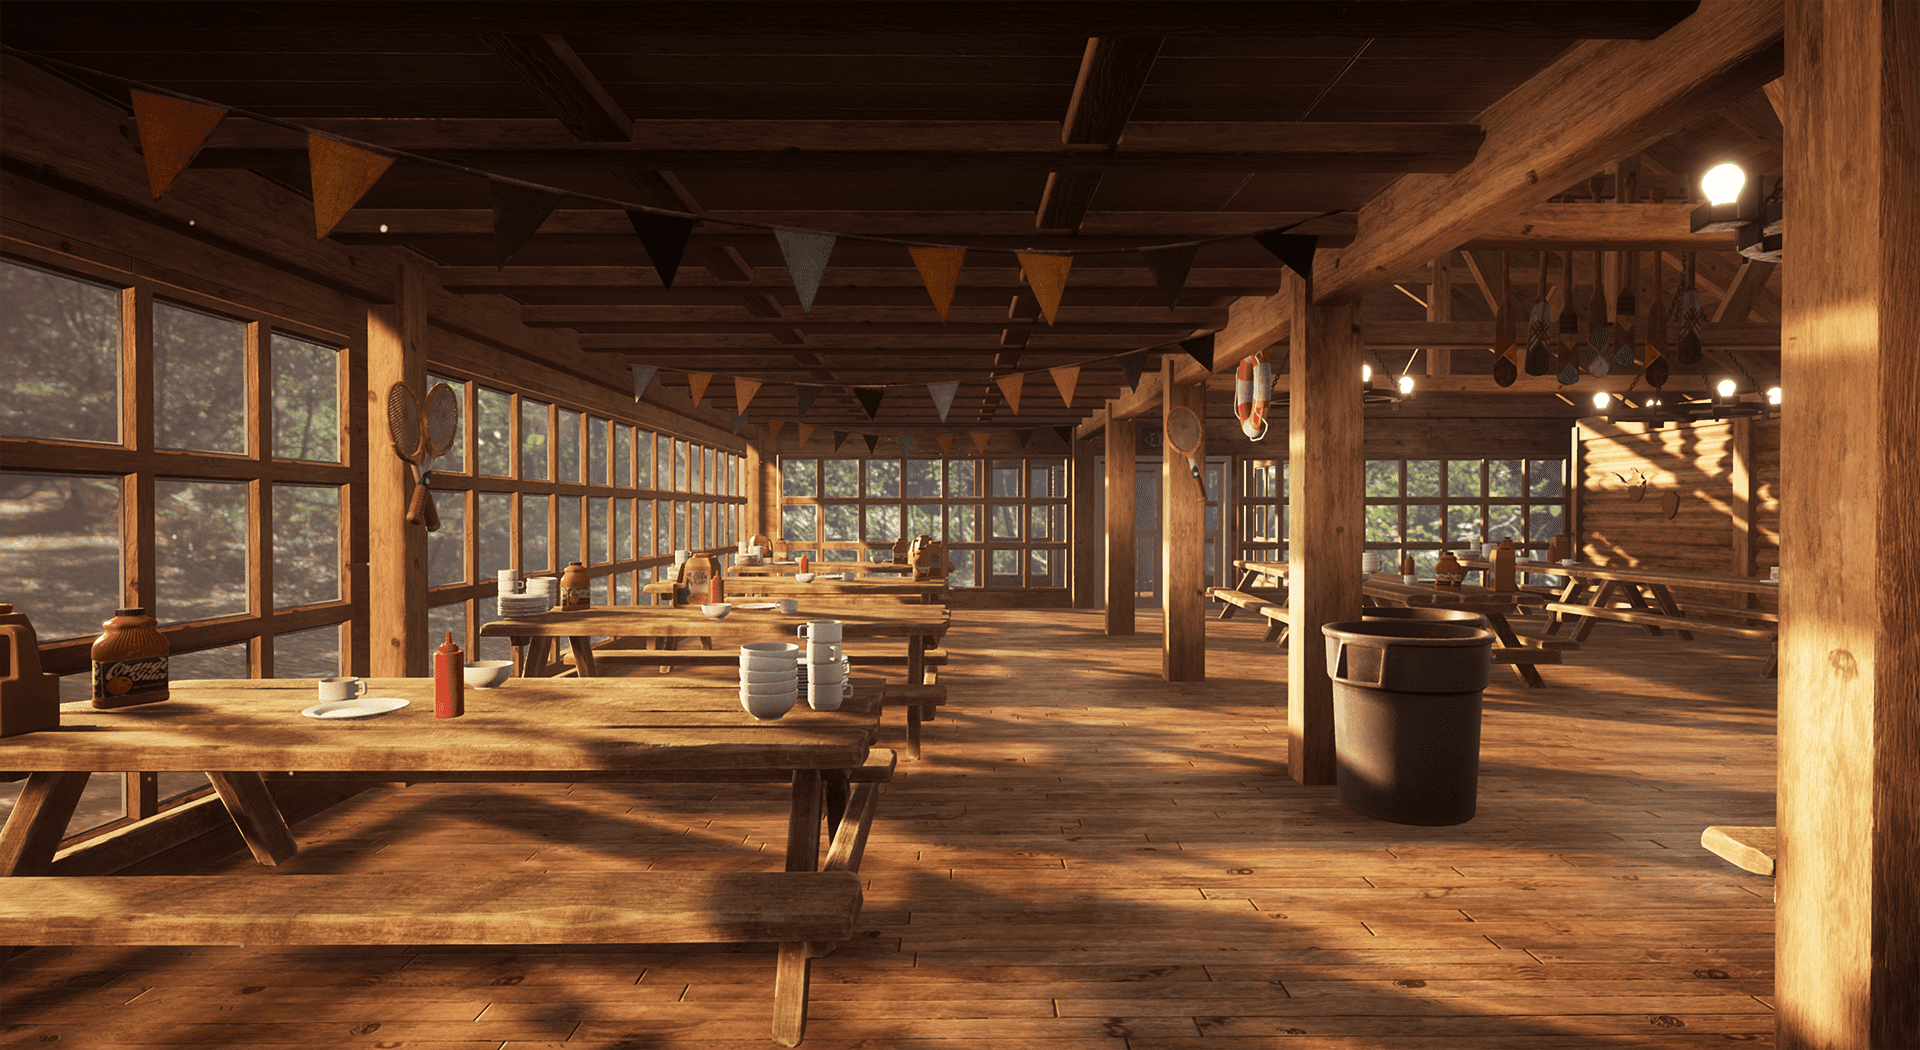
Lighting was a key element in elevating the scene to fit the nostalgic mood - I wanted to incorporate haze and bloom to represent morning time and a peacefulness before the kids rushed in for breakfast.
I opted to keep the lighting dynamic since baked lighting was a topic I planned to learn for my next project’s scene. For the majority of the project span, I used a lighting setup done specifically for my original keyshot. This was simply a directional light and a skylight. To fill the exterior of the cabin, I used the HDRI Backdrop plug-in with a bright, woodsy image from HDRI Haven.
For a more realistic tint of lighting, I suggest using the light temperature option in the directional lights instead of choosing a light color with the color picker.
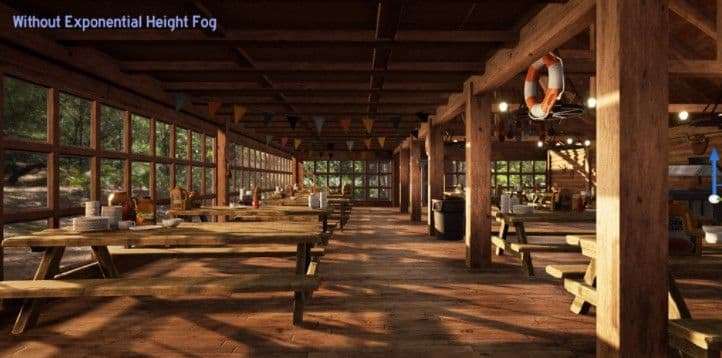
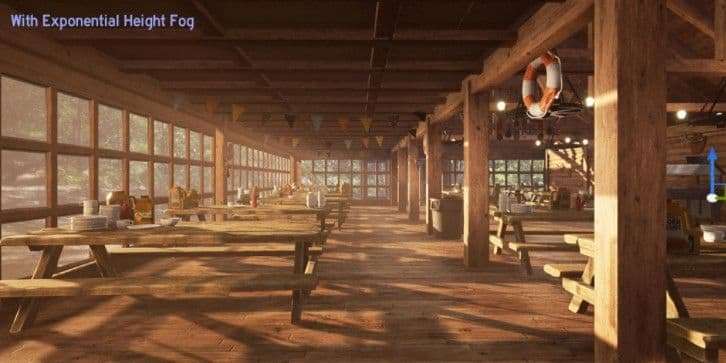
The addition of exponential height fog was the touch I needed to simulate the morning haze and soft god rays from the wall of windows.
I had several other keyshots that I wanted to include in the final renders, so for ease of access, I saved each view in a numerical slot. To do this, fly to the view you’d like to save and select Ctrl + the number you’d like to save the view to (now when you select that number on the keyboard, it will jump to your saved camera shot).
After realizing that each additional keyshot would benefit from its own unique lighting setup, I used layers to save the different setups. Each “Lights” layer contained the directional light and any other rect or spot lights used for that particular keyshot. As long as all the light actors are visible in the World Outliner, it’s easy to toggle the setups as needed. This also helps minimize confusion and clutter as the number of lights in the Outliner grows.
It’s important to remember to go into the Skylight > Recapture Scene for each lighting setup to make sure the sky light is up to date.
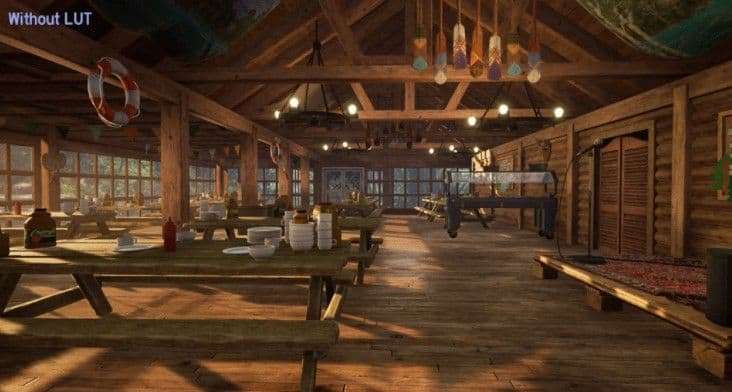
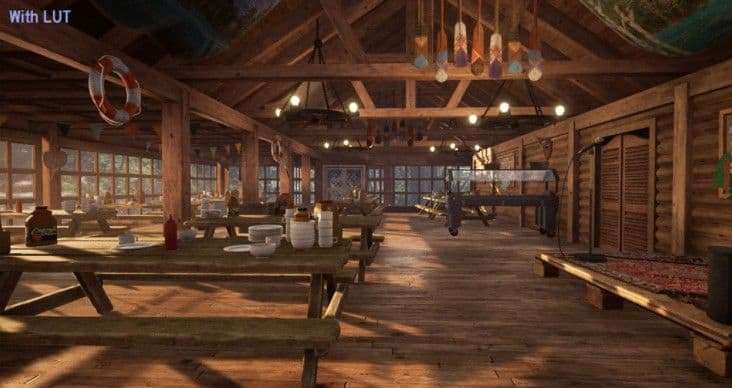
Lastly, I used a LUT for color grading to warm the scene up a bit. I find LUTs to be one of the most powerful features of post-processing and if you haven’t played around with this yet, I recommend checking out this tutorial from UE4.
Essentially, I was able to color correct a screenshot in Photoshop and apply those changes directly in UE4. You will see there are already color grading sliders in the Post Process Volume to use, but I find there’s more control making the edits in Photoshop.
Conclusion
Overall, I hope this breakdown can spark a little bit of motivation and excitement for artists who are either just starting their 3D journey or who are already seasoned industry veterans. For me this project was an important opportunity to tie together all the pieces of the 3D Environment Art pipeline and to understand the importance of creative iteration.
Some advice to send you on your way: constantly ask for feedback/ constructive criticism, have faith in the process, and don’t be afraid to experiment! Lastly, here’s your sign that it’s never too late to make a career switch into the games industry.
Thank you to my instructors at Think Tank Training Centre, my mentor Jason Gullion, and to all my classmates, family, and friends who have provided endless feedback and support!