How to Create a Pixar Style 3D Scene
Saif Alkhusaib is a current student at Think Tank Training Centre, and a freelance 3D Artist based in Muscat, Oman. In this article he shows us how to create a Pixar style scene from a 2D concept.
Saif Alkhusaib is a current student at Think Tank Training Centre, and a freelance 3D Artist based in Muscat, Oman. In this article he shows us how to create a Pixar style scene from a 2D concept.

Saif Alkhusaib is a freelance 3D Artist based in Muscat, Oman. From the time Saif started learning 3D, Pixar movies inspired him with their unique style and stories. Naturally, for his final project of his foundation term at Think Tank Training Centre, he decided on a concept with a stylised look similar to those Pixar movies that first inspired him.
In this article he shows us how to create a Pixar style scene from a 2D concept. If you are embarking on your first scene creation, this is the article for you!
This project took me roughly five weeks from start to finish. Most of the processes were new to me as I had never created a full 3d scene and modelled every element in it. The five weeks were so challenging but enjoyable at the same time.
As I mentioned before I wanted to work from a stylised concept. My goal was find a concept that had a calming vibe but yet could be a challenge to recreate.
I remembered a quote from an article written by Think Tank student Tomas Sackmann:
The selection of the concept is really important, not only to keep you motivated during the process but also to make more people engaged with it. In the end, we are all here to tell stories.
Those words made me take my time to choose the right concept that would motivate me and push myself to achieve the look I wanted.
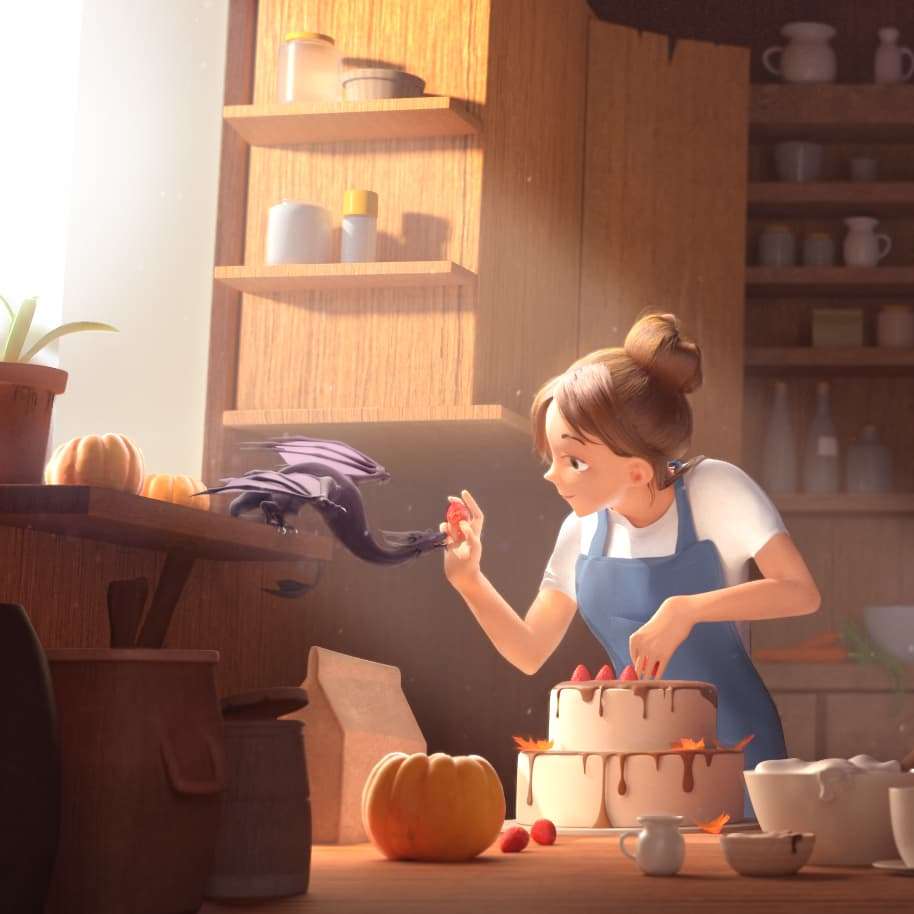
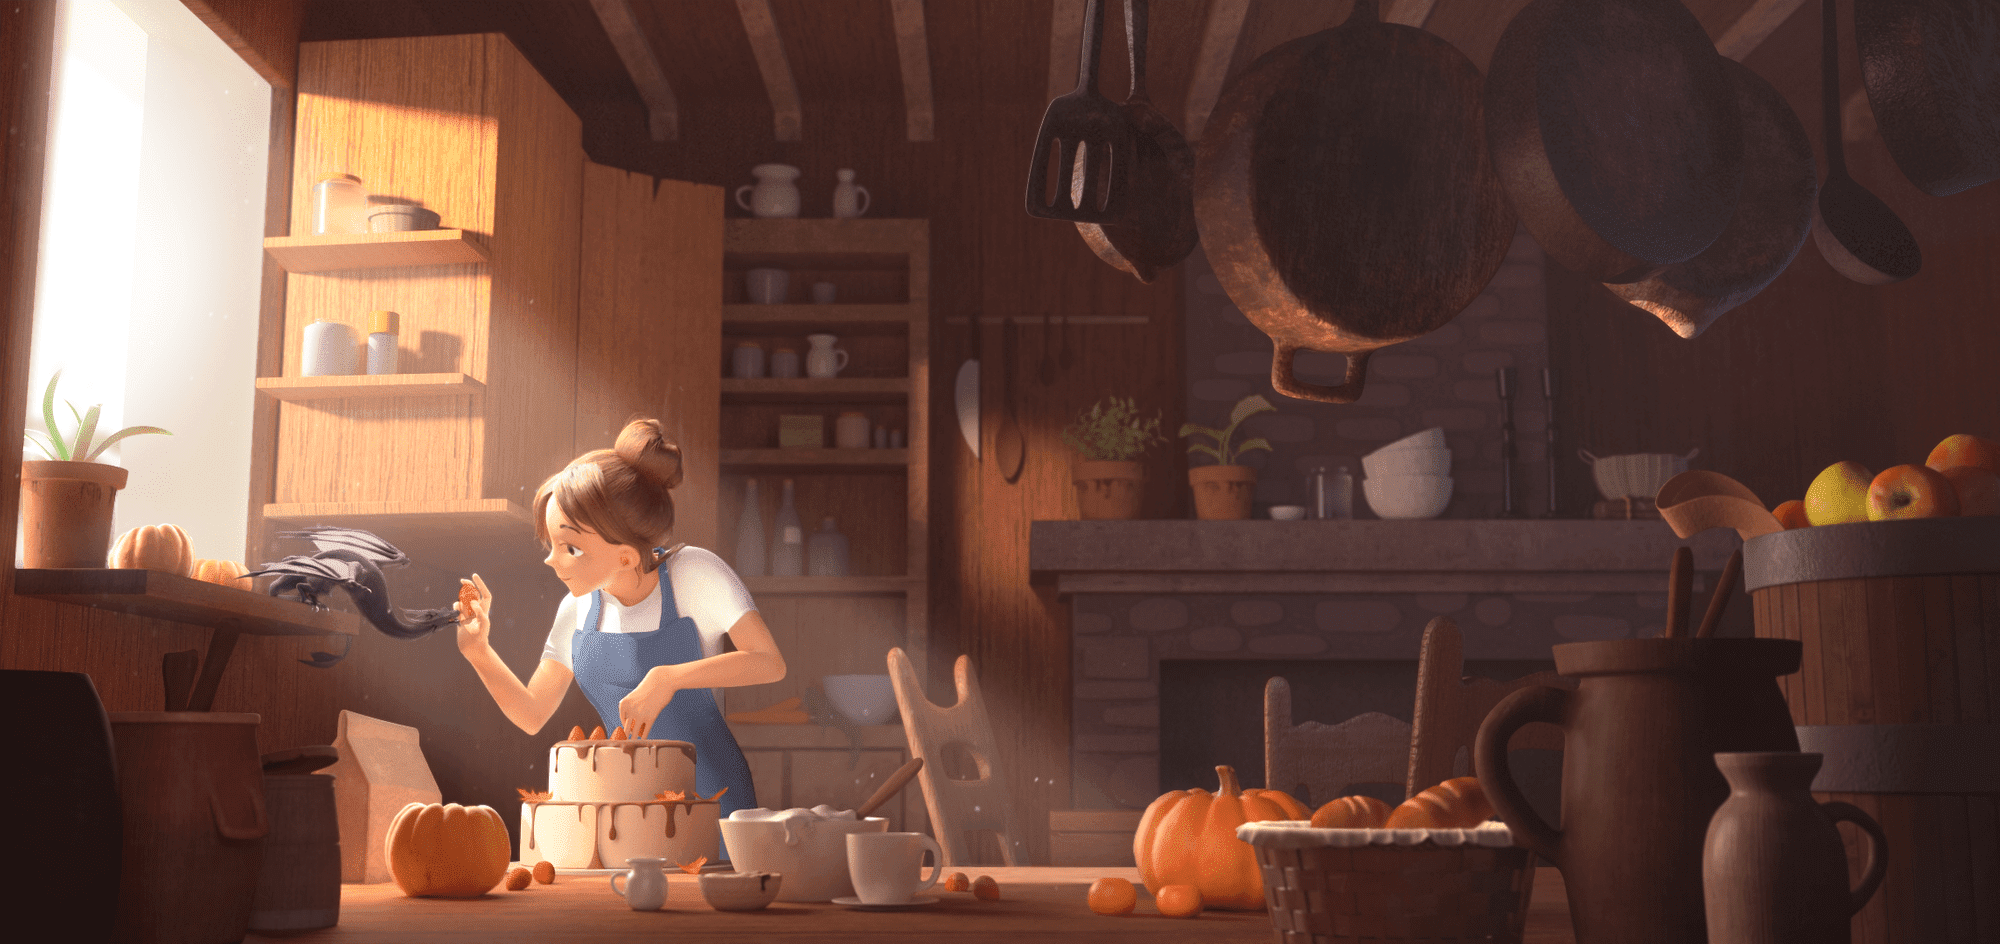
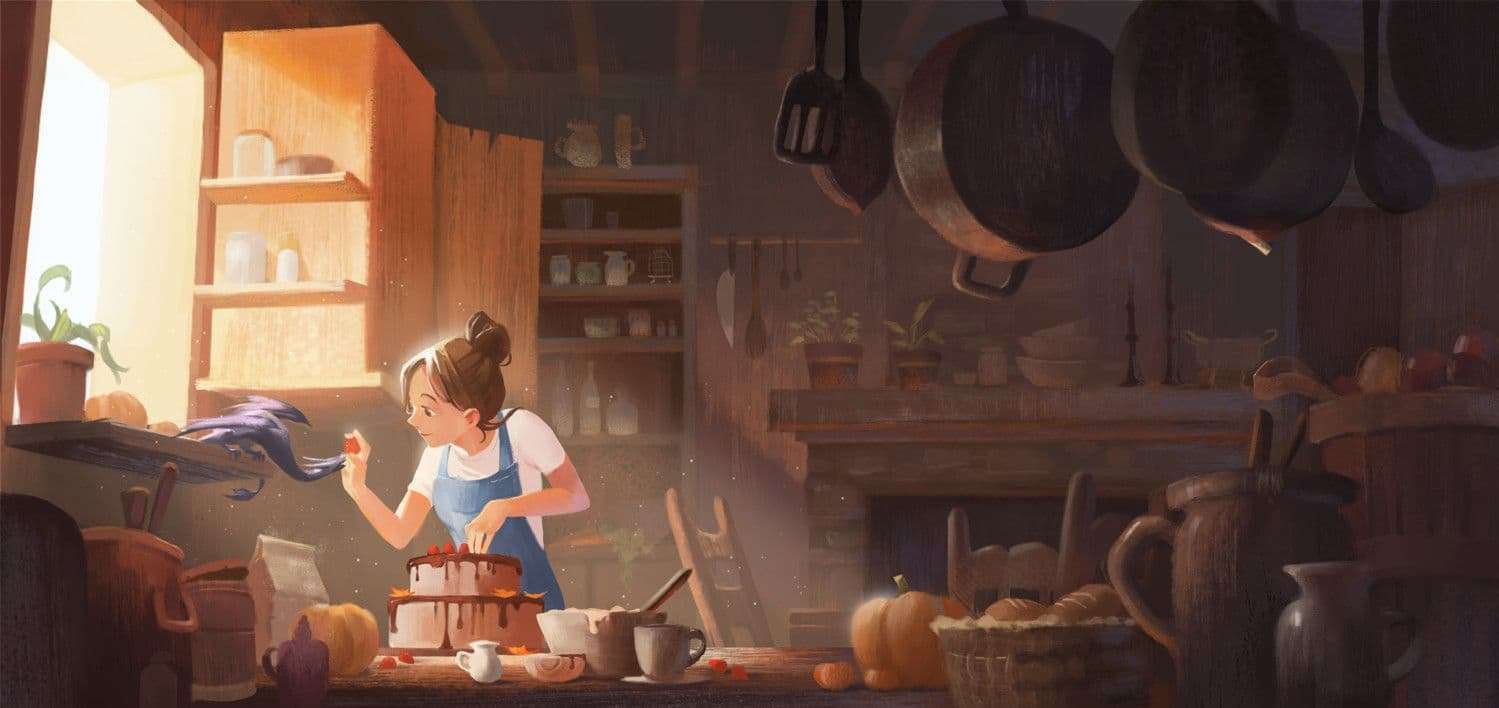
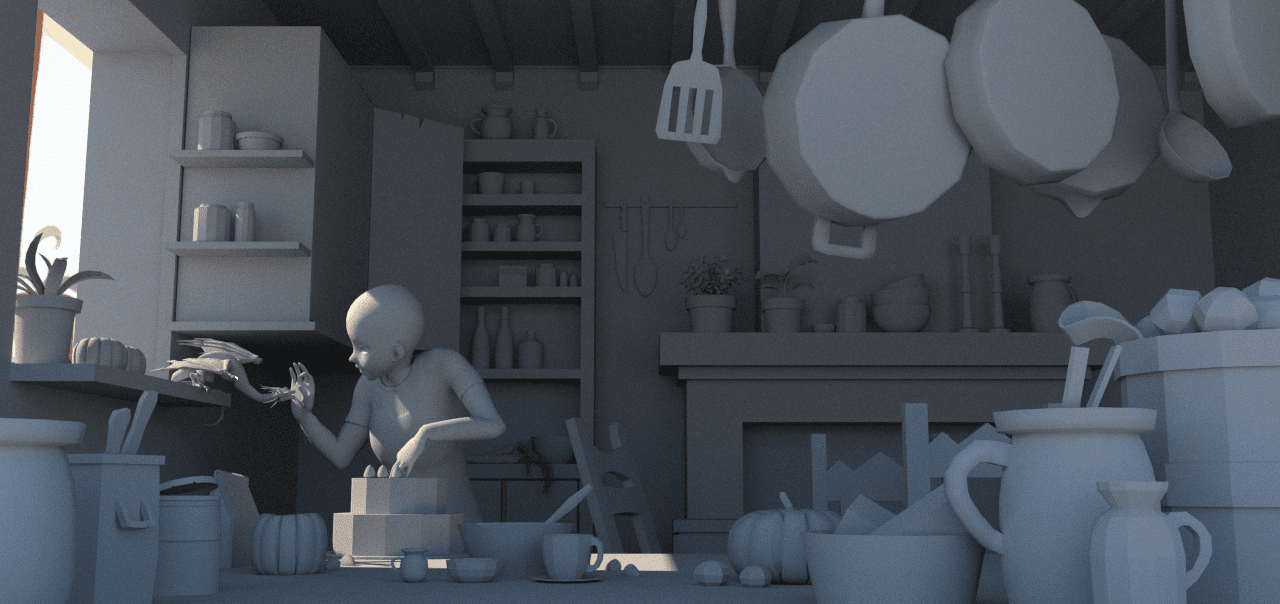
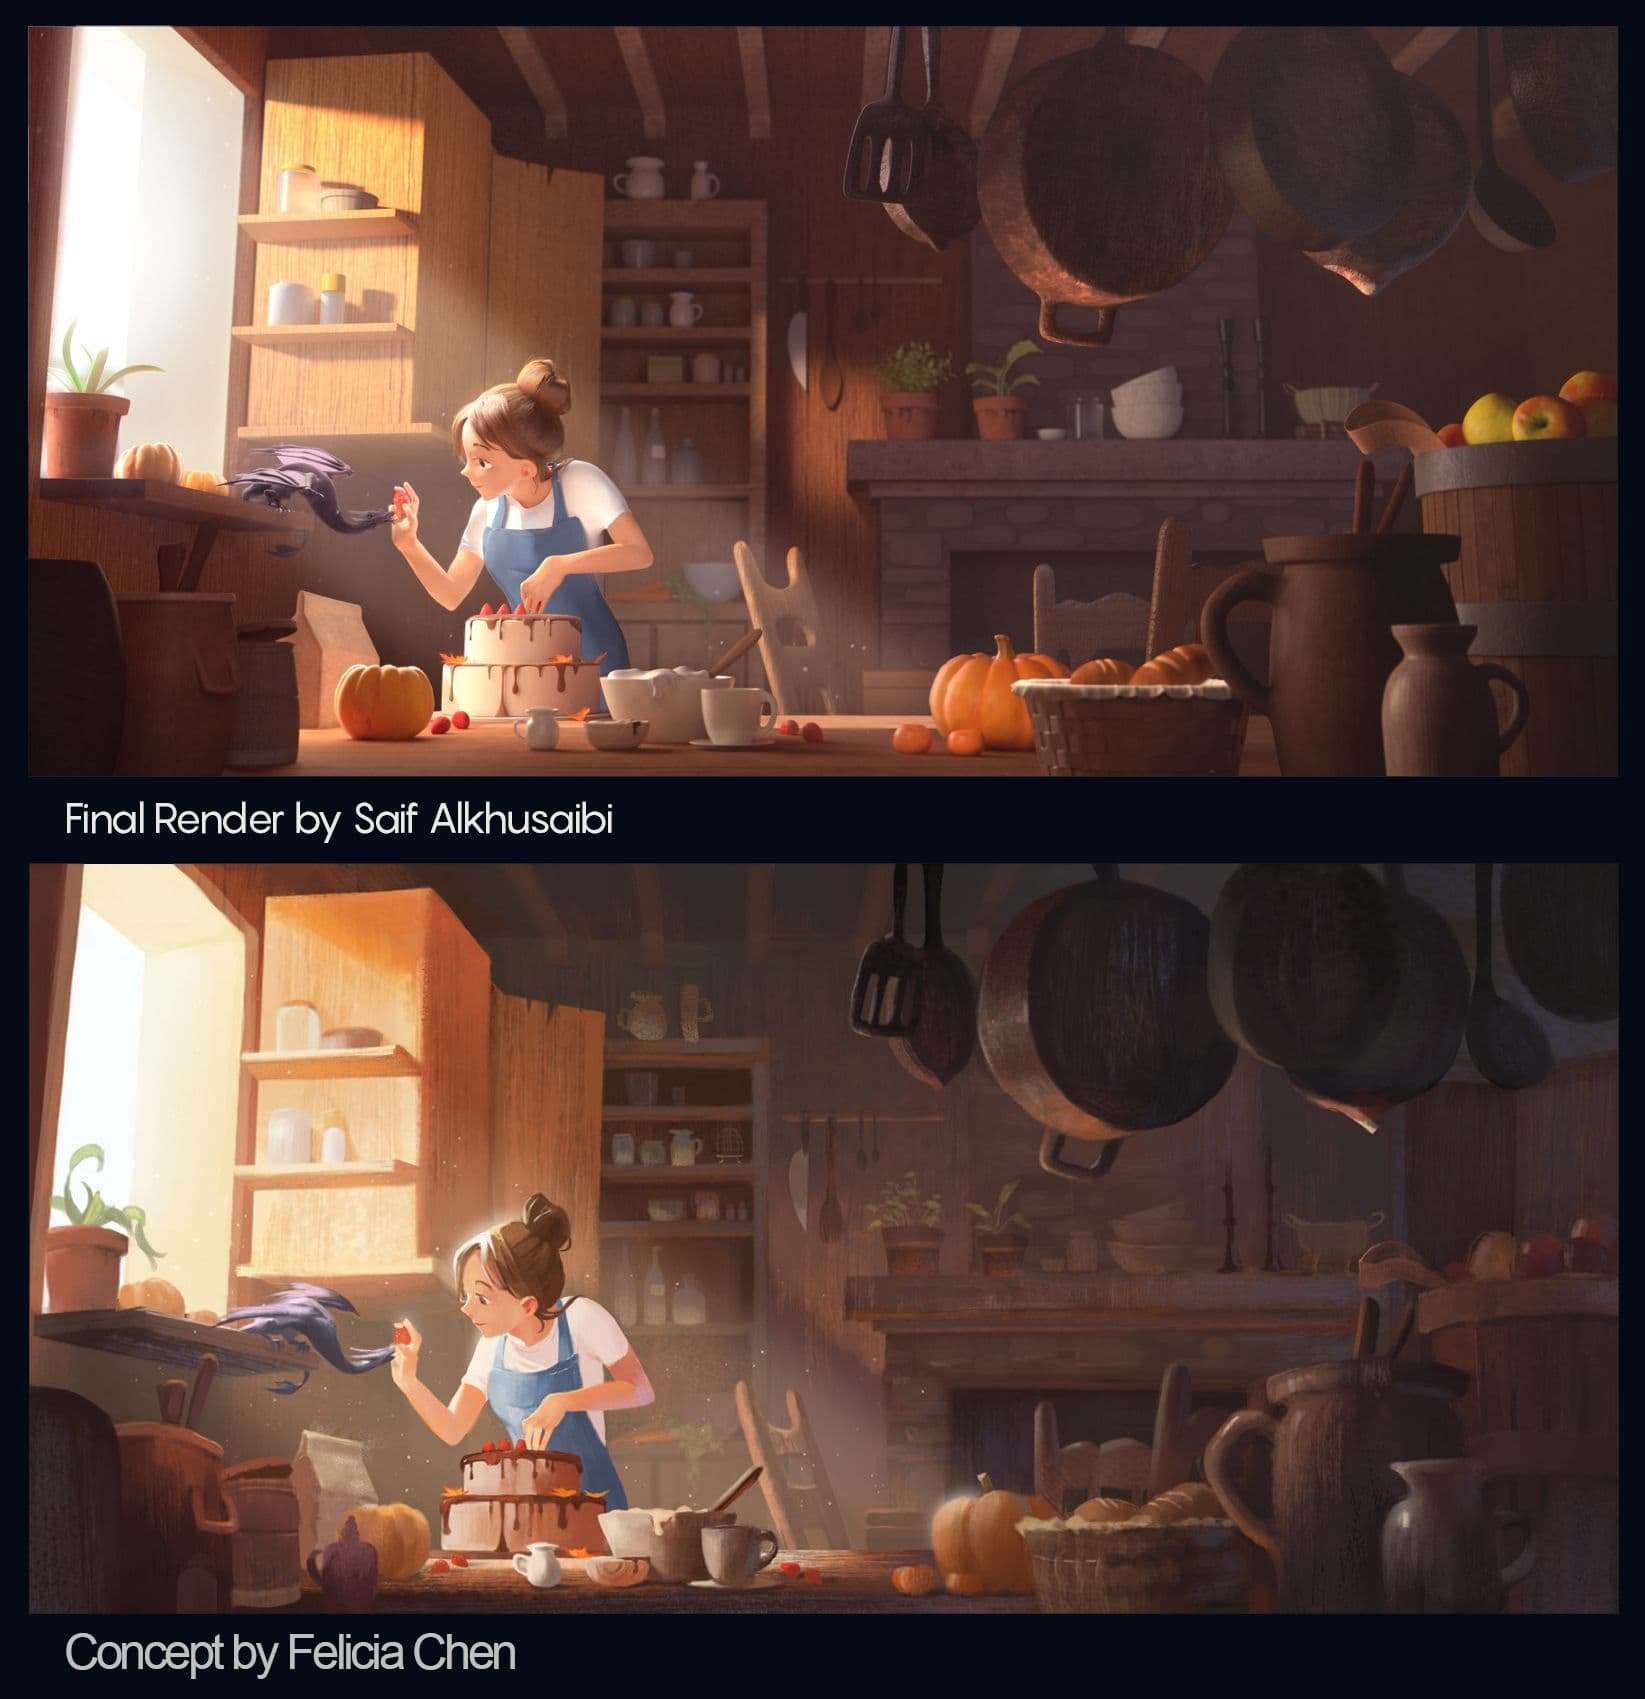
When I saw the (fall) concept by Felicia Chen, I felt it was the one that I was looking for. The reason for choosing it is the mood, look, and peaceful feeling the concept gives, as well as the way the characters interact with each other.
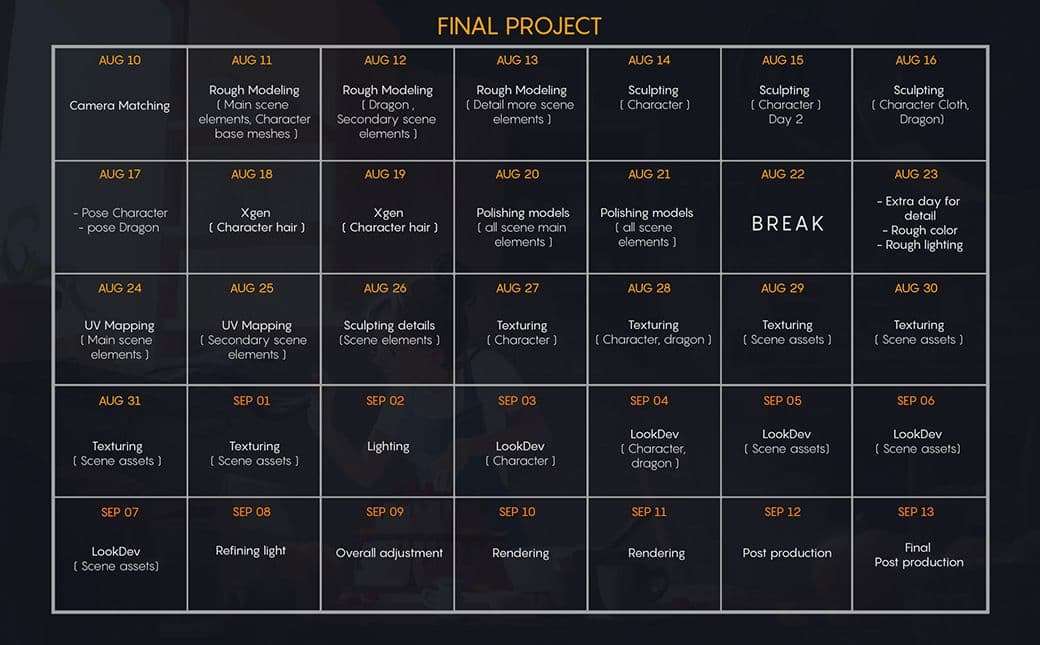
There is a lot to do in a five week project. That's why it's important to have a clear schedule and try to stick to it as much as you can. Here is an example of mine:
There are 6 main process category to go through when creating a project like this:
I tackled these stages using the software below:
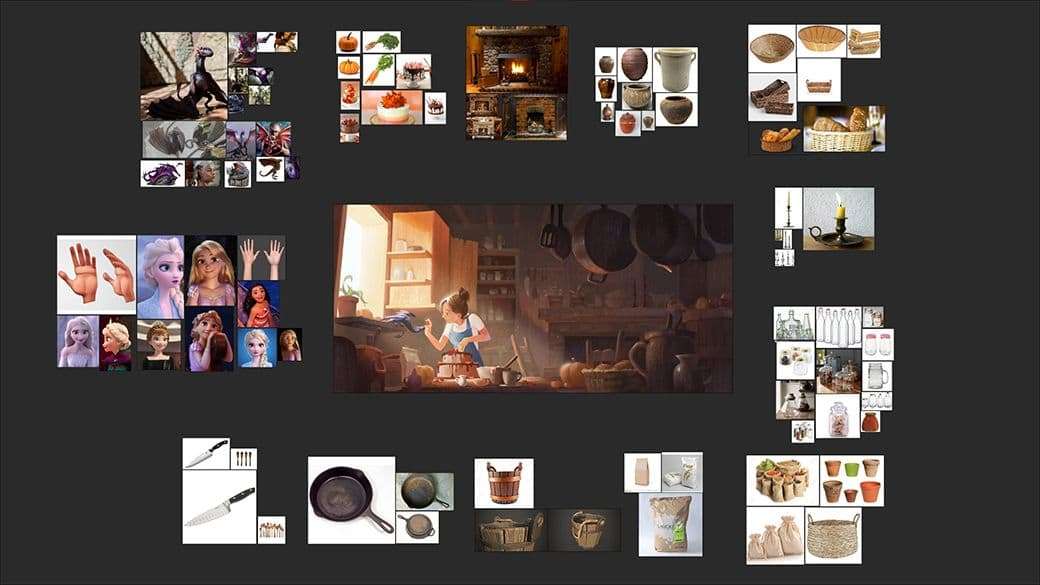
It is really important to collect as many references as you can for every object in your scene. The more references you have the easier will be to model and texture the objects.
Most of my references are collected from Google and Pinterest. And I used PureRef To combine it all.
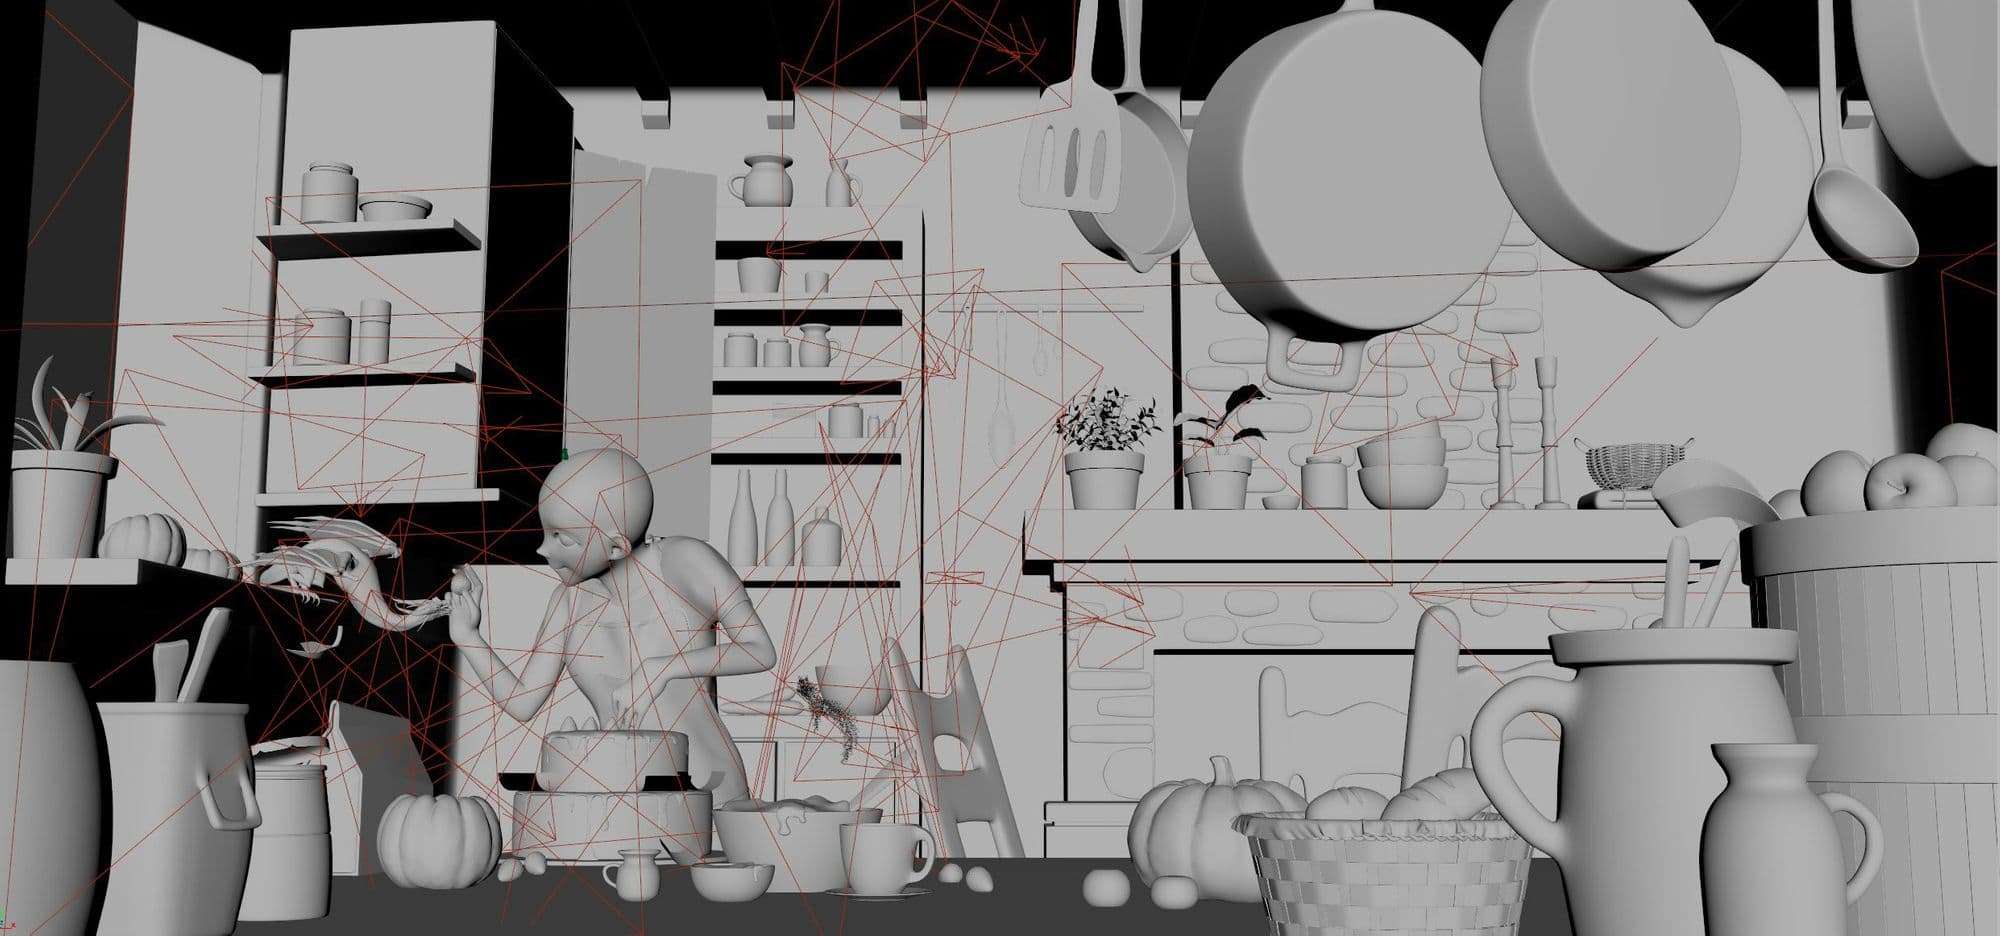
Since I had to take a 2D Concept to 3D Render, it was imperative that I took the time to match the perspective in the blockout stage, which ultimately affects how easy assets can be placed in the scene afterwards.
I also start with simple and big shapes to build the overall structure. It is important to block out the camera before moving to smaller shapes because it is still easier to adjust the perspective at this stage.
Remember to lock and save the camera position when you find the right perspective and camera focal length to avoid accidentally moving later on.
It's really helpful to make your scene scale in real-world scale to have a clear reference when you are going to smaller shapes.
After matching the perspective I started blocking out sunlight then I added a base mesh for my character and roughly posed it.
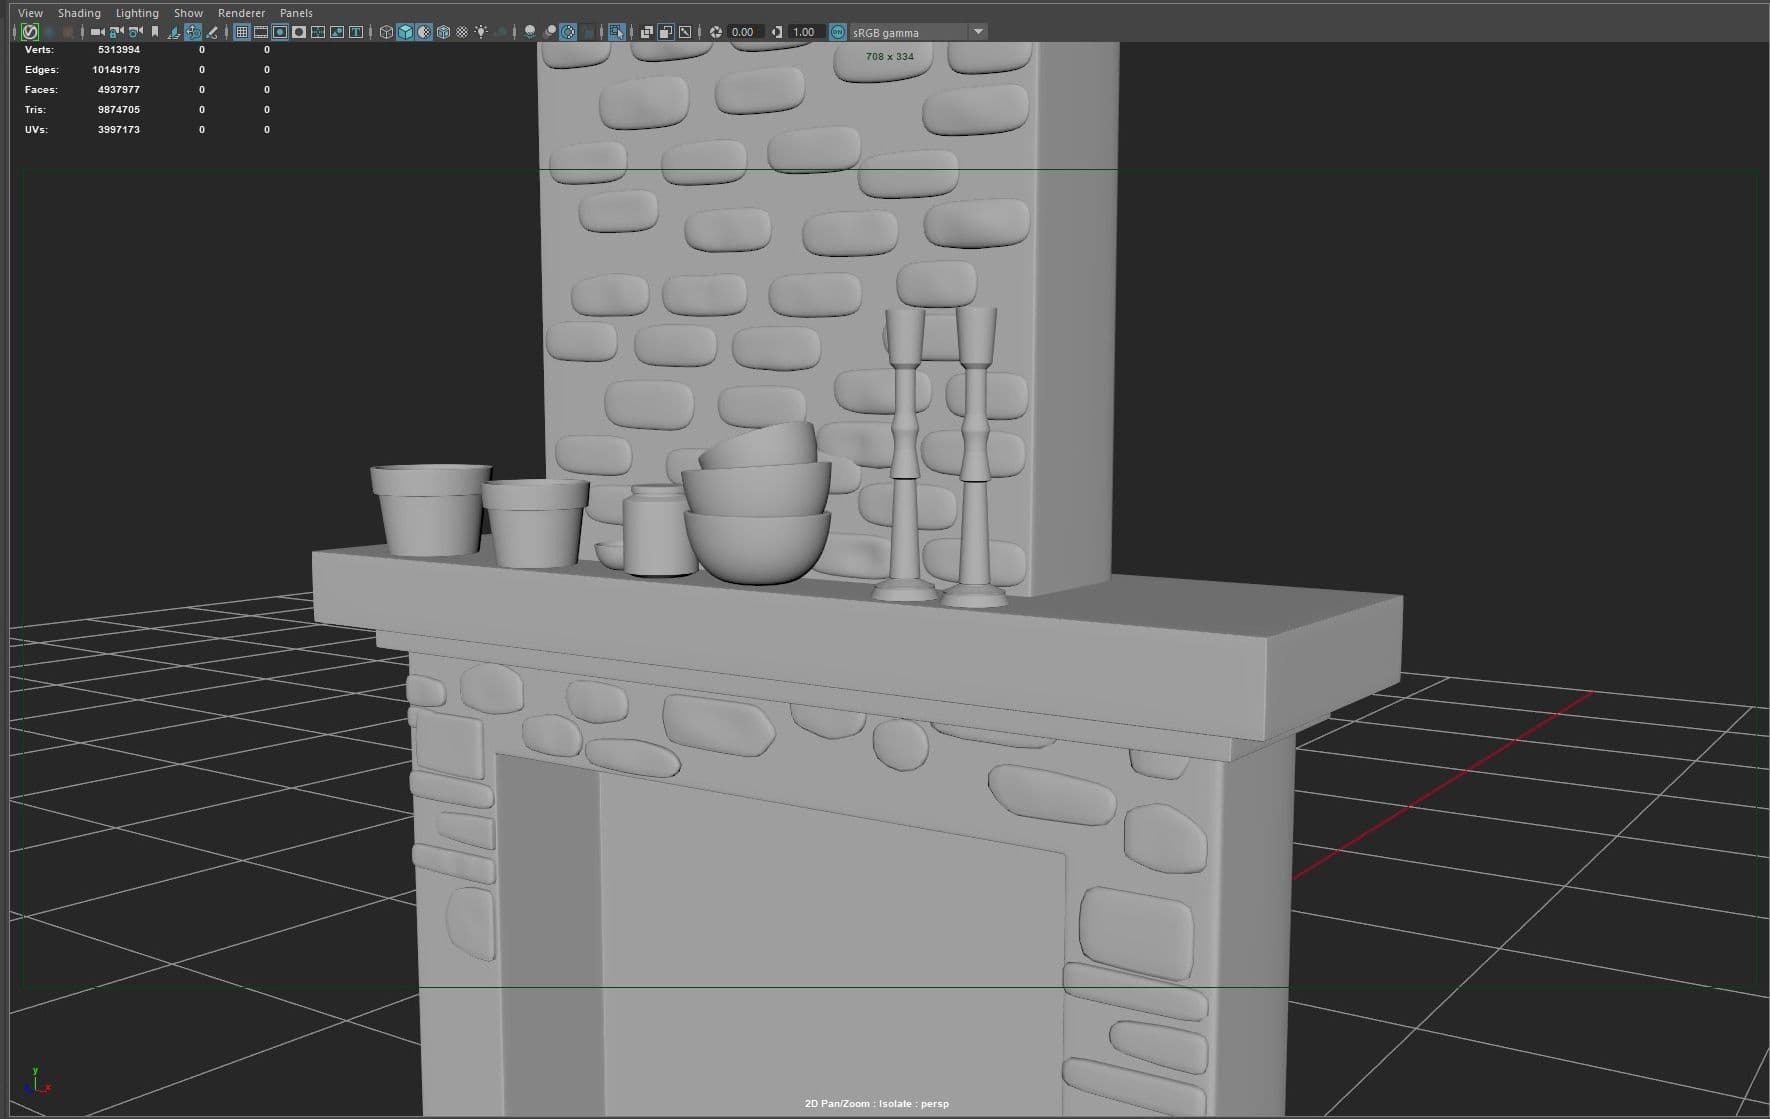
Finally, when I found the right perspective and focal length, I began to model the smaller elements. but still, at this stage, I didn't stress too much over details.
In this stage, It’s time to add refined details for the models. Here is where the reference collected previously is useful. Using many references gives you extra information on how an object looks from different sides, instead of relying on the concept only.

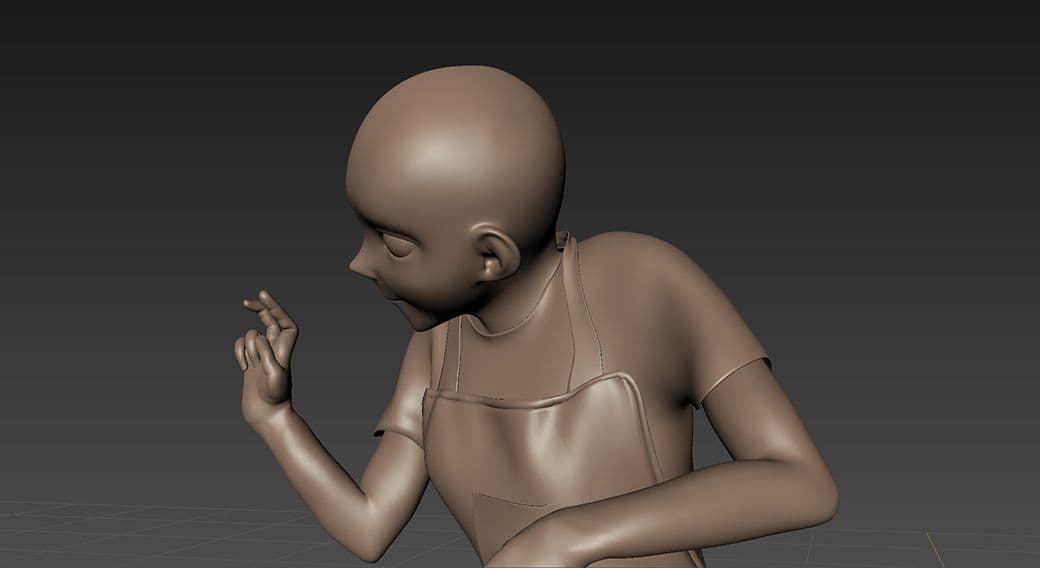
For the character and the dragon, I used Autodesk Mudbox to sculpt details. The sculpted objects then go through retopology, where you try to clean up the mesh and reduce polycount.
For the character, I used movies like brave and Frozen as my reference, as well as matching the concept to a degree.
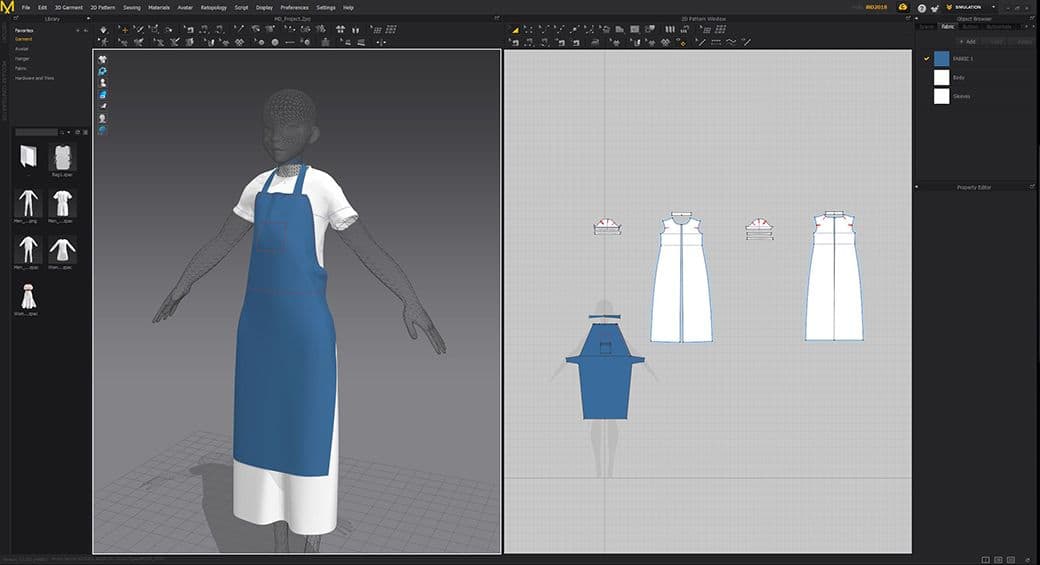
After I sculpted the character I imported the mesh into Marvelous Designer to make the clothes. It was a straightforward task because my character wears simple clothes with not many details on them. But still, it took me some time to get used to the software.
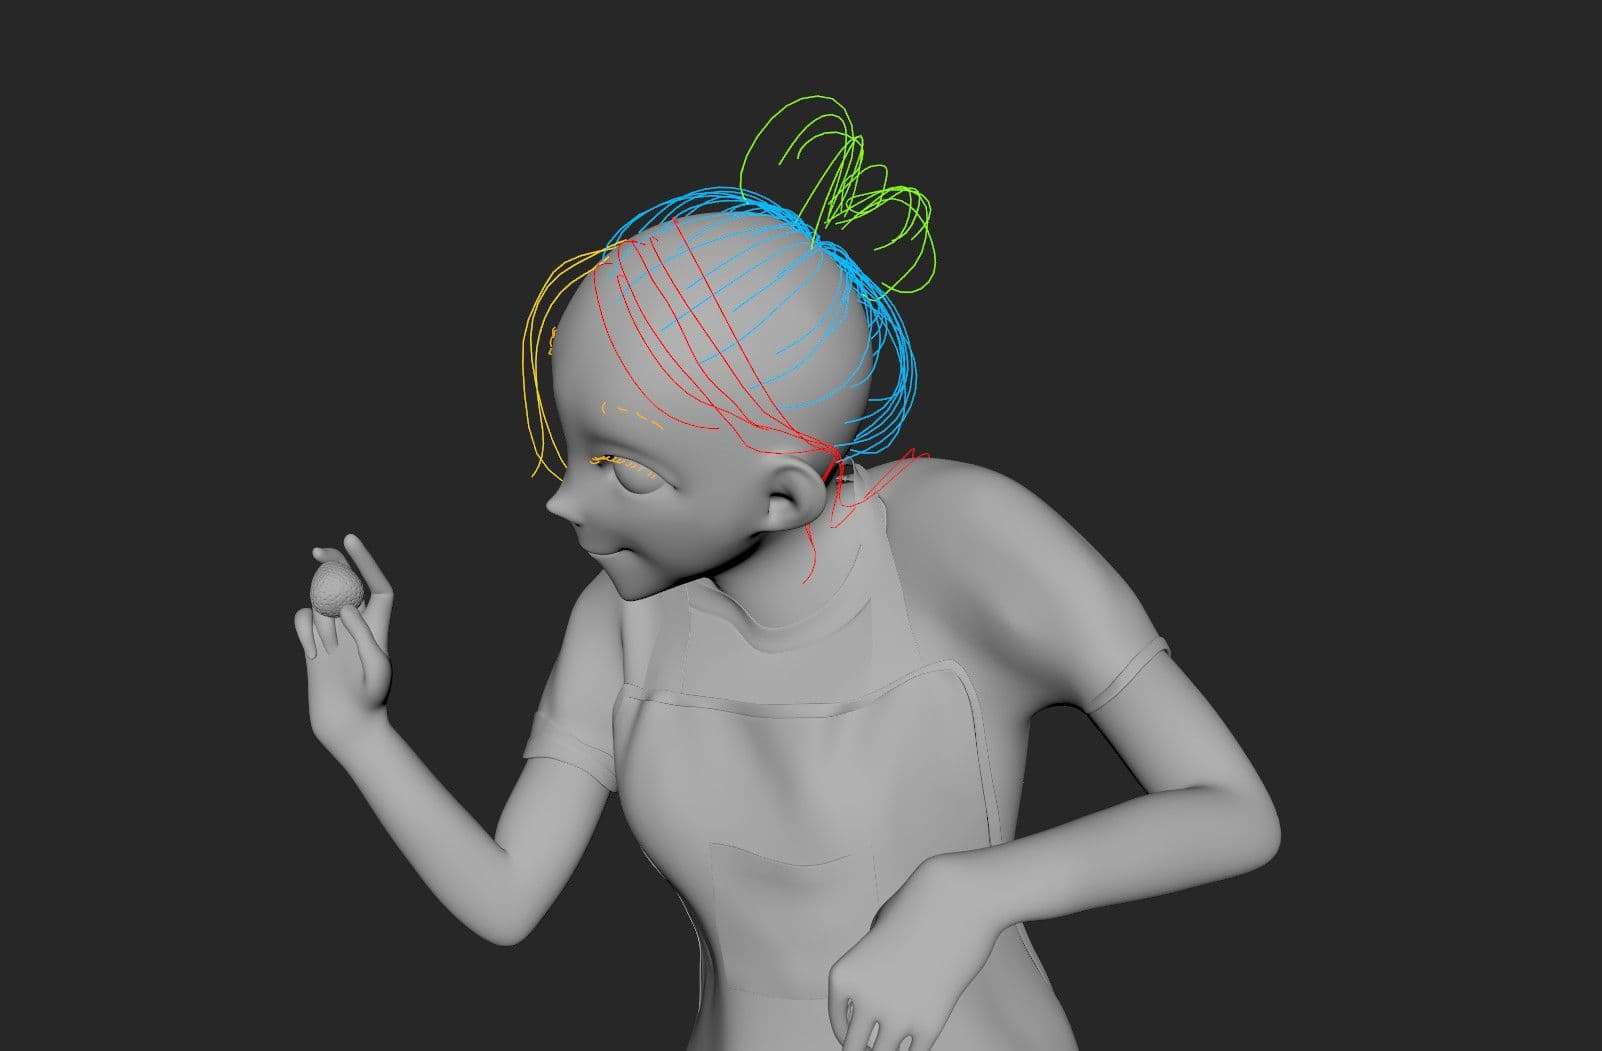
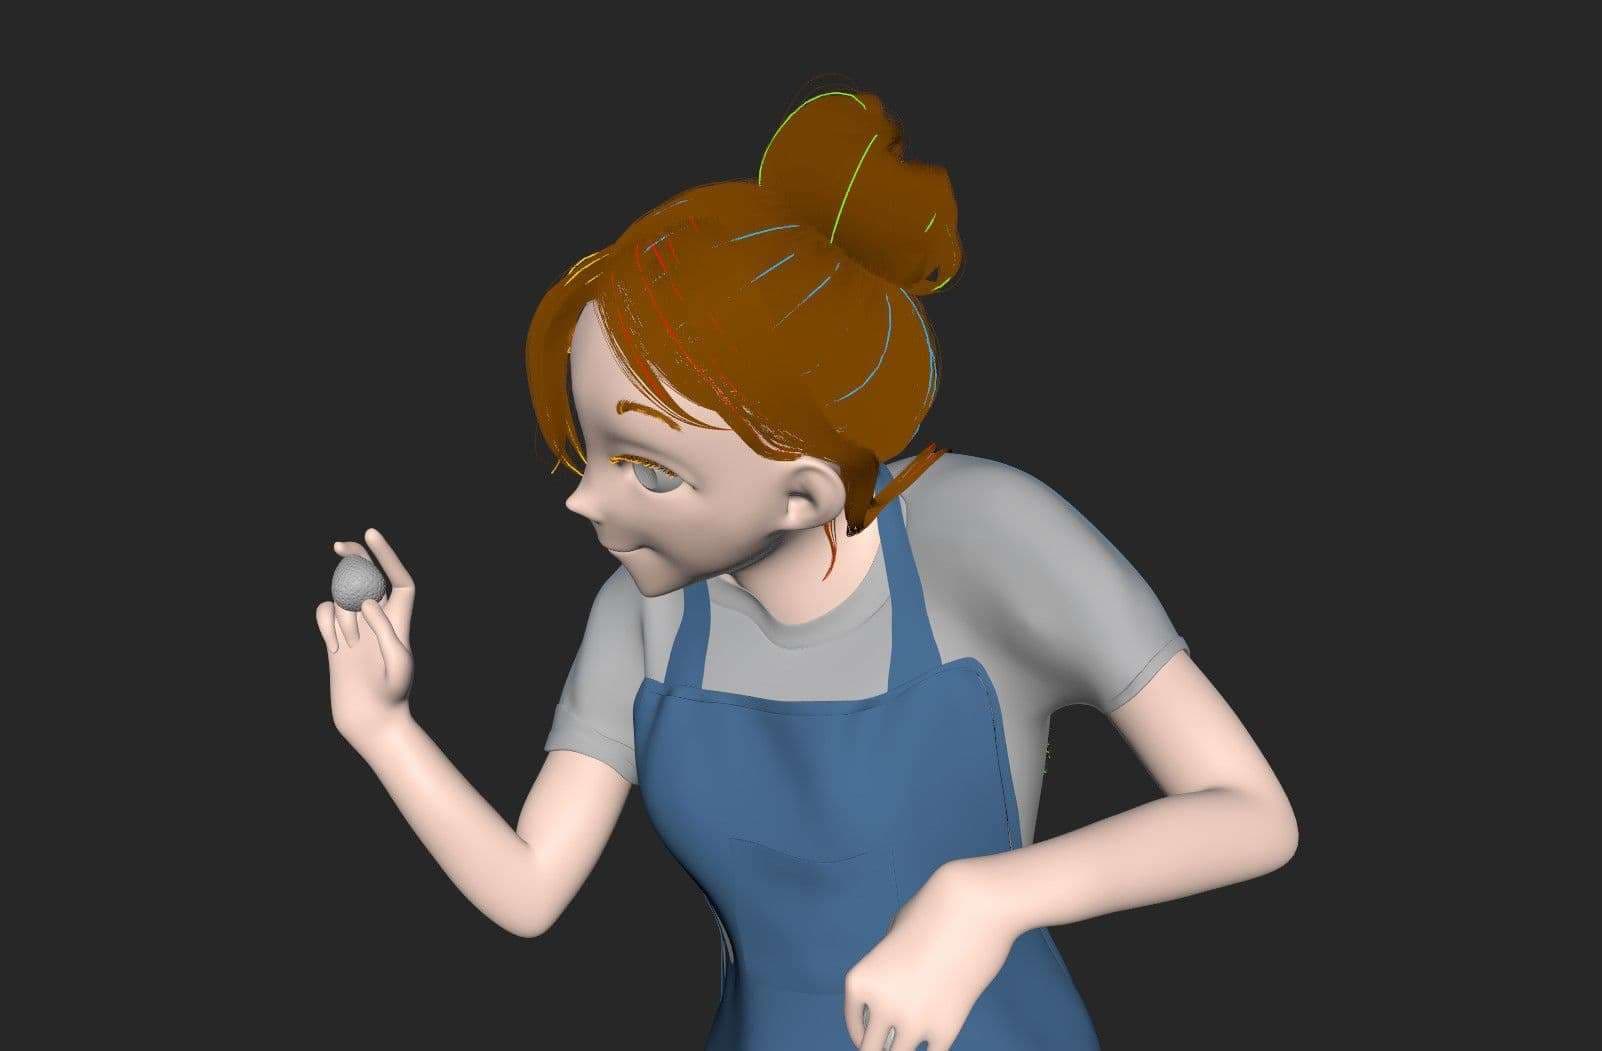
Hair grooming using Xgen was one of the most challenging parts of this project. Because Xgen is not part of the scope of the foundation term. But unlike what I expected, it wasn't that stressful but took time to tweak the guides and add modifiers.
As a general rule for creating hair, divide the hair into several big groups according to hair direction and shapes. Then, for each group start with a few guides to block general shape and add more guides one by one to define the final look.

Before moving to texture your object in software like Foundry Mari or Substance Painter it's really important to set your UVs resolution depending on the size and distance of your object in the scene because you don't want to have a small secondary object in the scene with 4k texture to slow down your render.
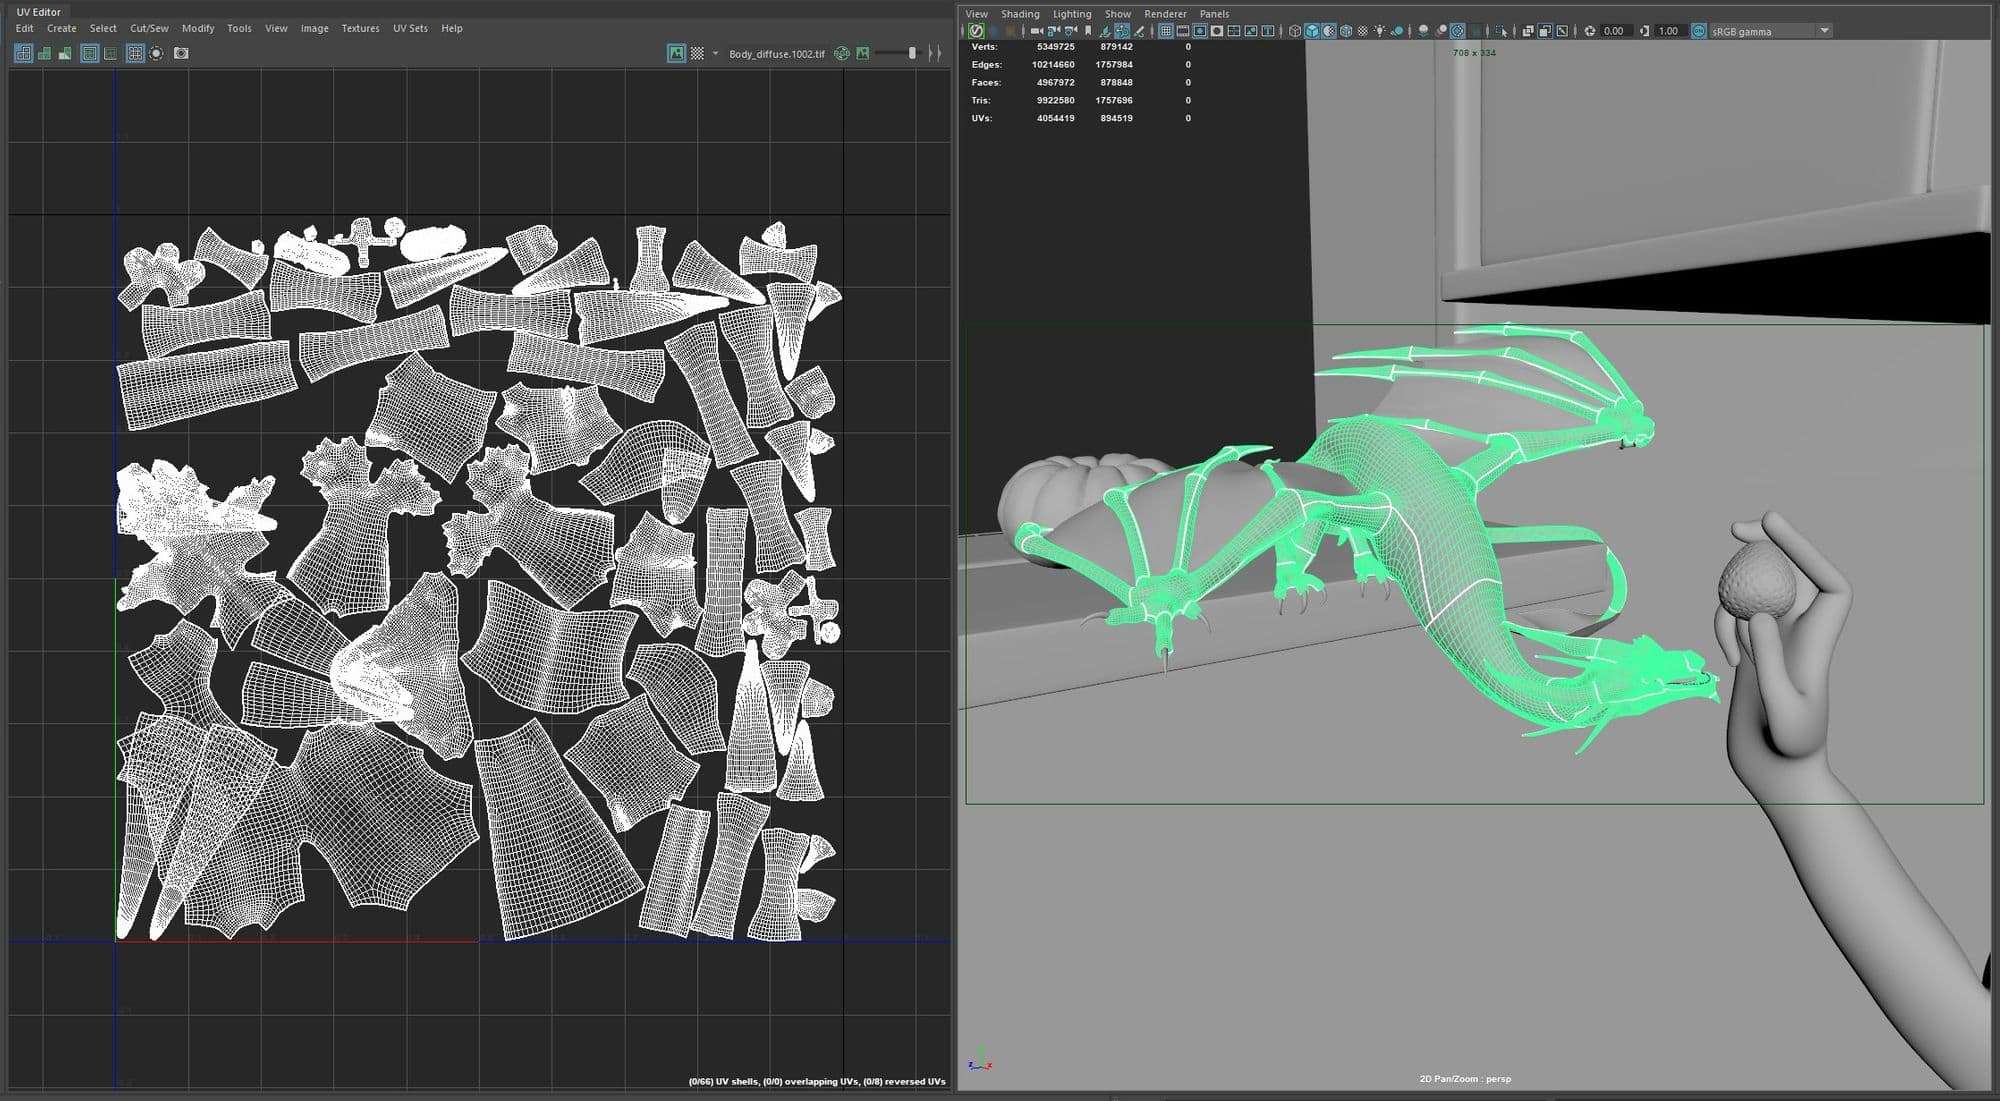
Also, it's useful to combine different elements of one model into a single object, then organize UVs in multiple UDIM.
In this project, I used Foundry Mari to texture almost all my scene elements, except for a few objects I textured by using a seamless texture with Vray triplanar.
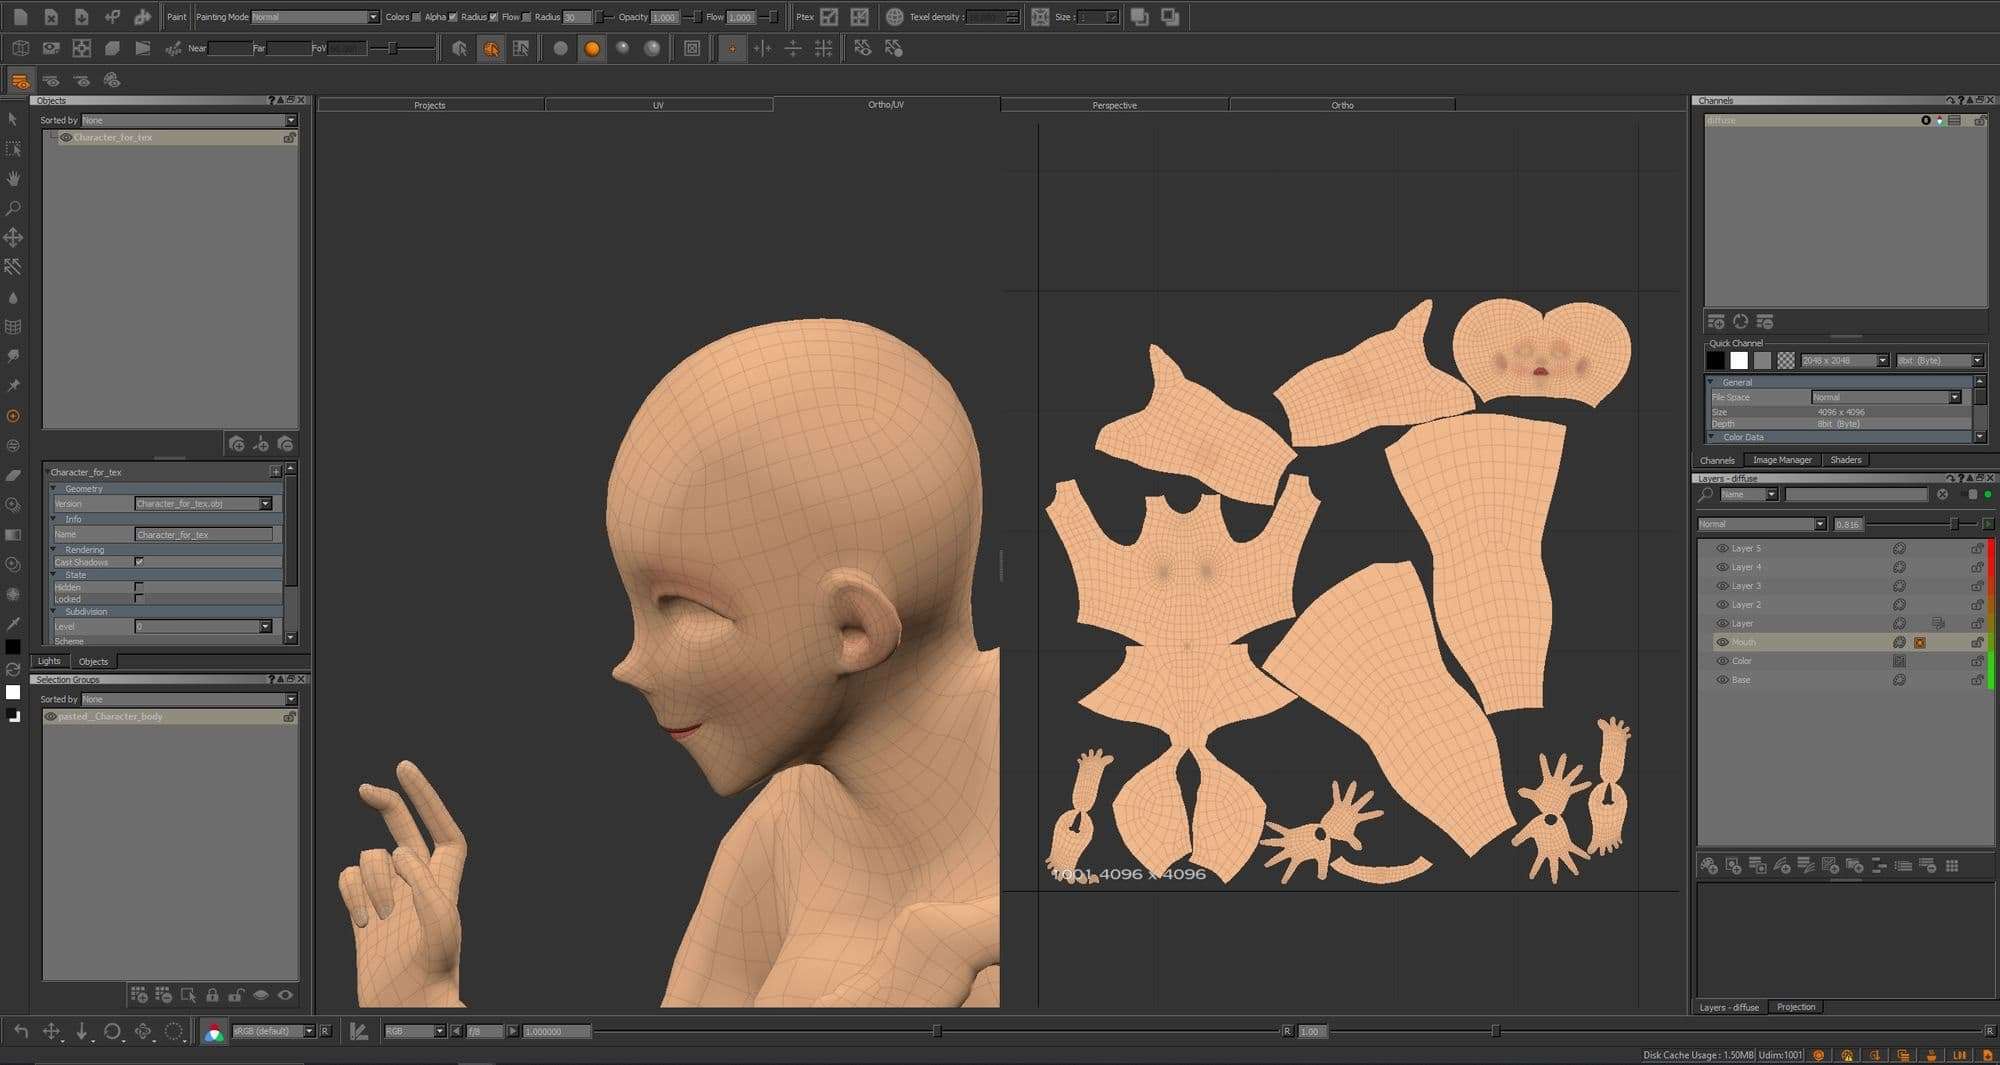
Mari is a great texturing tool because it allows you to work directly with your mesh using a hand painting tool. Also, it allows you to work procedurally with textures.
Substance Painter is another great option. Because it has smart material that you can use to achieve quick results. I did find however, that Mari can handle heavy meshes without lagging and slowing performance.
Remember always to add surface imperfection to your object to add an extra level of detail and realism even if you work in a stylized concept or hyper-realistic look.
For shading, I exported all objects texture from Mari then imported into Maya and shaded it with Vray.
The lighting in this scene is a key element that gives my render the feeling I wanted to achieve. Matching concept lighting was challenging because there were a lot of objects. Also, it's difficult to match their lighting using only sunlight coming through that window. So I cheated with lights and I added over 30 lights in the scene to match the concept.
I divided the lights into 4 categories:
I used Maya and Vray for the LookDev process. I imported the object into different projects to check it with different lighting setups.
After I rendered my scene and all necessary render elements I imported it into Adobe Photoshop for the final adjustment and post-processing.
I used the Camera Raw to match my render color and white balance with the concept as close as possible.
Render elements are so powerful and make your life easier. For instance, using passes like crypto matter or Multimatte helps you to separate and mask different objects in the scene as well as the atmospheric pass helps to control the fog or haze in the scene. Additionally, you can use Z-depth to add some extra depth of field and atmospheric effect.
This project was really fun to work on during my foundation term and a great learning experience that shows how much I need to learn. I am very excited for the next terms and to work on other projects.
In the end, I would like to thank Think Tank Training Center and my instructor Mieszko Lacinski, and all my colleagues and friends that have been on this journey with me.
You can find more of Saif's work here: TheRookies /Instagram/ArtStation