Ping Pong Girl: Creating a 3D stylized character with Zbrush, Substance Painter and Maya
Carlos Sanz is a 3D character artist who studied animation at U-tad and character creation at CICE, now is working on his portfolio to improve as an artist and to be part of the 3D animation industry. In this post we will see the process of creating his latest character.
Carlos Sanz is a 3D character artist who studied animation at U-tad and character creation at CICE, now is working on his portfolio to improve as an artist and to be part of the 3D animation industry. In this post we will see the process of creating his latest character.
INTRODUCTION
When I started studying animation I realised that character creation was my dream job. I had always loved watching the characters in Disney and Pixar movies, so I tried my hand at creating more stylised characters, that's when I decided to work on a daily basis and learn both the workflow and how to improve the style of my characters to make them visually appealing.
I found Seung Uk Hong's concept and I started to work on it. I have to thank Pablo Alonso for his feedback to give more personality to my character and give a better result.
SOFTWARE · Modeling and posing: Zbrush · Retopology: Topogun · UVs: Maya · Texturing: Substance 3D painter · Render: Maya Arnold
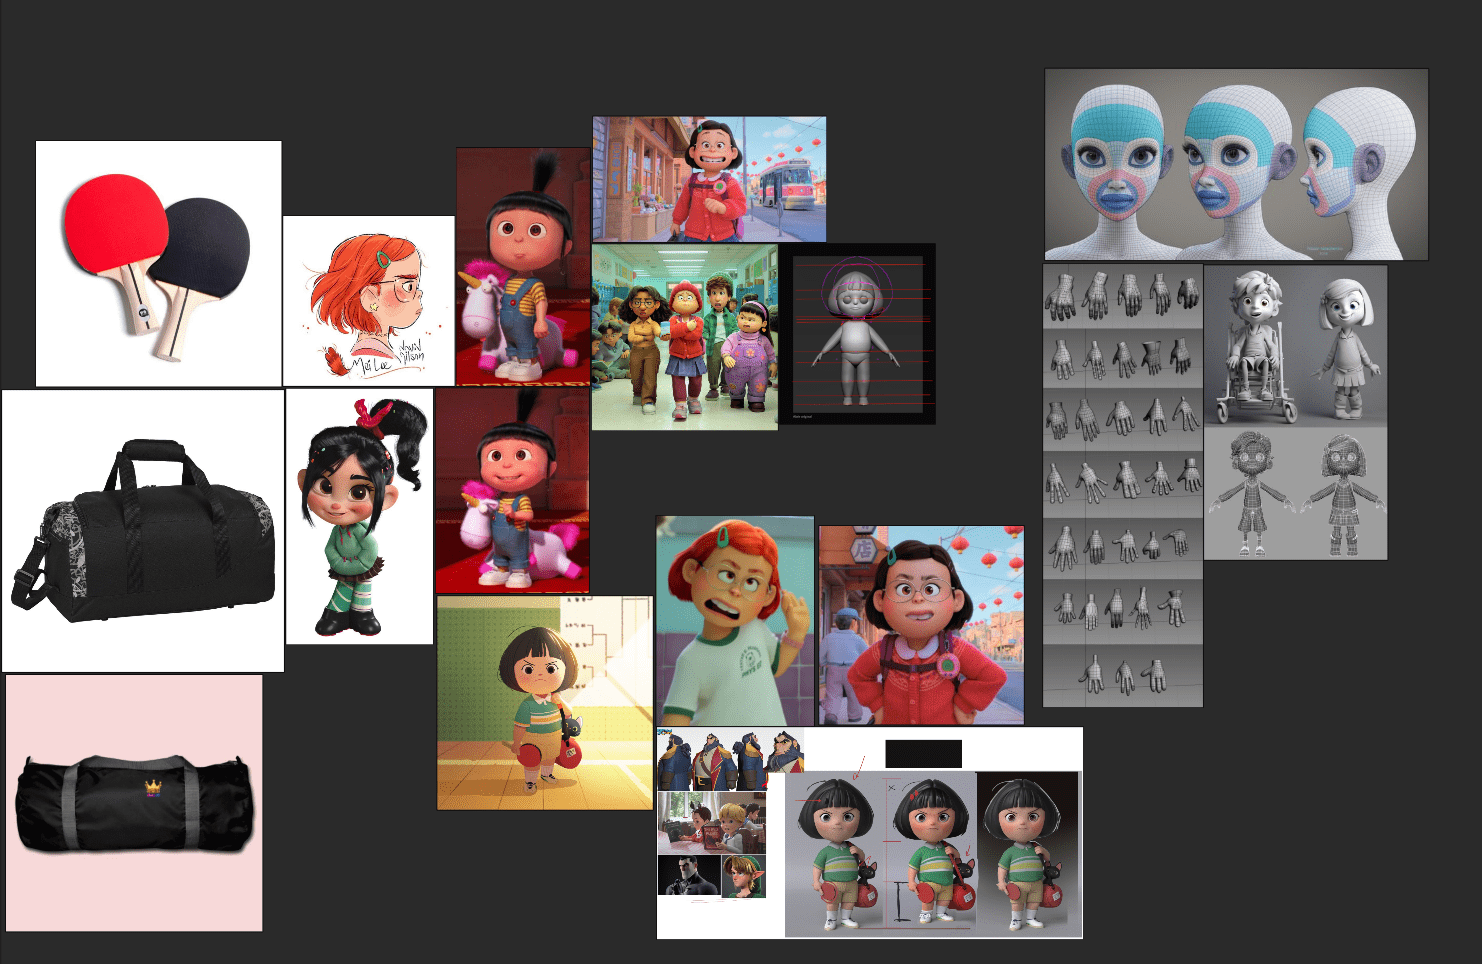
REFERENCE PROCESS
As always the first of all these processes is to get good references about all the props of the character and the scenery, in case you are going to make one.
In this case I have taken references from the Pixar film Turning Red, because I think my character has some similarities with the characters in this film.
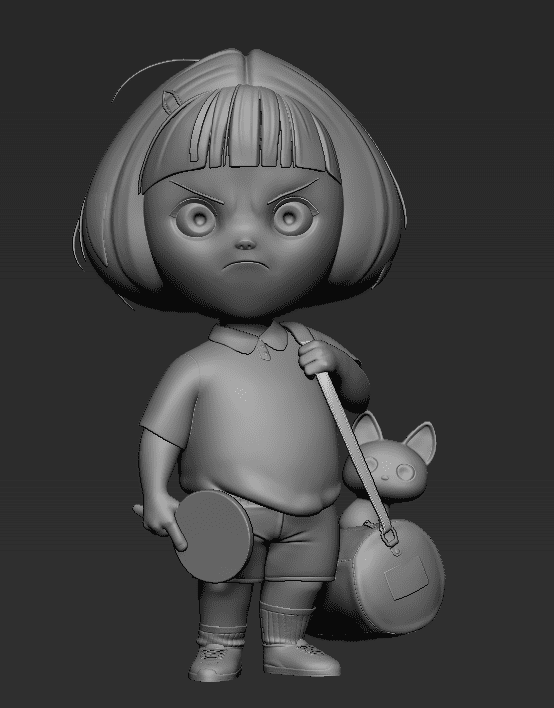
BLOCKING
In this part we will create geometric figures such as spheres, cubes and cylinders to create the main shapes of our character. In this case we had a concept with the character looking from the front and we can trace the main volumes with the background reference.
We will join each of the separate tools with a Dynamesh and shortly after we will create some guides for the Zremesher and have a more manageable topology with divisions.
The main brushes I use for this project are the basic ones, Standard, DamStandard, ClayBuildUp, Move and Pinch. I also use OrbCracks, a free brush that you can find in the Artstation marketplace.
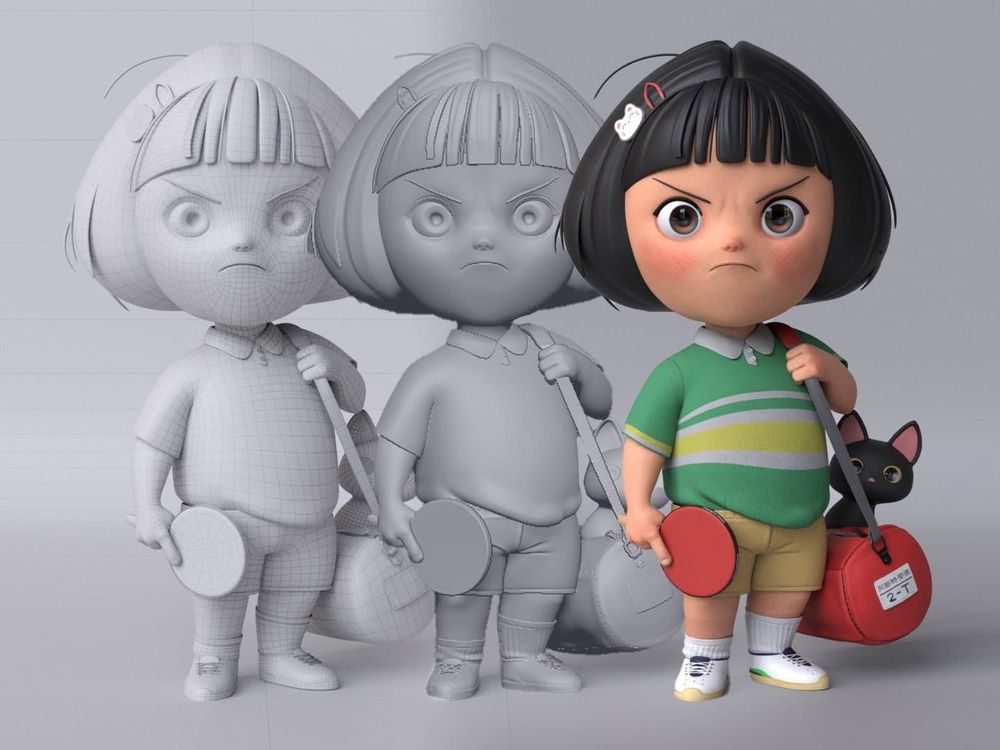
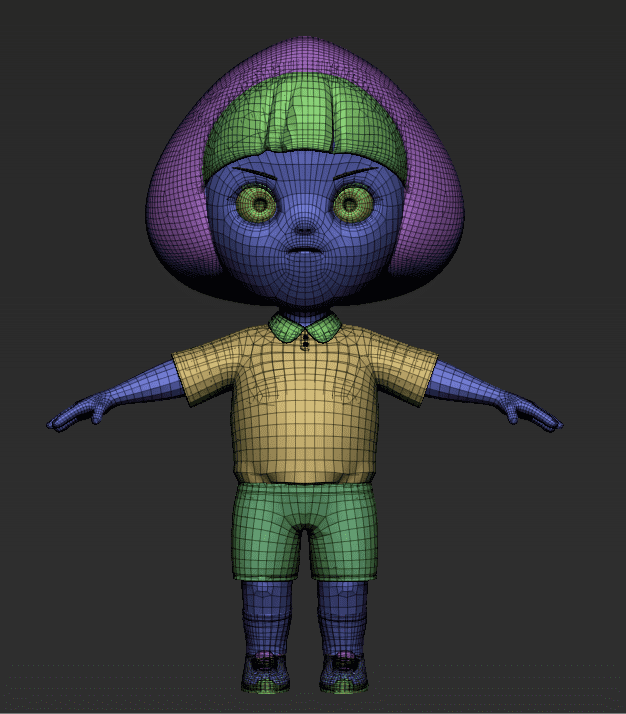
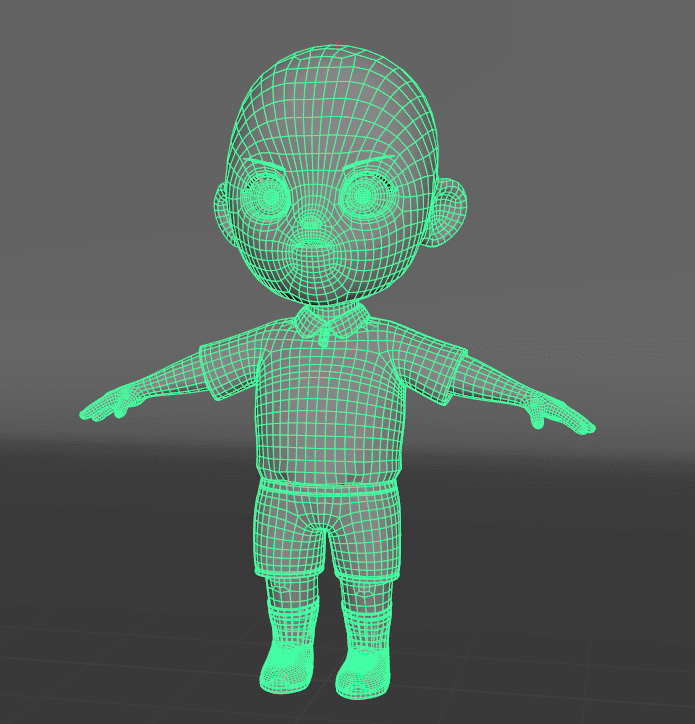
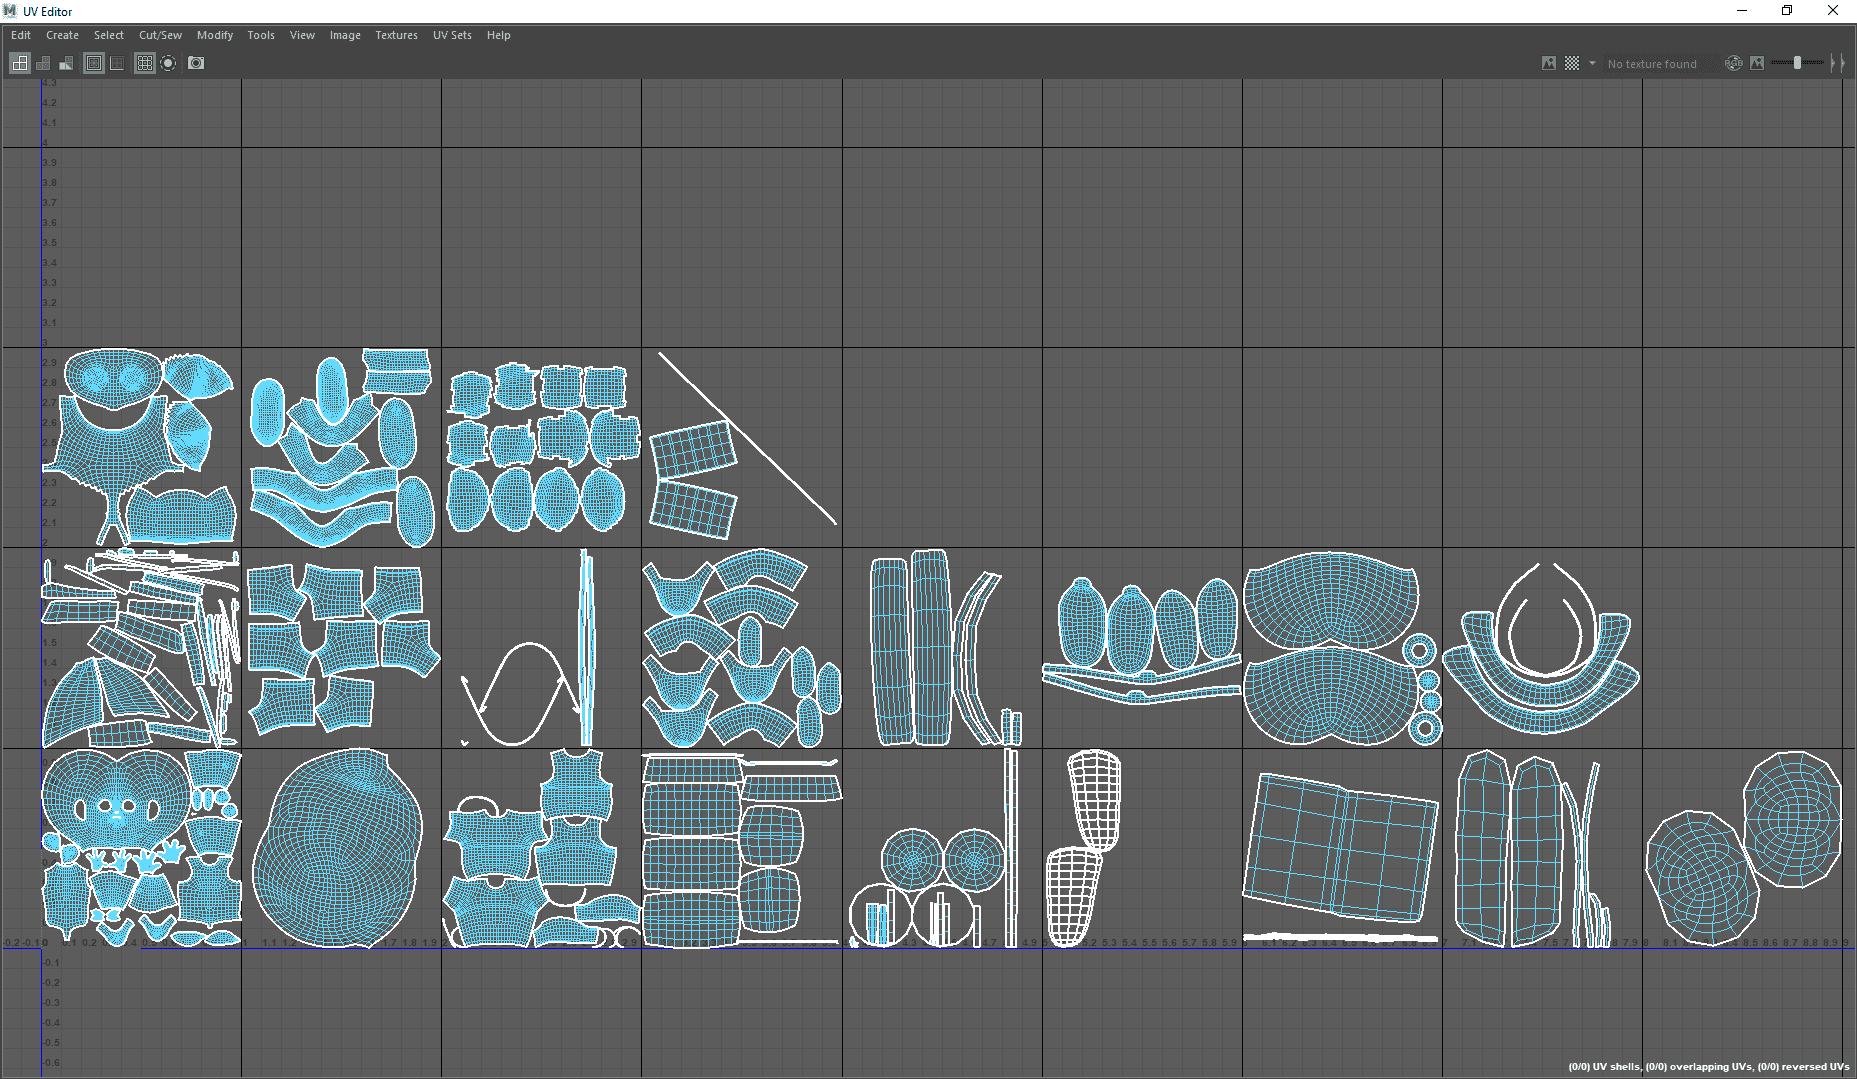
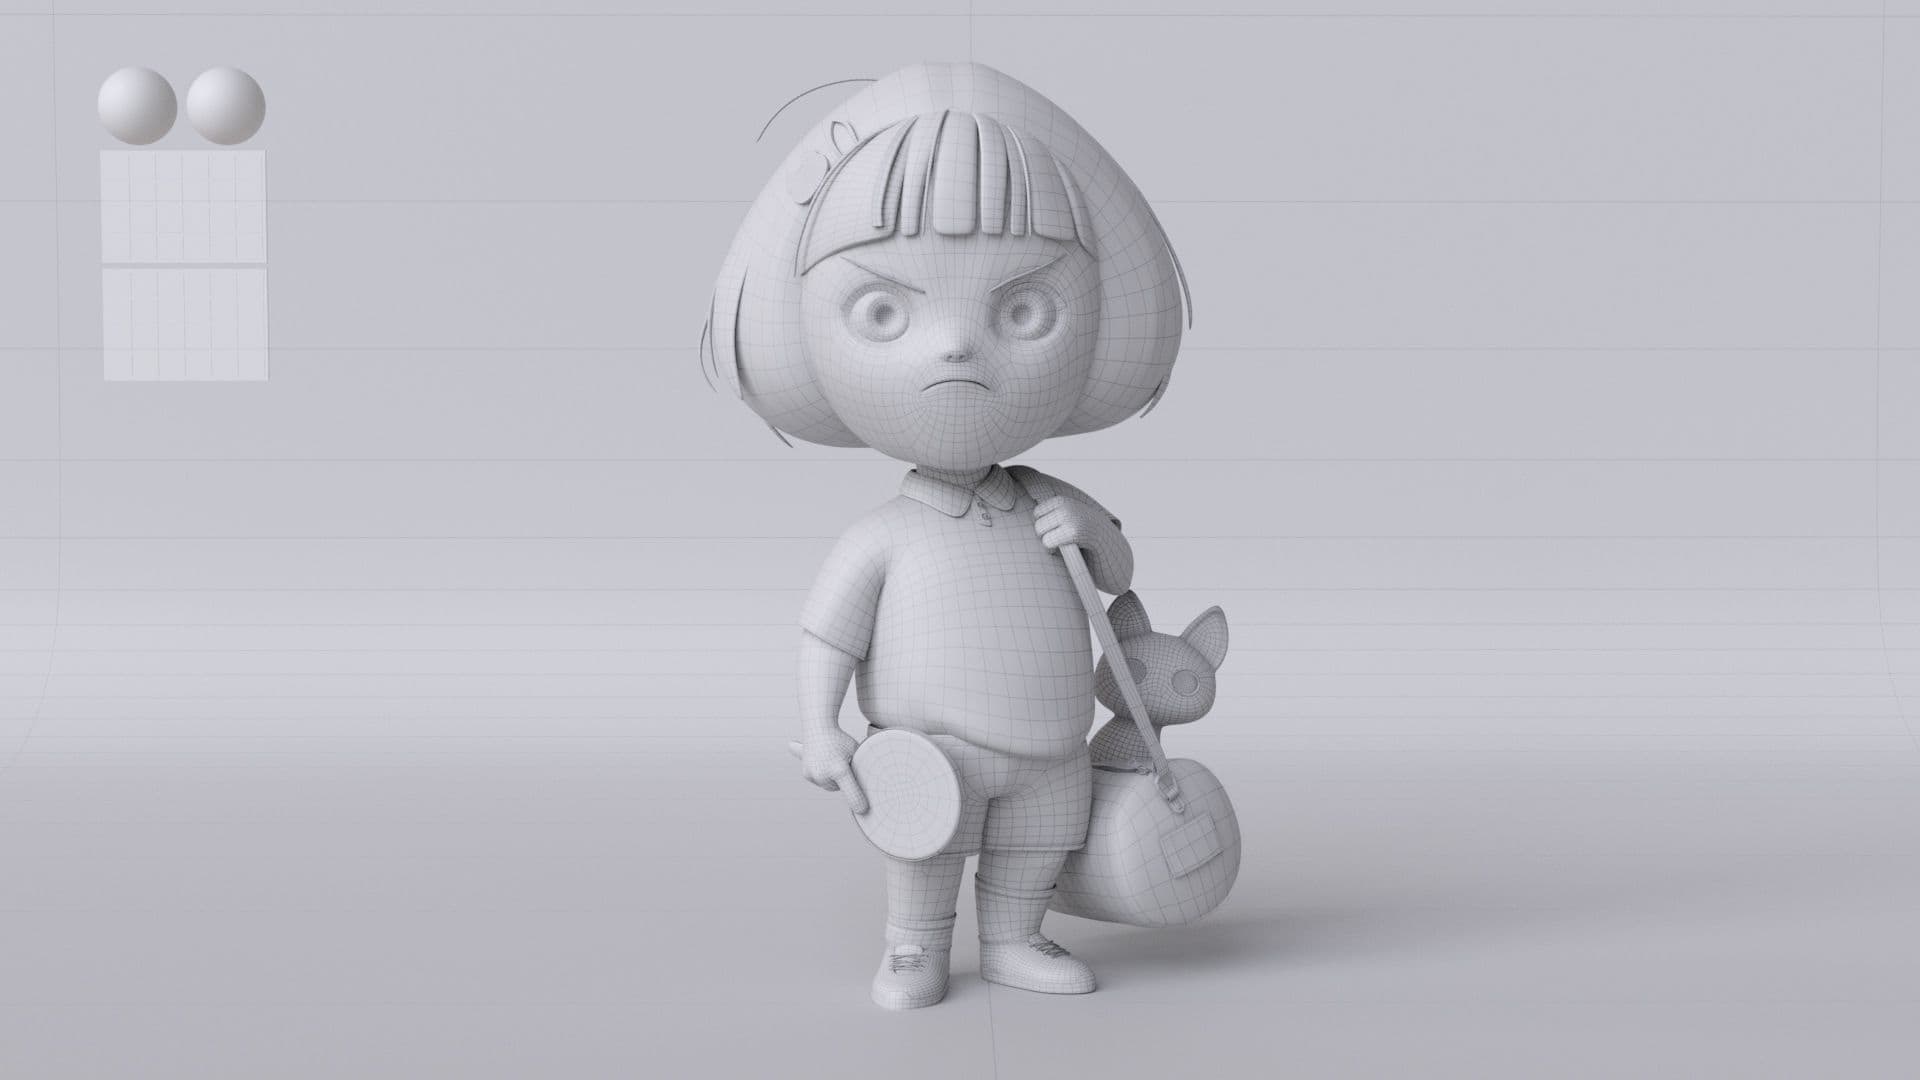
RETOPOLOGY AND UVs
When it comes to retopology, there are a few important things to keep in mind. First of all, if the topology is going to be used for animation, all the polygons have to be square.
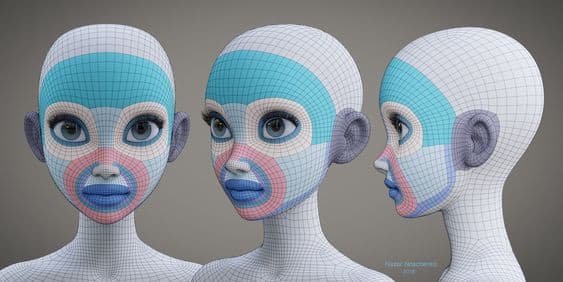
Topology from Nazar Noschenko
There are also a series of important loops that we have to position in certain areas of the face and hands so that when animating we don't have problems. Mainly in the face we have the mask that surrounds the eyes, the loop that surrounds the whole face and from the top of the nose to below the lips.
To get these loops and a good flow we will have to use poles in specific areas. For the hands it is important to have a little more density in the phalanxes, to help the fingers flex.
For the UVs we have to take into account if the character is for videogames and we have to optimise the space of the UVs to the maximum or if on the contrary we can use UDIMS and have some more freedom. I have to say that there are some pieces that don't have the best UVs in the world, you can always do better.
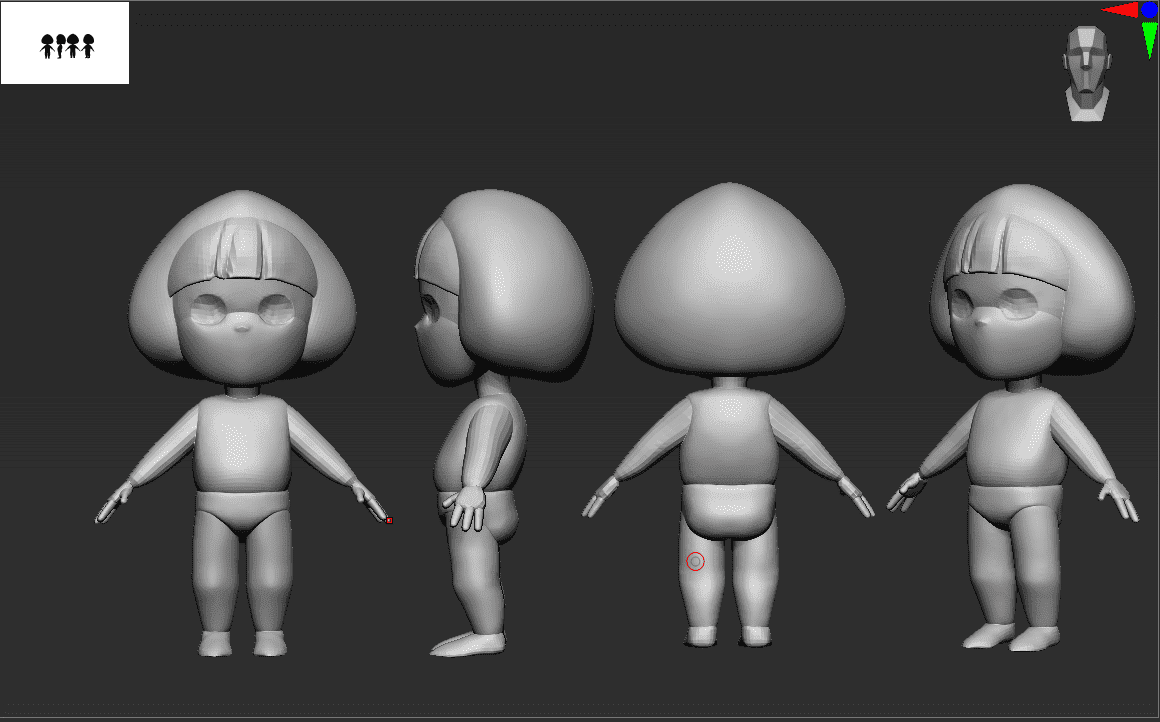
POSE
For the pose of the character I'm making we have to keep in mind that we are going to recreate the pose of the concept we are working on. The most important thing is the silhouette, if we are doing this process in Zbrush we can use the upper left frame where you have a preview of the silhouette of the character. We will use the TPoseMesh tool from Zbrush. At the end we always retouch the pose we get in this process later.
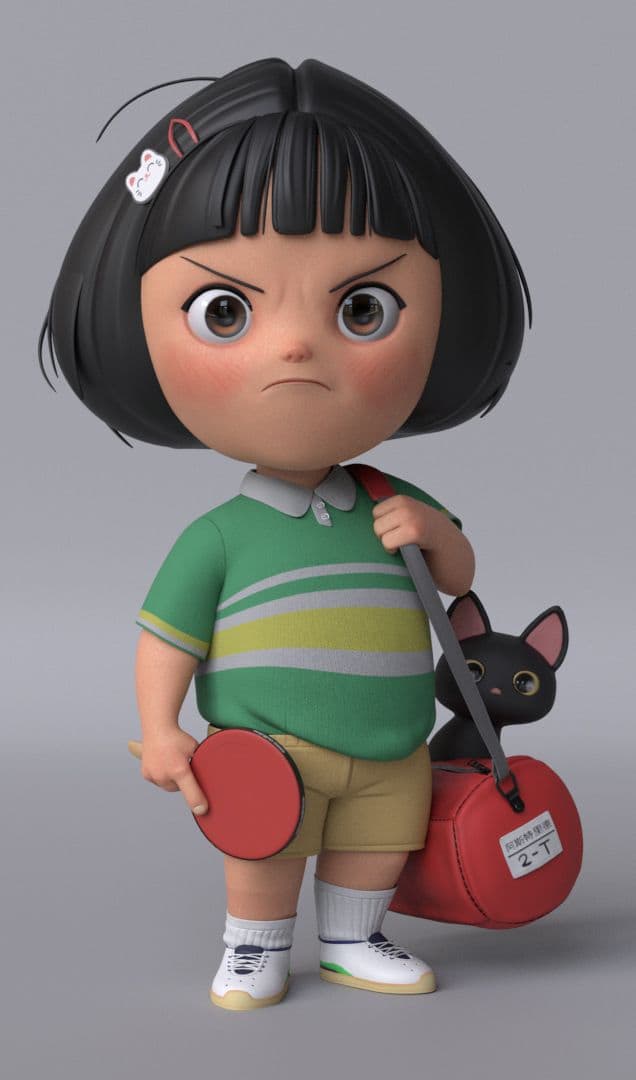
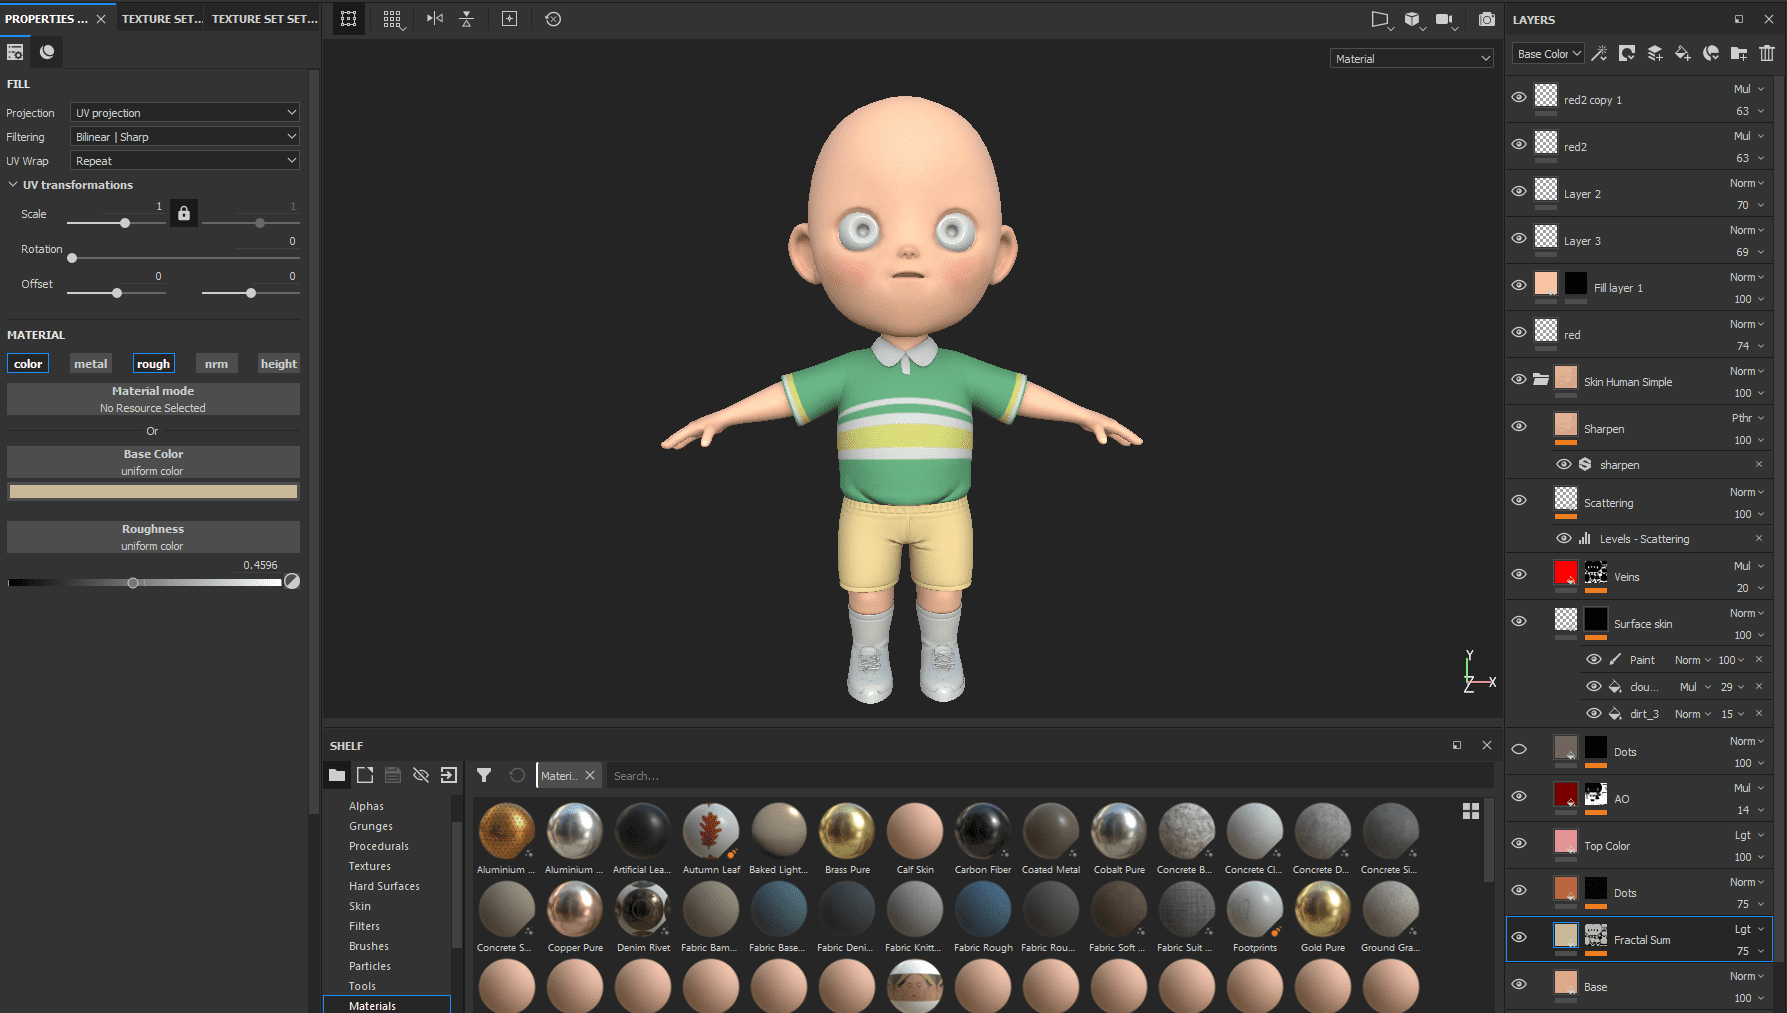
TEXTURING
To texture the character and his clothes we mainly have to rely on the clothing references we have selected and fiddle around in Substance Painter until we get something we like.
I usually try to find a base texture that I like and start working on it. I tweak some parameters of the material and add some masks having previously baked all the maps for each of the character's tools. Then we export the textures and create all the nodes in Maya to be able to render each of the textures we have created.
There are some materials that are not seen in Substance because I found it more comfortable to make them in Zbrush.
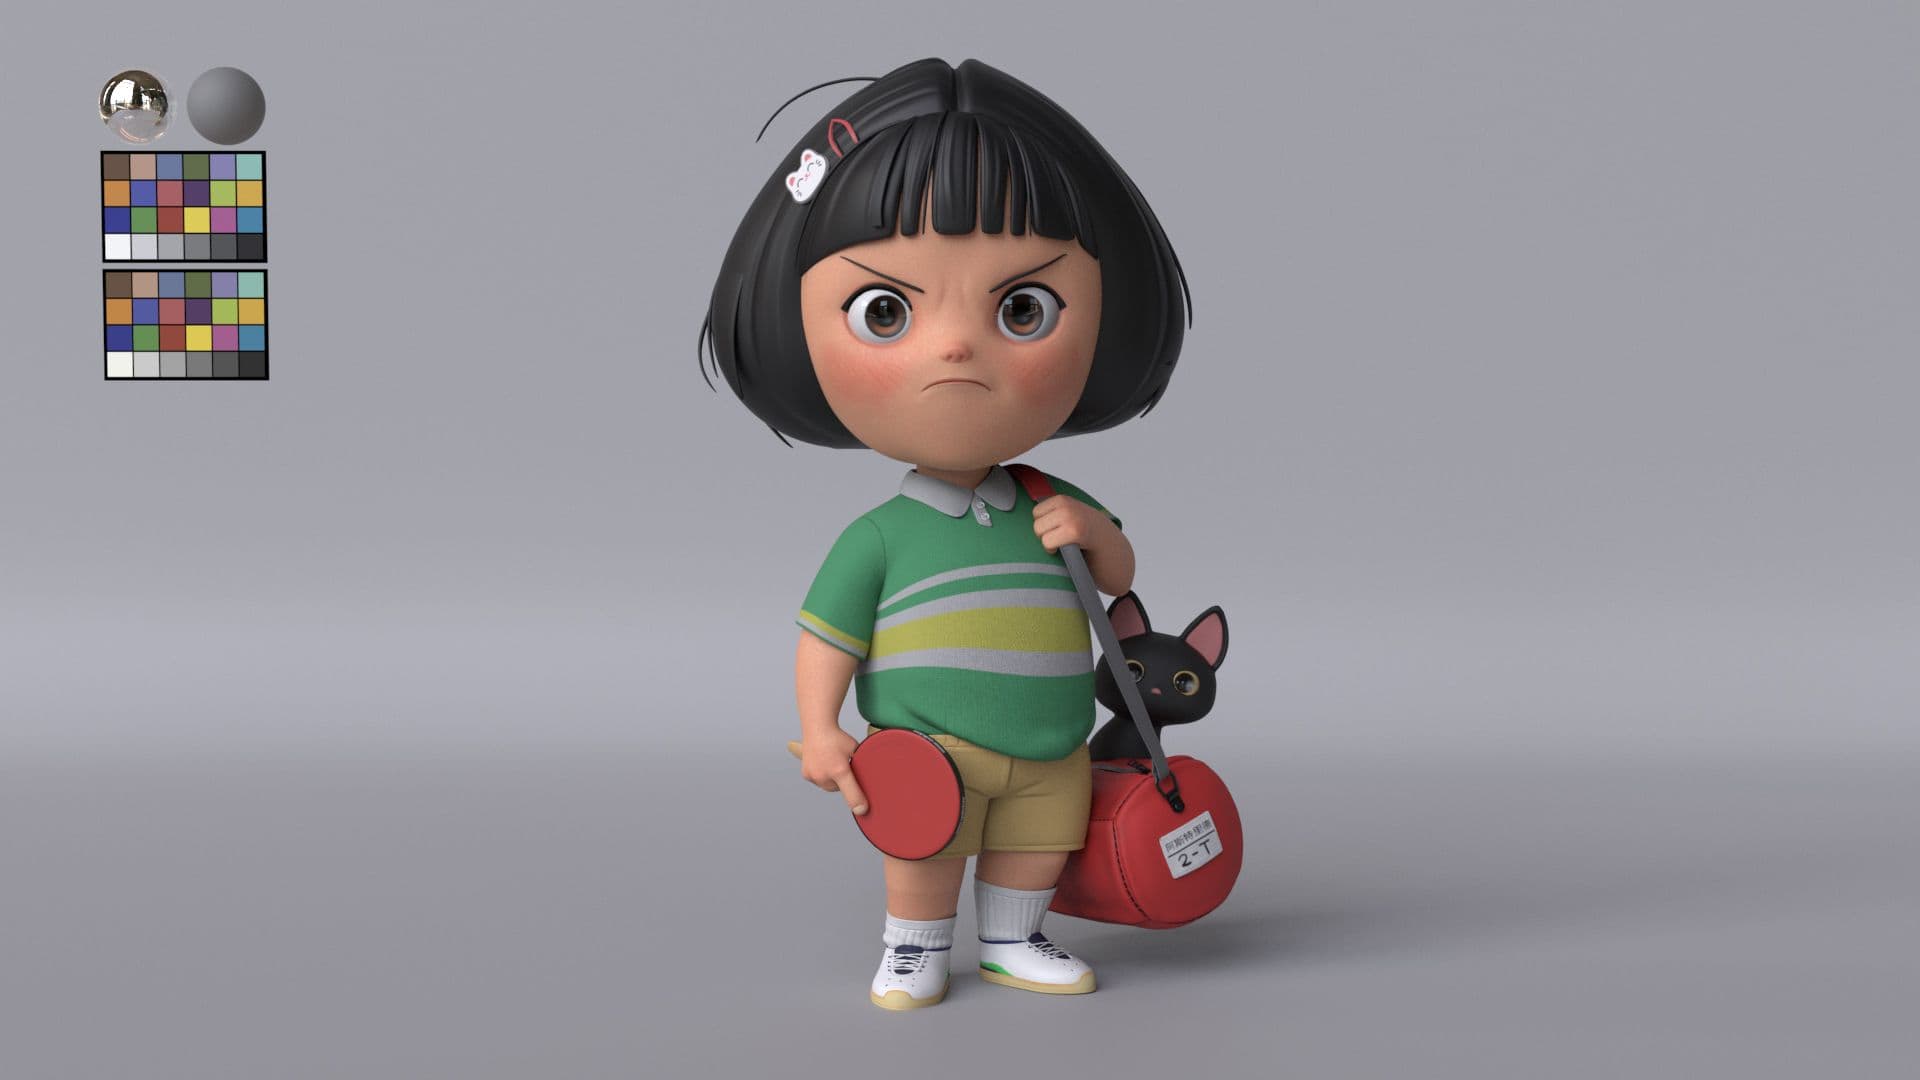
LIGHTING AND RENDER
For the render we need our character to have a simple stage with a grey texture, which is what I will use to introduce the character. The HDRIs I have used are from the site https://polyhaven.com/
The light I usually use to present my characters is the light I get from the skydome. On this occasion the character has a skydome and the eyes another one, to get a lighting in the eyes that I liked.
CONCLUSION
First of all, I would like to thank all the people who have contributed to this project by giving me feedback and proposing different ideas to add to the character. There are many ways to create characters, I hope my way will help people who needed some help in some process of creation.
Here is a timelapse of the process I followed to make the character. I apologize because the last phase of the process, which was to light the scene and so on, I couldn't capture it because of some problems that arose. I hope you like it.