Learning Animation at the Asian Institute of Design
Khushi Vekaria, a student at the Asian Institute of Design, shares her approach to creating captivating animations with iconic characters.
Khushi Vekaria, a student at the Asian Institute of Design, shares her approach to creating captivating animations with iconic characters.
Khushi Vekaria is a student at the Asian Institute of Design, honing her skills in Animation. Dreams of landing a Disney Pixar job propelled Khushi forward, and her goal is to become a 3D Animator who makes an impact on the industry. In this article she shares a bit about her experience at The Asian Institute of Design and also shares how she approaches a simple and engaging animation with iconic characters.
Hi, I'm Khushi Vekaria, choosing animation as a career path wasn't just a decision for me; it felt like a calling. My journey towards animation began with a fascination for storytelling and a deep appreciation for the art of bringing characters to life. One of my earliest memories is watching classic animated films with wide-eyed wonder, completely captivated by the magic unfolding on screen.
As I grew older, I found myself drawn to the creative process behind animation. I would spend hours sketching characters and imagining their movements, trying to capture the essence of their personalities in every frame. It was during my bachelor's degree in BSc Visual Communication that I truly began to understand the power of animation as a storytelling medium. I realised that animation had the ability to transcend language barriers and connect with audiences on a deeply emotional level.
My journey took a pivotal turn when I enrolled in a 3D modeling and animation course at the Centre of Excellence. It was here that I got hands-on experience with the tools and techniques used to bring animated worlds to life.
Animation offers a medium of storytelling and visual entertainment which can bring pleasure and information to people of all ages everywhere in the world. ~Walt Disney
During my internship and apprenticeship programs as a modeling artist, I gained valuable industry experience and insights. However, it was clear to me that my true passion lay in animation itself. I was fascinated by the challenge of conveying emotions and telling stories through movement, and I knew that I wanted to dedicate myself fully to mastering this craft.
That's what led me to pursue a diploma program in animation at the Asian Institute of Design. Here, I am honing my skills under the guidance of experienced mentors, learning new techniques, and pushing the boundaries of my creativity with each project. Every day brings new challenges and opportunities for growth, reaffirming my belief that animation is not just a career for me, but a lifelong passion.
In the end, it's the ability to create worlds and characters that resonate with audiences that drives me forward. Whether it's a heartwarming story that brings tears to your eyes or a thrilling adventure that leaves you on the edge of your seat, animation has the power to inspire, entertain, and ultimately, make a difference in people's lives. And for me, there's no greater reward than being a part of this journey.
Taking into consideration the key elements that are crucial for crafting any shot, understanding the principles of animation stands out as a paramount. It is imperative to grasp these principles and incorporate them into your work. With that said, let me walk you through the process I follow to create animations. For this particular article I would like to show you my process of creating an animation (parkour) for a beloved character, Jerry, from the Tom and Jerry cartoons.
Selecting the theme and genre for my animation involved a combination of personal nostalgia, creative inspiration, and a desire to explore new territory. When brainstorming ideas for my newest project, I wanted to tap into a cherished aspect of my childhood that would resonate with audiences while also allowing me to inject my own unique twist.
Growing up, Tom and Jerry was one of my favourite cartoons. The dynamic between the mischievous mouse "Jerry" and his bumbling foe "Tom" sparked countless hours of laughter and wonder. There's a timeless charm to the characters and their adventures that still captivates audiences today. So, when considering themes for my animation, it felt natural to revisit this beloved duo.
However, I also wanted to inject a fresh, contemporary element into the mix. That's where the idea of blending Jerry with the parkour genre came into play. Parkour, with its fluid movements, acrobatic stunts, and urban environments, offers a visually dynamic and exhilarating experience. By combining Jerry's playful antics with the adrenaline-fuelled world of parkour, I aimed to create a unique contrast that would both surprise and delight viewers.
The reason I chose this was because it had many different sides to it. First, it let me honour a beloved character while giving it a new twist, so both older fans of Tom and Jerry and younger people who like parkour could enjoy it. Second, the difference between Jerry being small and the big stunts of parkour makes it funny and interesting to watch.
Additionally, blending Jerry with the parkour genre presented exciting creative challenges and opportunities. It allowed me to explore new animation techniques, experiment with dynamic camera angles, and push the boundaries of what's possible in terms of character movement and interaction with the environment. It's a project that combines elements of my childhood with my passion for animation and storytelling, and I can't wait to see where this adventure takes me.
[At the Asian Institute of Design] I am honing my skills under the guidance of experienced mentors, learning new techniques, and pushing the boundaries of my creativity with each project.
If the shot is feasible, I create my own reference; otherwise, I download one.
Using reference material is crucial in the animation process as it provides a solid foundation for understanding movement, character expressions, and storytelling. In the animation process, reference material serves as a cornerstone for creating authentic and compelling movements and expressions. For the Jerry parkour project, revisiting Tom and Jerry provided invaluable inspiration and guidance. By watching various series and movies, I gained insight into the nuances of character animation and comedic timing that are characteristic of the beloved cartoon. Compiling snippets from different sources allowed me to tailor the reference material to suit the specific needs of the project, ensuring that it aligned with my artistic vision.
Subsequently, I select assets and rigs that align with the chosen concept.
When selecting assets and rigs for my animations, I prioritise several key criteria to ensure that they align with the specific needs and vision of the project. Firstly, I consider the quality of the assets, ensuring that they are well-designed and capable of conveying the desired level of detail and expression. For the Jerry parkour animation, I used a free Jerry rig from Artem Dubina. Additionally, I ensure that the selected assets are compatible with the specific style and tone of the animation. Some of the assets were created by me whereas the others are downloaded. I downloaded my assets from SketchFab. Ultimately, the selection of assets and rigs for animation involves a balance of artistic vision, technical requirements, and practical considerations.
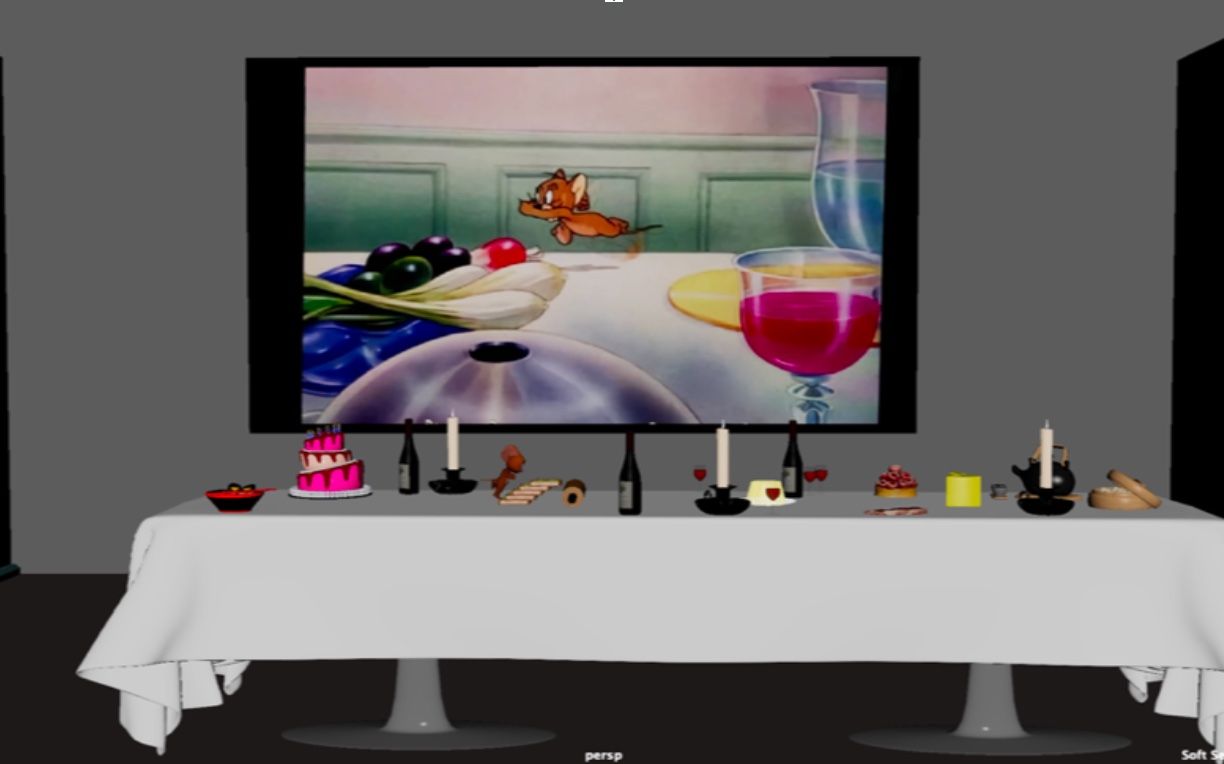
Begin by selecting and importing the necessary assets into Maya. This includes the character rig for Jerry, as well as any additional props or environment elements required for the scene.
Next, assemble the environment elements to create the parkour setting. This may include building platforms, obstacles, and other environmental features. Pay attention to scale, composition, and realism to create an immersive environment that complements the character animation.
Set up shot cameras to capture the action from different angles and perspectives. This involves positioning and framing the cameras to effectively showcase Jerry's parkour stunts while maintaining visual coherence and storytelling clarity.
Experiment with camera angles, focal lengths, and camera movements to enhance the dynamism and impact of the animation. Below I have attached my set up in Autodesk Maya.

In the process of blocking poses for my animation, I focus on establishing the foundational movements and key poses that define the character's actions Here's a detailed breakdown of how I ensure timing, spacing, and silhouette clarity during this crucial stage:
By following this process of blocking poses, I can effectively establish the foundational movements for Jerry's parkour stunts while ensuring precise timing, spacing, and silhouette clarity. This sets the stage for further refinement and detailing in subsequent stages of the animation pipeline, ultimately resulting in a polished and professional-quality animation.
To enhance the smoothness and realism of the animation, I incorporate in-betweens to add fluidity and naturalness to the movement. For example, during Jerry's jumps and landings, I add in-betweens to estimate between key poses, ensuring that the motion is continuous and seamless. This helps to smooth out any abrupt transitions and create a more lifelike sense of motion.
Additionally, I incorporate character overlaps to add secondary motion and weight to Jerry's movements. For instance, when Jerry performs a quick turn or change in direction, I animate his limbs and tail to follow through with a subtle delay, mimicking the physics of real-world movement. This adds depth and dimensionality to the animation, enhancing the illusion of weight and mass while infusing Jerry's actions with a sense of organic fluidity.
In refining and cleaning up my animation, I employ a combination of techniques and tools to ensure that the animation meets professional standards of quality and polish. Firstly, I utilise Maya's animation controls and timeline to fine-tune the timing, spacing, and poses, iteratively refining each movement for maximum impact and coherence.
Additionally, I make use of Maya's curves editor to further refine the animation curves, smoothing out any jagged or unnatural movements and ensuring that transitions between poses are seamless and fluid. This allows for precise control over the animation's timing and dynamics, enhancing its overall realism and appeal.
Furthermore, I utilise playback and feedback tools within Maya to review the animation from different angles and perspectives, identifying any areas that require further refinement or adjustment. By incorporating these techniques and tools into my workflow, I can effectively refine and clean up the animation, resulting in a polished and professional-quality final product.
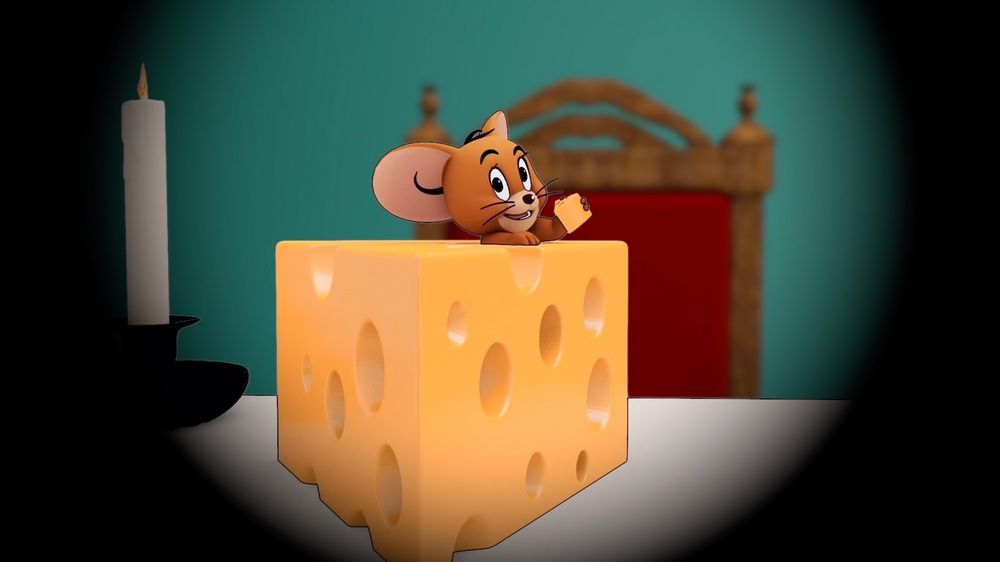
Upon satisfaction with the animation, I move on to lighting and texturing, dedicating ample time to create impactful lighting that enhances the animation. For this animation, I opted for a toon Maya rendering style to capture the essence of Tom and Jerry. This style maintains the iconic look of the classic cartoon while allowing for creative expression and flexibility in lighting and texturing. To enhance the mood and atmosphere, I focus on using bold, exaggerated lighting contrasts and vibrant colours to evoke a sense of whimsy and excitement. By strategically placing light sources and applying stylised textures, I aim to create dynamic visuals that complement the playful energy of the animation, while staying true to the nostalgic charm of the source material.
In the rendering process, I focus on achieving the desired aesthetic and visual style, ensuring that the animation is presented in the best possible light. Once rendered, I import the footage into Final Cut Pro for post-production adjustments. This includes applying transitions to seamlessly blend scenes and adding a circle transition to highlight Jerry holding the cheese, emphasising the climax of the animation. Additionally, I fine-tune colour correction to enhance the vibrancy and consistency of the visuals, and integrate audio elements to complement the narrative and enhance viewer engagement, resulting in a polished and professional final product.
Working on the Jerry parkour animation was both exciting and challenging. Adapting the beloved character into a dynamic parkour setting presented creative hurdles, but also opportunities for innovation. Balancing the whimsical charm of Tom and Jerry with the intensity of parkour required careful attention to detail and iteration. Overcoming technical challenges in animation tested my skills, but also deepened my understanding of the animation process.
Despite the challenges, the project yielded many successes. Bringing Jerry to life in the parkour environment was immensely satisfying, and seeing the character navigate the obstacles with agility and humor was a rewarding experience. Incorporating the toon Maya rendering style captured the essence of the classic cartoon while adding a fresh perspective. The final result, enhanced by post-production adjustments in Final Cut Pro, exceeded my expectations and left me proud of the work accomplished. Overall, the project was a valuable learning experience and a testament to the power of creativity and perseverance in animation.
In conclusion, the process of creating the Jerry parkour animation was both challenging and immensely rewarding. It allowed me to combine my passion for animation with a childhood nostalgia for the iconic duo of Tom and Jerry, resulting in a project that holds a special place in my heart. Through careful planning, iteration, and technical skill, I was able to bring Jerry to life in a dynamic and exhilarating parkour setting, staying true to the character's playful spirit while adding a modern twist.
I hope that readers will enjoy and learn from the insights shared in this article, gaining a deeper understanding of the animation process and the creative journey behind bringing beloved characters to life. May this animation inspire others to pursue their own creative dreams and embrace the joy of storytelling through animation.
Hope this article finds you well and you enjoyed the process as much as I loved creating it. Reach out to me via my Rookies profile here.