
A Renaissance Masterpiece: Building a Detailed 3D Prop in Just 10 Days
Passionate about creating realistic props, Raushan, a student at Florida Universitària, shares her latest project on The Rookies.
Passionate about creating realistic props, Raushan, a student at Florida Universitària, shares her latest project on The Rookies.
Currently in the final stages of completing her education in animation and video games at Florida Universitària, Raushan Sadvakas is also gaining valuable experience through an internship at Mariner S.A. A dedicated individual, she excels in creating intricate 3D models of furniture and producing realistic renders. Her passion lies in meticulously crafting 3D props, and she is determined to continually enhance her skills in this art form. This article features Raushan's latest project on The Rookies, an instrument from the Renaissance period.
Greetings! My name is Raushan Sadvakas. I also go by the name of Sodrose and I am currently enrolled in the Vocational Education of 3D animation and video games at Florida Universitària in Valencia, Spain. Before starting my studies, I felt lost and unsure about my future, but now I have found my passion for 3D modeling, particularly in creating realistic 3D props.
The project I want to discuss is my participation in the Art Challenge organised by my University. We were given 10 days to create any piece of art, with the only restriction being that it had to be based on the theme of the Medieval era. I have always been intrigued by Medieval art but I never had the opportunity to explore it due to time constraints. When I found out about the theme, I was thrilled and motivated to create something unique as it presented a challenge for all of us.
My goals was to finish the prop in 10 days and during that time to improve my modeling, baking and texturing skills. I also wanted to learn how to use Marmoset and create a great final render.

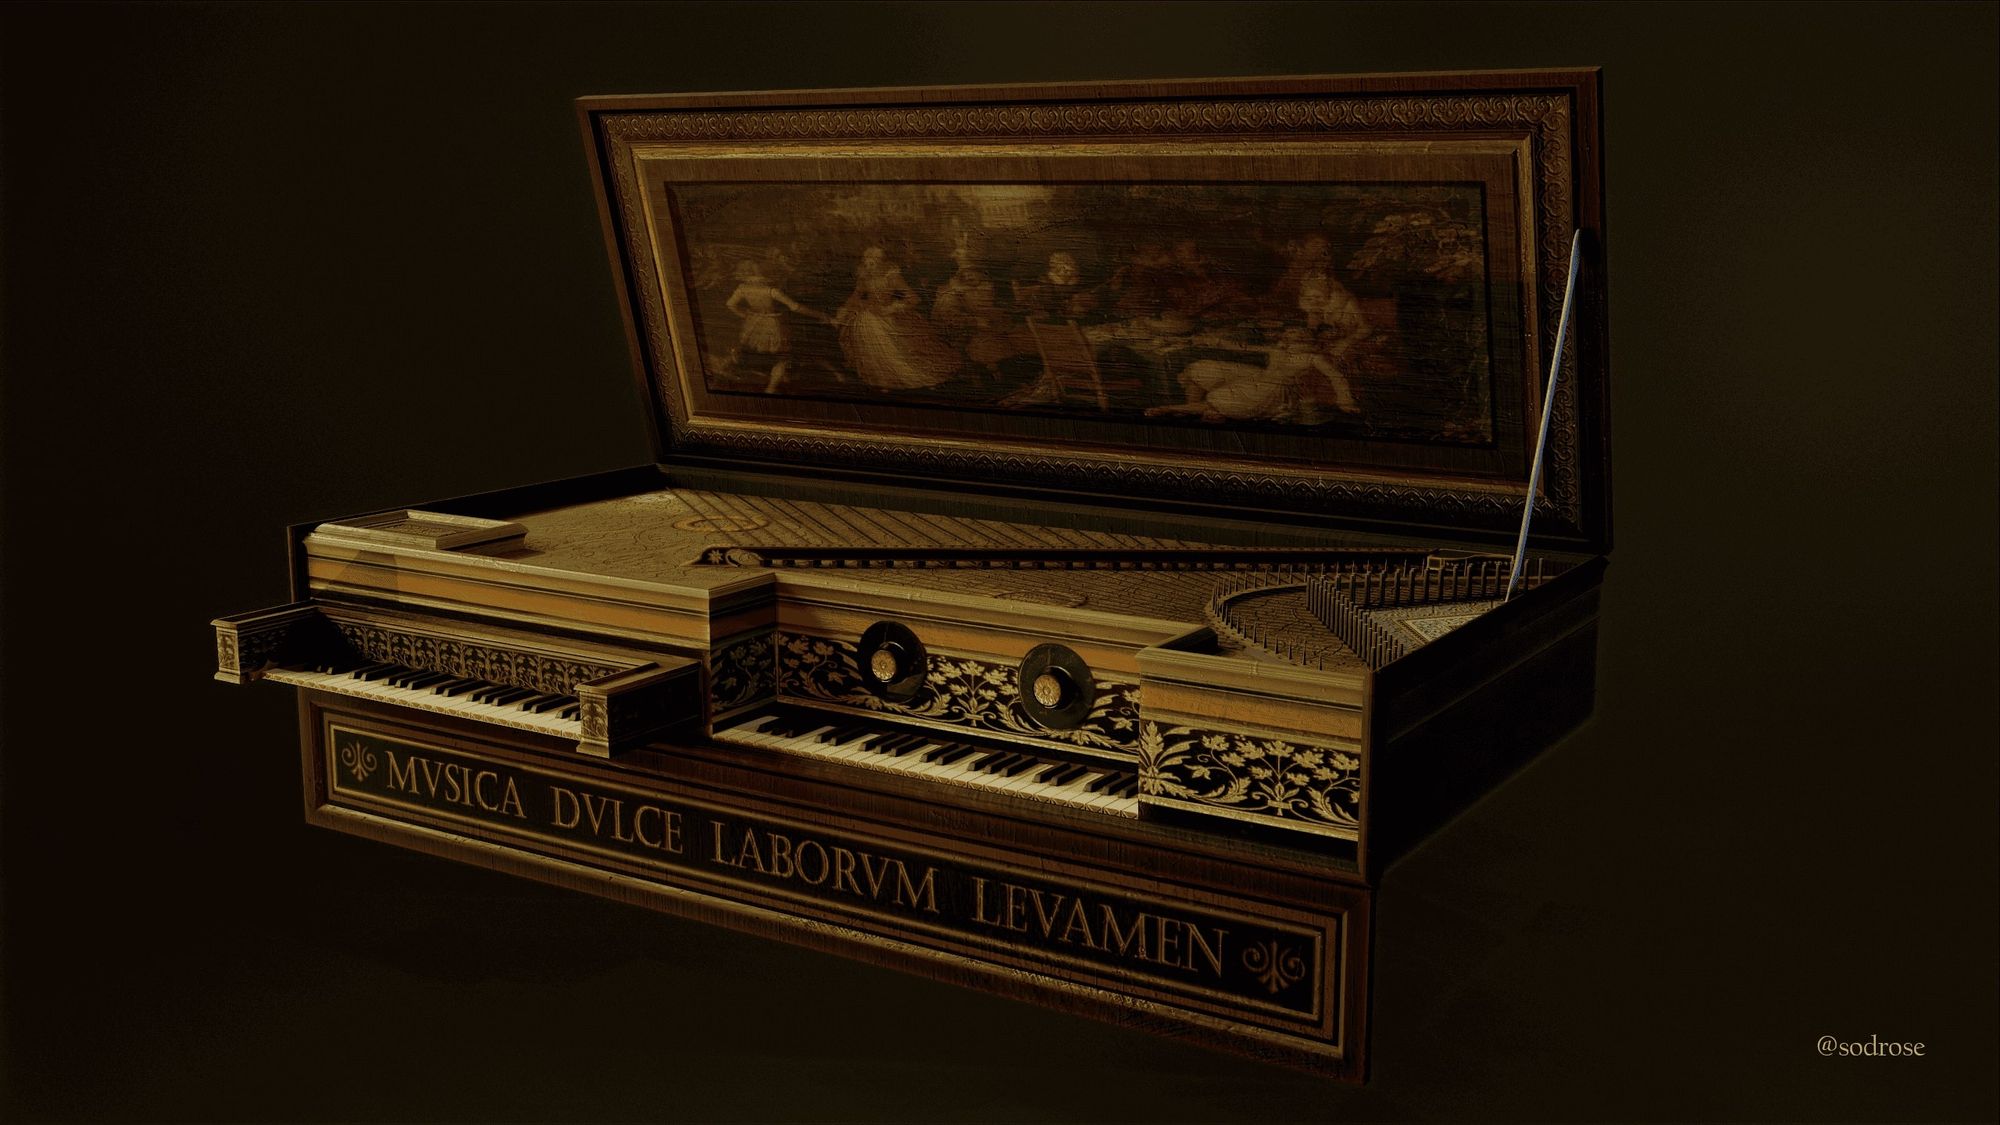
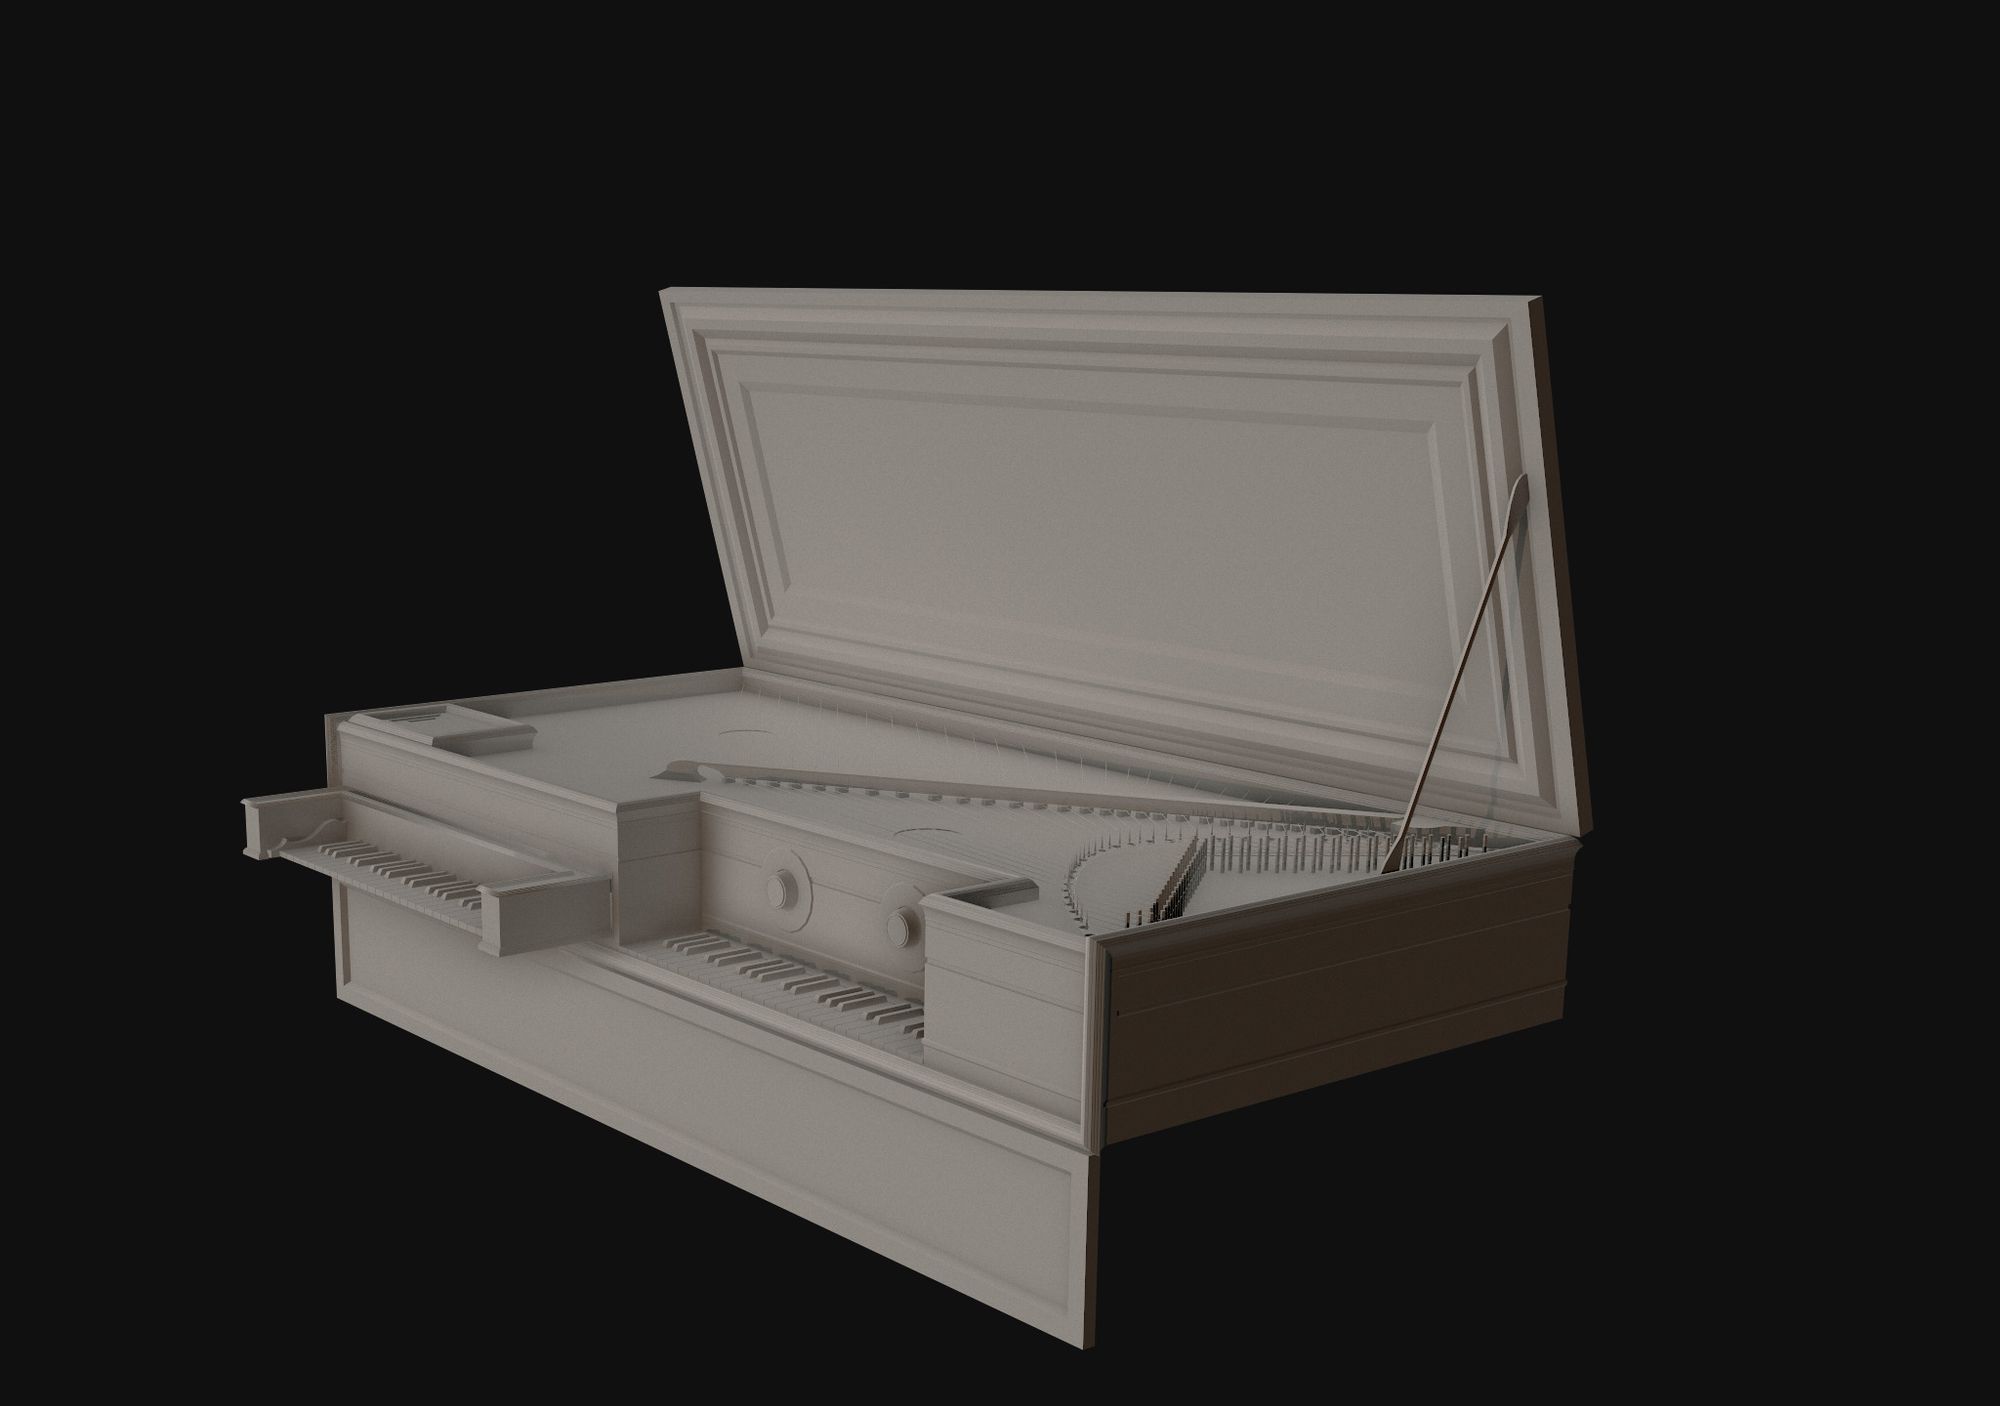
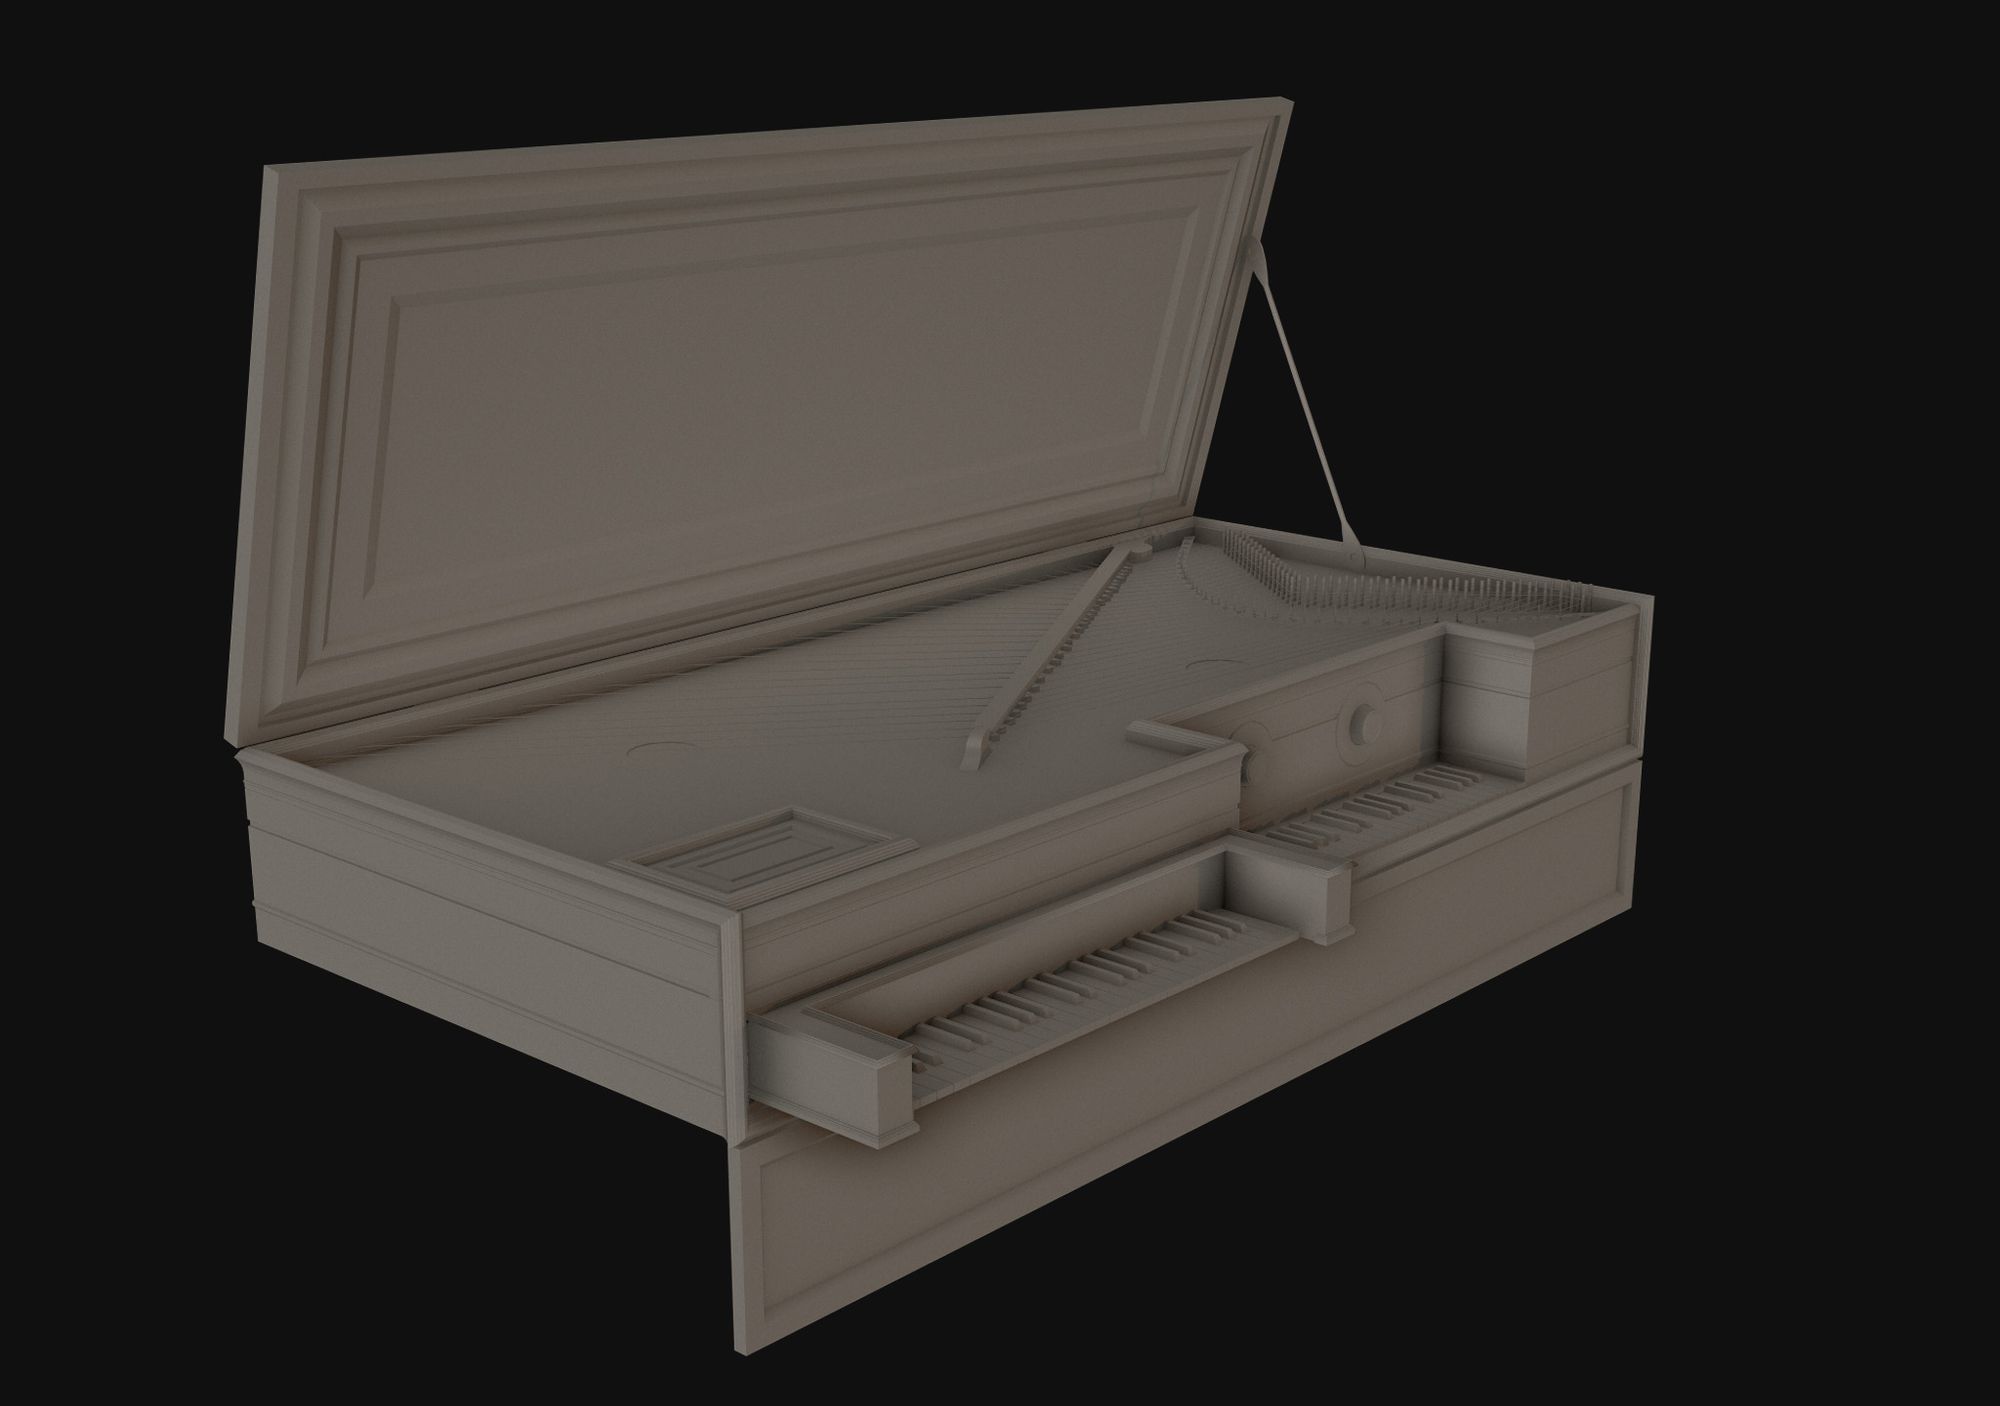
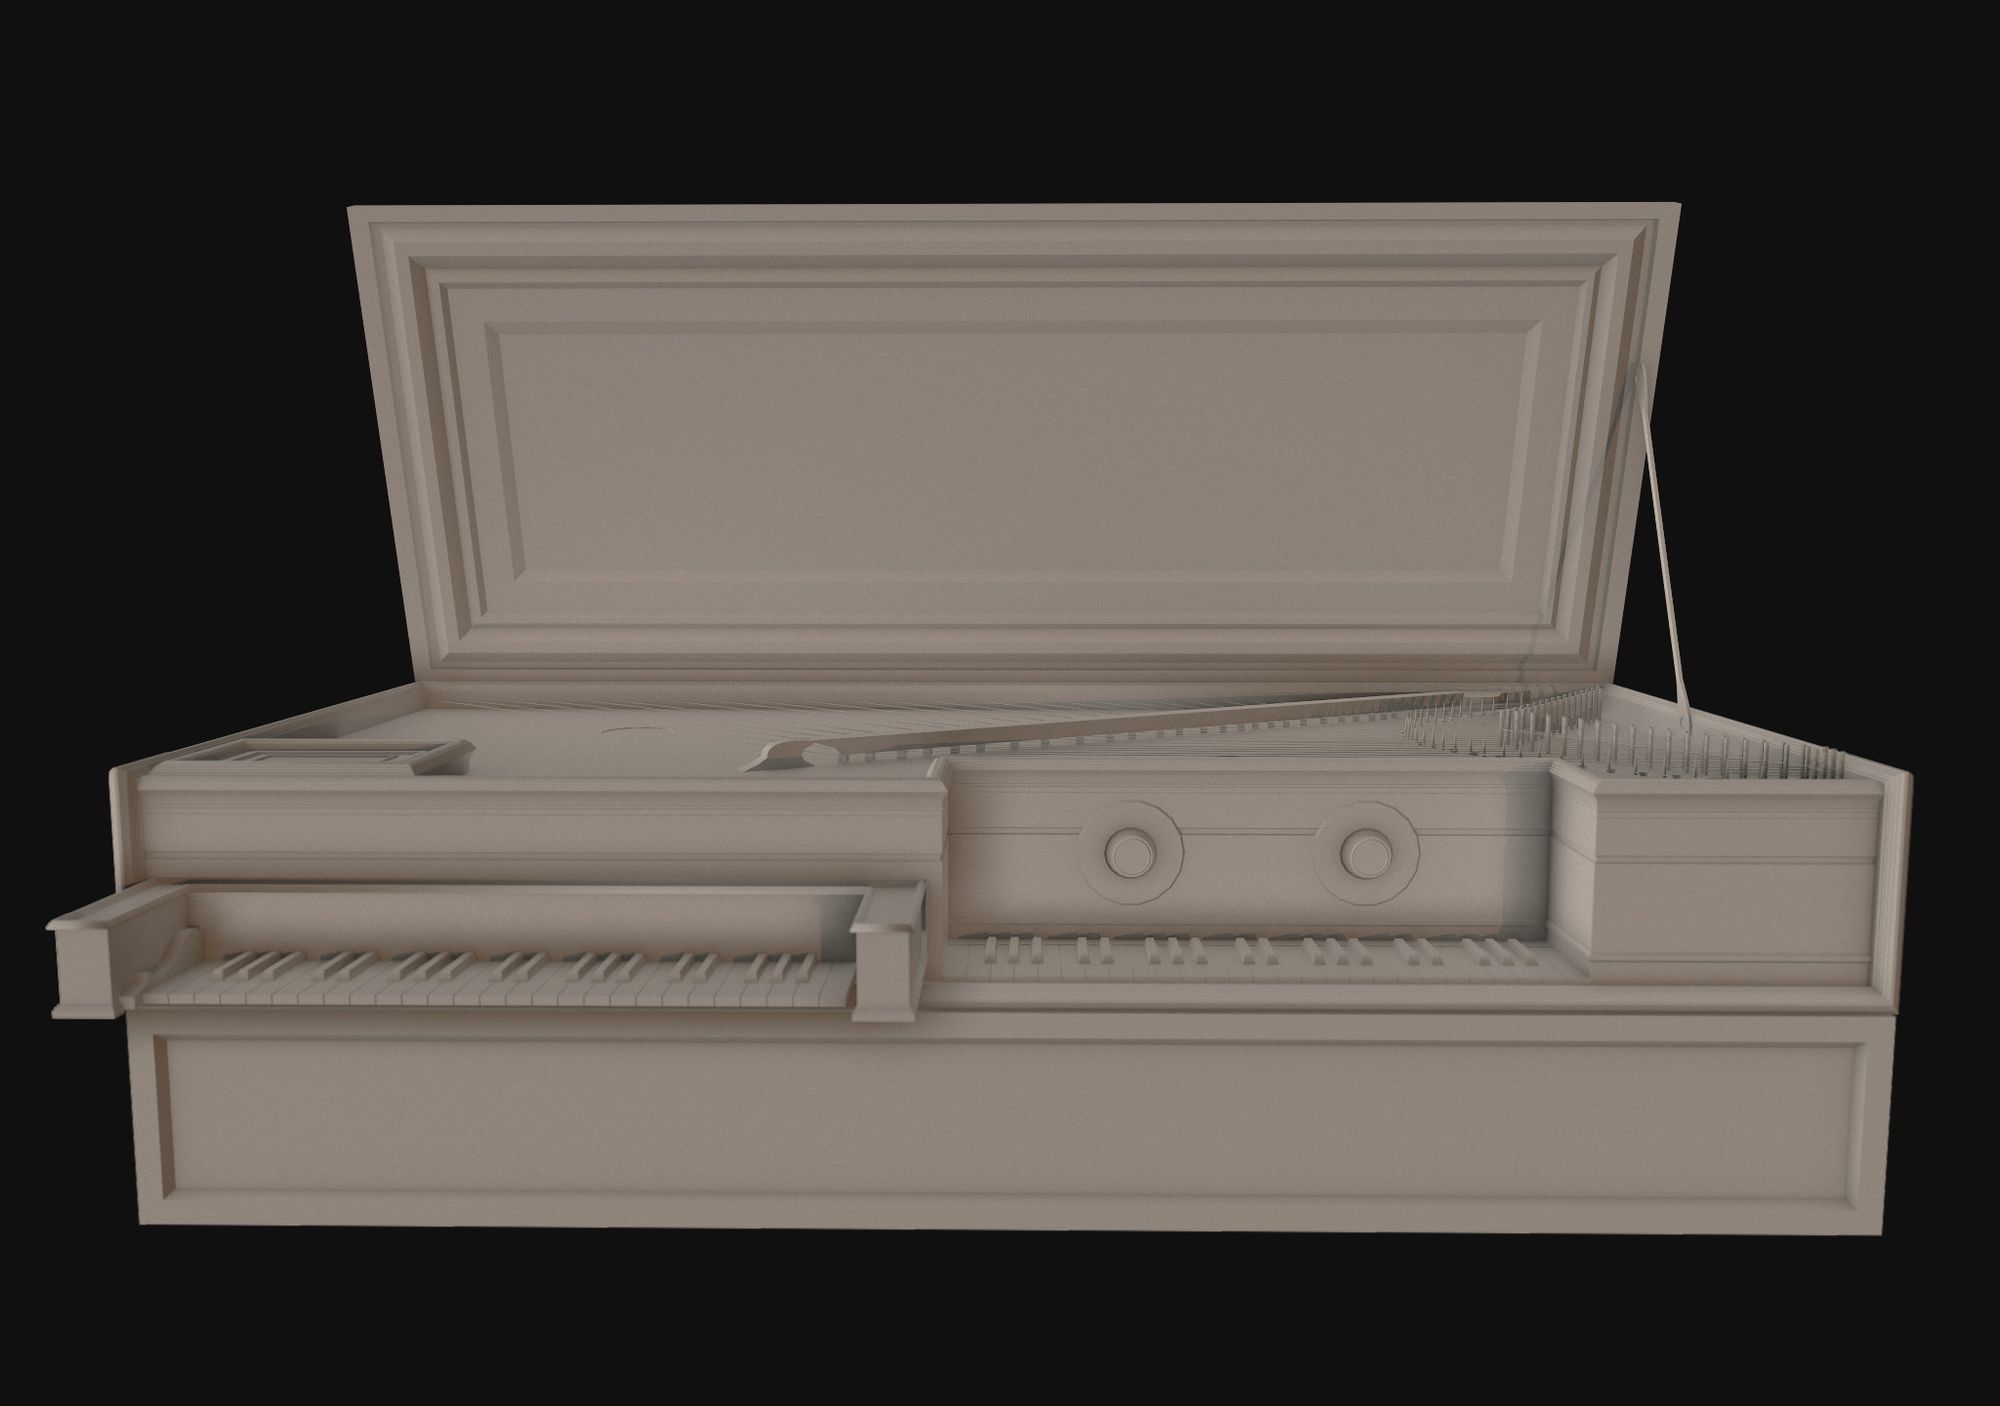
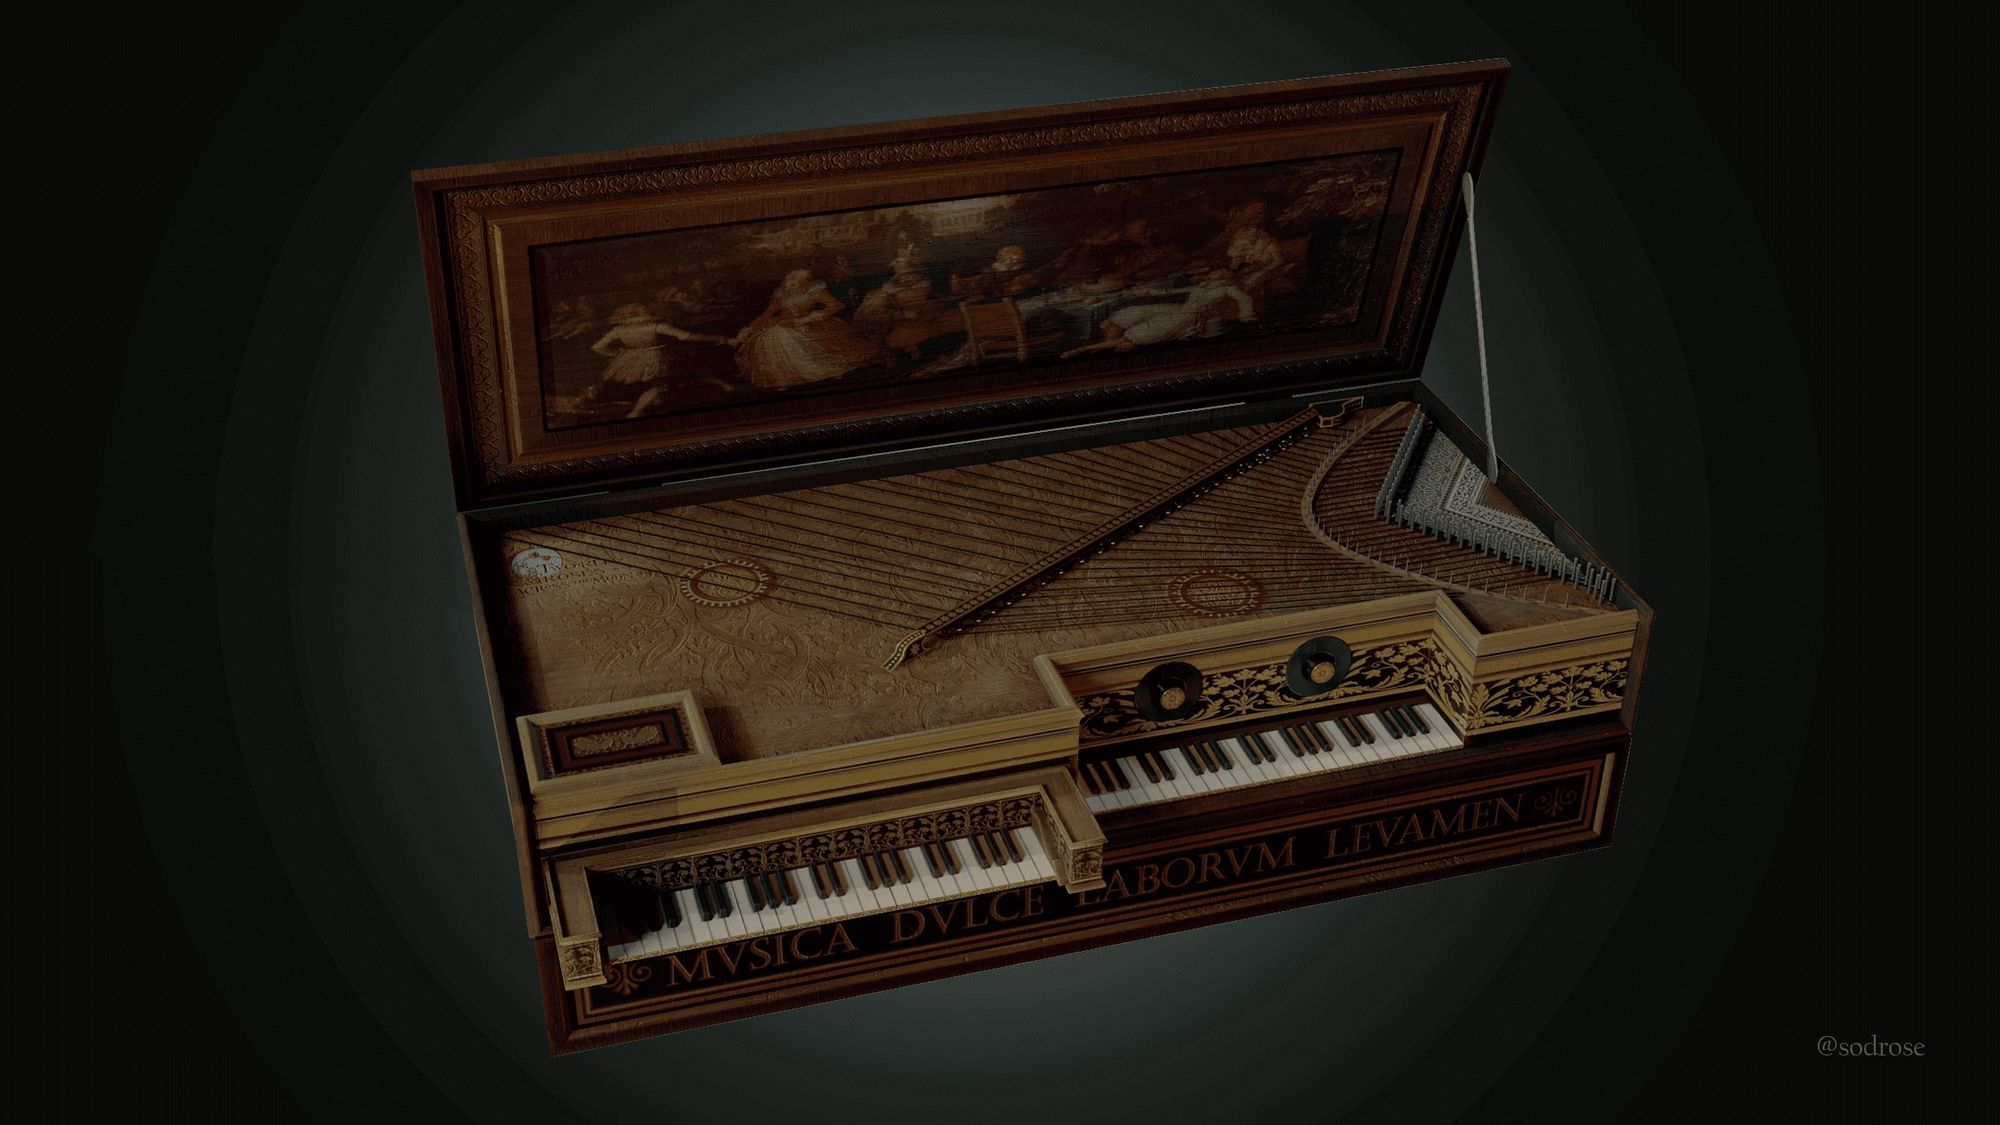
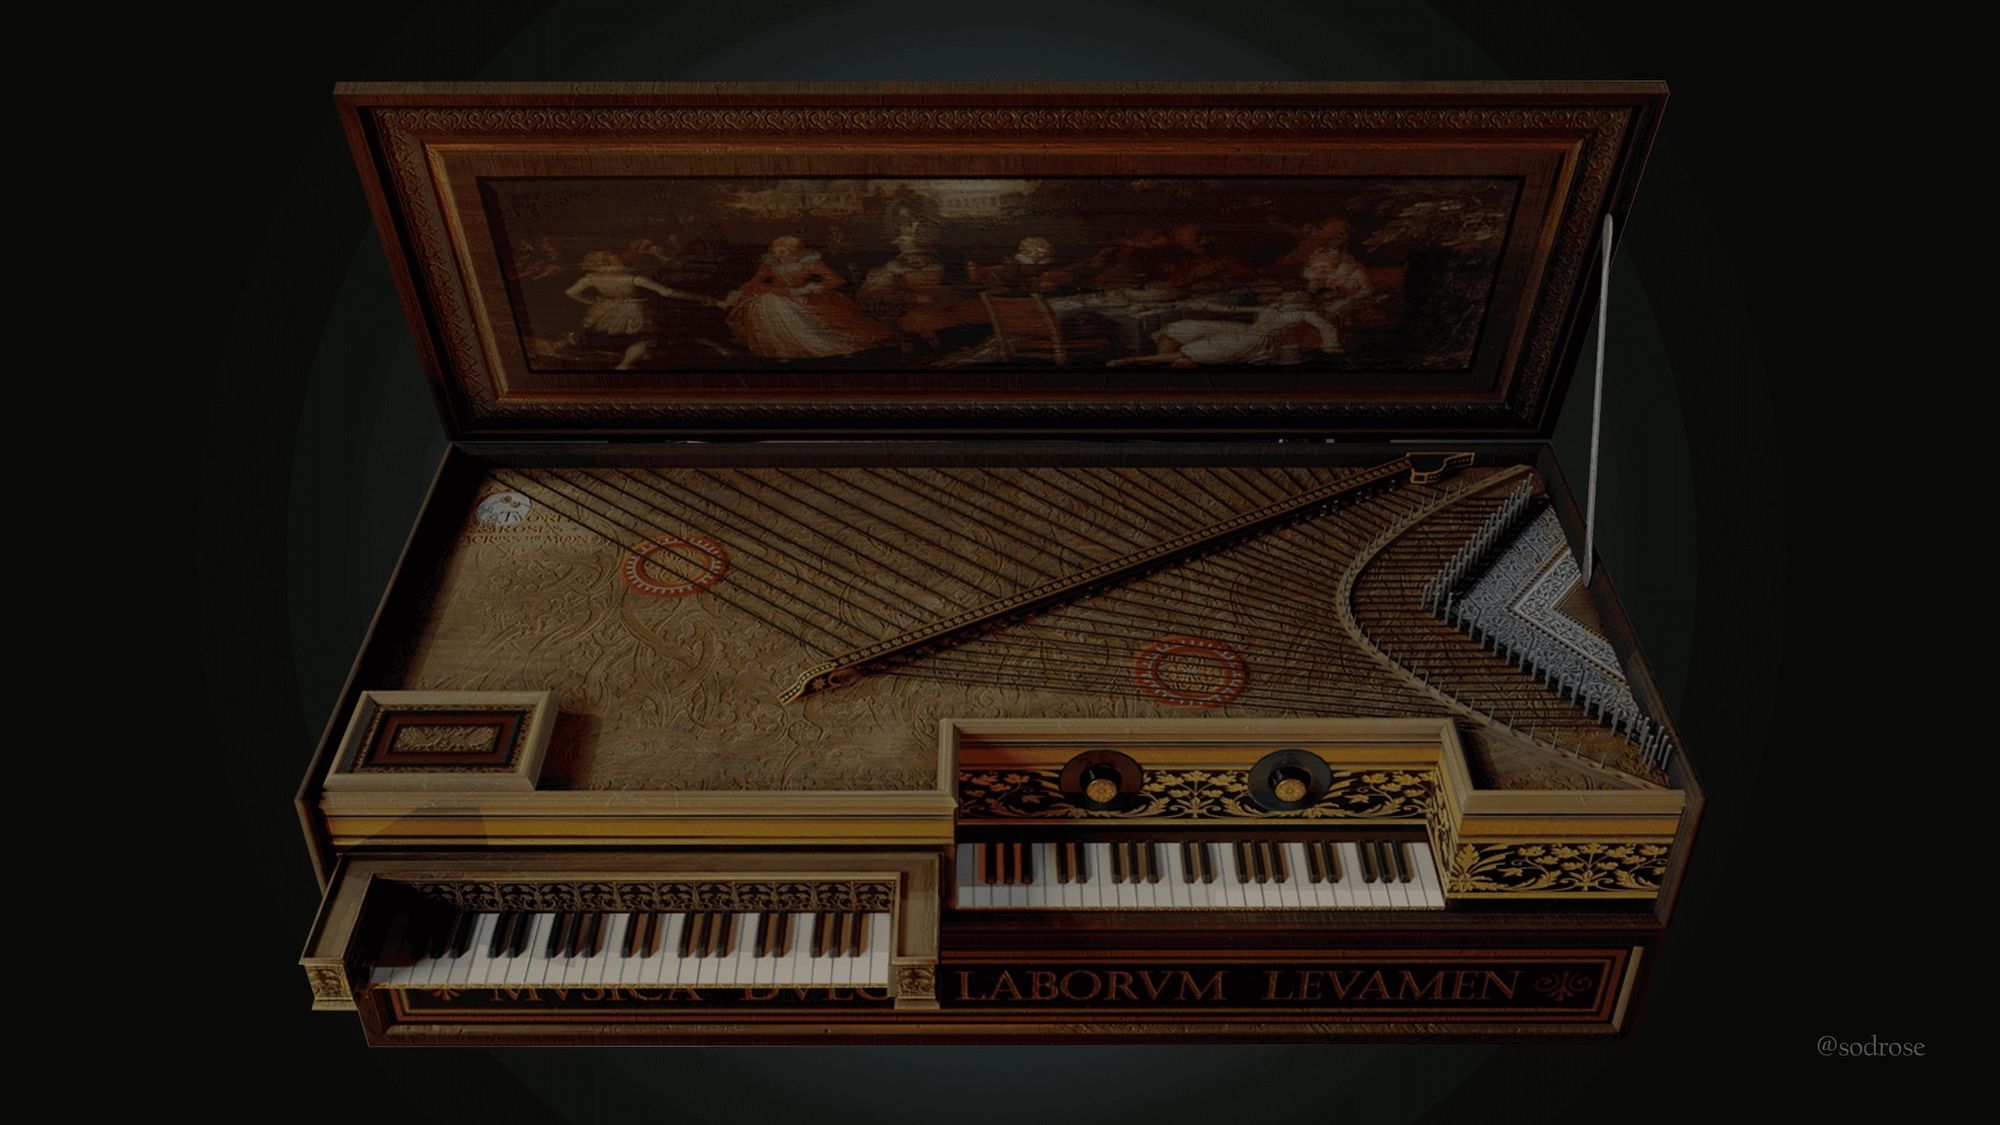
The Double Virginal is a type of keyboard instrument that was popular during the Renaissance and Baroque periods. It consists of two keyboards, each with its own set of strings, allowing the player to create a rich, layered sound. With its unique design of a large "mother" instrument and a smaller "child" instrument, it showcases the craftsmanship and innovation that the Ruckers dynasty was known for.
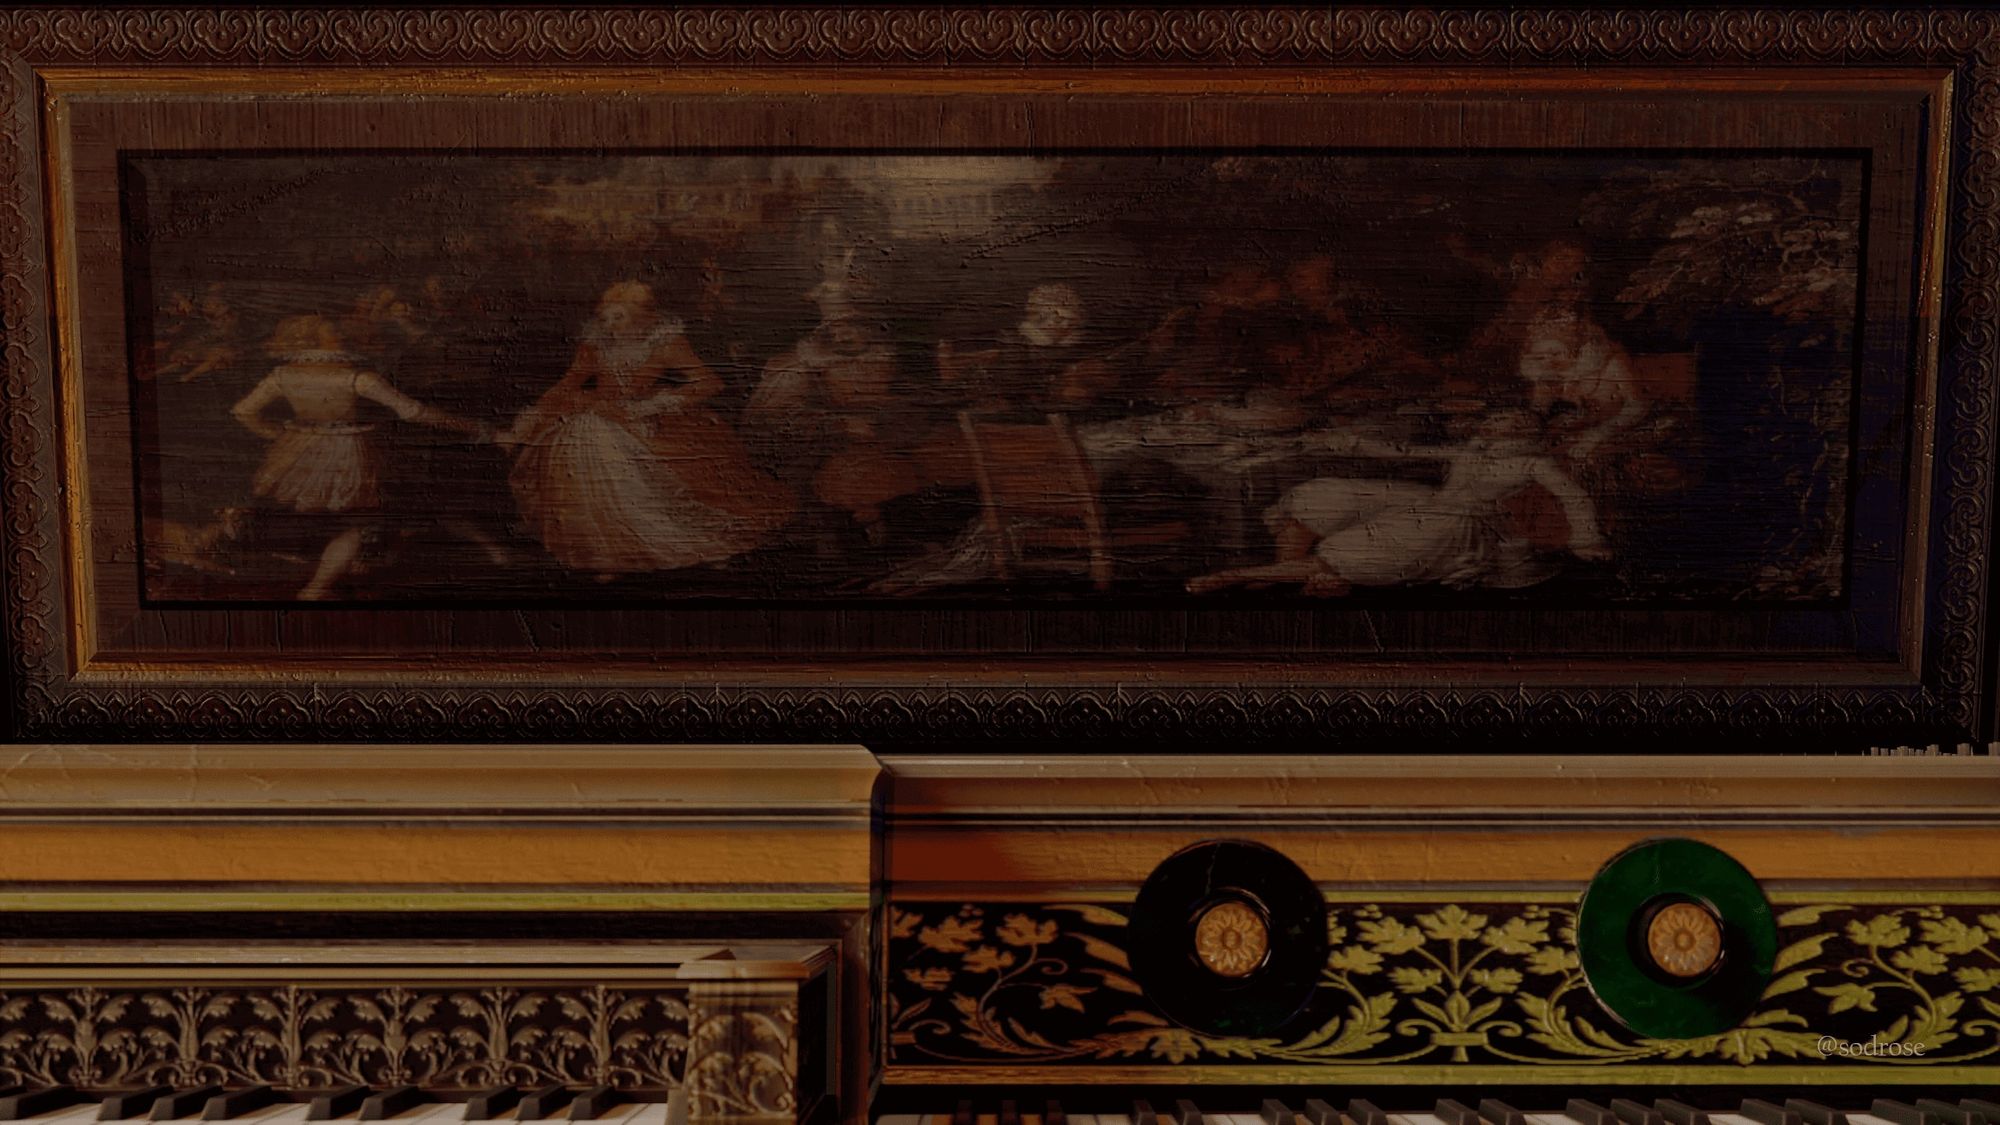
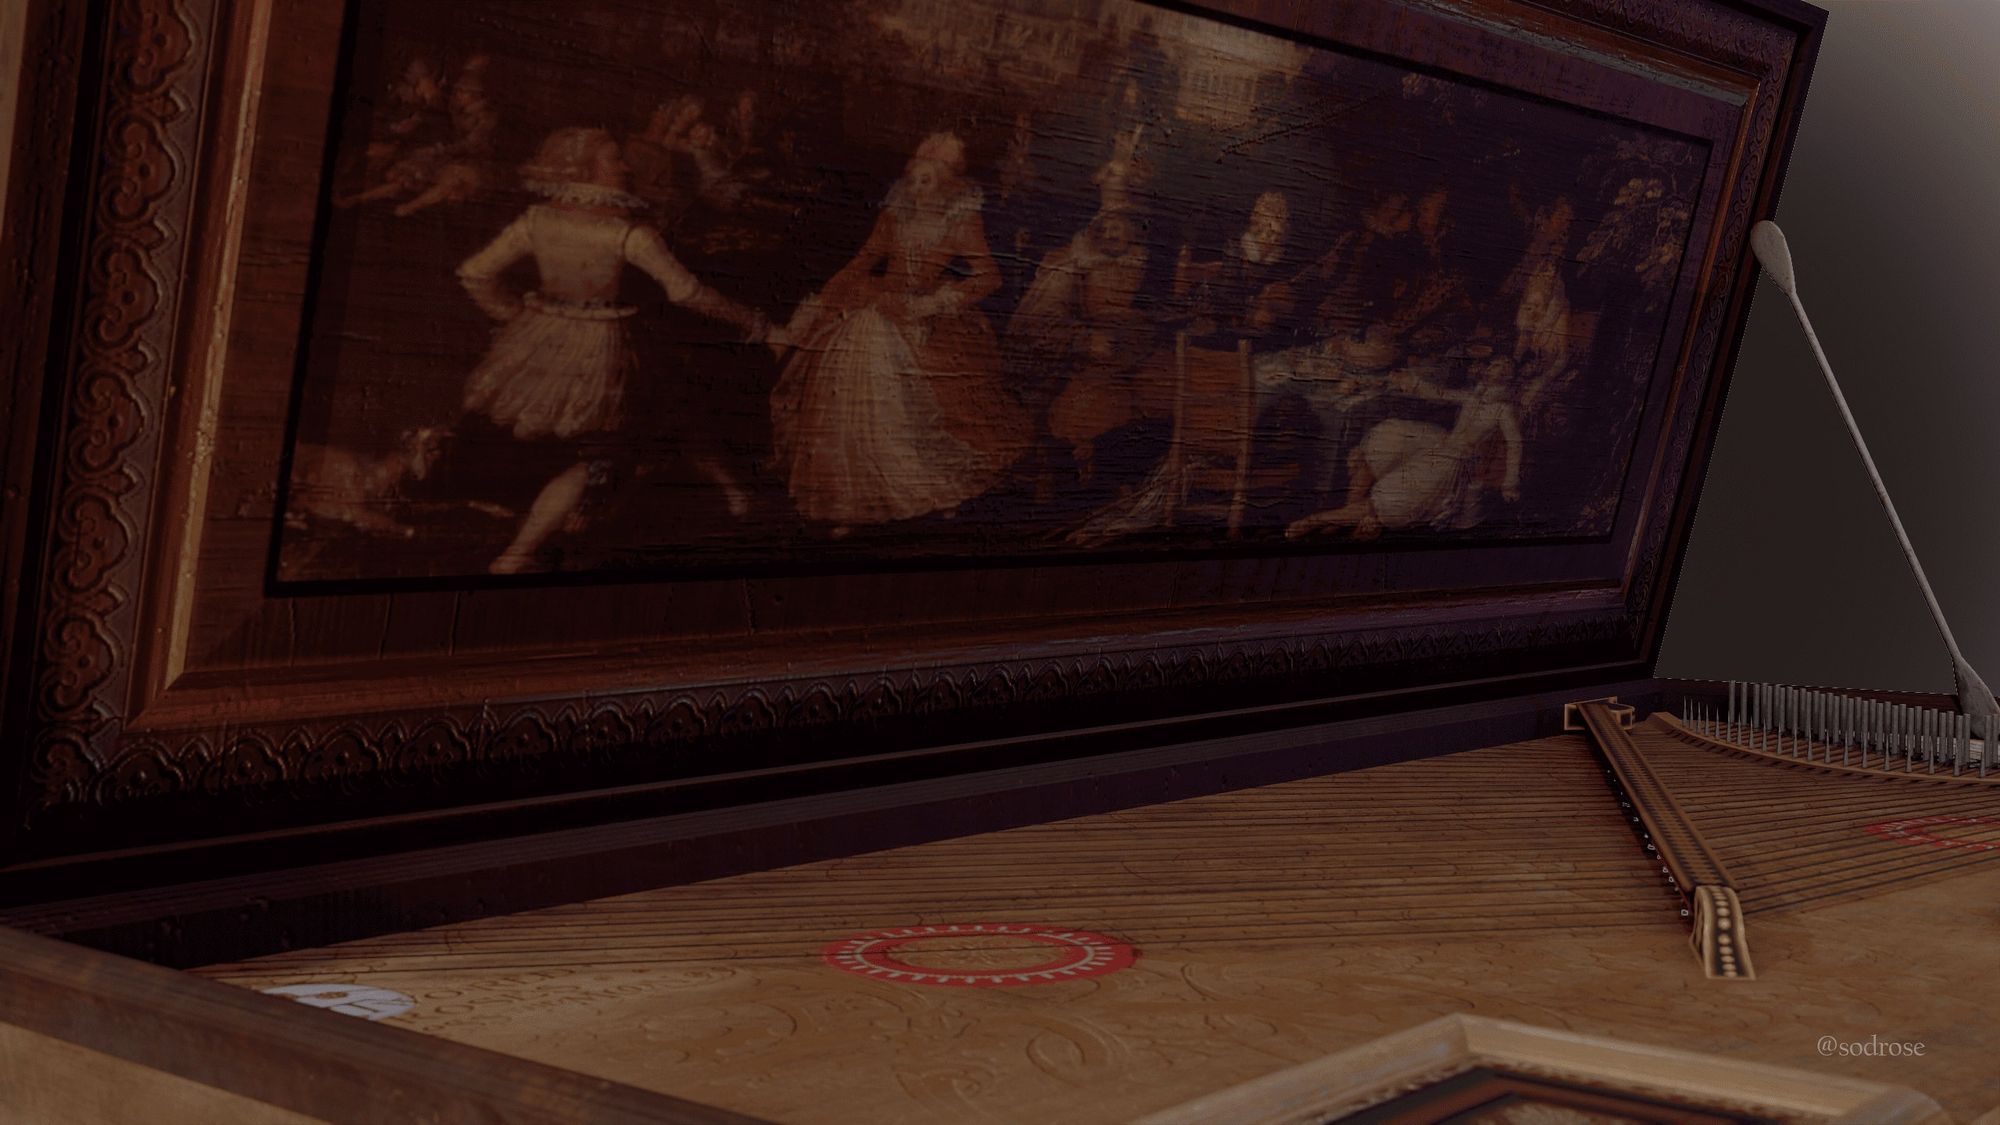
The lid's interior showcases a vibrant art piece of outdoor garden party. Although the artist behind this painting remains unknown, it is speculated to have originated from the time of Flemish Renaissance painters such as Lodewijk Toeput or David Vinckboons (for my project, I have drawn inspiration from David Vinckboons' work titled The Fête Champêtre ). Suspended from the instrument is a Latin phrase that reads "Mvsica Dvlce Laborvm Levamen" (Sweet music is a balm for toil).
Back then, live music was the sole choice available. Crafting instruments such as this was crucial, but access to music was limited to the wealthy, leaving popular music inaccessible to others.
I was immediately drawn to the beautiful design of the Double Virginal from The Met Museum, with its intricate carvings and delicate details. The craftsmanship of the instrument was truly remarkable, and I knew I wanted to incorporate some of that elegance into my own work.
As I began to study the Double Virginal more closely, I noticed the unique shape of the instrument and the way it incorporated both practicality and beauty. I wanted to capture that balance in my own design, creating something that was not only visually appealing but also functional.
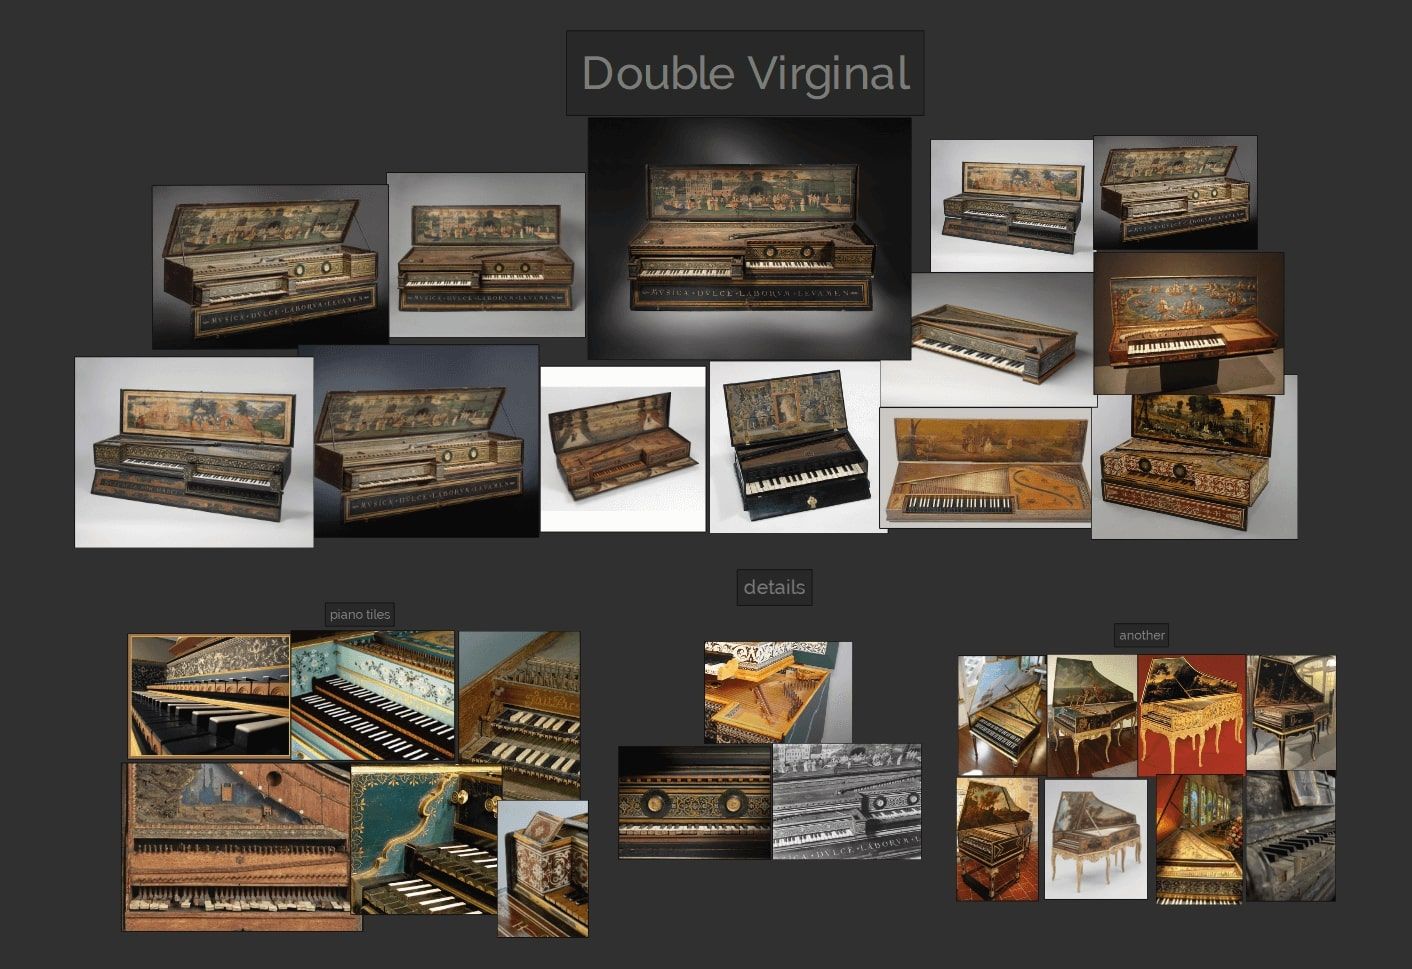
As you can see in the picture, I have separated my references by main references (the body, shape, materials and texture all in one), the piano keyboard, some close-up detail references and some references of other types of piano to better understand how they work. Also, I had to do some research on the museum's website and YouTube.
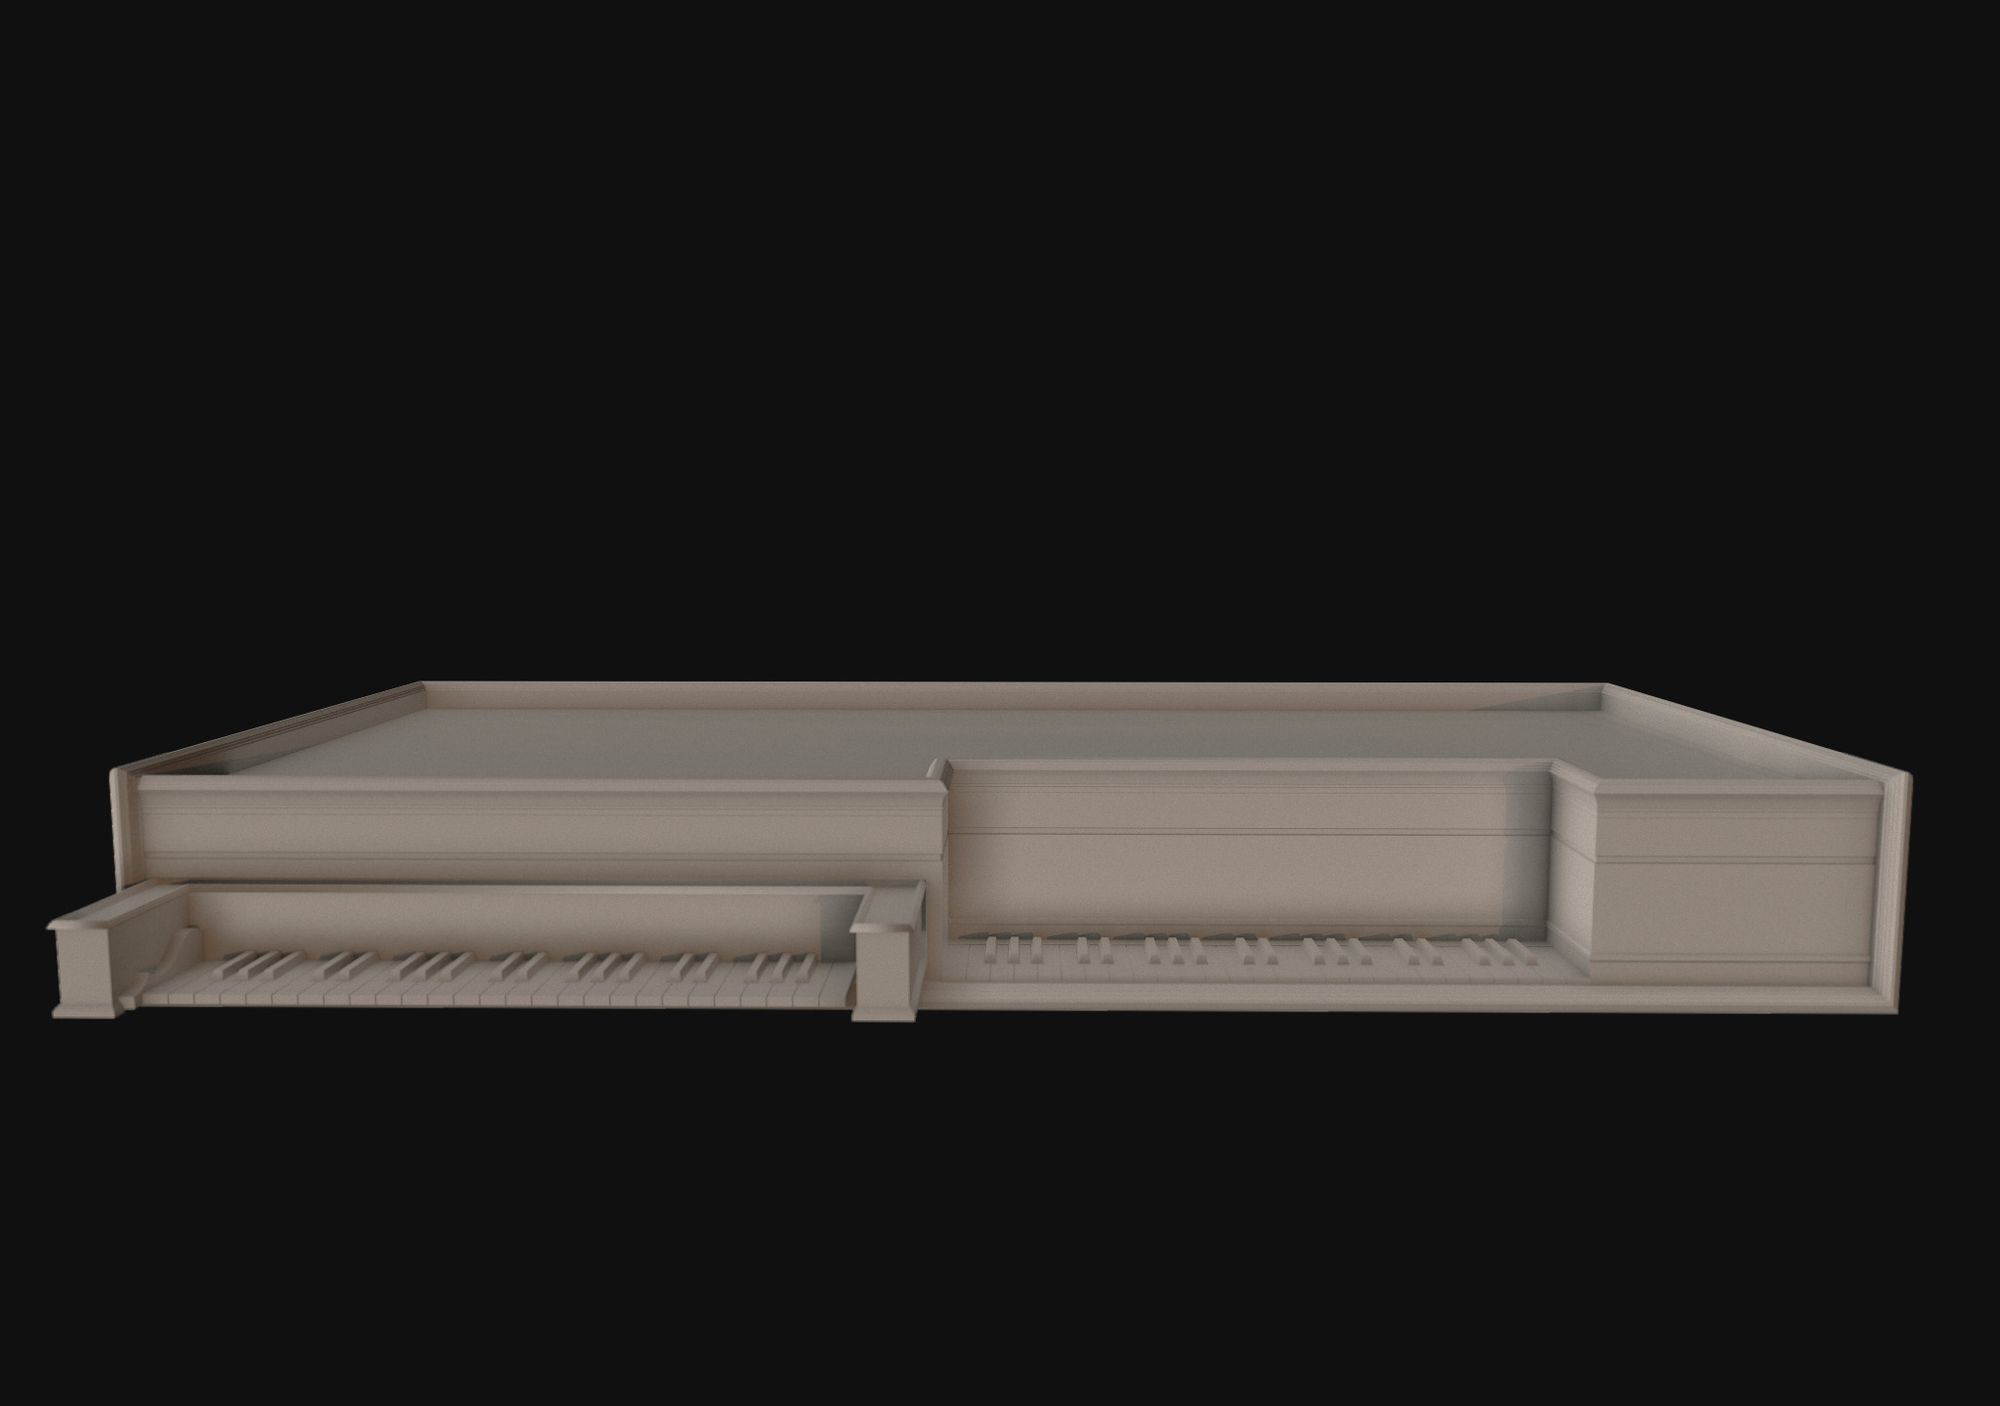
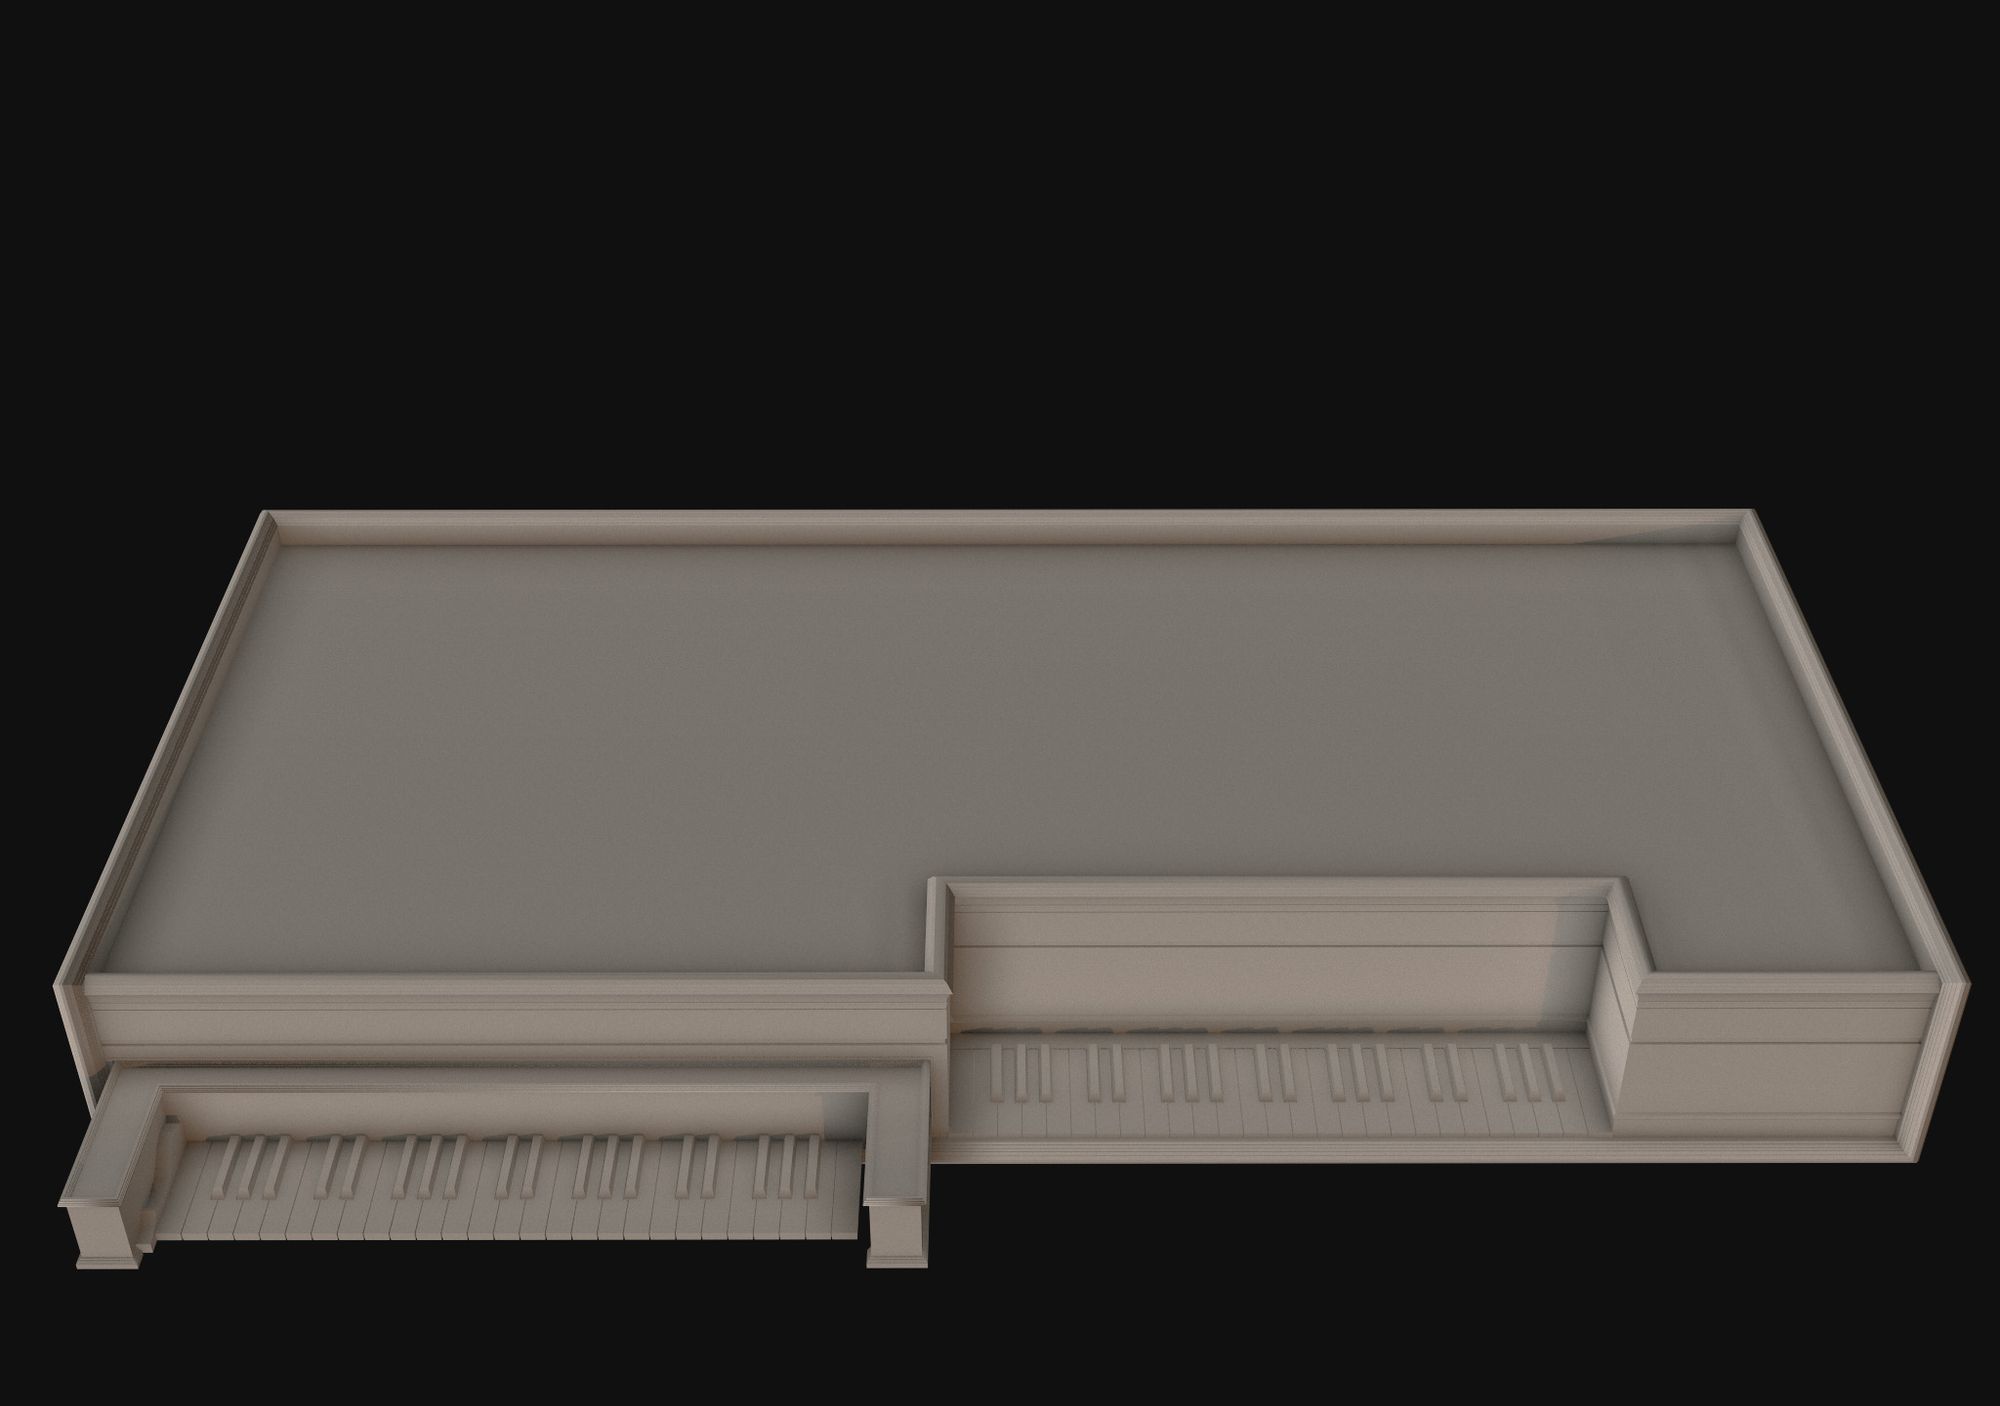
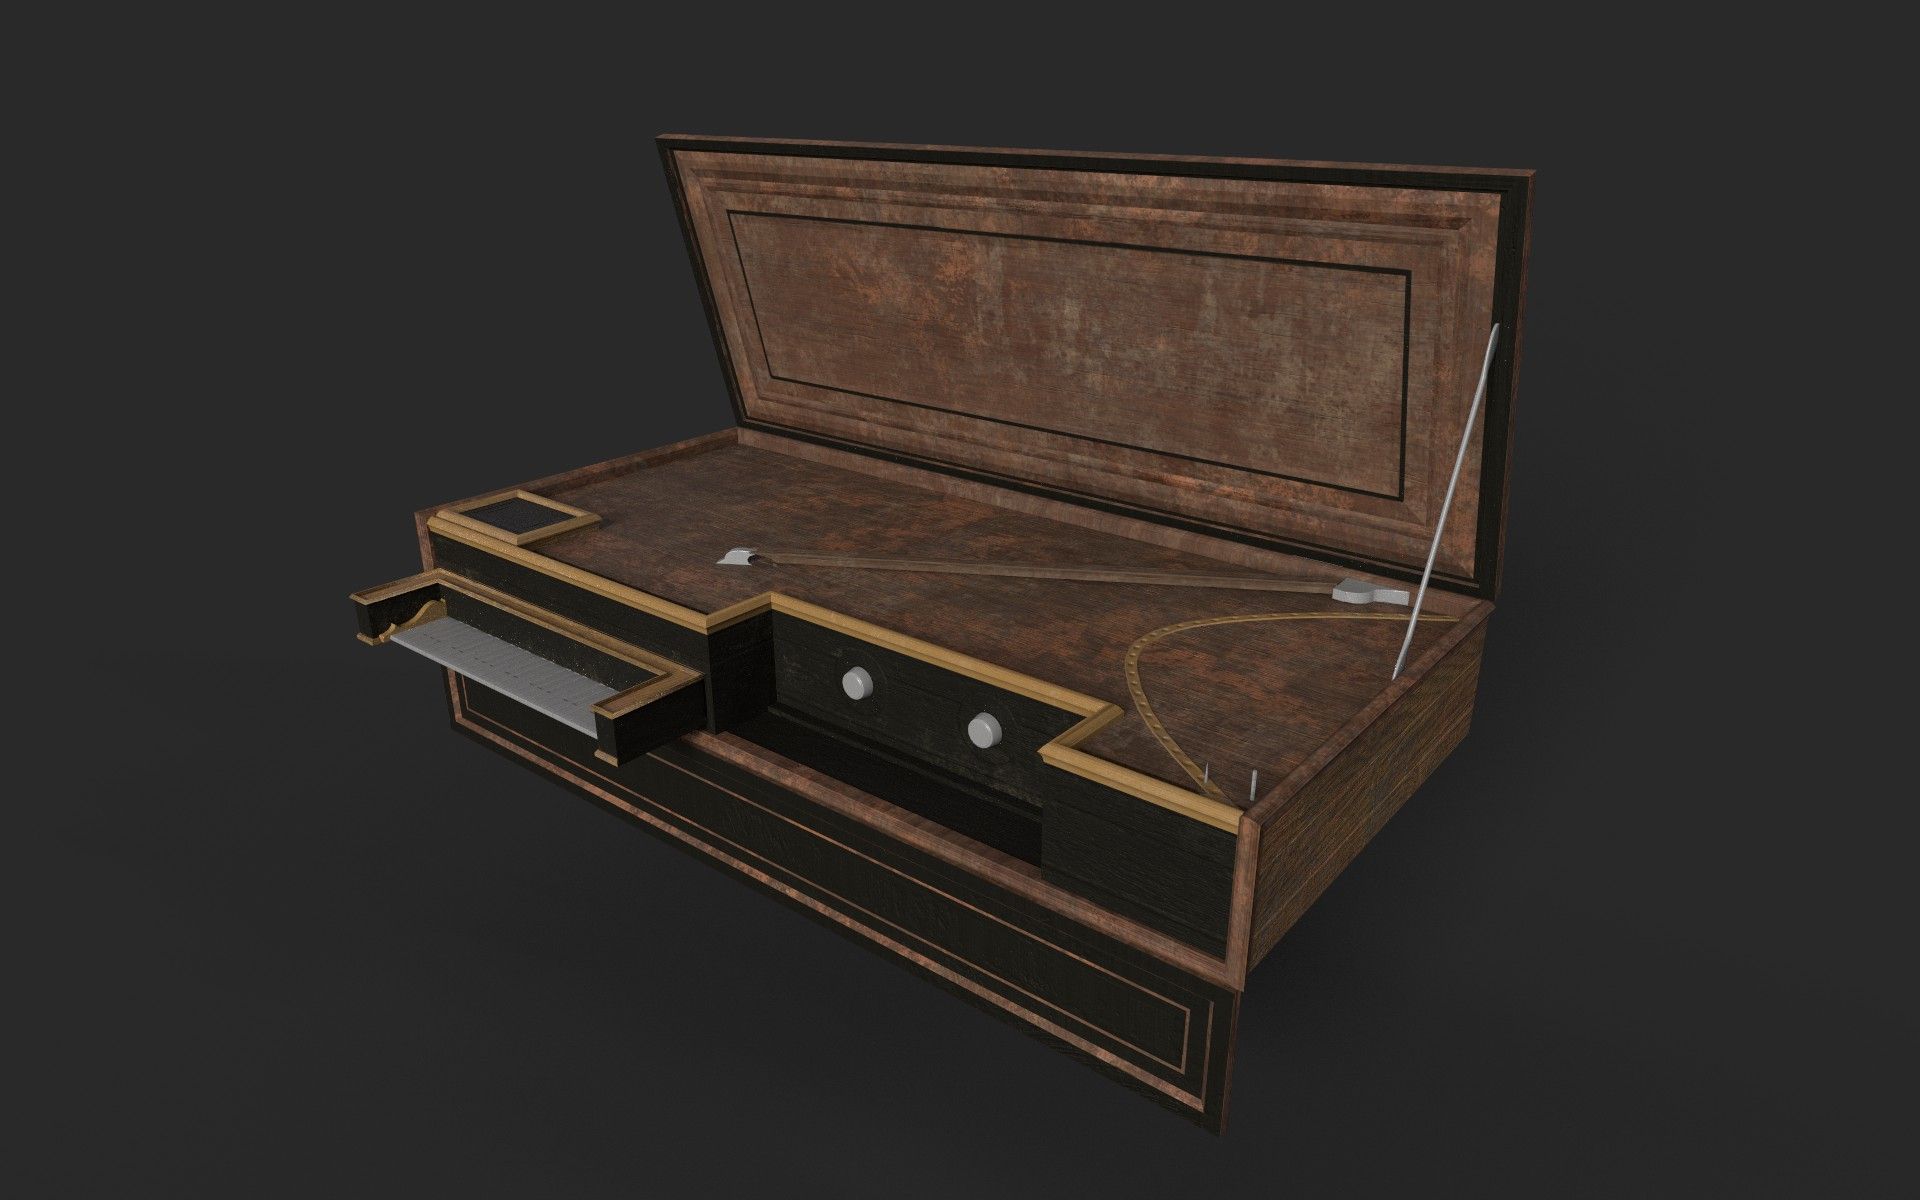
For the blockout, I created the primary box, referred to as the 'mother', along with a smaller counterpart, the 'children'. Since I didn't have any proportion references, I turned to modern piano dimensions and the scaling guidance provided by scaleman.


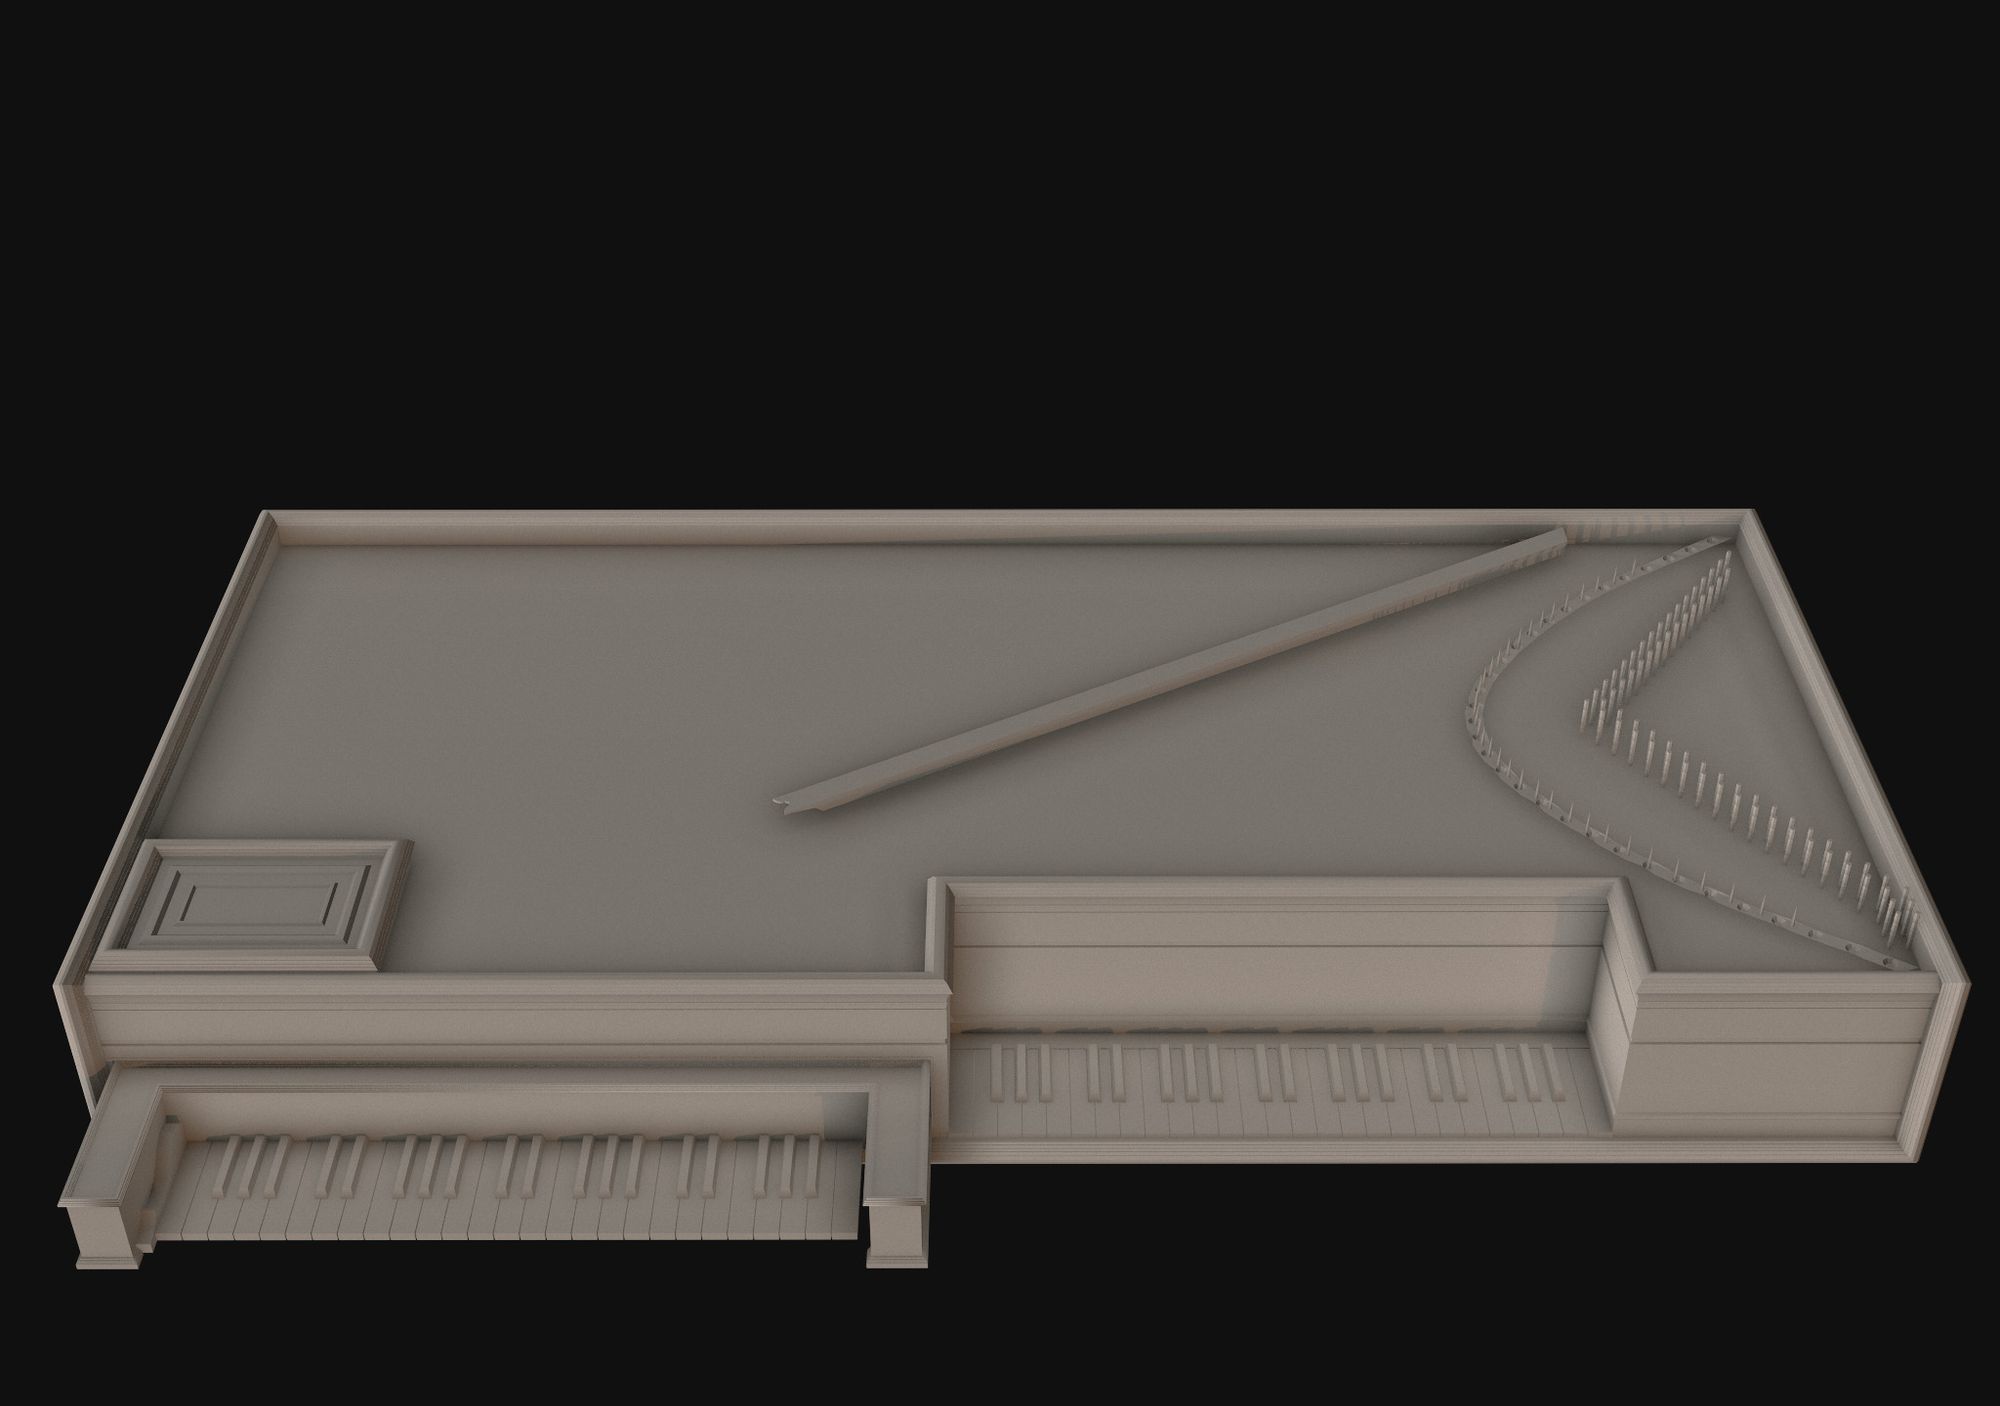
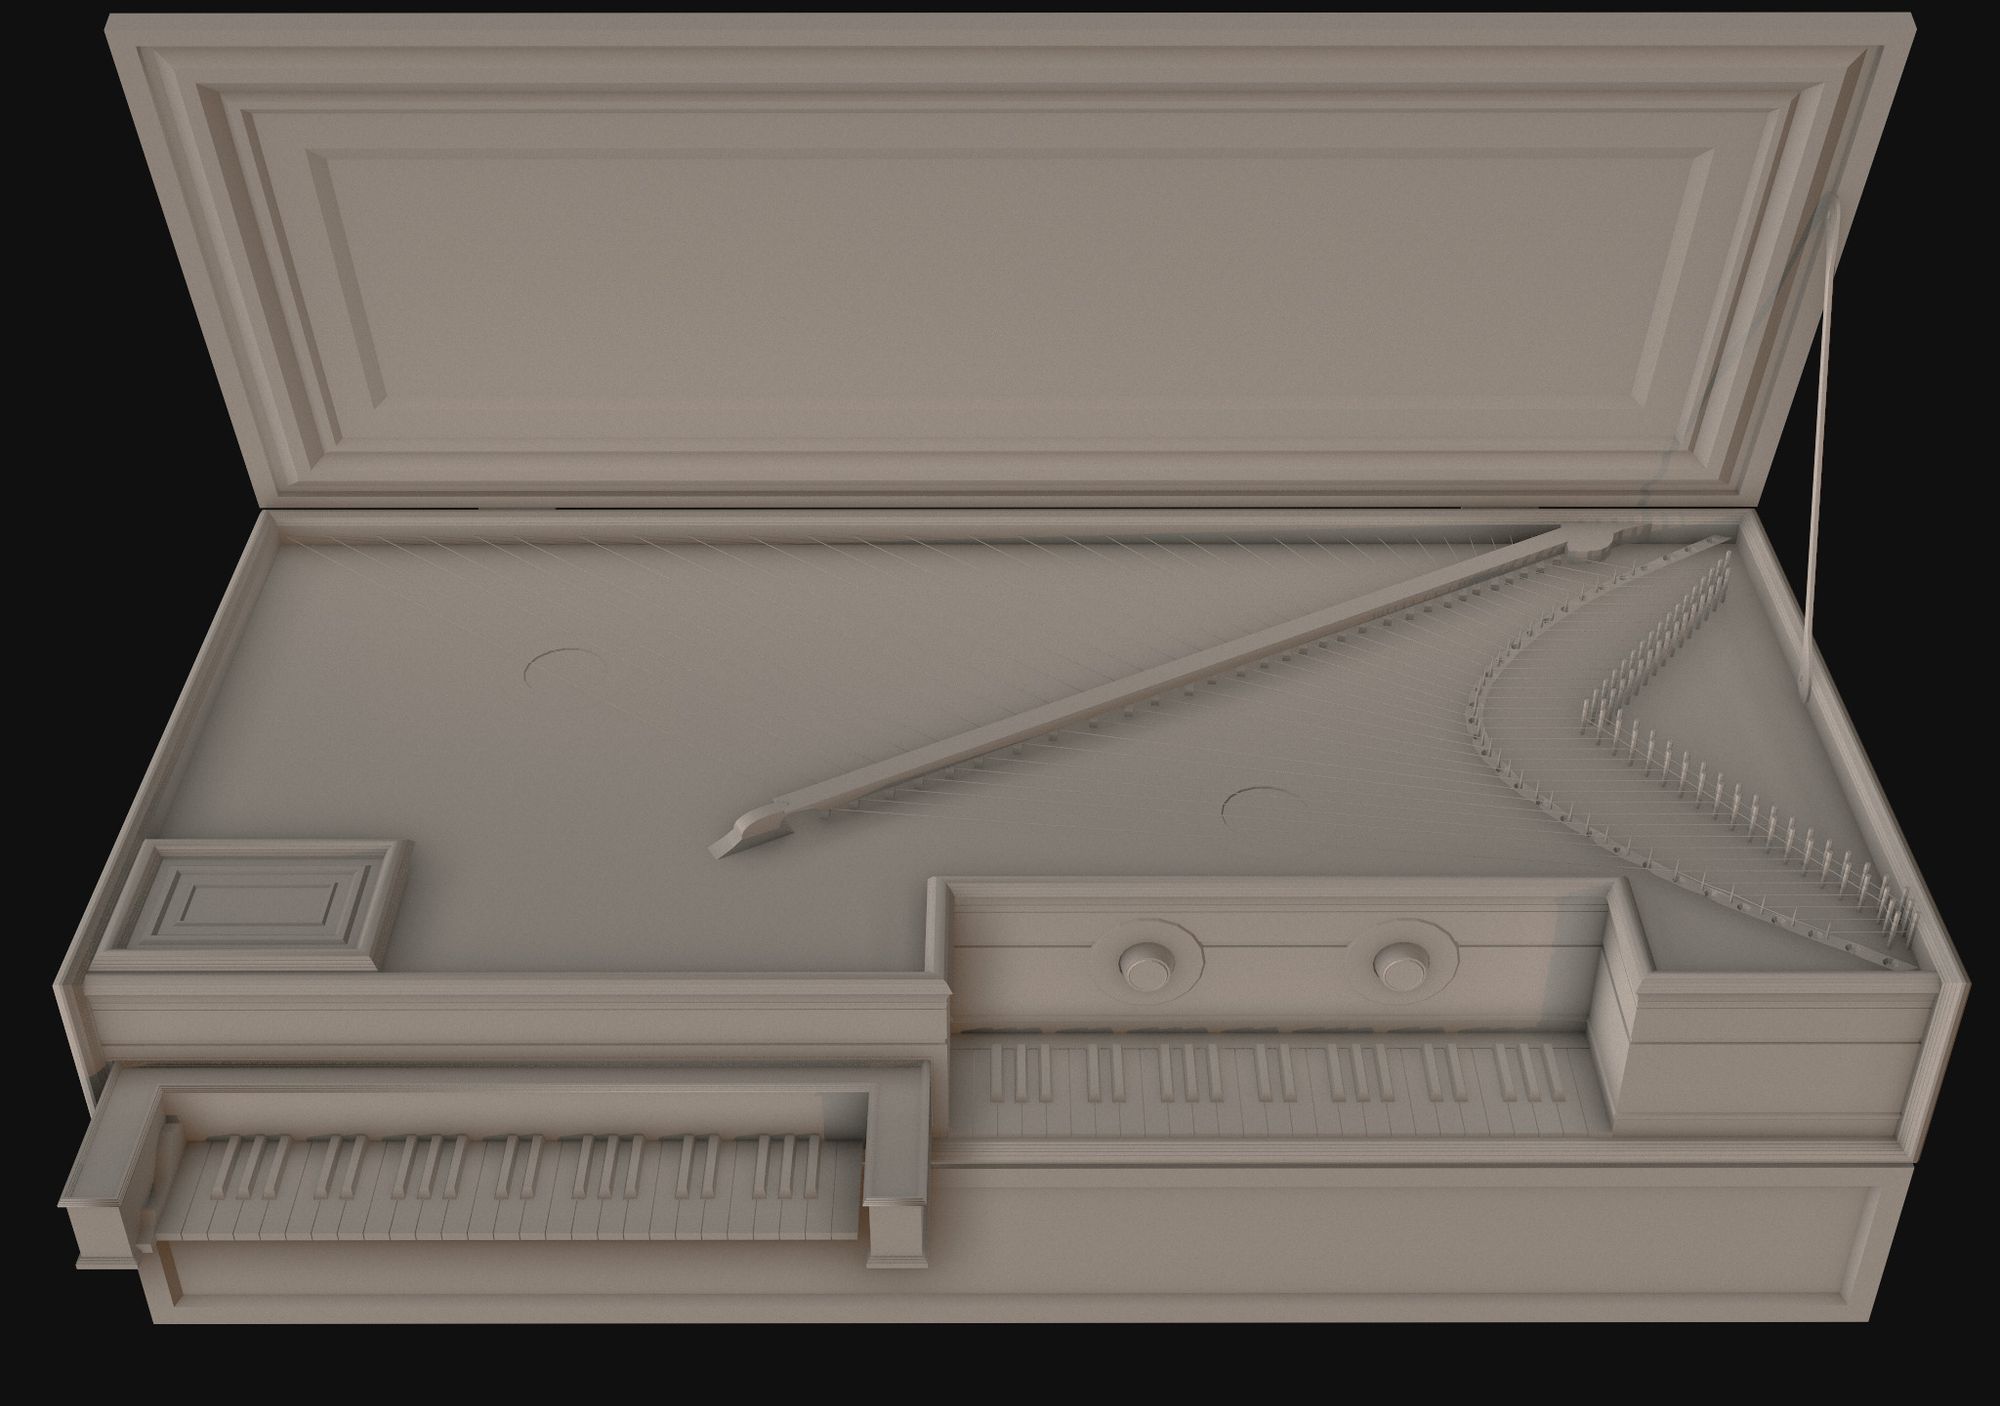
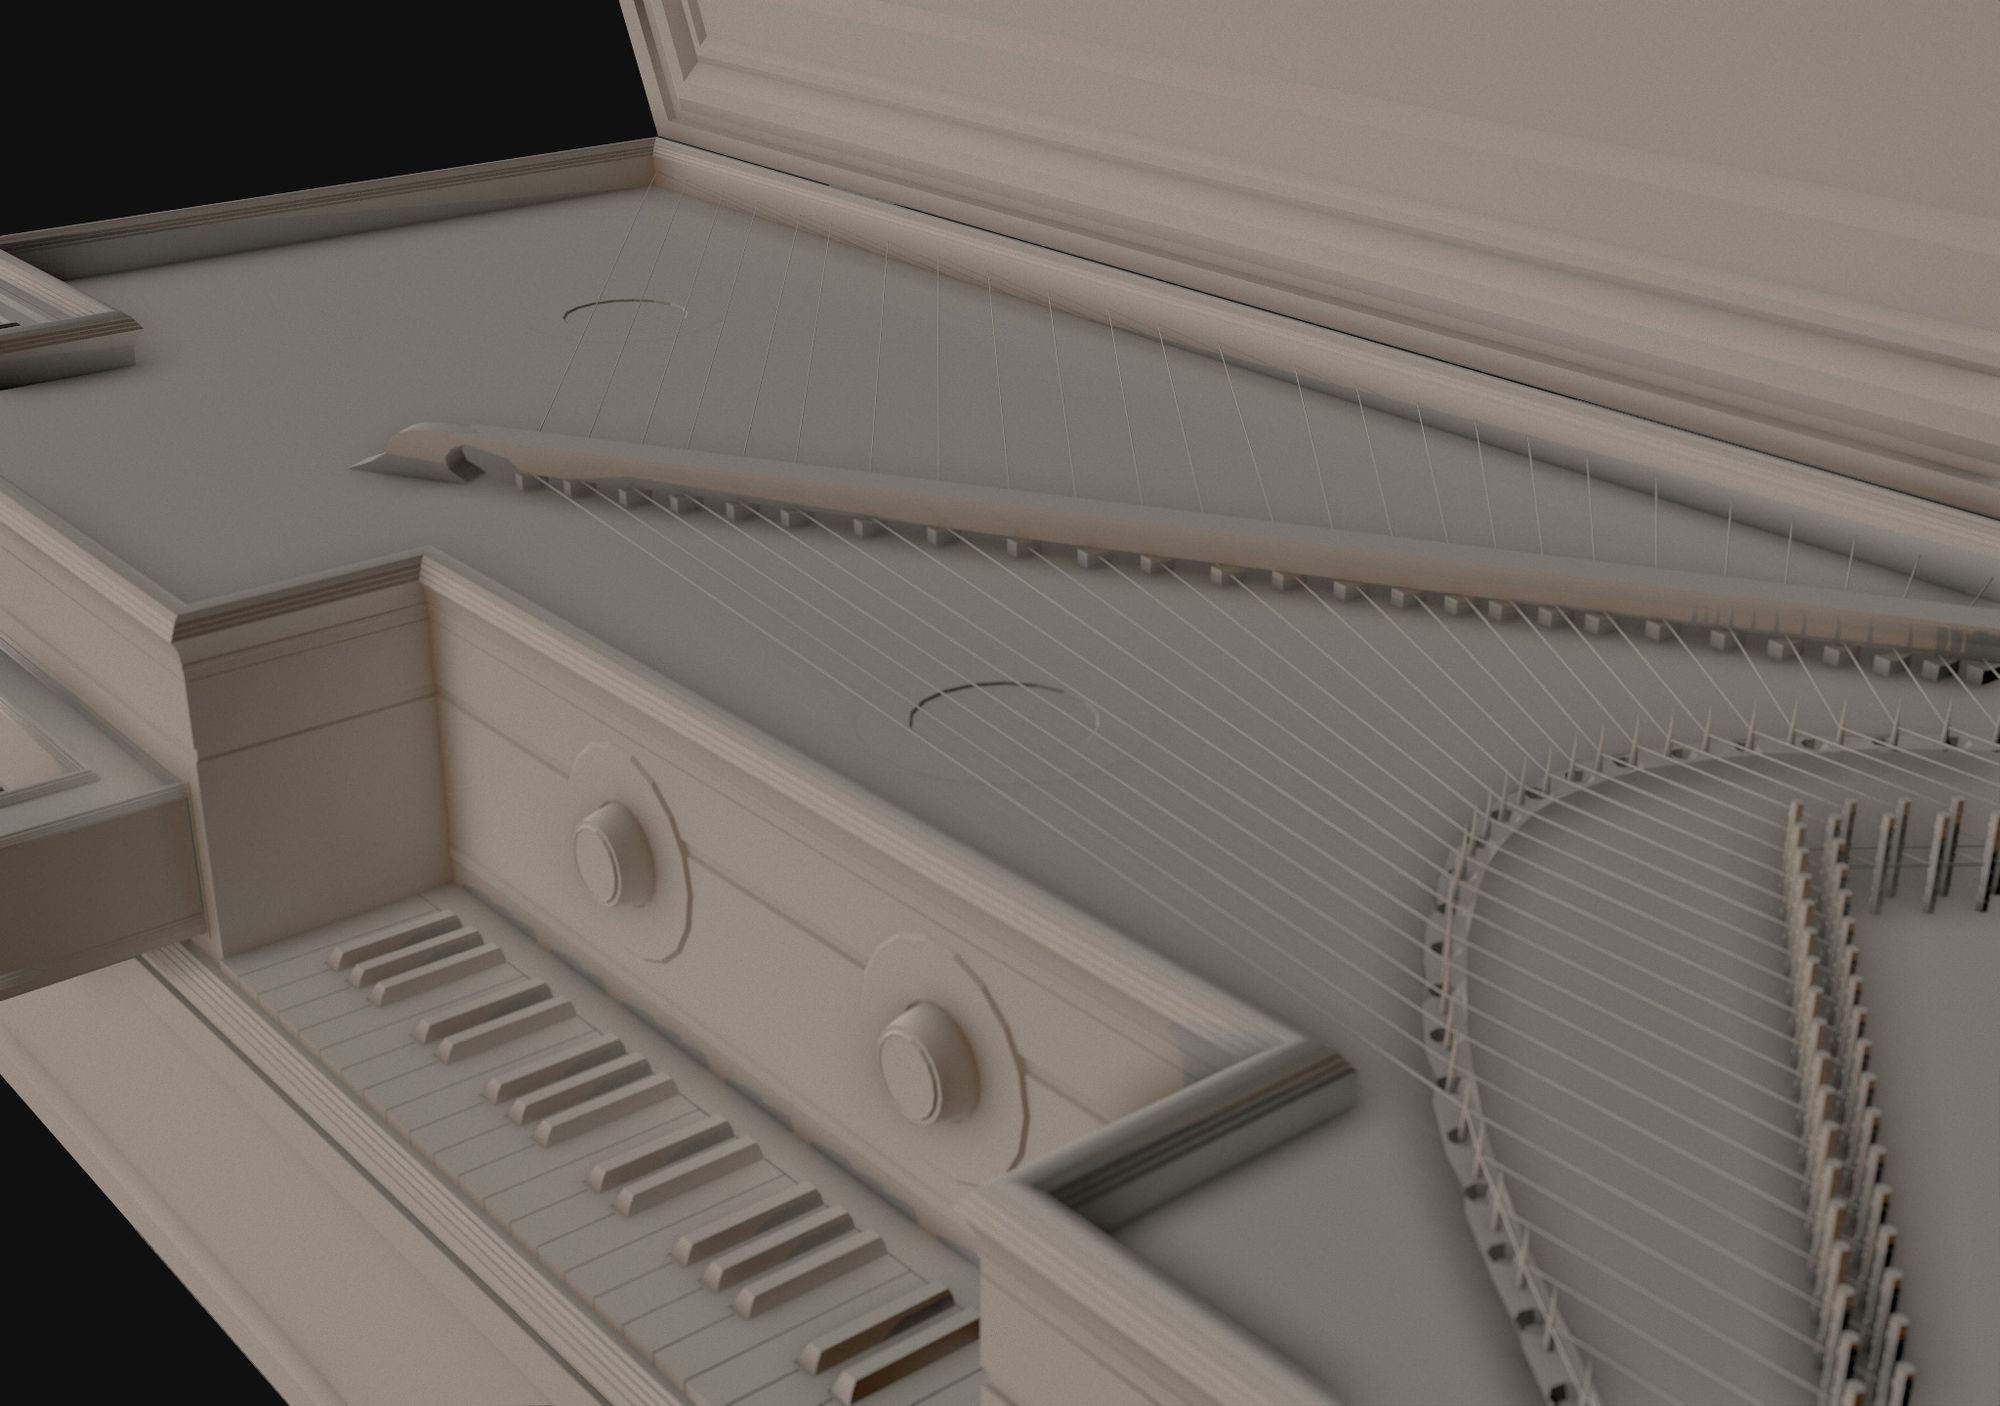
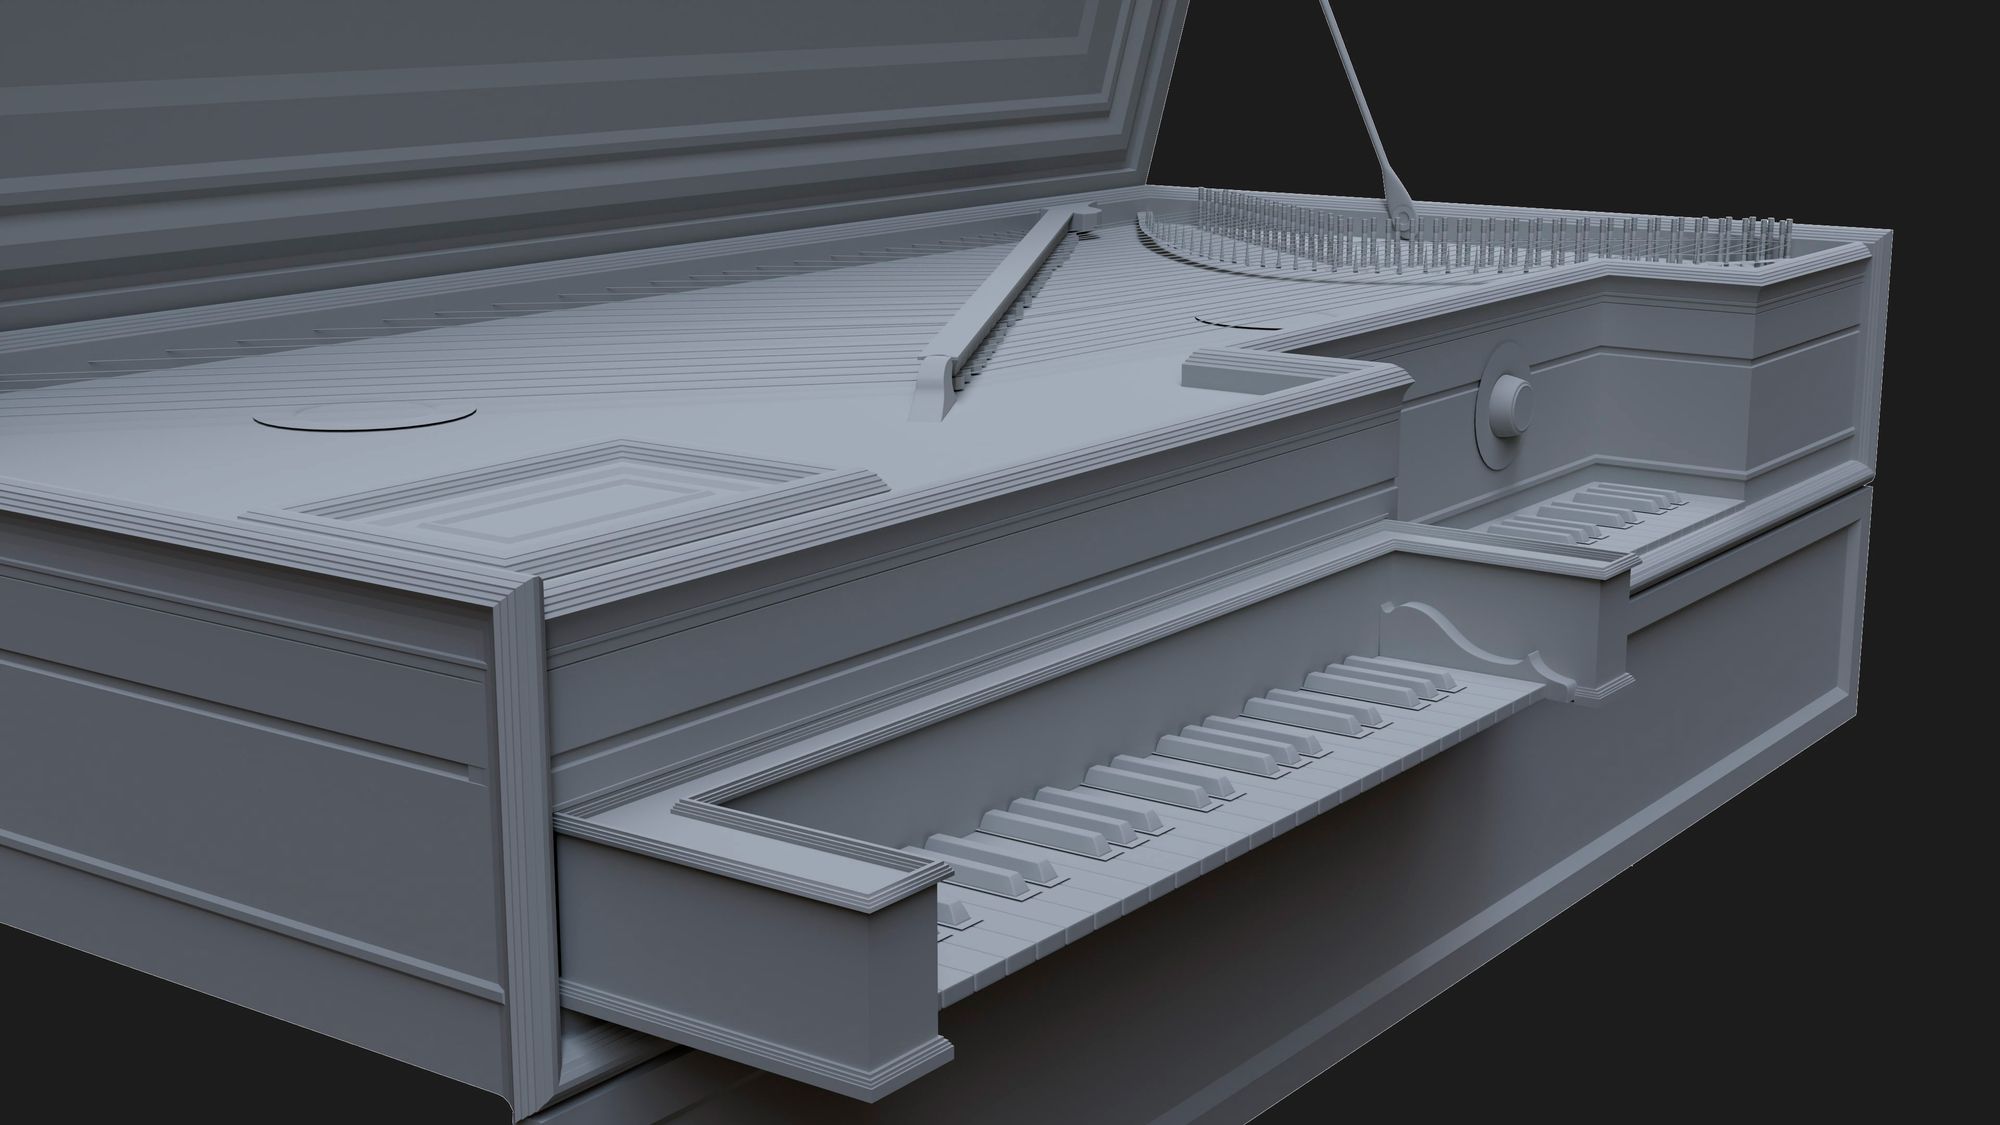
These renders showcase the high-poly modeling process, representing the stages where I began with the base of the Virginal. I progressively added elements such as the piano keyboard, strings, various high-poly details, cover components, banner parts, and more.
Before I demonstrate the entire process, it's important to note that I only had dimensions for the main body. Other components such as the children or mother keyboard, lid, or banner were created after establishing certain loops:


An advantage of 3DsMax is its list of modifiers. If you don't collapse them during the high-poly phase, you can easily delete modifiers like Turbosmooth or Edit Poly later on.
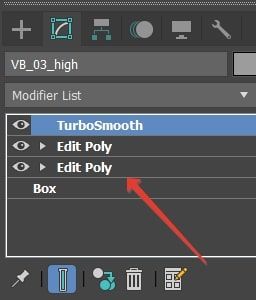
For instance, here you can observe the keyboard's high definition, with 18k polys and 9k verts. I prefer to model each stage using a separate Edit Poly modifier.
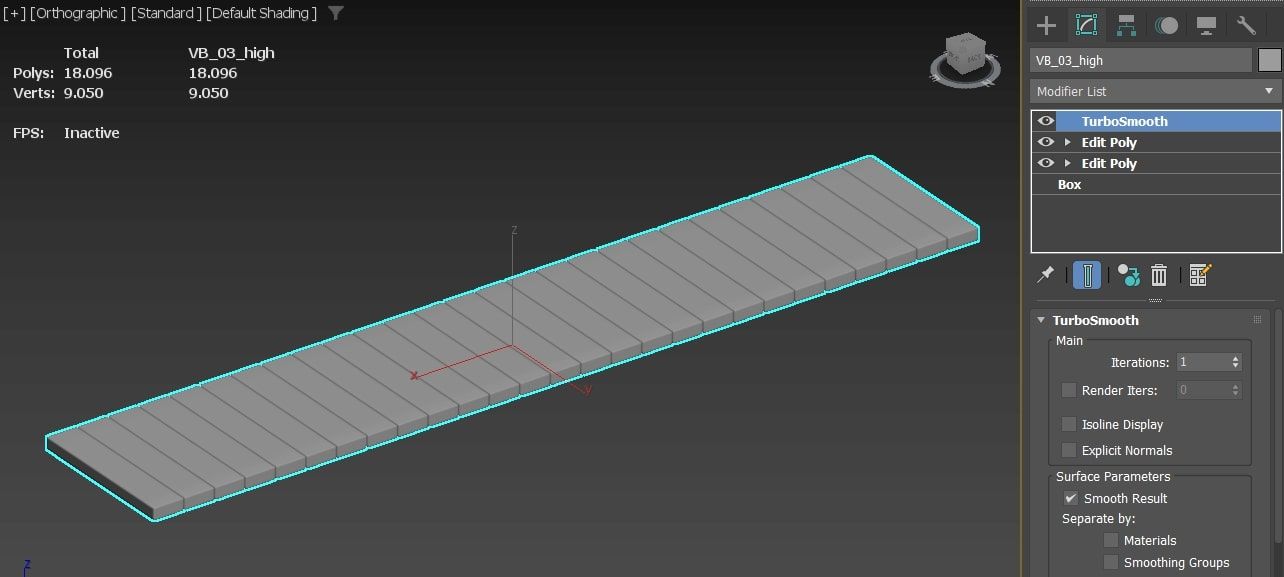
The first one is for the basic model, containing main loops to provide its initial shape:

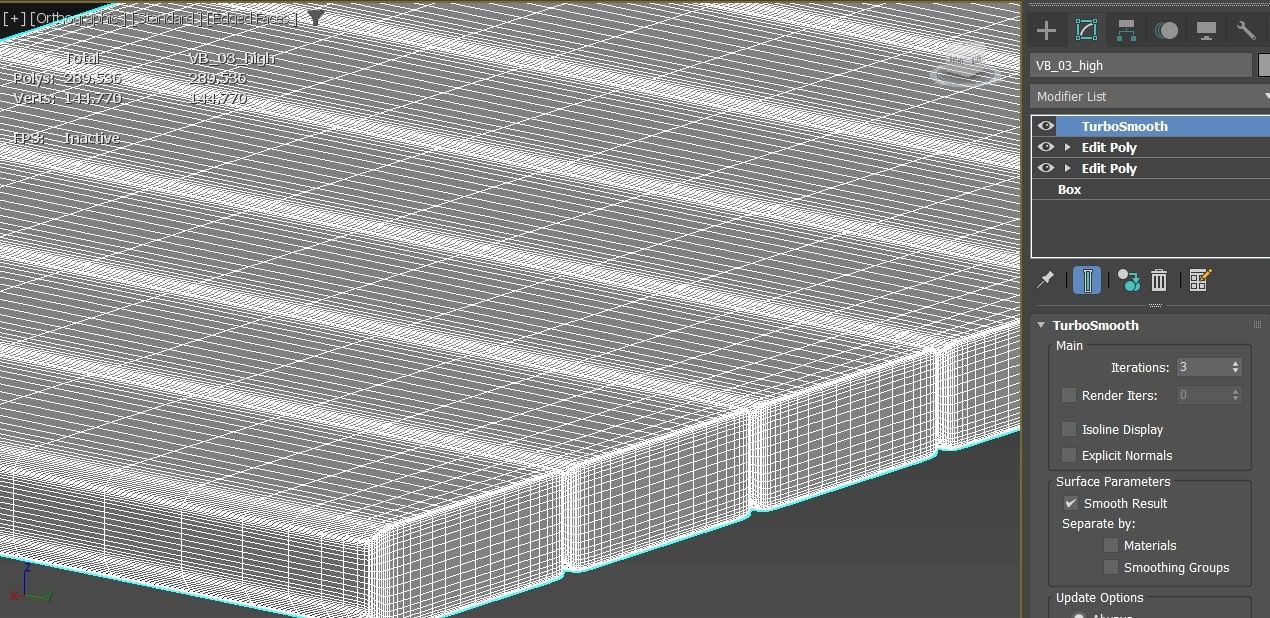
The second one is for adding supporting loops before applying the TurboSmooth modifier:

In conclusion, I applied the TurboSmooth modifier with 3 segments.
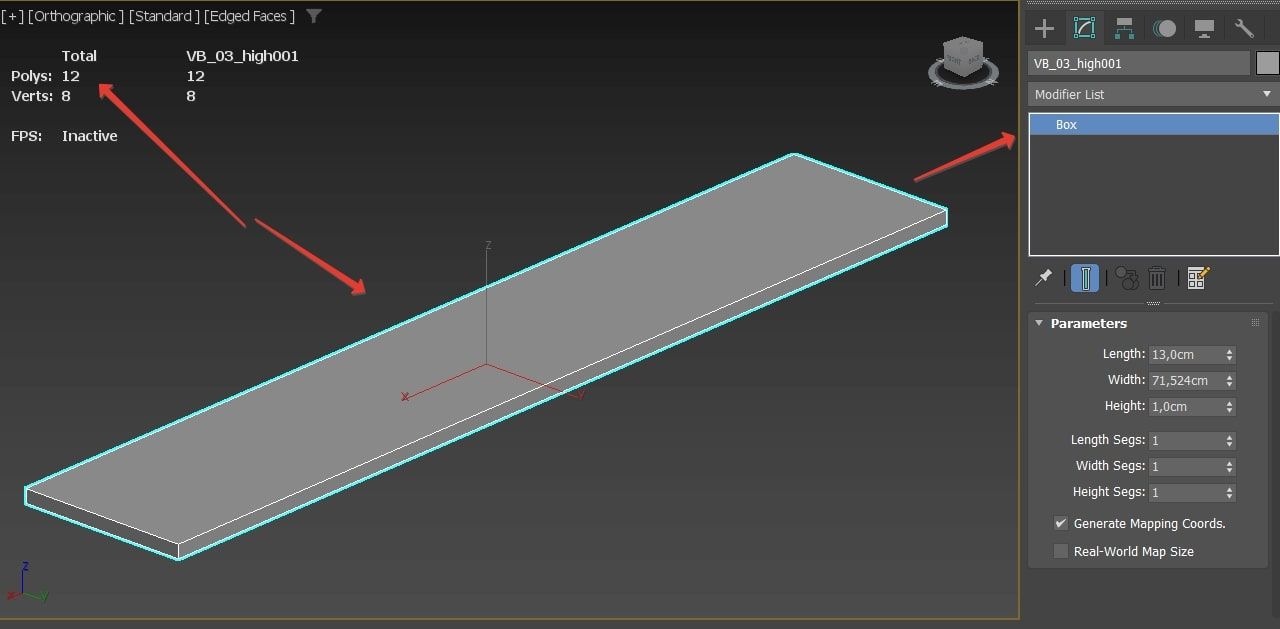
For the low-poly version, I simply removed all the modifiers, resulting in the low-poly model.
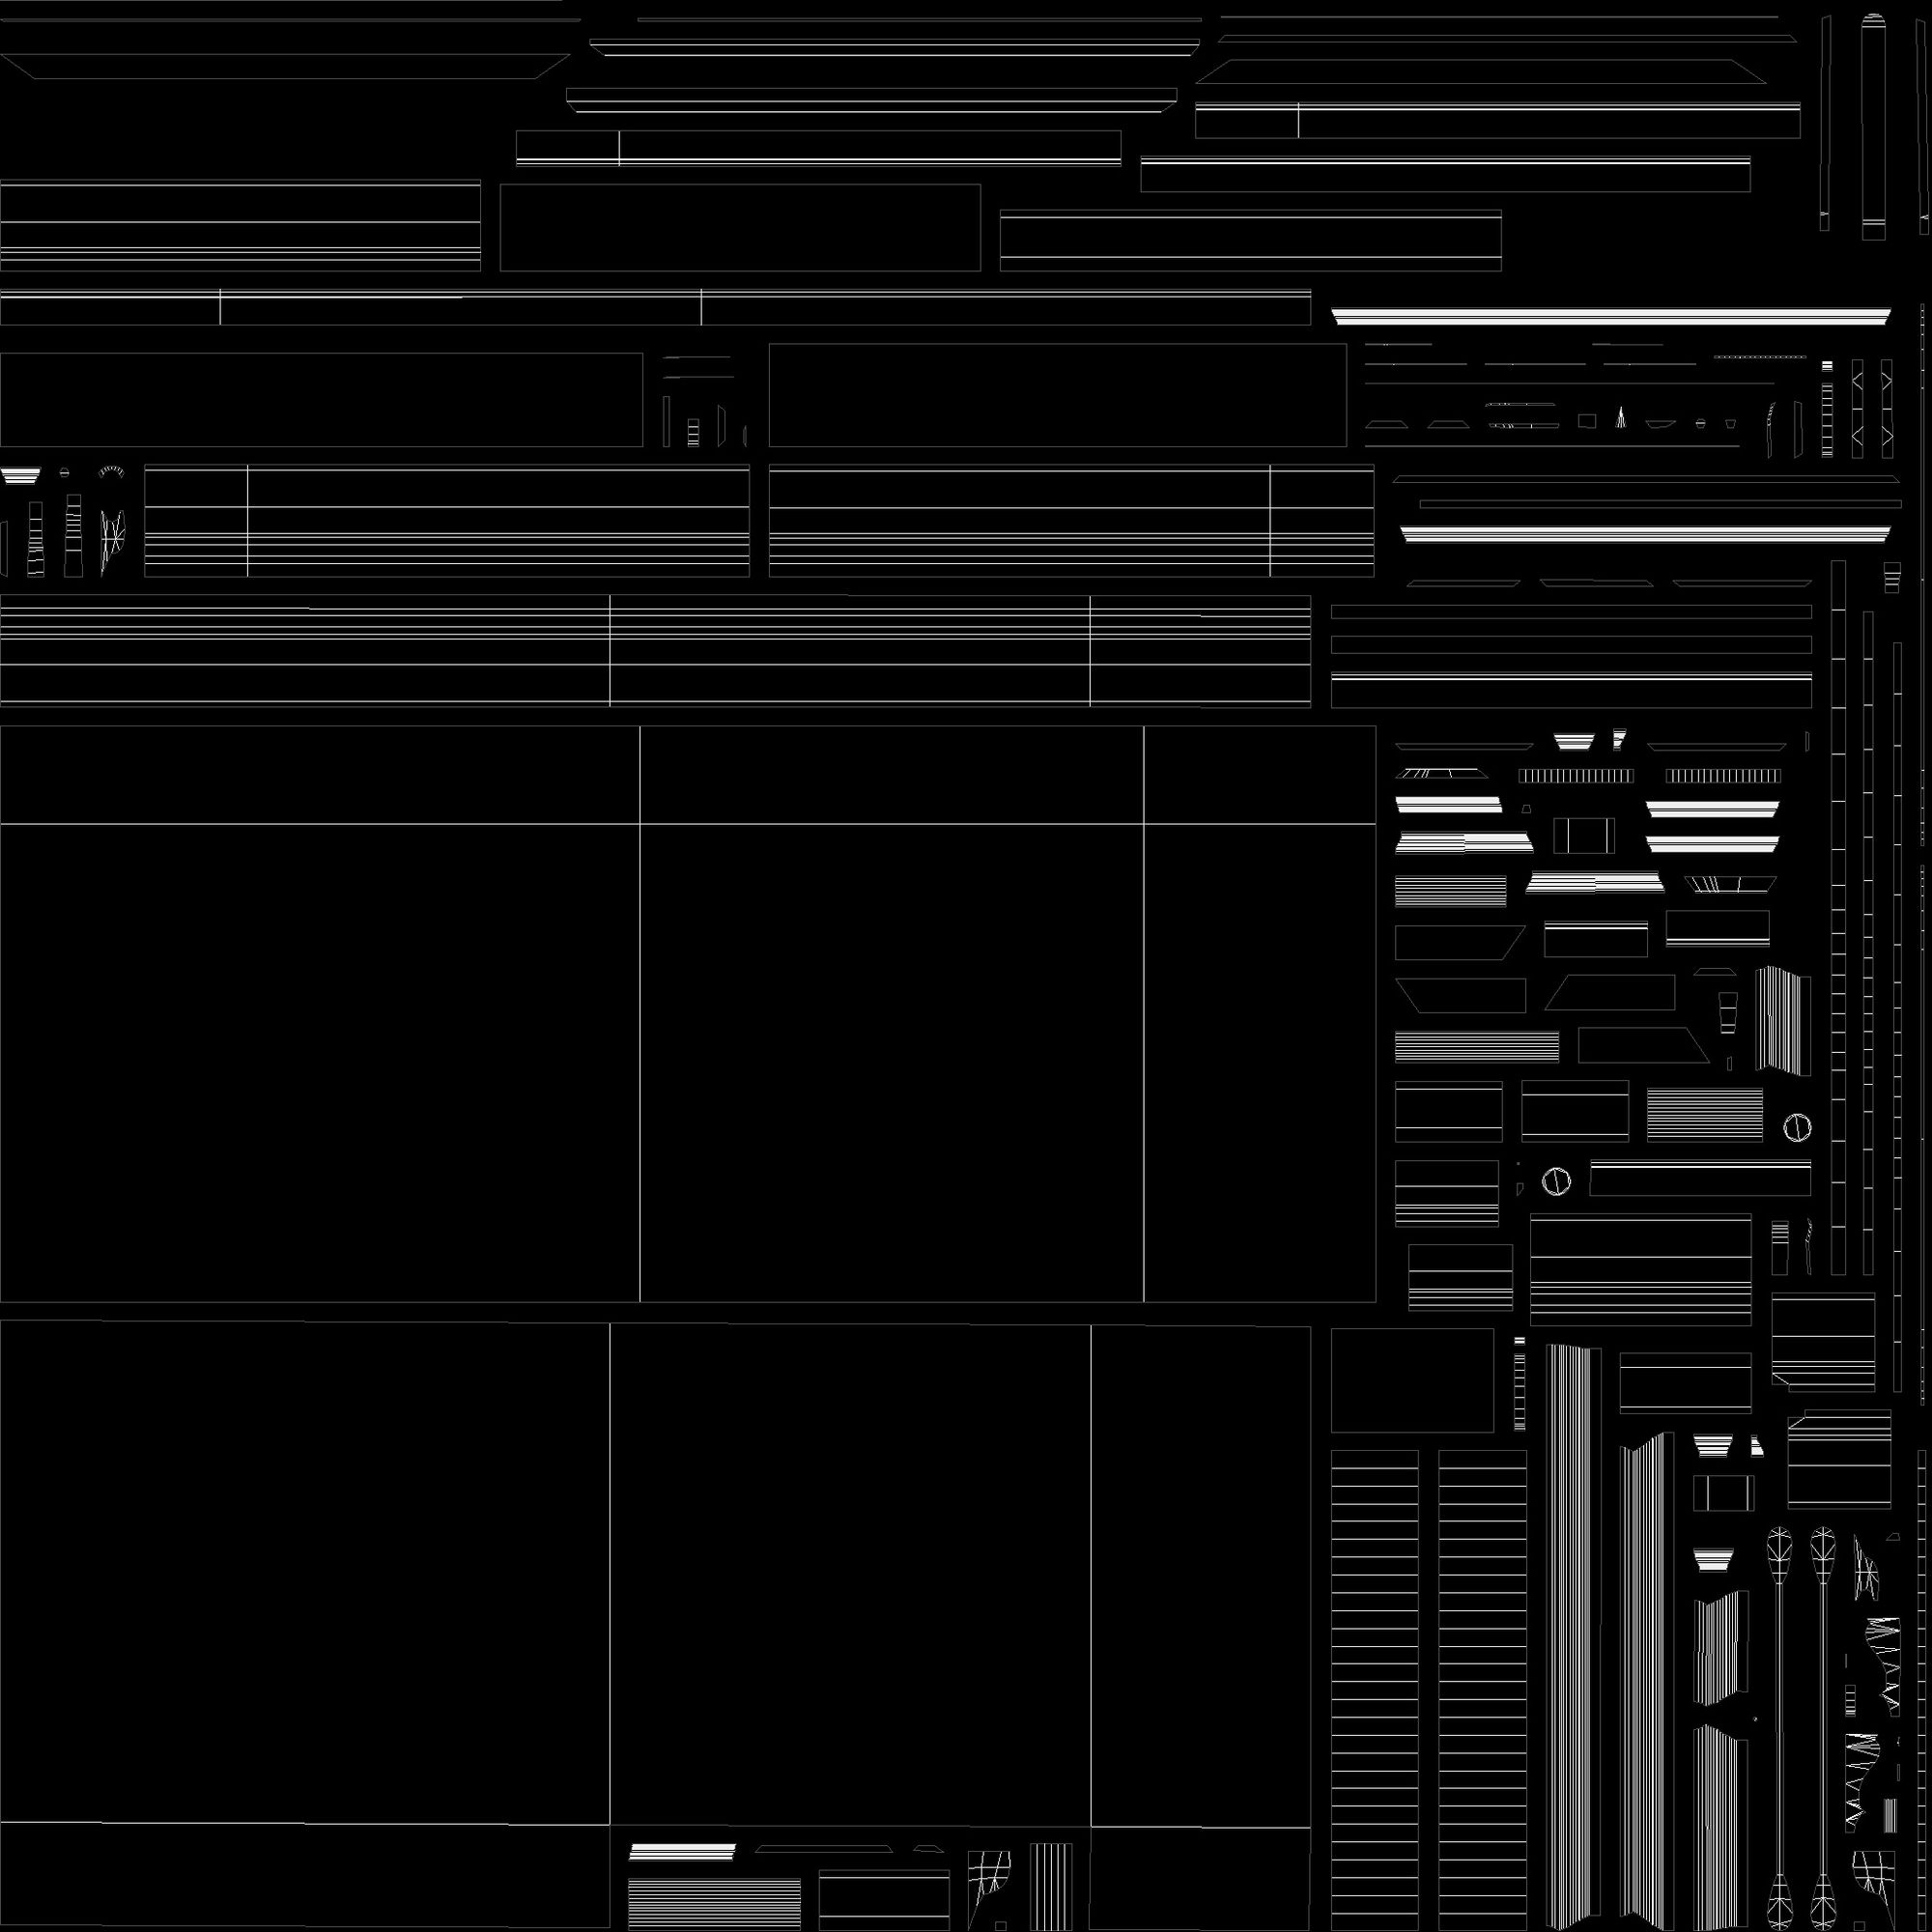
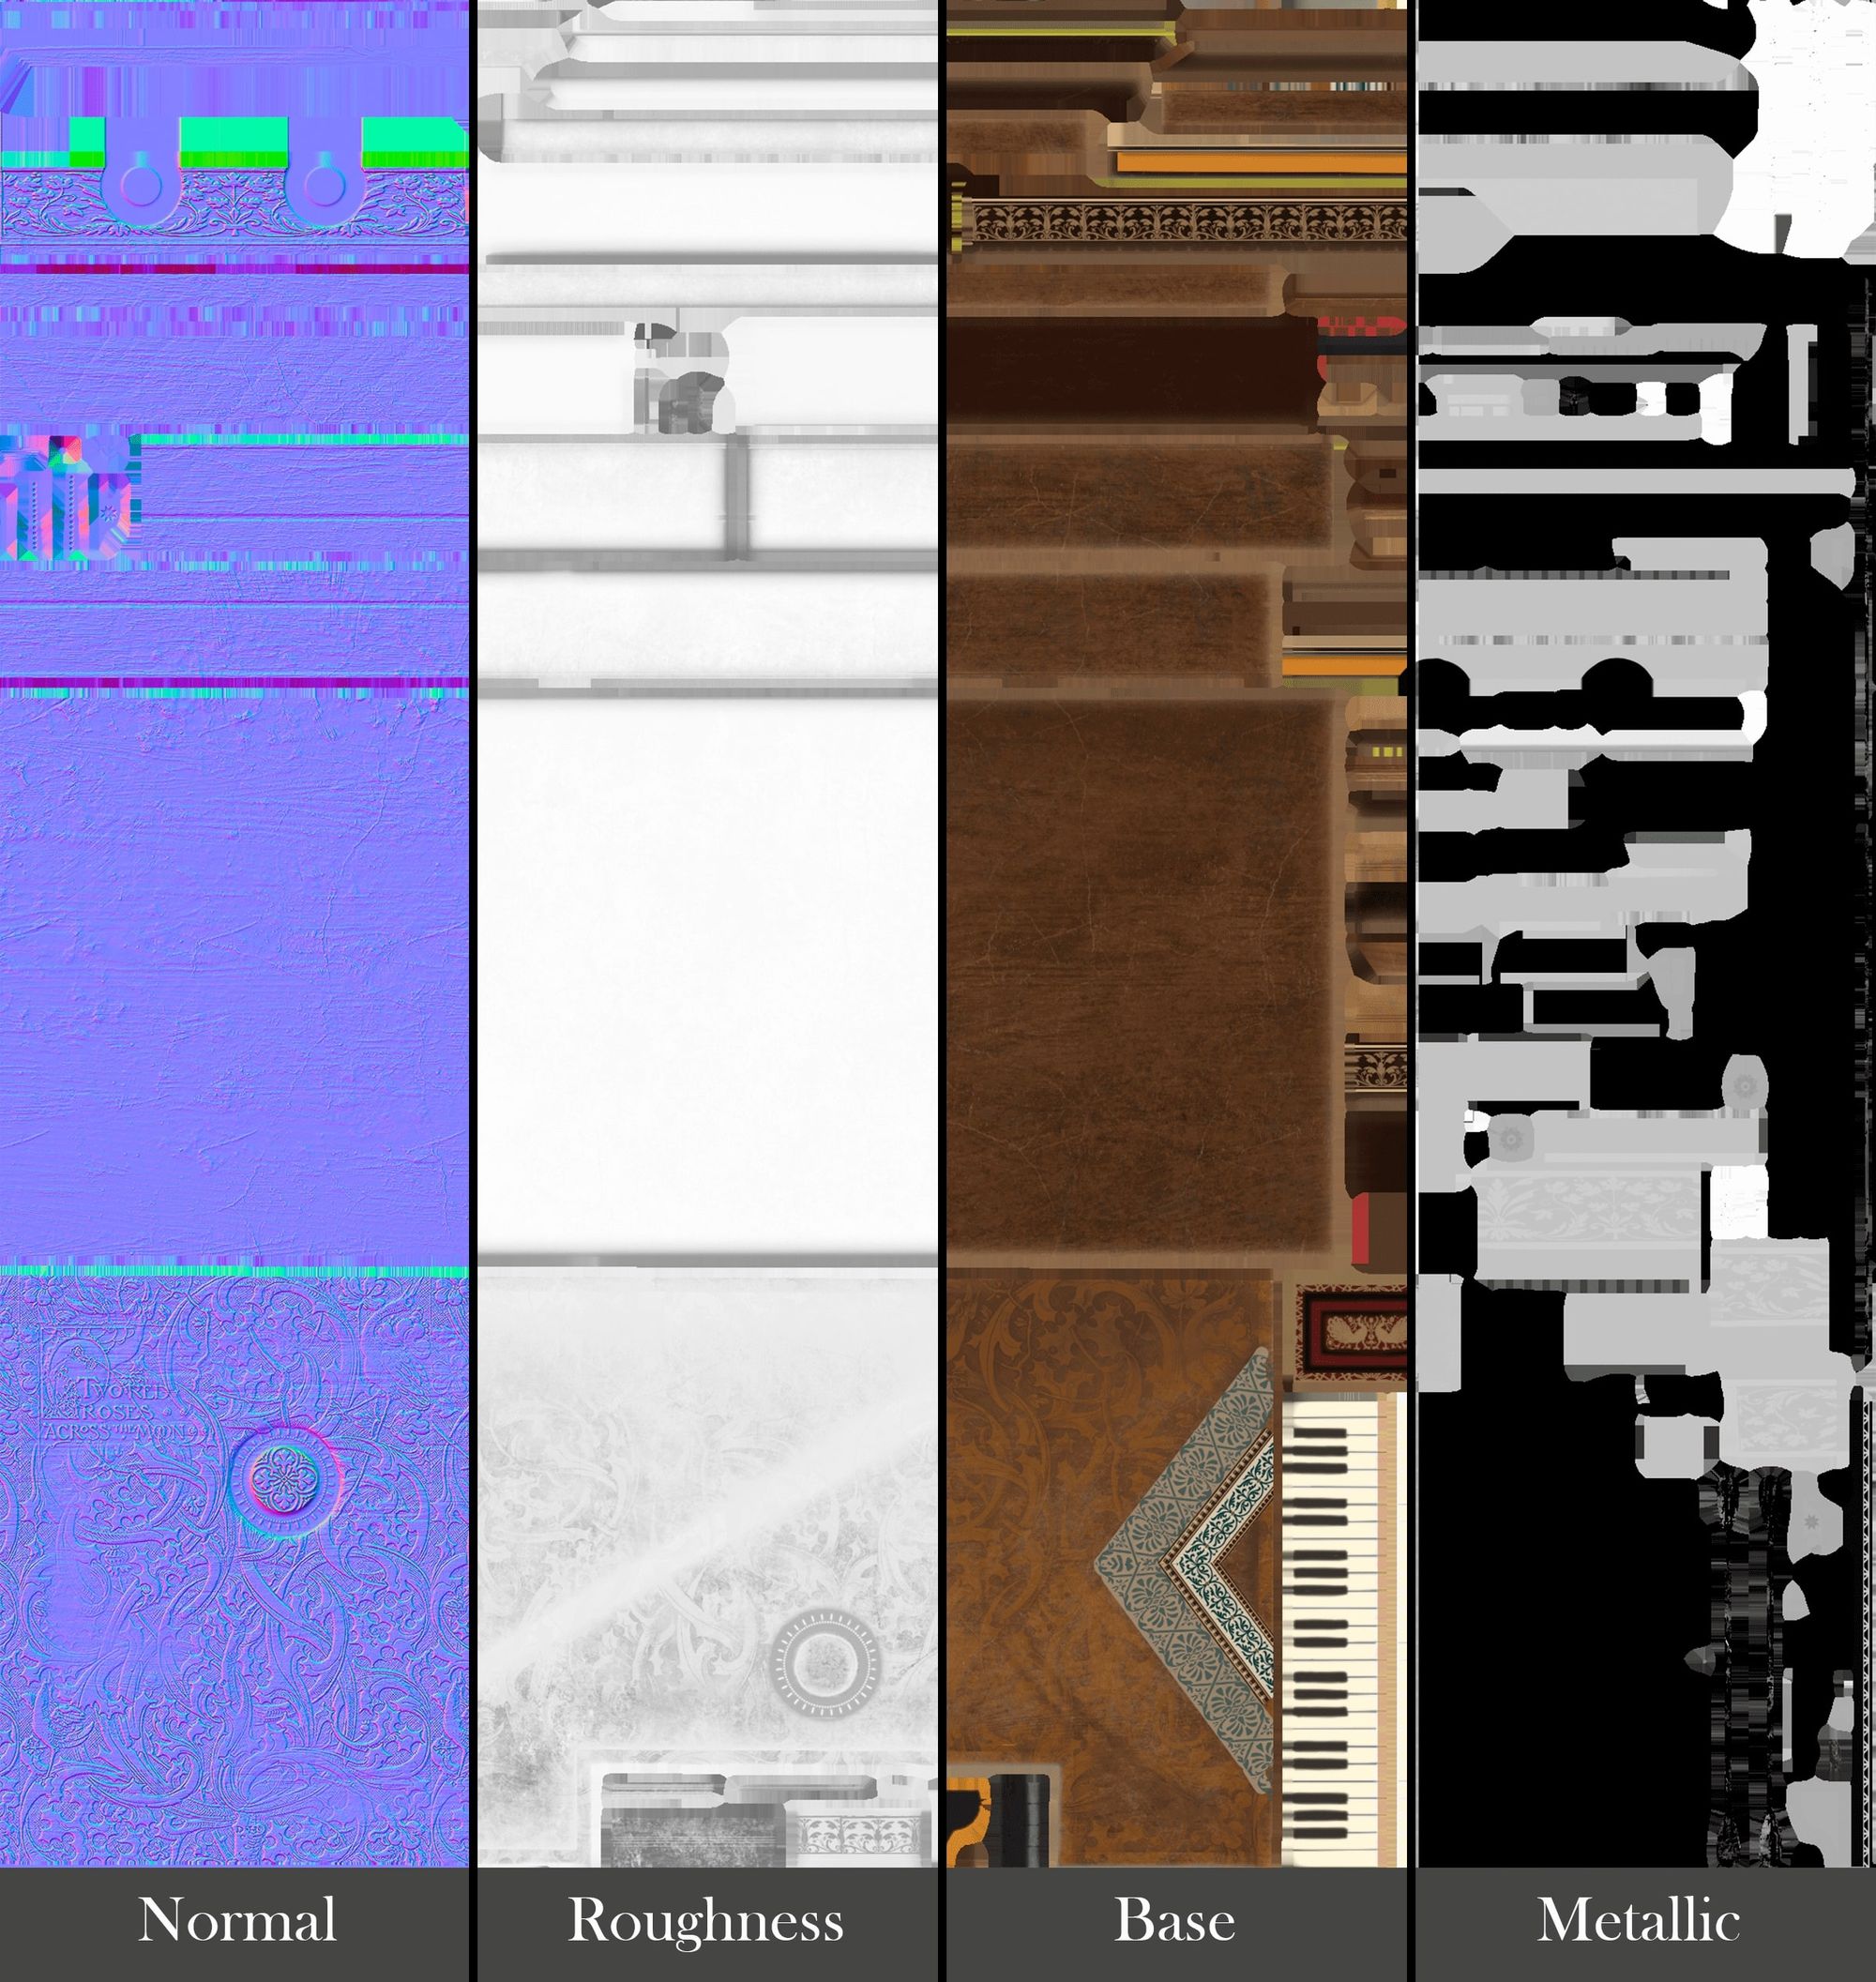
When it came to generating UVs for my asset, I followed a meticulous process to ensure the quality and efficiency of the texture mapping. I opted for a resolution of 2048x2048 pixels, providing an adequate amount of detail for the textures without compromising performance. Additionally, I added a 16-pixel margin around the texture border to prevent unwanted artefacts and ensure smooth transitions between adjacent textures.
This approach allowed me to maximise the visual quality of the textures while maintaining a reasonable file size. Furthermore, I ensured that the UVs were correctly aligned and optimised for texture application without distortion or visual errors.
In summary, by adhering to this carefully planned workflow, I was able to obtain high-quality UVs for my asset, significantly contributing to its final appearance and performance in the rendering engine.

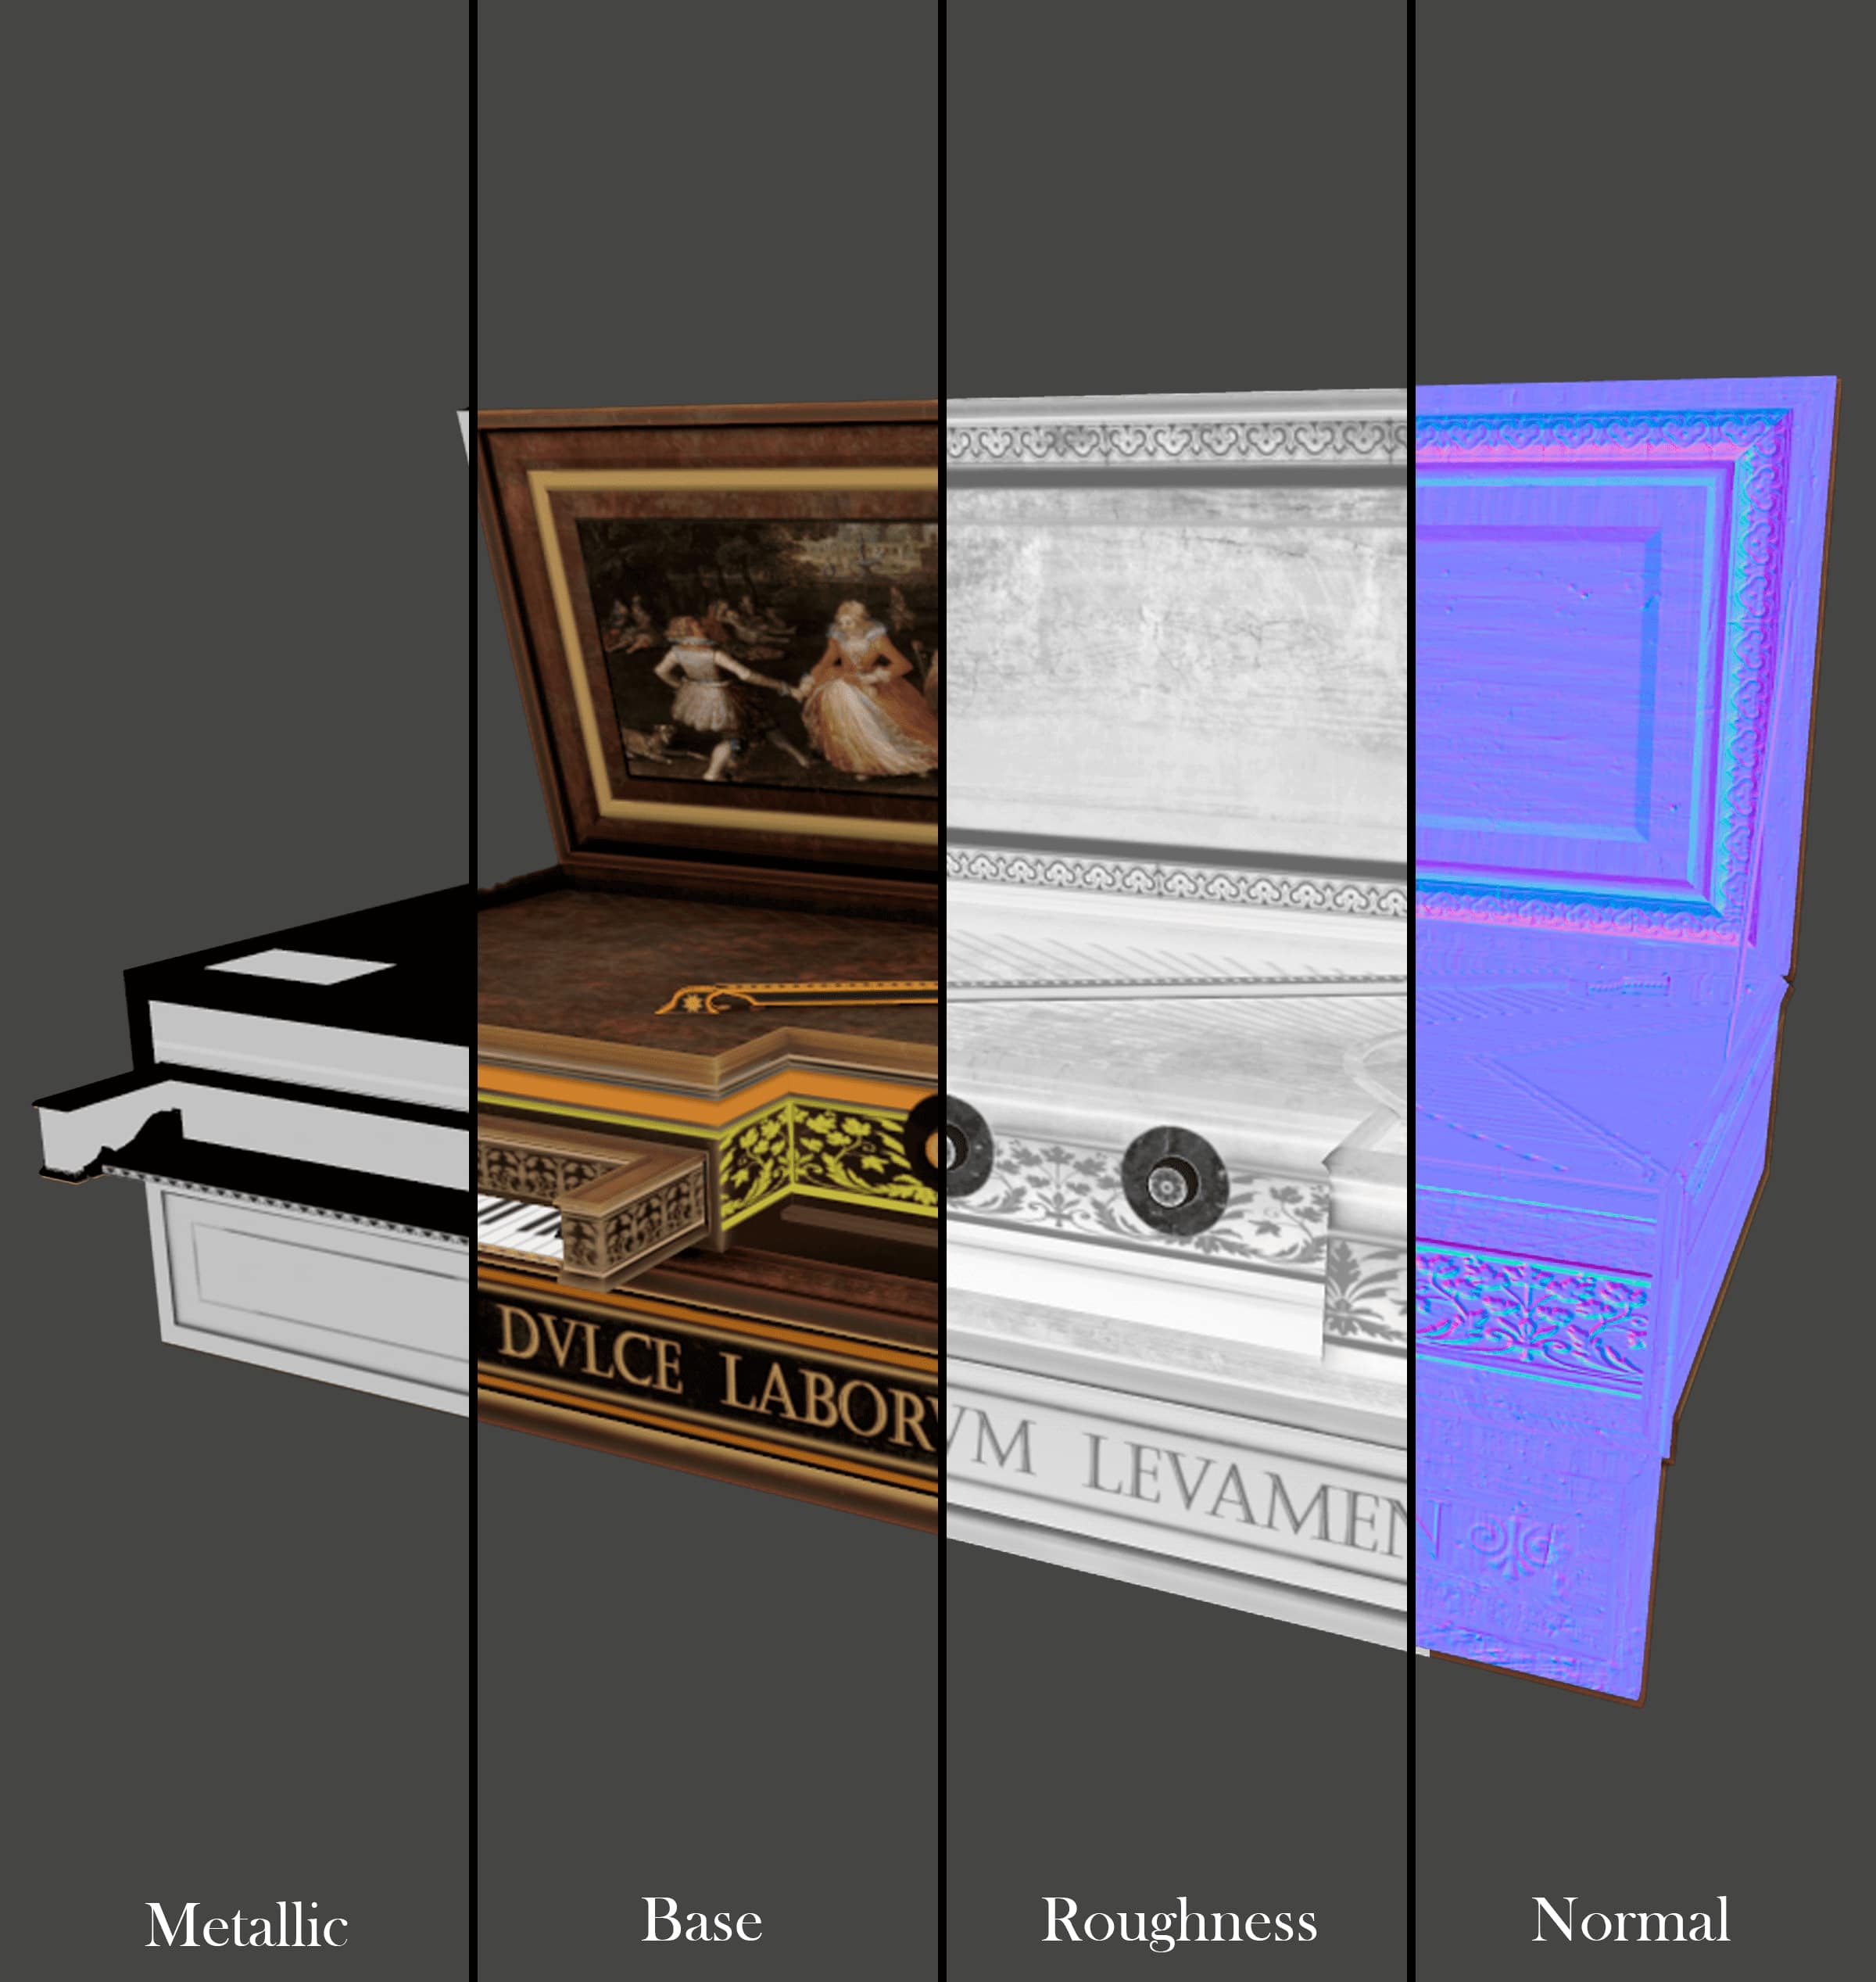
I prefer to begin texturing by focusing on materials. For instance, in this case, I initiated the process with a wood material. Initially, I applied base colours, then incorporated additional details such as roughness variations and highlights. To enhance the realism of the wood texture, I utilised grunge and vein maps.
Following that, I introduced edges and cracks with heightened roughness values to differentiate them from the base texture. Additionally, I applied a red gradient and adjusted transparency settings. To address the corners, I employed an ambient occlusion and dirt generator with a multiply filter.

After finishing the wood texture, I moved on to adding ornaments and decorations. I found several alphas on Pinterest and official websites that were valuable resources. For instance, the alpha I used for a board was sourced from The Met Museum. Furthermore, I incorporated various other alphas for decorative purposes as below:
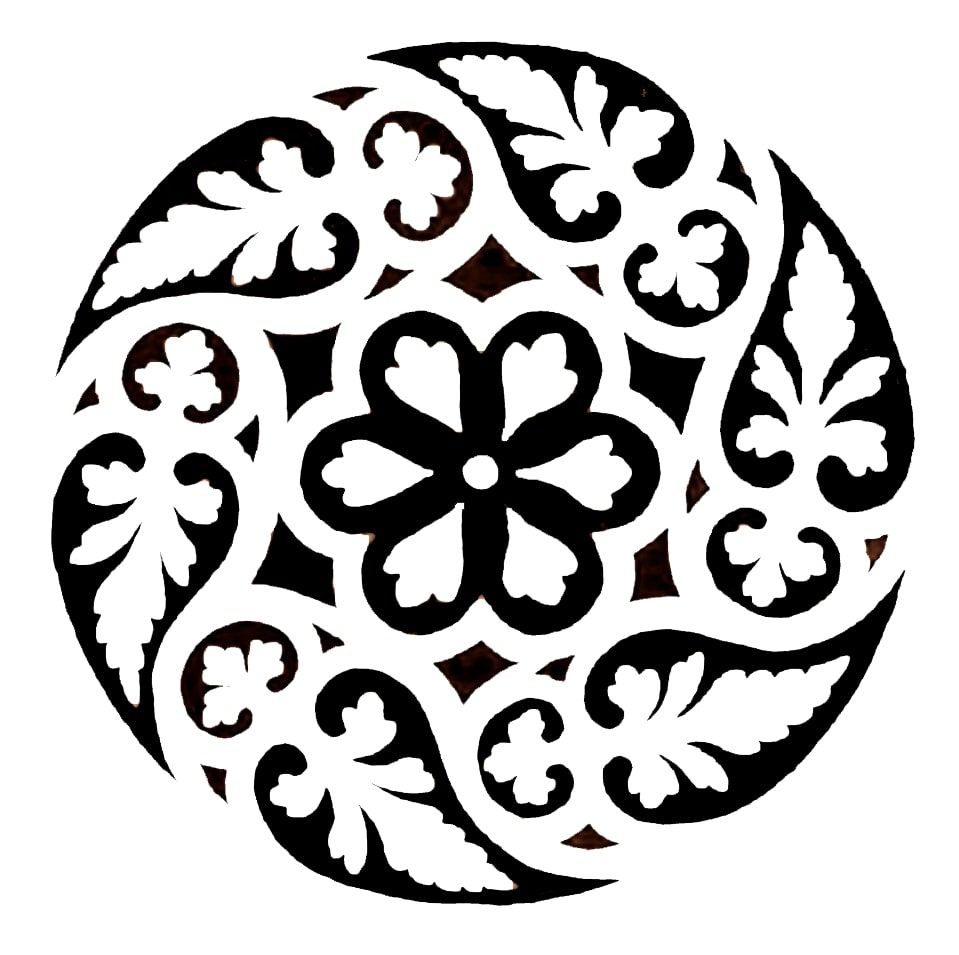
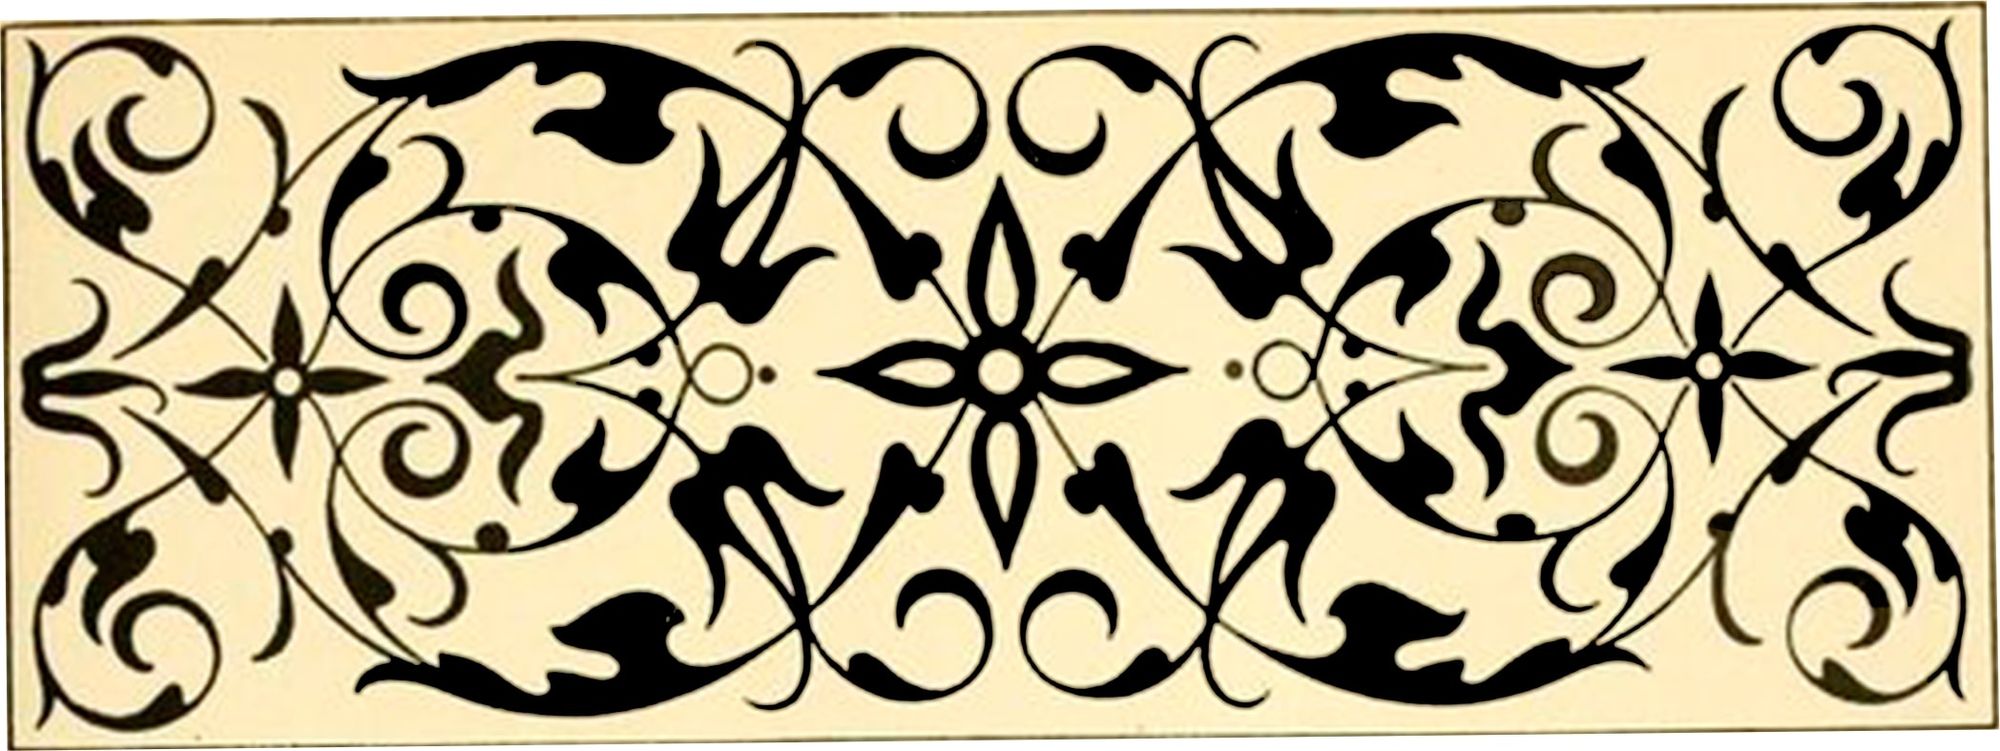

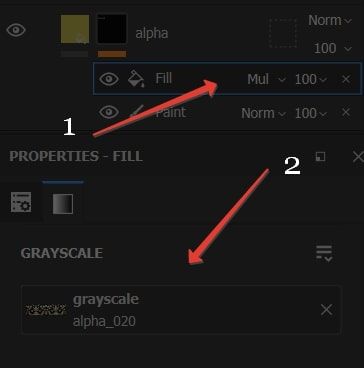
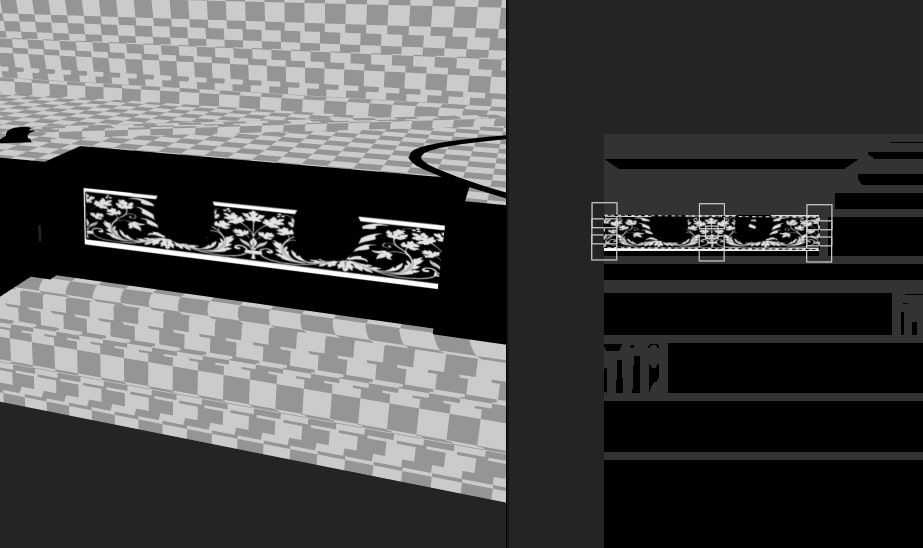
For the ornamental aspect, I could have opted for trims, but since this piece didn't require extensive trim work, I decided to use alphas as decals, stencil brushes, or simply by employing a fill layer in Substance 3D Painter. This technique is one I commonly use, and I'm unsure whether I picked it up from somewhere or perhaps developed it myself. Essentially, the process involves selecting the area you wish to decorate, creating a fill layer with the necessary colour, roughness, metallic, and height values. Then, you apply a black mask to this layer and use a paint layer to select the specific polygon using Polygon Fill or UV Chunk Fill.


Once we have our polygon selected, we generate a fill layer above it and adjust it to a multiply filter instead of normal (this allows us to work on the selected area). Within the grayscale, we simply drag our alpha and ensure it's positioned correctly.

I included additional ornaments and details. As mentioned earlier, for the lid, I referenced a picture by David Vinckboons The Fête Champêtre.


After texturing the Virginal, I exported the textures to Marmoset Toolbag. The HDRI I used is the default one named Skylight - Studio Beauty.
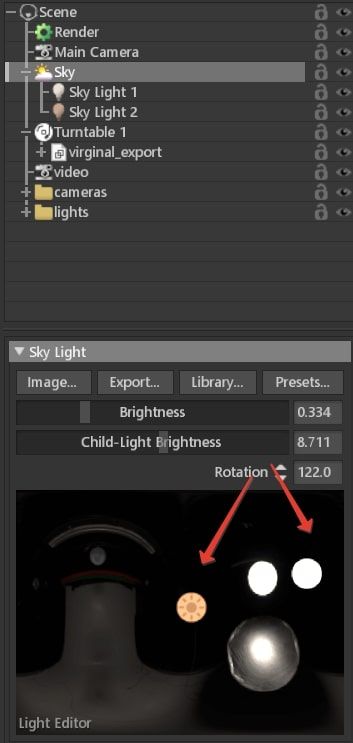
Therefore, as you can observe, I have two directional lights, resulting in the following appearance.

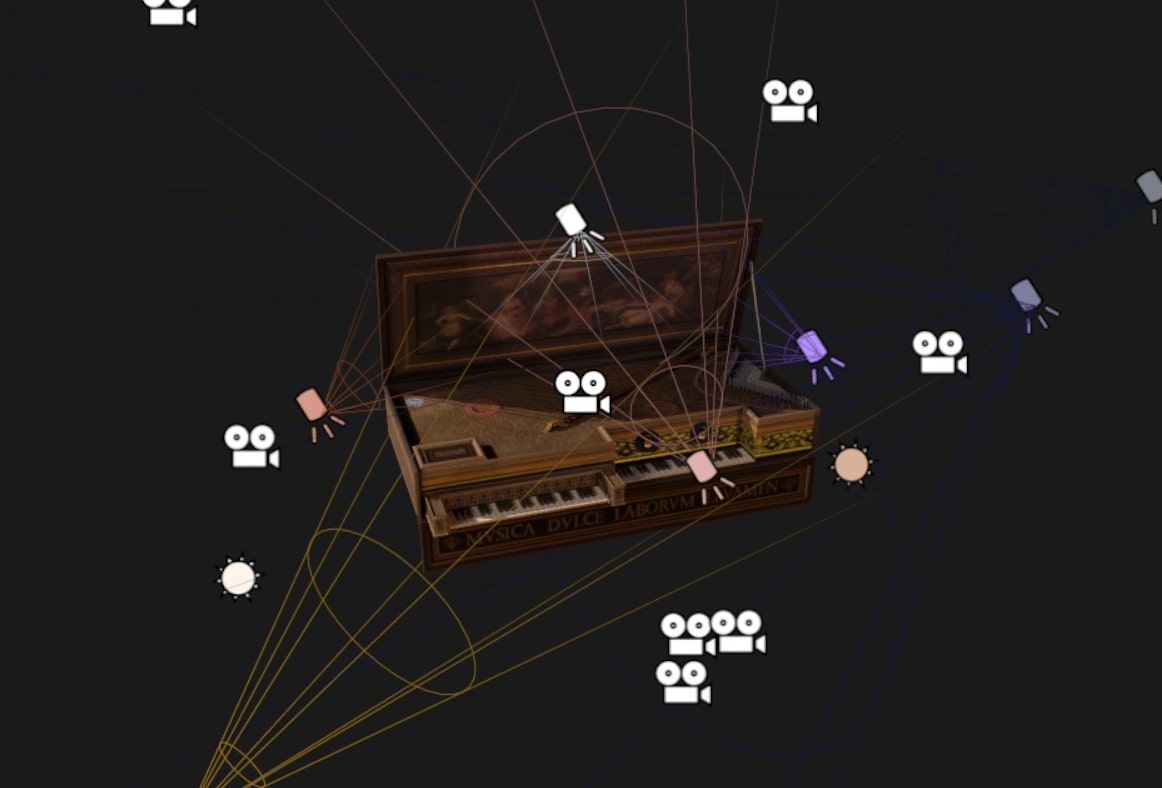
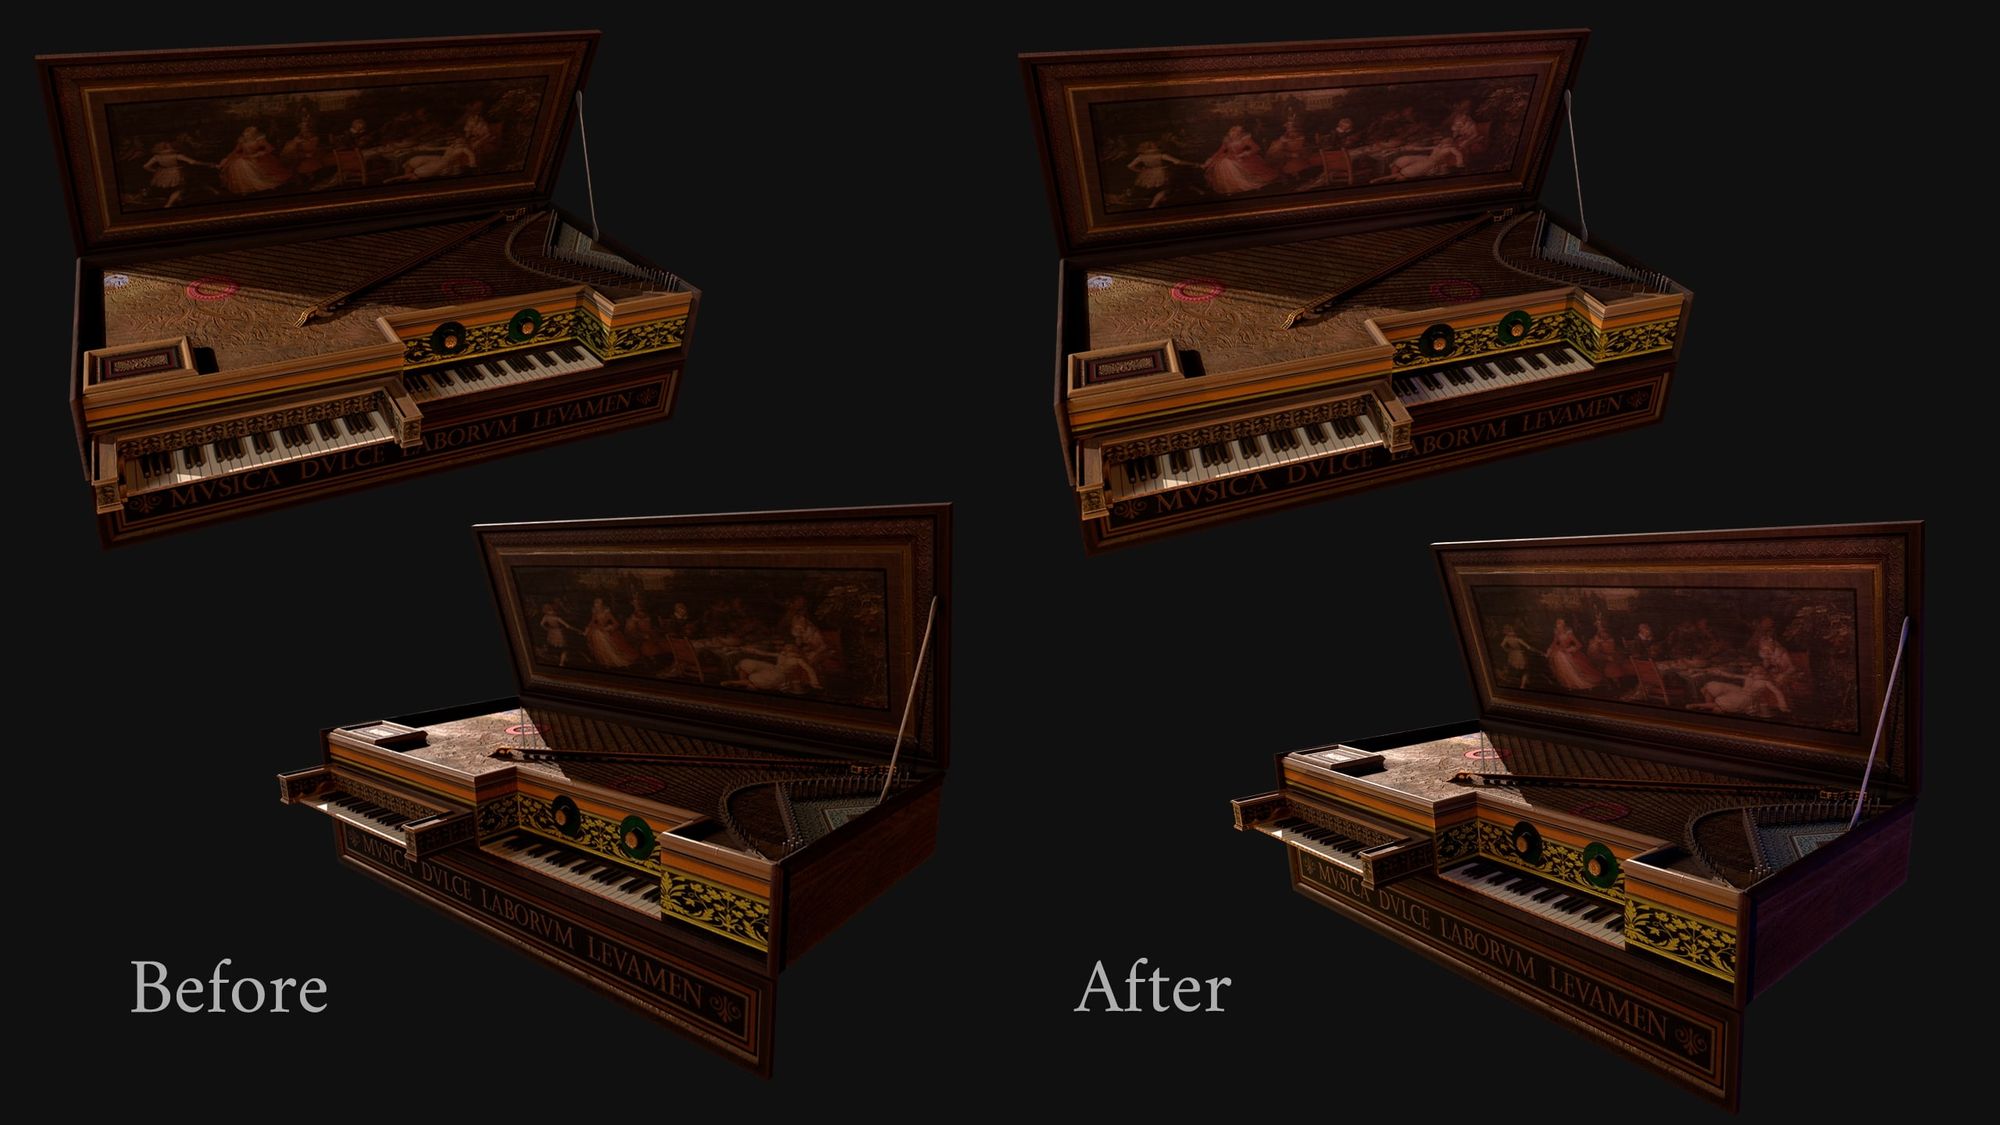
When I began with close-up renders, I observed that while the two directional lights appeared satisfactory, the model appeared somewhat dark. As a result, I introduced more, weaker lights to emphasise certain angles.

Here, you can observe the contrast. The variation may not be immediately apparent, but I can assure you that during close-up renders, the darkness was much more pronounced.
Also, I made some animation in Marmoset following this tutorial on YouTube.
And before I started rendering and lighting I saw this video which also has an animation part.
It has been a very interesting challenge for me when it comes to thinking and planning the workflow: to start with a simple box giving it more shape, to texture it so that it looks more realistic, but giving it a little different touch, too, respecting its use in real life.
It has been fascinating to observe how I can organize myself within a span of 10 days, witnessing the projects of others and recognizing their talents and creativity. Despite the "competitive" environment, we shared our knowledge, provided feedback, and supported each other. The organizers were instrumental in supporting us throughout, monitoring our progress, and assisting whenever needed. In the end, I am proud of the final result. Although my work may not be an exact replica of the Double Virginal, I believe I captured its essence and paid tribute to the craftsmanship and artistry that initially captivated me. My main reference guided me through the creative process, inspiring me to strive for excellence in my own work.
You can reach out to Sodrose and check out more of her work via her Rookies profile here.