
Hello, my name is Giorgio Lorenzetti, and I’m an Italian Lighting artist/CG Generalist. Here’s the “Making of ” for my Demo Reel piece “Reaching for the Stars” which I created at Think Tank Training Centre with Brent Elliott as my mentor.
The whole process was very tough and full of learning in many aspects. The breakdown is going to walk you through the entire process, including both the aesthetic and technical choices that were made.
Concept
I always find looking for a concept the best and the hardest part of a project. It’s the best because you are excited to start working on something that you like and because you get to choose what inspires you.
On the other hand, it can be a double-edged sword because what you really like is not always the best choice. As soon as you choose a concept, you also need to face artistic and technical choices to understand how to translate your picture into 3d.
I always find looking for a concept the best and the hardest part of a project.
I would say it is not only important to choose a concept that is both inspiring and impressive but one which owes itself to showing off your skills.
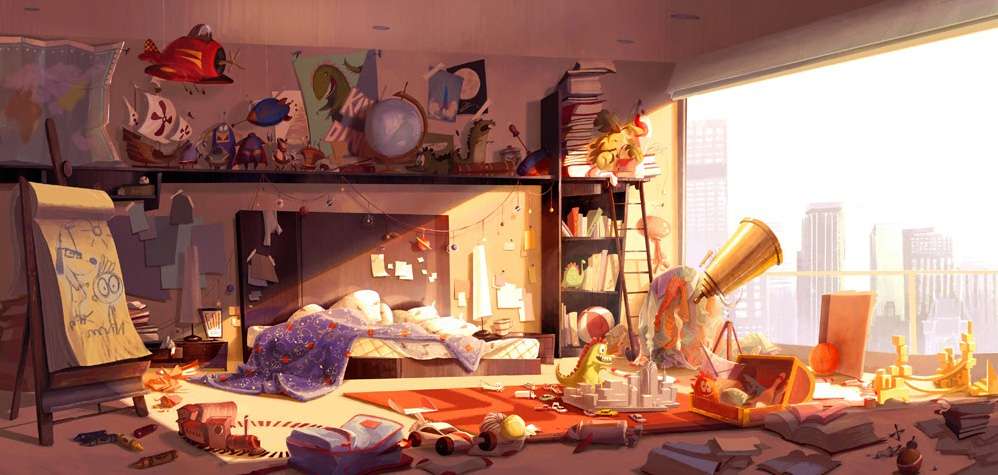
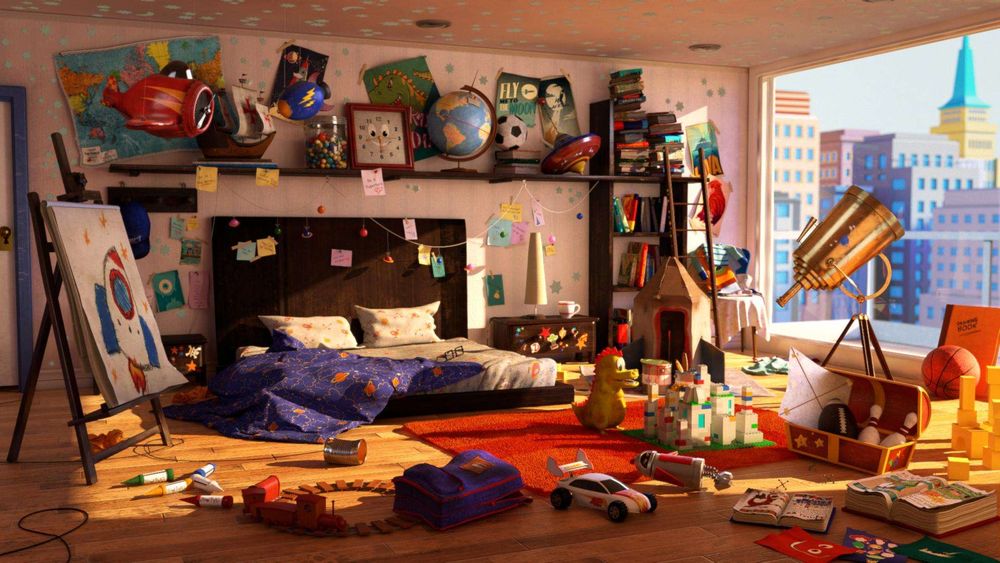
The concept I have chosen is an illustration by Priscilla Wong for Mr. Peabody and Sherman, and it is an excellent example of colour and design.
Now that I have the concept I want to decide what story I need to tell – A kid who dreams of reaching the stars, with his imagination.
Finding the story in a project always gives me the right motivation to work on it. So it was at this point that I started to block in the scene.
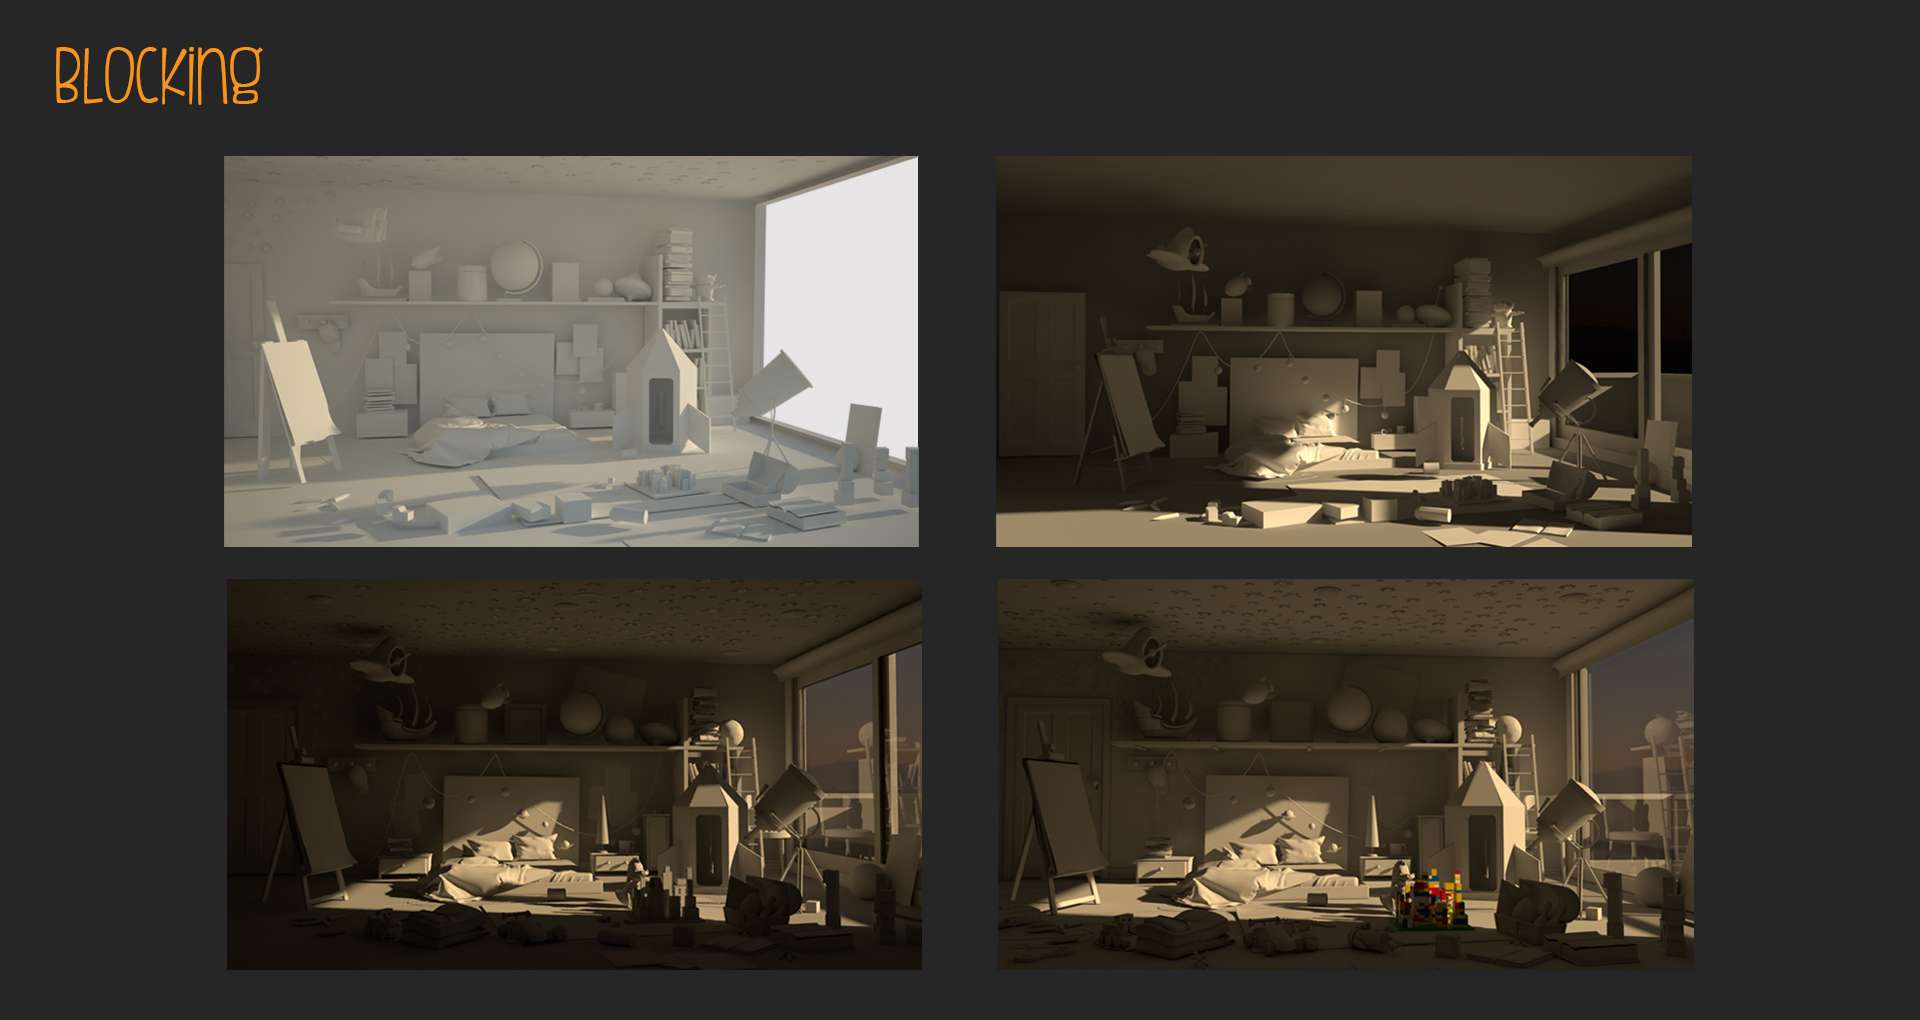
The aim of this process is to identify the correct scale and proportions, for this reason at this stage it is important to make significant changes without fear or concern of mistakes. This allows me to understand the composition better and to identify the most important objects within the scene.
In this case, it was the Telescope, Airplane, and Bed. I then blocked the cameras and made a storyboard.
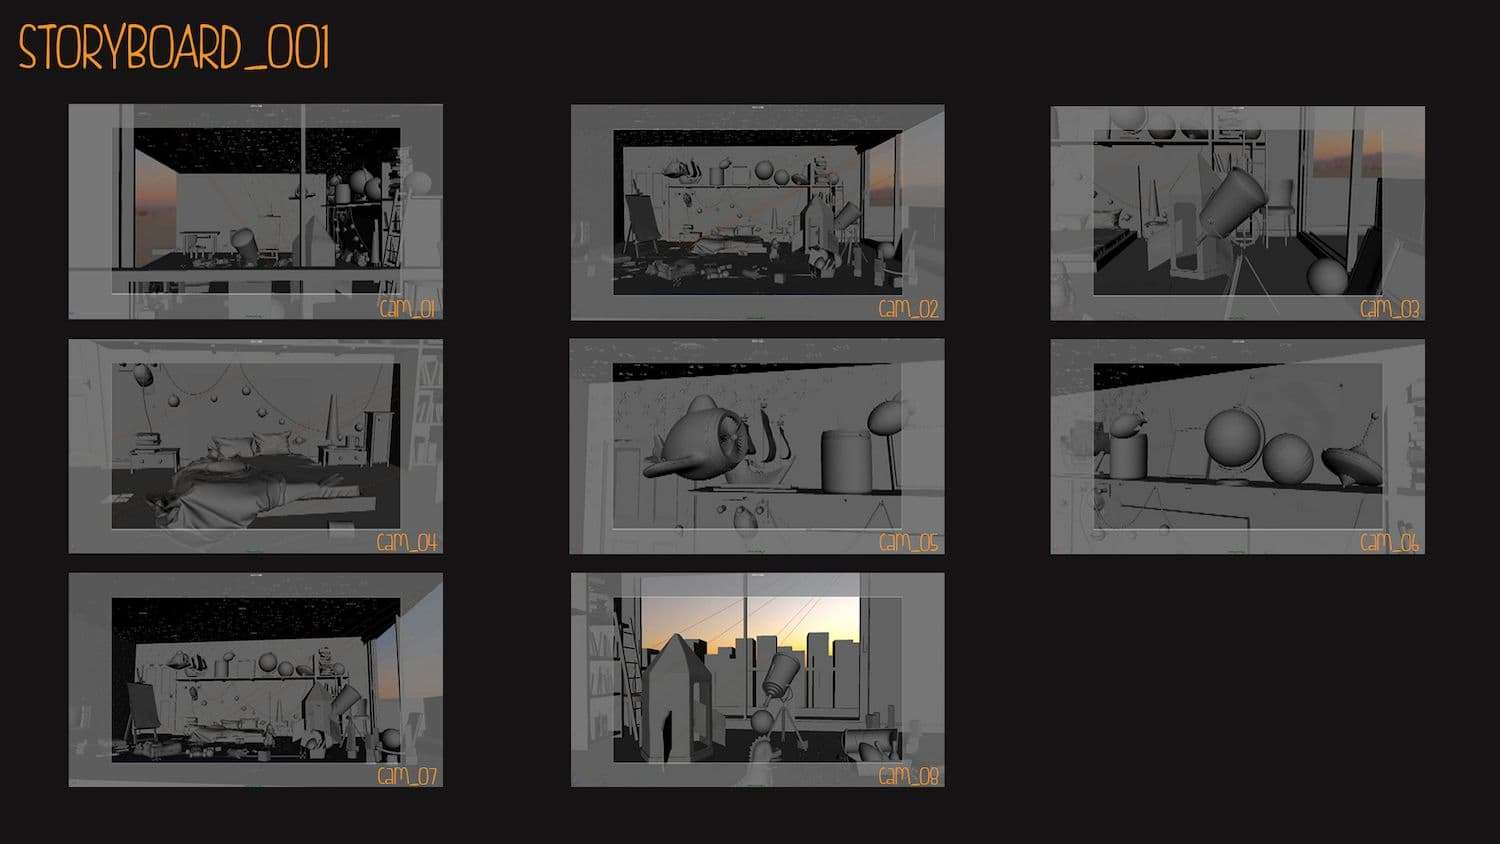
The storyboard also helped me to plan the accuracy and detail required in the textures and the models.
At this point I divided all the assets into three main categories:
Hero assets
Secondary assets
Background assets
Light is what makes everything look good in the first place, a good lighting system can enhance models and textures.
Texturing & Shading
For me the texturing process, is not just about painting a model but also an opportunity to tell a story. The way I usually approach a blank model is always by applying a basic color, to visualize what I want.
Unless it is a metal, I always paint the Diffuse map first because it describes most of the information that I need. I start from the color, and then I add the Ambient Occlusion, breakups, grime, scratches, dust, and dirt.
When I am happy with the final result in the diffuse channel, I know that I already have what I need to go forward with the other maps (Specular, Glossiness, Bump).
After I painted all the maps I copied the layers for grime, dust and scratches and made masks out of them in Mari.
Create your own naming conventions
Before starting the shading process or the lighting process it is important to set up a personal naming convention. It is good practice to maintain everything organized and well named, this is standard practice in the Industry as well. For this purpose I created different conventions for different type of files:
Models & Geometry
Geo_(object’s name)_(object’s part)
E.g.: Geo_Airplane_Propeller
Texture
(Typeofmap)(MAP/MSK)(object’s name)
E.g.: Diff_MAP_Airplane
Grime_MSK_Airplane
Shading & Materials
(Object’s name)(Material)(Typeofmaterial :MTL-BMP-BLND-2SDMTL)
E.g.: Airplane_Alluminum_MTL
Airplane_Scratches_BMP
Lights
Lgt_(typeoflight)_(object affected)
E.g.: Lgt_Keylight_Airplane
Cameras
Camera_(shot)_(frame range)
E.g.: Camera_Airplane_04_251_460
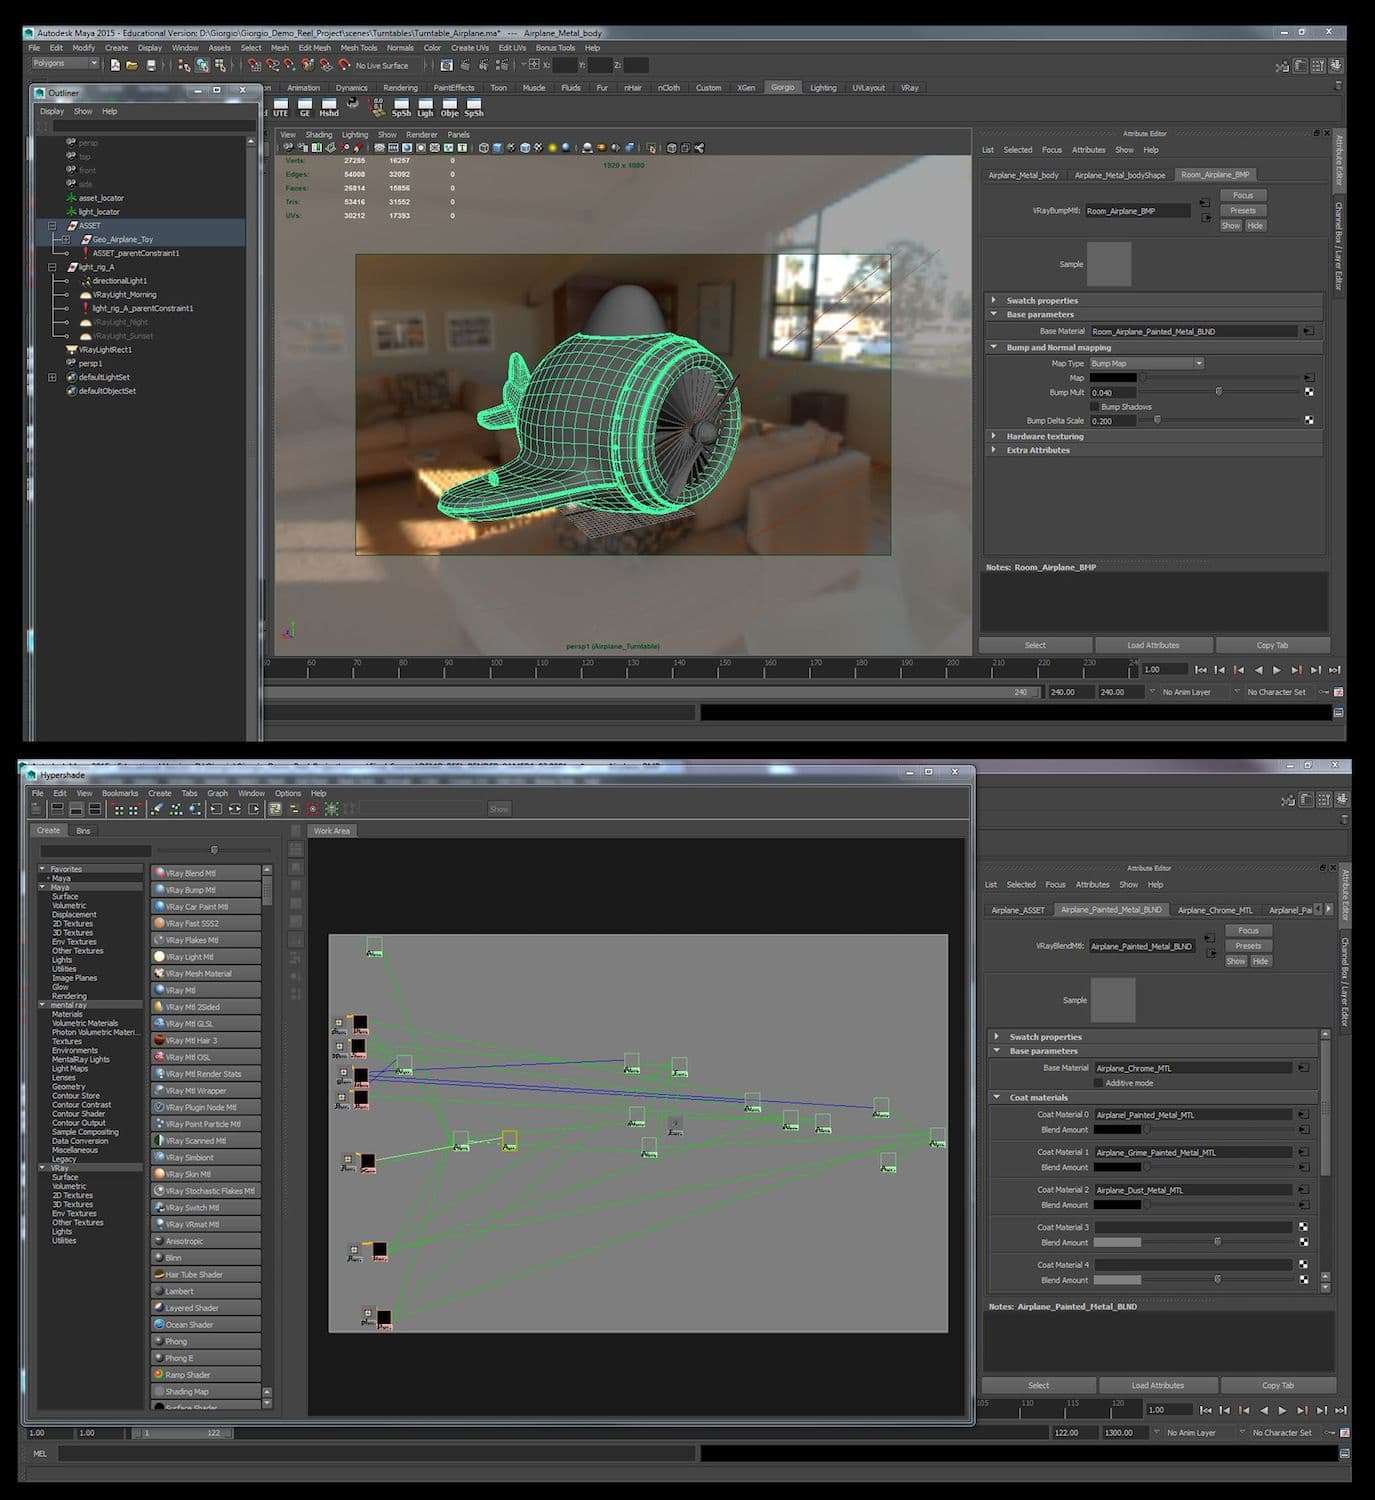
Shading the objects gave me the opportunity of tweaking the textures and the values inside MARI to have more control. I then created a scene in Maya with a Dome light, an HDRI, and a key light to test the shaders.
I created two empty groups and parented them to two locators, one for the Light rig and one for the ASSET. After this I keyed the locators on the timeline to animate the spin for both ASSET and key light. With this setup it was very easy to import and test each object separately.
To paint the textures and create effective shaders I used the following resources:
http://docs.chaosgroup.com Chaos Group official documentation.
http://viscorbel.com/ General knowledge for shaders.
https://labs.chaosgroup.com/ Great source, and great documentation on the GGX Shader.
https://vimeo.com/102632184 Great tutorial for cloth shader by Oasim Karmieh.
http://www.paulhpaulino.com/ A great friend and artist who makes great tutorials for texturing.
Lighting
Lighting is to me one of the most important, fascinating and fun parts. Light is what makes everything look good in the first place, a good lighting system can enhance models and textures. The first consideration I had to make was what kind of lighting I wanted to achieve, whether it be more realistic or cinematic. I opted for a more cinematic look to have a more stylized result, similar to an animated feature film.
A very valuable resource to assist in this process is the Gnomon Workshop of Jeremy Vickery, called “Efficient Cinematic Lighting 2” which covers how to approach a scene or a short with many cameras. Having a valid Color Script is an important step for a scene like this, and this technique is also used in animated feature films.
A Colour Script assists in mapping out the colour, lighting, emotion and the mood in a film or a scene. This helped me in the early stages of achieving the result that I wanted both in terms of feeling and story.
For this scene I started with Vray Sun and Sky to have an idea of what I could achieve with it. I always start with a Key light (Rectangular Light) and a Dome Light with an HDRI plugged into it. In this way I know which one is my main source of light and I can adjust the intensity, colour and direction of it.
The Dome light on the other hand doesn’t just fill the dark spots but is also providing color and mood to the image. Using a texture in the Dome light is a good way to get some variations in the reflections as well. One of my main sources for quality HDRI image is HDRI Labs where you can find many good exr. for free.
One of the most challenging aspects in this scene was to get the same contrast between light and shadow produced by the daylight shown in the concept.
After I tweaked the Key light and I was happy with its position, I moved to the second step of the Lighting process. I created some other rectangular-lights to fill the scene and add some brightness to it. I then added two big fill lights to make the objects closer to the camera more visible since they were in the shadow.
The last step of the lighting process is about refining and adding final depth to the scene. At this point the lighting is already quite good, but the contrast that I wanted to achieve was muting the textures and the shaders. I was able to overcome this issue by using the Light Link editor, which allows you to decide a specific light to illuminate a specific object. With this process I added more depth to the scene and I emphasized the most important objects.
During this process I always used low render settings because at this point I was more interested in the overall effect being achieved rather than the quality of the final image. I increased the settings gradually only towards the end of the process to refine everything. Understanding how Vray works helped me a lot to save on render times and to have quick but good results. Another way to speed up this process is to create a render layer with a white material override which allows you to light the scene without using the textures.
Here you can find some good resources to understand how Vray works:
http://www.cggallery.com/tutorials/vray_optimization/
http://www.interstation3d.com/tutorials/vray_dmc_sampler/demistyfing_dmc.html
I applied the same process to the night scene. After I lit everything with Key and Dome, I took care of the stars, main characters of the night shot. I used self-illumination to give them a glow feeling and then I rendered them out separately to be able to comp the animation of the glow.

Compositing
This last part of the process always adds more contrast, saturation, color correction, and it balances everything giving the final touches to the image. The render from Vray must be always as close as possible to the final result you want to achieve, to facilitate the compositing process.
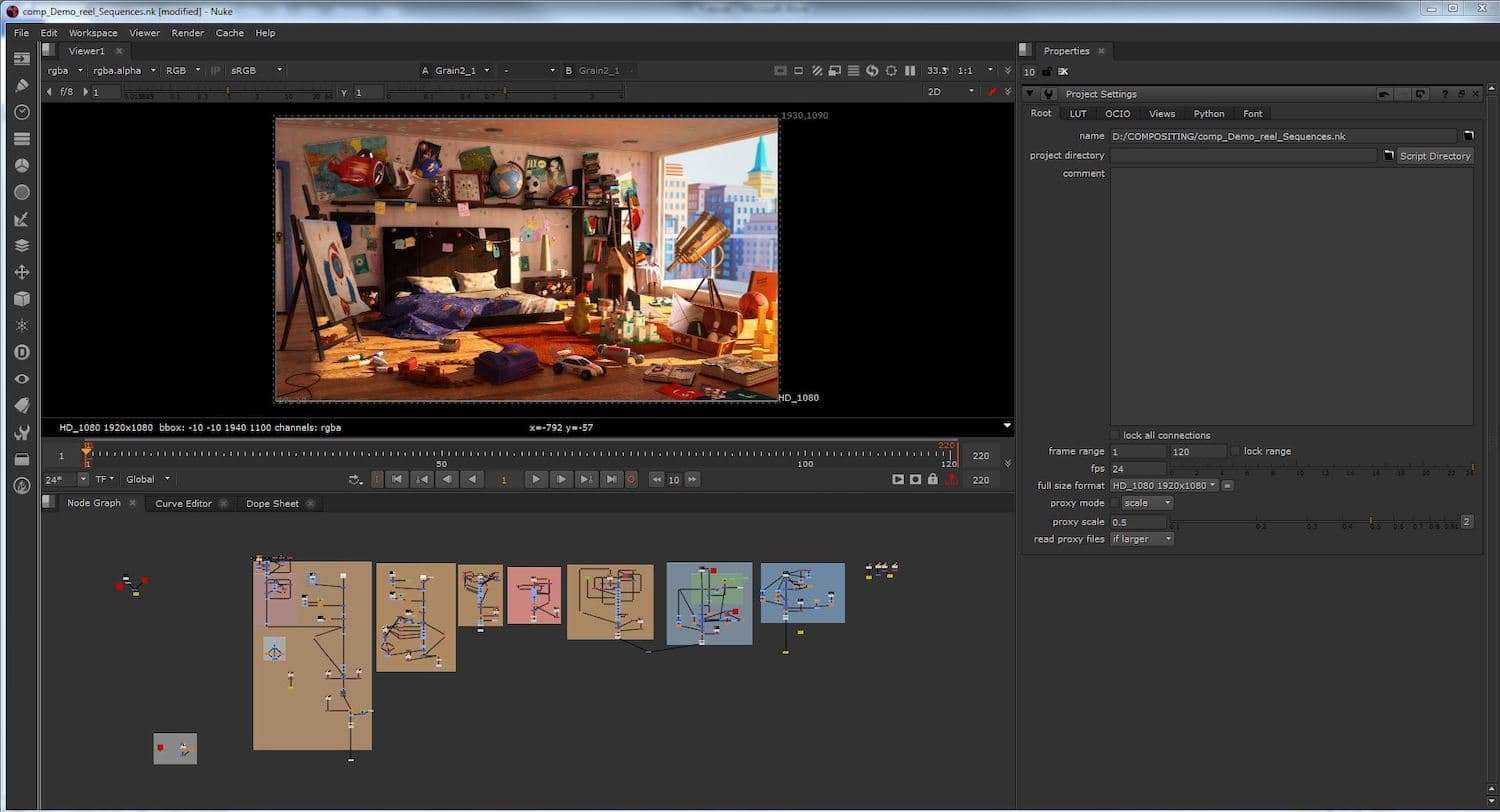
Vray also allows you to render out different render elements such as Diffuse, Specular, Reflection glossiness, etc. and other secondary passes, very useful in the compositing process such as Light Selection, Multimatte, Object ID. For this phase I used NUKE, and I worked on the sequences dividing them per camera.
The way I approached comp was the same for all the sequences: first merge all the CG elements such as Balcony, Window, and City and then adjust bright values, alter single objects, color correction, contrast, saturation, and add depth of field, vignette and noise at the end.
This project has been a great learning process for all my skills. Although it was very hard I learnt a lot and I am pretty happy with the final result.
I hope you enjoyed this “Making of” and found it useful. I am also planning to write another tutorial for more specific assets to describe specific parts of the process.
A special thanks to my mentor and friend Brent Elliott who helped me along this journey. Without him I couldn’t have done this project.
A special thanks goes also to my school, Think Tank Training Centre, and to the artists, and teachers, especially to Matthew Novak and Joe Crawford.
I am also happy to share some names of amazing artists, and schoolmates who helped me, and advised me during this long journey: Roohi Topgi, Paul H Paulino, Christian Peck, Alonso Bocanegra, Renato Scicchitano, Rotem Talker, Rachel Tay, Hugh Behrozy and Fred Richards. Check out their websites!