

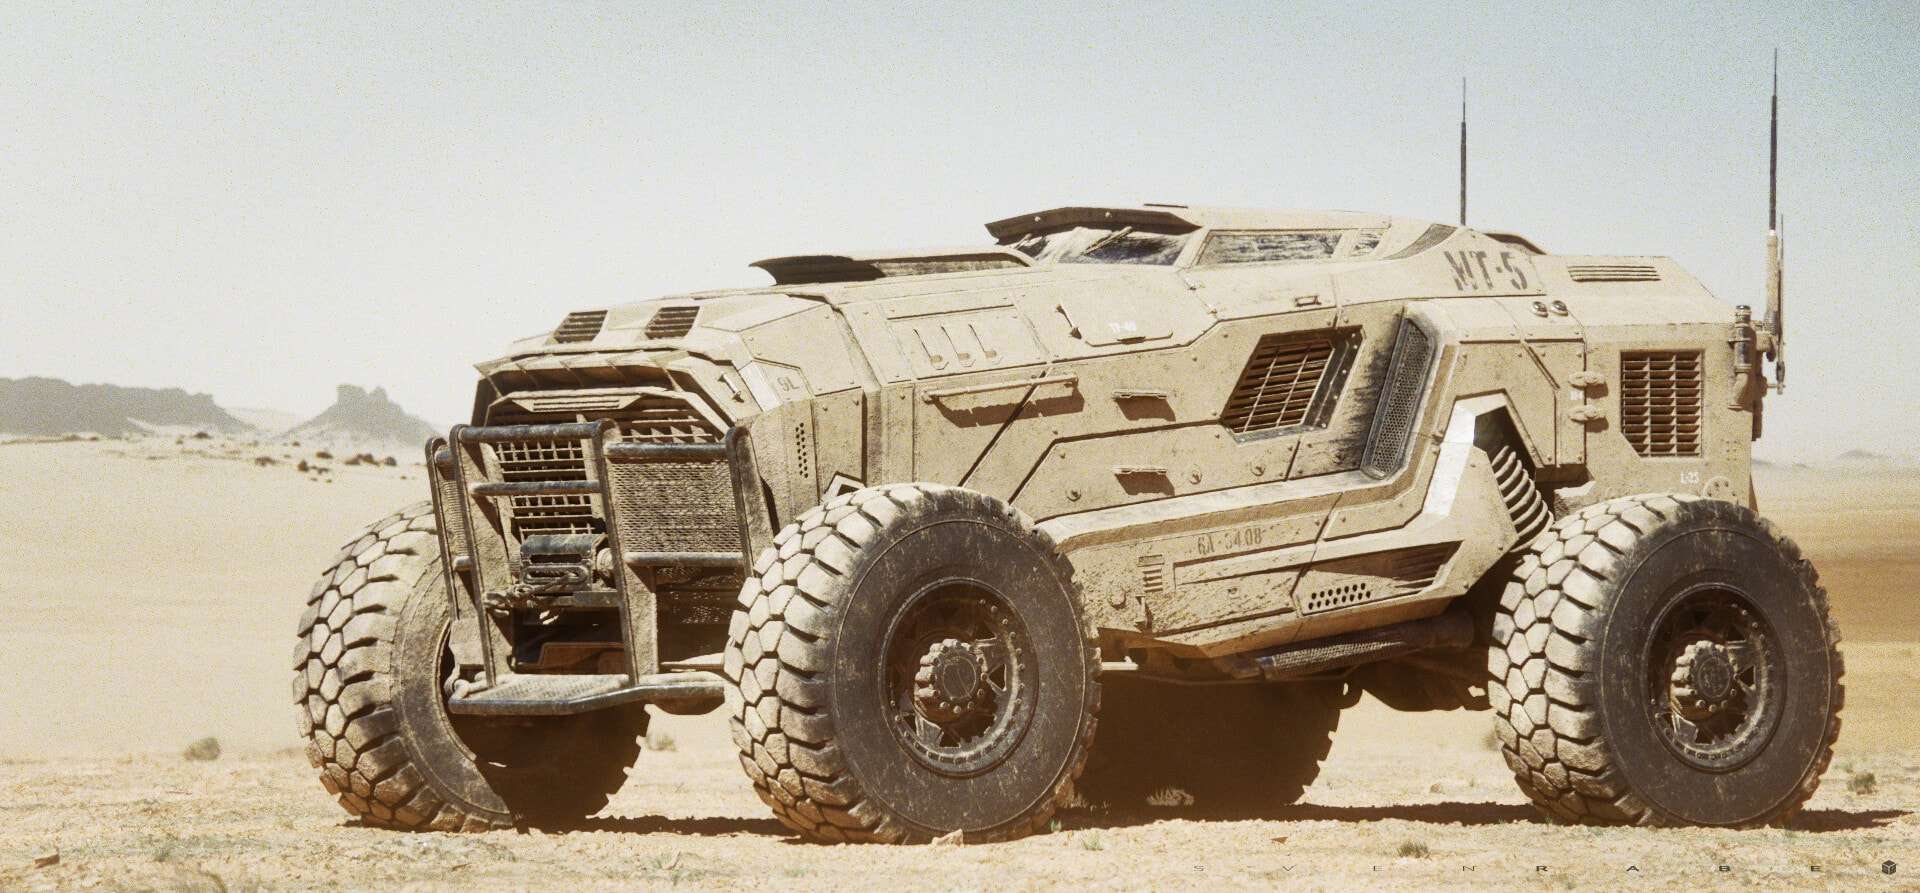
Sven Rabe, a CG Modeler shares this amazing breakdown of this MT-5 vehicle. Sven has been working in the cg industry for over 15 years, creating high quality assets for tv and film. He specialises is modeling, texturing and look dev of assets and this article really showcases his skills, so take note and follow along.
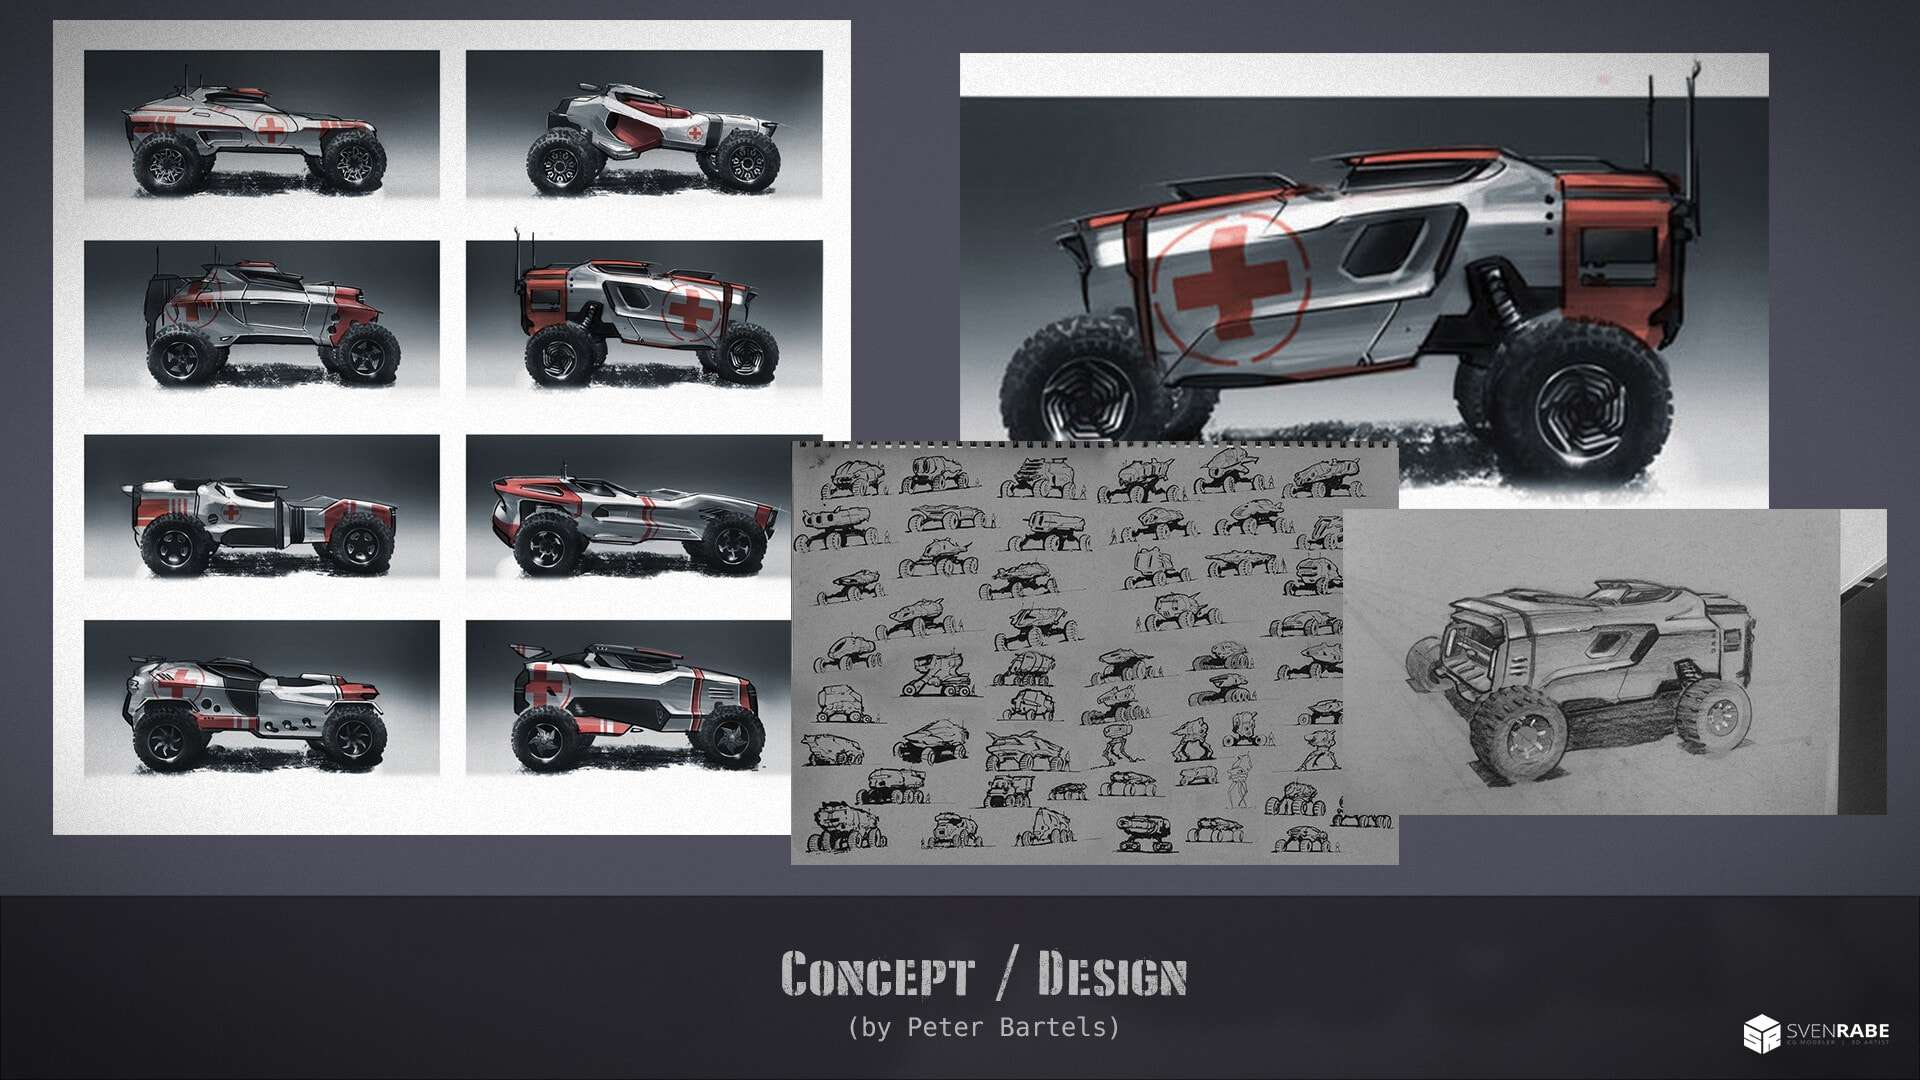
These are the original design sketches I've used as a base. Done by the amazingly talented Peter Bartels. You can check out his work here: https://www.artstation.com/pebe
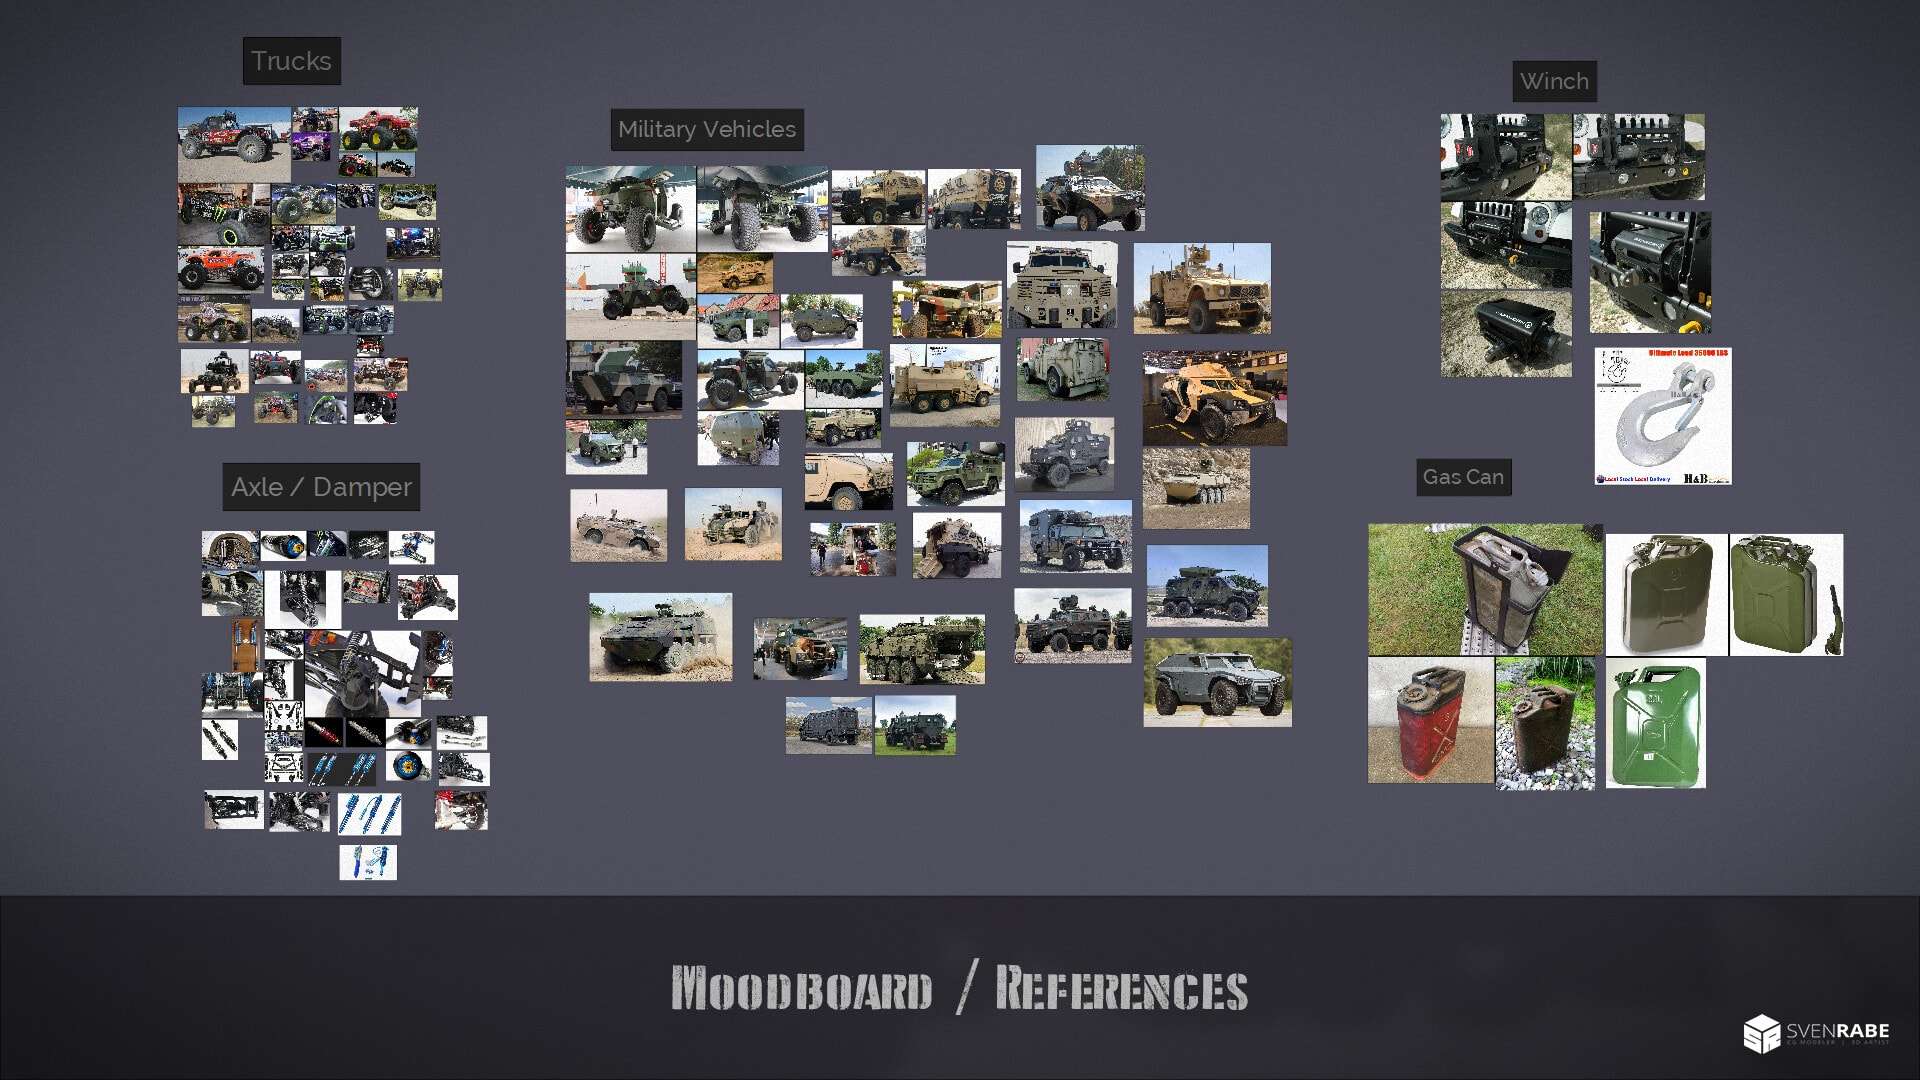
This is one of various moodboards I've created. It's a very important step, as it helps to stay grounded in reality, even if you're doing sci-fi stuff. This will help to make your work more believable.
Modeling Timelapse
I've used Maya for all the modeling. Here you can see a bit of the process from start to finish. It's all subd poly modeling. as my goal was to create a production ready vfx asset with clean topology.
MT - 5 - Clay and Wireframe
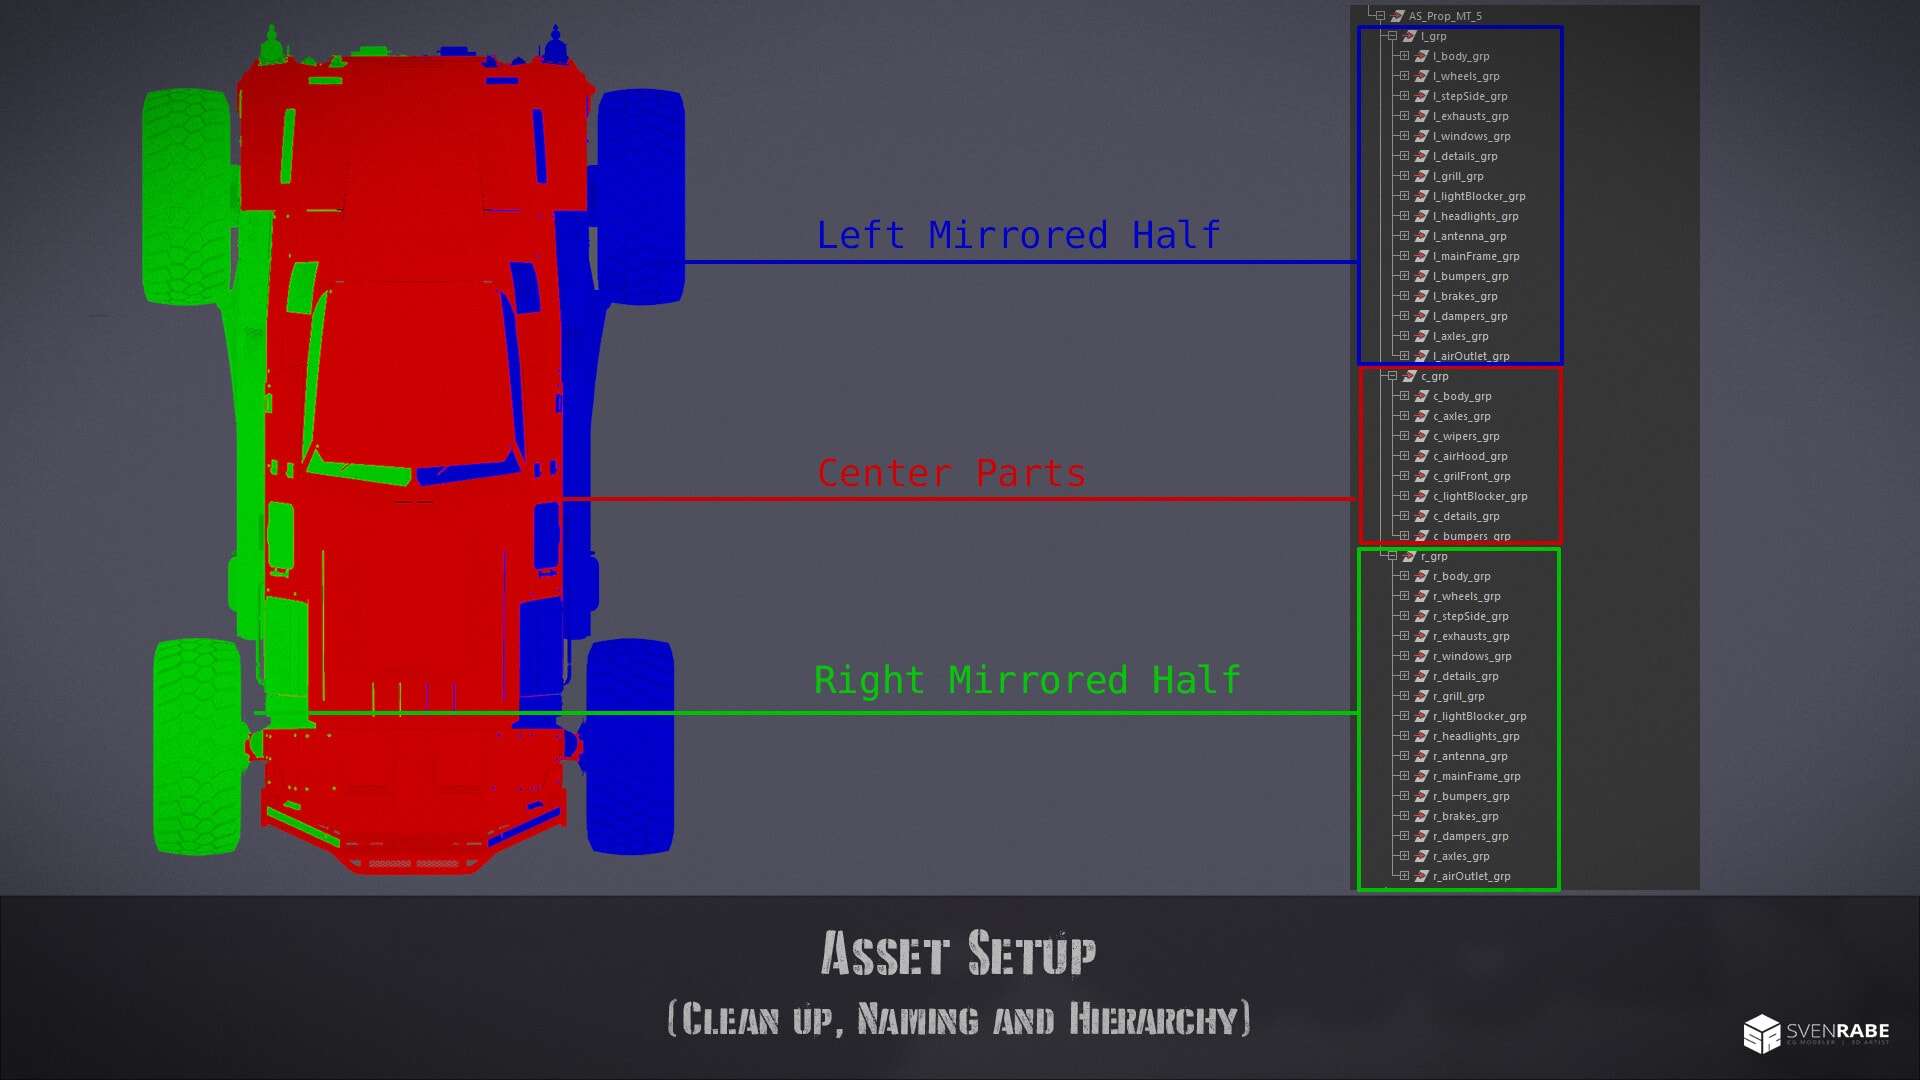
To finish up the asset I've cleaned all the geometry, naming and hierarchies, so everything is ready for export. This helps for further processing down the pipeline and makes it easier for various updates.
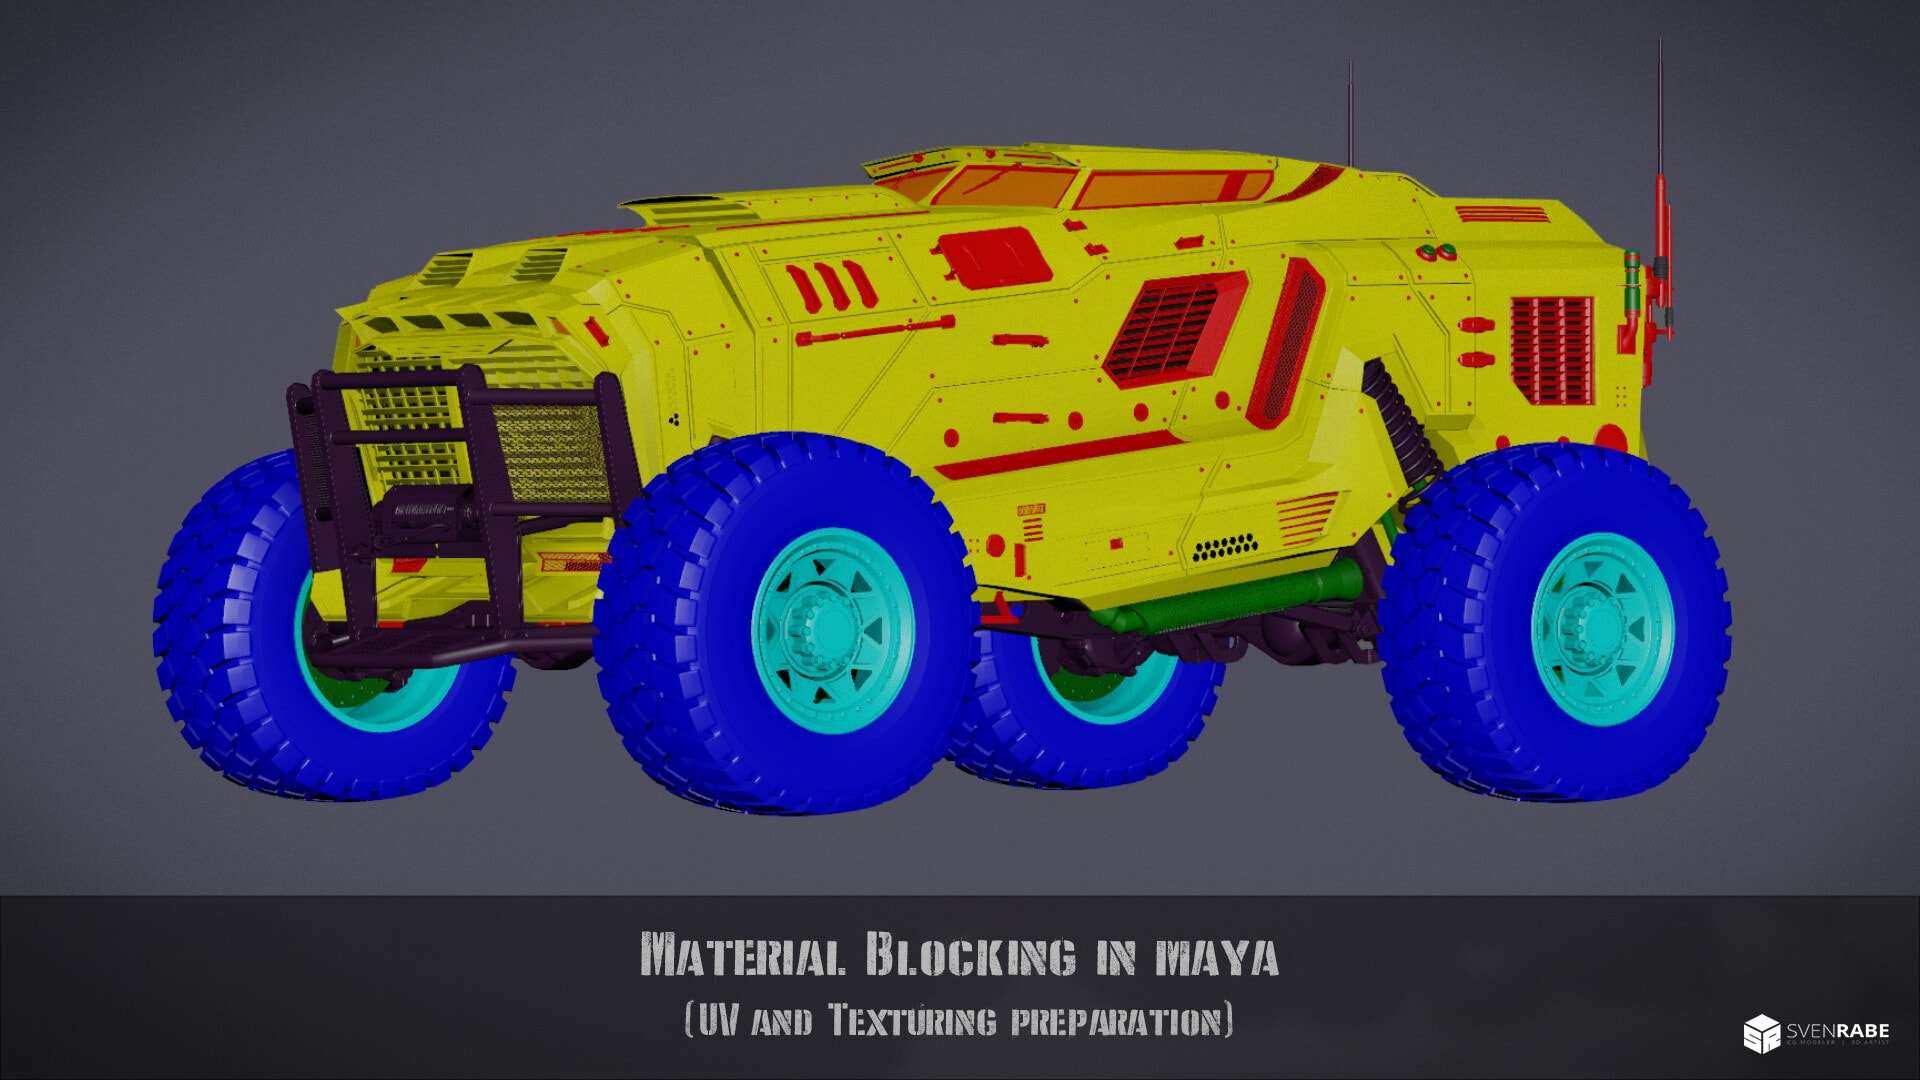
In the next step I do a quick material blocking, which gives you a good overview of all the materials you'll need. Sometimes I also do quick test renders with specific pbr values, to have a basic start in the texturing package.
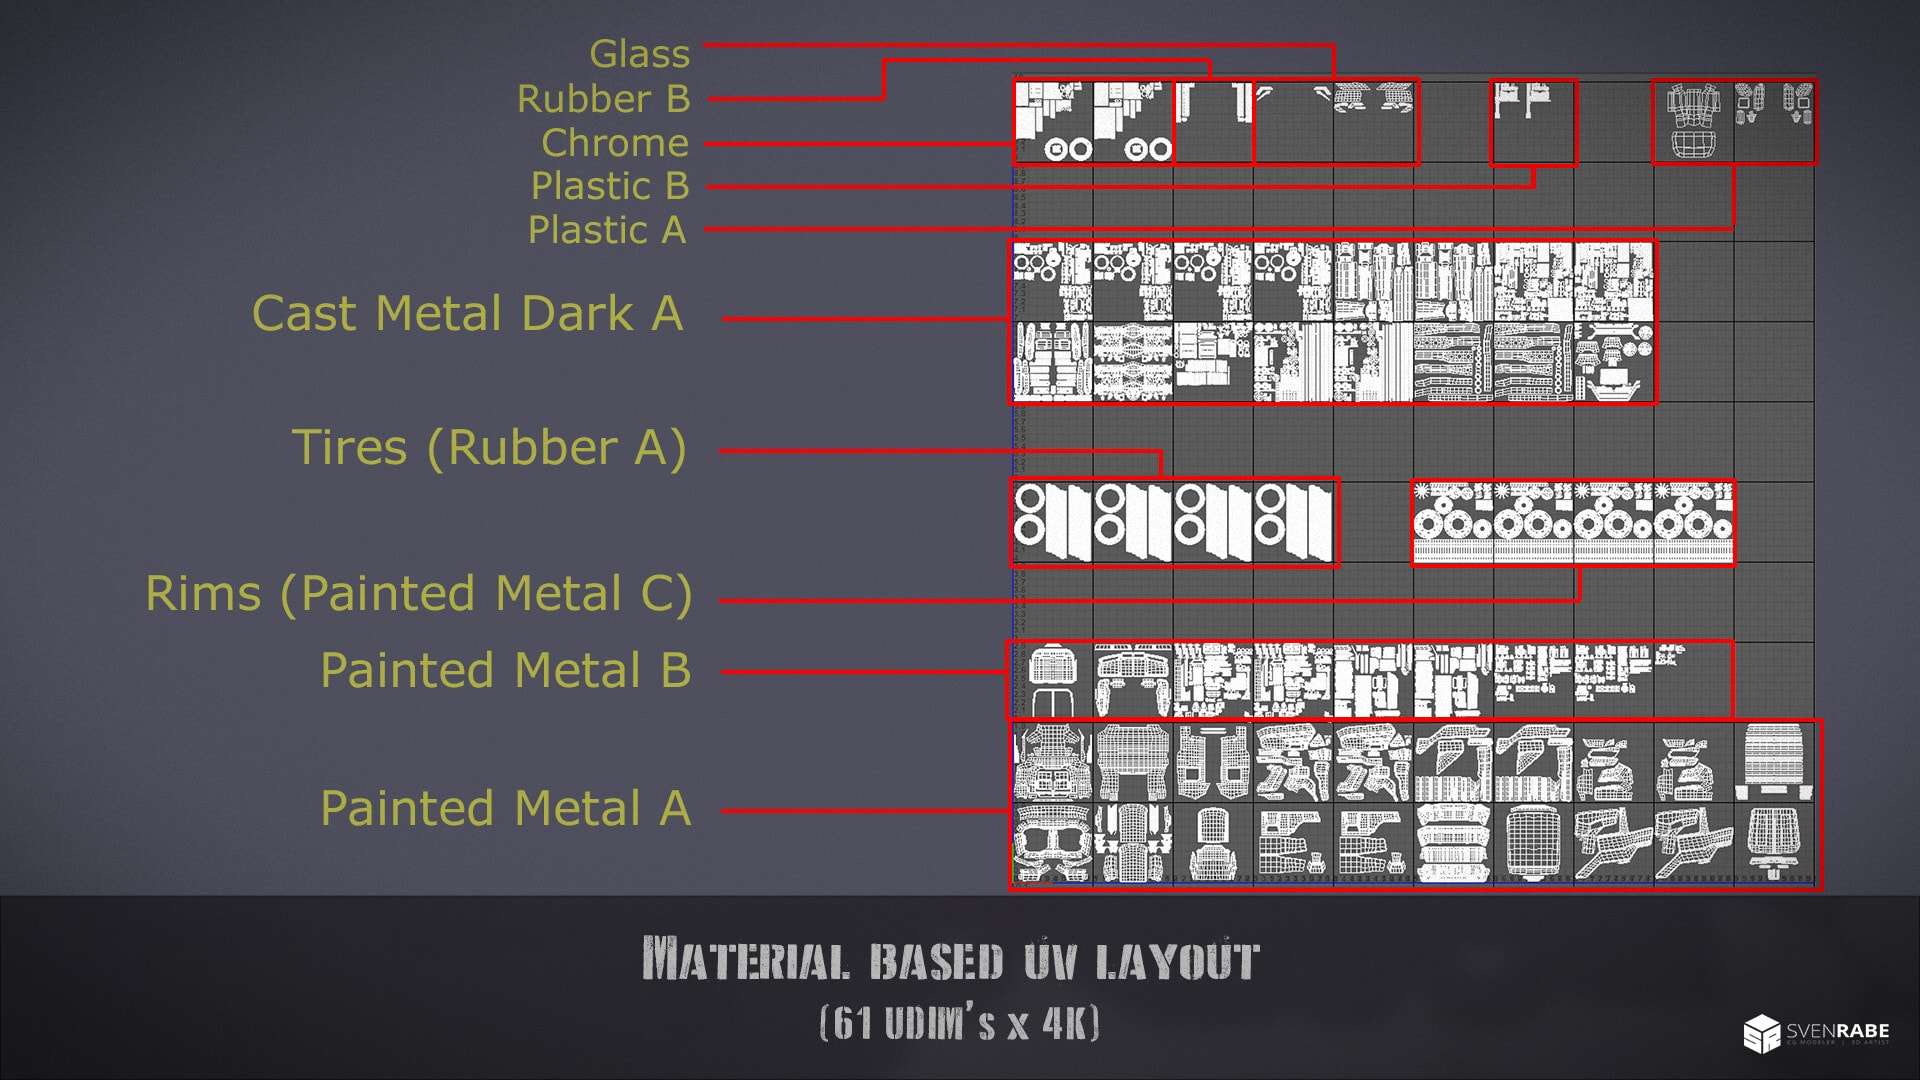
The uv's were also done in Maya. I usually try to organize them by material, as this makes life easier during the texturing process. Of course things can change during the project, but generally it's very handy to have them organized by material.
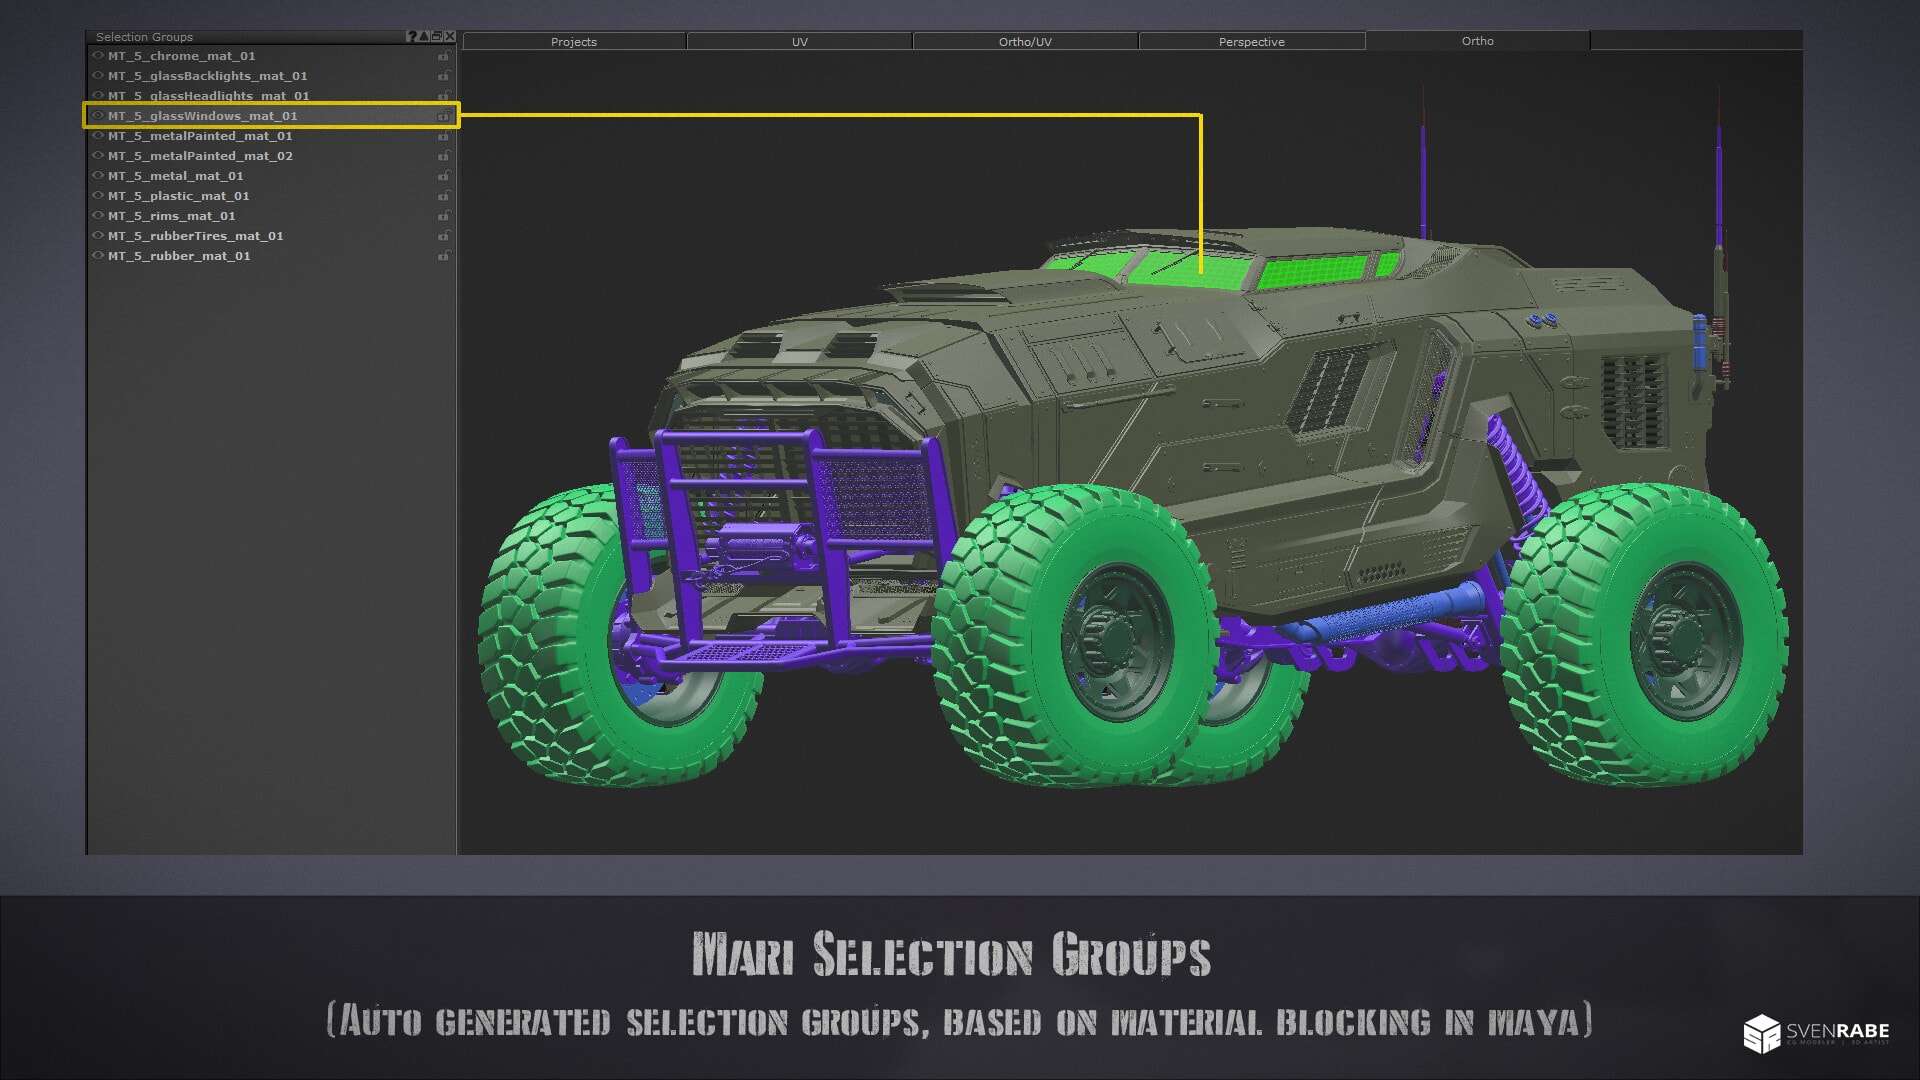
If you import your model into MARI via FBX or Alembic, you get auto generated selection groups of your material blockings from maya. Neat!
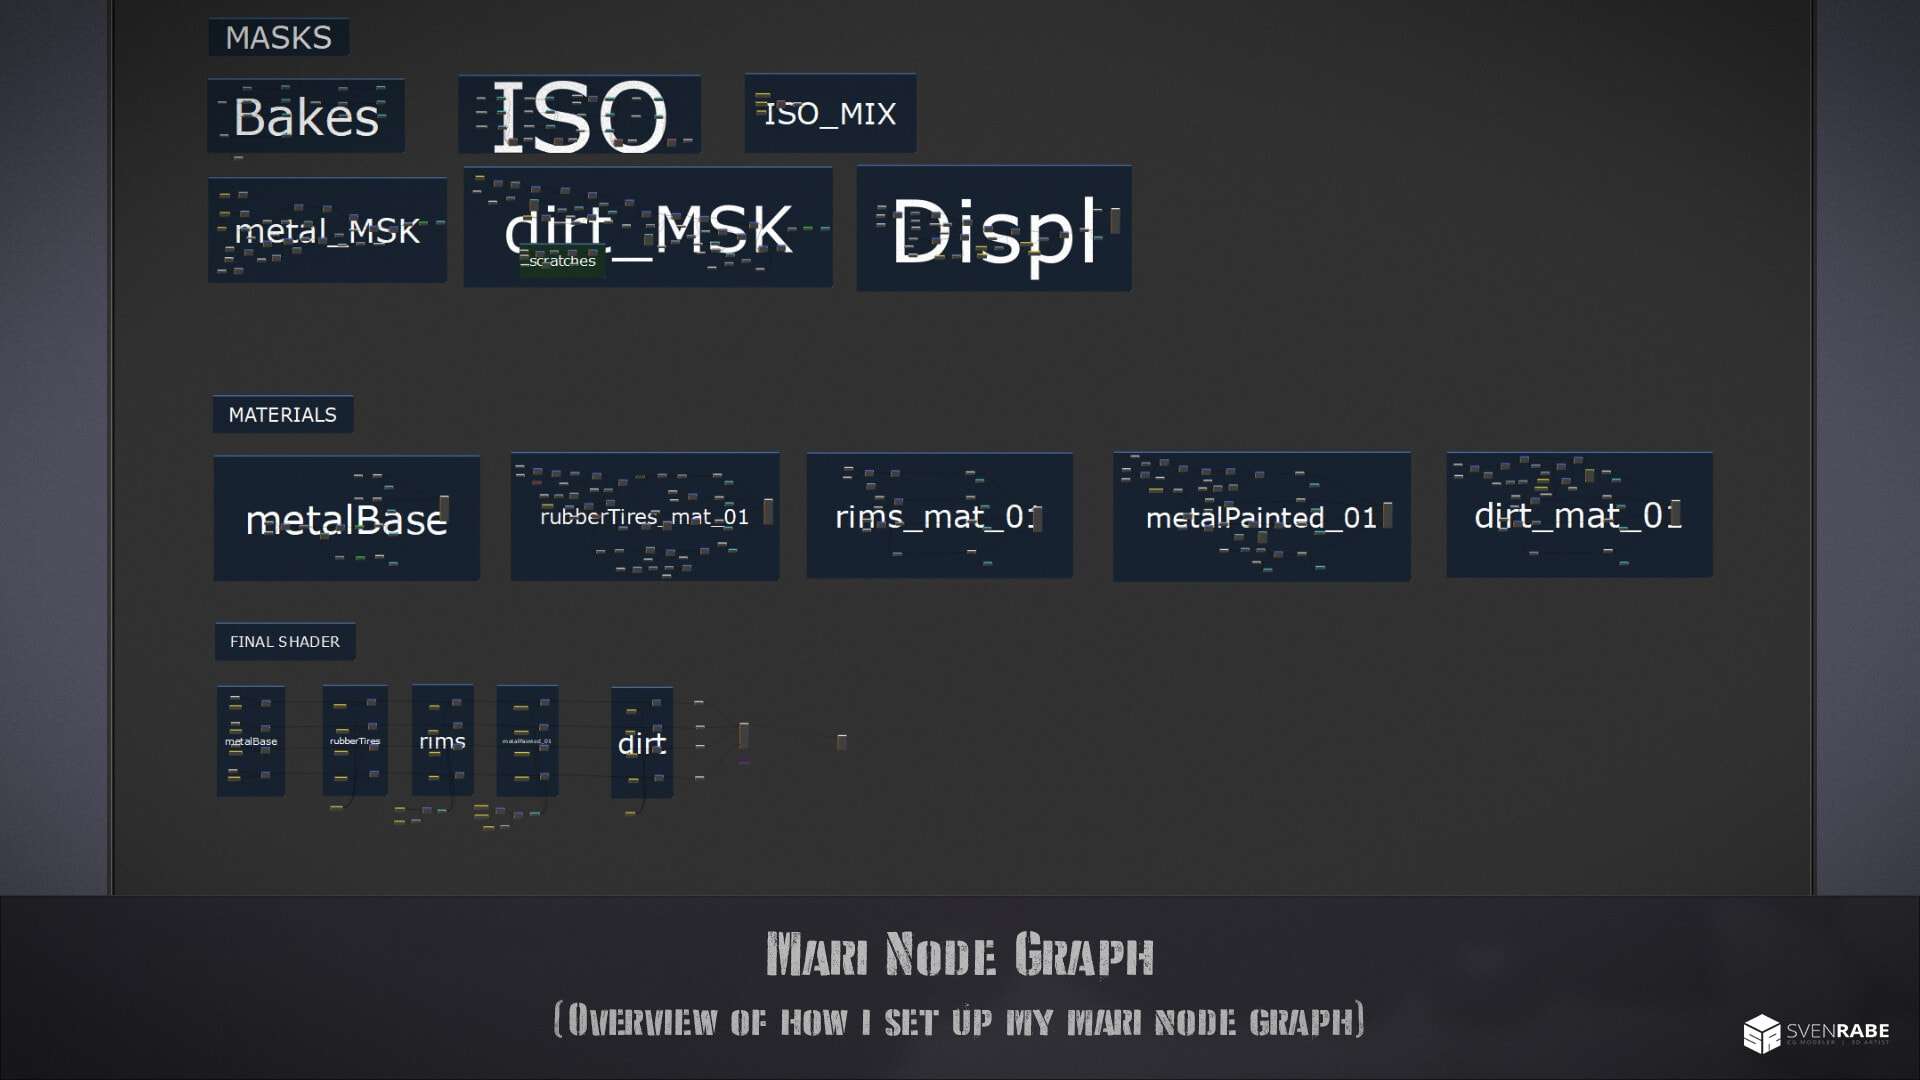
In Mari I like to use the node graph for the texturing process. In my opinion it's way more flexible and clearer than using nested layer stacks.

Here you can see some of the channels I've created in Mari for later look dev. Most of it was done procedural.
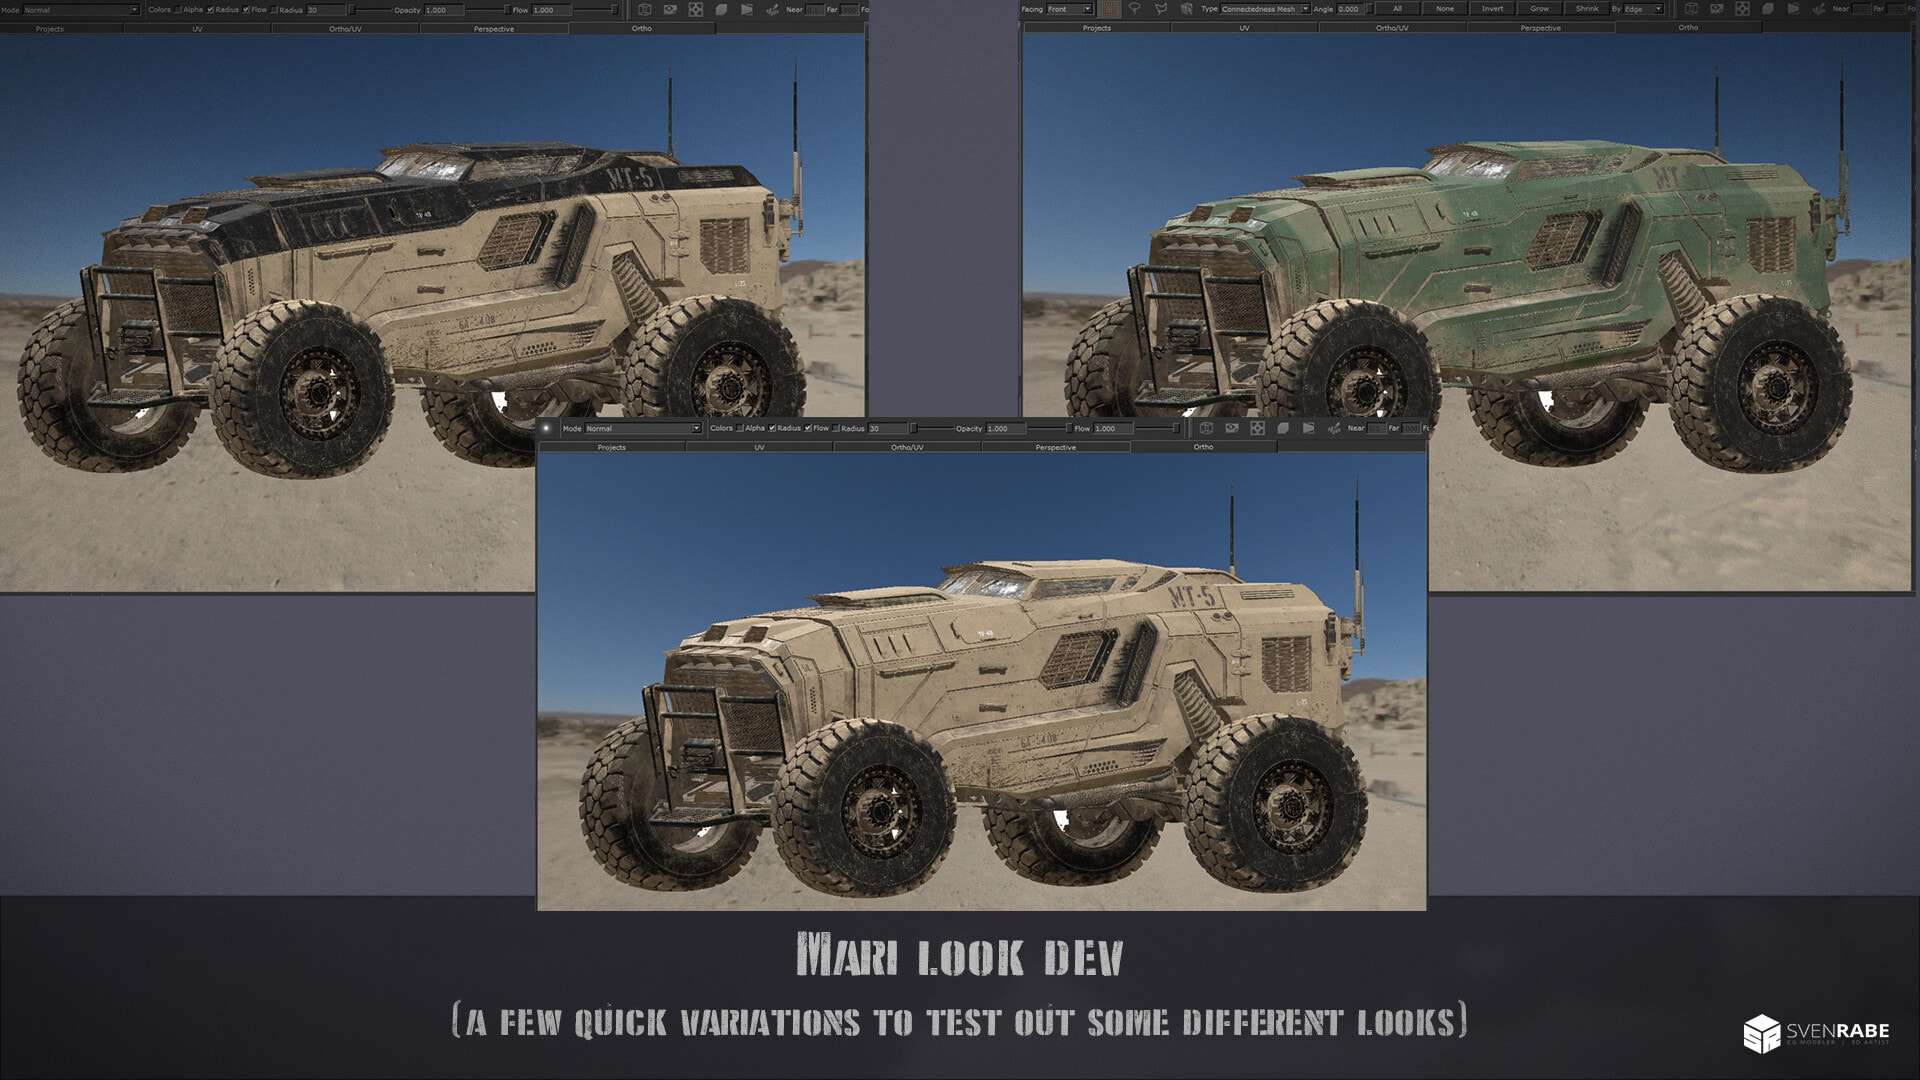
With only a few clicks within the Mari node graph, I was able to test out various looks really quickly. Here are 3 of them.
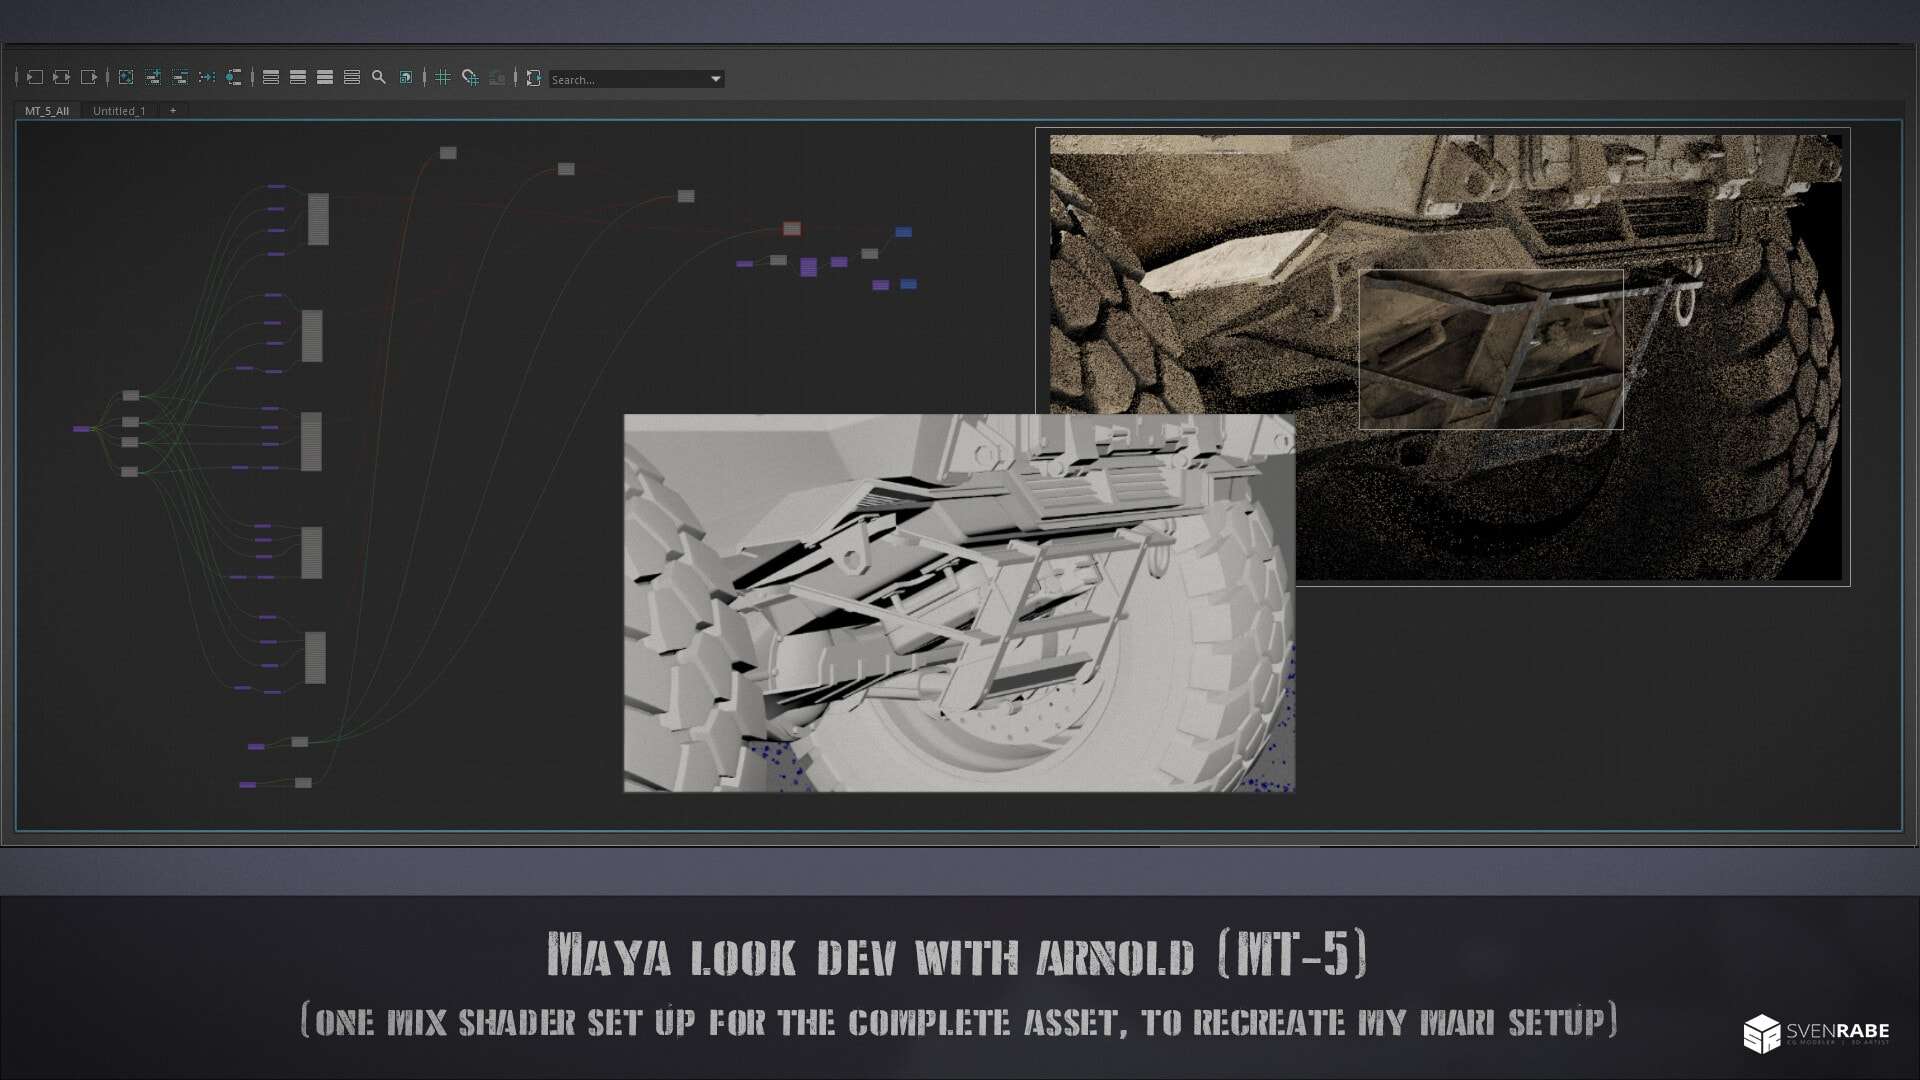
For the look dev in Maya, I did one daisy chained mix shader set up for the whole asset with Arnold , to recreate my Mari setup.
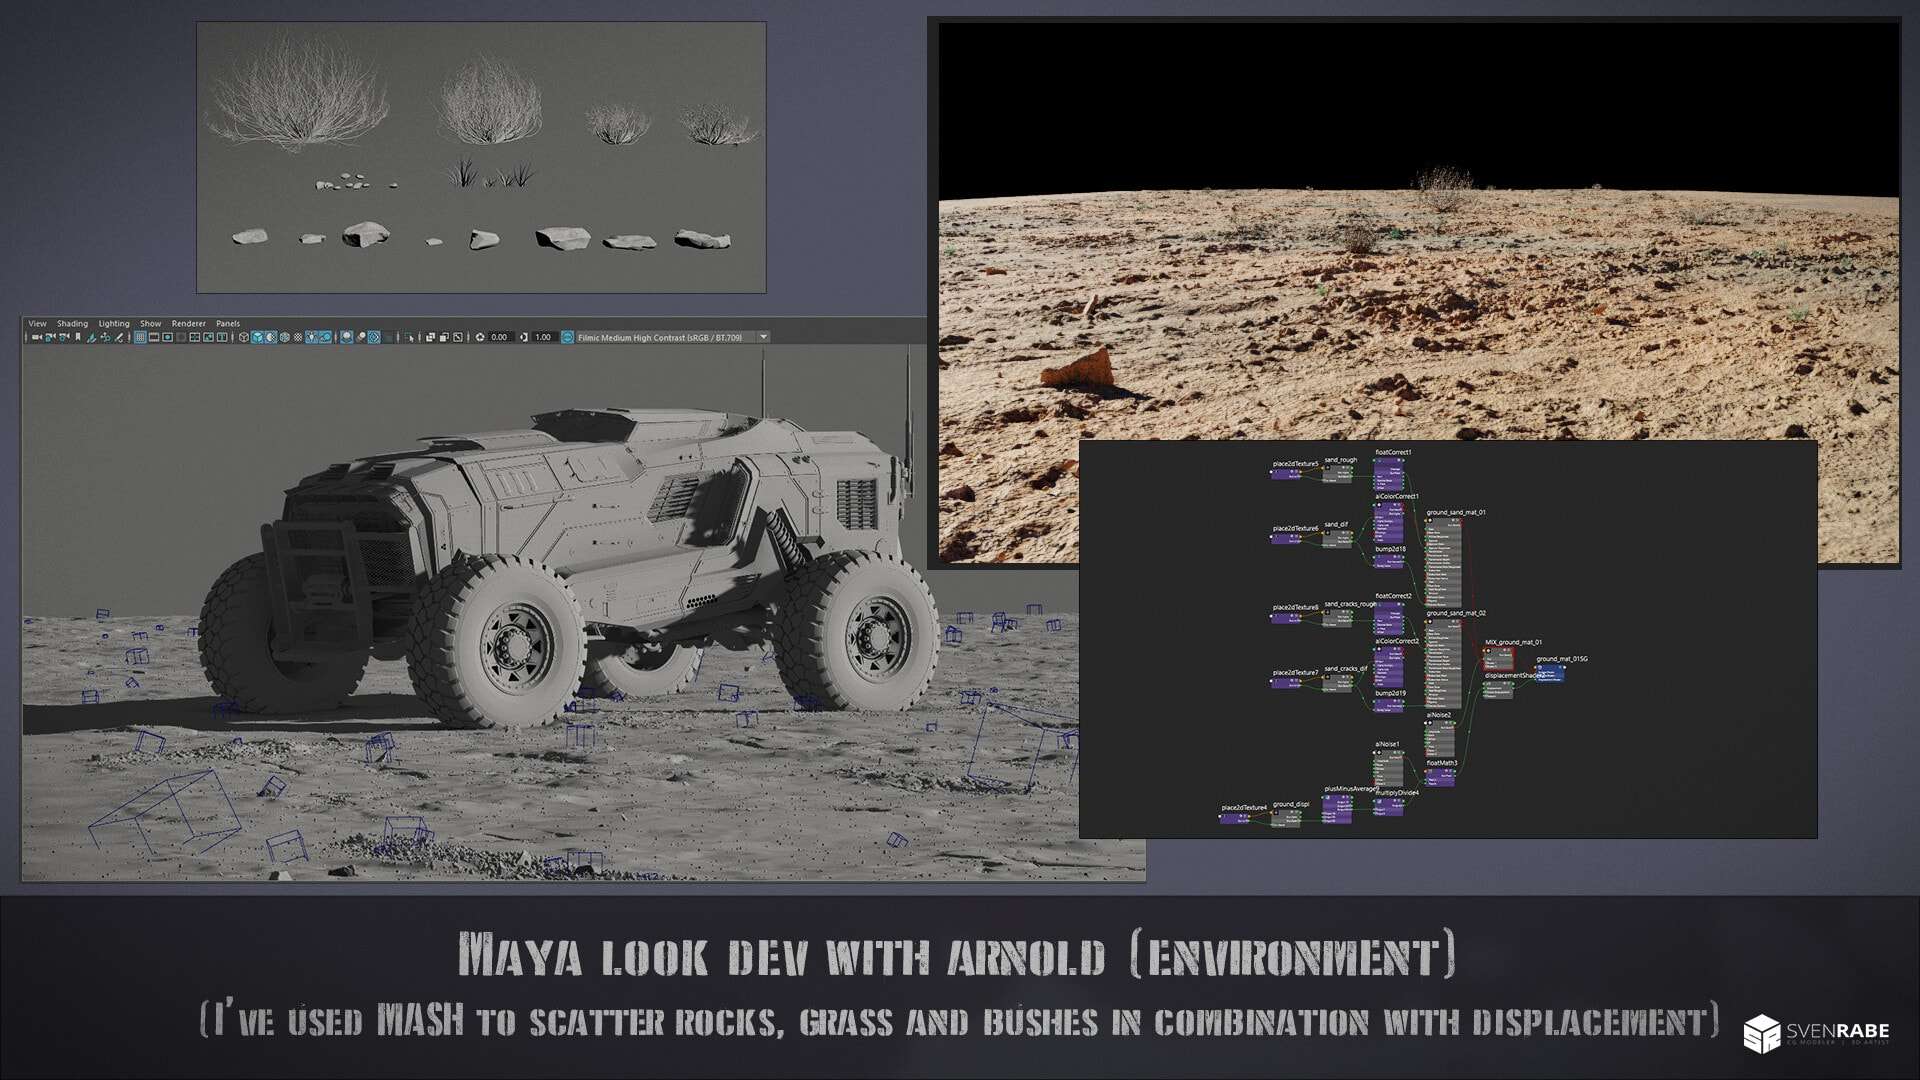
For the environment I've used MASH in Maya to scatter all kinds of rocks, bushes, grass etc. The ground itself was a mix of displacement and a aiNoise node to break it up.

The light rig was very basic. Actually just a directional light as sun and an skydome light with an HDRI. In the HDRI I removed the sun, so I have more control over it with my directional light.

Some of the aovs I've rendered for the environment, for later use in comp.
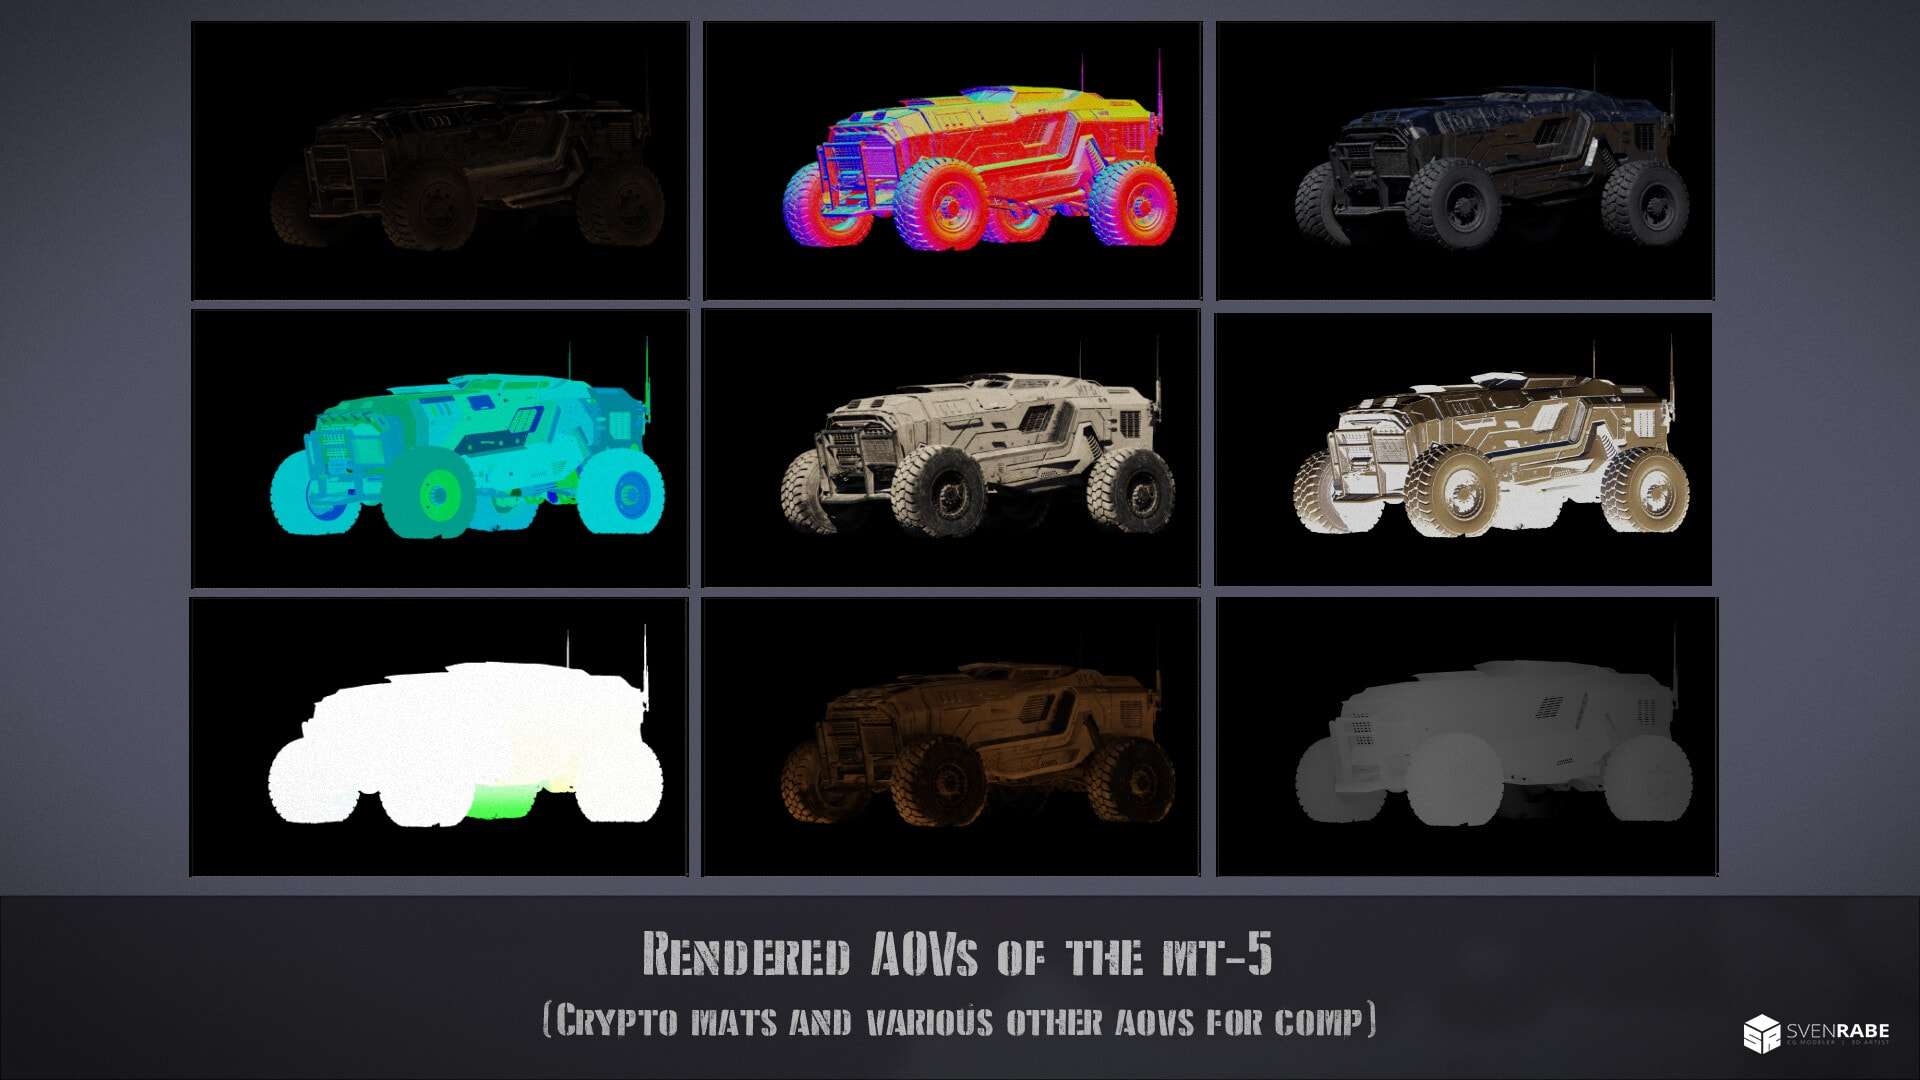
And here are Some of the aovs I've rendered for the MT-5.
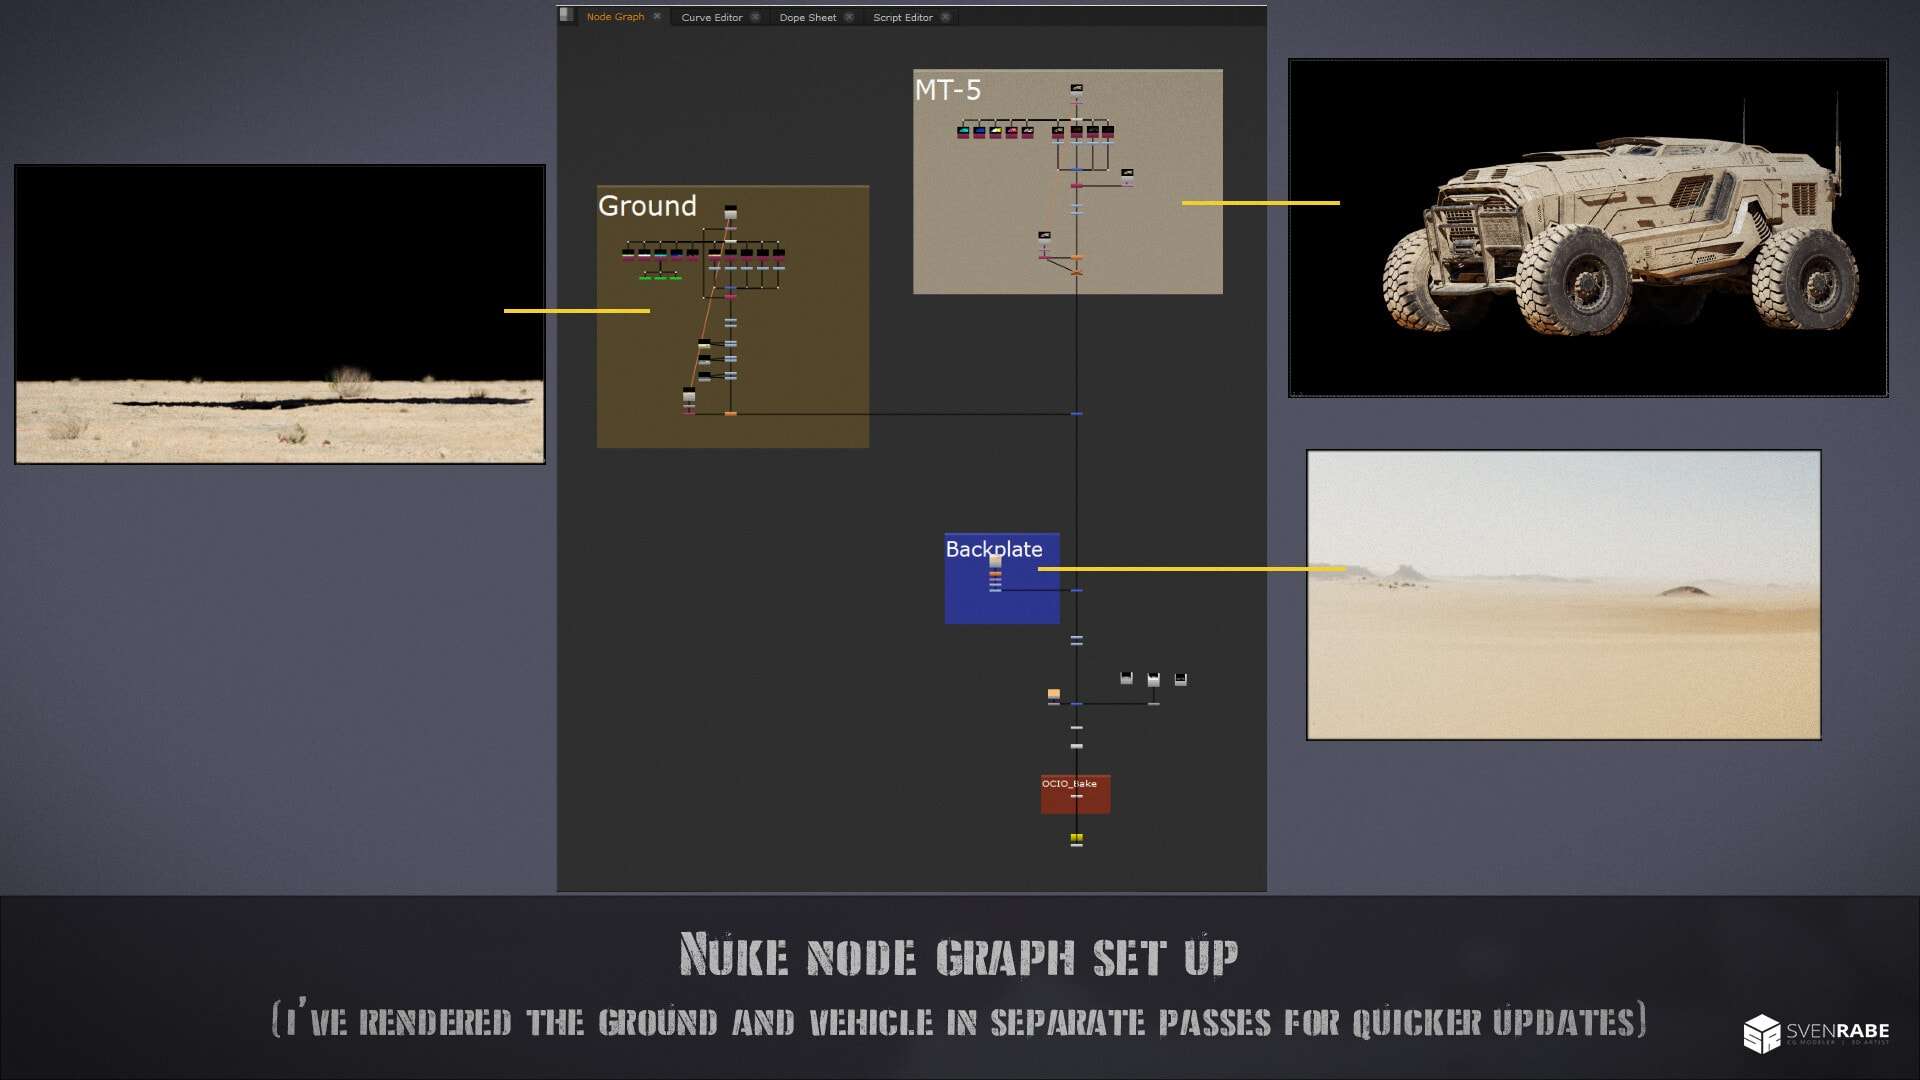
For the final comp I used Nuke, as it makes the whole process of updating a lot easier and more flexible. Here you can see how I set up my node graph.
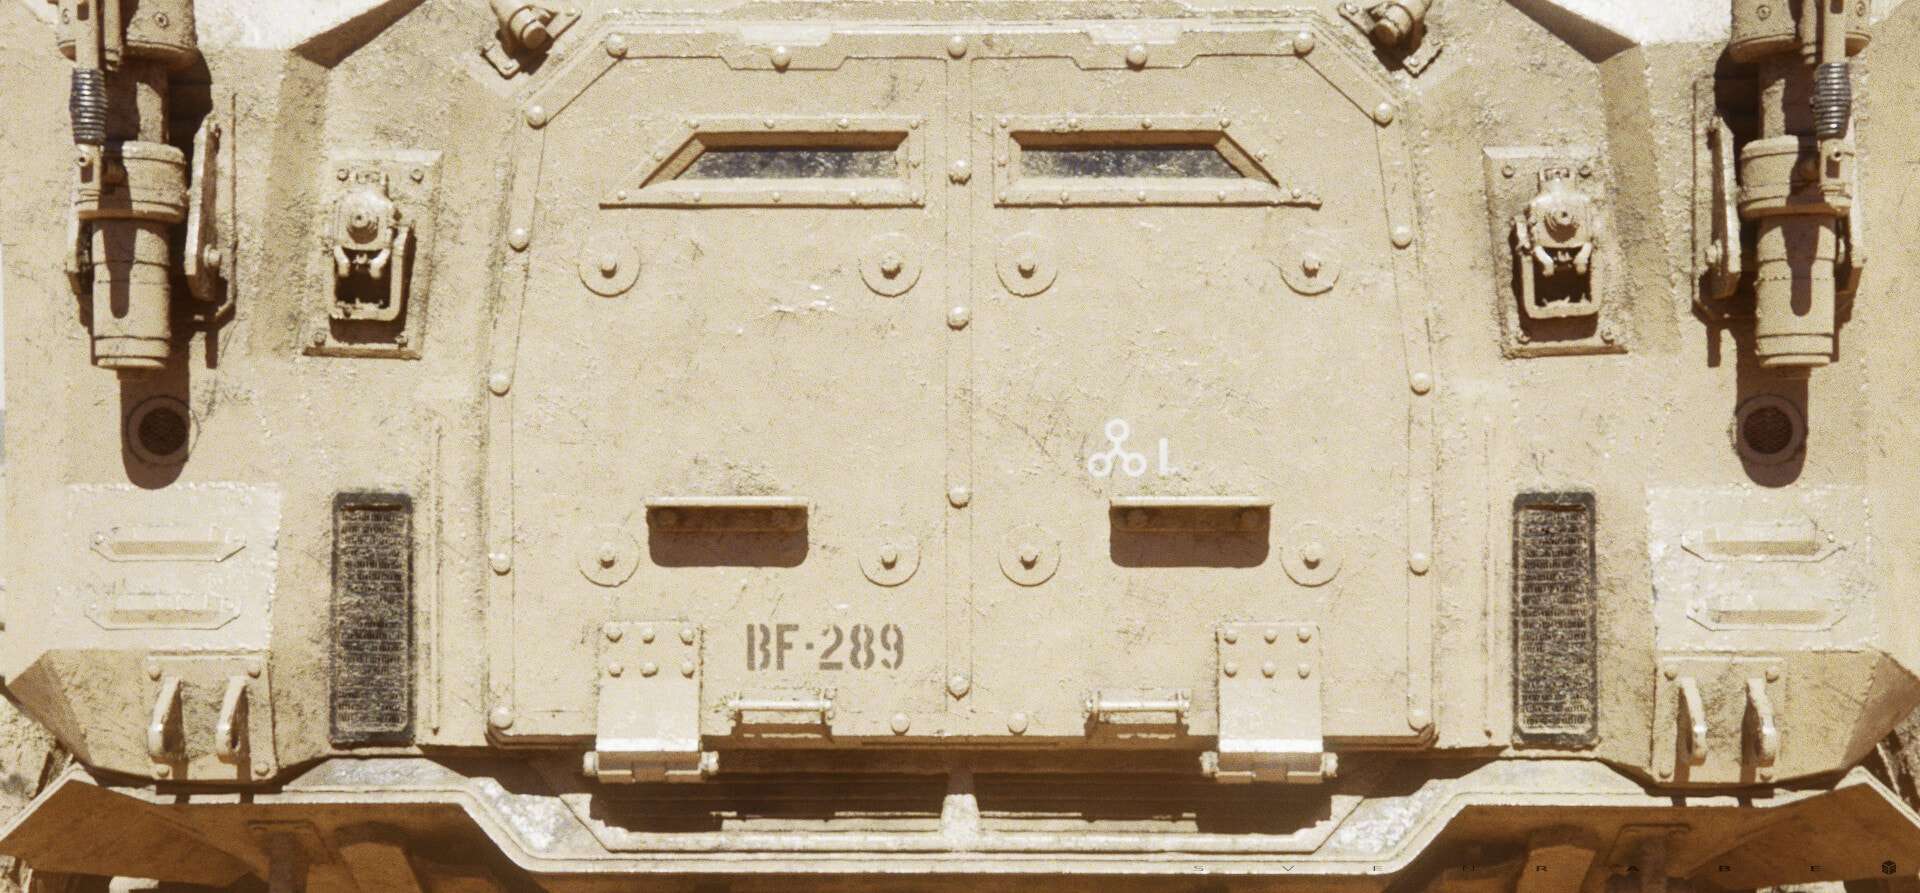
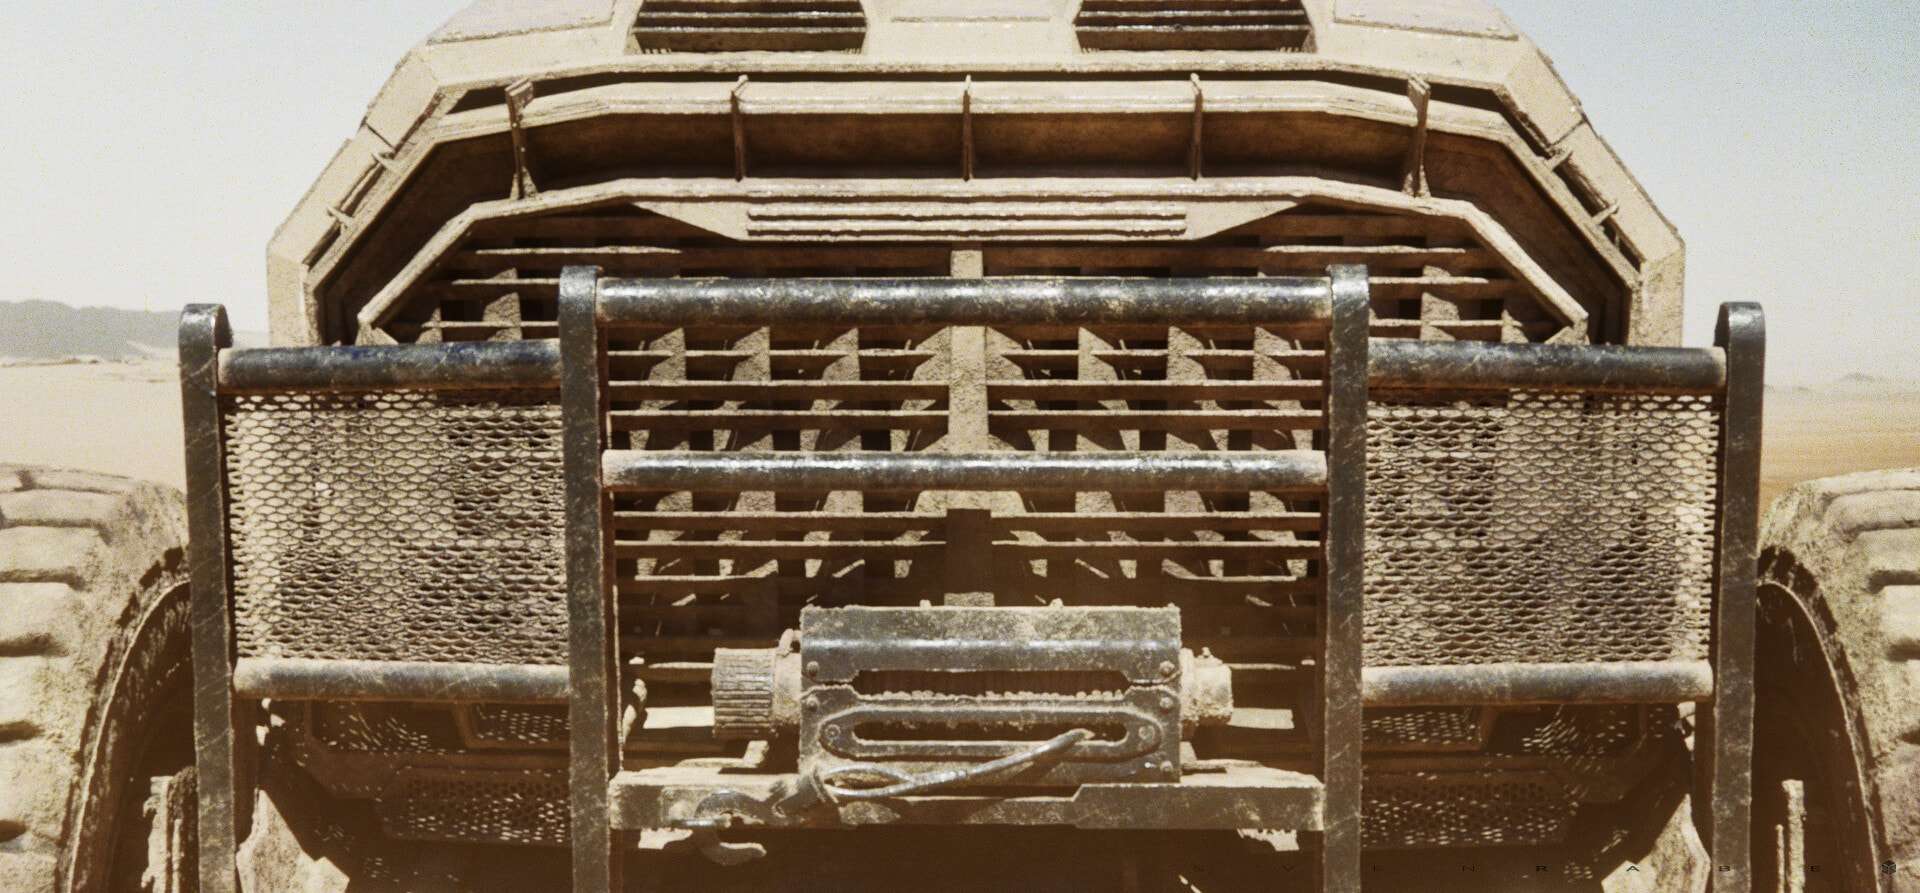
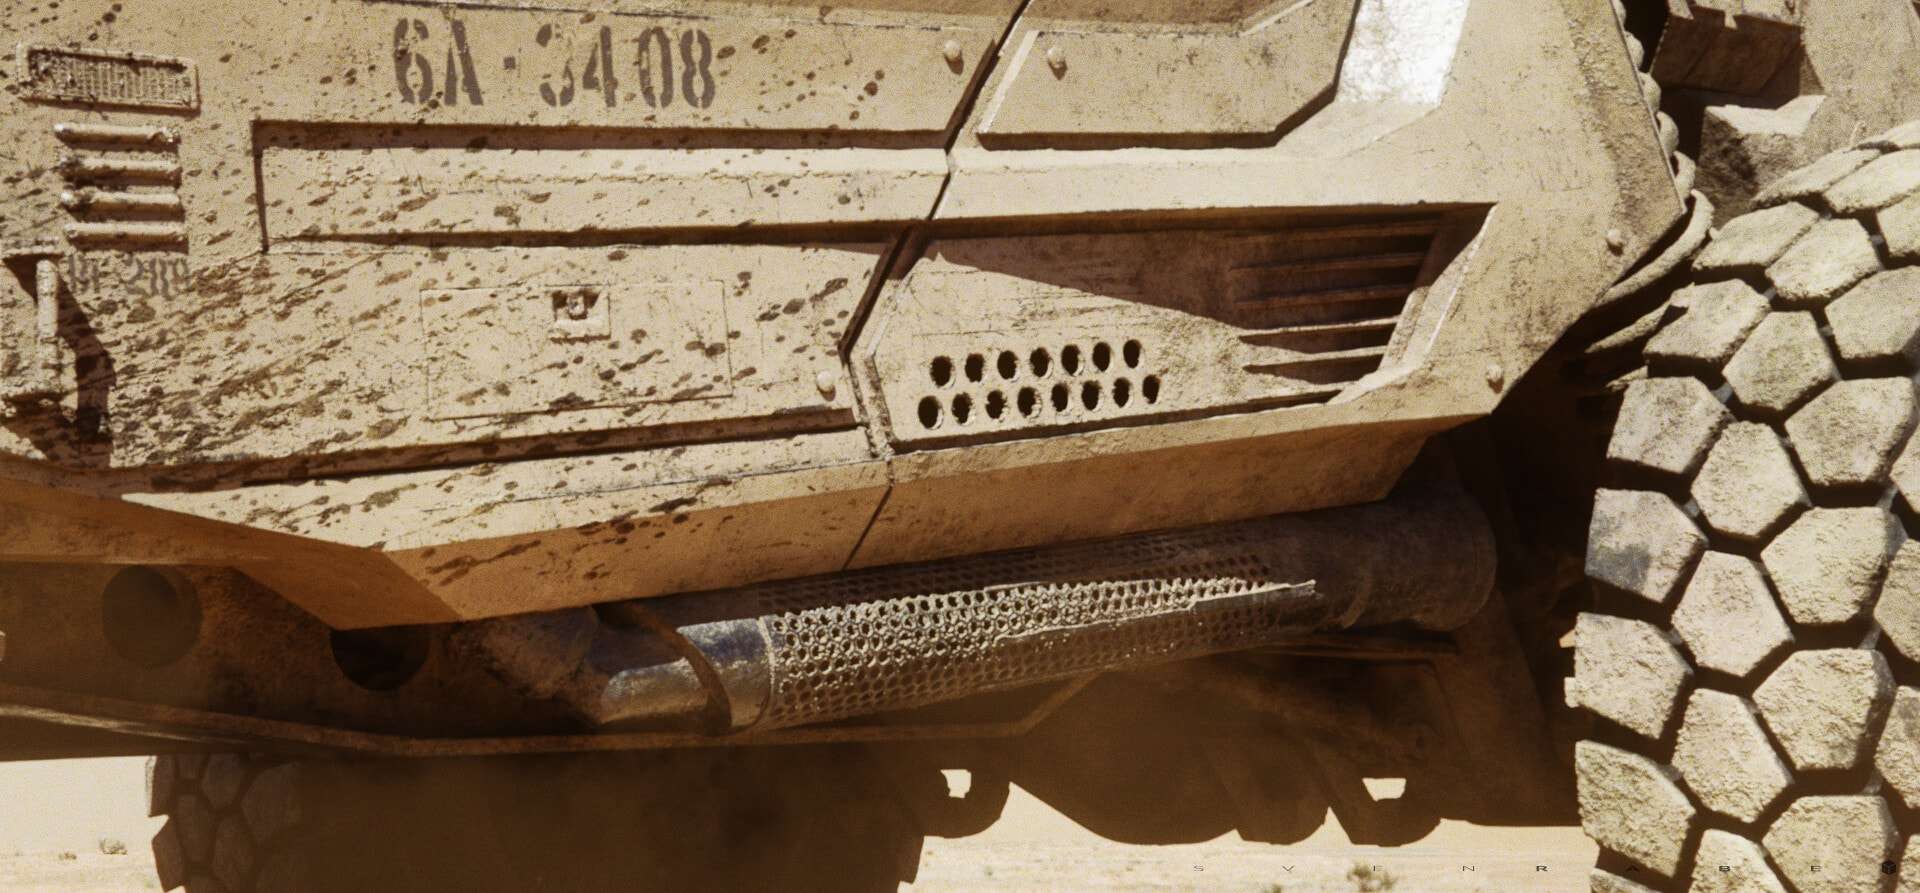
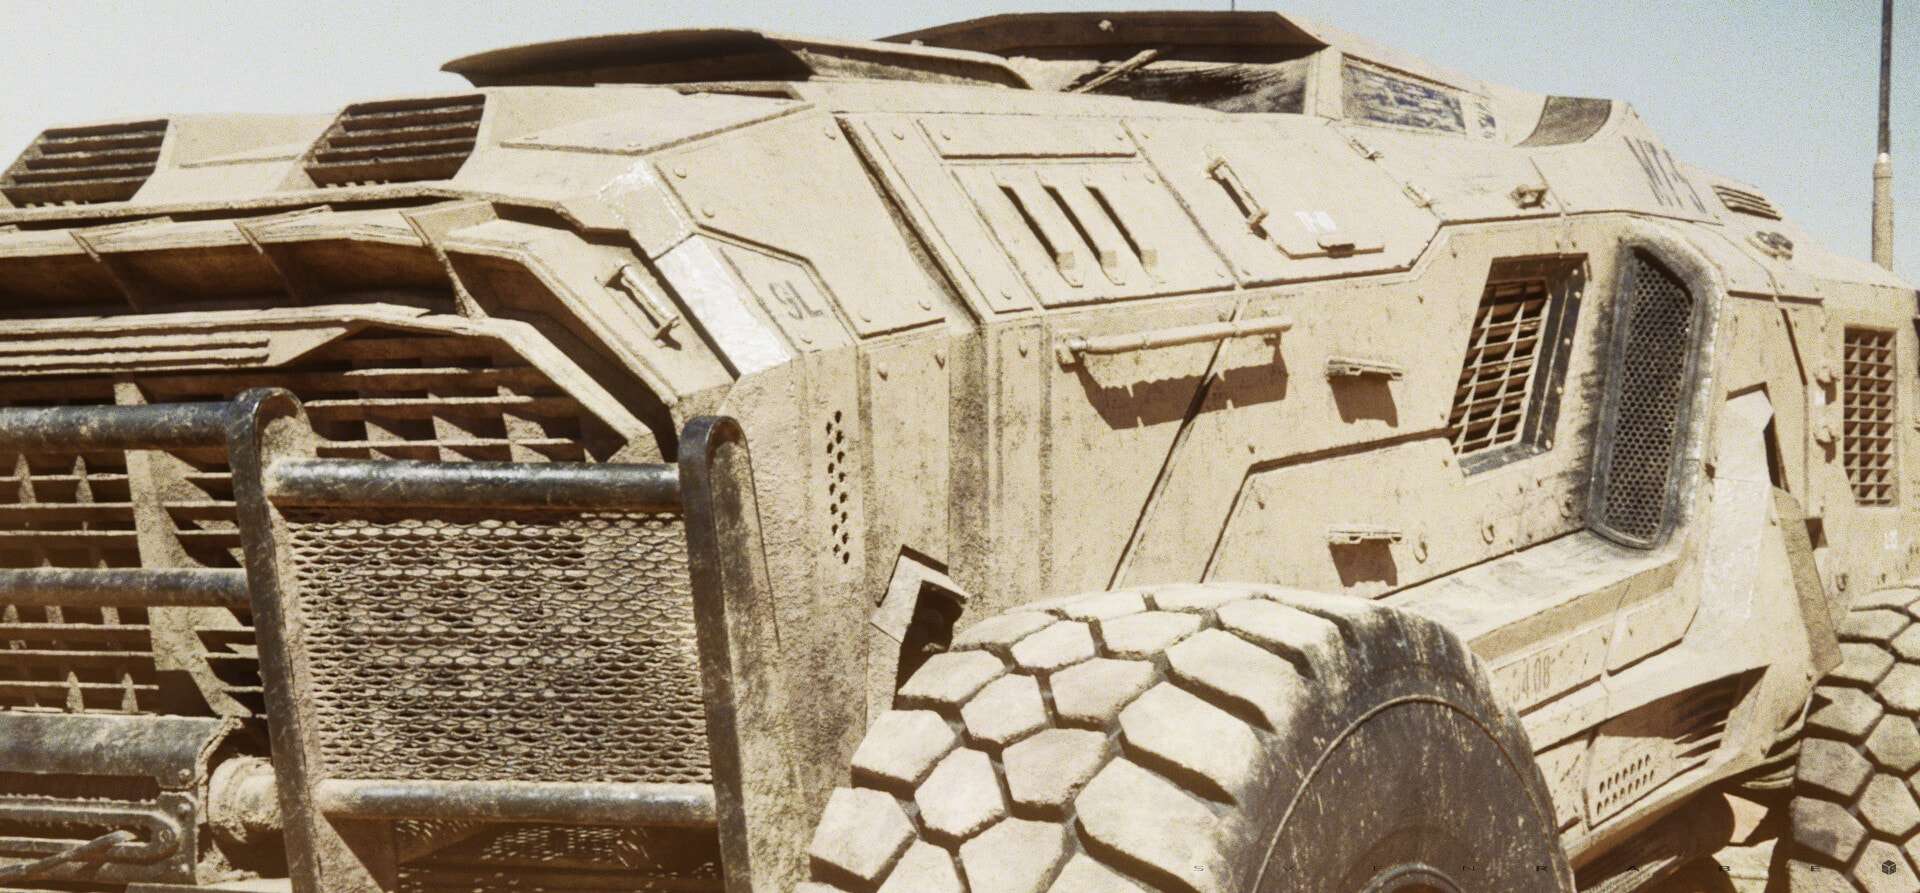
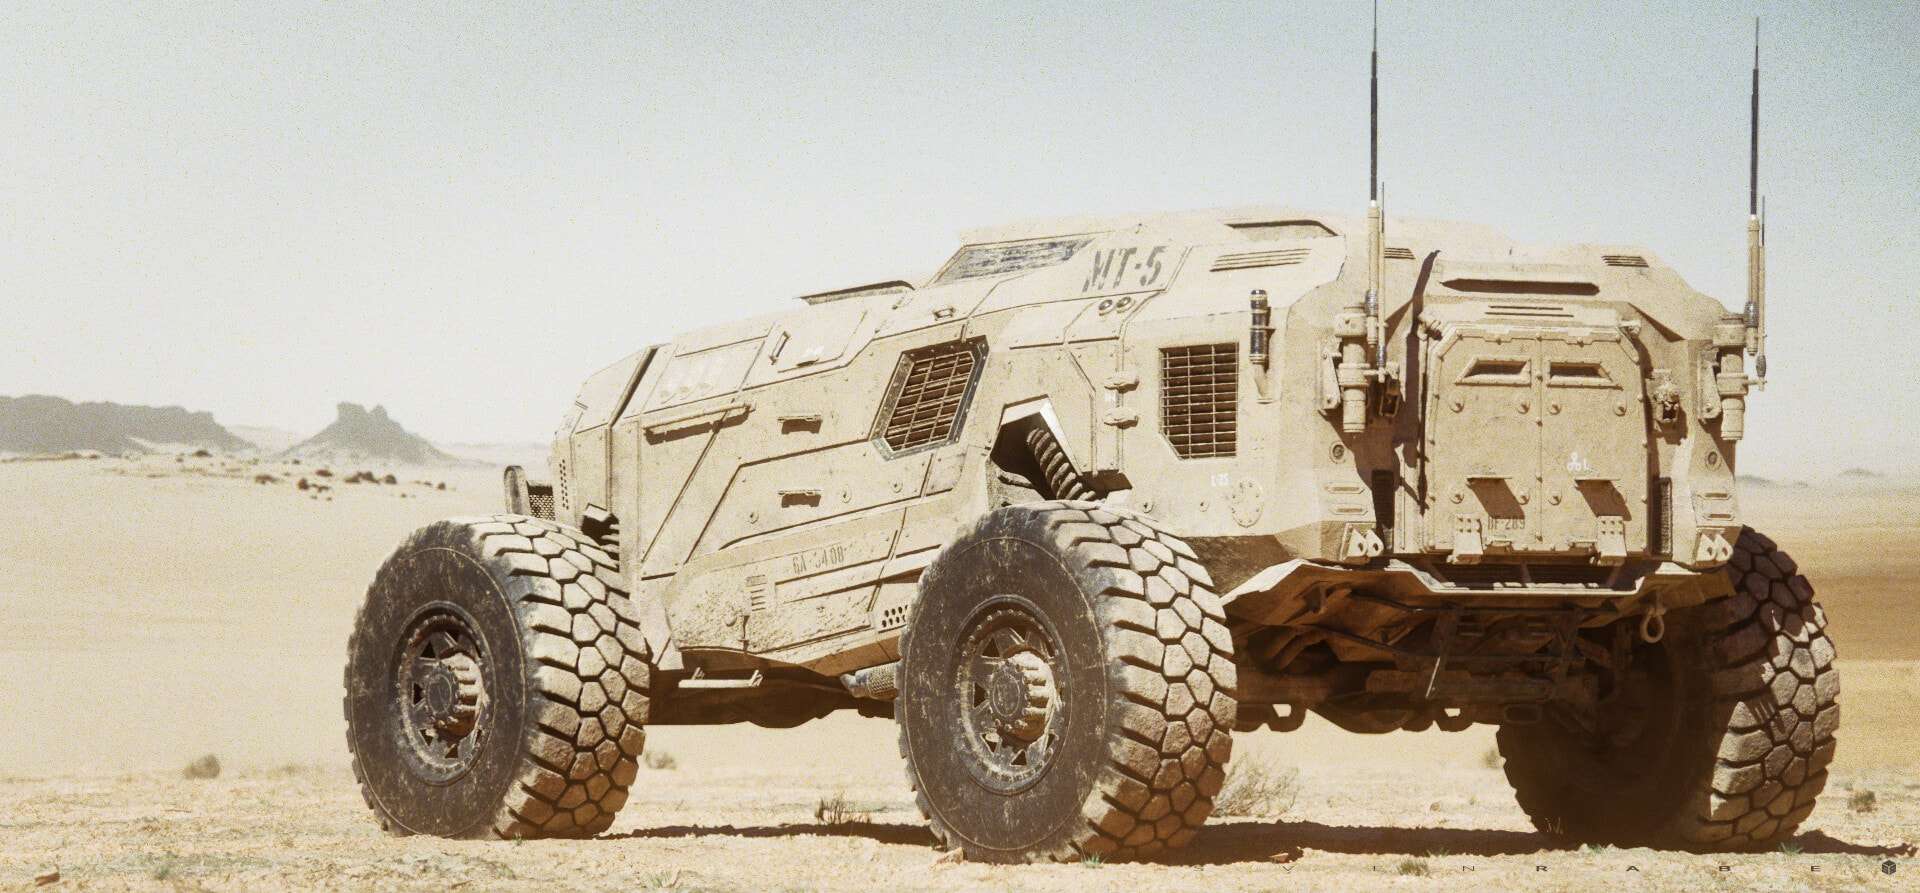
Finals Renders
About the Author: I’ve been working in the cg industry for over 15 years, creating high quality assets for tv and film. My specialization is modeling, texturing and look dev of assets. As a Senior Modeler I have a strong knowledge of production topology in both, hard surface and character modelling as well as digital sculpting and displacement extraction. Over the years in production, I was fortunate enough to gather experience in other disciplines, too. Such as grooming, lighting and rendering. Throughout my career I have had the honor to work on a wide range of projects, including some of the top brands and agencies in broadcast and advertising as well as german feature film projects.
Links: Artstation | Facebook | LinkedIn