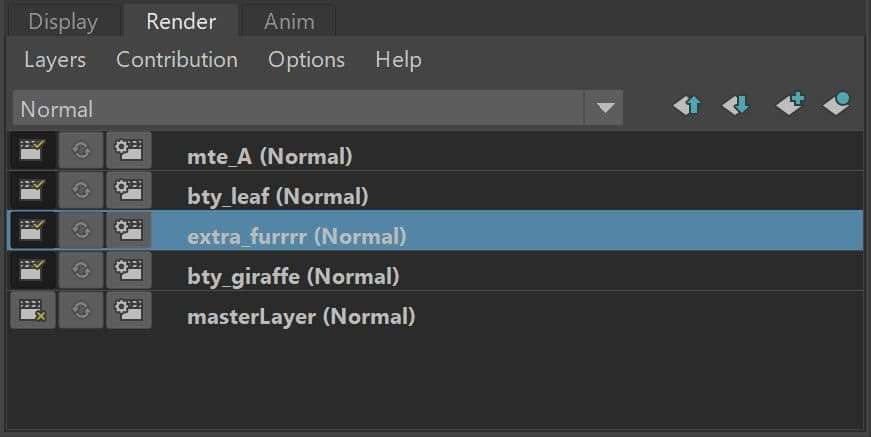
After I locked down the footage, I numbered each VFX shot and wrote what kind of effects I wanted to happen in the shots. This way, it was really easy to keep track of what was missing in the shots and which shot it was.
Xiaoli Zhang is a compositor who has recently graduated from the School of Visual Arts, Computer Art Department in New York City. Xiaoli shares with us her process for creating her short film, MIRAGE.
My path to VFX
Before I got into the world of Visual Effects, my dream was to have a career in Film. Film will always be where my passion is. After studying in film and photography for a year on the west coast, I quickly learned that I gravitated towards the post-production part of film-making, because of how important the visual effects are, to support a story. At that time, I made the move from the west coast to the east coast, to study at the School of Visual Arts.
During my time at the School of Visual Arts, I was able to explore more in the field of visual effects, and I quickly discovered my passion for compositing. I enjoyed it so much when I had projects at school where I could go outside shooting and compositing creative elements into the live-action footage; making the character look cool in the scene always creates a sense of satisfaction for me. All of these experiences eventually inspired my thesis film - MIRAGE, a short film about a man who seeks "hope" in the desert.
MIRAGE was inspired by the legendary film - Lawrence of Arabia. As a previous film student, I admire the cinematography in this film so much. From here, I began to think about the idea of shooting my short film in the desert.
Filming Location
Scouting Location
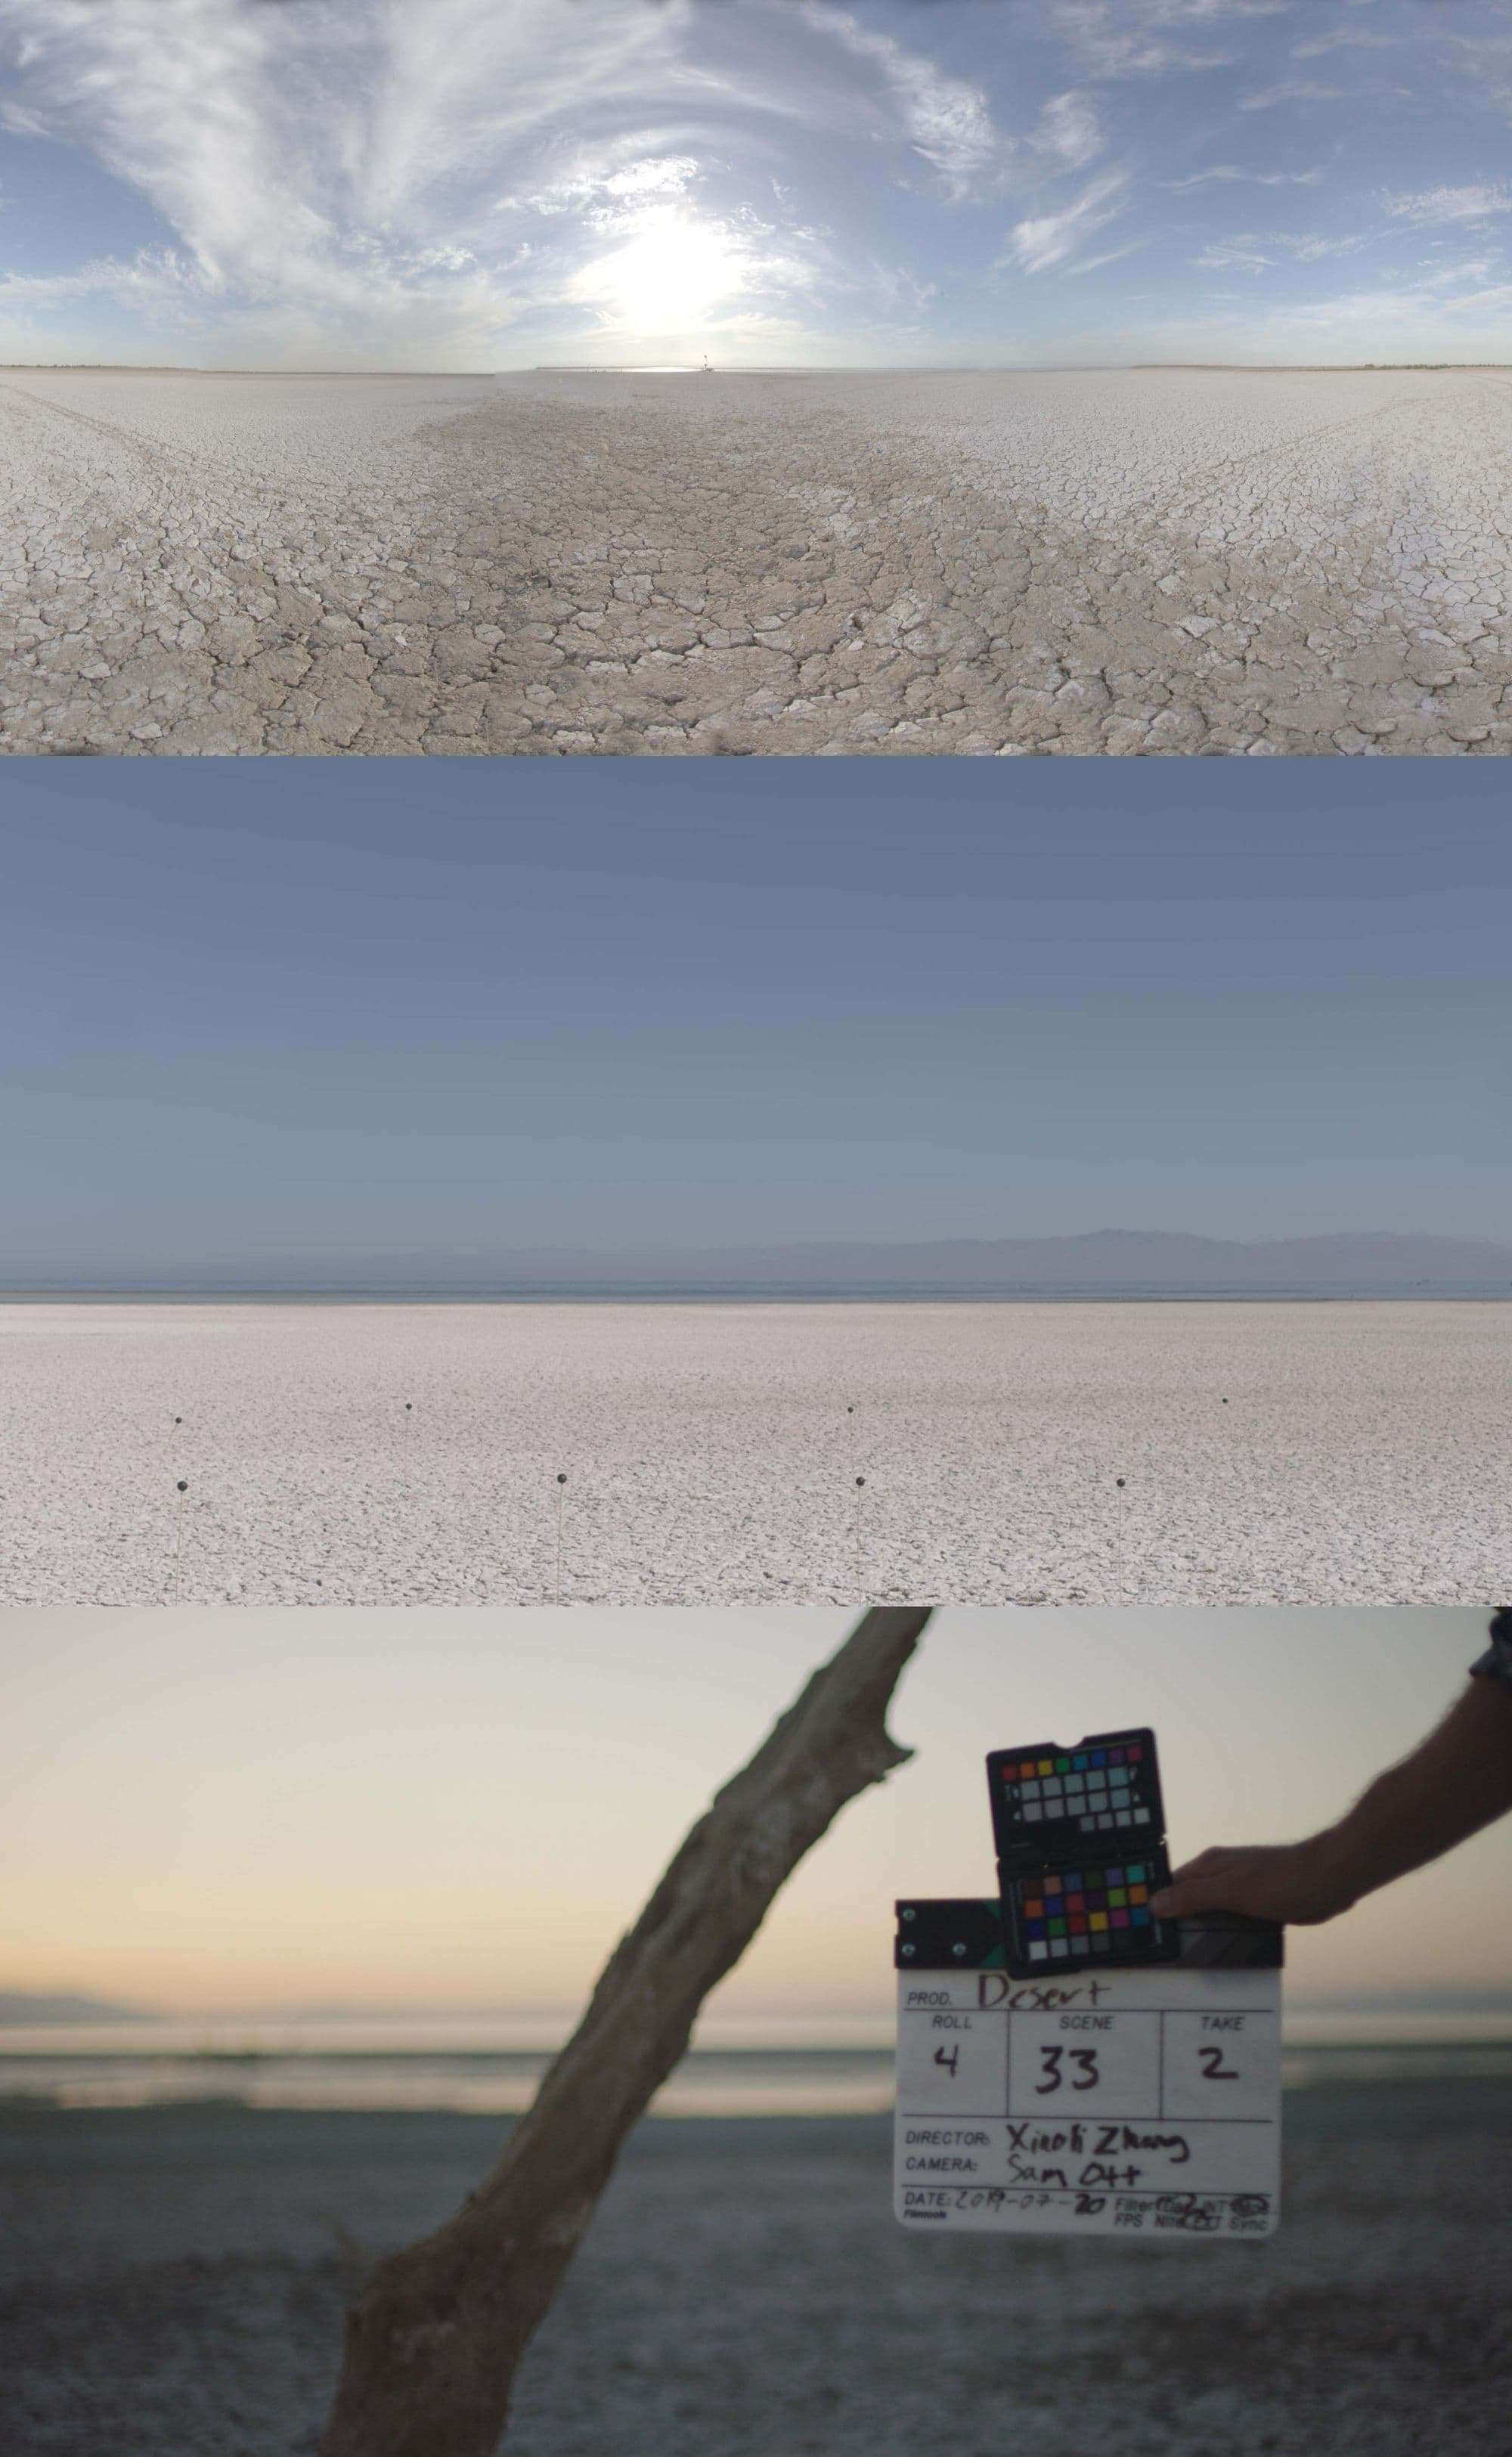
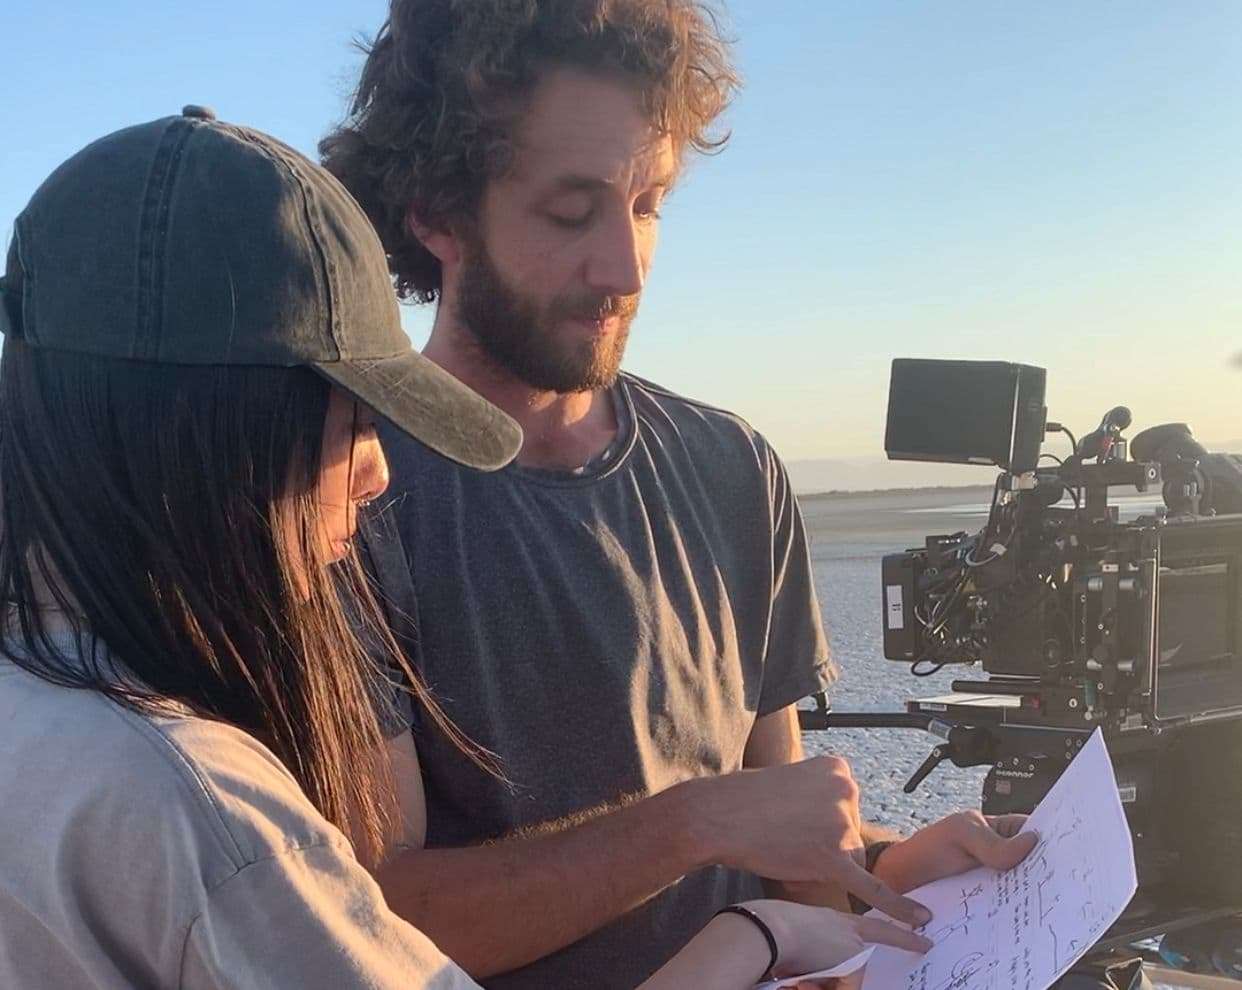
As soon as I had my story written at the end of junior year, I began to scout locations. I’ve been to many places in China to see if they fitted the story but they were not ideal. Then, I started my internship at FuseFX in LA in early June and I began to drive outside of LA every weekend when I was off work. I went to many locations and eventually, I found the location in the Calipatria area where we have to pass the US immigration border.
My filming journey finally began in mid-July that year. Within two days, a crew of nine people completed shooting. It was a great summer: extreme weather, tough locations, getting crews together...etc. I learned a lot from the on set experience.
Onset preparation for VFX
During the shooting days, while I was on set directing, I also set up HDRs: putting black ping pong ball as trackers, and making sure every CG shot I planned had the x-rite color checkers. Due to budget limitations, I didn’t have a Chrome ball and Grey Ball on set for my short film; they are a great guide for CG elements but HDRs were just enough for my film.
HDRs did help me a lot when I tried to light the CG elements in Maya. As for the trackers, I found that in retrospect, depending on the location, some locations didn't require me to add ping pong balls to help with tracking in post-production. Although the preparation takes a bit of time and may create some headaches with clean up afterwards, it is better to be safe than sorry! I still found that my preparation saved me a tonne of times during post-production, working on the CG and compositing.
My HDR result: ping pong ball tracker, X-Rite ColorChecker
Organising footage and setting up the pipeline
I began to back up my footages right after I finished shooting the film, to officially start the post-production process. Editing was also done by me. I’m not an editing major but I did it anyway using Resolve. I think Resolve is a powerful tool to know and the good thing about Resolve is, editing and colour grading, can be done with the same software.
After I locked down the footage, I numbered each VFX shot and wrote what kind of effects I wanted to happen in the shots. This way, it was really easy to keep track of what was missing in the shots and which shot it was. Folder structures are also a seemingly small factor but moving forward, this step is very crucial and saves time trying to find the files.
Due to budget limitations, I didn’t have a Chrome ball and Grey Ball on set for my short film. They are a great guide for CG elements but HDRs work just as well.
Concept Art, Texture and CG fur creation
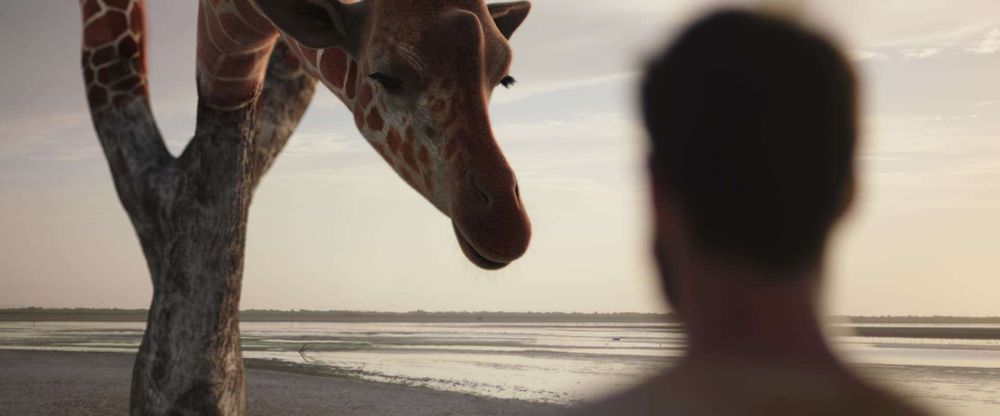
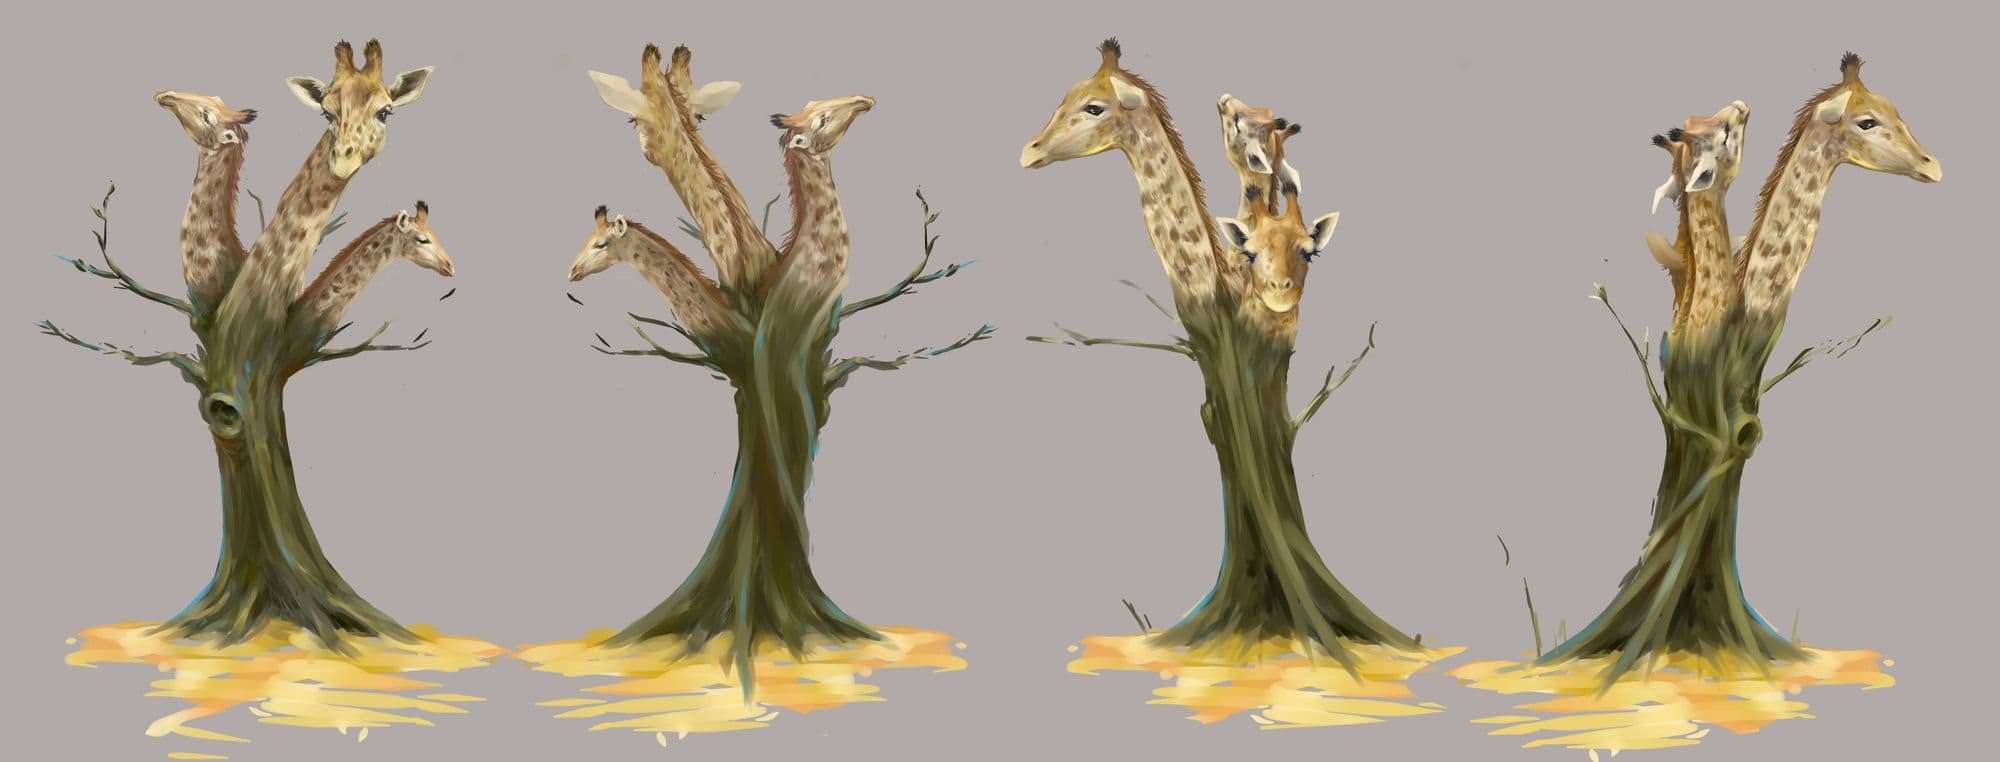
After I set up the pipeline for my short film, I started working on getting the CG elements done and at the same time, I started to get all the VFX shots without CG elements done first in Nuke. This concept art is for the main CG element, a giraffe tree. The reason behind the giraffe tree is to combine a thriving awe inspiring animal, with a dying tree/environment, to symbolise that good things can grow from something that is dying, to create a feeling of "hope".
Concept Art
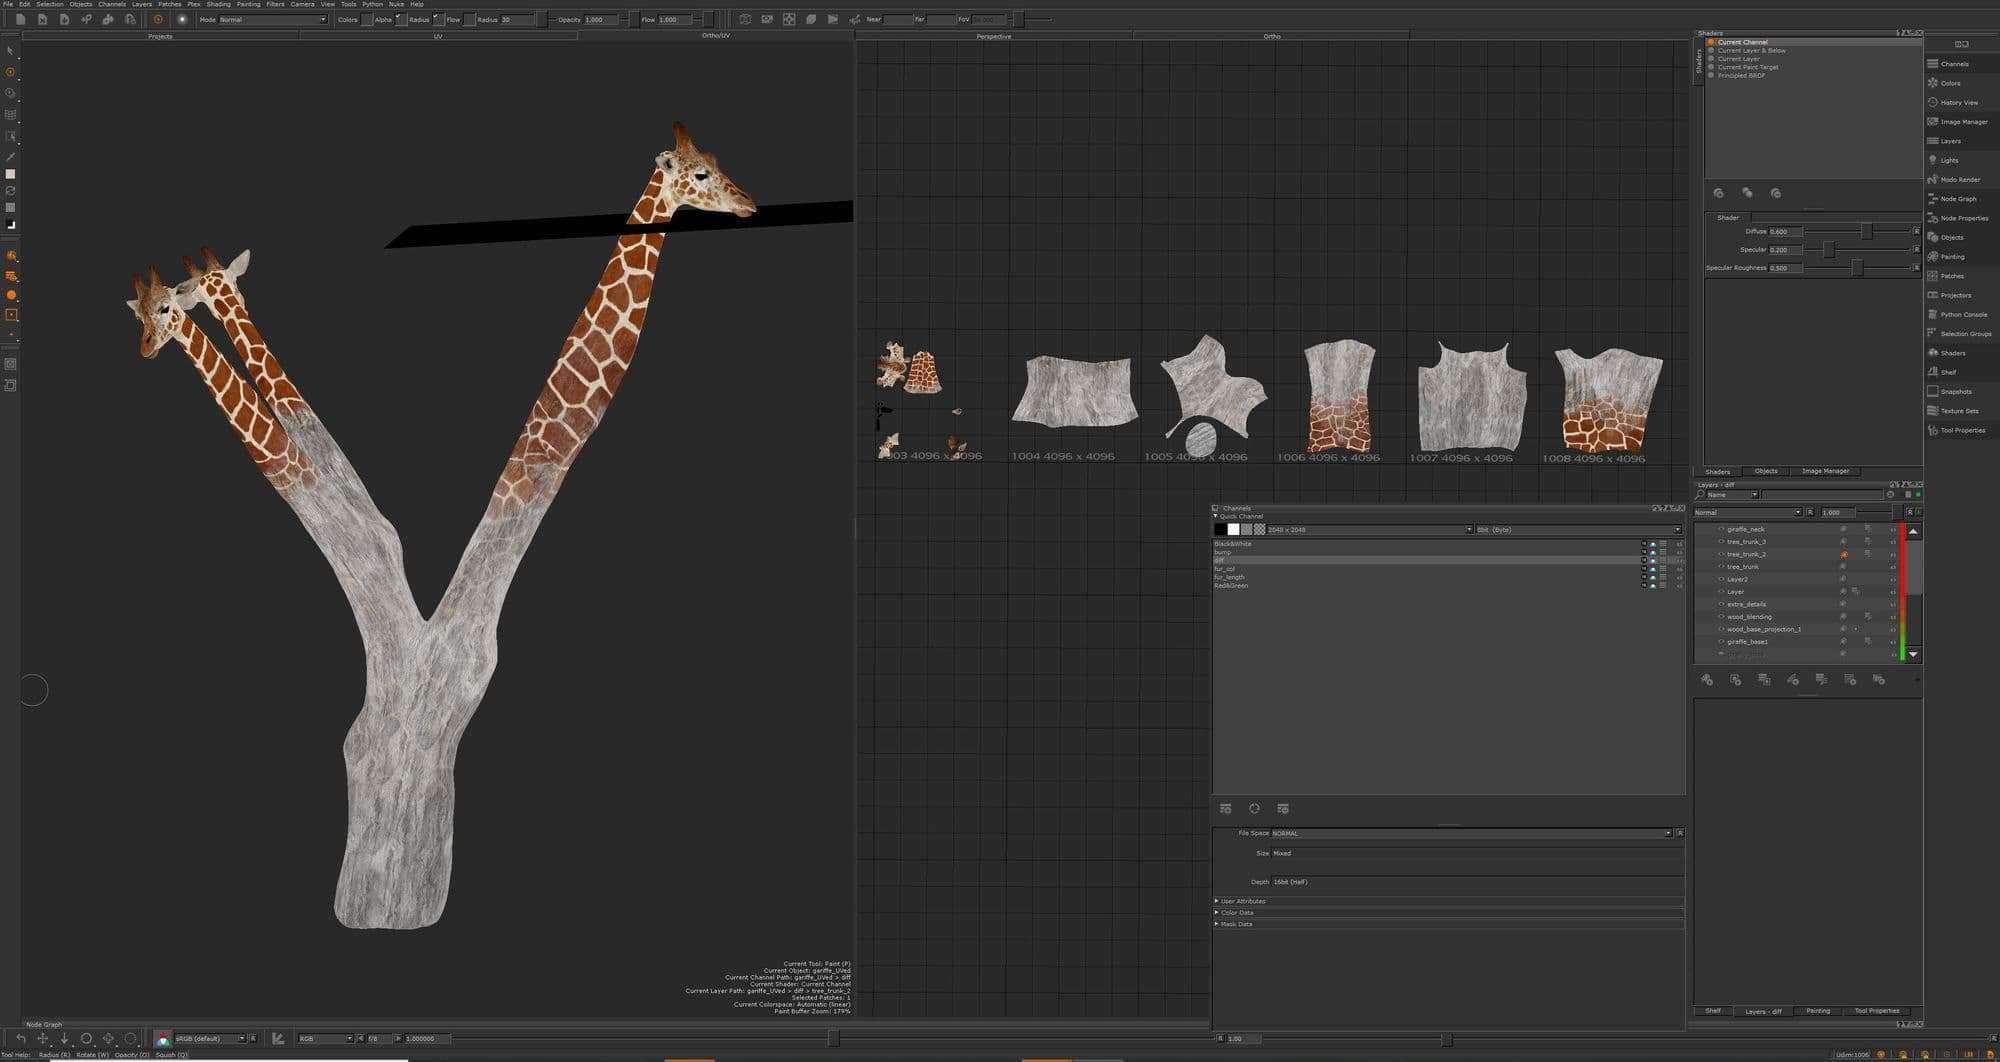
Textures for the giraffe tree were one of the big challenges for me and I knew if I did a bad job on the textures, it would directly affect my comp work and wouldn't look realistic and believable for the audience.
I spent a lot of time learning Mari on the side, and also observing tons of dry-trees and giraffes. Before I brought the geo into Mari, I separated the UV into 8 tiles. Each giraffe part was 1 tile and the tree part was separated into 5 tiles. I did it this way because I needed 4k high resolution textured CG, so that when I composited it into to the live-action footage, the results would be sharper.
Mari is very much like a “3d Photoshop” to me. It’s fun to use and I’m quite familiar with Photoshop so the learning process of Mari wasn’t too painful. I started to texture the giraffe tree from October and it took me months to finish because I’m not a texture artist! But I was glad the time I spent on texturing paid off and it was worth it.
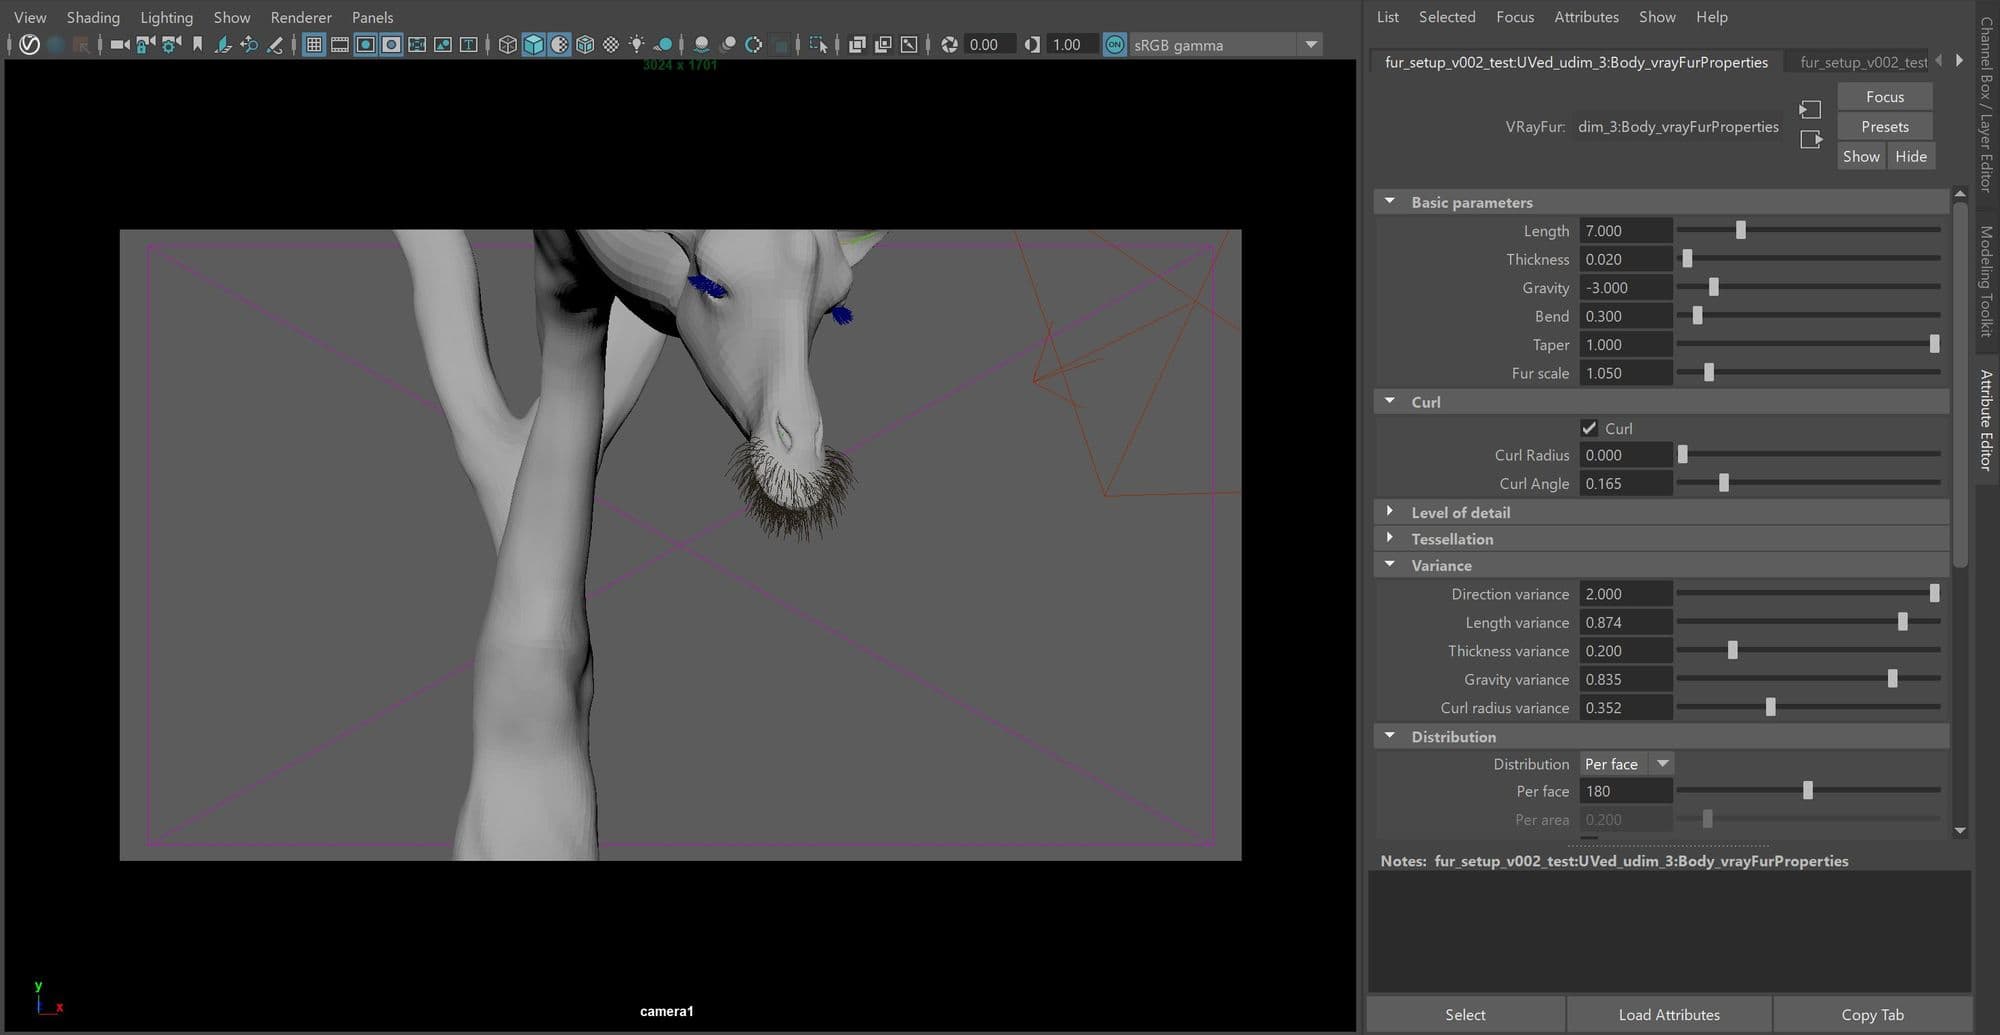
CG fur was also a big challenge for me in this film as I didn’t have the knowledge of xgen and didn’t have the budget to have another artist to make the fur for me. I was able to find a “cheap” way to make the fur happen: after I created the diffuse map in Mari, I painted another map, (in this case I called it “Black&White” map) and based on this “Black&White” map, the giraffe fur was generated from Vray Fur in Maya. The fur length is created according to your map (black is the shortest hair length, and white is the longest hair length).
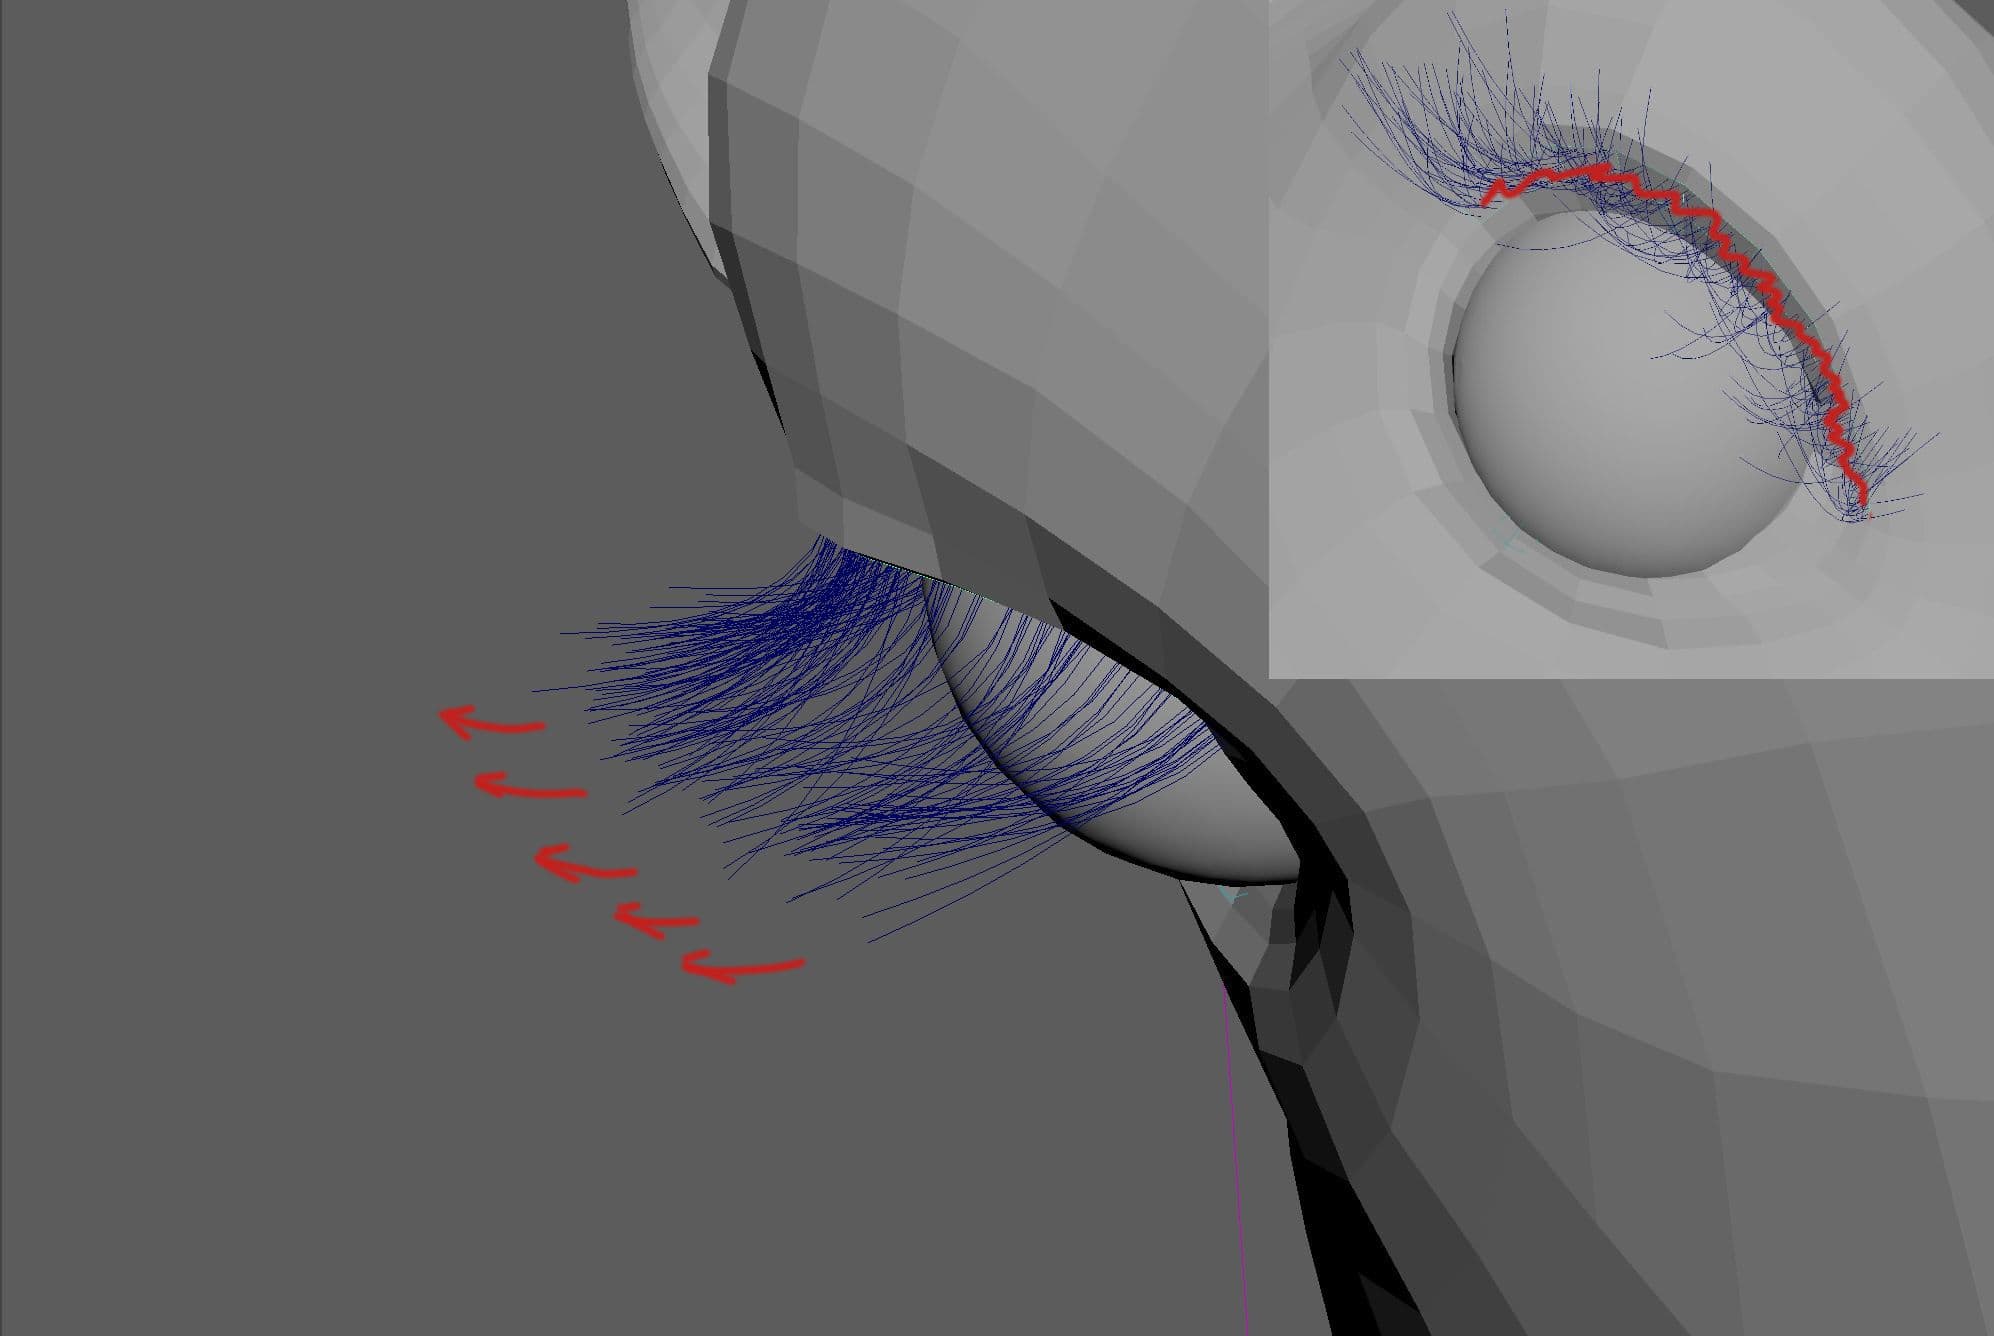
For the eyelashes and some detail hair around the mouth, there’s an extra geo face on top of the geo body, which are rigged together so the eyelashes or the detailed hair can be generated individually and adjusted accordingly. Fur can be adjusted procedurally based on the parameters. It’s simple and quick once you have the map.
Inside MariMaya VrayFur
Lighting, Rendering and Compositing
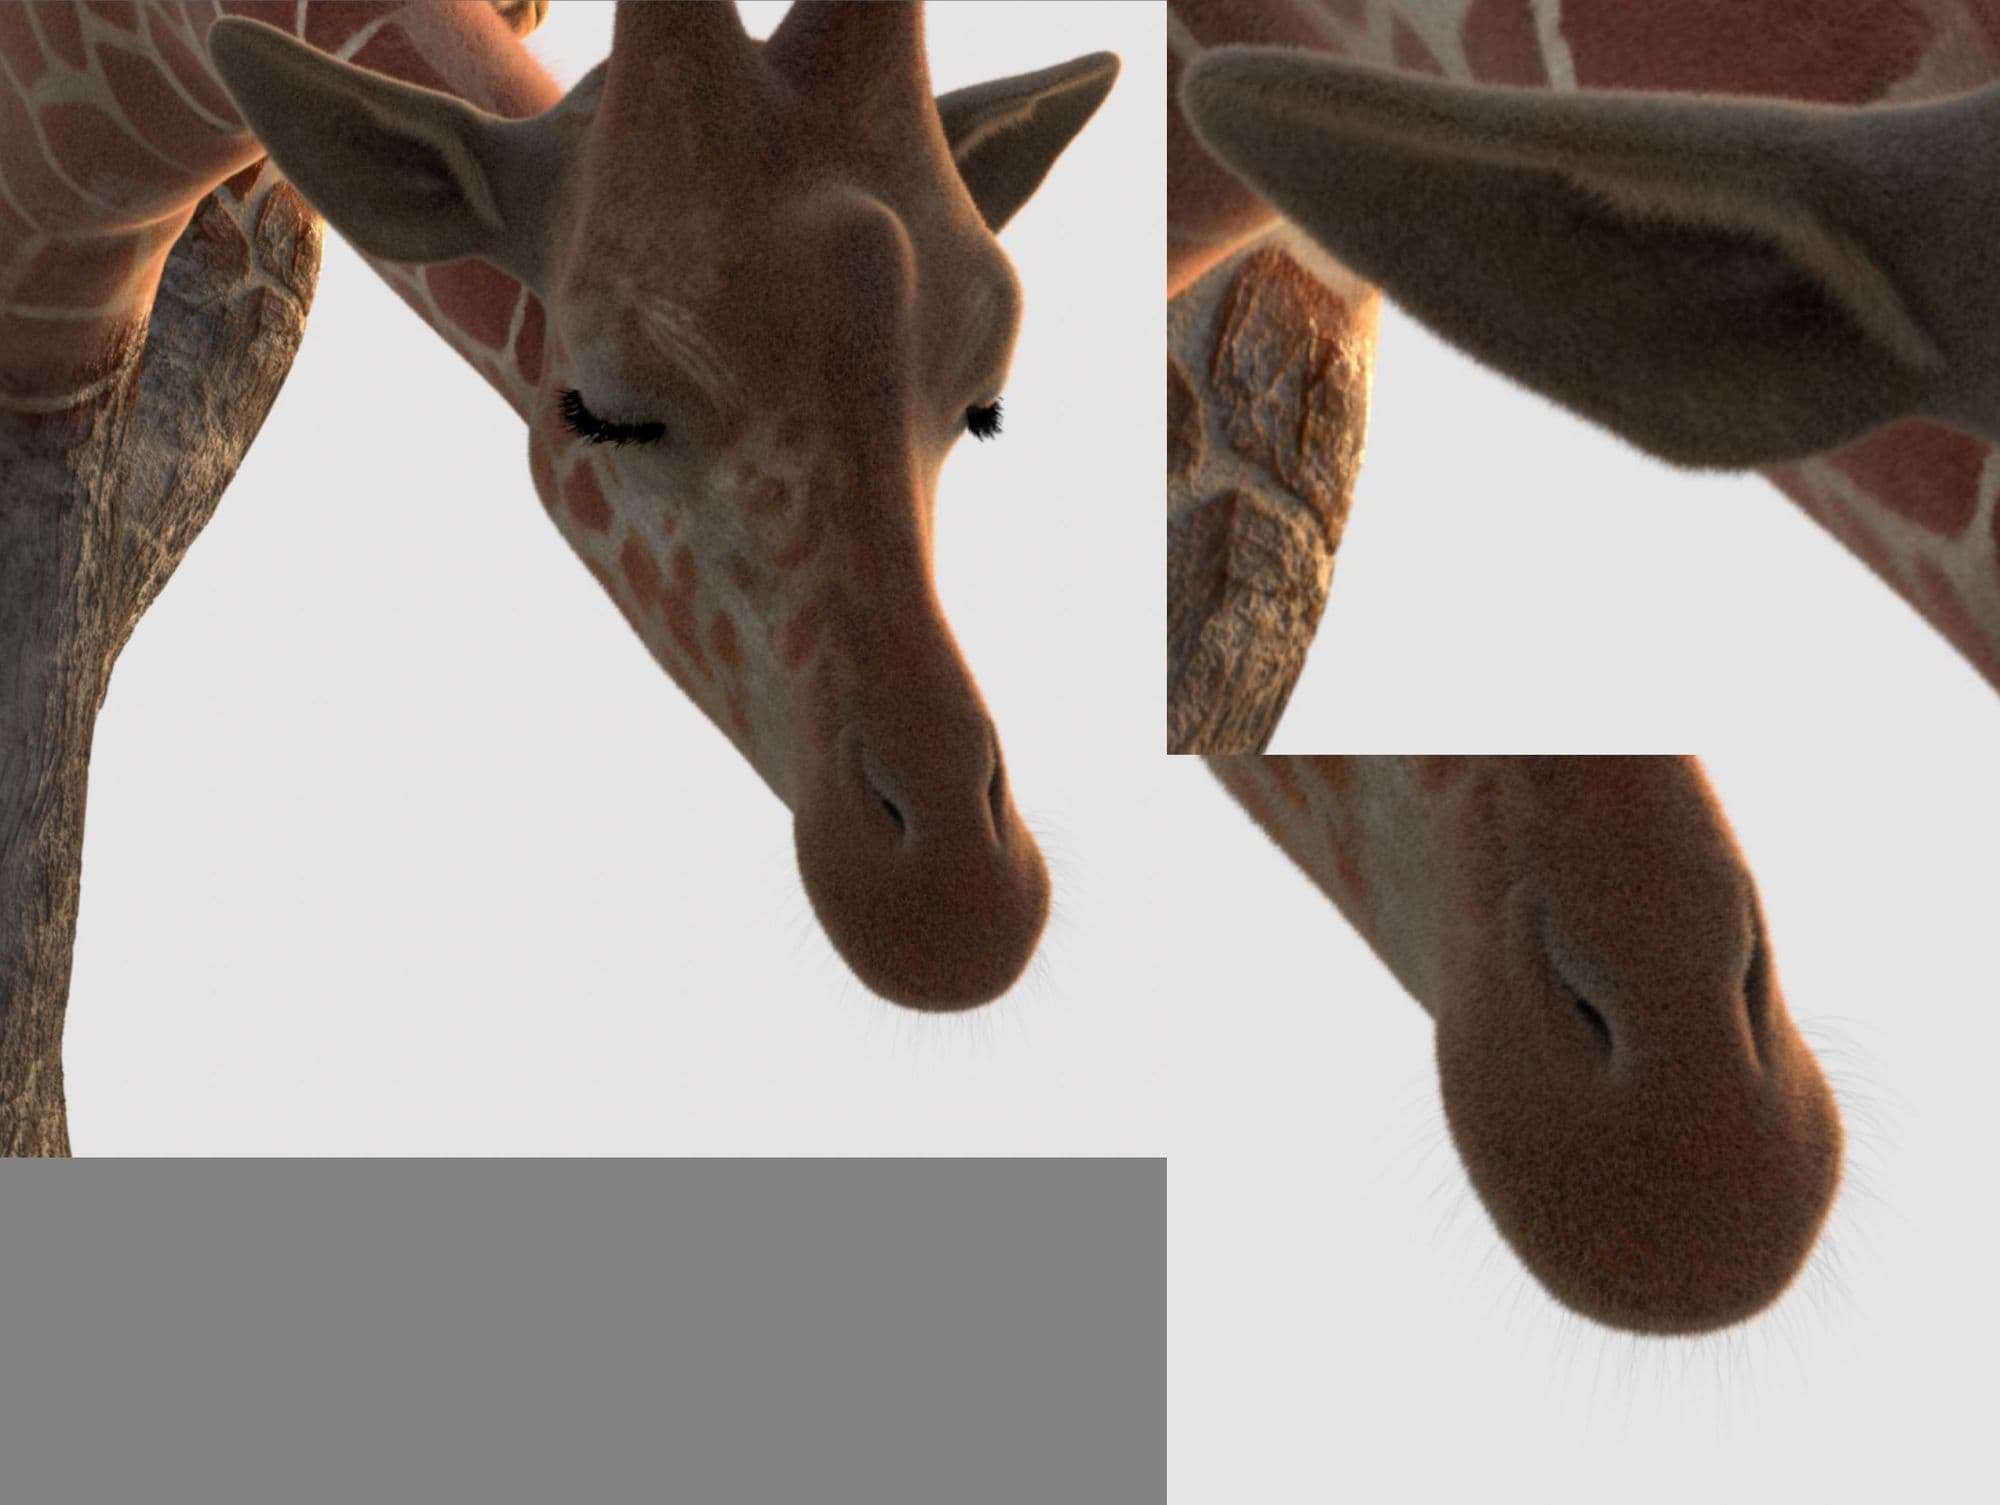
Most of my CG giraffe scenes were shot during sunset. All the lights for these scenes are quite similar. With the help of the HDRs, I set the Area Light colour temperature somewhere around 3200K. Because my actual footages resolution was 2880x1620, I rendered most of the giraffe scene from Maya in the same resolution. One of the giraffe scenes needed an overscan so the resolution was 3024x1701.
CG elements are always sharp and saturated, so defocusing and desaturating a little bit, will always add some extra reality.
Render Closeup
I had the most fun in compositing, and there are few shots, for which I would like to share the breakdown. The first shot I want to talk about is one of my favourite shots in the film. As the breakdown below will show, I did a few cleanups in the background and composited the CG giraffe on top of the plate. Looking at real-life references benefited me a lot when I worked on these CG scenes. Without looking at real-life giraffes, I wouldn’t know that their pattern colour is actually between orange and brown, for example.
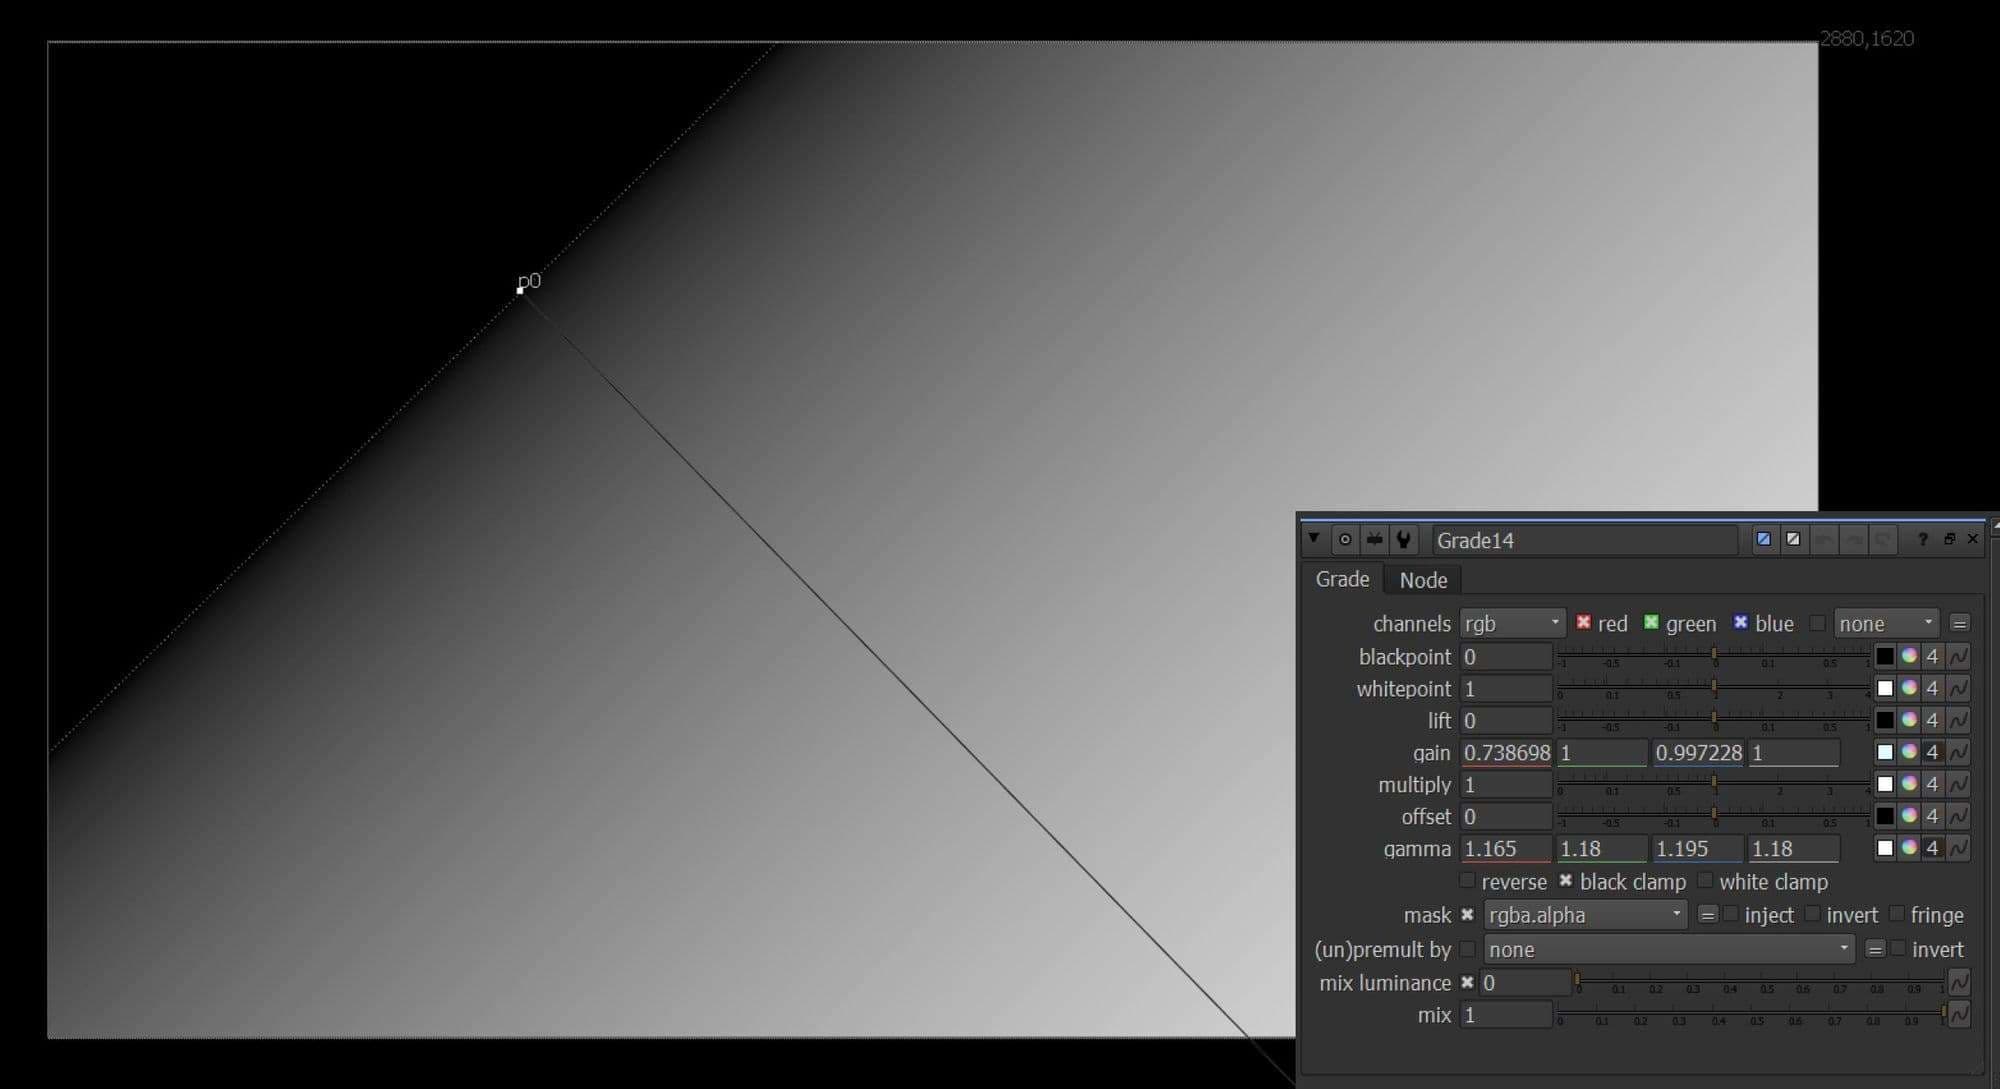
Before I did anything to the CG render, I needed to separate AOVs and recombine the passes. Always "unpremult" before grading. CG elements are always sharp and saturated, so defocusing and desaturating a little bit, will always add some extra reality. Matching the black level and adding a little bit of light wrap around the CG elements will also make your CG fit into the plate even more.
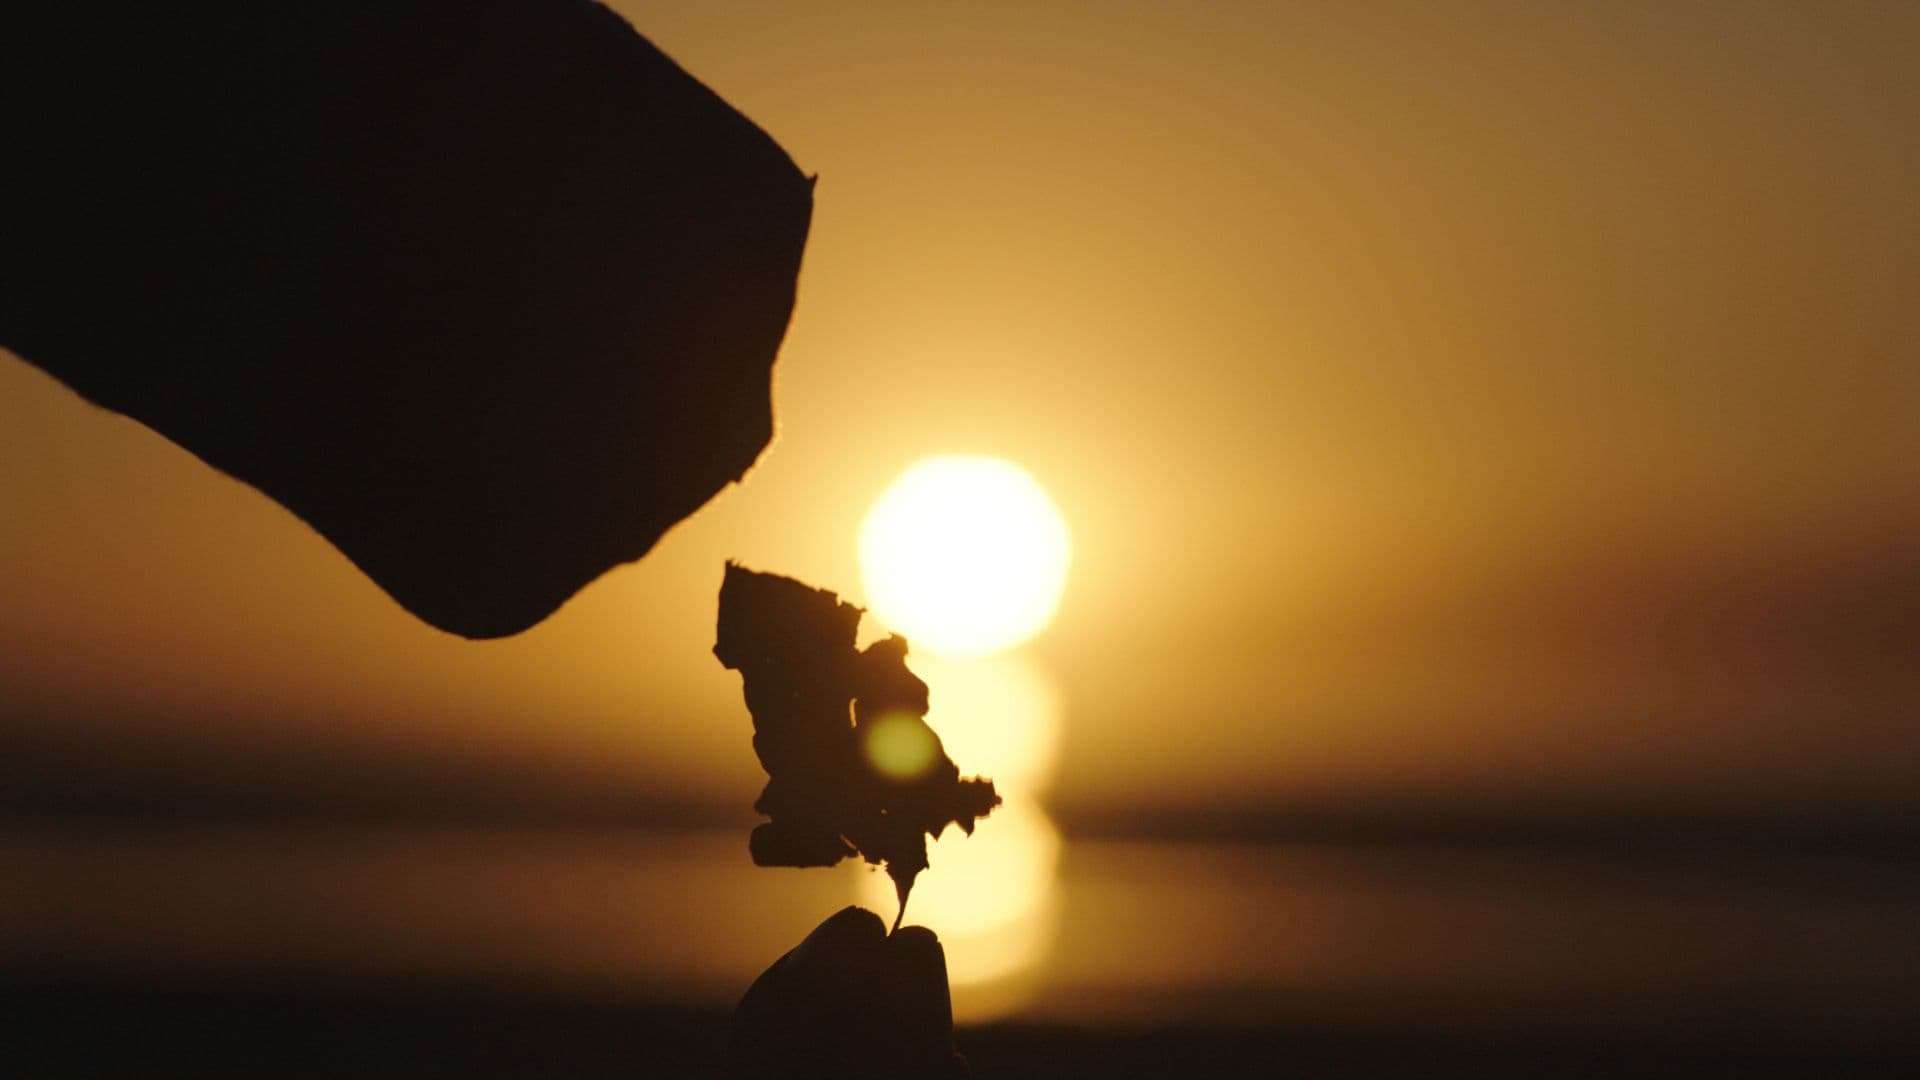
Working with a green screen and CG at the same time was a really big challenge for me, especially, this close-up shot below. My original plan was to make it a silhouette shot then I realised, if I make this shot a silhouette, it would look too different compared to the rest of the film. It was a hard decision to make because I really liked how the actual plate came out. Eventually, I decided to reshoot this scene at our school's green screen room and used my friend’s hand as reference. Luckily, I already had the leaf CG element from my other shot.
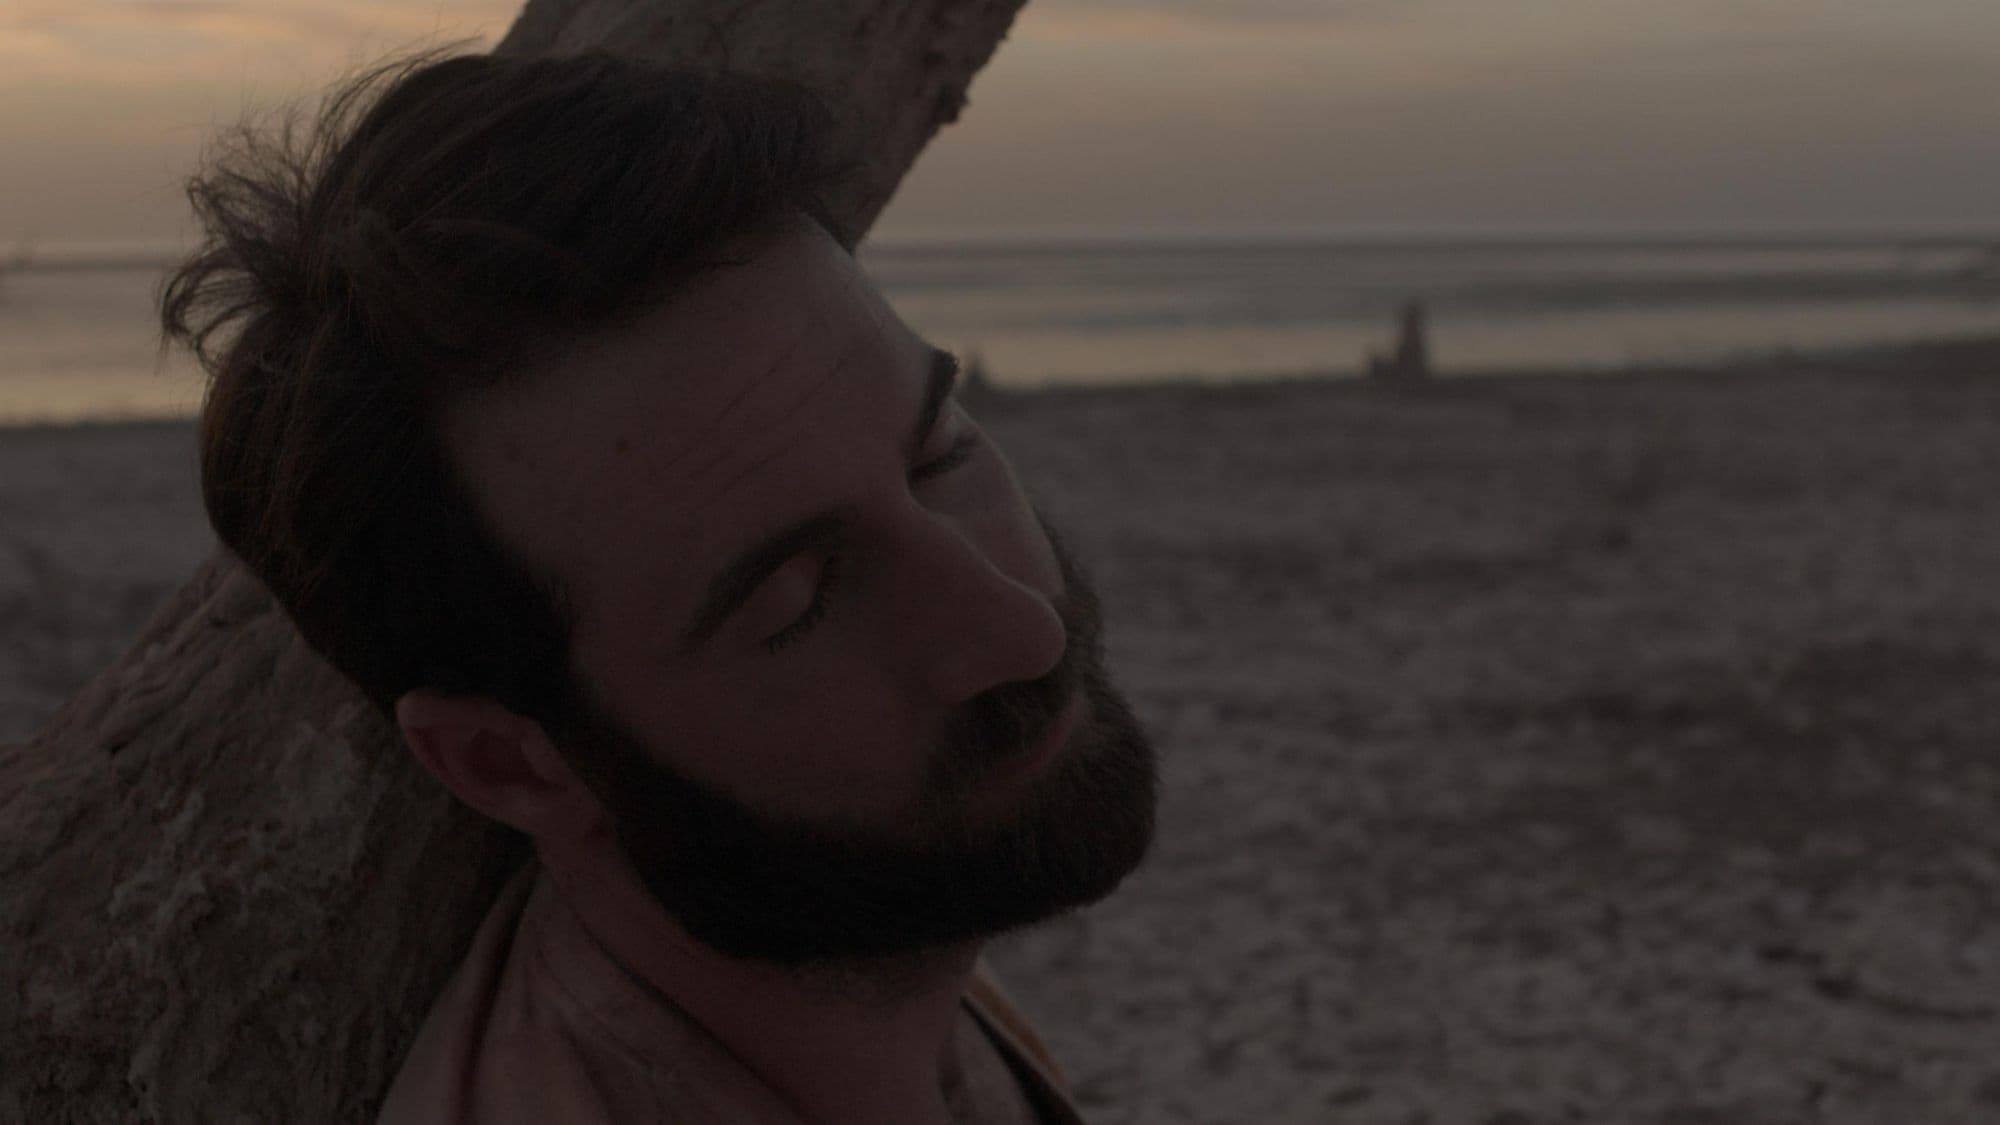
The Actual Plate
Now that I had all the elements I needed to assemble this shot, technically (if the sun is behind the giraffe), this shot should be a silhouette. At that time, I decided to not follow the rules to make it look realistic, instead, I wanted to make it look more like “you shouldn’t actually see this in real life.”
Inside Nuke, I chose a still frame from one of the wide shots where the sky looked particularly dramatic, scaled it up and then used the CornerPin node in Nuke to animate four corners of the still to make the sky have a little bit of movement with some added animated lens flare.
At the very end of my work, I added a grade node and used the ramp node as a mask to create a little bit of fall off, so the left part of the shot remains that orange look from the sunset, and the right part has some blue from the next shot. This way, the shot connects the previous and next.
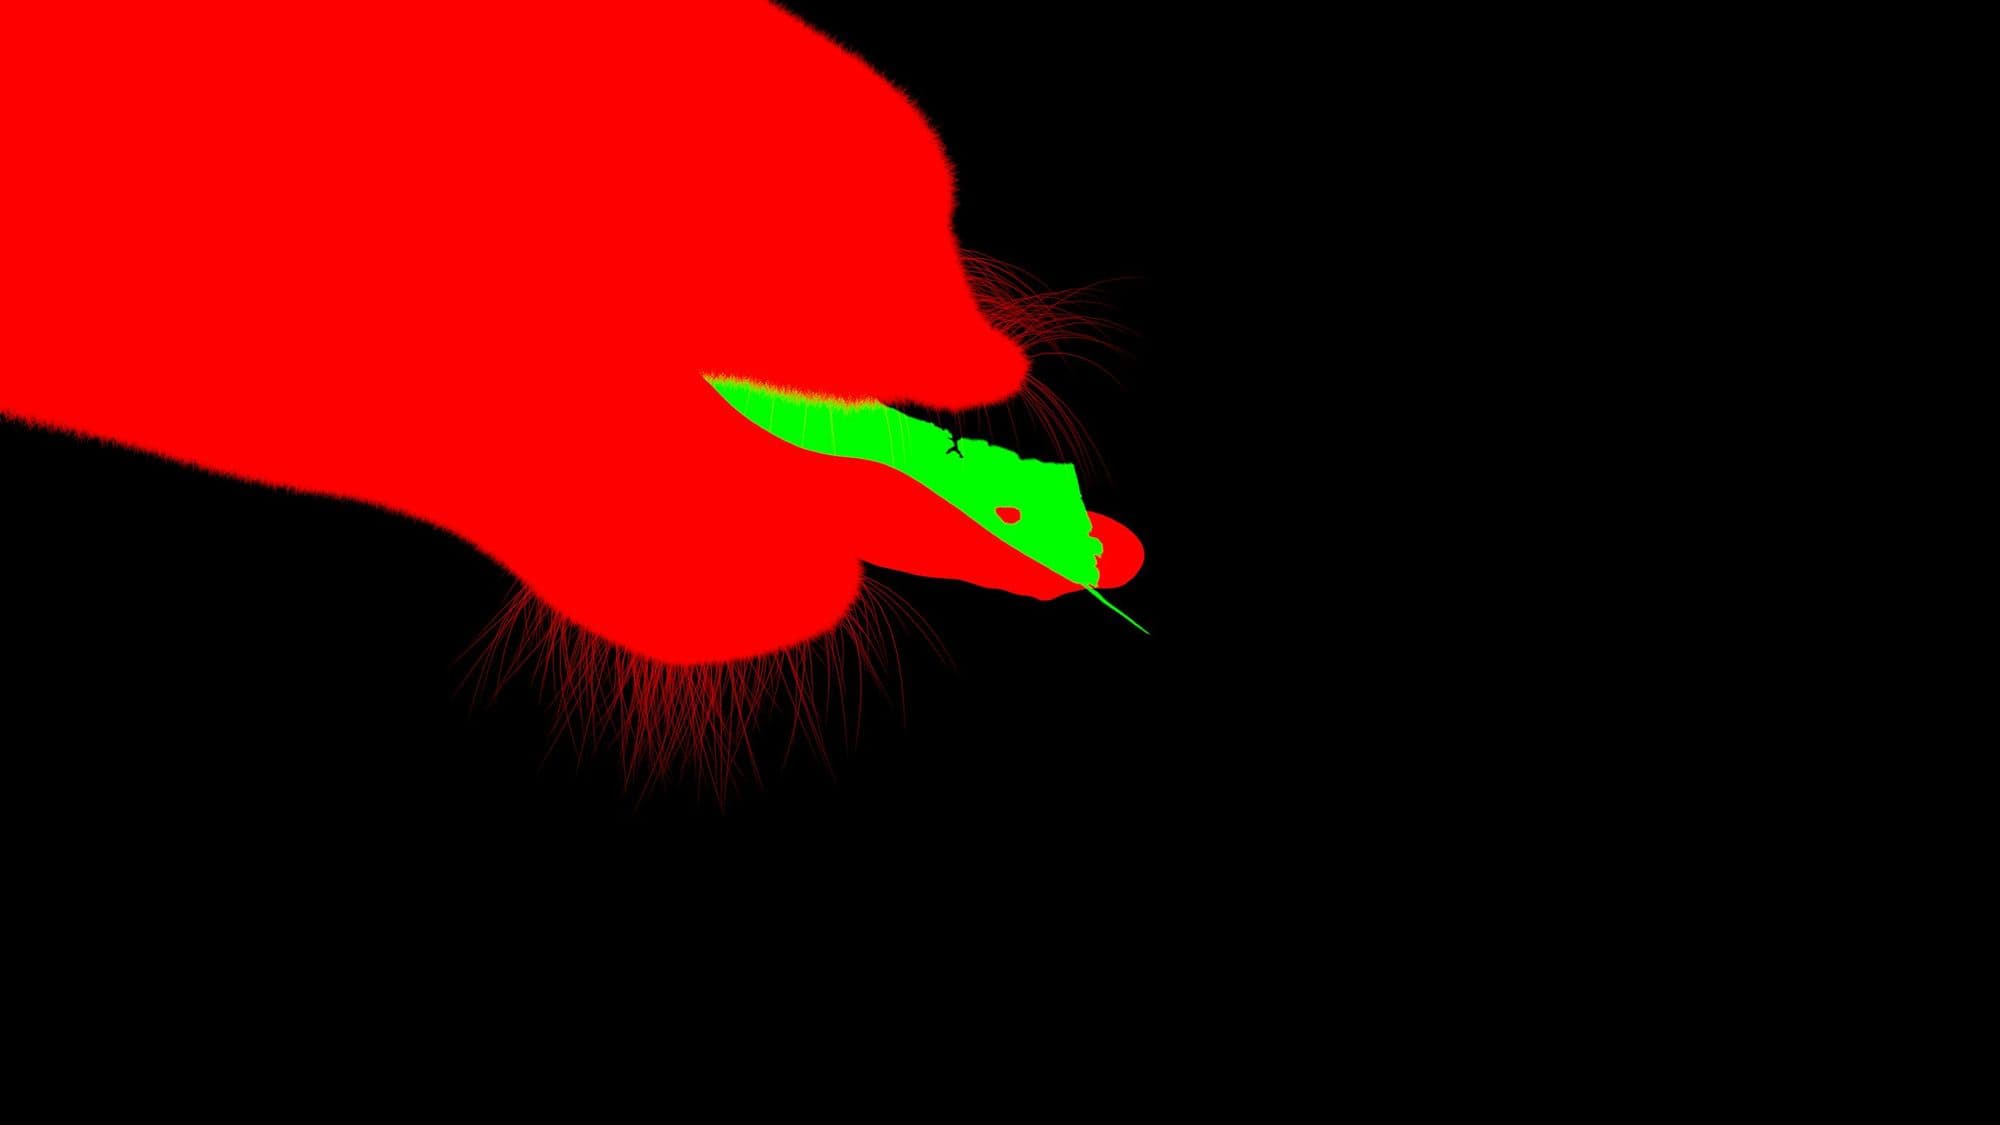
Inside Maya, I rendered the giraffe head, the leaf and another layer of fur to add a little more detail on the giraffe head separately. Besides these, I rendered another EXR sequence and took the red channel as my alpha for the giraffe head and green channel as my alpha for the leaf, so I could save some time on rotoscoping.
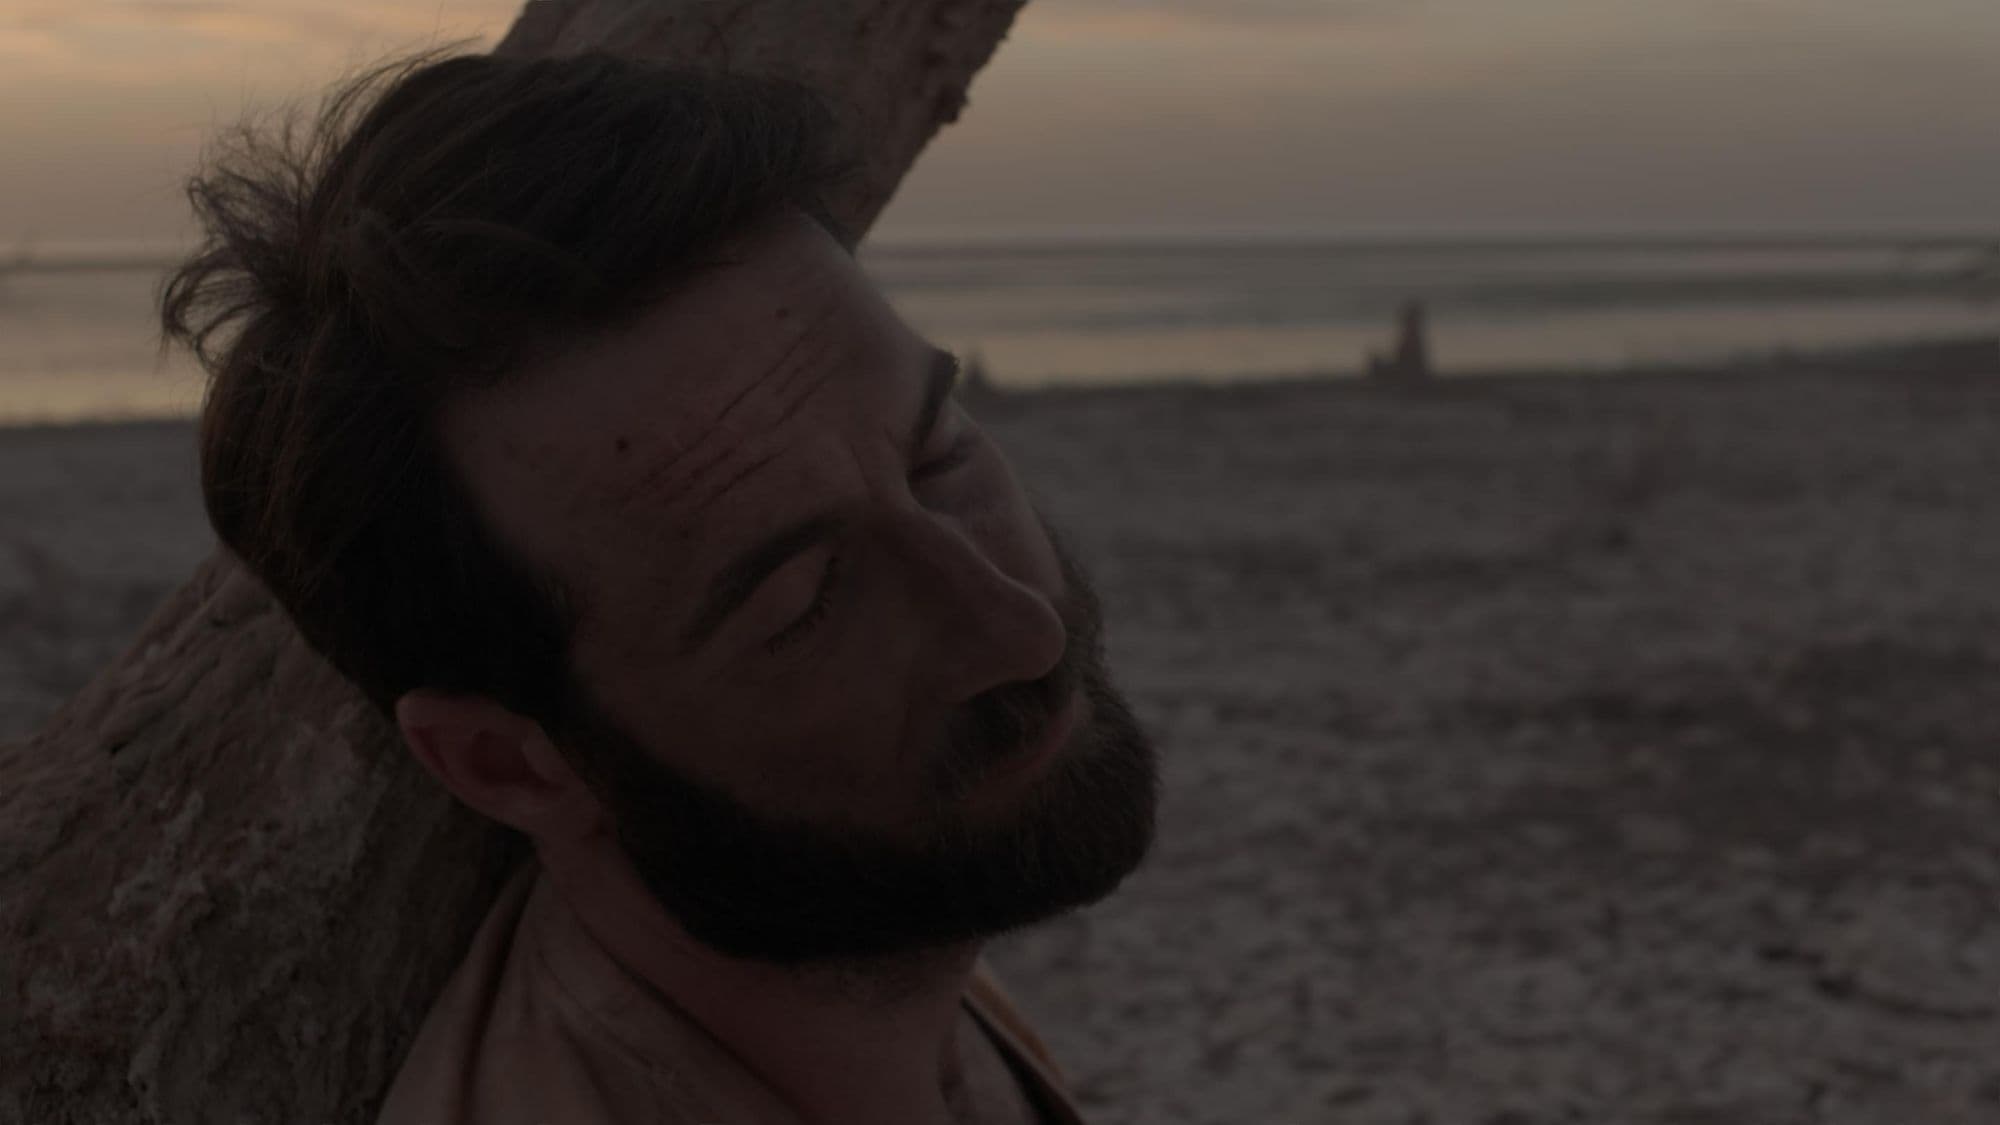
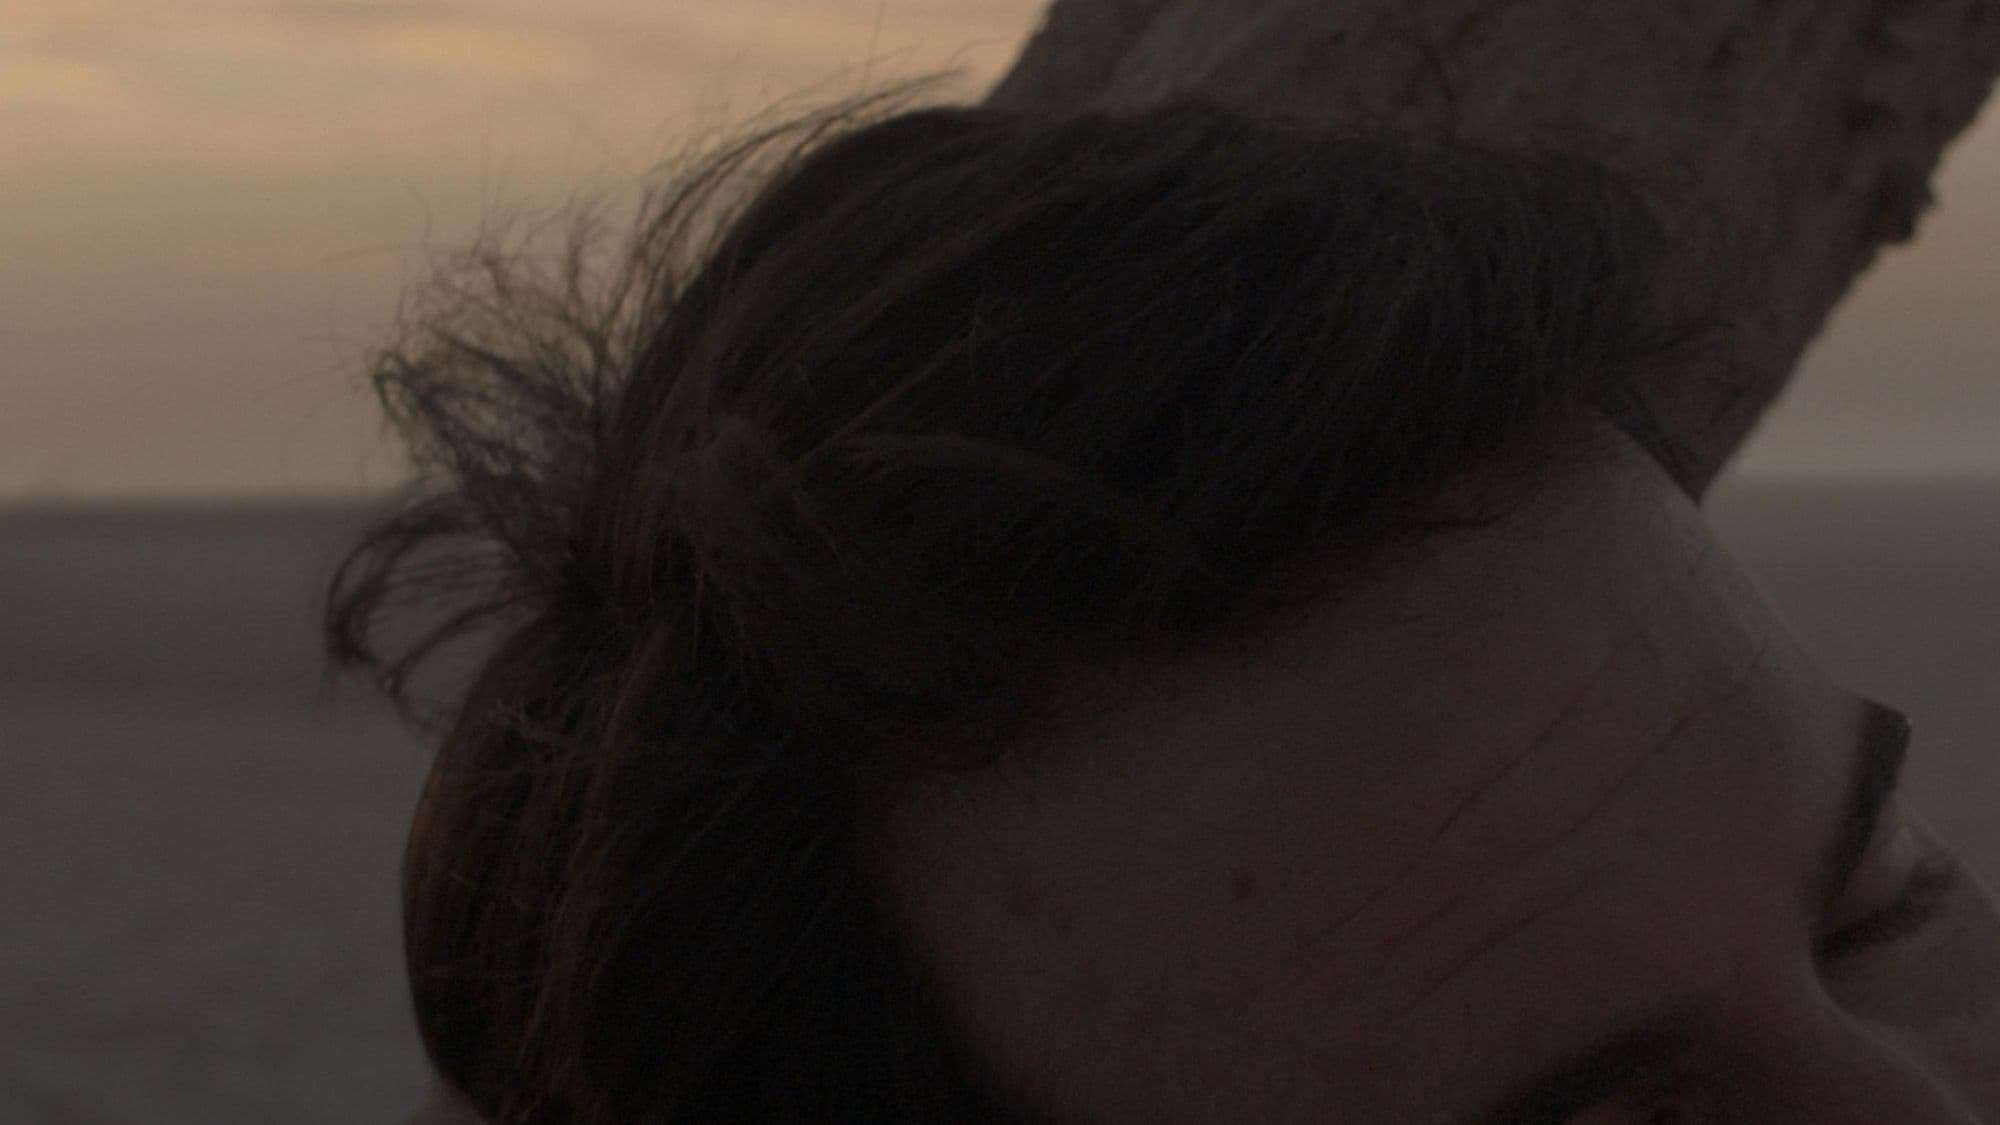
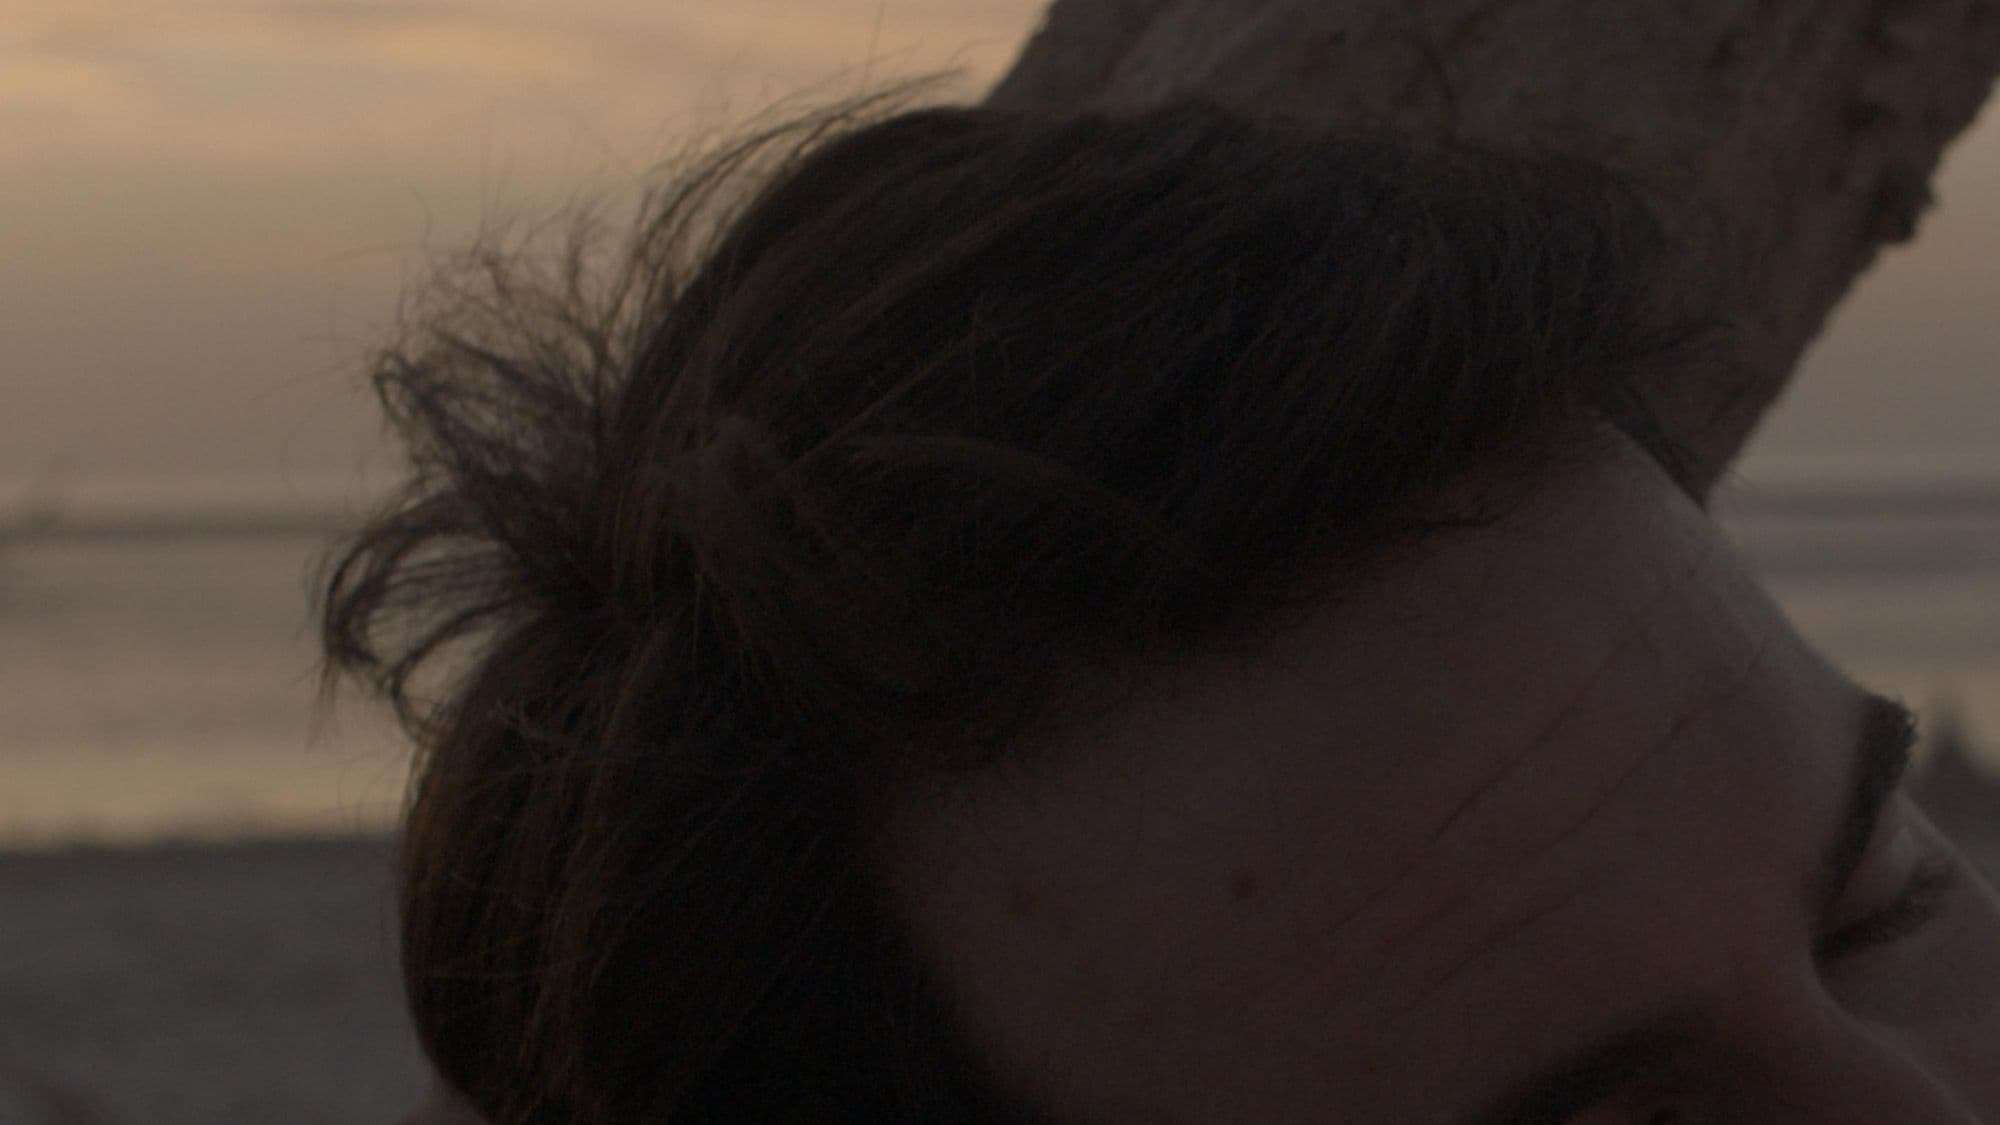
My biggest challenge throughout the post-production process was my last shot. I spent months developing and improving this shot. The visual effects are: ageing on the face, making his body skinnier, and extending the ground to cover the river in the actual plate.
Tracking was the first challenge for me when I worked on the shot - the shot is about 800 frames. It is a little bit dark because it was shot at dusk. The focus is not perfect, sometimes it’s in focus and sometimes it’s out of focus. Also, the shot is extremely shaky in a lot of parts that I had to manually place the trackers and keyframe them.
The software I used to track this shot is SynthEyes. Before I put it into SynthEyes, I used a gizmo called “HighPass” to make some of the dark areas more easily captured by tracking software, and rendered the shot as PNG image sequences from Nuke. PNG or JPEG is lighter than EXR and DPX image sequences so it won’t make the tracking software stuck and take forever to process. I then brought it to SynthEyes and manually placed each tracker in the shot. Sometimes the trackers went through smoothly and sometimes I have to manually keyframe them. The results were pretty good and I got 0.7 error.
Tracking Result inside Nuke
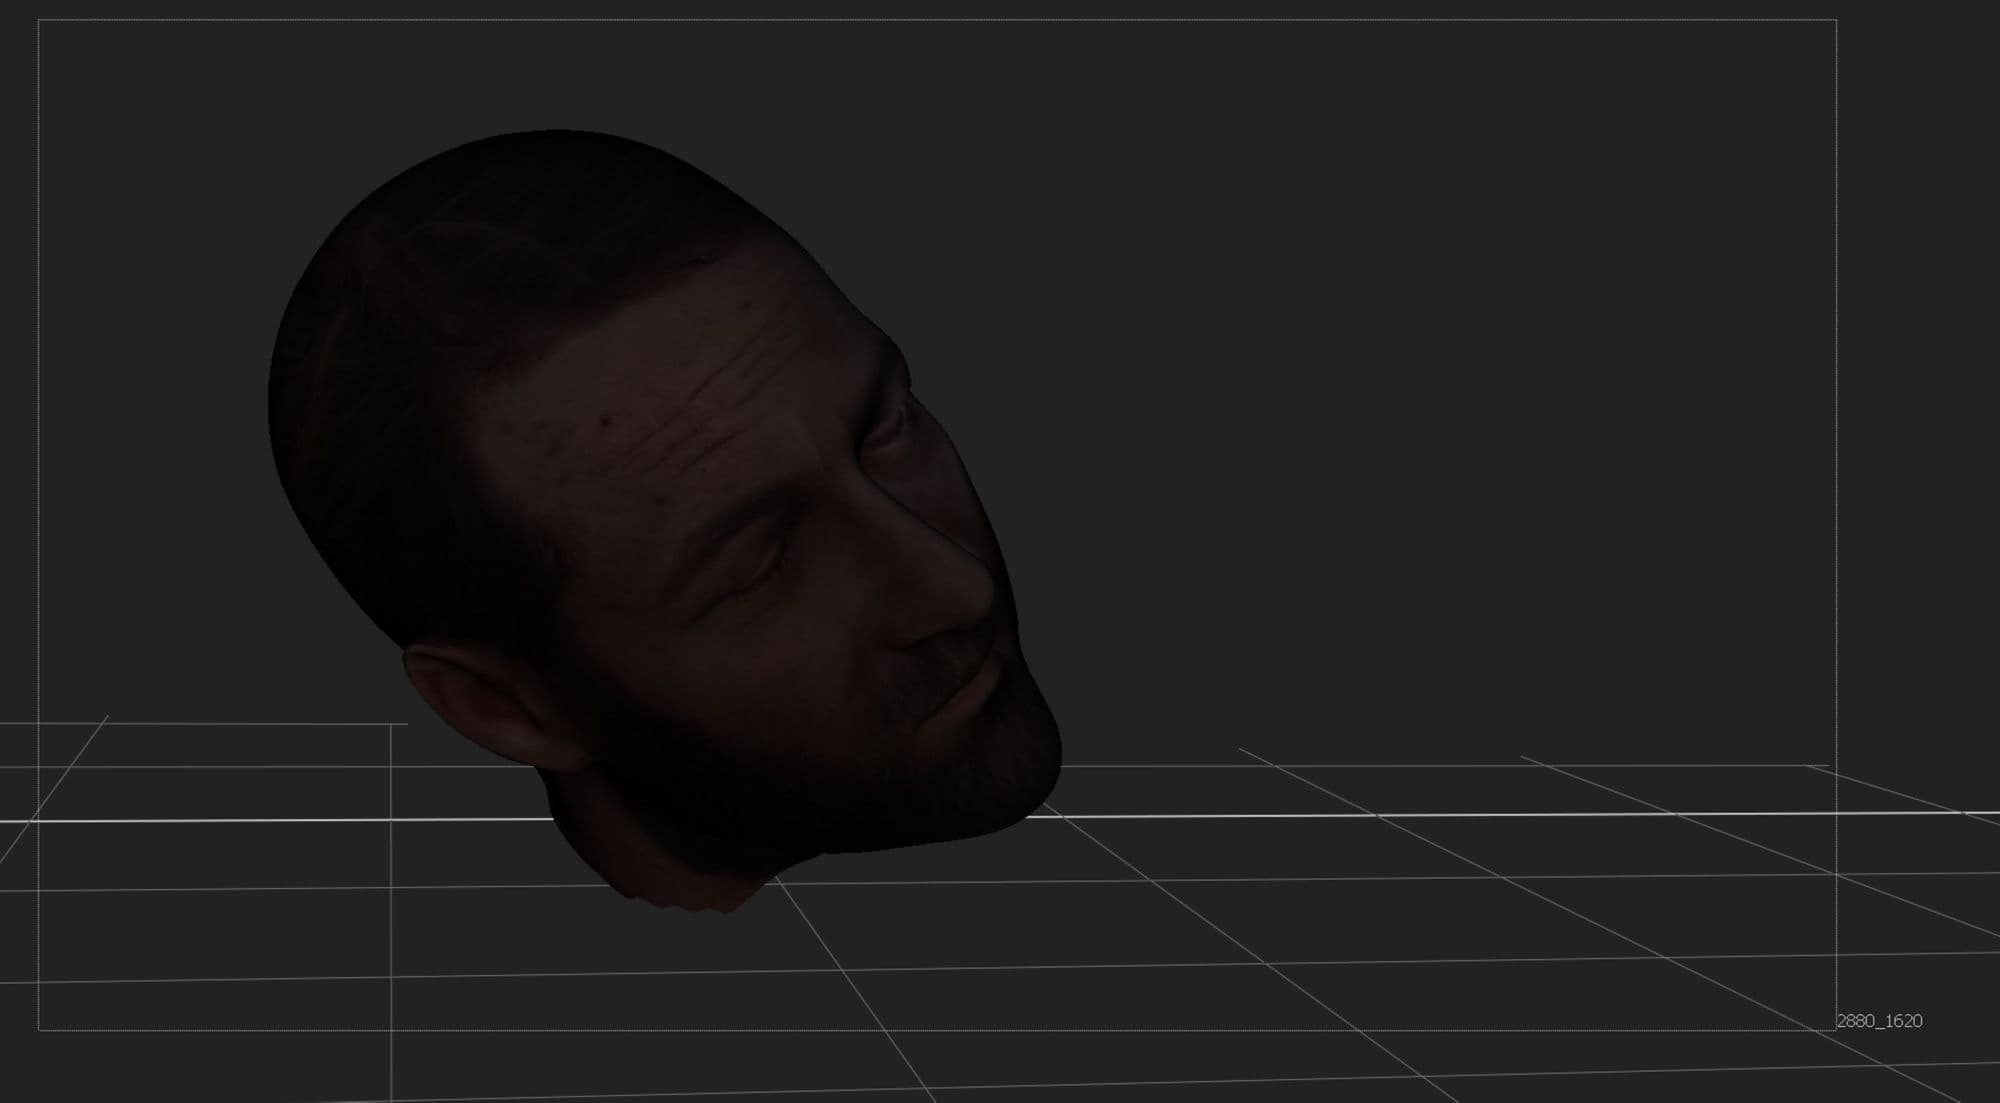
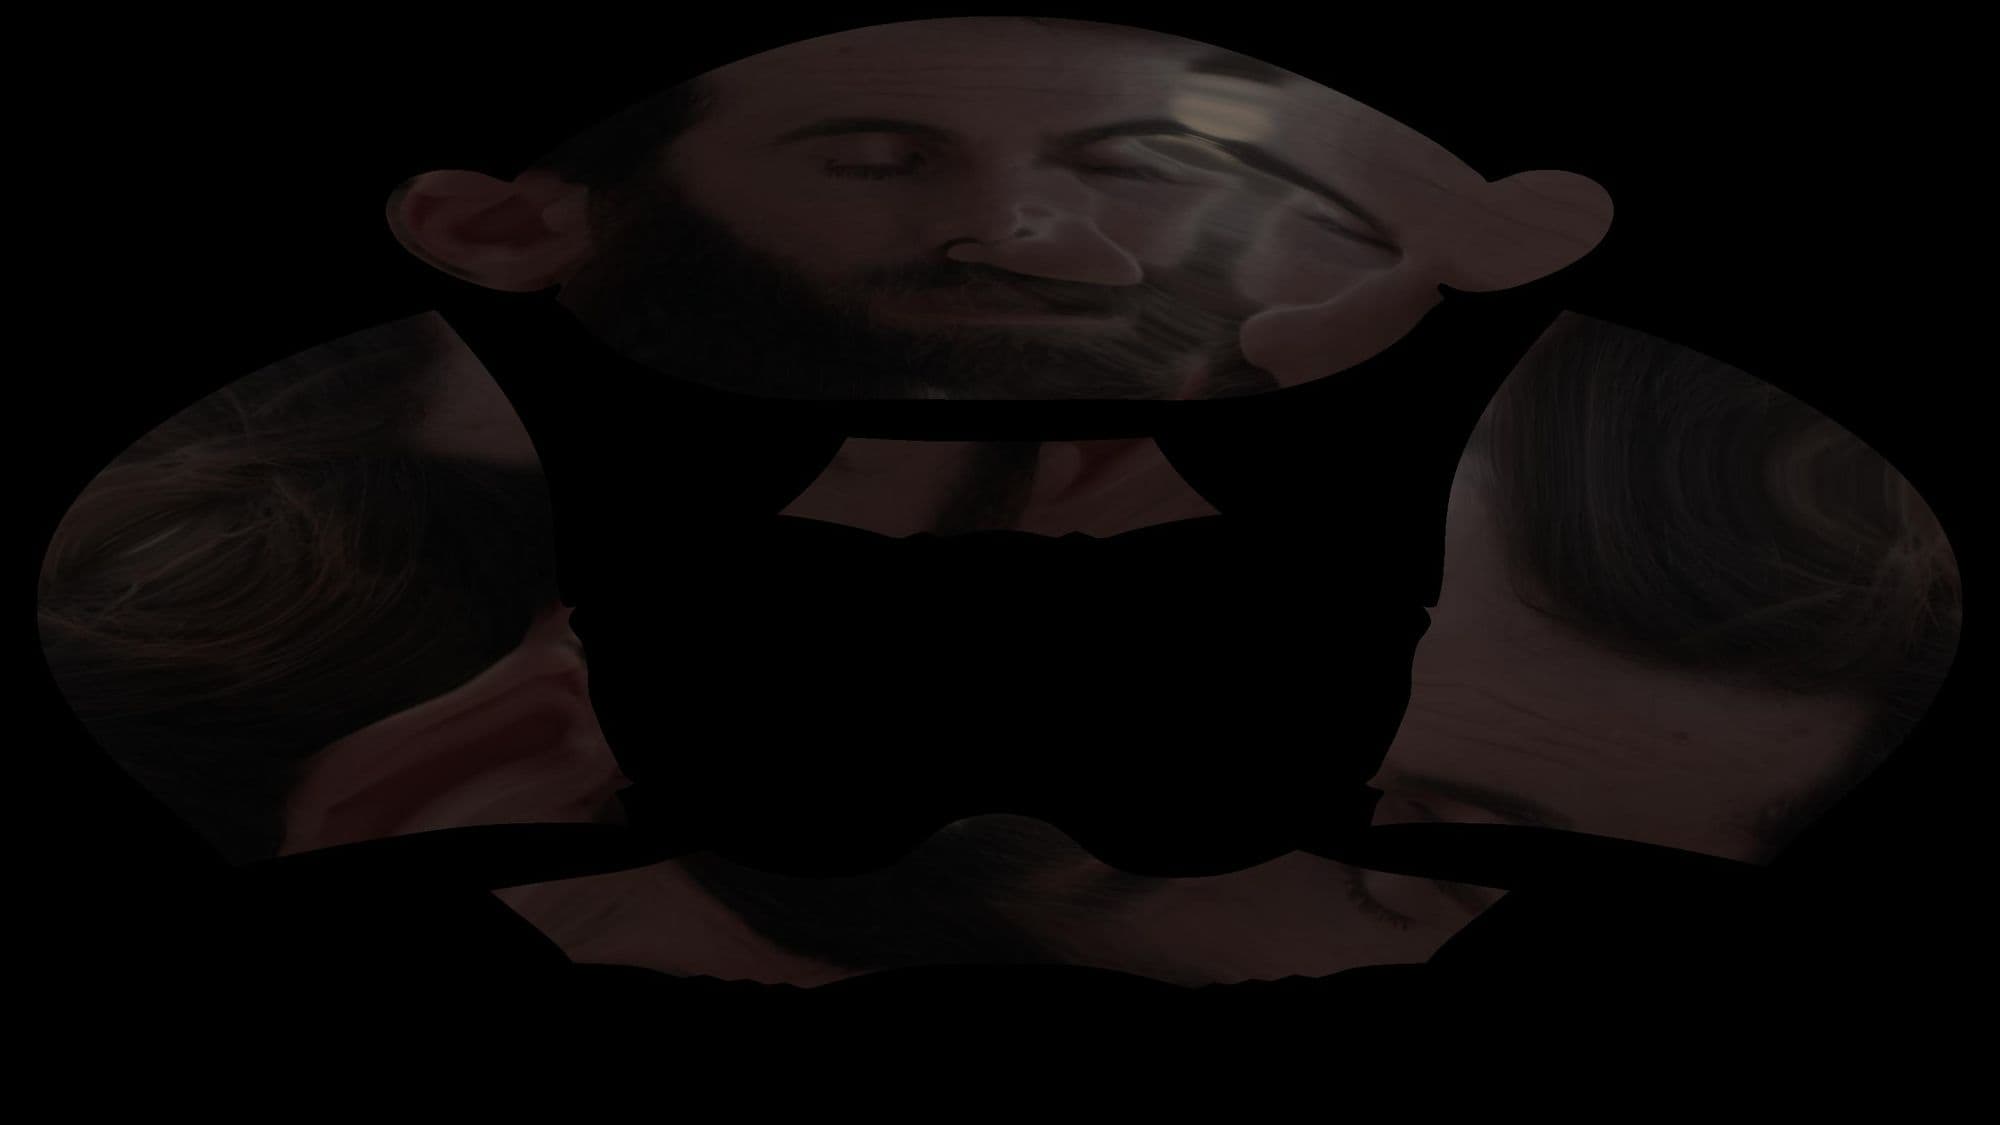
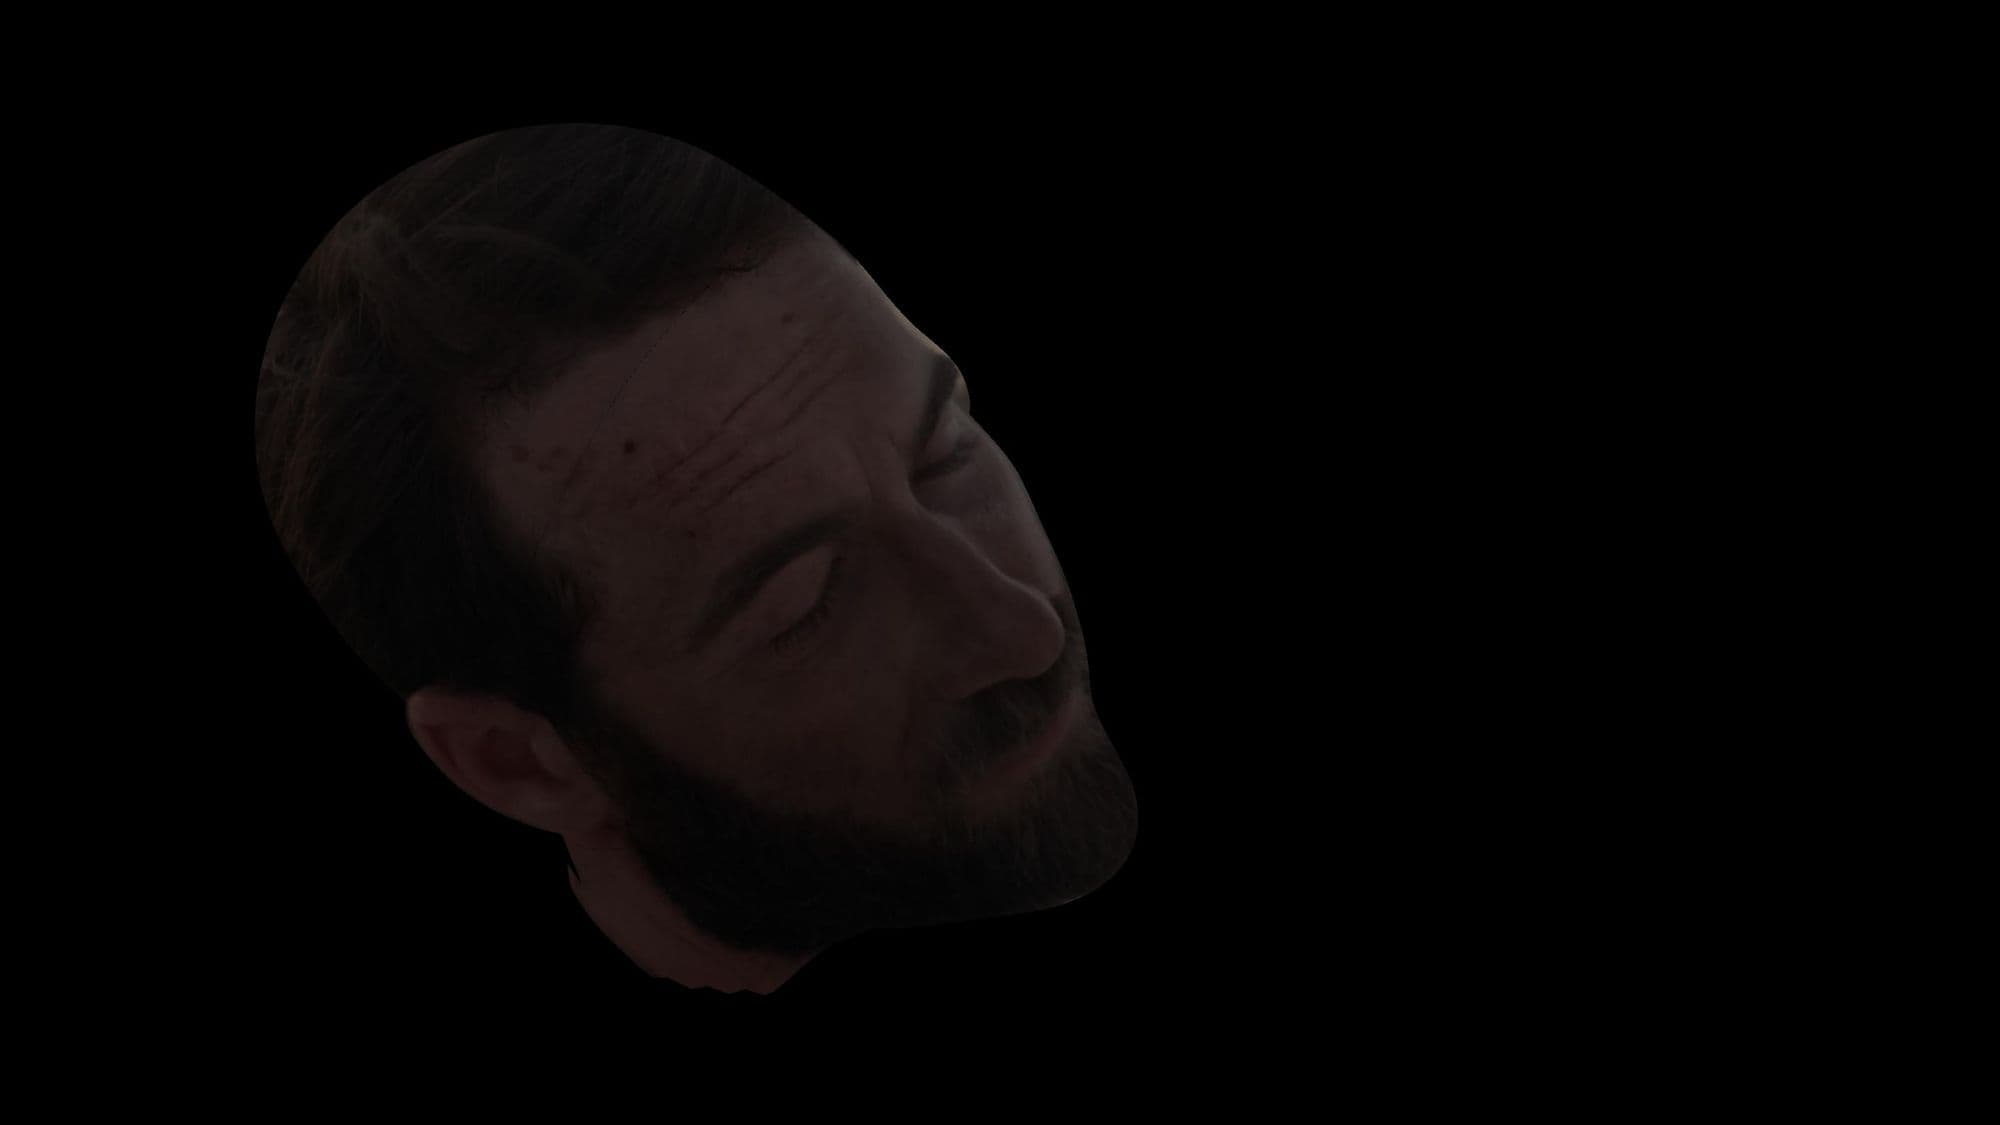
Ageing is the next challenge I was facing. At first, I tried to use a 2D way to achieve it. I selected a few frames as reference frames and generated a few SmartVectors. I blended the SmartVectors together and used them as STmaps to make my ageing matte paintings stick to the face. Smartvectors would work for certain parts and they were also very easy to break as well if the shot moved too much. Then, I found an extremely powerful tool called KeenTools. This tool saved me a lot of time. It can create a face geo inside Nuke and track the geo magically. I used KeenTool to generate a UV and when I read it from ScanlineRender, the geo head matched the head in the actual plate. A simple merge over operation, and it’s done!
KeenTool Nuke 3D viewKeenTool Face Geo UVKeenTool Comp resultClean Plate
After making the actor’s face older, I need to make his hair look grey as well. Salt and pepper is the look I wanted to achieve. I used a colorcorrect node and desaturated the hair. Also with keying and rotoscoping, I got the hair matte and used it as the mask for the colorcorrect node. Rotoscoping for the hair took me a lot of time to do because it would show so obviously on the hair if the rotoscoping was not super detailed.
Matte paintings of the river were tricky for this shot. Since the shot started from a close-up shot to a wide shot, the camera movement had a turn at the beginning and light was changing too. my matte paintings behind the actor were to start from defocused into focus, adjusting accordingly as the camera turned and matched the light changing in the shot. To make it happen, I picked the beginning frame, middle frame, and the end frame as reference frames for the matte painting and then blended three of them together so the extended ground looked blended into the scene. Also when the shot moved to a wider view, I added a sun glow onto the extended ground so it looked like the sun was shining on the ground.
The matte paintings itself took me some time to make. I looked through some pictures I took when I was on set and realised to make the matte paintings better, I needed to make a middle ground and a background and blend them nicely.
Matte Painting Setup
Finally, I needed to rotoscope for the hair which was time-consuming due to 800 frames! Luckily, I had a 3D camera track and I was able to utilise the track to make my life easier. But still, a lot of rotoscoping for me. Especially, in the beginning as the actor’s hair is a little messy on the top.
Hair Detail Keying ResultClean Plate
The final result
I underestimated the amount of work there was to do on this film! I had a deadline for this short film and I did my best for it, although it isn't perfect. Creating this film was a journey filled with excitement and wonder - I did so many things I didn't even think I could do. Also, as I am mostly a compositor, I challenged myself to work on the other aspects of 3D: creating textures, CG fur, and lighting...sometimes, all you have to do is push yourself a little bit more and you might be surprised what you can achieve!
I know I could’ve shot the film inside to make it much easier to control instead of going outside shooting with more unpredictable factors, but I really wanted my thesis short film to be represent something I was passionate about. I think what I want to say is, we are artists before technically skilled worker, and passion for art should be the drive for all of us.