Blocking is one of the most difficult and time-consuming stages of modelling. A modeller should be able to create a block out with the right proportion and feel of the original concept. Analysing concepts and references to match proportions takes time and practice.
Luca Giammattei is a3D artist specialised in modelling and texturing for visual effects and real-time production. Luca loves to create vehicles and environments to let people inhabit extraordinary and unbelievable stories.
Luca strongly believes that sharing knowledge is the first step to grow as a professional and as a person, an so he shares with us his 3D hard surface modelling techniques for creating props for Film and Games.
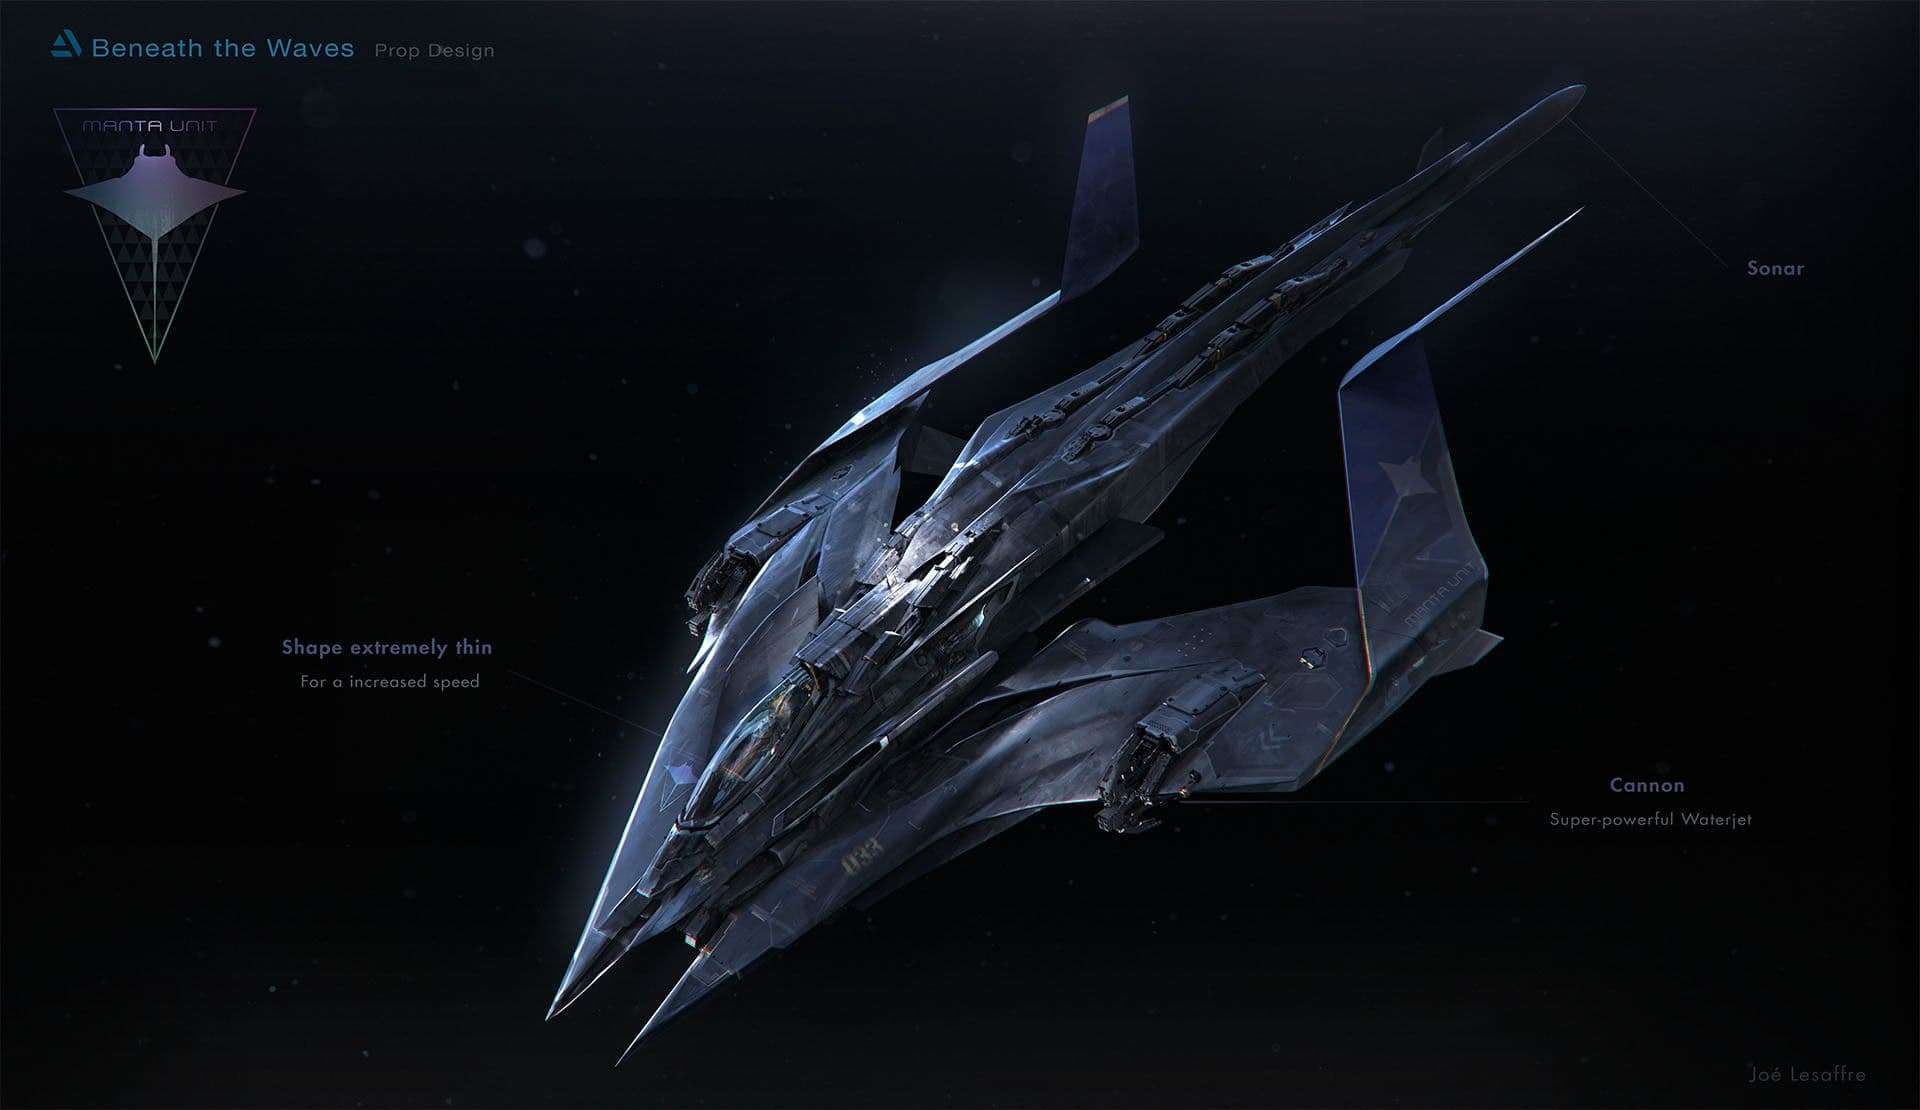
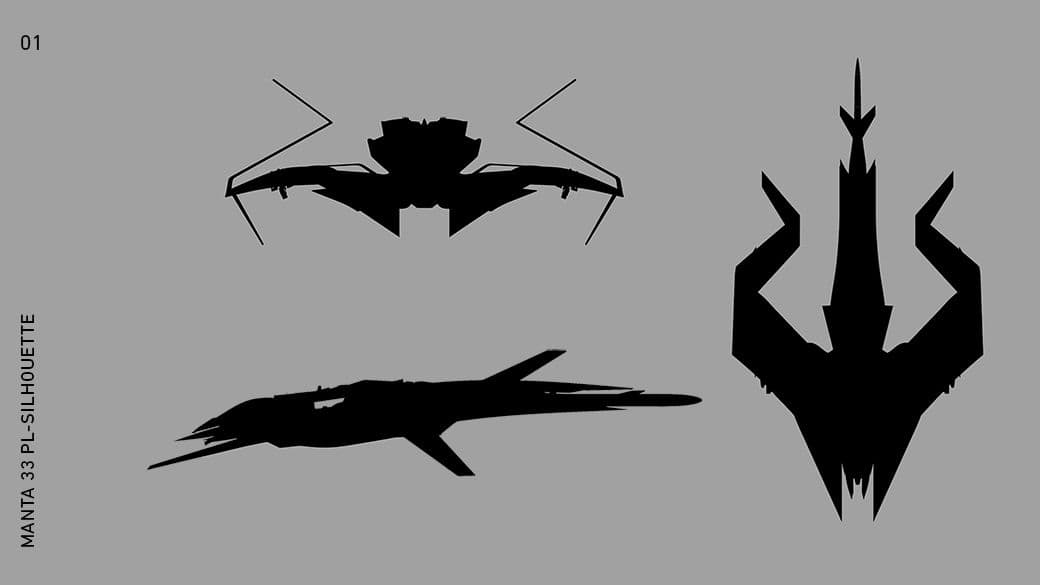
When approaching my modelling, the majority of the techniques that I use are replicable with a lot of 3D software. One of my goals is to let you understand fundamental and software-free modelling approaches. To describe my workflow I am going to use my latest personal project, the Manta Unit 33 PL.
Software are just tools. Knowing what every key does is not necessary to be an artist. Focus on fundamentals instead.
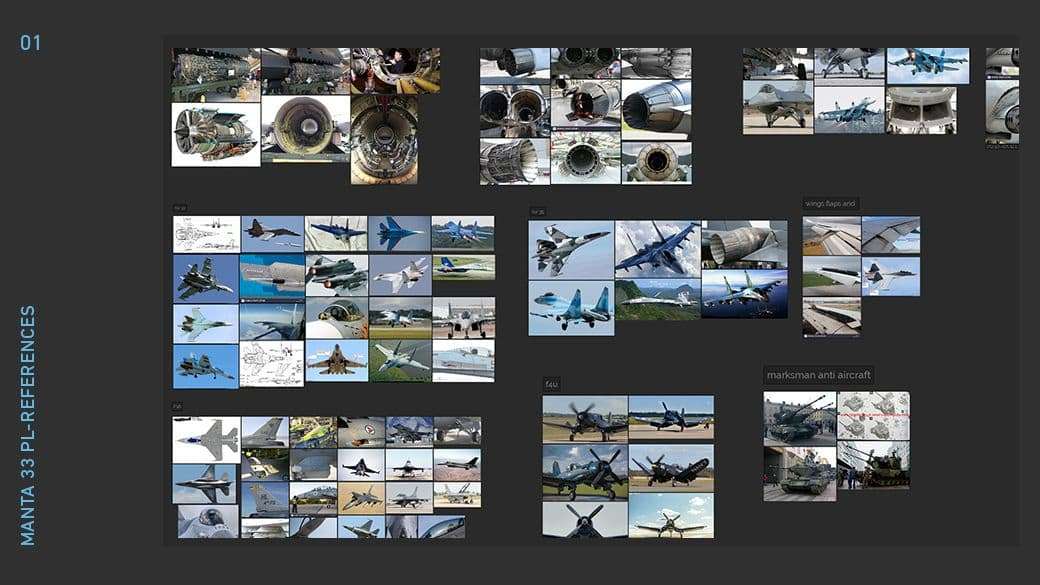
As hard-surface modellers, we need to accurately replicate an existing design. References usually represent real objects like aeroplanes or fantasy ones like unexplored planets.
Showing personal concept art is not valuable if you are applying for a modeller position. But being able to conceive or to apply design principles is a valuable skill.
A lot of concepts have undefined areas that need interpretation. You should choose concepts that will challenge you to improve your skills. Unfortunately choosing the perfect one can be tricky and time-consuming. It is easy to get lost scrolling a lot of amazing artwork on ArtStation and Conceptships.
Here are a few tips to help you choose:
Pick a concept that has a few colours, it is easier to understand how the main shapes relate to each other;
Avoid choosing a concept with the same design language of your previous works. Try to vary;
Verify if someone has already modelled it;
Avoid unfinished sketches;
See if there are more images on the web and a description/story.
After you chose a concept, it is time to study it's feature and design language.Spending a proper amount of time to understand shapes and forms is very important. To speed up that process, I paint over the concept with different colours and low opacity.
I break the concept in 3 main groups: primary, secondary and tertiary components. Always look for mechanical joints or movable parts. You need to figure out how to make them movable and functional.
One of the differences between a model ready for production and a 3D concept is the functionality of the former.
Every object is built with a purpose. Air and Terrain vehicles, for examples, have different characteristics. In production, we always ground our models in reality. Before starting to model, I collect a lot of real-world references.
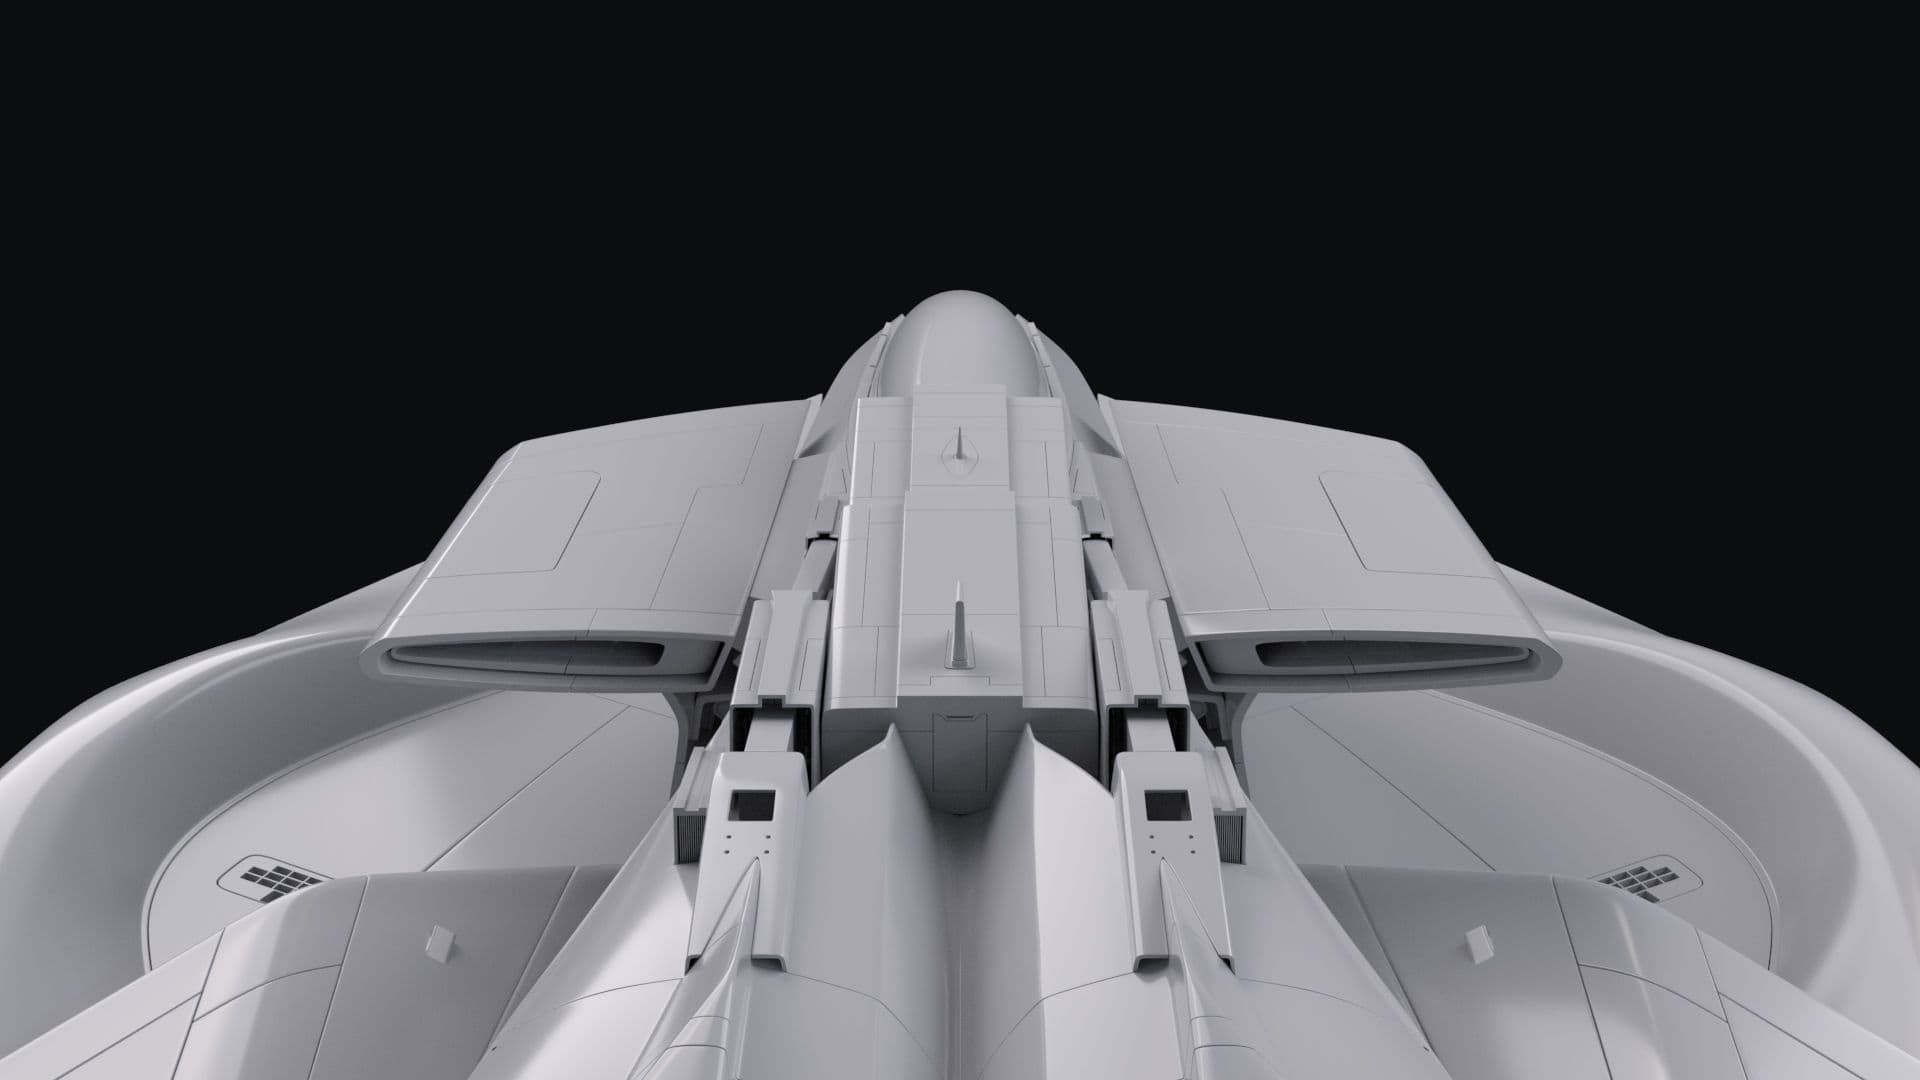
Although the Manta 33 is a sci-fi spaceship, I searched images of jets, wings parts, fuselages and more. One of the most important things to learn is how mechanical parts connect and work together. I tried to learn as much as I can about flaps, slats and other mechanical parts designed for air vehicles.
Bringing functionality to a concept, without changing its aesthetics and design is a real challenge.
Hero, mid-ground and background assets
Before starting to model there are a few things to consider:
Distance from the camera
Visible angles
SubD/Poly
Surrounded by other assets or CG elements
FX
Be efficient and smart to manage deadlines. It is not useful to spend a lot of time adding high-frequency details if you are working on a background asset. In production, modellers make LOD also for hero assets to reduce render times.
As you progress you will know how to approach different types of assets. If you are working on a portfolio piece it is easier to plan the production process, as you are in control of all aspects of production. In the case of Manta 33, I planned to model a hero asset visible from all angles.
Production
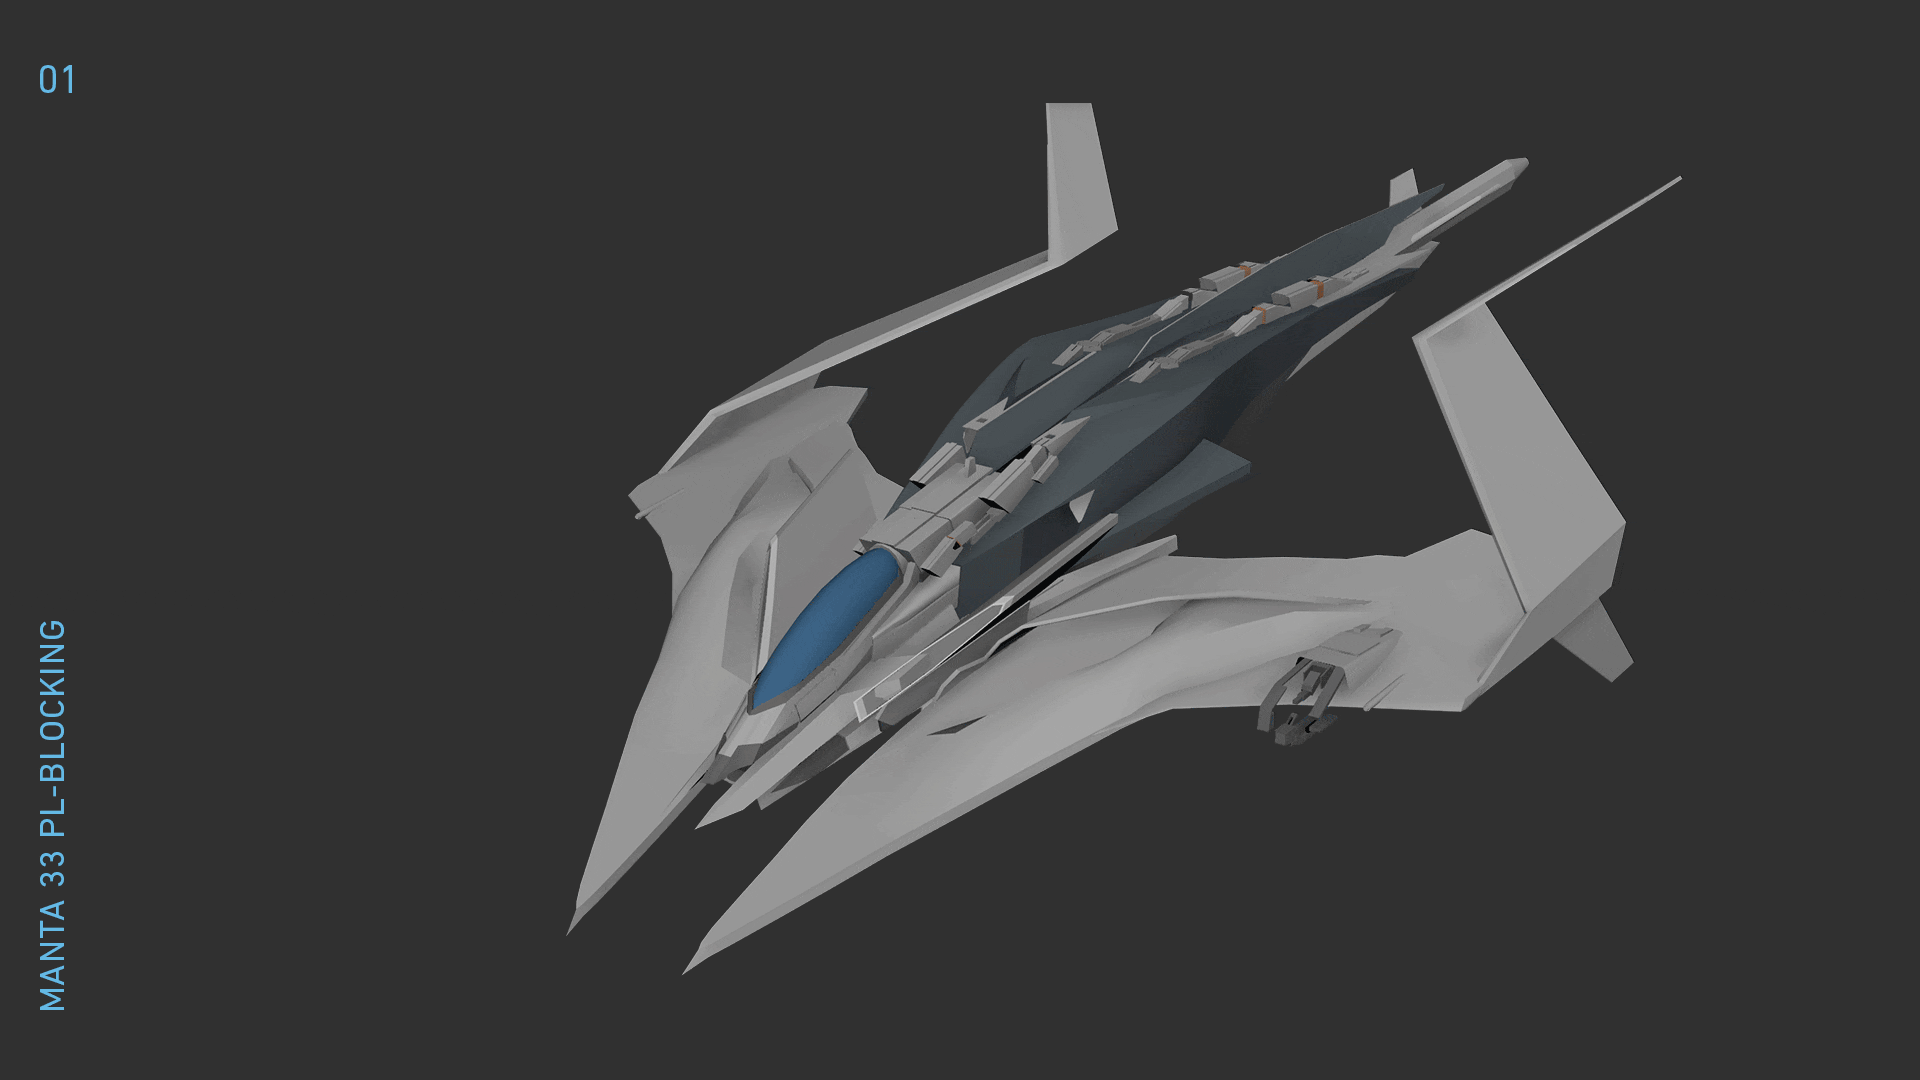
Blocking & refining
Blocking is one of the most difficult and time-consuming stages of modelling. A modeller should be able to create a block out with the right proportion and feel of the original concept. Analysing concepts and references to match proportions takes time and practice.
To improve you need the right combination of exercise, motivation and discipline. Don't give up if you are not able to model complicated piece at the beginning. Set up attainable goals and you will grow step by step.
Before starting, I set up a project folder, create a new camera, a linked image plane and import a basic human model. Sometimes I also change the project scale according to the concept size.
Don’t rush the blocking stage, what you come up with will be the foundation of the entire project.
Lining up the block out with the concept can be useful to match at 99% the proportions. If you chose a 3D concept this part is easier, but If it was reshaped during the painting process, aligning it can be tricky. Try to not mess with the focal length and to match at least one side of it. The majority of concepts don’t have a perfect perspective.
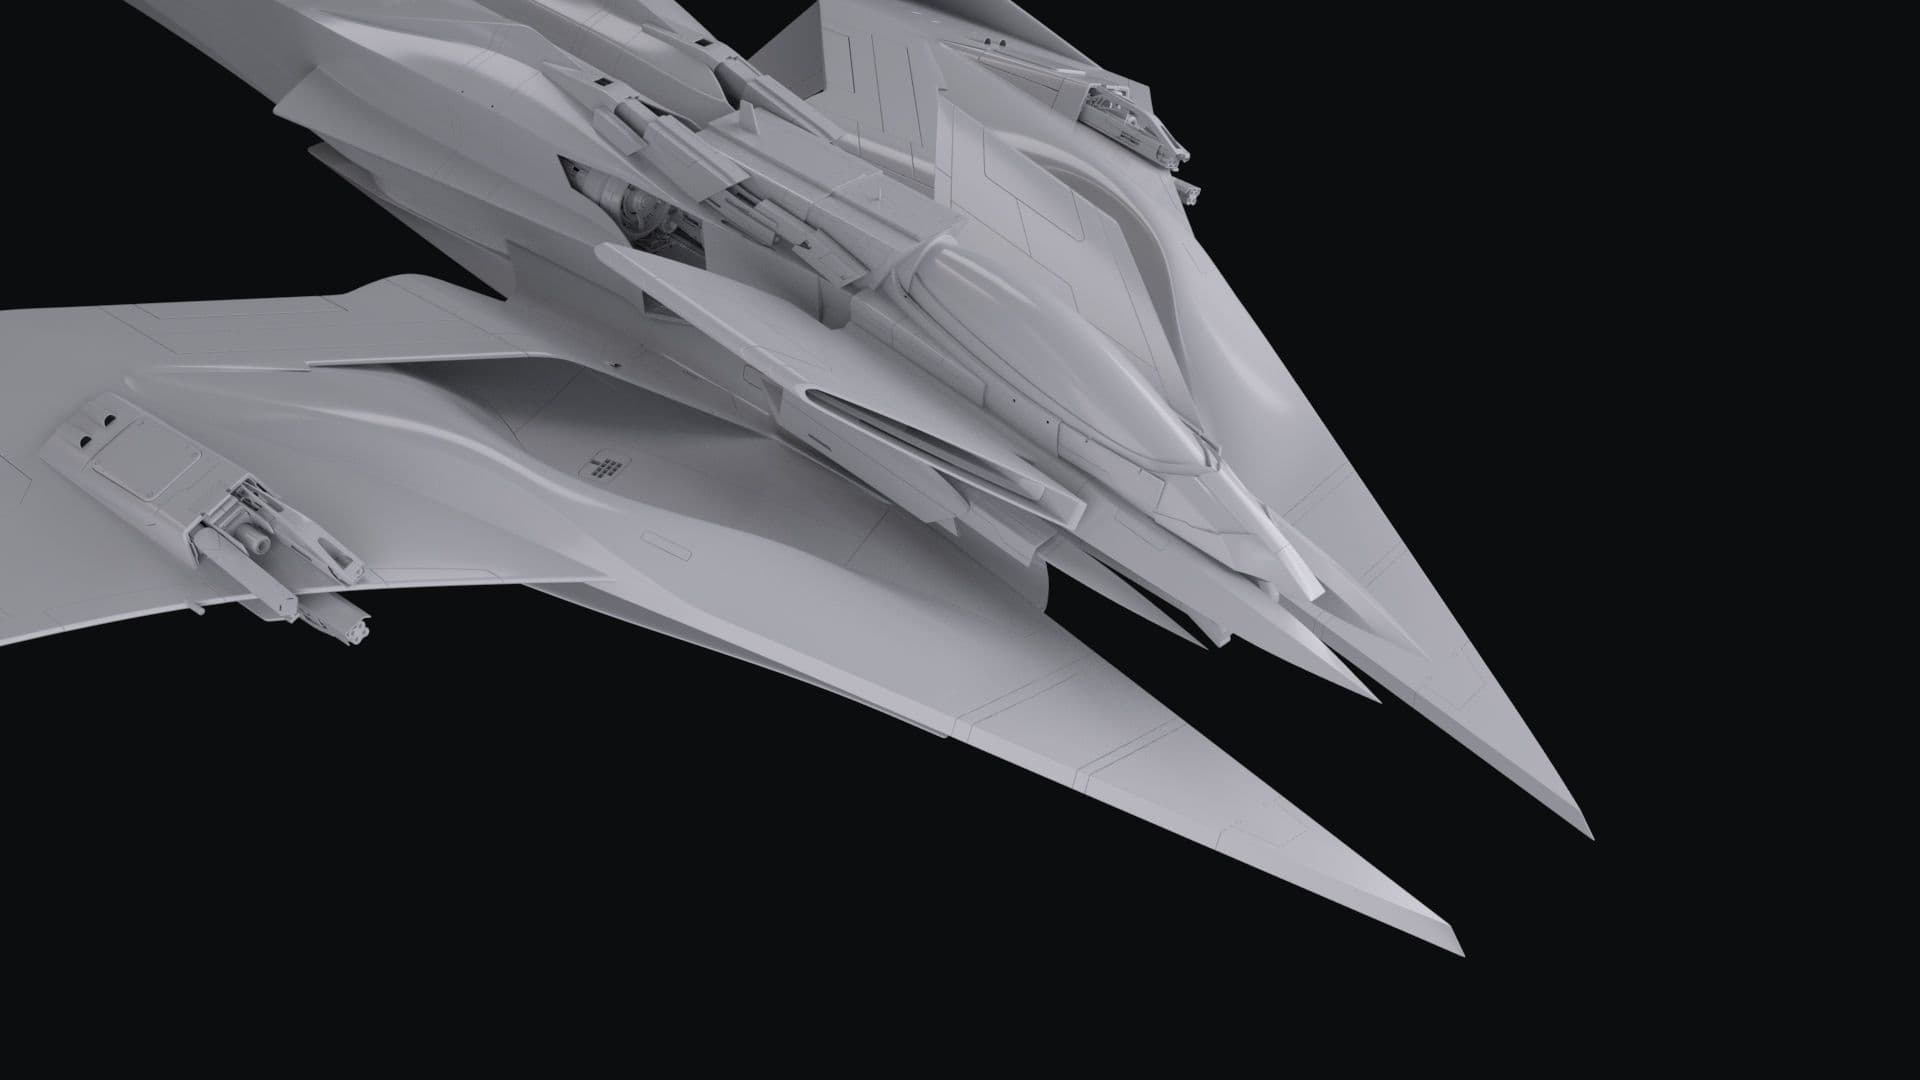
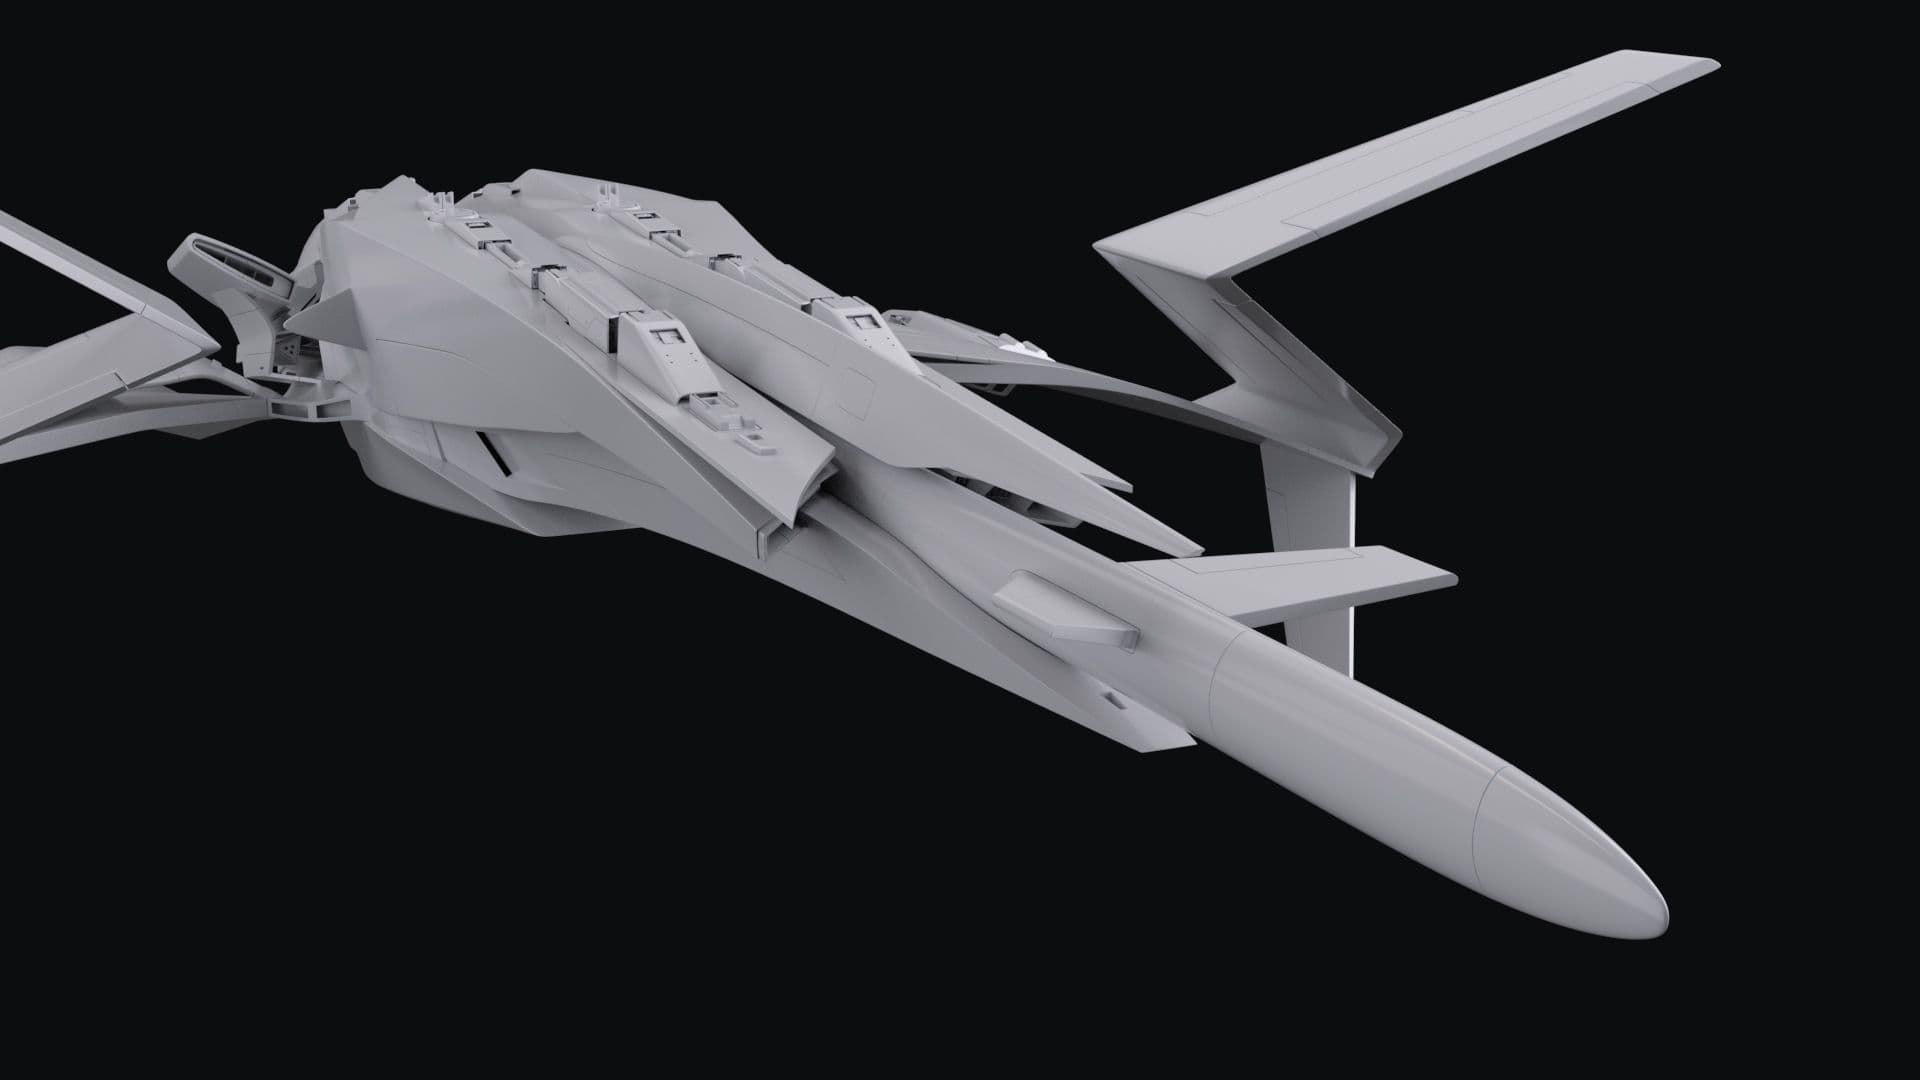
I usually break the blocking stage in various refinements steps. Getting the main shapes in place at first is very important. You can block pretty much everything with basic primitives. Don’t worry too much if meshes co-penetrate, remember to use fewer polygons as possible.
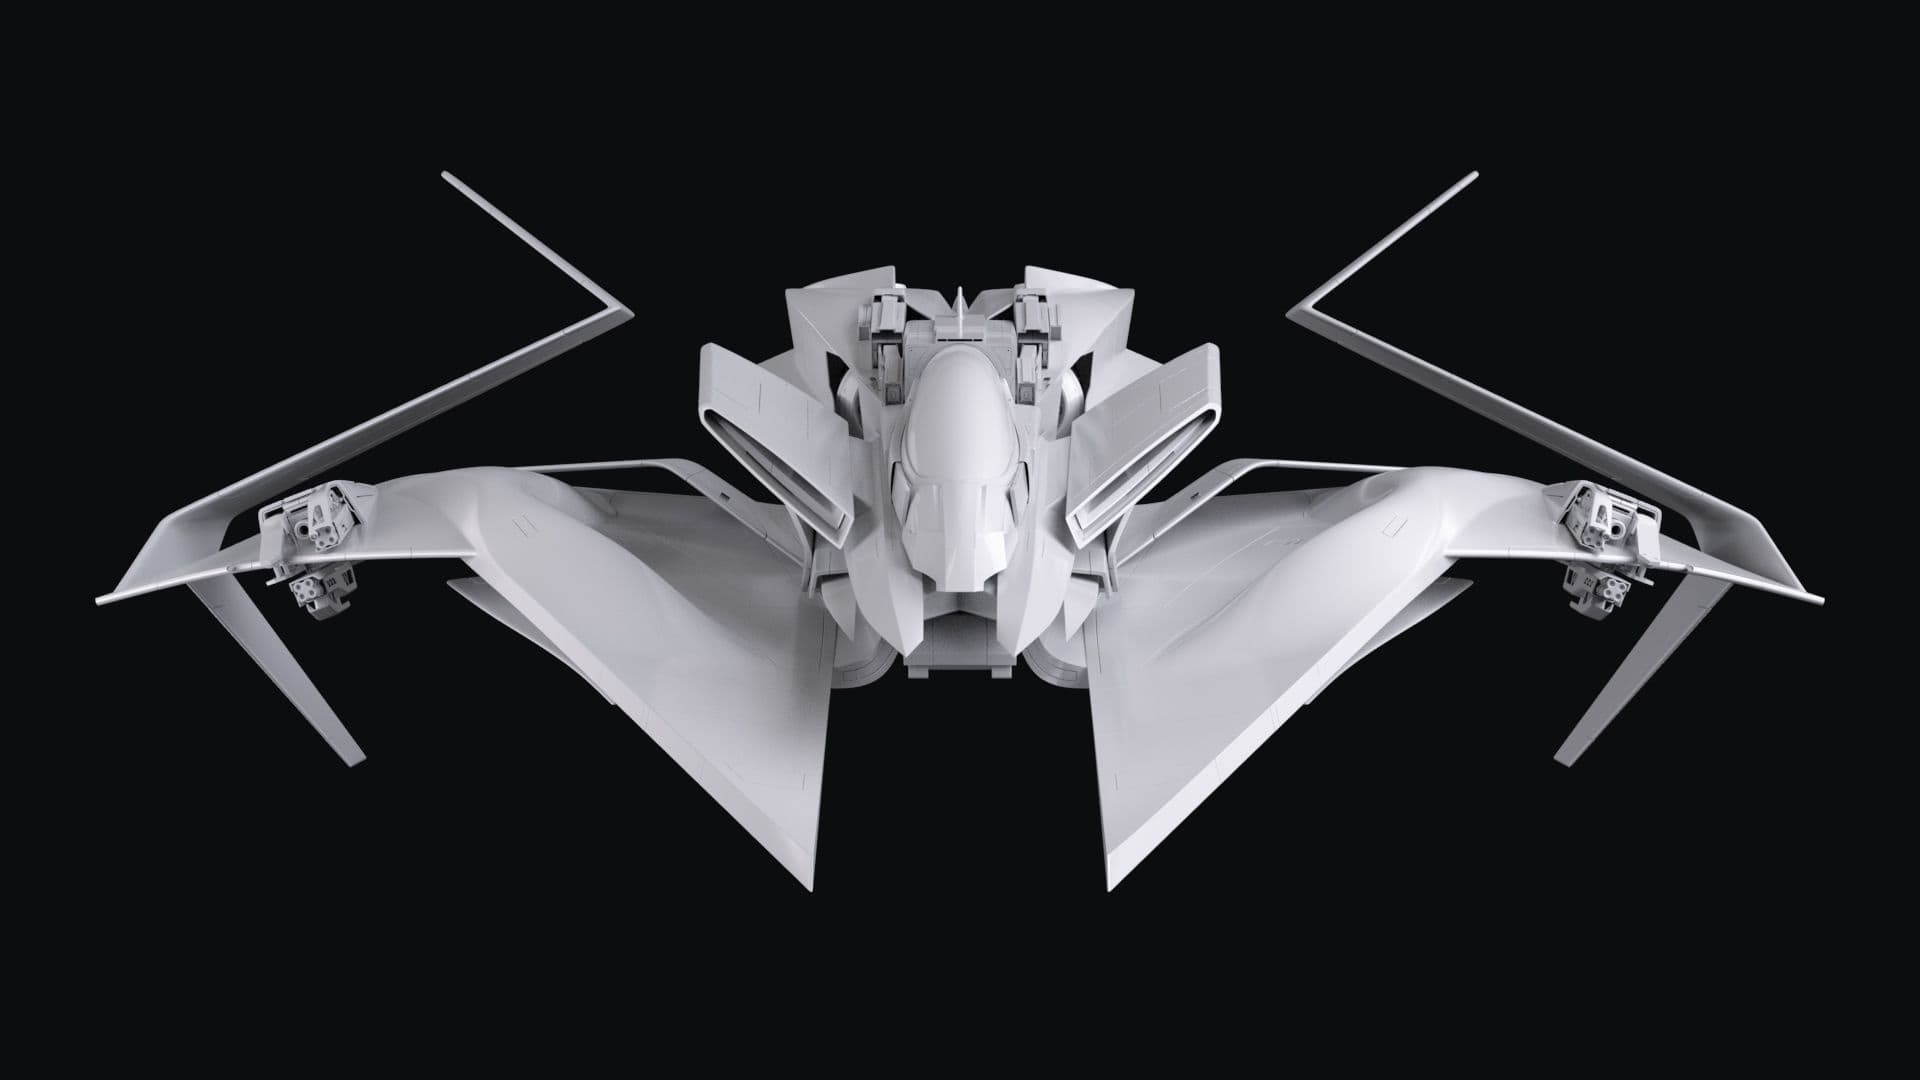
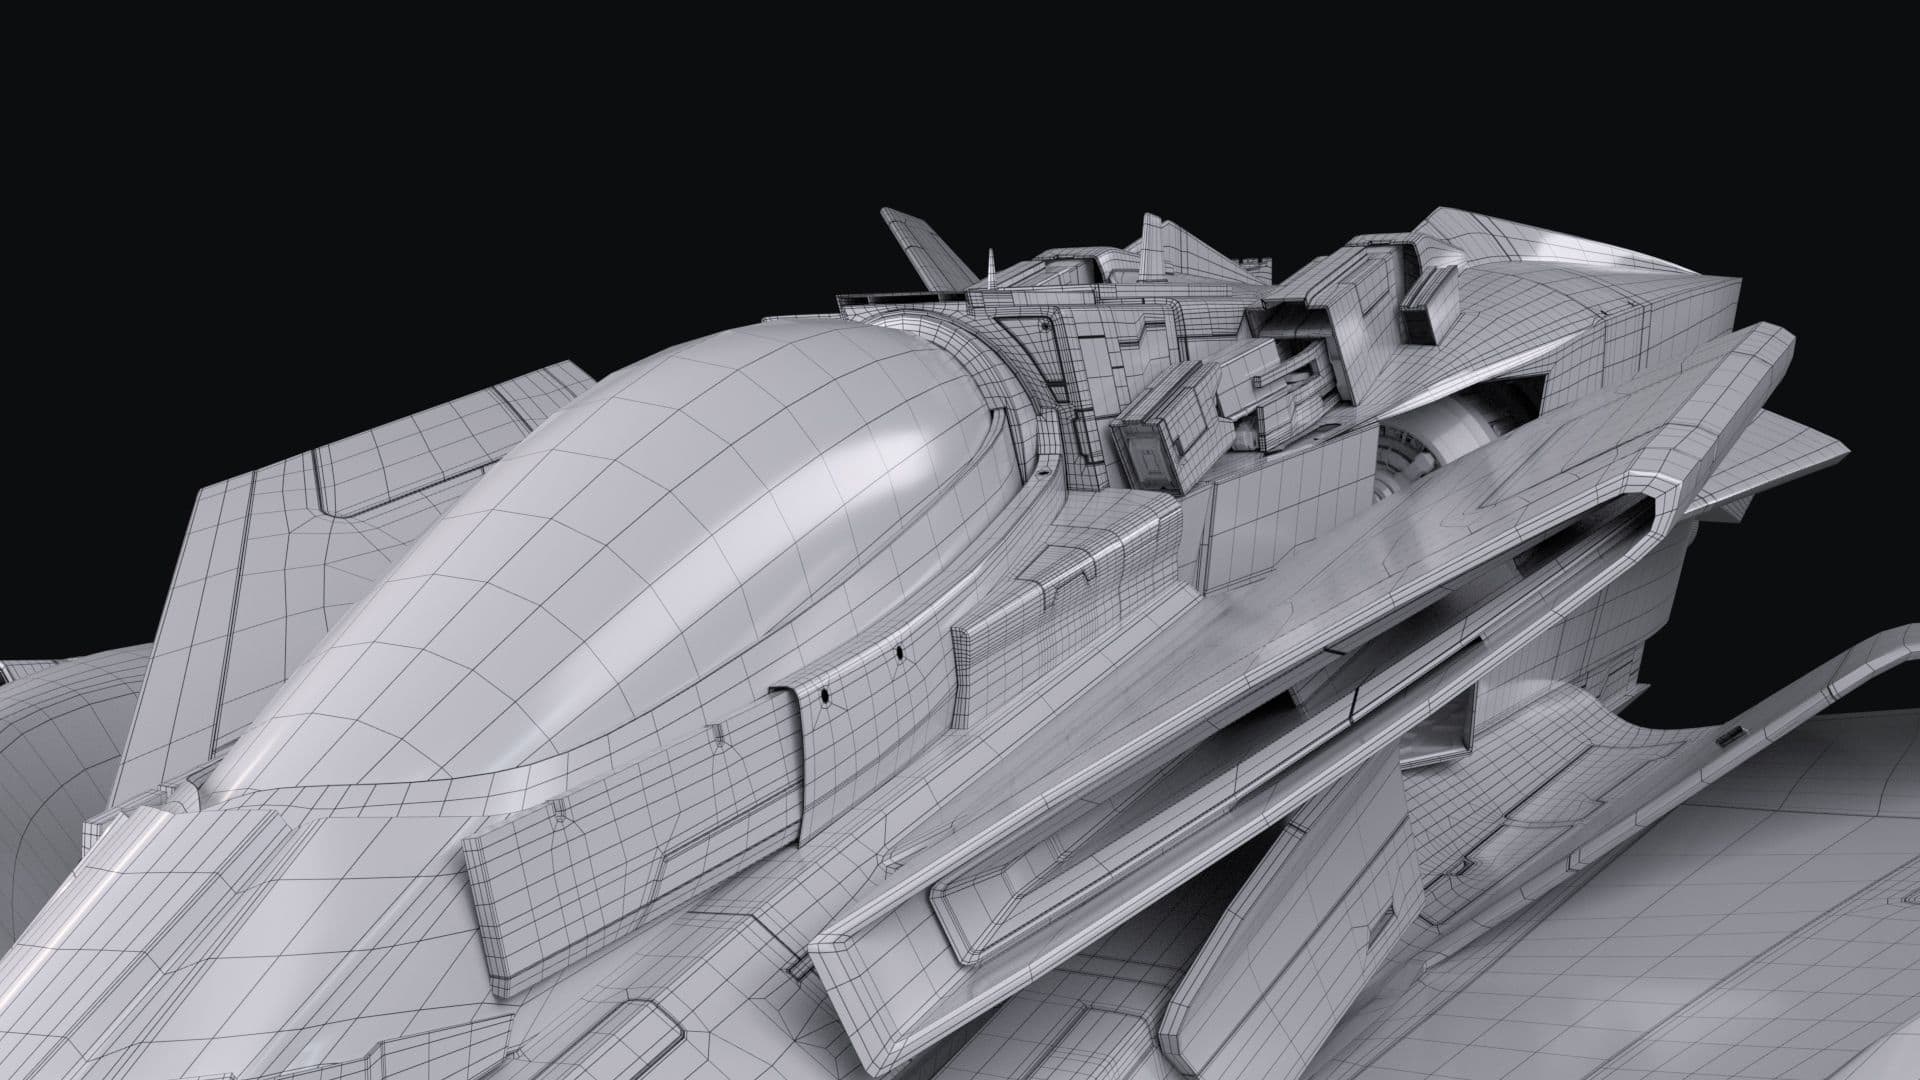
To block the cockpit, the body and the wings of the Manta 33 I used one sphere and 4 cubes. I didn’t put too much emphasis on secondary and tertiary shapes.
While you are progressing it is important to understand how the shapes relate to each other. You should go back and forth between the concept camera and the perspective views. Check often the silhouette to be sure that is nice and clean.
When the main shapes are in place, you can start refining them at the same level of detail. Don’t focus too much on a specific piece. After a bit of time and tweaking, you can start blocking secondary shapes.
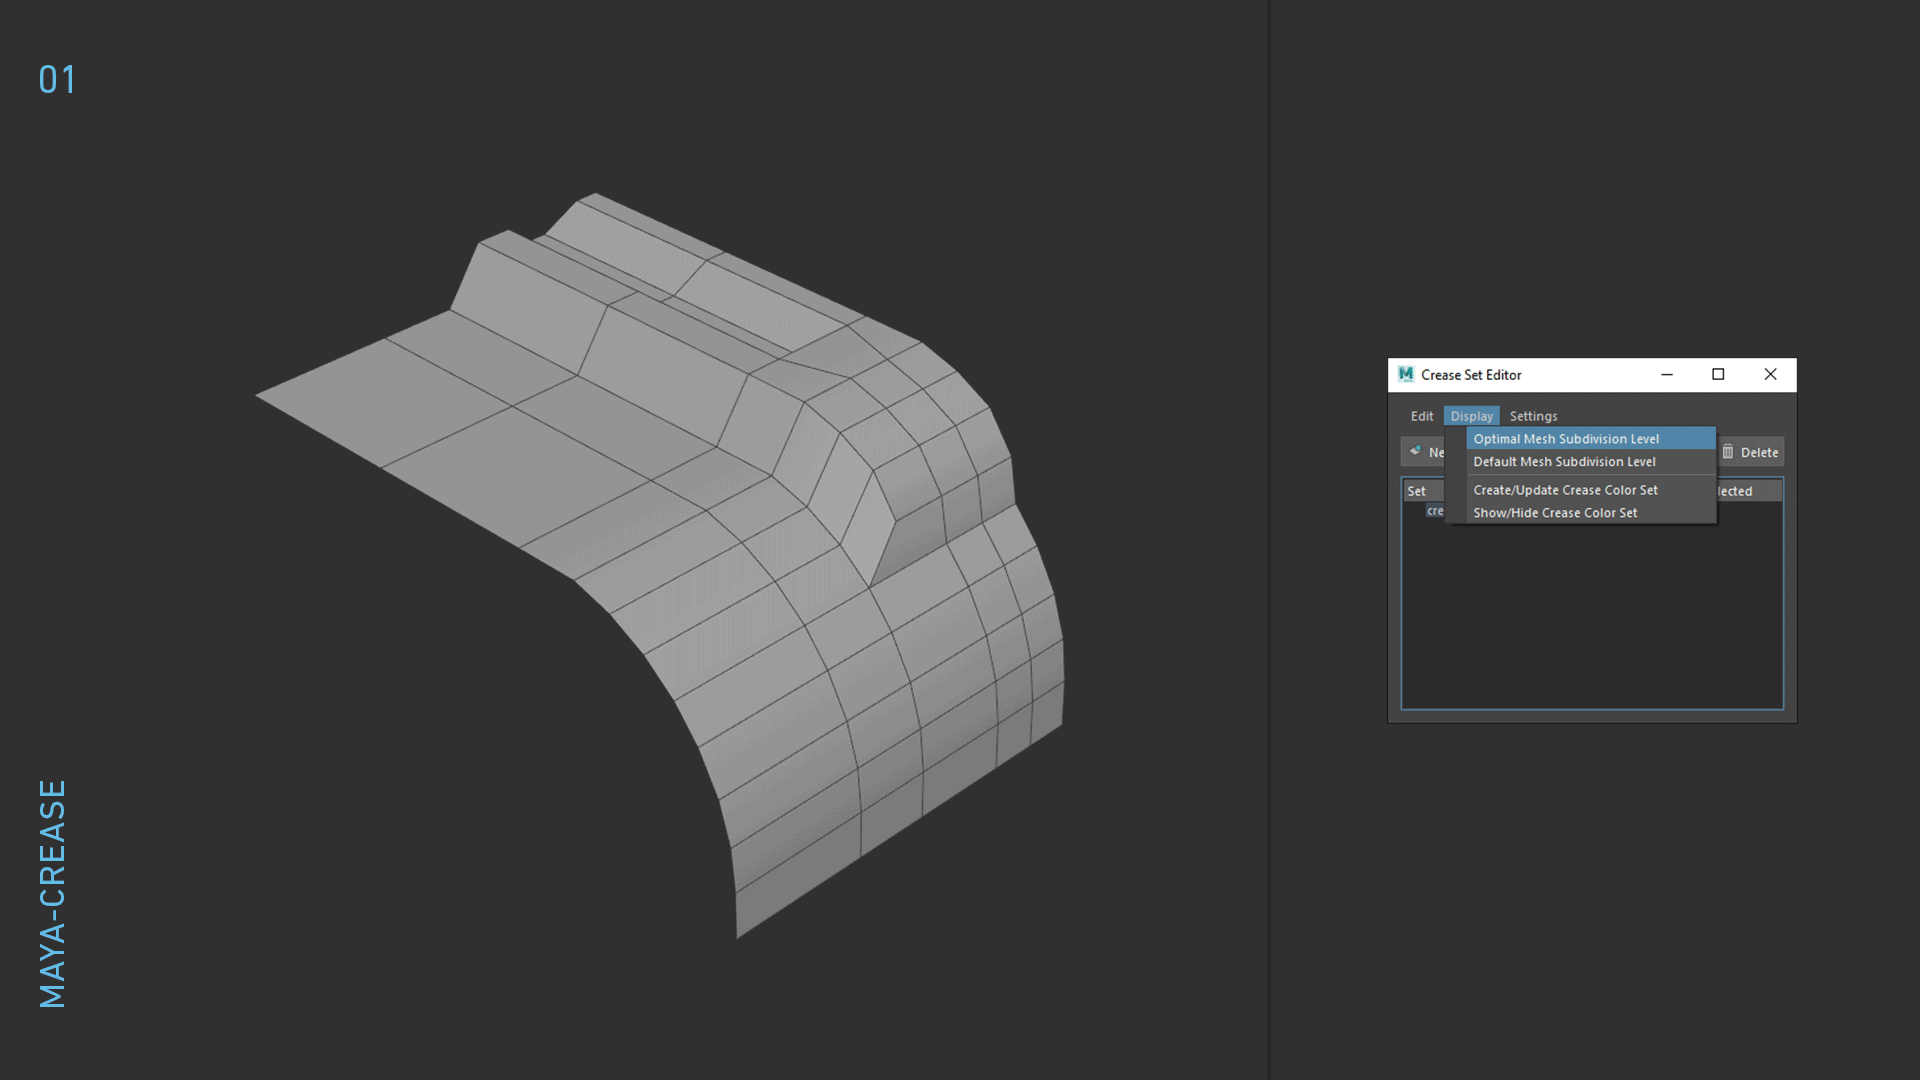
Sometimes, during this stage, I use creases to get a preview of the shapes without adding extra loops. This method can be also used if you need to add more resolution maintaining sharp corners.Creases shouldn't be used on the final model. A hero asset should always be modelled in SubD (triple edging).
Once I am satisfied with the main volumes and the silhouette, I assign materials to the objects. This usually helps to better visualise the overlapping shapes. Take the right amount of time during the blocking stage - don’t rush, what you come up with will be the foundation of the entire project.
Secondary shapes
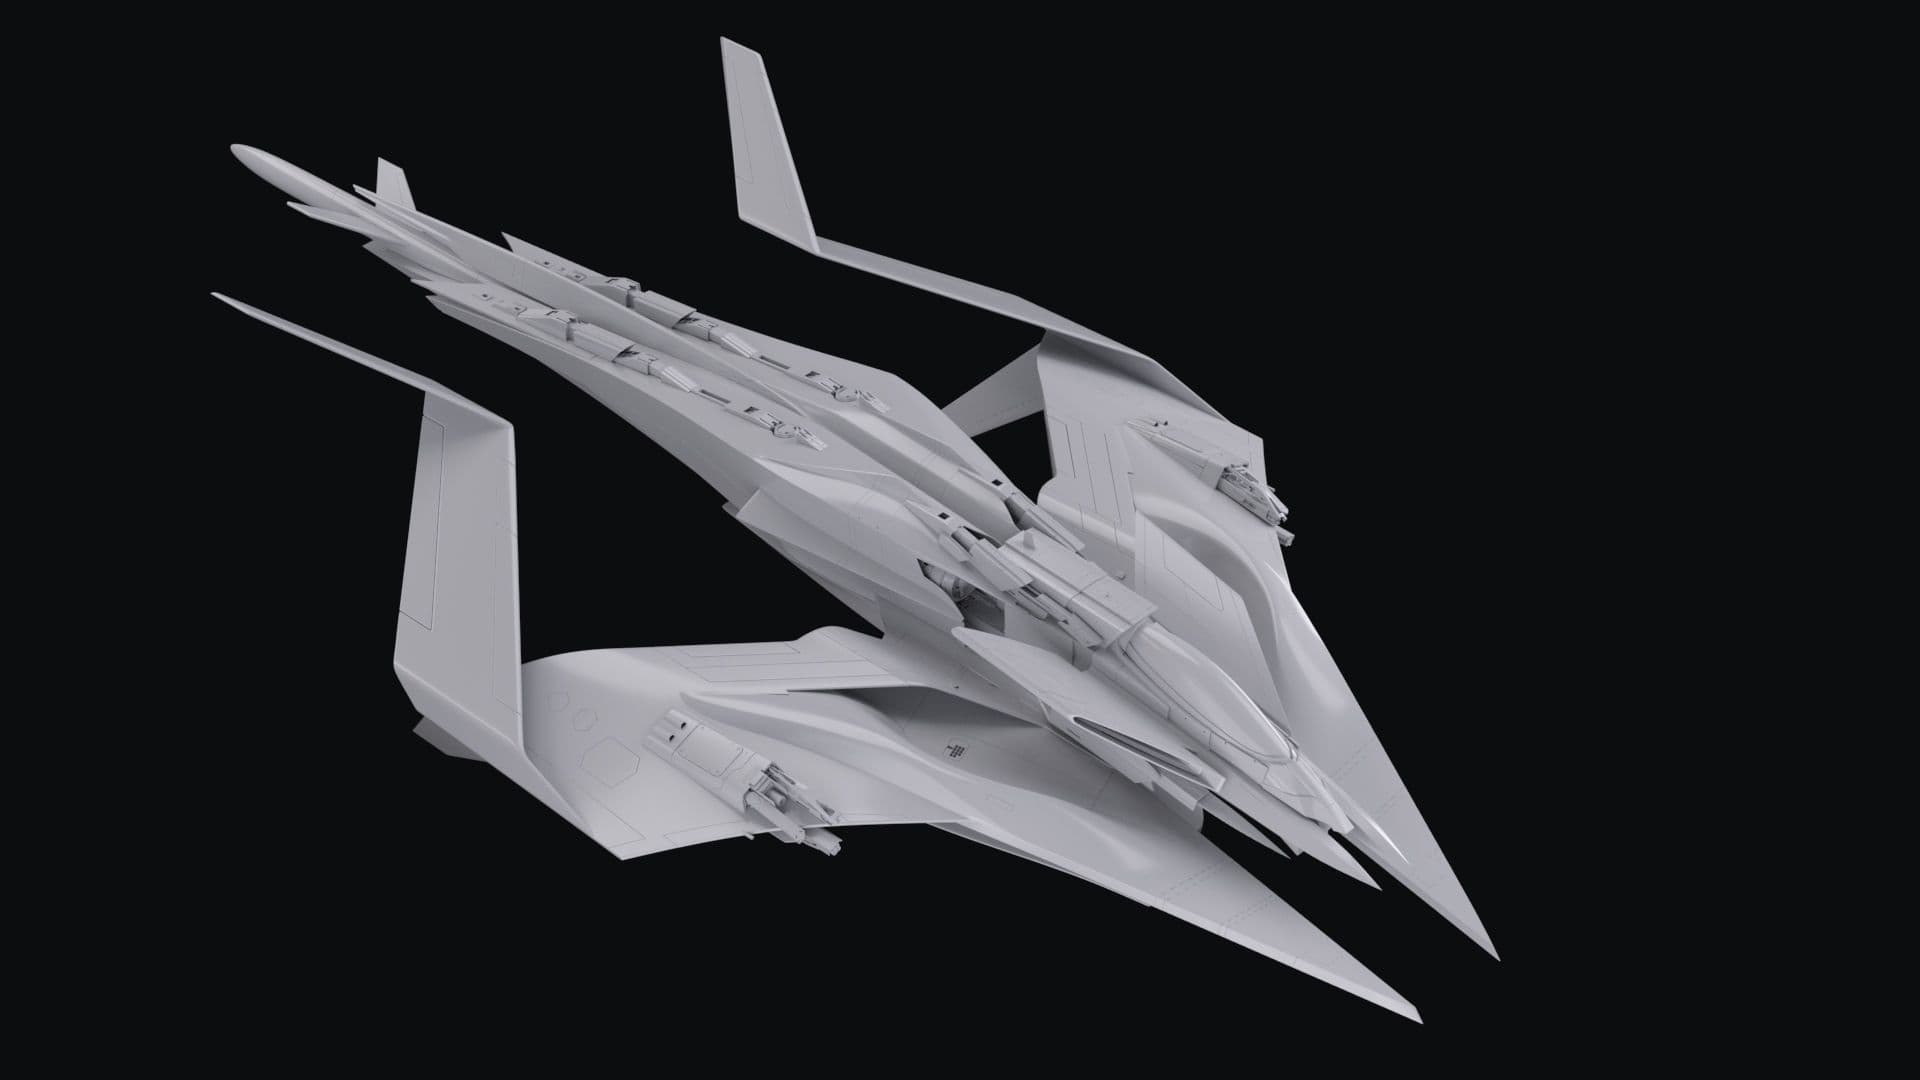
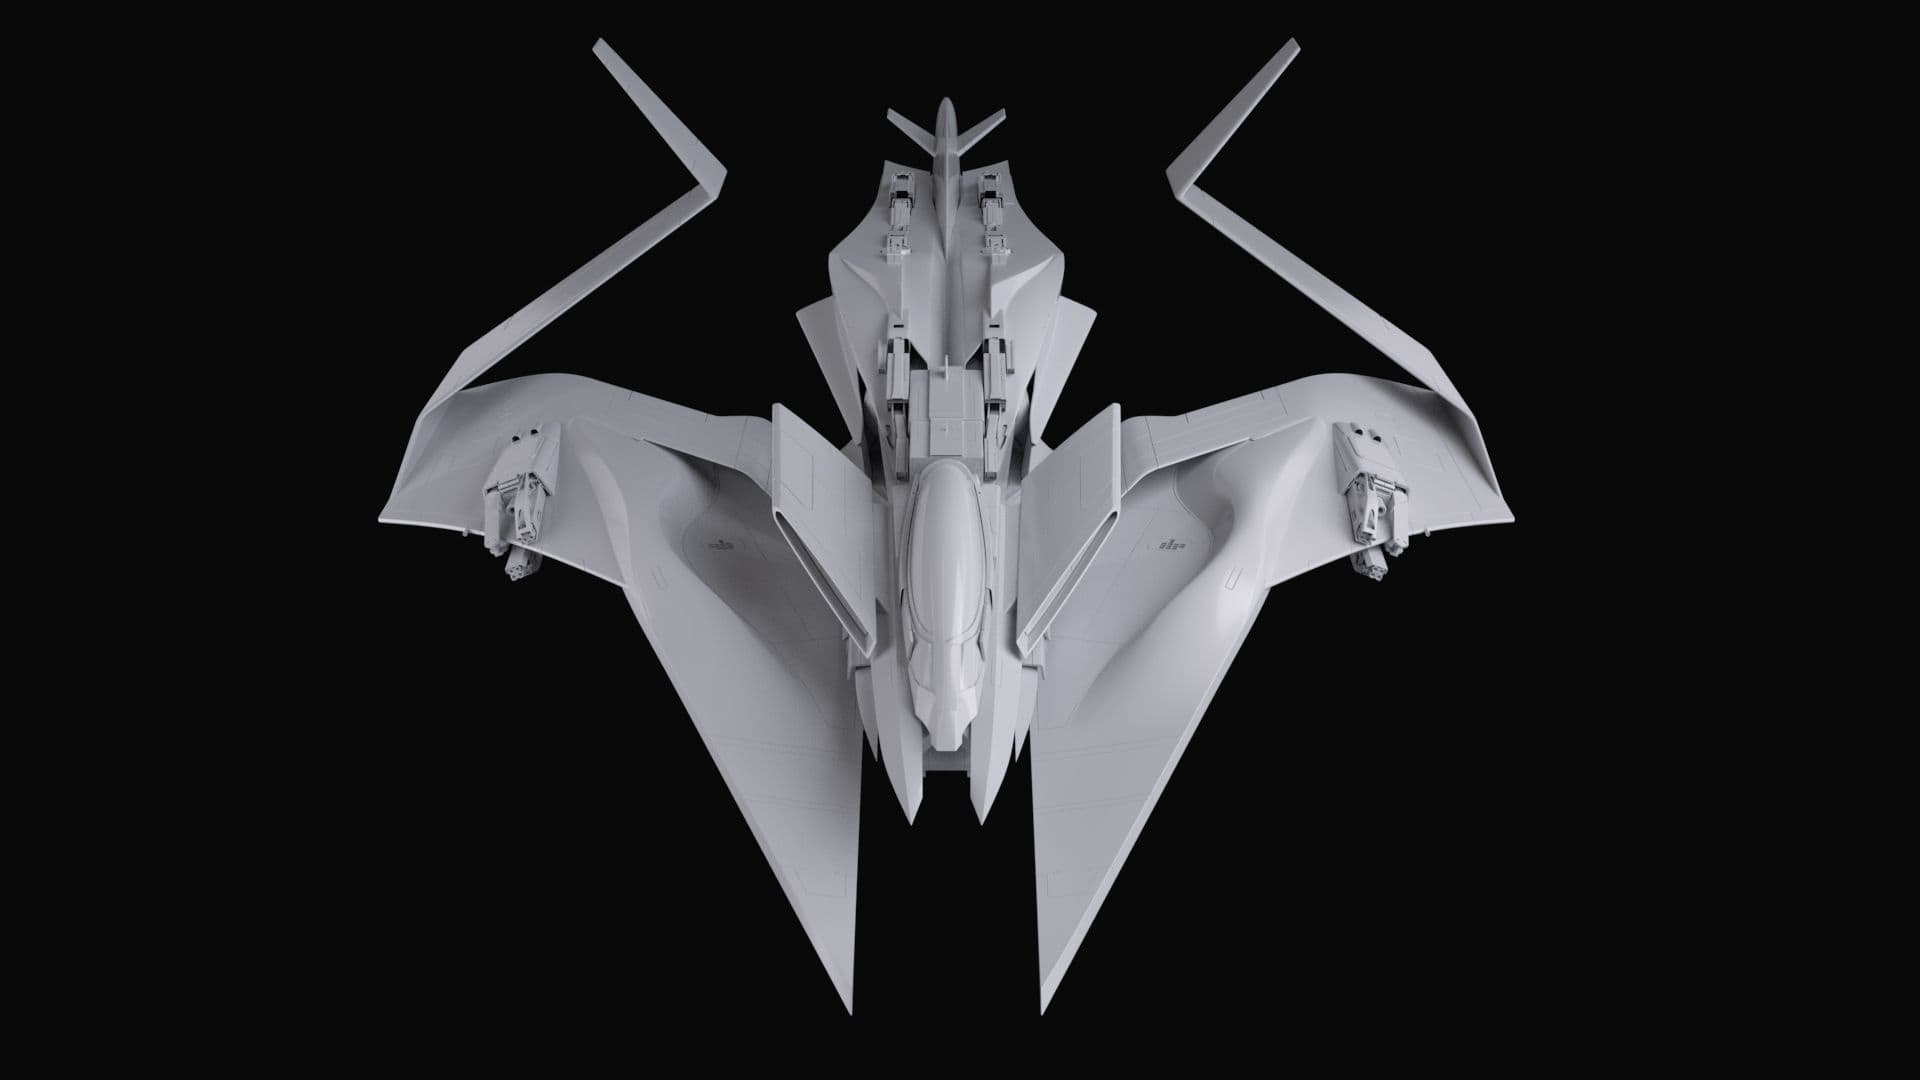
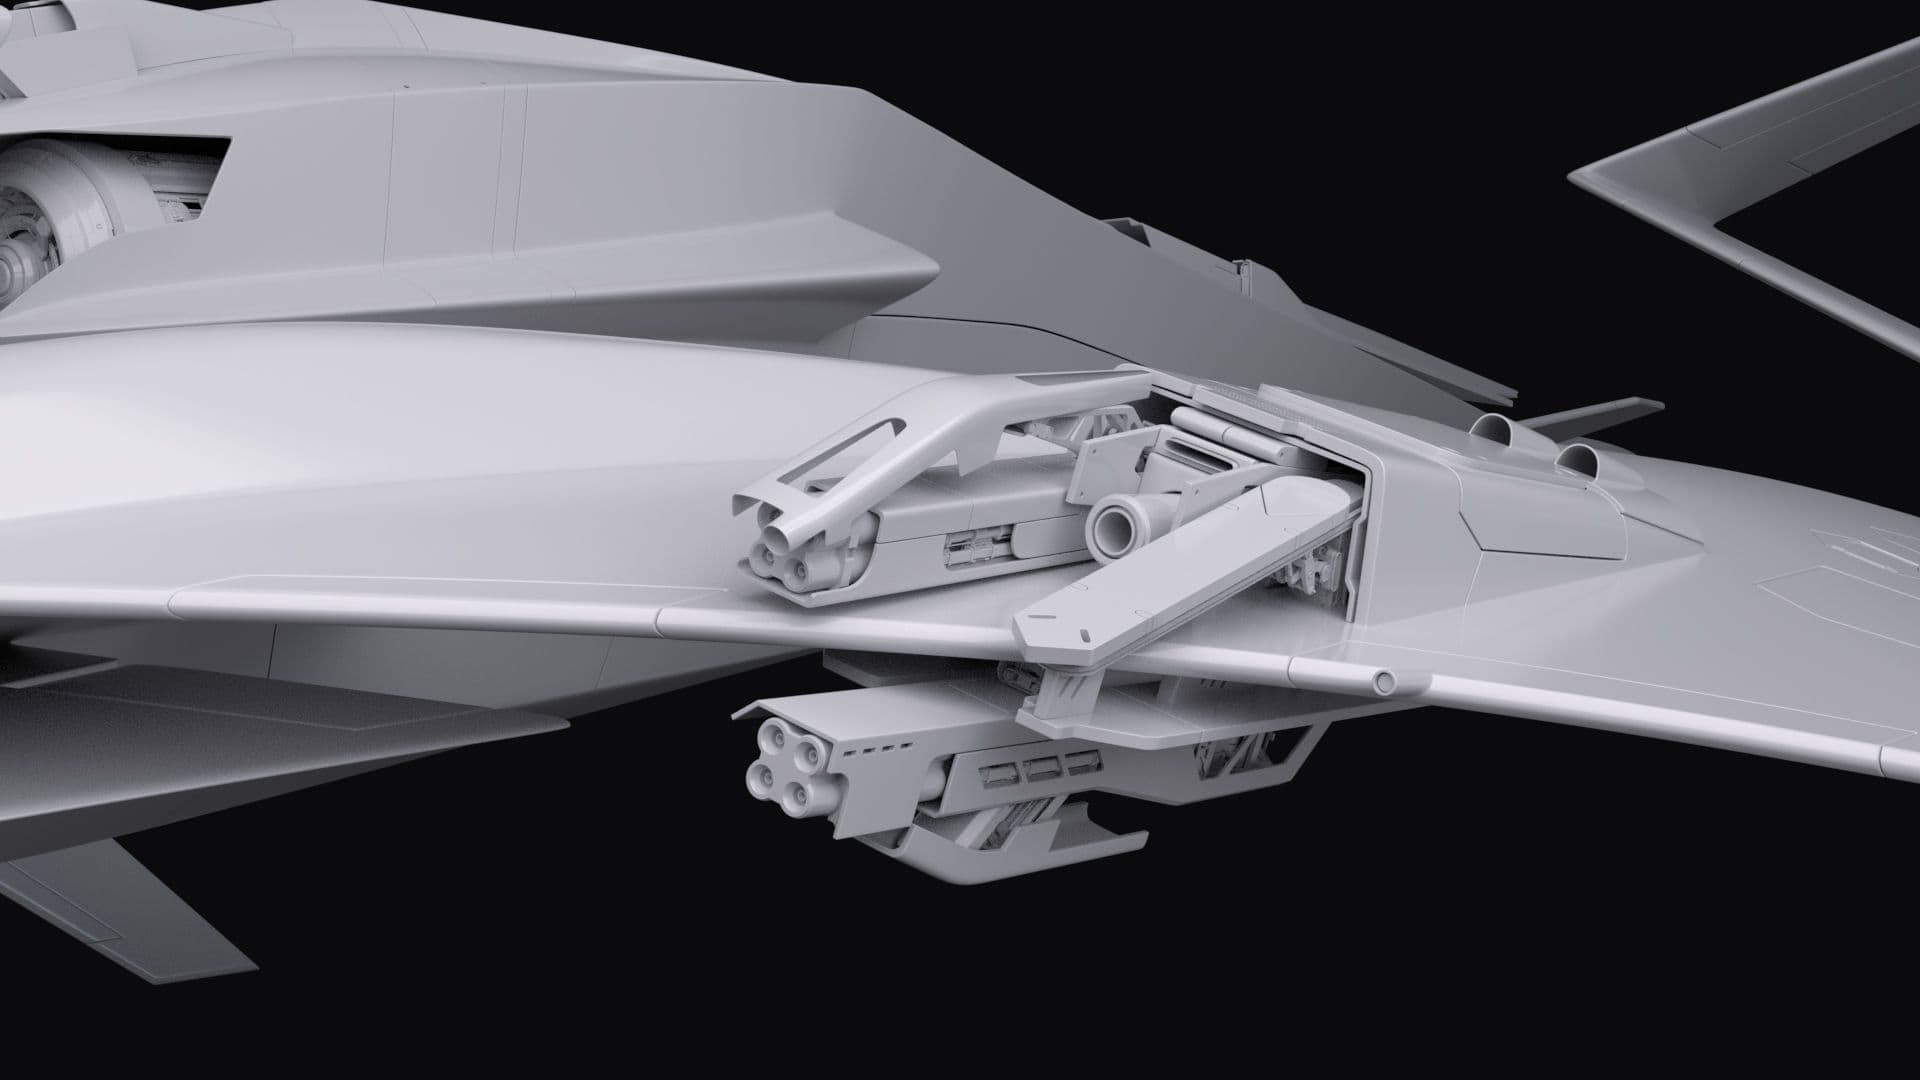
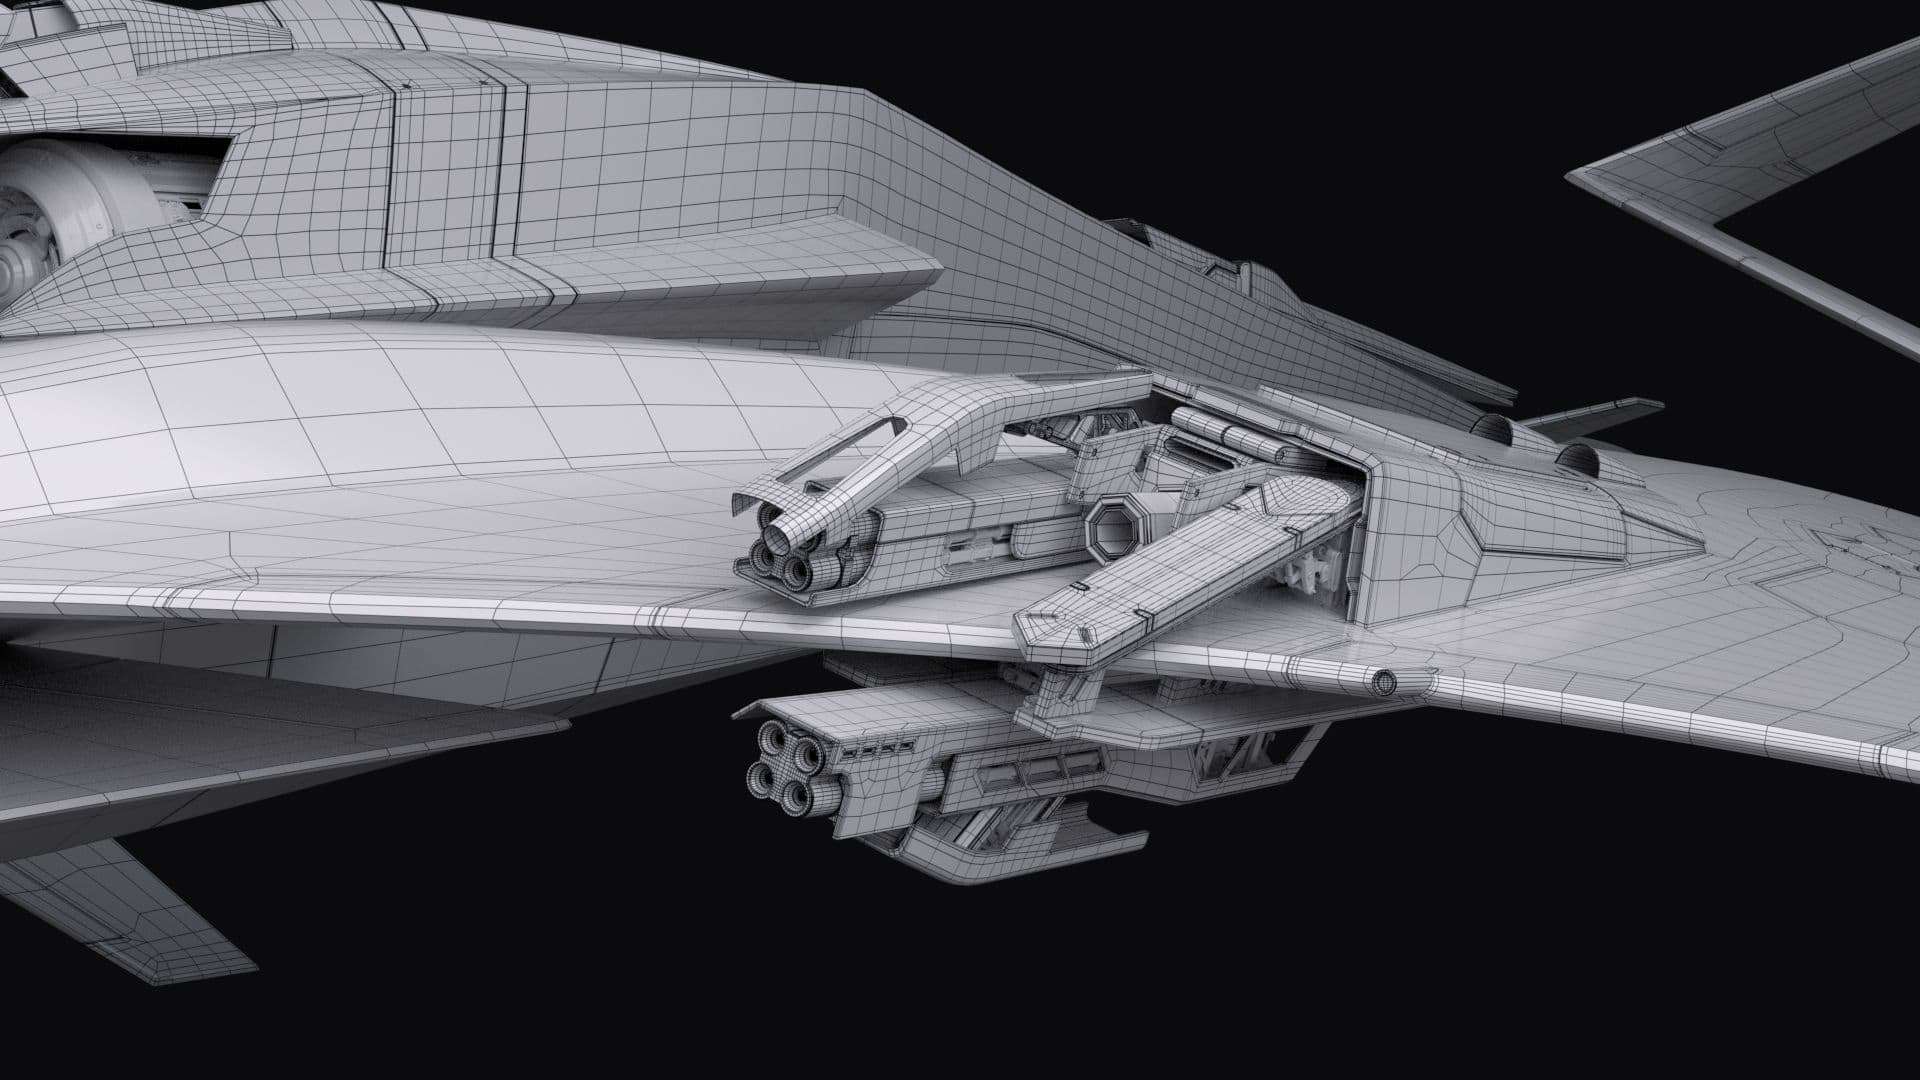
While you are going on, is important to define secondary shapes and to block the tertiary ones. The Manta 33, for example, is made of various components that intersect each other.
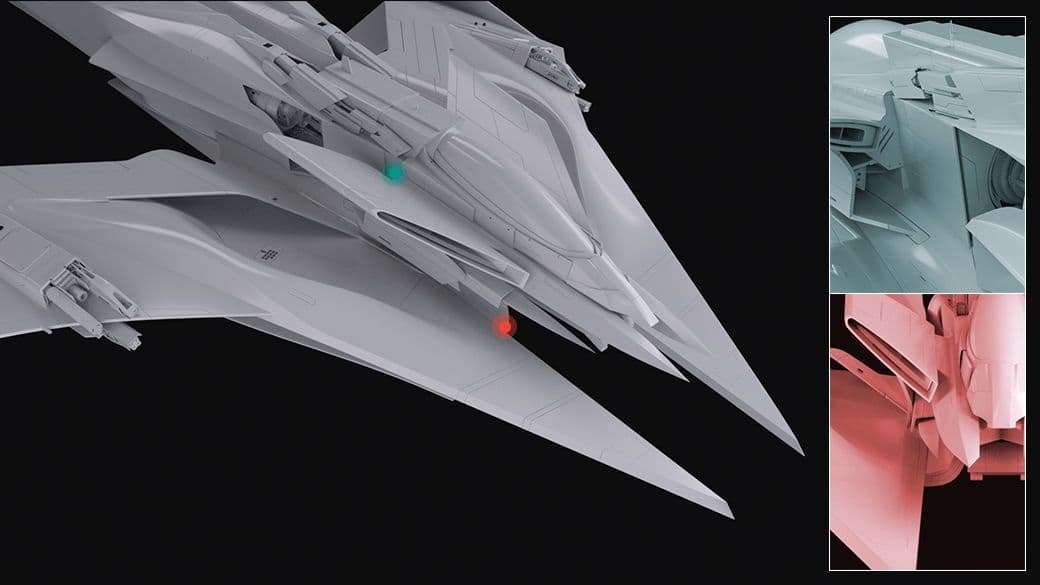
Take a look at the front part: the cockpit is covered by panels and pieces that go throw the main body. After a bit of time, I started another refinement pass from the main cabin to the sonar. I also designed some pieces to connect the cabin and the body, the two wings, the front vent and the bottom part. Those areas were not completely visible in the concept.
I made a lot of changes to find the right balance between design aesthetics and functionality. I always try to look as many references as I can. Spending a bit of time trying more design choices is definitely valuable. By doing that you will be sure to take the model to the desired direction.
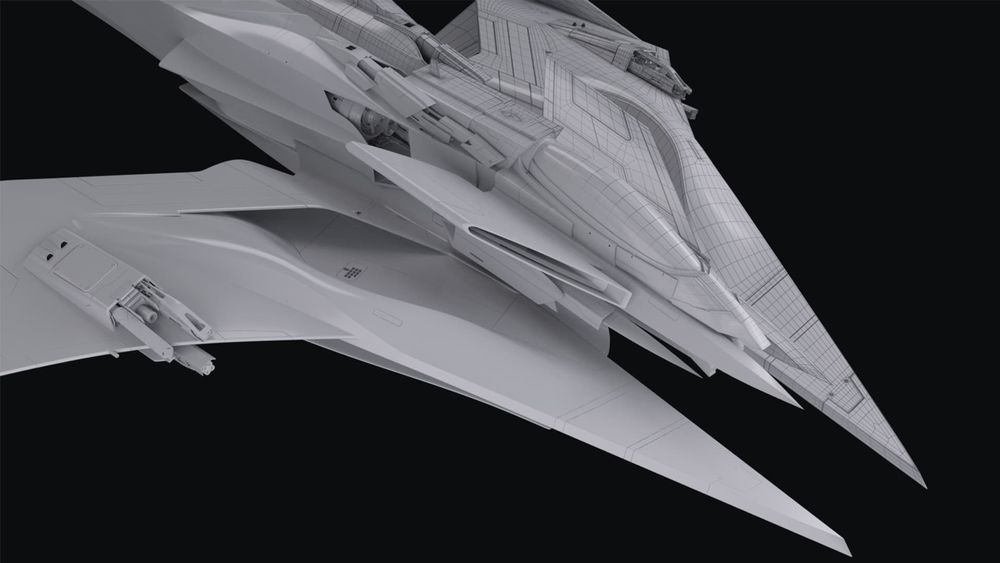
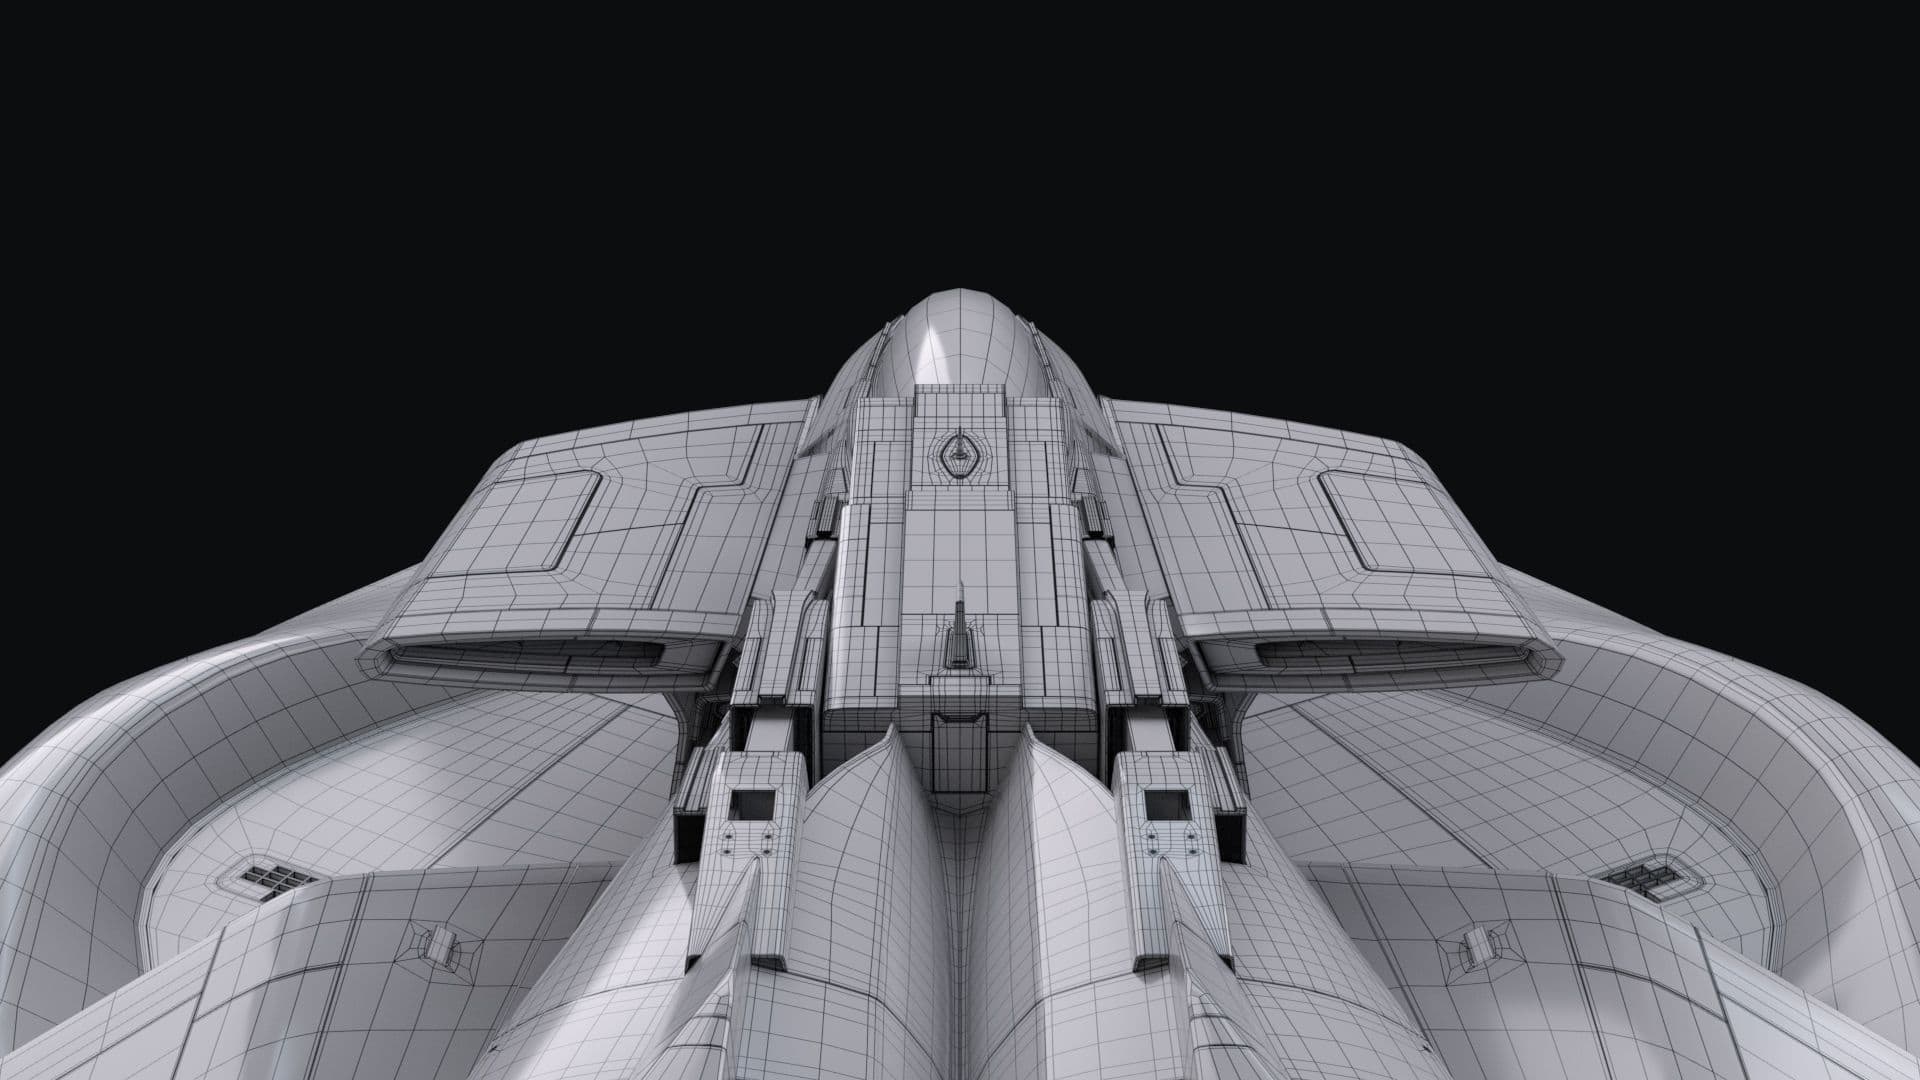
At this stage, I already deleted crease and started to model in SubD - a clean topology will help in the next production stages.
After a few days of work, I compared the previous block out to check the original silhouette. I noticed how the feeling of the spaceship was becoming more and more consistent.
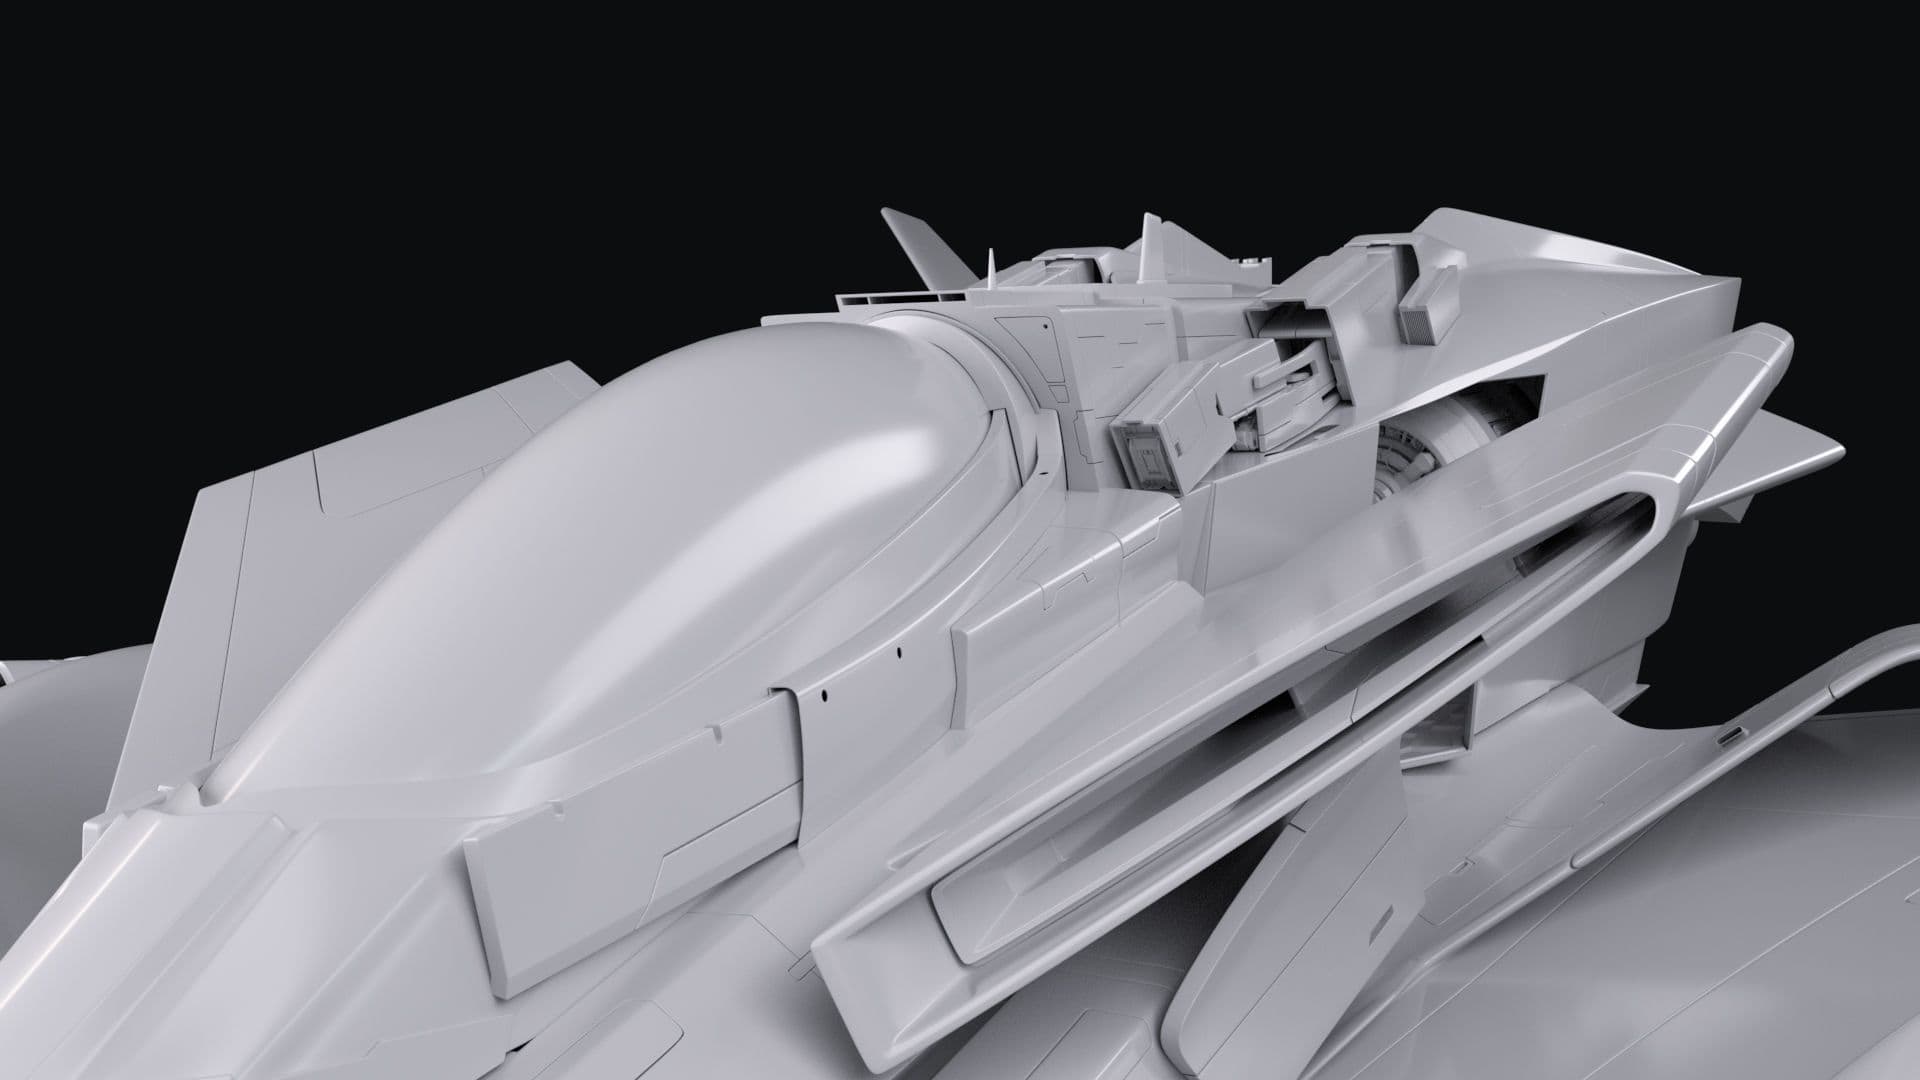
Designing Panels
Before adding details you should be 100% sure that you spend time blocking the main shapes. Check your topology and fix n-gons. Fixing the proportion of a detailed mesh can be hard and time-consuming.
Before designing an undefined part of a concept, I always analyse references. A real aeroplane wing box is made by different parts. In the original wing design, panel lines are vague and there aren’t any slats, air brakes or rudders.
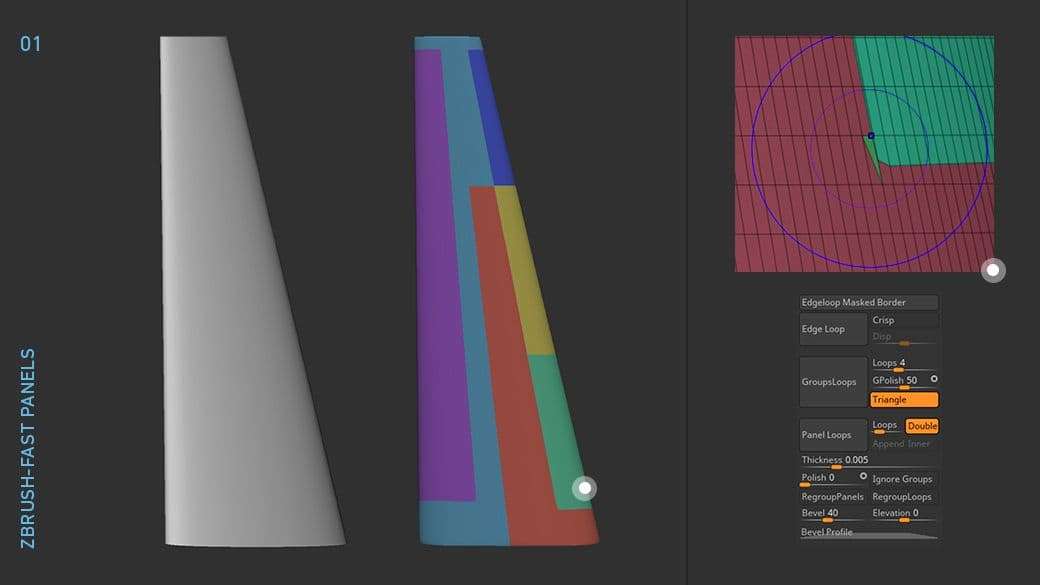
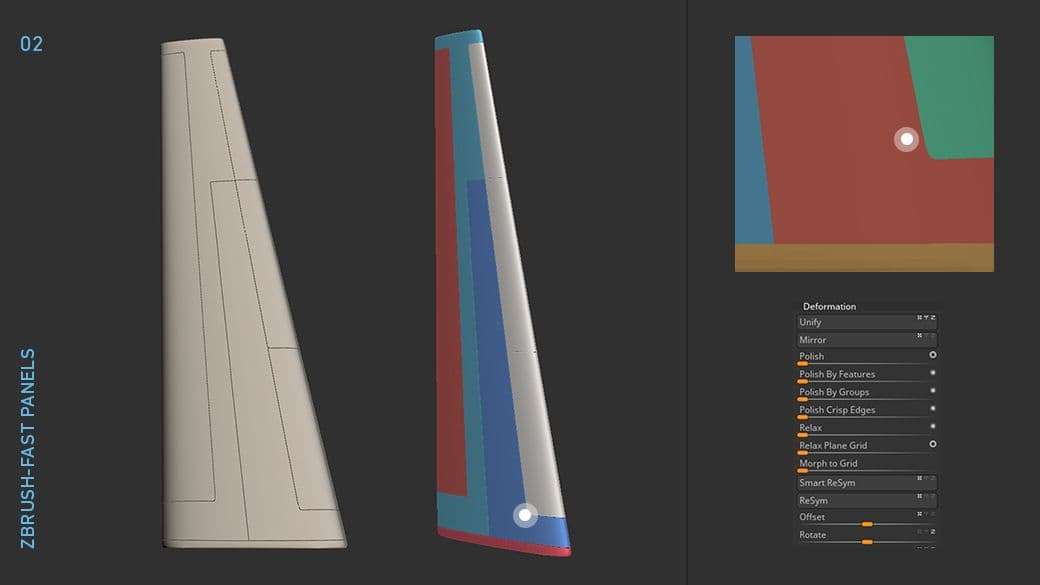
ZBrush can help artists to rapidly sketch and try new ideas. I use the standard brush and the DamStandard with lazy mouse enabled to block out the first set of shapes. Masking is another way to speed up the process and also create organic transitions.
While I am designing, I assign polygroups to polish the shapes with the deformation tools. To quickly create panels, I use the edge loops and the panel Loops features. To get even more control and precision, you can also use live boolean. This tool is one of the most powerful features of Zbrush.
Depending on the level of detail that I need, I always check if there are imperfections in the final mesh. Brushes like hPolish, Trim Dynamic and Smooth are helpful to fix distorted areas. When I am satisfied with the design, I export a decimated version of the mesh.
Sometimes, depending on the complexity of your mesh, it is better to add details on the existing topology.
Topology & Detailing
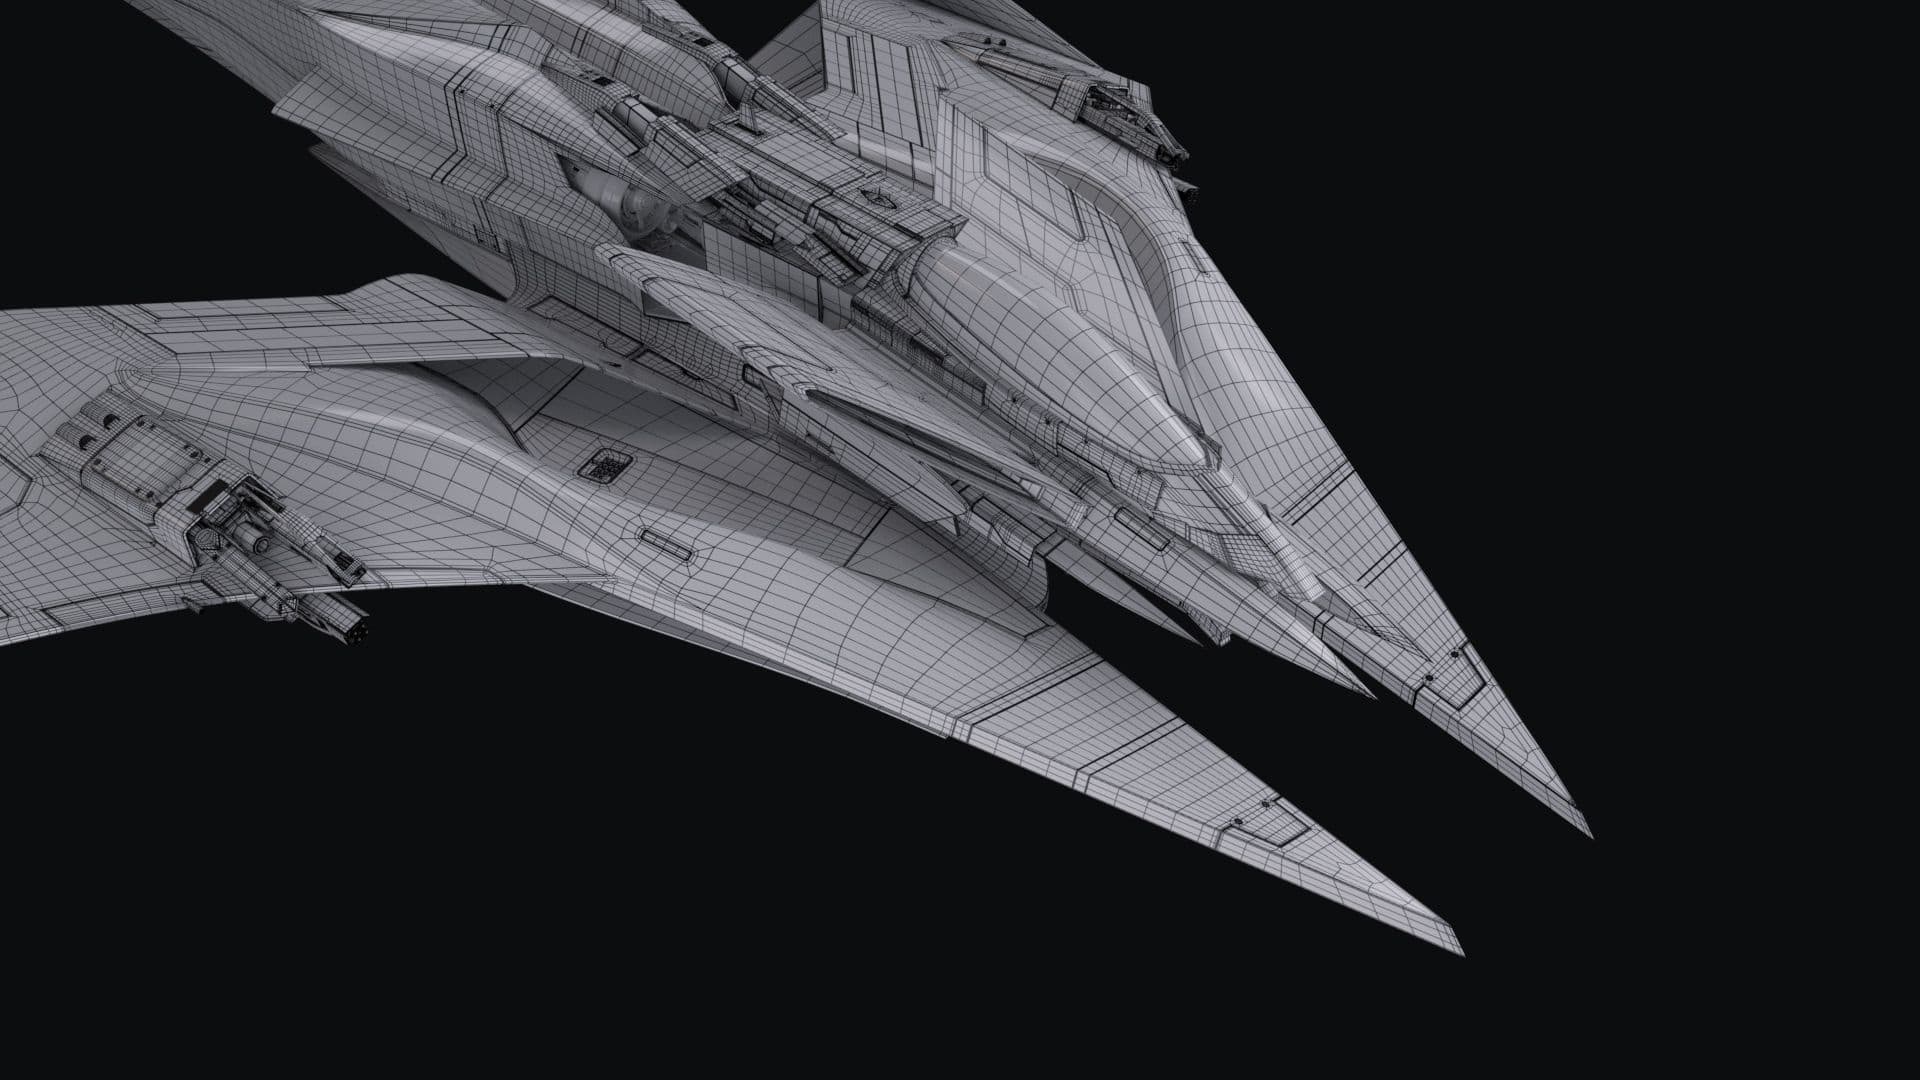
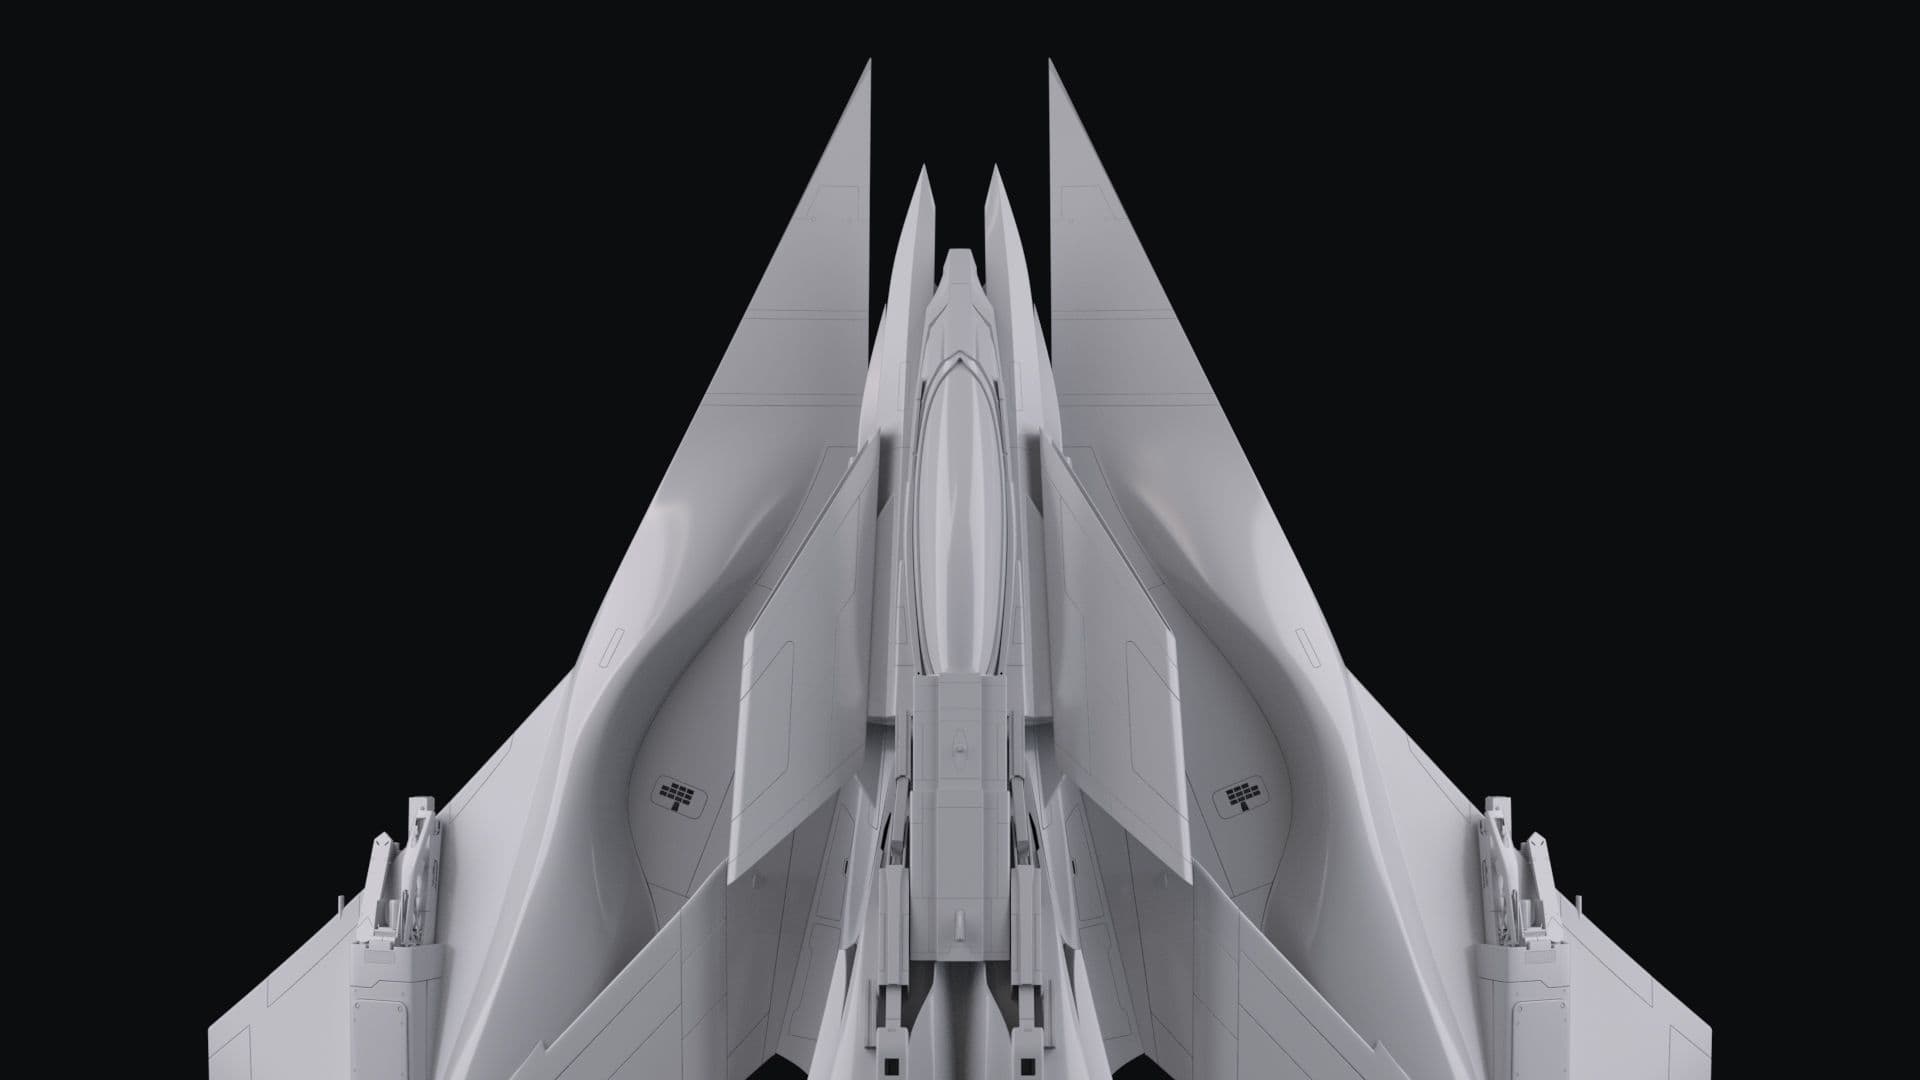
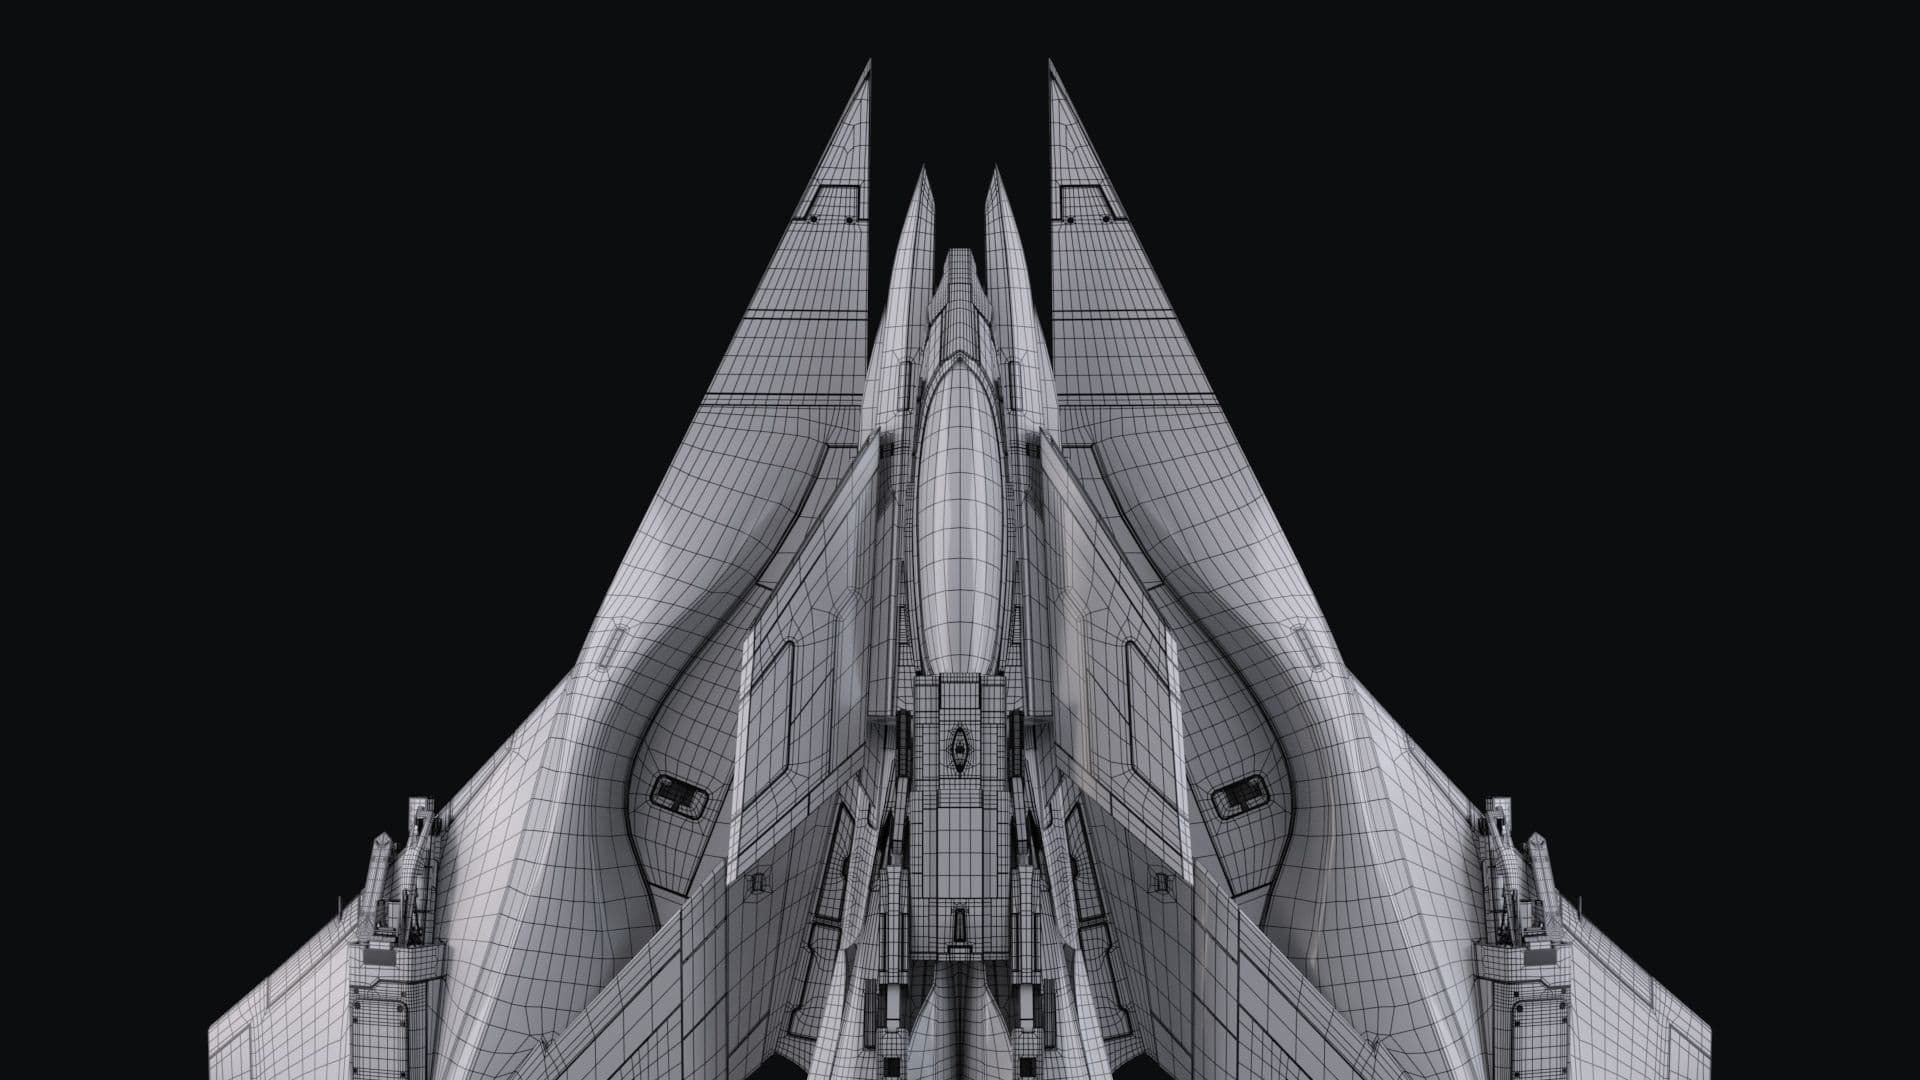
A hero asset should always be modelled using the SubD (triple edging) principles. Meshes shouldn’t co-penetrate. When pieces intersect, I modelled proper holes and cuts. If you will go close with the camera, all those efforts will be always visible in the final output.
If you are working in production, you should always deliver a clean topology. Avoid shortcuts that can reveal pinches or other problems during dailies and on the next working stages. This is something to take into account to avoid slowing down entire departments. For this reason, I am extremely picky and precise during every modelling stage. As modellers, we are always in the first line.
Detailing is one of the last steps of the modelling process. Depending on how close you will see the asset, middle and high-frequency details can take a model with a solid foundation to the next level.
Using a few design principles will help you get a more pleasant result:
Don’t forget Hierarchy (primary, secondary and tertiary shapes). If you place too many details in an area it will look too complex and messy, but if it is too simple will look boring;
Place details with a purpose. Try to place them in the connection areas or when there is a movable joint. Real objects are functional;
Shape contrast is the key to achieve forms that will look more dynamic and interesting;
Use references to replicate all the surface's finest details and imperfections. Chang fillet width according to the different machining process to achieve more realism.
Growing as an Artist and as a Person
Be curious
As things quickly change in this field, remember to stay curious and to develop new skills. Try to change your mindset about software and new technical improvements. Understanding what new creatives opportunity will be unlocked in the future, is way more important than remembering where every menu is located. Is pretty clear that we will have less and less technical limitation in the future.
Software vs Knowledge
Software are just tools. There is no doubt that a few of them are industry standard, but all principles of your role will stay the same. Software can be discontinued, your knowledge will not.
Team means power
Be humble, relationships matter. If you would like to work in the creative field be aware that you will work in a team. Turn off your ego when you are receiving feedback and try to learn from your mistakes to0 quickly improve. As a team, you can be invincible.
I am grateful to The Rookies for allowing me to share my thinking process, tips and my opinions with you. Feel free to share your thoughts about this article. You can follow me on ArtStation and The Rookies to see more about this project.