Creating a Photorealistic Nature Shot in ZBrush and Substance Painter
A recent graduate from Vancouver Film School, Syed explains how to create a photo-real 3d image from a photograph, using ZBrush and Substance Painter.
A recent graduate from Vancouver Film School, Syed explains how to create a photo-real 3d image from a photograph, using ZBrush and Substance Painter.
Syed Hassam Hussain Jafri, a graduate from Vancouver Film School, started his journey has a character artist by learning ZBrush on his own and motivating himself to test his skills and grow as an artist.
Syed shares how he created a photo-real 3d image from a photograph, using ZBrush and Substance Painter. He created this piece in 2019 in his free time after graduation.
This project took me roughly 2 weeks on and off, from start to finish. I believe in mastering a software when I'm approaching a project, so I sculpted and painted everything by hand using Zbrush poly-paint and Substance painter to add the procedural details.
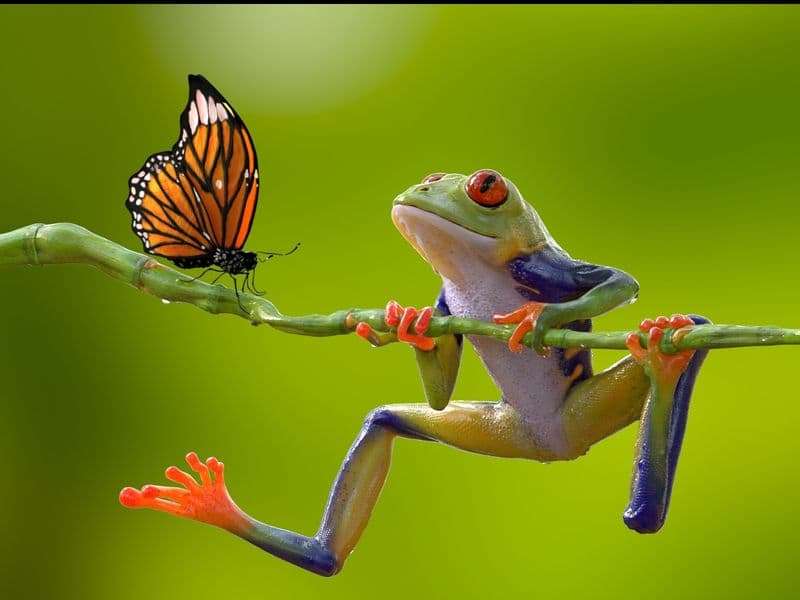
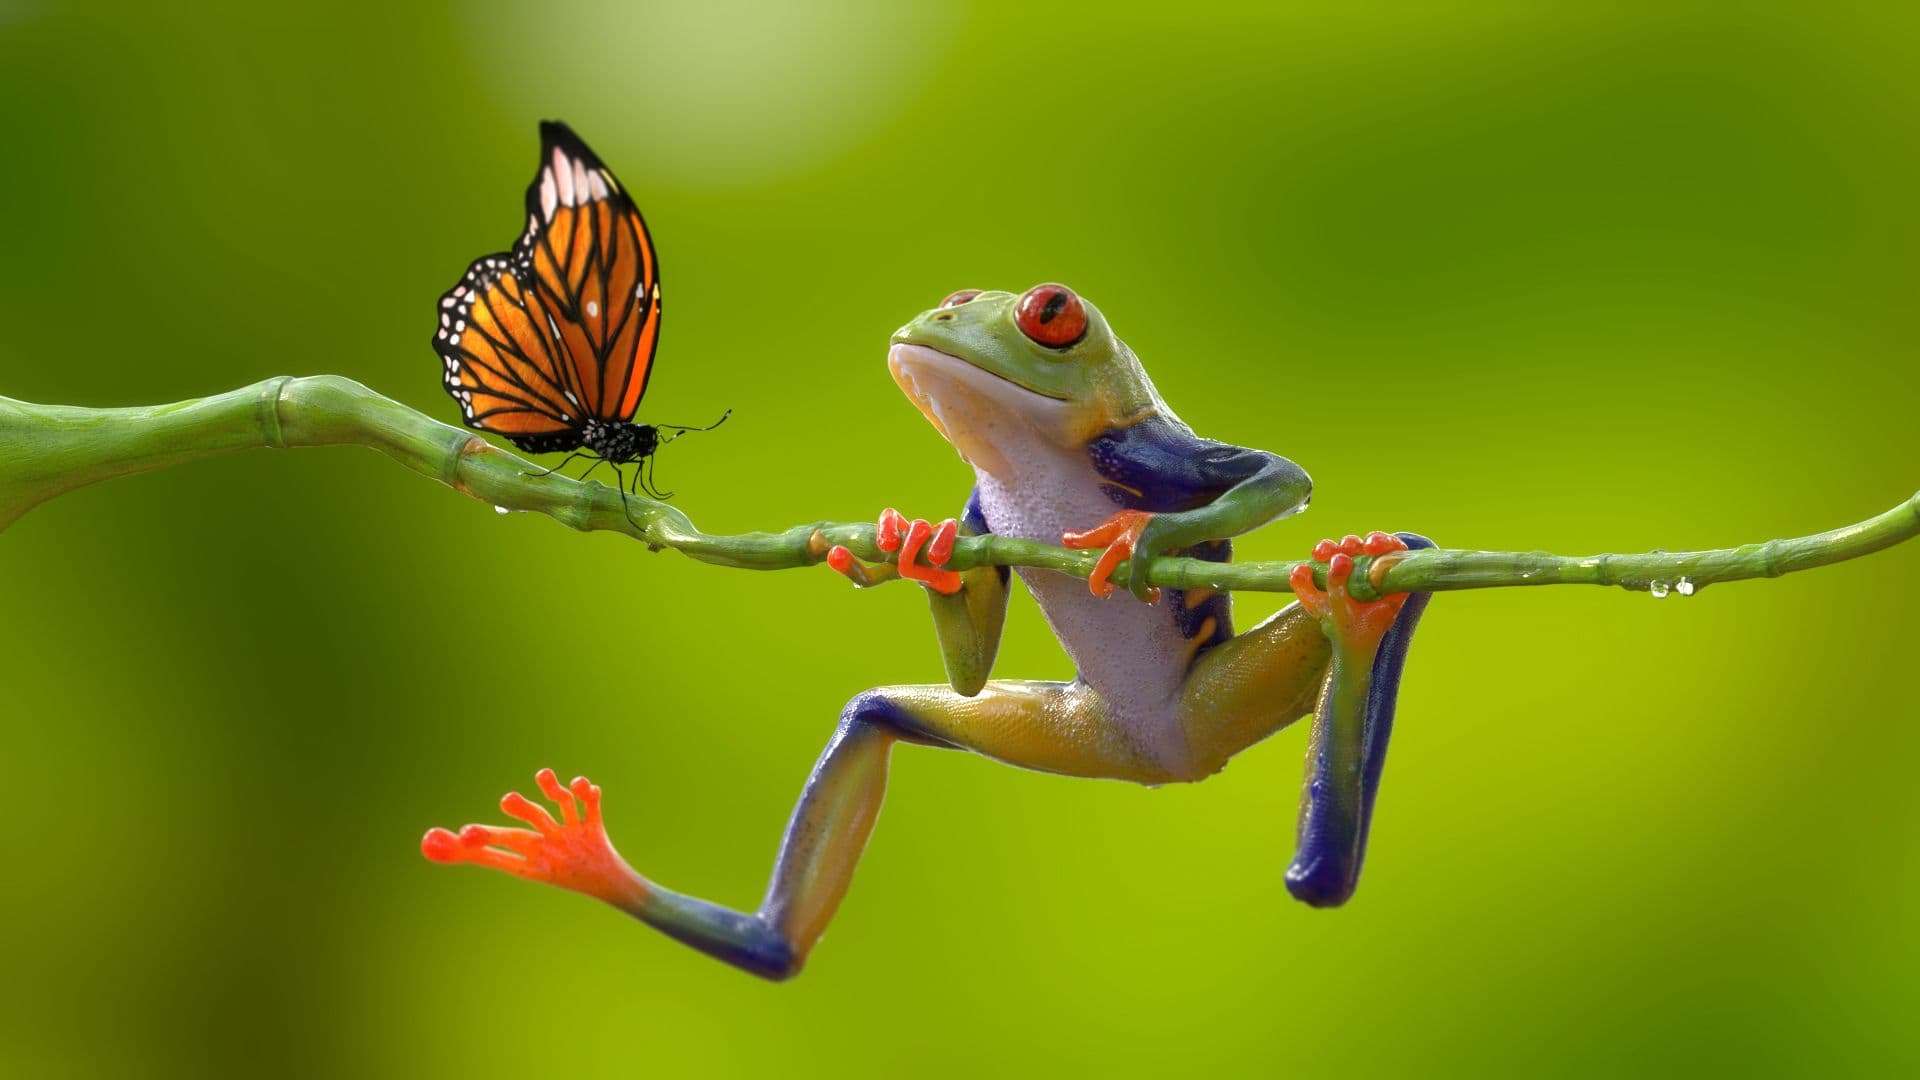
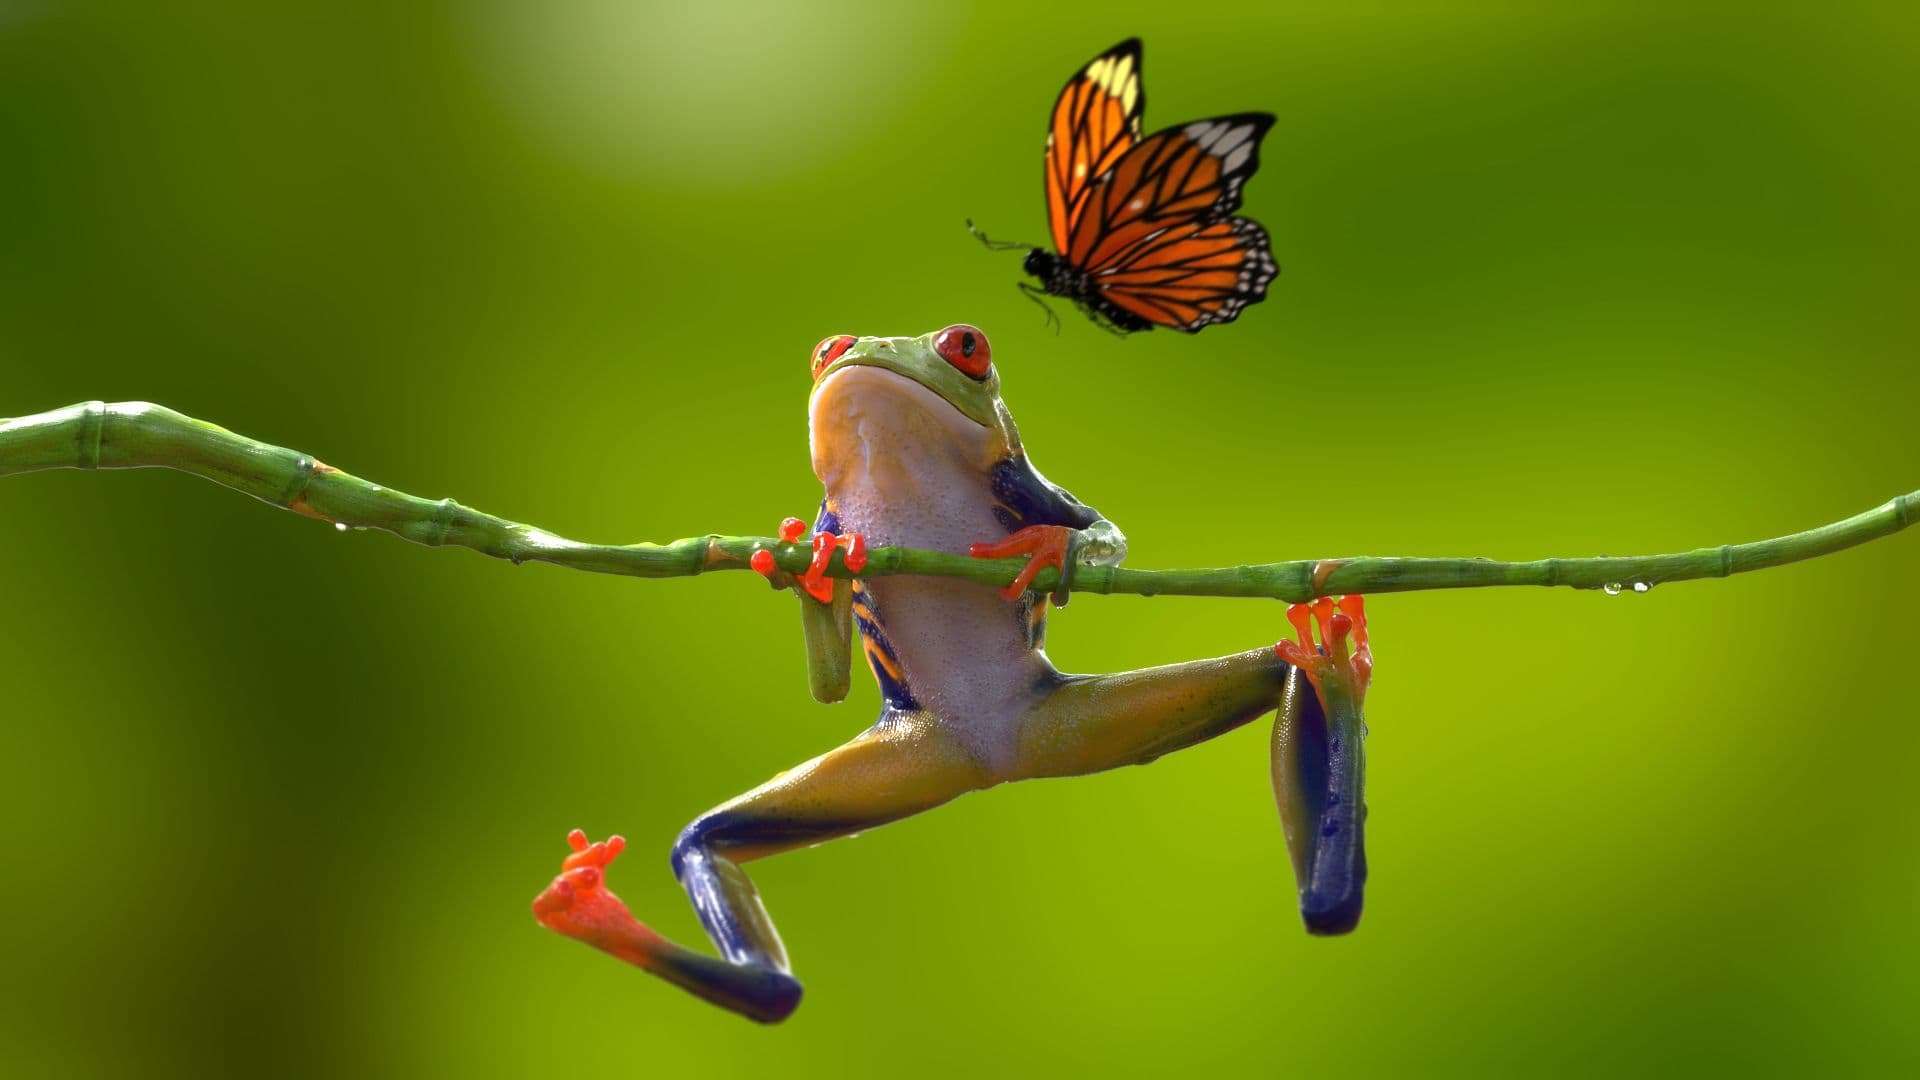
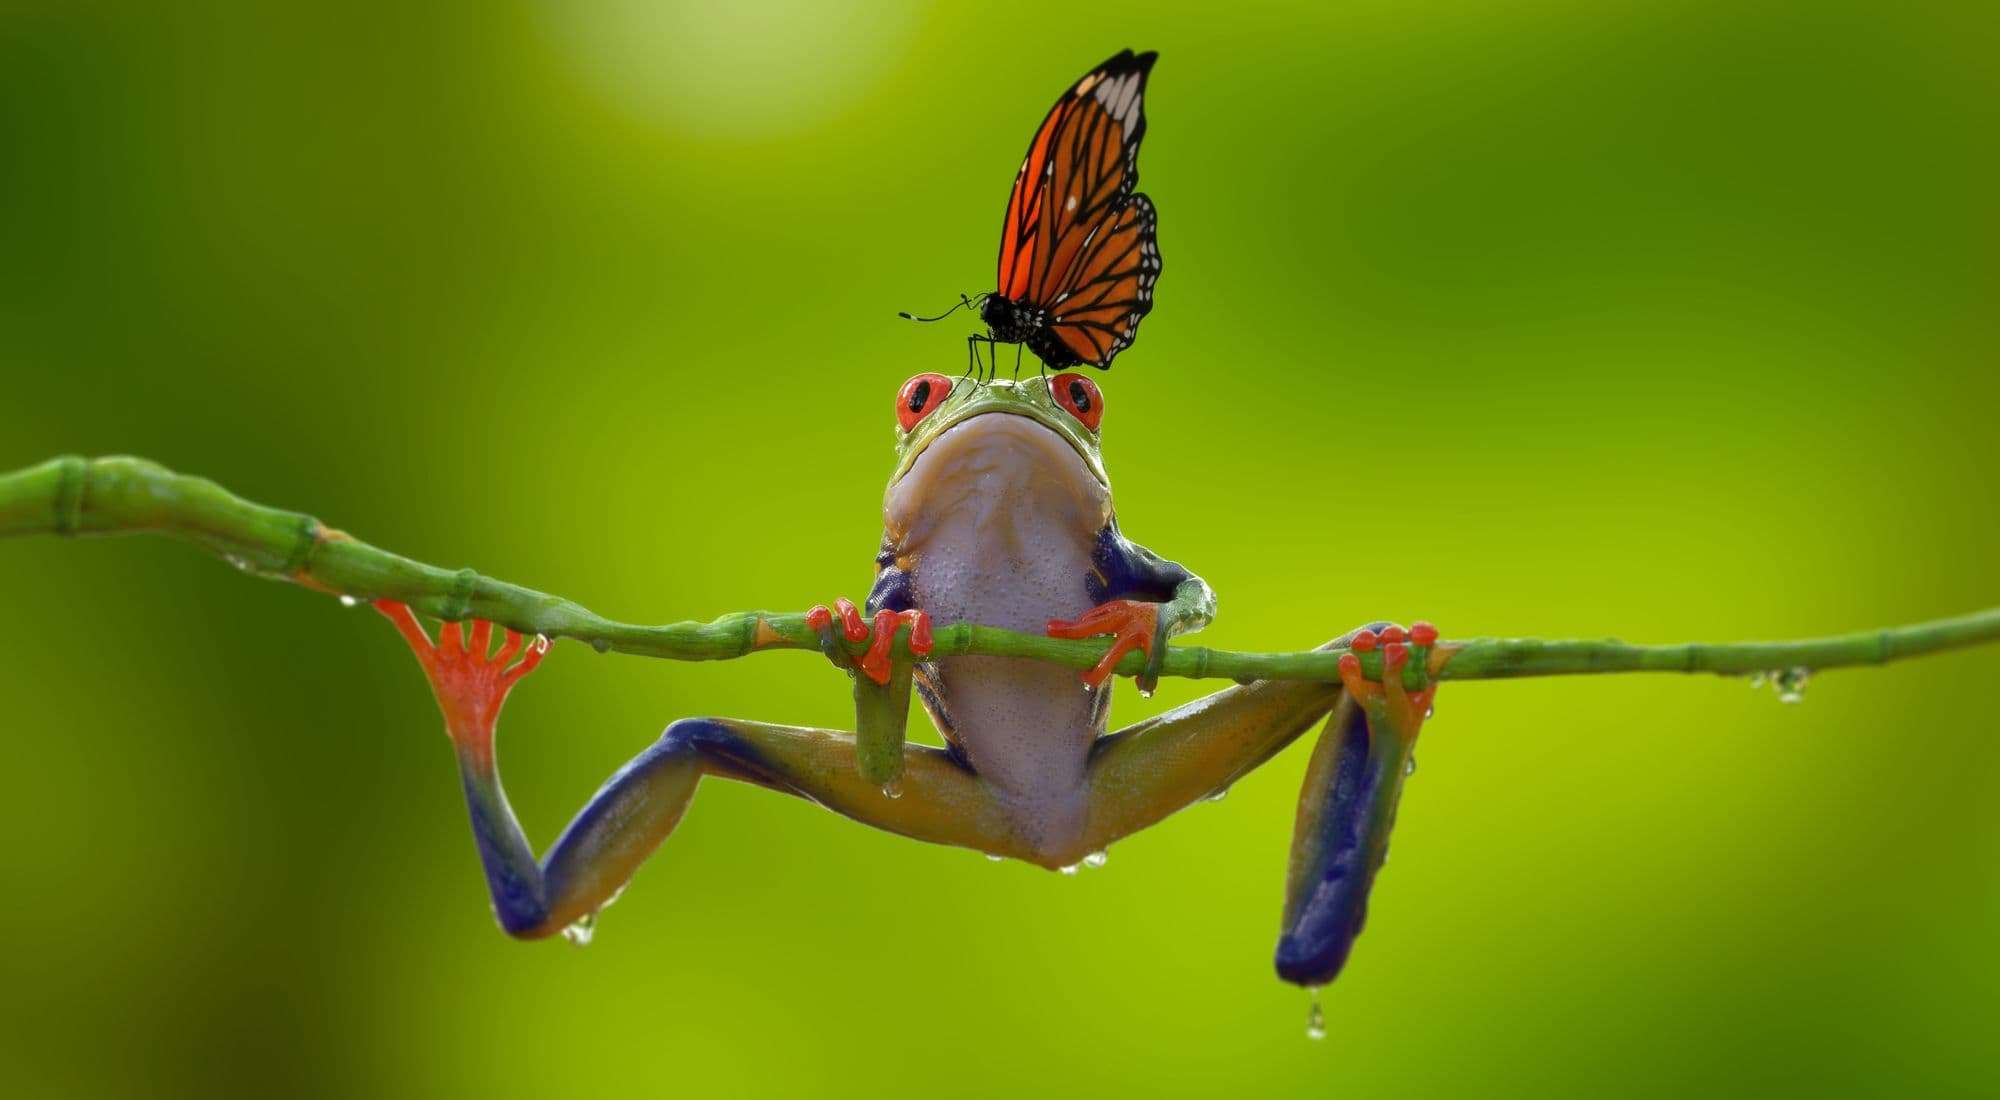
I starting this project inspired by this beautiful picture taken by Kurit Afsheen.
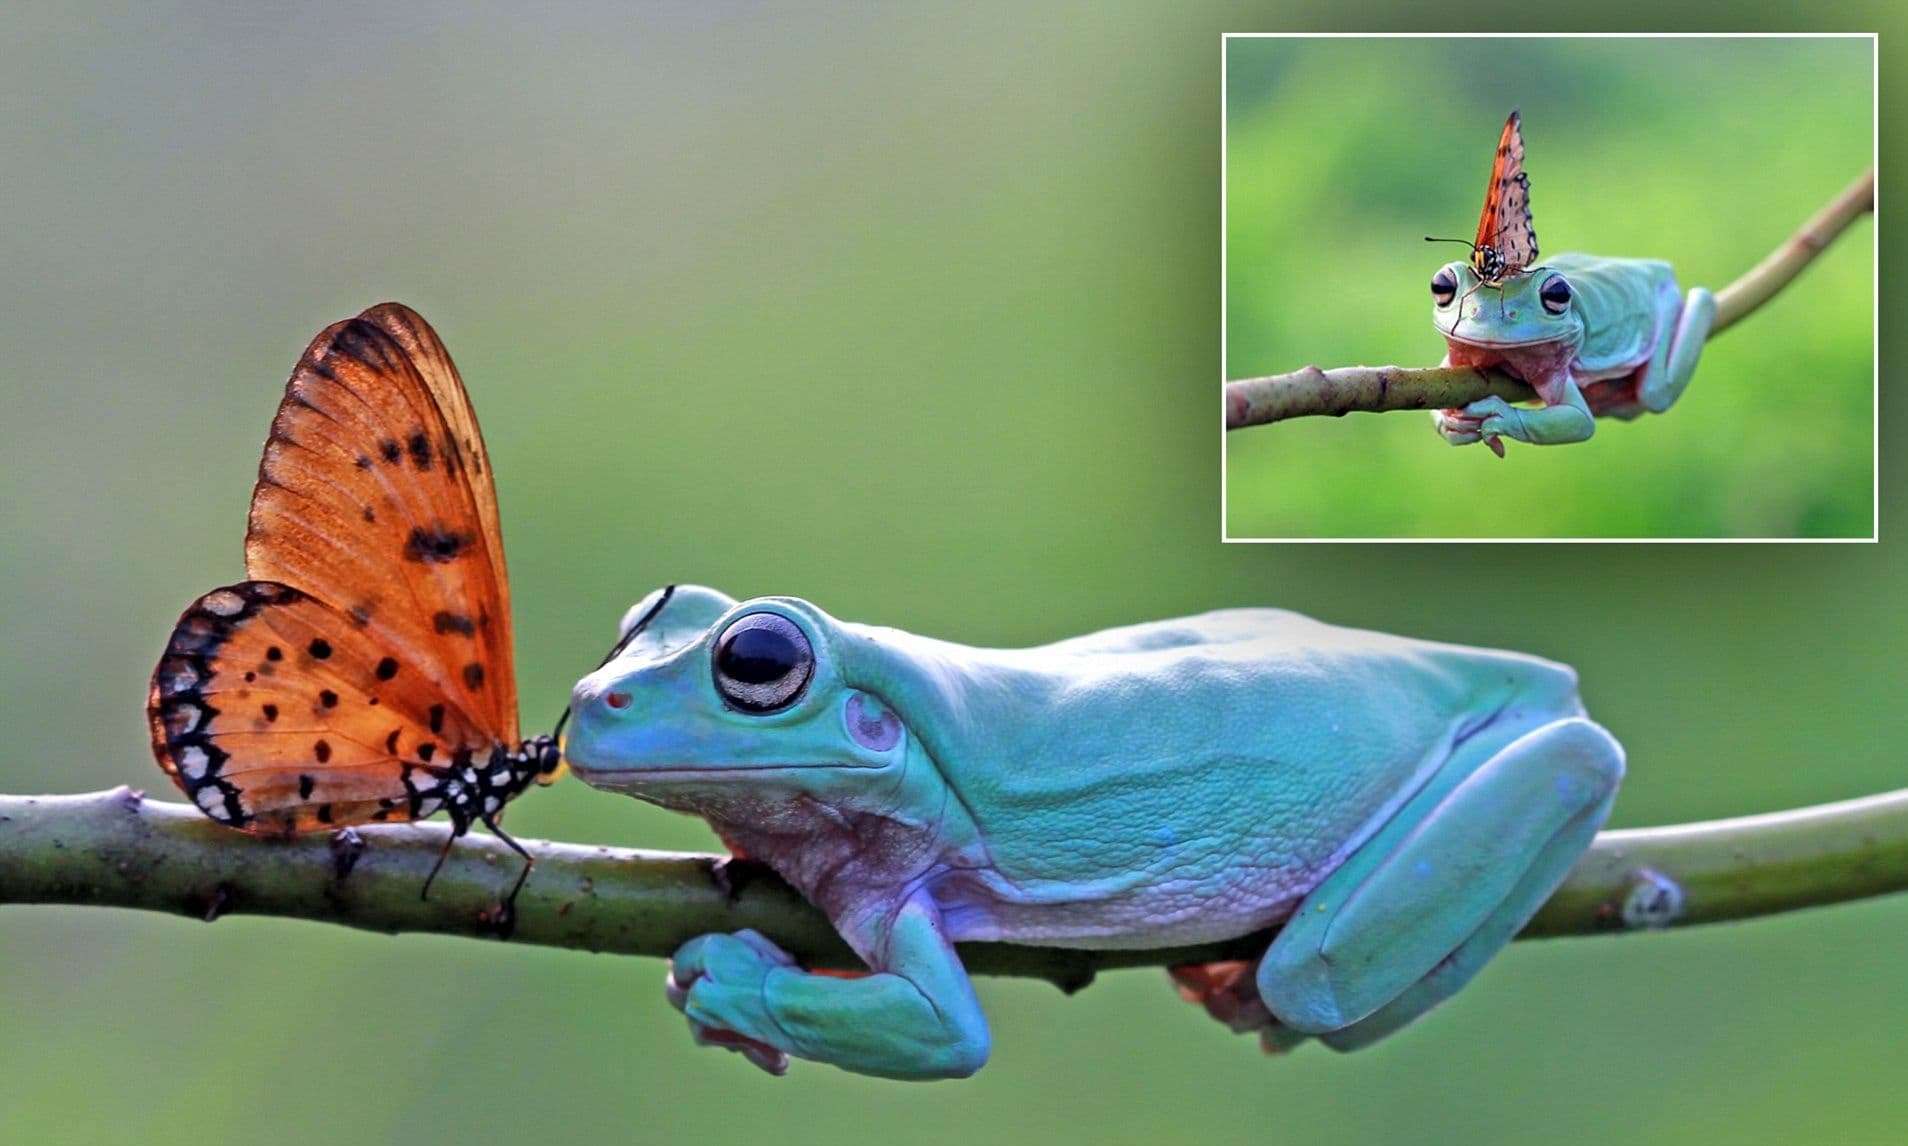
I wanted to recreate this image in a different pose and to create a story to support it. I started gathering my reference. To start any project you need to have a lot of references, at least enough to get you a complete idea of material, lighting, posing, surface details, colours, etc.
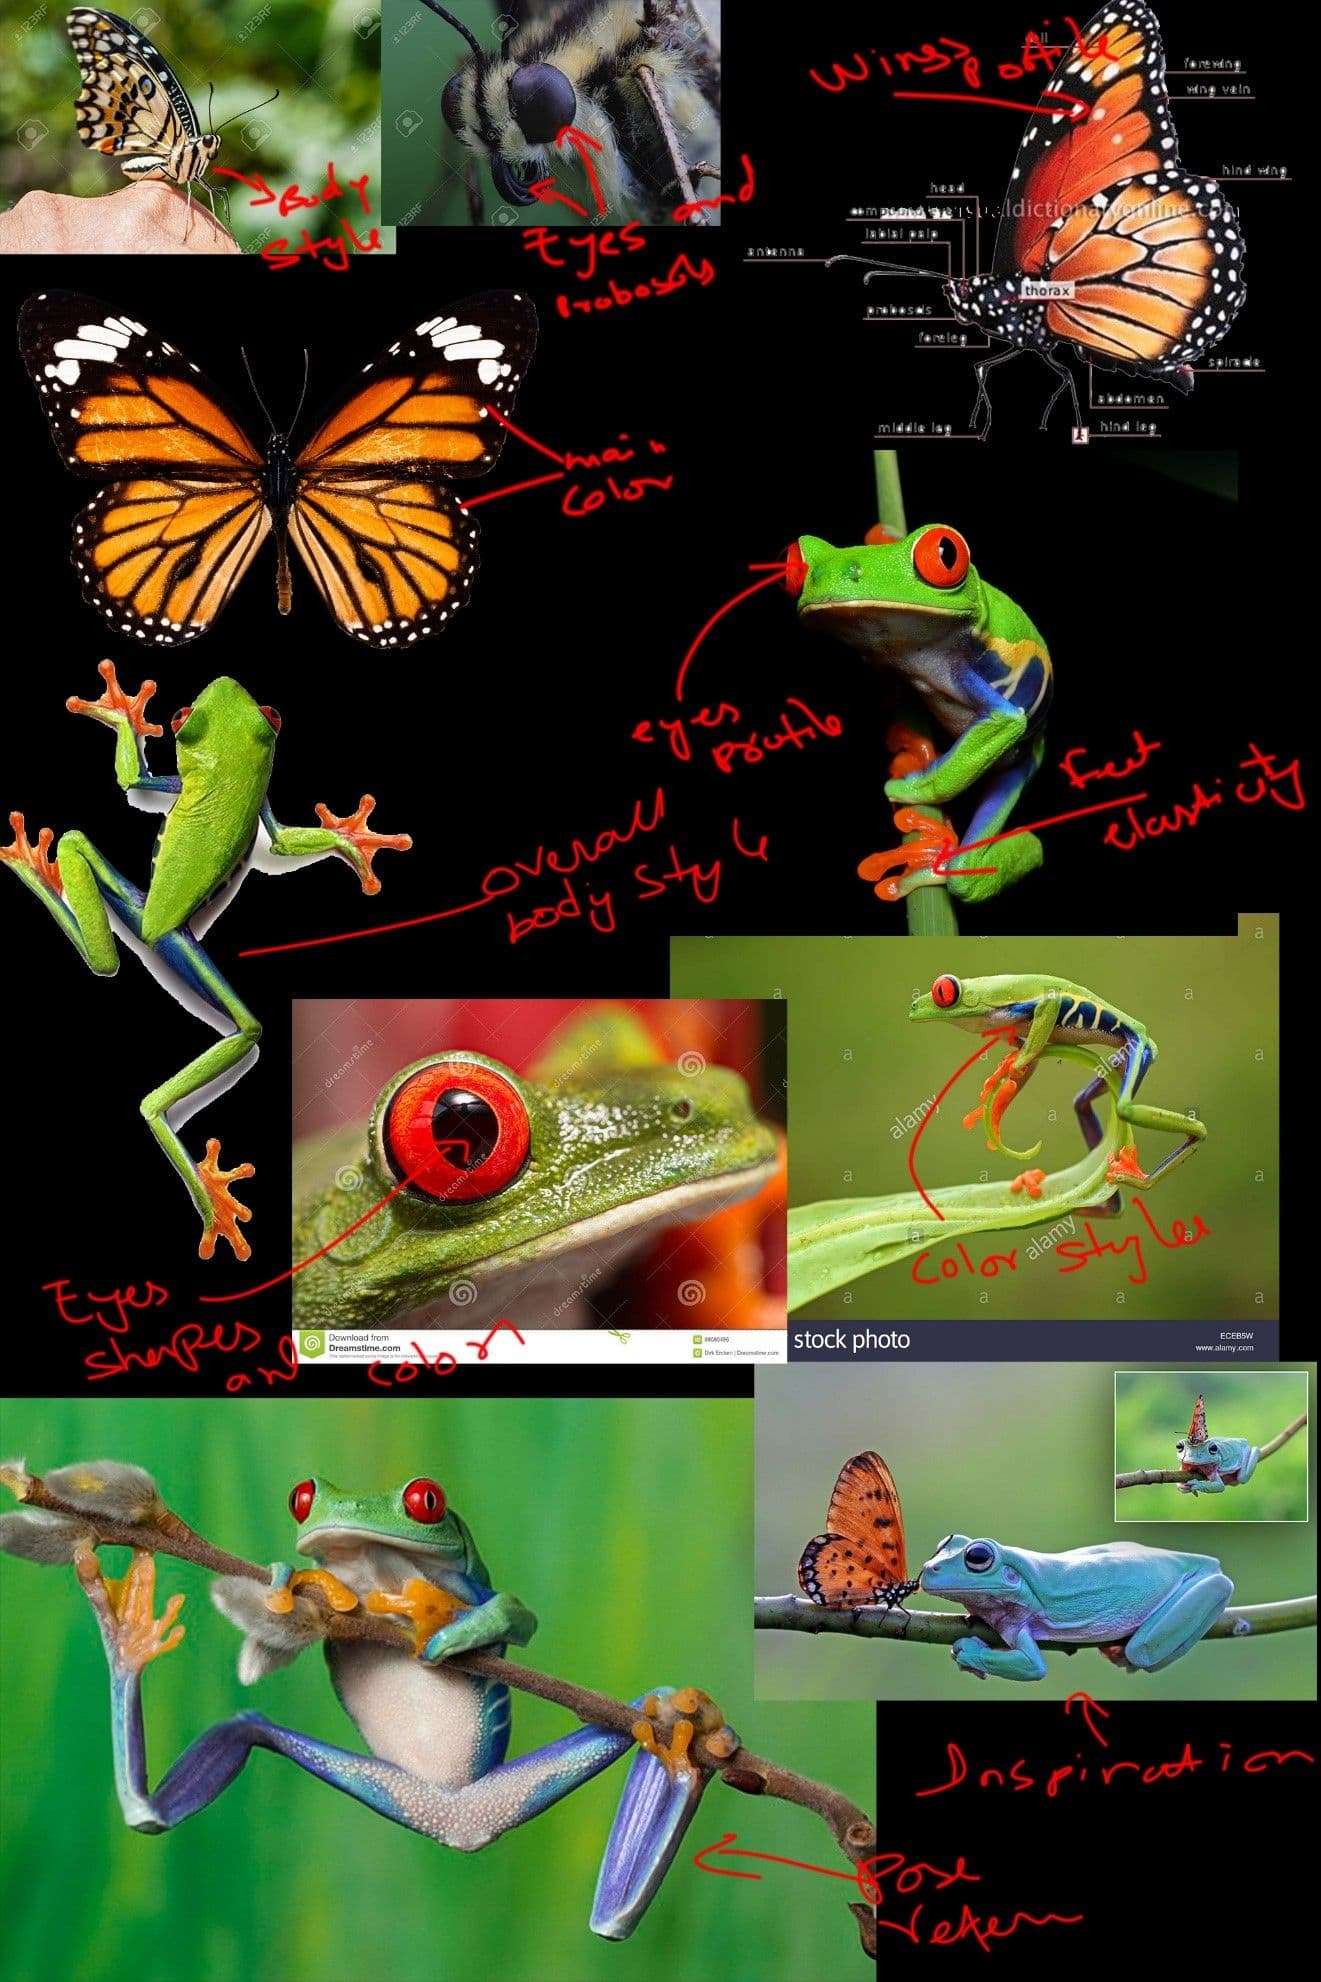
Note: having too many references sometimes can lead you to get lost, so it's always good to have some clear ones locked for the major elements such as posing, hands, feet, eyes, and go with them as clear direction helps with efficiencies later on.
Here is the reference sheet I made for my self from the library to lock the final look of certain details:
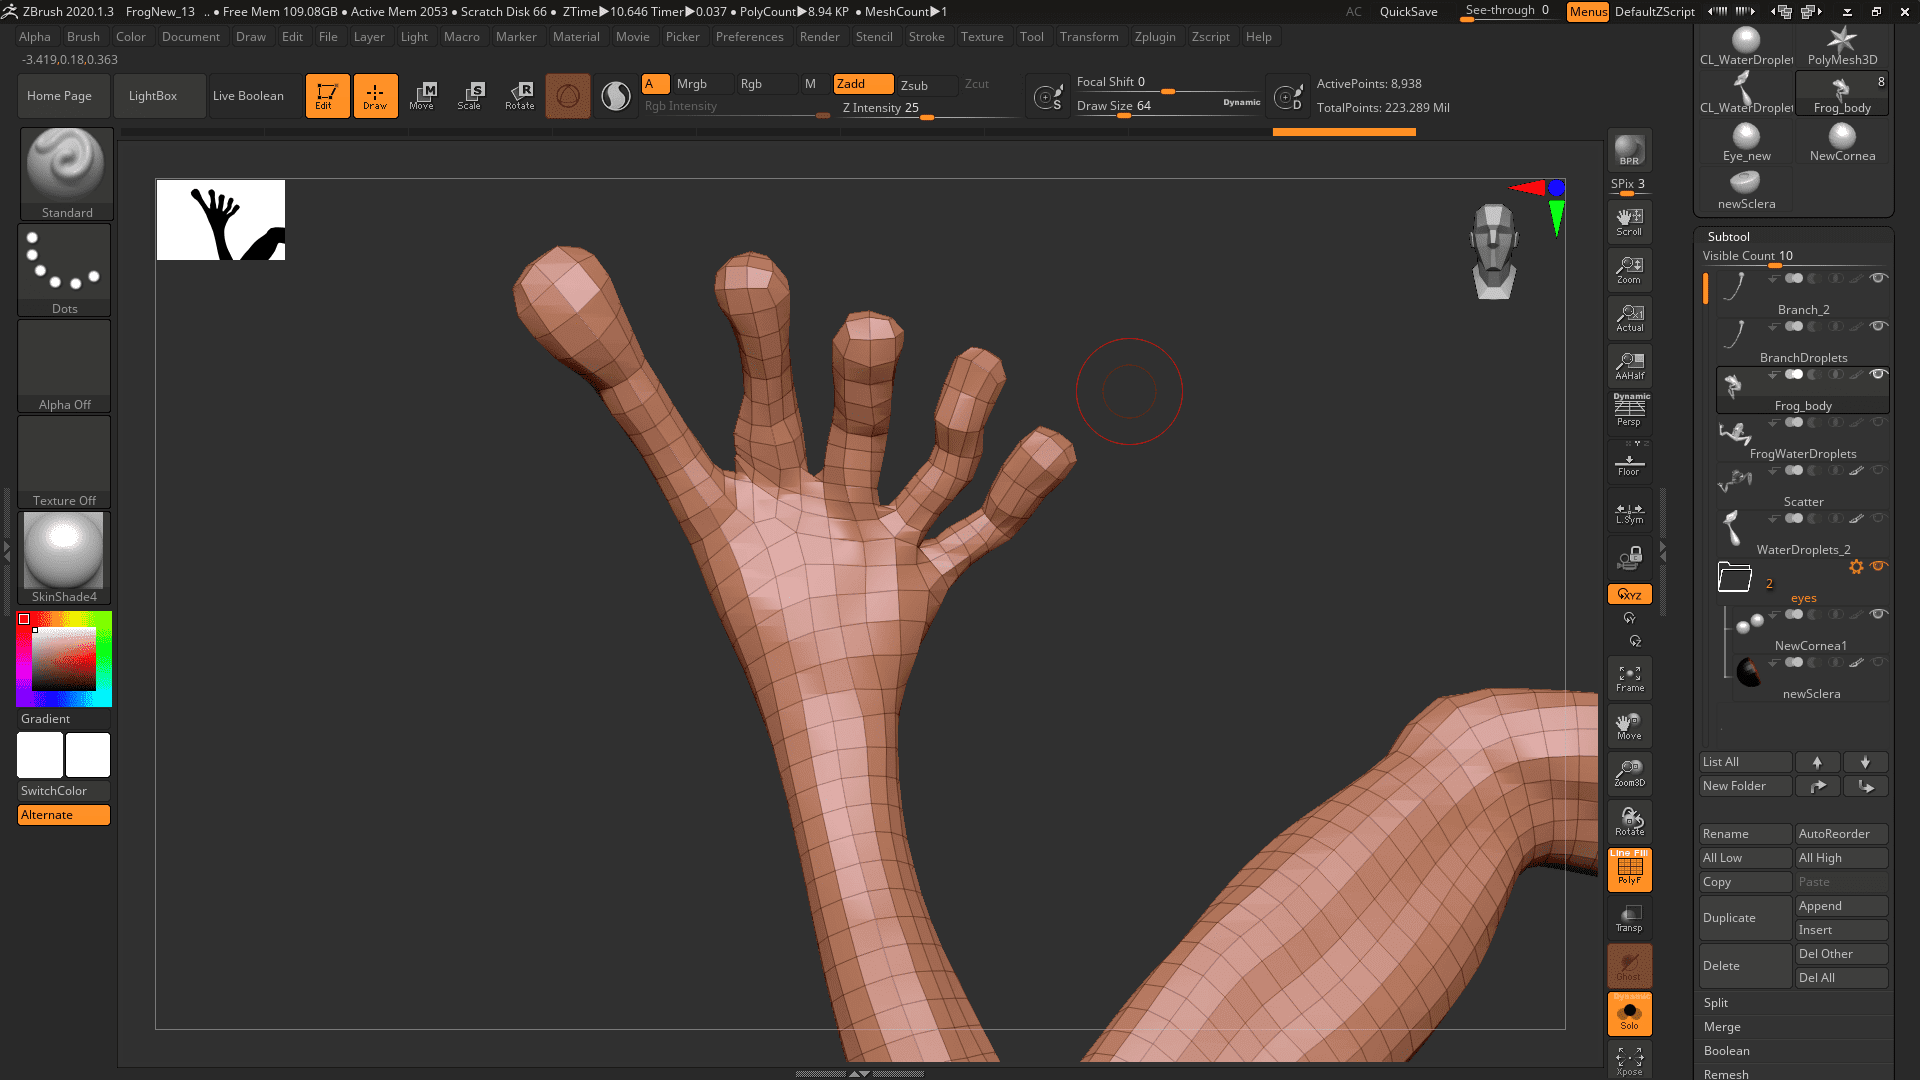
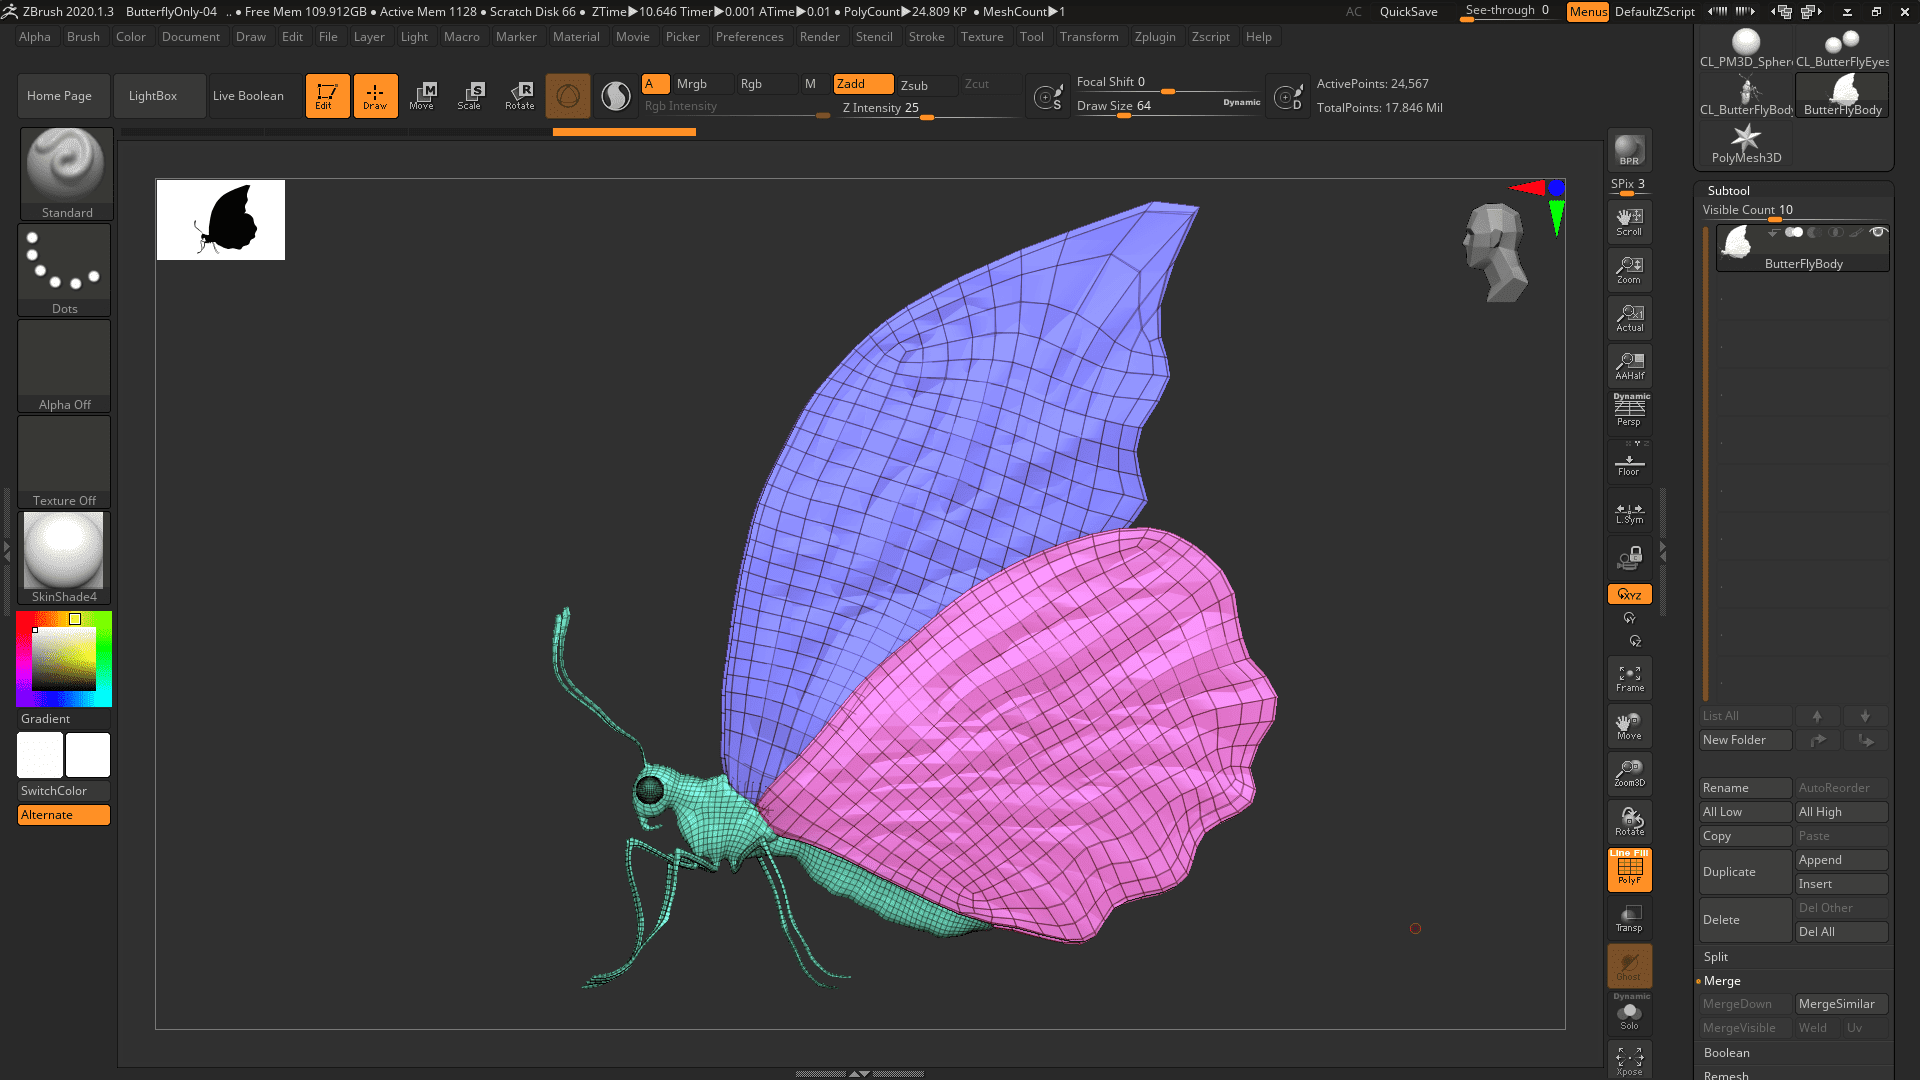
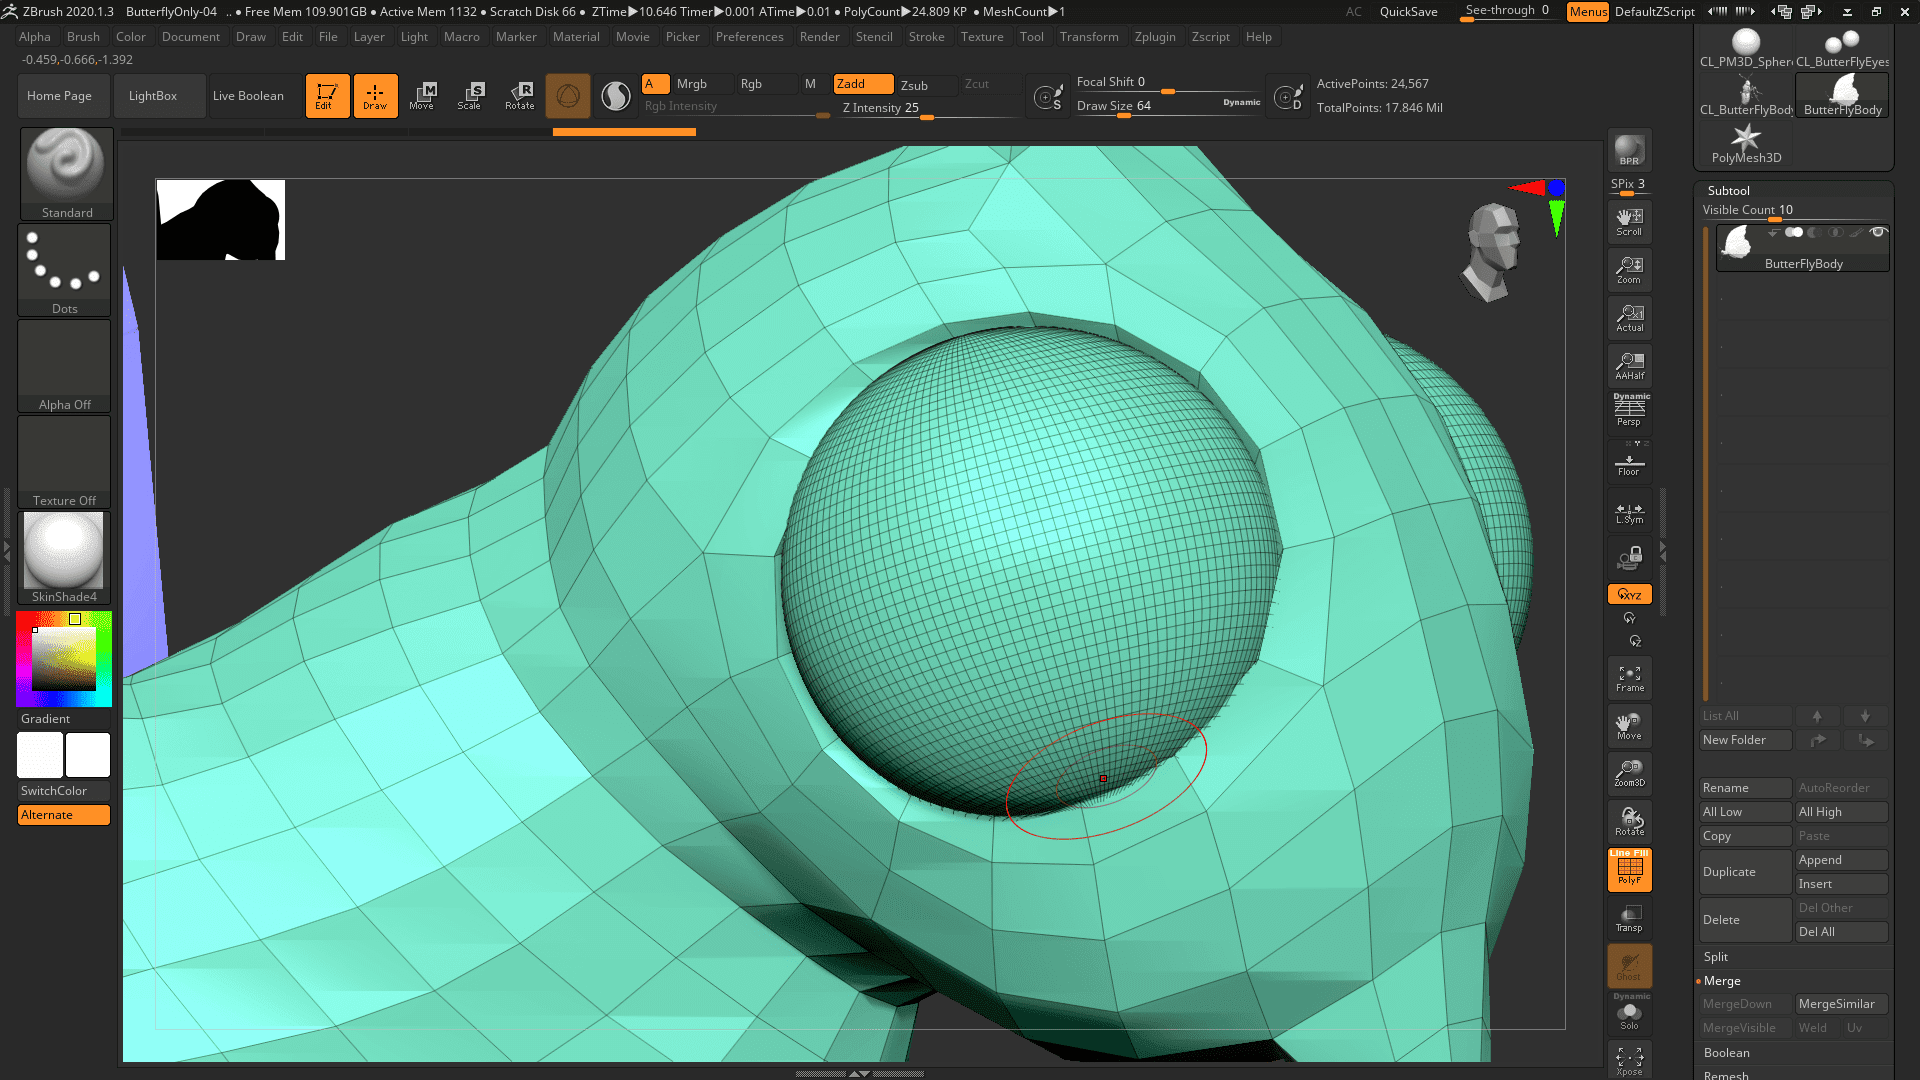
Once I had the references I started to sculpt the block-outs for both characters in ZBrush. I usually start with z-spheres and keep my mesh considerably low poly as its very easy to manipulate and re form low poly meshes than working with high poly mesh, after having shape right, I turn to dynamesh to sculpt the basic details, keeping them both separated as I was planning to combine them later inside Maya.
Once I have reasonable detail, I look to duplicate the mesh then run zremesher and then project the dynamesh details to the remeshed geo so I can add high resolution details later.
My basic process for sculpting and surfacing on this project is as follows:
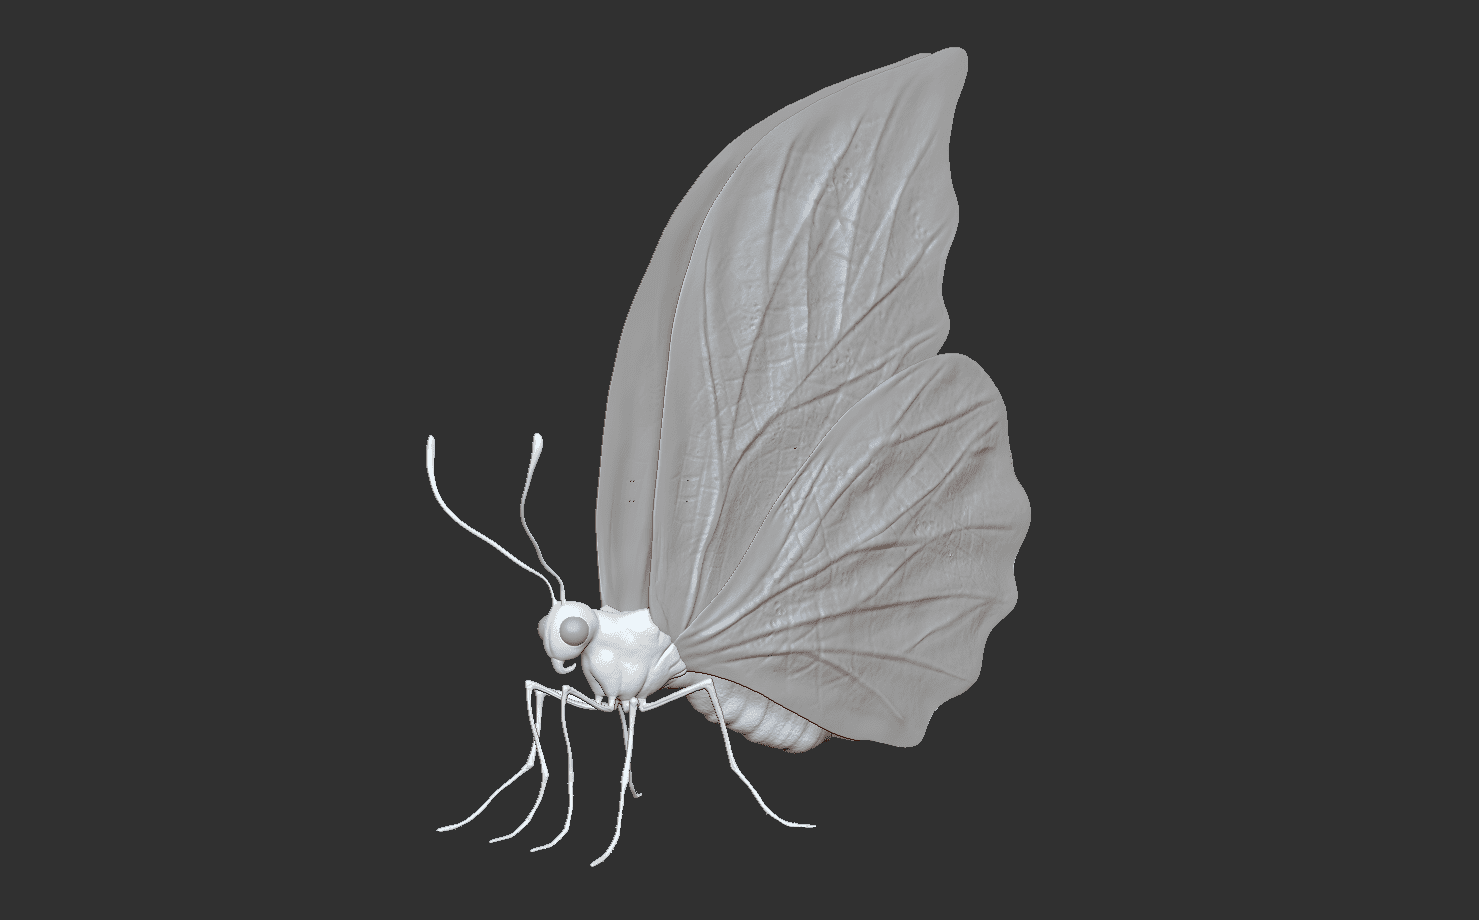
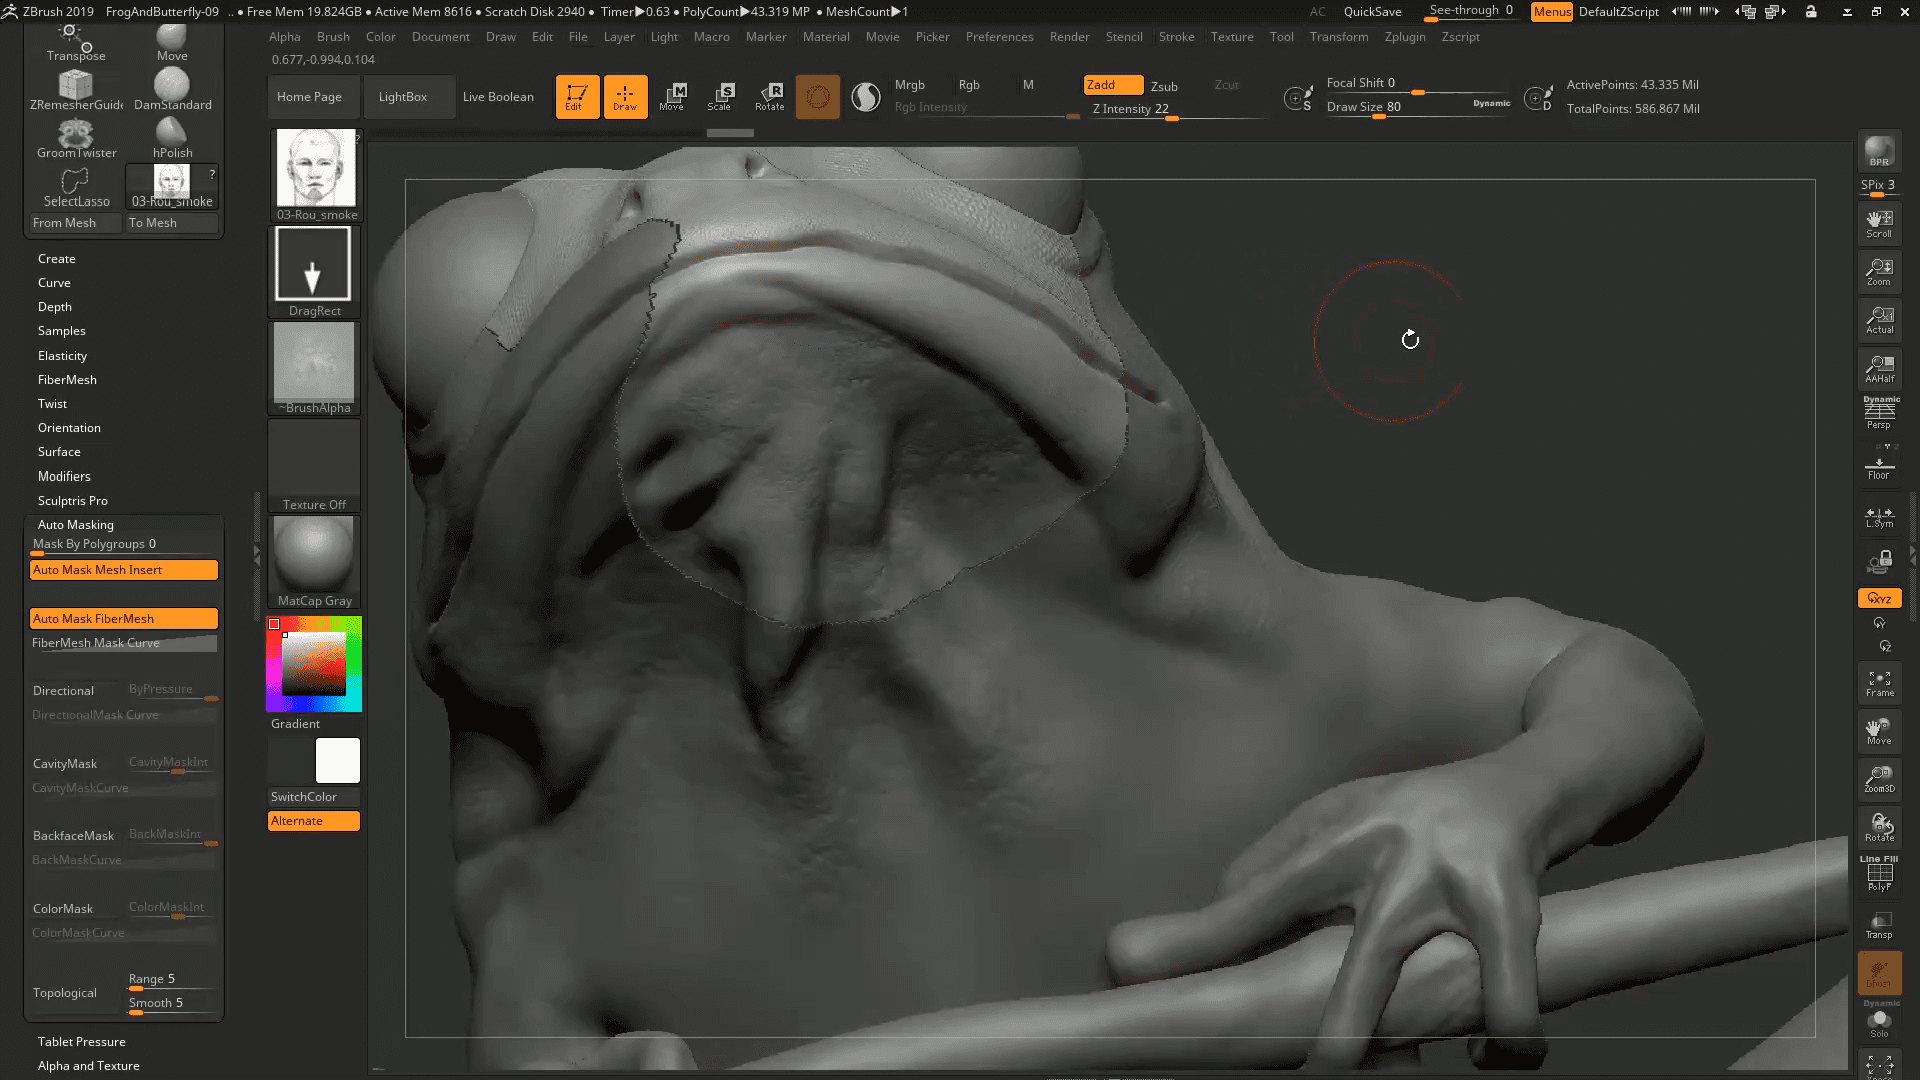
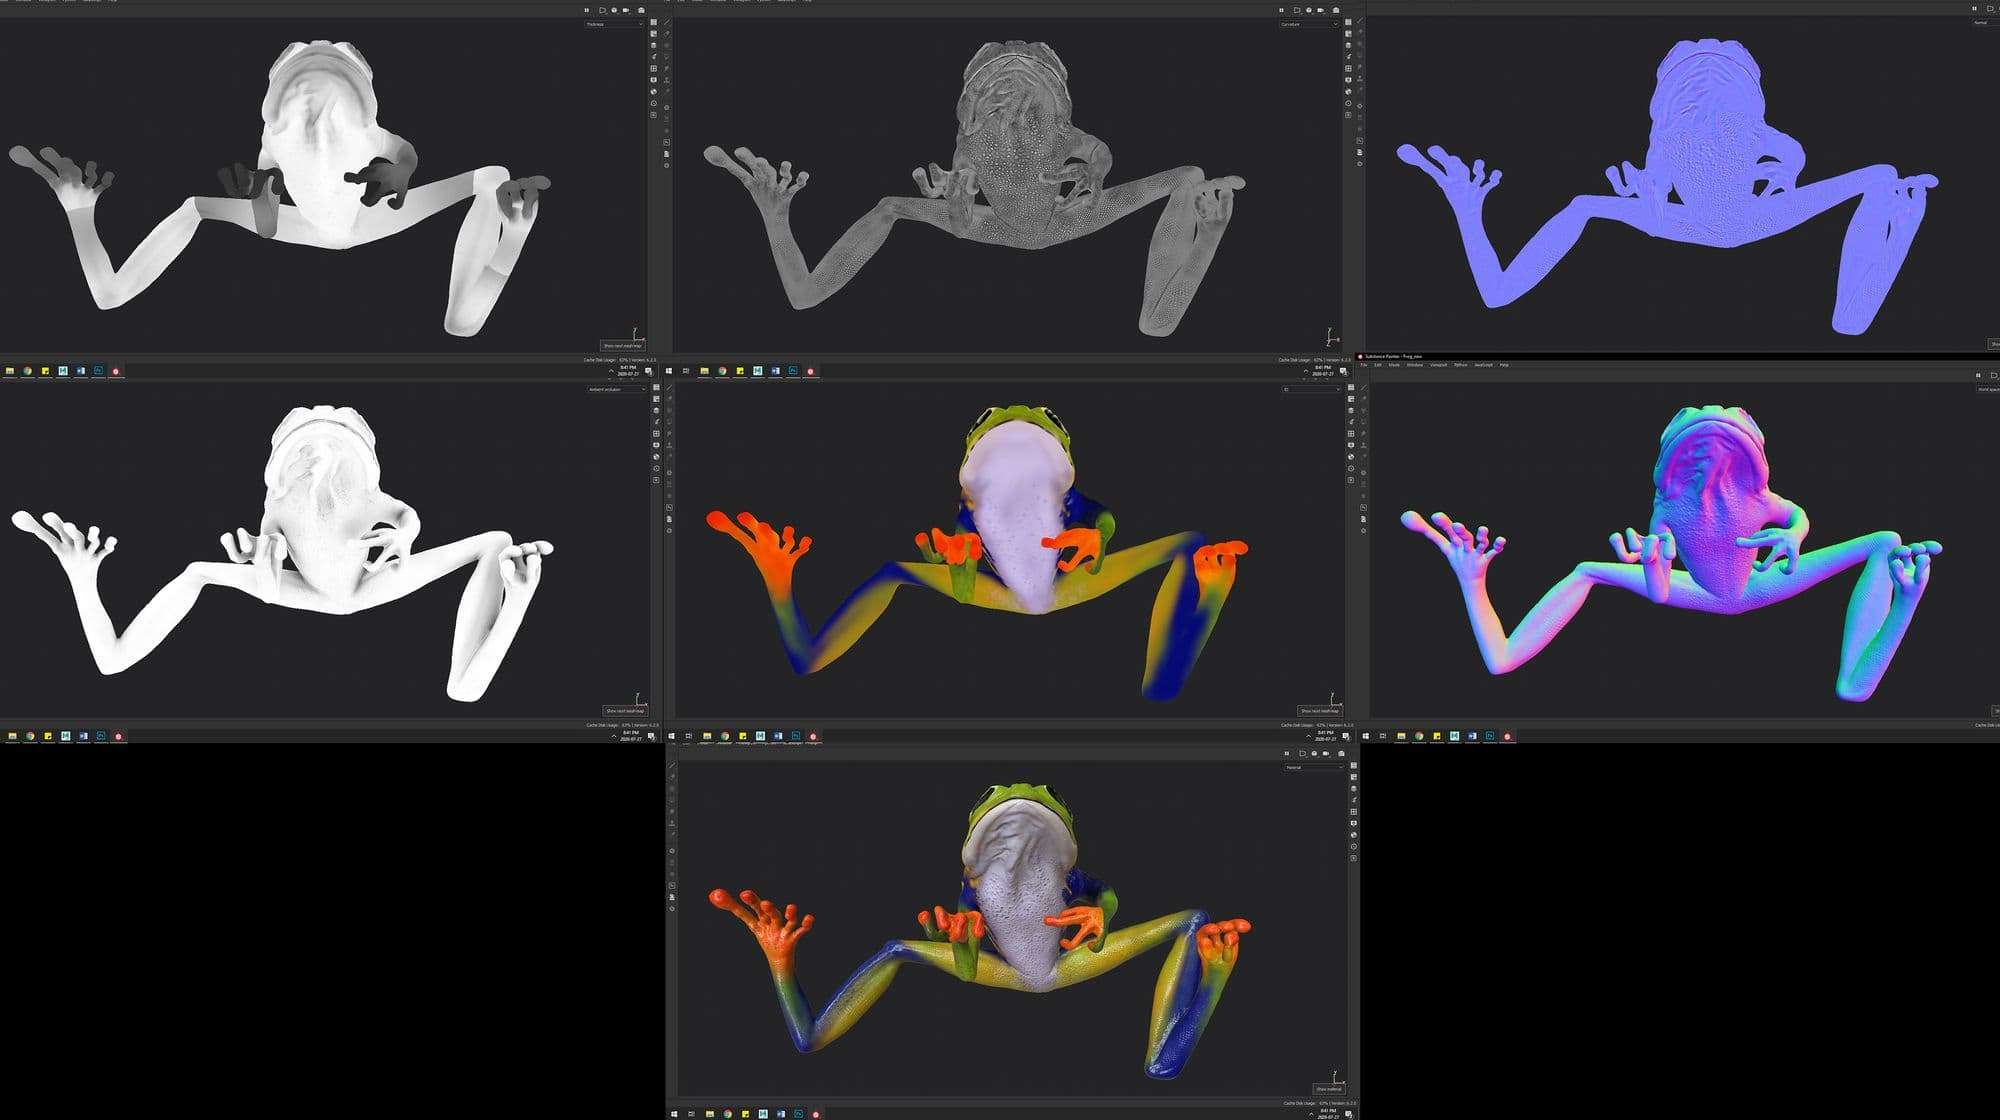
1: Sculpt details in Zbrush and export as displacement and normal maps,
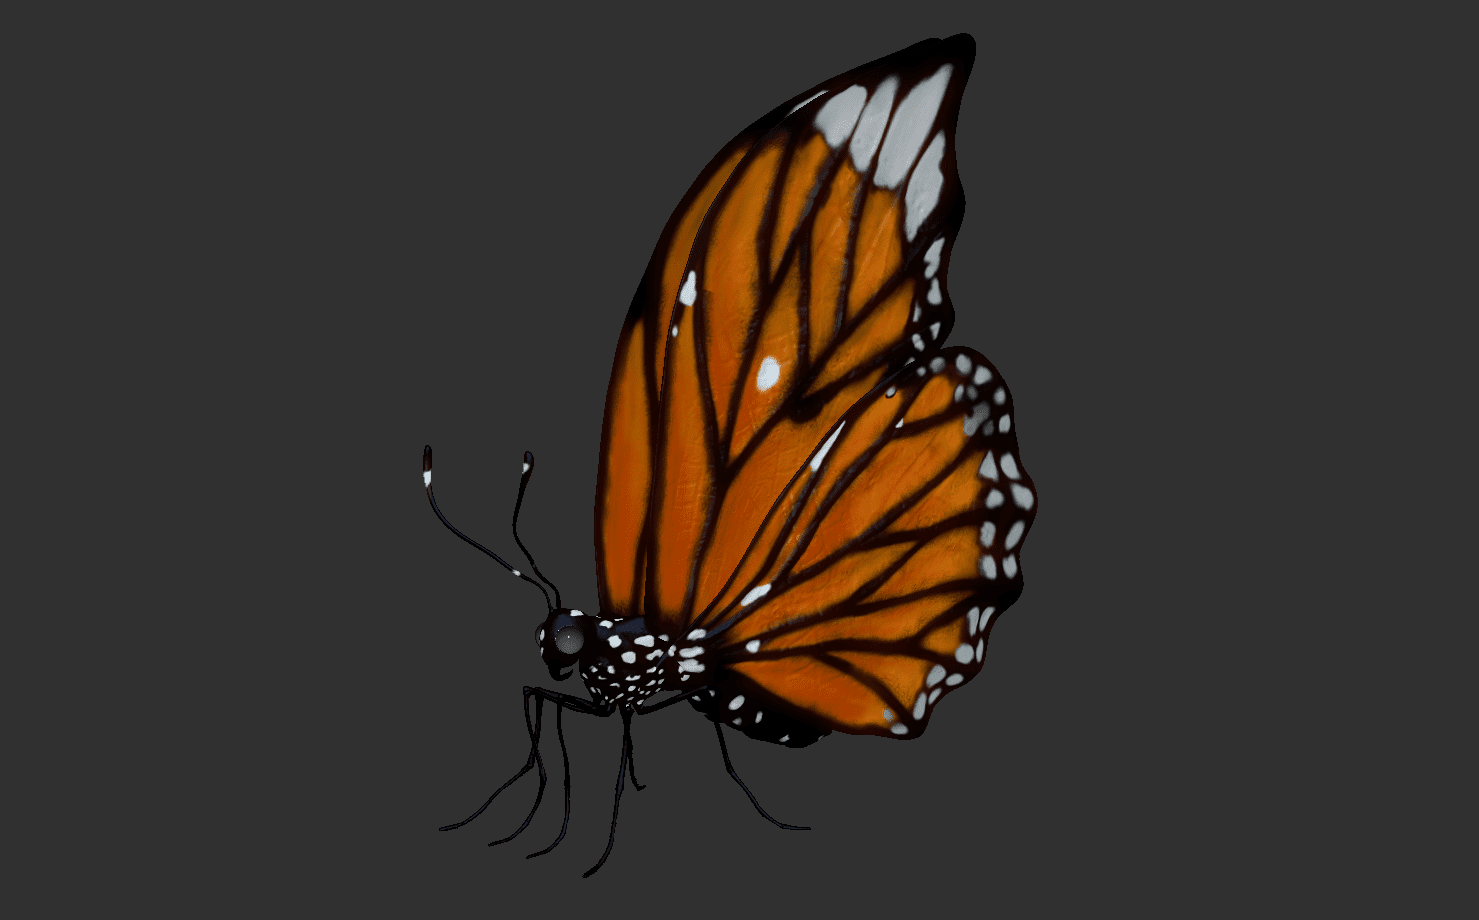
2: Paint the base color/color style I'm looking for manually, using poly paint and export it as Texture map,
3: Using the normal and texture maps from Zbrush then jumping into Substance Painter to add roughness/gloss, paint extra patterns and textures, including the use of some procedural masking and painting.
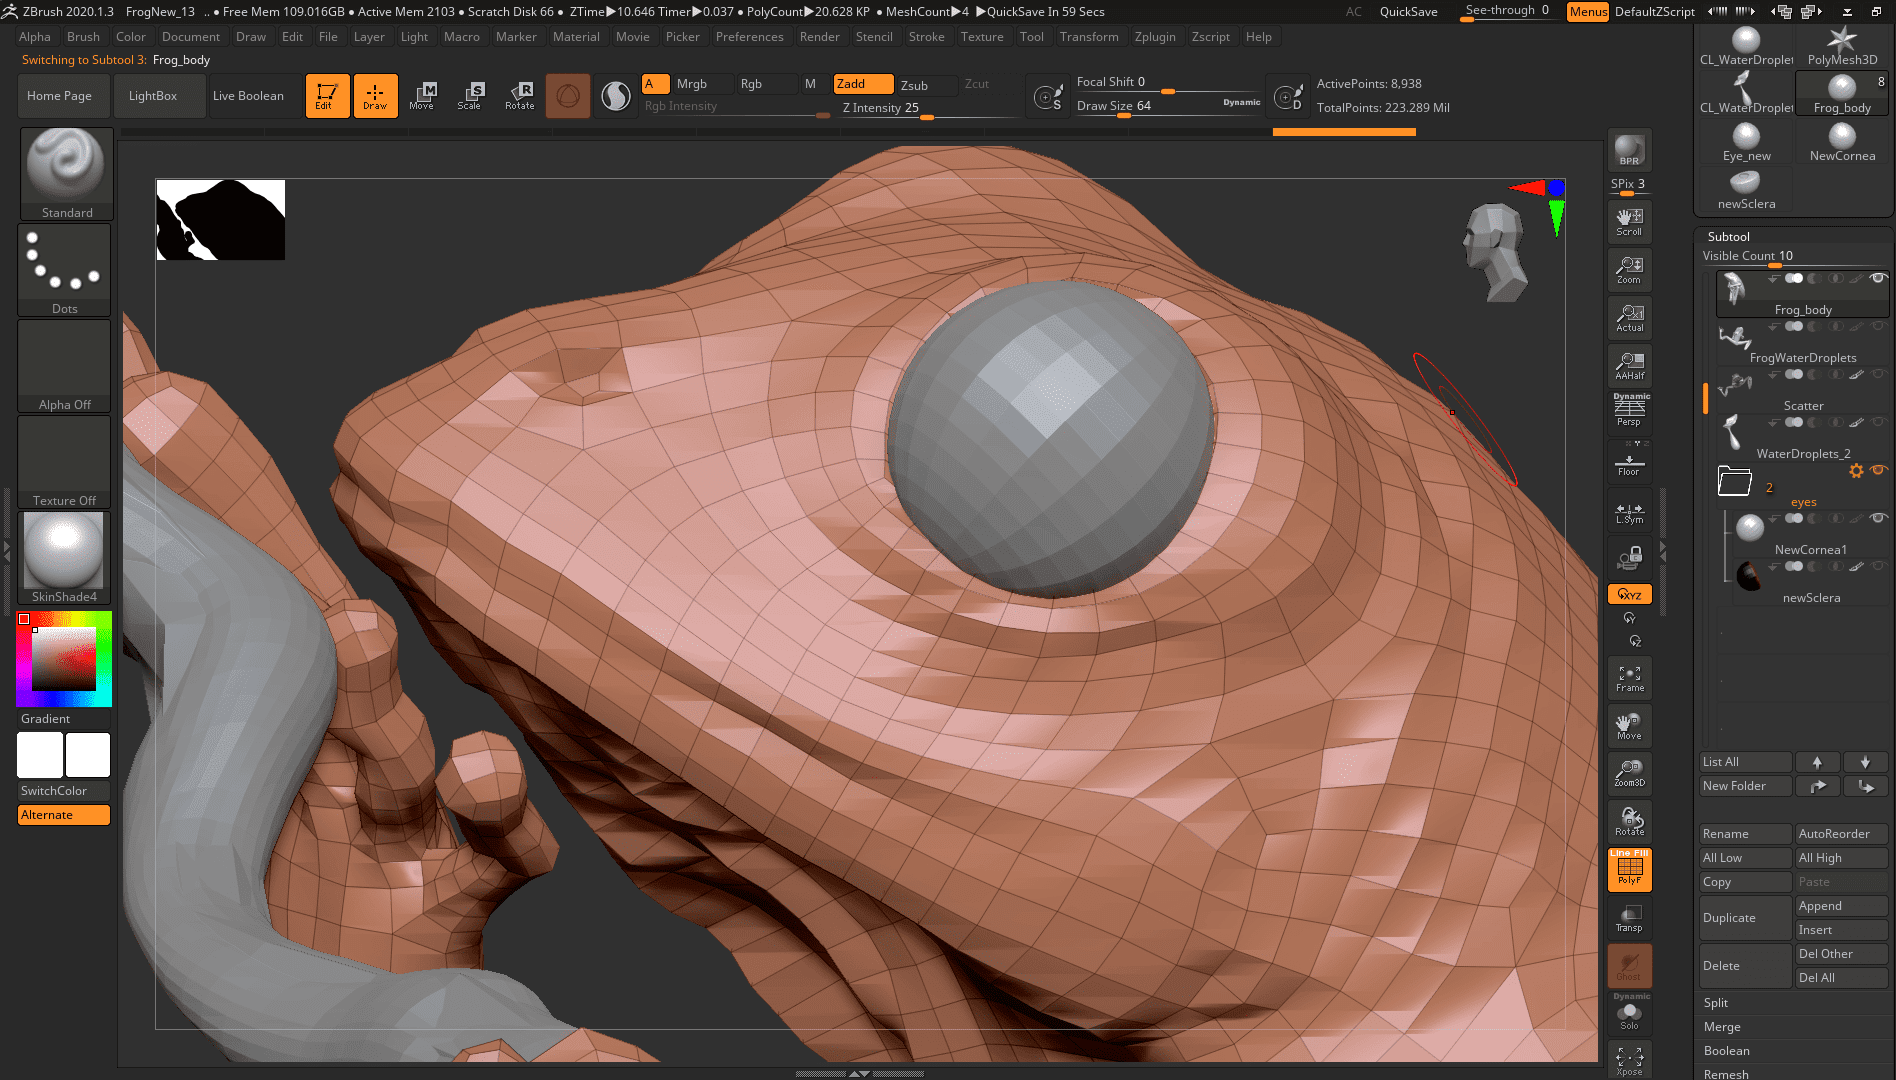
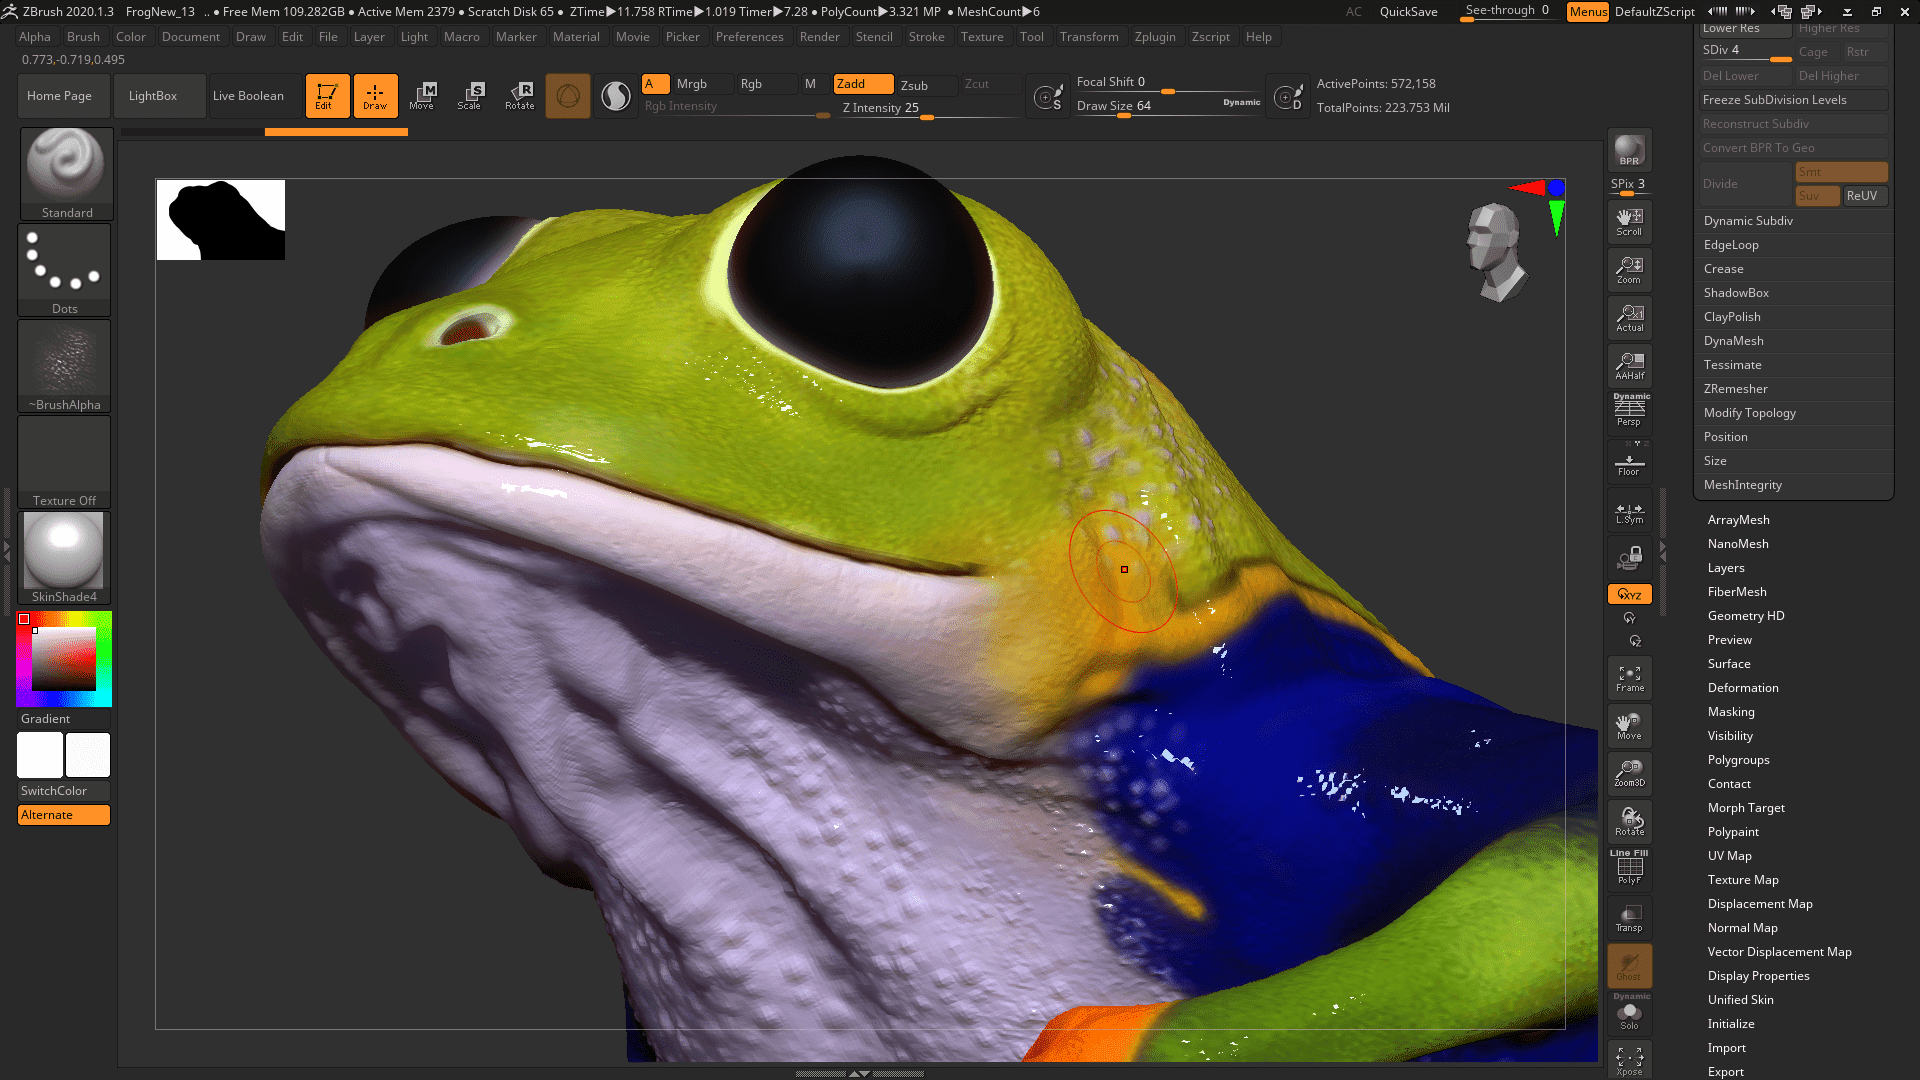
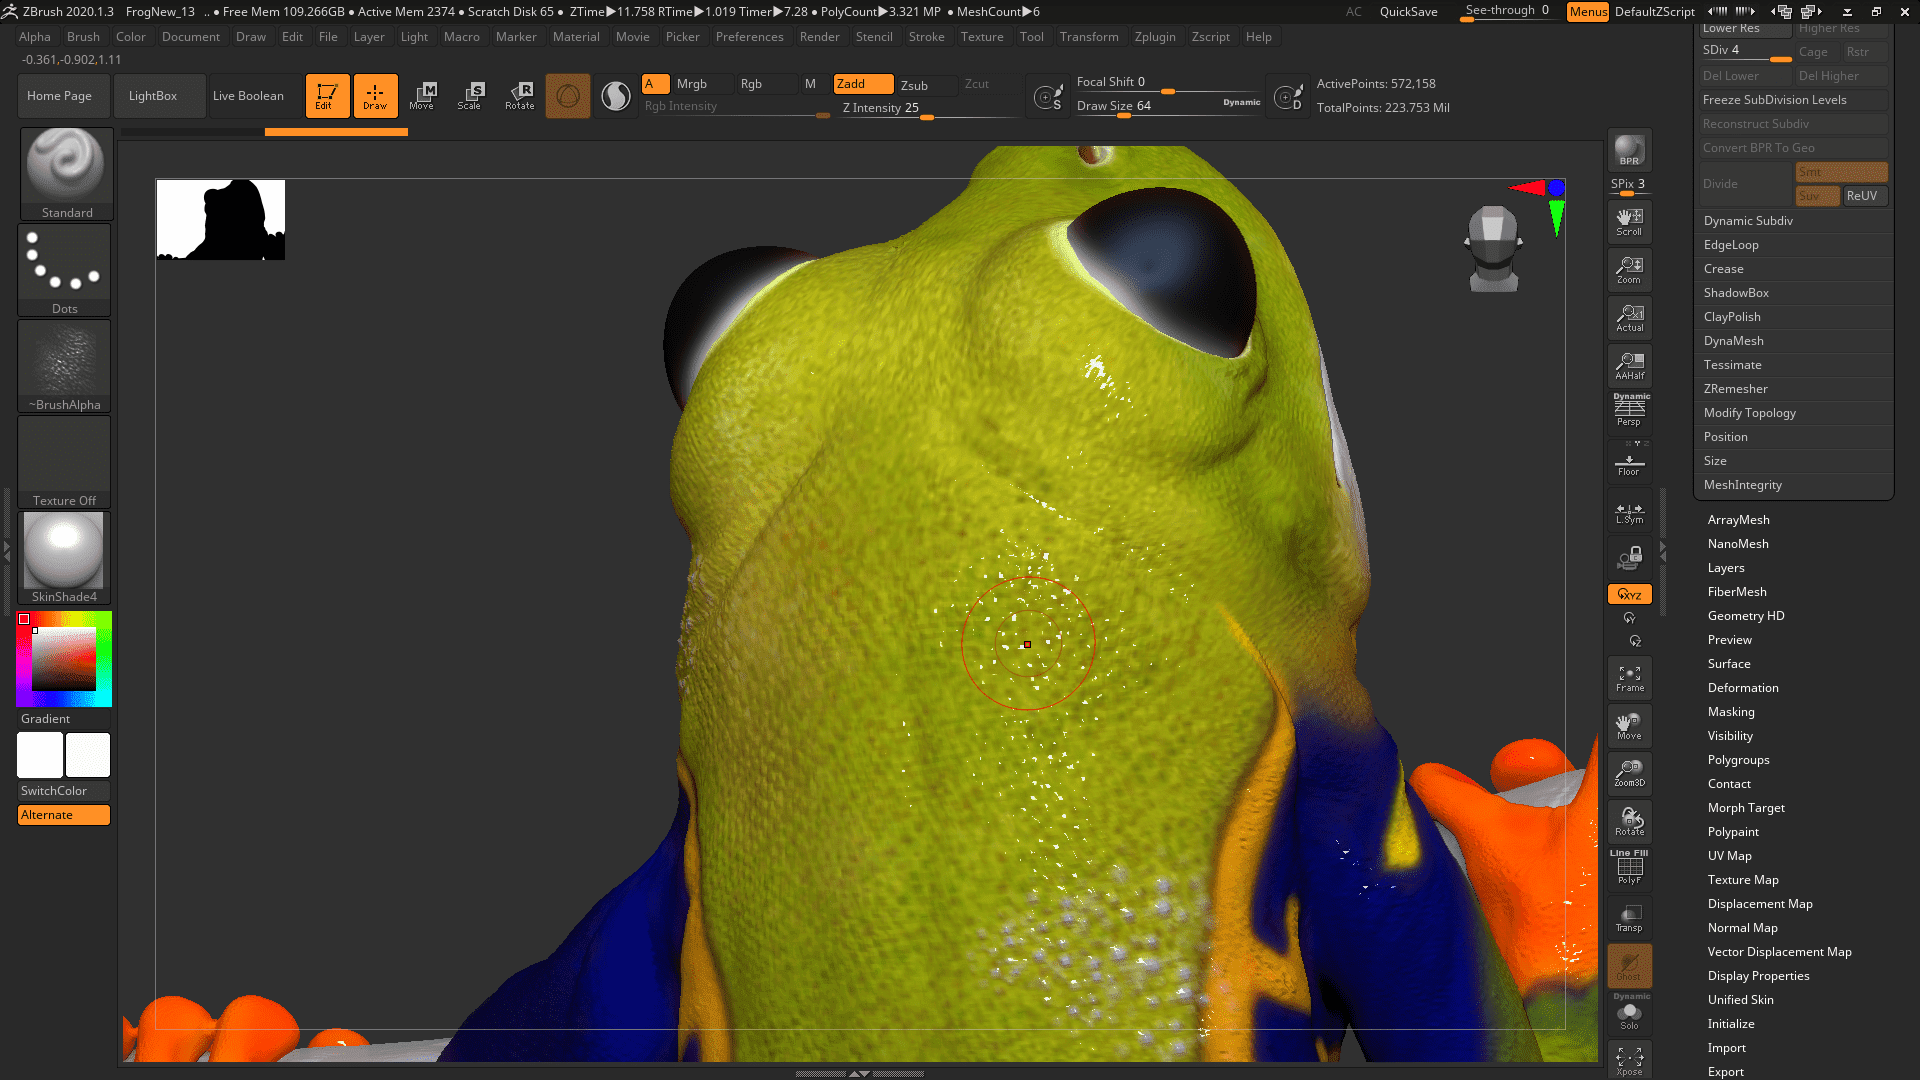
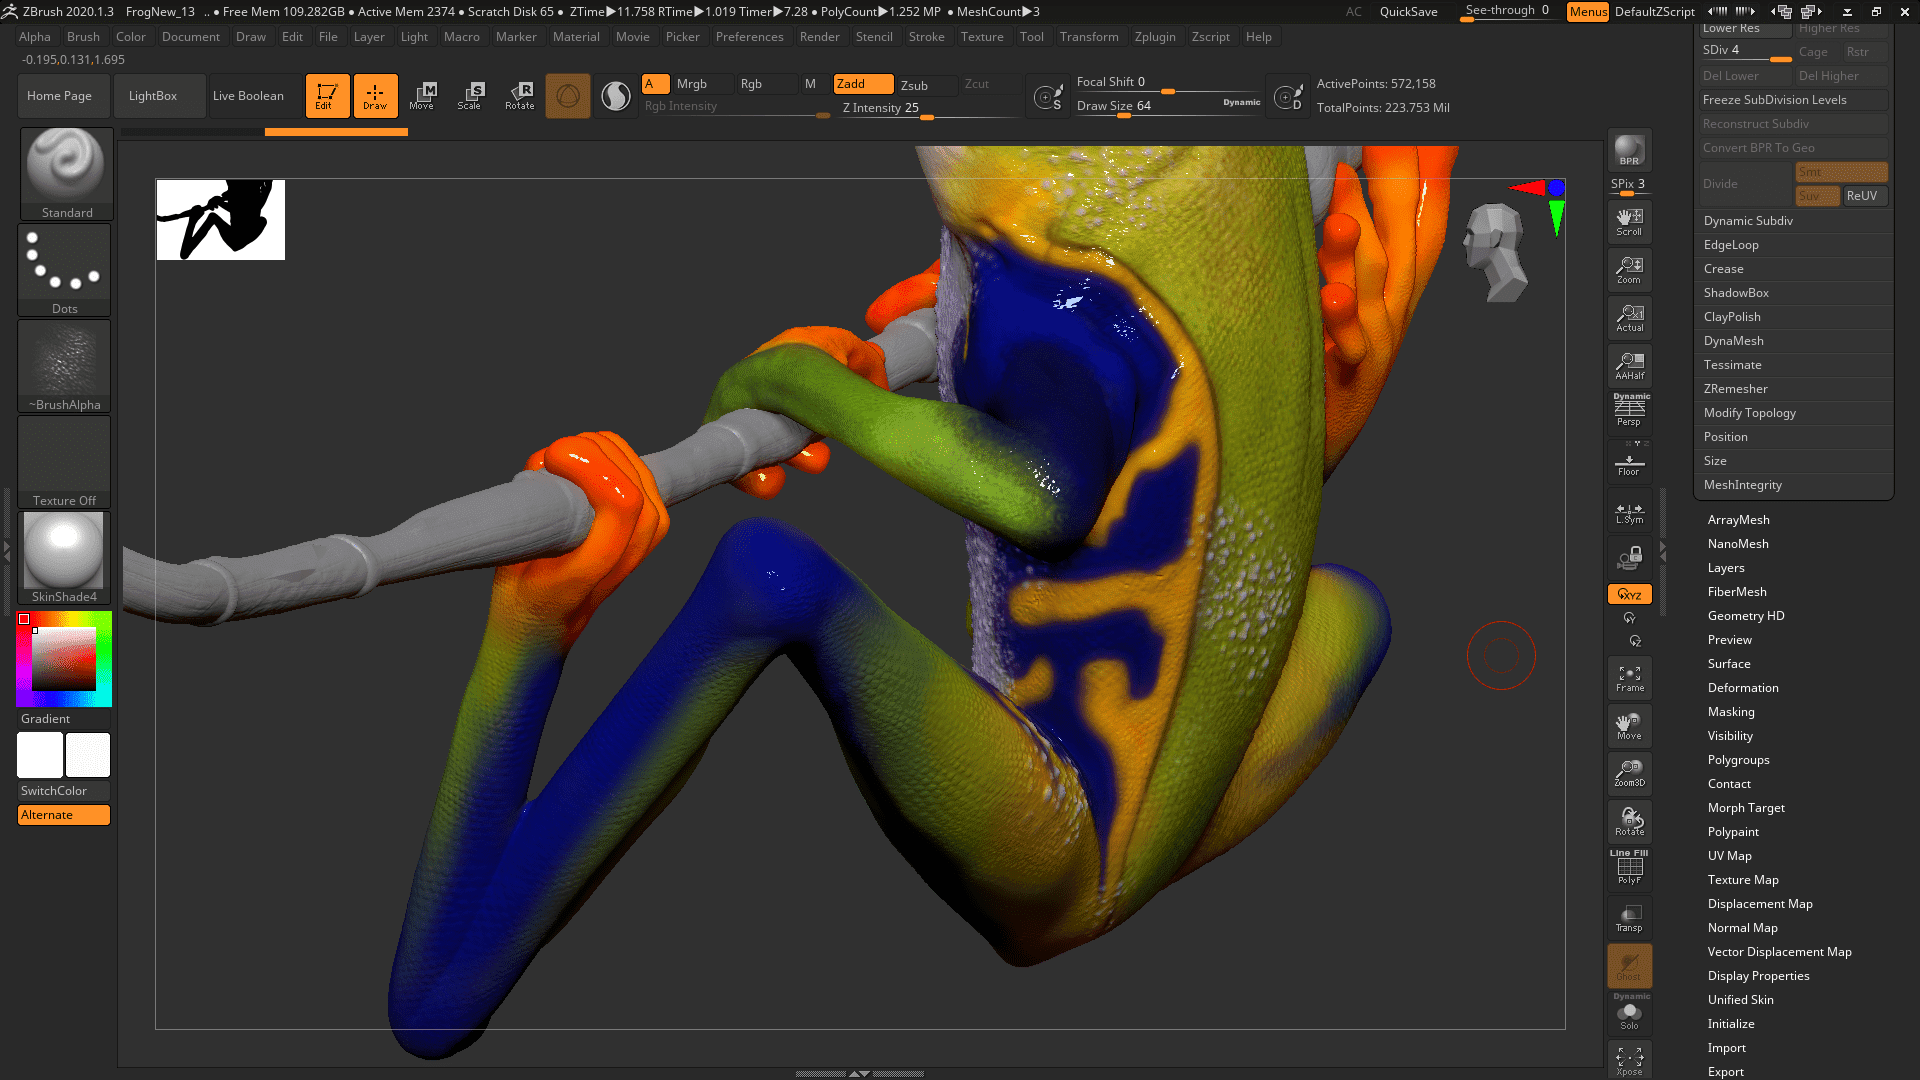
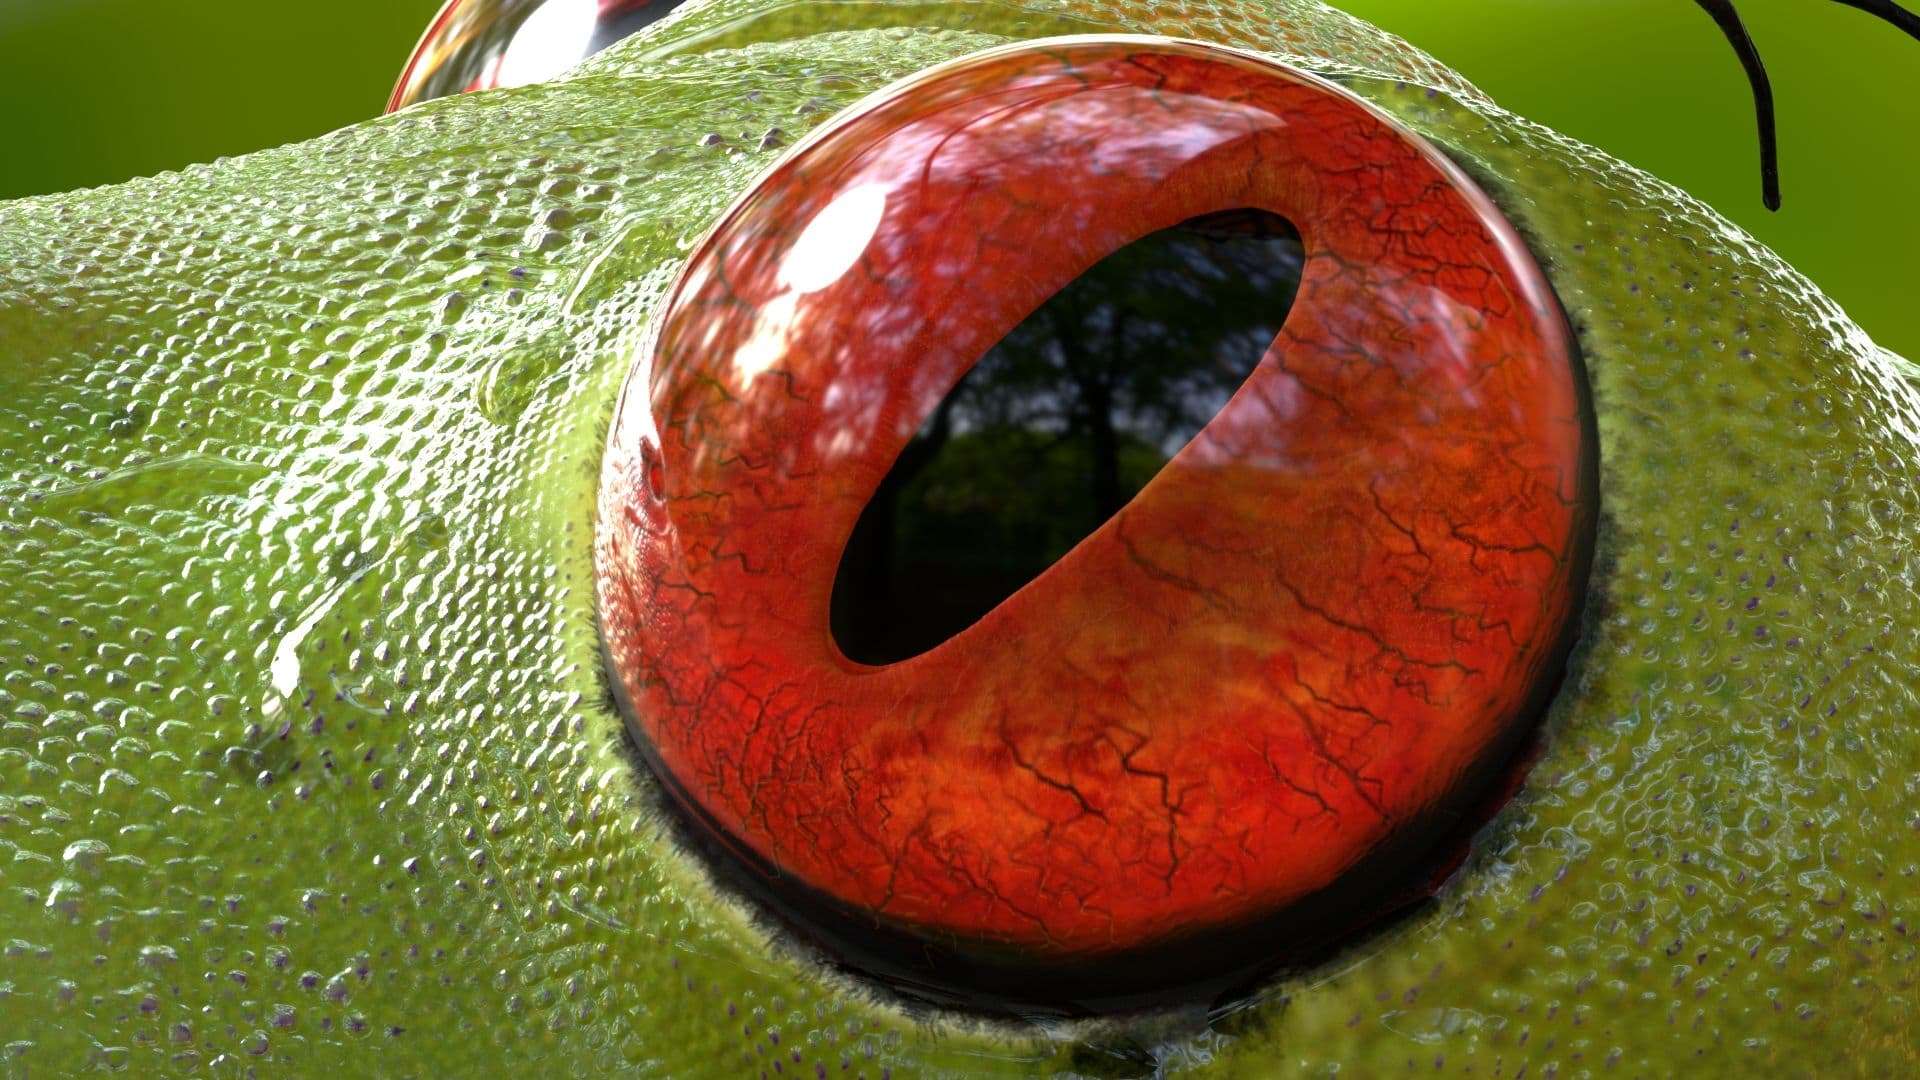
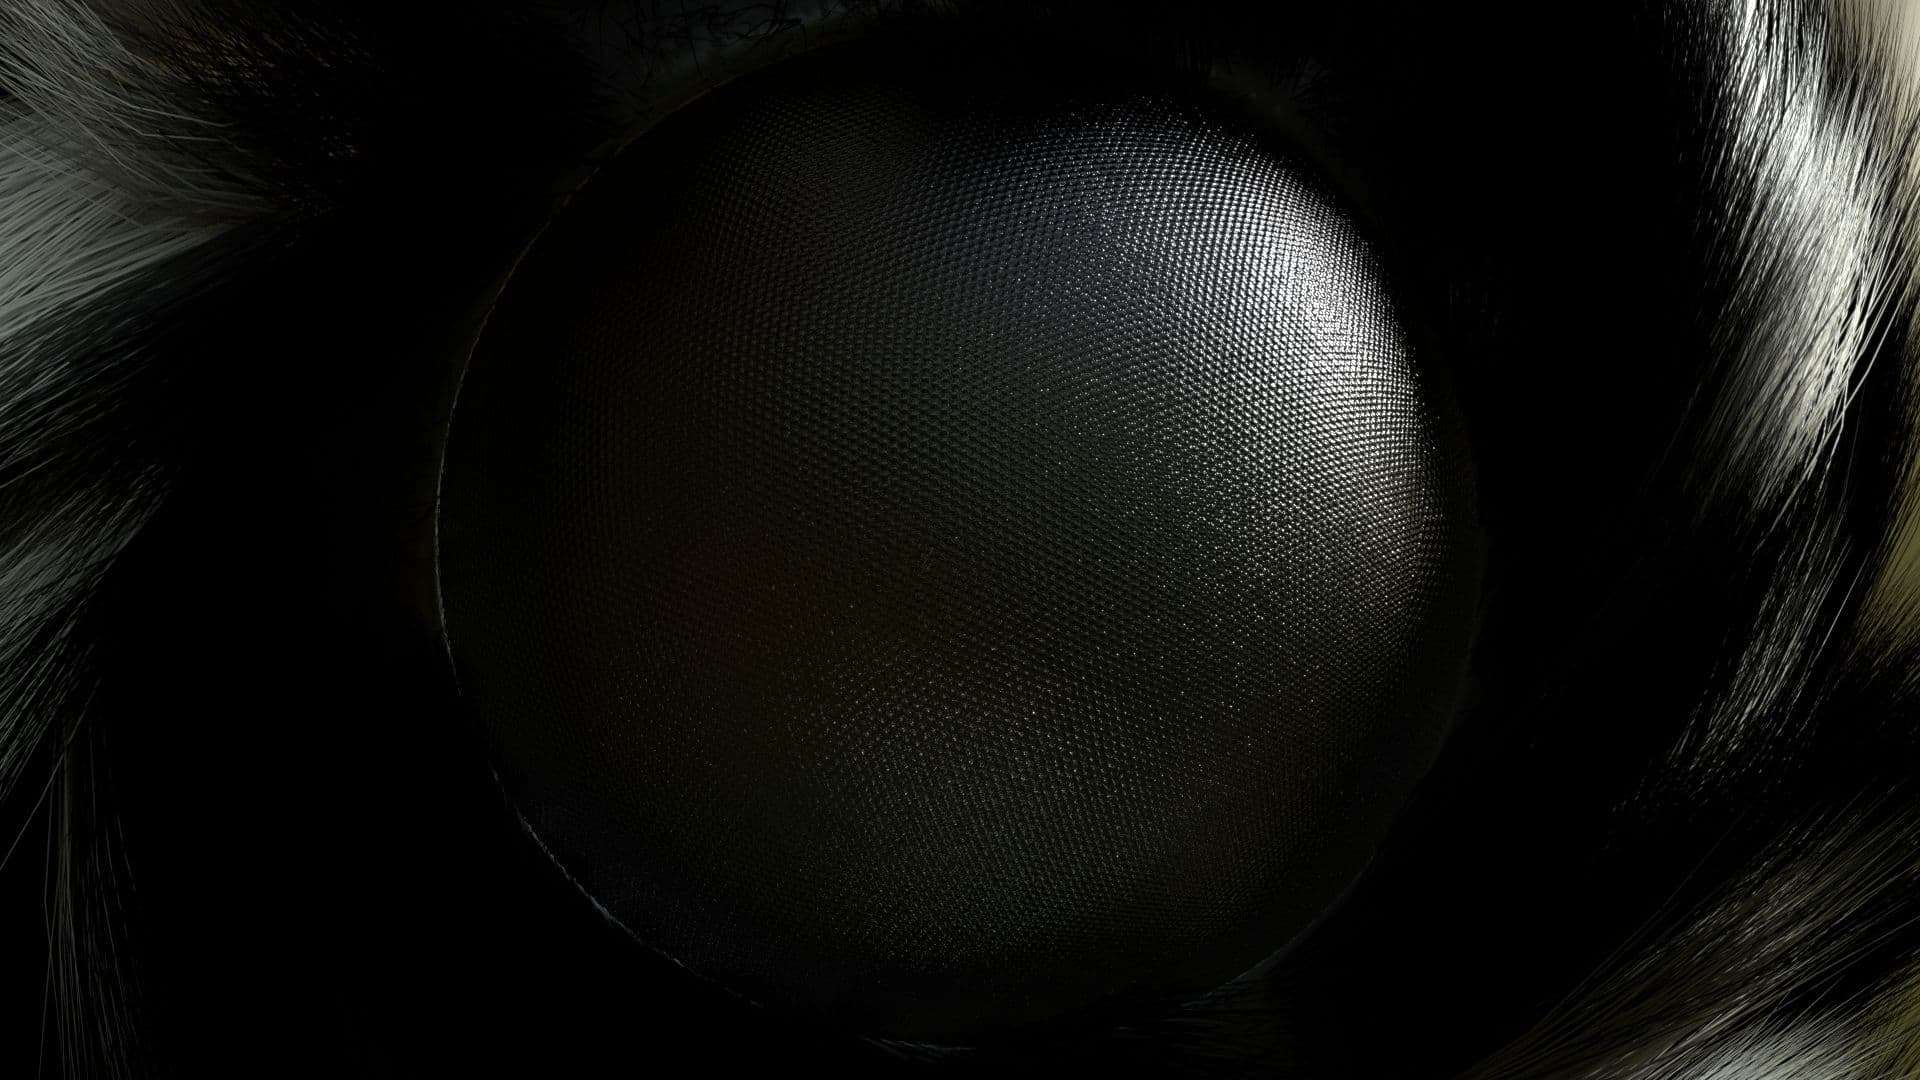
I used HD Geo for this project so I could sculpt the finest amount of details.
Here are some of the screen grabs:

After sculpting the desired details I then paint the base colour map using poly-paint manually.
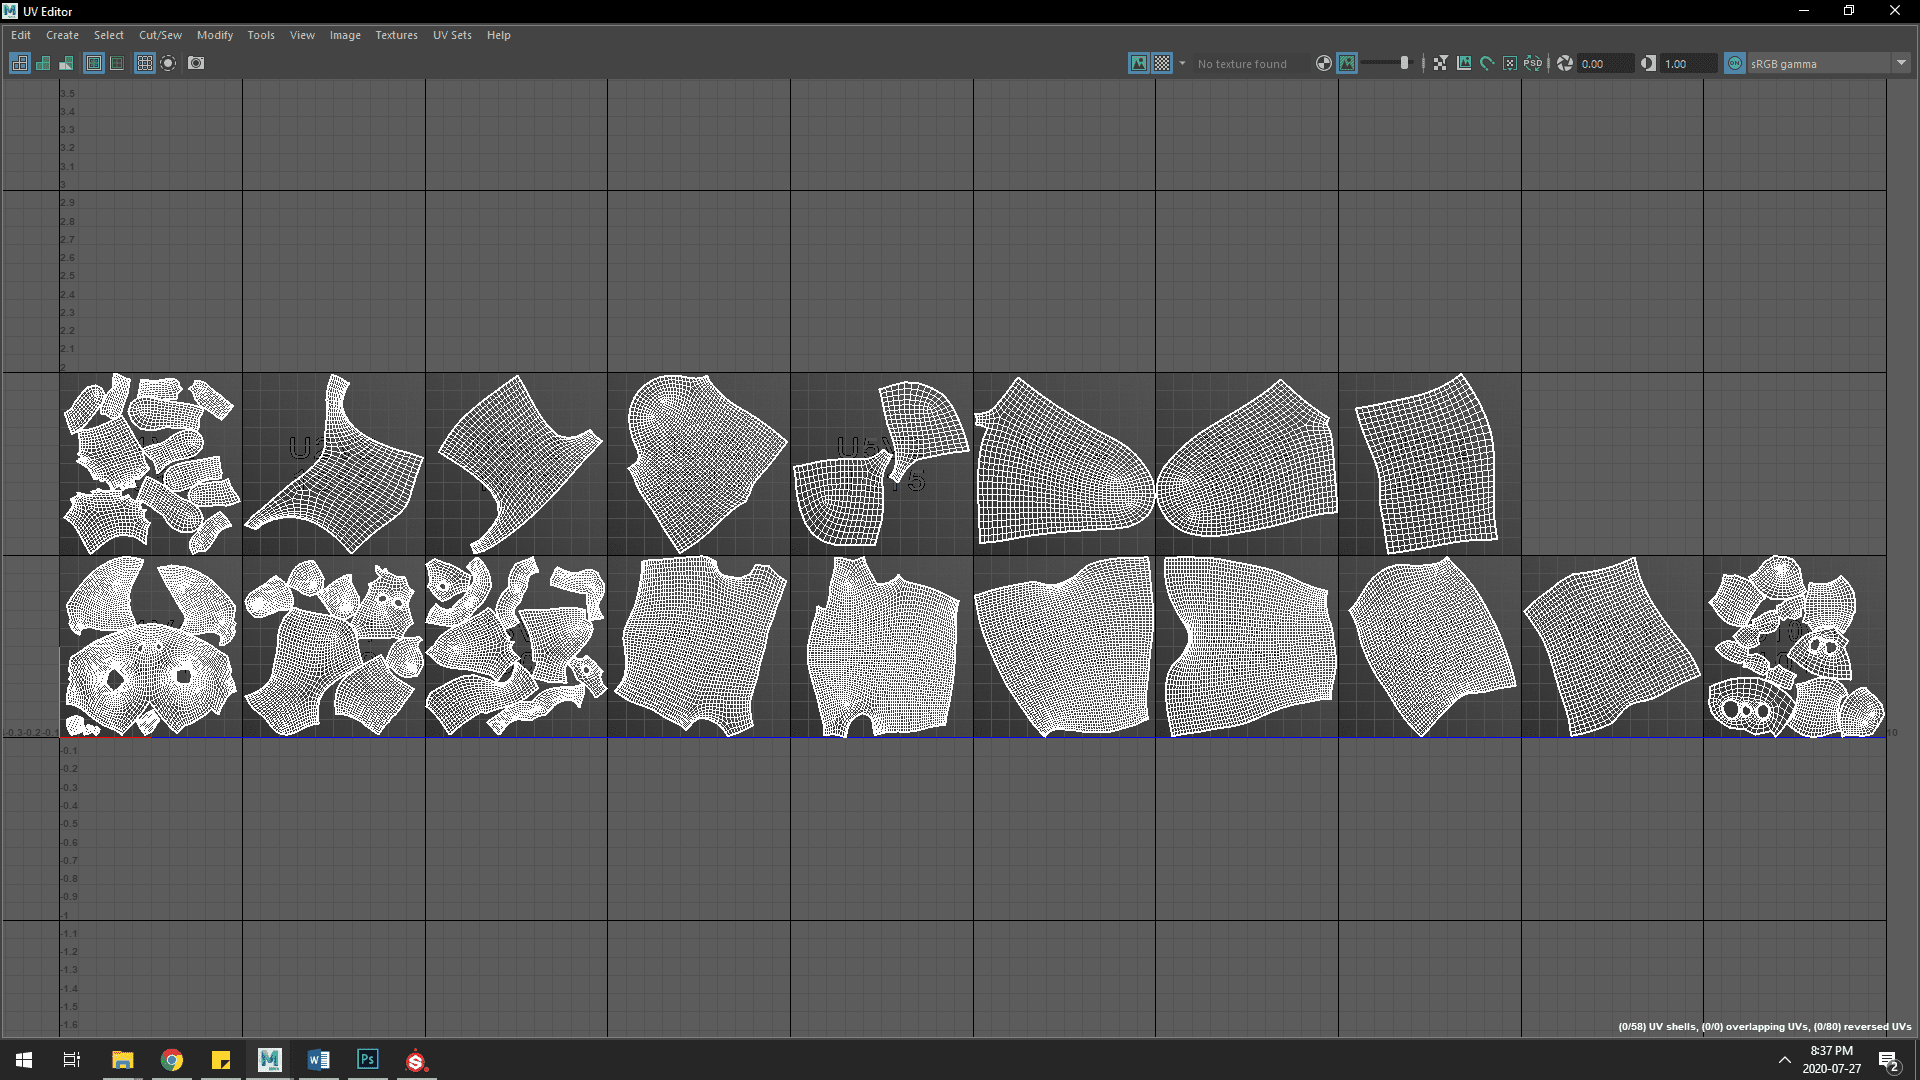
Then comes the UV’s - as my project is extremely detailed I was not ready to lose a single bit of it, so I decided to utilise the power of UDIMs for the body of the frog and relatively similar amount for the rest of the parts depending on their part in the shot. I used Maya for un-wrapping and lay-outing my UV's.
After exporting everything as planned with Displacement, Normal, and texture maps, I jumped into Substance Painter to add some procedural details like dirt, roughness breakup, etc.
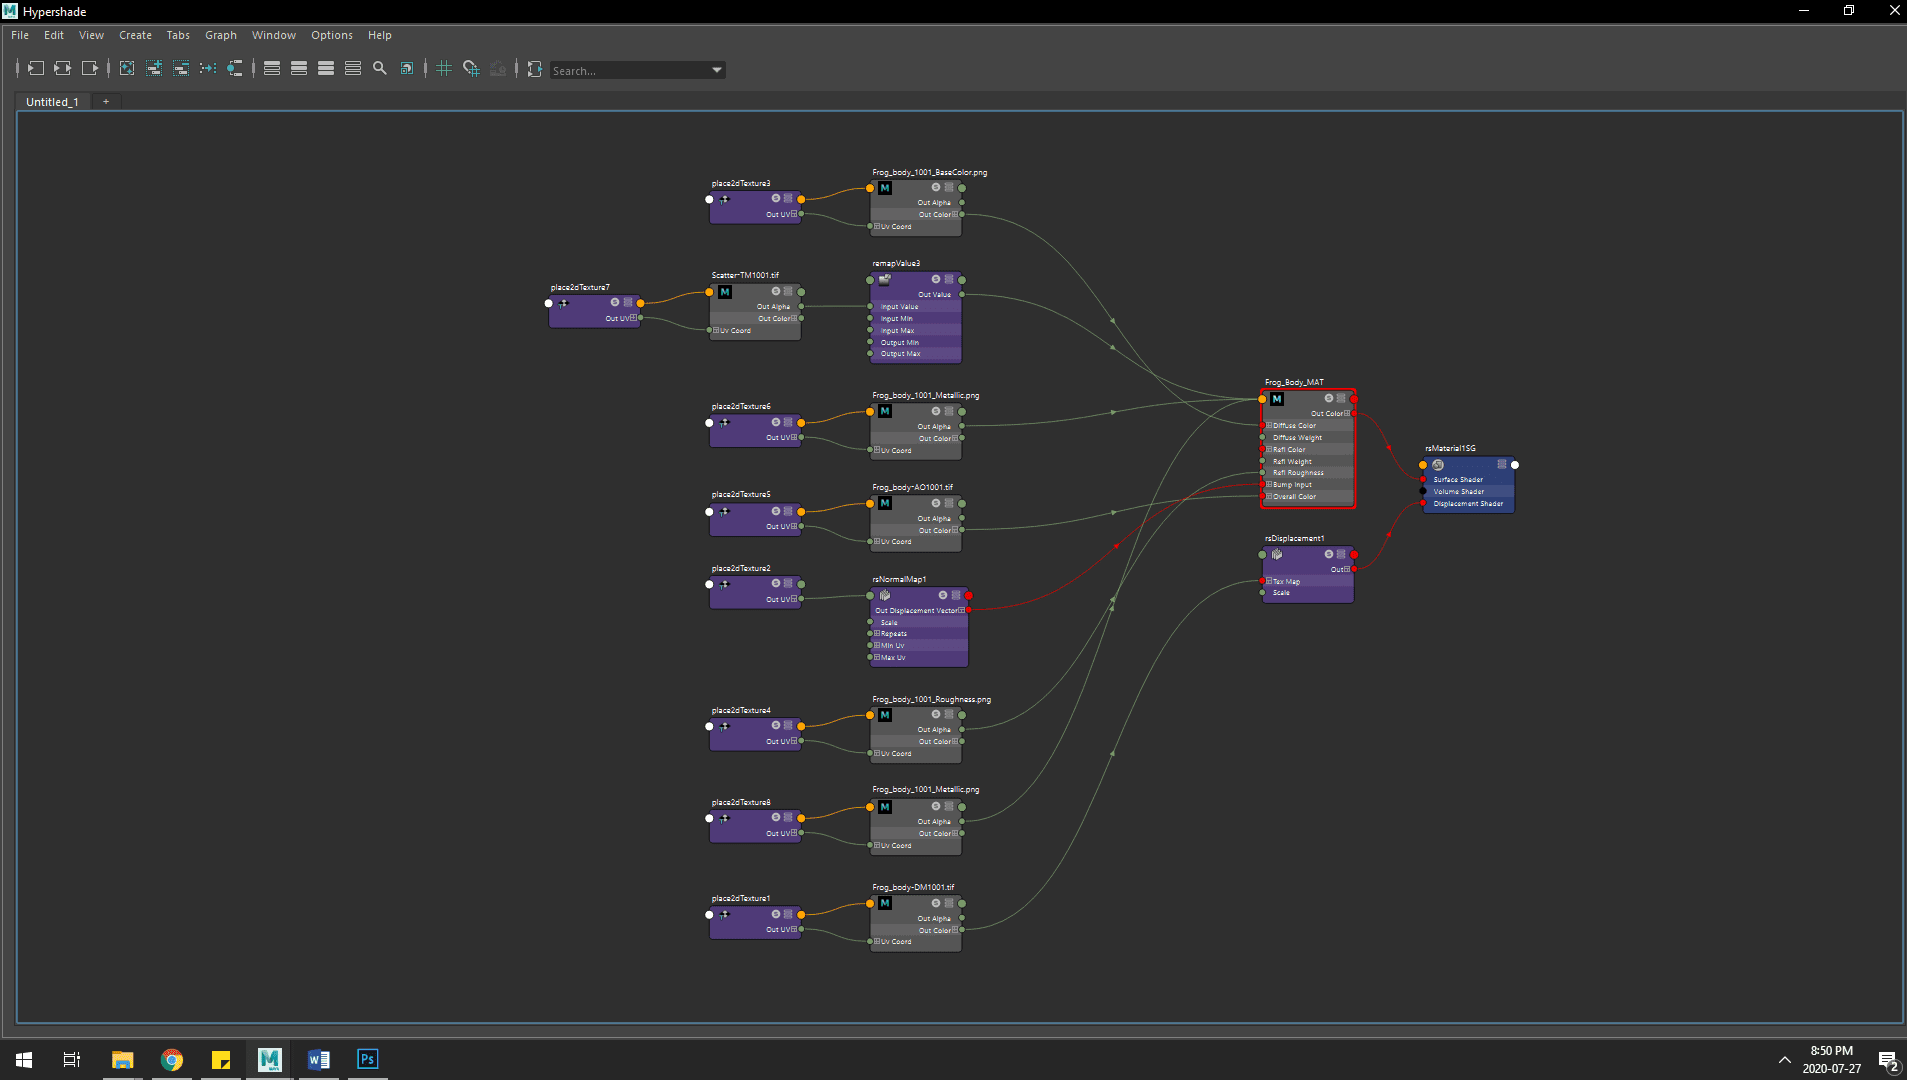
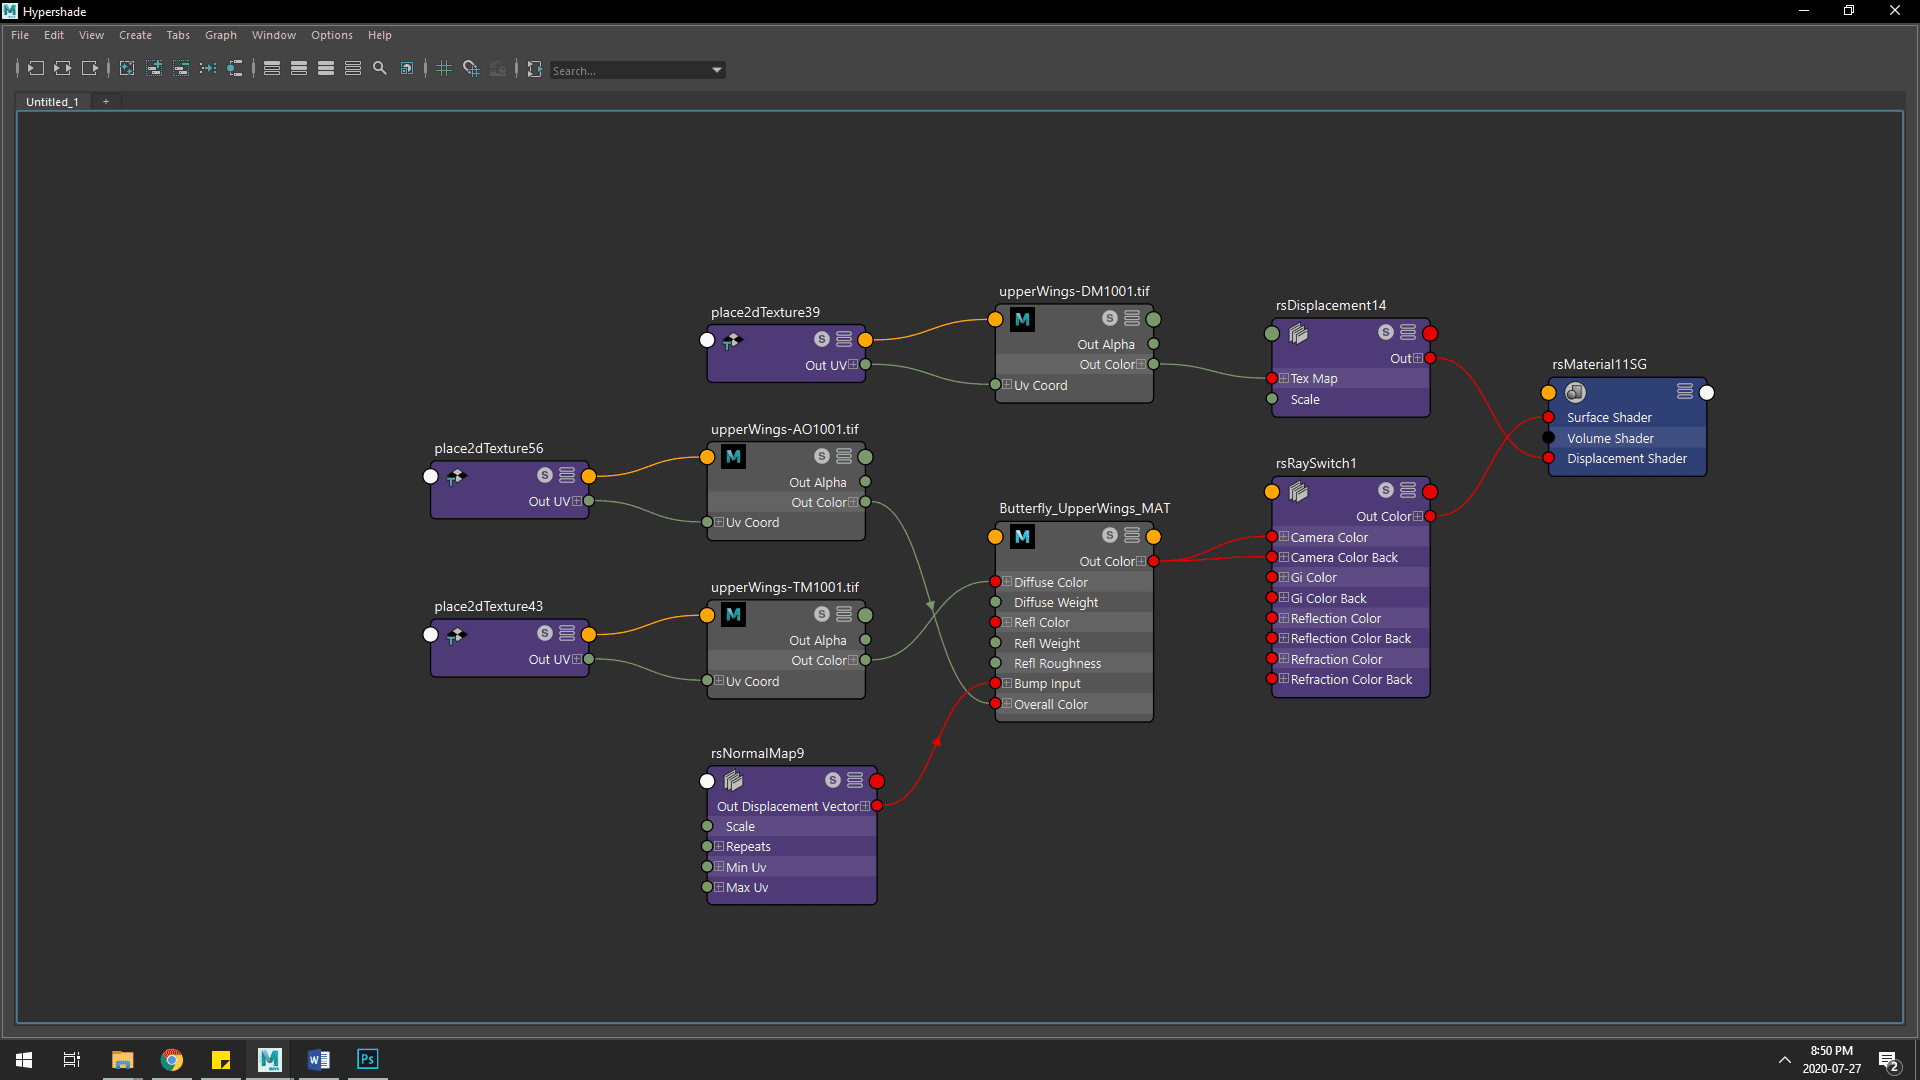
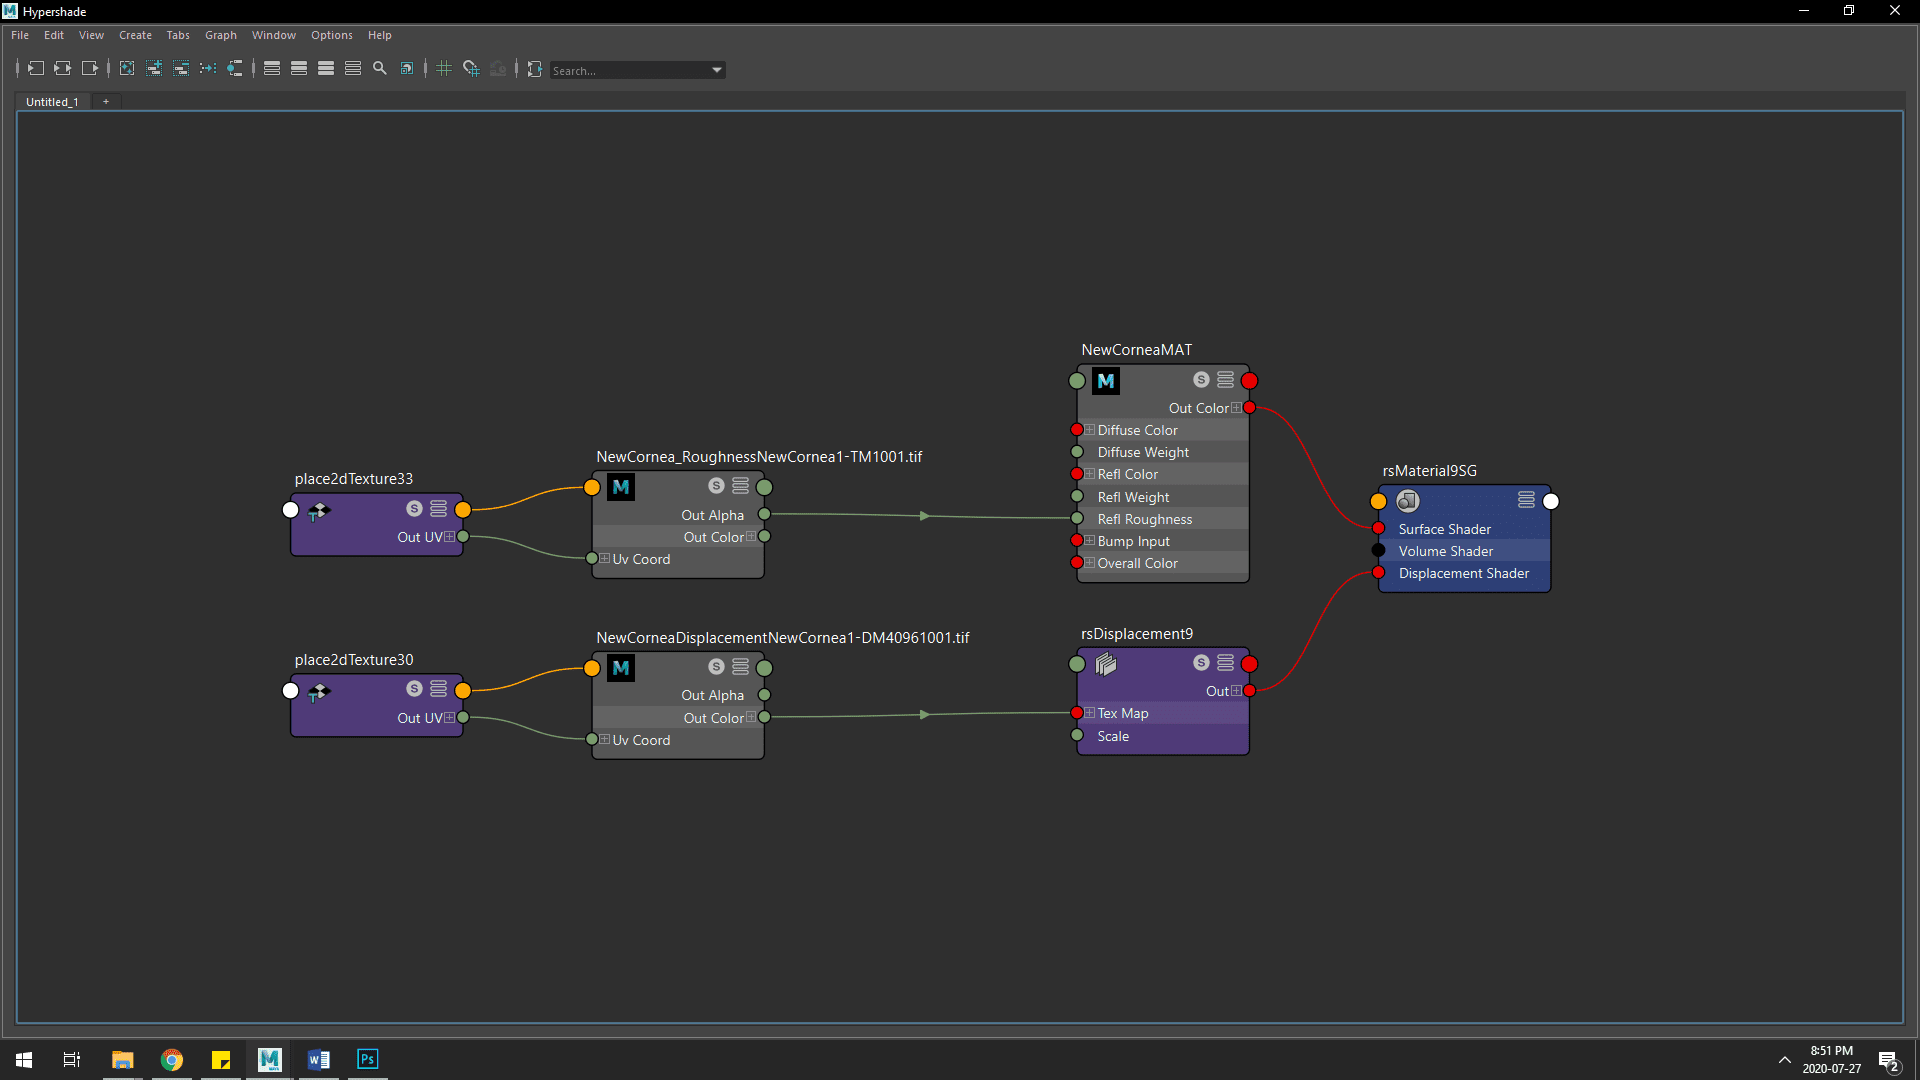
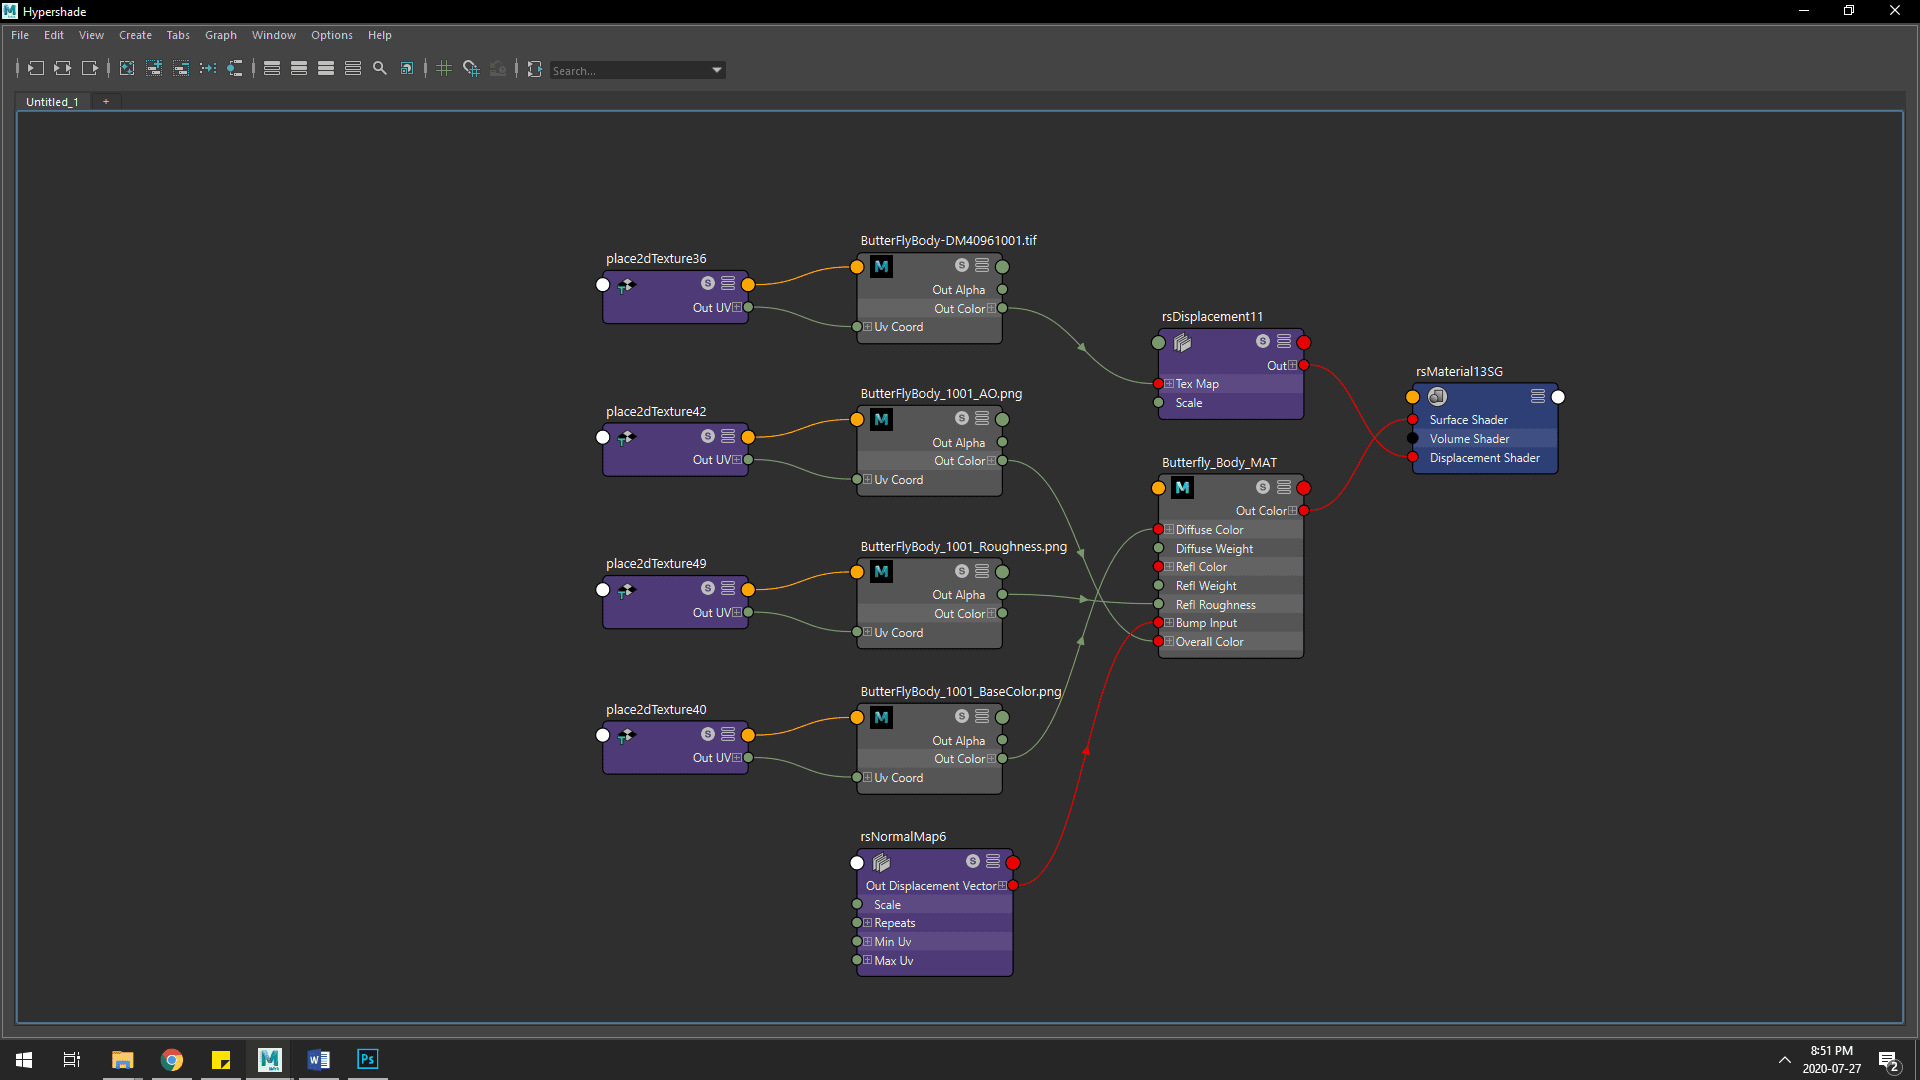
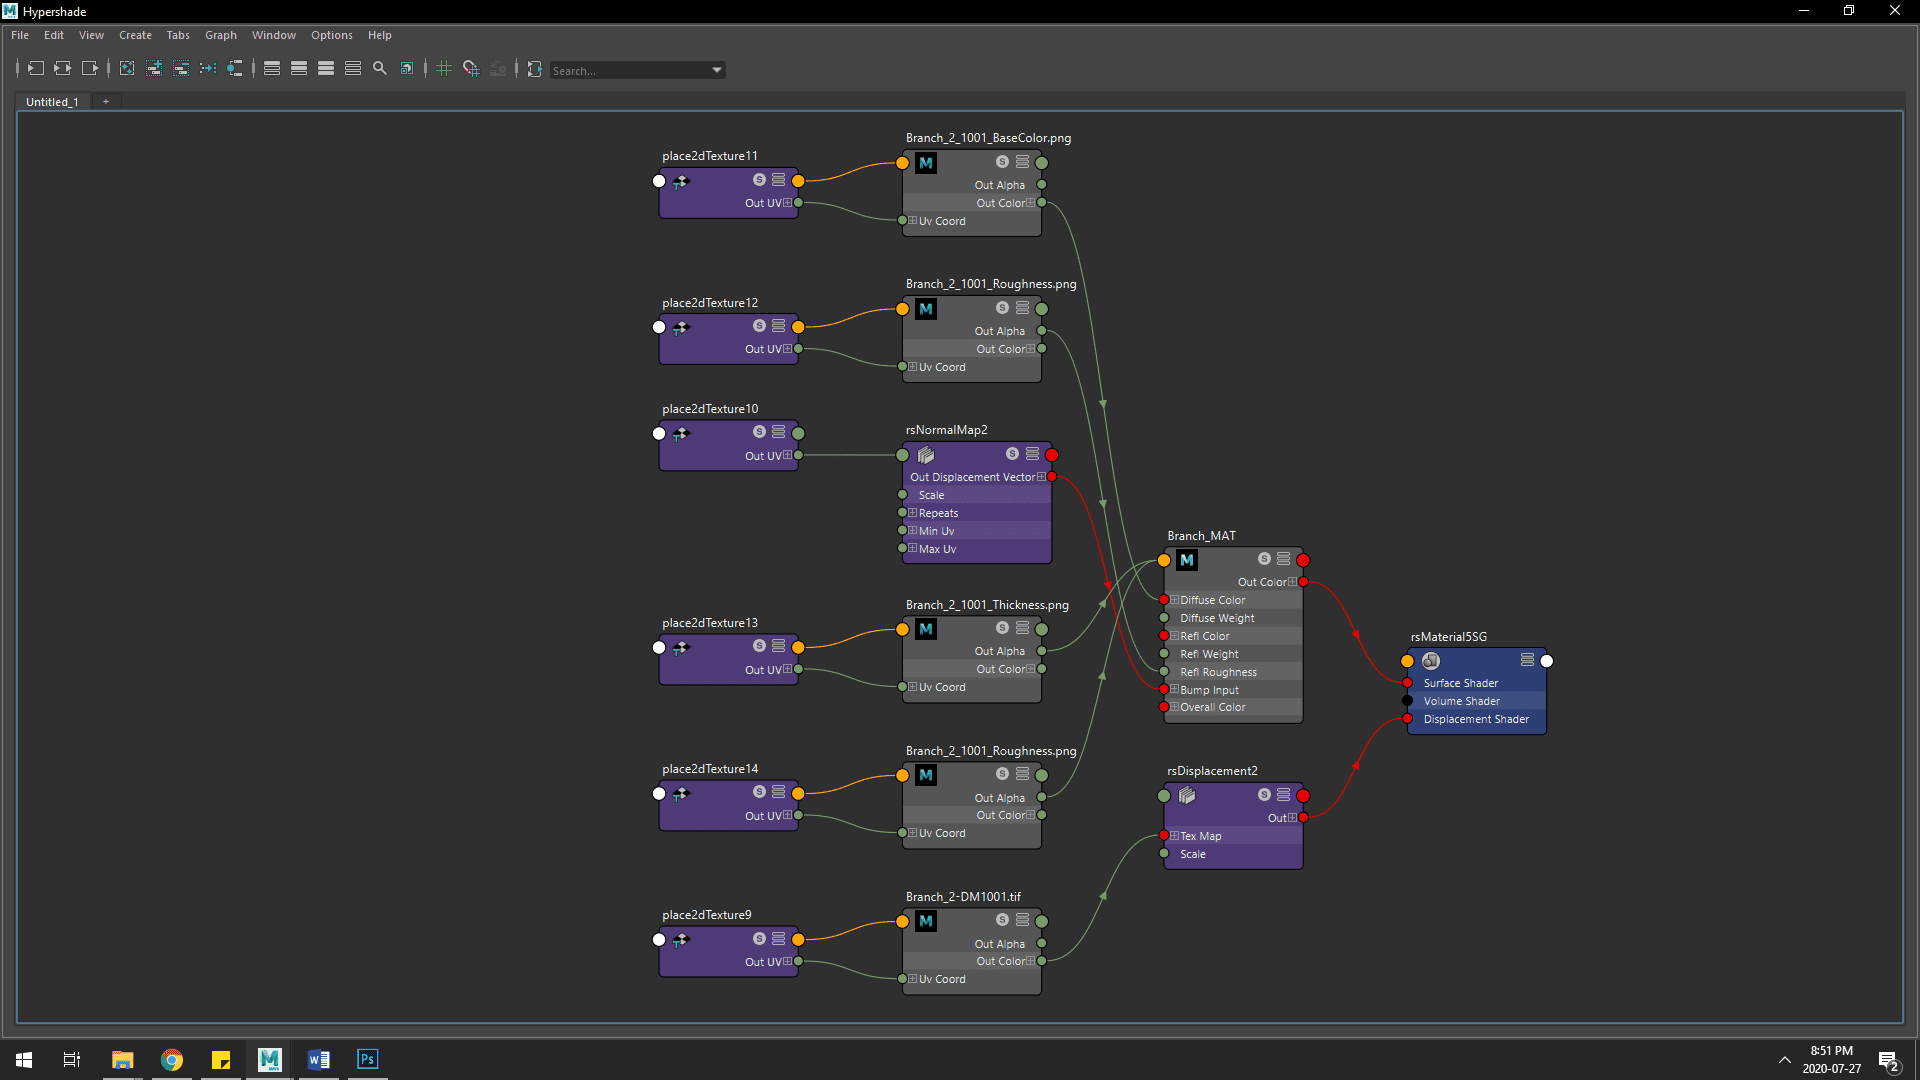
I had planned to render my scene using redshift for maya and xgen for the fur. Here are the shaders I made for redshift inside maya, fairly simple and straight forward as I like to keep my things cleans and simple:
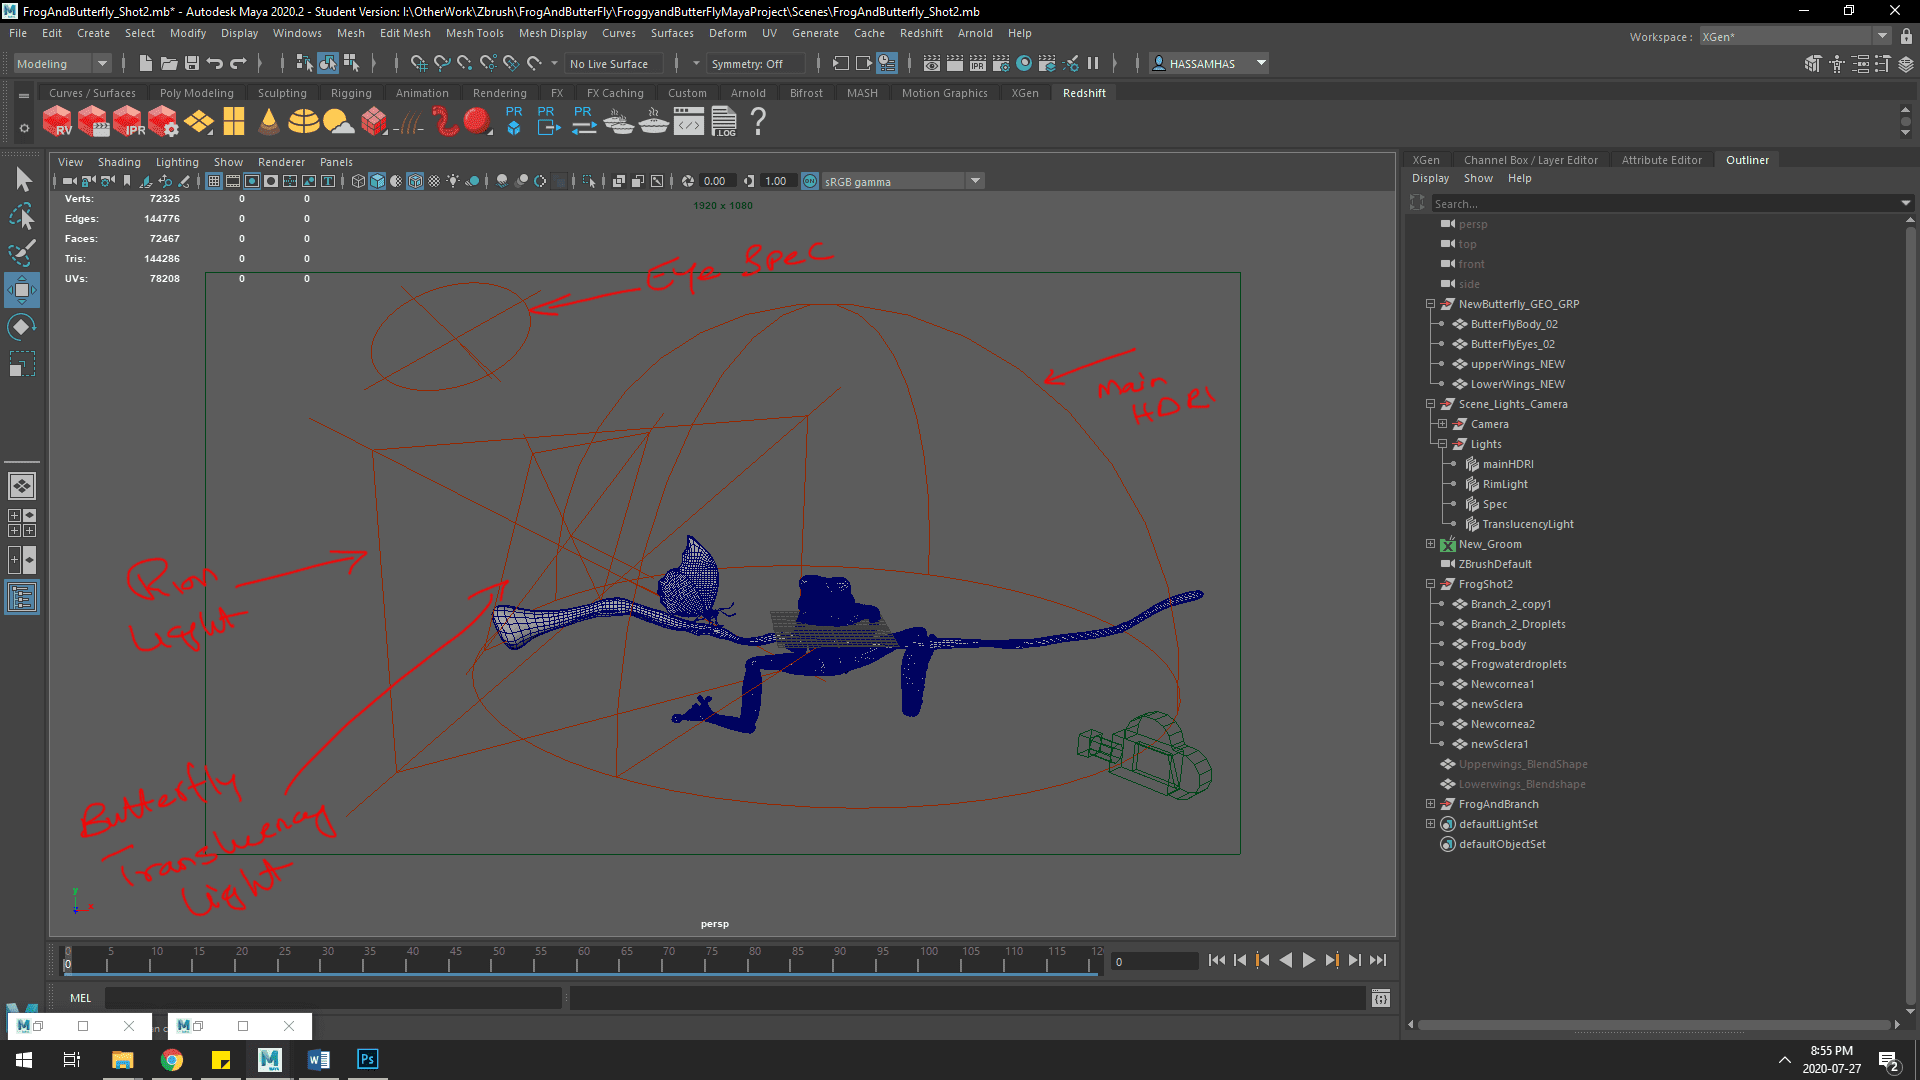
The lighting setup was also very basic and straight forward, using a total of 4 lights:
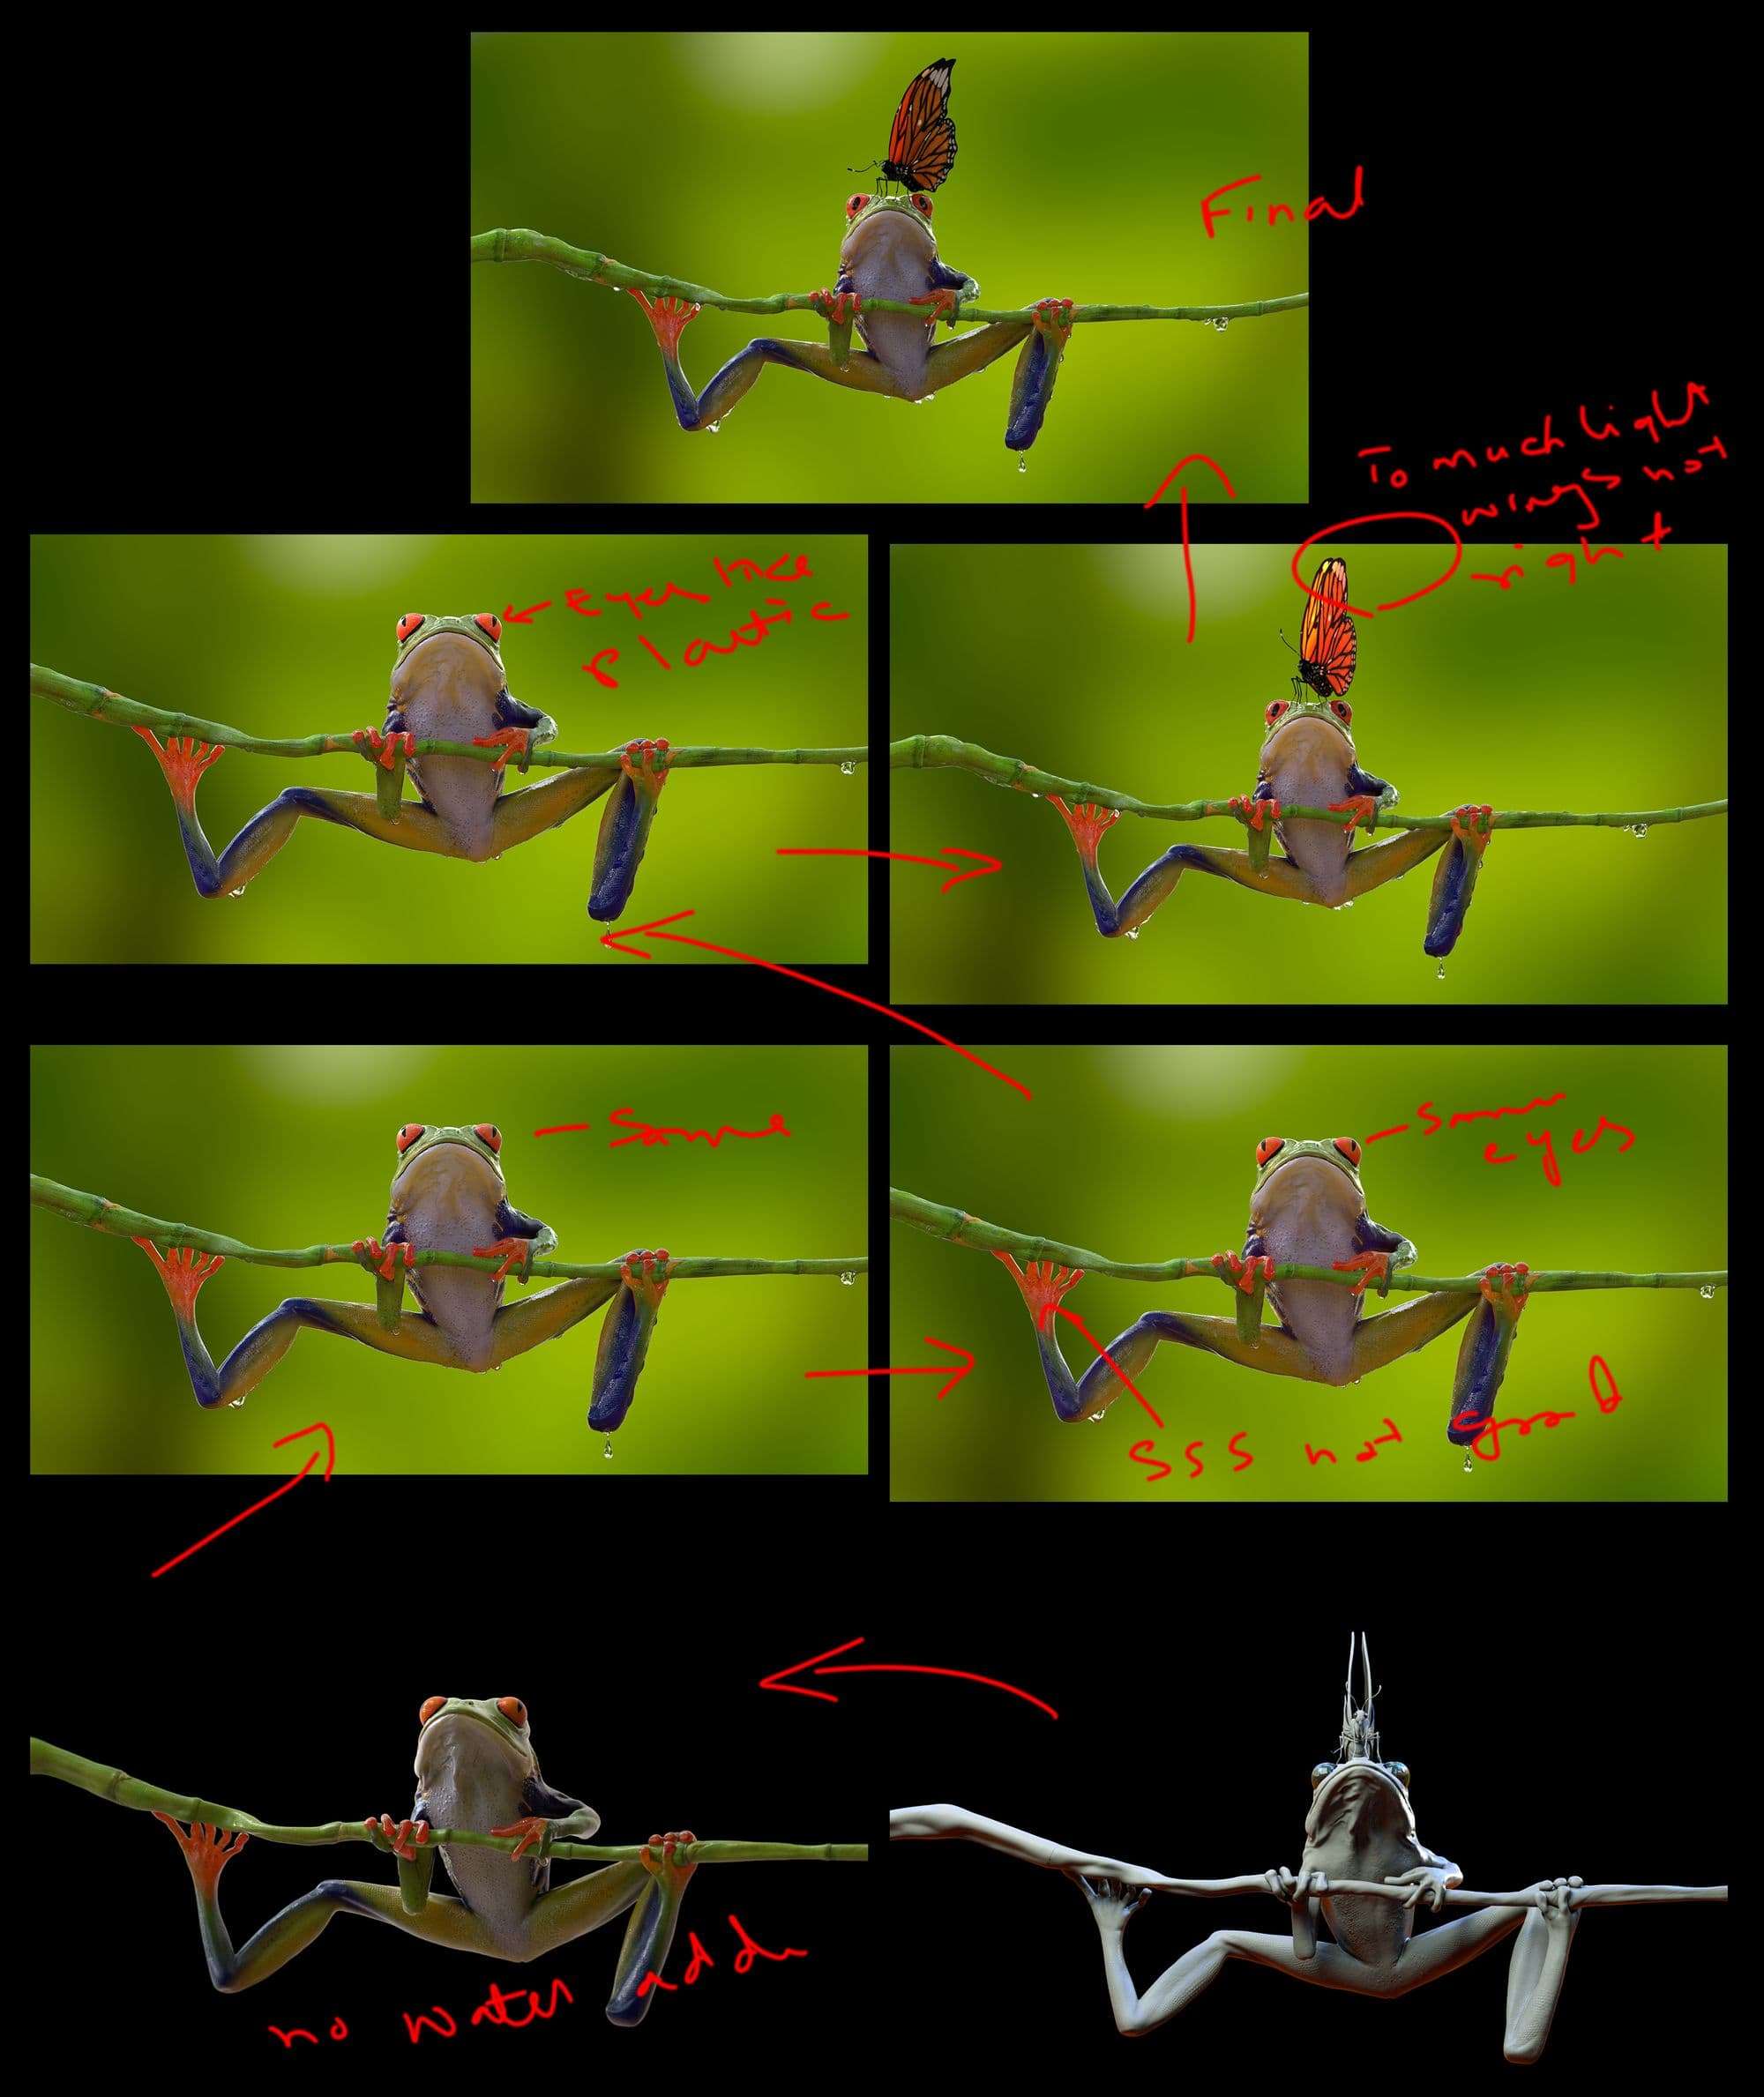
The final and most important part of the process - evaluating the right results/look including the accurate representation of the materials with light interaction.
Below are some notes I made for myself before rendering the final image:
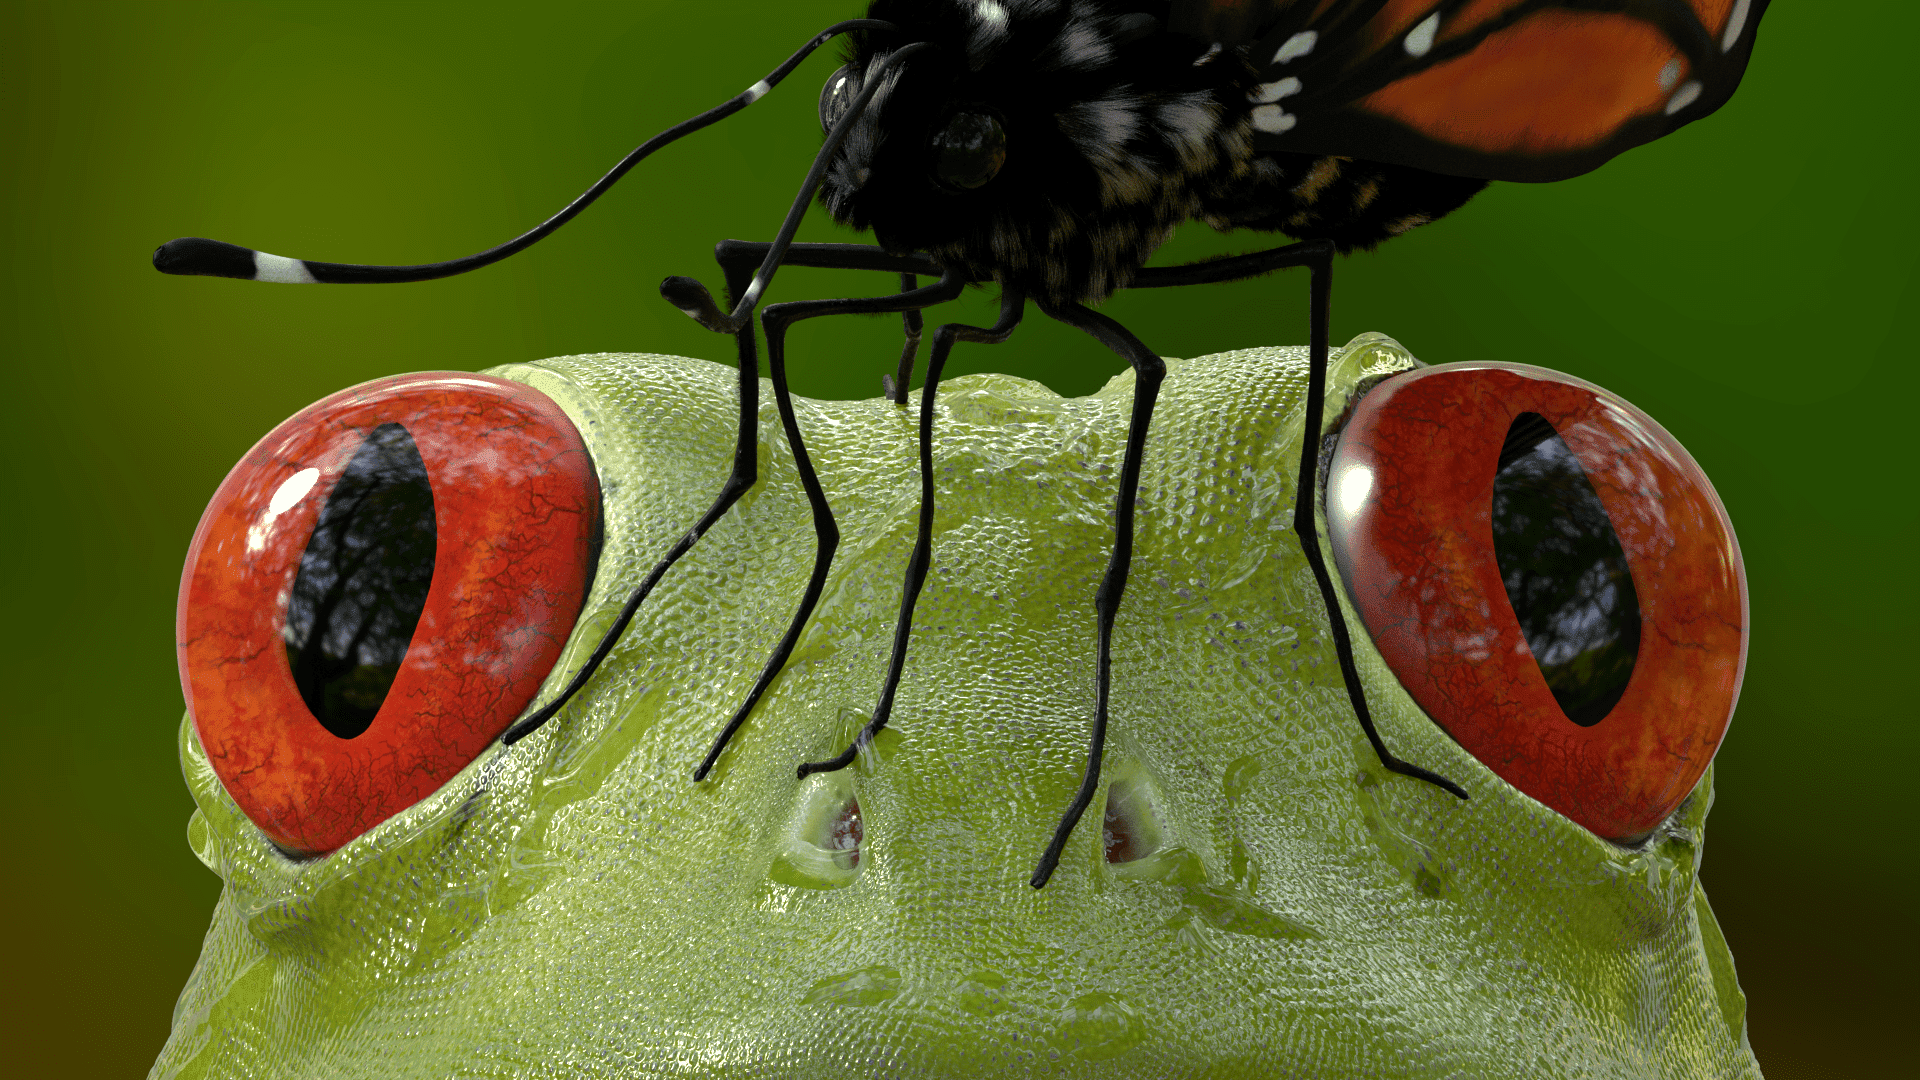
Below is the final product straight from the render without any post effect or process on it:

I hope it was helpful for many as it’s a very intimidating process but really enjoyable if you take the critique from fellow artists and sometimes from general public.
Thank you!