How to Create a Realistic 3D Portrait Using Maya and ZBrush
A student of 3D, Parth shows us his workflow when creating realistic 3D portraits in Maya and ZBrush.
A student of 3D, Parth shows us his workflow when creating realistic 3D portraits in Maya and ZBrush.

Parth Shah has been drawing and creating illustrations since he was a little boy. Only just a few years ago he came across artists work from the CGI industries and was hooked. A student of 3D, Parth shows us his workflow when creating realistic 3D portraits in Maya and ZBrush.
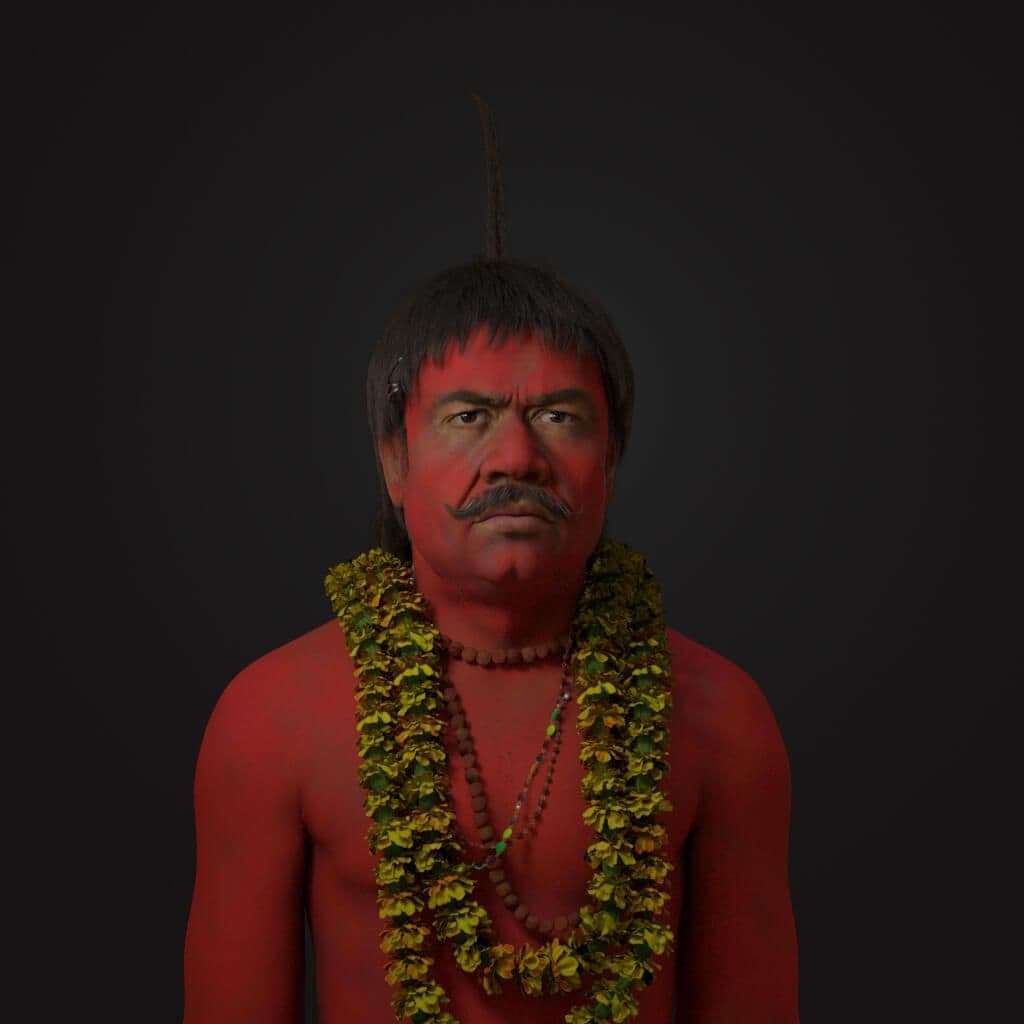
Finding a unique character and having some kind of concept or story is important. For artists starting out, I recommend modeling a popular person so it's easy to get feedback on likeness quite easily. I selected Chota Pandit from Indian movie "Bhool Bhulaiyaa" for his unique look.
Research is the first step towards any project although it seems like a never ending process. Gathering reference images is important and gathering from different search engines and platforms like Pinterest, blogs and movies, is a good place to start.
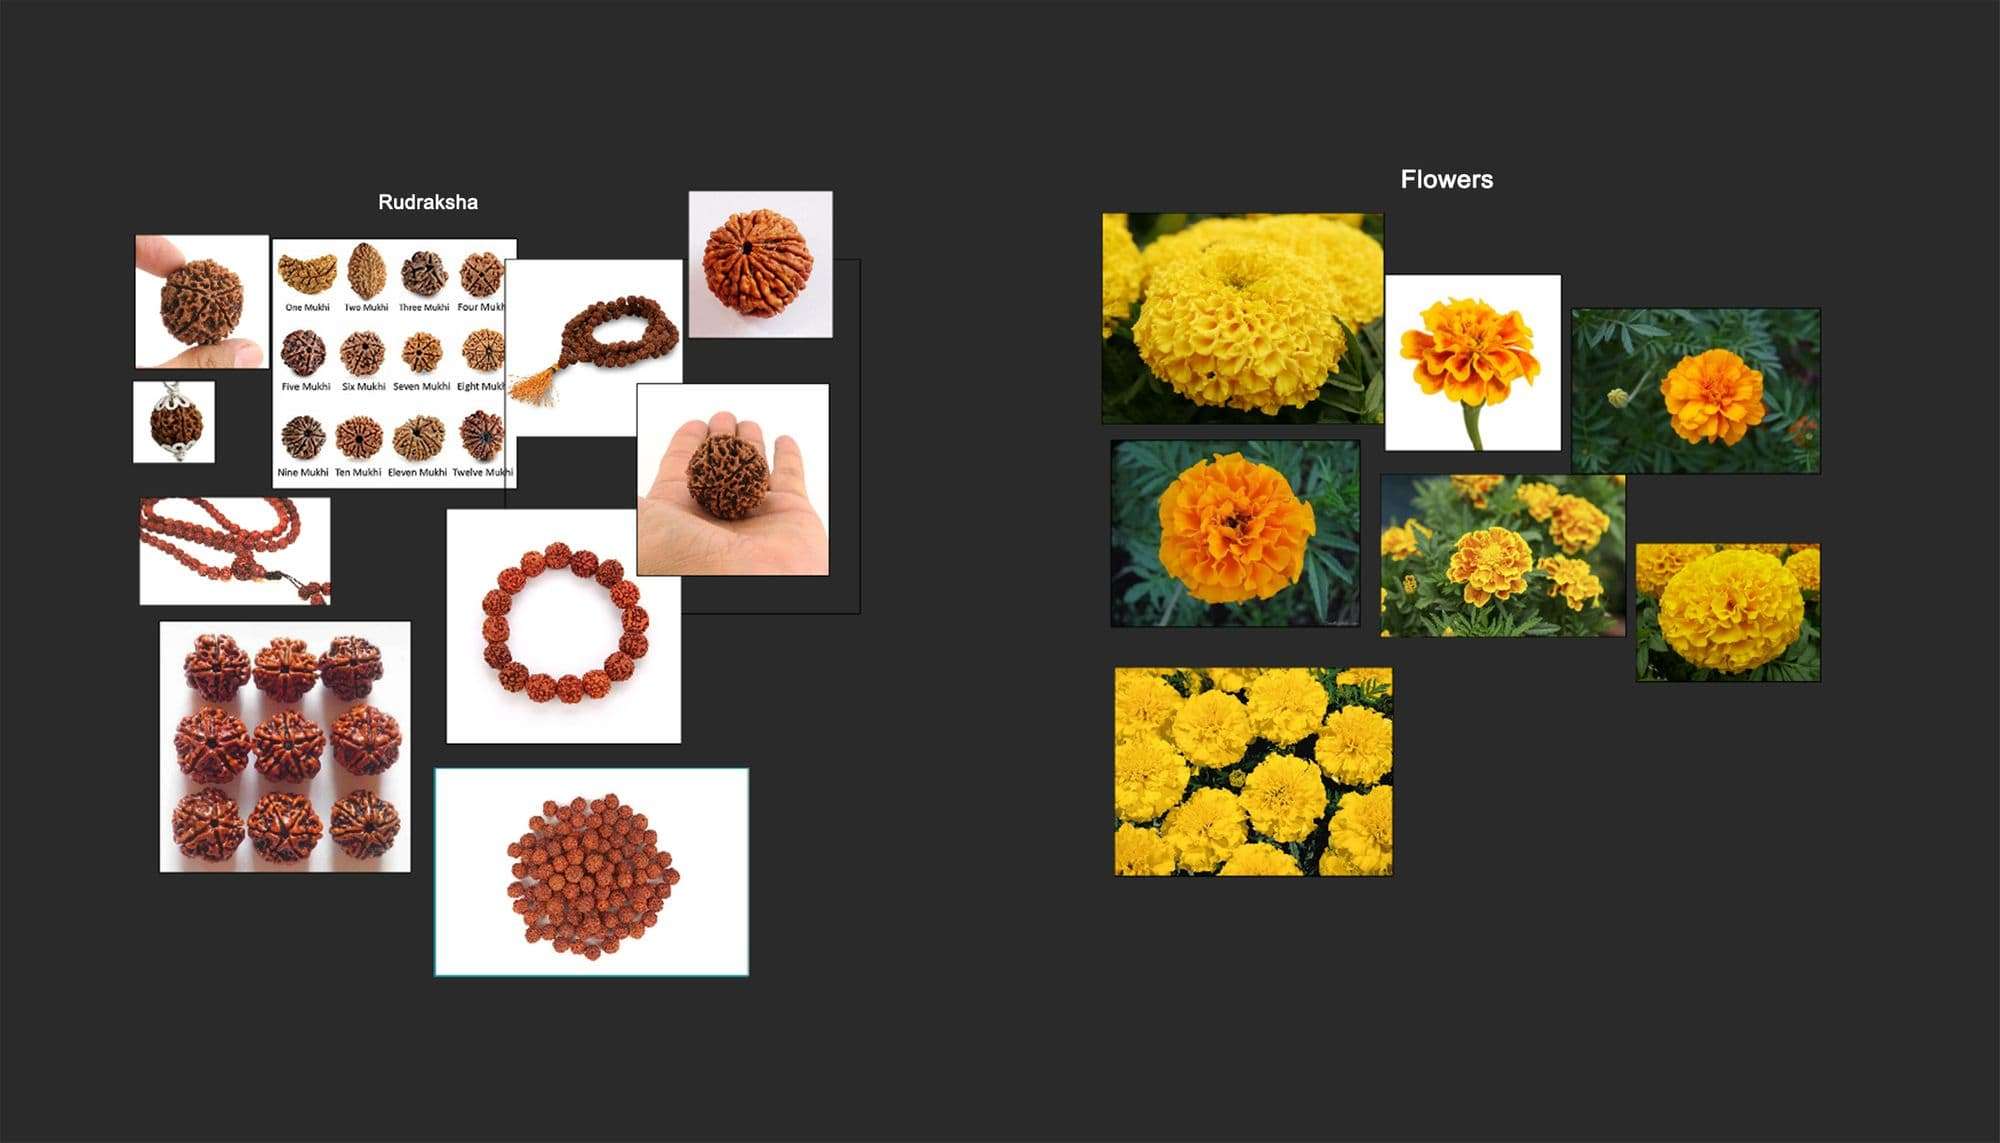
I created different groups of character reference to study them separately. For the character I worked on, I divided the reference into two groups with makeup and one with red chili color. I also had different groups for character props like Rudraksha, flowers etc.
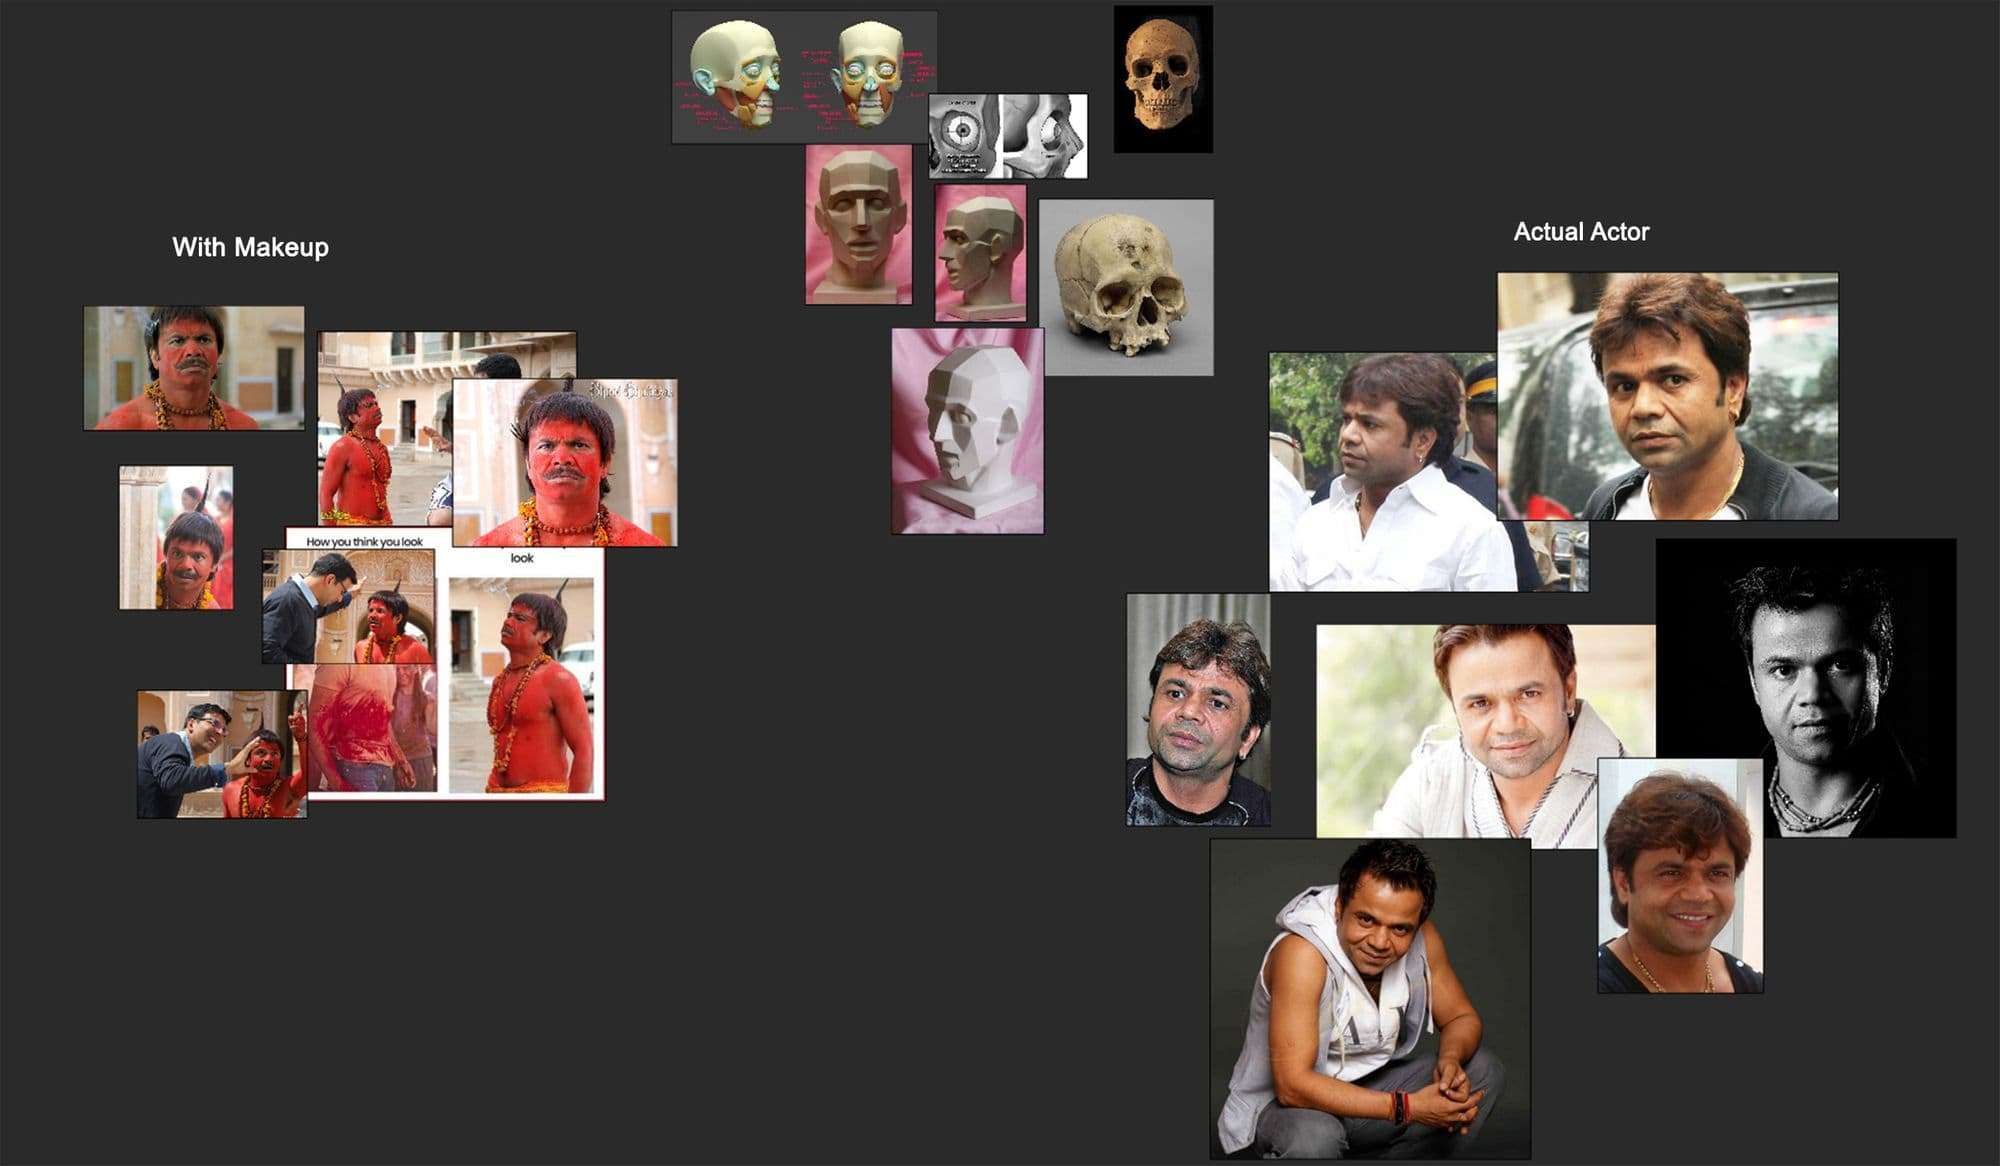
I used Photoshop and PureRef to organise my references. I also created rough skull sketches on images to get rough ideas about anatomy - I did the same for other parts of the body.
For Sculpting I used Zbrush software but you can start within Maya for a base mesh or even Mudbox. Initially, I started blocking out on a sphere. Figuring out the proportions from observing references, I created basic shapes for the nose, eyes, and lips. Remember, reference images play tricks so setting up right FL or Angle of view is necessary.
I then moved on to defining the shapes I mentioned and established the skin and muscles around them. I layer these details on, keeping everything symmetrical for a while. Brushes I used for building in ZBrush are "standard", "move", "flatten" and "claytubes". While doing this I keep checking my head model via different angles or modes - common methods are flipping the head vertical and horizontal.
Whilst I work, I am always looking to other artists for inspiration - I follow and get motivated by artists like Ian Spriggs, Kris "Antropus" Costa, Hossein Diba and more.
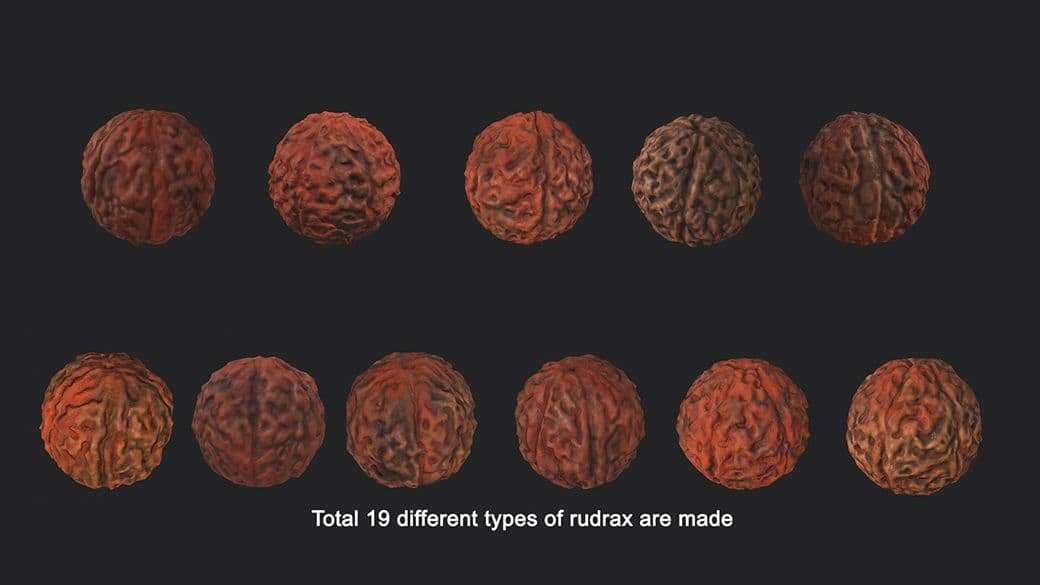
I worked on my props later, using ZBrush with the default brushes I mentioned above. For each prop I created 19 variations of models for things like the flowers and gems, applying different texture maps.
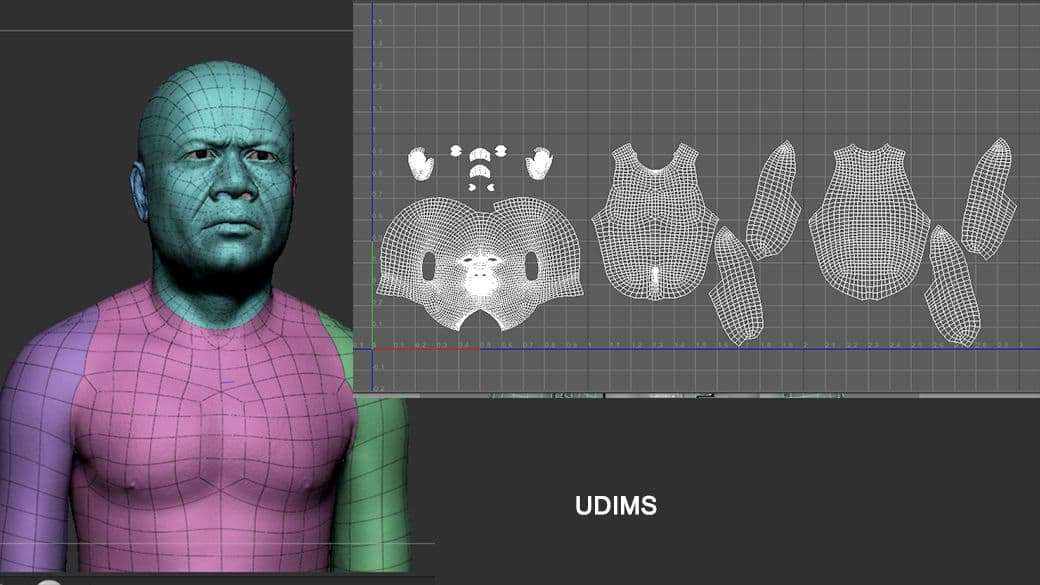
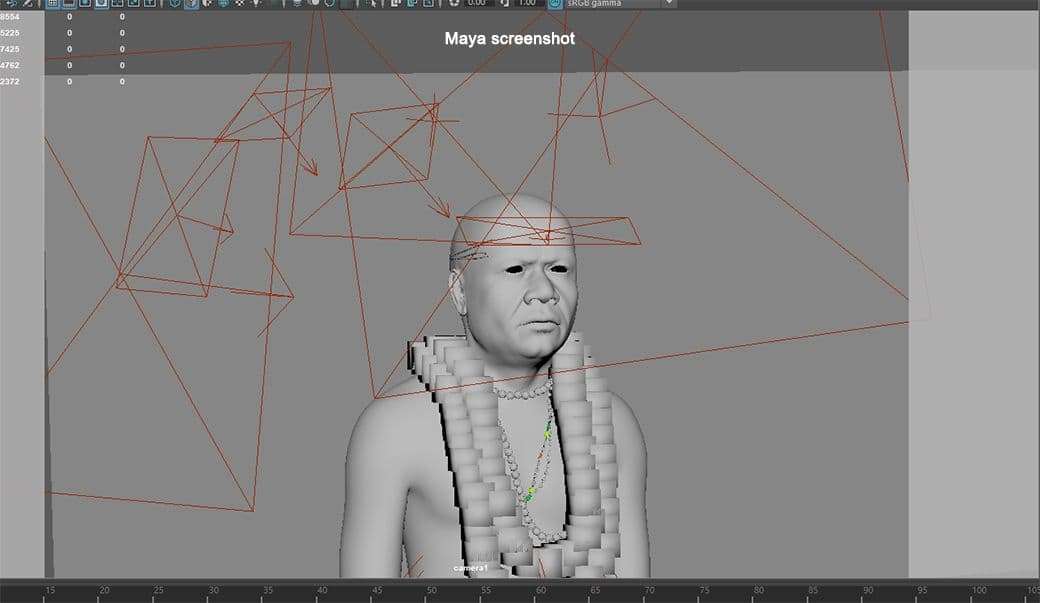
After creating the model I shifted towards the retopo of models in Maya. First I created a scaling model to real world dimensions. I used Maya tools for retopo character making sure my topology is correct and shift back to ZBrush for projection. After projection I tweaked secondary and tertiary forms of my character; breaking symmetry and proceed for Udims.
UV’s can be created in both ZBrush and Maya but I like to do this in Maya. During this process I make sure all UVs are arranged properly and not overlapping. I also check to avoid UV distortion and check UV scale.
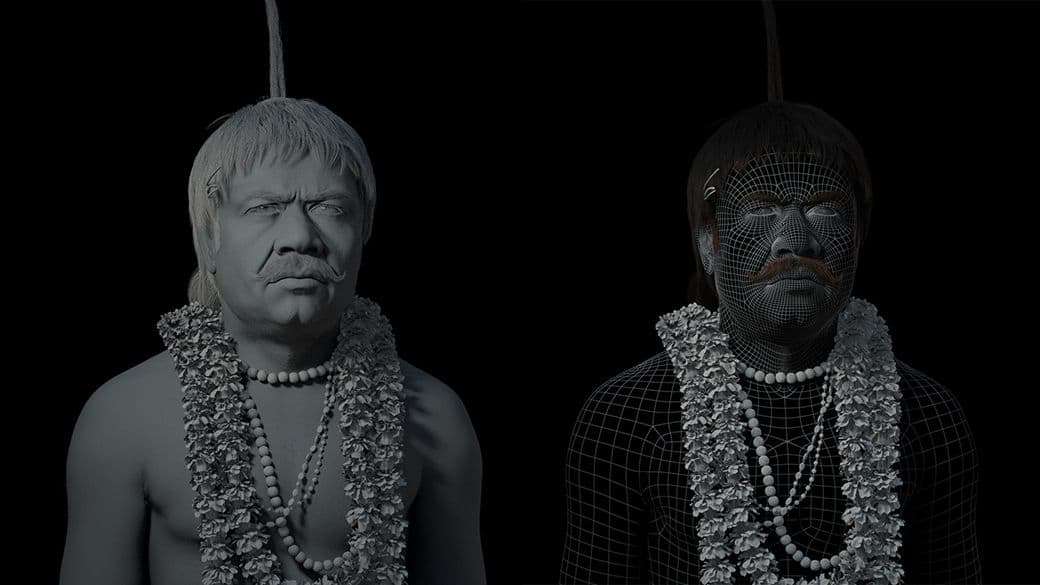
In order to finalise the model, I create a first pass render to critique - correcting my shapes before jumping to surface details.
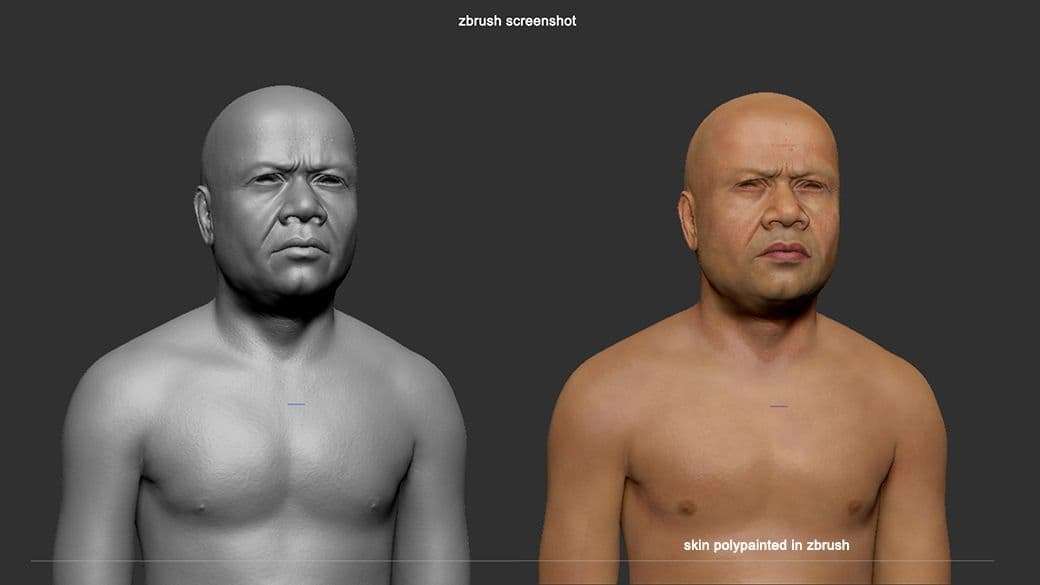
For surface details like skin, I use my custom brushes in ZBrush. You can also use Texturesxyz maps, scan data or alphas from photographs.
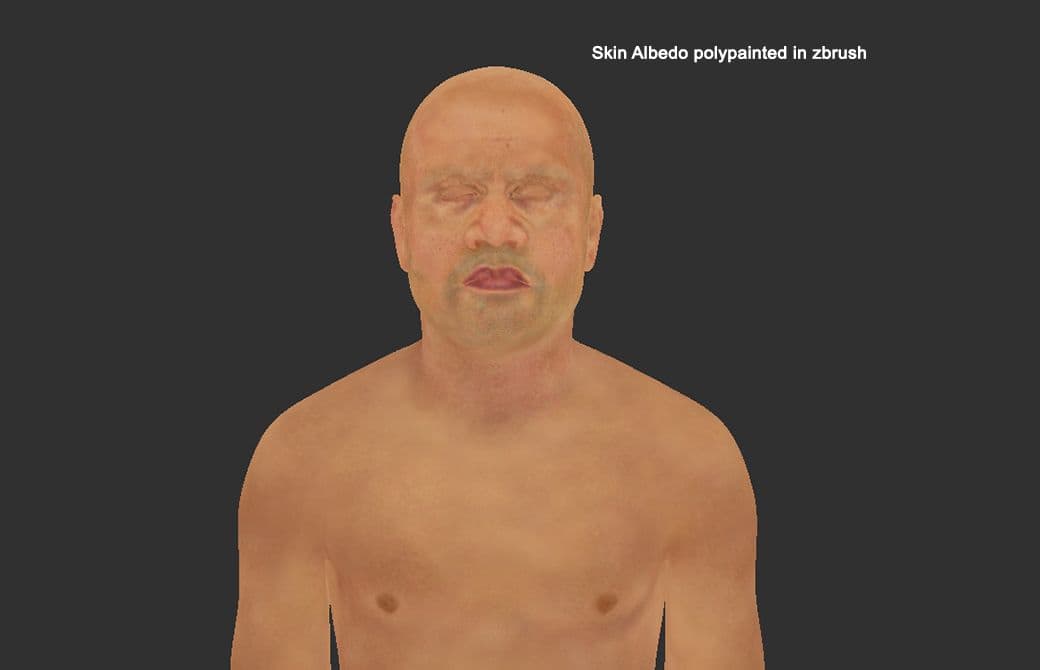
To get finer skin details, I refer images without makeup. I prefer collecting images, with studio lighting to see skin details.
Also having a library of skin closeups is very helpful. Creating skin bumps, albedo maps and spec of these 3 maps are important and all have to be well detailed. For skin paint I used a polypaint method in ZBrush but again, one can use maps or photographs for texturing. Skin was painted with all default alphas and standard brushes in ZBrush, similar for spec map.
After creating these maps I exported all maps from ZBrush using a multimap exporter in Zplugin. I exported an 8K map for displacement and 4K map for albedo and Spec Map.
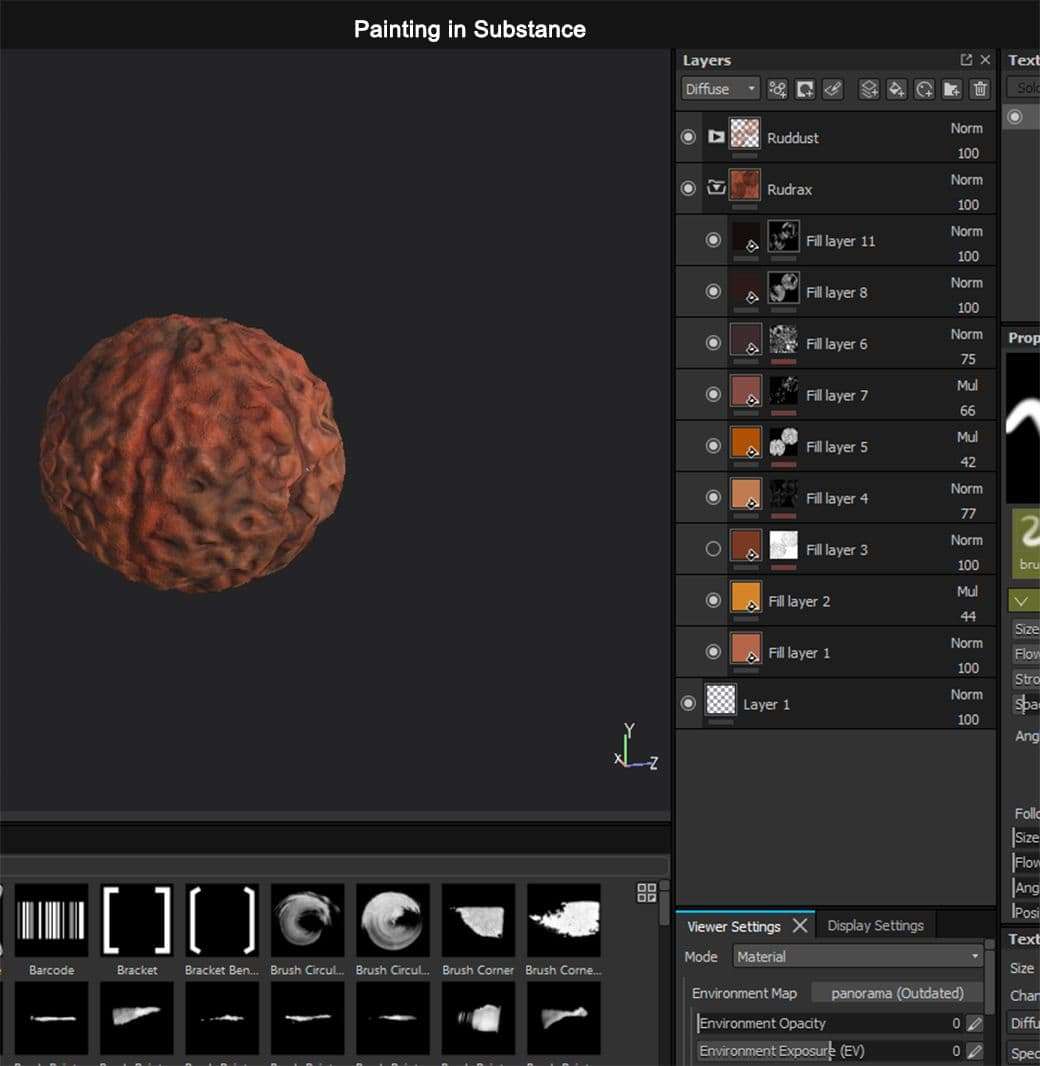
For props I used Substance Painter to speed up things. All were hand painted using default brush/alphas in Substance and maps exported in 2K for V-ray Maya.
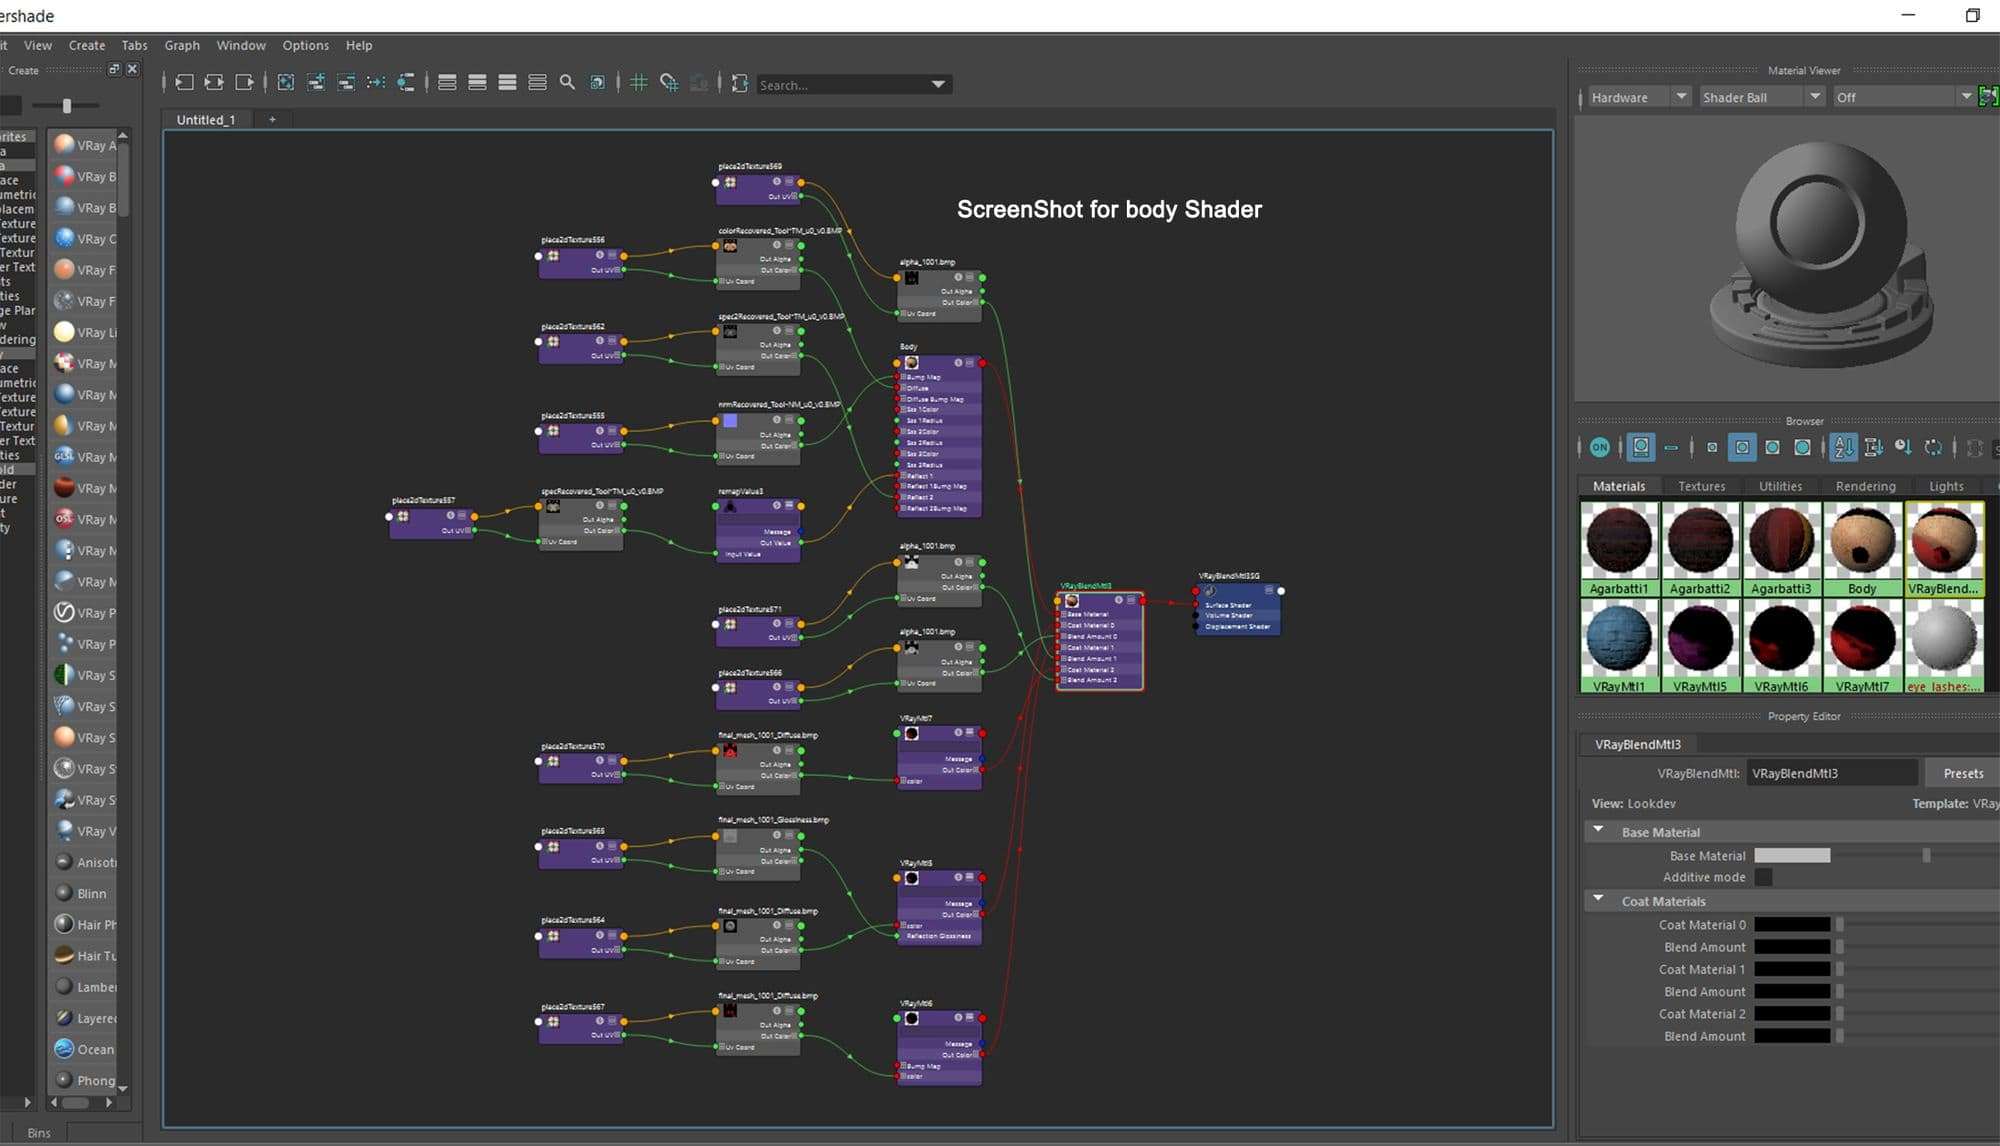
I used V-Ray in Maya to render this character. All models were imported in maya and I started setting up V-Ray lights. In V-Ray I used two shaders for all my models: V-Ray AlSurface for skin and VrayMtl for both skin and props. For Skin I created two different shaders one with skin showing subsurface effect and another showing makeup effect and blended them using VrayBlendmtl.
For props like rudraksha, flowers and agarbatti, I used a Vraymtl shader. The flower model has large polygons so I created a vray proxy and copied the proxy models.
Starting with hair was complex so dividing it in parts helped to solve complex structures. I studied how hair behaved on my character: hair roots, type of hair etc. I then started my groom using hair guides and played with modifiers to get likeness of hair. Most of my time was spent correcting guides during this process.
For the eyebrows I used a similar process. If you are new to this please research Xgen tutorials in google - there are tonnes of tutorials! For shading I used Vraymtl Hair 3 Shader and ramp map for variations in colour and spec.
All images were rendered in 2k resolution and turnaround in 1080. Rendering 2k res images took around 20 minutes. This project took me around two months to complete and during this there were many ups and downs. But finally, I finished the project and was proud of the results. I suggest keeping the habit of research and development, the most powerful weapon in this industry - keep wanting to improve!
This was my process which I learnt from various artists by reading their articles, watching tutorials and many more things. Now this was my turn and I continually refining my process!