
How to Create a 3D Animated shot from Start to Finish
A recent graduate from Amposta explains to us how to improve Hard-Surface techniques with different tools and how to connect with a 3D Boxing Robot in real time. Let's take a look !
A recent graduate from Amposta explains to us how to improve Hard-Surface techniques with different tools and how to connect with a 3D Boxing Robot in real time. Let's take a look !
Sandro is 21 years old from Amposta (Spain). This year he finished his studies in Barcelona, graduating with a 3D Content Creation for Games, Animation and VFX Bachelor. He is interested in everything related to technology, industry and science fiction. Currently, his focus is on improving rard-surface modelling techniques in order to develop better quality projects.
Sandro took the time to share how he created a 3D Animated shot from start to finish, using his awesome Boxing Robot as the star of the shot!
Your imagination is based on what you see in your everyday life and, automatically your ideas for your art, are built around that. However, it is not easy to precisely communicate what we want to express all the time, so this is why finding references is key.
As far as I am concerned, the first and crucial step in creating a successful 3D shot, is gathering a range of references. In my opinion it's great to use pictures from other projects to inspire yourself or to see how other artists work, and to collect images of things in the 'real world' to articulate your ideas.
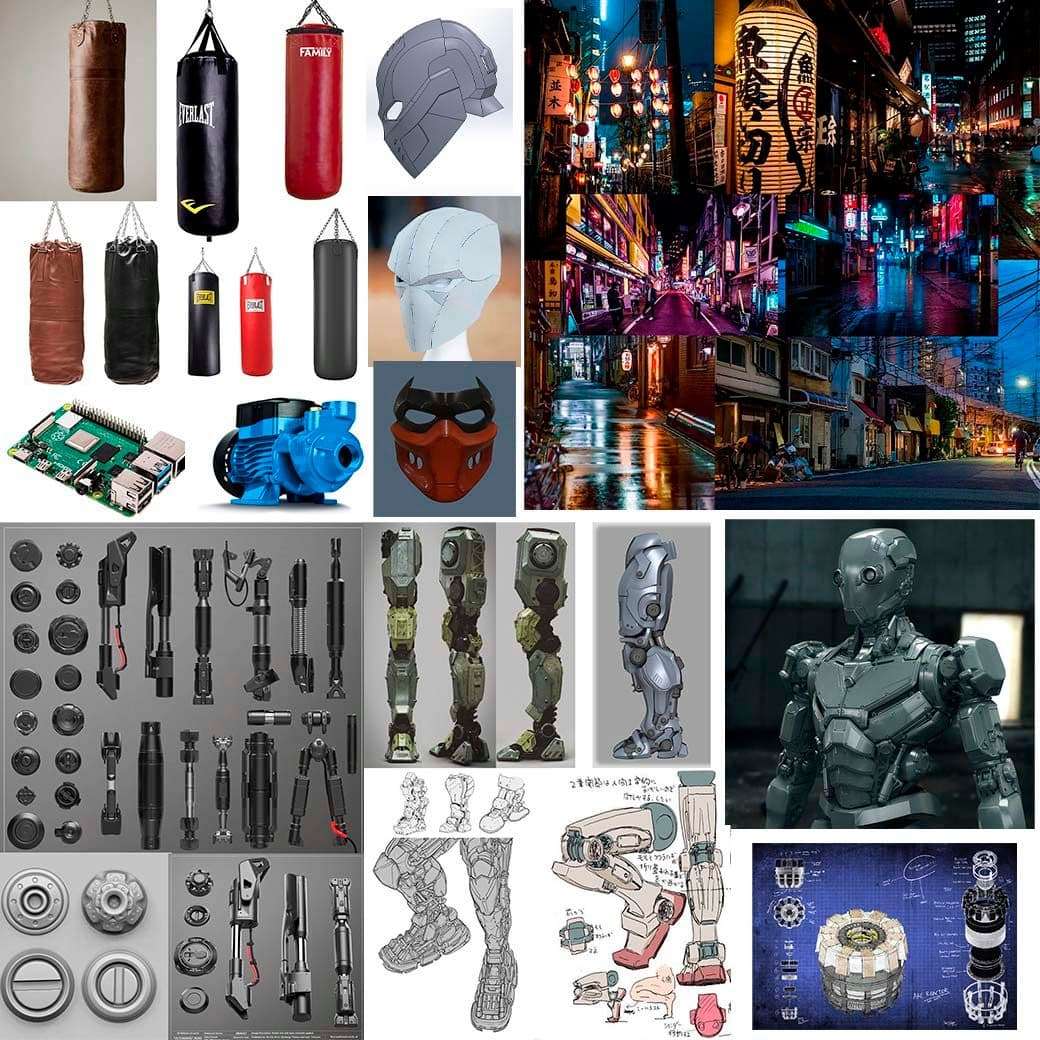
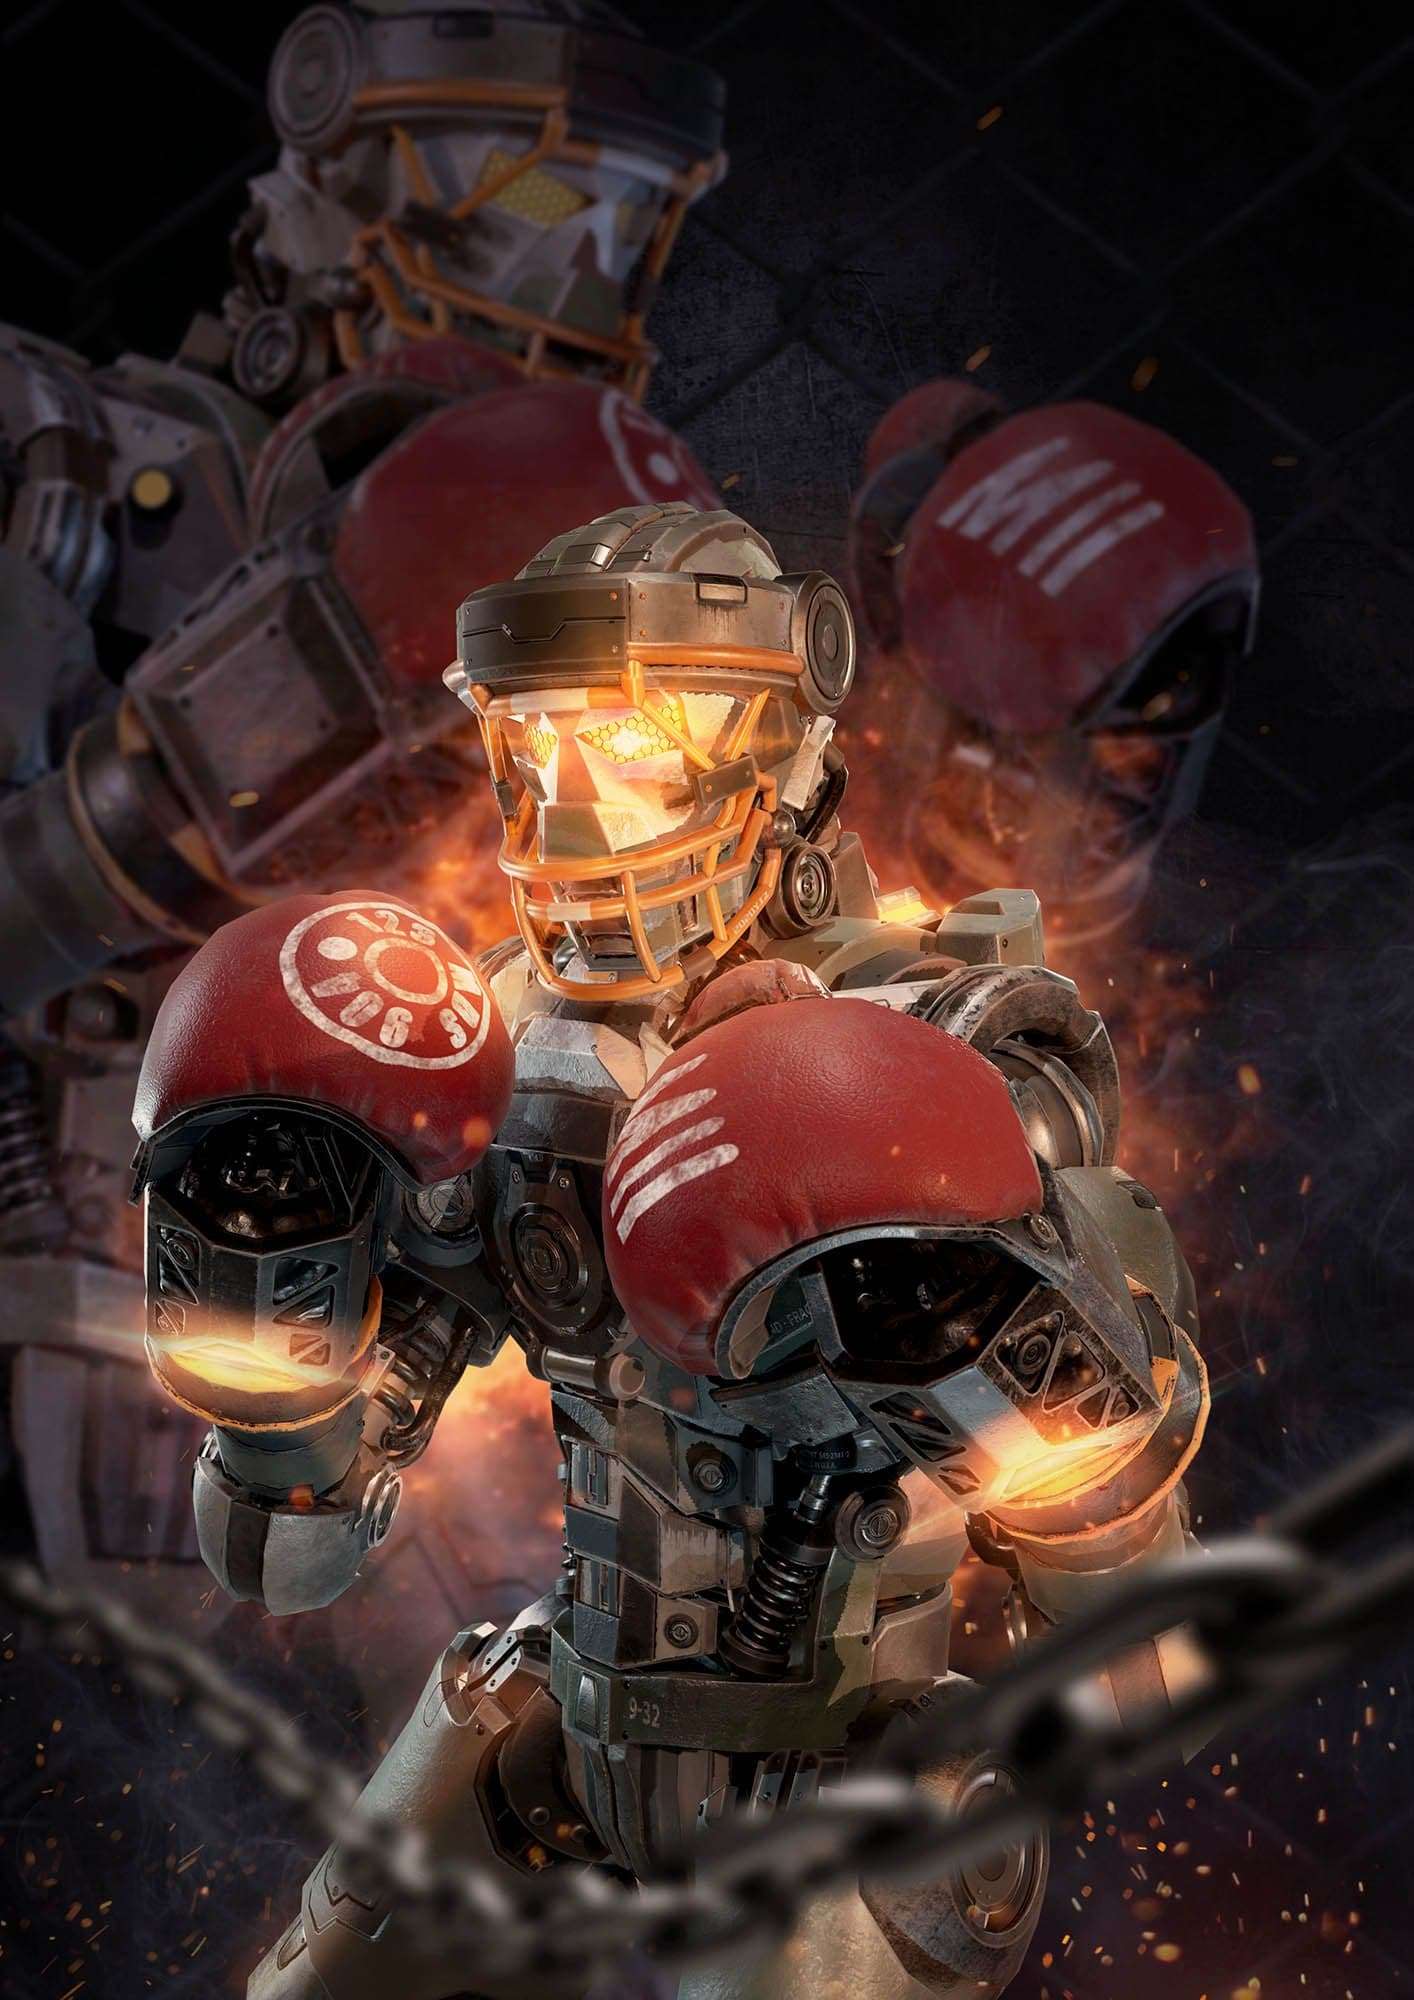
Regarding the robot design, I tried to find a balance between what I liked and what I could realistically model. As a Chinese proverb says: ‘you must learn what your knowledge limitations are in order to know what your limit is.’
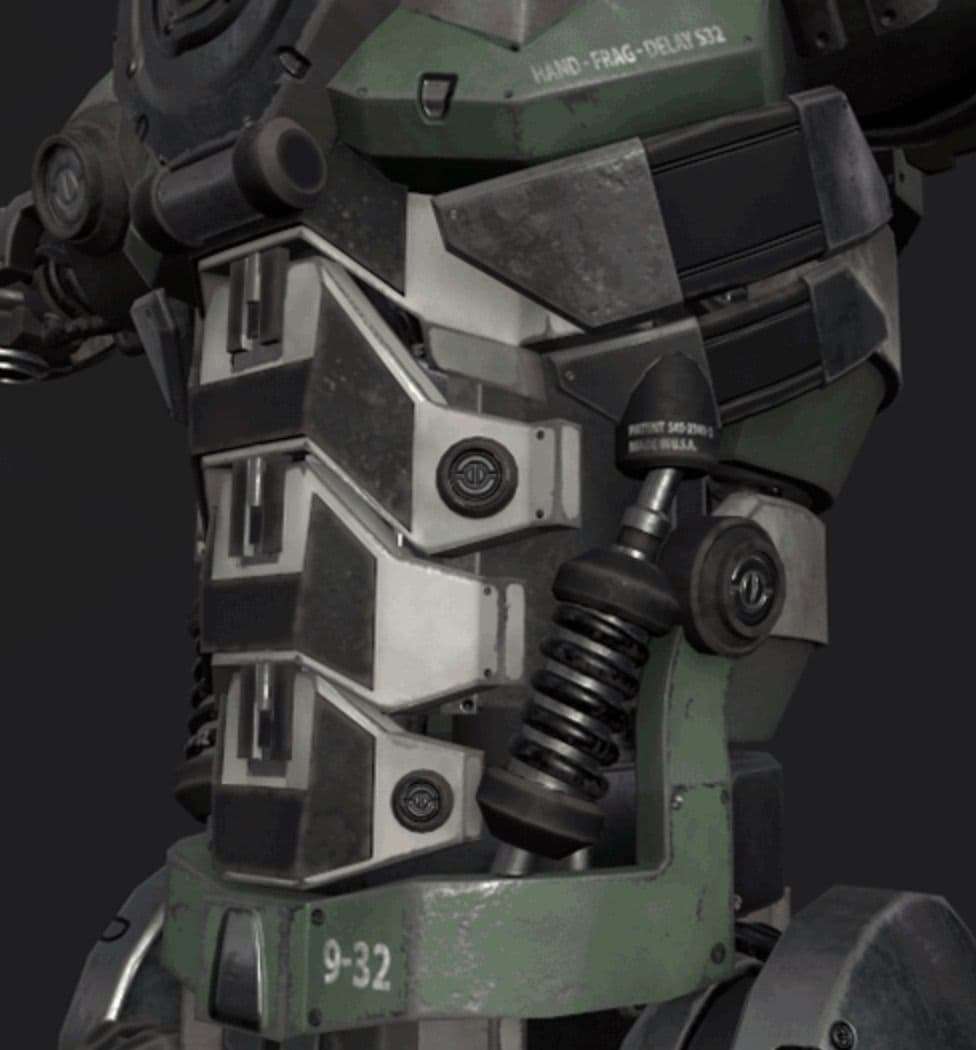
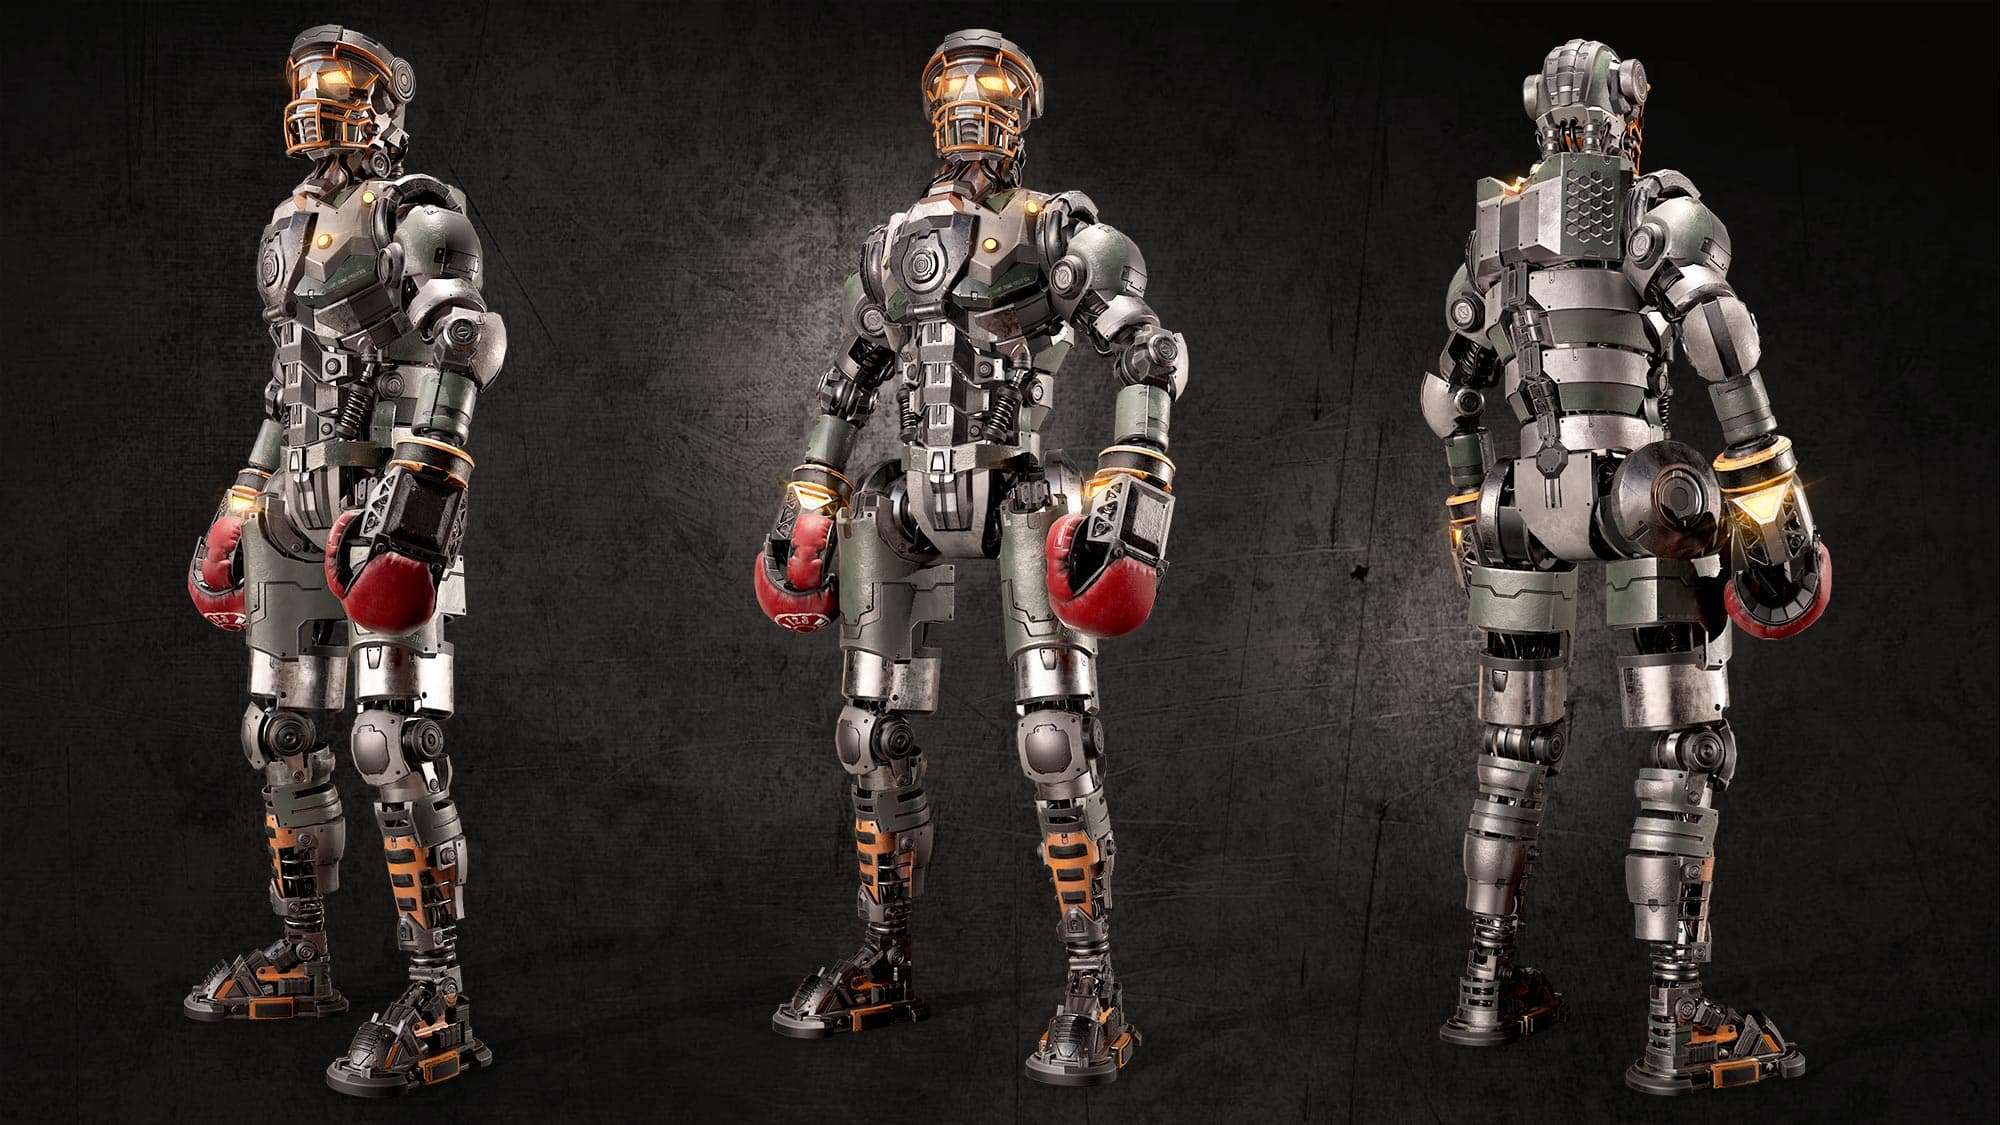
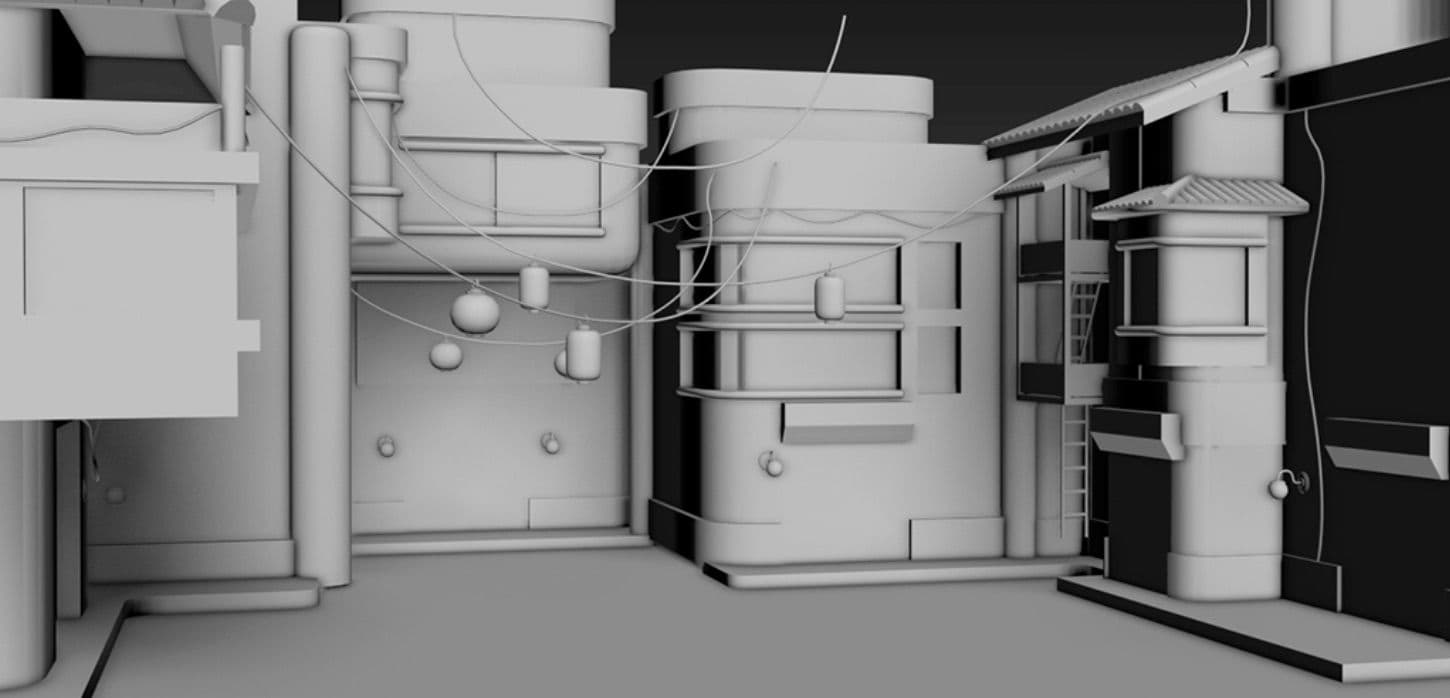
One of the main inspirational sources to my project was Atom, the main robot of the Real Steel movie. I did not only want that the robot looking nice from the outside but also from the inside, this is why I created an internal circuit (following a fictitious logic) formed by: a thermoelectric reactor, an hydraulic pump, hydraulic cylinders, a refrigeration system and a motherboard.
I found the reference pictures in Yandex and Pinterest - these are the websites in which I usually do my research before starting a new project.
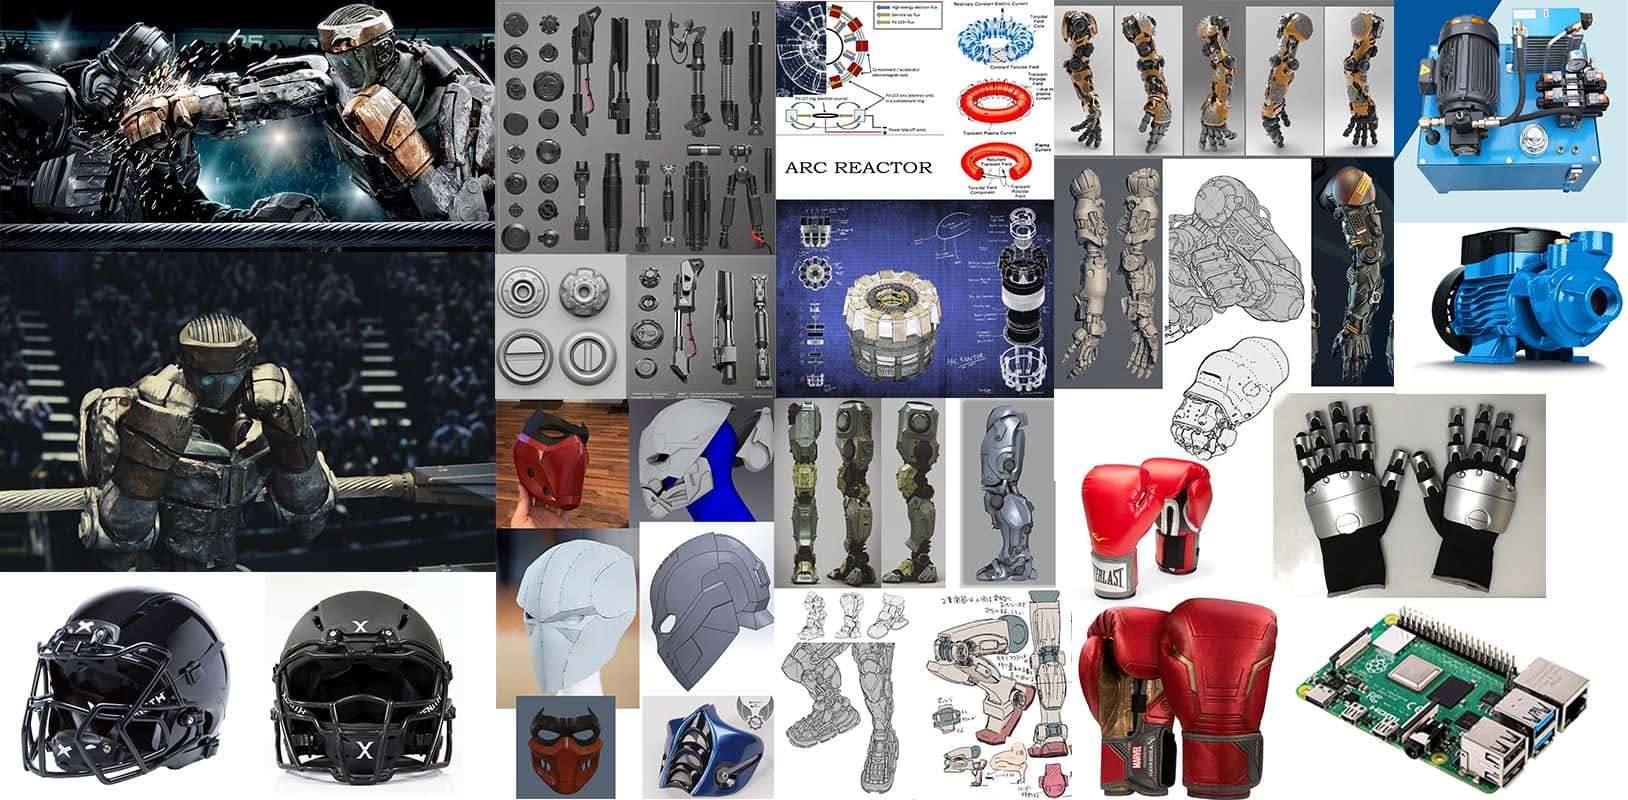
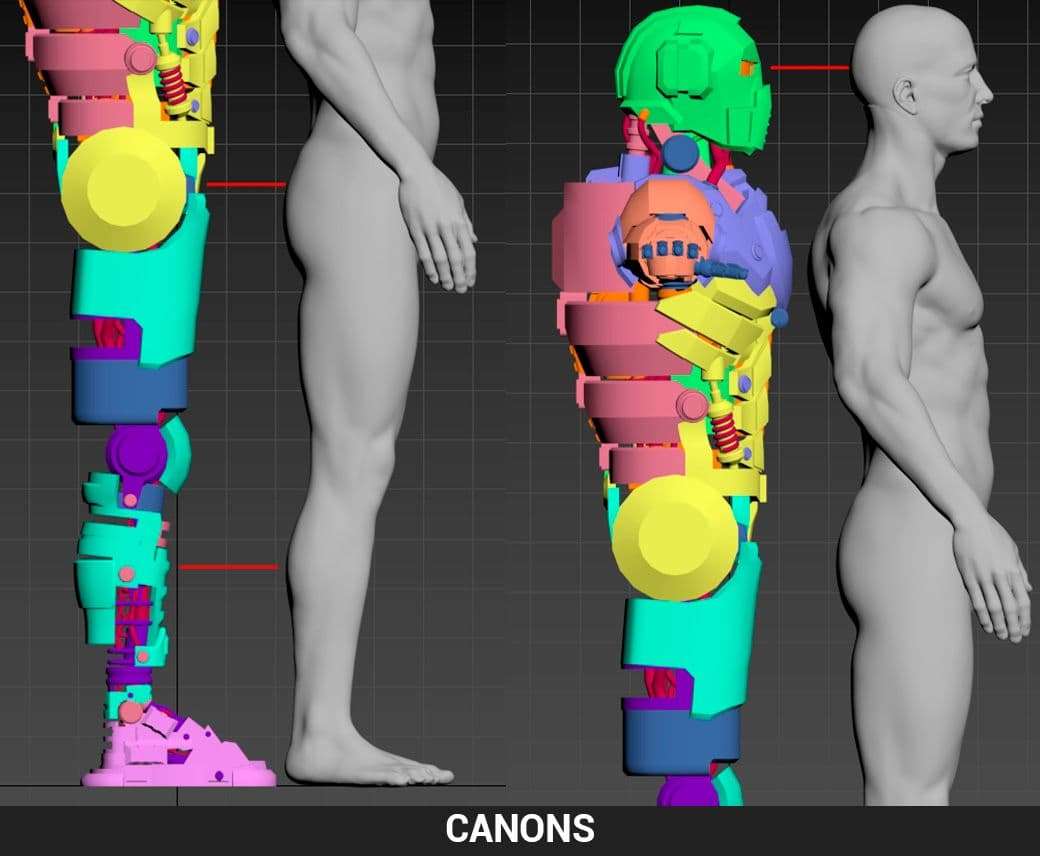
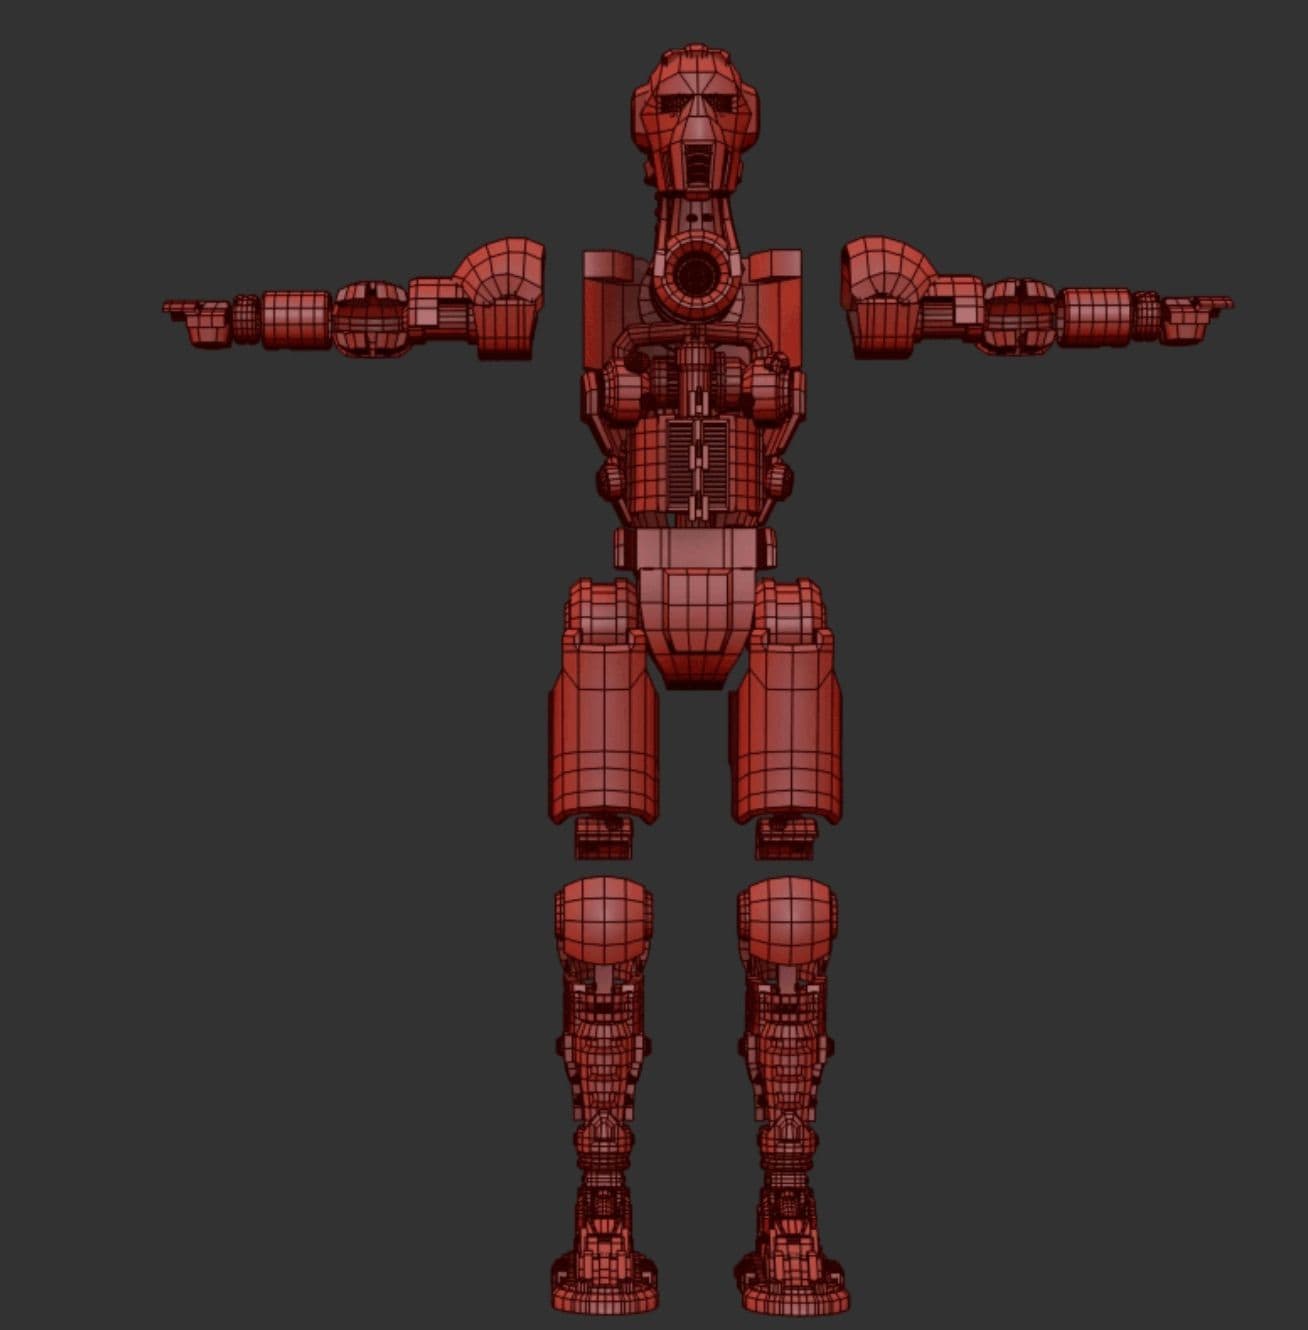
Despite the fact that we are talking about a robot, the dimensions within the 3D space are very important. I used a human base so as to define and clarify the appropriate place of each piece, tubes and devices.
I used 3ds Max for the development of the model and also the large part of the project has been made using this program as it is the tool that I manage the most and, thus, I feel more comfortable with.
I suggest dividing the model you are working on in groups since it helps you to preview how you really want to keep modelling and in what points you need more support.
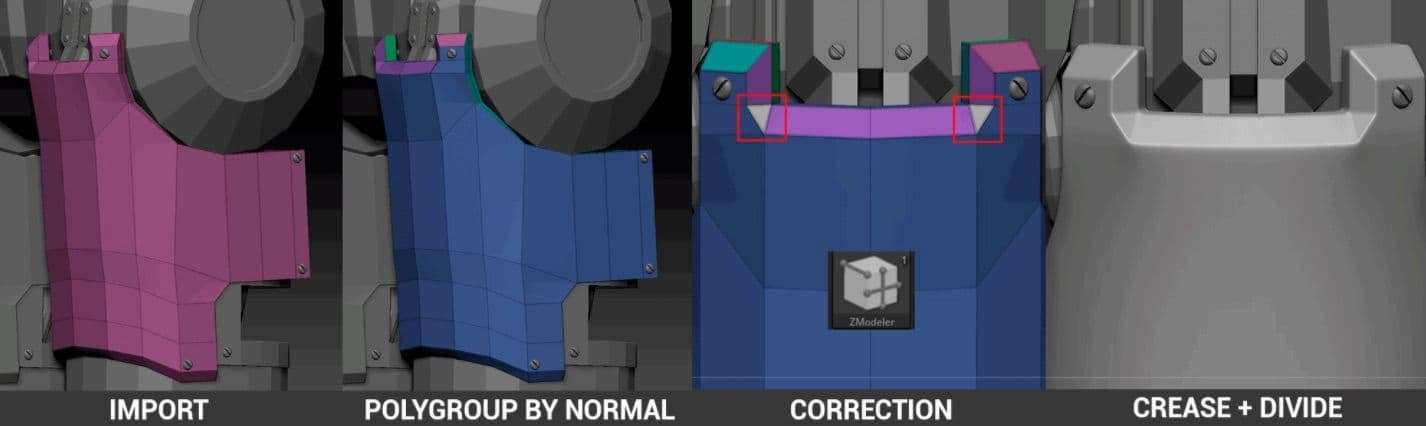
I normally use Zbrush to affect the areas with right angles that I don't want to see in my model - I wanted the robot to get a polished and beveled finishing touch. In order to do this, I used a combination of Polygroup By Normals at forty degrees, and Crease by Polygroups at third level (depending on the beveled level we want to get).
If it is necessary to adjust the Crease in the model, I recommend using the ZModeler Tool to chance the Polygroups colours.
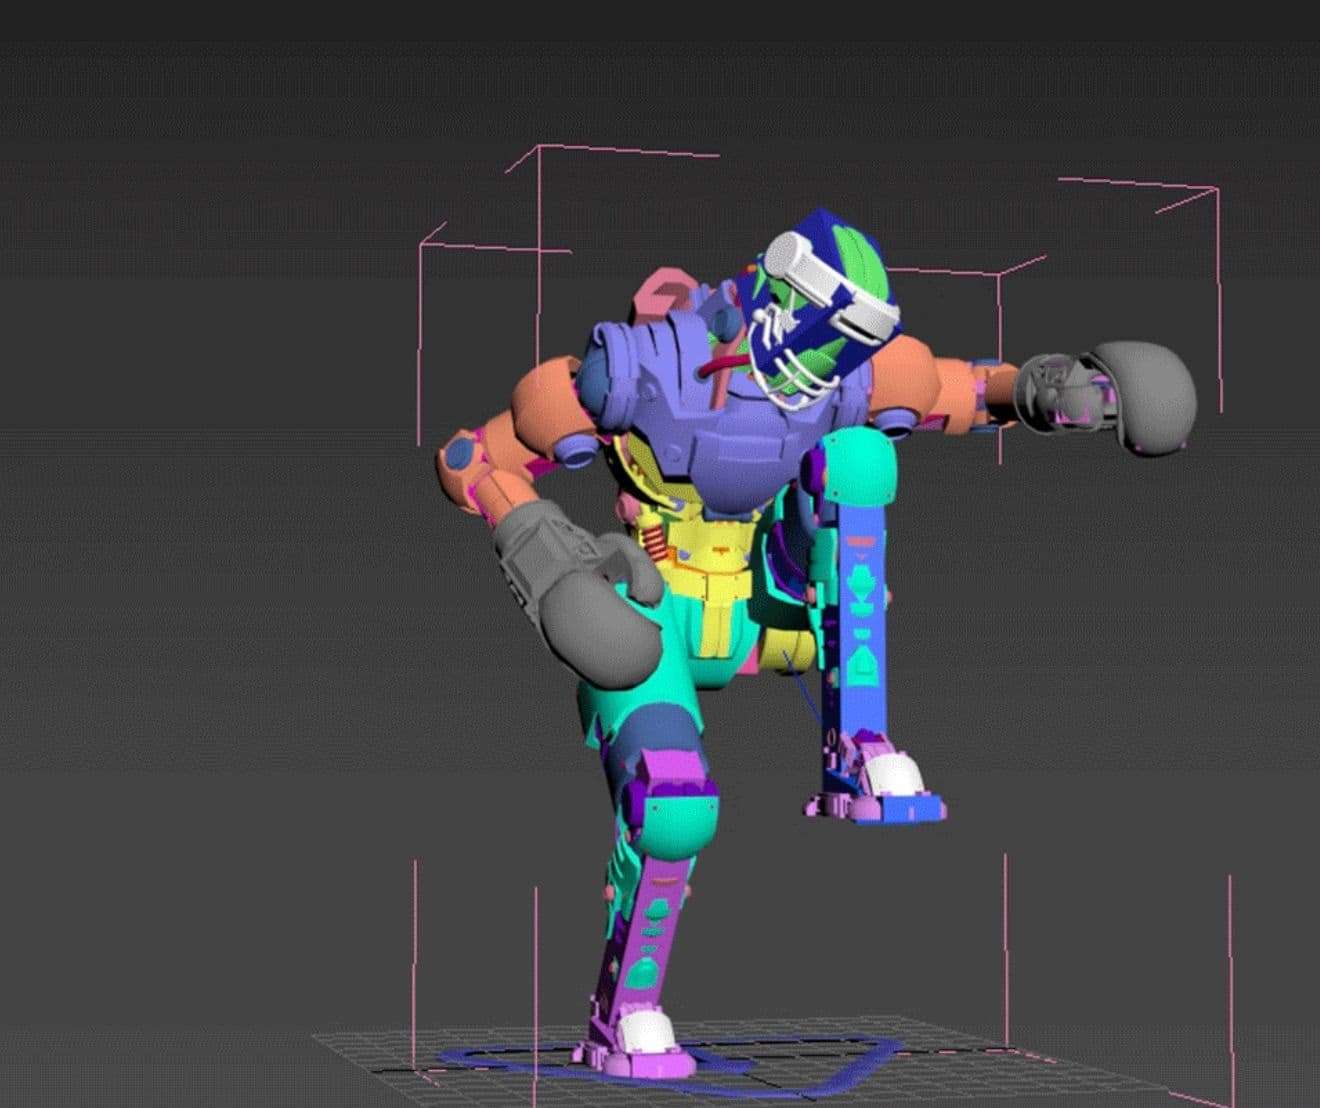
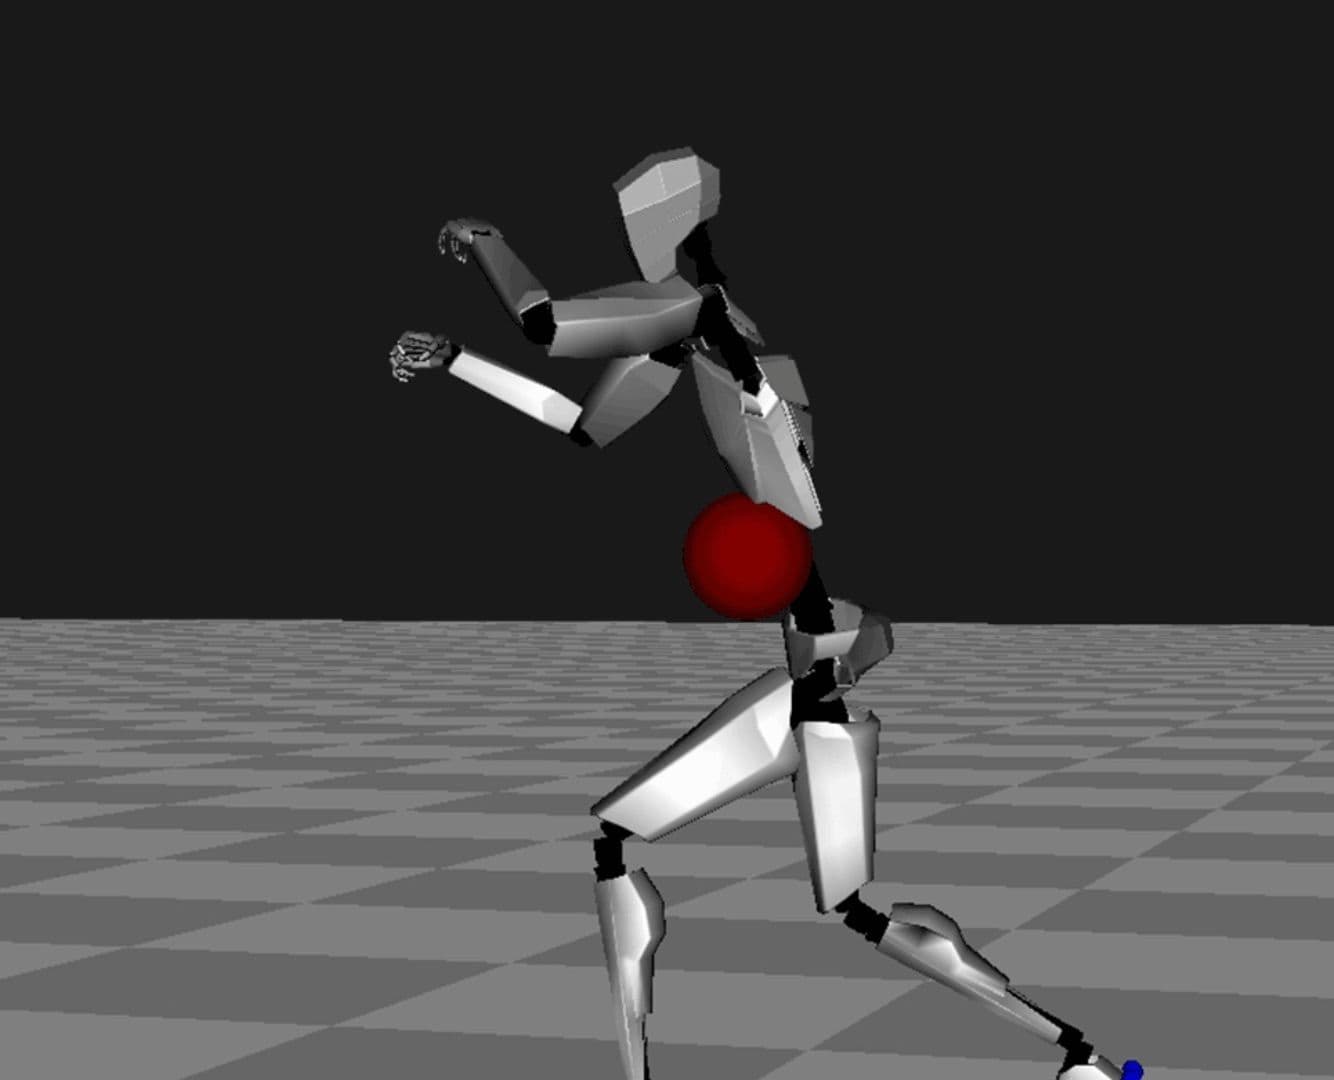
Since one of my objectives was that my robot could move and pose, I needed to work on the rigging and the skinning.
The rig was fairly easy; I added some extra bones in the gloves so that this part could have autonomous movement. However, when I saw all the pieces that formed the skinning, I put my hands on my head. There were more than one thousand pieces to do the skinning!
After a while, I thought that since all the pieces were rigid, the vertex level had to be in red (level one), except for some bending point in the limbs and in some tubes. Having checked that everything worked correctly, I proceeded with the stress positions exercise.
Let me highlight how important it is to keep an order in each one of your projects. I really like to see that everything is in its correct place when I texture which optimises working time, and in turn yields a better result.
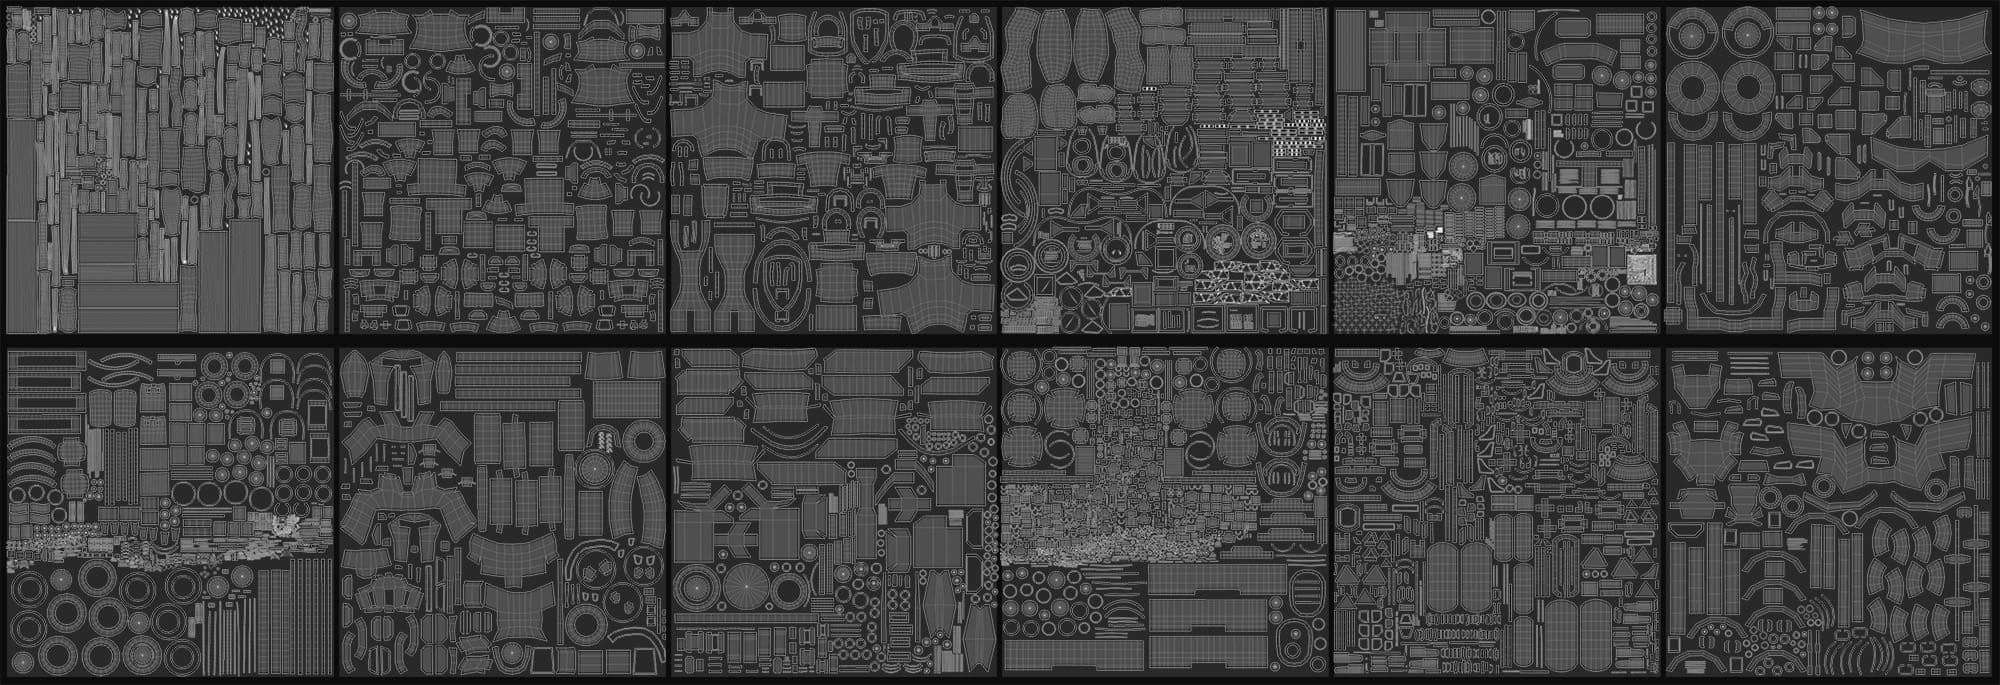
In order to get the texture maps, I normally use the Baking tool that is included in the Marmoset Toolbag program. I really like how the AO map affects the model and also the precision in which you can modify the Cage so that it adapts perfectly to the Mesh.

I have been using Substance Painter to texture since I think it is such an intuitive program in which you can create textures of a very good quality.
Before starting, I think of the colour palette in which I am going to base my model on. In this case, I chose both cold and warm tonalities.
I recommend using a base Smart Material in order to be able to do a quick preview of how you want your model to look. Four different types of base material were used in this project, including some metals and different types of rubber and plastic.

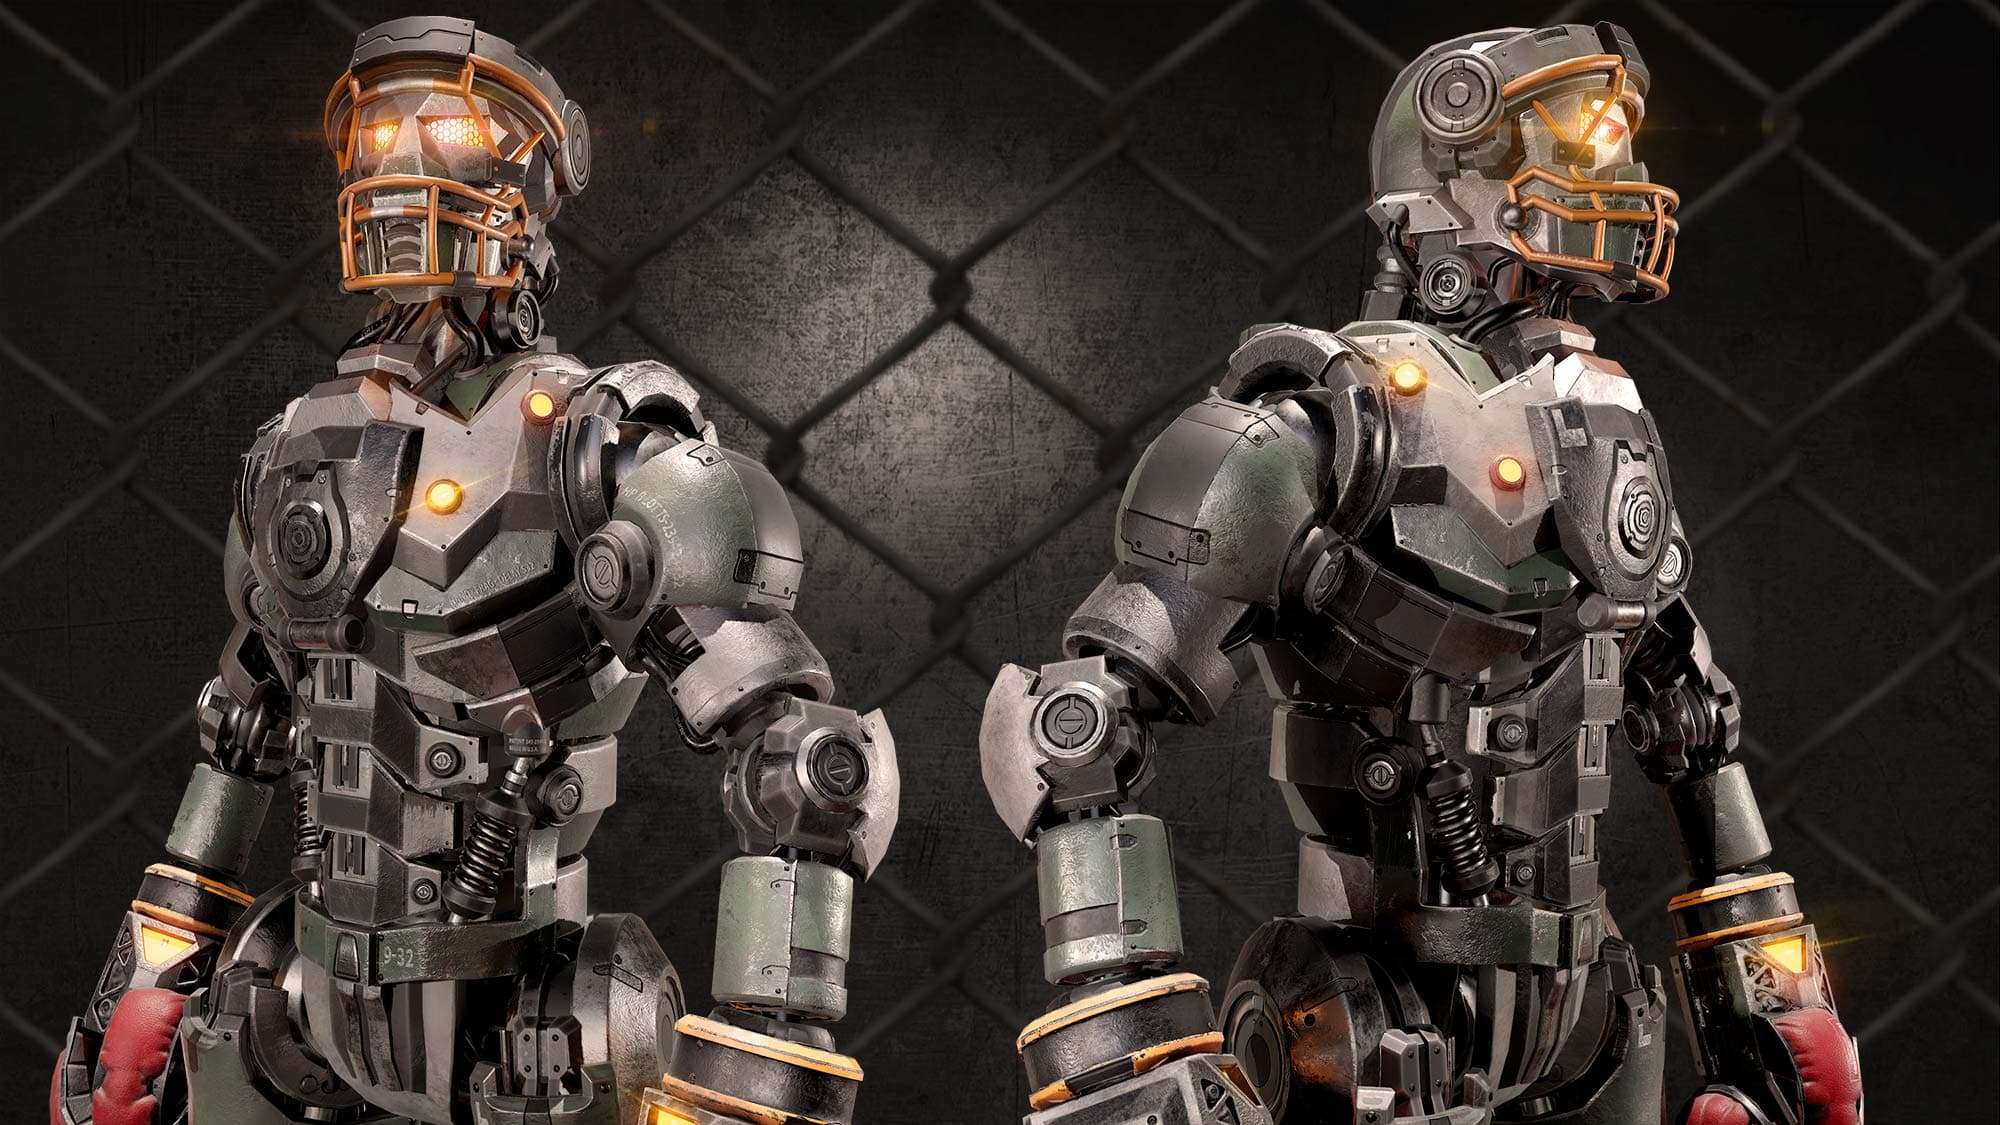
At this point, and in order to give a finishing tone, the manual details that make the texture to be more realistic are still missing. Iron rust, dents, attrition and dirt are some of the details that I added later.
Once everything is textured, I check two factors: if the light correctly affects our model and if the maps act as they should. In order to avoid possible errors in our process, I add a turntable in the render scene. By doing so, I get a complete vision from all perspectives.
Regarding the composition of lights that I often use, it is composed of three white lights from the Spotlight type: one placed in the upper part, another at the side and the third one at the front. The latter has a different intensity in order to get a good contrast between brightness and shadows which helps the model to be more interesting.
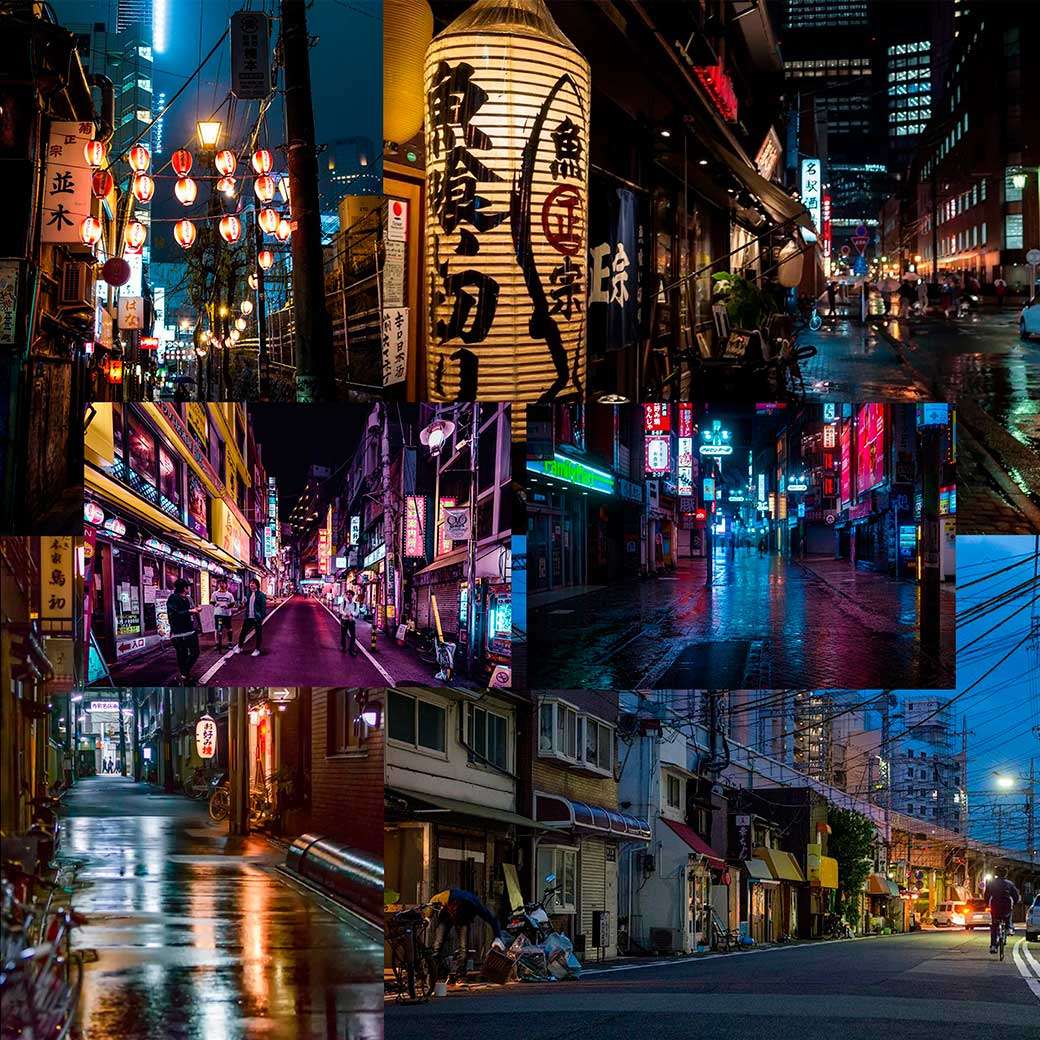
When thinking about my environment, I was inspired by a Japanese style, dead-end street at night. In addition, I wanted my setting to be rather futuristic.
Neon lights play an important role within the development as thanks to their varied warm tonalities, the robot feels like it is surrounded by a Cyberpunk-style environment.
I started with a basic blocking of the enclosure. My aim was to get something dynamic and chaotic with a lot of variations both in the horizontal and vertical structures. The windows, the pipes and the wiring helped me to give a more detailed shaping of what I had in mind.
To continue working up the environment, I used a free marketplace offering by the graphics engine itself Unreal Engine 4.
The plugin I used is called Quixel Megascans. It is a massive online scan library that contains a lot of interesting items that can help the artist to transform his or her blocking into something more complex, achieving a better quality. I used some models and textures that perfectly fit the topic I had in mind.
It must be taken into account that using free content does not mean that the effort put into composition is unworthy. We are artists and the more tools we are able to use, the better.
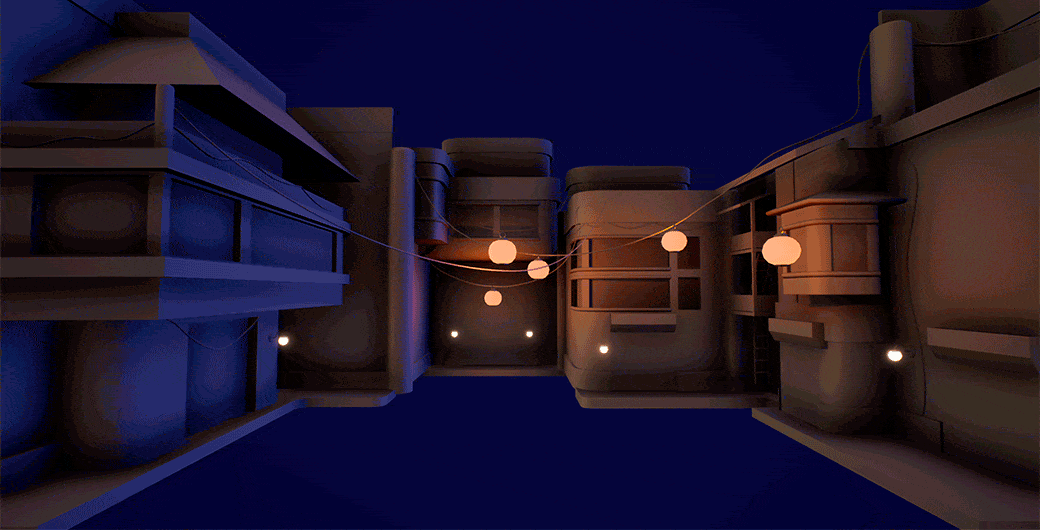
Engine lights are very important as the definition of the environment and the lighting of the parts we are interested in, depend on them. However, lights consume a lot of resources and this is why we should start the project with a good base.
Unreal Online Learning has free tutorials which helped me fully understand how lights work and their complexity.
When I first watched the movie Real Steel, I loved the idea of connecting with a robot. I thought of a way to keep a connection with mine. It was then when I discovered the Motion Capture world.
I used a suit with independent sensors that capture the movements that I made in a wireless way. The device is from the enterprise Perception Neuron.
It also offers intuitive software which allows you to view your movements in real time, record them and finally, export them.
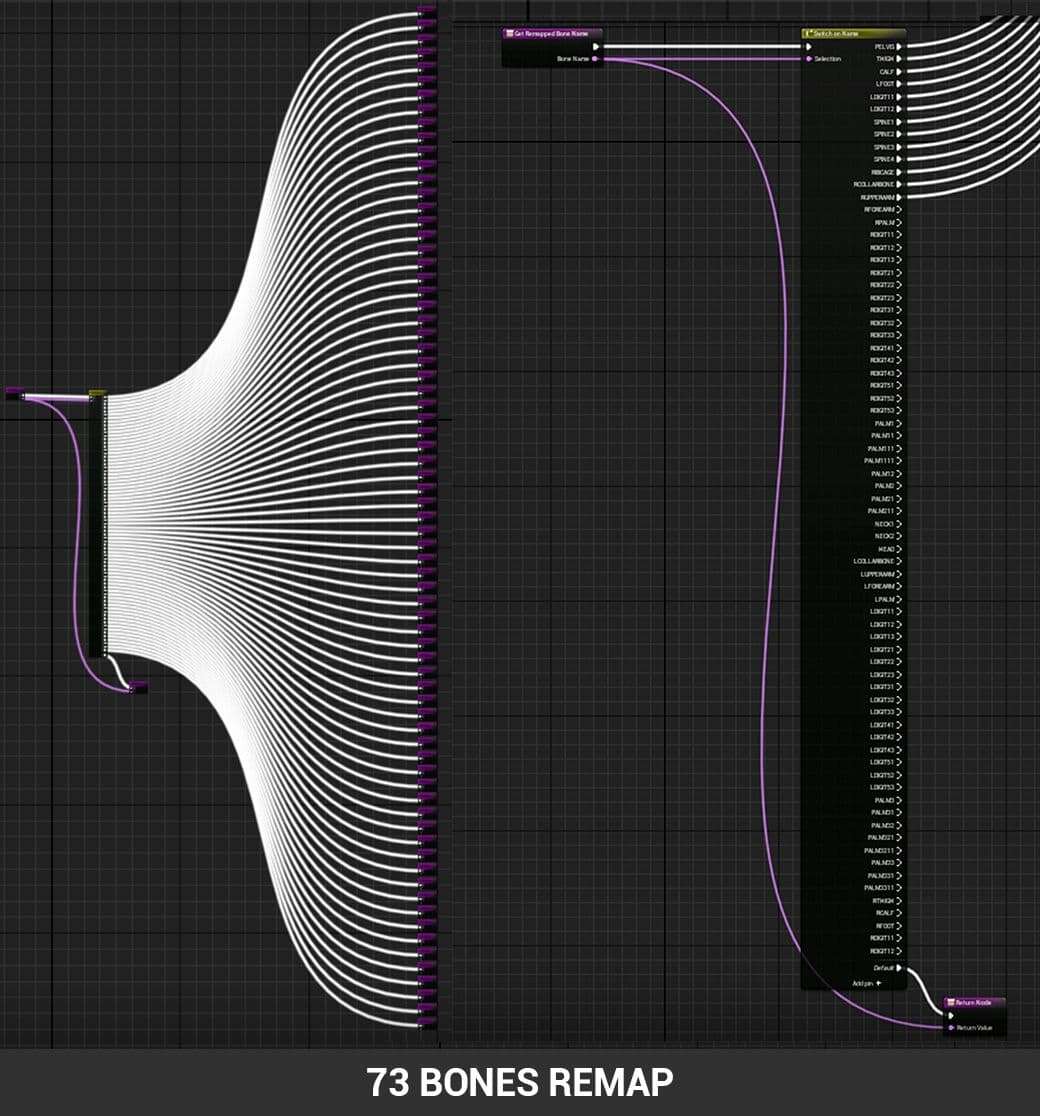
Some problems appeared, and one of the most important was the fact of having extra bones in a Live Link that only supports a standard skeleton.
Then, I had to resort to a new blueprint which created a remap of each and every bone that formed the skeleton.

I have invested three years into project and honestly, at the beginning I thought I was not going to achieve it. During four non-stop months, I provided all my effort and dedication to this project and I can say that the result is indeed rewarding!
I am aware that I am just a beginner in 3D design and I am sure that there are some features to improve, but this is what I like the most about this industry - to have the chance to learn with professionals that share the same passion as me and be able to grow up together in the same community.
Finally, check out the final animated shot below!
You can find me on Artstation or on LinkedIn and Instagram. Thank you for your time!