
Tips on Making an Animated Indie Film
In this article, Goody gives us his tips on funding and making an animated indie film with a team of artists.
In this article, Goody gives us his tips on funding and making an animated indie film with a team of artists.
Goody Wu is a Vancouver based CG artist. He grew up in Taiwan and moved to Canada with his family when he was a teenager. To pursue his passion for digital arts, he attended Emily Carr University of Art and Design from 2015. In 2019 he graduated with a Bachelor of Media Arts. Since then, he has been working as a Junior Modeler and Texture artist at ICON Creative Studio in Vancouver, BC.
He loves to draw inspiration from his cultural background and pop culture. Also being interested in grooming and lighting, Goody took on most of the 3D tasks in the making of this short film. He learned a lot of new skills in the process that he continues to build on with the help of online courses.
In this article, Goody gives us his tips on making an animated indie film with a team of artists.
My partner and I made our graduation short film ‘Across the Bridge’ at Emily Carr University, for which I will go over the process and challenges we encountered. I will also give my personal advice to anyone interested in making their first indie short film.
I graduated from Emily Carr University of Art and Design in 2019. Our major was Computer Animation and it was a four year program. In these four years, we received a general introduction to all aspects of animation. We had to learn basics in classic animation, illustration, sculpting, rigging, etc. To sum it up, we have had a general study here which has some pros and cons. I have a wide range of skill sets, but on the other hand I ended up not having a more focused discipline.
In my studies, I developed a passion for modeling, texturing and grooming. Knowing that what the course could provide me was limited, online resources were a big part of how I got to learn and improve my skills.
Lastly, as much as I wish I could, it is really really hard to do everything by yourself. That is why, my partner and I decided to team up together! We both love different aspects of animation and we managed to divide up the project based on what we enjoy in film making.
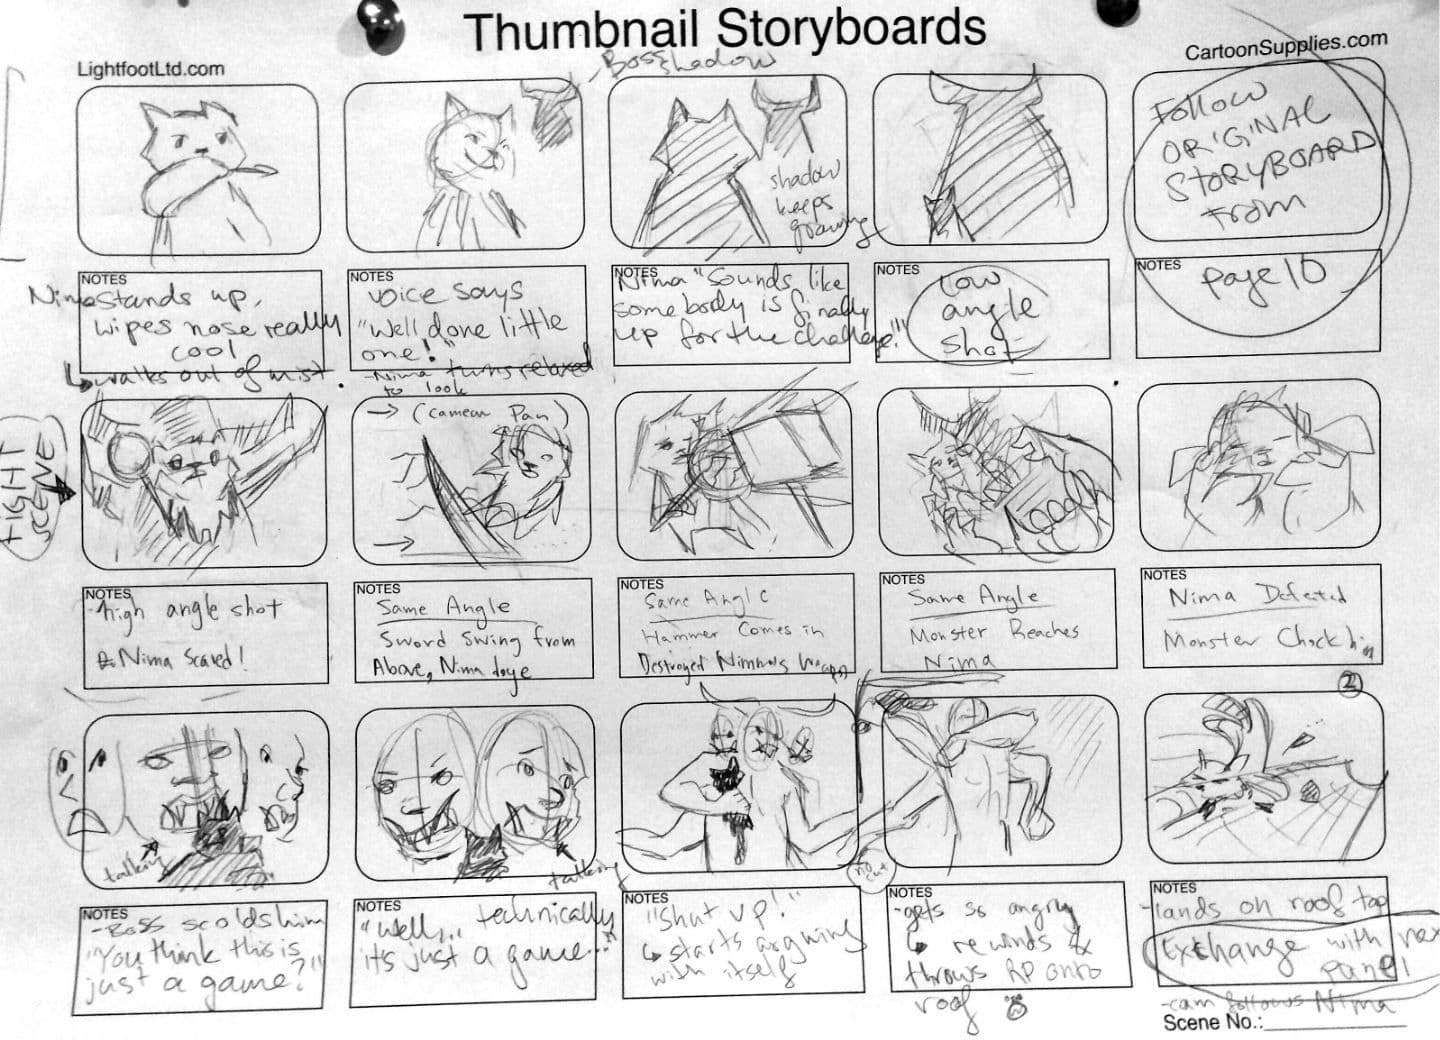
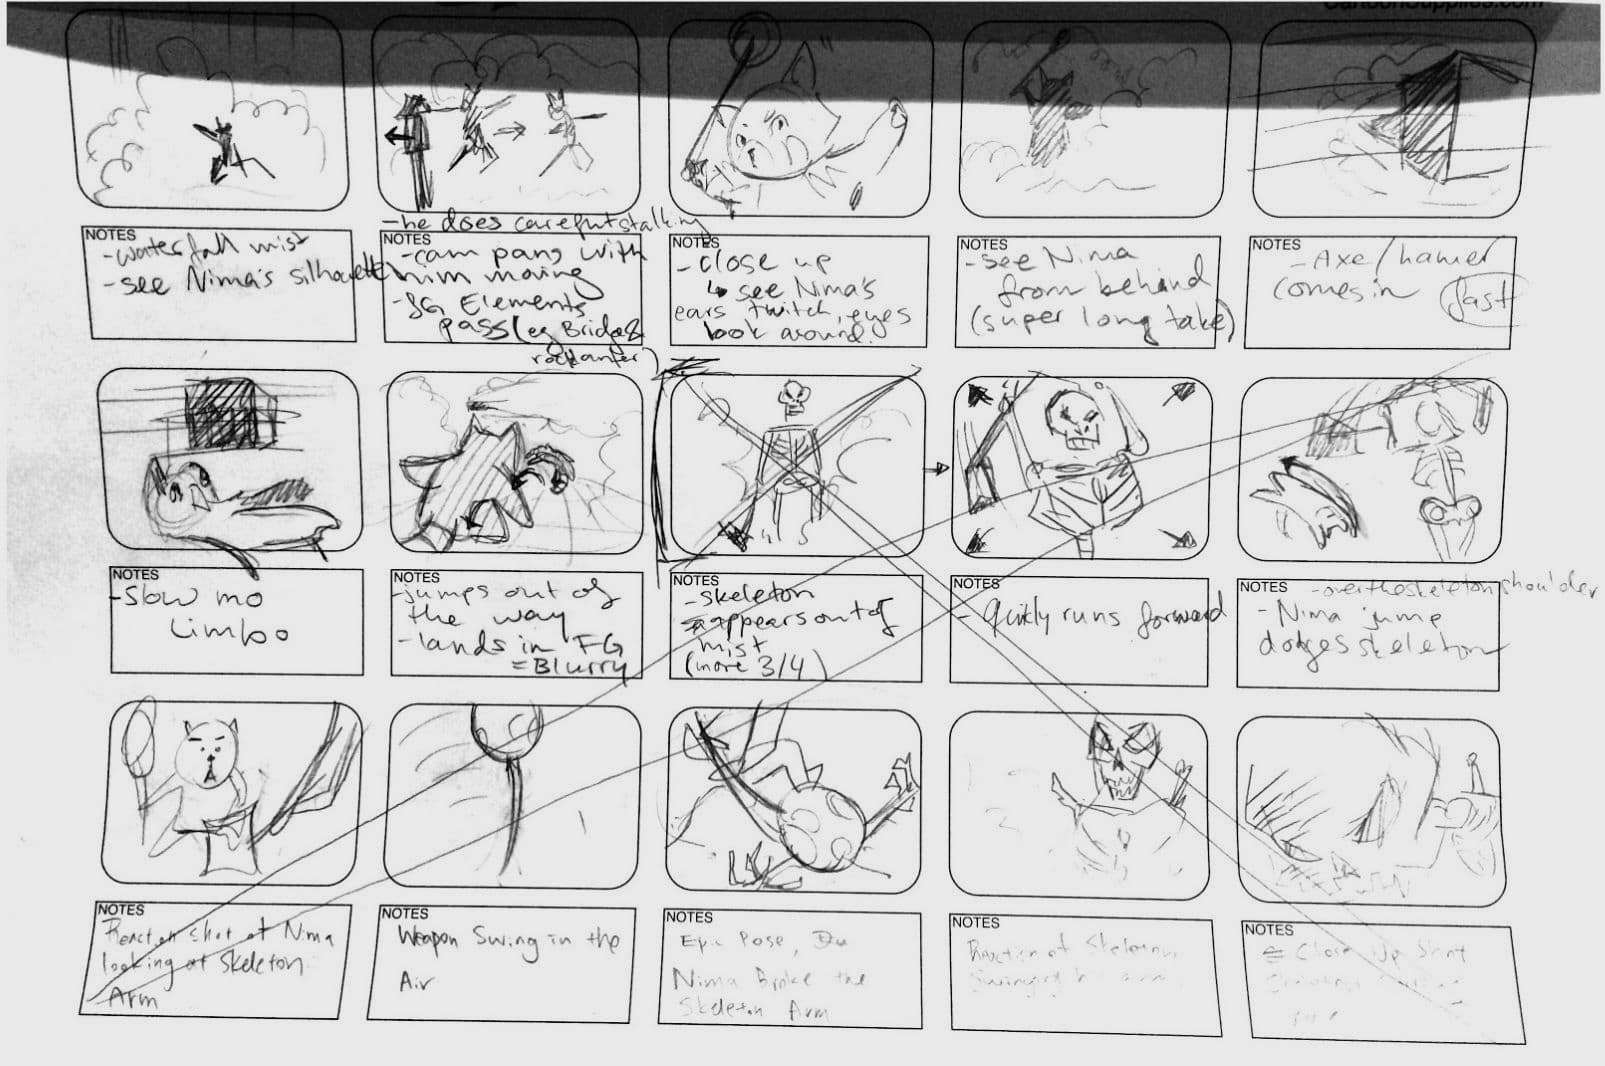
Pre-production for this film can be broken into five steps:
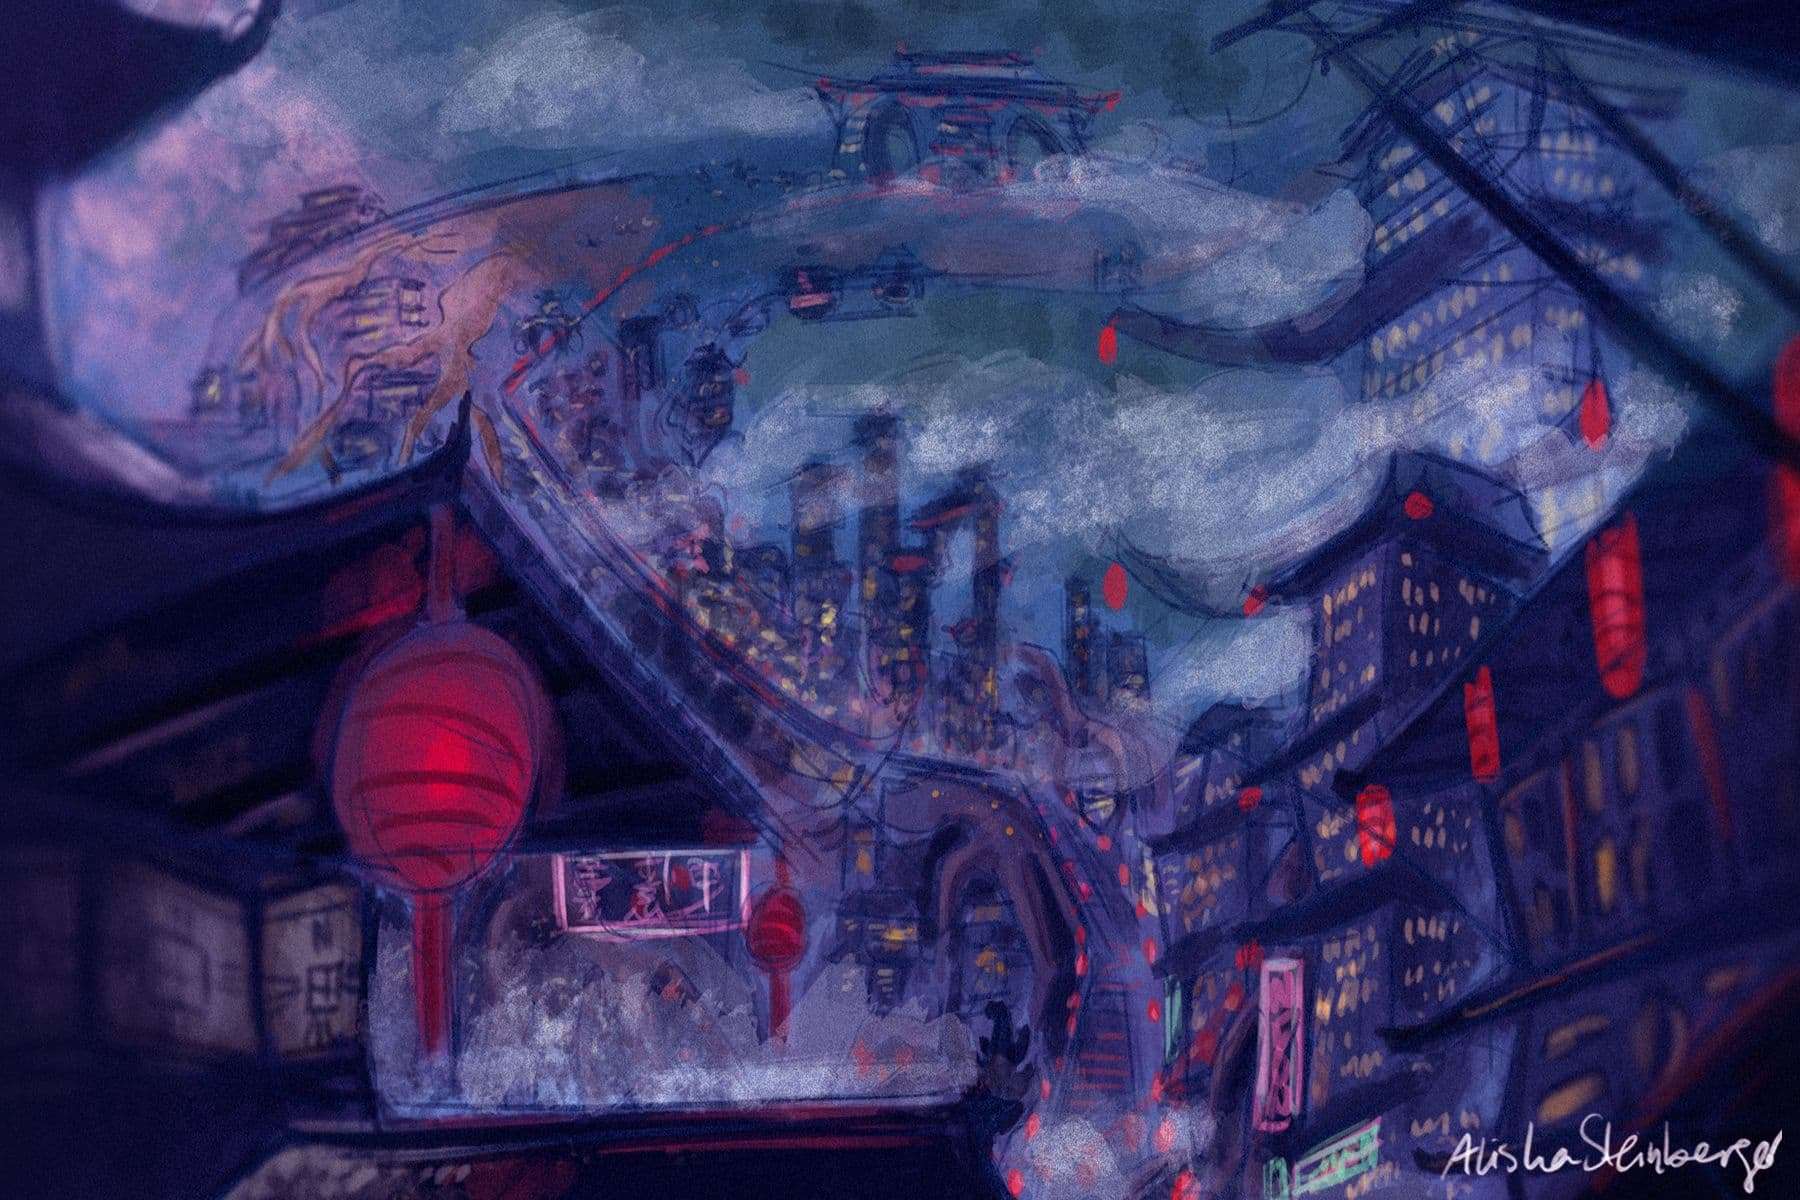
Coming up with a story was probably the most exciting part yet the most difficult part of pre-production. We probably came up with a dozen story proposals. But some stories were too difficult to execute, some were too long, and some might have had too many characters. And as a beginner and a small team, “you have to try not to bite more than you can chew”. In the end we settled on a story that speaks about our heritage, relationship and interests, featuring a few key characters.
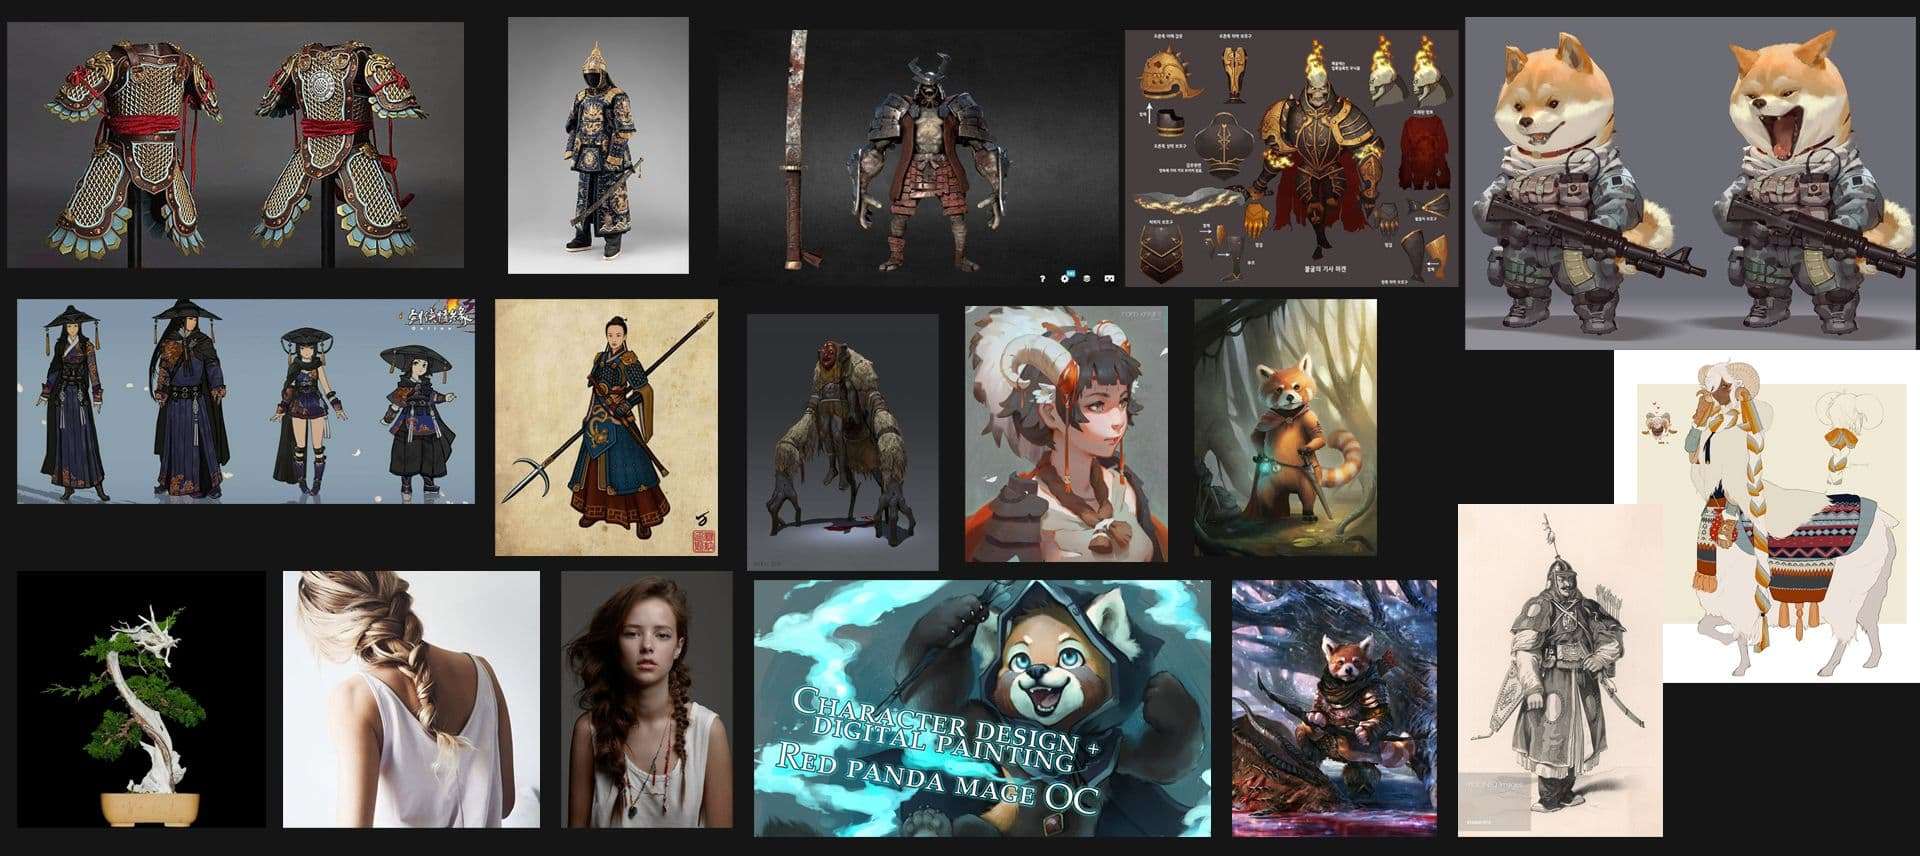
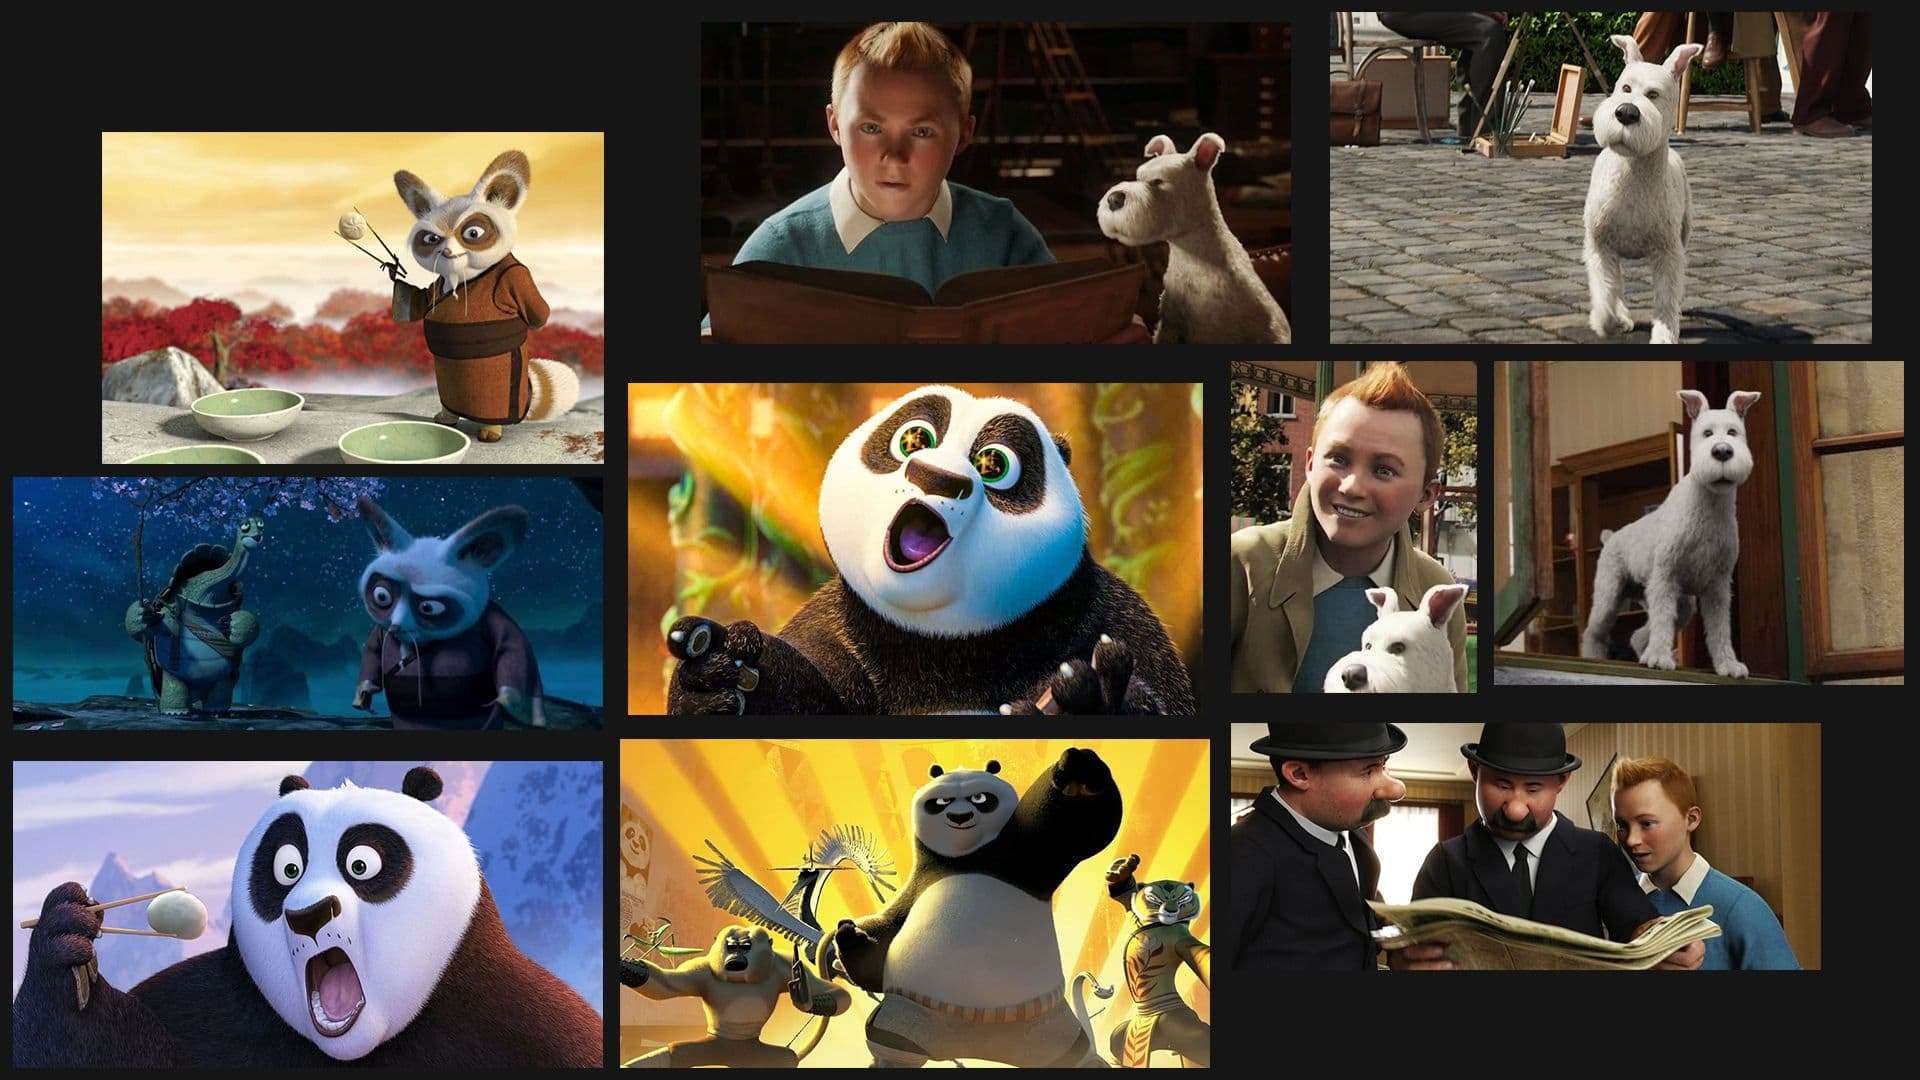
After we settled with our story, we began to do research, collecting references and exploring for inspiration. These three steps intertwined with each other. We took inspiration from many cinematic short films like Overwatch, movies like Kungfu Panda and Tintin. These are the styles that my partner and I both mutually enjoy. With those ideas in mind, we could start collecting references based on our story’s theme.

We first started with concepts and ideas. A lot of ideas were crossed out because of many limitations we had. For example, we cut out many parts that we initially planned out because of the duration of the film. As we blocked out the short film we realised it will be more than ten minutes and we definitely did not have time to finish it before graduation. As filmmakers we realised that very decision needs to be considered carefully. I think this is especially true when there is a time and budget restriction.


As the concept and storyboards were pinned down, we started to gather references and inspiration. I feel like this is a really important step as beginners and students like us. We still have so much to learn, and references and research helped us to make less mistakes in the upcoming process such as modeling, texturing and look development. To find references and inspiration, I used all sites, such as Artstation, TheRookies, Google Image, etc,.
Sometimes I felt like I was walking in the dark when I was working on this short film. As a student, I was still learning software and workflows. When I was making this short film I wanted to adopt a cleaner workflow but at the same time I was hesitant to change. I think that is one of the biggest challenges...I guess my dilemma was that I wanted to feel comfortable working with the same tools, but learning new softwares and workflow would have potentially sped up the process down the line. Consider pushing yourself and learn new things!
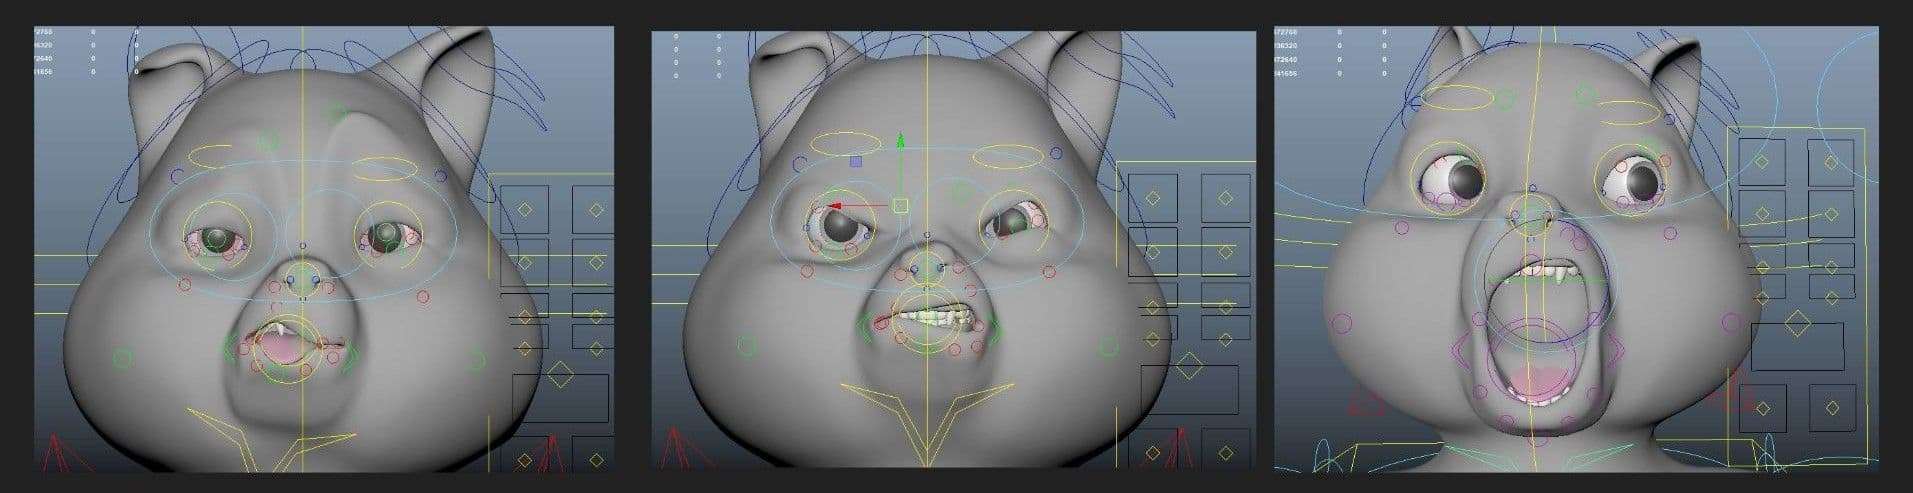
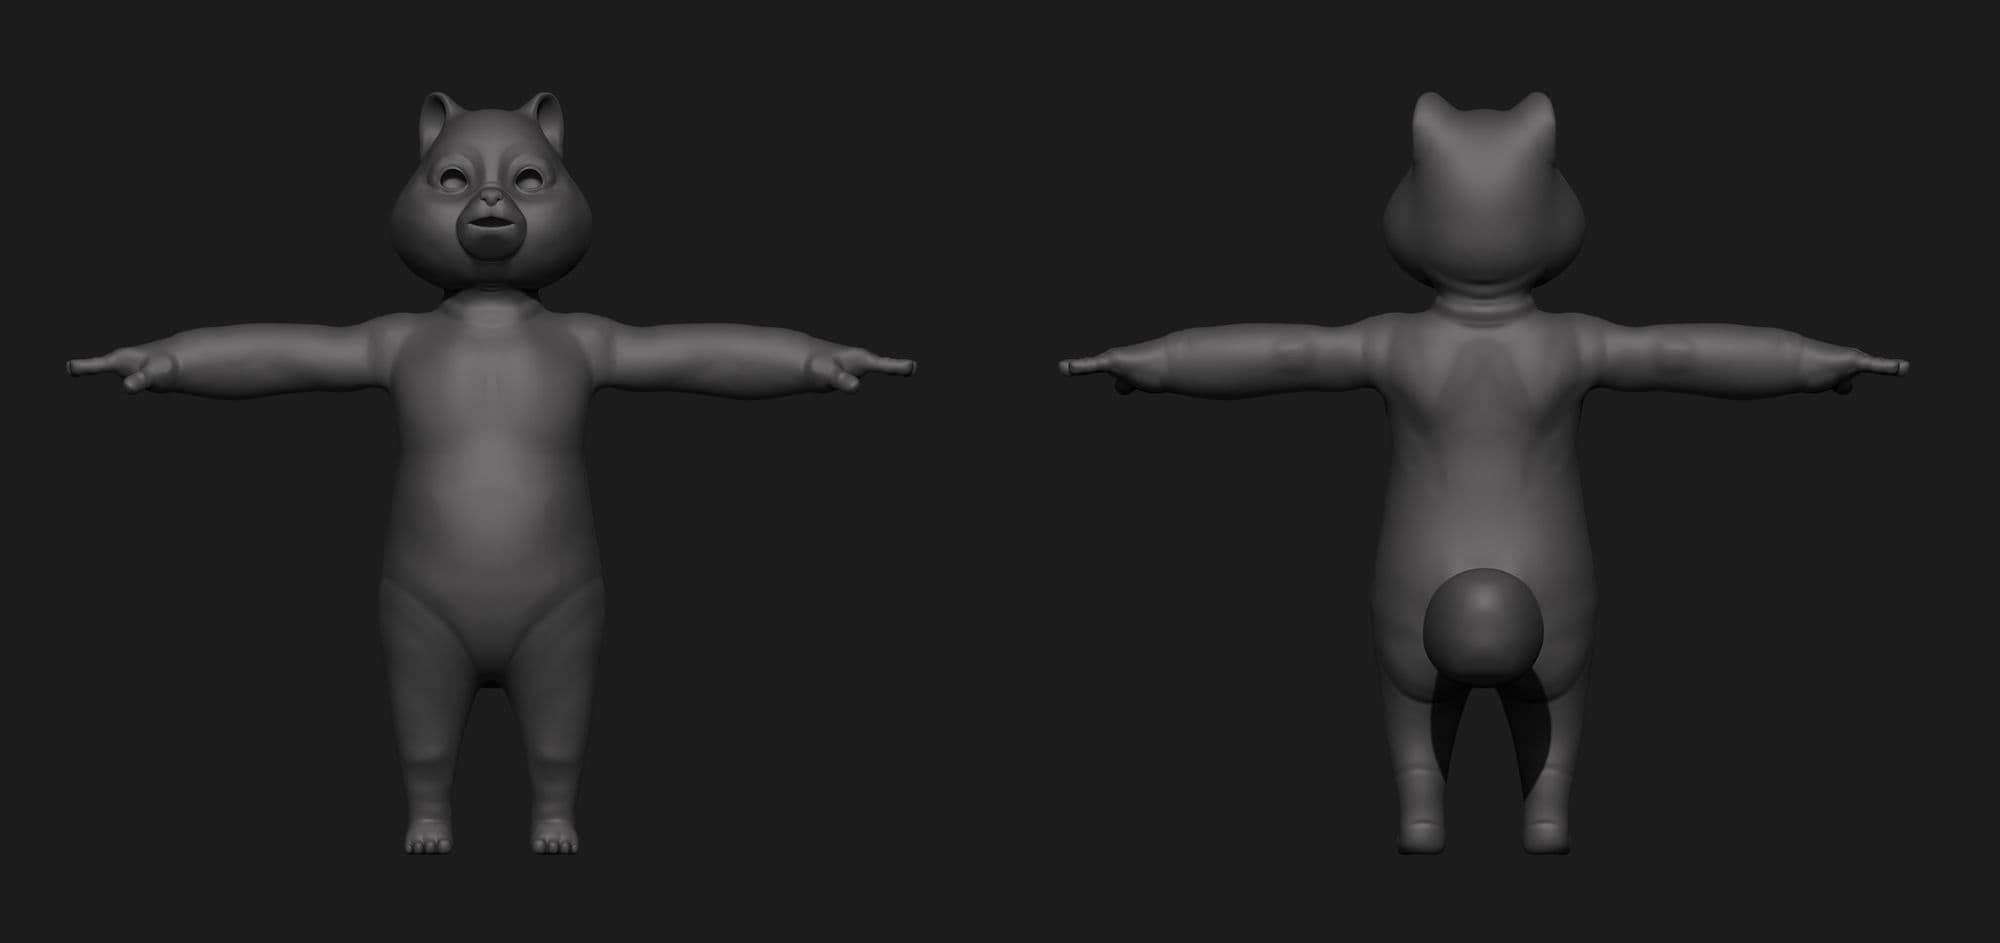
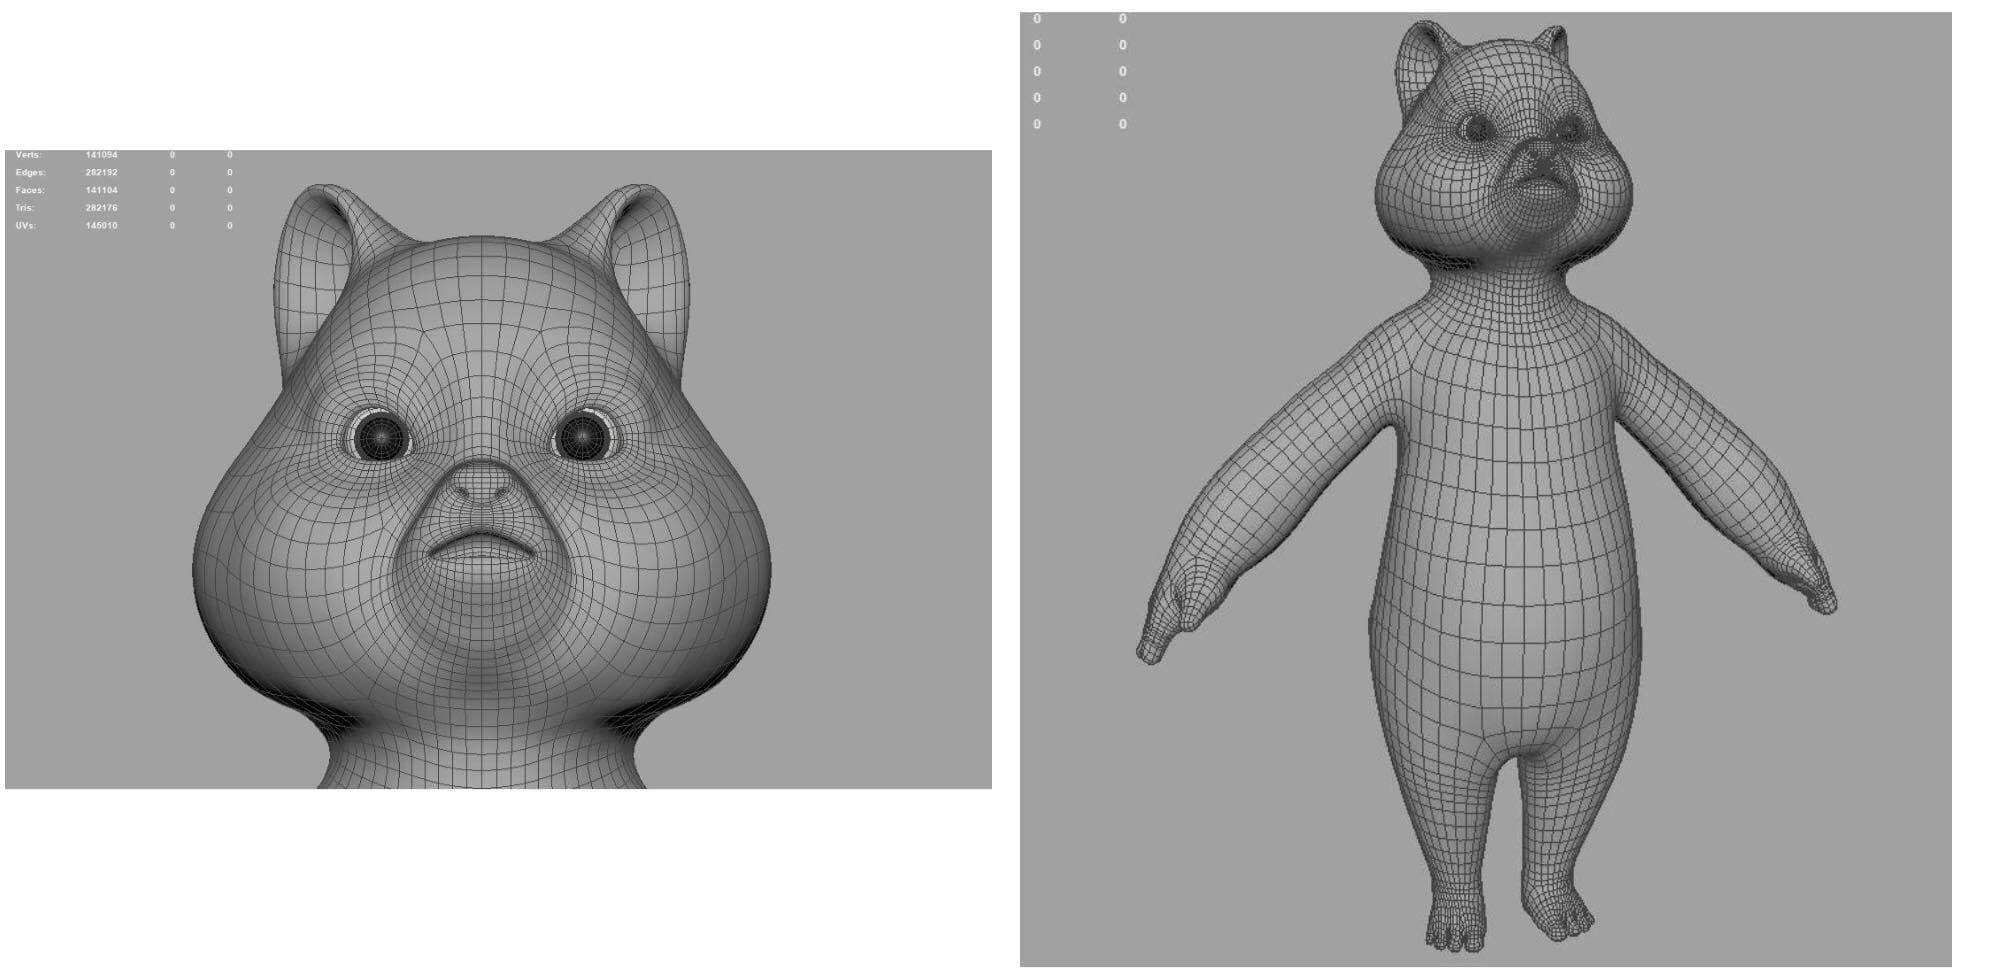
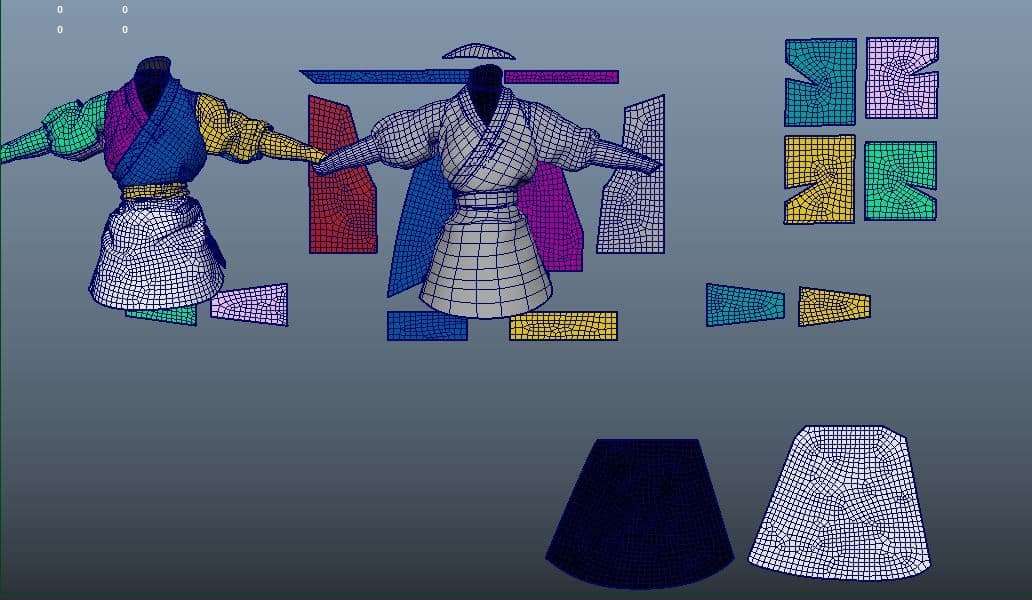
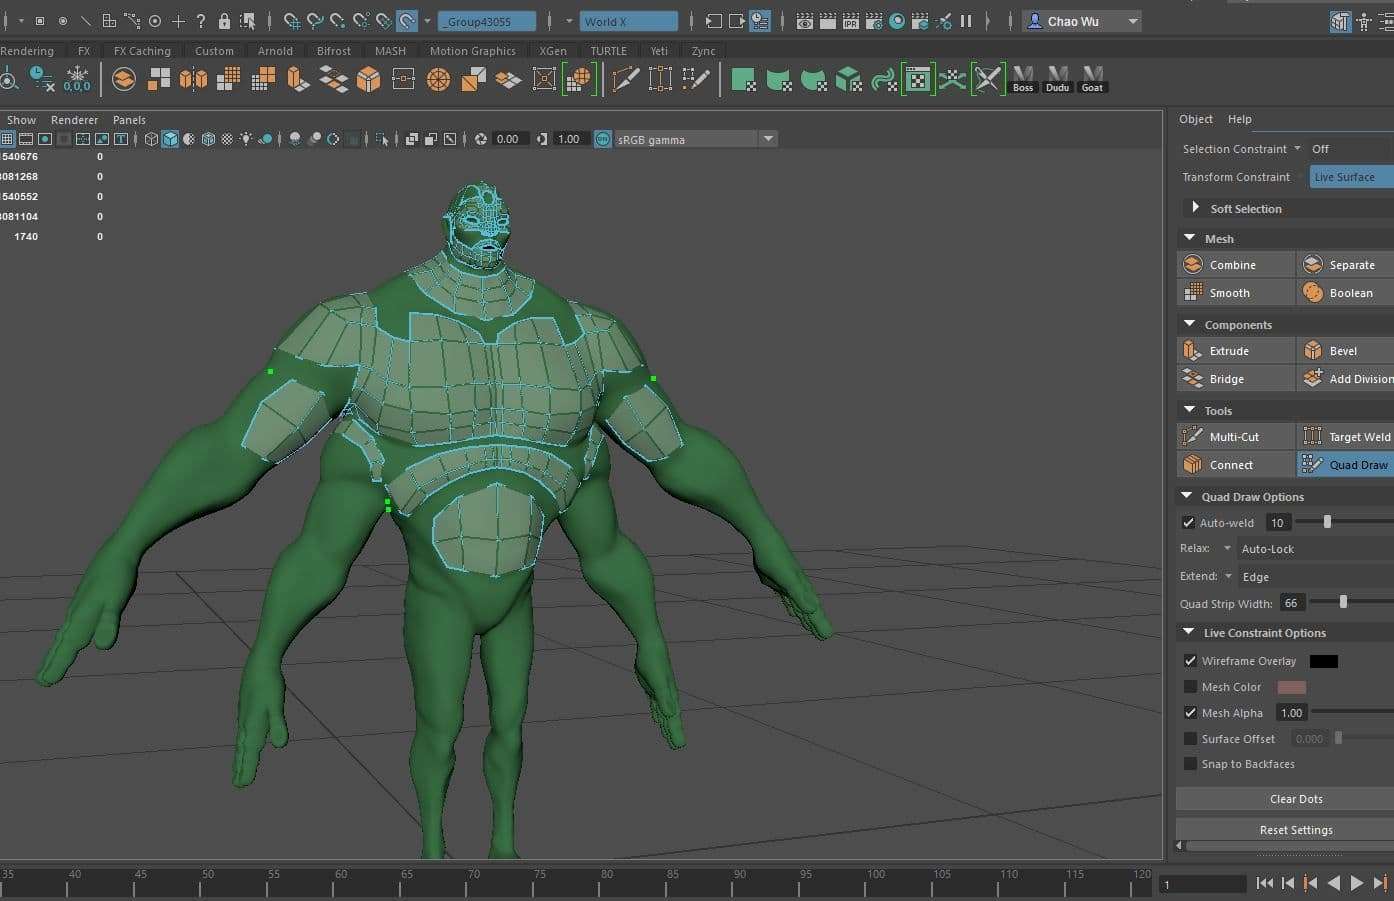
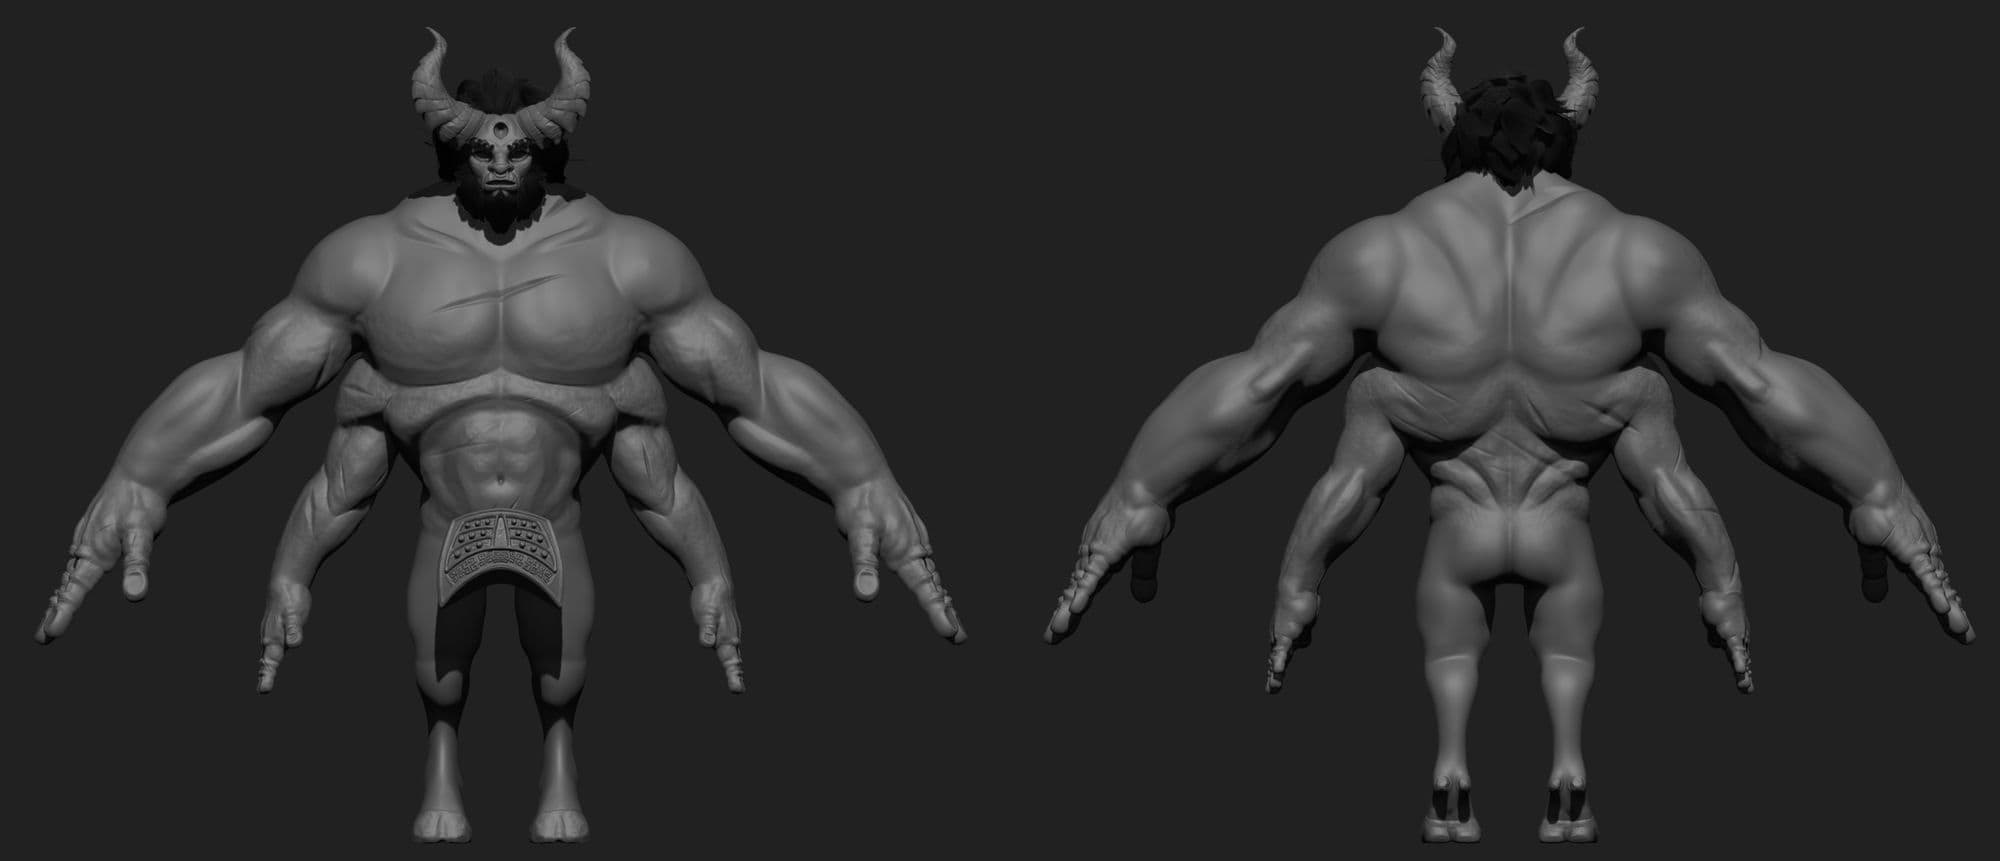
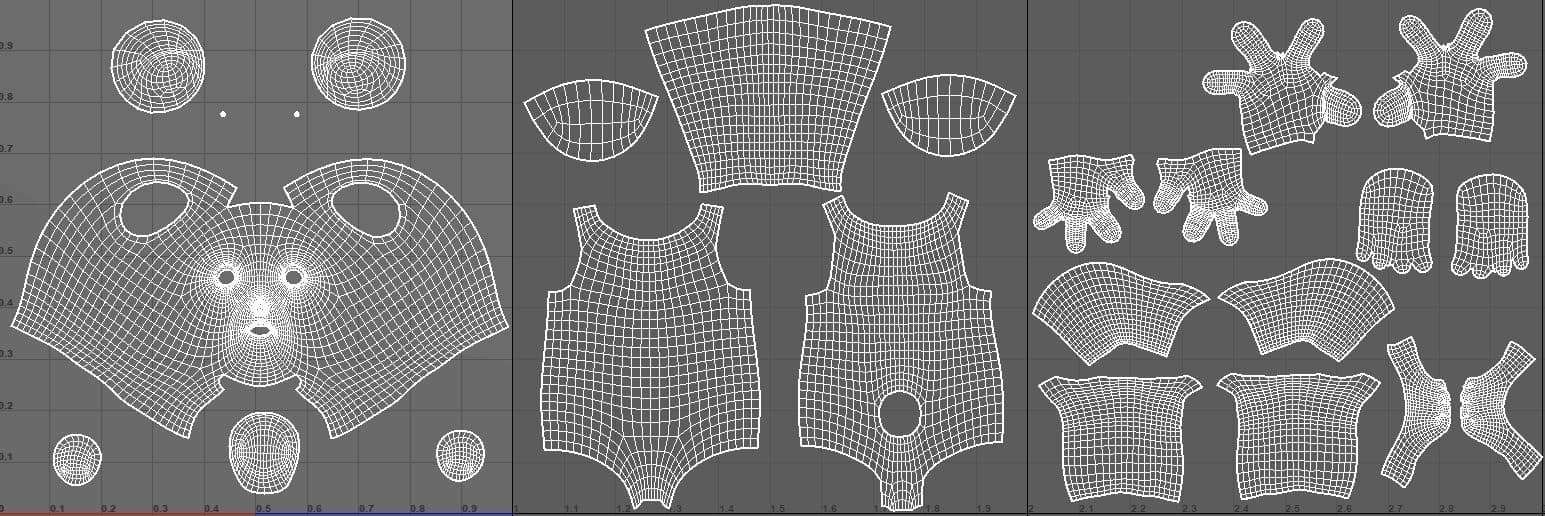
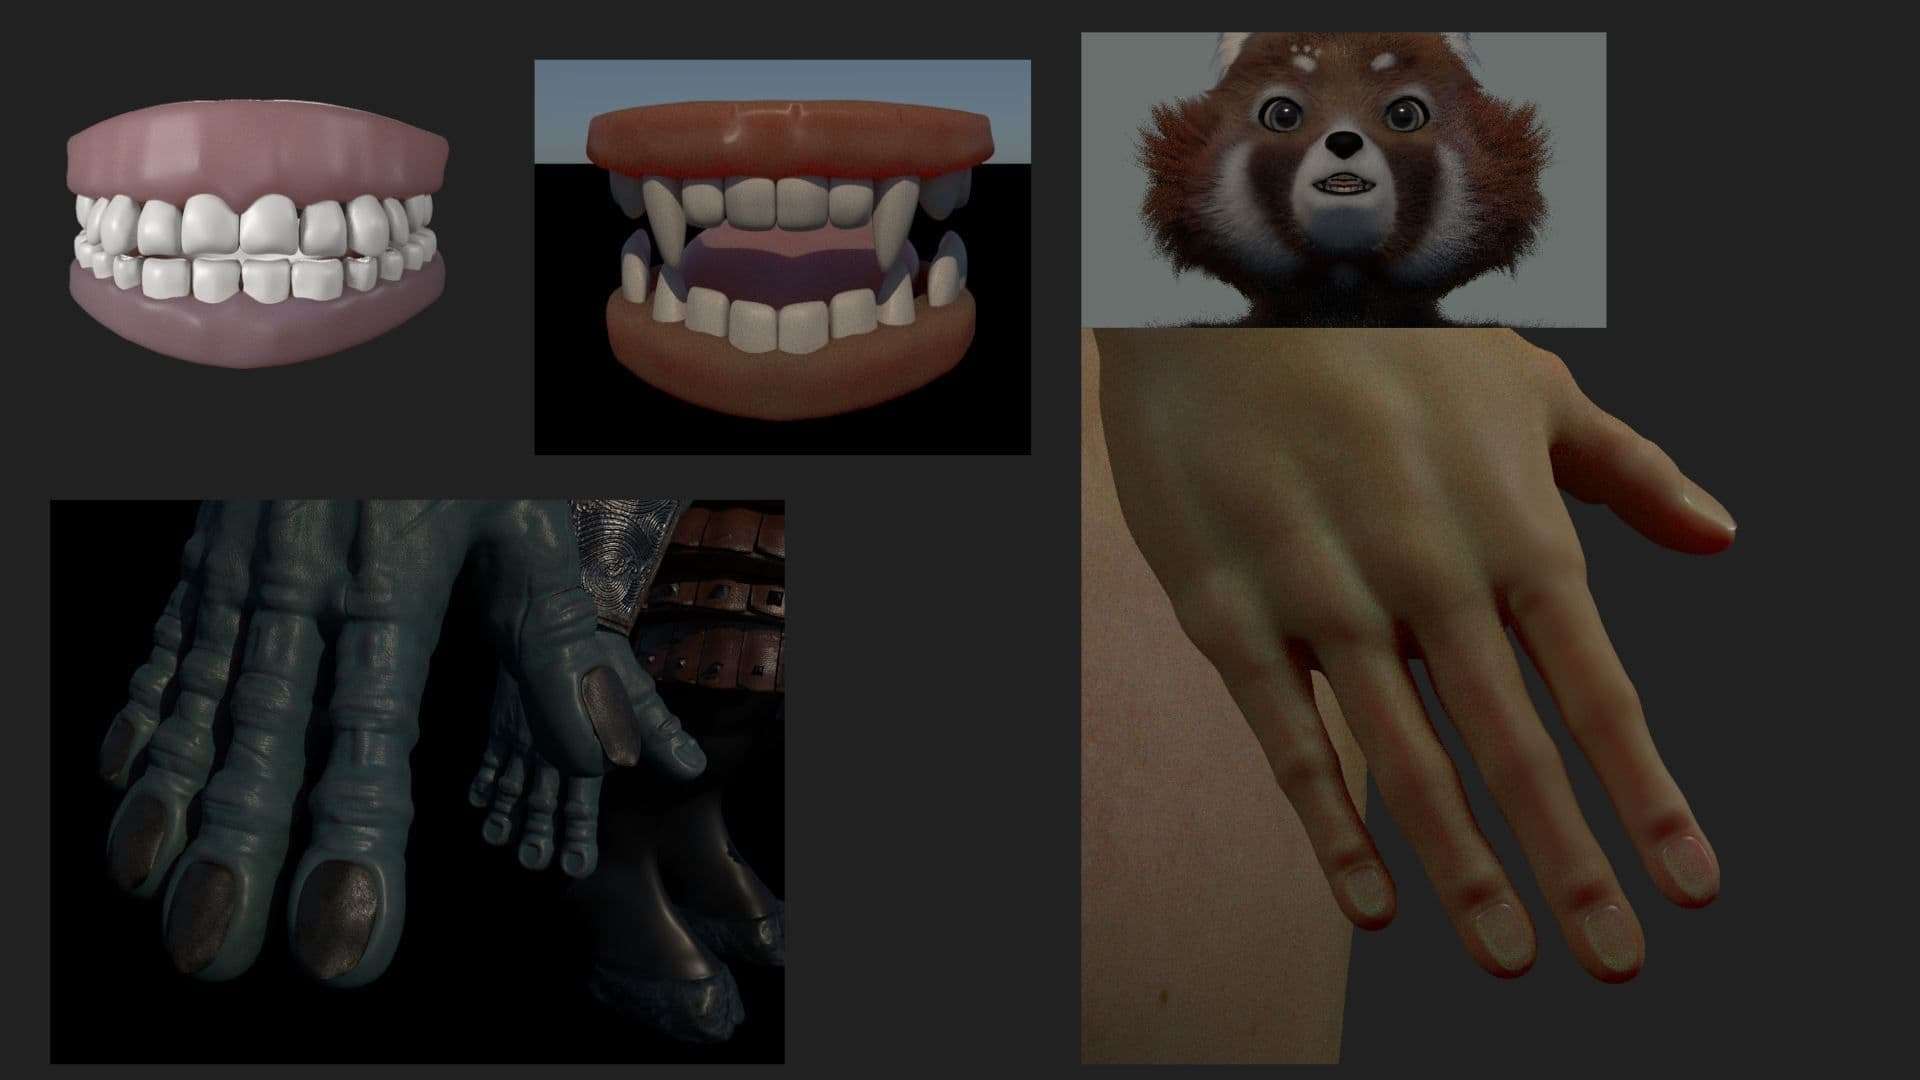
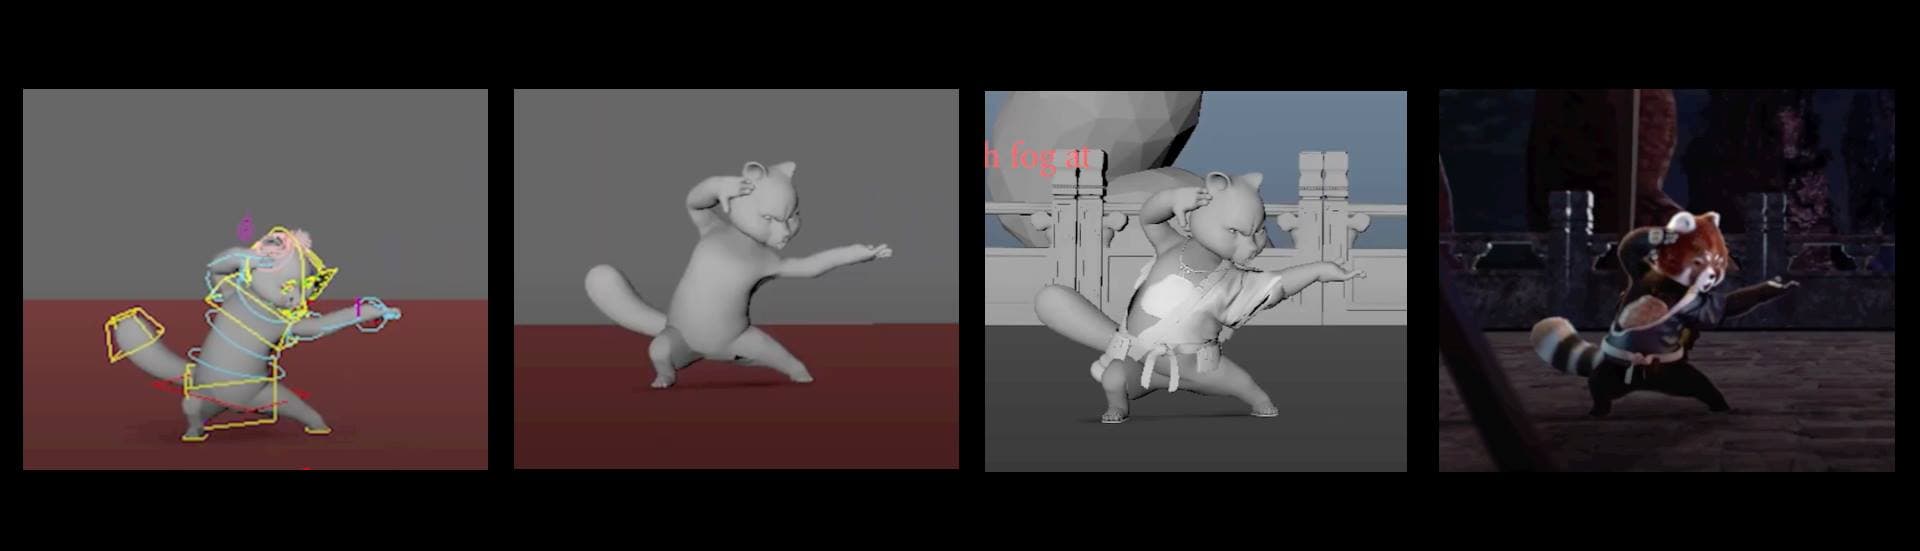
Usually, I try to model everything in Maya. But that is often more time consuming for me. For this short film, I tried a different approach. I started all my characters with Zbrush. I used the ZSphere tool to quickly block out the forms of each character and slowly finalise it by sculpting them with some standard Zbrushes. When I was satisfied with the models, I would then bring them to Maya for retopology. This way, I got to jump back and forth between maya and Zbrush with a clean topology and UVs to work on.
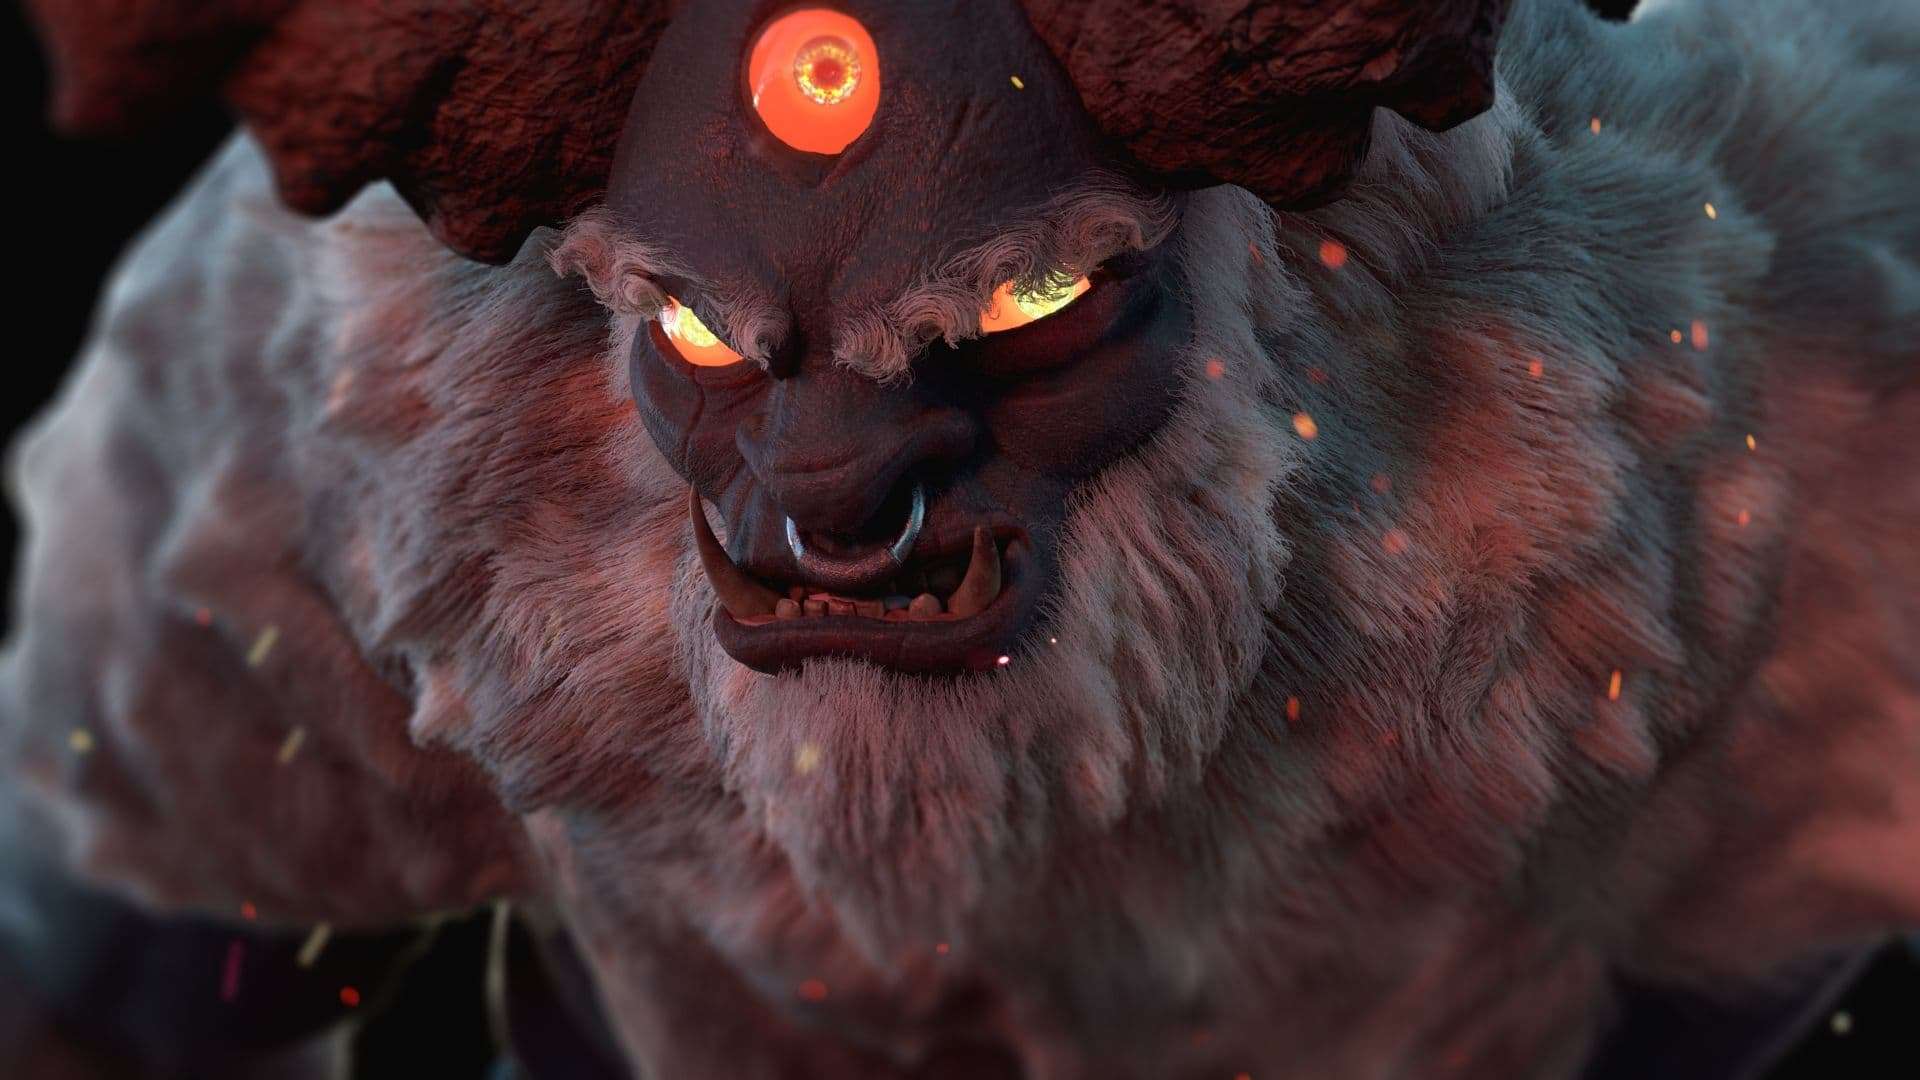
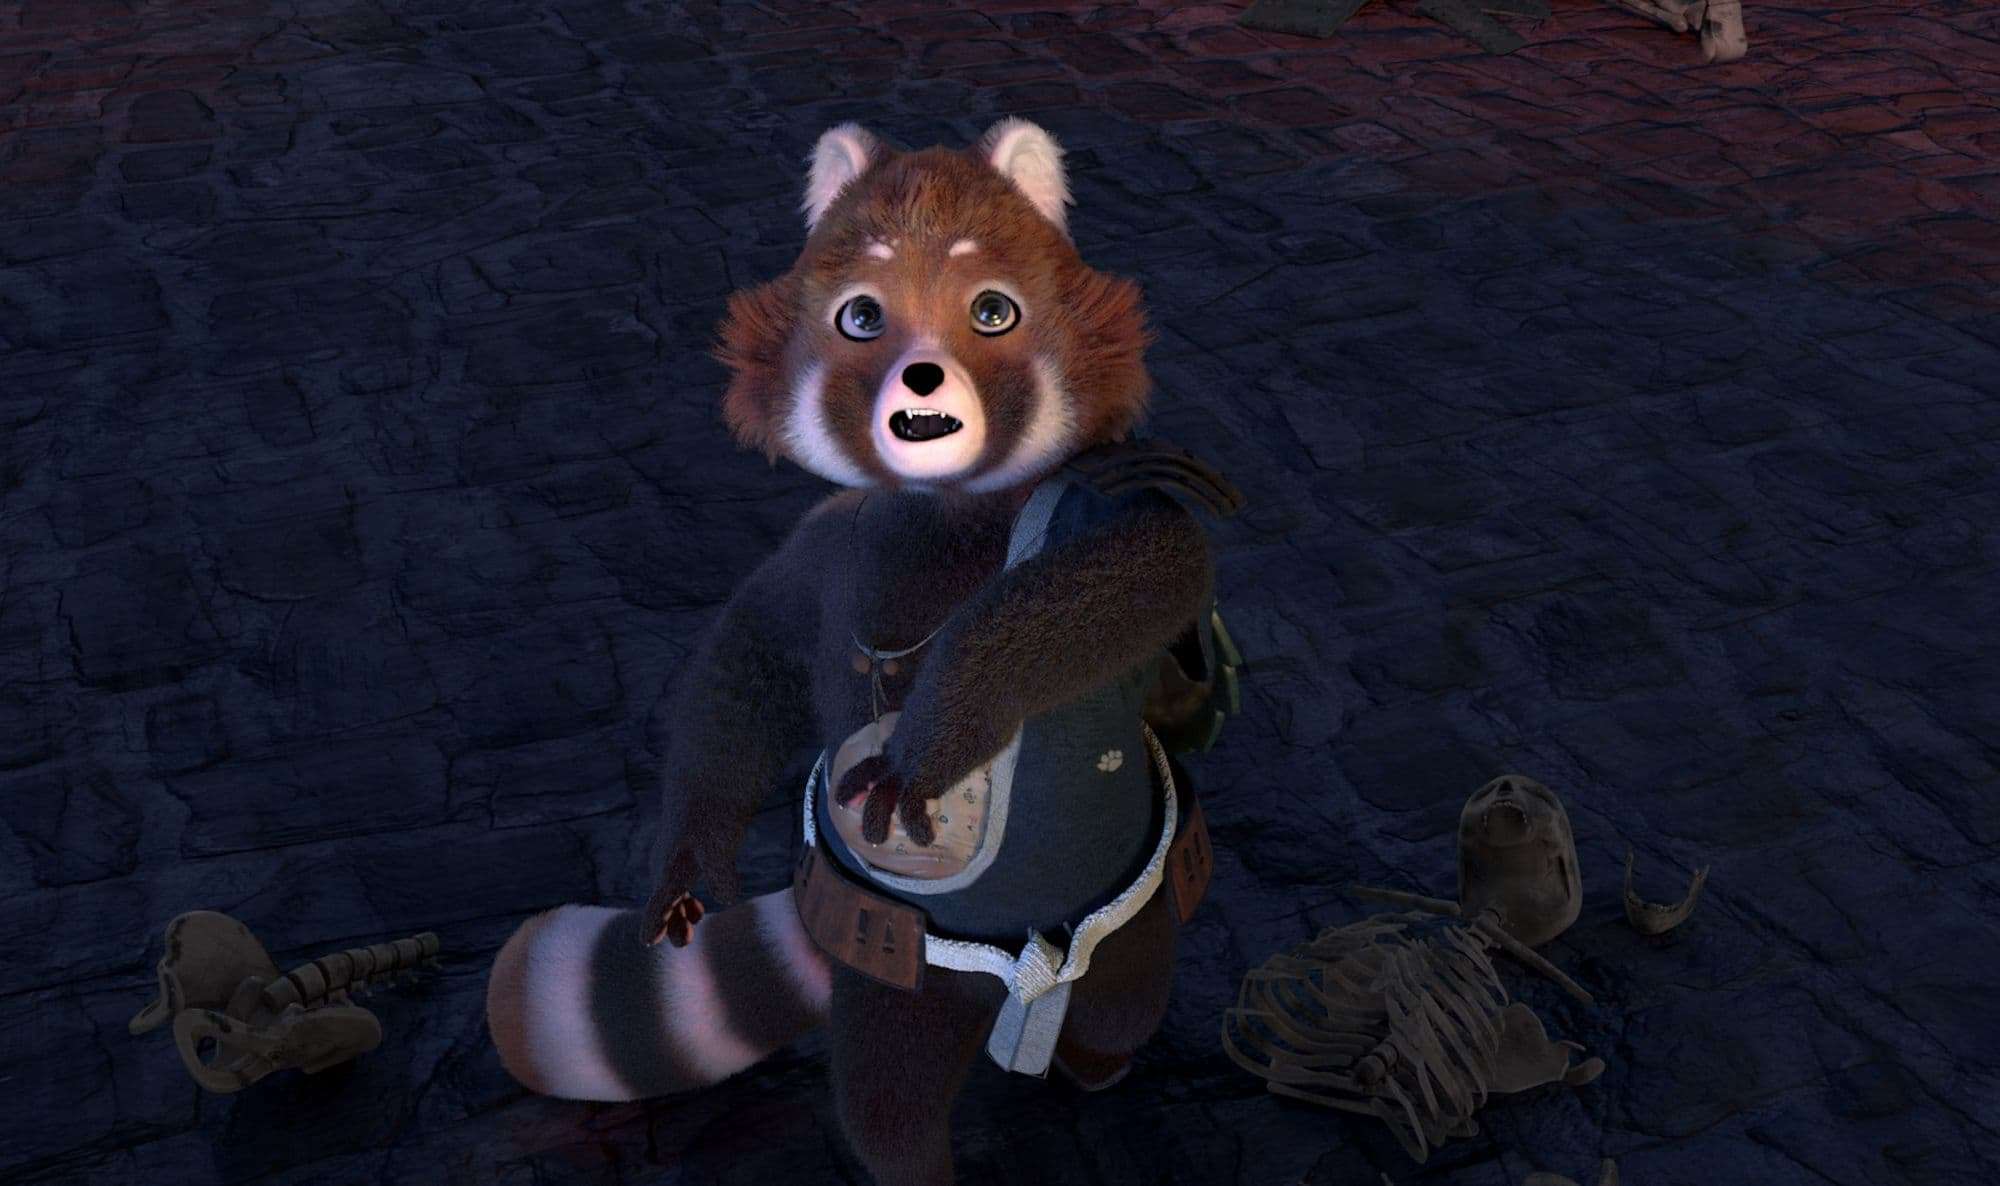
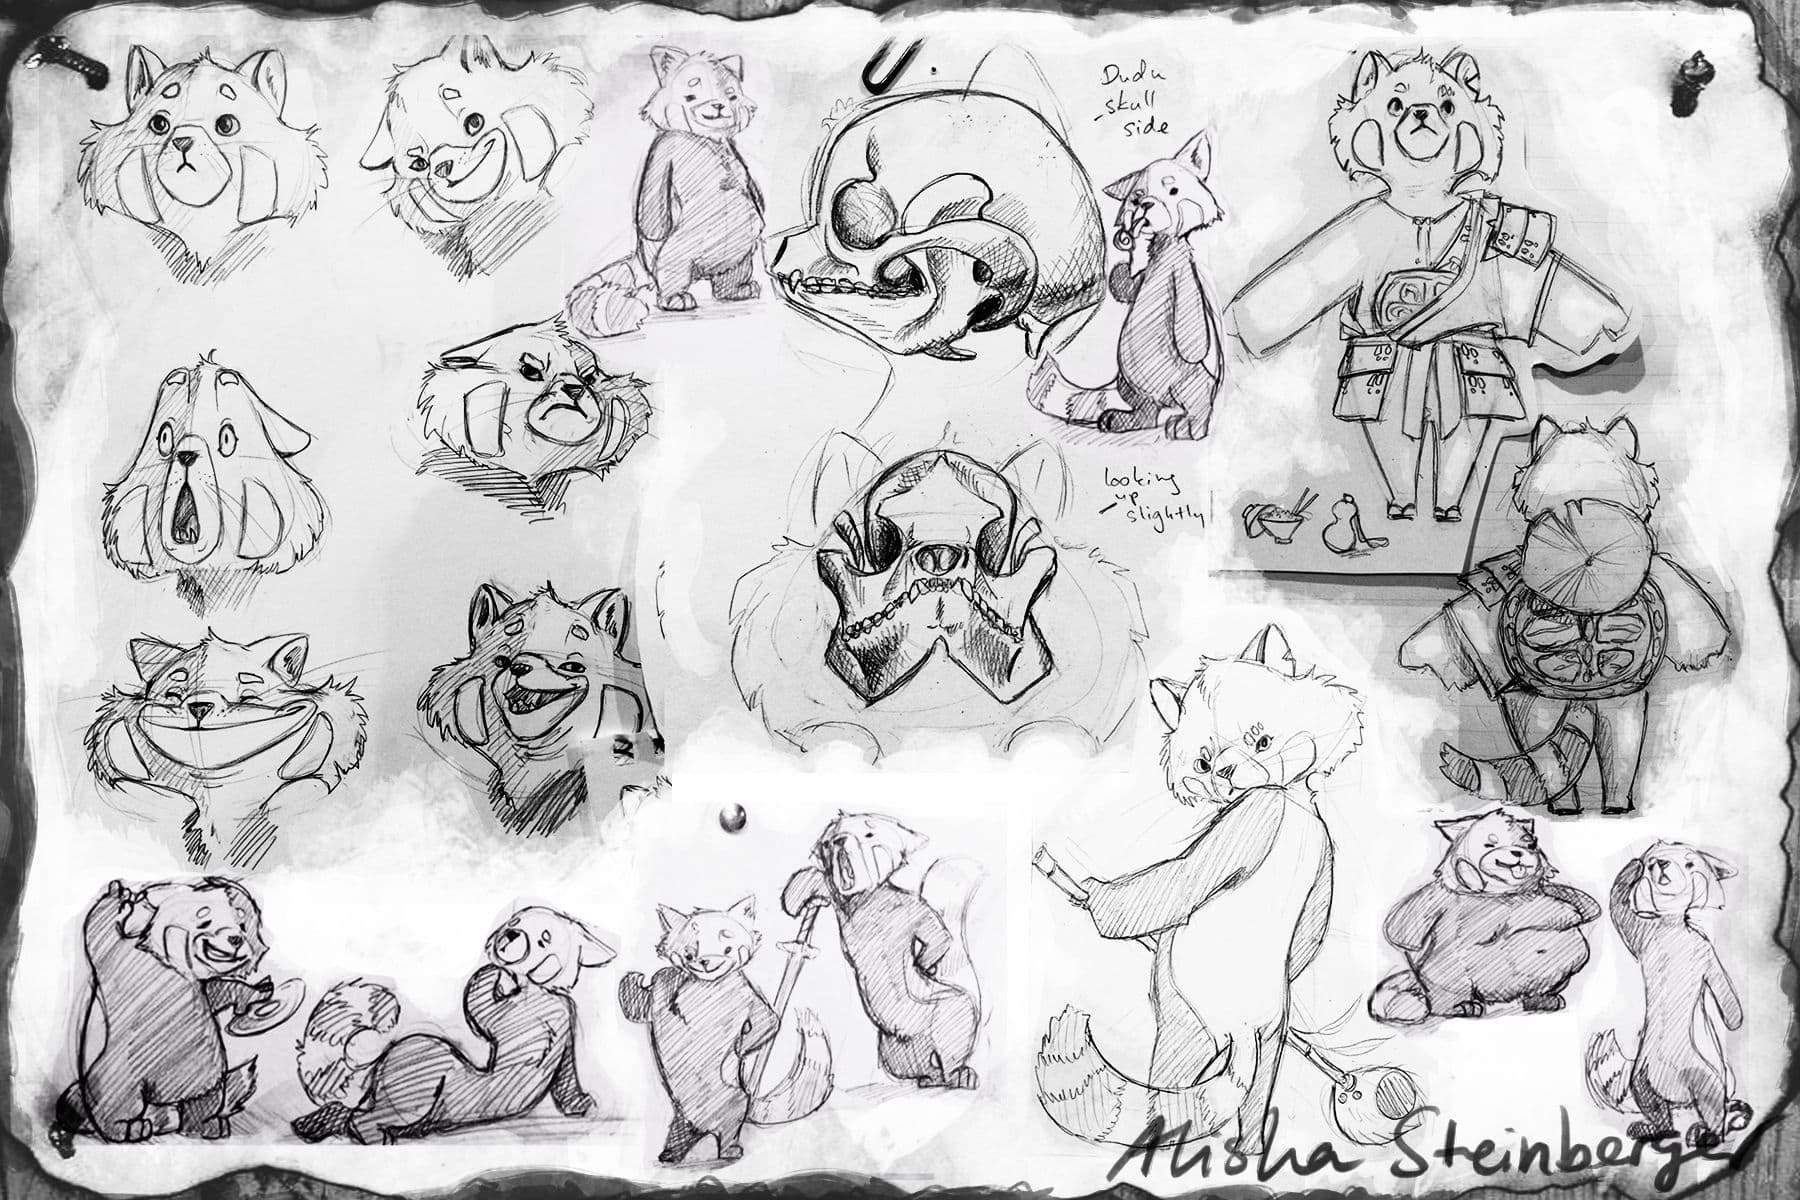
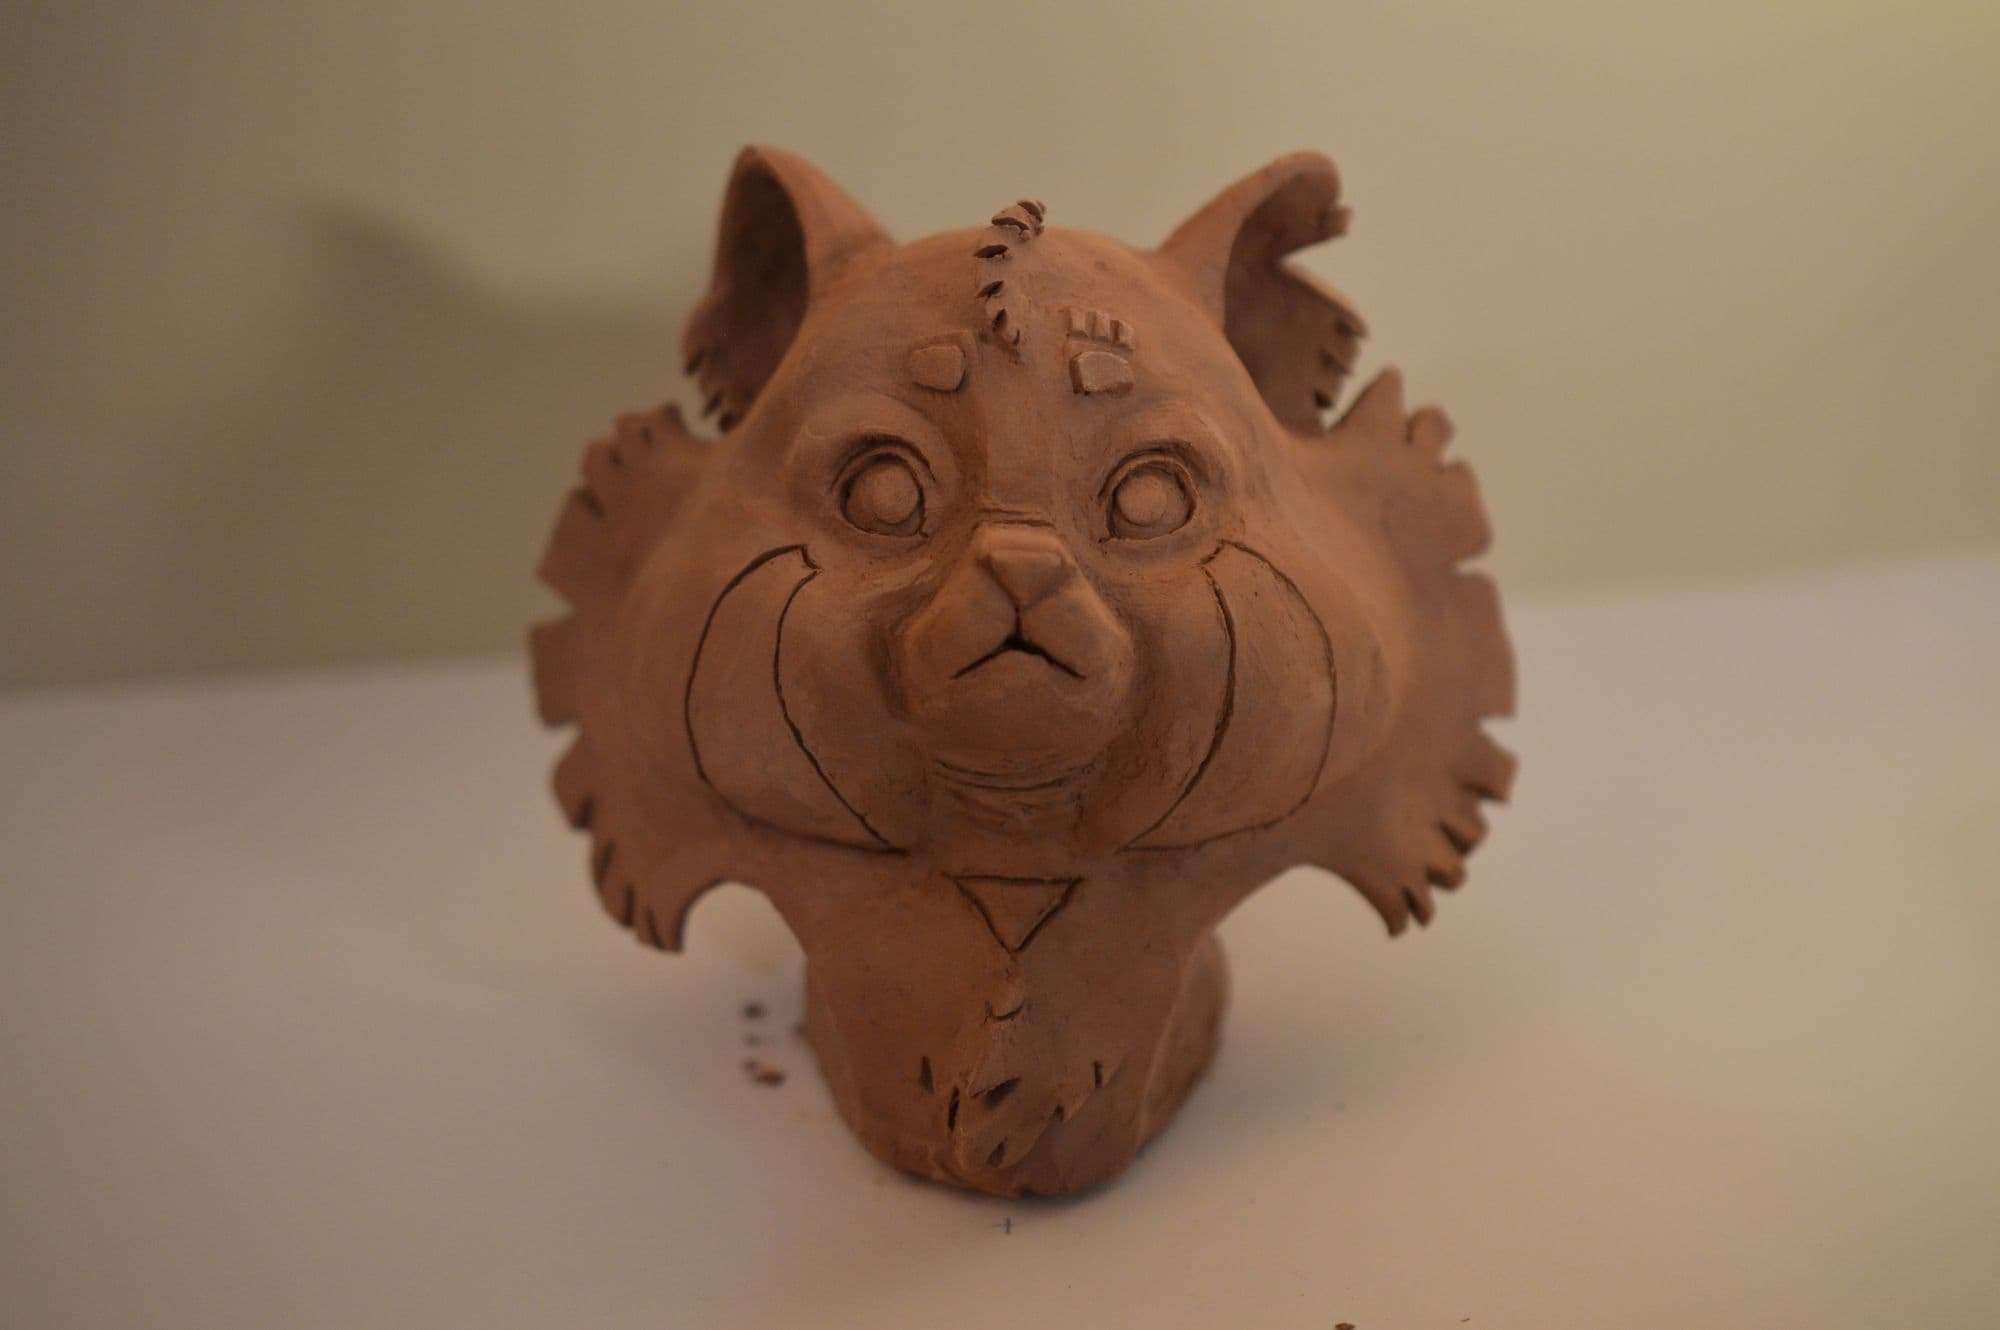
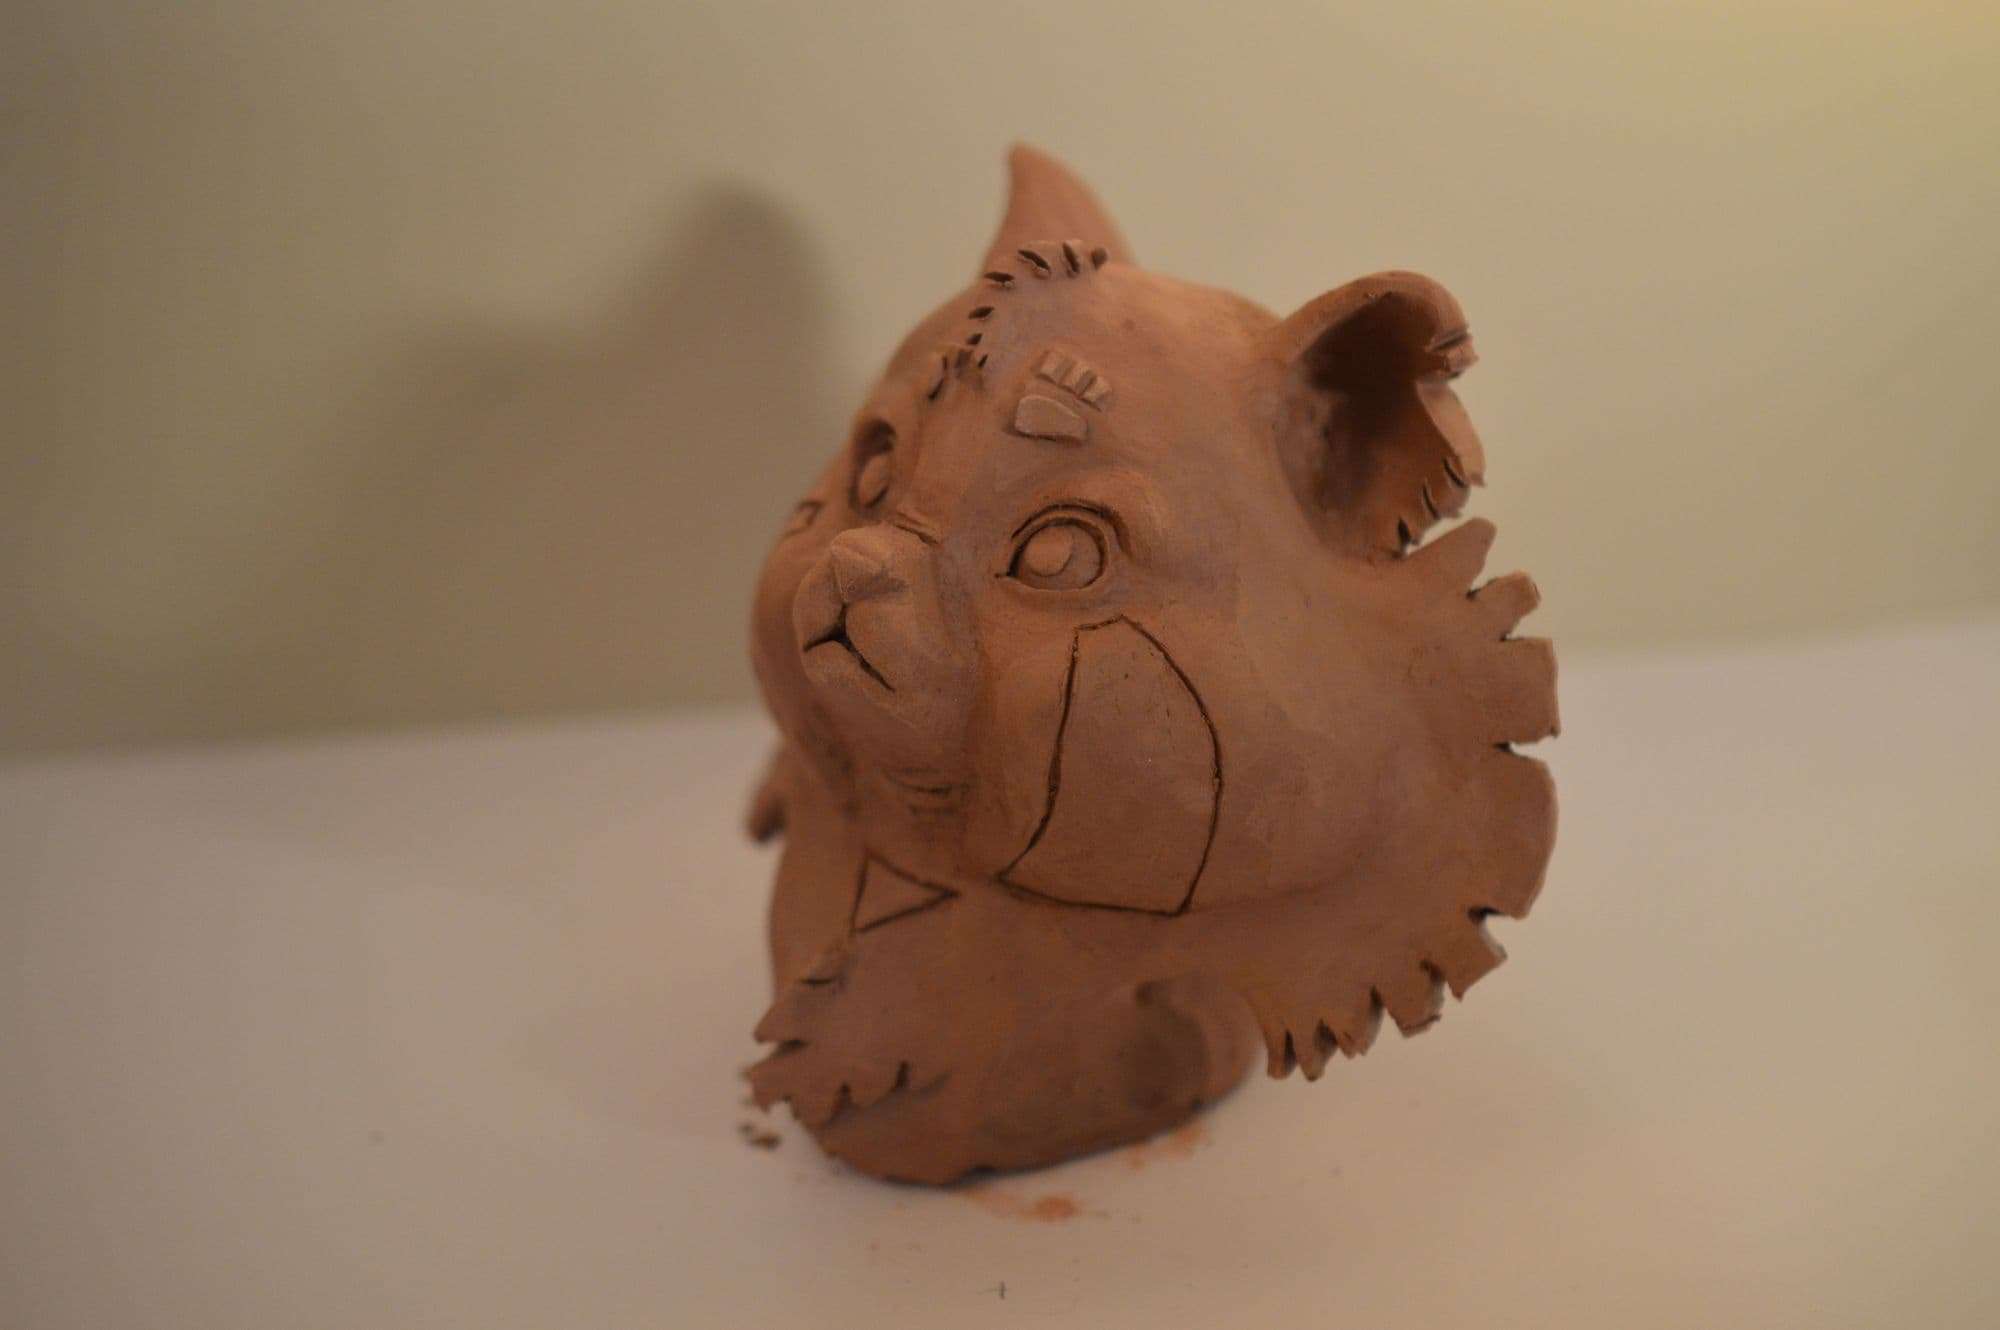
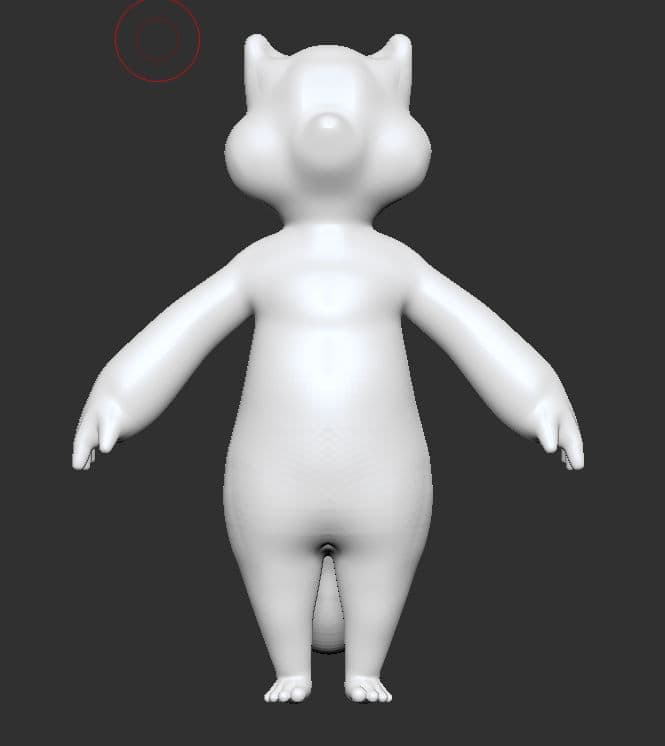
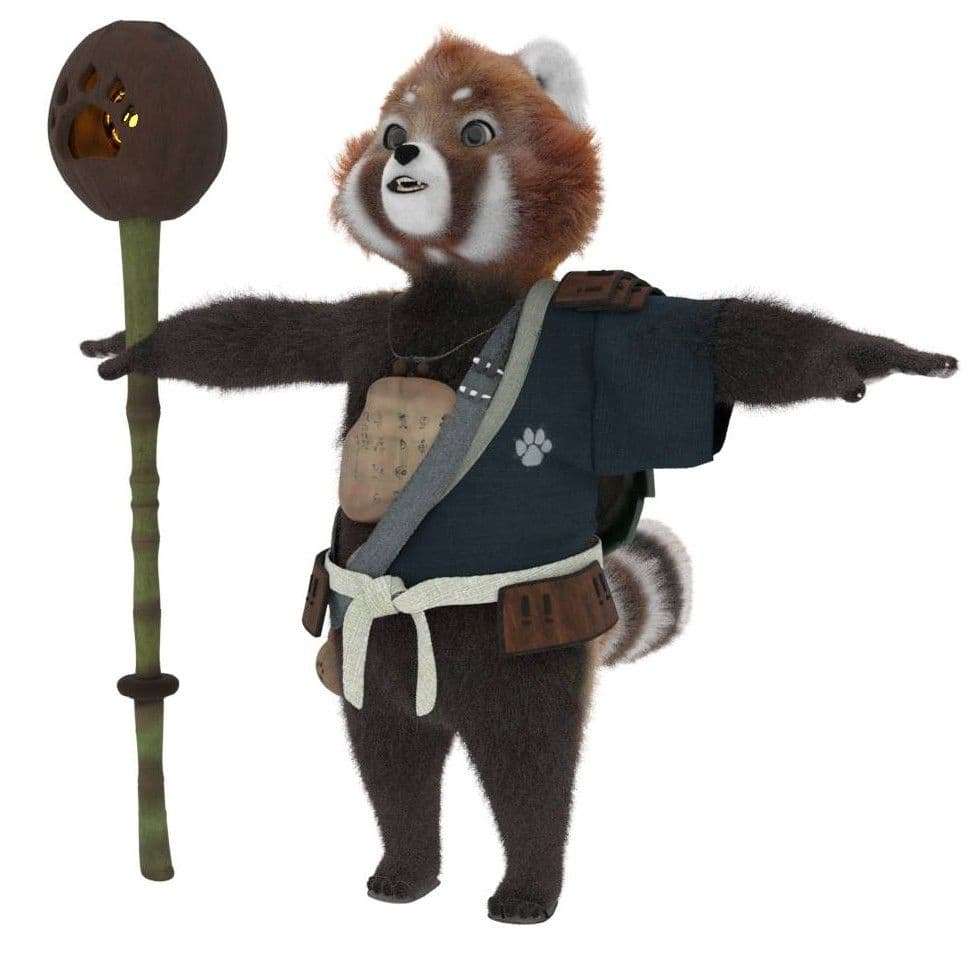
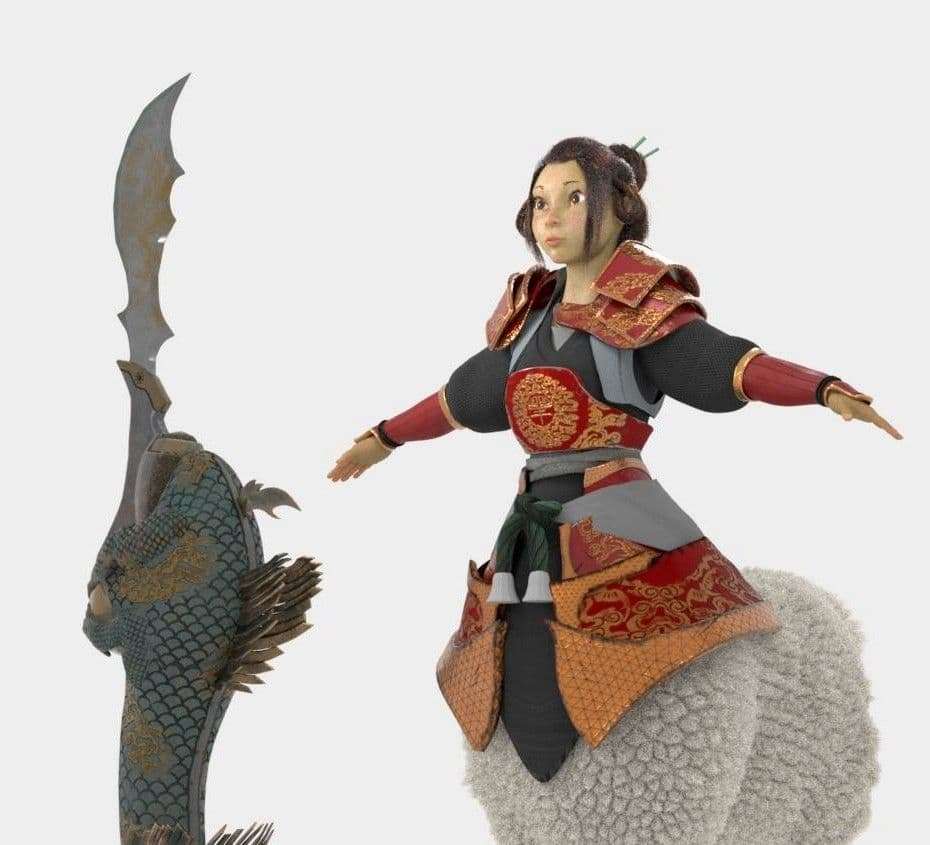
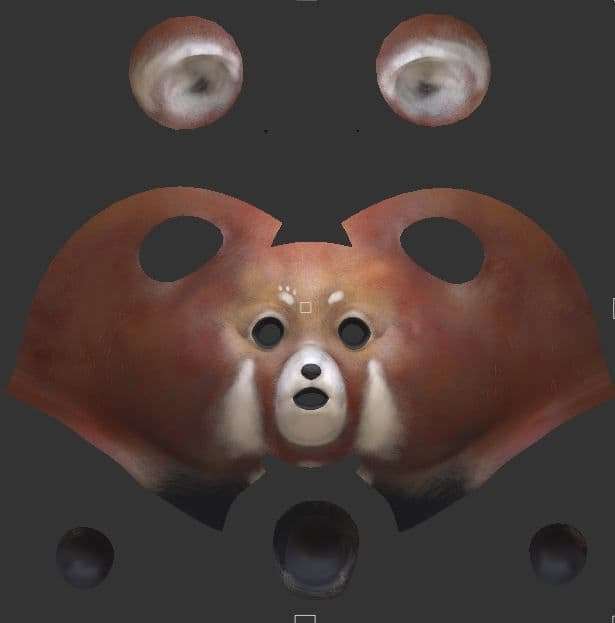
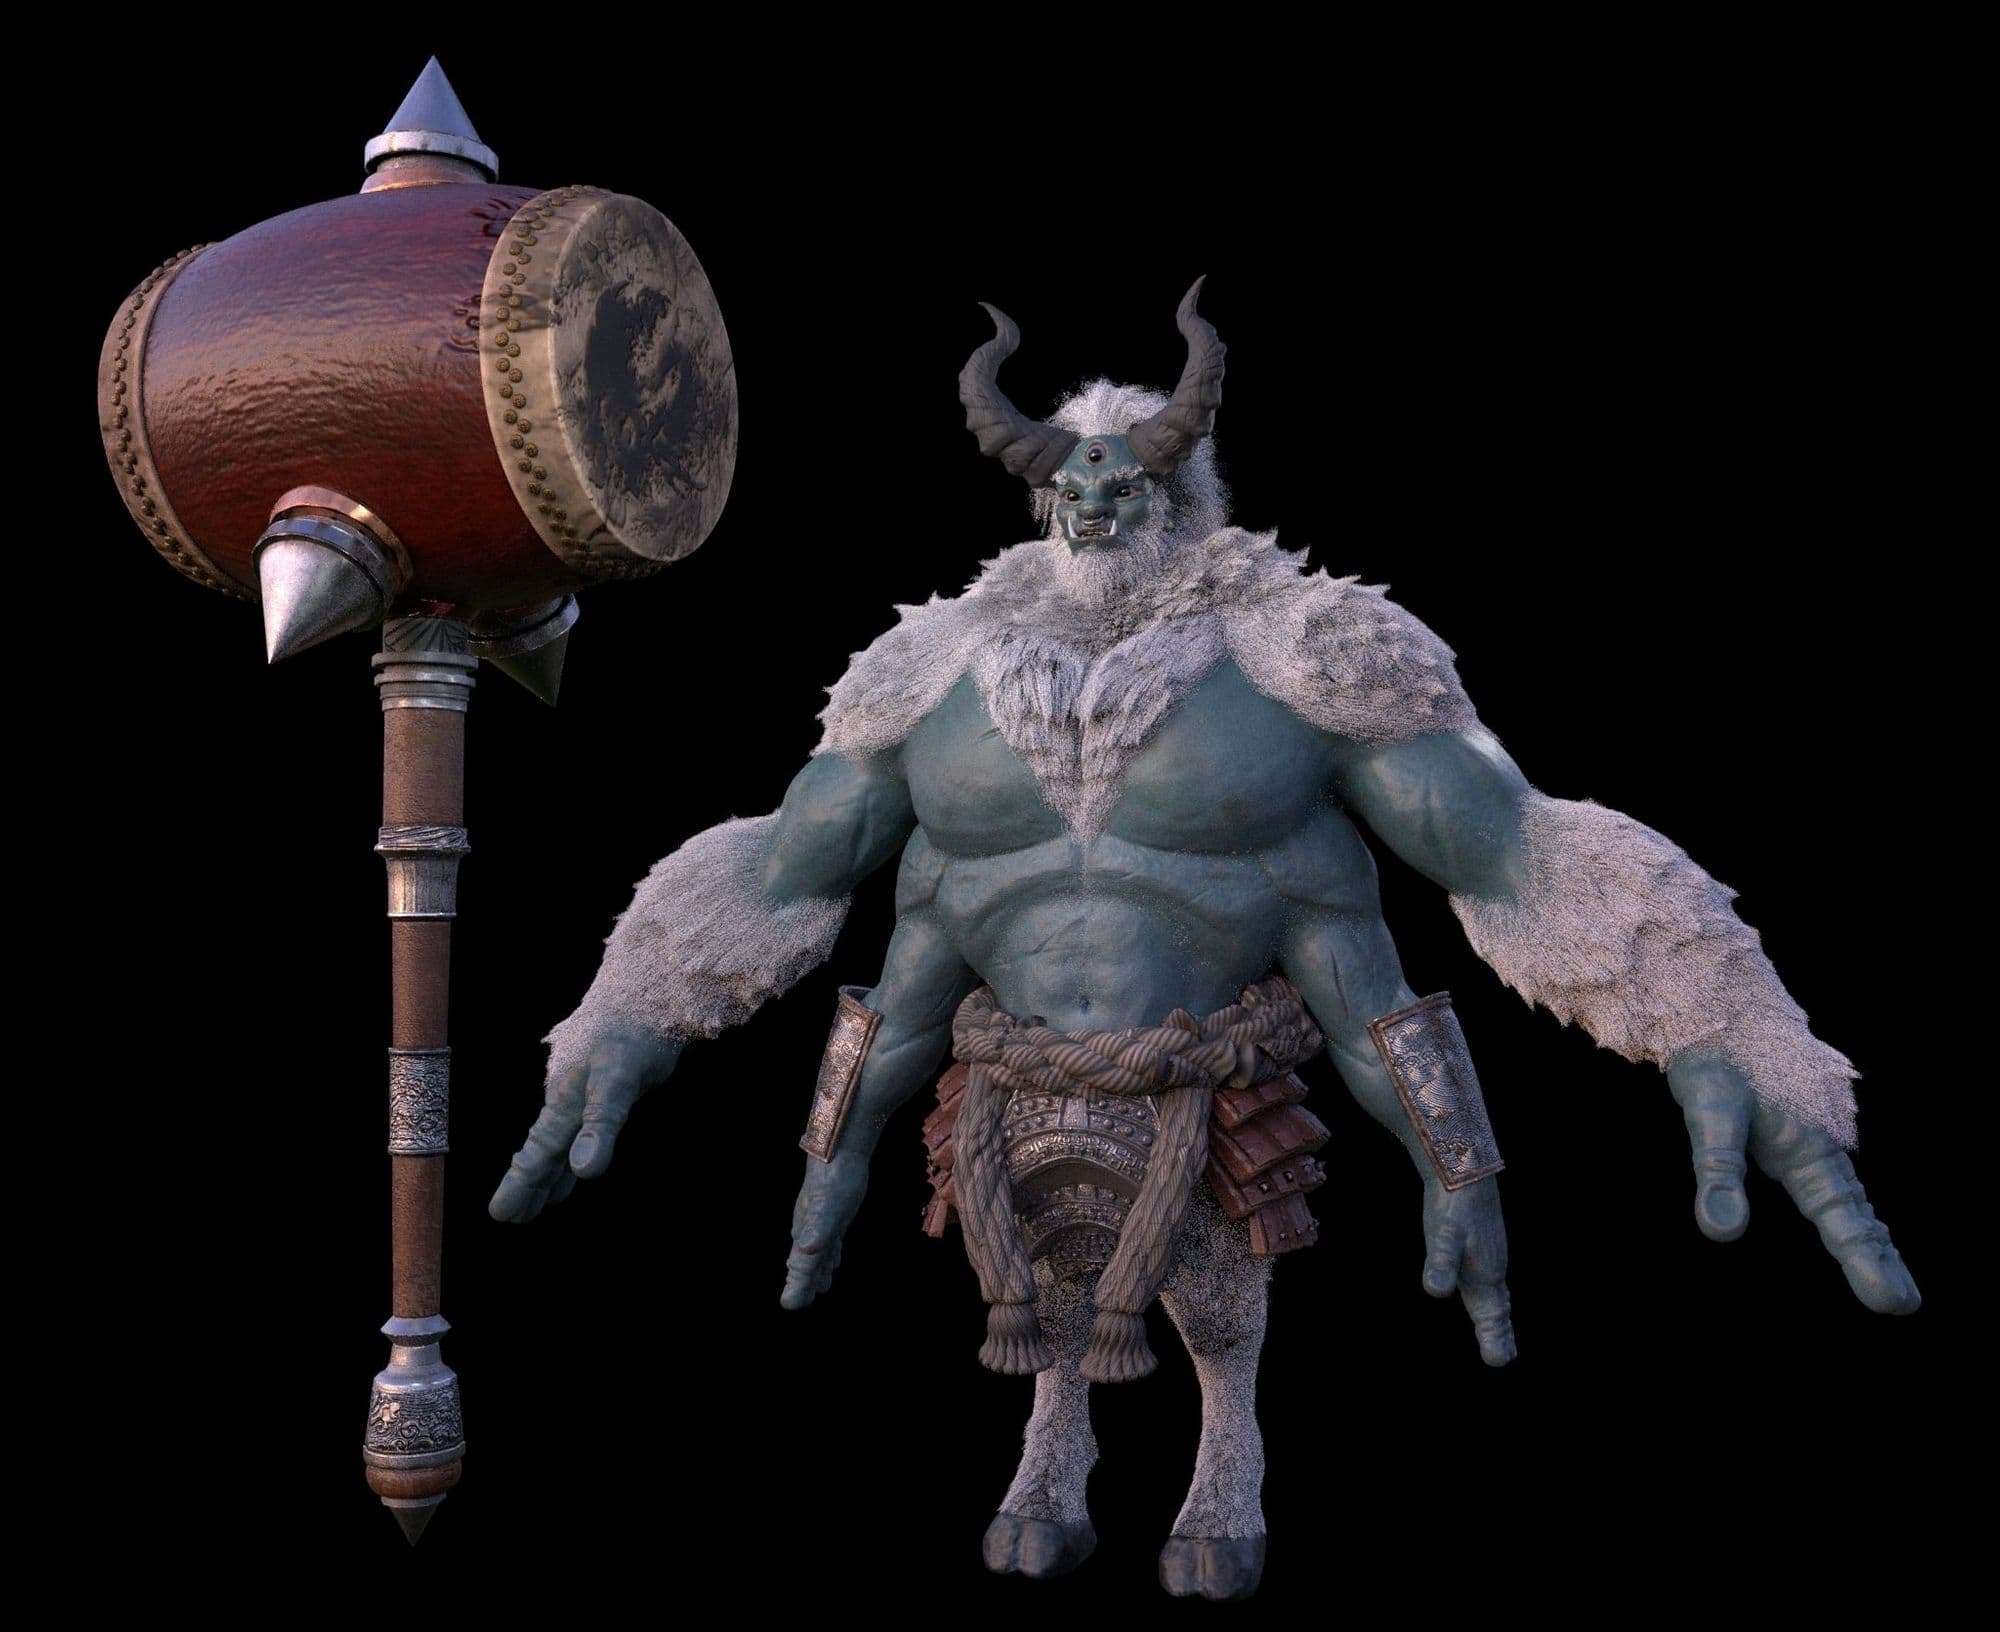
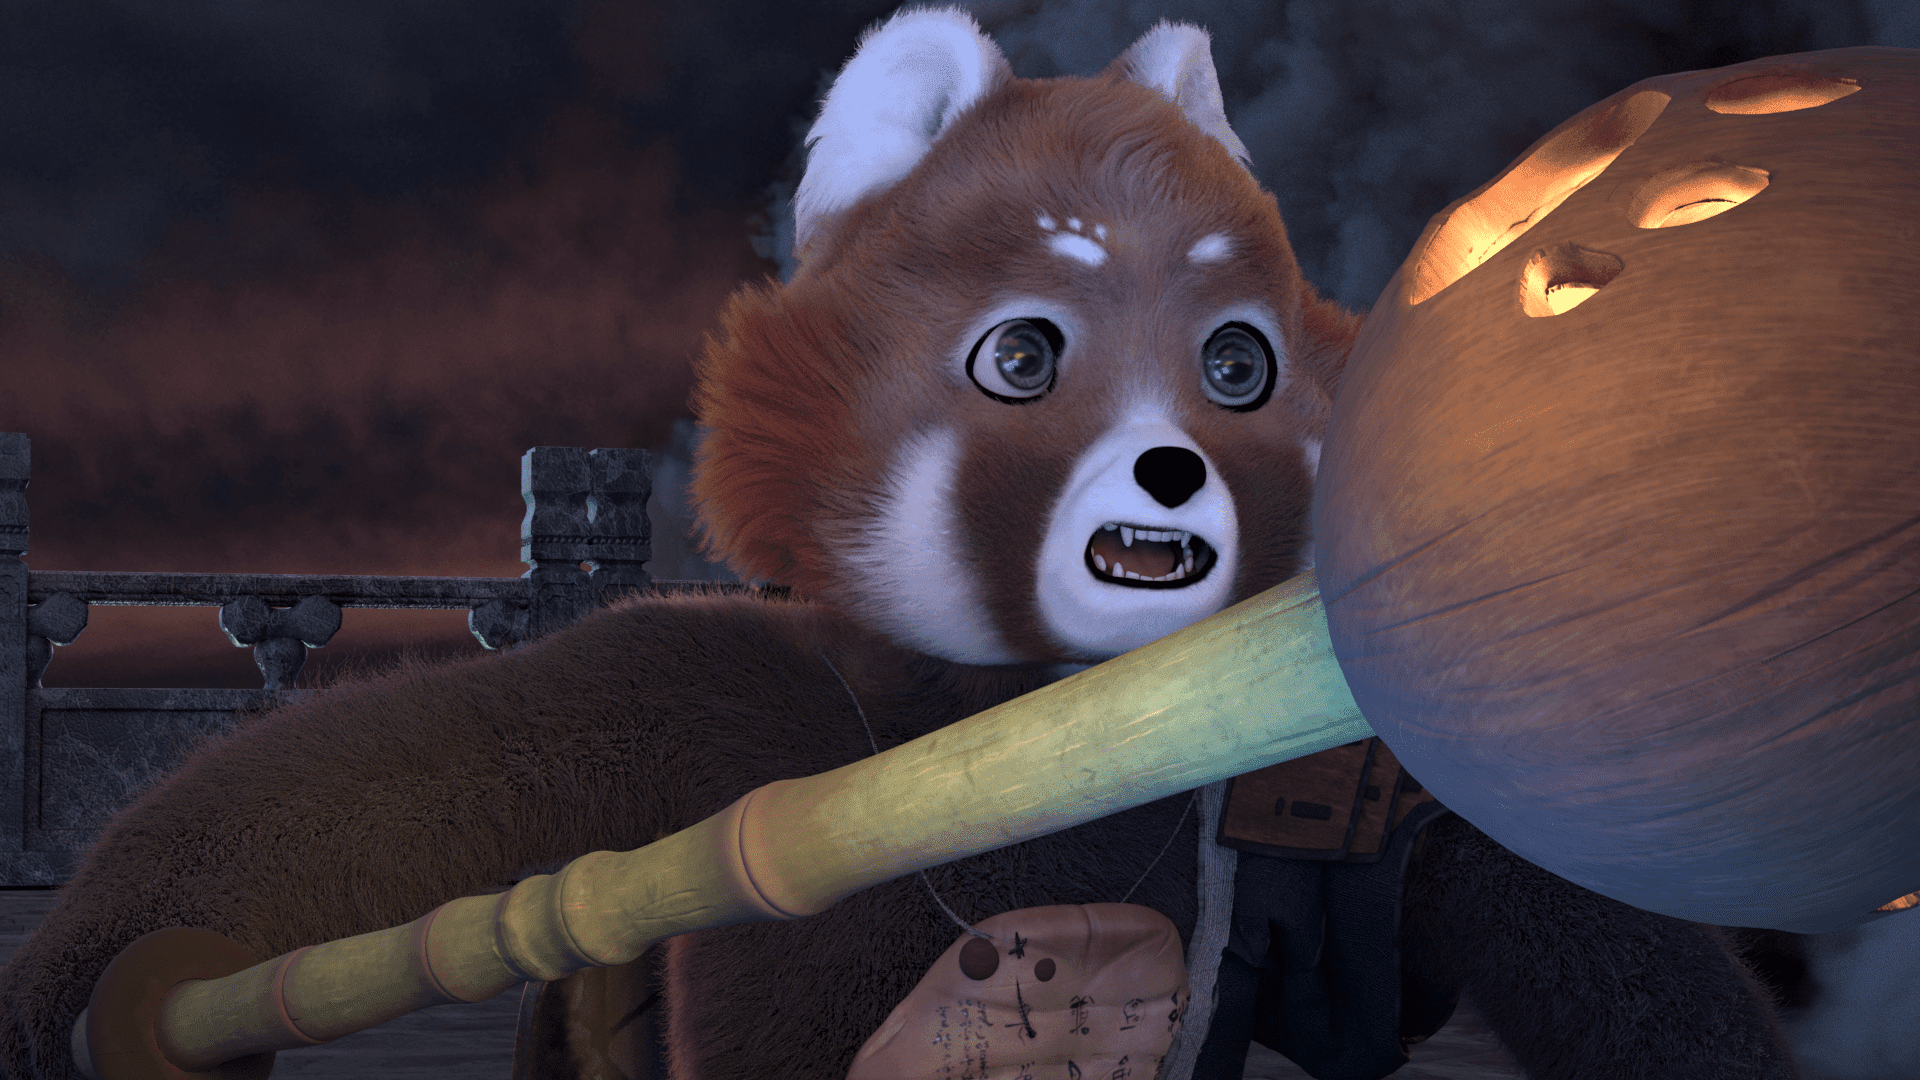
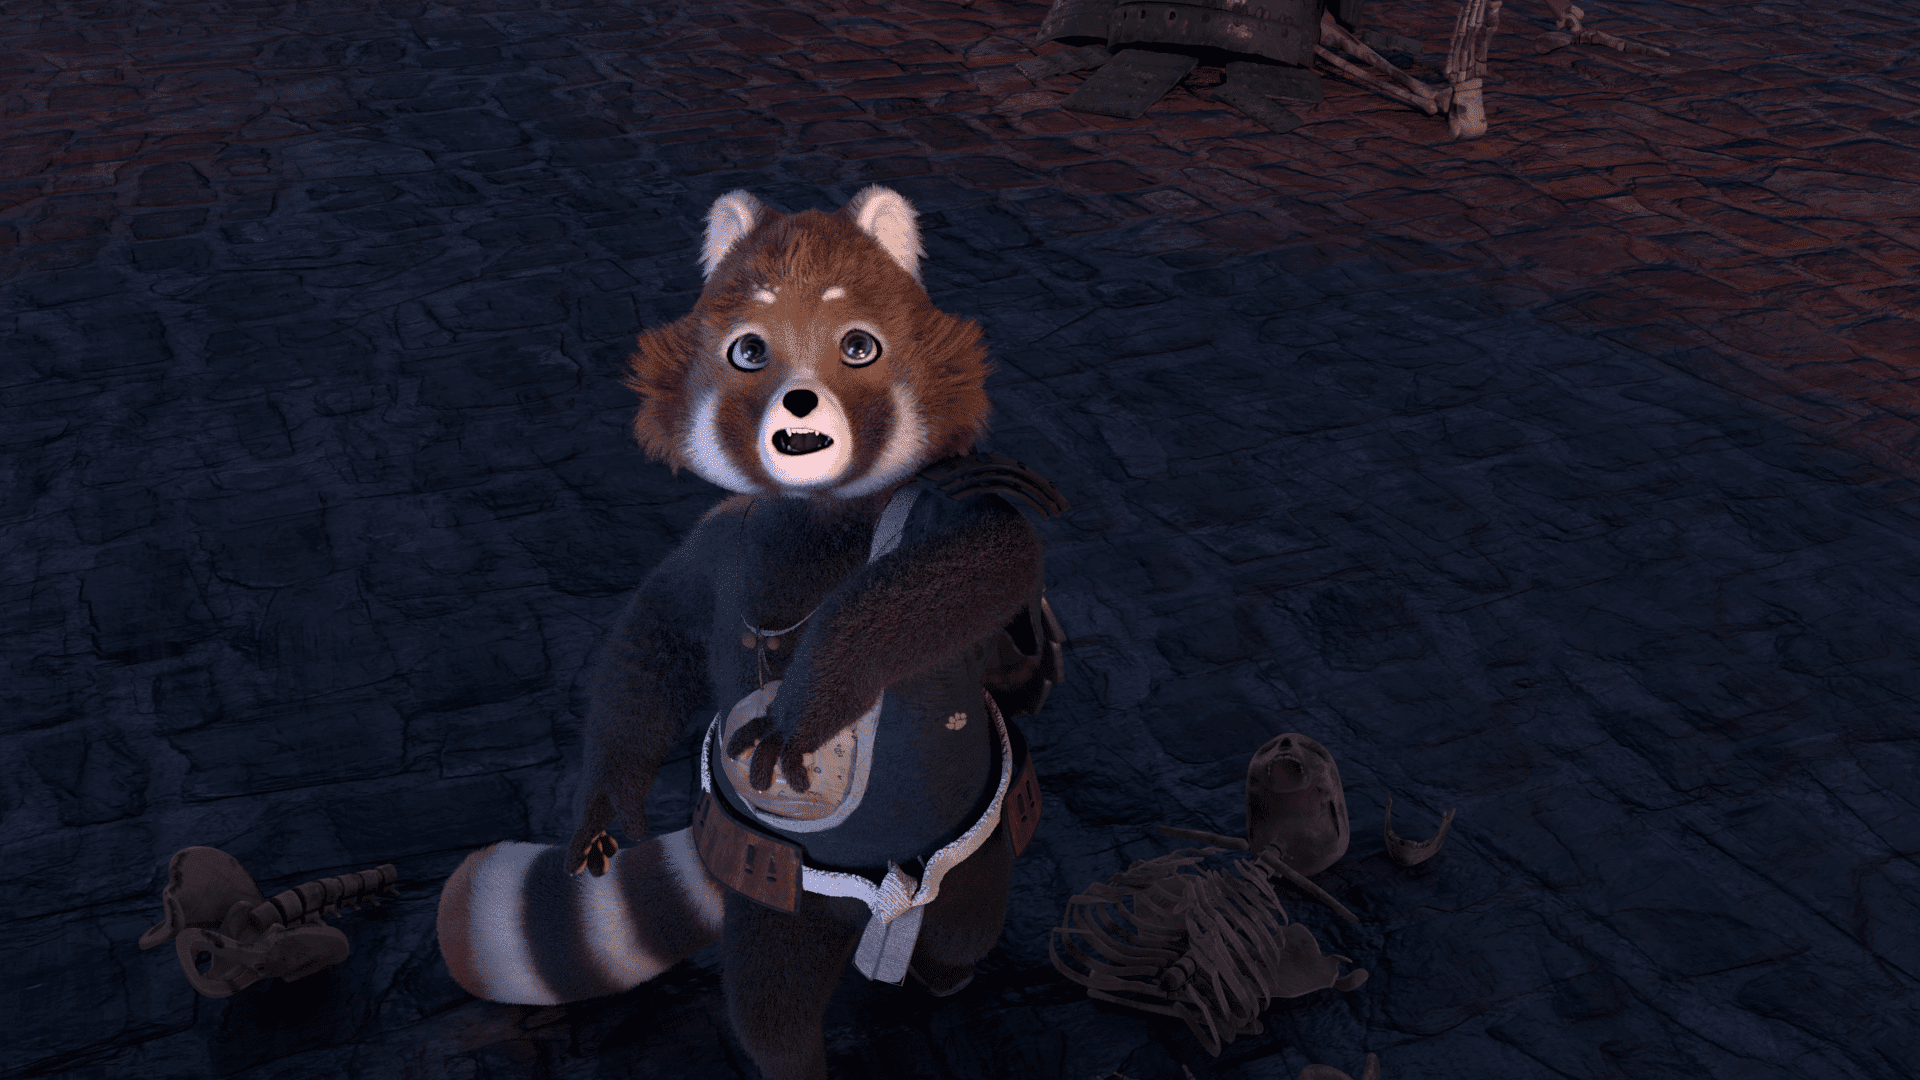
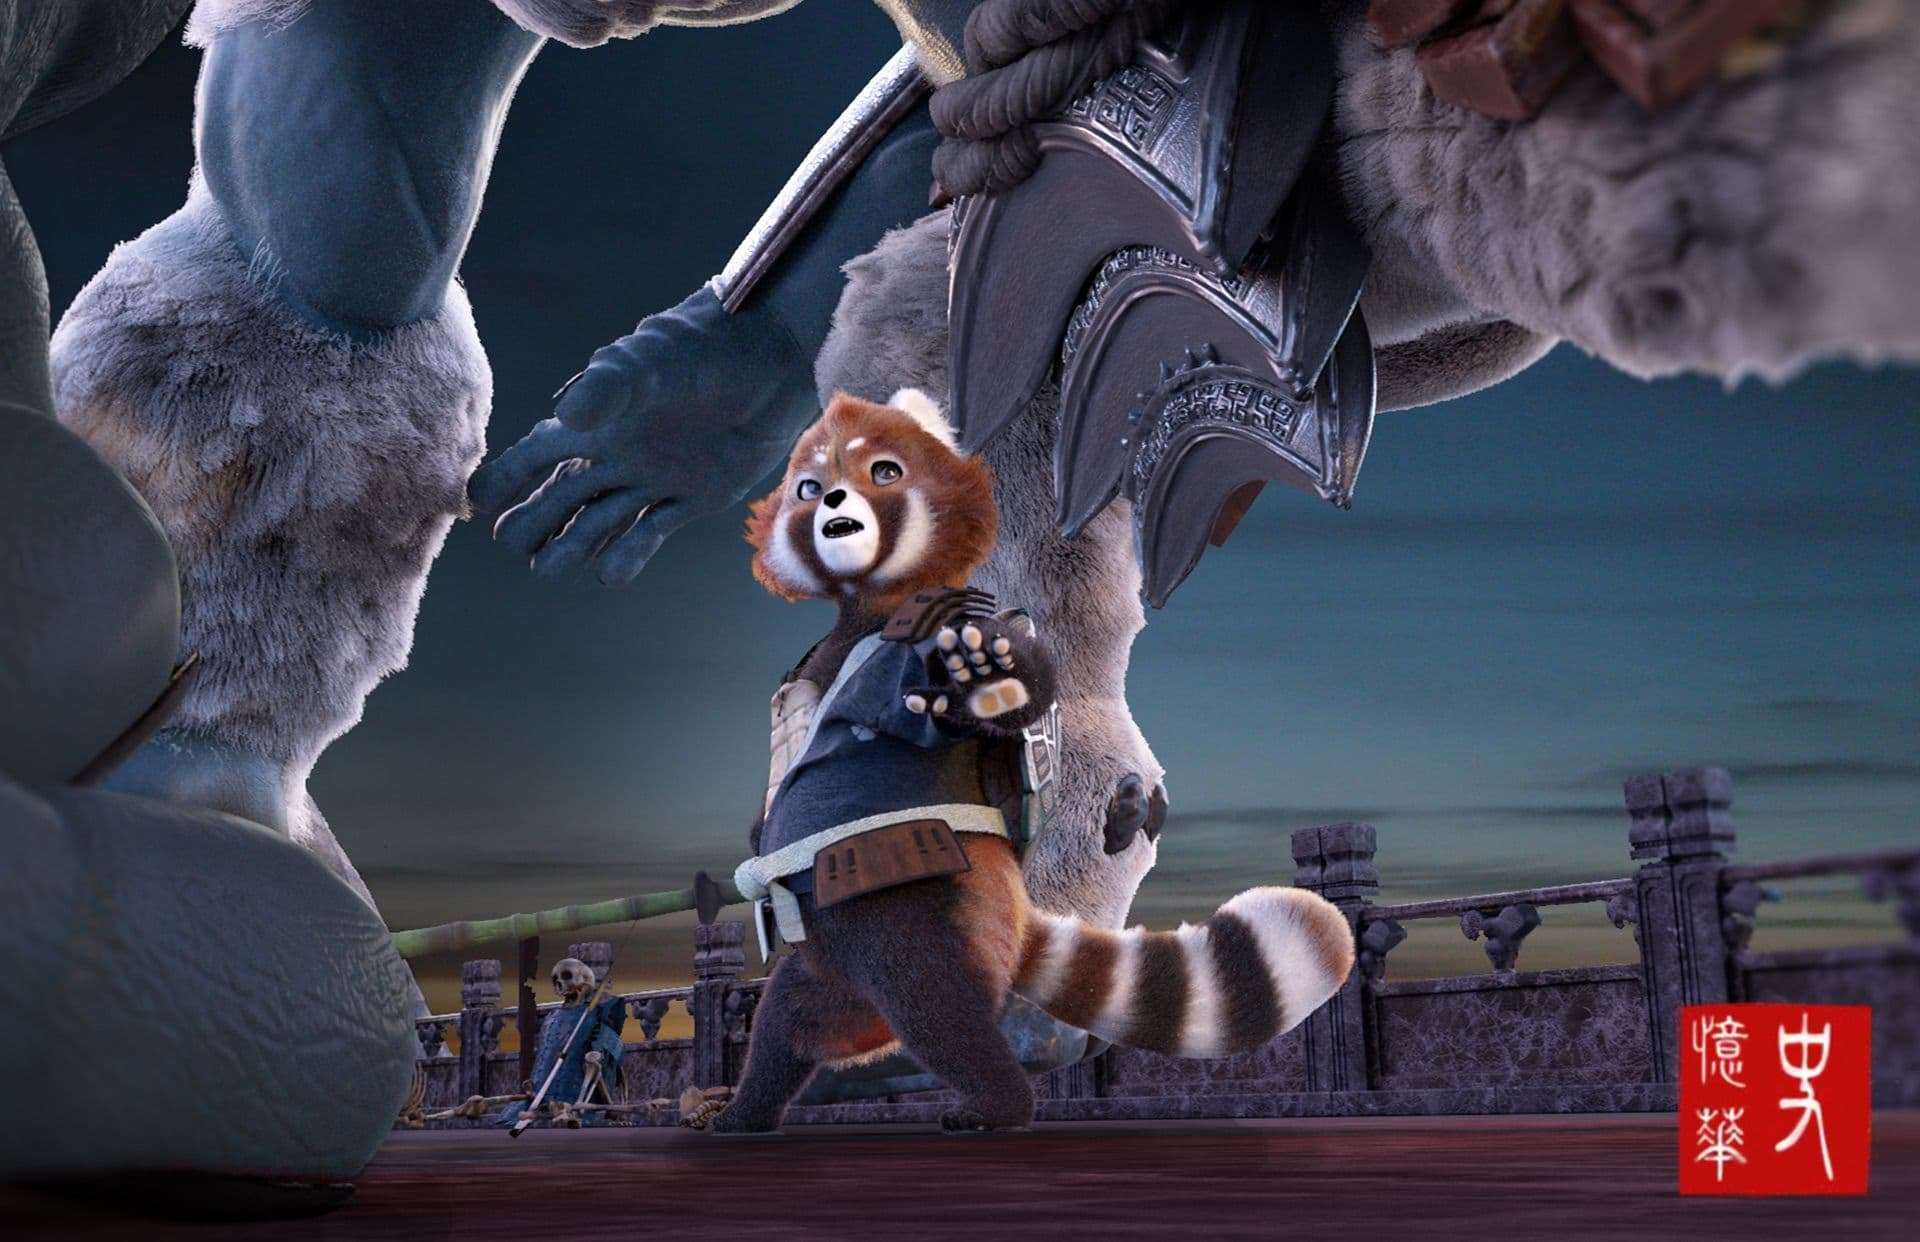
Our Protagonist - Red Panda Warrior
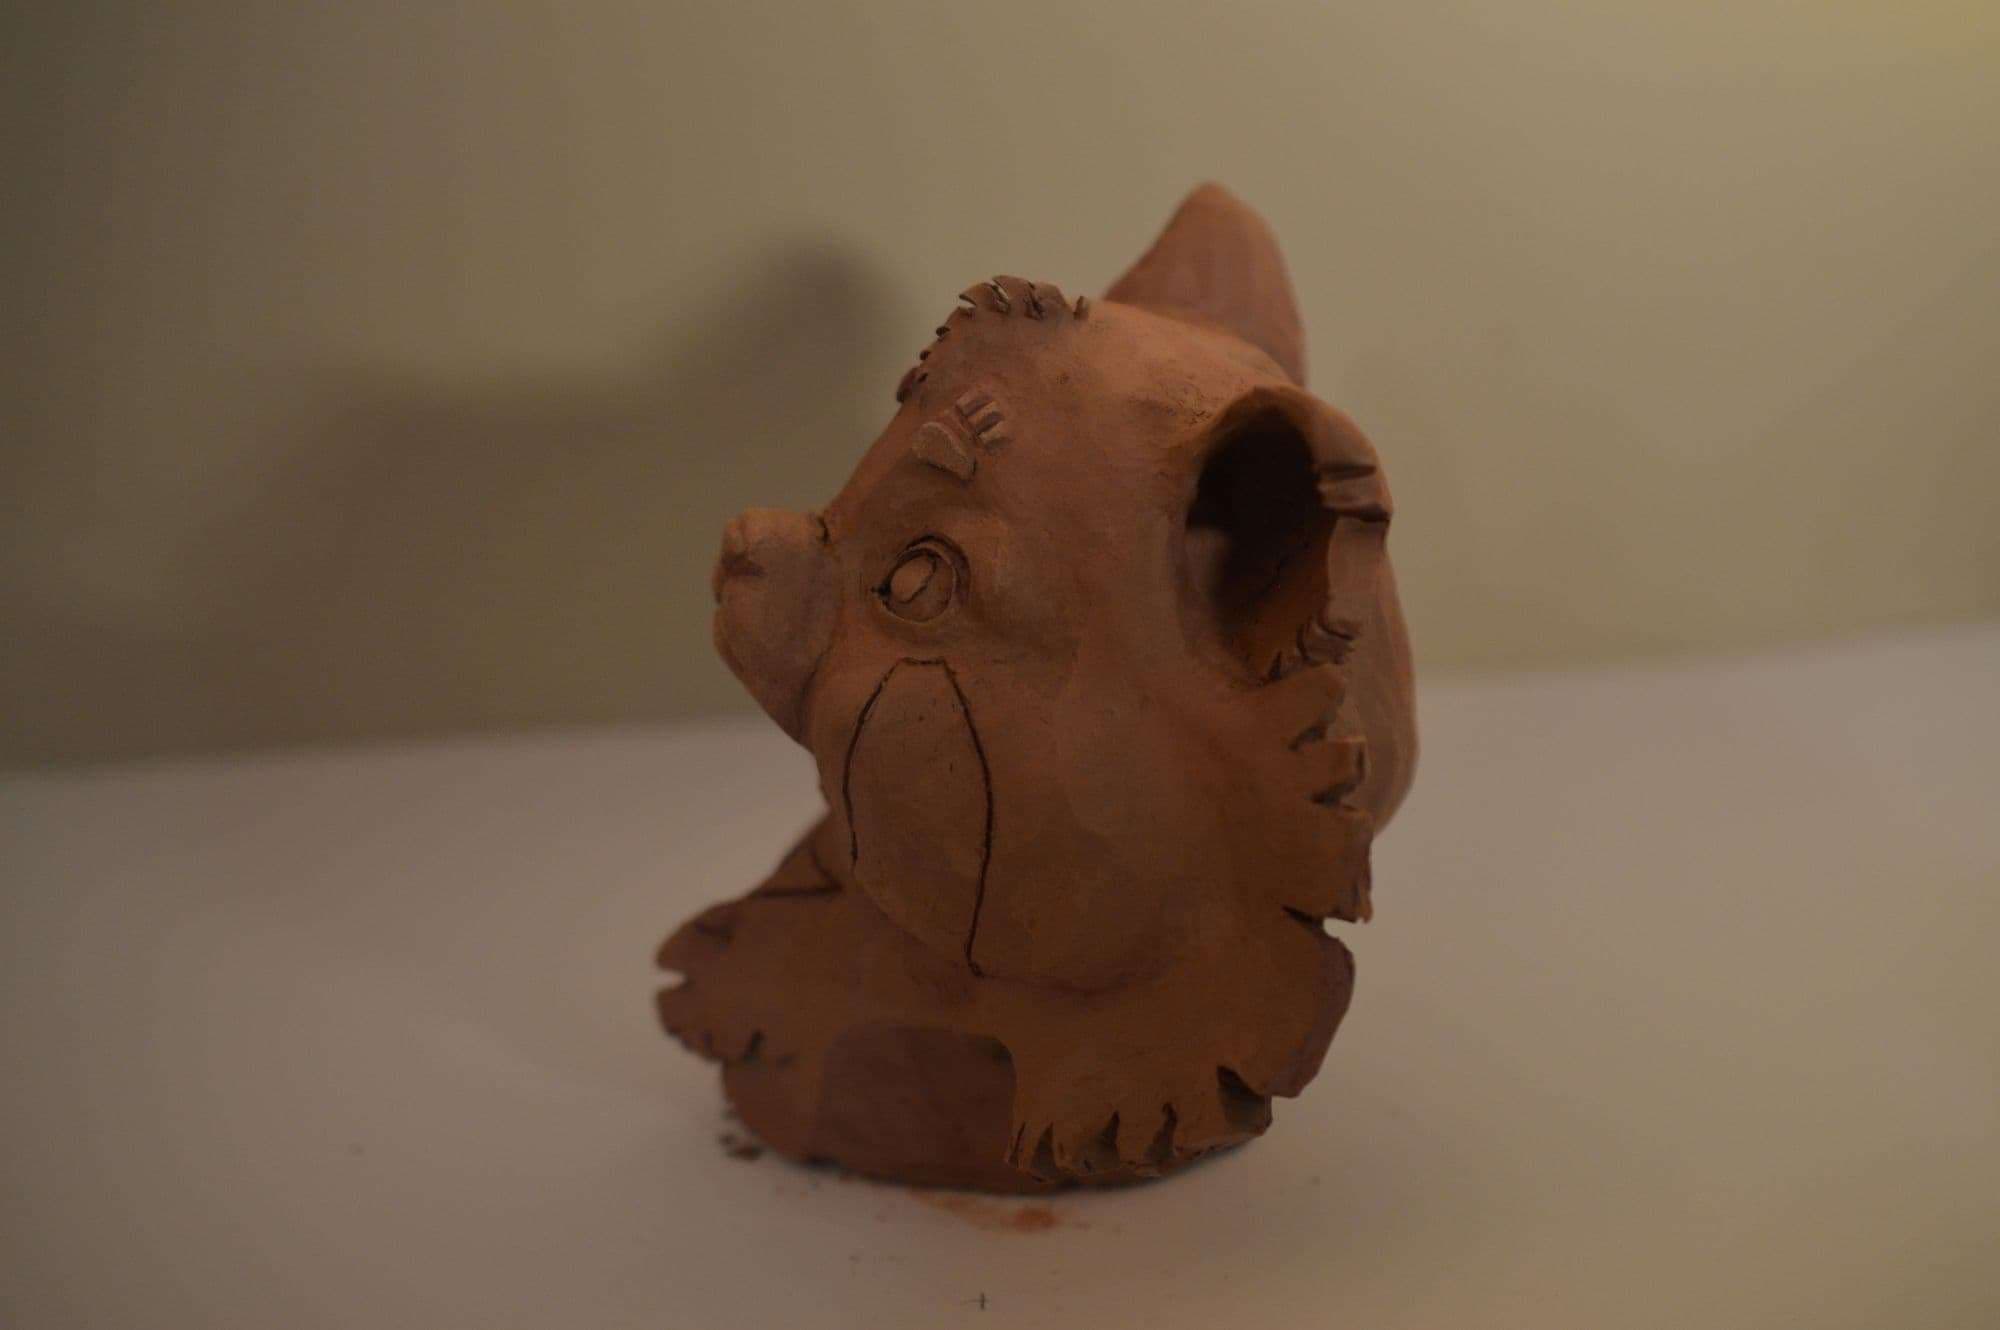
With the red panda character, it was quite easy to achieve the look we designed, since my partner sculpted out a bust of the Red Panda character with clay. Since I had a 3D object to base it on, translating it to Zbrush was quite fast.

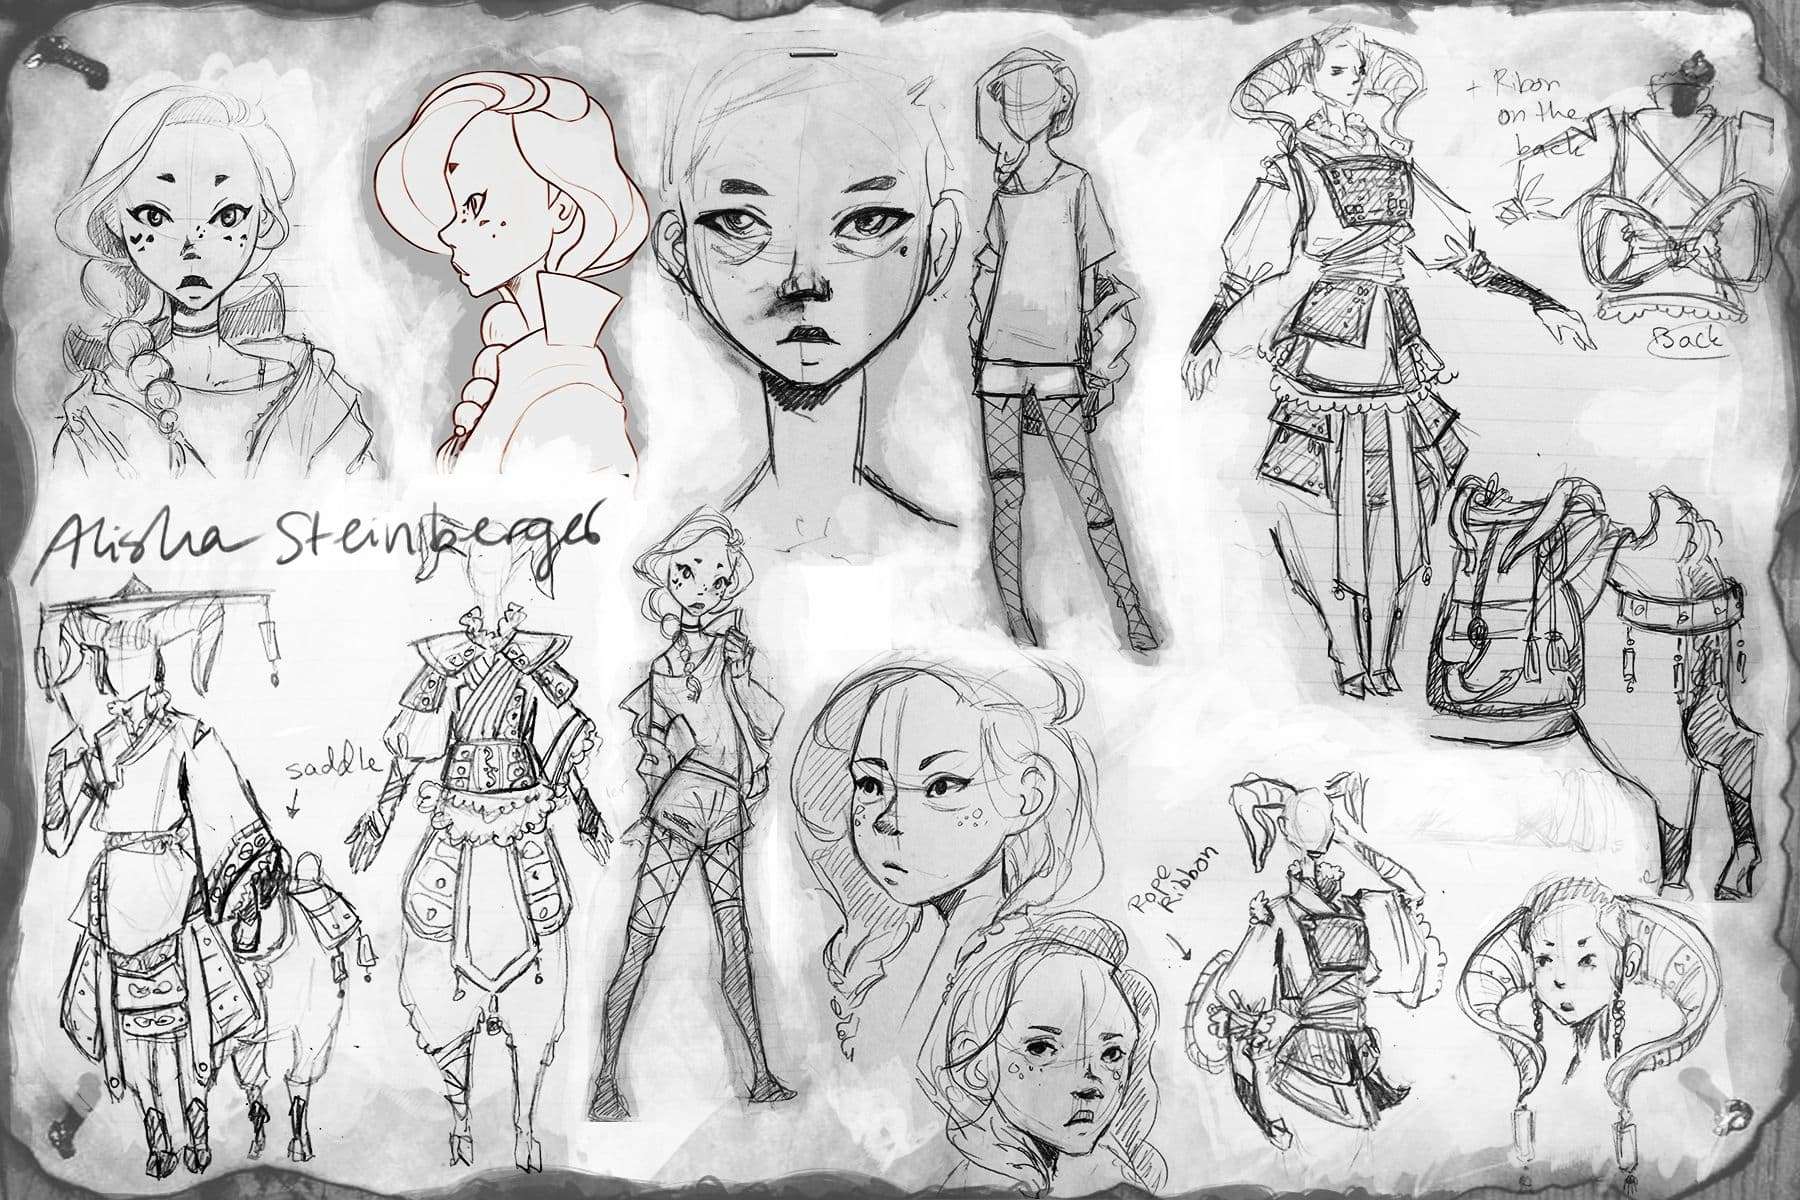
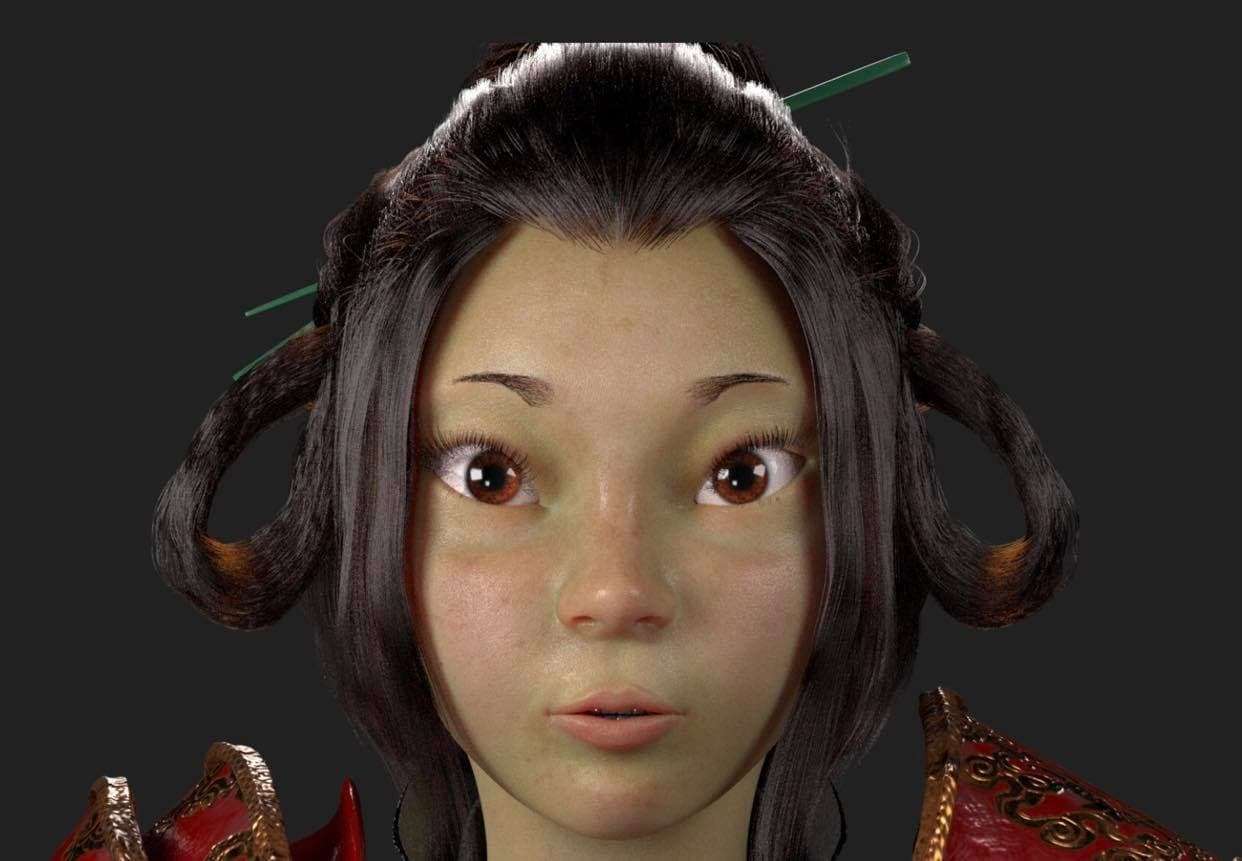
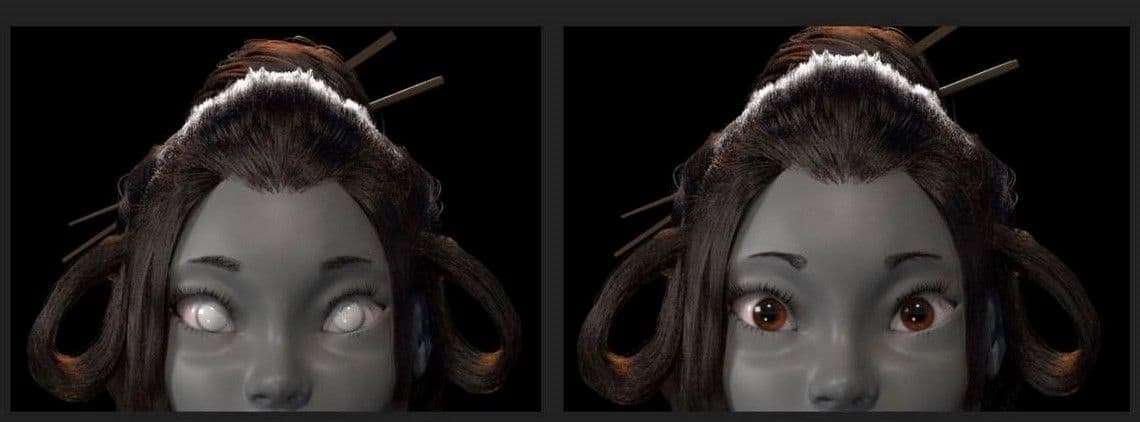
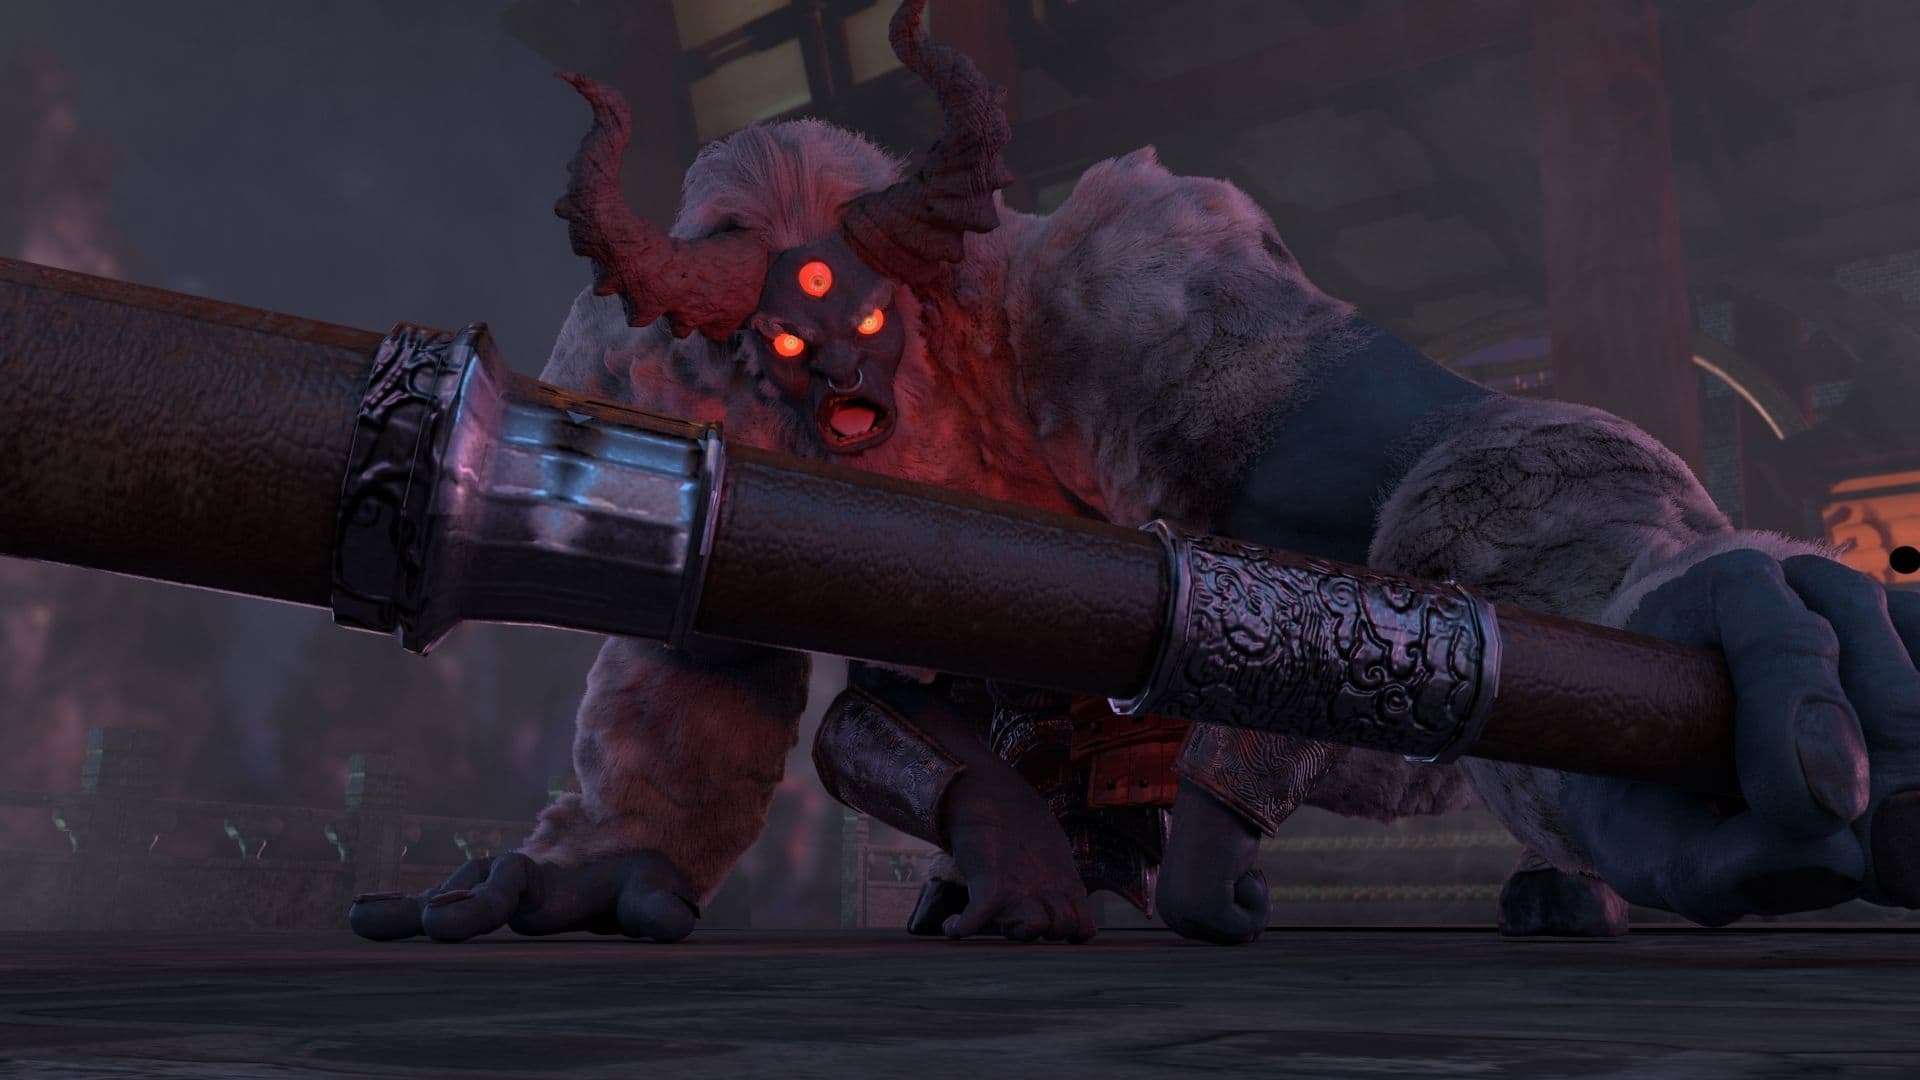
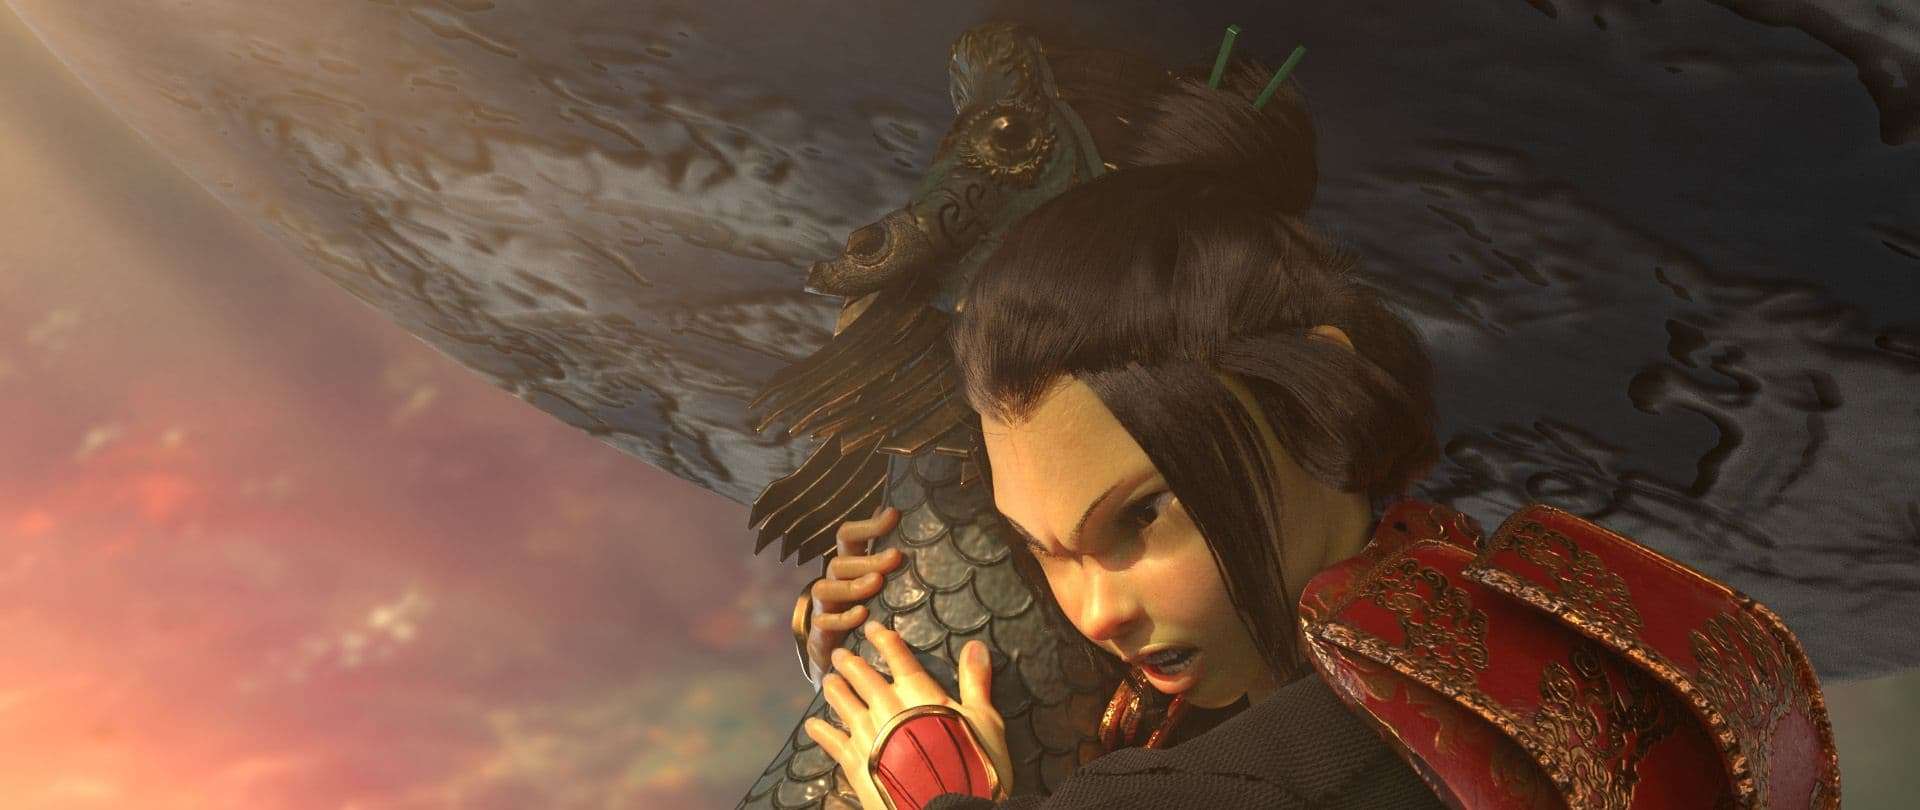
Our Heroine - Sheep Warrior
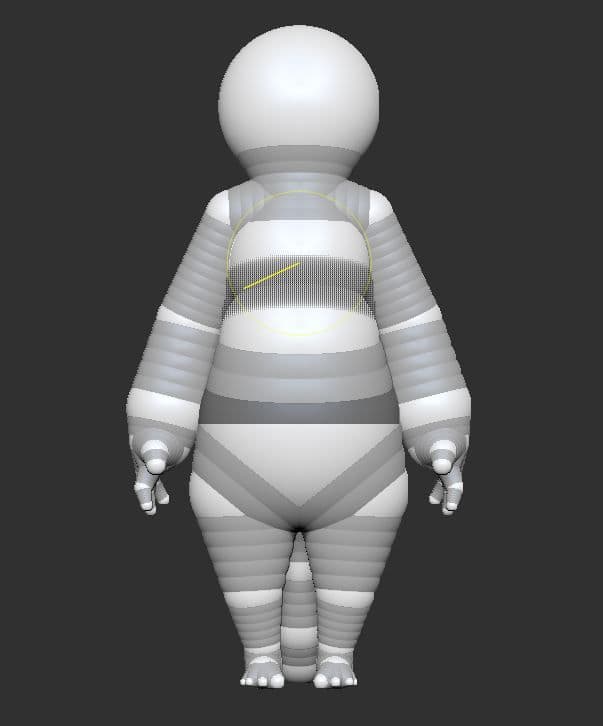
With our heroine, we had a couple versions before we settled down on one. We initially started with a biped character. But we wanted to try something more challenging and interesting. So we settle on a centaur-like female warrior. With this character, I struggled a lot. I had a hard time translating it to 3D. Sometimes it looked good in a certain angle but then after rotating the model, the anatomy would look wrong. In addition, since I never model a centaur I also struggles to merge the quadruped and the human body seamlessly. Thus, references really come in handy in these kinds of situations - I would pull out illustrations and 3D models from online to study the anatomy of these kinds of creatures.

When it comes to texturing, I had the same struggle - I used to texture with Zbrush and Photoshop, but I was eager to learn new texturing softwares such as Substance Painter and Mari. By no means do I think a specific software is more powerful or better than another, sometimes it really depends on what kind of task you are working on.
I guess my dilemma was that I wanted to feel comfortable working with the same tools, but learning new softwares and workflow would have potentially sped up the process down the line. Consider pushing yourself and learn new things!


The main reason I wanted to try Mari, was because I am fascinated by Tom Newburndy’s works. I bought a couple of his tutorials from Gumroad. He has some awesome tutorials for texturing and look dev which is quite thorough and easy to follow.
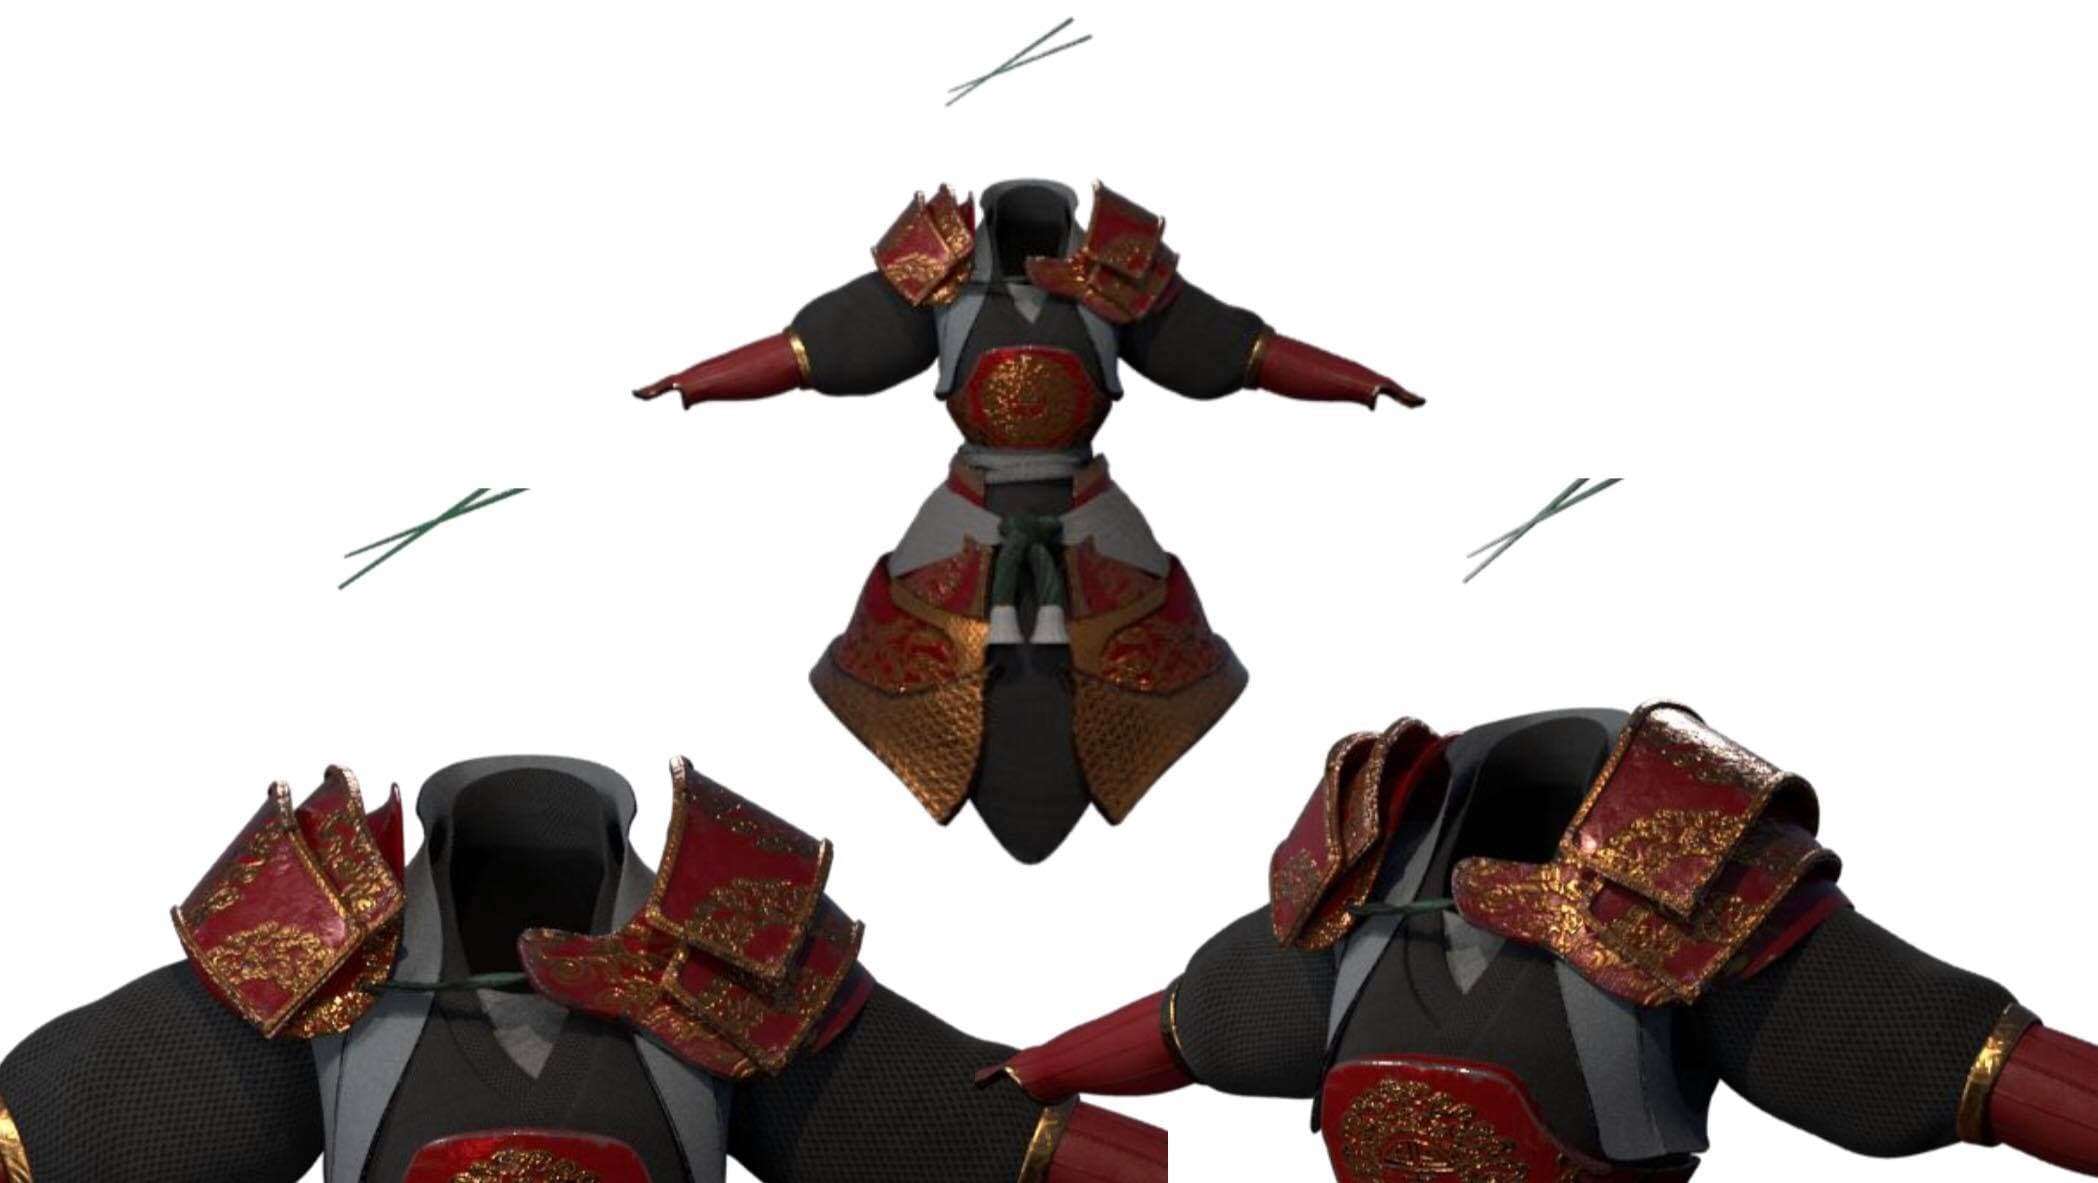
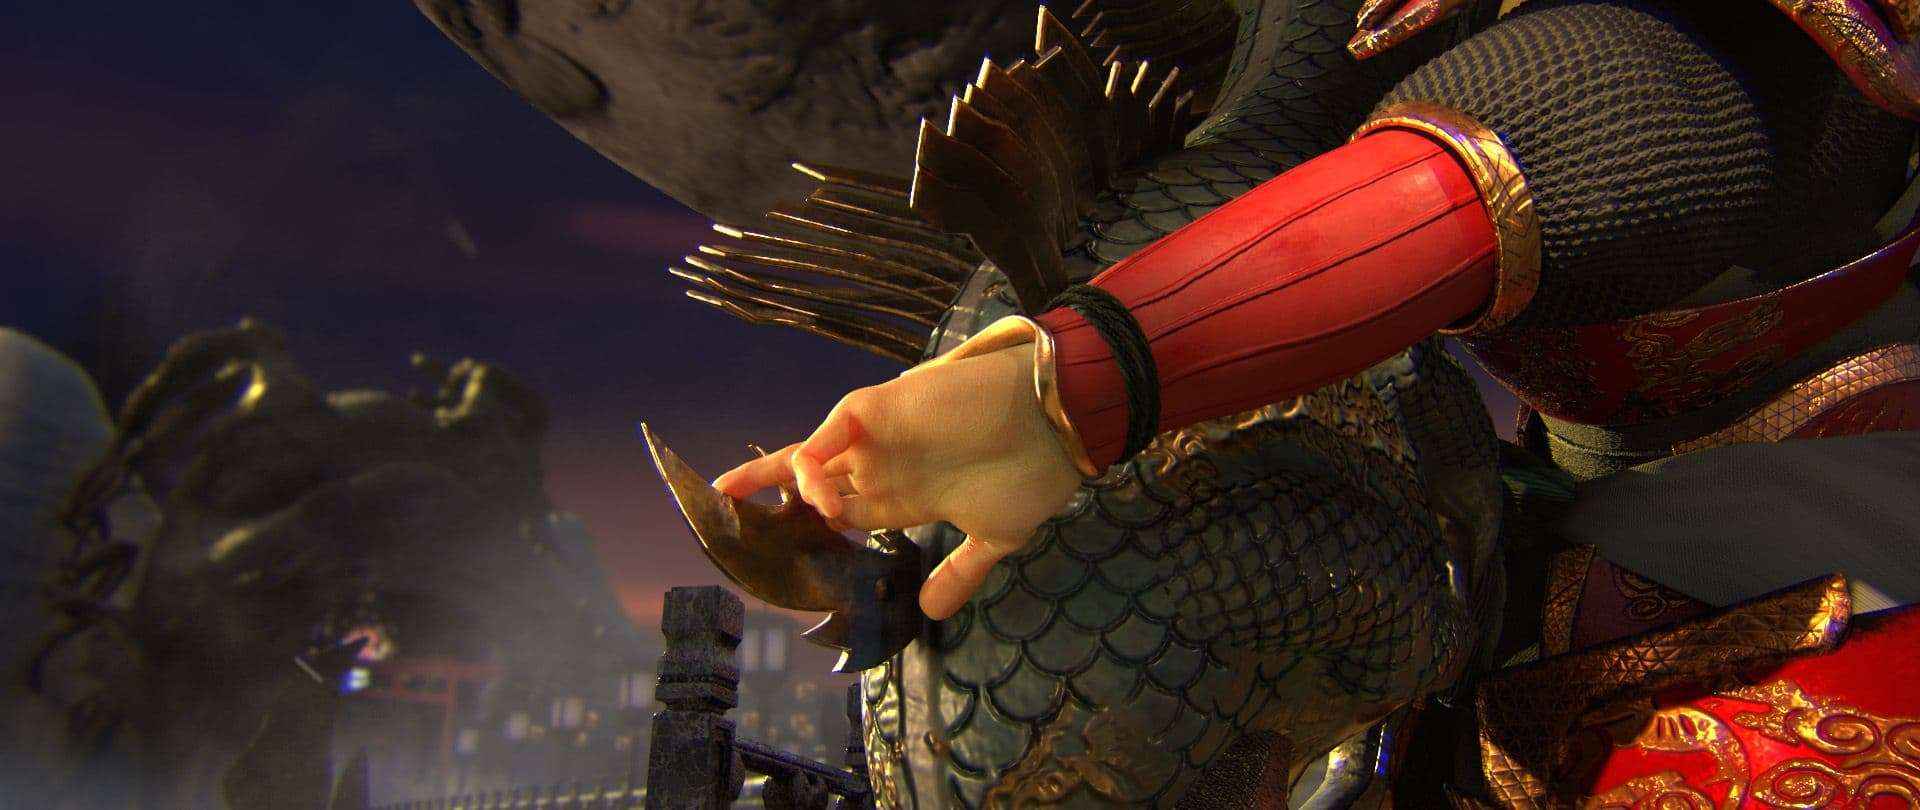
For texturing Tom uses Mari and textures from Texture XYZ to achieve a realistic skin look. That was one thing I really wanted to attempt for this short film. Texturing in Mari is quite different from Substance Painter, Zbrush and photoshop. In Mari, you are kind of doing photo bashing in a sense, by stamping on texture instead of painting them. Although you can also paint texture in Mari. For pretty much everything else like armour, accessories, weapons and such, I used Substance Painter. Substance painter is really user friendly and I find it super easy to use for beginners. They have many custom shaders, masks, and brushes which I find extremely handy when you have to complete a task within a deadline.
When it comes to grooming, it was a tough decision to choose between Geo hair or actual fur system. Geo hair is more manageable and less heavy on the rendering side. However, having been a huge fan of the fur system since Final Fantasy and Monster Inc, I always wanted to give it a try.
I began to look into Yeti, which is a grooming plugin. Yeti has a quiet user friendly interface and grooming system, however, there are not as many tutorials and documentation for Yeti. There were a couple times I had to test things out myself or message people around for an answer. Luckily the CG community is filled with so many friendly people that are more than happy to help you out.
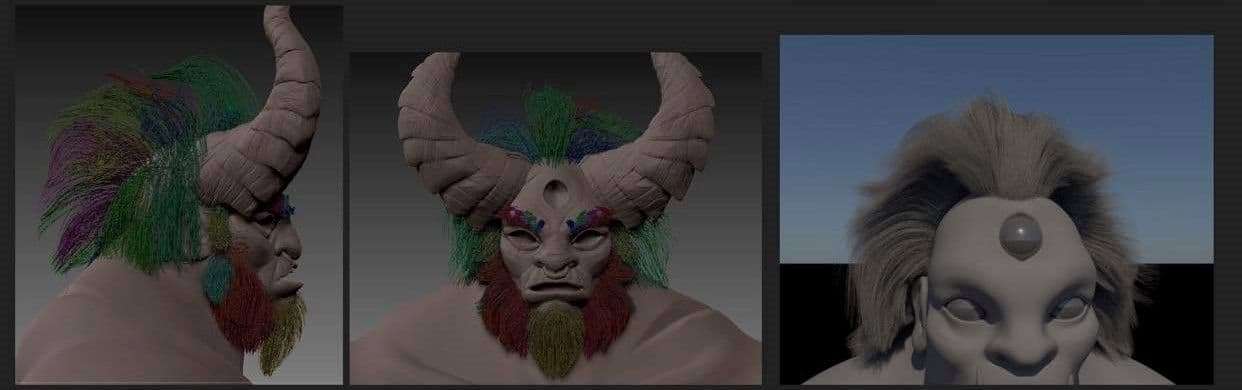
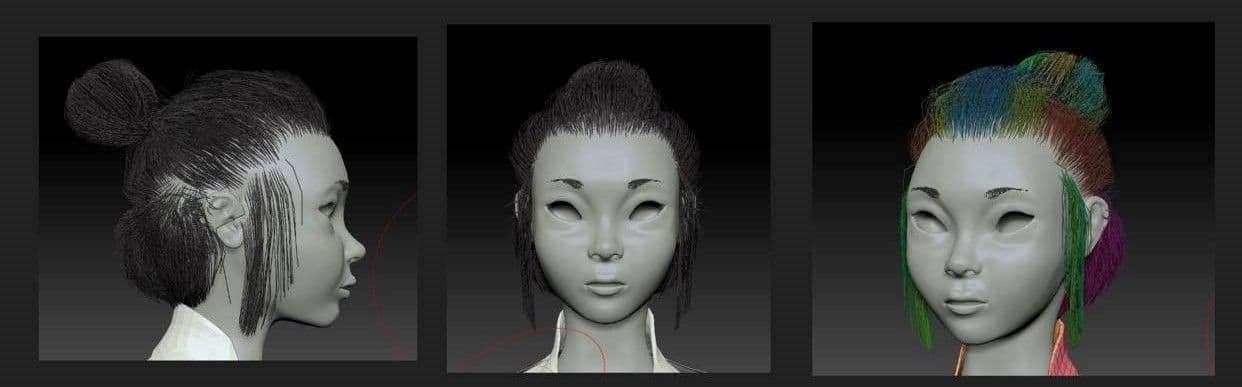
Overall one of the biggest challenges I had with grooming was styling. For me, I think it was not that hard to achieve and decent looking fur. However, styling the hair/fur to match the concept, and making sure it looks believable and natural, I think that is the hardest part in grooming.
With stylising, I find it easy to use fibermesh in Zbrush first. Fibermesh gives you a wide range of freedom to sculpt out your hair based on strands. When you are satisfied with the overall look, you can convert them into curves and bring it to Maya.
Because we had a super tight production schedule, oftentimes I would be working on grooming and look dev or lightning and texturing simultaneously. Which sometimes gave me problems. For example, a couple times I finally set up a good lighting scene, but when I added my characters with groom, the fur would look super exposed. And I think that is the part where not having a proper workflow or mixing the process together might mess things up.
Lighting was probably the most stressful part of the project. The reason being: we were quite behind our production schedule at the end of the school year. Thus, we ended up not having too much room for post-production. As a consequence of that, I had to light some shots within a few hours and send them to the render farm. And because of that, sometimes the renders would come back with errors and mistakes that needed to be fixed and re-render. Therefore, leaving yourself enough time for post production is very important. Keeping in mind that this final step needs time as well.
We used Arnold for lighting and rendering, and it provided a really nice render result. Arnold comes free as a plugin for Maya. However, the render times might be slightly lengthy depending on how well you optimise your scenes. For us, because we also had a fur system, it also cranked up the duration for the render. And this is a very valuable lesson I learned as a beginner - I did not think much about render time when I was in production. I focused too much on executing the task. By the time I got to lighting the scene, my render time was taking way longer than I anticipated.
Unfortunately because of the time crunch, I could not go all the way back to fix it. In addition, there were many mistakes and stuff that I could have avoided if I had the chance to make the short film again. Things like caching geometry, creating Stand Ins were things that I wasn't aware of when we made this short film. Not optimising the scene to make it most render friendly was also something that I was completely oblivious about. Sometimes you also have to consider what kind of maps you are using. For example, having different sized texture maps to switch between depending on how important that character is in specific shots.
Subsurface scattering, transmission, displacement and opacity are all some render attributes that you should also consider carefully before you start your rendering. These attributes will significantly crank up your render time.
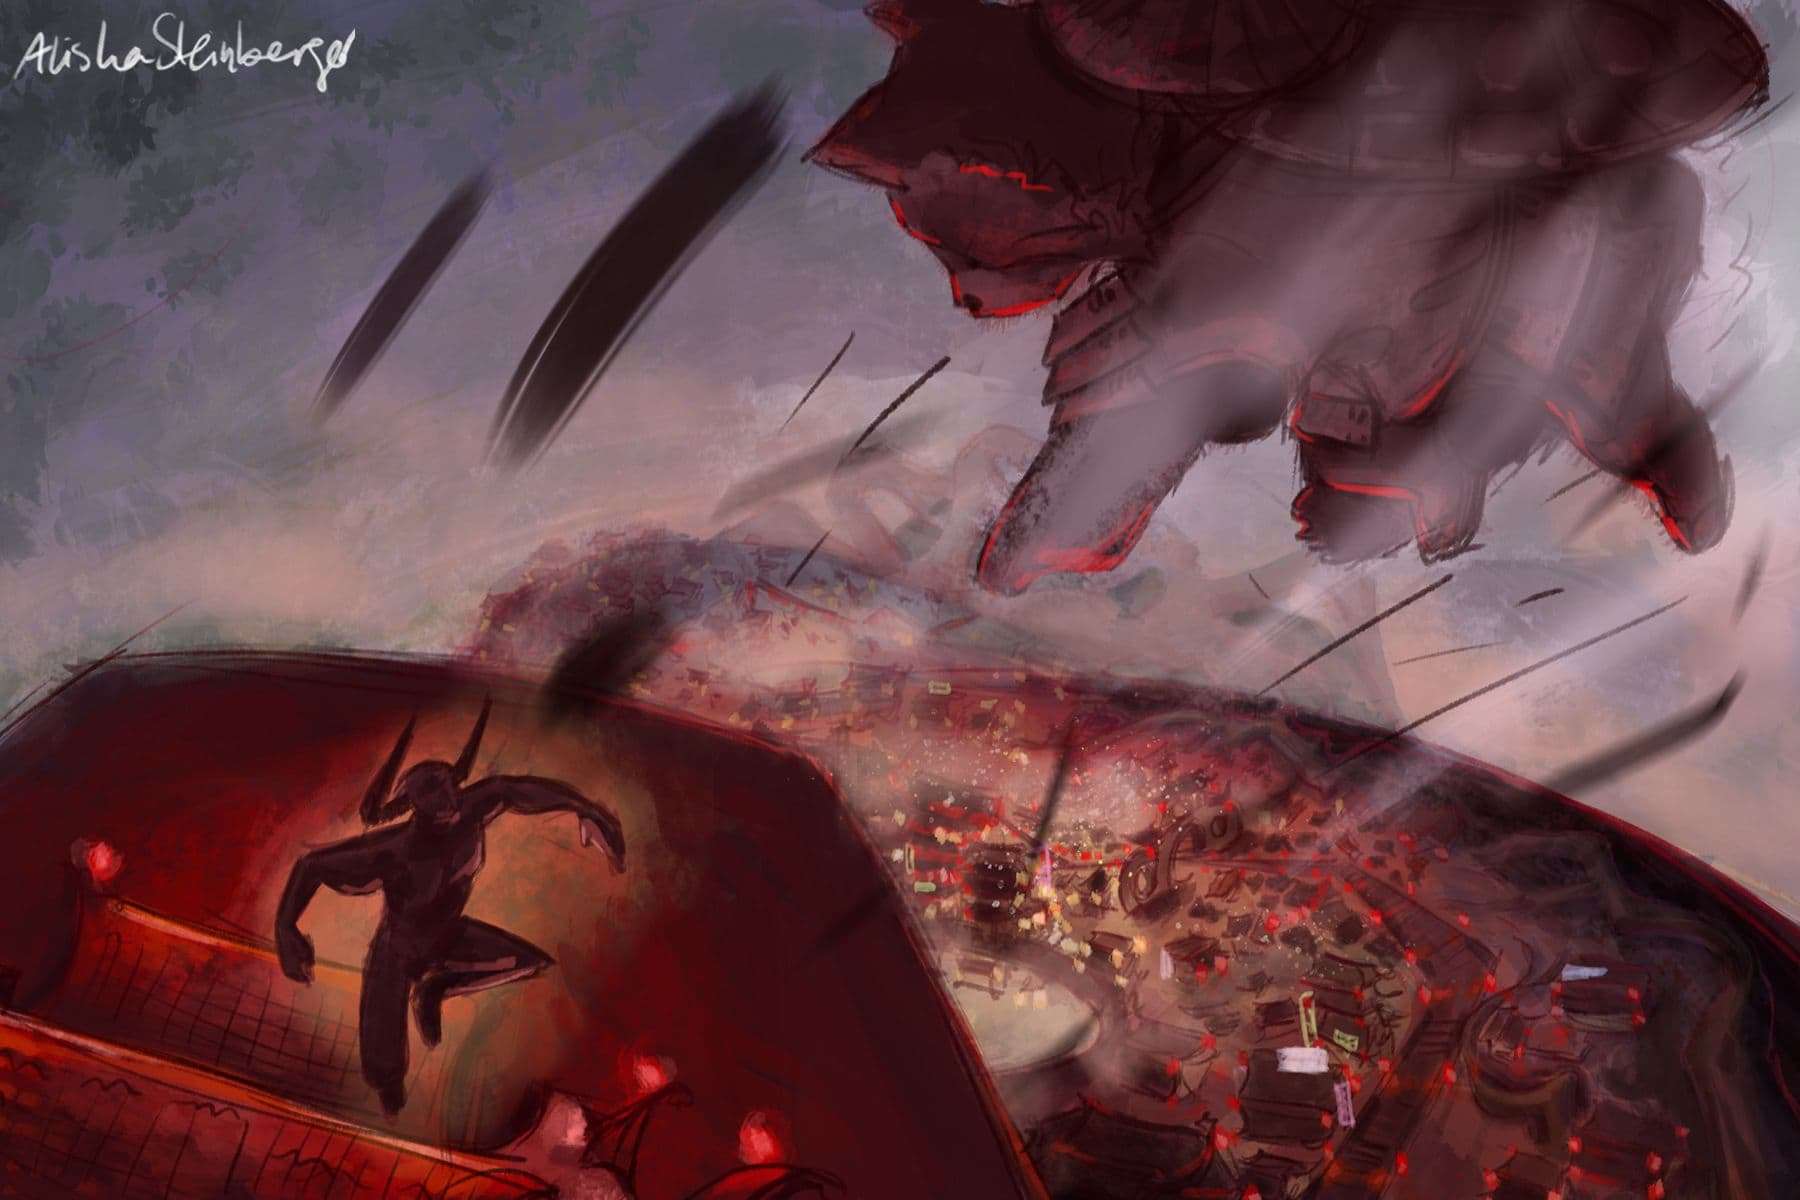
My project partner Alisha Steinberger took over all the Layout and Animation, in both the 2D and 3D part of the film.
She writes: It has always been a huge dream of mine to make an animated short film, ever since I fell in love with animation through Ghibli films and game cinematics. If it wasn't for Goody, I wouldn’t have tried 3D animation at all. I was initially more interested in 2D animation, and very intimidated by the 3D software. I quickly learned however, that animation principles don’t change, no matter which technique you use. Whether it is 2D, 3D, stop motion, etc. I quickly learned the basics, and was able to make things move, and then I could apply the same animation principles I use in 2D. With the film idea we had in mind, we were able to distinguish the two worlds with different styles. We decided to use 2D and 3D animation to make this distinction! As I love both forms of animation, we were excited to incorporate them both into the film.
Often Animation and VFX production is a huge team effort. The collaboration of many artists who are proficient in various aspects of production work together to create one masterpiece. Because of the variety of knowledge required to make a CG film, having a team to collaborate with, speeds up the process. It can even make the production more fun and successful.
Because my partner and I worked so closely together, we were able to bounce ideas off of each other. This way we got feedback, and found better ways to execute our ideas. Even if we were not able to help each other technically with the areas of production we “specialised” in, we were able to give each other creative input and constructive feedback. It was also great for moral support, as we had a good team relationship.
Of course there will be bumps on the way, and disagreements, but all in all it was really amazing to have each other to hold on to during the process. Being able to work with others is also a great skill to have. Later on in the industry, it is very likely that you will be working alongside other artists, following directions from leads, supervisors and directors.
Leaving yourself enough time for post production is very important. Keeping in mind that this final step needs time as well.
Knowing the amount of work we wanted to put into the project, and the limitations we had as a small team, we had the idea to start a crowdfunding campaign, that would allow us to commission other artists to help out on various aspects of the film that we were perhaps less interested in (eg. building assets, colouring or setting up renders).
We also knew that we wanted to use online render farms to speed up the process, so we wanted to be able to cover those costs as well. In the end, we received over $4000 CAD from our crowdfunding!
It was a really great experience, and we had lots of fun making merch and videos for our campaign. In theory this was plenty of money for a student film, but as I have said above, unfortunately we did not factor in all the render time, errors and re-renders we had to make in the end. It was great to have this budget to work with, because it gave us a lot of freedom we would not have had otherwise. It has also taught us to work more smartly in the future. In addition, we can more properly appreciate the amount of effort and money that goes into making amazing short films, movies and games!
Me and my partner put a lot of time and effort into this short film, and we also have to thank a lot of helpers and artists that we commissioned. We could not complete this short film without them.
In total, We worked approximately on the film for 18 months, and recently submitted the short film to a couple film festivals - we have been selected by few already!
I have learned so much from this short film production, from working as a team, understanding workflow, and learning softwares. Although we made many mistakes during the film production, we learned a lot. And hopefully, with what we learned, we can make an even better short film in the future!
You can find more of Goody's work on The Rookies, ArtStation, Facebook, LinkedIn.