The Secrets to Sculpting and Texturing Realistic ZBrush Characters
Jordan Moodaliar is a 3D Character Artist with a passion for creating characters for film and games. Jordan shares with us his secrets to sculpting realistic and believable characters in ZBrush, Maya and Substance Painter. He takes us through his workflow from design to final rendering.
Jordan Moodaliar is a 3D Character Artist with a strong passion for creating characters for film and games. Jordan shares with us his secrets to sculpting realistic and believable characters in ZBrush. He takes us through his workflow from design and sculpting, to texturing, grooming, shading, lighting and finally, rendering.
Jordan started his journey with 3D Sculpting in 2016 when he was 13 years old after watching “Warcraft” with his Dad. Having watched CG movies before but never wondering how they were made, on this particular day, he needed to know...how do people create these realistic characters? Jordan's Father, a Graphic Designer familiar with ZBrush, gave him the answer he was looking for and from that day he knew his calling was to be a 3D Character Artist who would one day create characters for movies and games.
Concept And Design
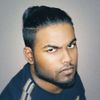
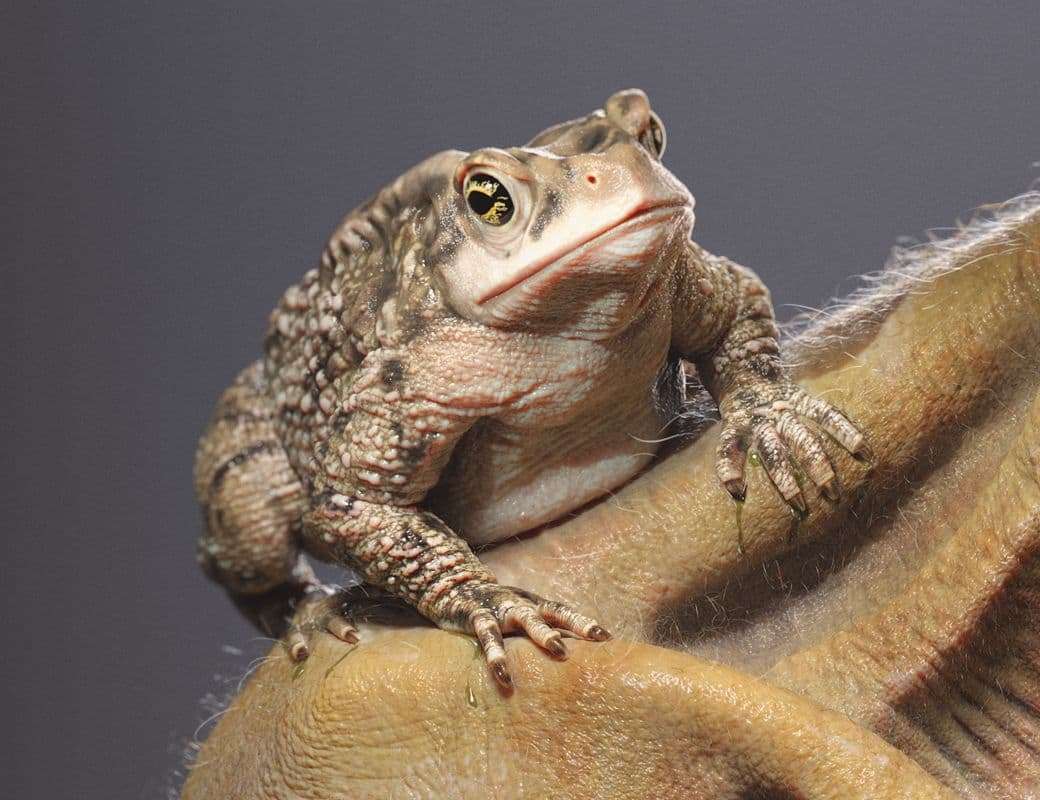
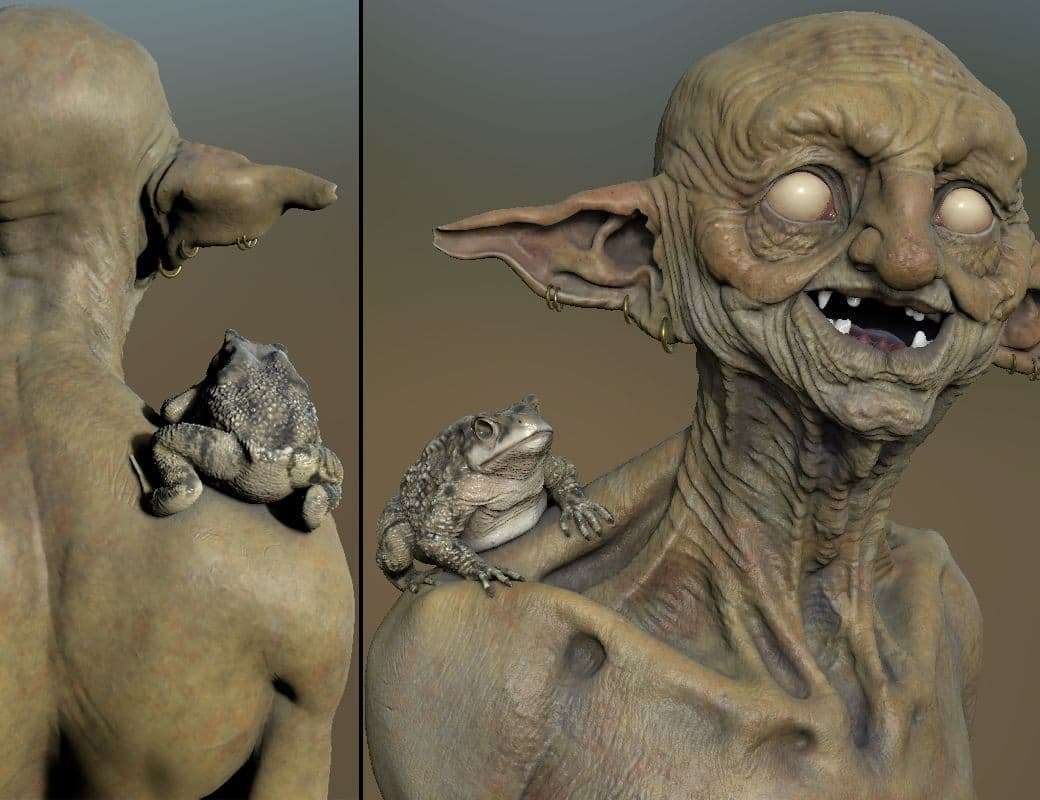
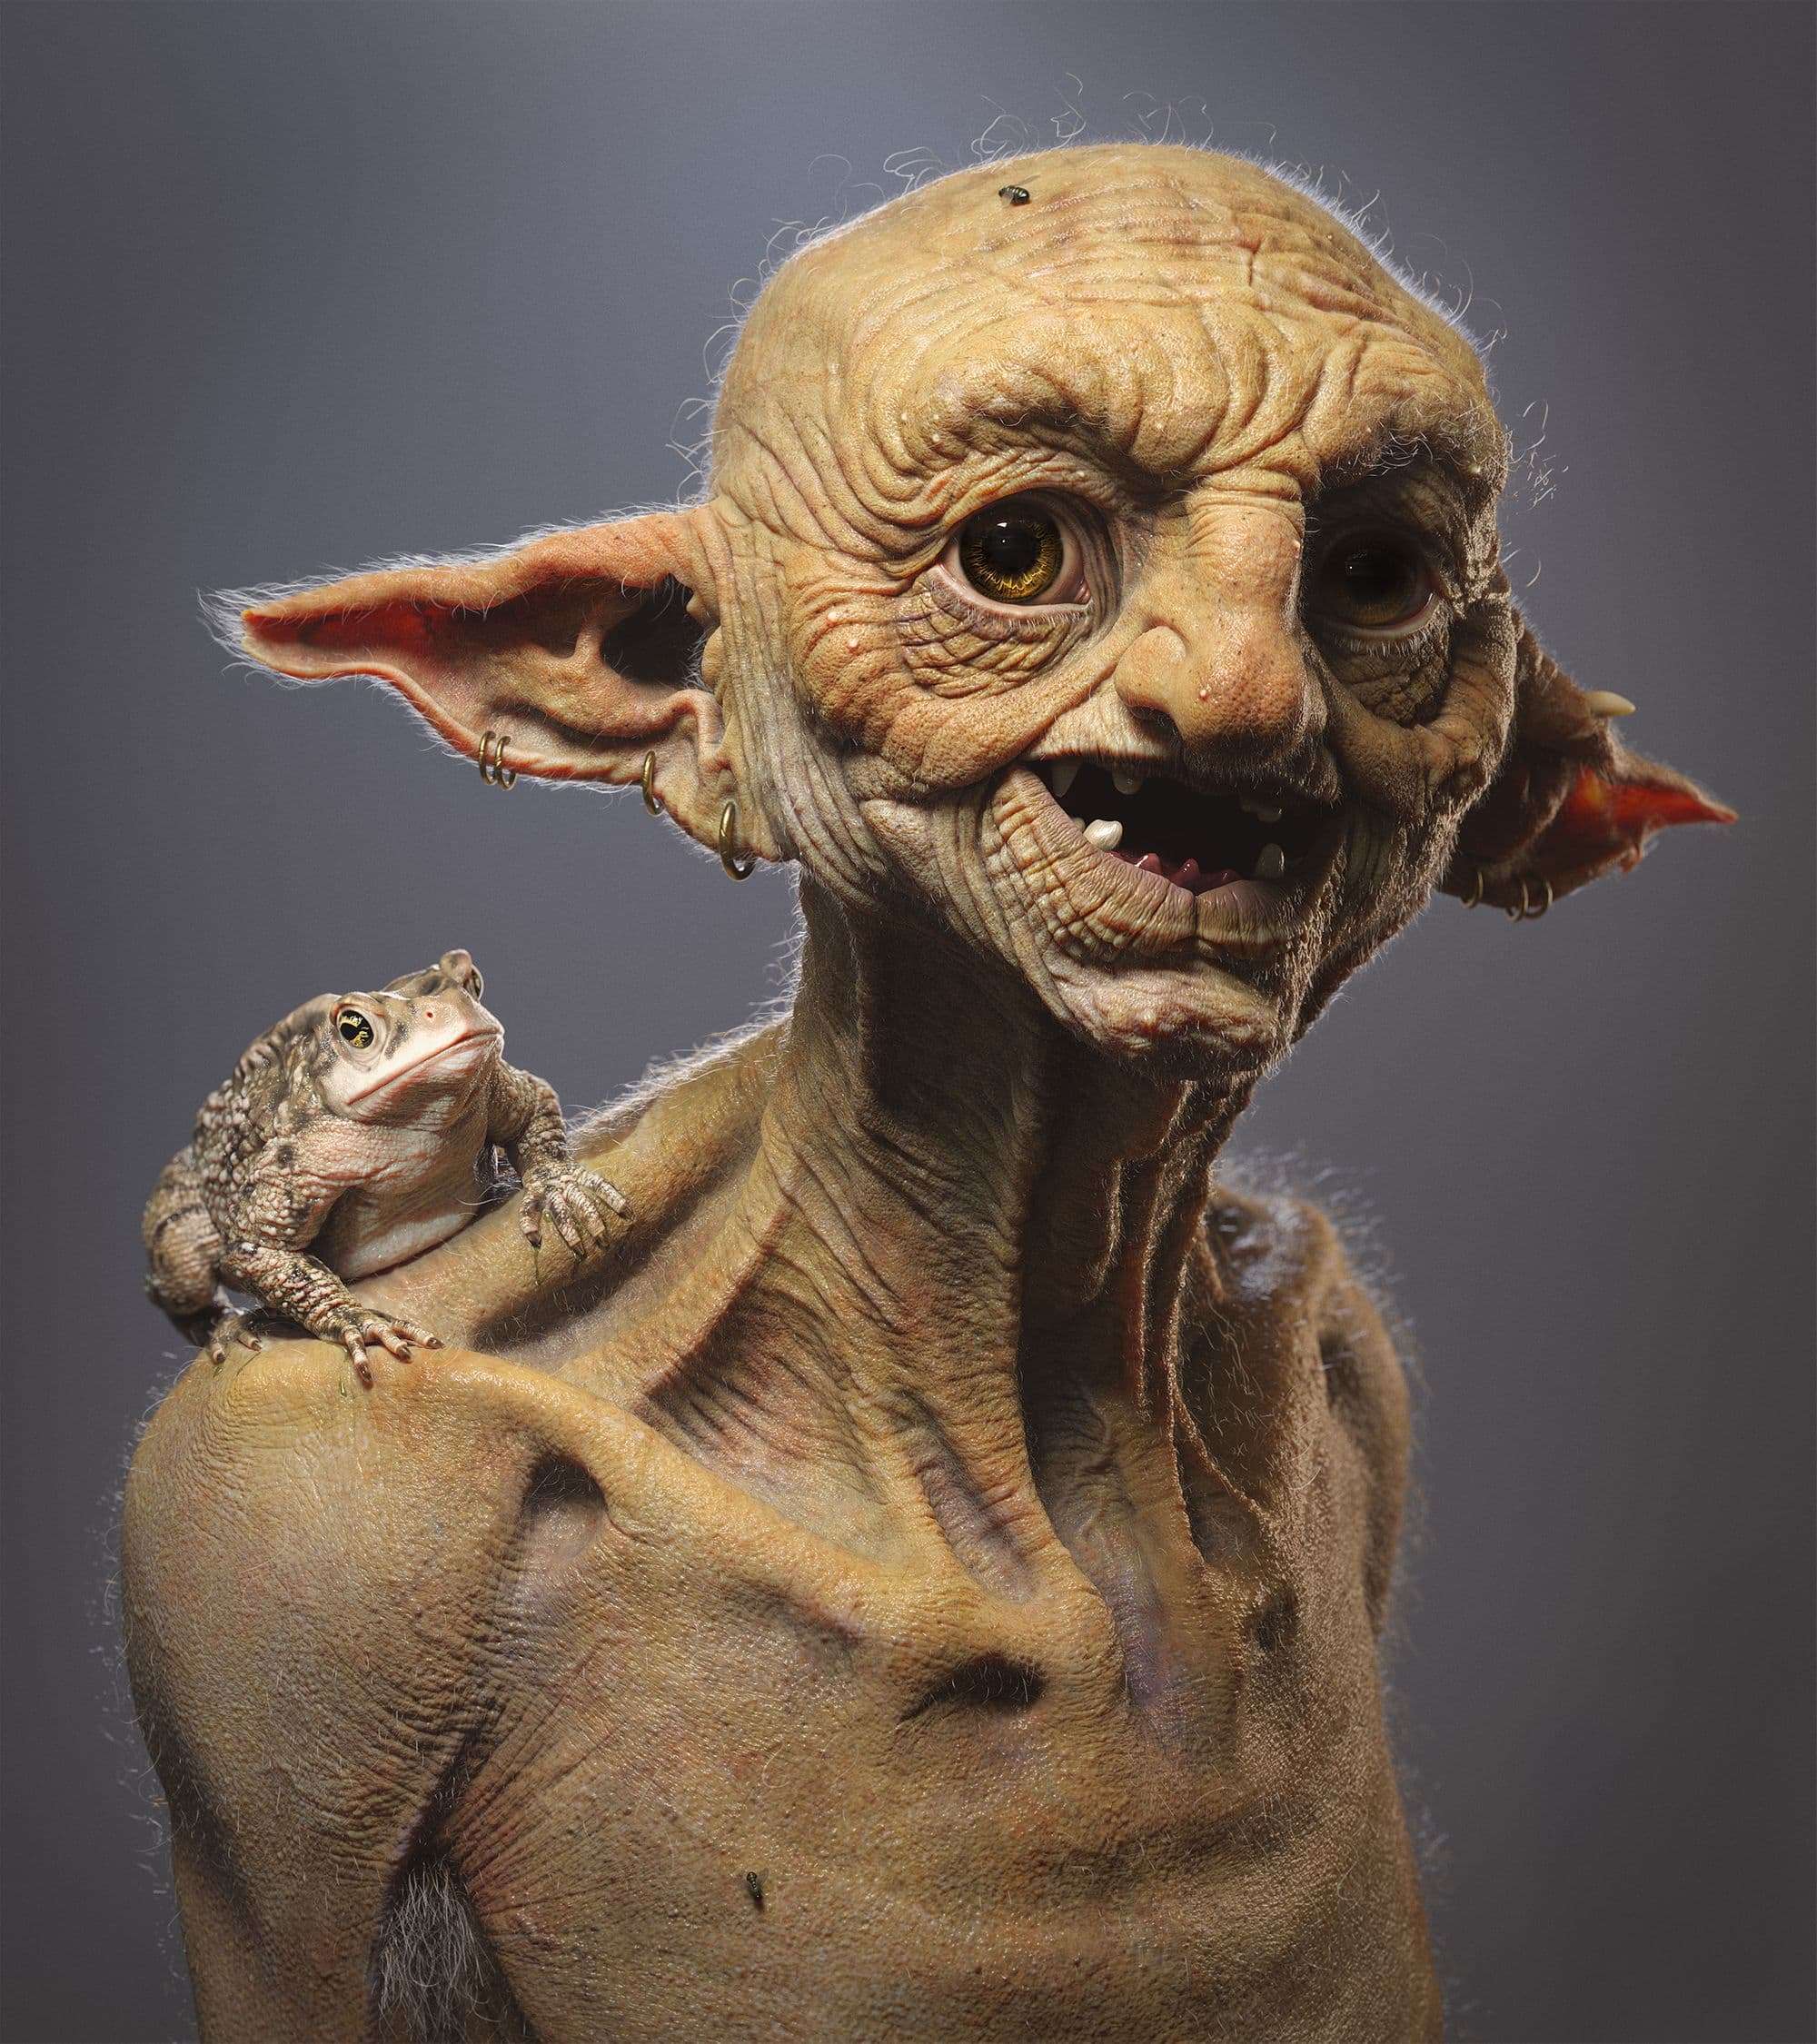
Brainstorming for ideas is probably the most crucial step when designing an original character. When making this character, I gravitated to the idea of creating a friendly little swamp goblin with a disgusting toad friend on his shoulder.
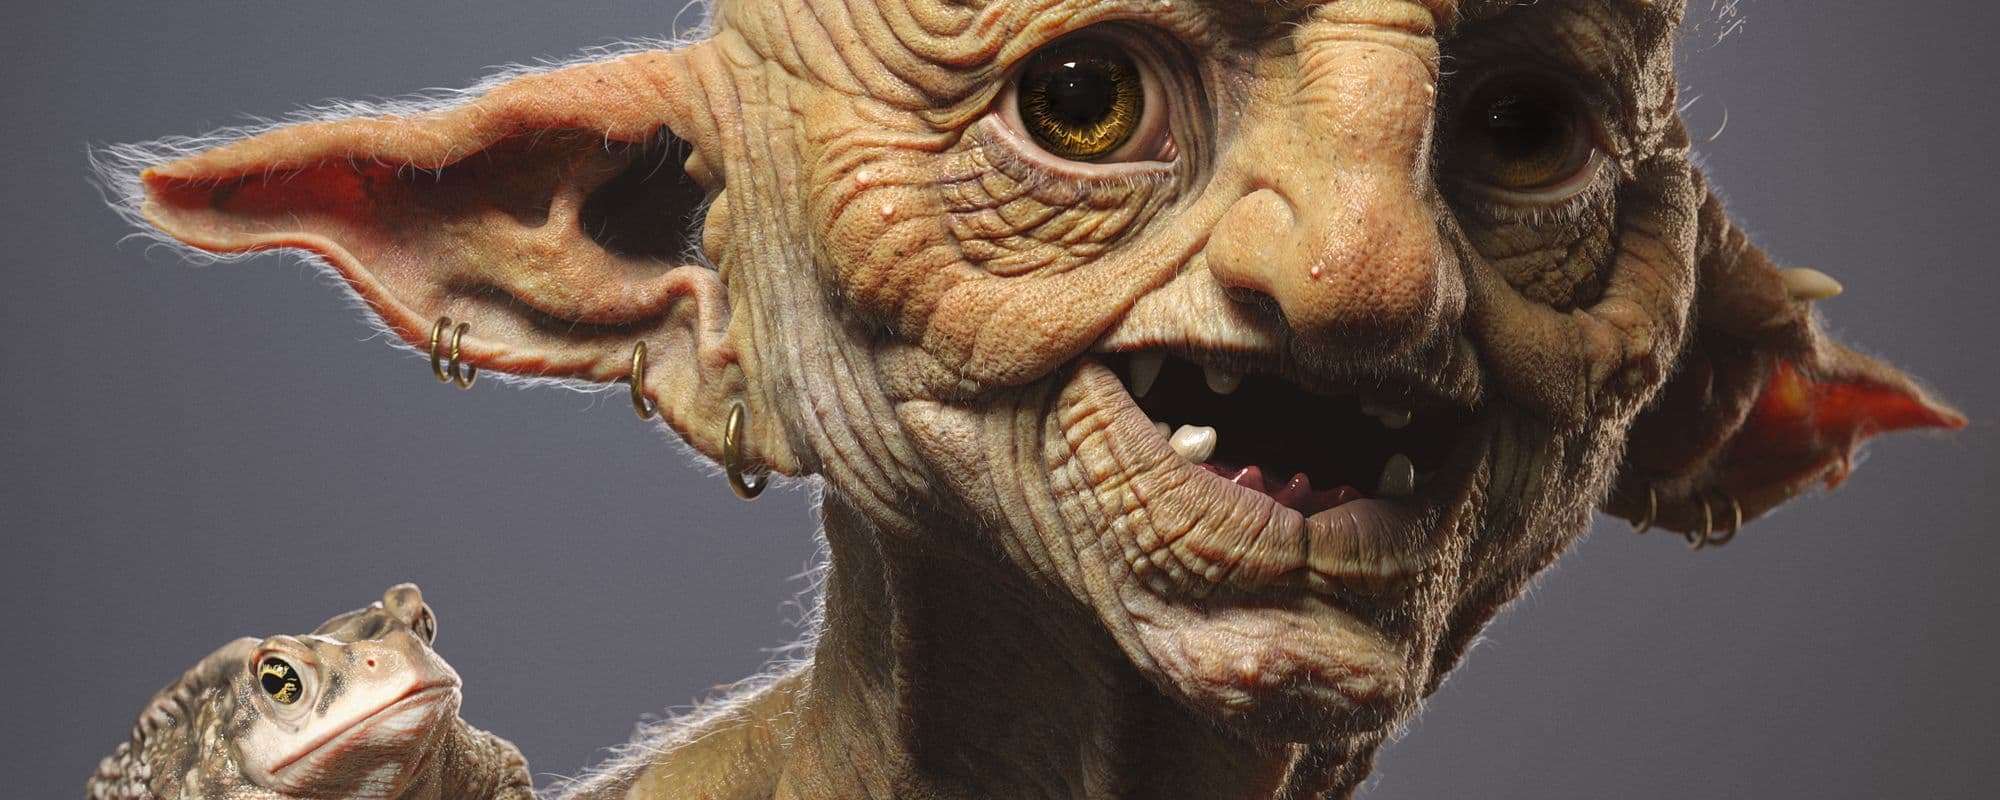
Gathering reference images are important if you are sculpting anatomy, this way you can give your sculpts a feel of realism and movability. I also encourage you study human anatomy in detail, you should know where fatty tissues are located, how skin reacts with certain ages, and how muscles conform to the bony landmarks. Knowing anatomy gives you a huge advantage and allows you to breathe even more life into your characters.
Here are some of my references, as you can see, I am highly inspired by Smeagol’s lively smile and master Oogway’s overall silhouette.
Sculpting
Now that we've covered design, let's get into the juicy bits. Sculpting realism is not easy, you will get better over time by spotting your weaknesses and working on them. Soon you might even notice people when you're walking on the street or whenever you see someone your brain will give you Superman's X-Ray vision and you will be able to analyse how their faces are constructed from the skin to the bone...no?...just me?...okay. The point is, that you should be curious about what makes faces unique and how to implement that into your artwork.
I’ve made a little time lapse to show you how I sculpted the first phase of my Goblin.
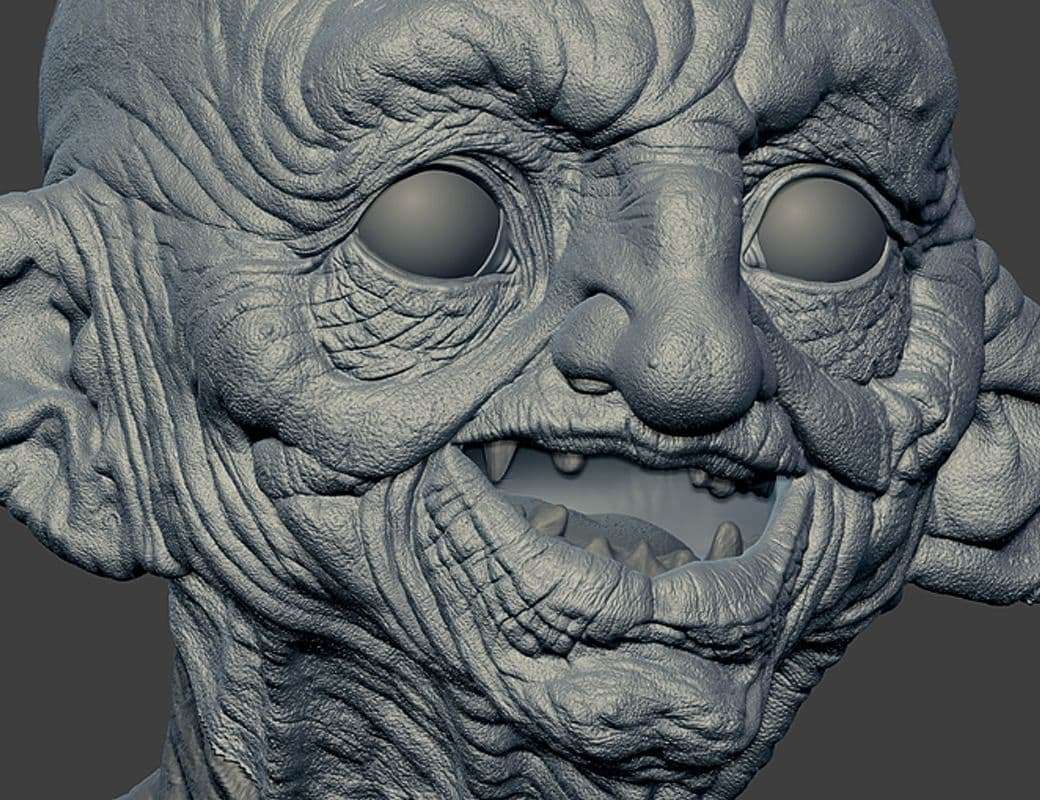
As you can see, a lot of design changes have happened in the first phases. There are three main phases, primary, secondary and tertiary. The primary phase is when you block out the main shapes like the head shapes and overall silhouette.
The secondary phase is about tweaking the smaller shapes like skin folds on the forehead. Finally, the tertiary phase entails blocking out the tiny details like skin pores and small wrinkles. Think about it like a pyramid with three layers, primary being the bottom layer, secondary the middle layer and tertiary the top and smallest layer. This should be the hierarchy in which you should judge the importance of the three phases.
With primary shapes being the most important, I begin to block out the main shapes while looking at various anatomical references that I have gathered. In ZBrush, I mostly use the Move, Clay Buildup, Dam Standard and Smooth brushes when blocking out the main stages. I start off with a low amount of polygons and go higher if needed, this way I can move big shapes around and not worry about details this early into the process. All I am thinking about in these stages is the main silhouette of the character.
As I start to shift into the secondary phase, I raise my polycount and block in some appropriate folds caused by the expression on the Goblin's face whilst paying attention to his age and skin quality.
Before I detail my model, I need to retopologise my model and make sure the surfaces are clean so that I can start the next process. ZRemesher was used to create clean enough geometry since I was not going to animate the character.
It's All In The Details
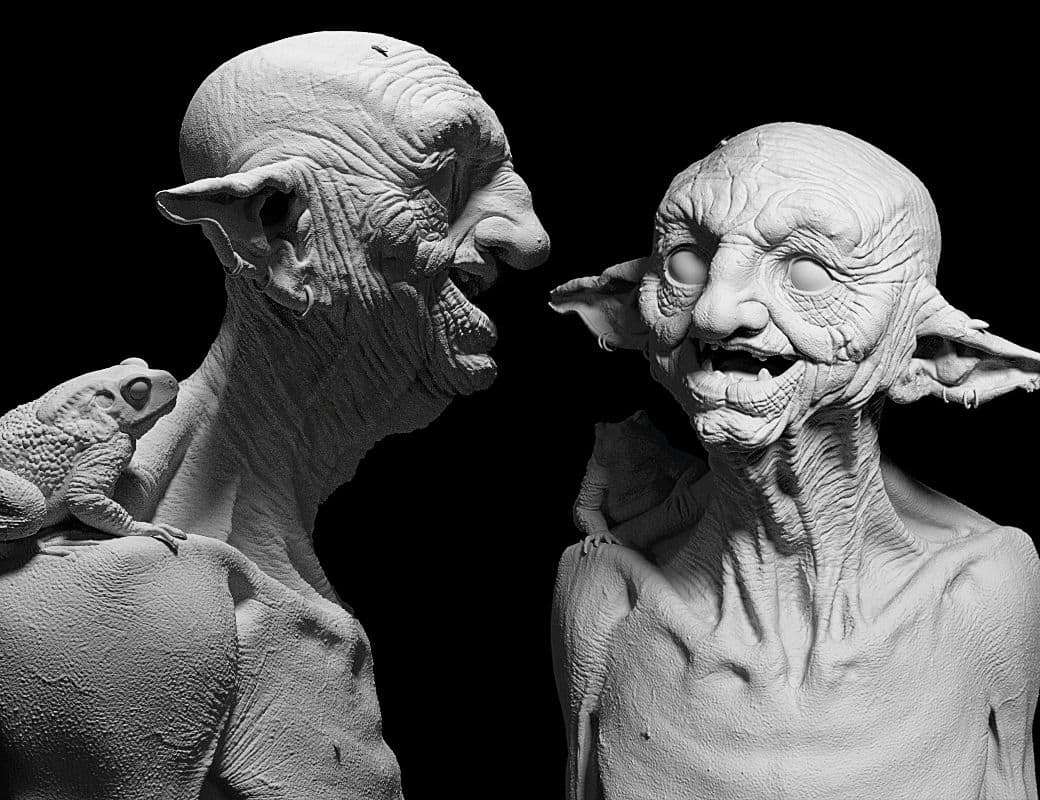
Once I am confident that I've done the best I can do in both the primary and secondary phases, I move on to detailing. Remember that an artwork can never be finished, there’s always room for improvement. Feel free to hop back and forth from phases and tweak your work along the way as I did.
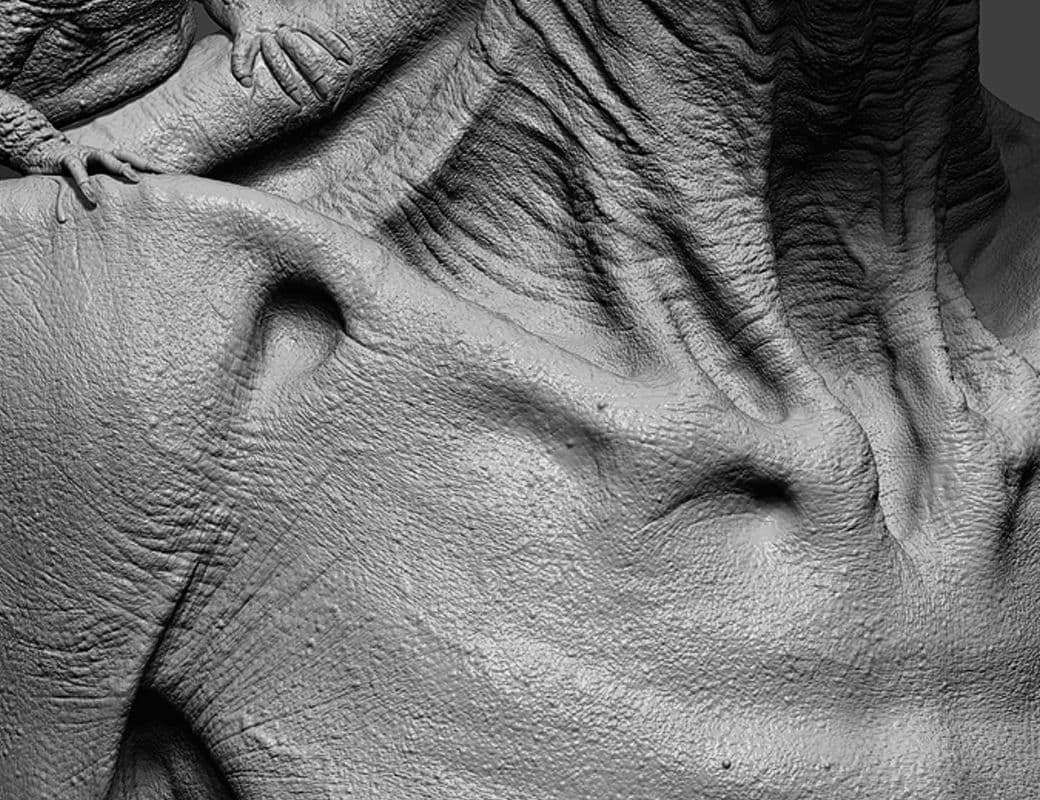
Detailing is probably the most time consuming part in the whole sculpting process. I made a set of custom brushes that I use to add pores, wrinkles and pimples up to my models. One brush in particular is the “Single Pore” brush. I like to manually add pores one at a time whilst making sure to keep the size, and distance of each pore constant. This is very time consuming but since this was a personal project I had some time to get all the nitty gritty details looking right.
After a layer of the pores are done, I use my “skin facial scrub” brush to add some finer detail. Skin irregularities are then sculpted in to make the skin look and feel organic.
It’s important that your clay object in your software looks and feels like the surface you are trying to replicate even before colour is applied.
The best advice I can give you when detailing is to look at reference and try to replicate the look and feel of skin as close as possible, there’s no easy way out, realistic skin is achieved with time, patience and experience.
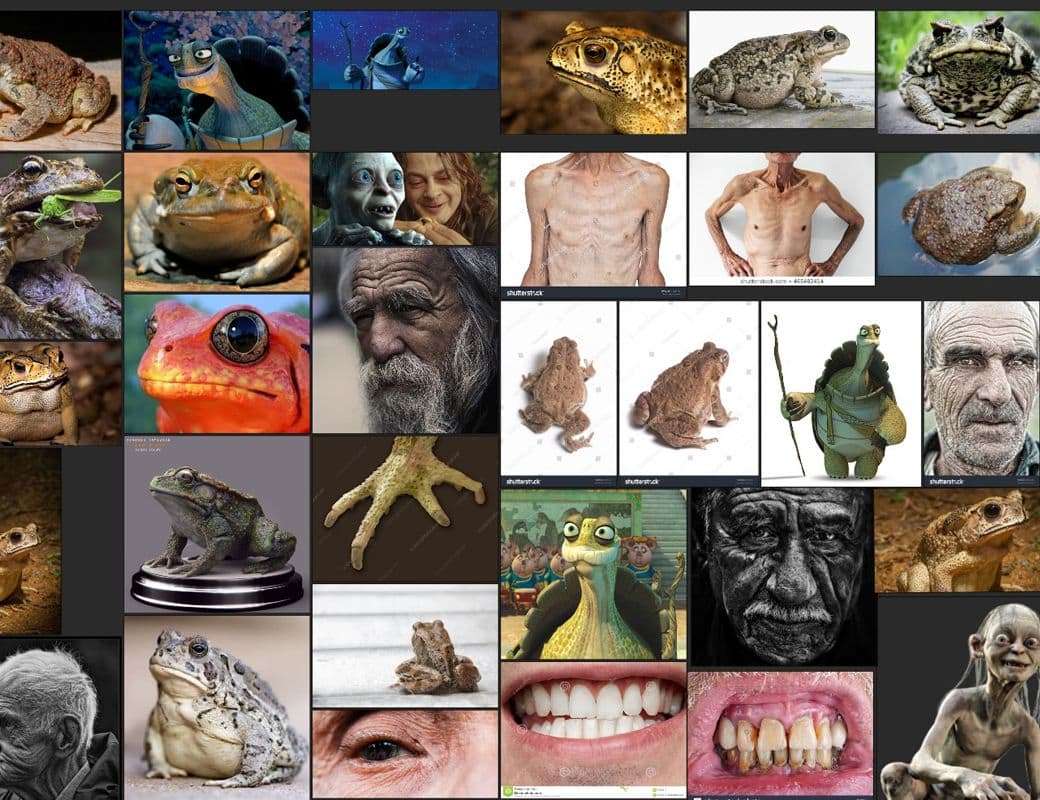
The toad was sculpted using the same workflow when sculpting the Goblin.
I generated the UV’s inside of ZBrush as it was a personal project and I was not worried about rigging. If the character was for a game I would use Maya for retopology and make sure the topology is clean and rig ready.
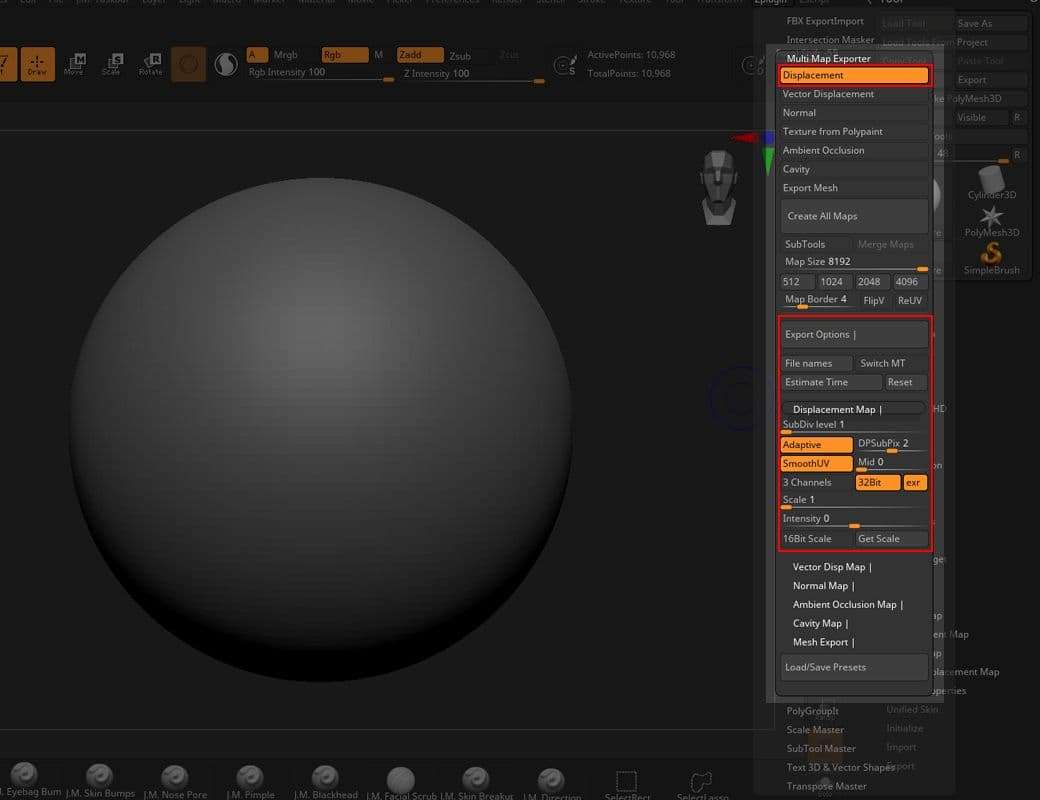
I generated the displacement maps inside of ZBrush using Multimap exporter. Depending on the size and importance of the model, I will adjust the map size accordingly. So for example I exported the head displacement at 8k resolution and I exported the Lacrimal caruncle displacement at 1k resolution or much lower.
Here are my settings, feel free to try them out:
Texturing
Now it’s time to Texture our model. I export my model and import it into Substance Painter, I also export some Normal maps from ZBrush to use in Substance Painter.
Remember that an artwork can never be finished, there’s always room for improvement. Feel free to hop back and forth from phases and tweak your work along the way as I did.
When texturing the skin of the Goblin, I took his natural habitat into consideration. He lives in a damp swampy area and knows no hygiene. The skin texturing for the Goblin was rather complex, I had a total of around 20 layers contributing to the colour of the Goblins skin. It's important that you don't just drop in the base colour of the skin. Treat your texturing process as if you are painting each level of the skin starting from the blood layer and ending on the base colour.
I focused on the three main layers of the skin when texturing. The blood, the Subcutaneous Fat and the Epidermis. I paint in these layers and add skin colour irregularities to give the character a damaged skin effect. I did not want the Goblin to be too green, I wanted him to be a sickly brown green, this makes his skin look more believable.
There are no shortcuts when it comes to achieving realistic skin, all the textures are hand-painted to get the desired result.
I also painted the SSS, Roughness and Scatter maps for the Goblin and toad so that I can control these attributes when shading. Transparency maps were painted for the Sclera and Lacrimal Caruncle. Once all textures are painted and I am happy with the result, I will export the textures at a high resolution.
When I am comfortable enough that all my maps are ready, I import my meshes into Maya and set up a scene. Maya works based on the scaling of your object so make sure you get your scaling right.
Grooming
I like to work on grooming first. I use Xgen for grooming, Xgen is great for creating believable hair efficiently and consistently. I start off adding hair guides one at a time, these hair guides will essentially guide the movement and flow of the hair depending on how you place your guides.
On certain areas of the goblin ( chest, arms etc.), I used Xgen's Interactive grooming functions which allows you interactively move guides around to get the desired look that I wanted. I used various clump, cut, coil and noise modifiers on the hair to get it looking as believable and natural as possible.
Shading
Shading is the main step in creating a believable character. If you shade your character wrong you could end up with a plastic and still looking character. The skin shader for the goblin was fun to do, I had to keep in mind that I wanted the skin to be sickly yet warm and appealing.
There are no shortcuts when it comes to achieving realistic skin, all the textures are hand-painted to get the desired result.
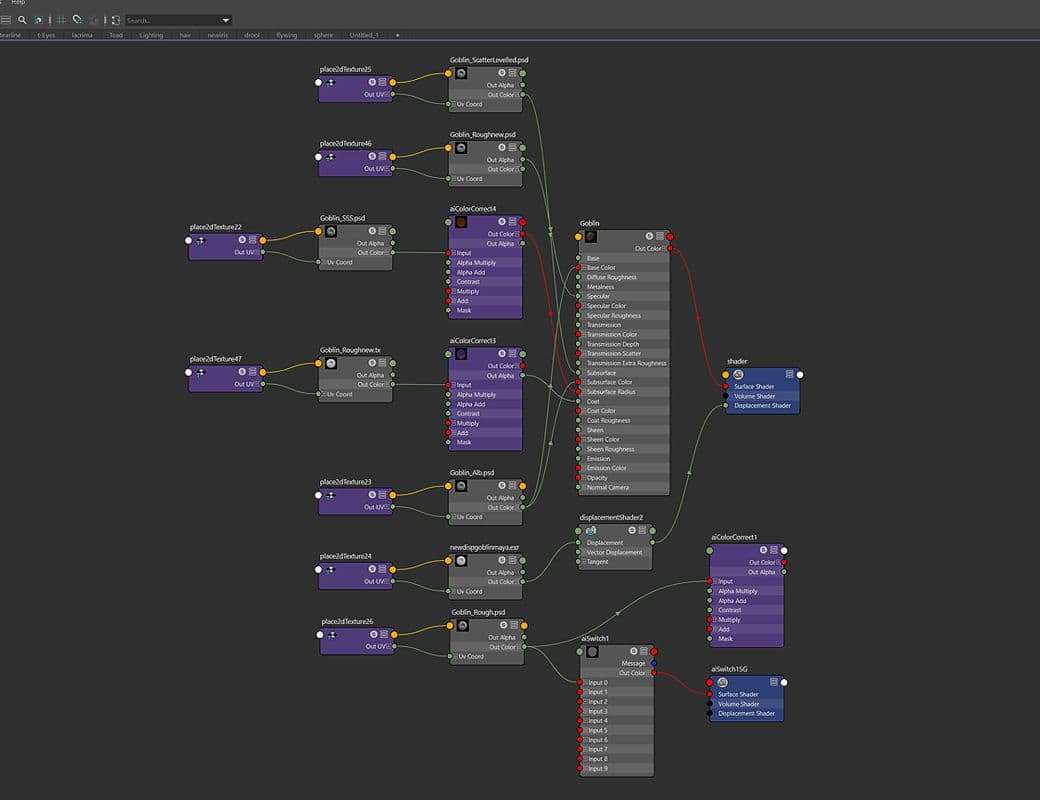
I attach the Diffuse, SSS, Scatter, Roughness and Coat maps to an aiStandard surface shader in Arnold Renderer. I play around with Subsurface Scatter settings in Arnold to get a realistic skin look.
Lighting
Lighting tells the story of the character, whether the lighting is front lit, side lit or even dramatically lit using strong shadows, changing up the lighting can change the overall mood of your image and can give you various results to choose from.
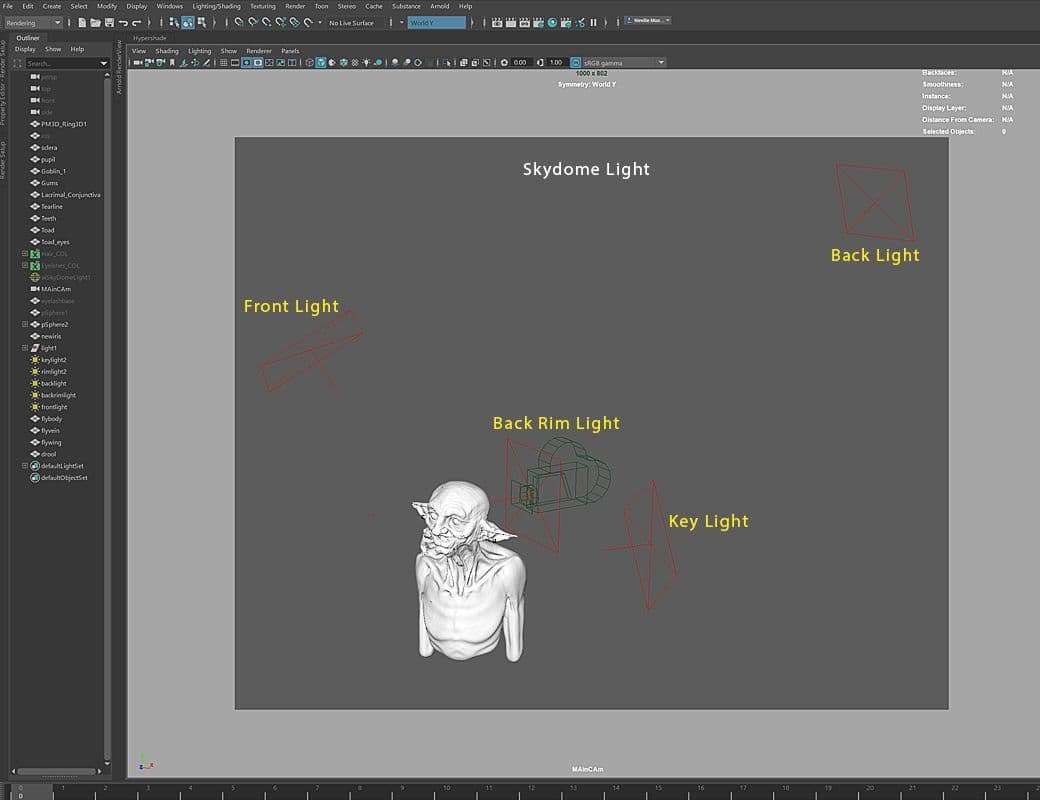
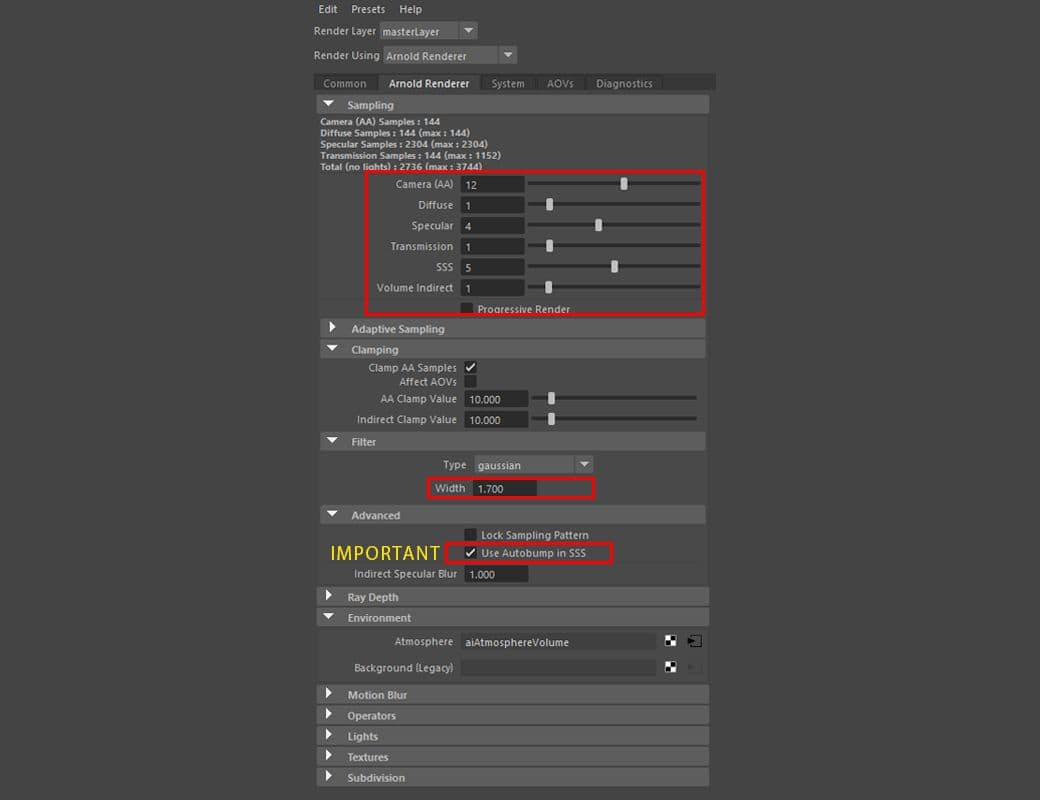
I wanted my character to be lit in a way that showed off the form and also gave it a professional portrait look. The lighting rig consisted of 5 lights in my scene and 1 reflector. I wanted the light to add a reflection on the eyes, it would add more friendliness to the characters appeal.
I rendered my images at 4000x4500 pixels and render settings as follows, 10/1/1/3/6/1 under Arnold settings. Quick tip, enable Auto bump in SSS to give your render a small but noticeable boost in detail.
Once the render was finished I did a quick curves adjustment in Photoshop to add an extra pop of warmth and contrast into the lighting of the character.
And without further ado her is the finished result!
Finally, I want to thank The Rookies for giving me the opportunity to share my process and workflow on this project. I had too much fun with this project and learned so many new things, until next time, I hope to bring you many more breakdowns in the future!