How to Make a Character Artist's Original Portfolio Piece for Film and Games
Felix D'souza, an electrical engineer, businessman, self taught 3D character artist and a dreamer, from India., shows us how to make a character artist's original portfolio piece for film and games.
Felix D'souza is an electrical engineer, a businessman, a self taught 3D character artist and a dreamer, from India. He loved to sketch from an early age but it remained a hobby until 2018, when he finally decided to quit a stable job to follow his dreams. Felix loves exploring various art forms and mediums and today shows us how to make a character artist's original portfolio piece for film and games.
The inspiration
This artwork was created for "BEHIND YOUR SCENE" challenge. This challenge was conducted by The Extra Mile & The Rookies for the extra mile community members. The idea of this challenge was to produce an original portfolio piece along with an article showcasing various stages of work and approach to creating the final piece. The time allotted for the challenge was 31 Days.
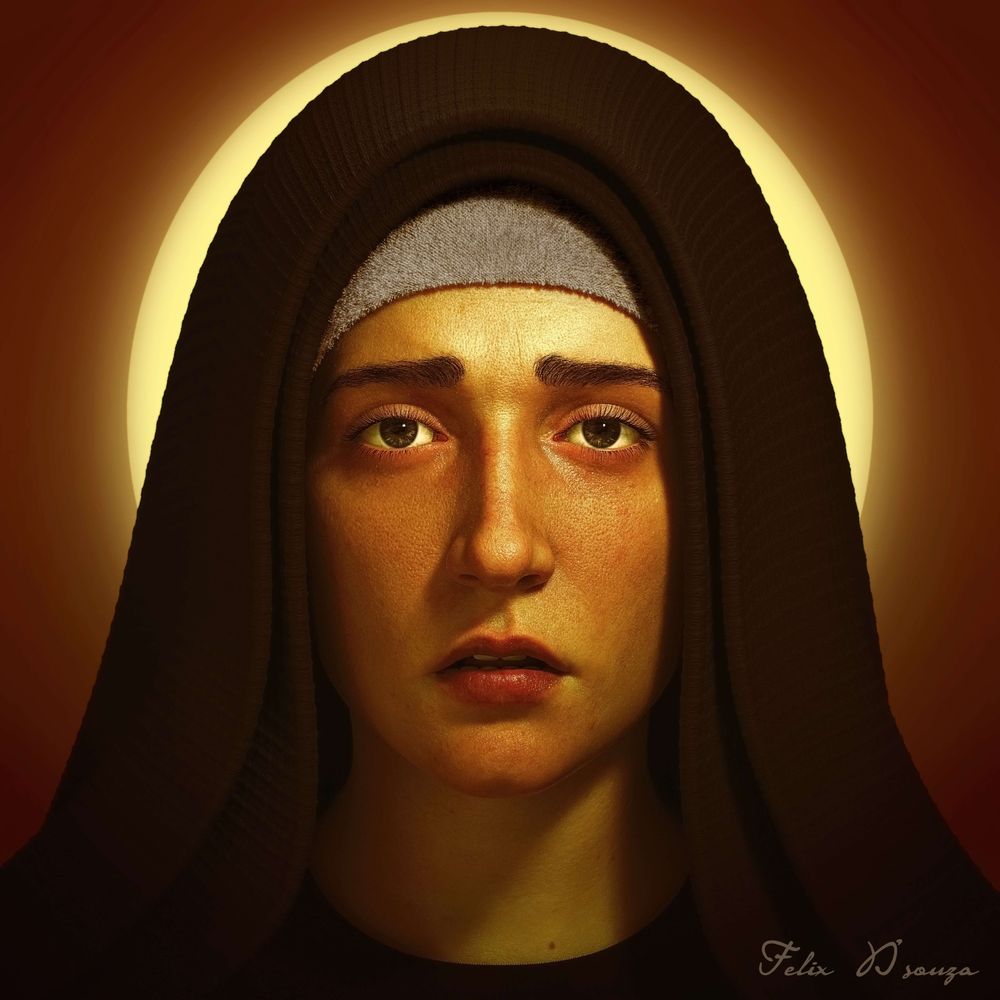
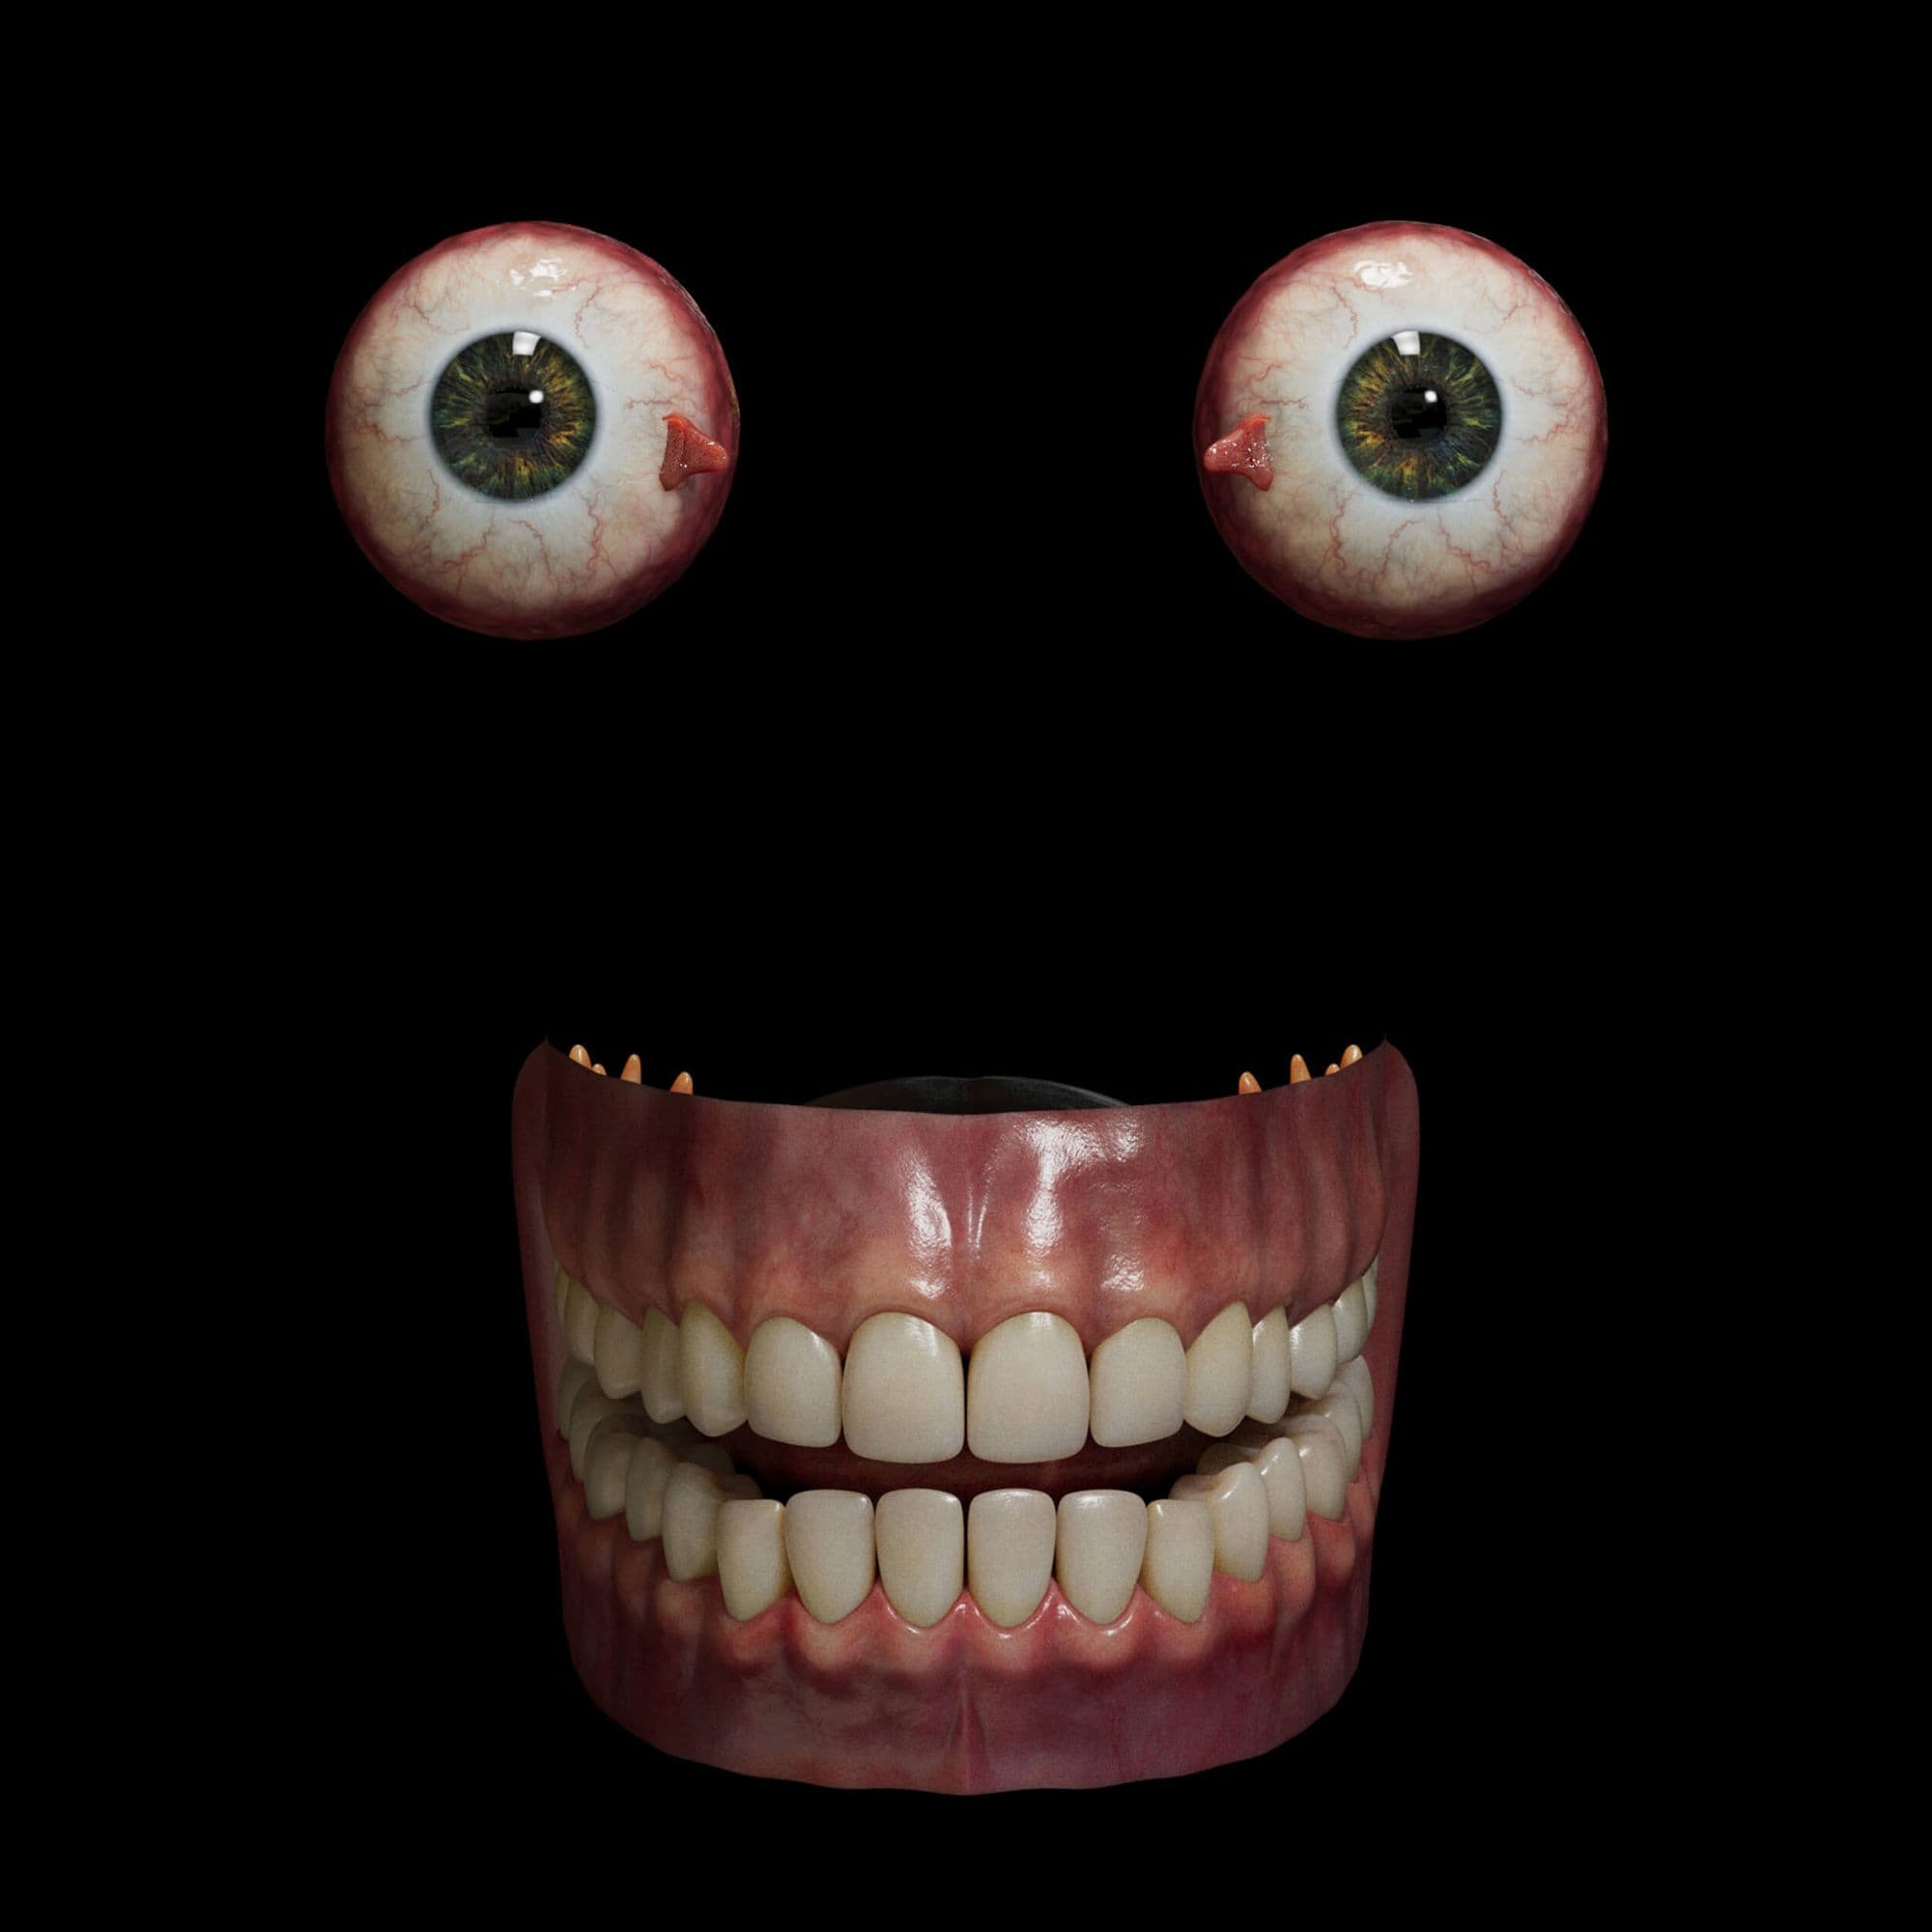
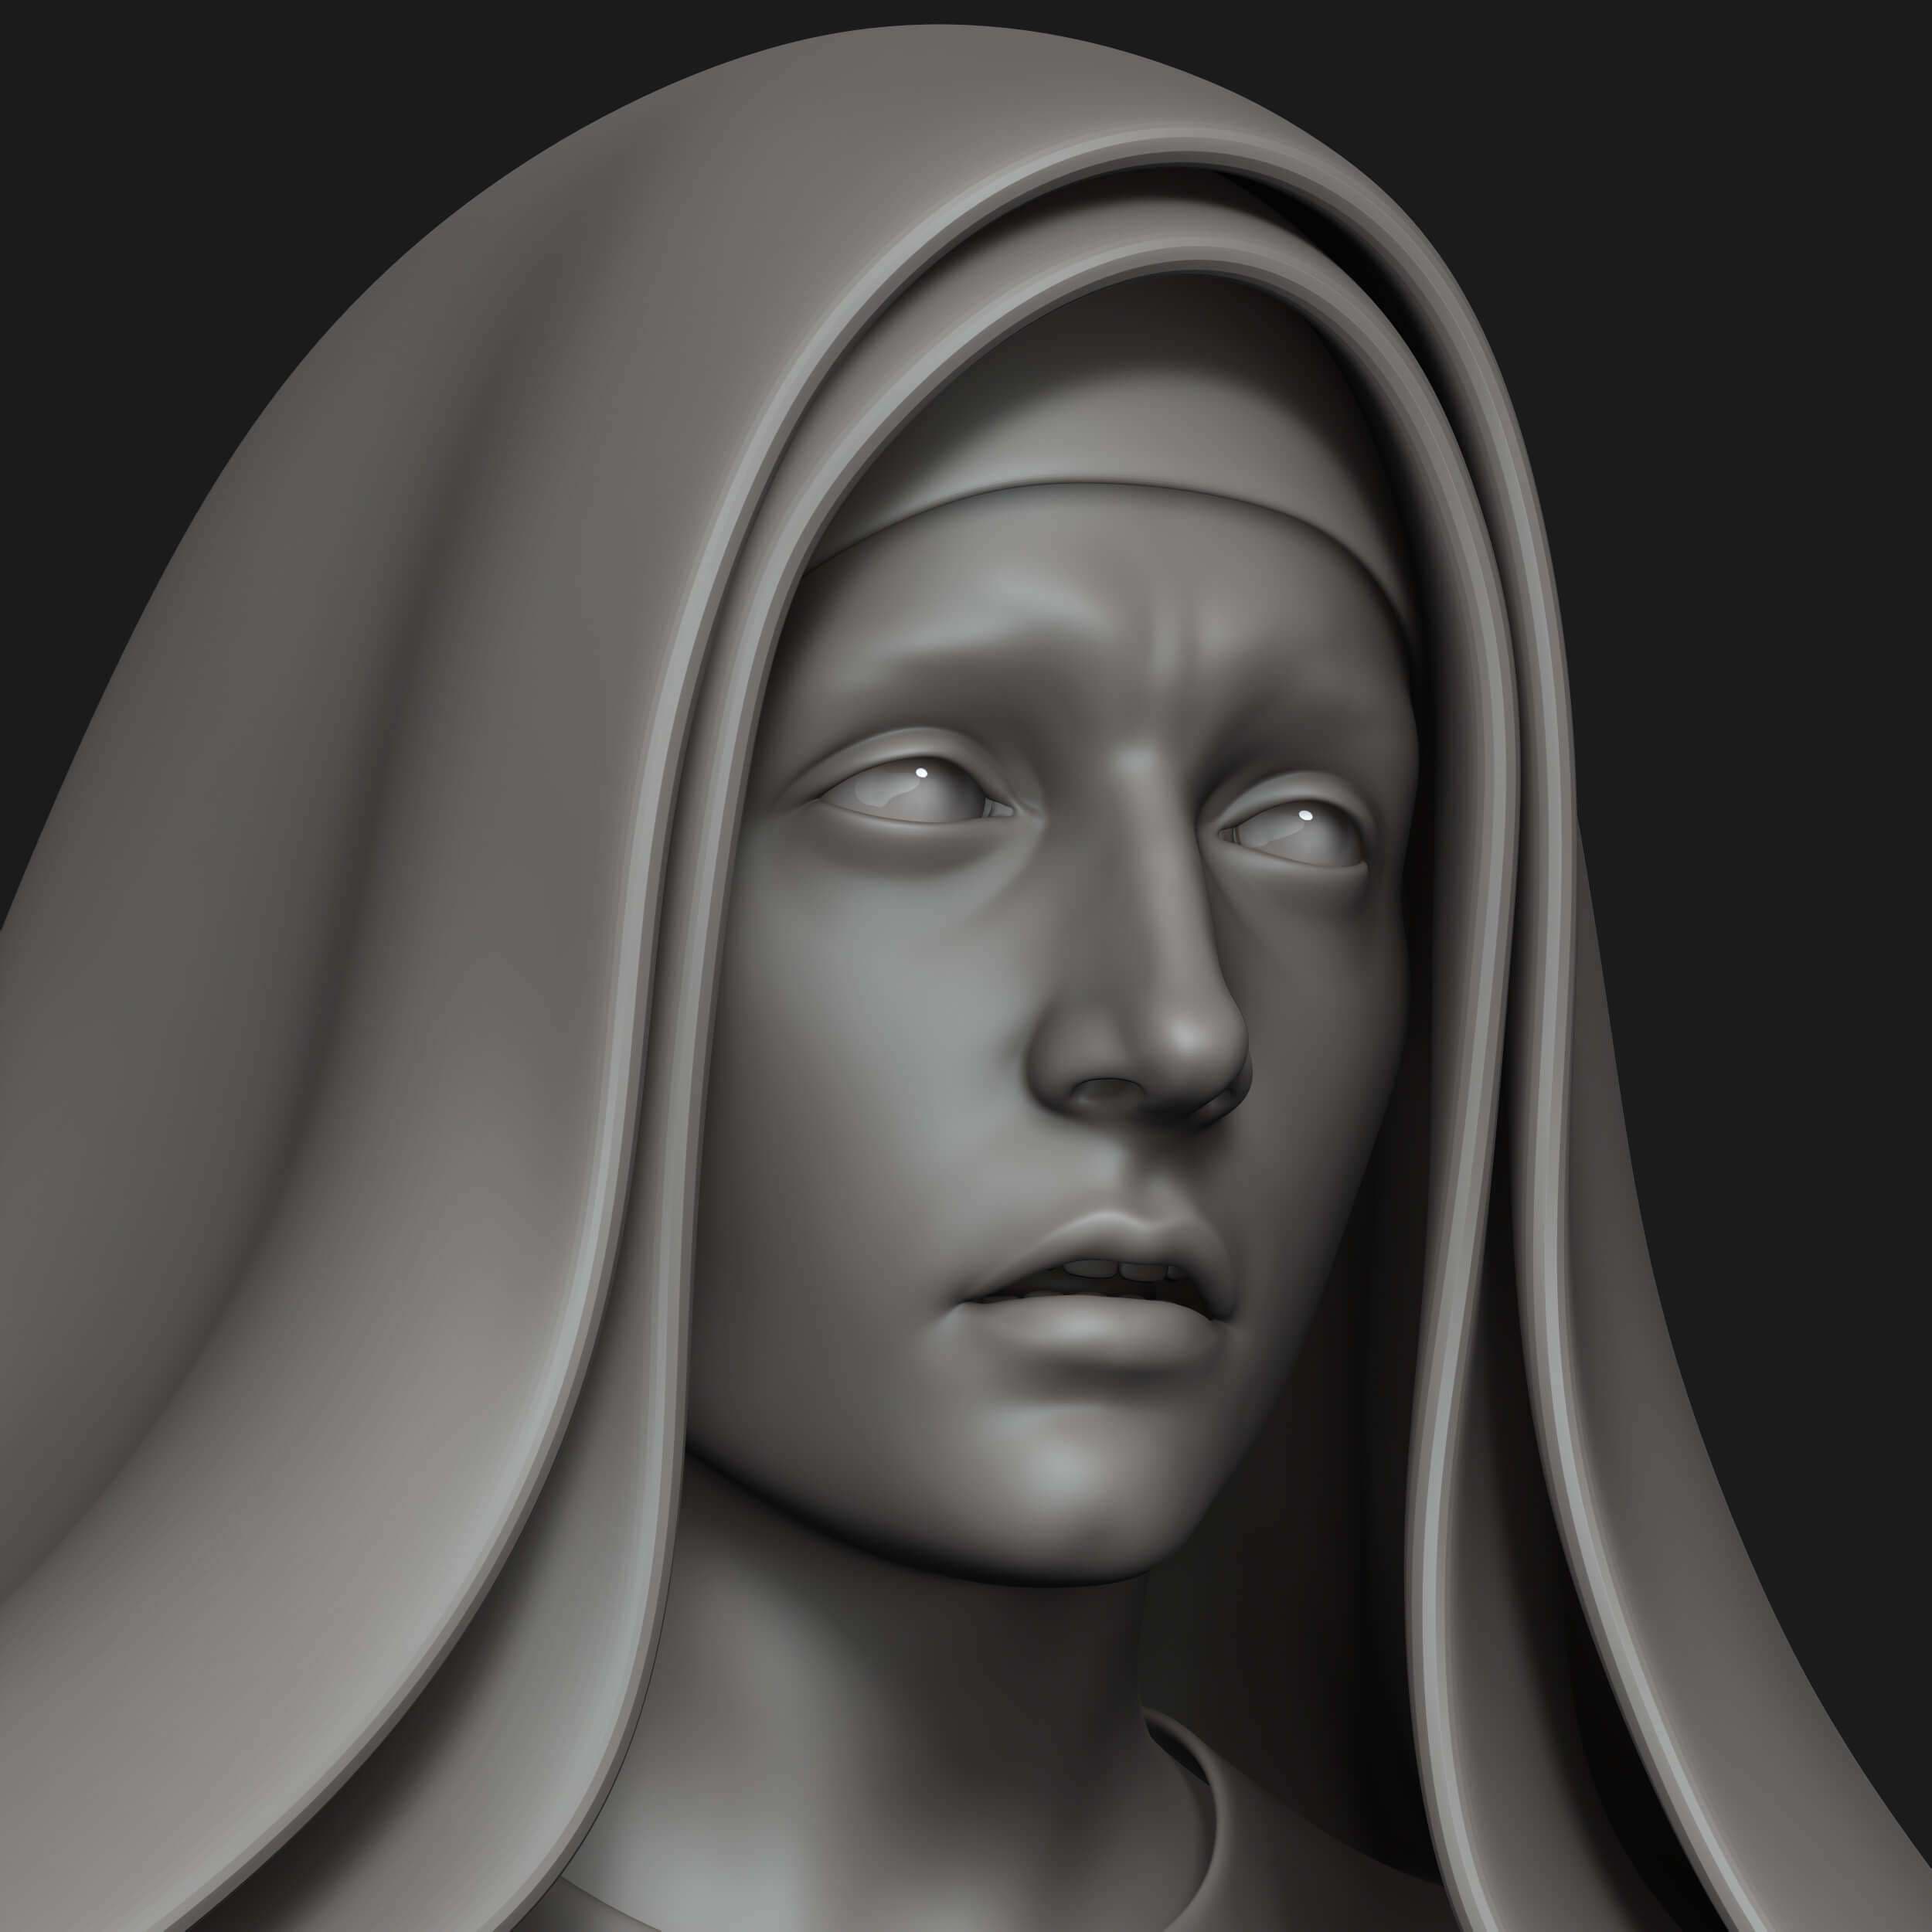
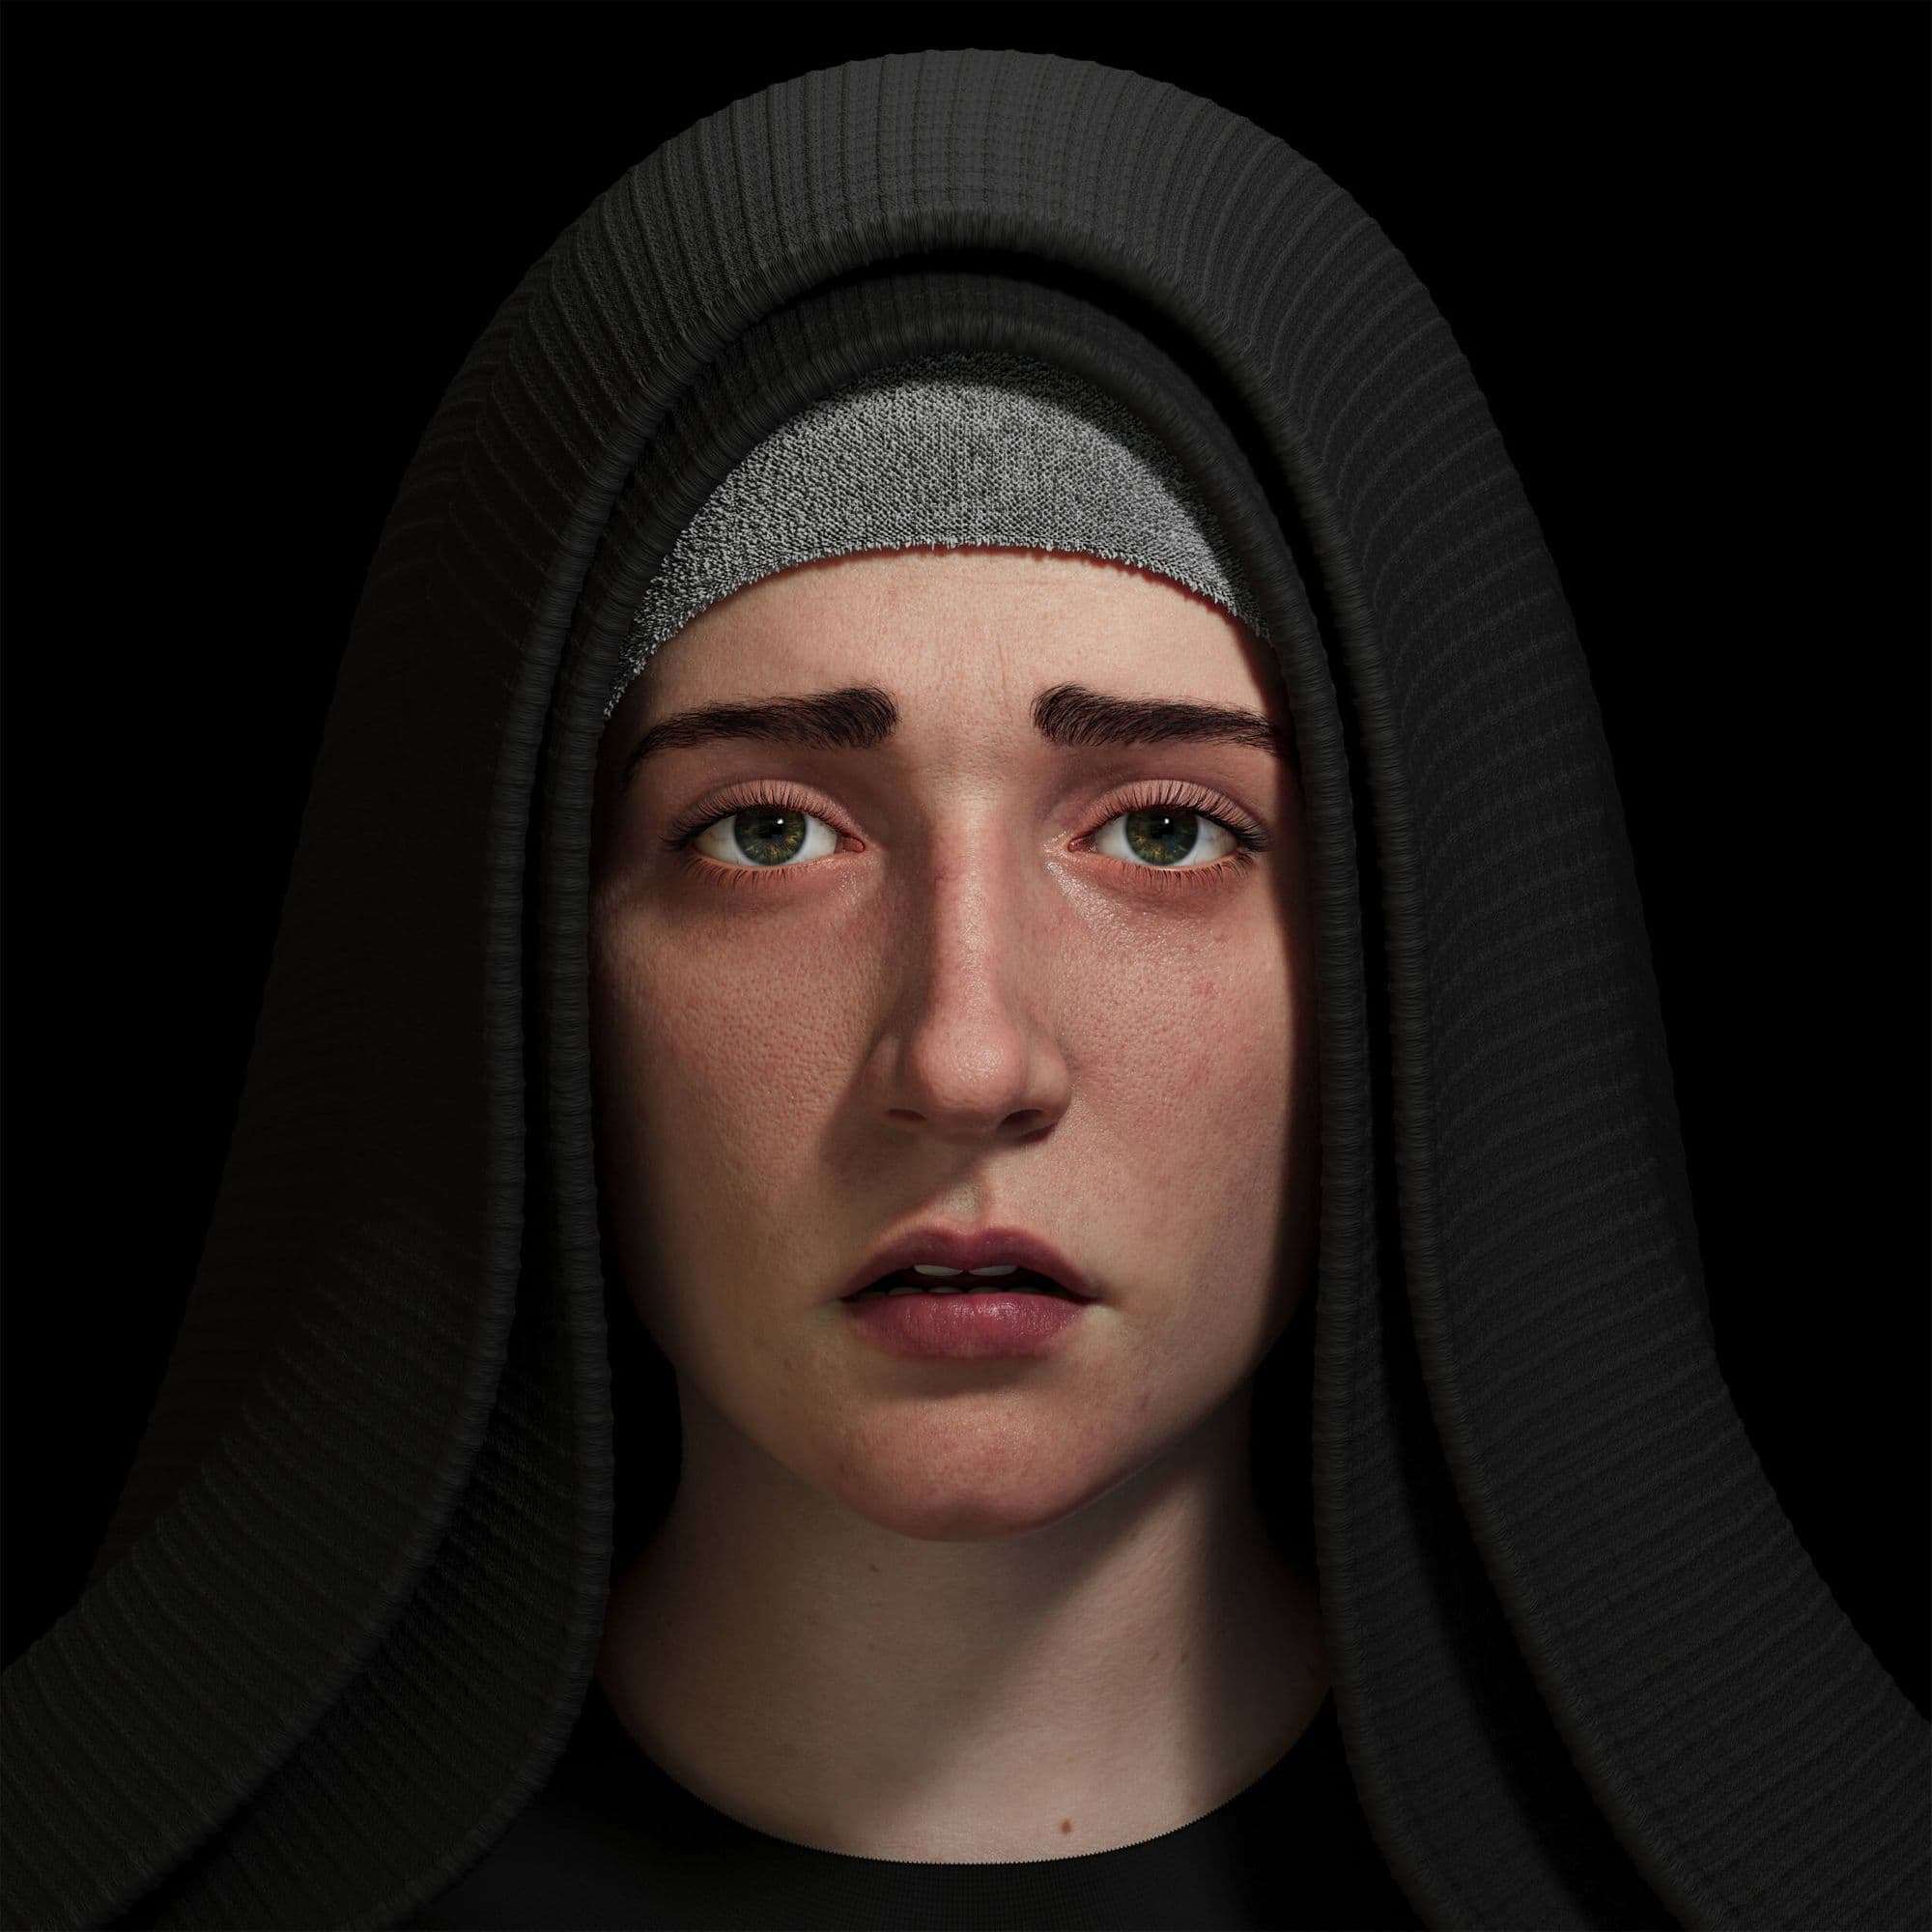
I wanted to depict the pain in Mother Mary's eyes from Jesus' perspective. My reference board consisted of 470 images.
Modeling the Head and Face
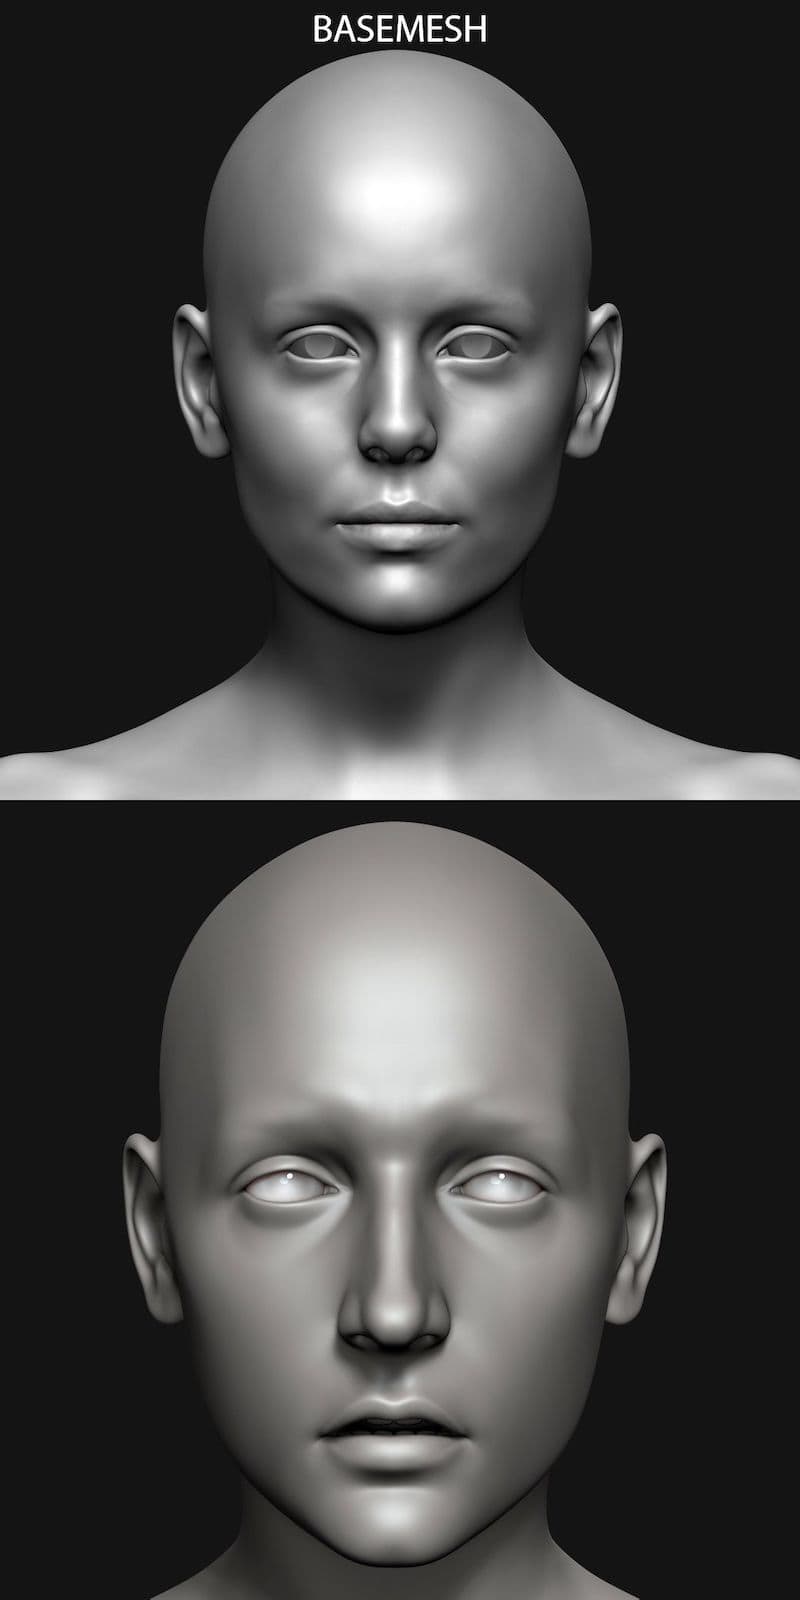
I began in Zbrush with a base mesh from 3dscanstore. This base mesh is a real human scan, so the proportions were accurate to the real world scale. It provided me a good starting point. I studied anatomy and tried to stay within the limits of an idealistic female anatomy most of the time. I started making changes layer by layer keeping in mind the anatomy of skull, fats and muscles. I used move, clay buildup, dam standard and smooth brushes mostly to get the desired forms. I kept on changing lights and materials to see the forms properly.
Texturing the Head and Face
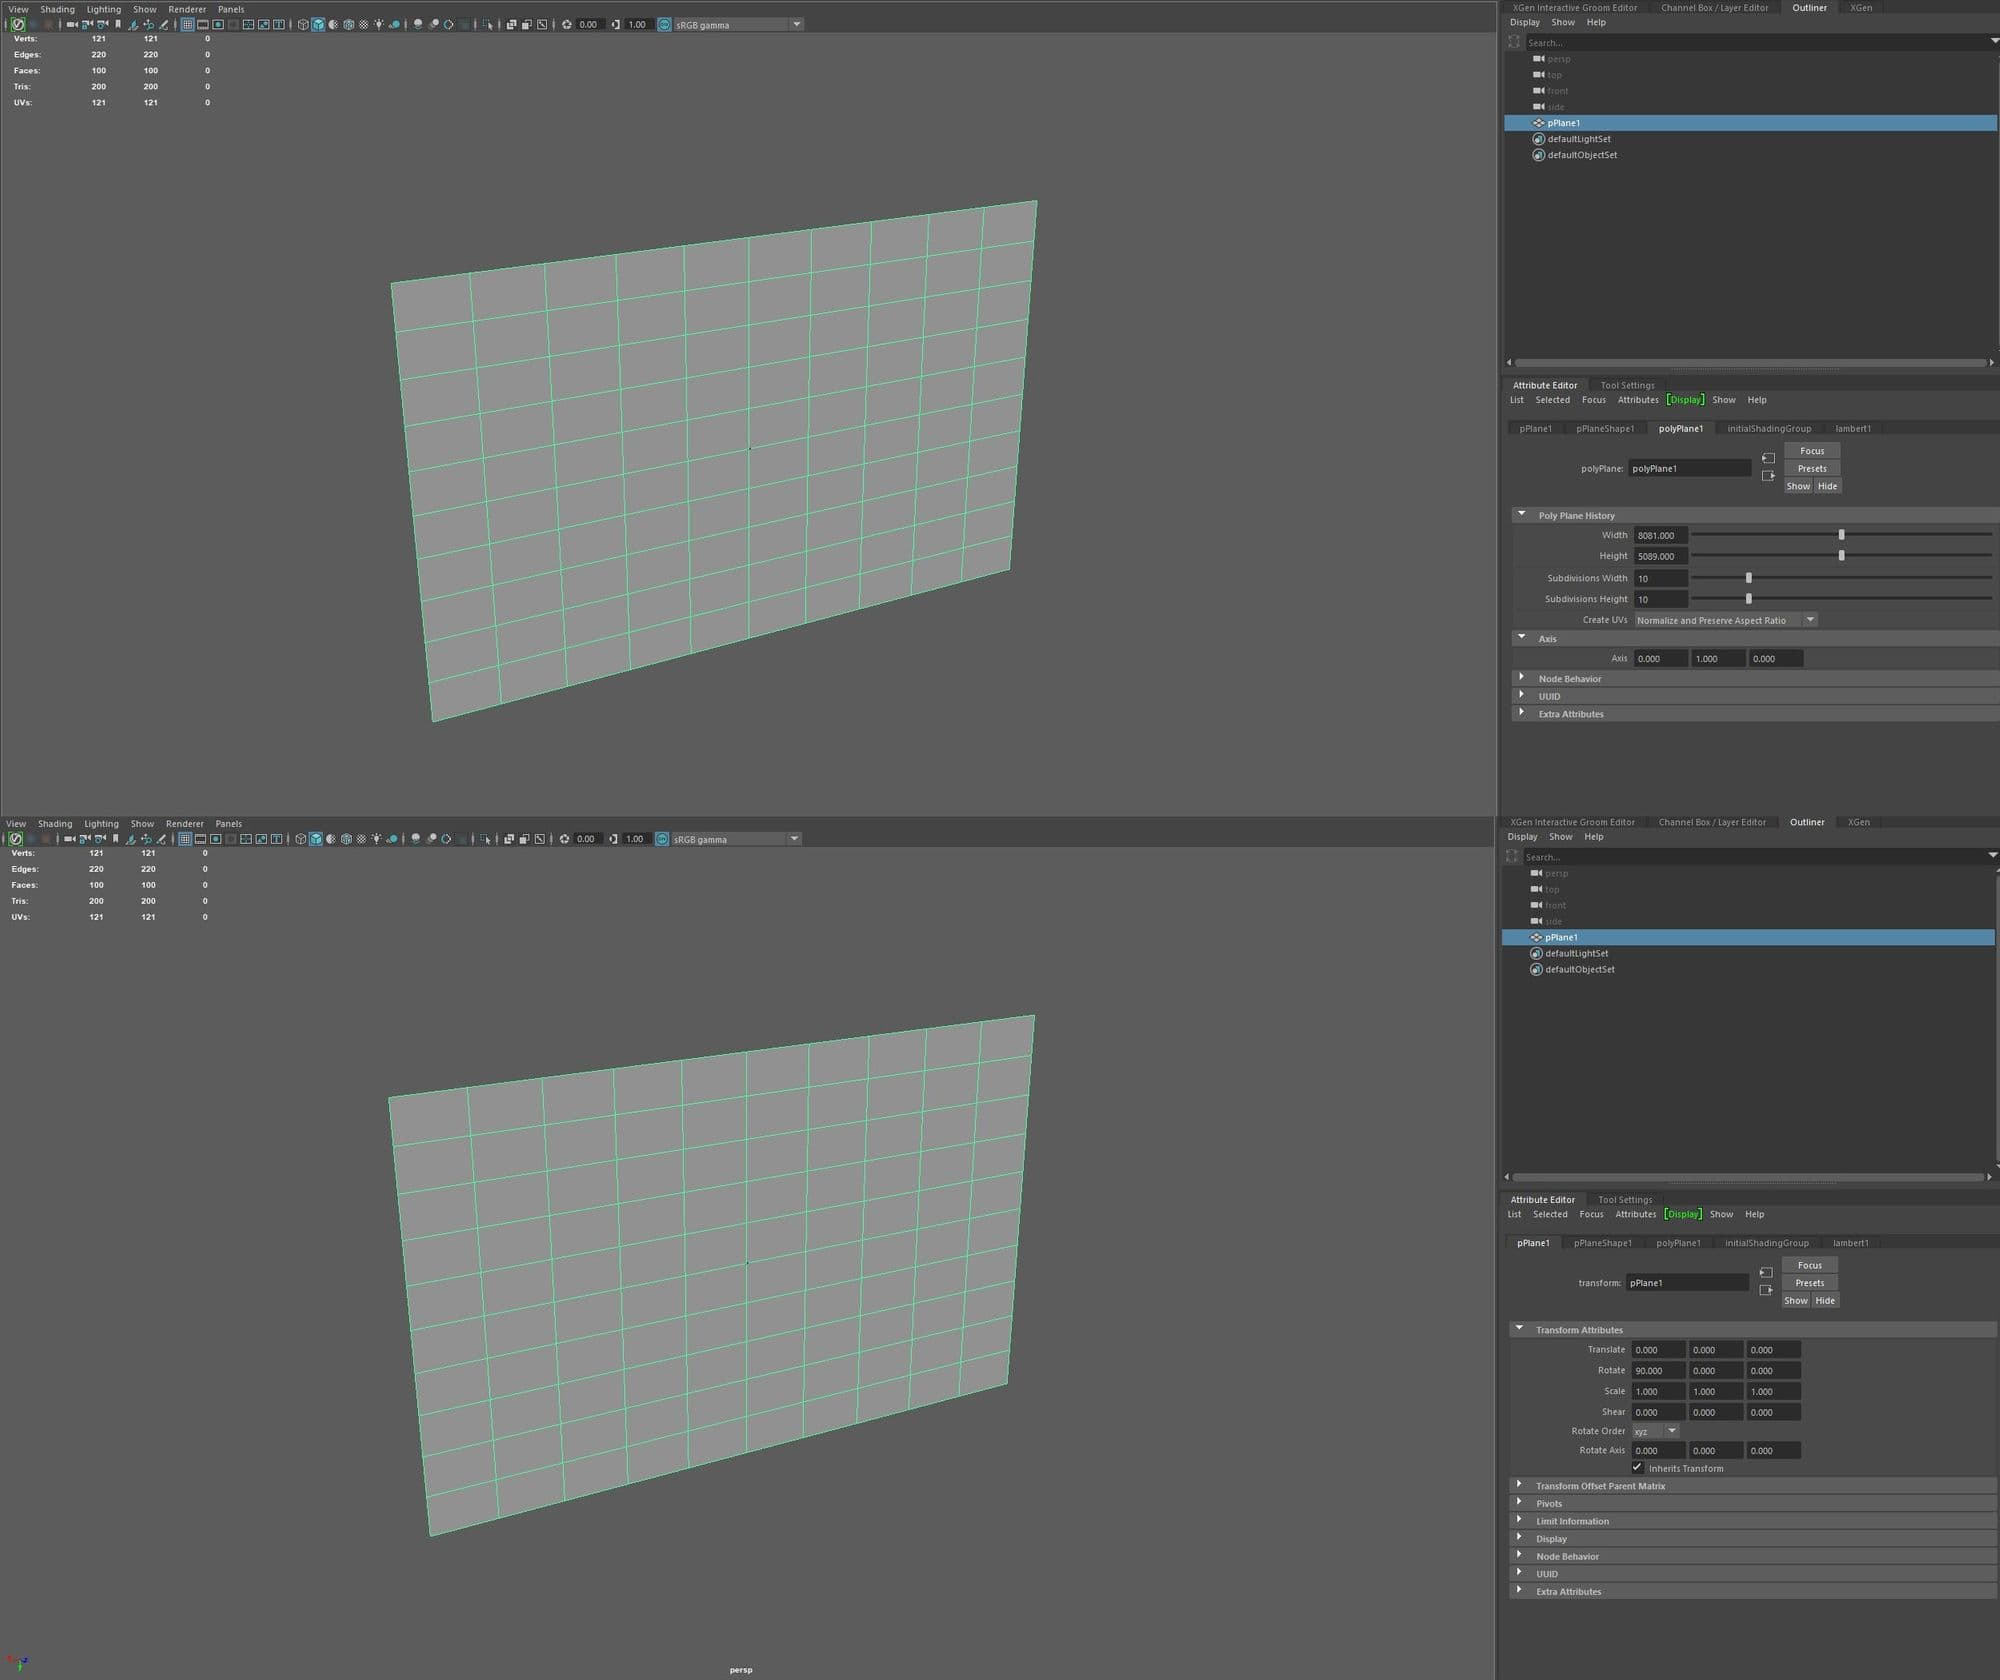
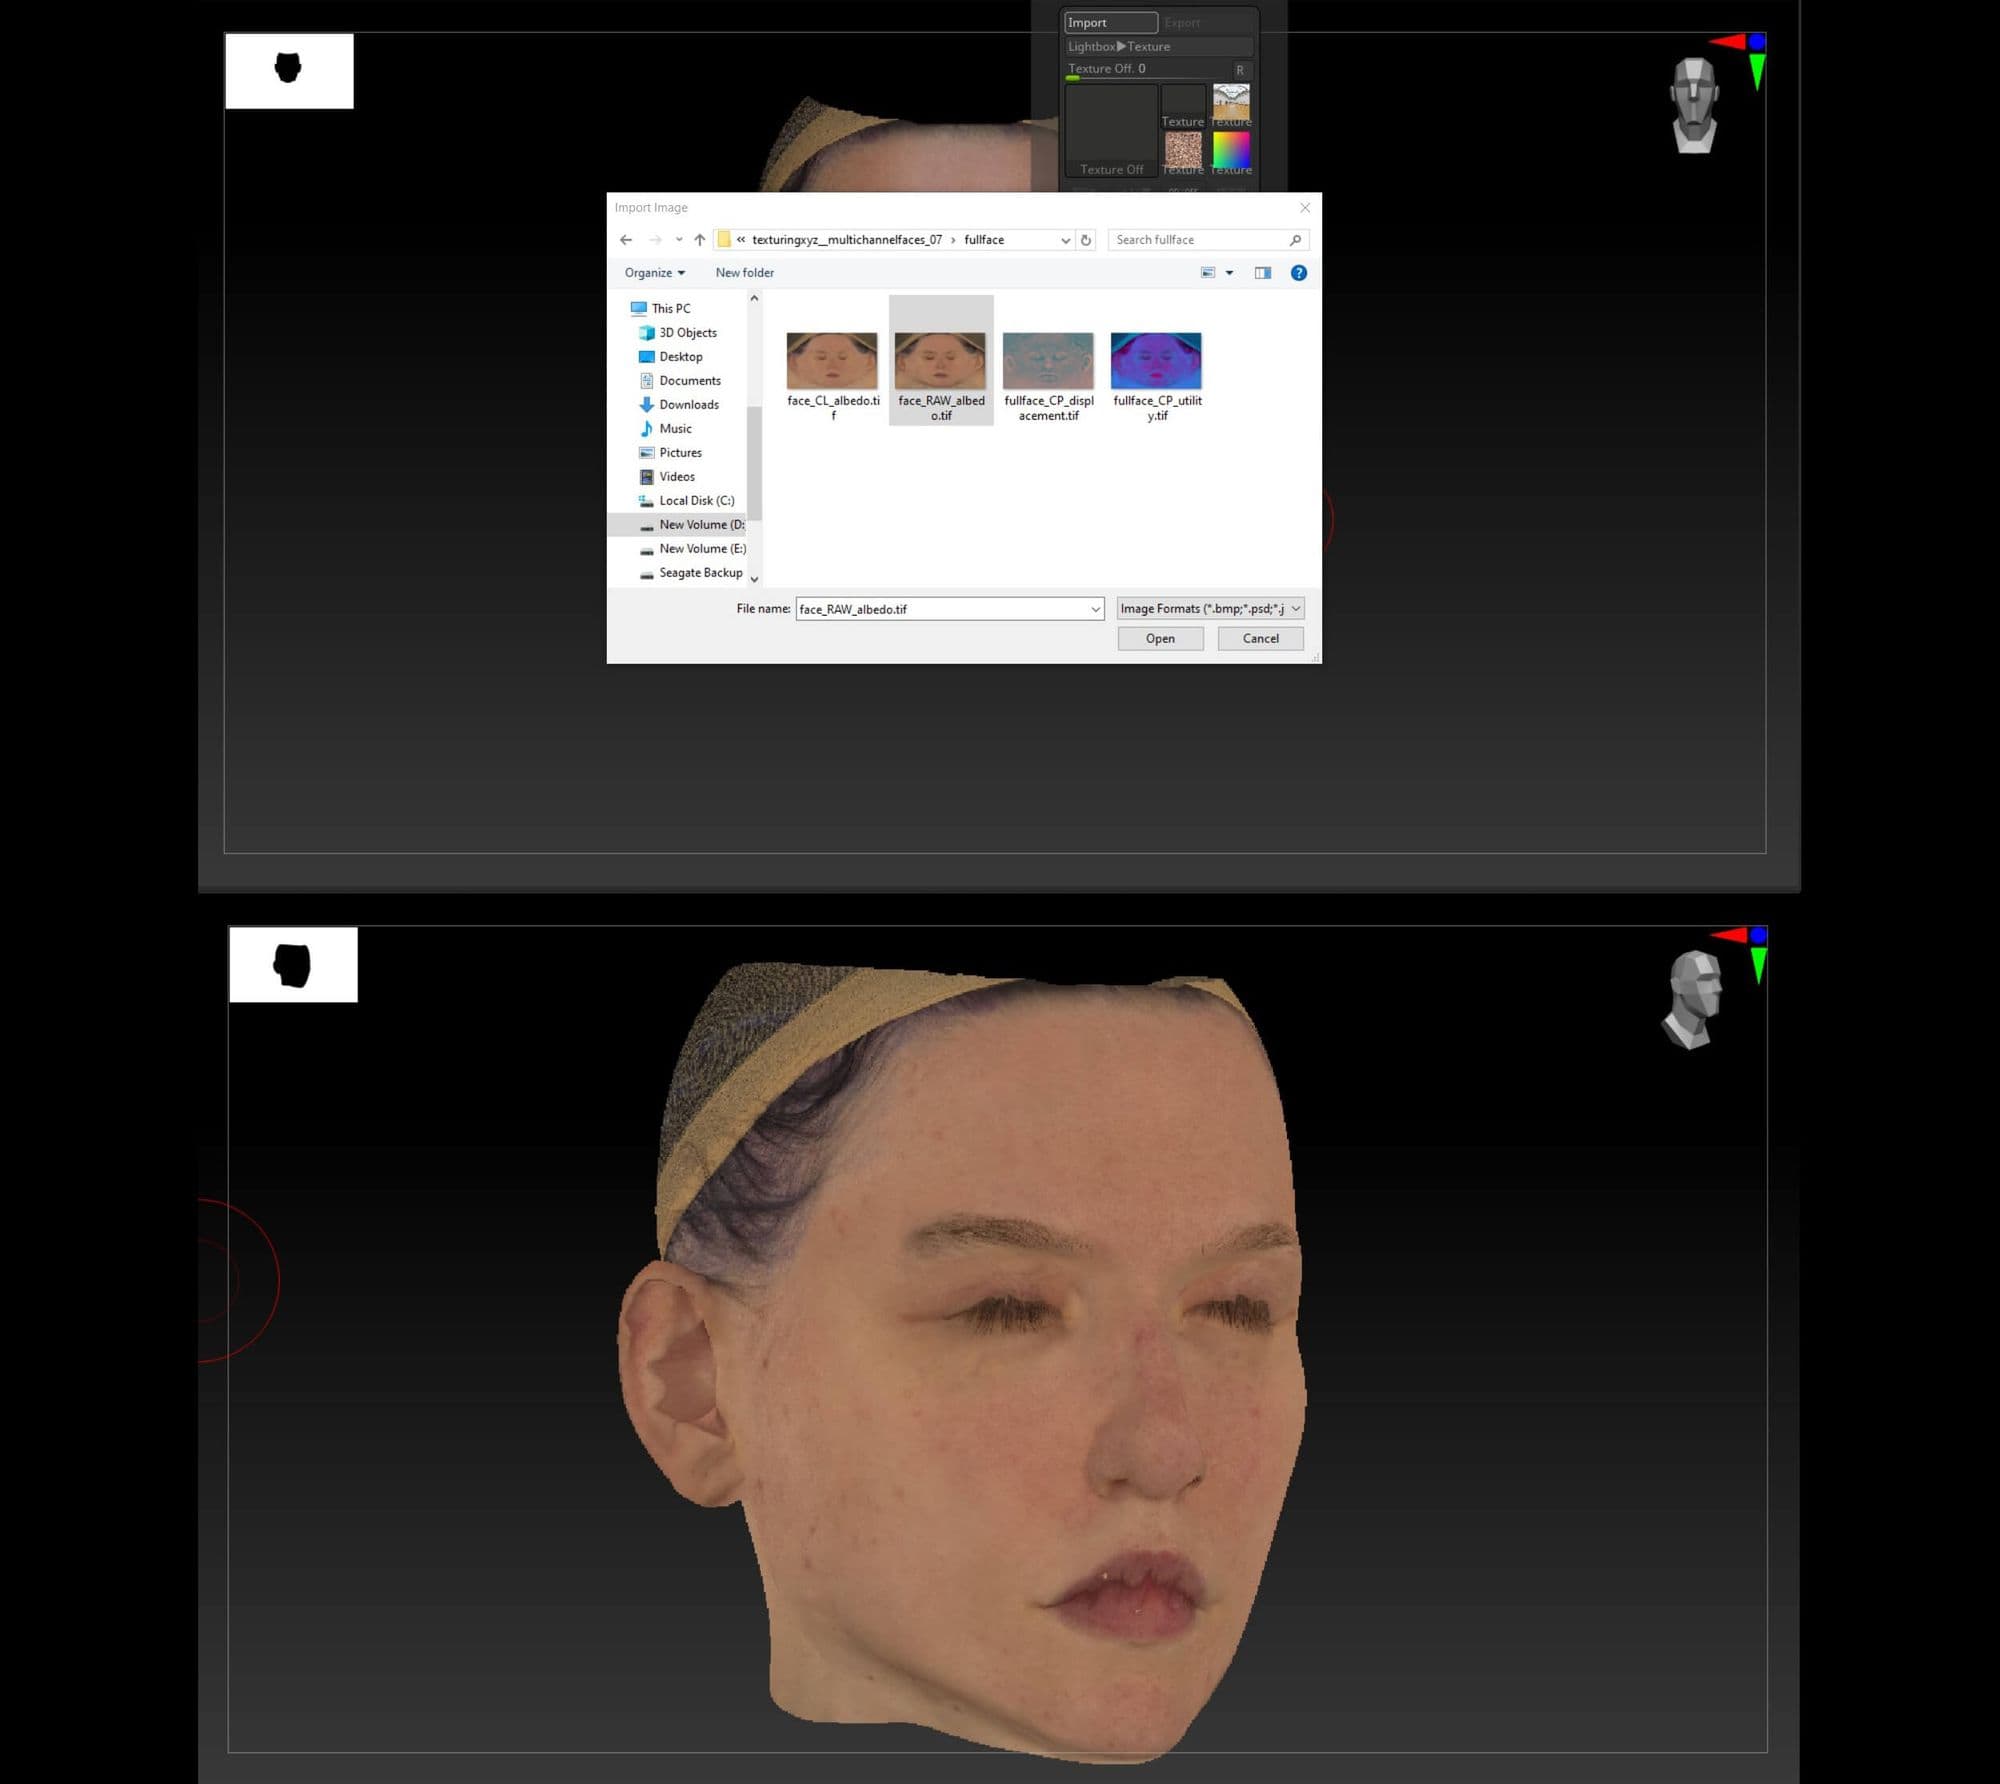
In Maya I created a polygon primitive plane. I used multichannel face #07 from texturing.xyz. The width and height of plane was set equal to the image resolution of texturing.xyz map (8081 x 5089 pixels). The plane was rotated 90 degrees on the x axis. The projection plane was saved and exported as an obj file.
The projection plane was imported in Zbrush as a separate subtool and resized to match the face. Raw albedo was imported as texture map from the texture tab inside Zbrush. The imported texture was flipped vertically using the flip vertically option.
The projection plane was subdivided five times to have good resolution. I made sure all the subtools were invisible except the projection plane and head. I launched the Zwrap application by going into zplugin tab. You can refer to the images for this workflow from the link here.
In Zwrap I started adding points on the image and its corresponding points on my model. I ensured to add enough points around eyes, nose, lips, ears and chin. I clicked on start wrapping option after clicking the wrapping tab at the bottom. Once I was happy with the projection I clicked done and was redirected back to Zbrush. I exported this projected plane as an obj file from Zbrush.
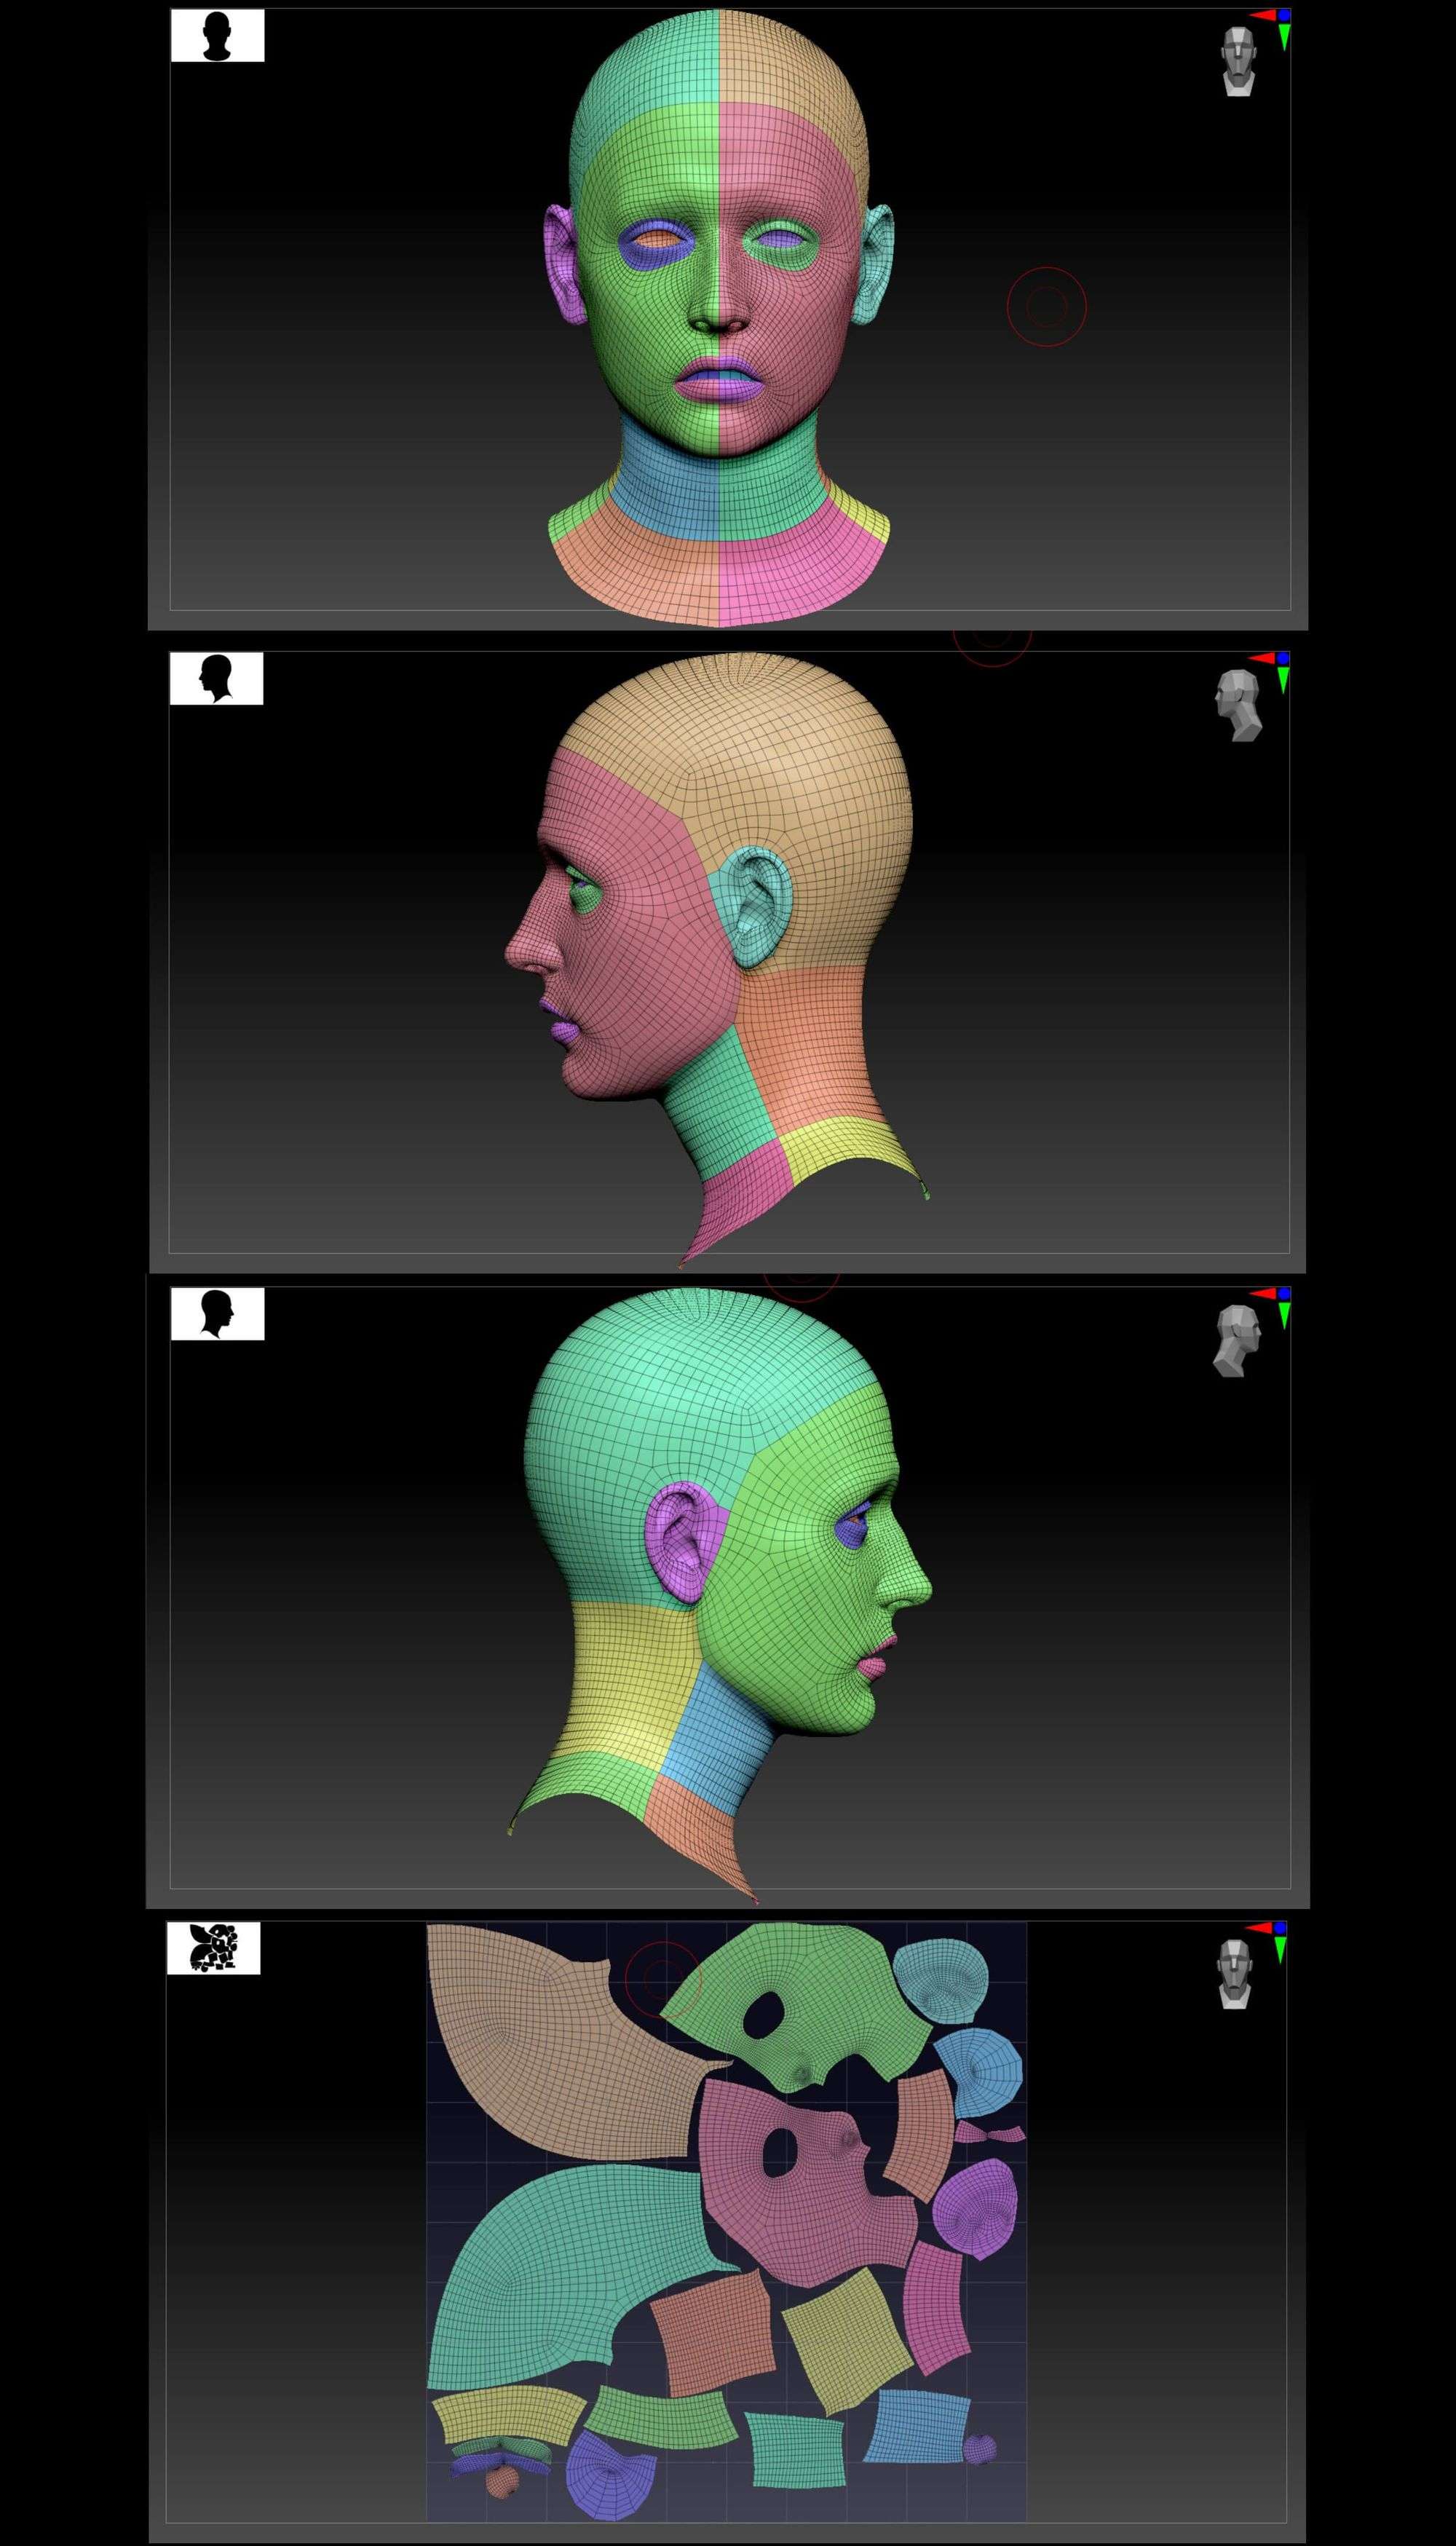
I created different polygroup sections on the head base mesh. I unwrapped it using Zbrush's UV master keeping symmetry and polygroups tabs on.
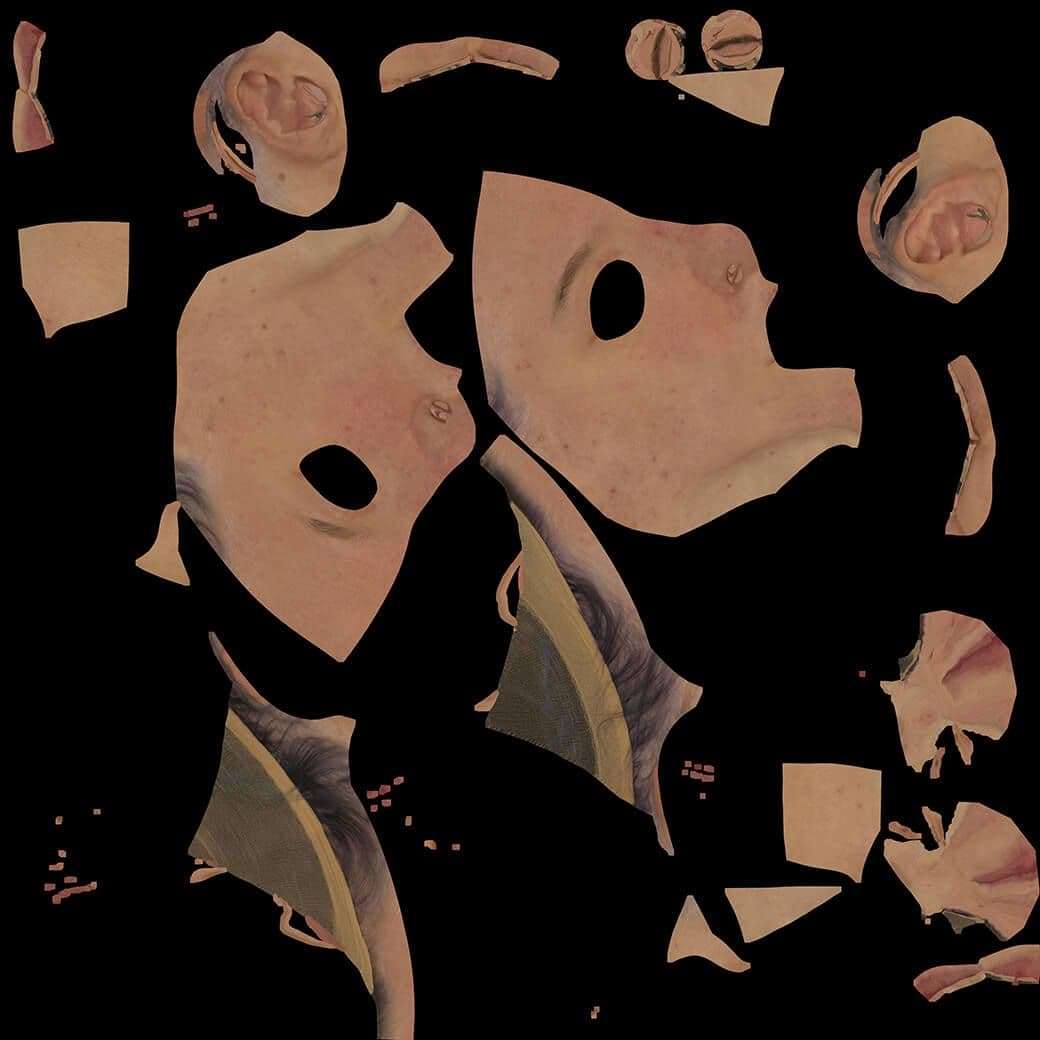
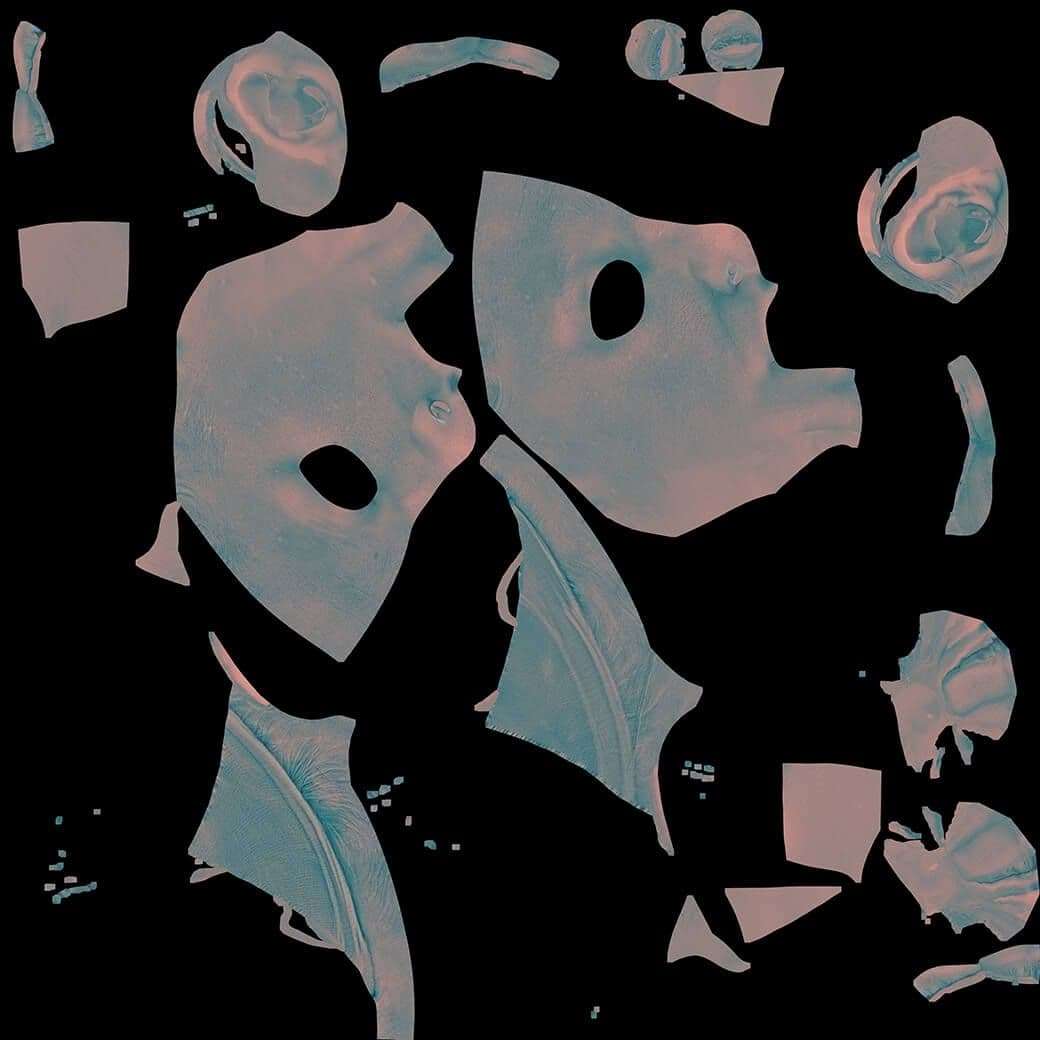
After this I went into the Xnormal application to generate the Diffuse map and Displacement map.
DIFFUSE MAP FROM XNORMALDISPLACEMENT MAP FROM XNORMAL
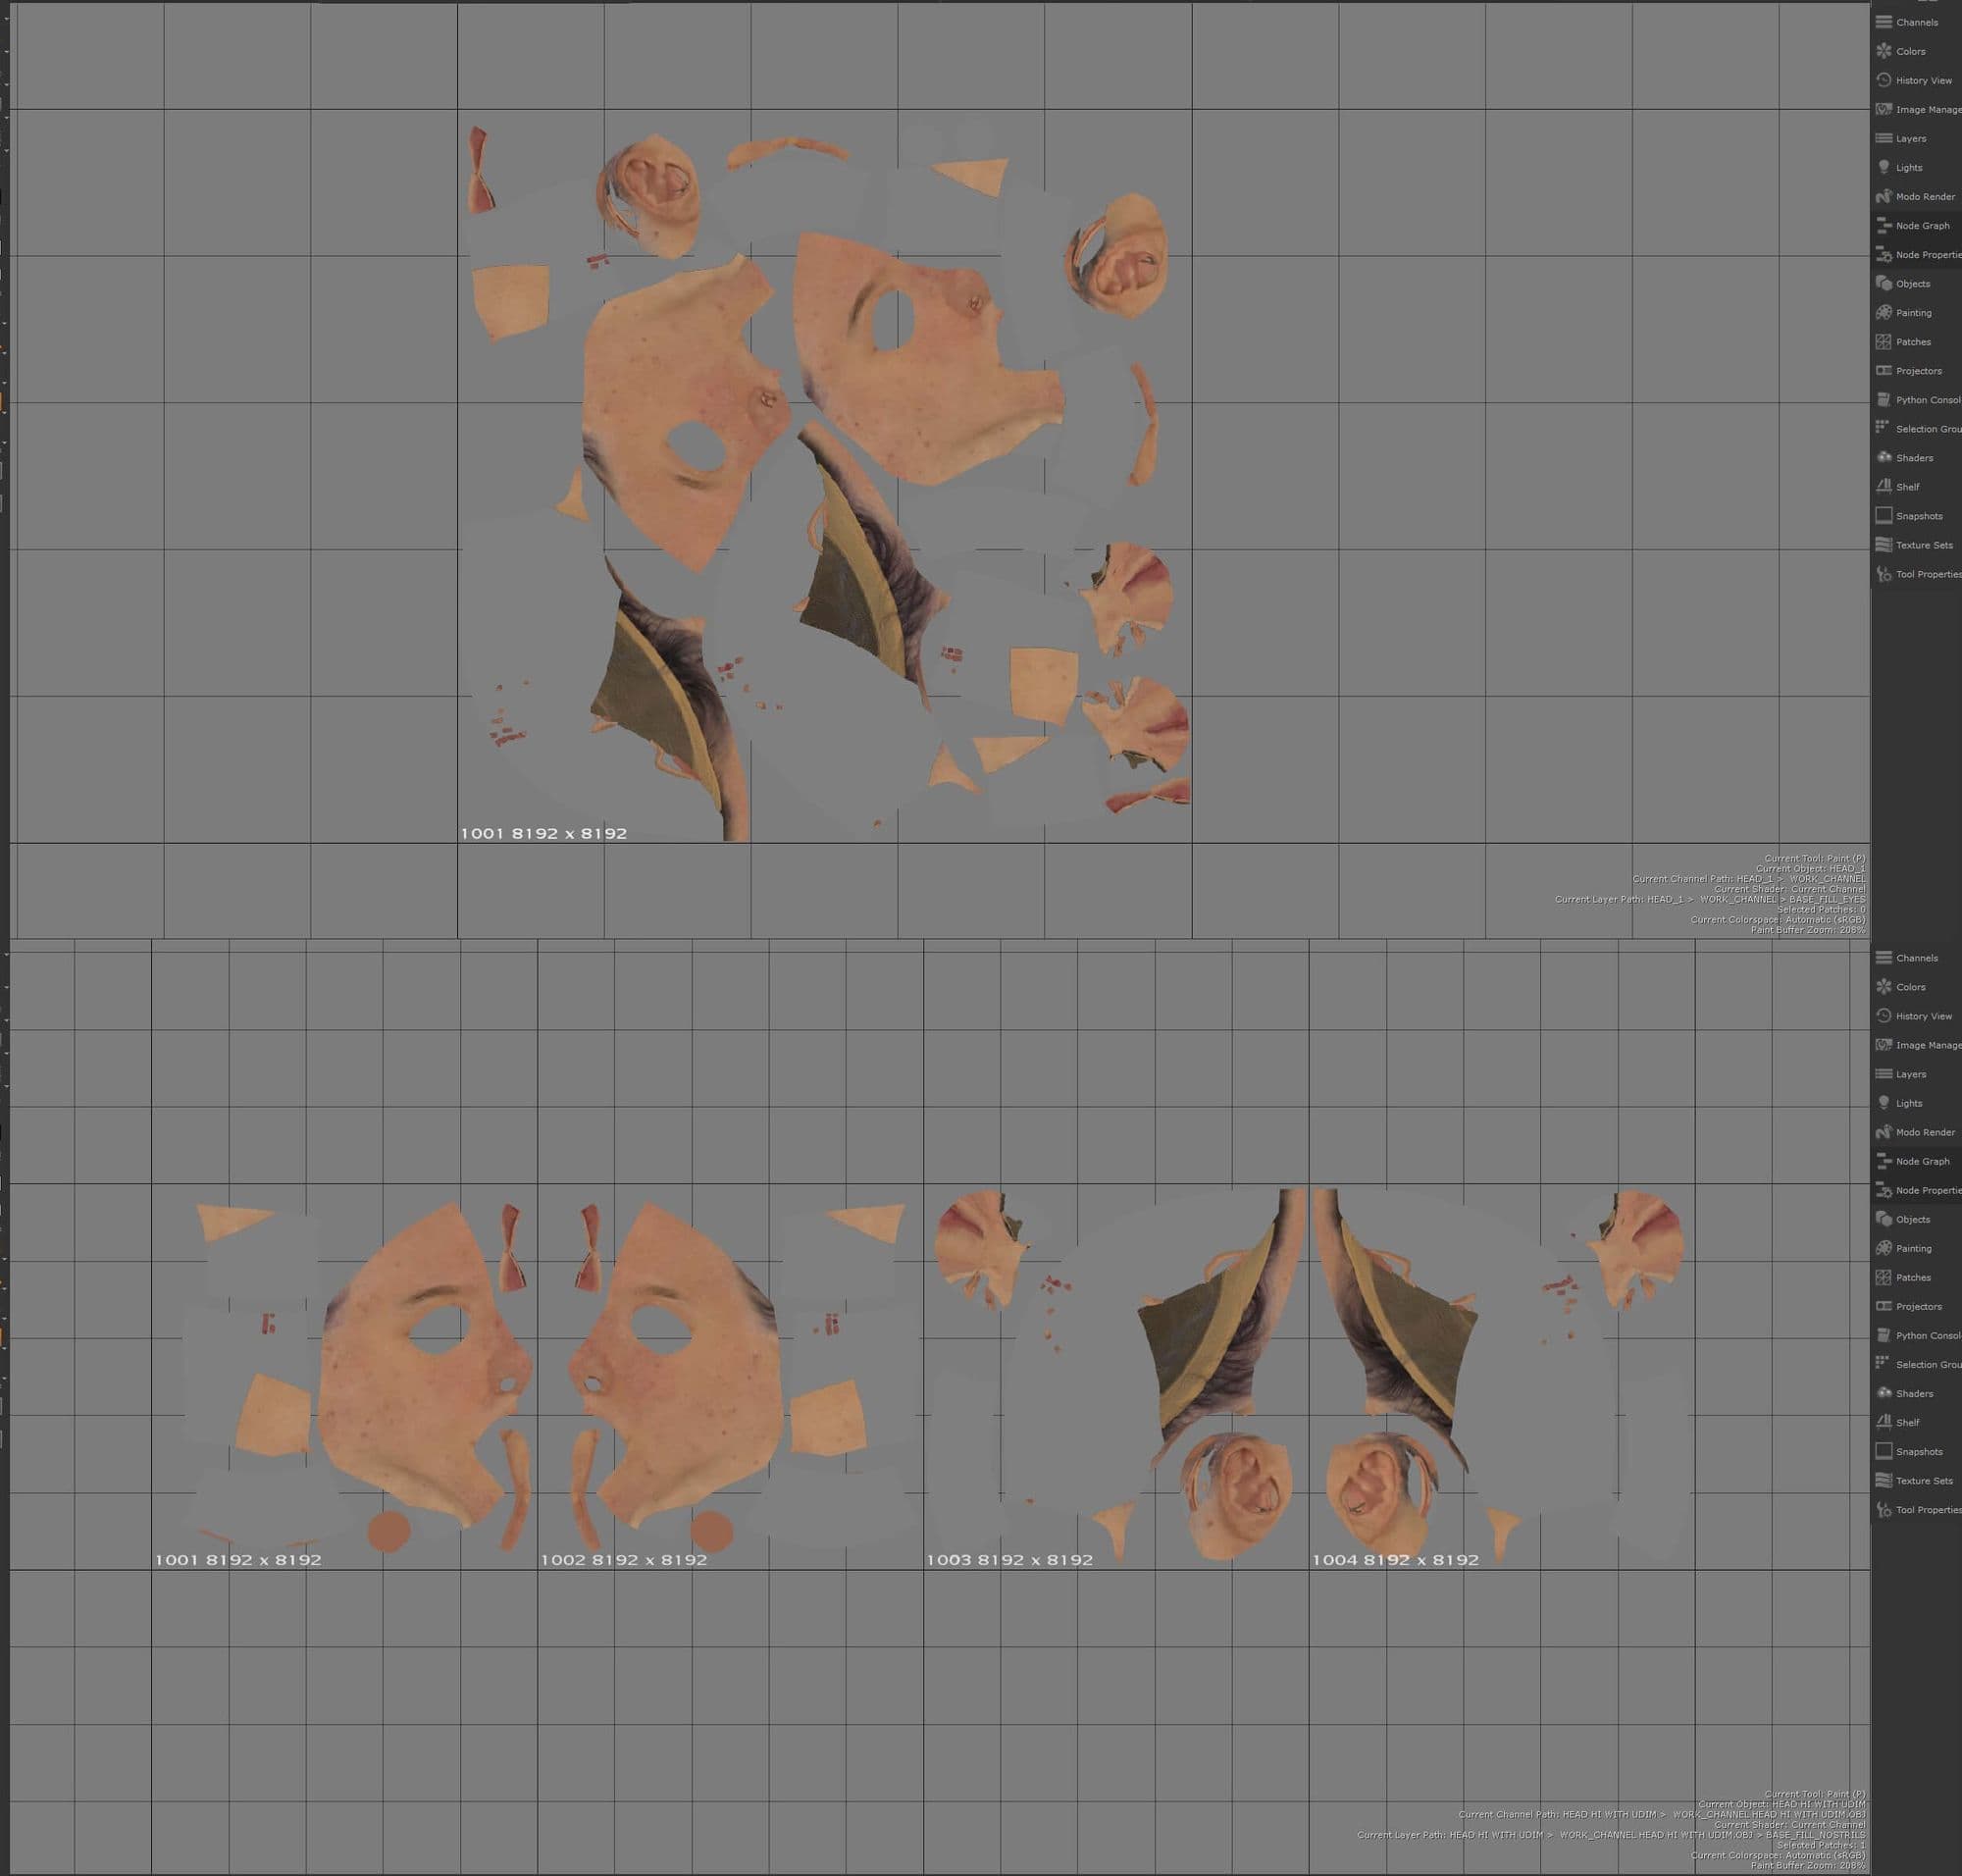
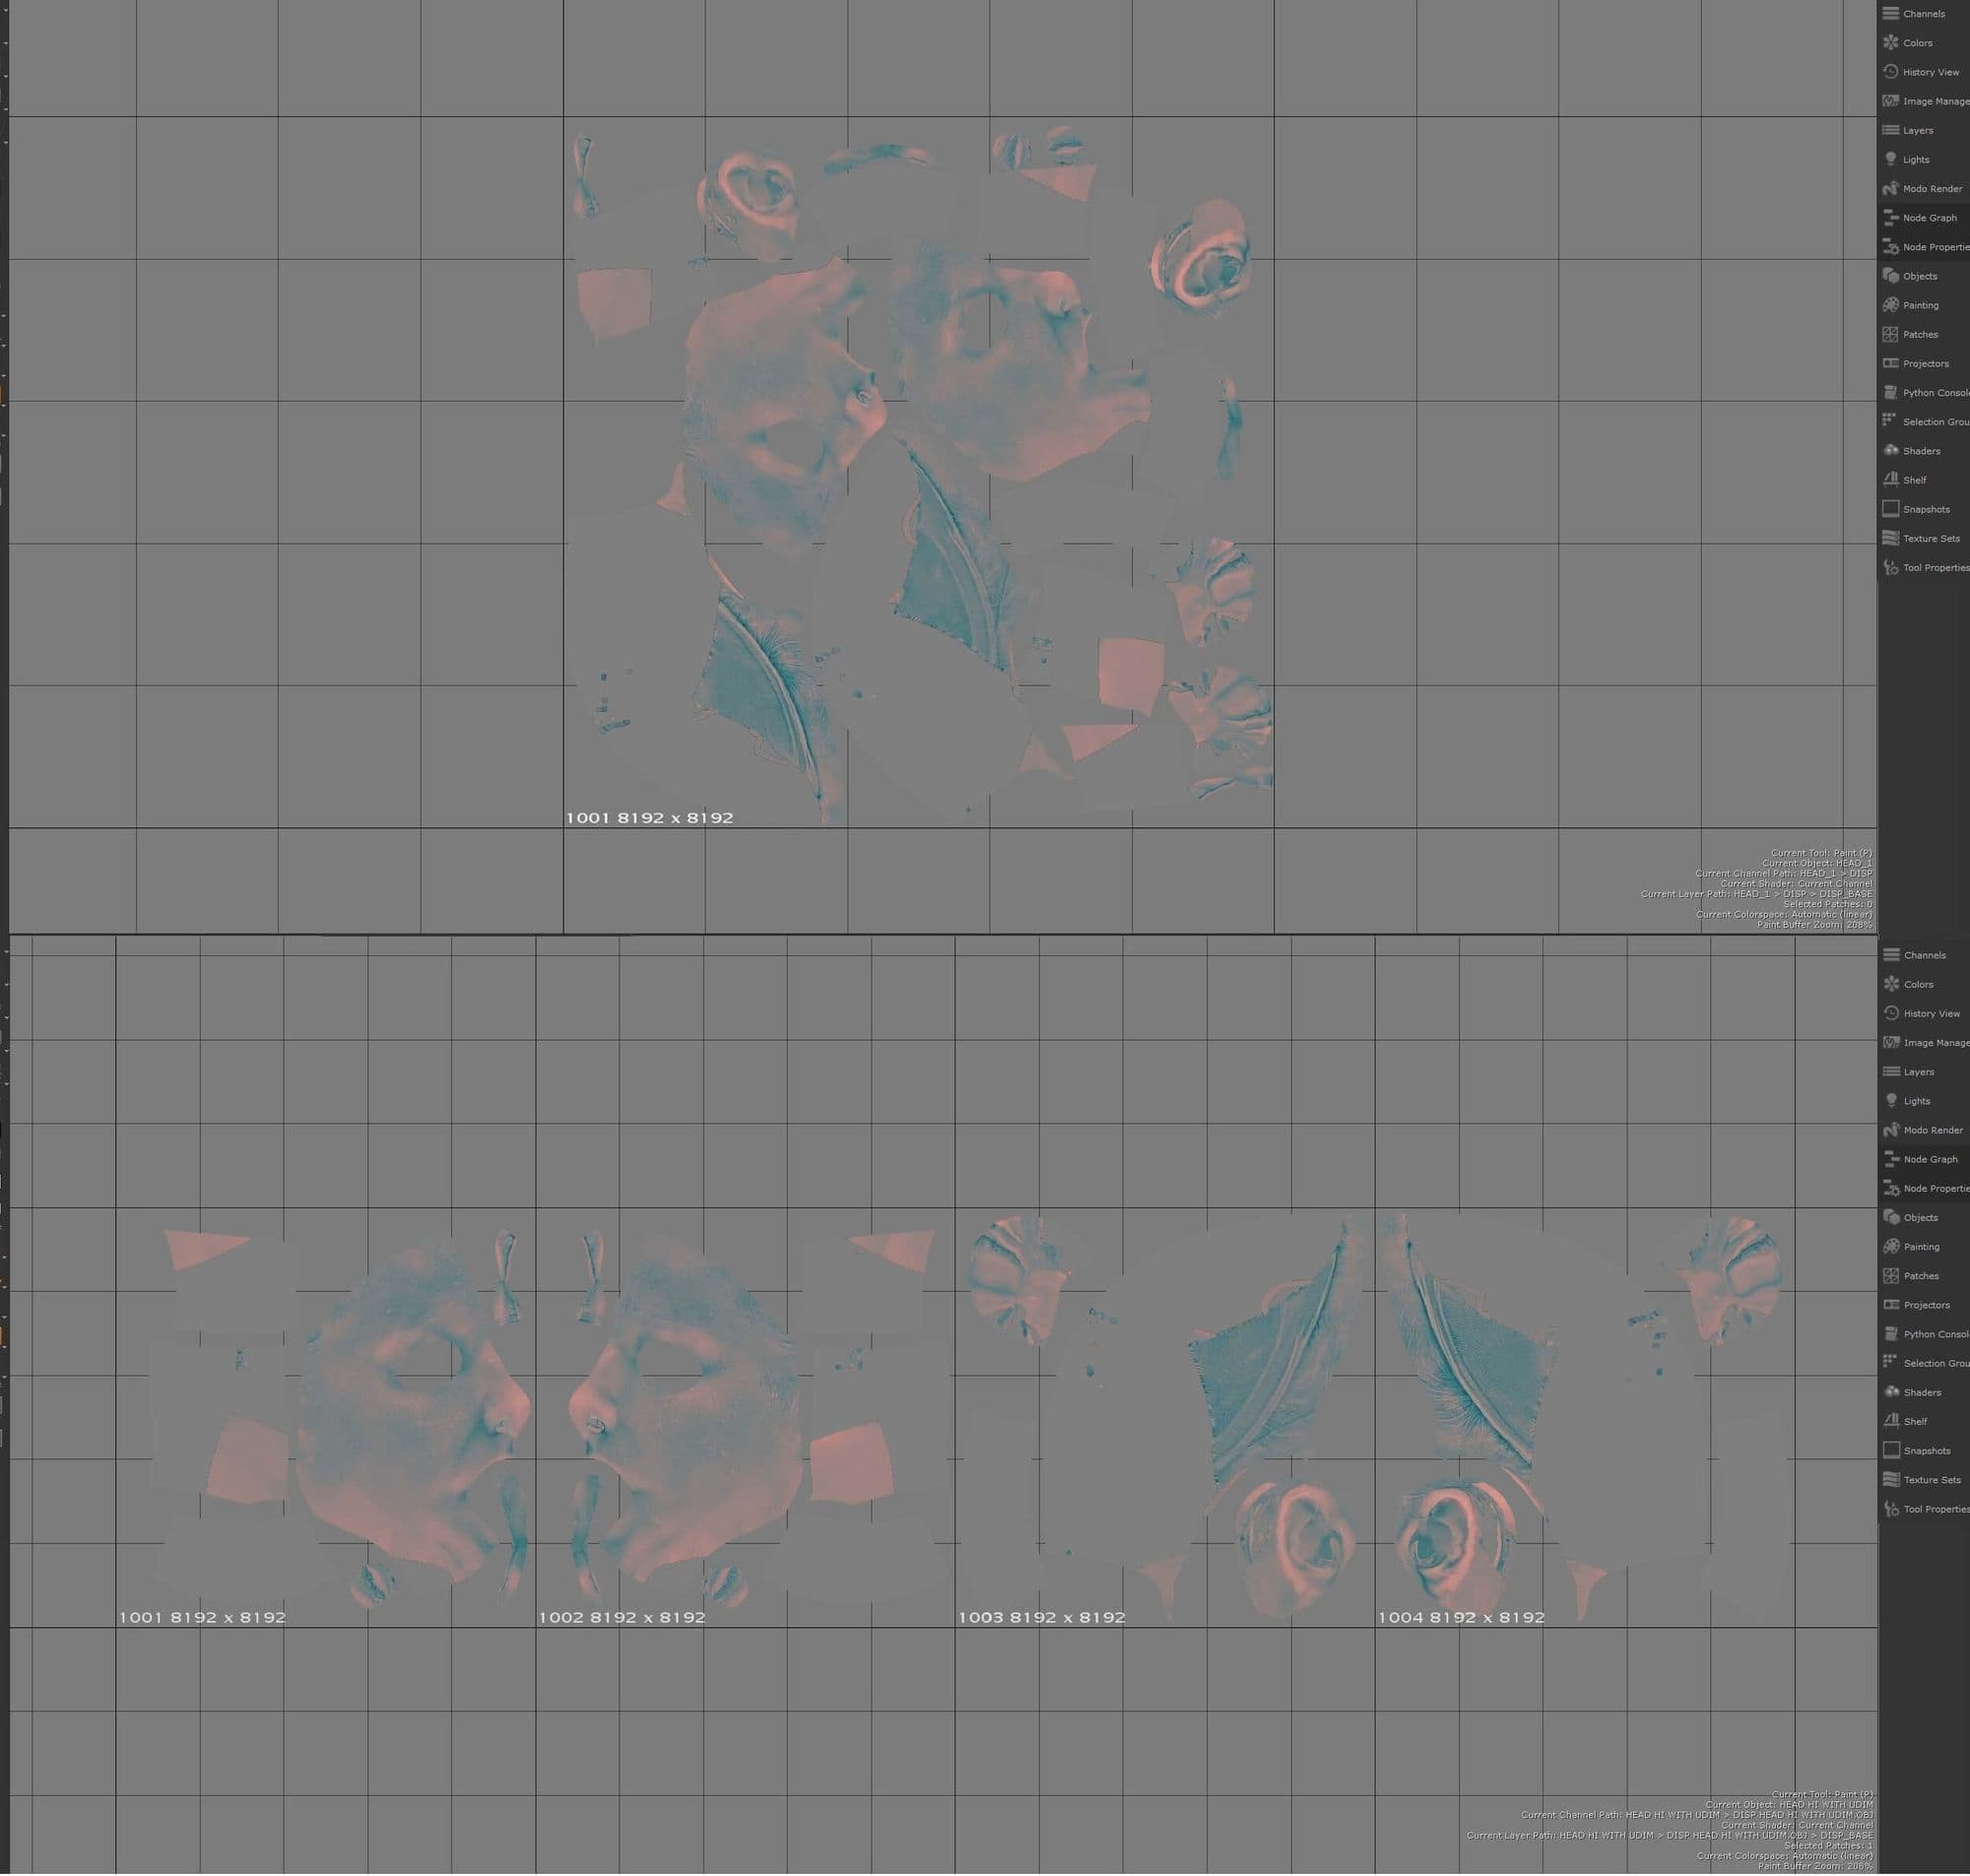
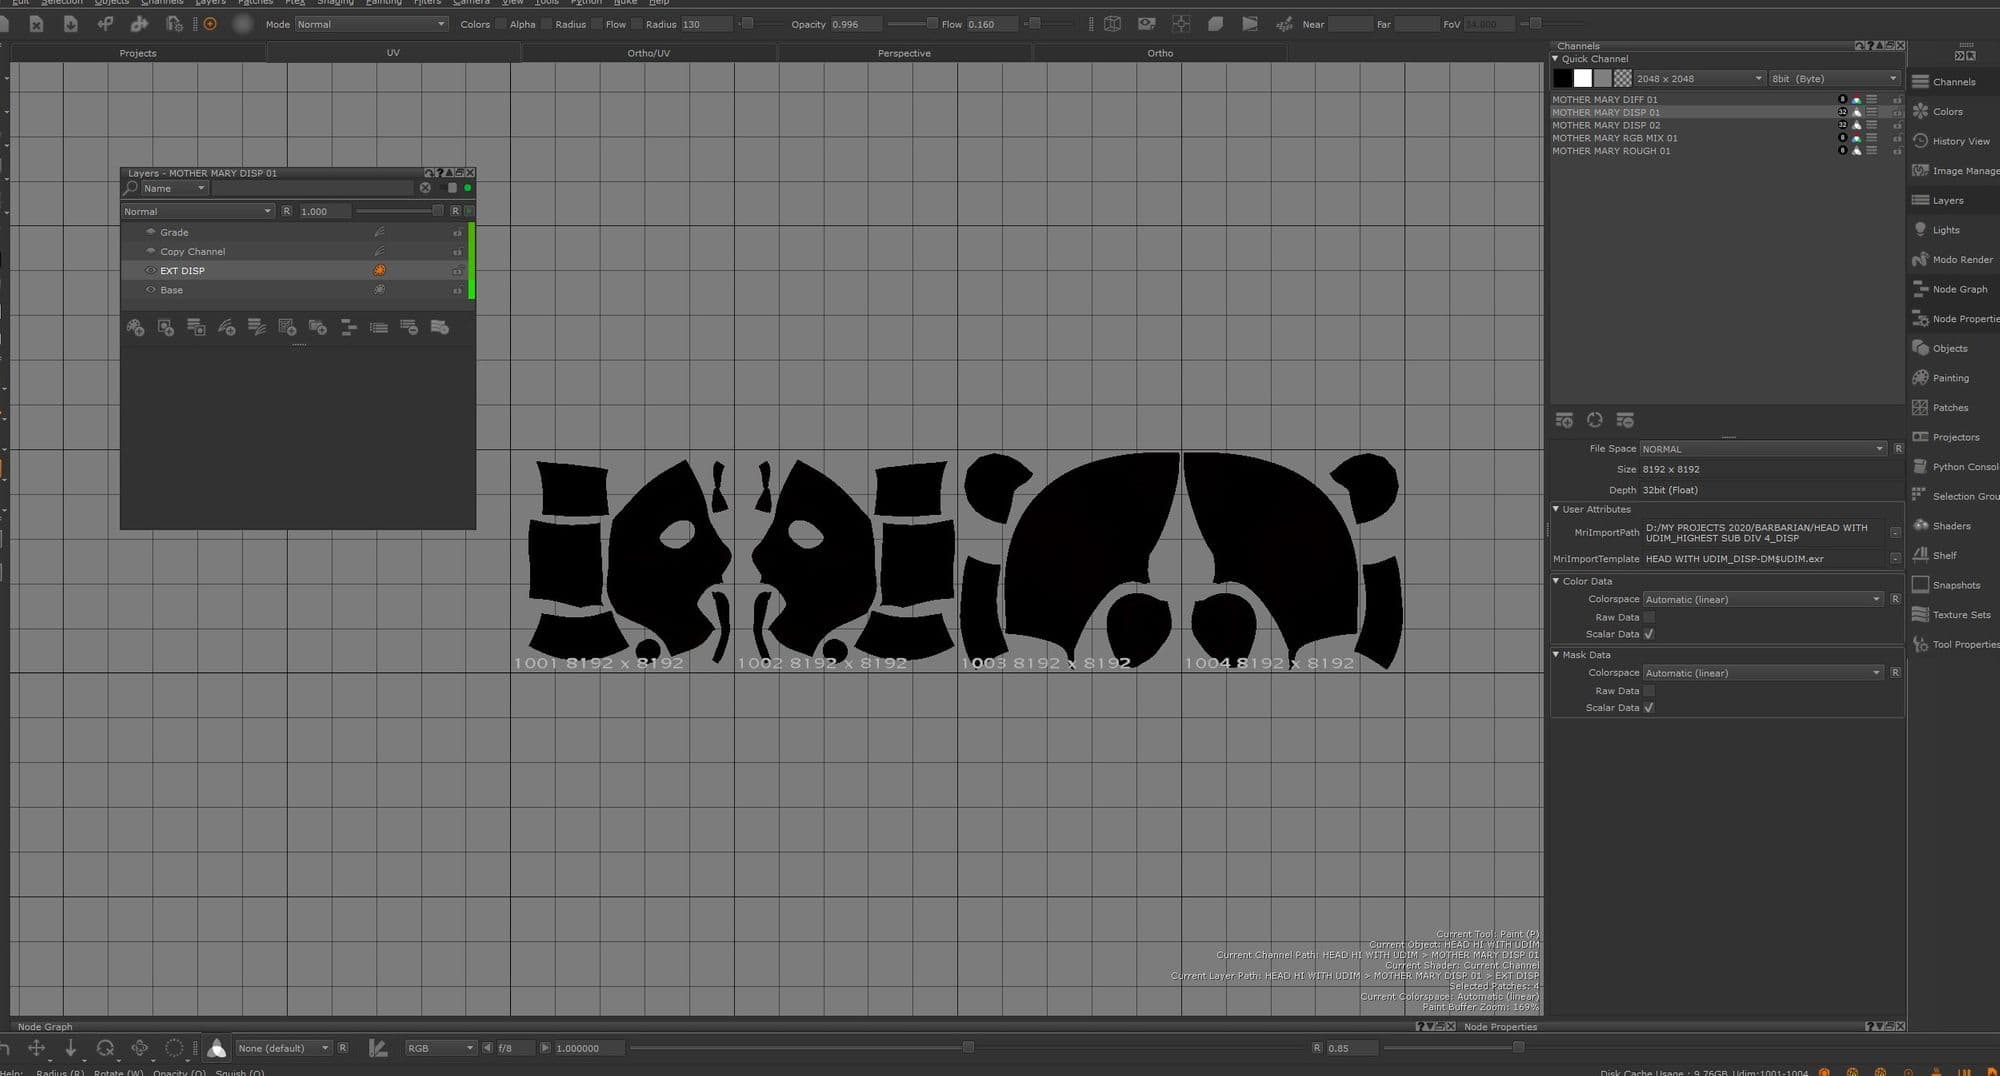
I then went into Maya and placed the UV shells of the head base mesh into 4 UDIMs to get more texture resolution. In Mari I created a new project and added two heads (one with UVs in single UDIM and other with UVs in four UDIMs).
I created an 8k (8 bit) diffuse channel and 8k (32 bit) displacement channel for both the heads. I copied & pasted the diffuse and displacement maps from image manager into the head with single UDIM. I then transferred both the maps from the head with a single UDIM onto the head with multiple UDIMs. I followed this video to do so.
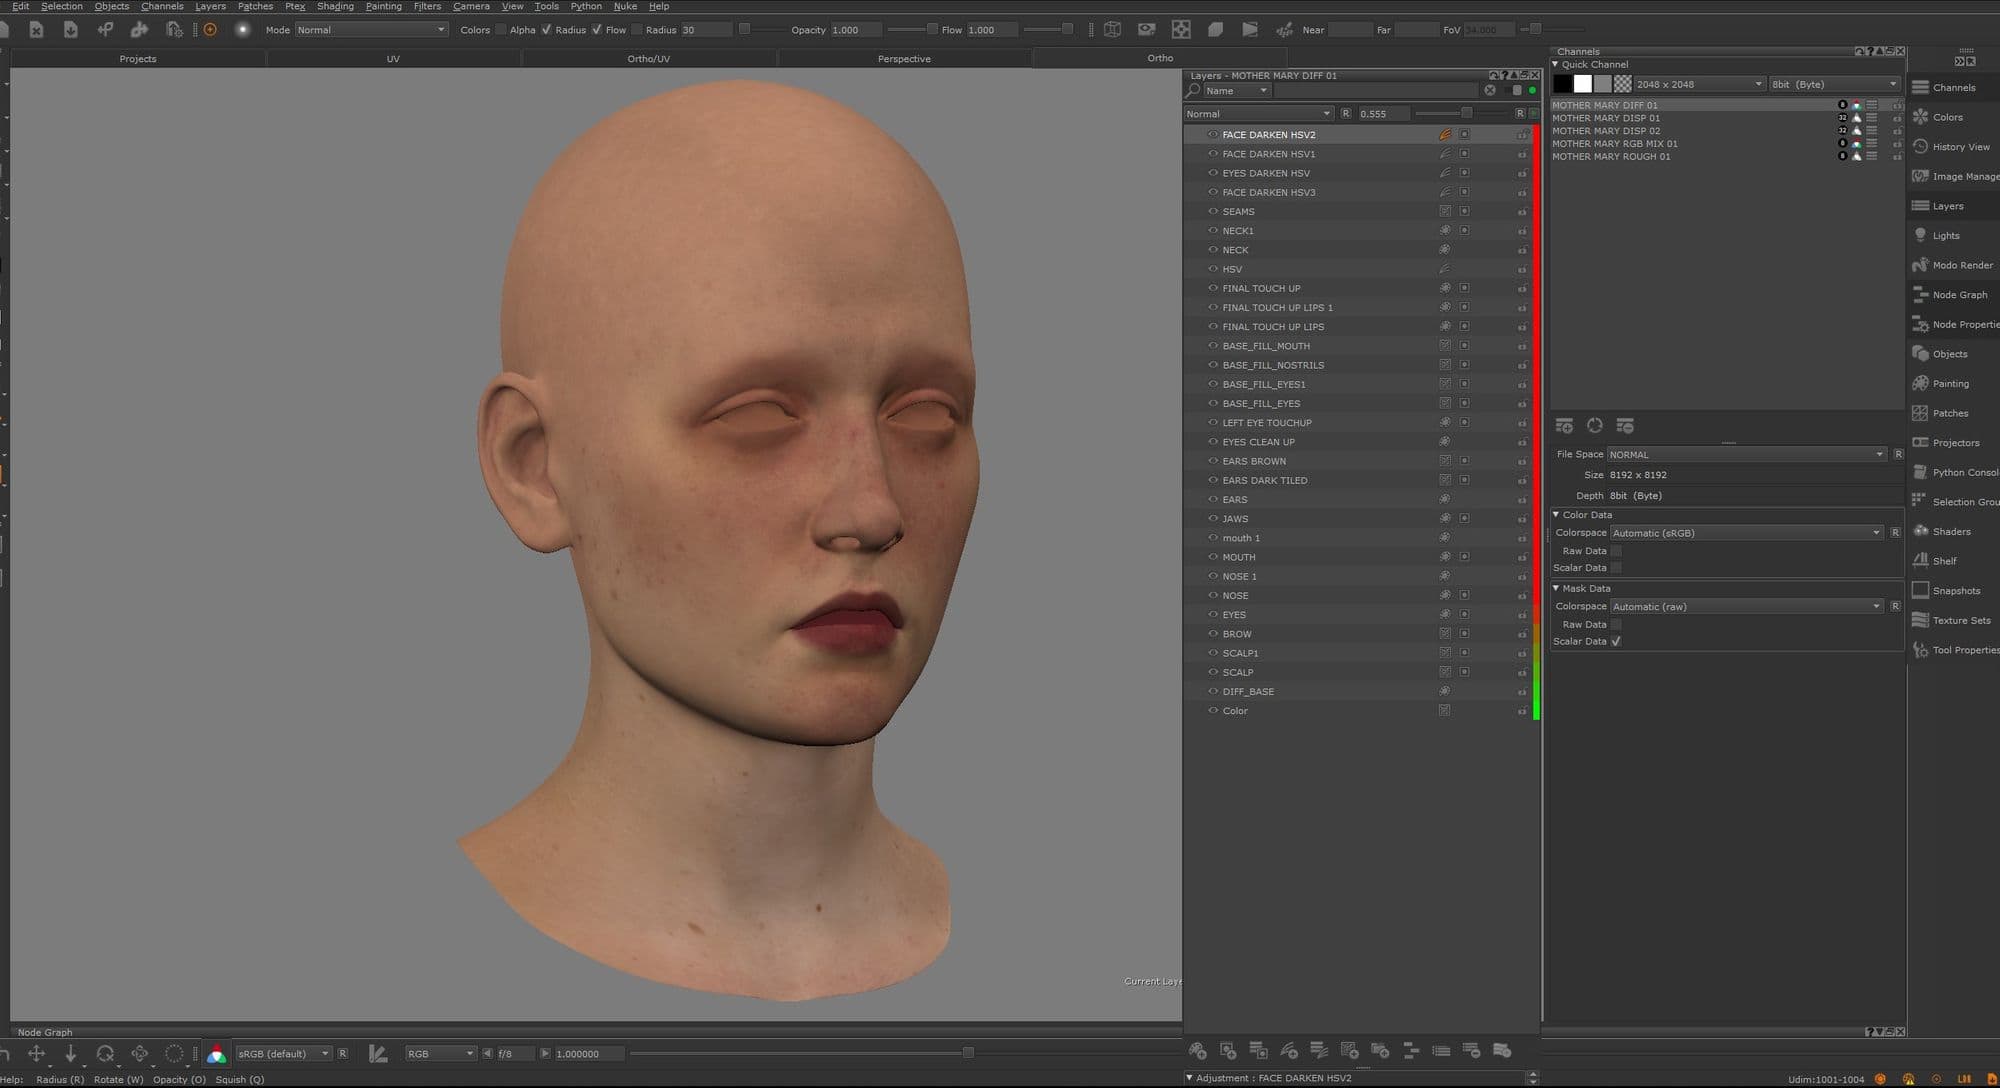
With the diffuse channel selected, I created individual procedural base fill layers for the eyes, nostrils and mouth. I matched the colour with their nearest area’s skin tone colour. I used "hide all masks" and painted with white colour the areas I wanted visible. I used basic brushes such as default brush, hard brush and supersoft brush. I painted in both UV view and perspective view.
I created the same procedural base fill layers with 50% grey value for the displacement channel. I copied the masks from the diffuse channels into the displacement channel.
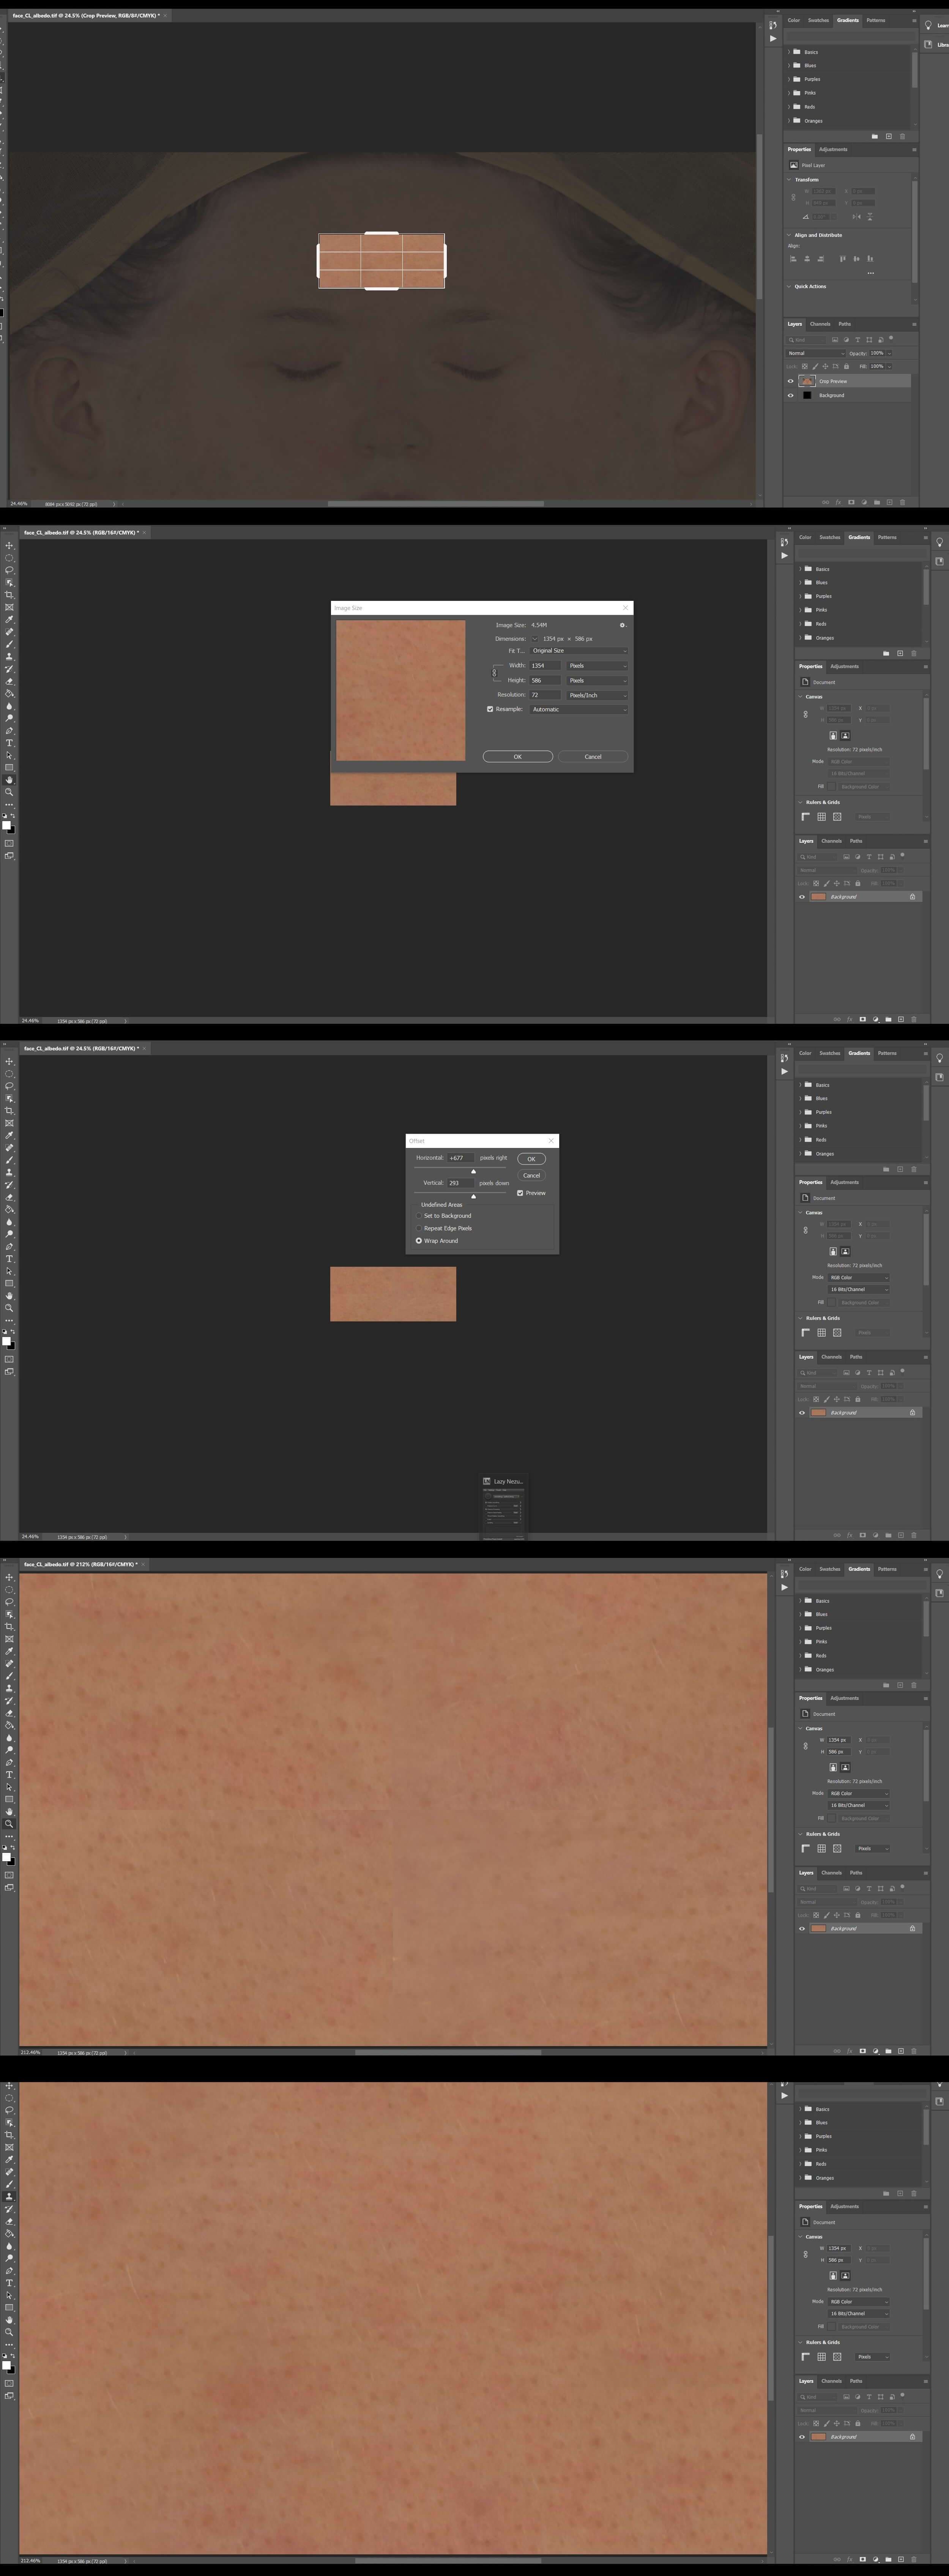
In the next step I created my own tileable maps in Photoshop from the albedo and displacement maps from texturing.xyz maps.
For tileable diffuse maps I cropped a skin area from the image. I noted the size of the cropped image in pixels (1354 x 586 pixels) from image size option under the image tab. Then I went to the offset option which is available under the other options under the filter tab. I entered half of the value of image resolution (which in this case is 677 x 293 pixels). I used the spot healing brush and clone stamp tool to remove artifacts and seams. I created a few more of them for different regions.
For tileable displacement maps I followed the same steps as above.
I used these tileable textures for filling in and cleaning the areas such as the scalp, neck and brow regions. I created a tiled pattern procedural layer with "hide all mask". I played with the offset and repeat values to get the desired result.
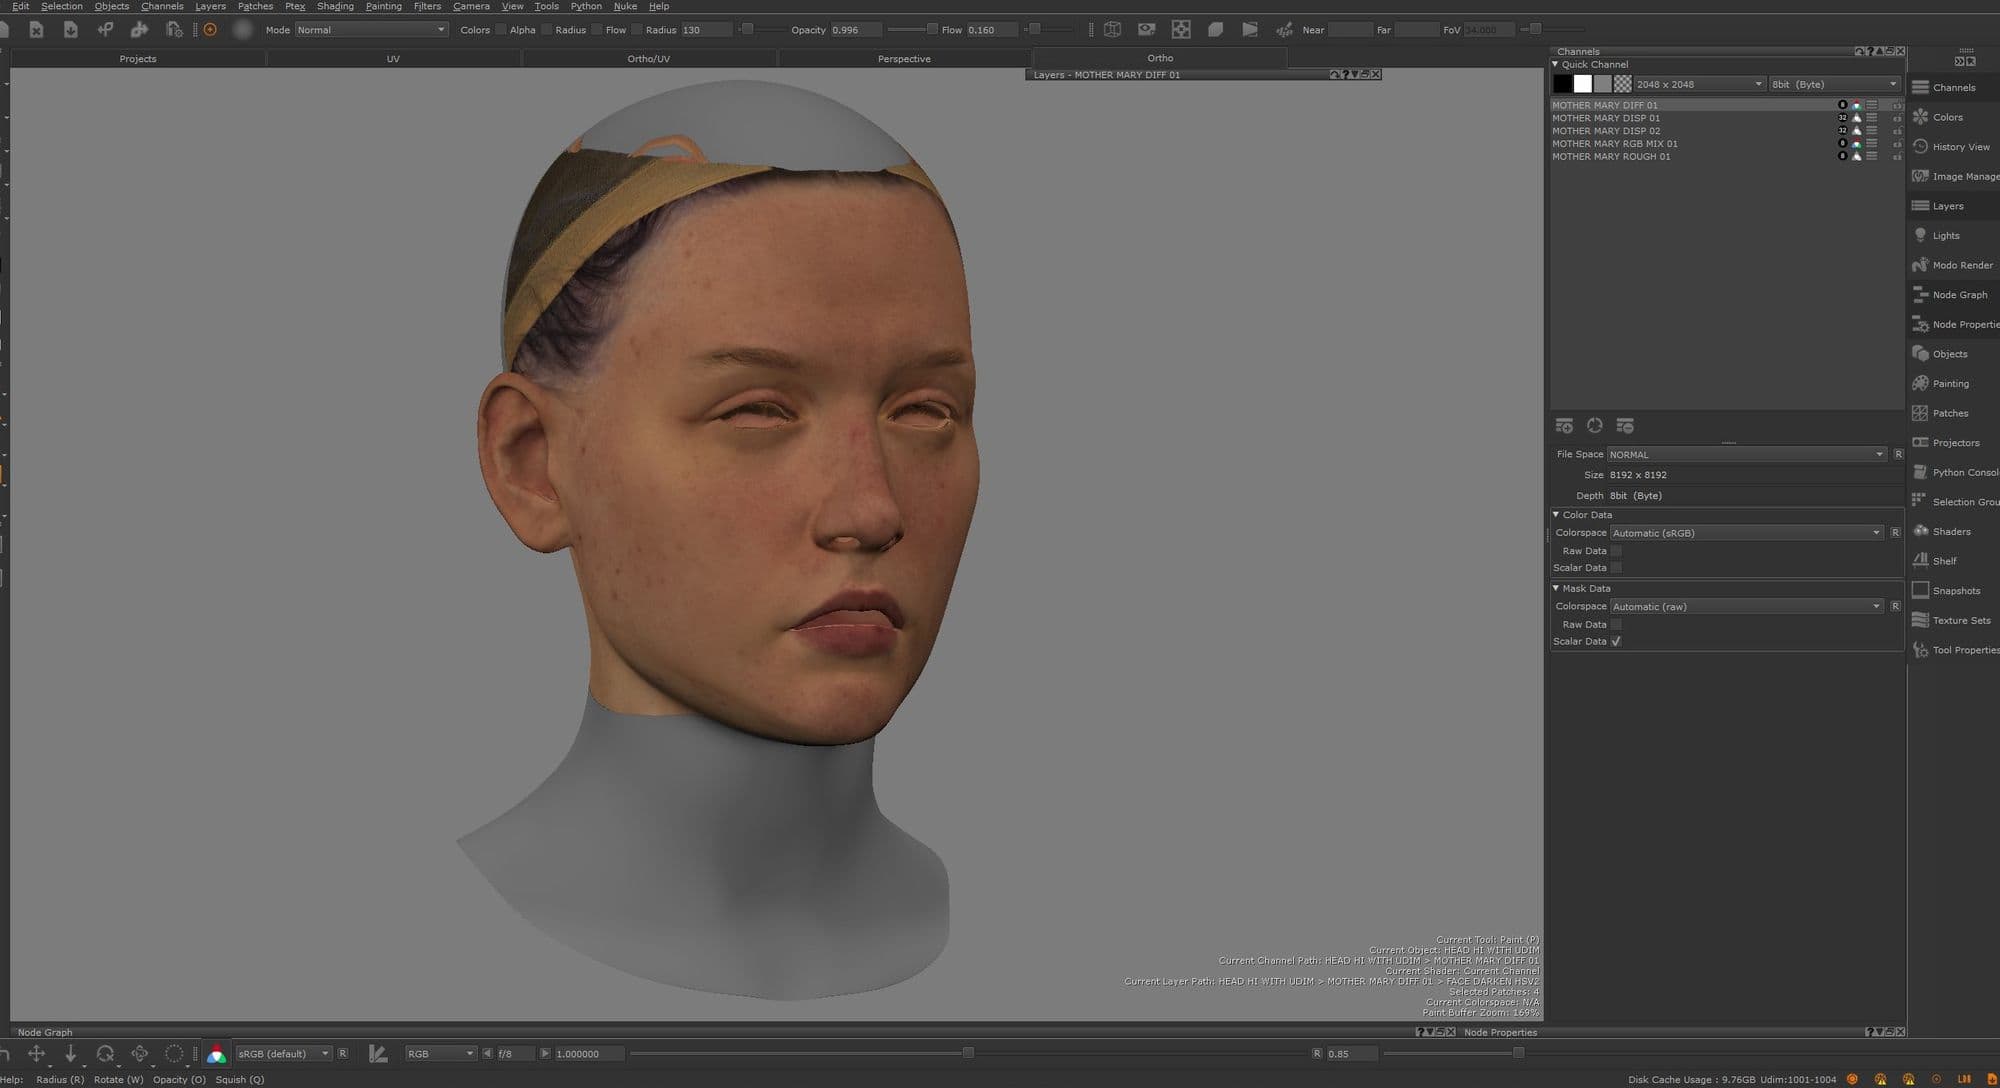
I then worked on individual areas step by step. I created a paint layer and used supersoft brush to project details from albedo and displacement maps from texturing.xyz. I used show hide all masks whenever necessary. I used HSV layer for colour correction and did some paint-overs to enhance the look in the diffuse channel.
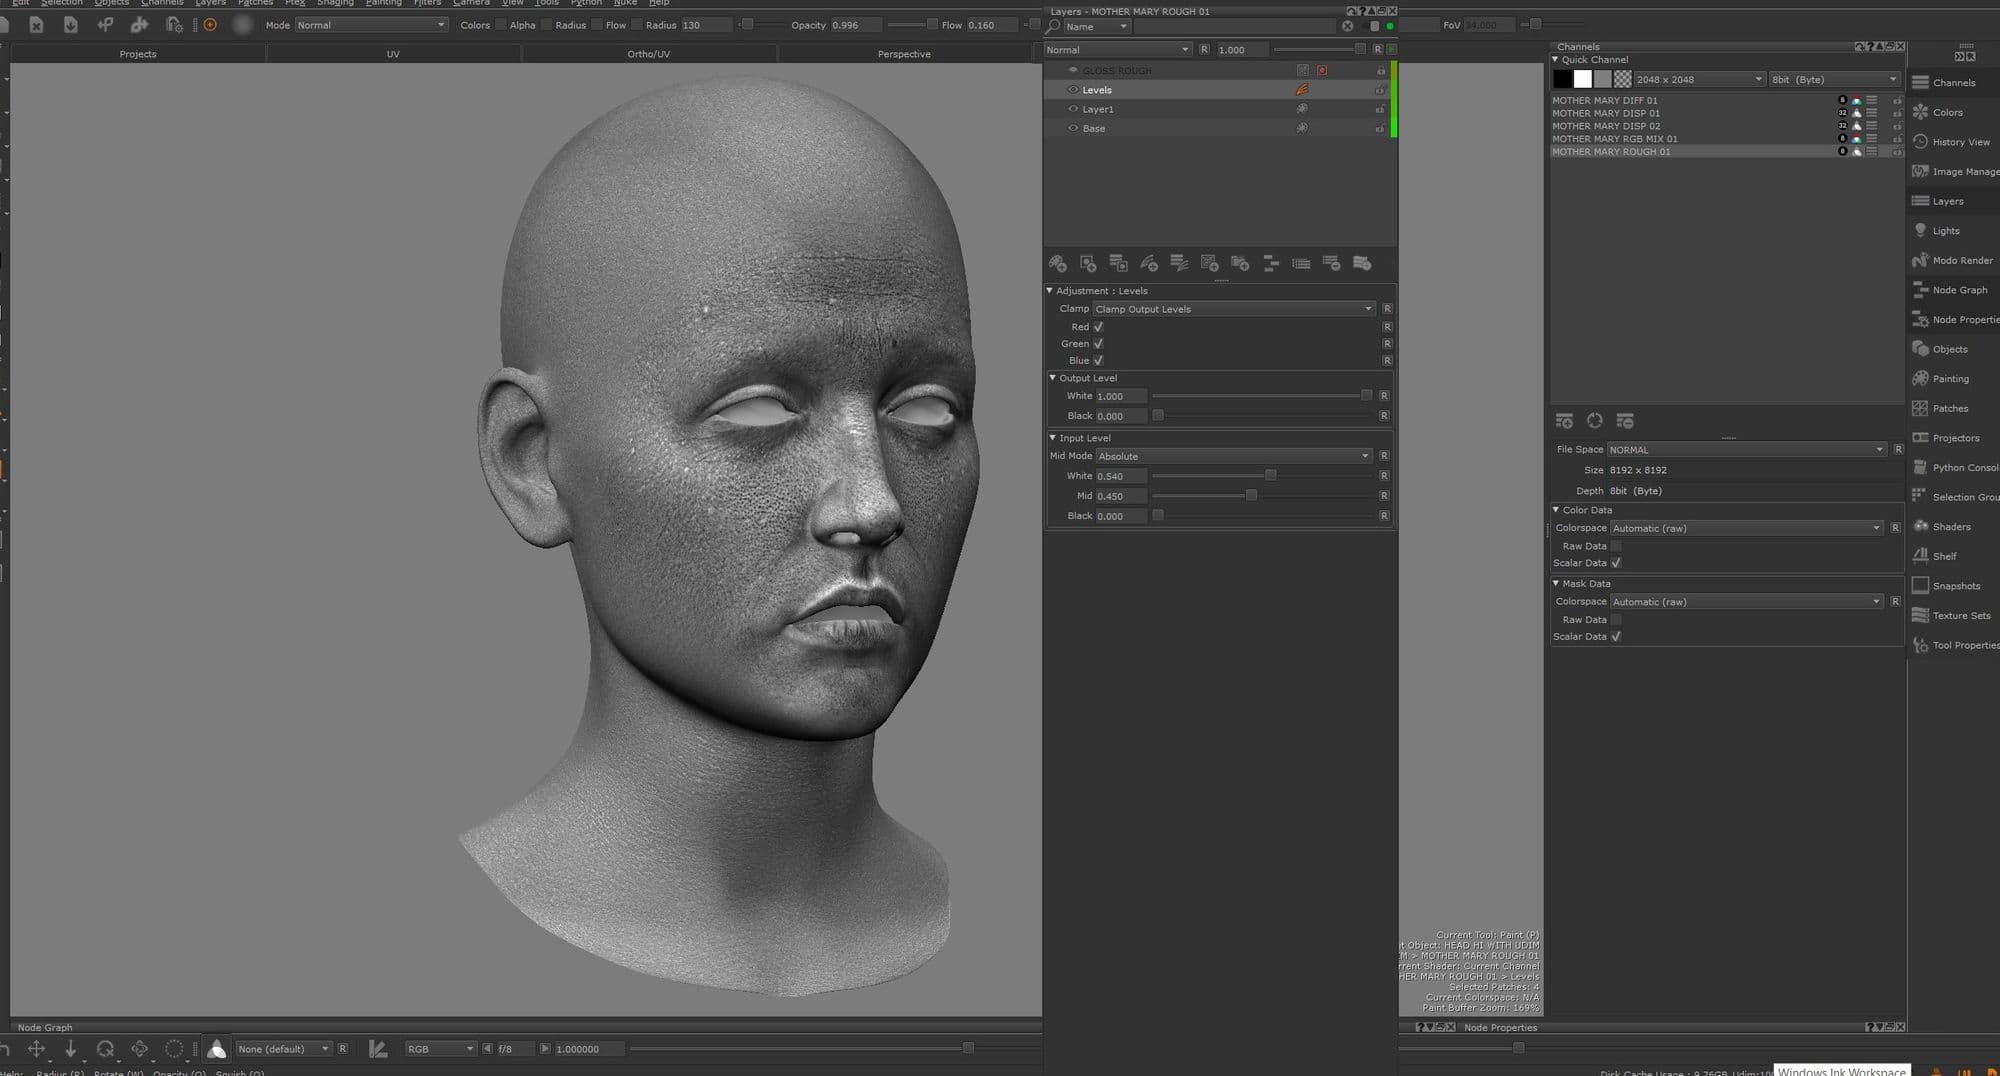
I created an 8k (8 bit) roughness channel and a copy channel layer on top of the layers of the displacement channel, and set the channel to green. I copied all the layers of the displacement channel and pasted them in the roughness channel.
In the roughness channel I merged all the layers into a single layer. These layers were copied from the displacement channel. I created a level adjustment layer on top of it to get a better contrast.
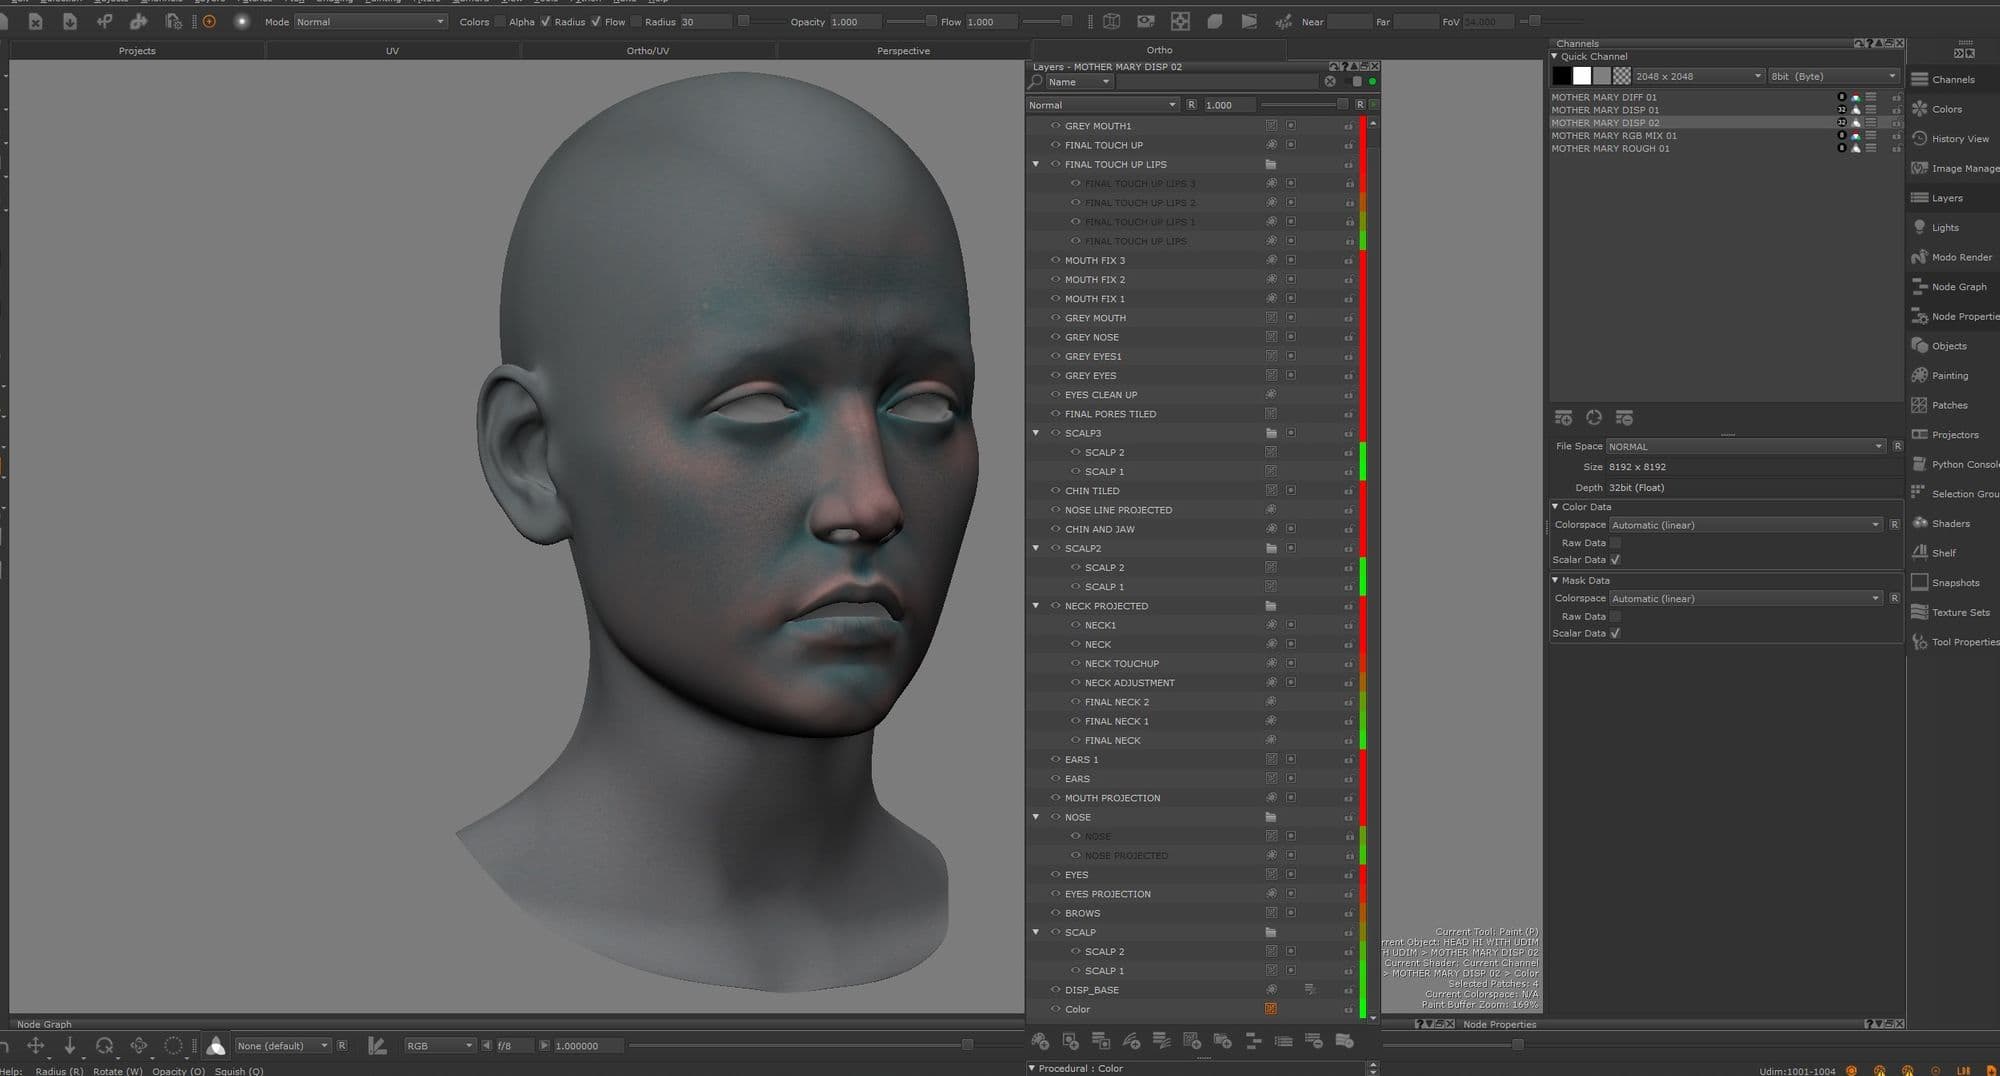
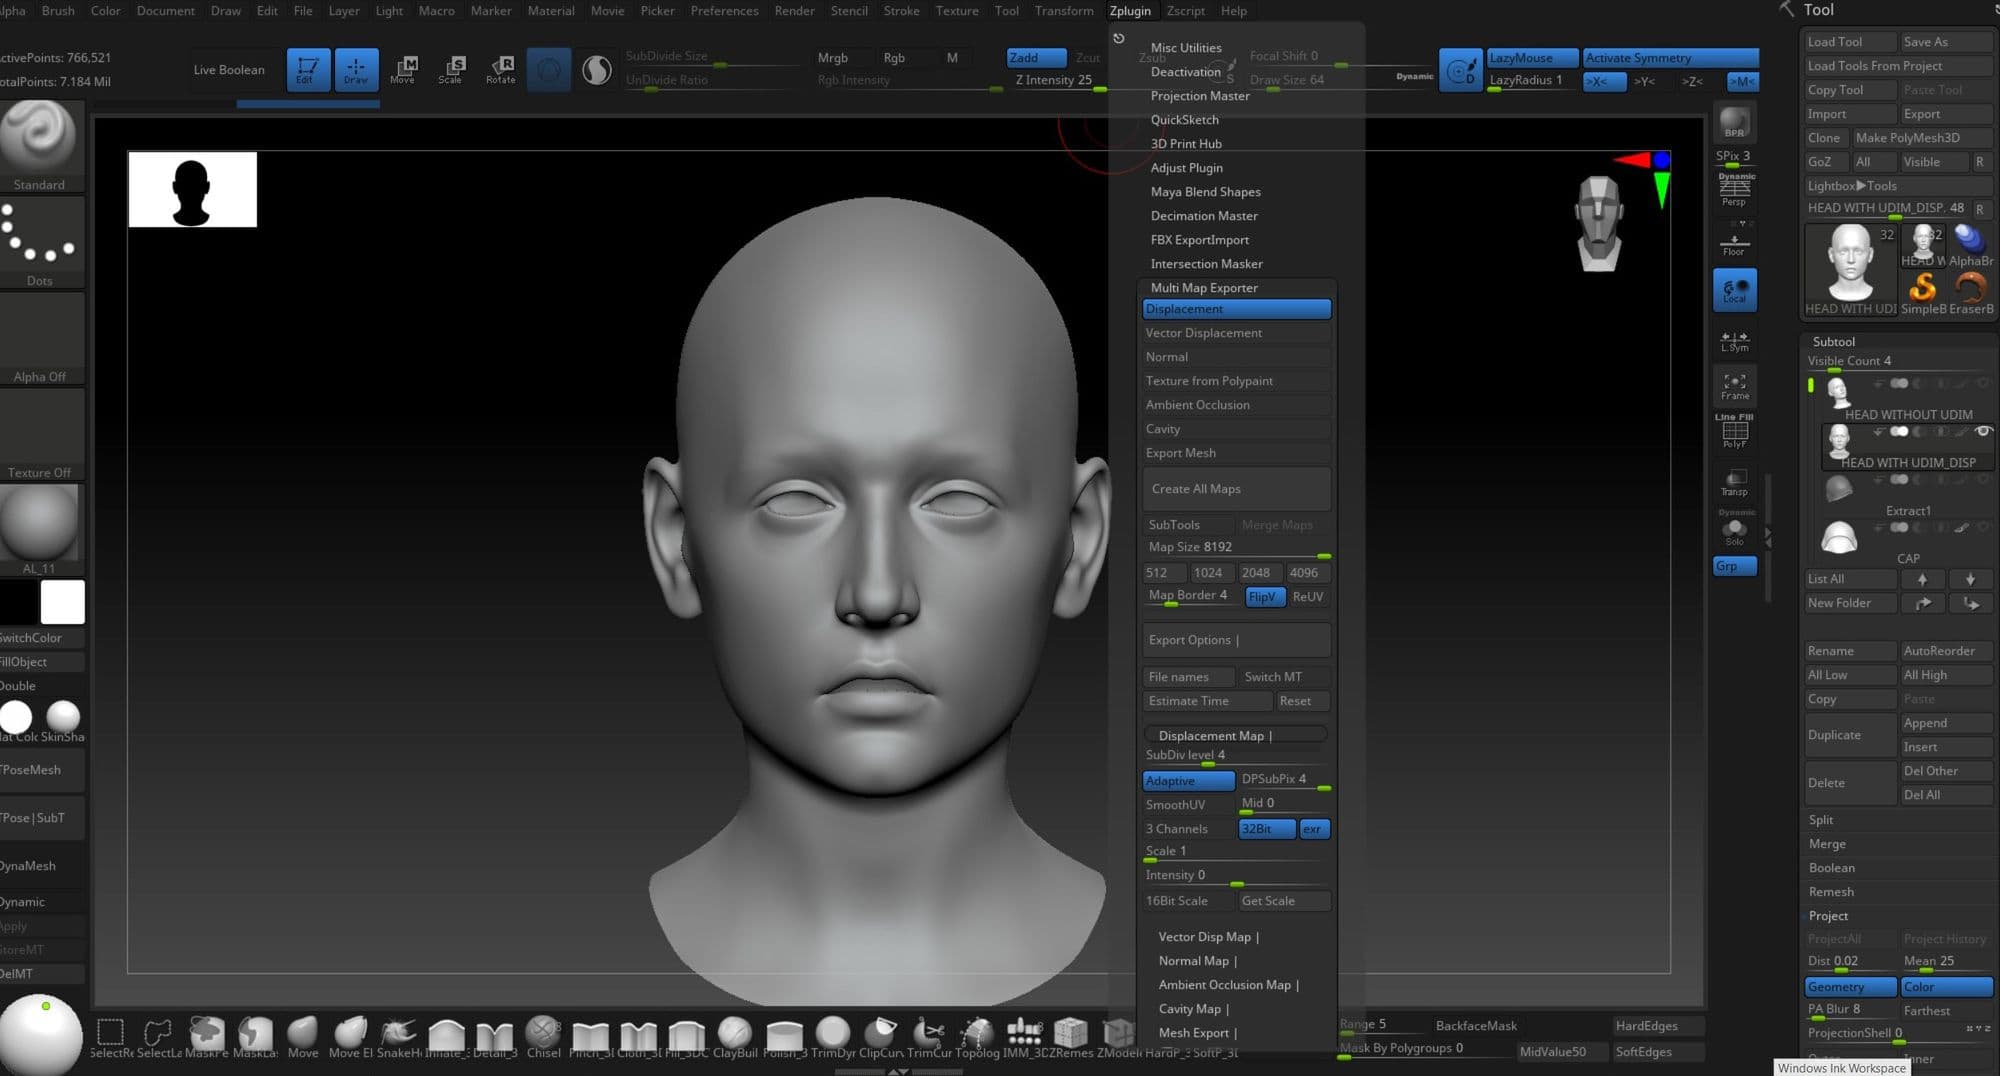
I created another 8k (32 bit) displacement channel to import displacement maps from Zbrush. I went back to Zbrush and exported the displacement map. All settings are represented in the image below.
I imported the displacement map by right clicking inside the layer tab. Clicking import into new layer under the import option.
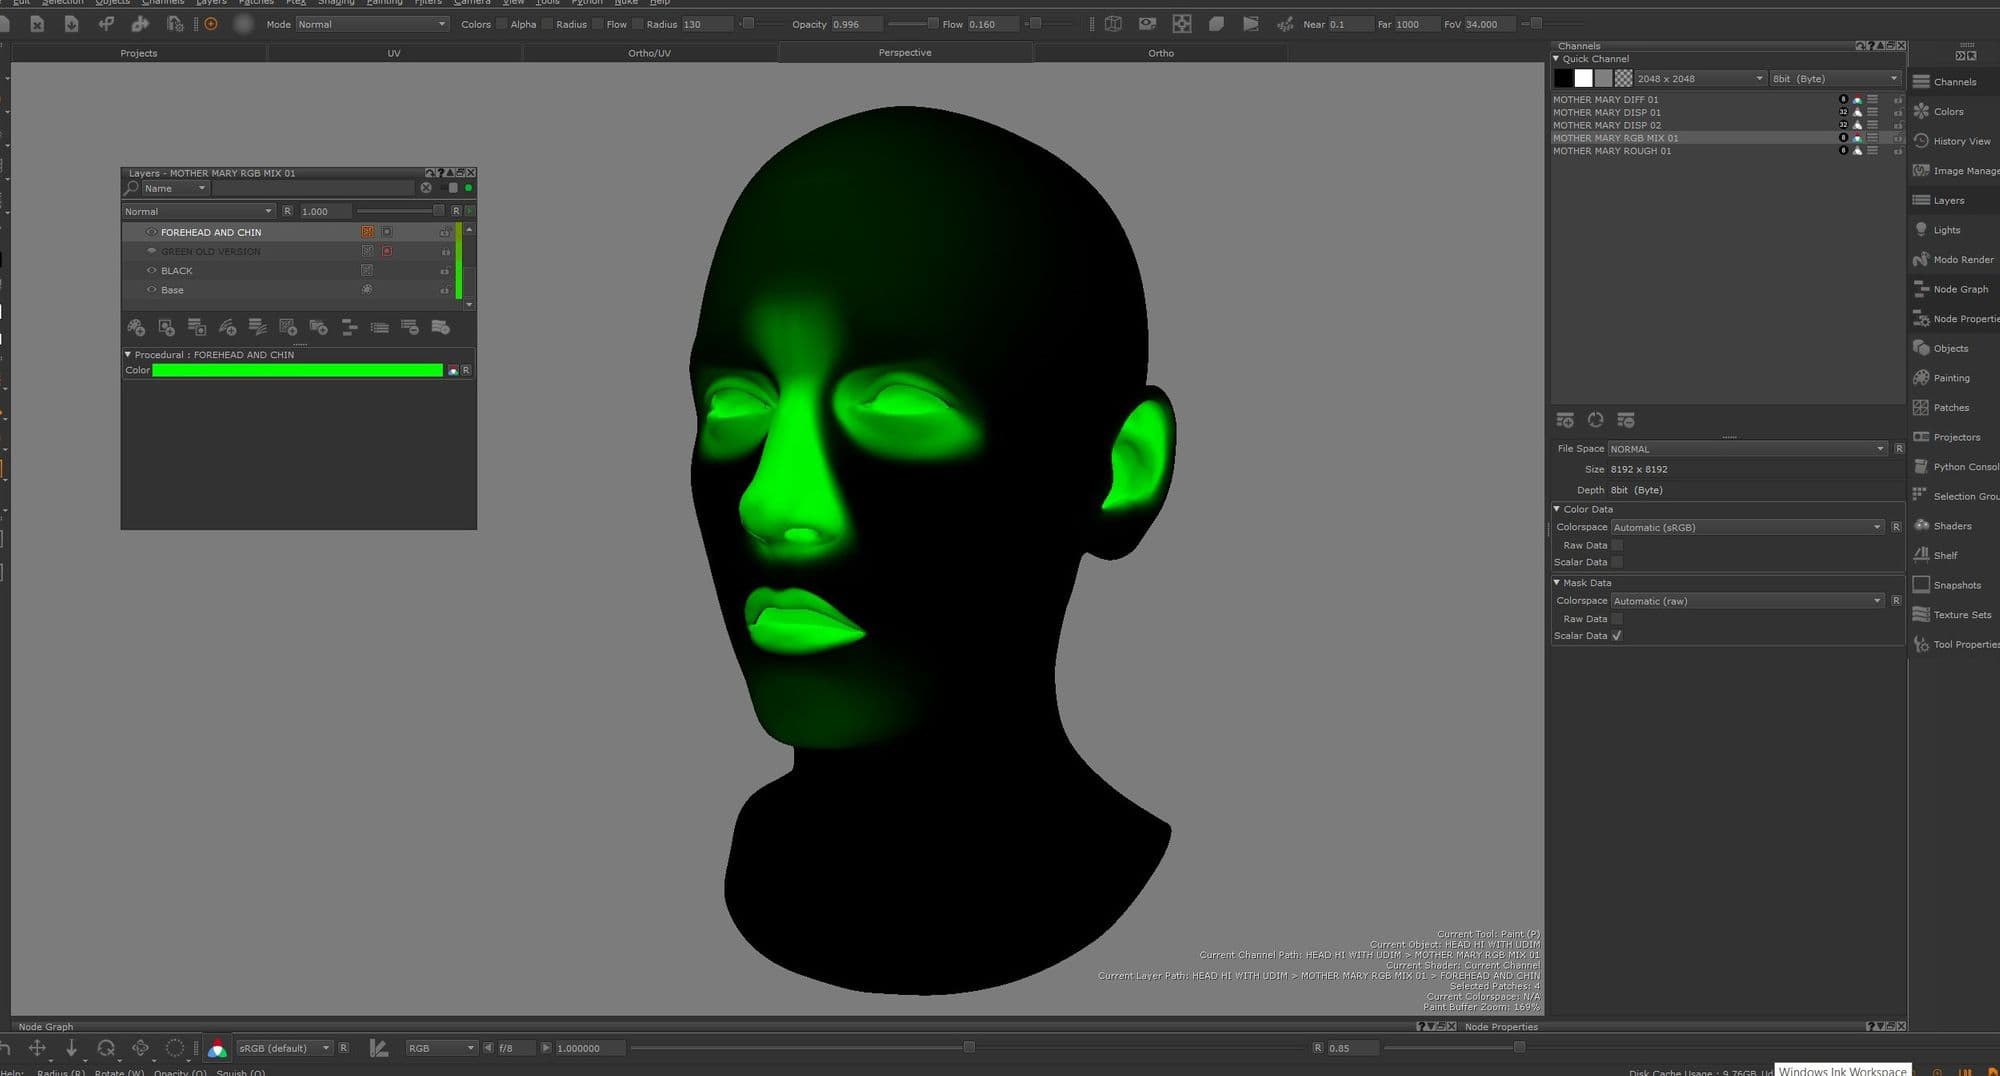
I created an 8k (8 bit) RGB mix channel to control specularity. I made two paint layers namely green and black. The green painted areas represents areas which are specular.
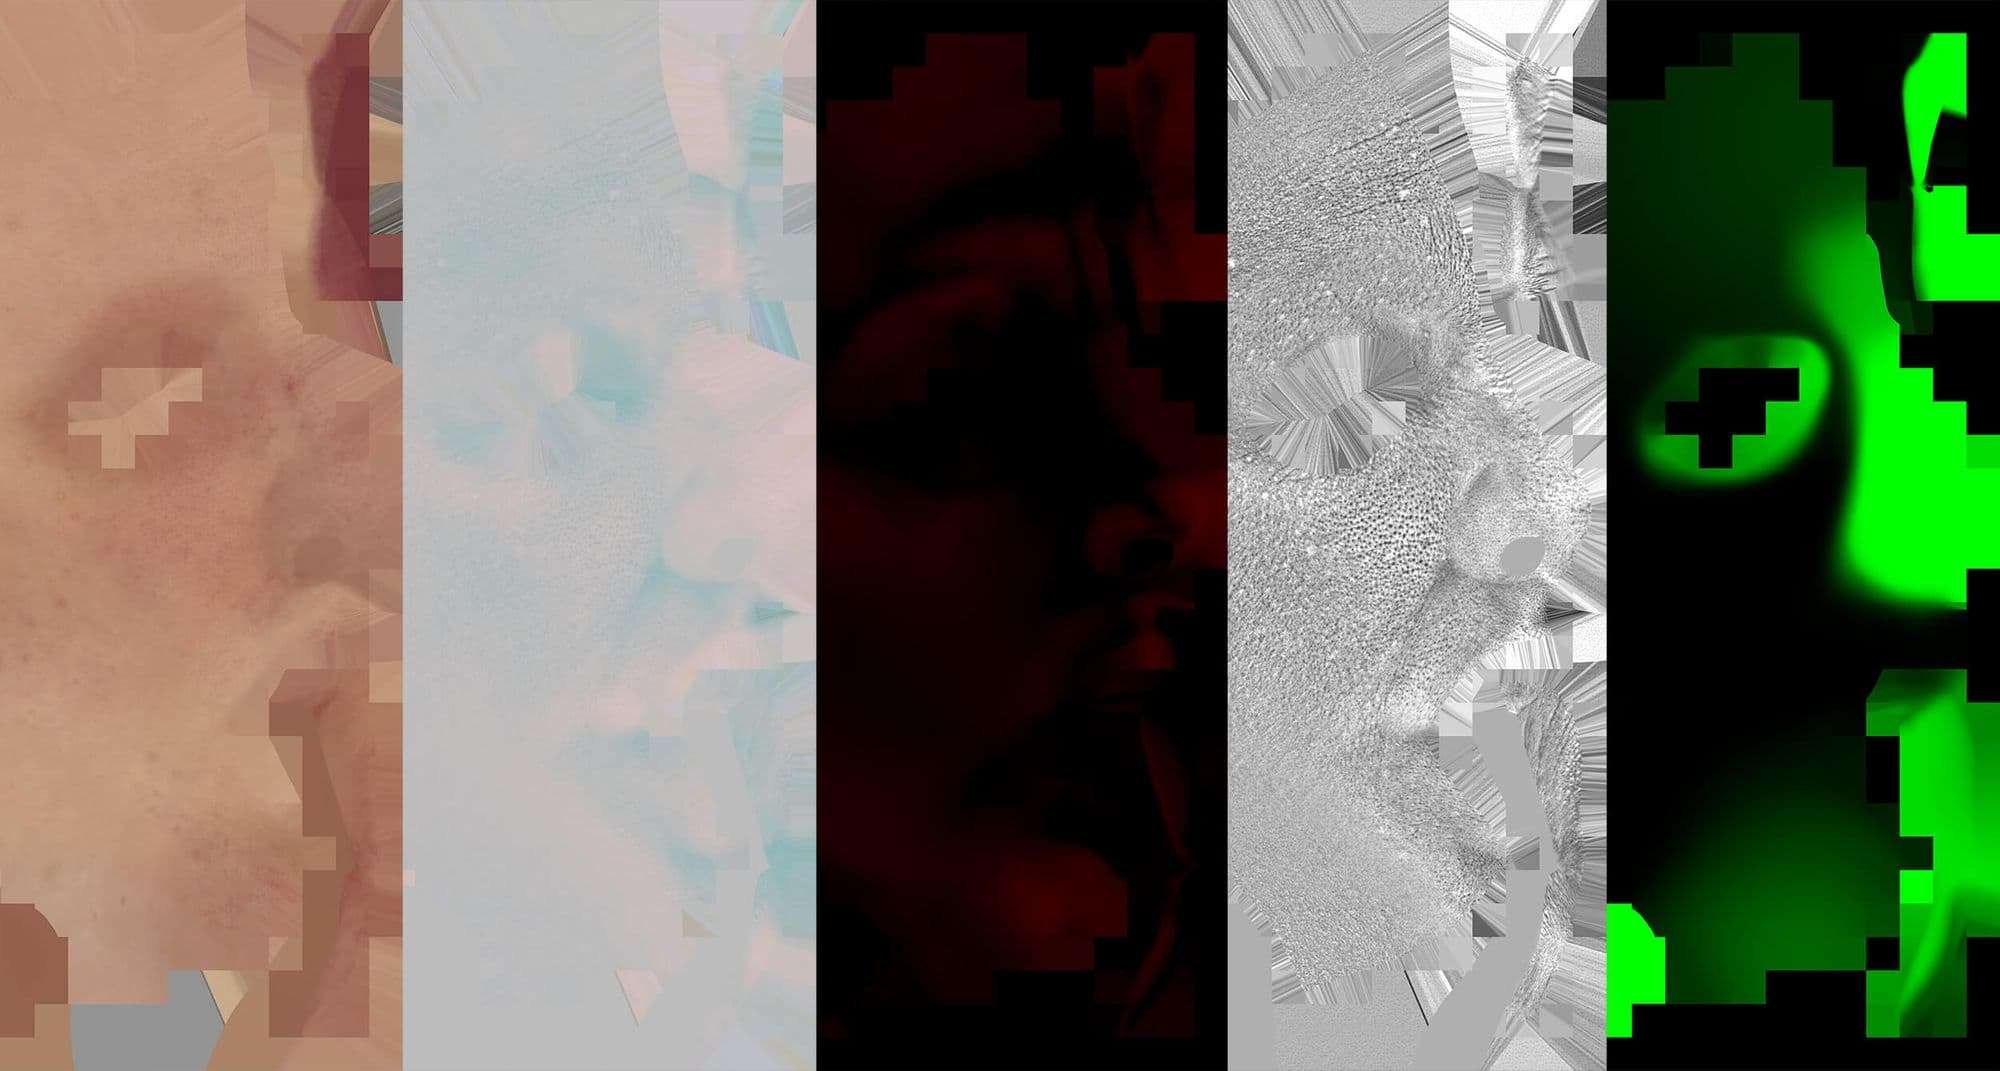
I exported all the maps (i.e. Diffuse, Displacement, Roughness, RGB mix) by clicking current channel fattened. This option is under the export flattened option.
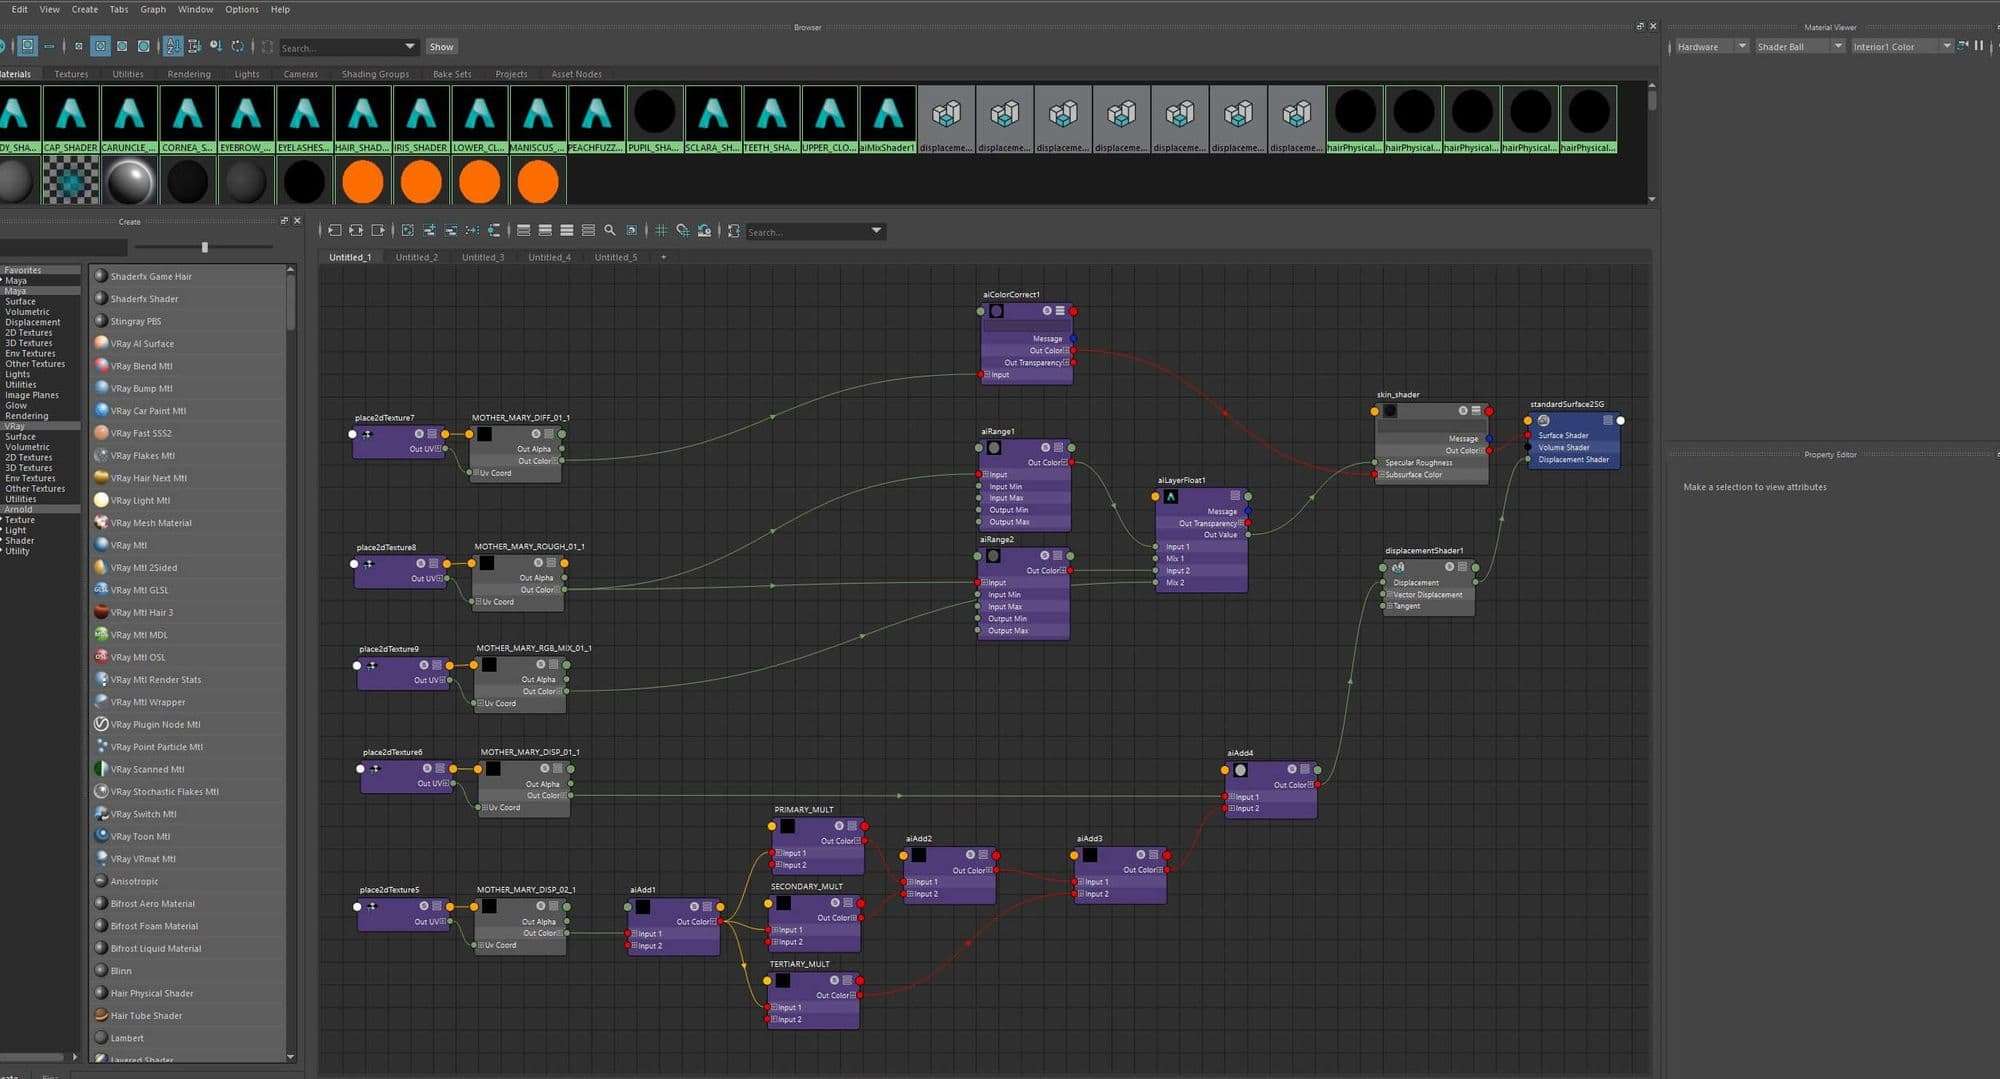
Lookdev of the Head and Face
Skin Shader Breakdown
Modeling of the Eyes
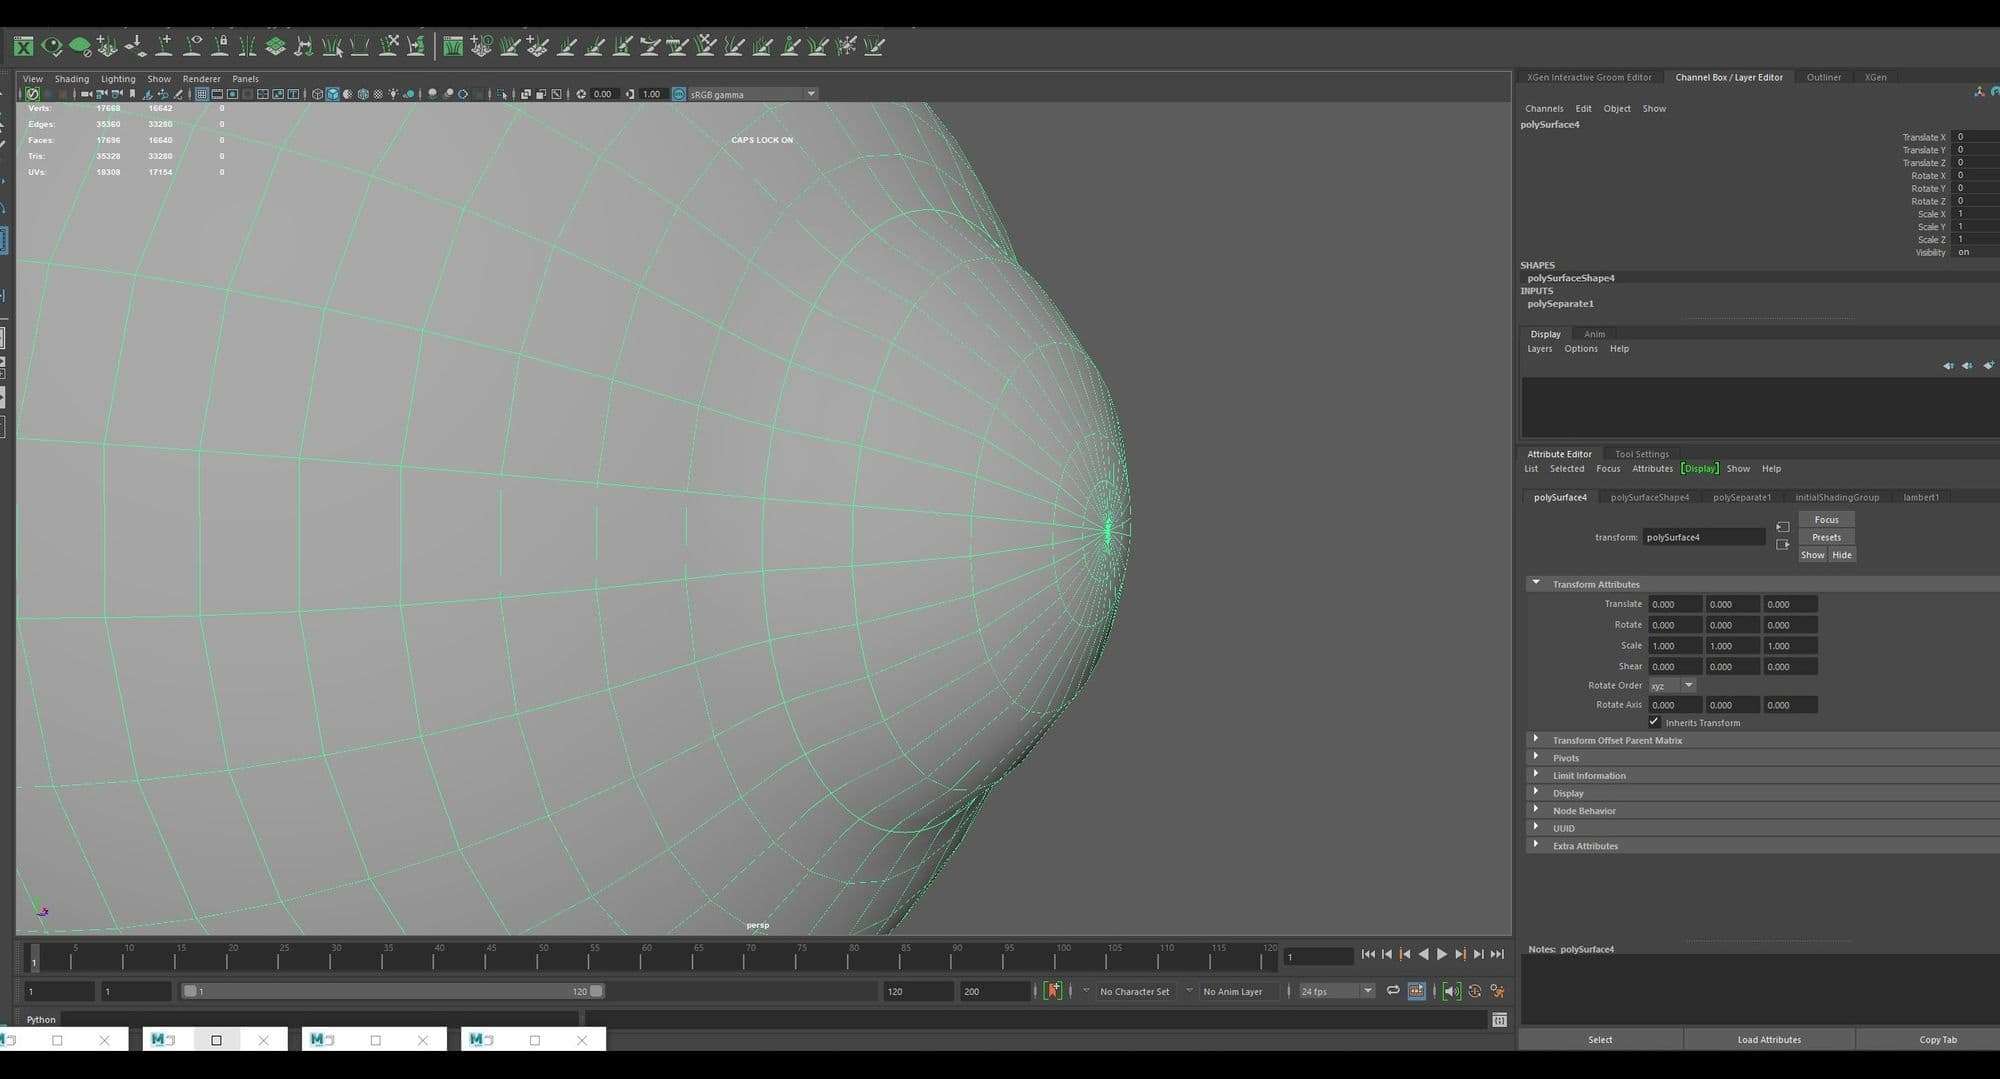
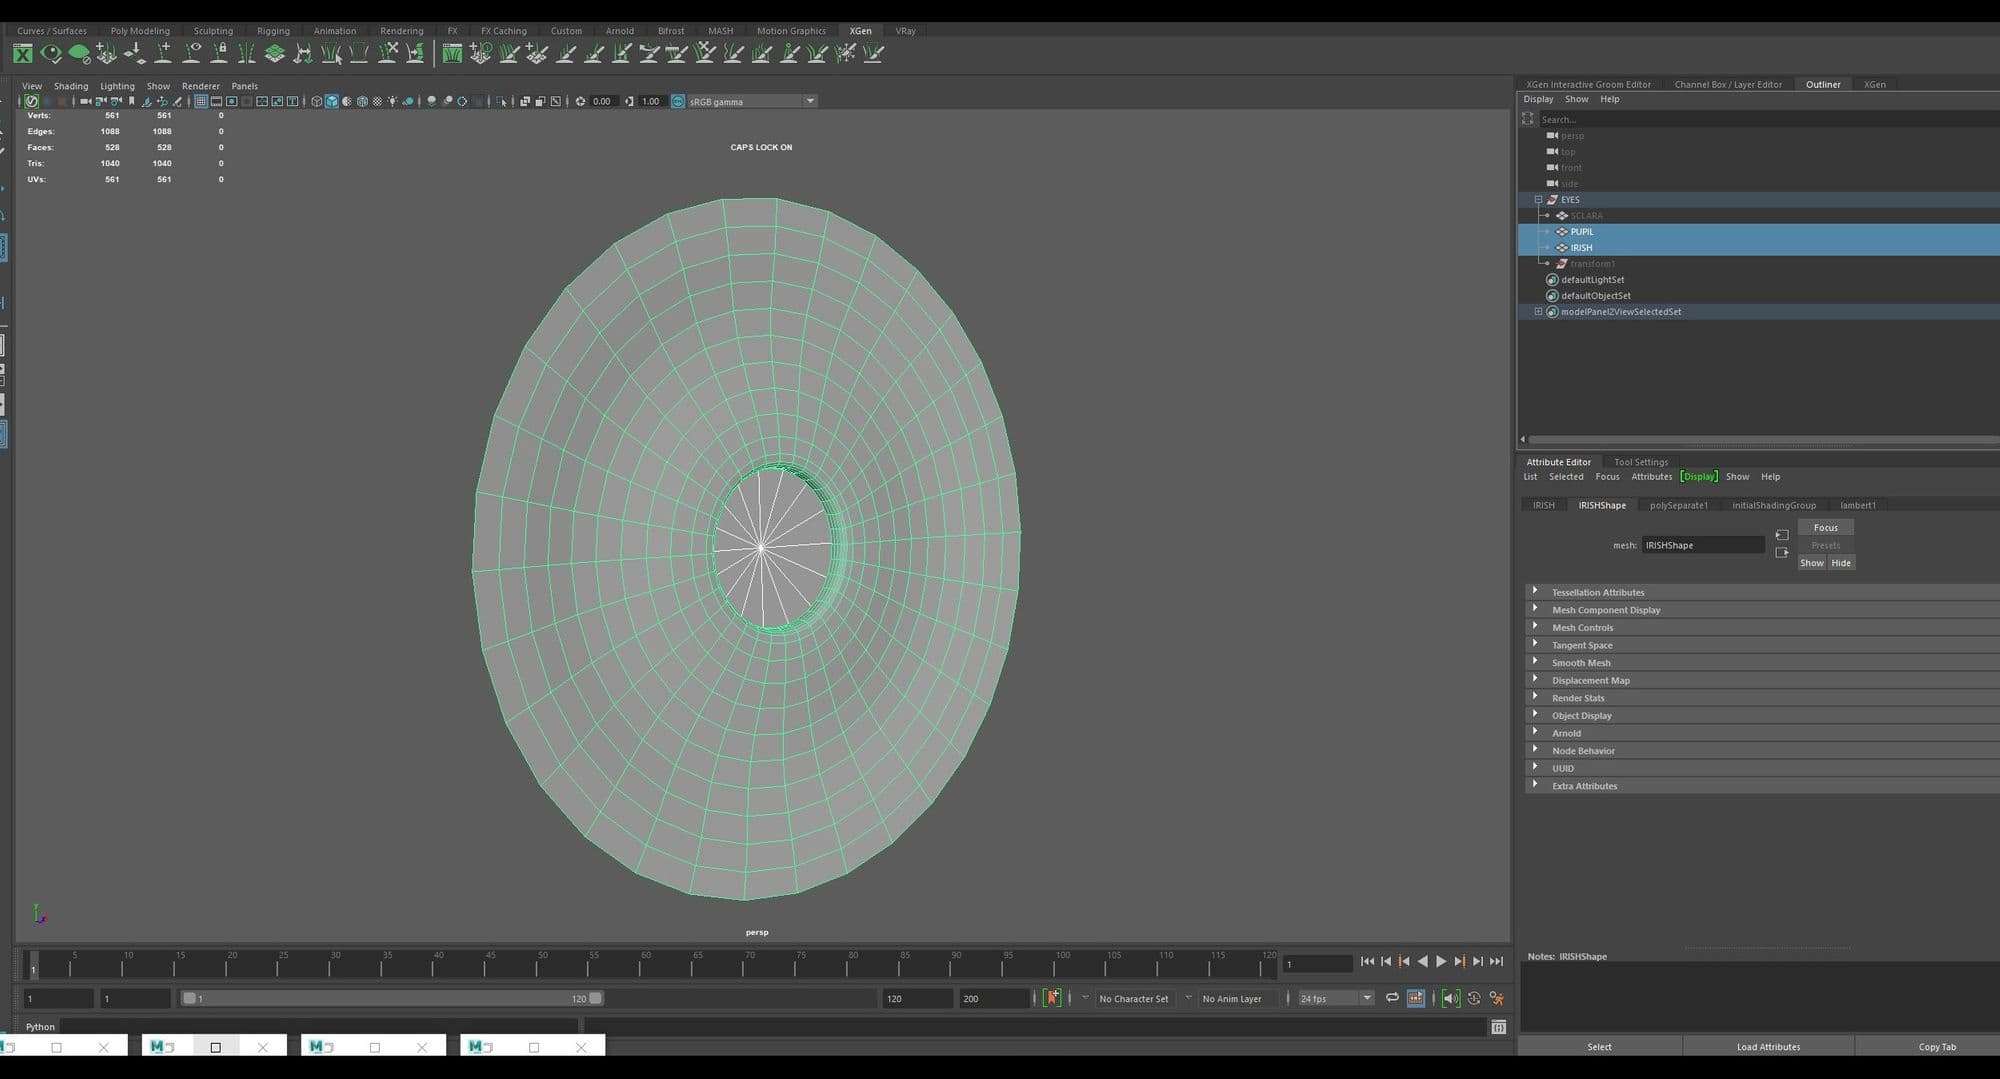
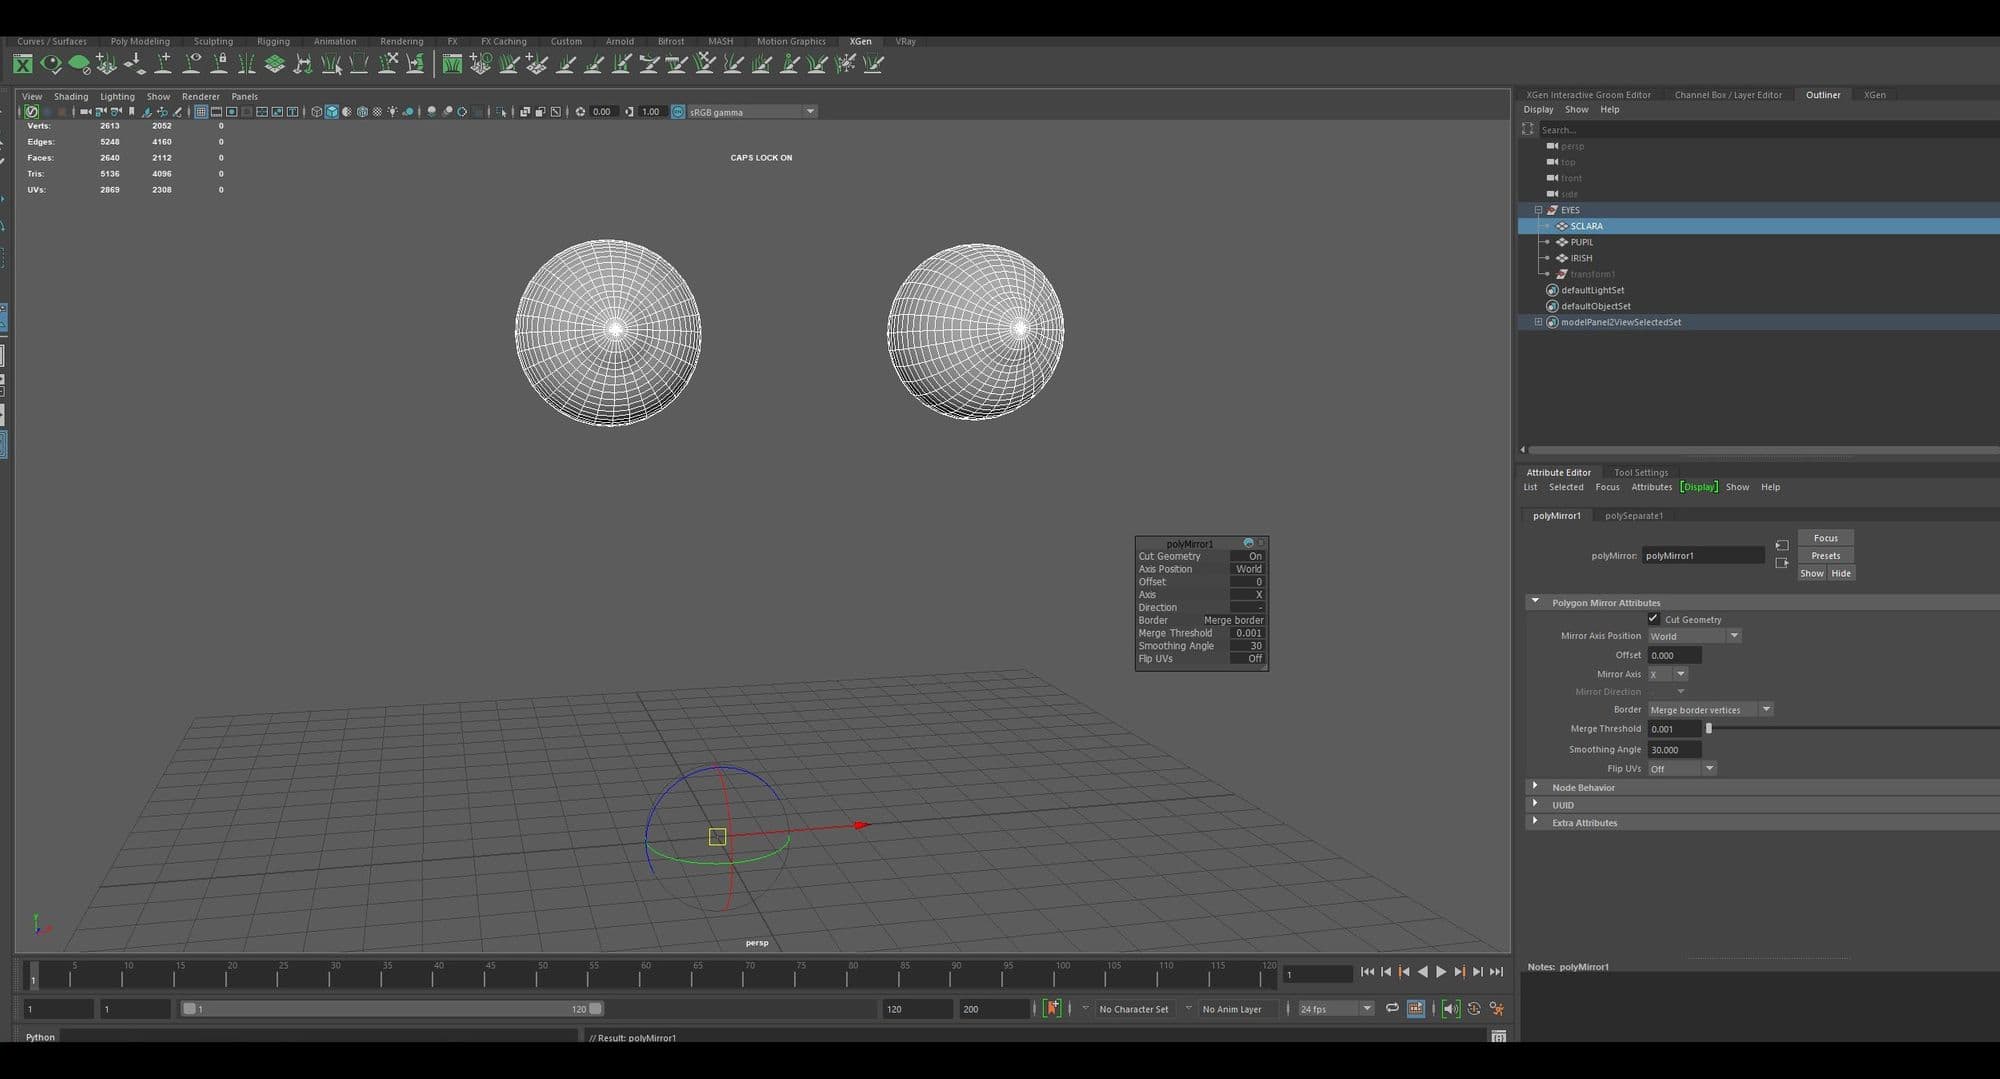
Some of the reference images I used for eyes can be viewed in this link. I created a polygon sphere in Maya and matched it with eyes already available with the base mesh. The eyes that came with the base mesh didn’t have the cornea, iris and pupil. I created these using the eyes from the digital Emily project as a reference. For the pupil and iris I used polygon cylinder to create them.
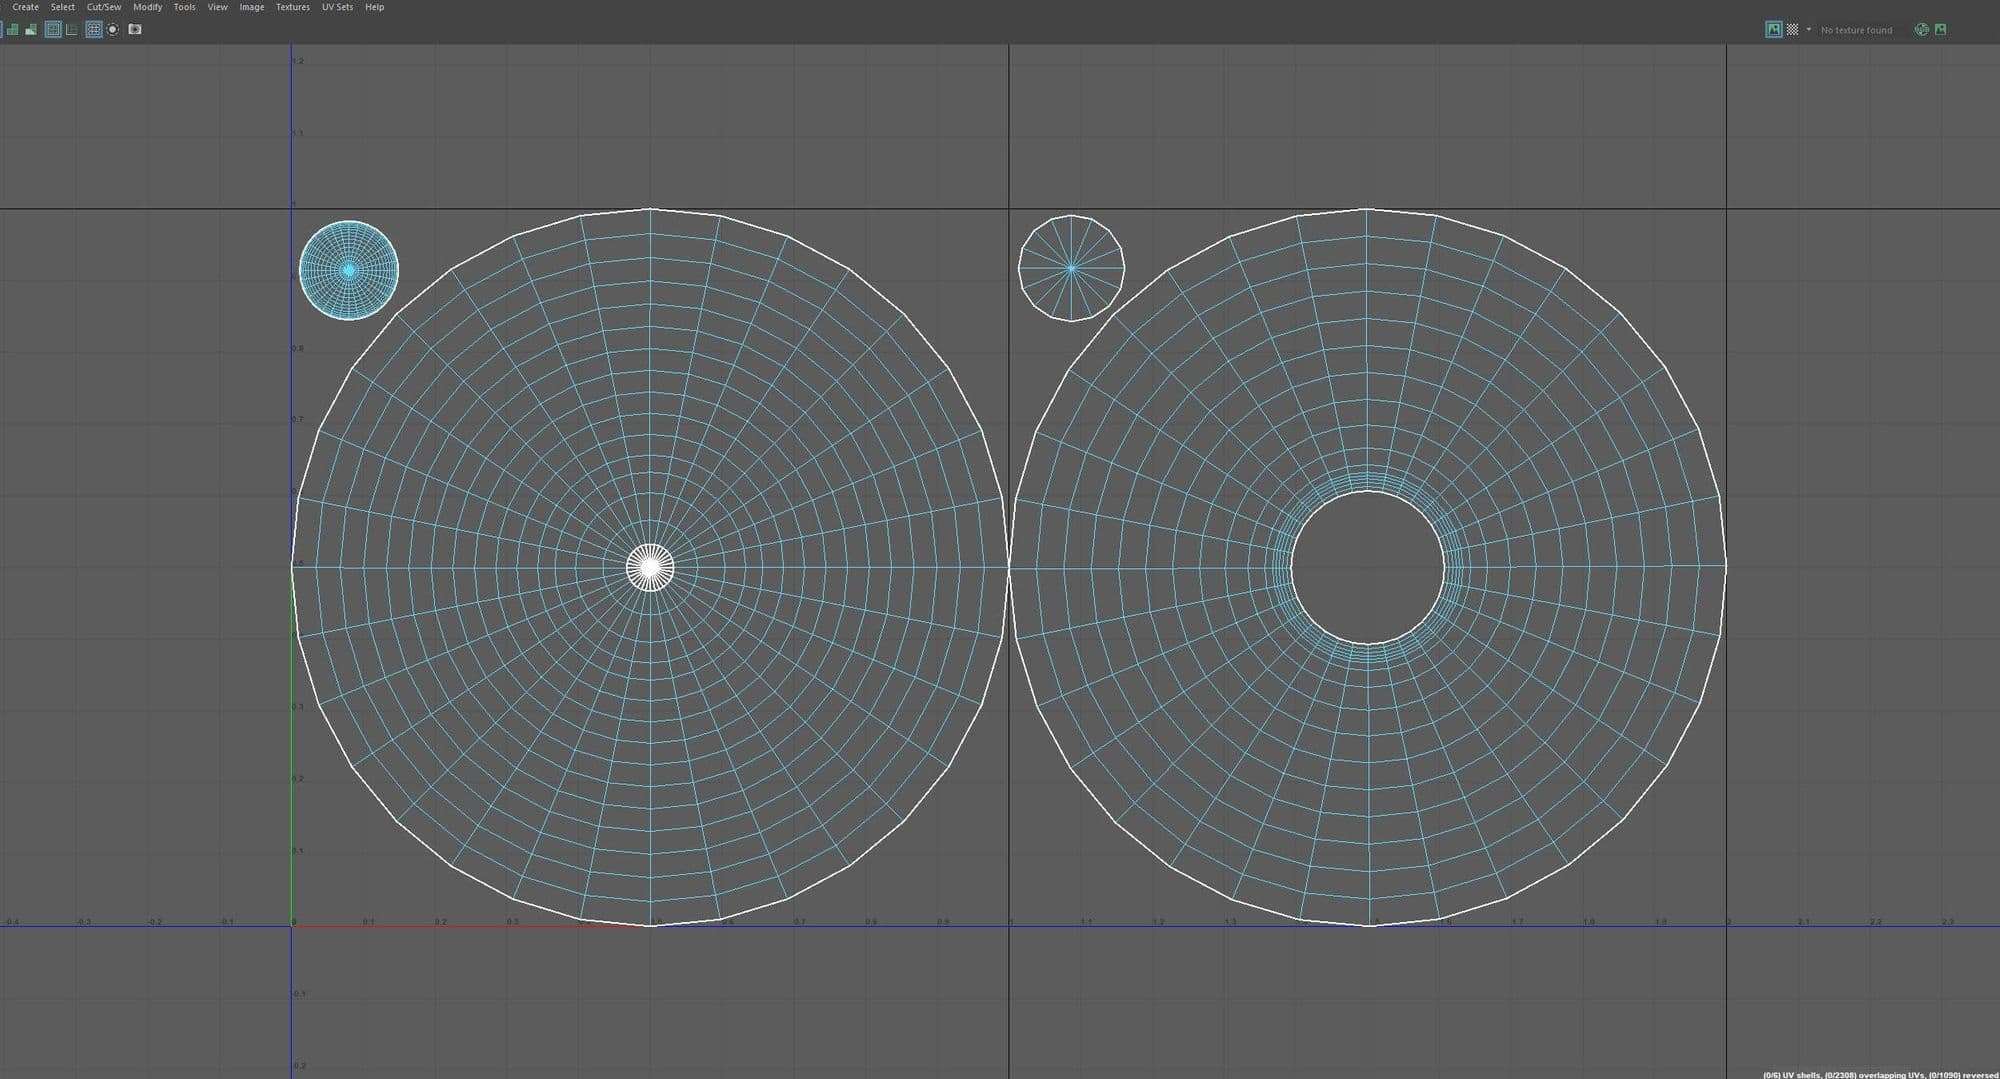
After that, I created the UVs using the planar mapping technique for each piece. I placed the UV shells of sclera in one UDIM and UV shells of the pupil and iris in the next UDIM. I then mirrored the sclera, iris and pupil, along the world x axis to get the other eye.
Texturing of the Eyes
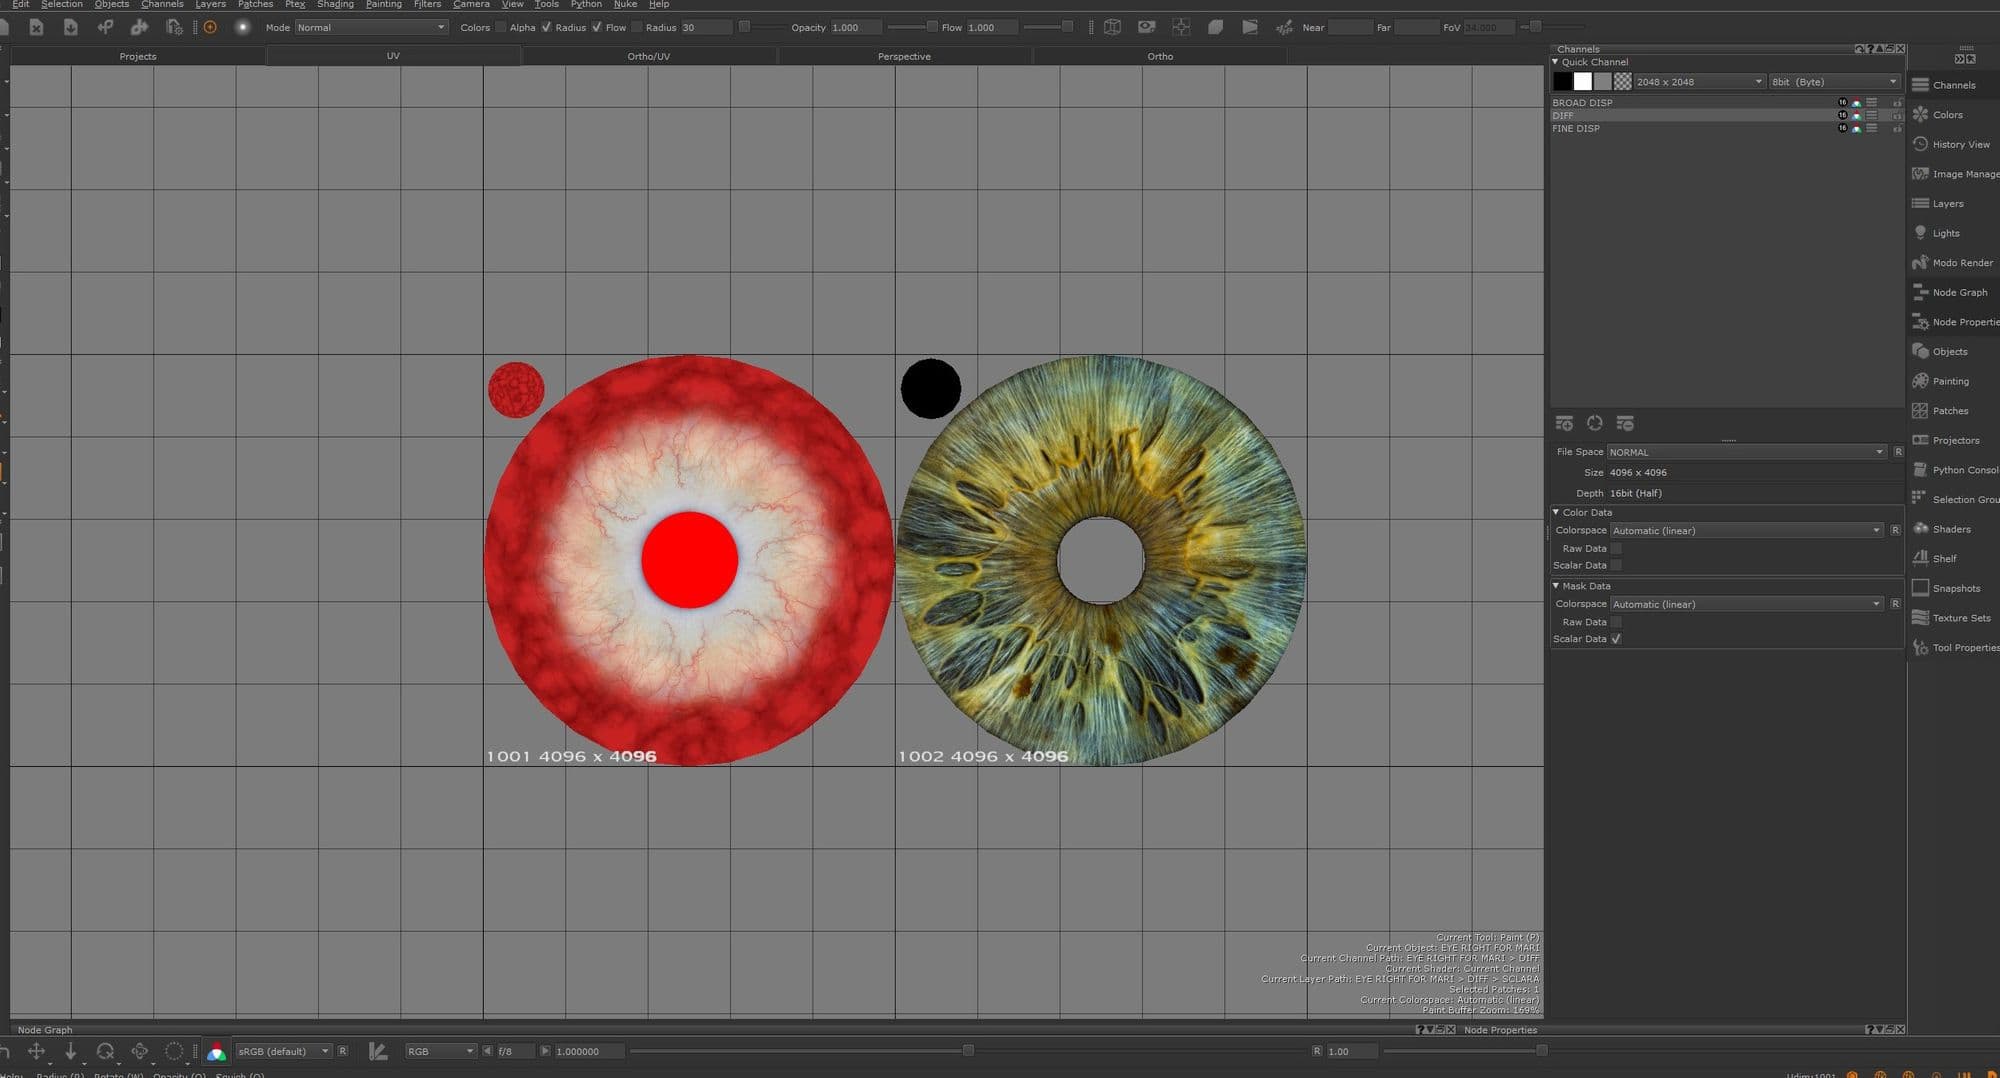
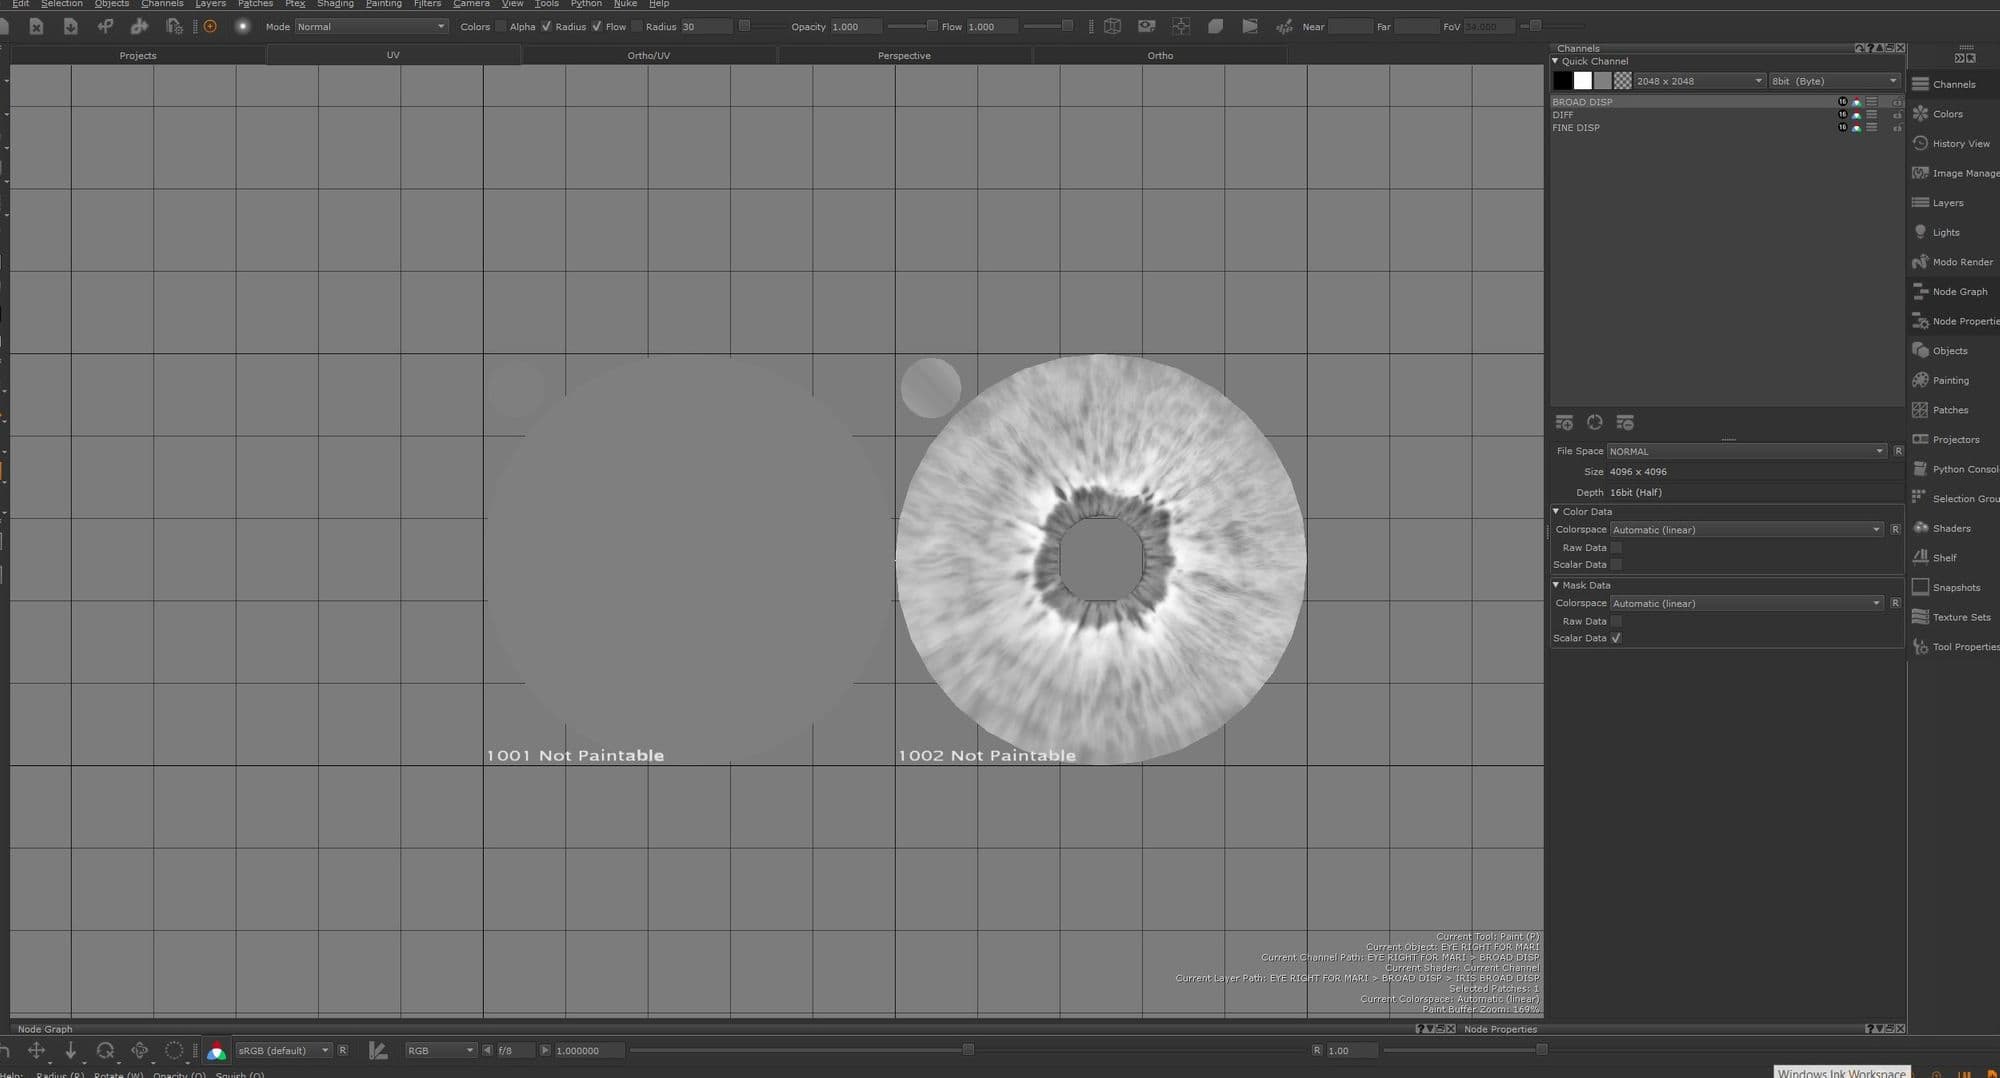
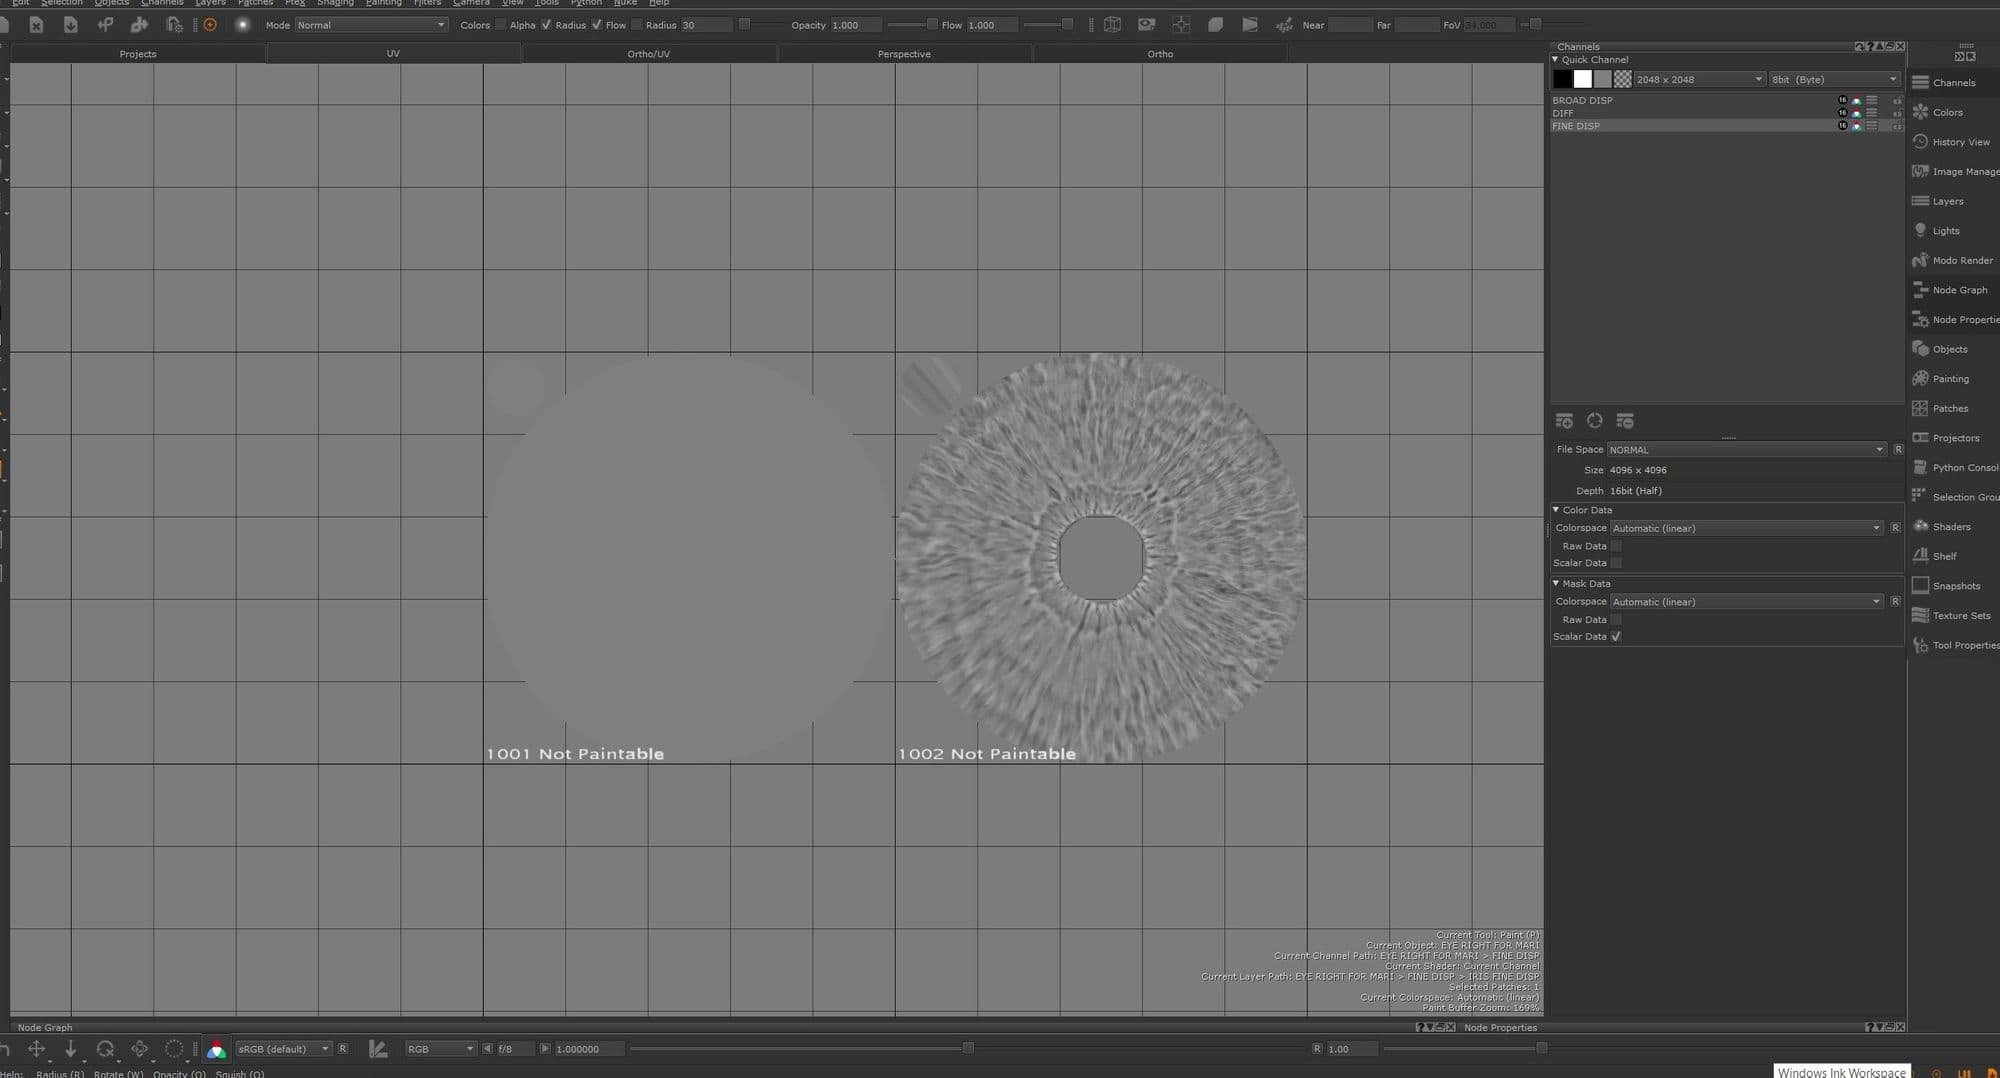
I created a new project in Mari and imported the eyes which I modeled. I created a 4k (16 bits) fine displacement channel, a broad displacement channel and diffuse channel.
The Iris texture I used for projecting in diffuse channel can be found on this website. To texture the iris's fine and broad displacements I used the bump and displacement maps from female human eyes green iris #03 from texturing.xyz.
I projected the details in the UV view and adjusted them using the warp tool to match the size of my model.
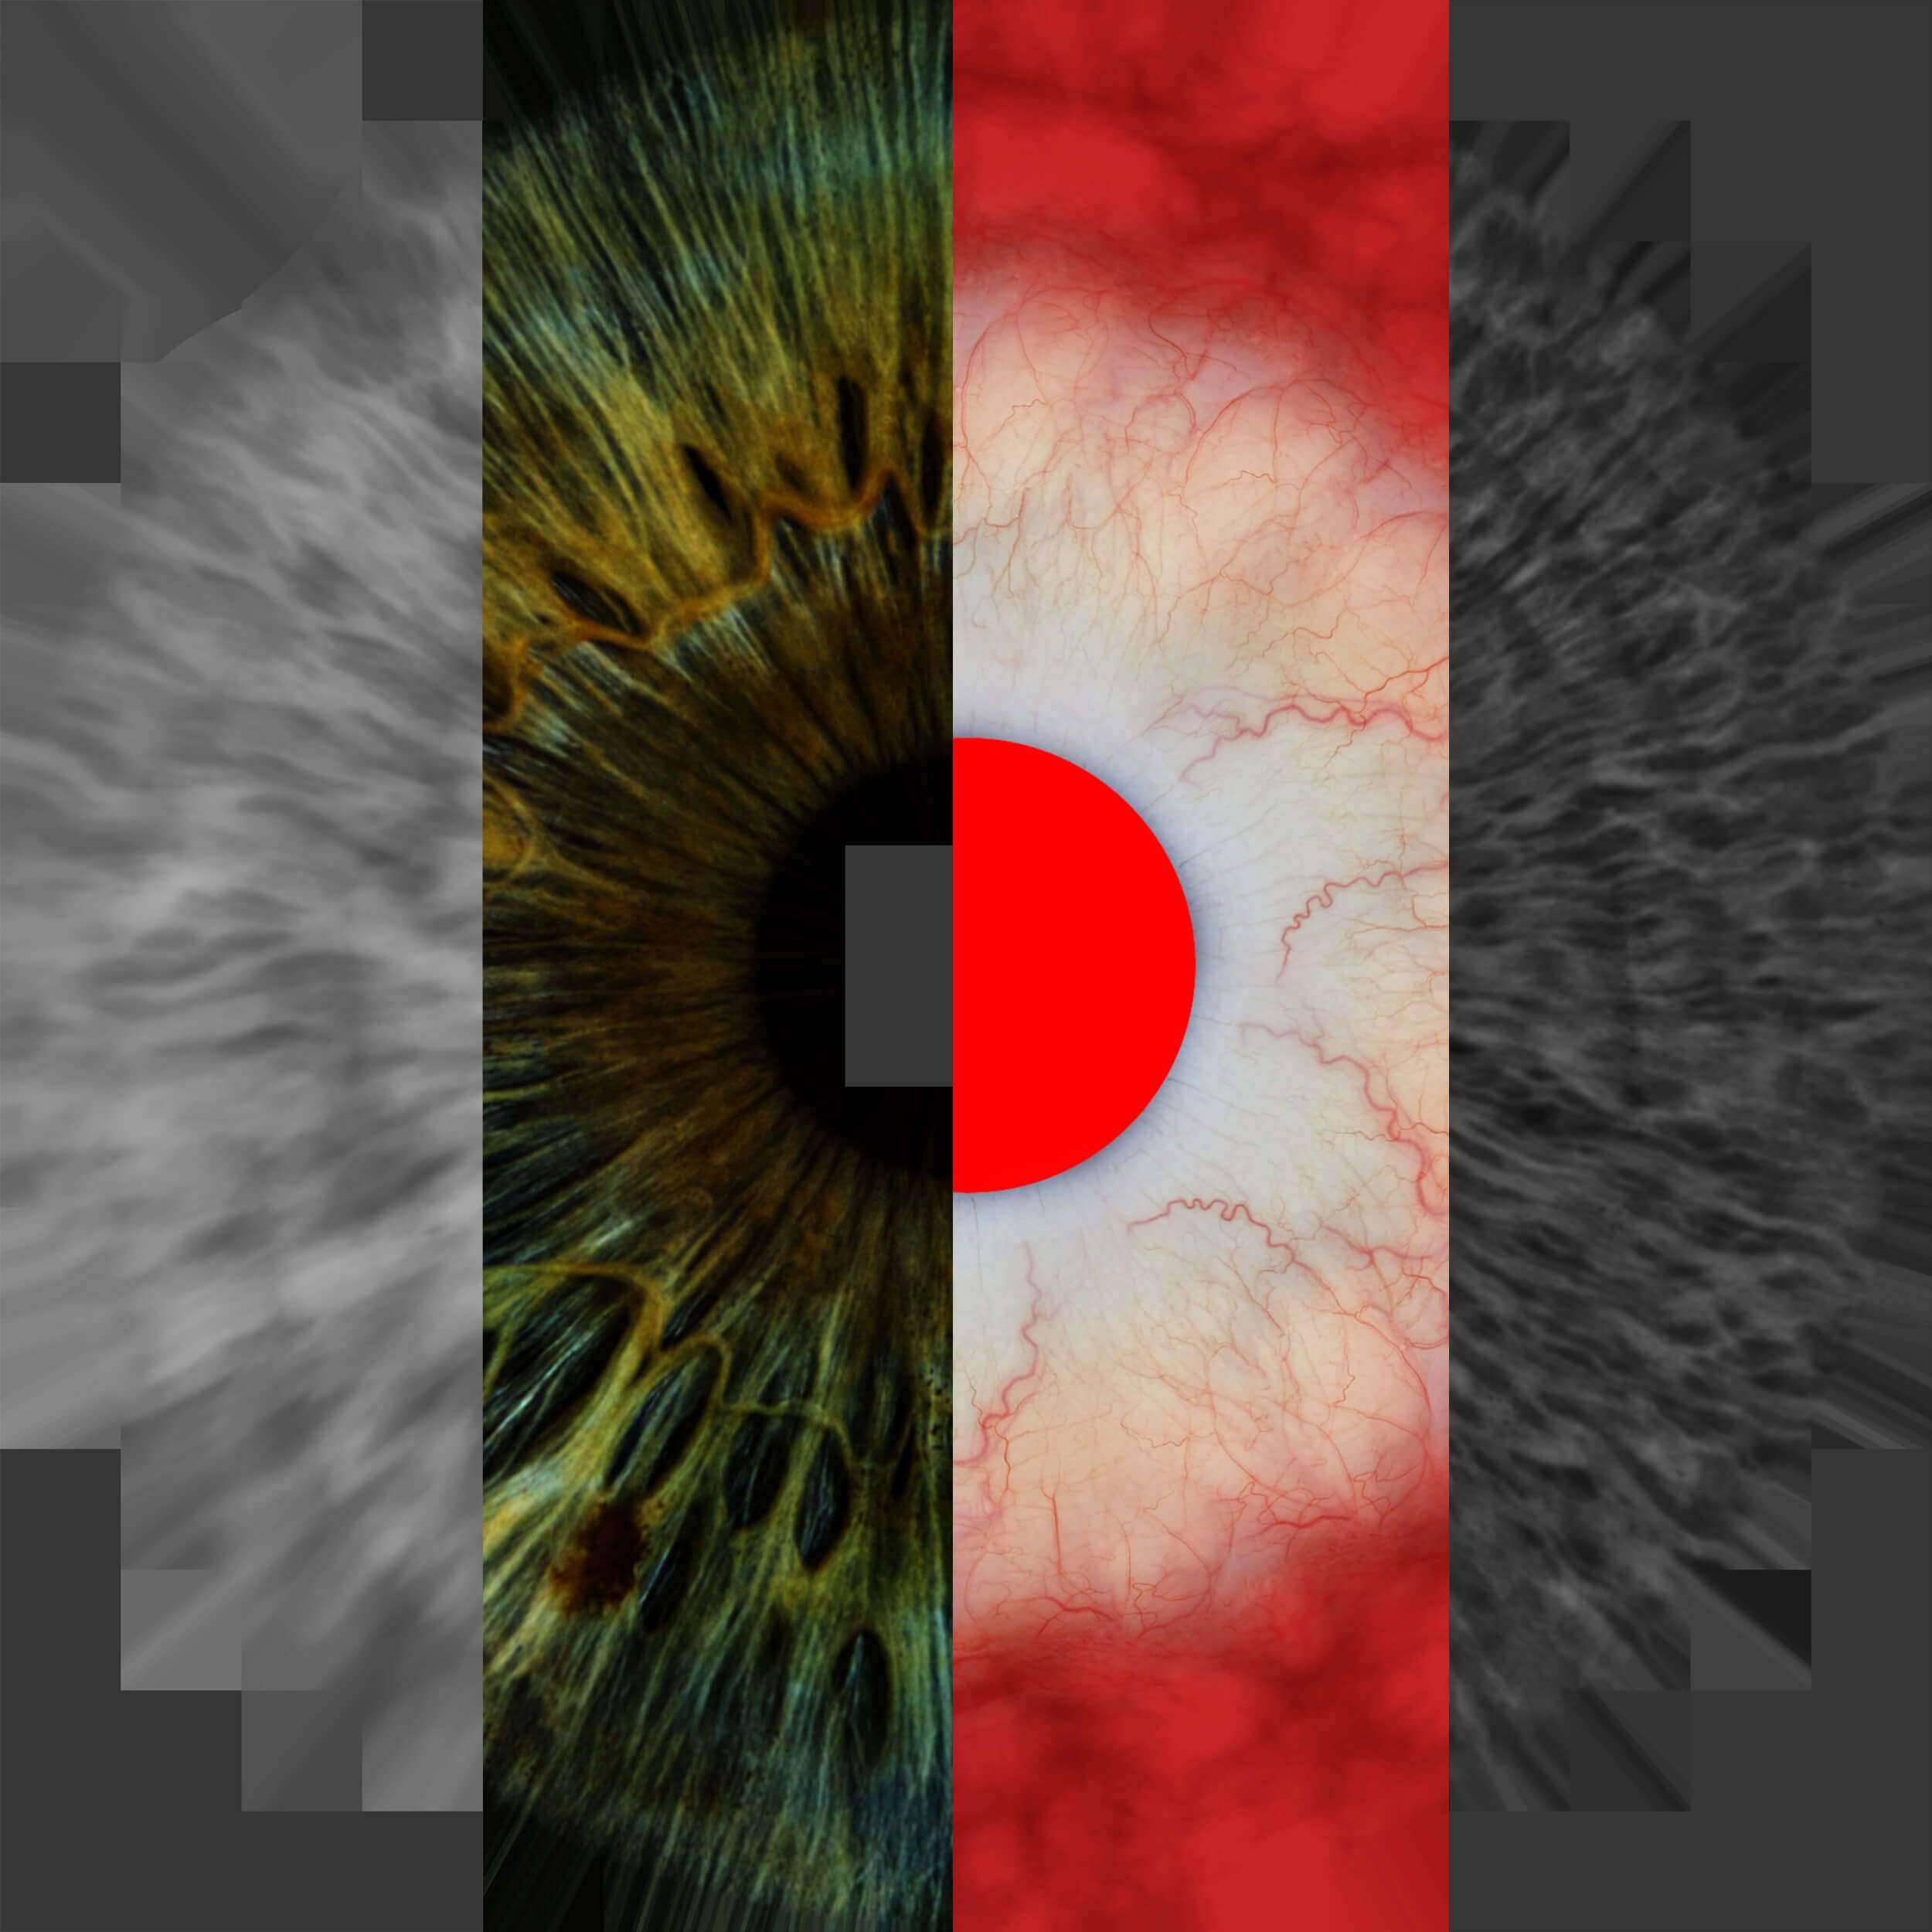
For the sclera I hand painted the diffuse map in Photoshop with a red circle inside for the cornea guide line. I then projected the map onto the UVs of the sclera.
Diffuse and Displacement Maps from Mari
Lookdev of the Eyes
Breakdown of Shaders
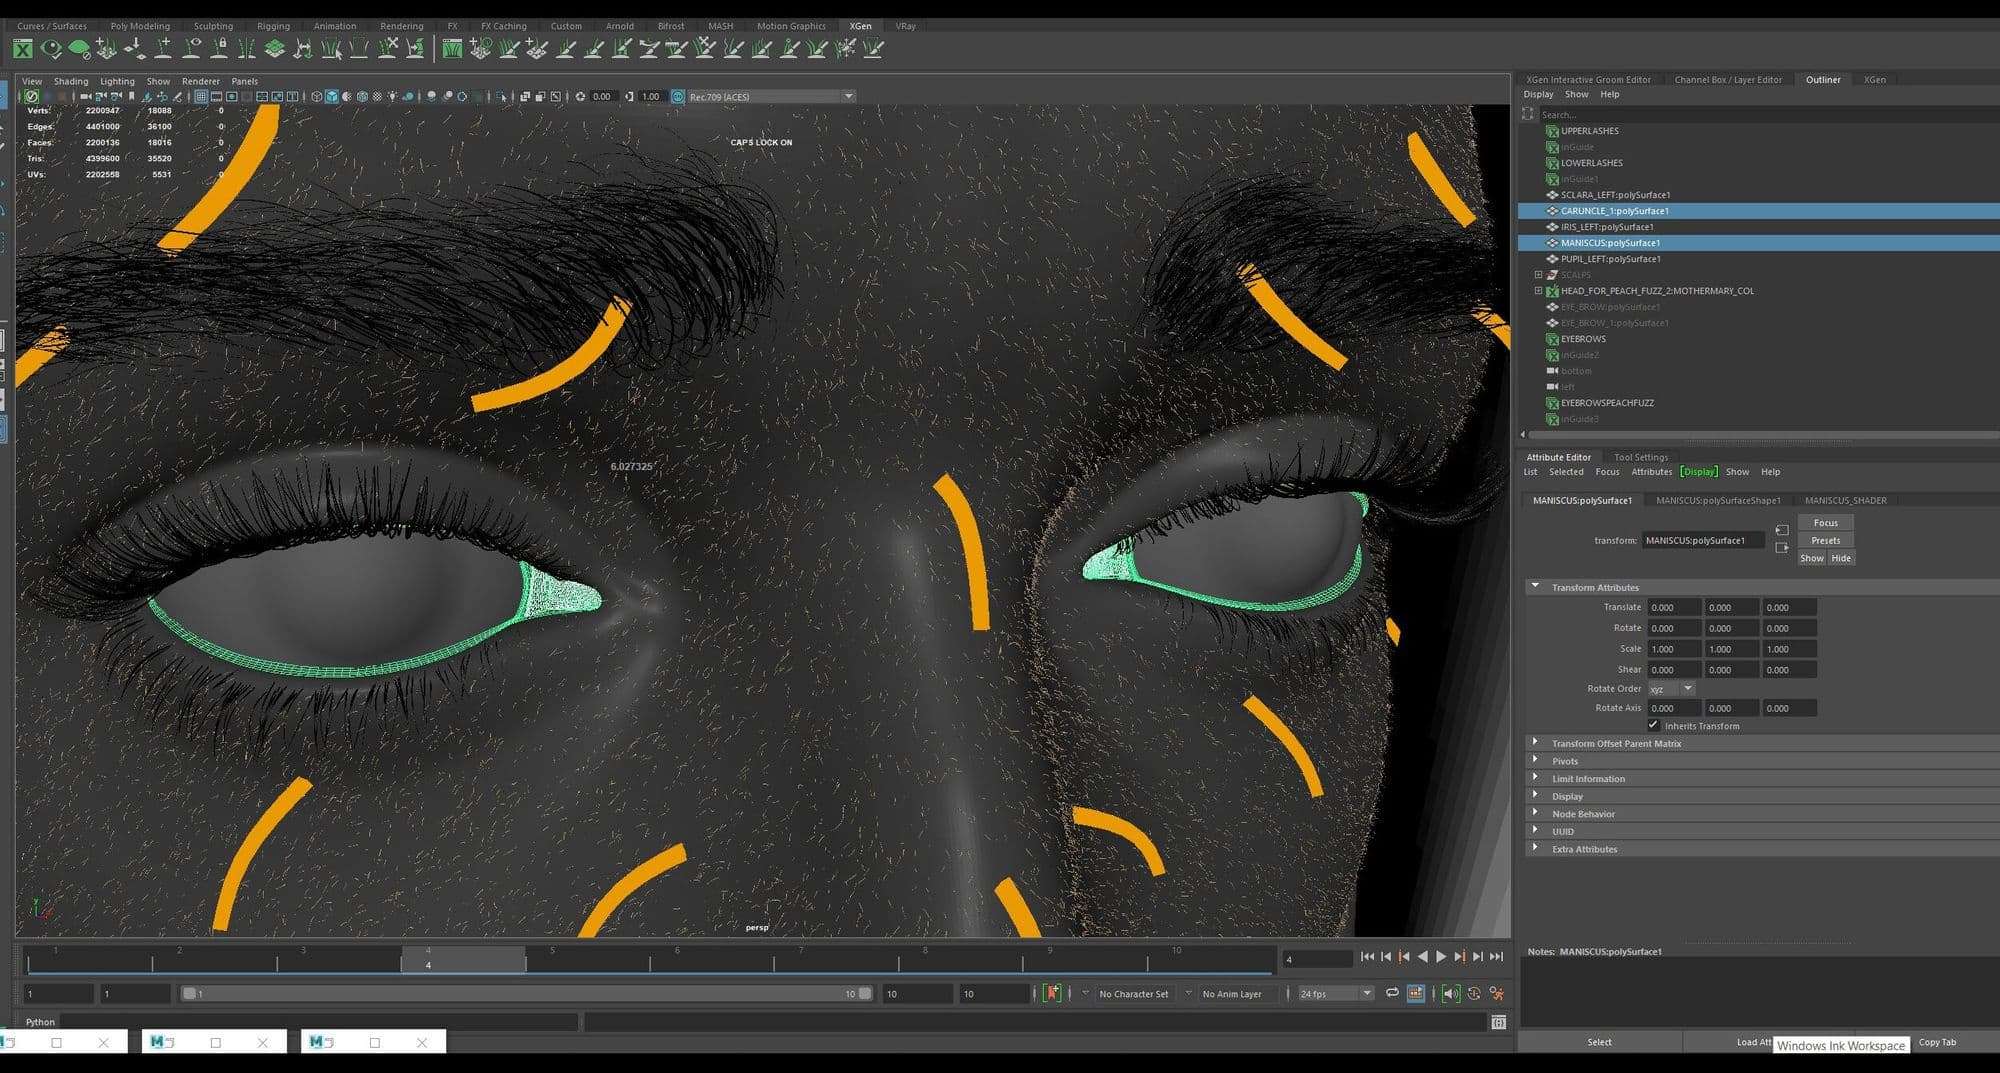
Meniscus and caruncle were modeled in Maya and Zbrush respectively using basic tools.
Lookdev of the Teeth
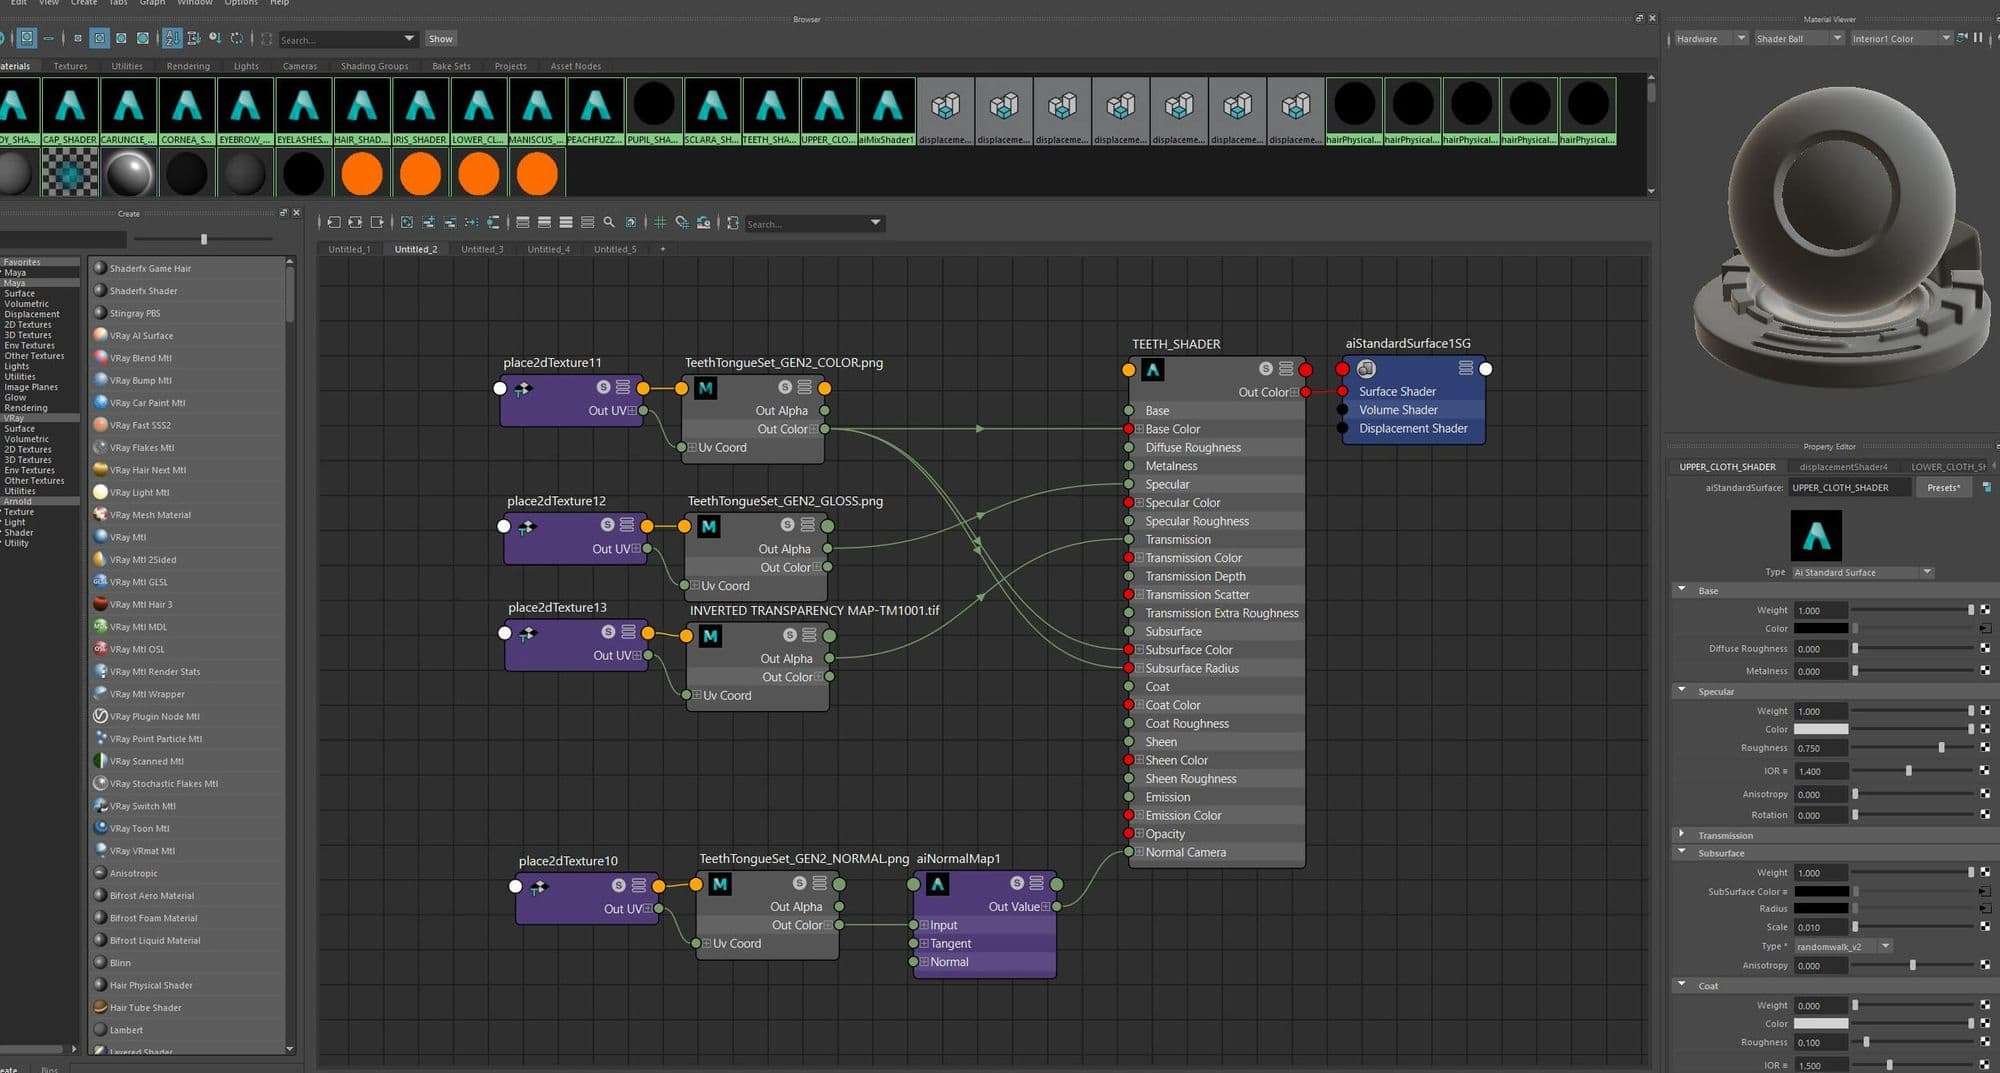
Teeth Shader Breakdown
Due to time constraint I did not model and texture the teeth. I purchased them online from this link. I created a shader network of my own for it. I also created my own transparency map in Zbrush using the polypaint technique.
Test Render
Hair Creation
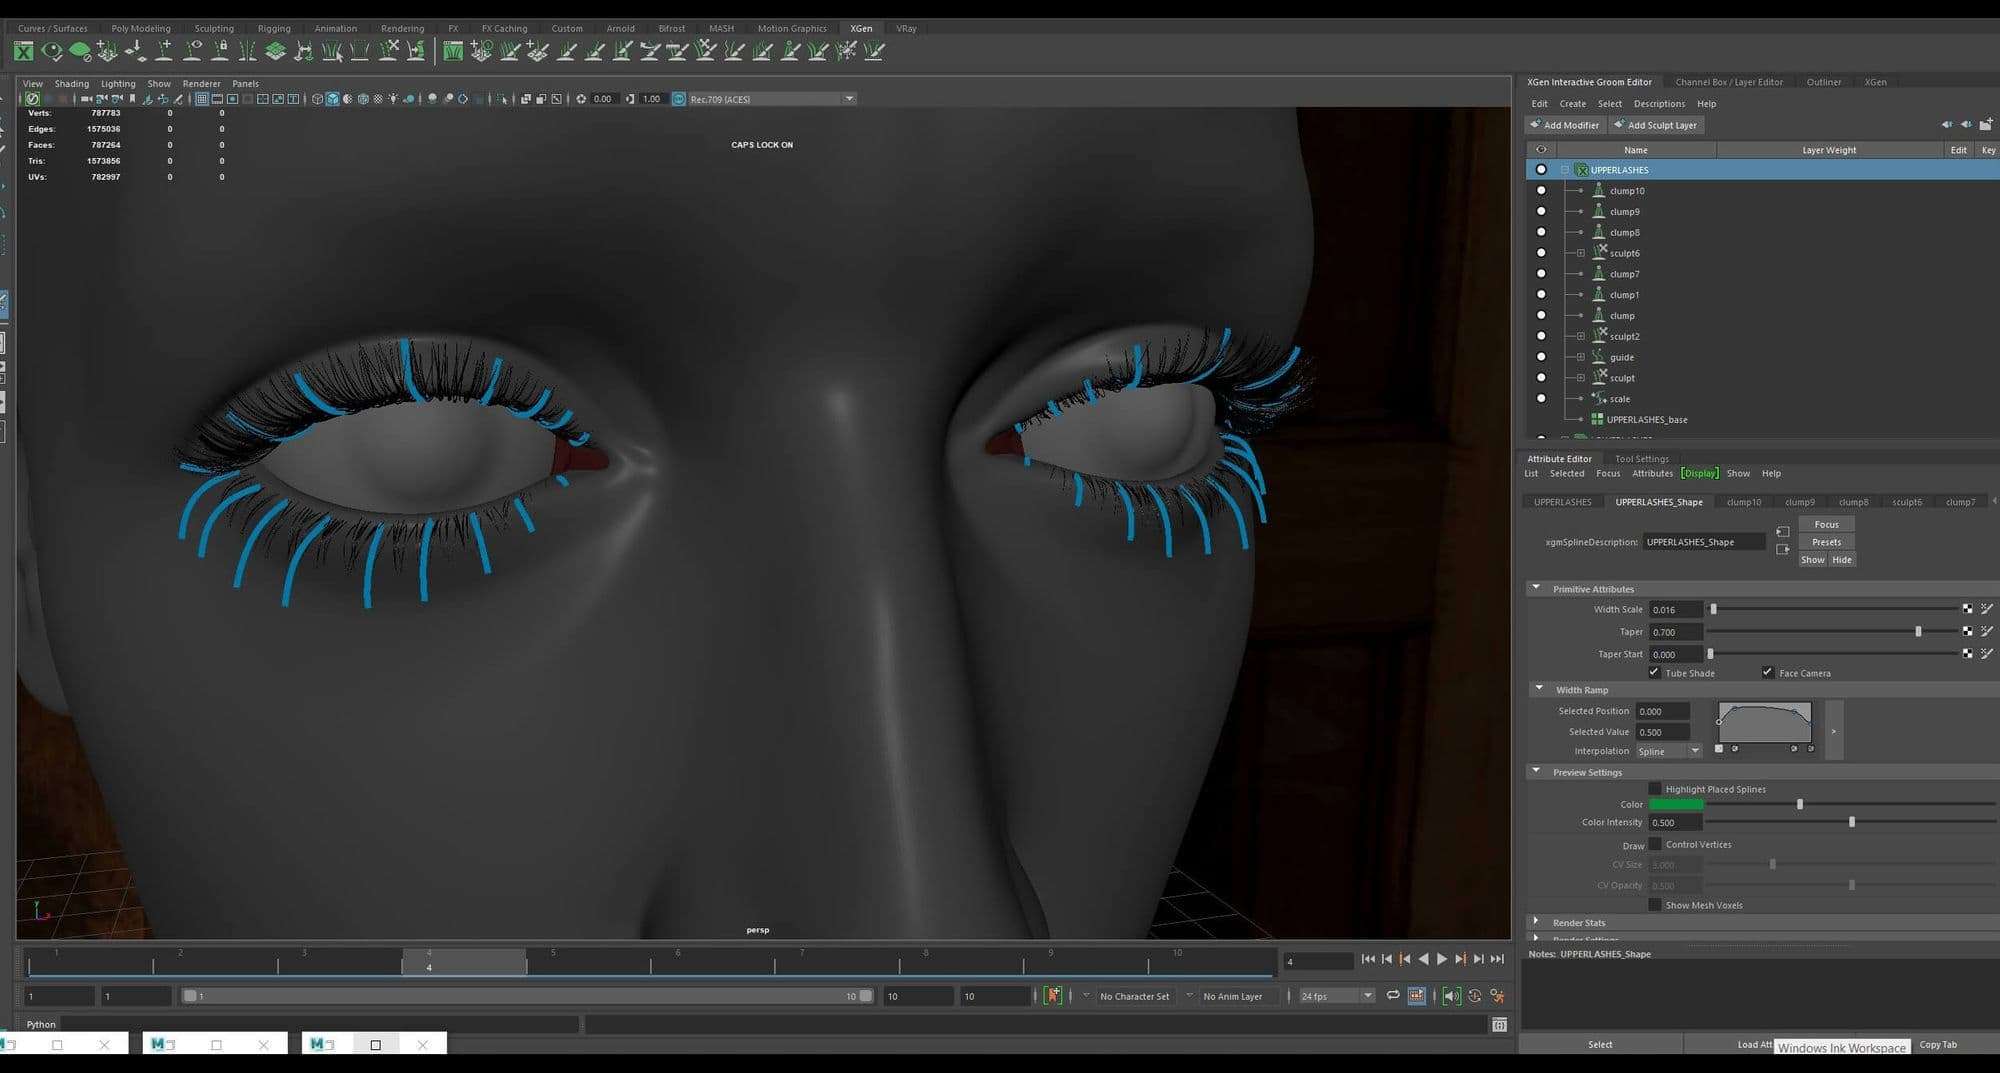
Eyelashes
I started by creating the upper eye lashes using Xgen interactive grooming technique. I had the head which was symmetrical. So with symmetry on I selected all the polygons where the eyelashes grow.
I then created interactive groom splines by clicking interactive groom splines. This option is in the create tab within the Xgen interactive groom editor. The upper eye lashes count is 400 approximately for both eyes combined. So I adjusted the density in such a way that I get approximate spline count=400. I kept length=.8, width=.01 and CV count=32. Then I went ahead and clicked create.
I created guides, sculpt layers and clumps by going into the add modifier tab. I adjusted the eye lashes using place tool brush, length tool brush, width tool brush, comb tool brush and freeze tool brush.
I created the upper eyelashes layer by layer. I played with the attributes to get the desired result. For lower eyelashes I created a new description in the same way as the upper eye lashes. I used the same techniques for creating the lower eye lashes. I kept the count and length equal to half of the upper eyelashes.
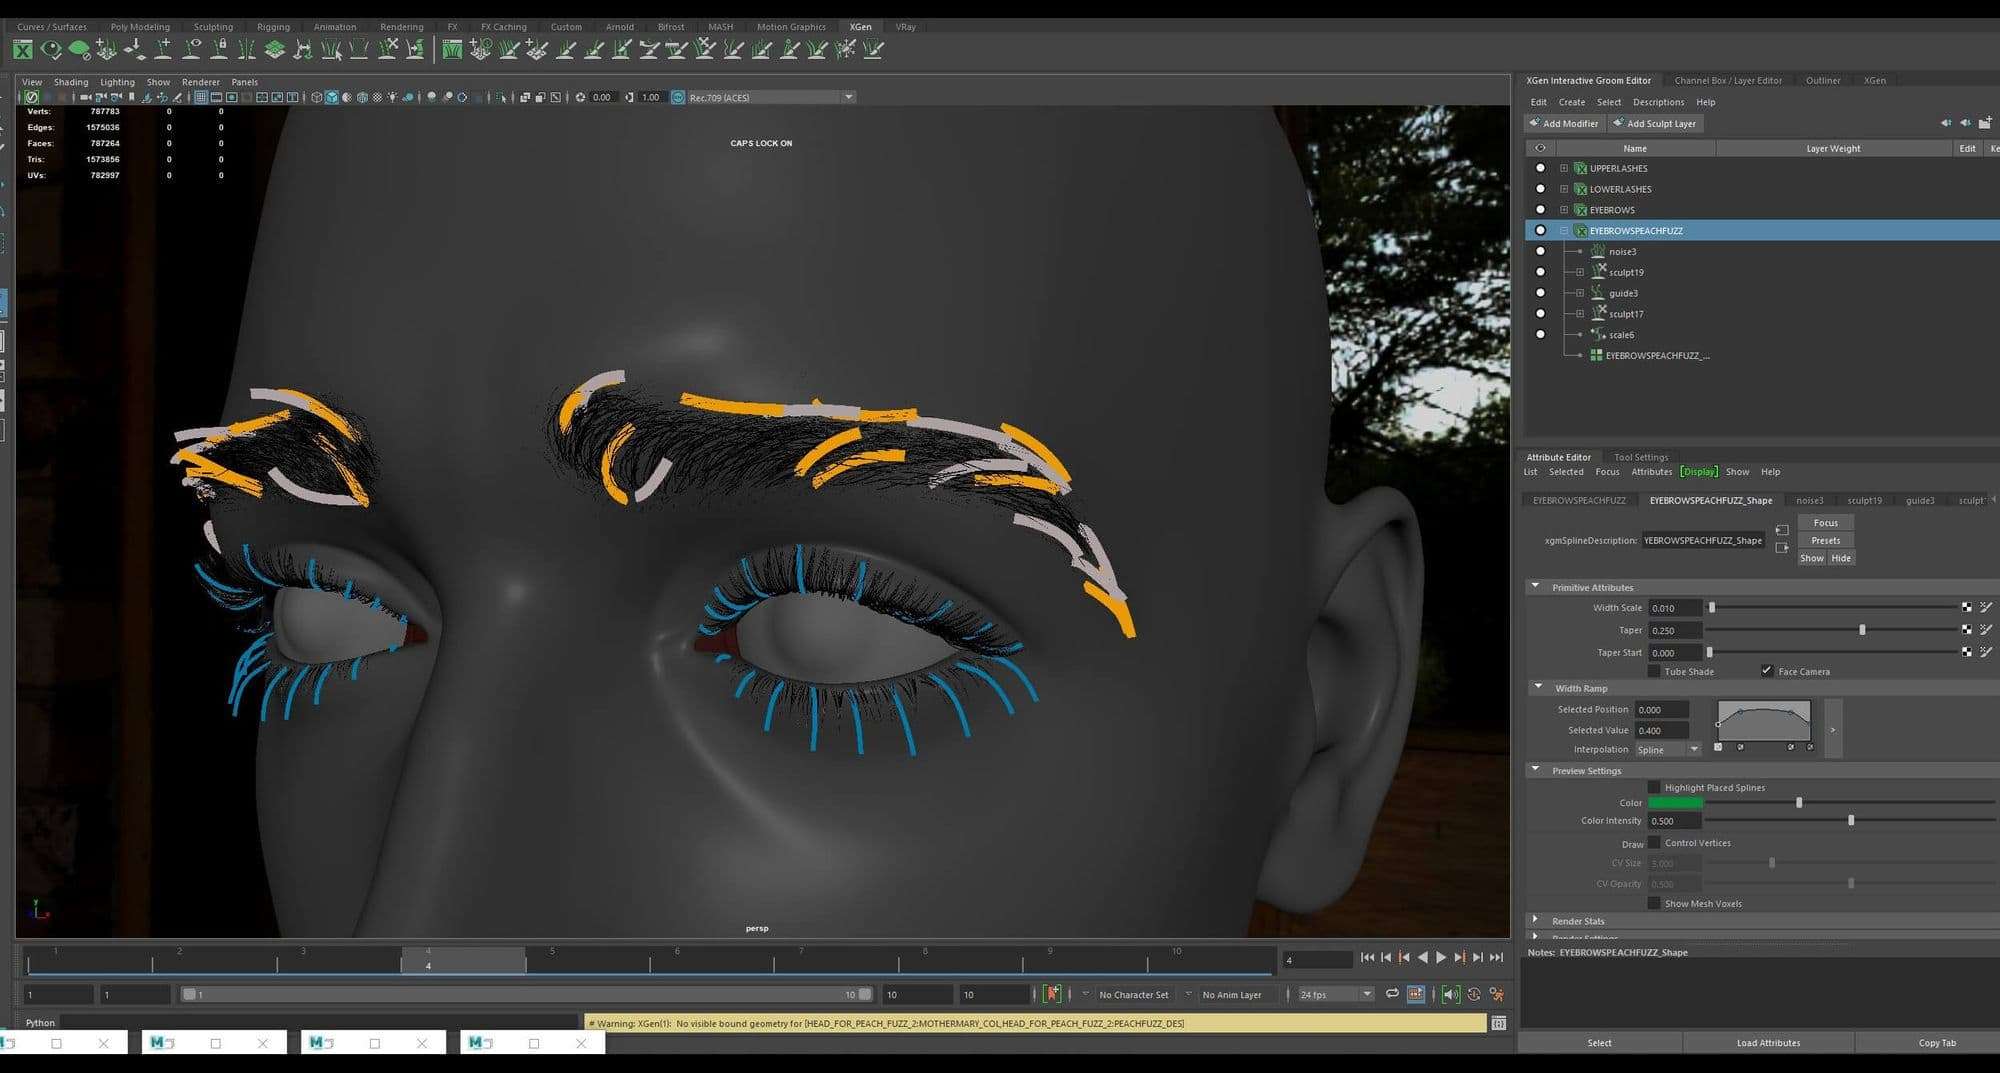
Eyebrows
For the eye brow I selected the polygon faces on the head where the eye brow grows. I created interactive groom spline description for the eyebrow in the same way as the eye lashes. The total count of the human eye brow is 1000 approx. combining both sides. So I adjusted the density to match that value. Remaining values are same as the upper eye lashes.
I created guides and adjusted them with the same brushes mentioned above. I then created many sculpt layers to make adjustments and added noise layers to bring realism.
I created a new interactive Xgen spline description called eyebrow peach fuzz. It has the same setting but shorter length. I created it to blend the eye brow with the peach fuzz and adjusted these hair to get better blending.
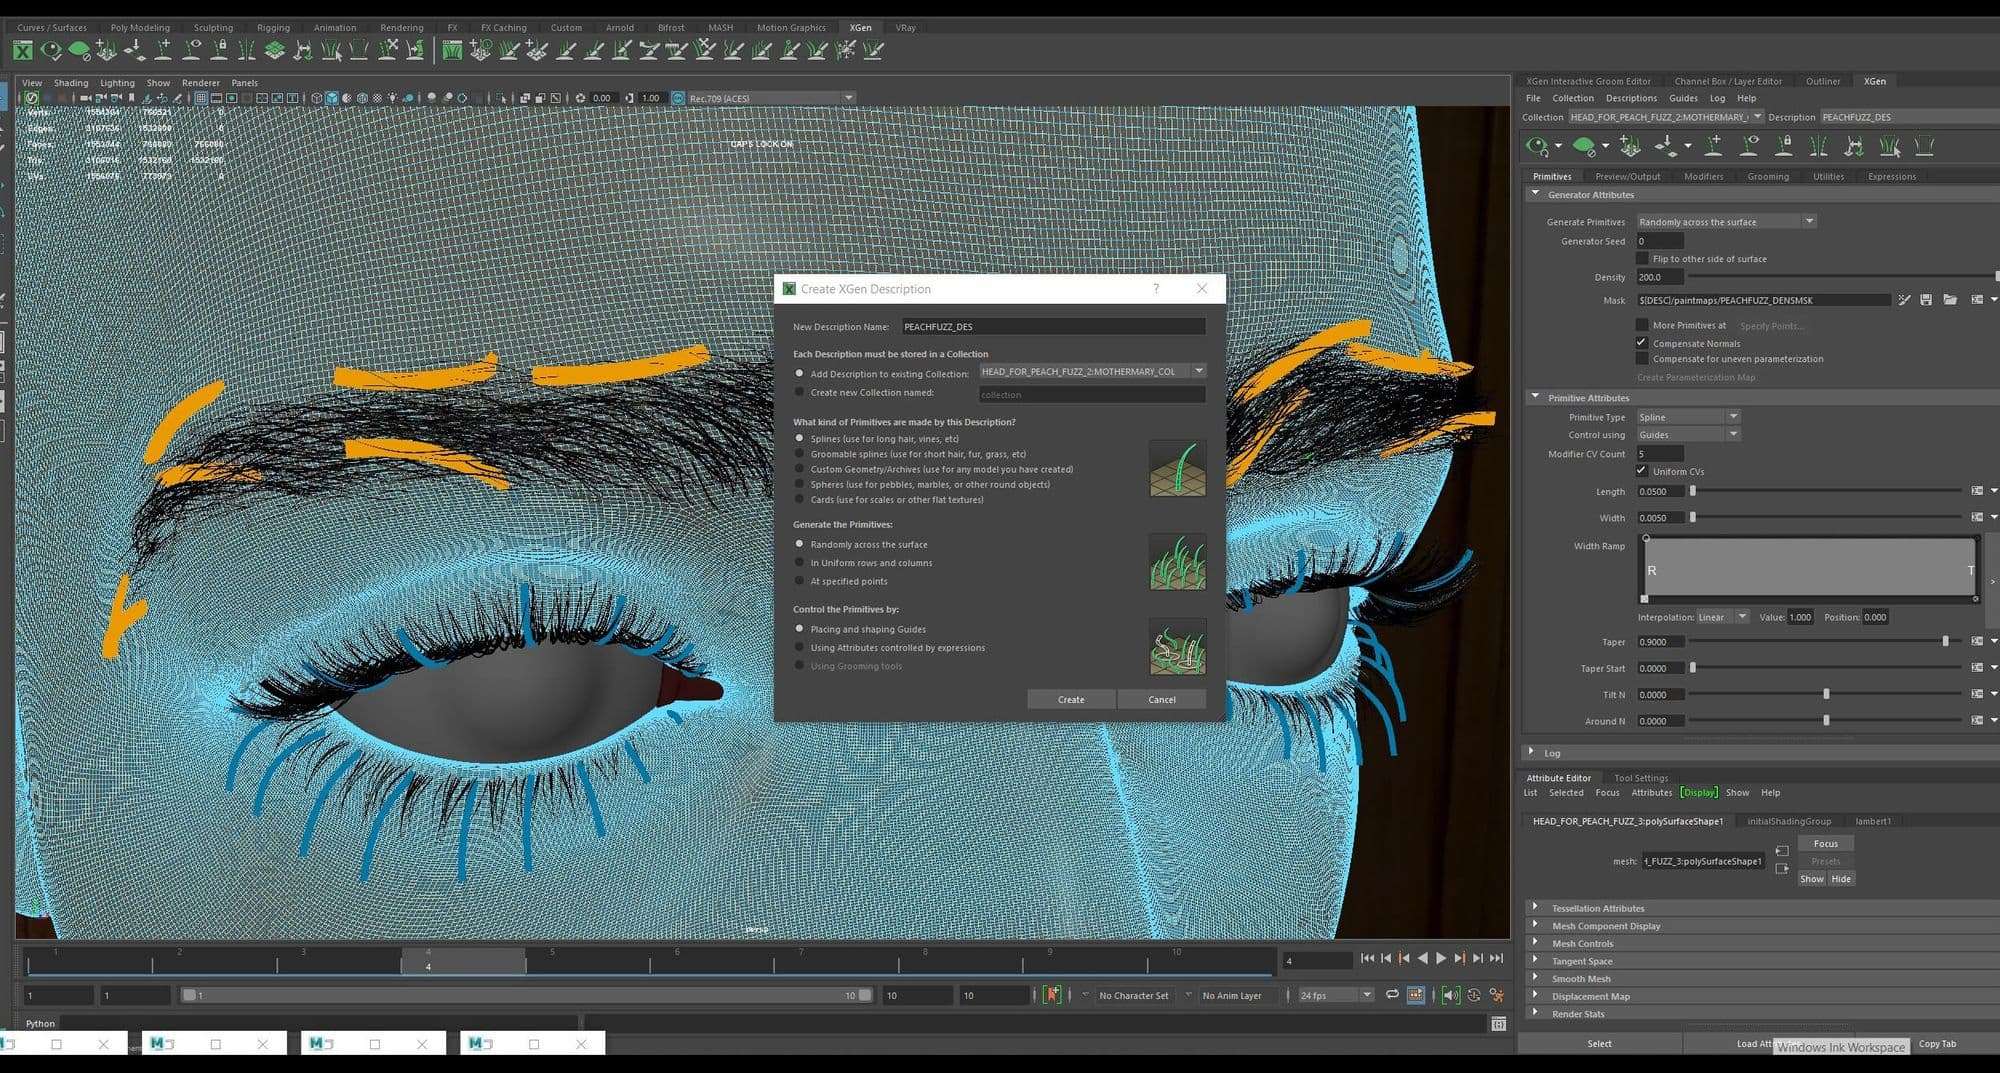
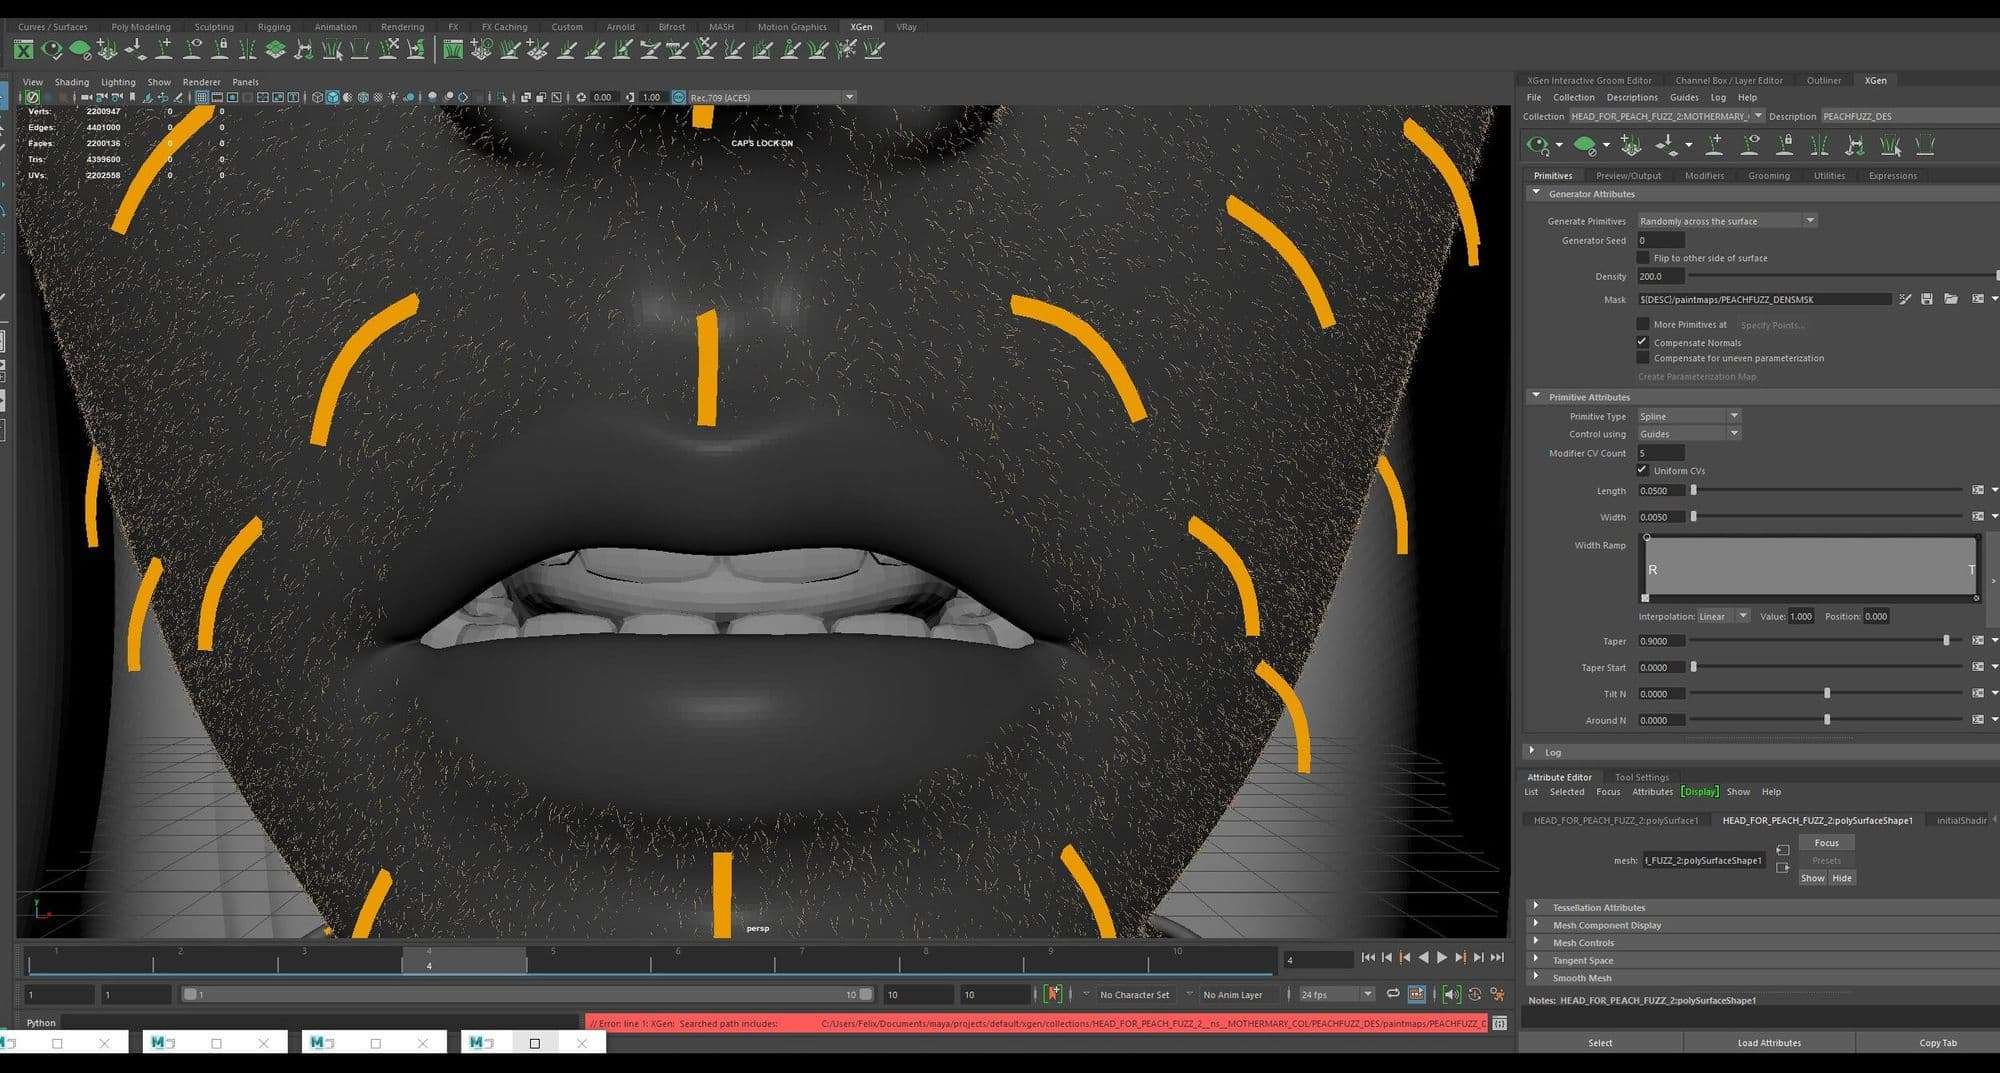
Peach fuzz
For the peach fuzz I tried a different method. I brought the head (dummy head) with all the UV islands packed in the single UDIM so that I can paint symmetrically over the face.
With the dummy head selected I created a new Xgen description called peachfuzz.
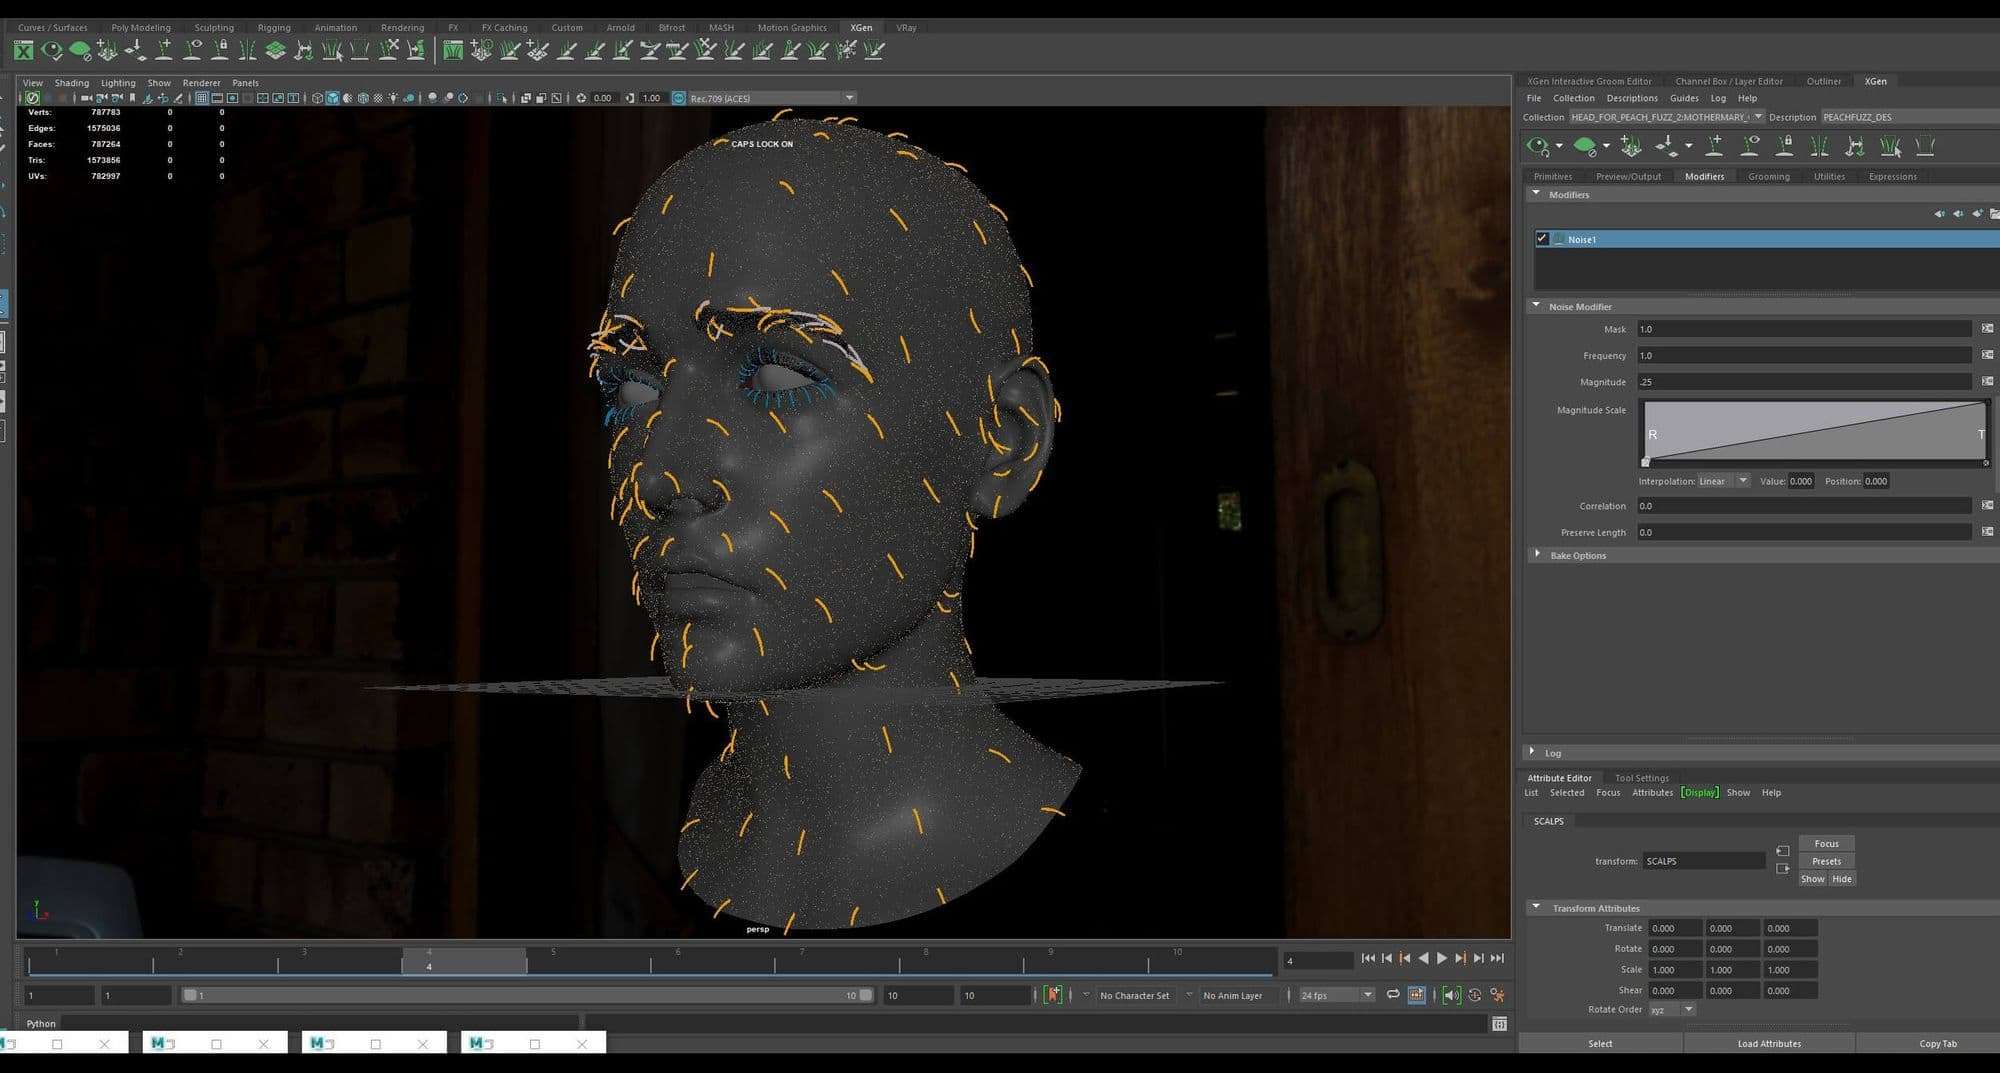
I used add or move guide brush to create guide symmetrically. I followed actual hair growth direction to place the guides. After placing the guides I set the density to 200 and length and width to .005. I then added a noise modifier of magnitude .25.
I used sculpt guide tool to bend the guides and give them directionality.
To remove hair from eye lids and mouth I created a white density mask. I painted the area with black where I didn’t want any hair growth.
Lookdev of the Hair
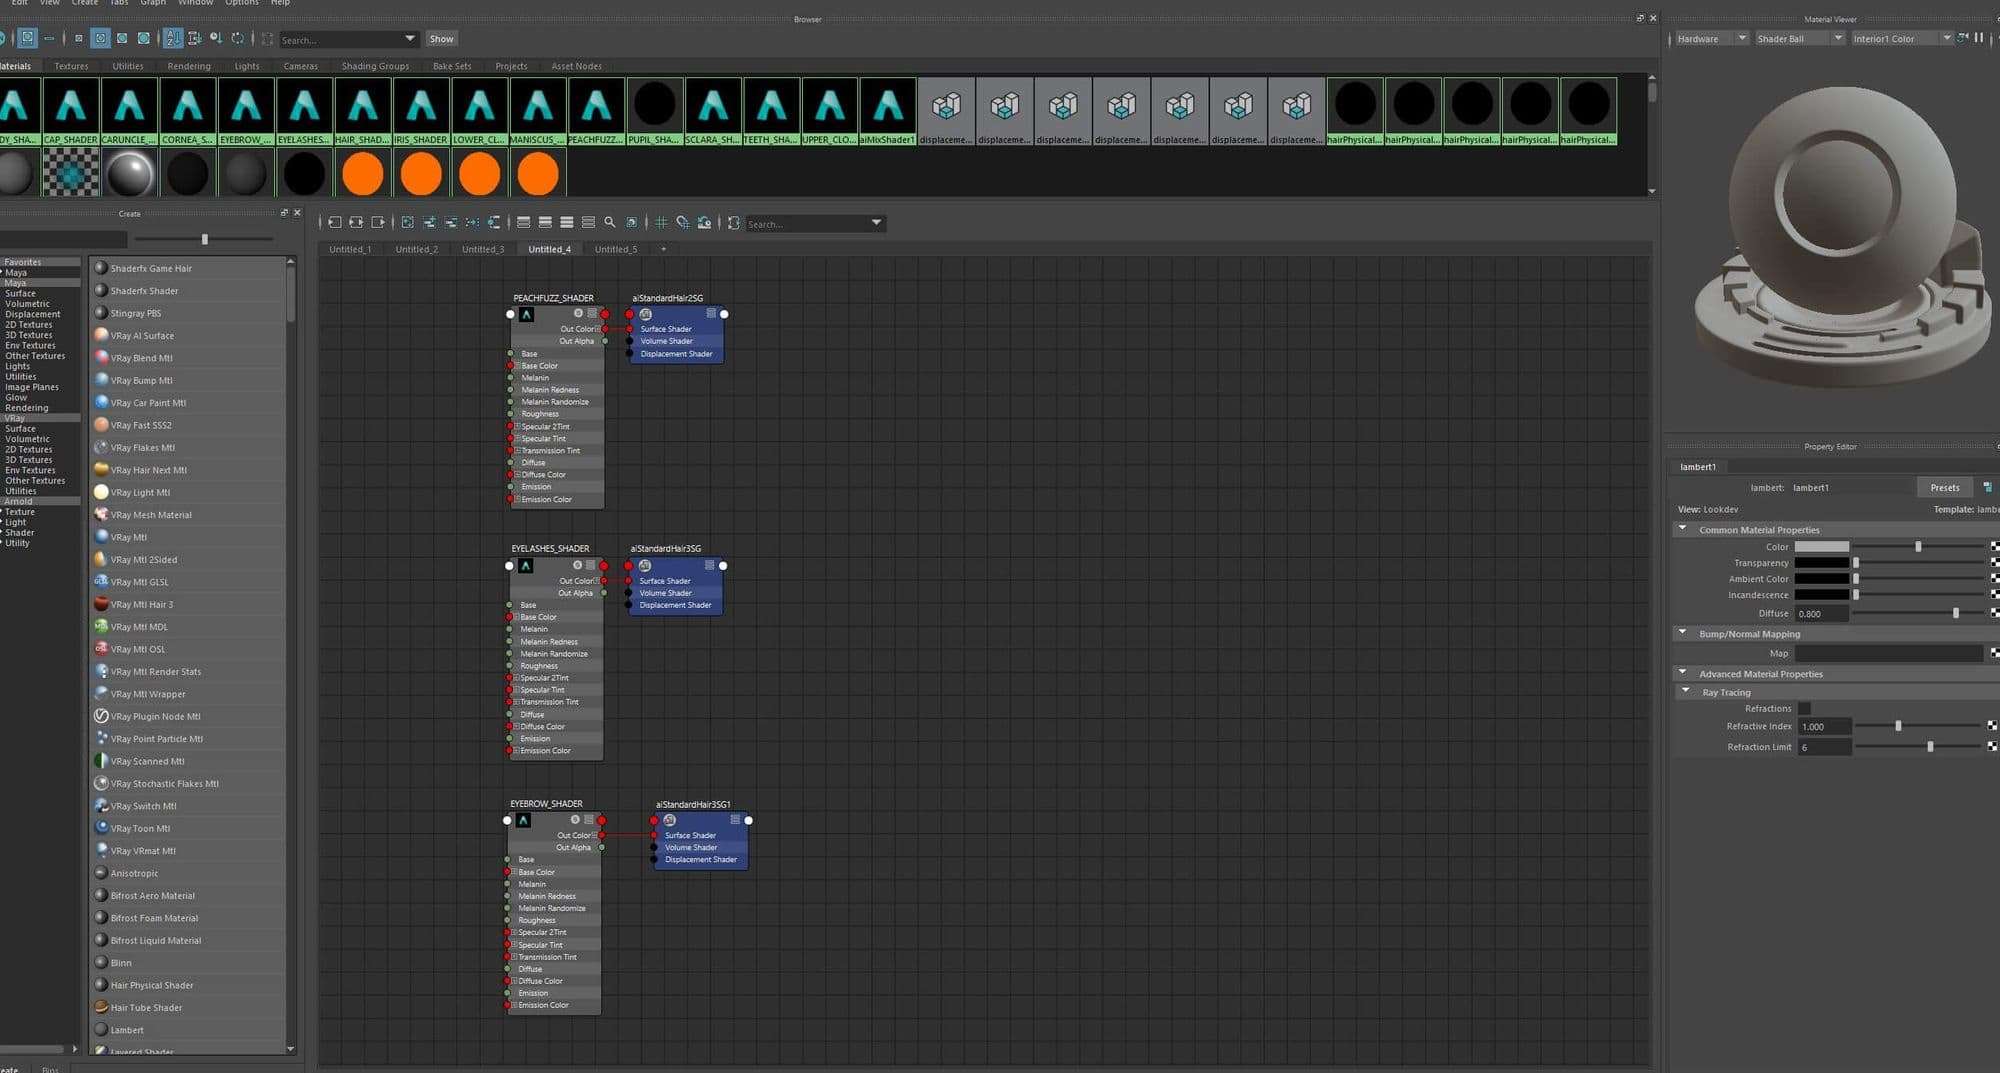
Hair shader breakdown
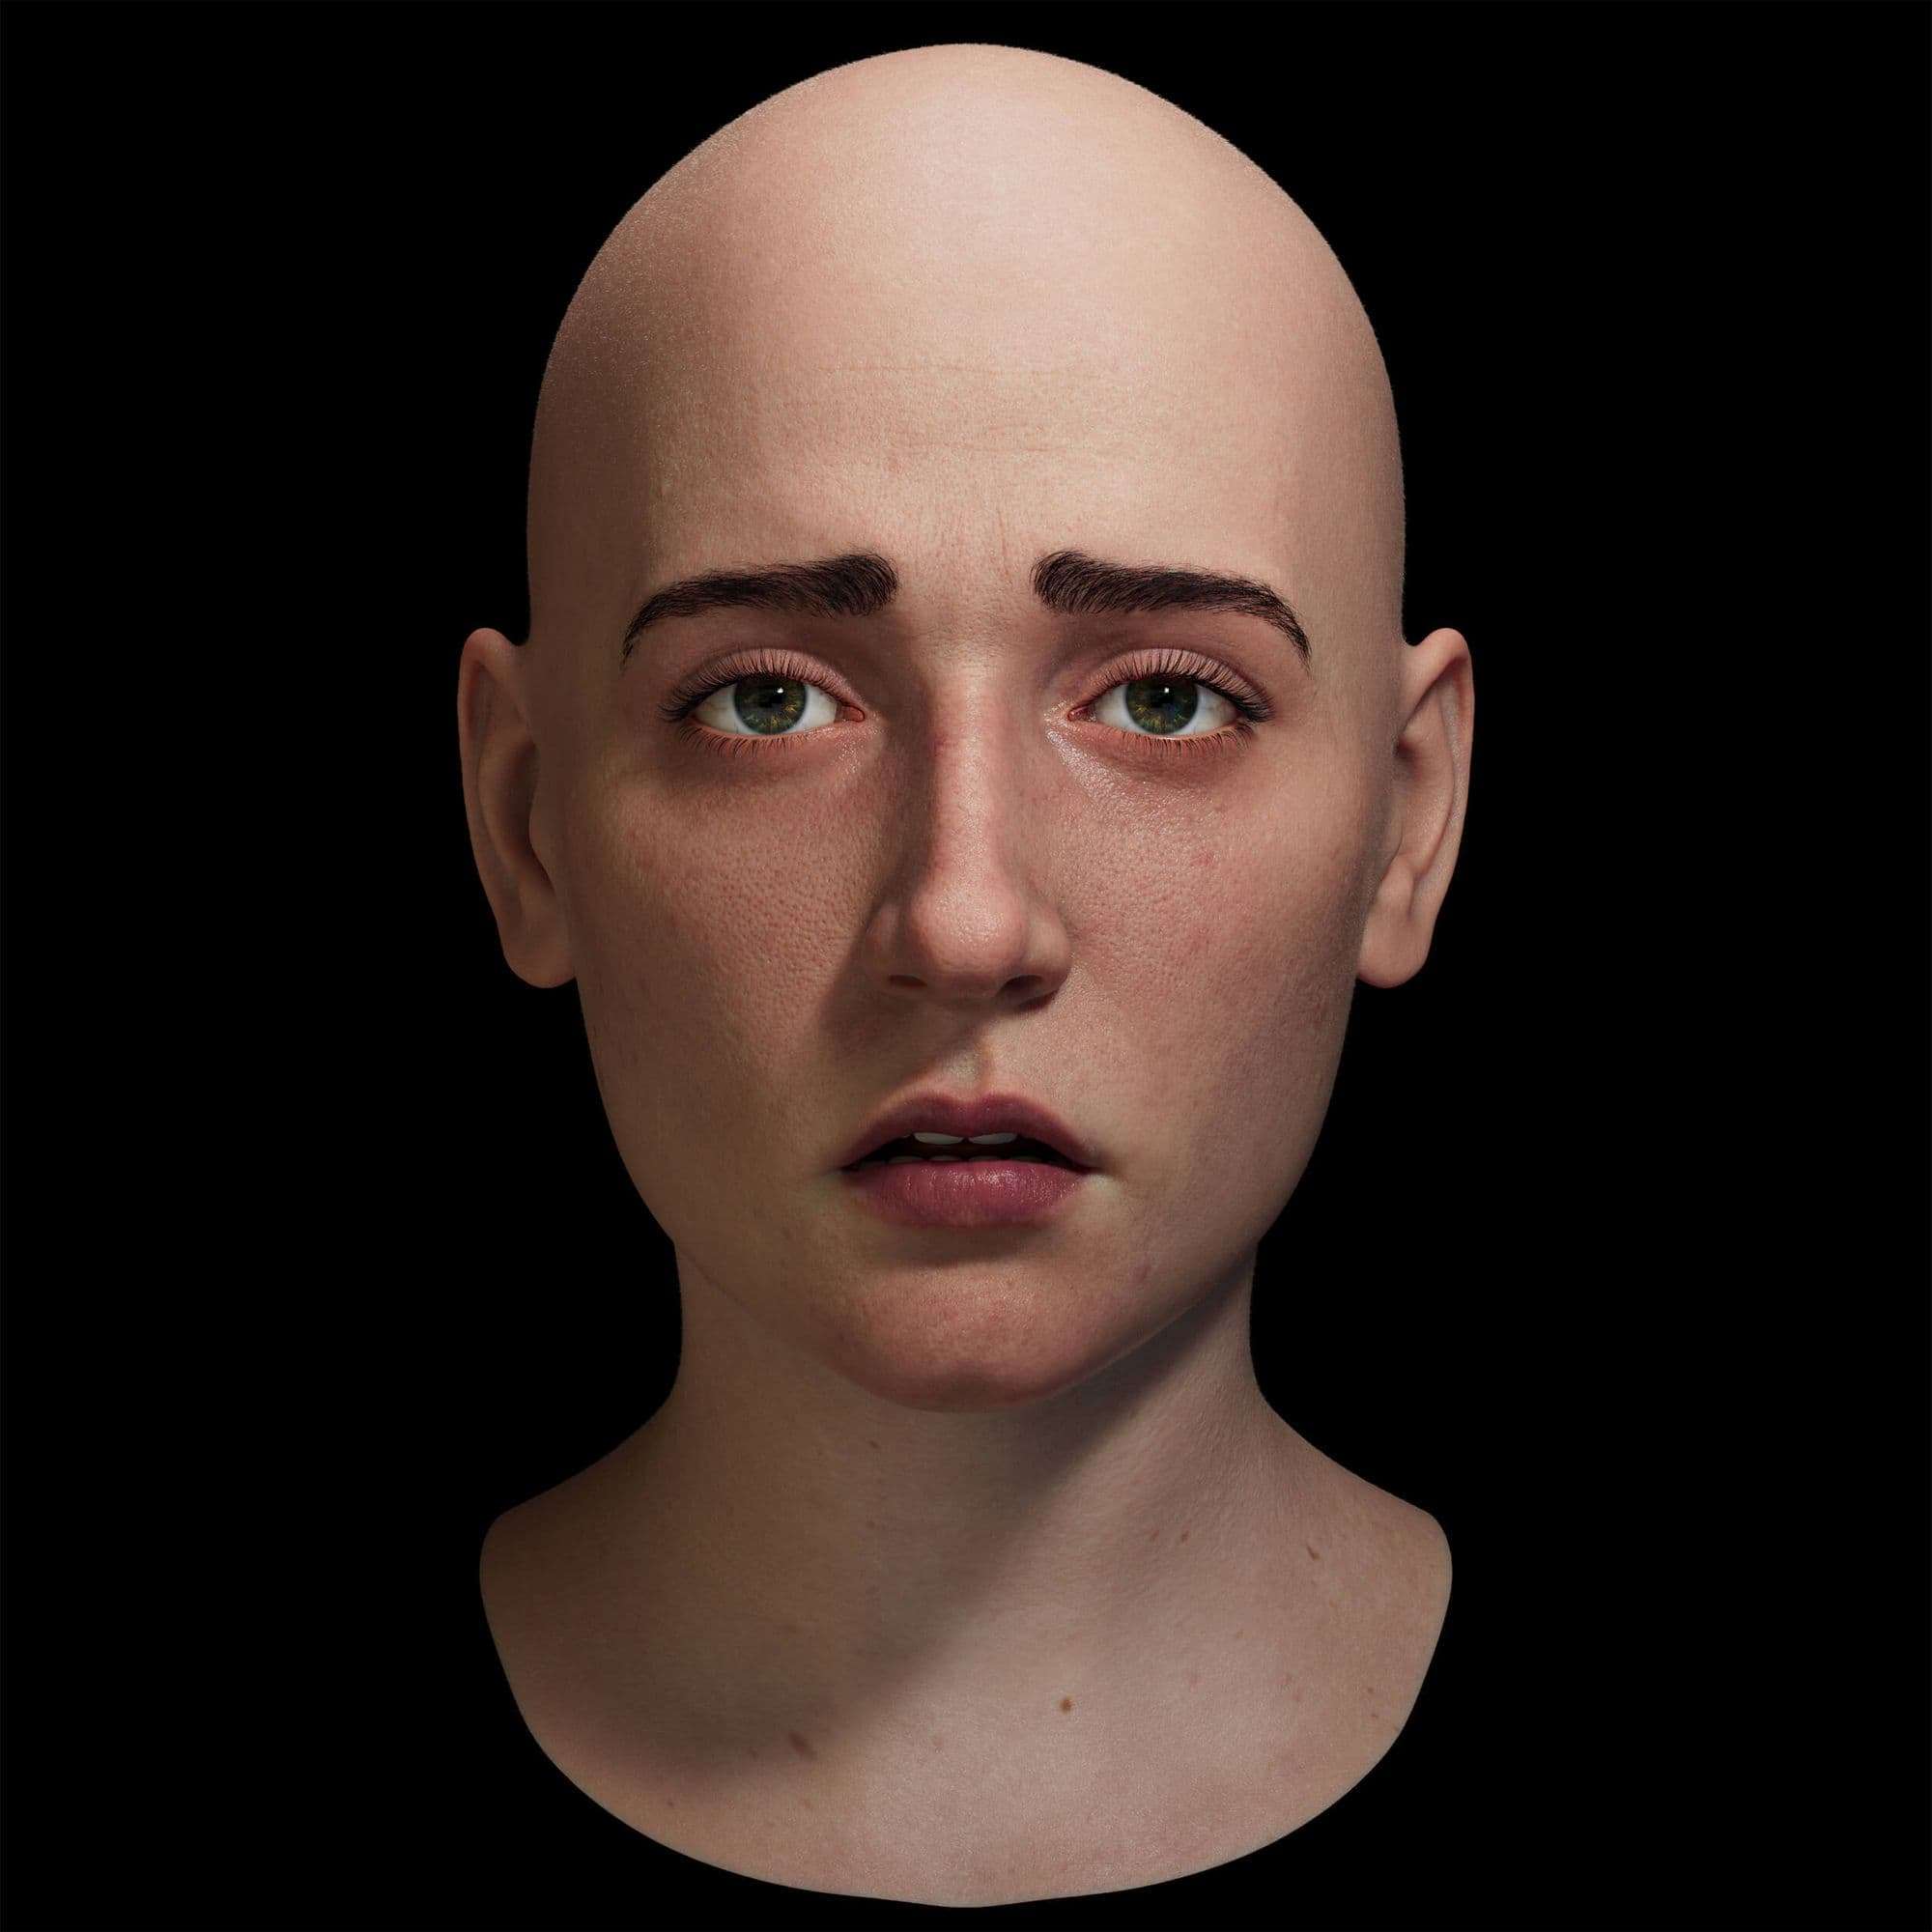
Test Render
Modeling of the Clothing
For the head clothes I took a 3D plane and using move tool and standard tool I created the clothes. I then used Zmodeller brush to give it thickness.
For the cap and body cloth I extracted the meshes from the base body and Zremeshed them. I also provided thickness to them using the Zmodeler brush.
I then UVed all the clothes using UV master plugin in Zbrush keeping symmetry and polygroups on.
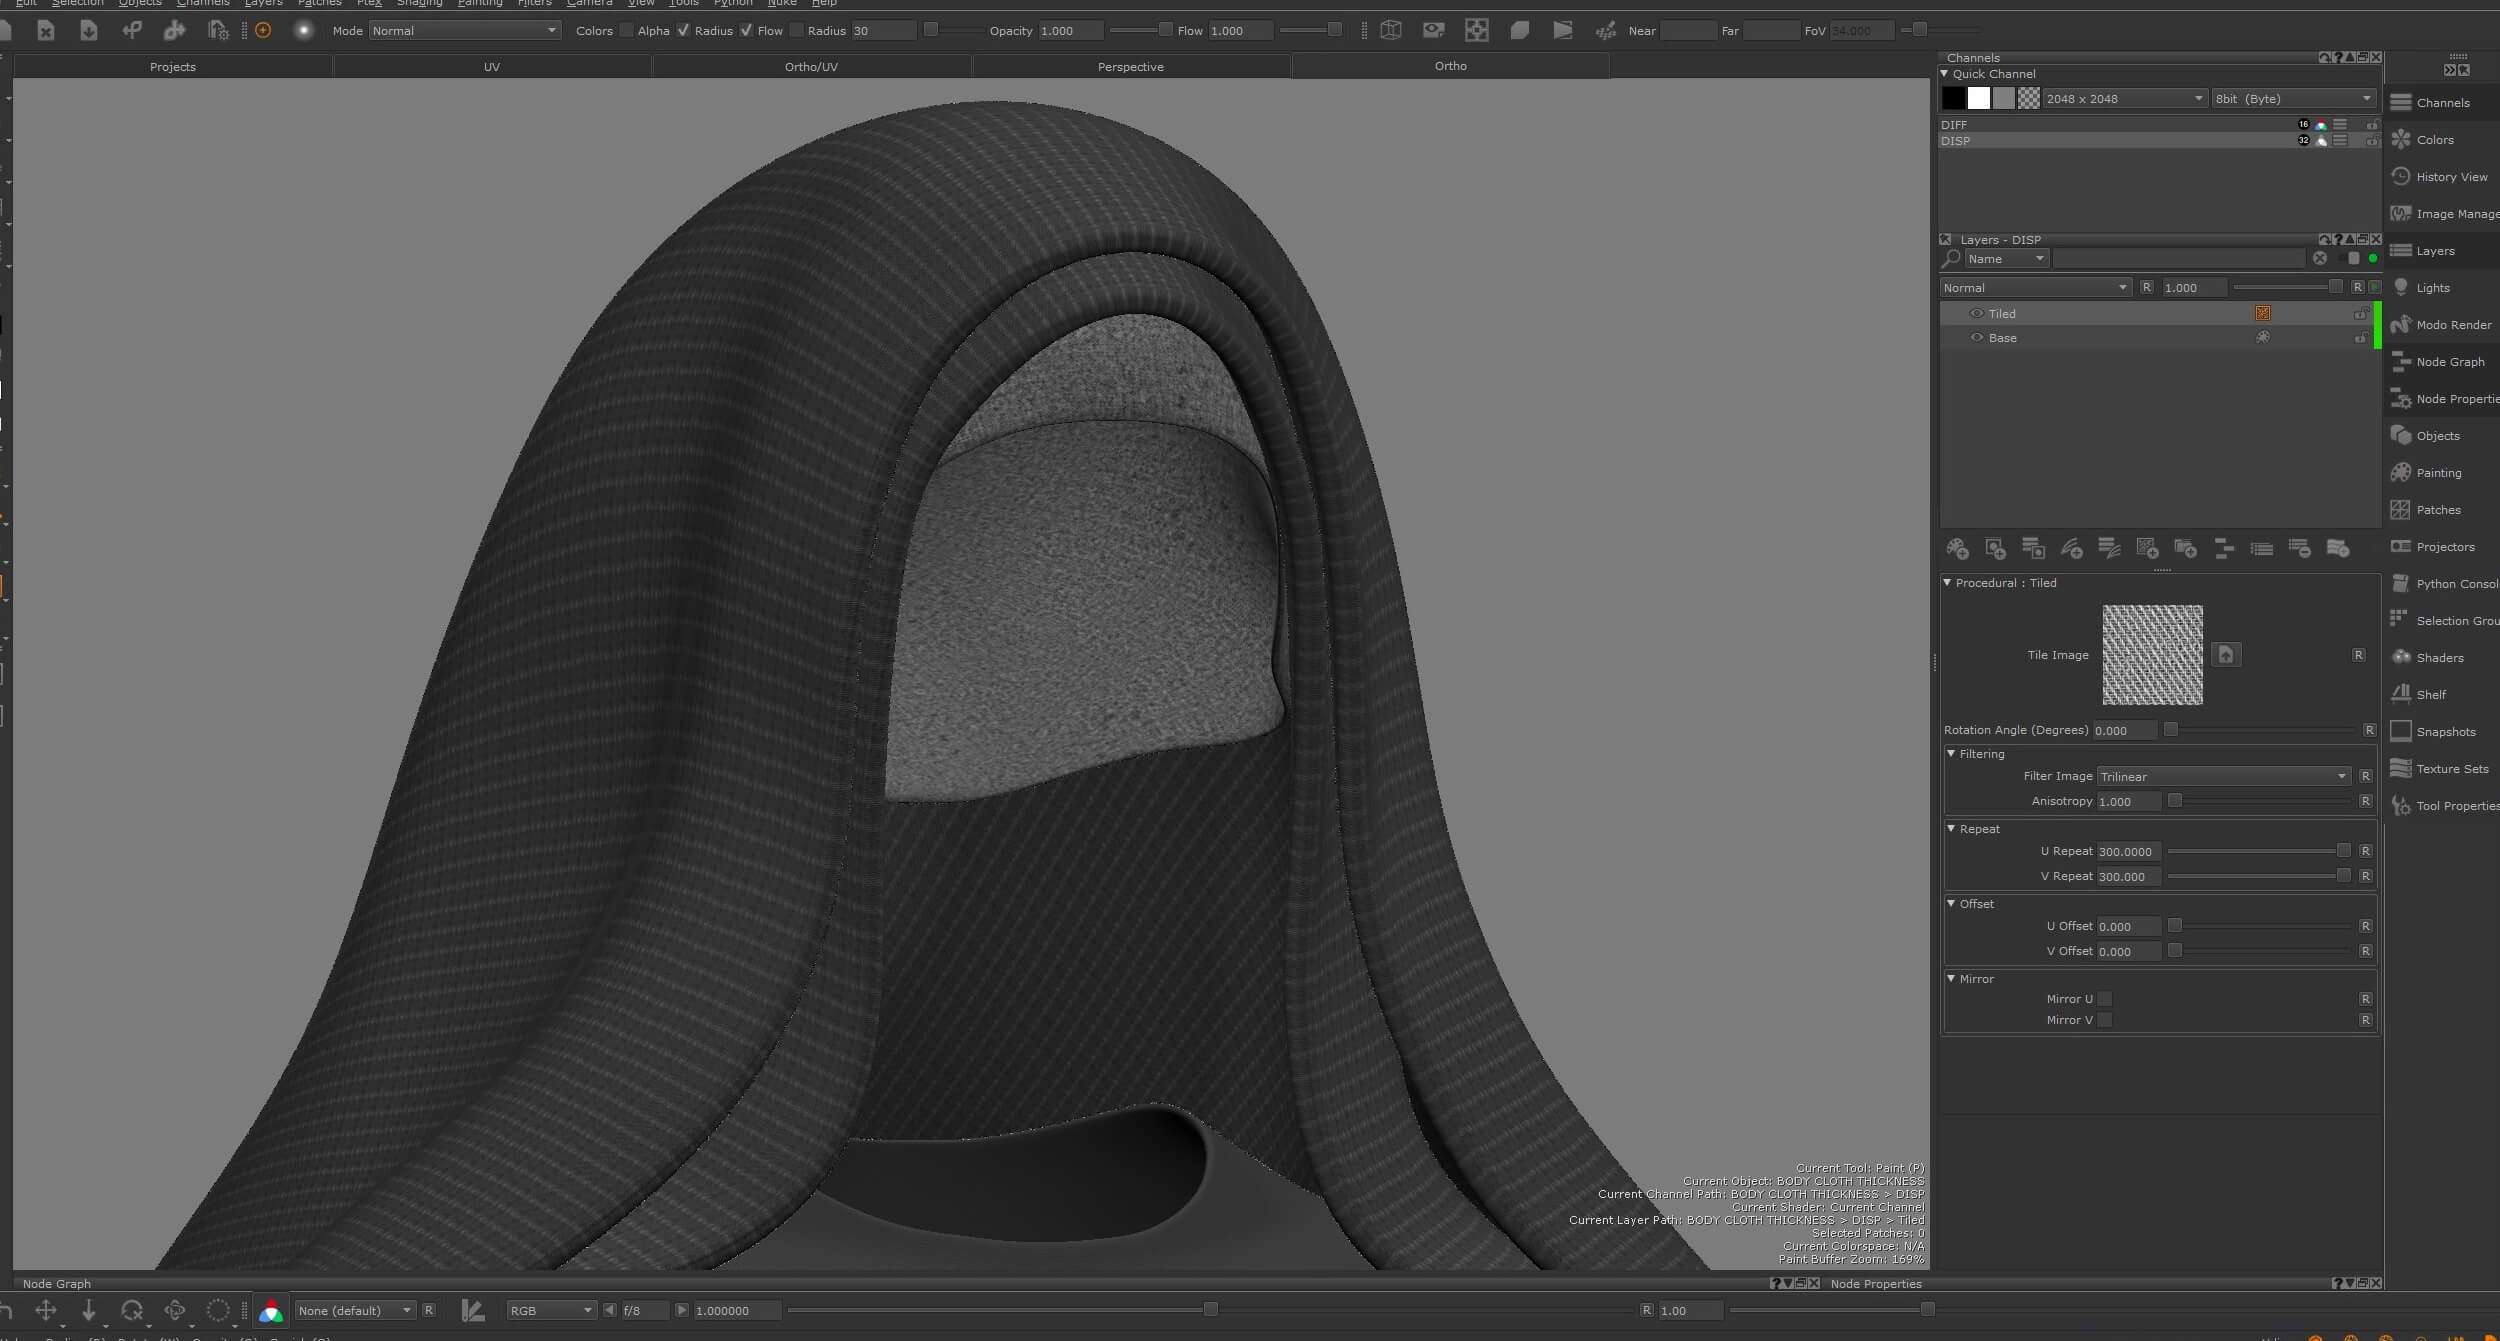
Texturing of the Clothes
I created a new project in Mari. I brought the upper head cloth, lower head cloth, cap and body cloth as separate objects. I created 8k (16 bit) diffuse channel and 8k (32 bit) displacement channel for each objects.
In both diffuse channel and displacement channel of each object I created a procedural tileable layer. I used the clothes pattern from friendly shade website. I exported all the maps in the same way I showed before.
Lookdev of the Clothes
Breakdown of Clothes Shader
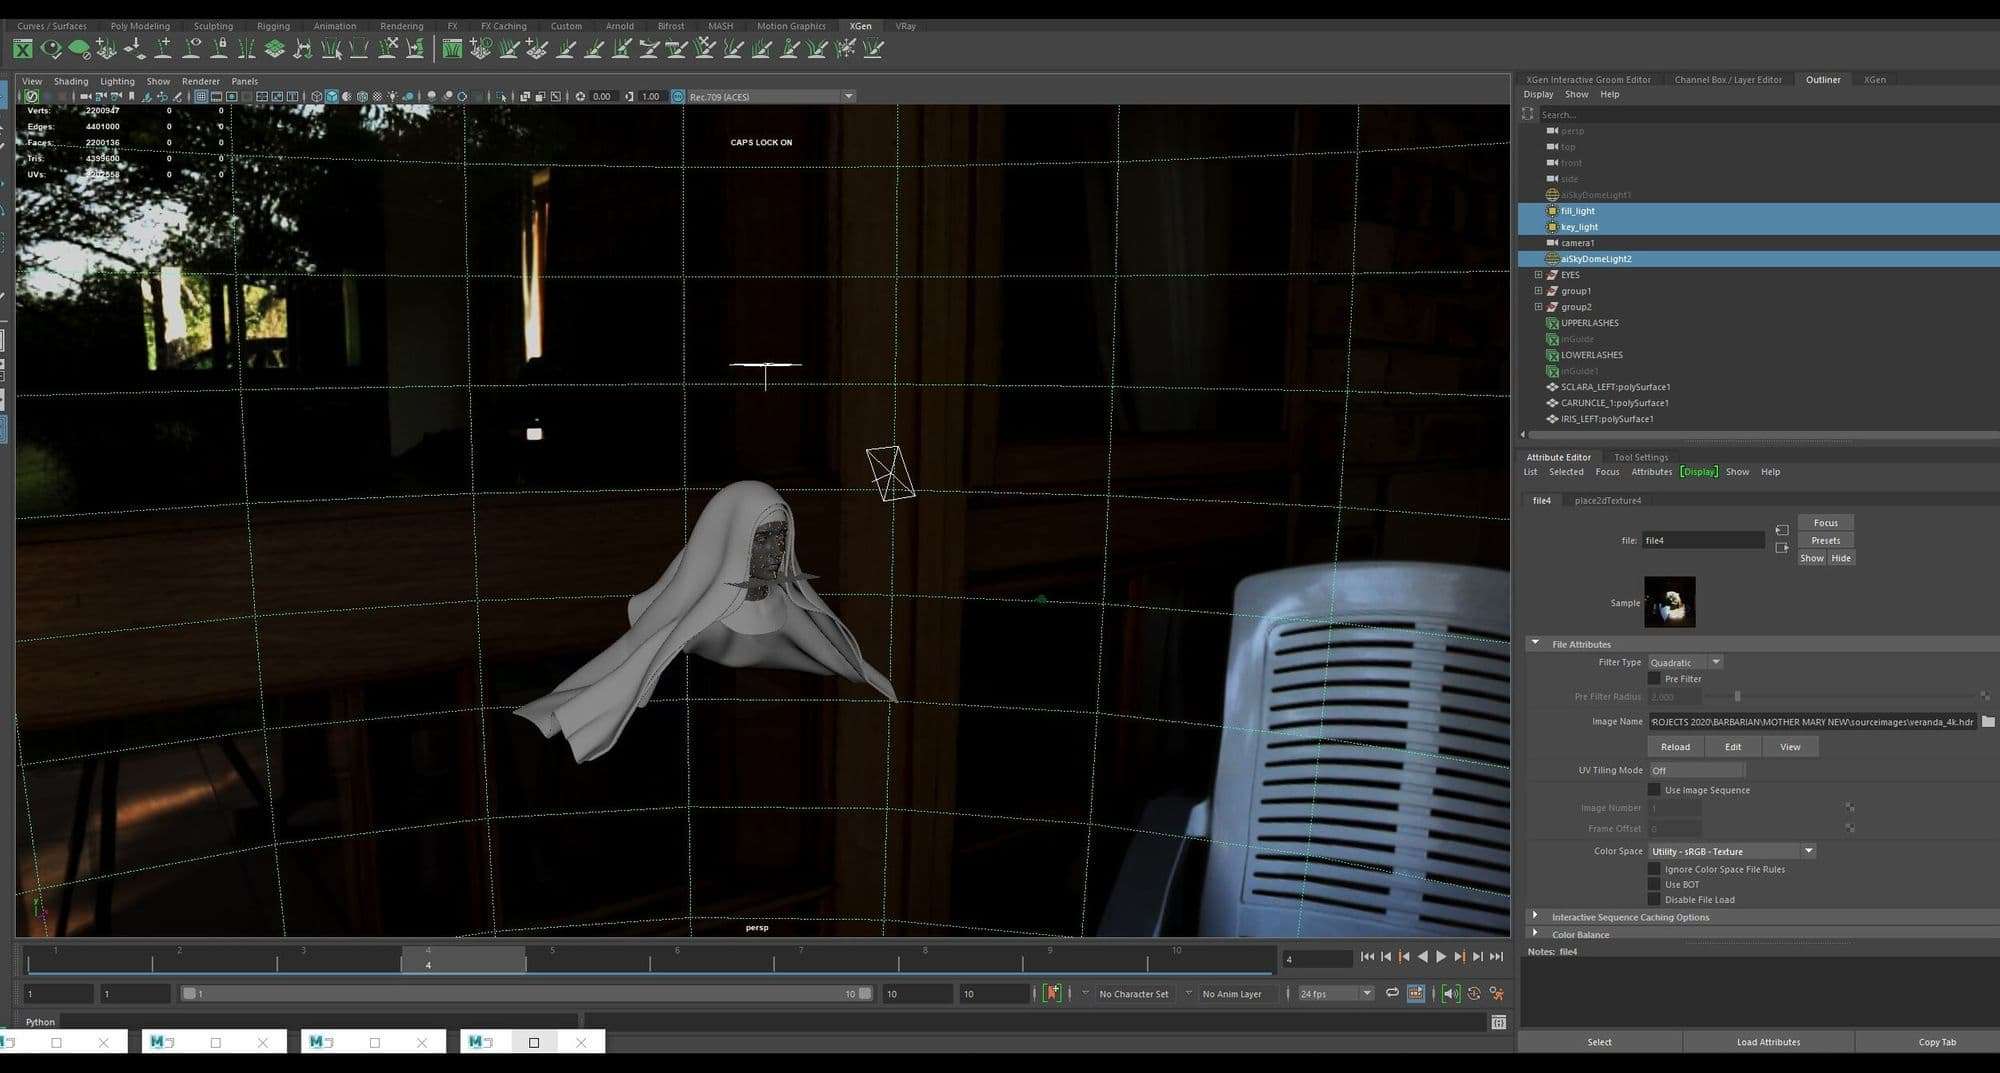
Lighting Setup of the Scene
I used two area lights. One behaving as key light on top and the other as fill light from side. I have plugged in two large soft boxes in them.
I also used one sky dome light with an HDRI image plugged in it from HDRI Haven.
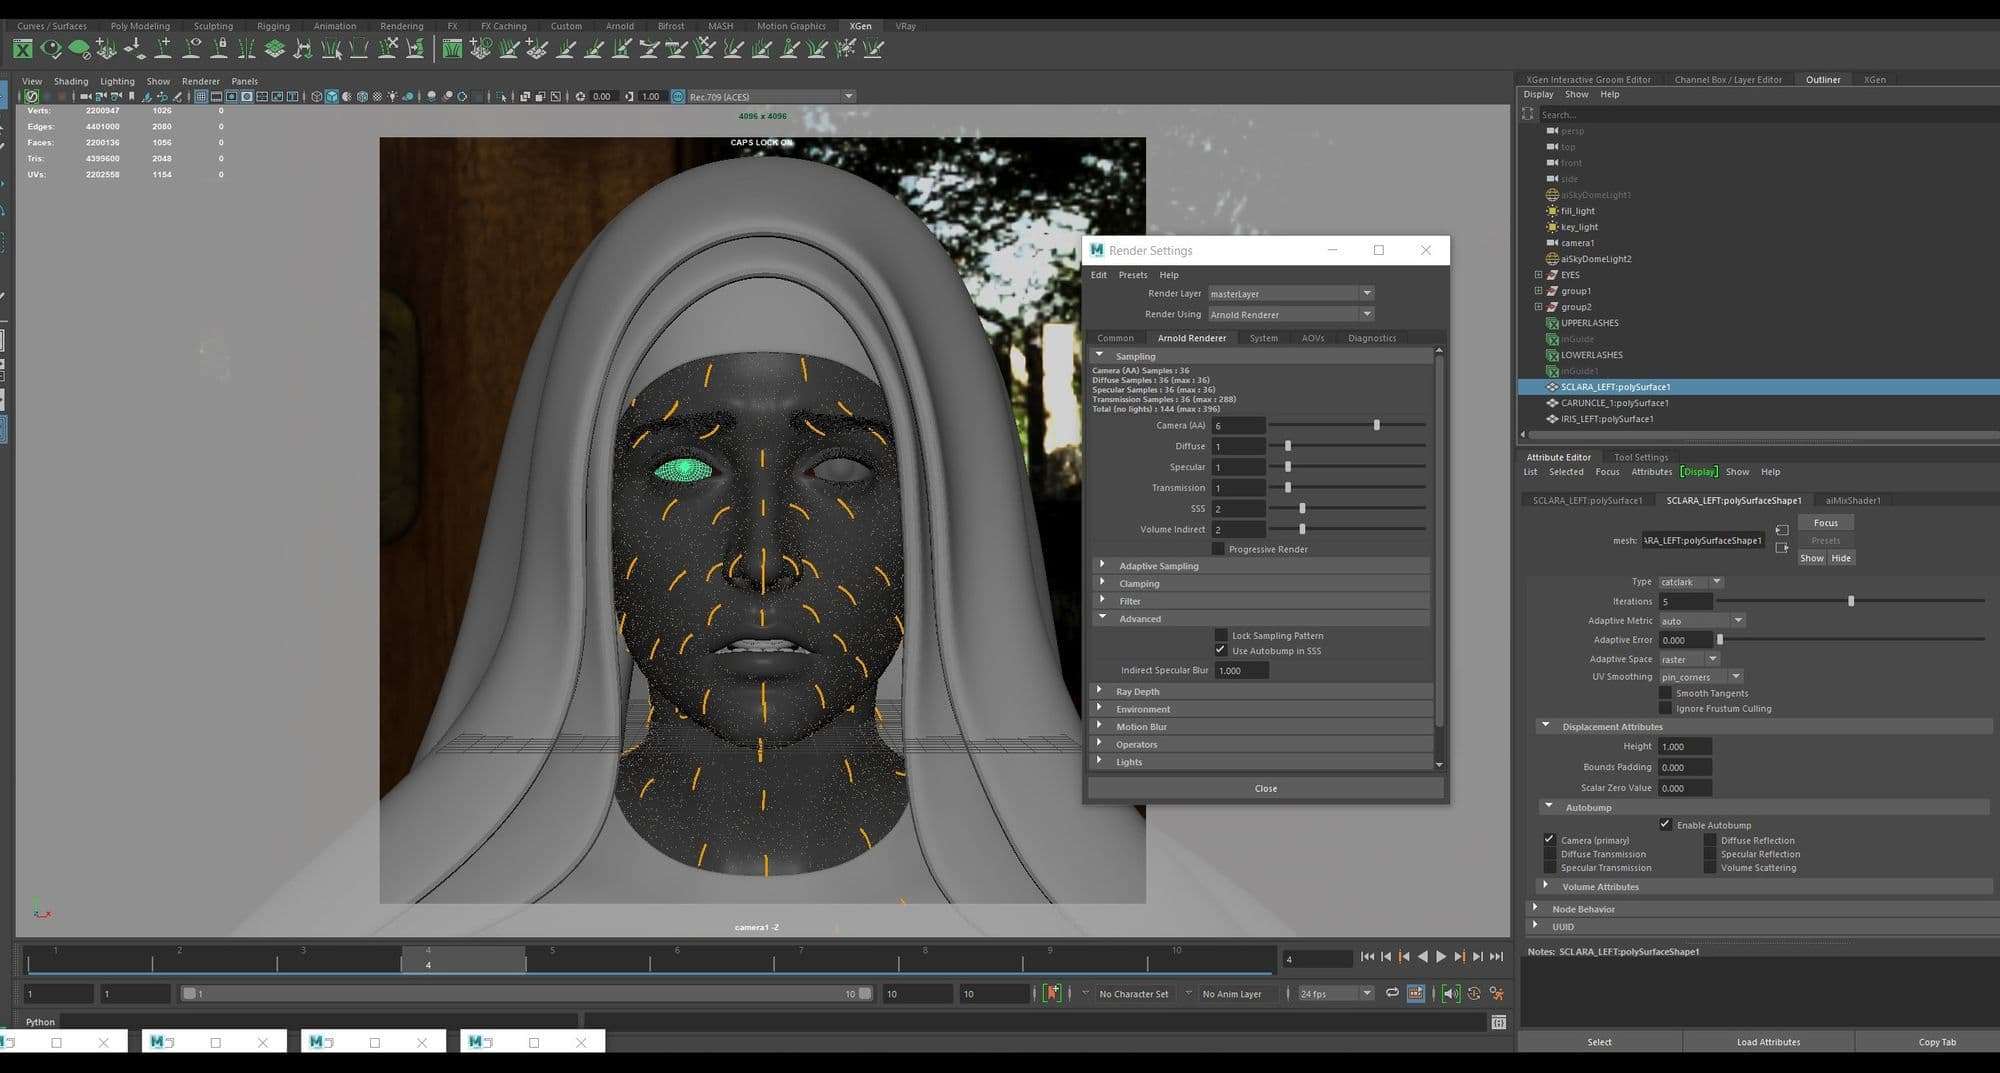
Rendering
For rendering the final image I used ACES colour scheme in Maya. I created a camera with a focal length of 70. I used Catclark option under subdivision tab. This option is under the Arnold attribute of each object to sub divide the object during the render time.
I also enabled auto bump option. This option is under auto bump tab inside the displacement attribute of the Arnold attribute.
Render O/P from Arnold
Compositing
I composited the image in Photoshop to get the final result.
I would like to thank God, Jesus and Mother Mary for giving me blessings to create this artwork. I would also like to thank Mr. Pablo Munoz Gomez and Mr. Alwyn Hunt for giving me this wonderful opportunity to showcase my work.