Designing, Modeling, and Texturing High Quality Weapons For Visual Effects and Games
Andy Huang is a CG Artist studying Animation at the University of Southern California. Inspired by the CG in movies and video games, Andy takes us through his process for designing and modeling high-quality weapons for Visual Effects and Games.
Andy Huang is a CG Artist studying Animation at the University of Southern California. Inspired by the CG in movies and video games, Andy is on a mission to create 3D artwork and work professionally as a CG artist in Hollywood.
In this article, Andy takes us through his process for designing and modeling high-quality weapons for Visual Effects and Games.
Modeling weapons is one of the most fun and rewarding ways to practice hard surface modeling. There’s always a plethora of online resources you can gather for reference and they're all based off of real world designs. Today, I will show you how I model, texture, and render out one of my scenes from my “loadout” series using Blender.
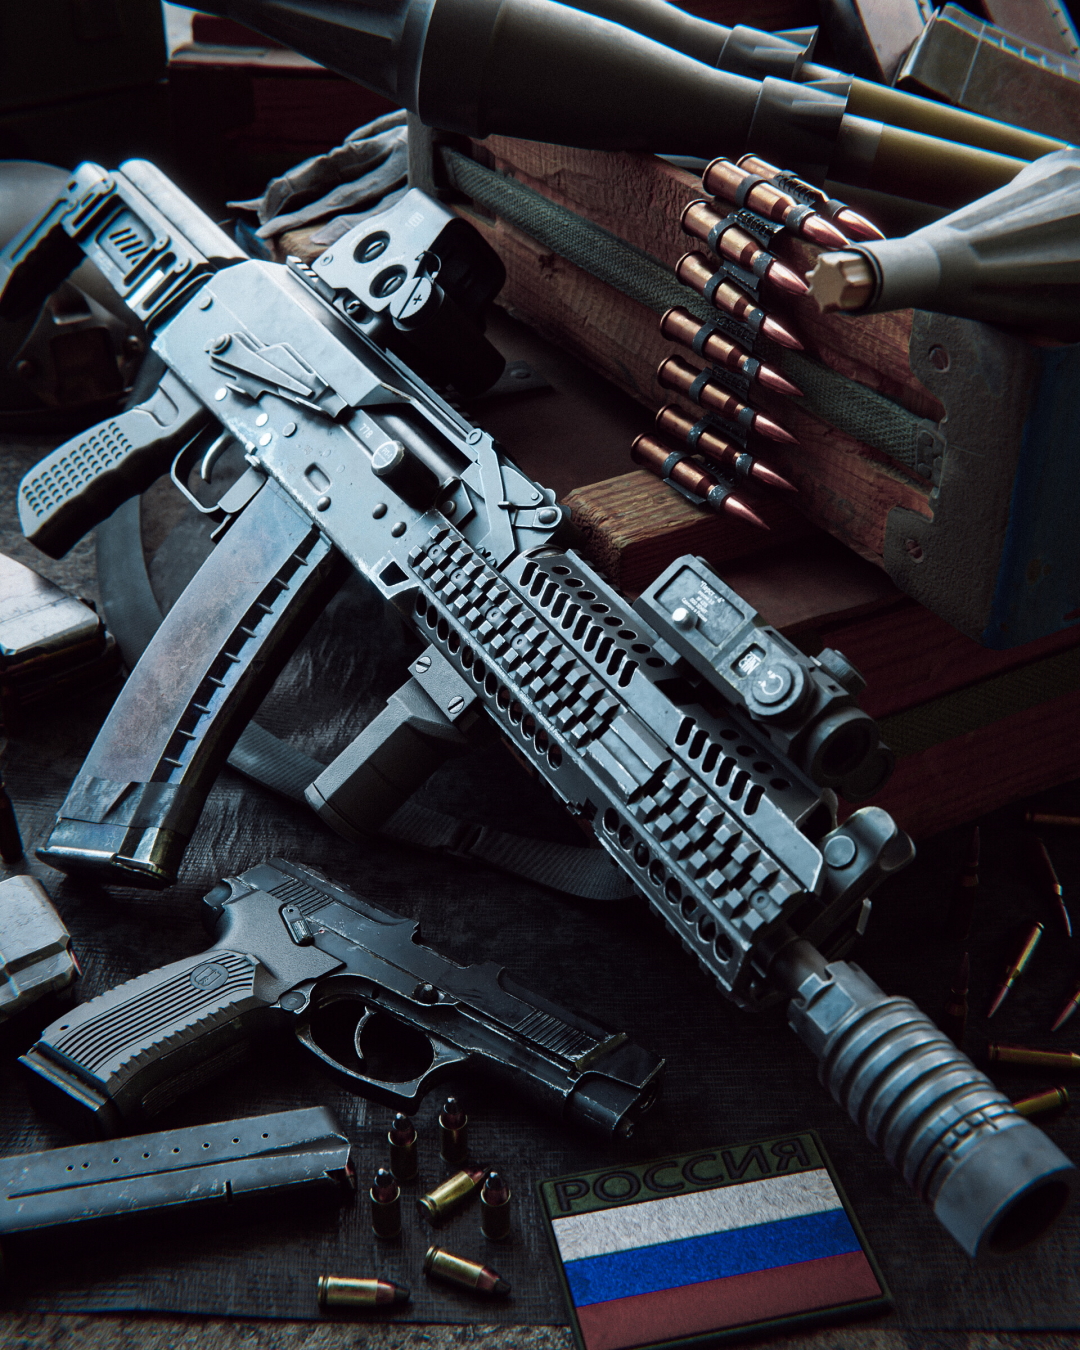
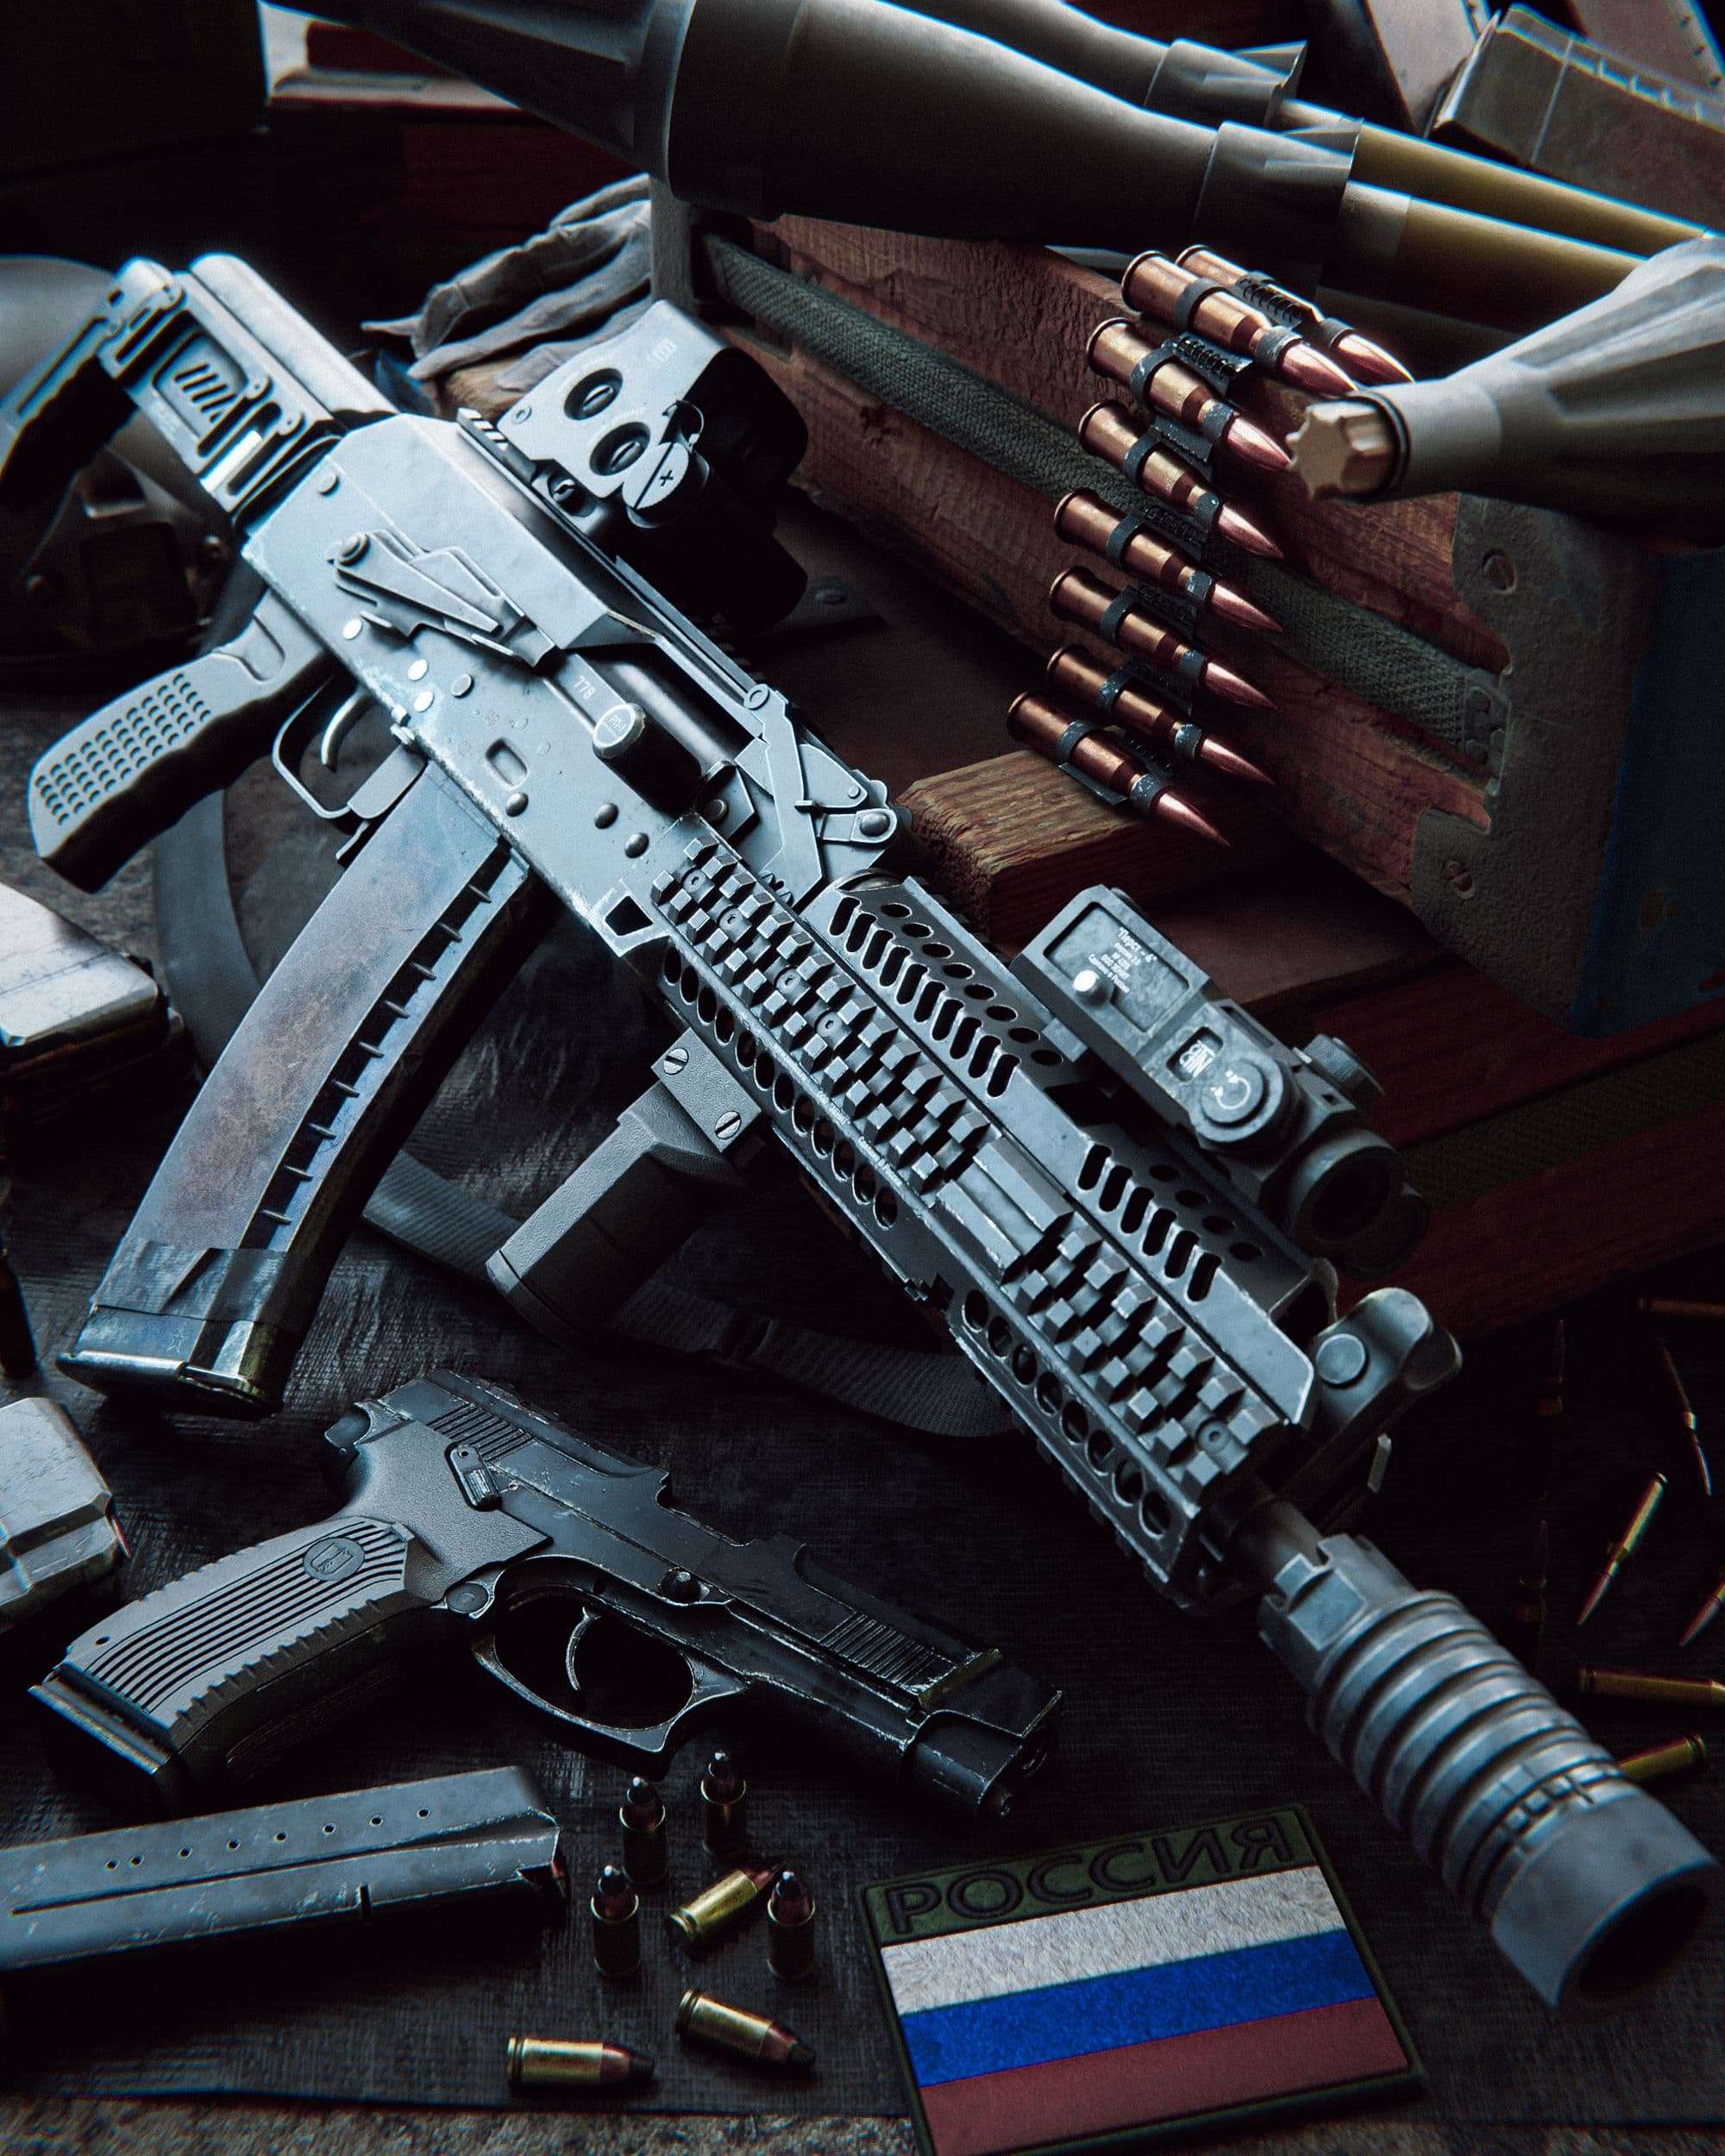
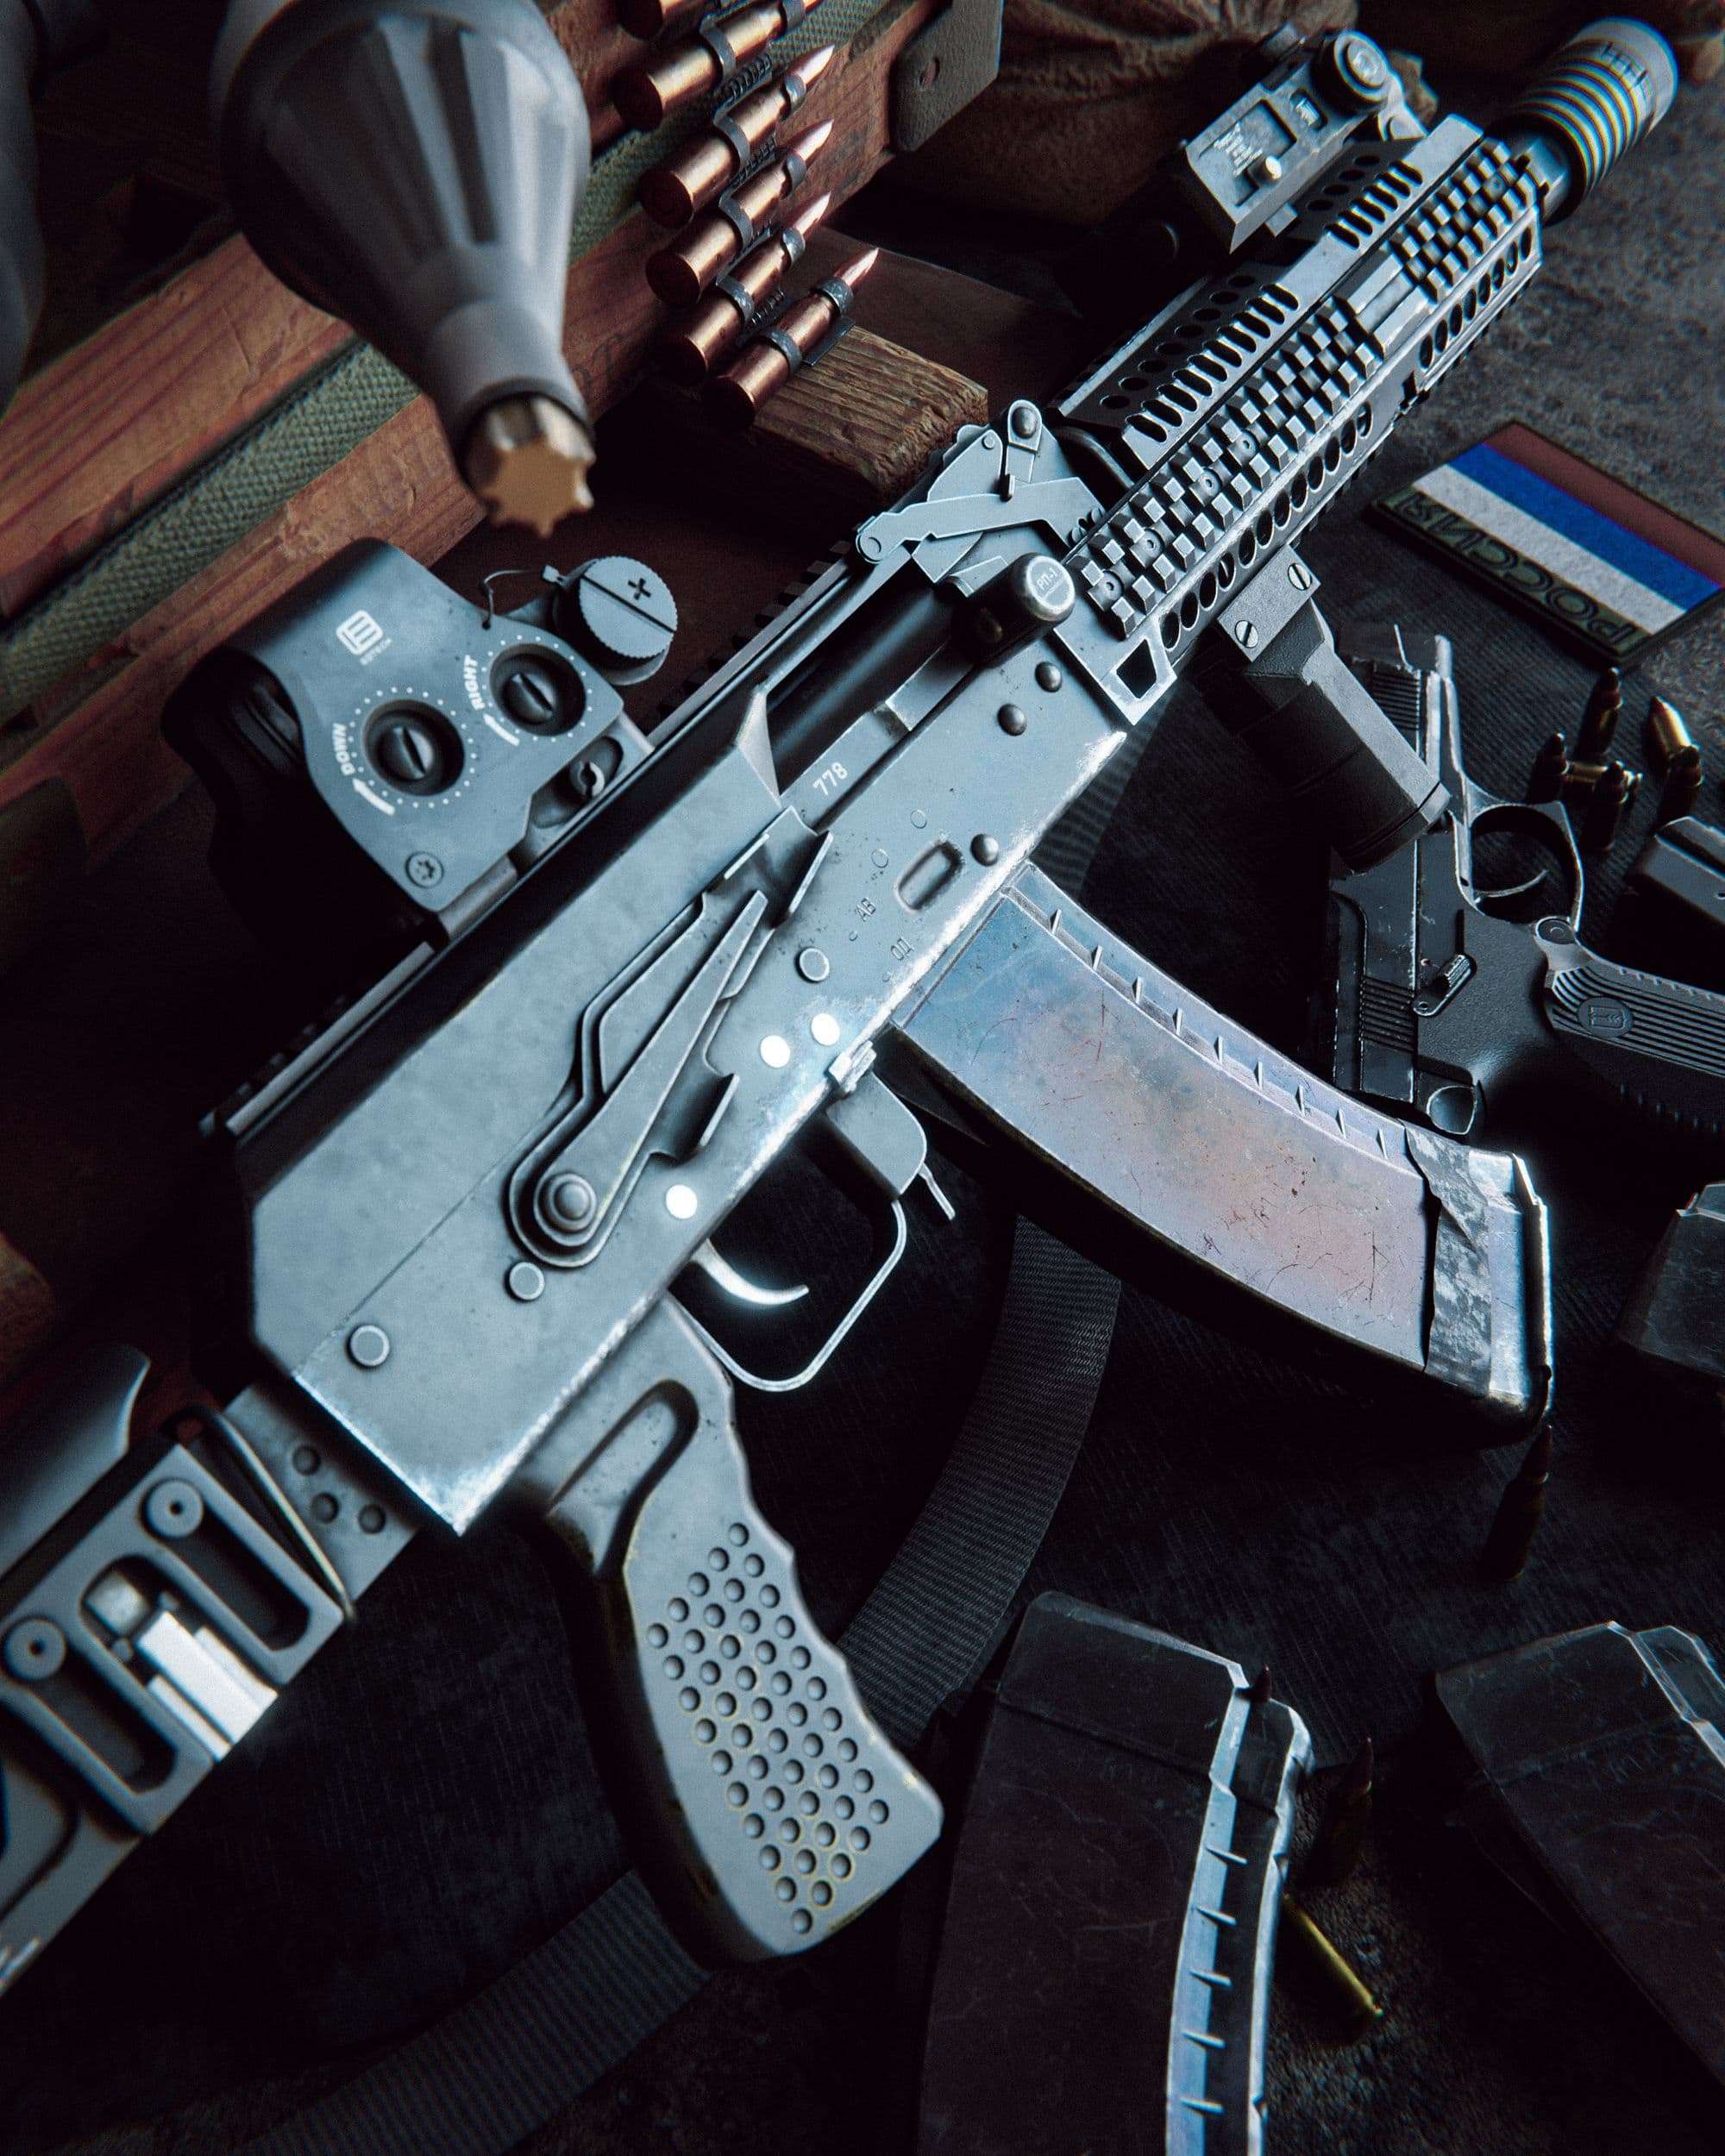
For this scene, I'll be focusing on my latest Loadout render, based on Russia’s infamous Spetsnaz “Alpha Group”, a special forces group specializing in counter terrorism.
Research and References
The first step to any project is planning. To start planning, look on the internet for resources and references for whatever weapon you plan on modeling. If you find something that catches your eye, save it to a folder for reference. You'll need it for later. Online, you can find weapon blueprints and manufacturer specs that provide perfect references for the project. Google images, videos, and product photos are great.
References in PureRef
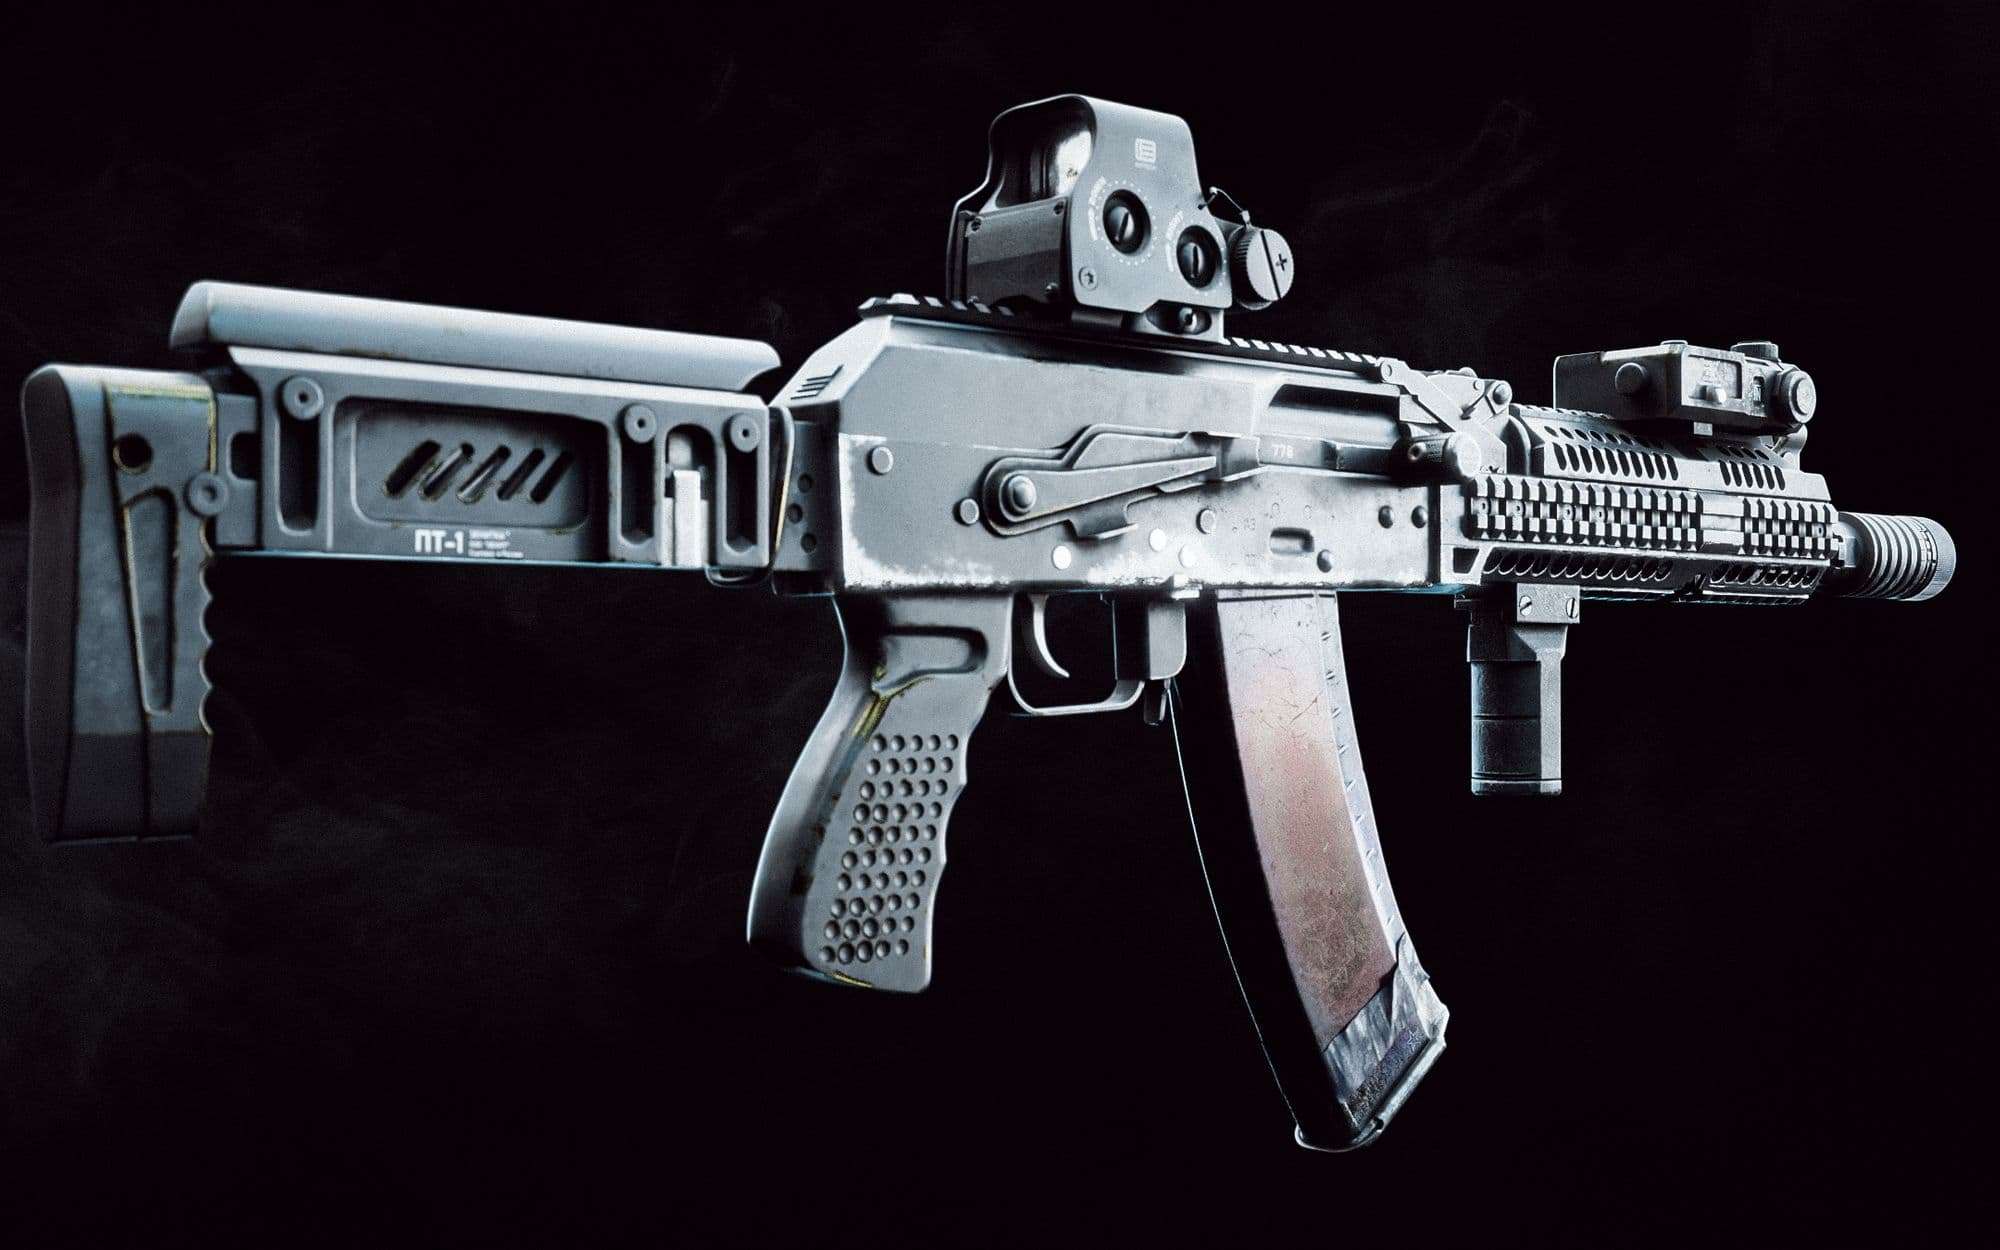
For my Spetsnaz loadout I found images of the Spetsnaz’s “Alpha AK” rifle and MP-443 Grach pistol. The rifle also included multiple attachments such as laser sights and foregrips, so I included those in the references. Below is a list of the individual weapon parts I used for the Alpha AK:
∙ Zenitco Railed Handguard
∙ Zenitco RK-3 Pistol Grip
∙ Zenitco PT-1 foldable buttstock
∙ Eotech EXPS-3
∙ Zenitco B-33 Receiver Cover
∙ Krinkov Flash Suppressor
∙ Zenitco Perst-4 Laser
∙ ZenitCo RK-0 tactical front grip
I found the names of all of these parts by doing research on what an "Alpha AK" is spec'd out to have. Then, on Google, I searched the product photos for these parts and saved them all onto a single folder. Afterwards, I took the images into PureRef, a free image-referencing software that can showcase a gallery of images at once. Doing this allows me to visualize how the parts look like from different angles. When I have a good idea of what each part looks like, I can start modeling.
Modeling
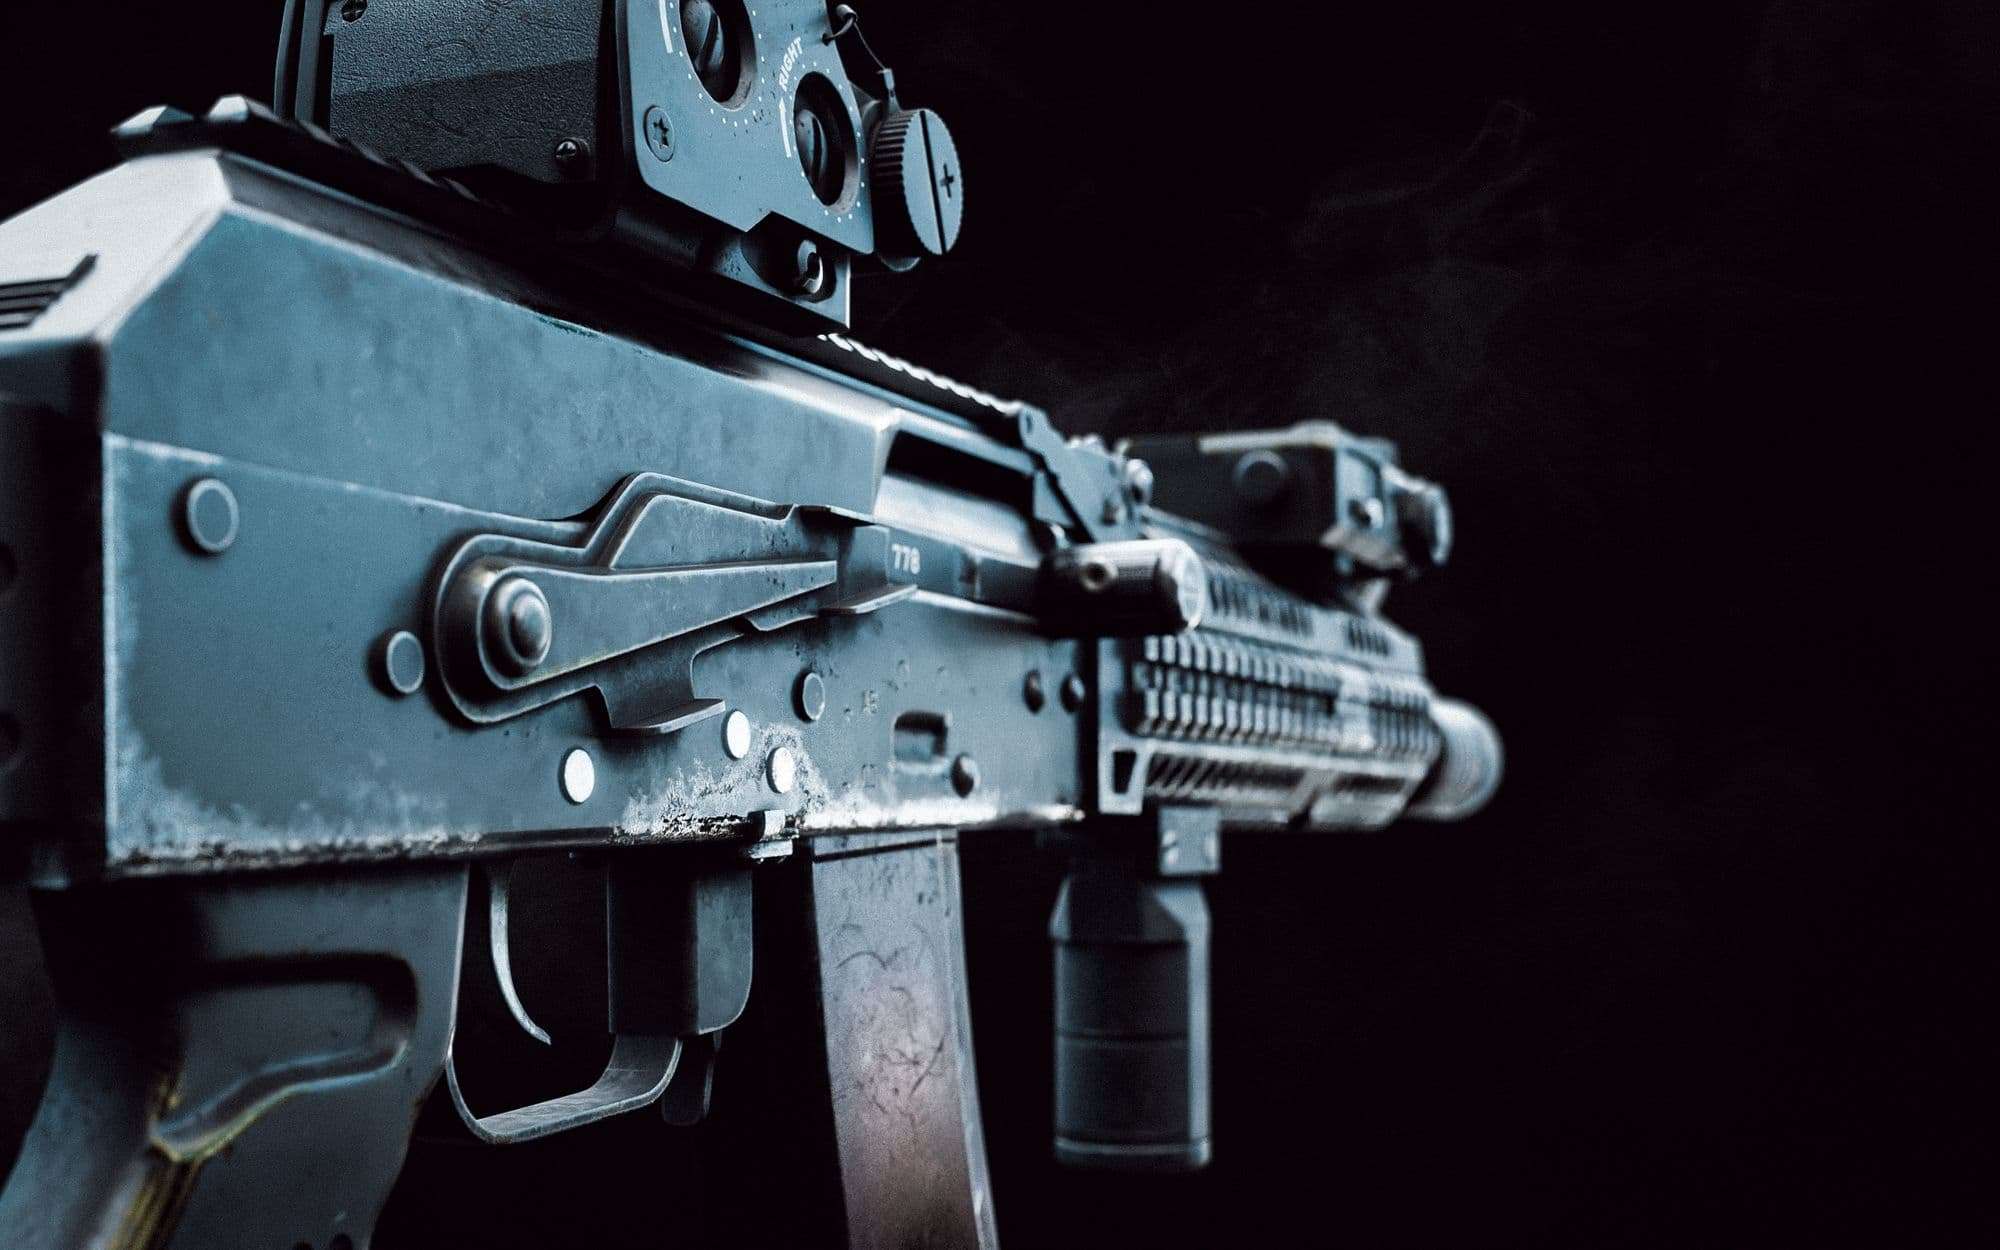
After gathering reference photos, I can begin modeling the individual weapon parts in the scene such as the receiver, barrel, handguard, etc.... Before I begin modeling, I put the reference images in the scene as an image plane. Afterwards, I set the measurements of each part (that can be found online) and line them up with the reference images. So if an individual part is 10 inches in length, I'll line up a side view image of that part to be 10 inches in the scene. Then, I model the parts by matching up the geometry with the reference image.
Modeling with reference
The modeling process is usually the most time-consuming part, but I find it easy to get into the flow of modeling because you can see your progress in real time. Modeling weapons requires hard-surface modeling skills, so if you have any practice modeling robots, machines, vehicles, etc… modeling weapons shouldn’t be a problem.
Modeling weapons is one of the most fun and rewarding ways to practice hard surface modeling.
Here are a couple tips I have for modeling weapons:
• Visualize what your model would look like if it was well-topologized, and plan ahead how you'll make your geometry look like that;
• If a part is symmetrical, add a mirror modifier, or reflect it;
• Weapons and hard-surface objects have a lot of geometric patterns, symmetry, and arrays - when you see one of these features, you can use a mirror modifier, or add an array;
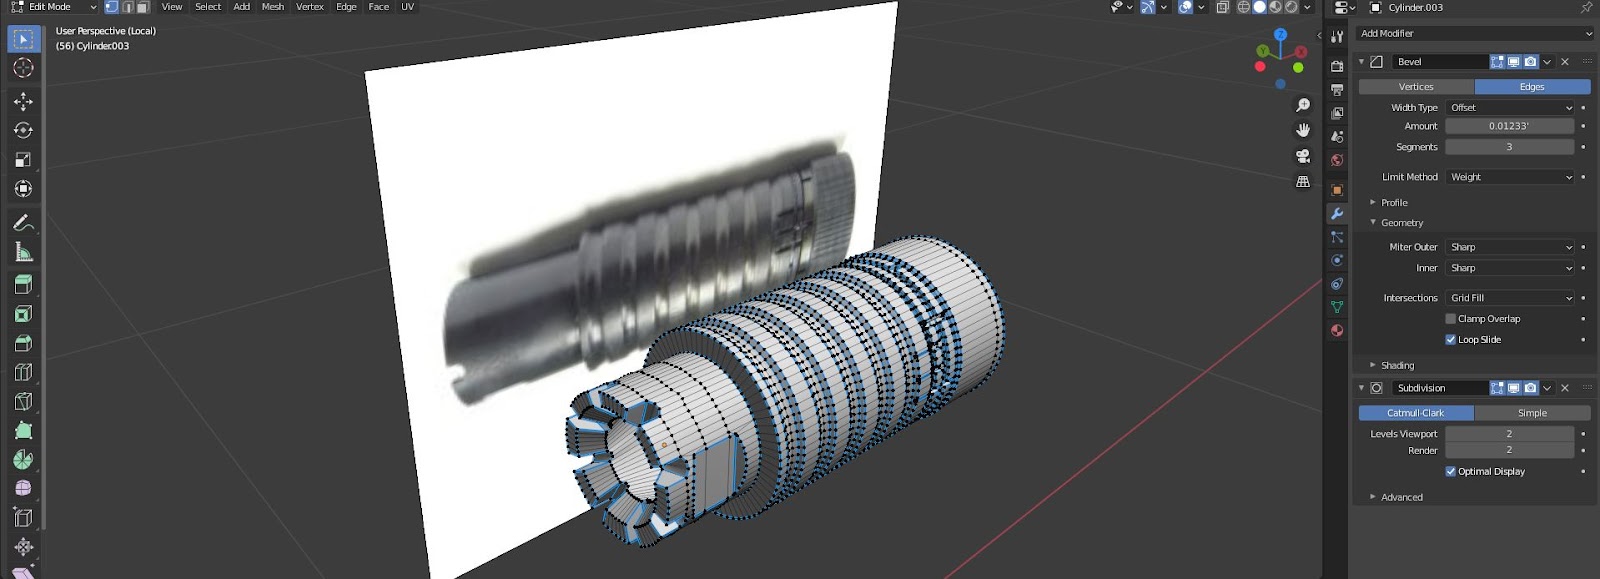
After finishing the low-poly poly model, I convert the model into a high poly model using the beveled subdivision workflow. This video from ChamferZone gives an overview of the beveled subdivision workflow. Basically, I used bevels [on the blue edges] to give hard edges and then applied a subdivision afterwards to smoothen out the model. What you're left with is a high definition model with correct shading that you can re-edit at any time.
Here are some of the parts I modeled and their topology:
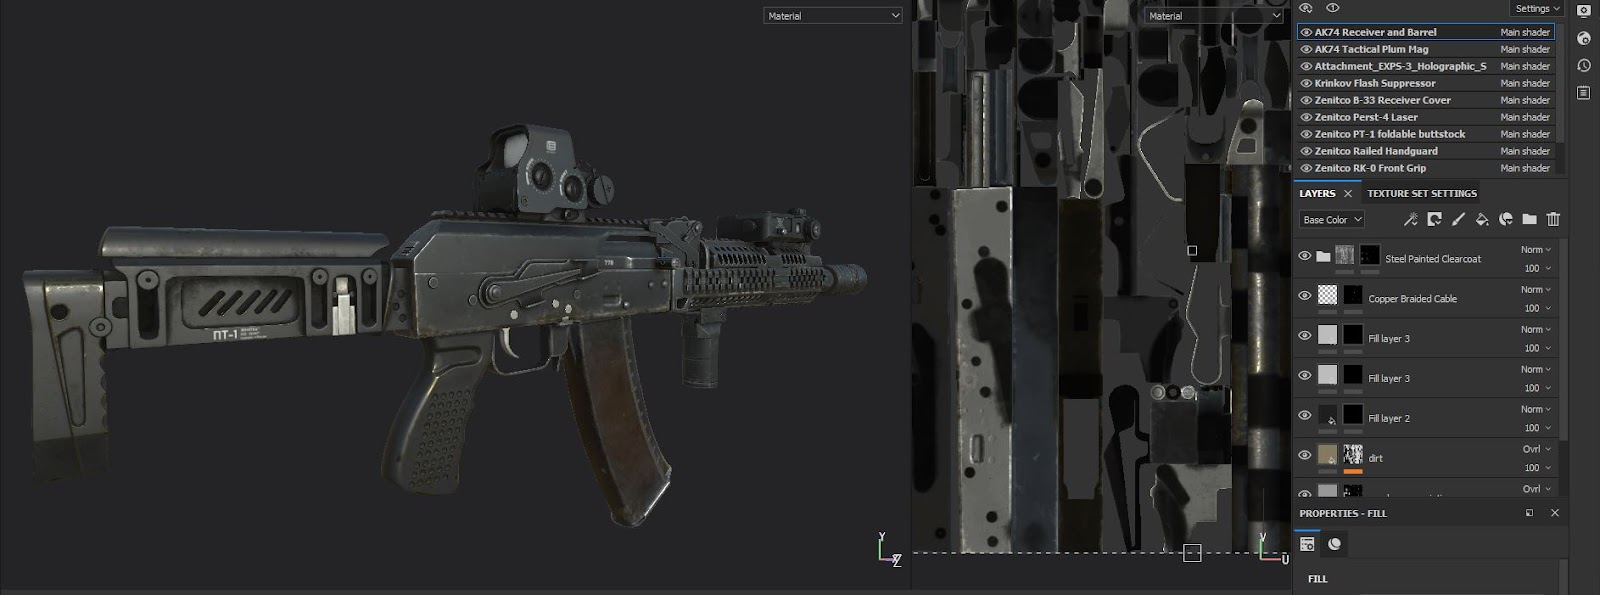
After modeling, I unwrap the model part by part and give each part a material. If you're modeling for games, I would obviously recommend unwrapping the entire gun as one map or using UDIMs. After that, I’m ready to import the models as obj’s into Substance Painter to begin texturing.
Model
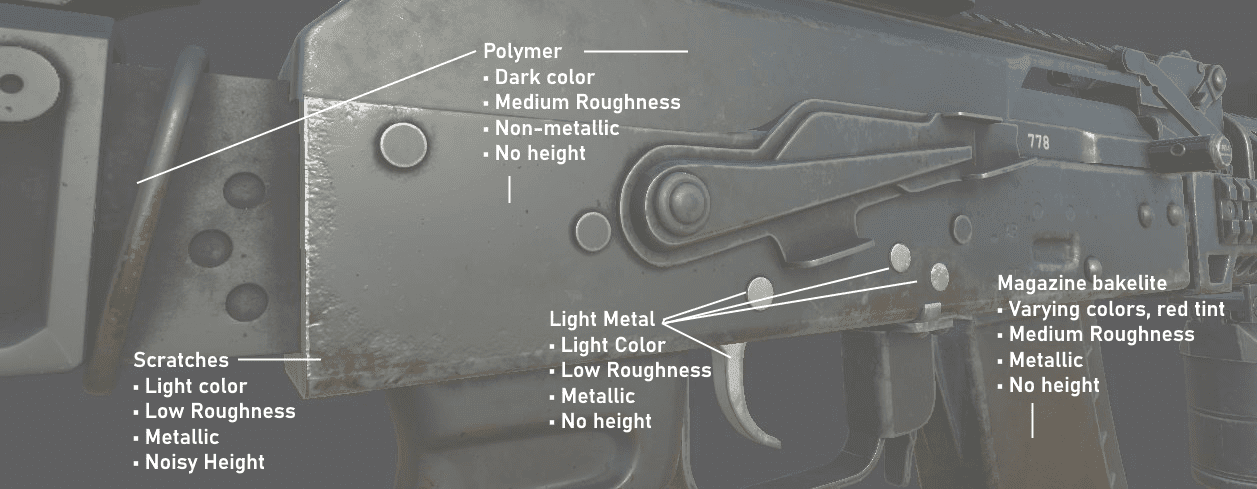
Using Substance Painter requires a basic understanding of the texture channels (Color, Metallic, Specularity, Roughness, Normals, Height, etc...). This article gives a good explanation and representation of what each one does.
What you want to be focusing on mostly is:
Base Color - Color
Metallic - Metallic and Non-metallic parts
Roughness - How reflective it is
Normals+Height - Depth & Angle information
Texture maps
Painting a weapon is more than just changing the colors. There are scratches, dirt, rust, damages, dust, etc... that needs to be added in order for it to look realistic. The more worn the weapon is, the more there'll be needed to paint.
Weapon Materials
Weapons also have markings and insets on them. I made these alphas in an image editing software (Paint.NET, Photoshop, Gimp) and imported them into Substance Painter. This video gives a good overview of how you can do this. After importing, I open a new paint layer; change out the color, roughness, metallic, and/or height channels, and add a black mask to paint the alpha onto the weapon.
Alphas
Scene Building
There are a couple questions you should ask yourself when you’re building a scene:
Are you trying to showcase something? Tell a story? Explore some concept art? Ask yourself: What’s my purpose in this artwork and what assets should I include to achieve that?
In my Spetsnaz Loadout artwork, I was trying to showcase the loadout of a Russian Alfa Group Operator and so I included Russian ammunition, ammunition crates, explosives, a flag patch, and Russian military equipment.
All of this is entirely up to you and whatever artwork you want to create.
Lighting & Shots
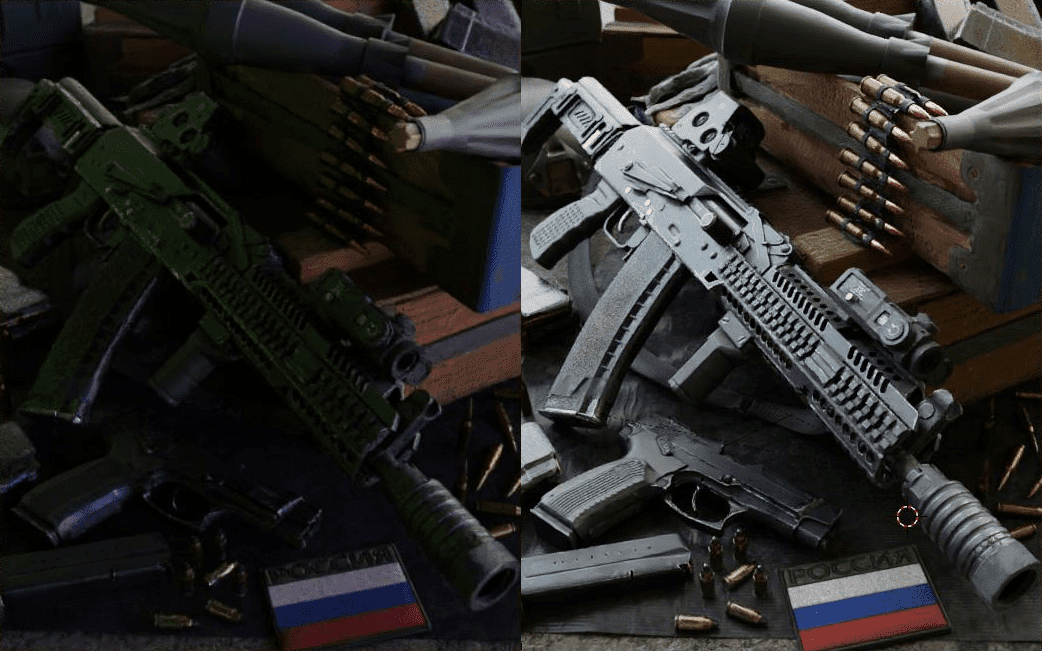
Bad lighting can turn a good scene into a mediocre render. Likewise, good lighting can turn a boring scene into something interesting.
Bad lighting vs. Good Lighting
There’s no one correct way to light a scene. It depends on the mood you’re trying to set and what parts of the scene you’re trying to emphasize. There is a science to lighting alongside a few principles, but they serve more as guidelines.
Ask yourself: What’s my purpose in this artwork and what assets should I include to achieve that?
You can light a scene with an HDRi (as I did in this scene), with lights, or a combination of both. In addition to this, you can use volumetrics to give your scene another layer of depth and mood.
For this loadout scene, I wanted to emphasize the main focus of the render - the rifle and the pistol. Thus, I rotated the light angles until I found an angle that lit the rifle and contrasted it with the other darker elements. Thus, the lighter, more important elements (weapon, bullets, patch) are in focus, while the darker, less important elements are not.
After you’re satisfied with your scene, lighting, and angles, you can finally render out your image.
It’s finished, now... right?
Finishing Up - AKA The Fun Part
No, not exactly. There’s one final step that will make your renders look even better: Post-Processing.
This is the fun part where you get to add all the cool lighting effects like chromatic aberration, glare, and dust.
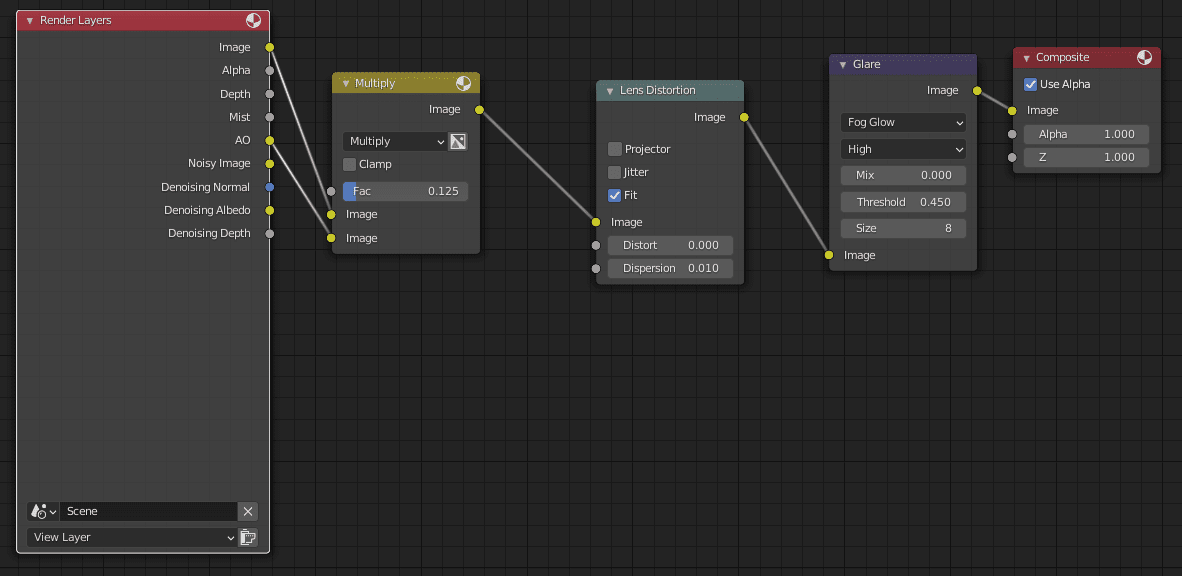
To do that, you can composite those effects in with your program’s compositor.
Blender Compositor - a bit of Ambient Occlusion, Chromatic Aberration(Lens Distortion), and Bloom(Glare)
Then, with the composited render, you can take it into color correction and image manipulation programs. I use Paint.NET, but you can use Photoshop or Gimp if you're more comfortable with them. During this step, you can add film grain, smoke, noise, etc... to make your image pop. Gleb Alexandrov has an excellent tutorial on how to do post-processing.
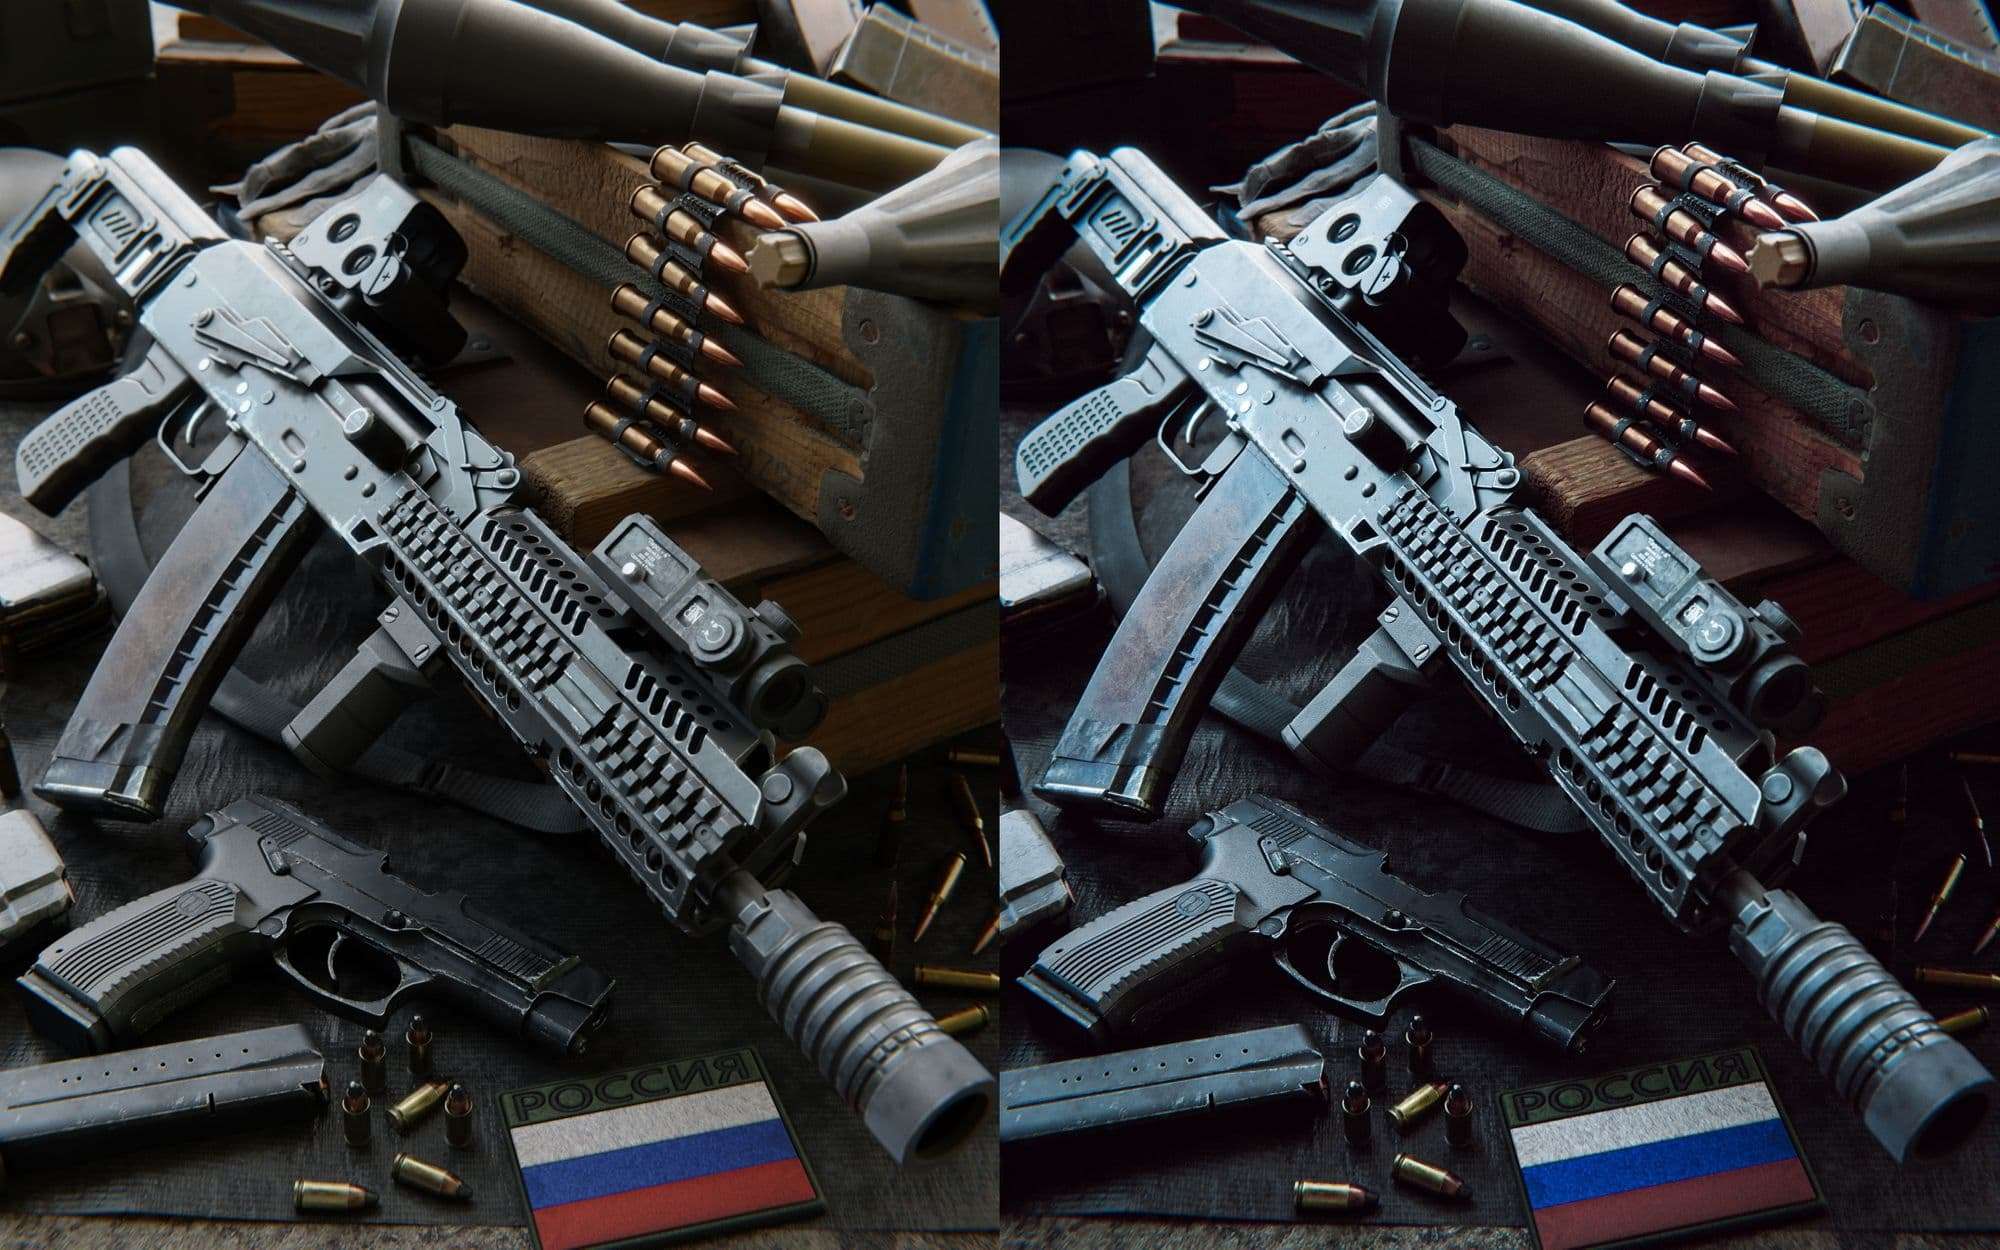
After this, I take it into color correction in order to set the mood I want with the render, changing the hues, saturation, color curves etc...
For my Spetsnaz Loadout render, I wanted a cool, cinematic mood and so I graded the grays into a cyan/blue color that you see in film. Be careful not to go overboard with the color grading or else it will look like those oversaturated HDR images people post on the internet. Don’t be one of those guys.
When you’re satisfied with it, you can call it finished.