Modeling and Texturing a 3D Reptile: A Step by Step Guide
If you are taking on your first reptile character, Juan Melo's step by step guide to modeling, texturing and rendering a reptile in 3D, is the next article you need to read.
If you are taking on your first reptile character, Juan Melo's step by step guide to modeling, texturing and rendering a reptile in 3D, is the next article you need to read.

Juan Melo is a 3D Generalist at Warriors VFX in São Paulo, Brazil. Not fully realising his passion for the creative industries until he left his studies in Systems Engineering, Juan Melo is now living his dream creating stunning 3D visuals.
If you are taking on your first reptile character, this article is for you! Juan Melo takes us through the process of modeling, texturing and rendering a reptile in 3D.
This project started as a sketch which yielded some interesting shapes and from that point I decided to treat it as a full personal project. I unfortunately had to put this project down for almost six months due to work commitments. I started a mentorship thereafter, and picked up this model again to undertake the study and improve my skills.
When I re-opened the model I wasn't satisfied with the direction I went in. Sometimes, distance from a project, allows you to revisit it with fresh eyes and new techniques. After re-working my model, I was thrilled with the final result.
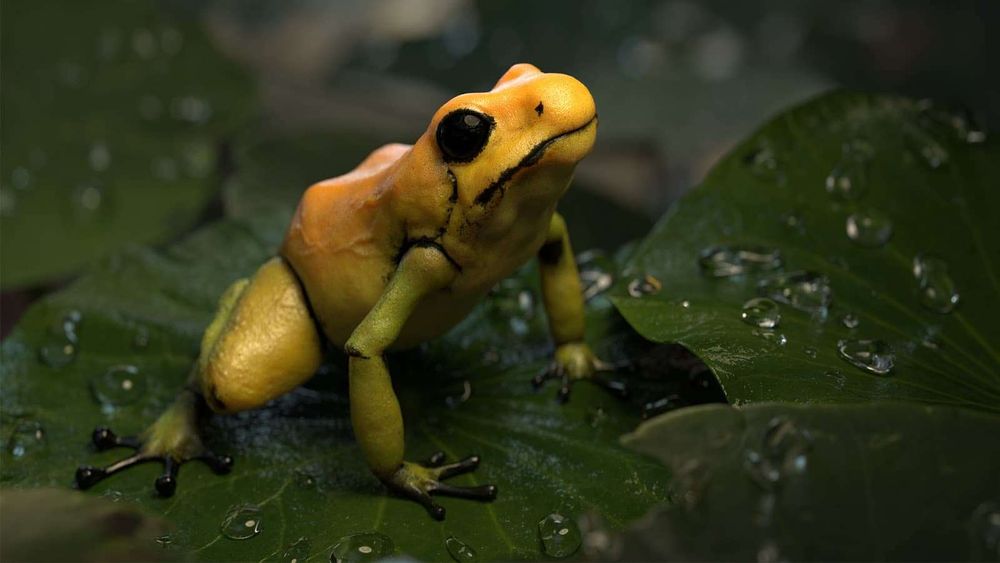
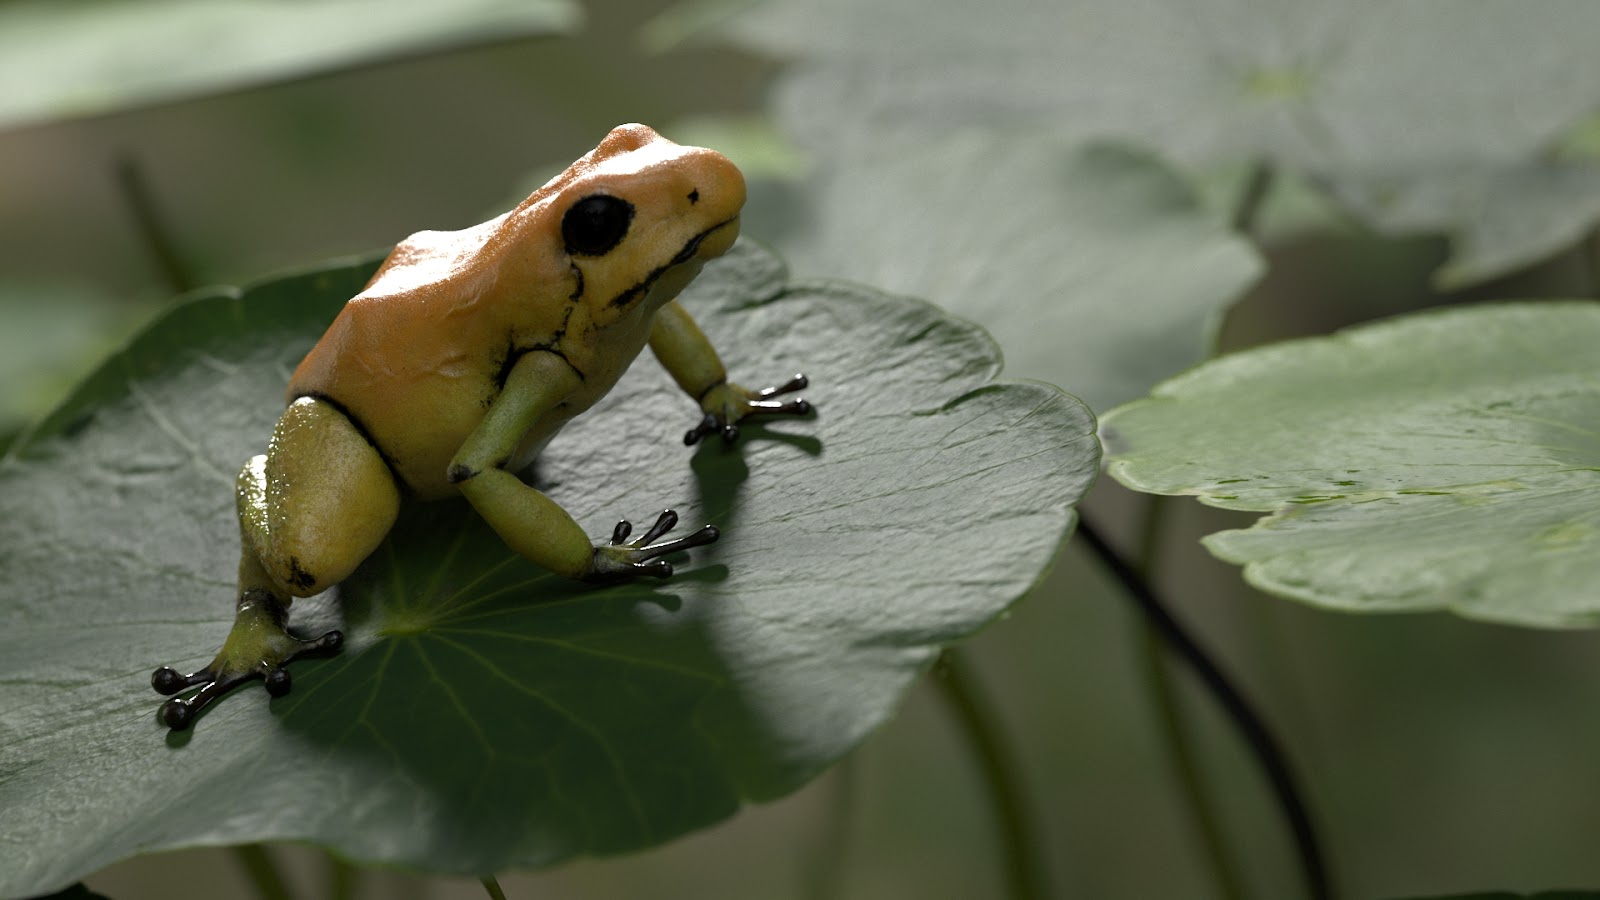
The workflow I am about to describe covers the modeling, texturing and lighting of a 3D reptile. The idea to work on this tiny amphibian came to me after a visit to the museum of science - I was amazed by how small these little guys were. The golden frog hails from Colombia and is very poisonous. It's species for the most part, is in danger. This project is in a sense, a tribute to this amazing reptile.
I really like wildlife documentaries so after the trip to the museum, I started looking for some visual material of toads and frogs. I found a TV show about the most dangerous species in Latin America. At one point in the show, they featured the cute but deadly golden frog in the Rainforest. From there, I decided my model be framed as if it was being shot by a wildlife photographer in the middle of the rainforest.
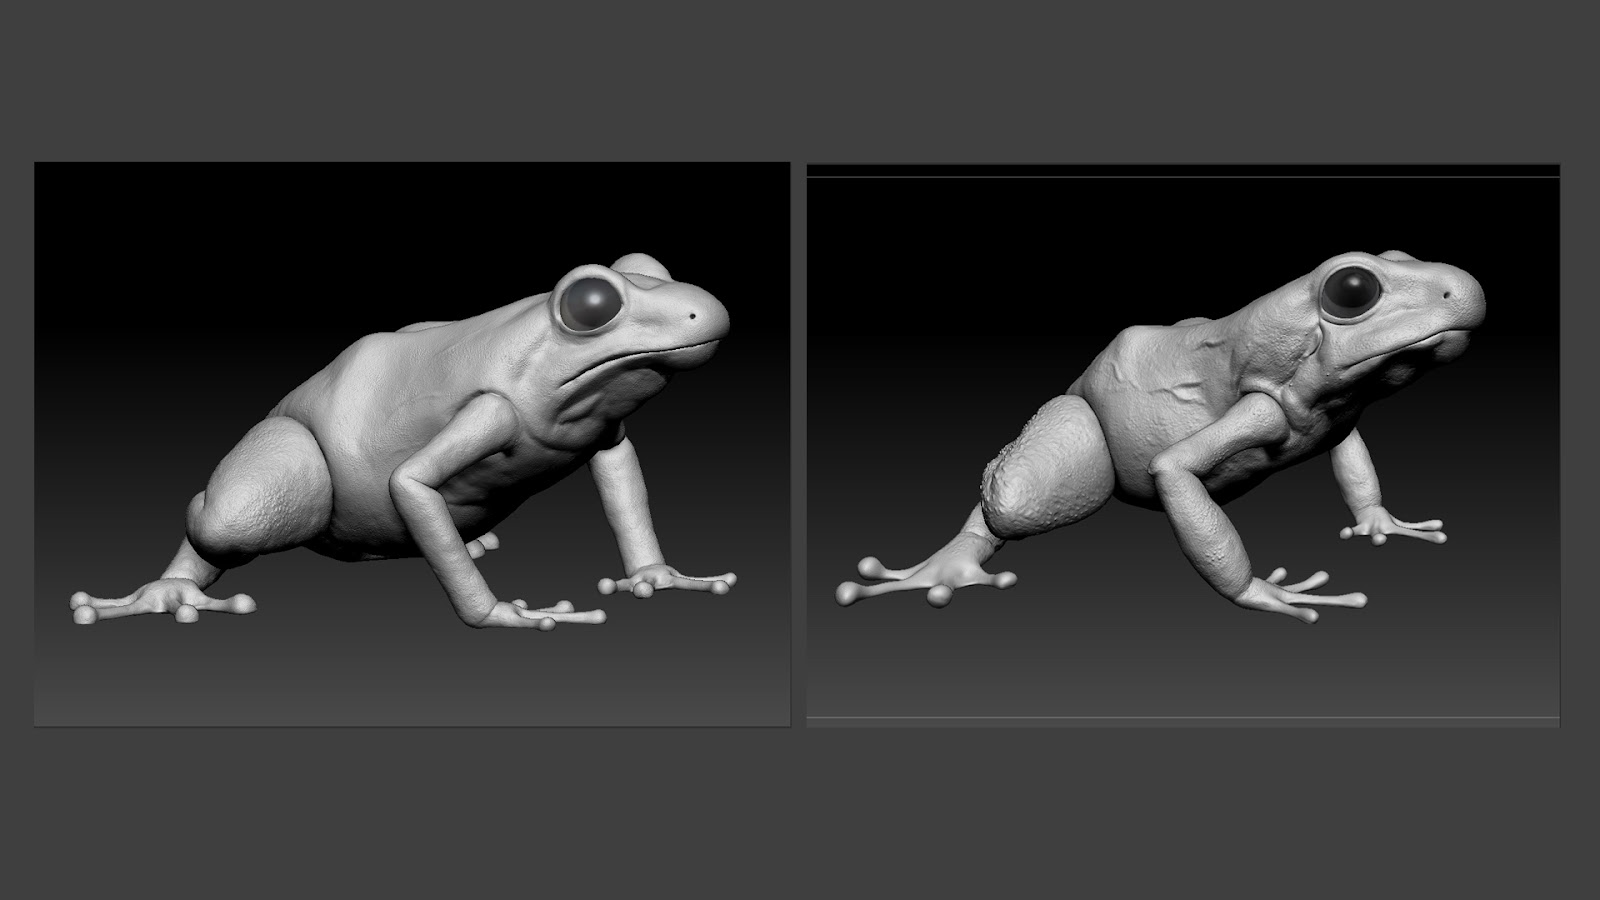
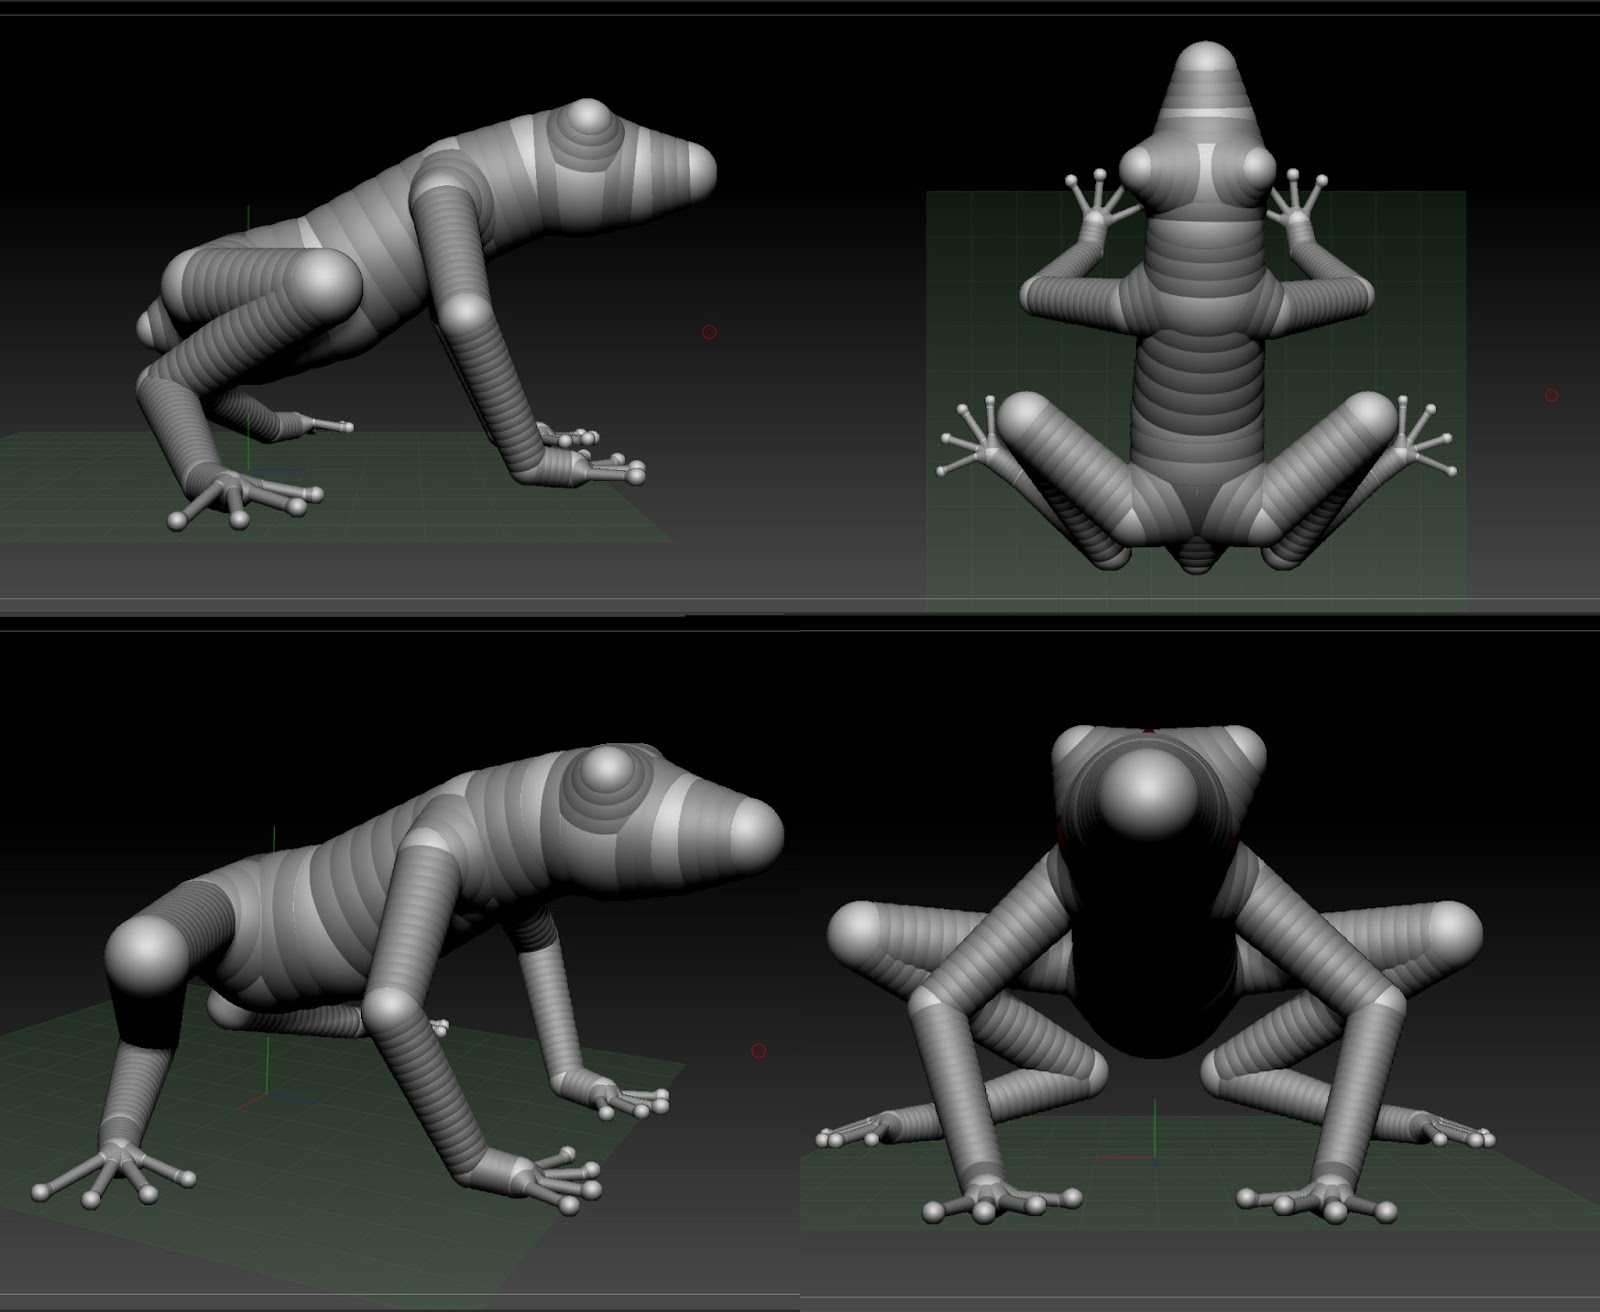
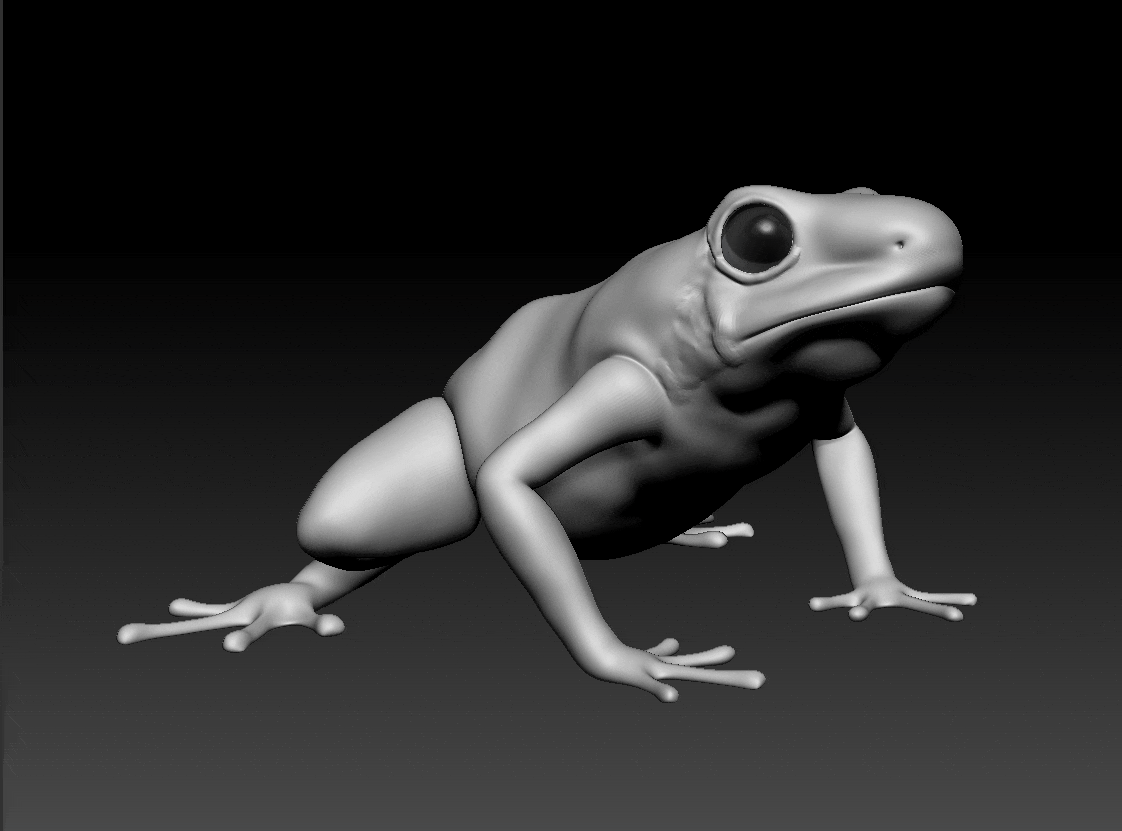
I started blocking the model - trying to get some interesting silhouettes and identifying the main proportions. Zsphere is a great tool to start with as it allows you to see and it proportions quickly. You can also edit poses quickly which allows you to be flexible with your model. This model was not planned to be used in animation production, so I was not concerned about topology.
After this initial phase, I started to add pieces of mass - trying to think in terms of traditional sculpture; adding mass to carve later. I like to use Dynamesh for this step of the process, using low resolution values to start.
The idea here is to approach the shape quickly, without worrying about the detail and keeping an eye on the silhouette. It is also nice to keep the polygroups that came with the zsphere, especially for the fingers, as it helps you to isolate and work on them on an intuitive way.
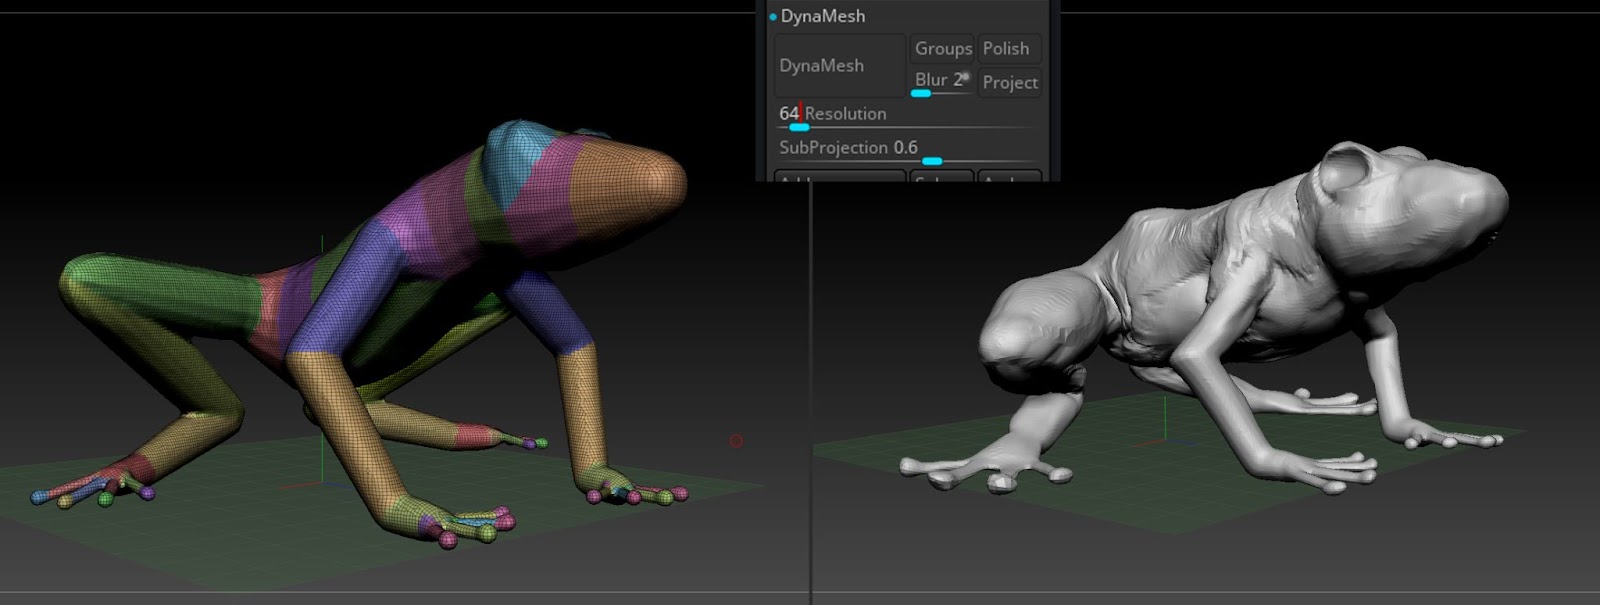
I used the move, clay build up, and dam standard tools to do the carving. Once I had the bulk of the model complete (ensuring that I wasn't going to have any dramatic volume changes), I used a Zremesher to have a nice mesh to work with - not too low, not too high.
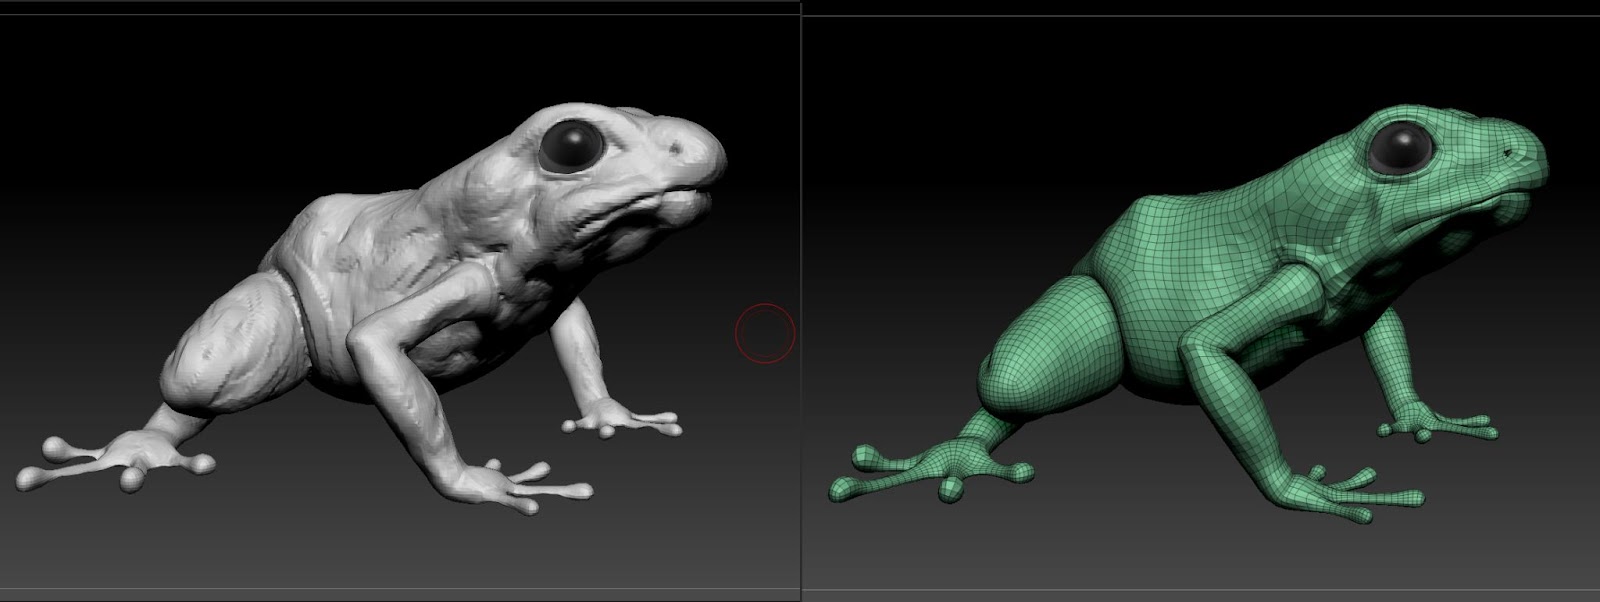
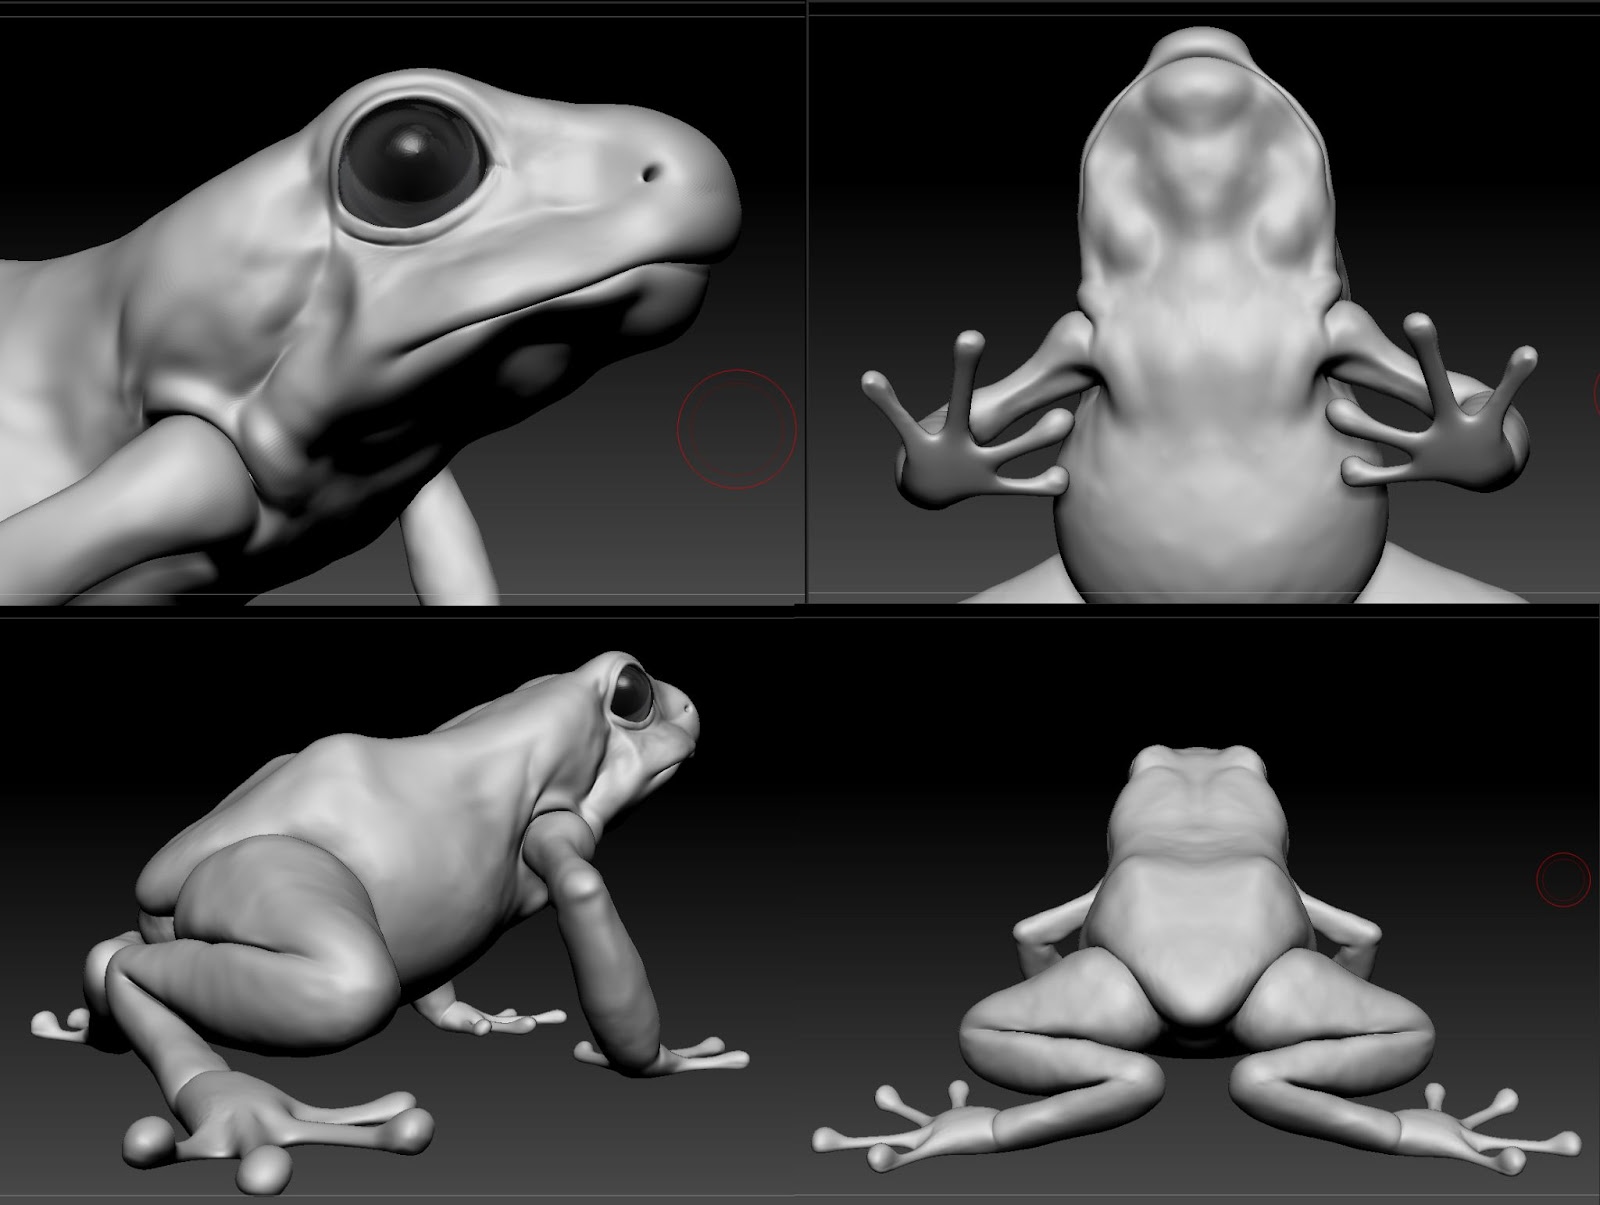
I use the smooth and Polish brushes to achieve a smooth surface, preparing the model for the secondary shapes state. The idea here was to work on some representative volumes like muscles and landmarks, trying to discern where the fat and muscle should rest in relationship with the skin, and major skinfolds.
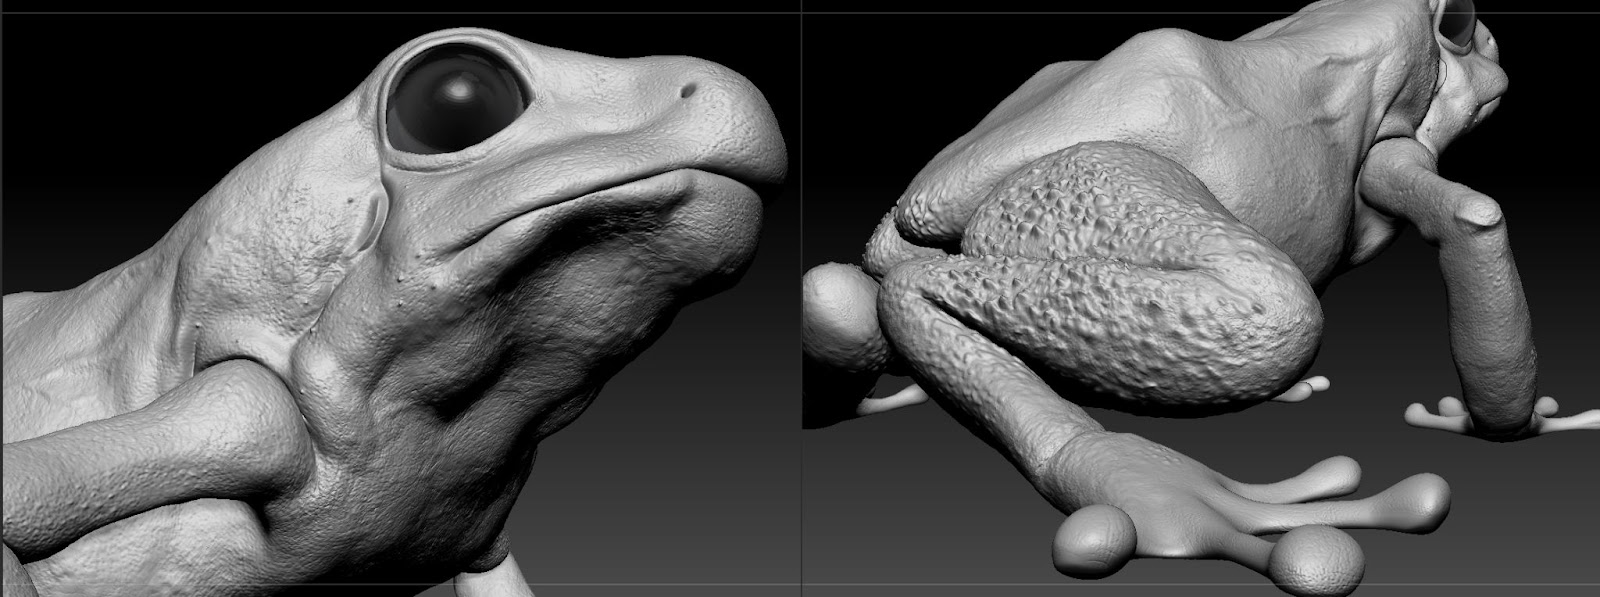
Once I had my secondary forms ready, I started to get into the fun part - the detail! For this part of the process, I like to test textures that don't make much sense, for example, using rough concrete or leather textures to represent parts of the skin. Thinking outside of the box, can give you some unique results.
A lot of sites like Flipped Normals or Gumroad can provide awesome organic alphas, or even the default zbrush alphas, which can give you an amazing result.
I like to mix a lot of textures with the DragRect option; mixing on really low values can give you some amazing outputs.
Last but not least I exported the main displacement map in 32-bit EXR. I would recommend the Akin Bilgic´s guide to displacement workflow when doing this.
I worked on this part of the project under the mentorship of George Damiani, who was also my teacher at Faculdade Melies in São Paulo, Brazil.
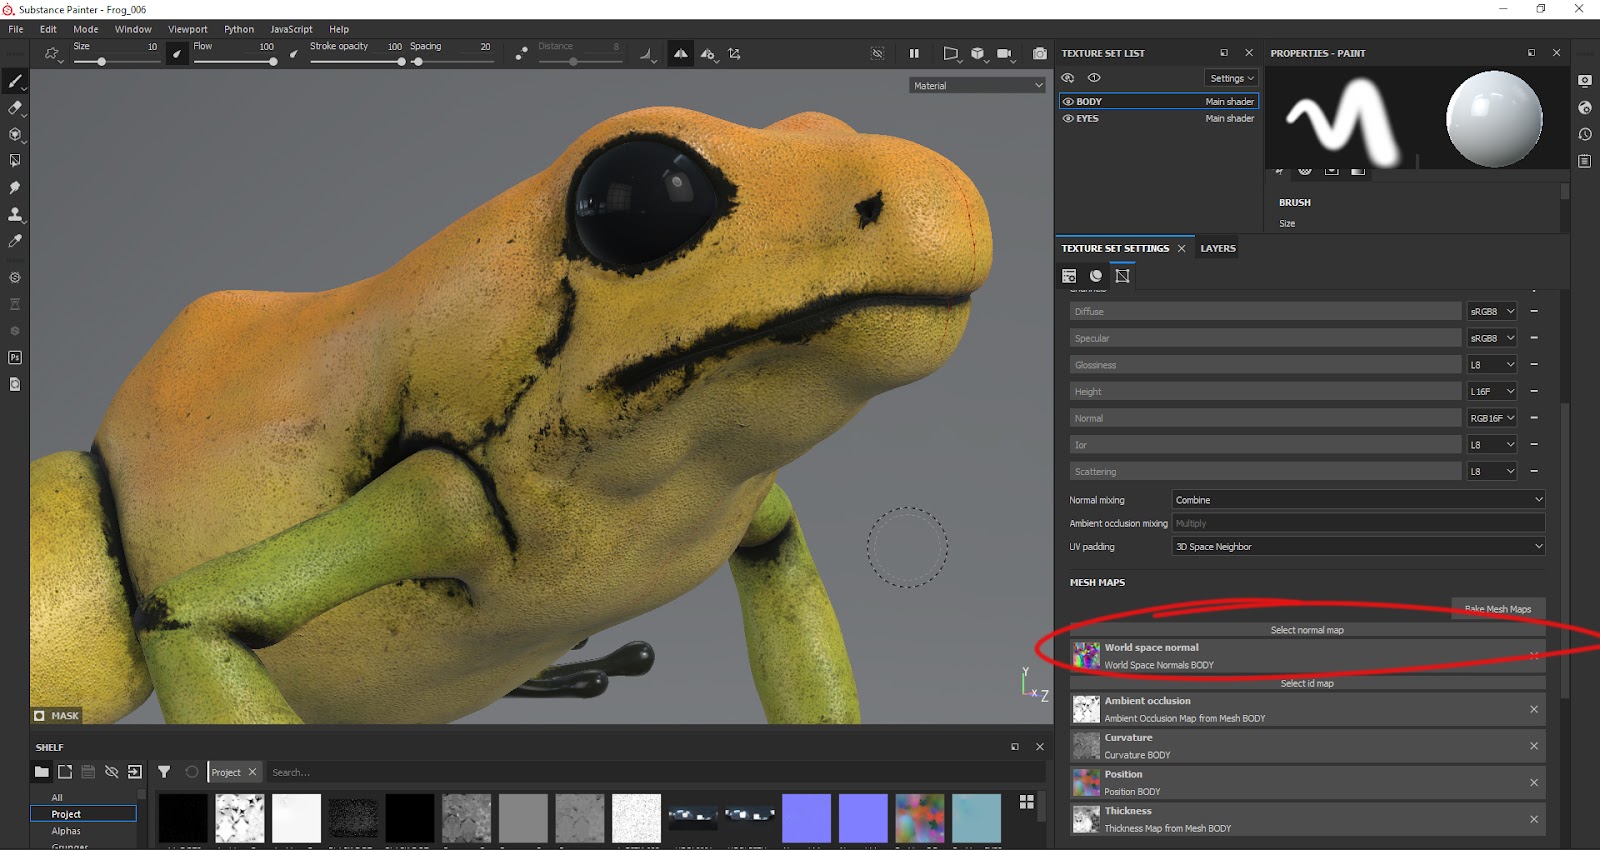
I started with the lowest and the highest mesh from Zbrush and baked the maps.

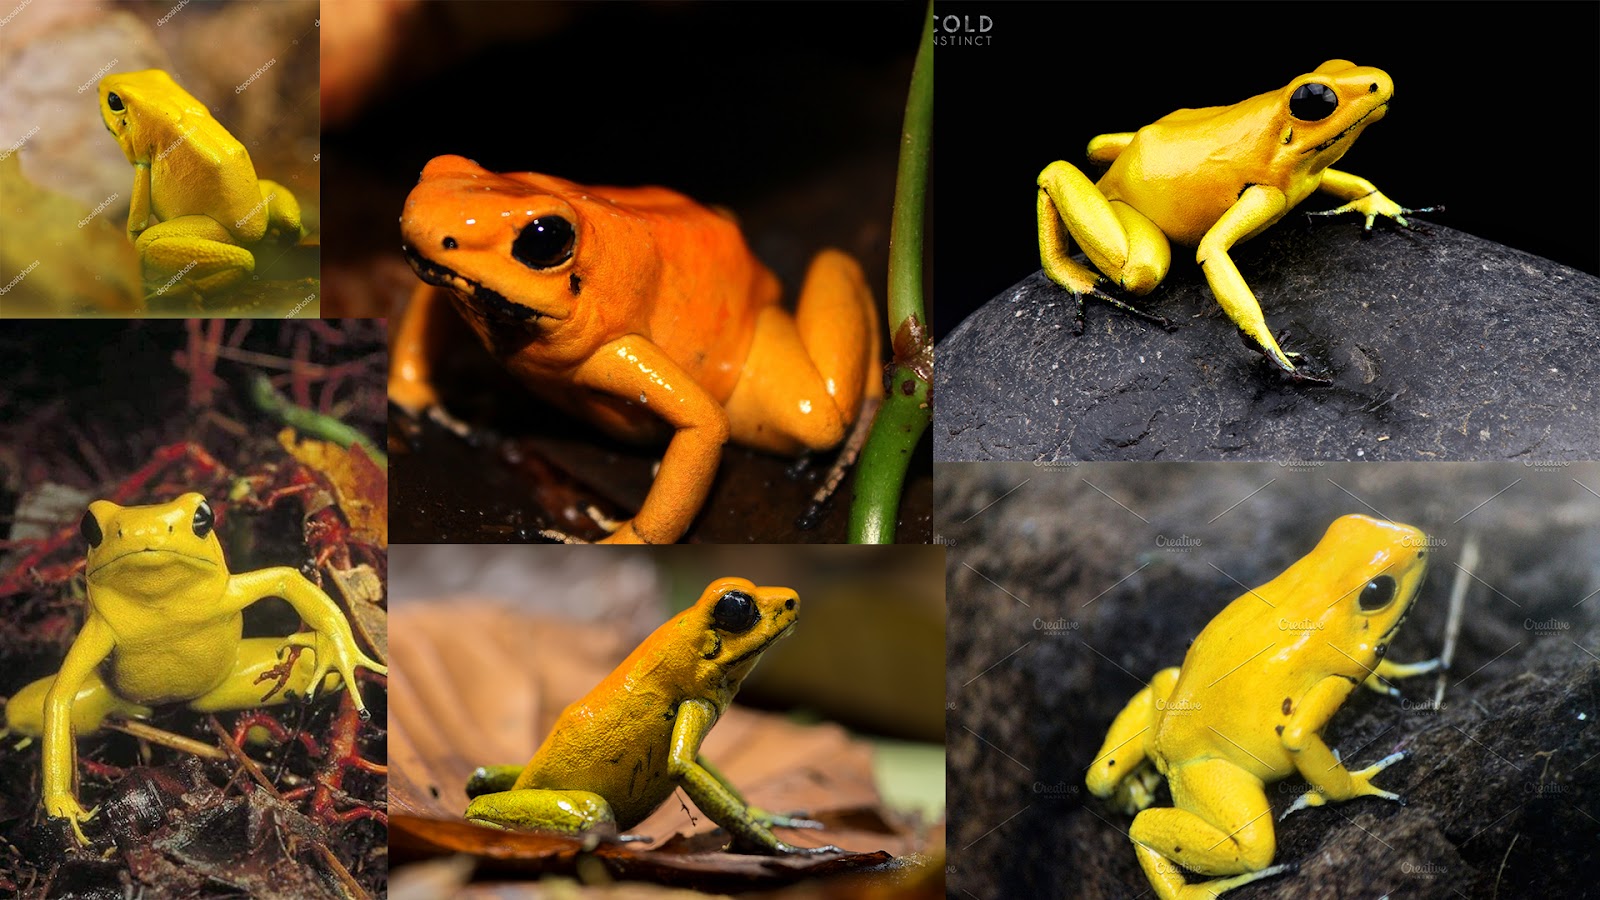
Before starting the painting, I looked at the main colours of the frog and the most representative marks. I focused on green and orange being driven by an almost pure yellow, with strong contrasting dark spots and lines.
For the first pass, I created a base using a variation of yellow going to brown and green. I didn't use manual paint here - I mostly used drip and dirt generators, mixed with noise textures, driven by blend modes (mostly Multiply and screen), and starting with empty fill layers.

I chose five colours to being blend. Once I set my base, which was the blend of the colours determined by the ambience, I tweaked my settings so that I got a more saturated and dark colour on top, representative of the sunlight. I wanted a more clear and whitish desaturated colour on the underside, which would represent the humidity and shadows on the ground of the rainforest.
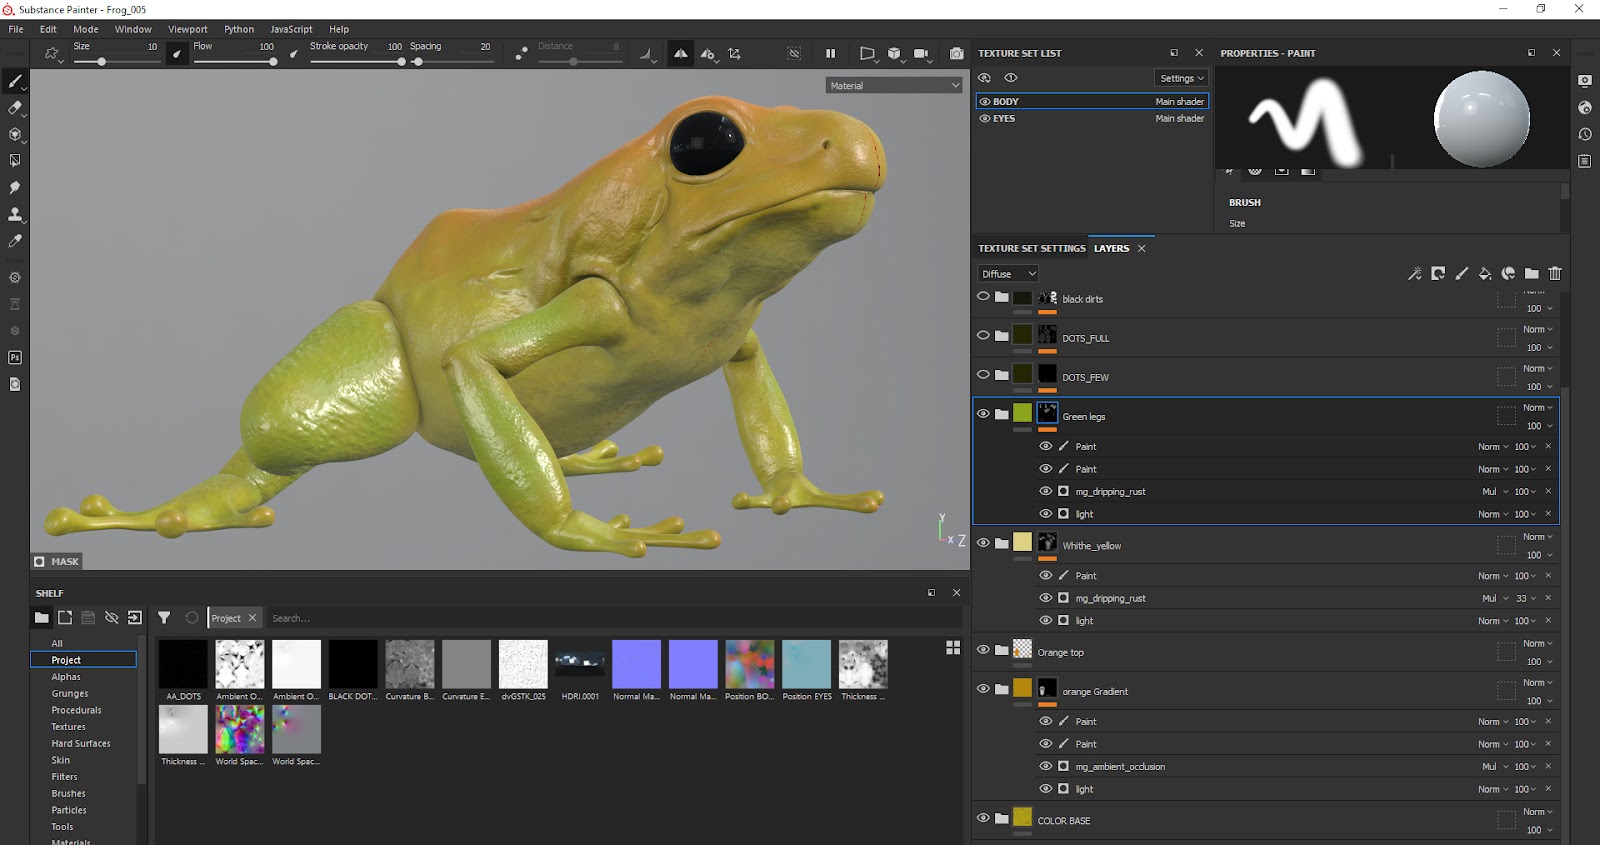
To mask these main colours I used the generator element Light, mixed with some manual paint, mixed by blend modes multiply and screen.
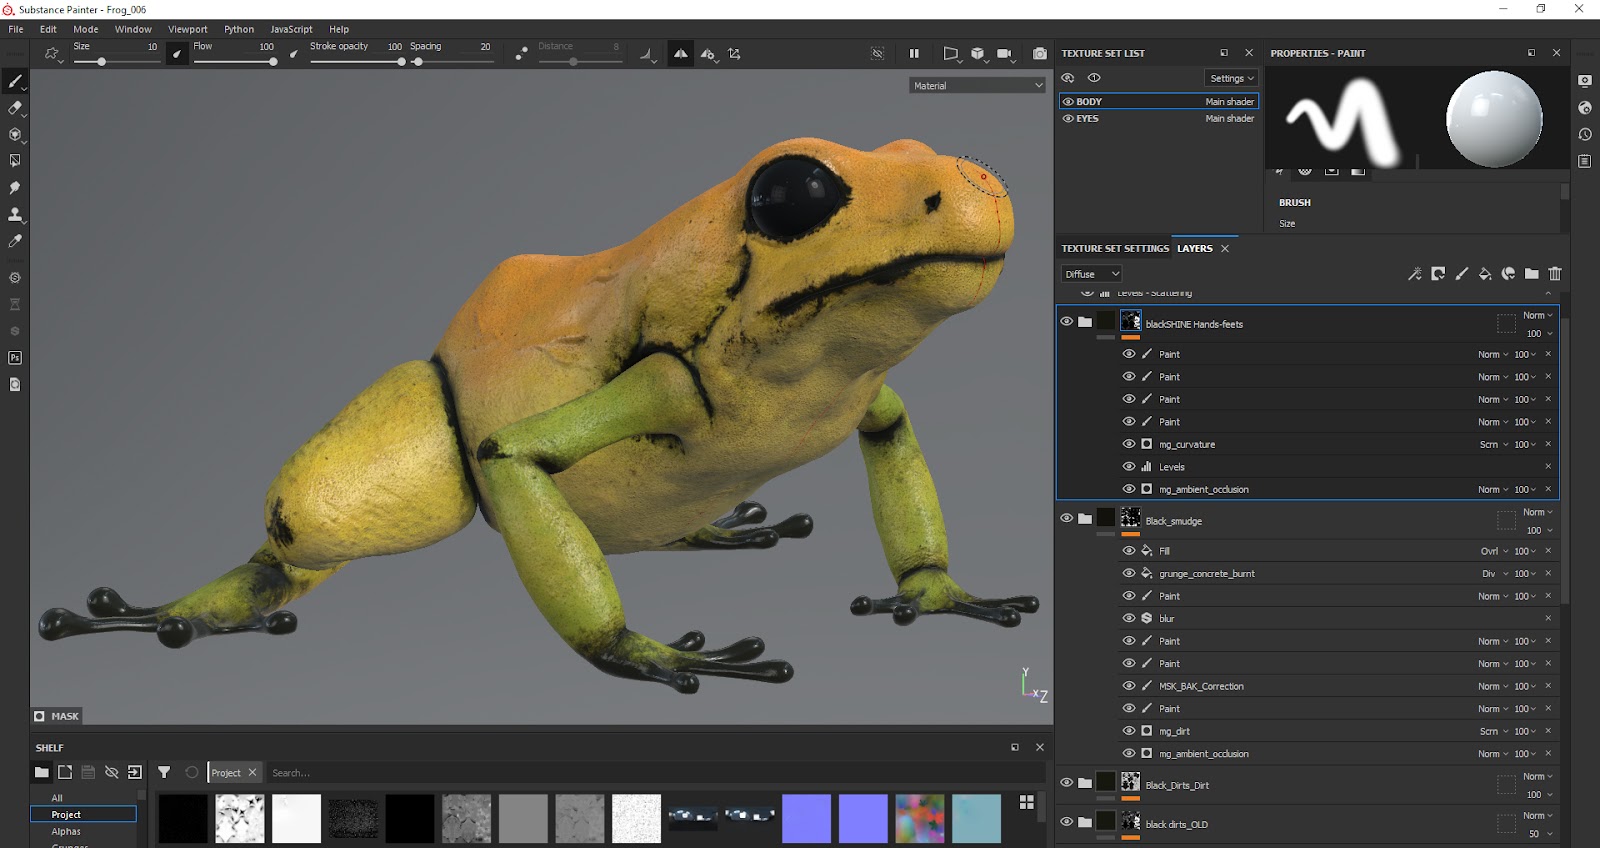
As you can see, I repeated the process here but this time using ambient occlusion and dirt generator mixed with dirt textures. At this time I did a lot more manual painting and allowed for extra time for manual brush detailing, also trying to break the symmetry.
Since the detail in the final render comes from the displacement map, I had to unplug the normal map before exporting the textures.
Since I had been using empty fill layers for the entire process, I was able to reuse these masks to get variations on my roughness-glossiness channels.
The cool thing about Substance Painter is once you get your textures painted you can use any render engine to get a nice output image. In this case, I went for Maya/Vray.
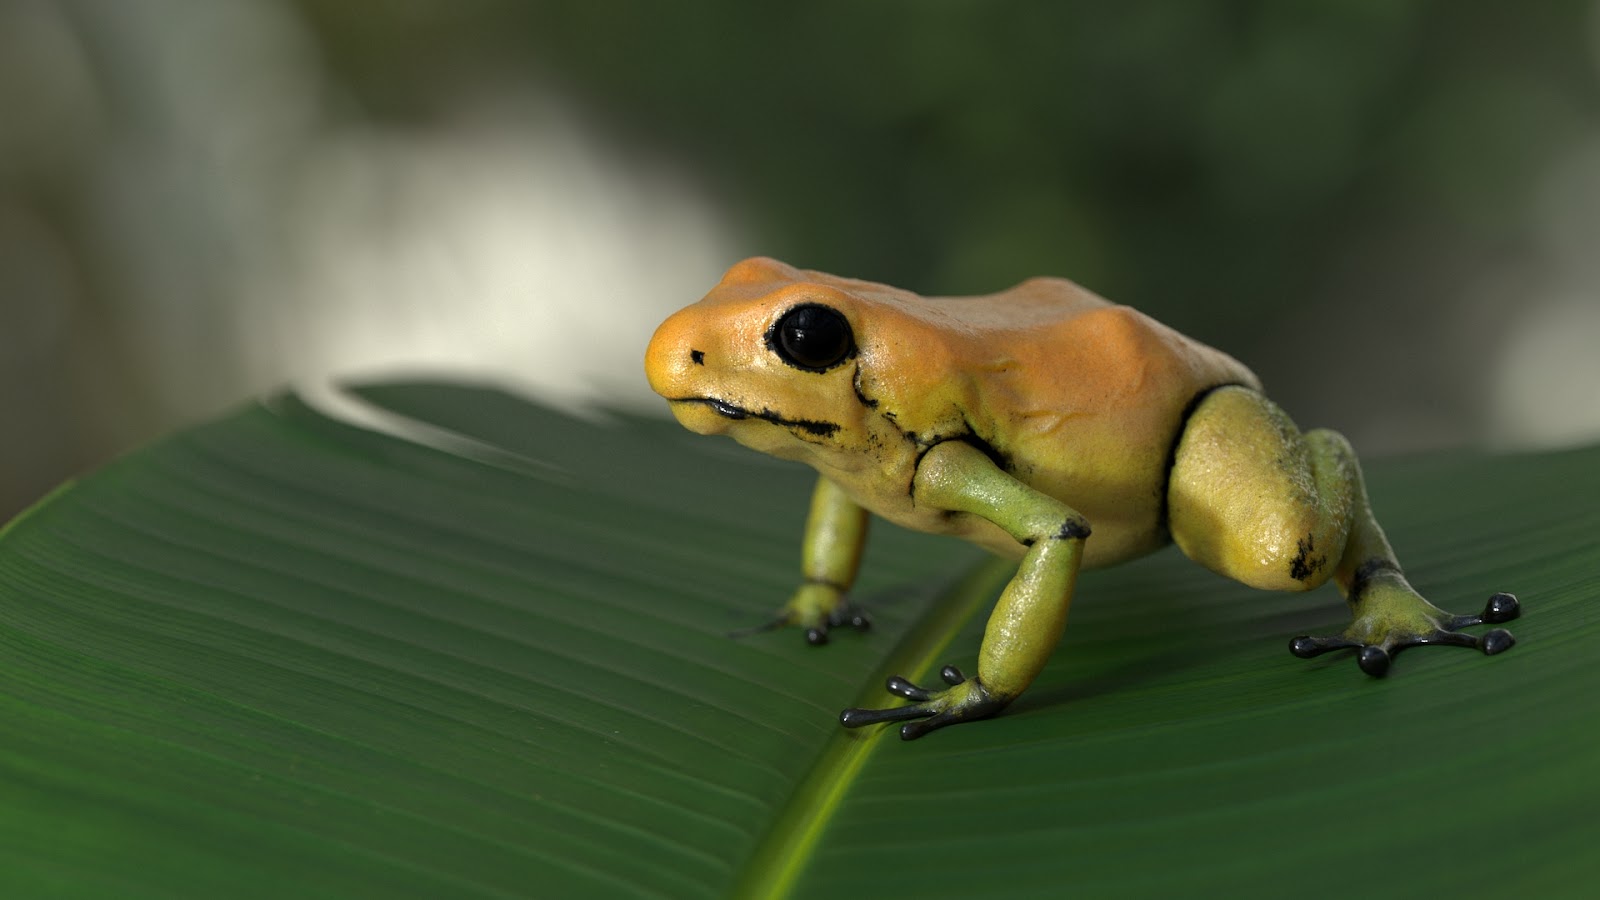
To create the environment, I chose some leaf assets from the Unity Asset Store. I also modeled a more detailed leaf - the one that was closest to the camera.
To get a more wet ambience, I did deform a sphere and scatter it over some leaves using the MASH tool. This step of the process can be done in any 3D software as I mentioned previously.
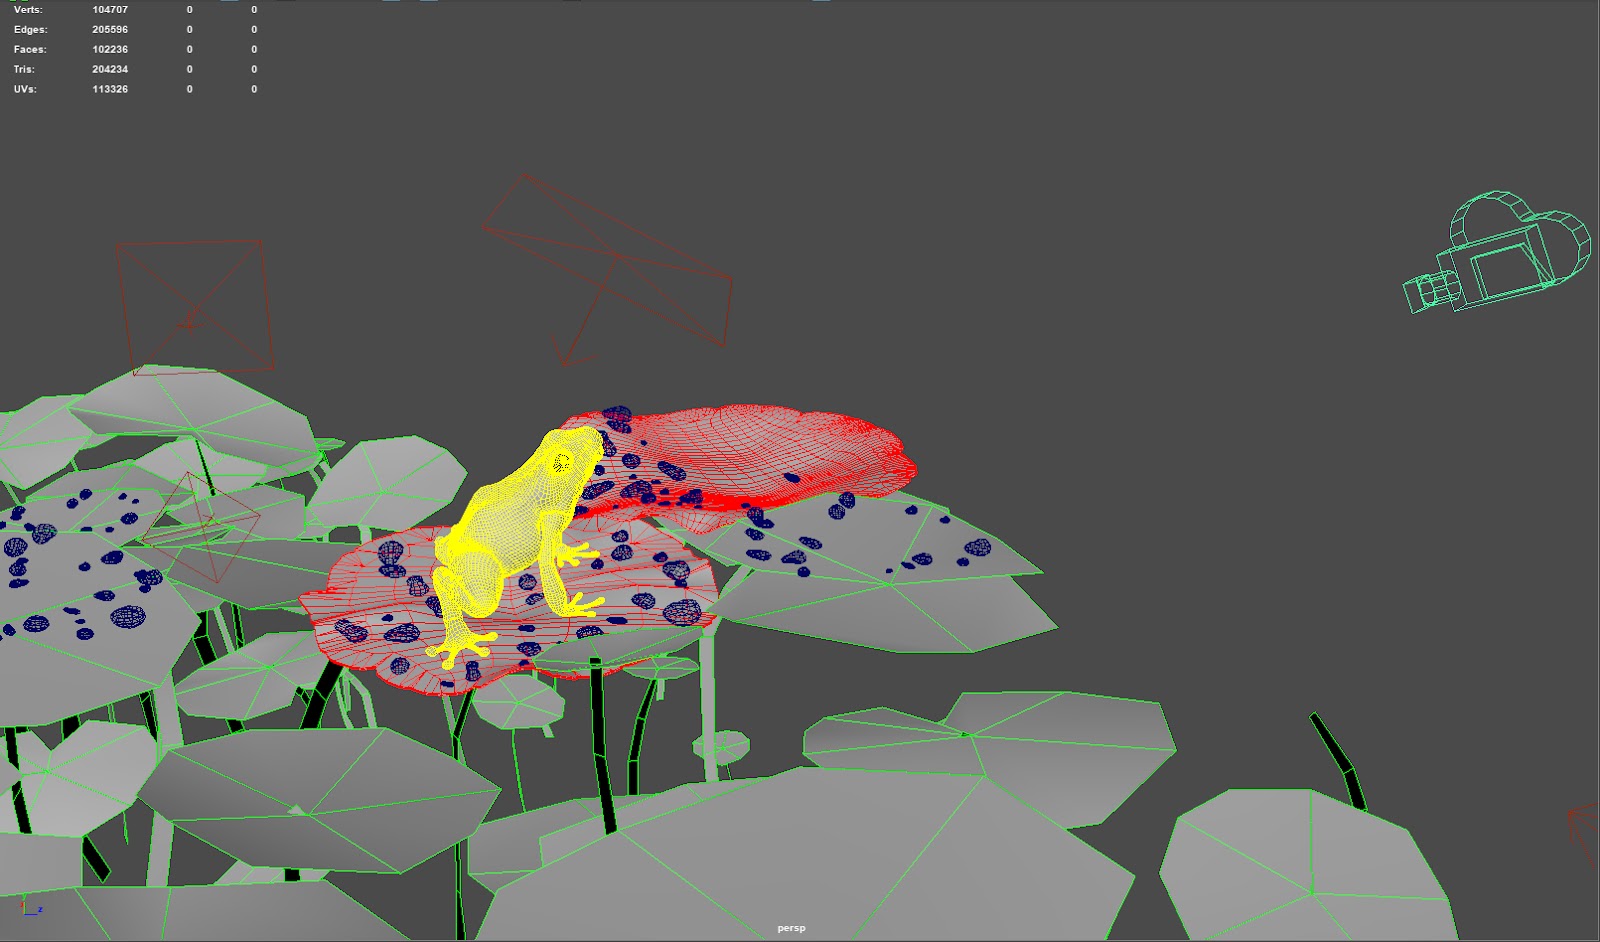
From the start of the project, I envisioned my camera position to look similar to something you would see in a wildlife documentary. I wanted a camera coming from a top view, looking at the ground.

I had the time and preferred to use a Physical camera to create a more accurate depth of field (this has significant increase in the render time, hence the extra time!)
Once I established my frame, it was time to turn the lights on! A 3-point lighting system works perfectly here, nothing fancy! I Like to do RIM-KEY-FILL in that order of construction. I also used an HDRI image to create some ambient lighting. HDRI Haven is a great place to get HDRI images for free.
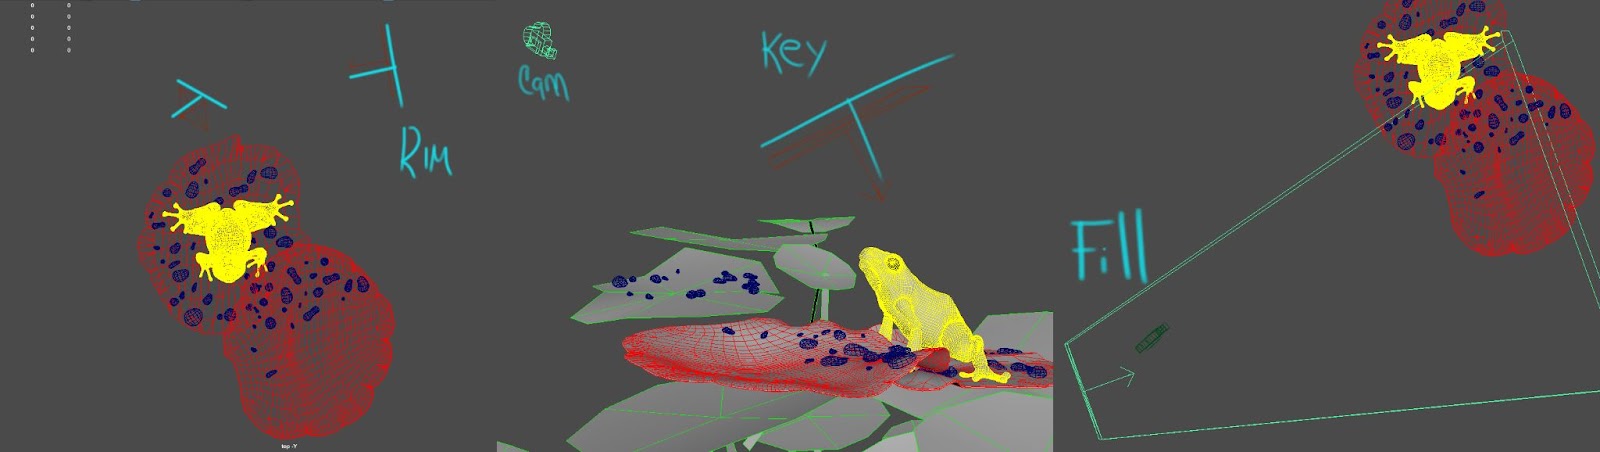
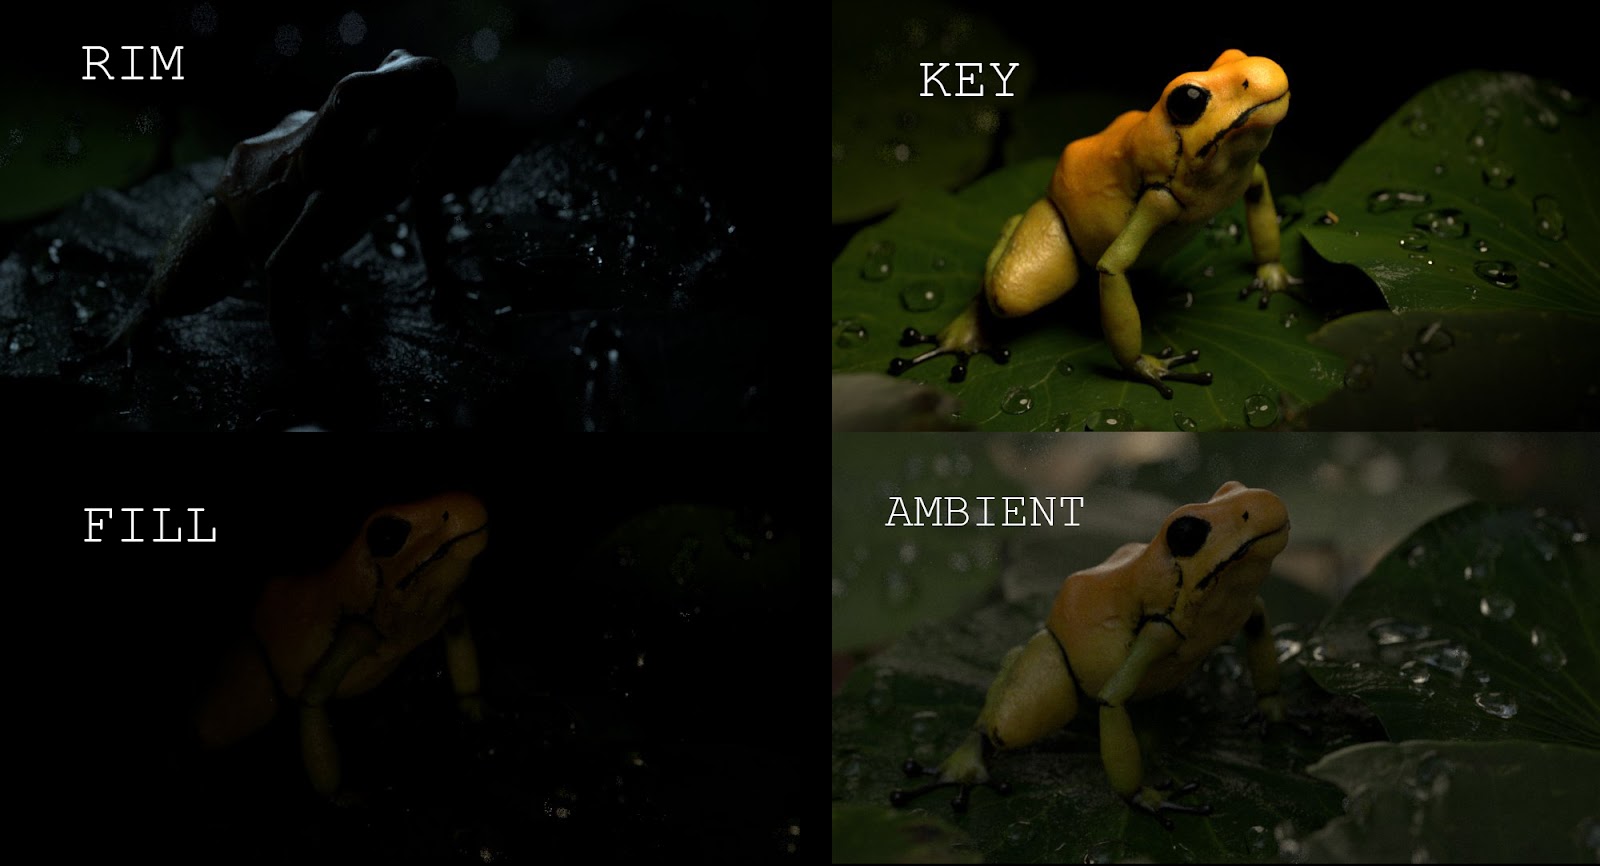
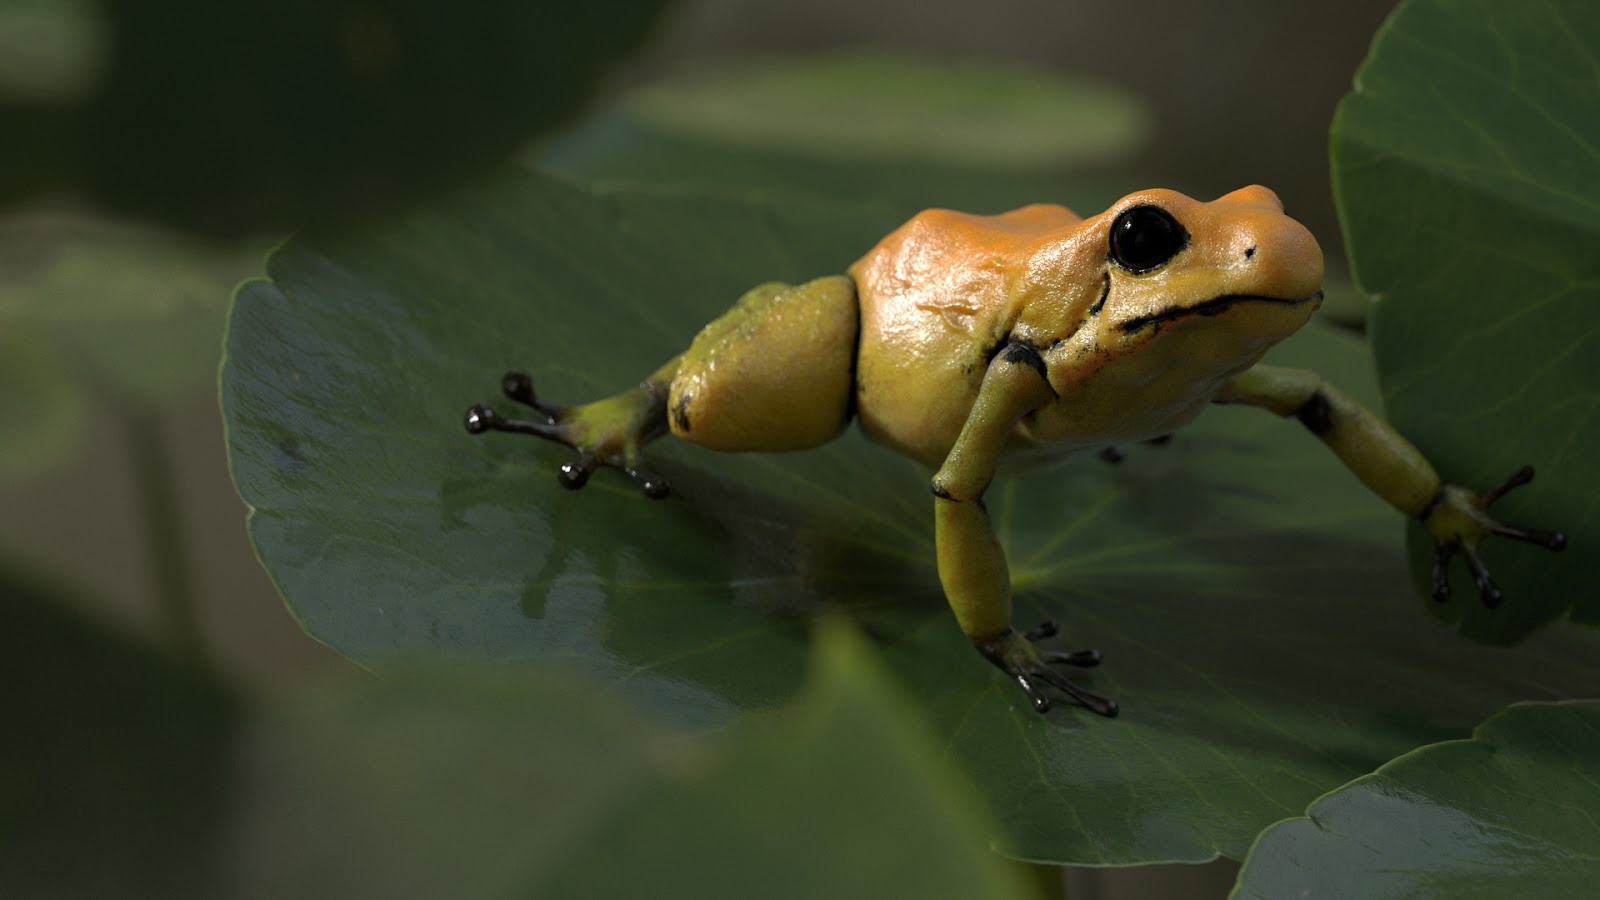
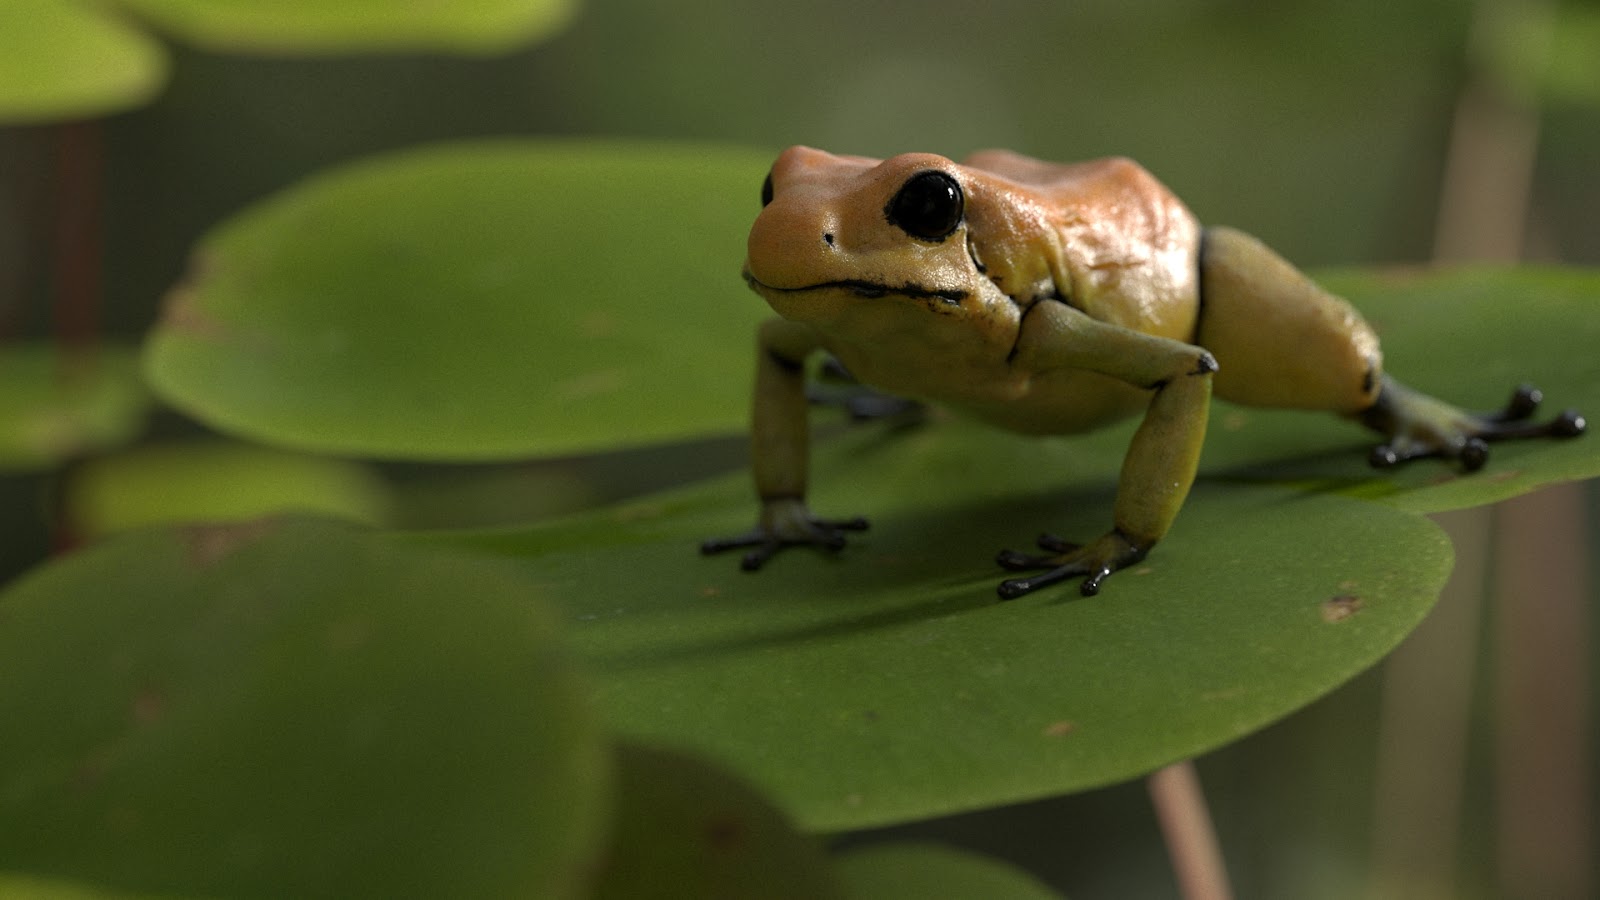
Below you can see the final render with all the lights on. This final light position and the position of all the assets, were the result of a lot of time invested in experimentation.

I also wanted to share some early attempts of camera position and other leaf types that did before I achieved the final shot:
You can find more of Juan's work on Vimeo, ArtStation and LinkedIn.