Achieving Realistic Skin Details With Manual Sculpting in Zbrush
Want to achieve realistic skin details for your 3D Portraits? Parth Shah, a Modeling TD at Double Negative, explains how to achieve realistic skin details using manual sculpting techniques in Zbrush.
Parth Shah is a Modeling TD at DNEG, and alumnus of MAAC Institute in India. Parth is constantly pushing the limits of realism in his artwork, and in this article explains how to achieve realistic skin details using manual sculpting techniques in Zbrush.
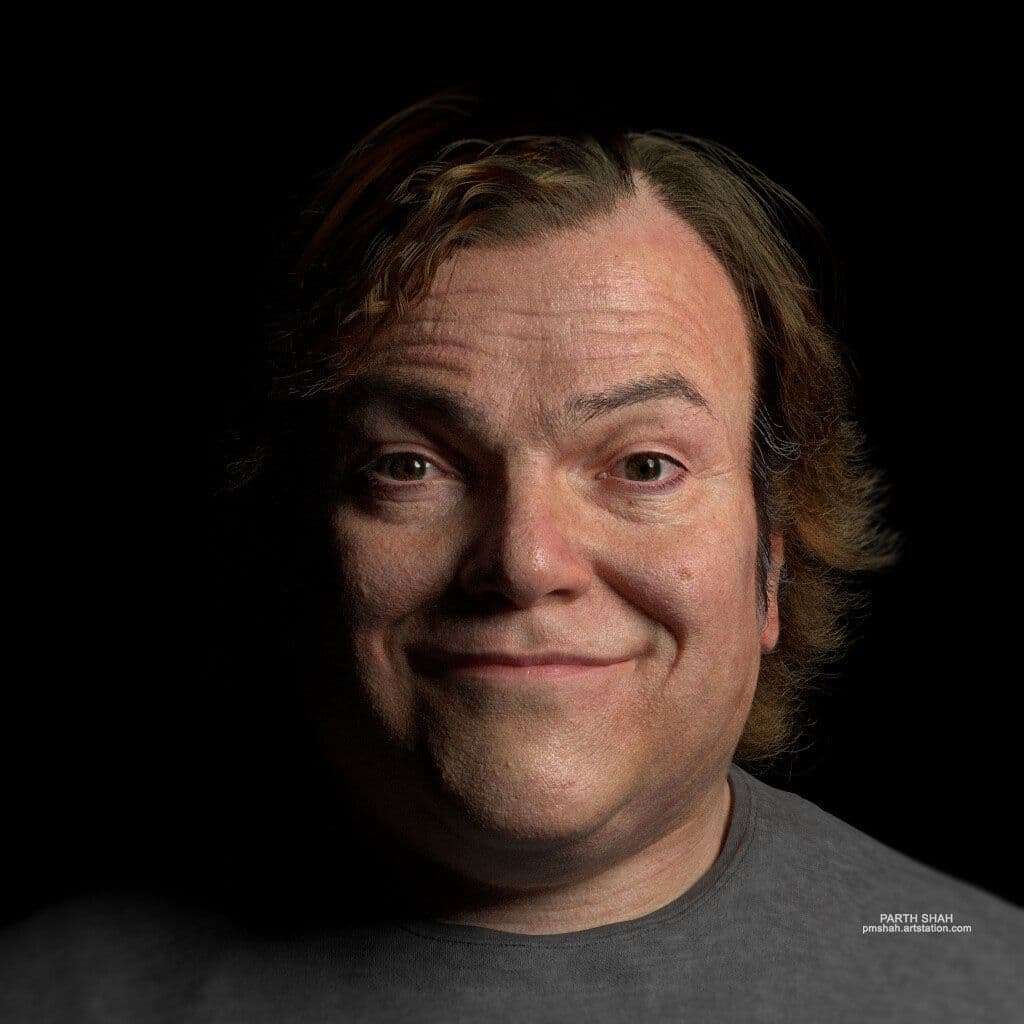
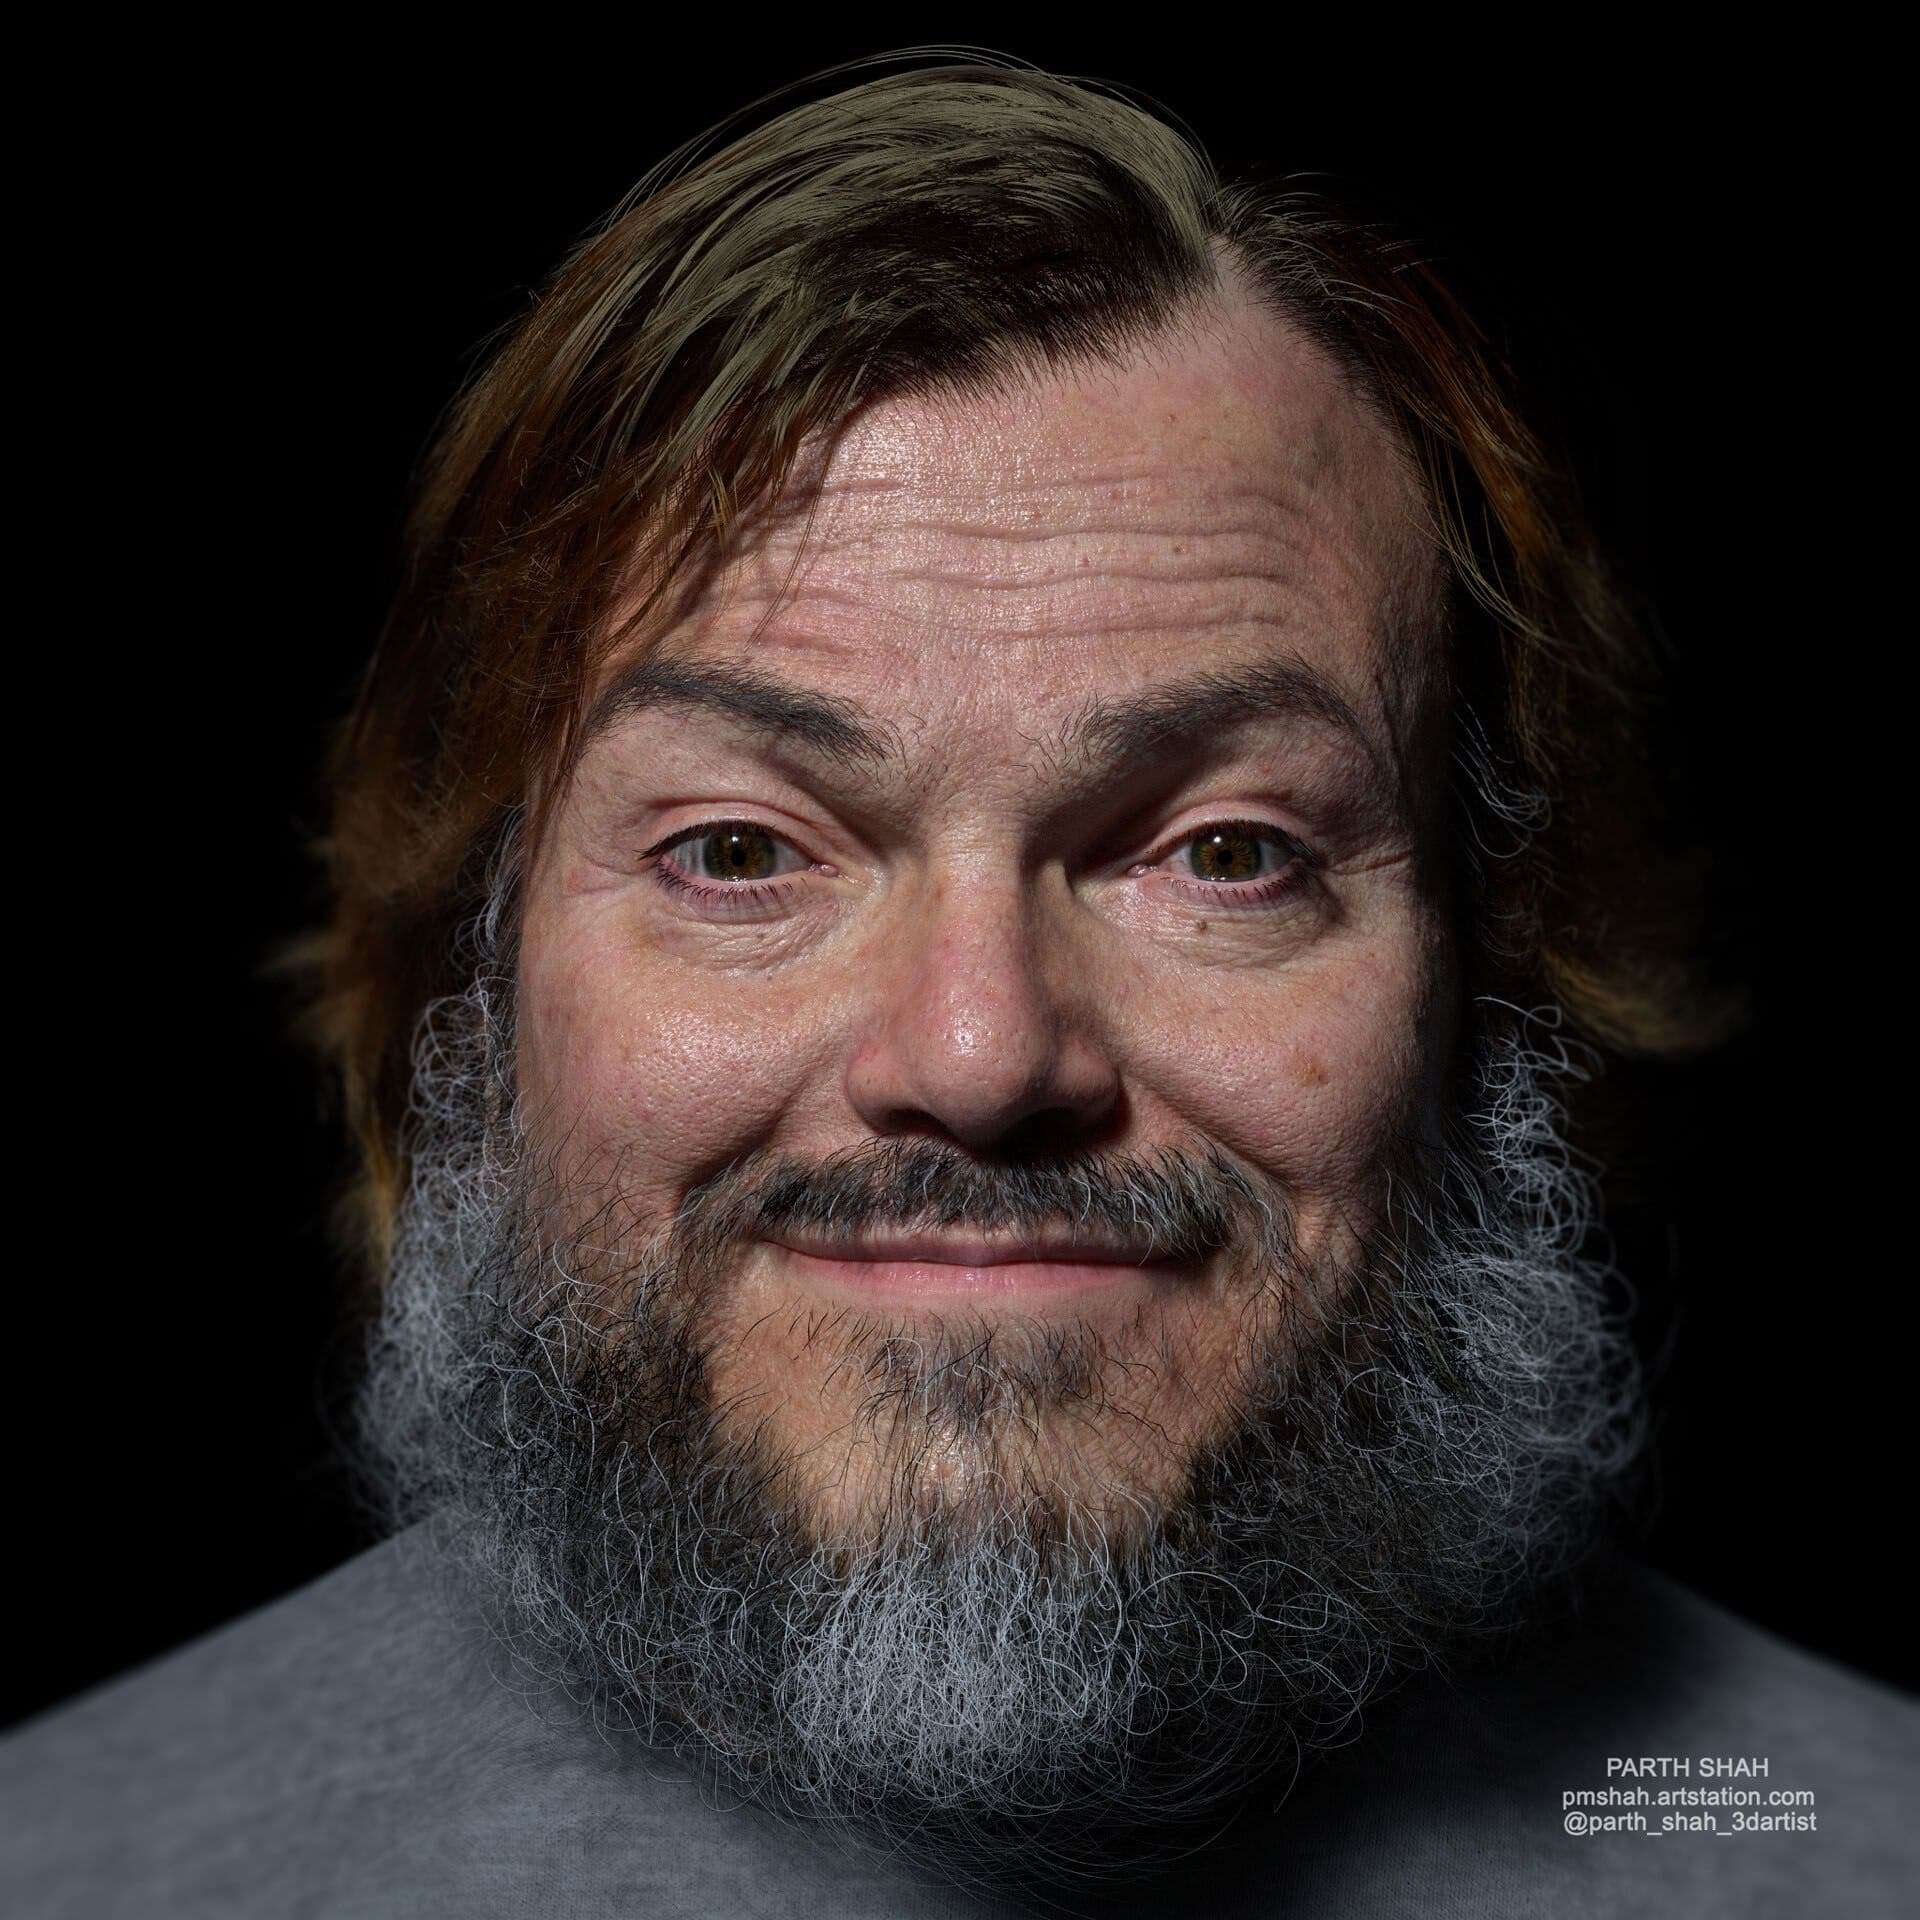
When creating this portrait my initial goal was to achieve realistic skin details with manual sculpting in Zbrush. I also wanted to achieve realistic results of the overall portrait.
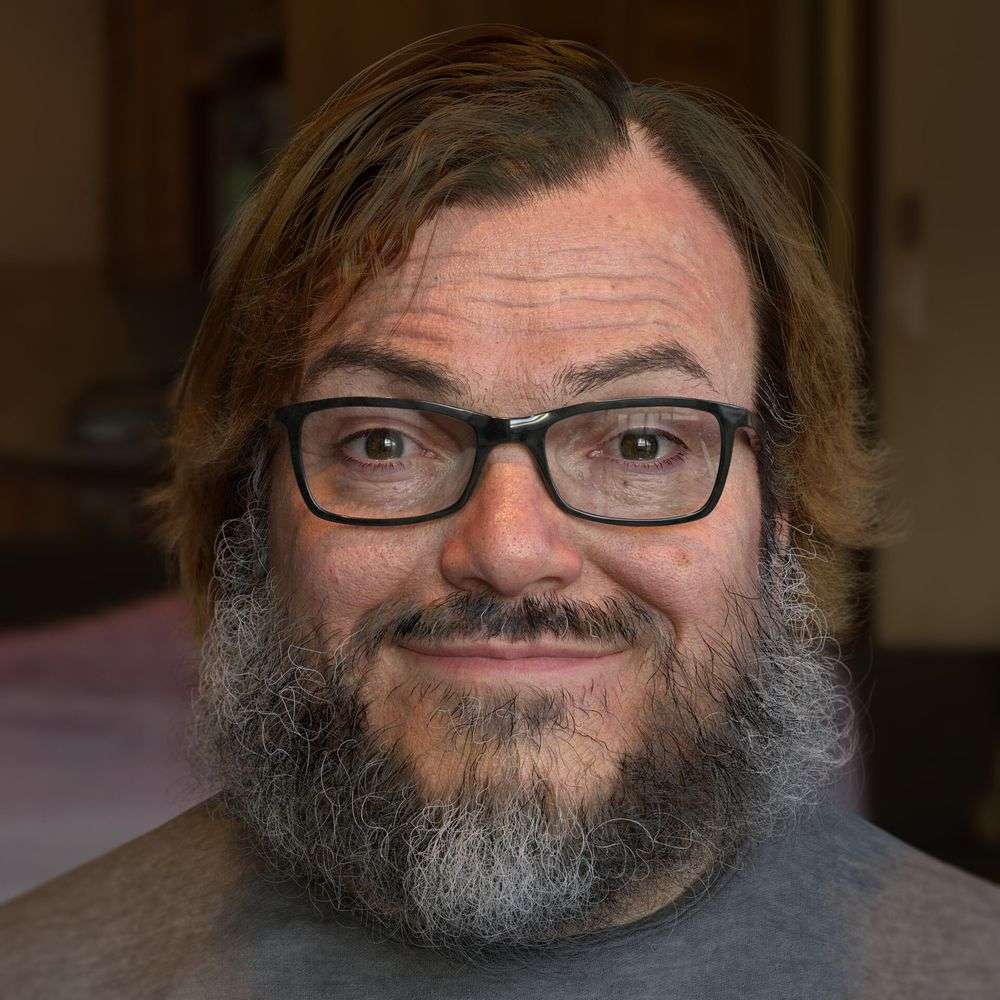
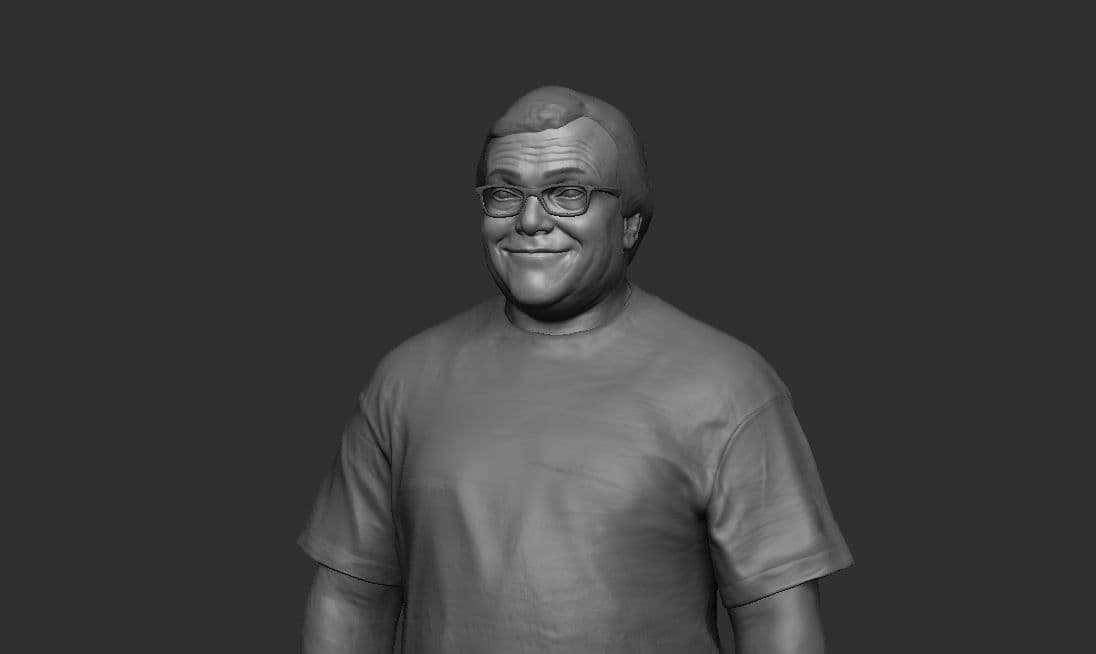
I decided to create a portrait of Jack Black as everyone loves him and also I wanted to create a head that had more volume, personality and characteristic.
Since Jack Black is one of my favourite actor, I decided to try out his portrait.
Reference
With starting a model, my first challenge was to get reference images. On the internet you can find tonnes of images of famous actors but it starts getting complicated when you don't have similar camera data of every image. Also, you don't have the luxury to get photographs of actors as you need them.
I spent a lot of time gathering images from movie screenshots, interviews shots, and other sources. For the skin details I gathered skin closeups images and other artist works for inspiration. No matter how good you are, artists always need inspiration to start. I also collected more references during the entire process.
Modeling
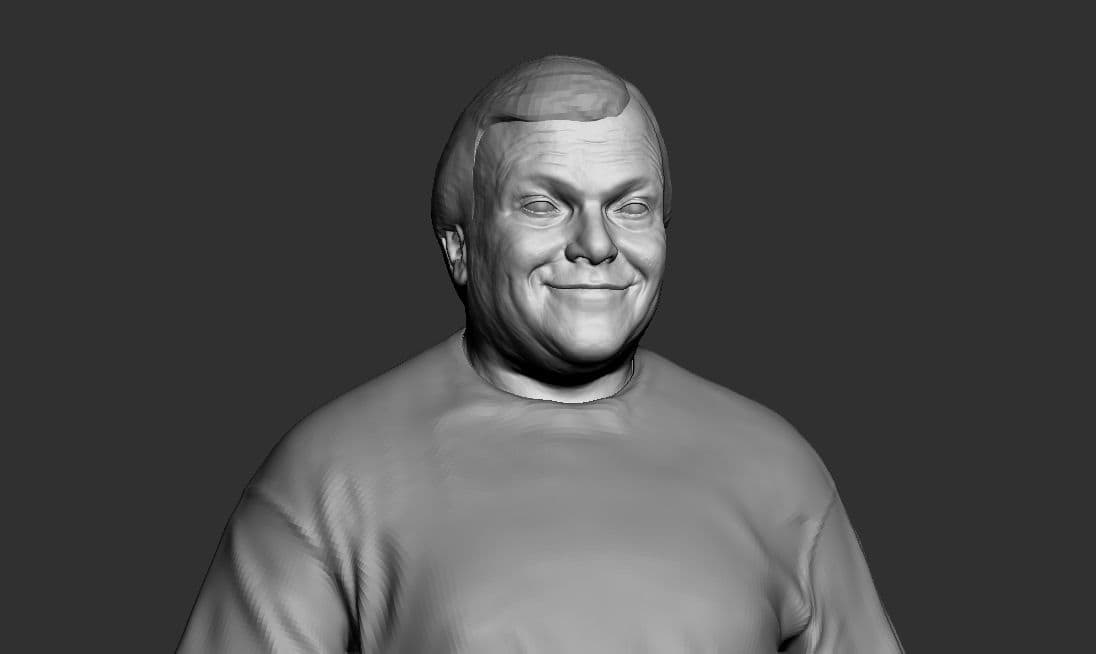
Before modelling, I first set focal length visually to references in Maya and Zbrush. The process can take quite a bit of back and forth. I also studied images for all proportions and lineup overall, to get an idea and start blocking out.
For the modeling process I used both Maya and Zbrush. Initially, I started with a sphere in Zbrush, blocking out all forms, and then started gradually building primary and secondary forms. I modelled the character to the pelvis and after blocking basic details, I went to Maya for the retopo process.
This is a basic process, one you can find easily on YouTube. I also followed anatomy books as a reference guide.
Constructing the head can prove to be a laborious task as some images have different camera data and can create a lot of confusion. I also took some inspiration from caricature illustration to get ideas about features that could make my version of his head stand out from other 3D images that have been created.
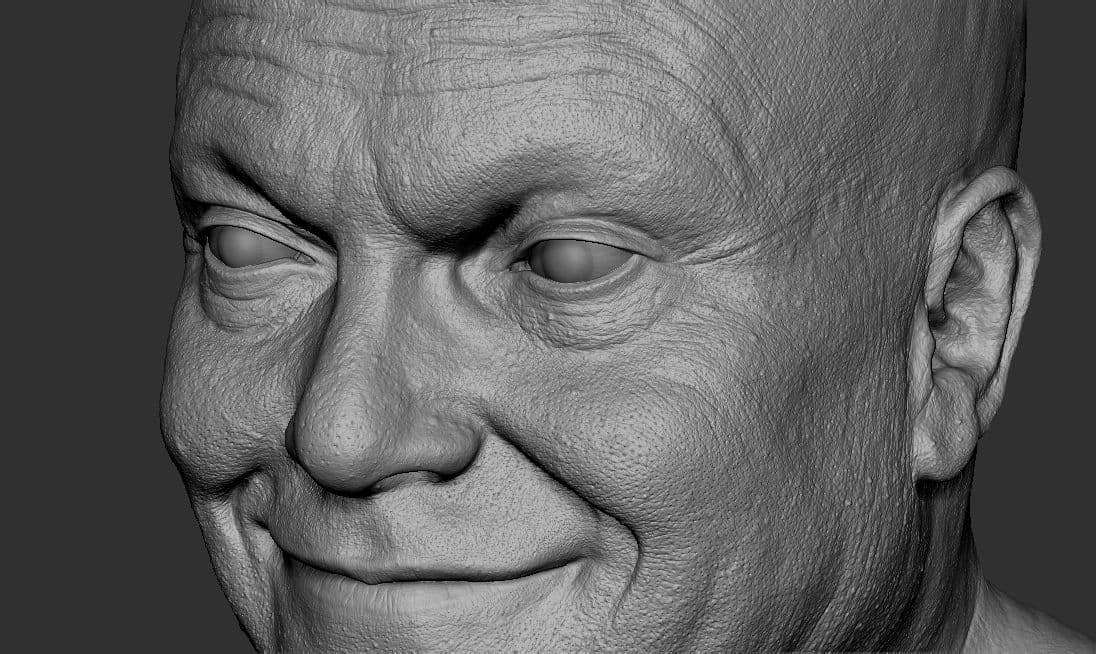
For surface details I followed the tutorials of artistKris Costa, and tried to achieve similar realistic results for skin. It is a difficult process but once you understand it, it gets a bit easier. For faster results XYZ map or Photo Scans are best and they have different processes to achieve results.
Scans are commonly used for results but here I wanted to try for realism all by manual sculpting in Zbrush.
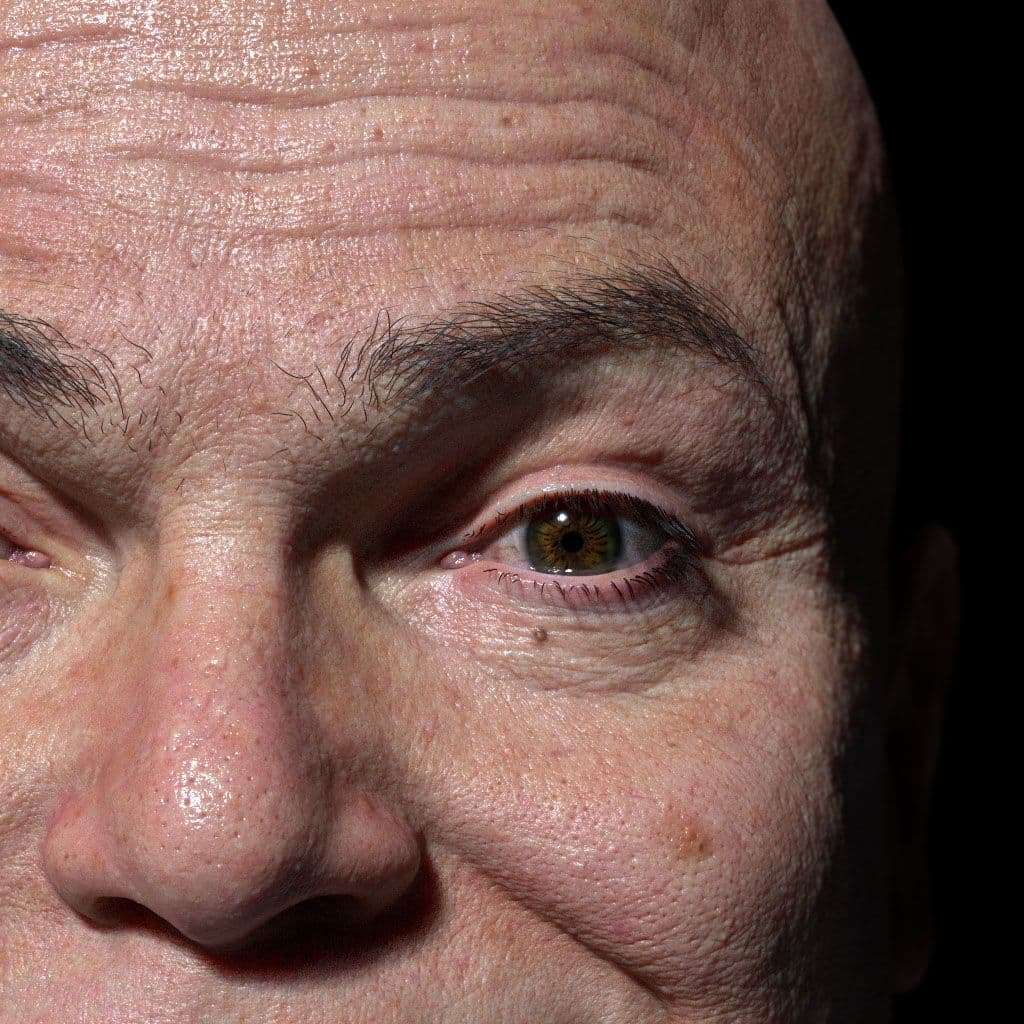
The process to create skin details is different from artist to artist. I usually start with quick sculpting pore layers and start with different kinds of variations, layer by layer.
Sometimes if end results are not good enough for some parts of skin, I remove those and start again with sculpting. Pores are sculpted, an alpha created from them, and then used as a brush for the head.
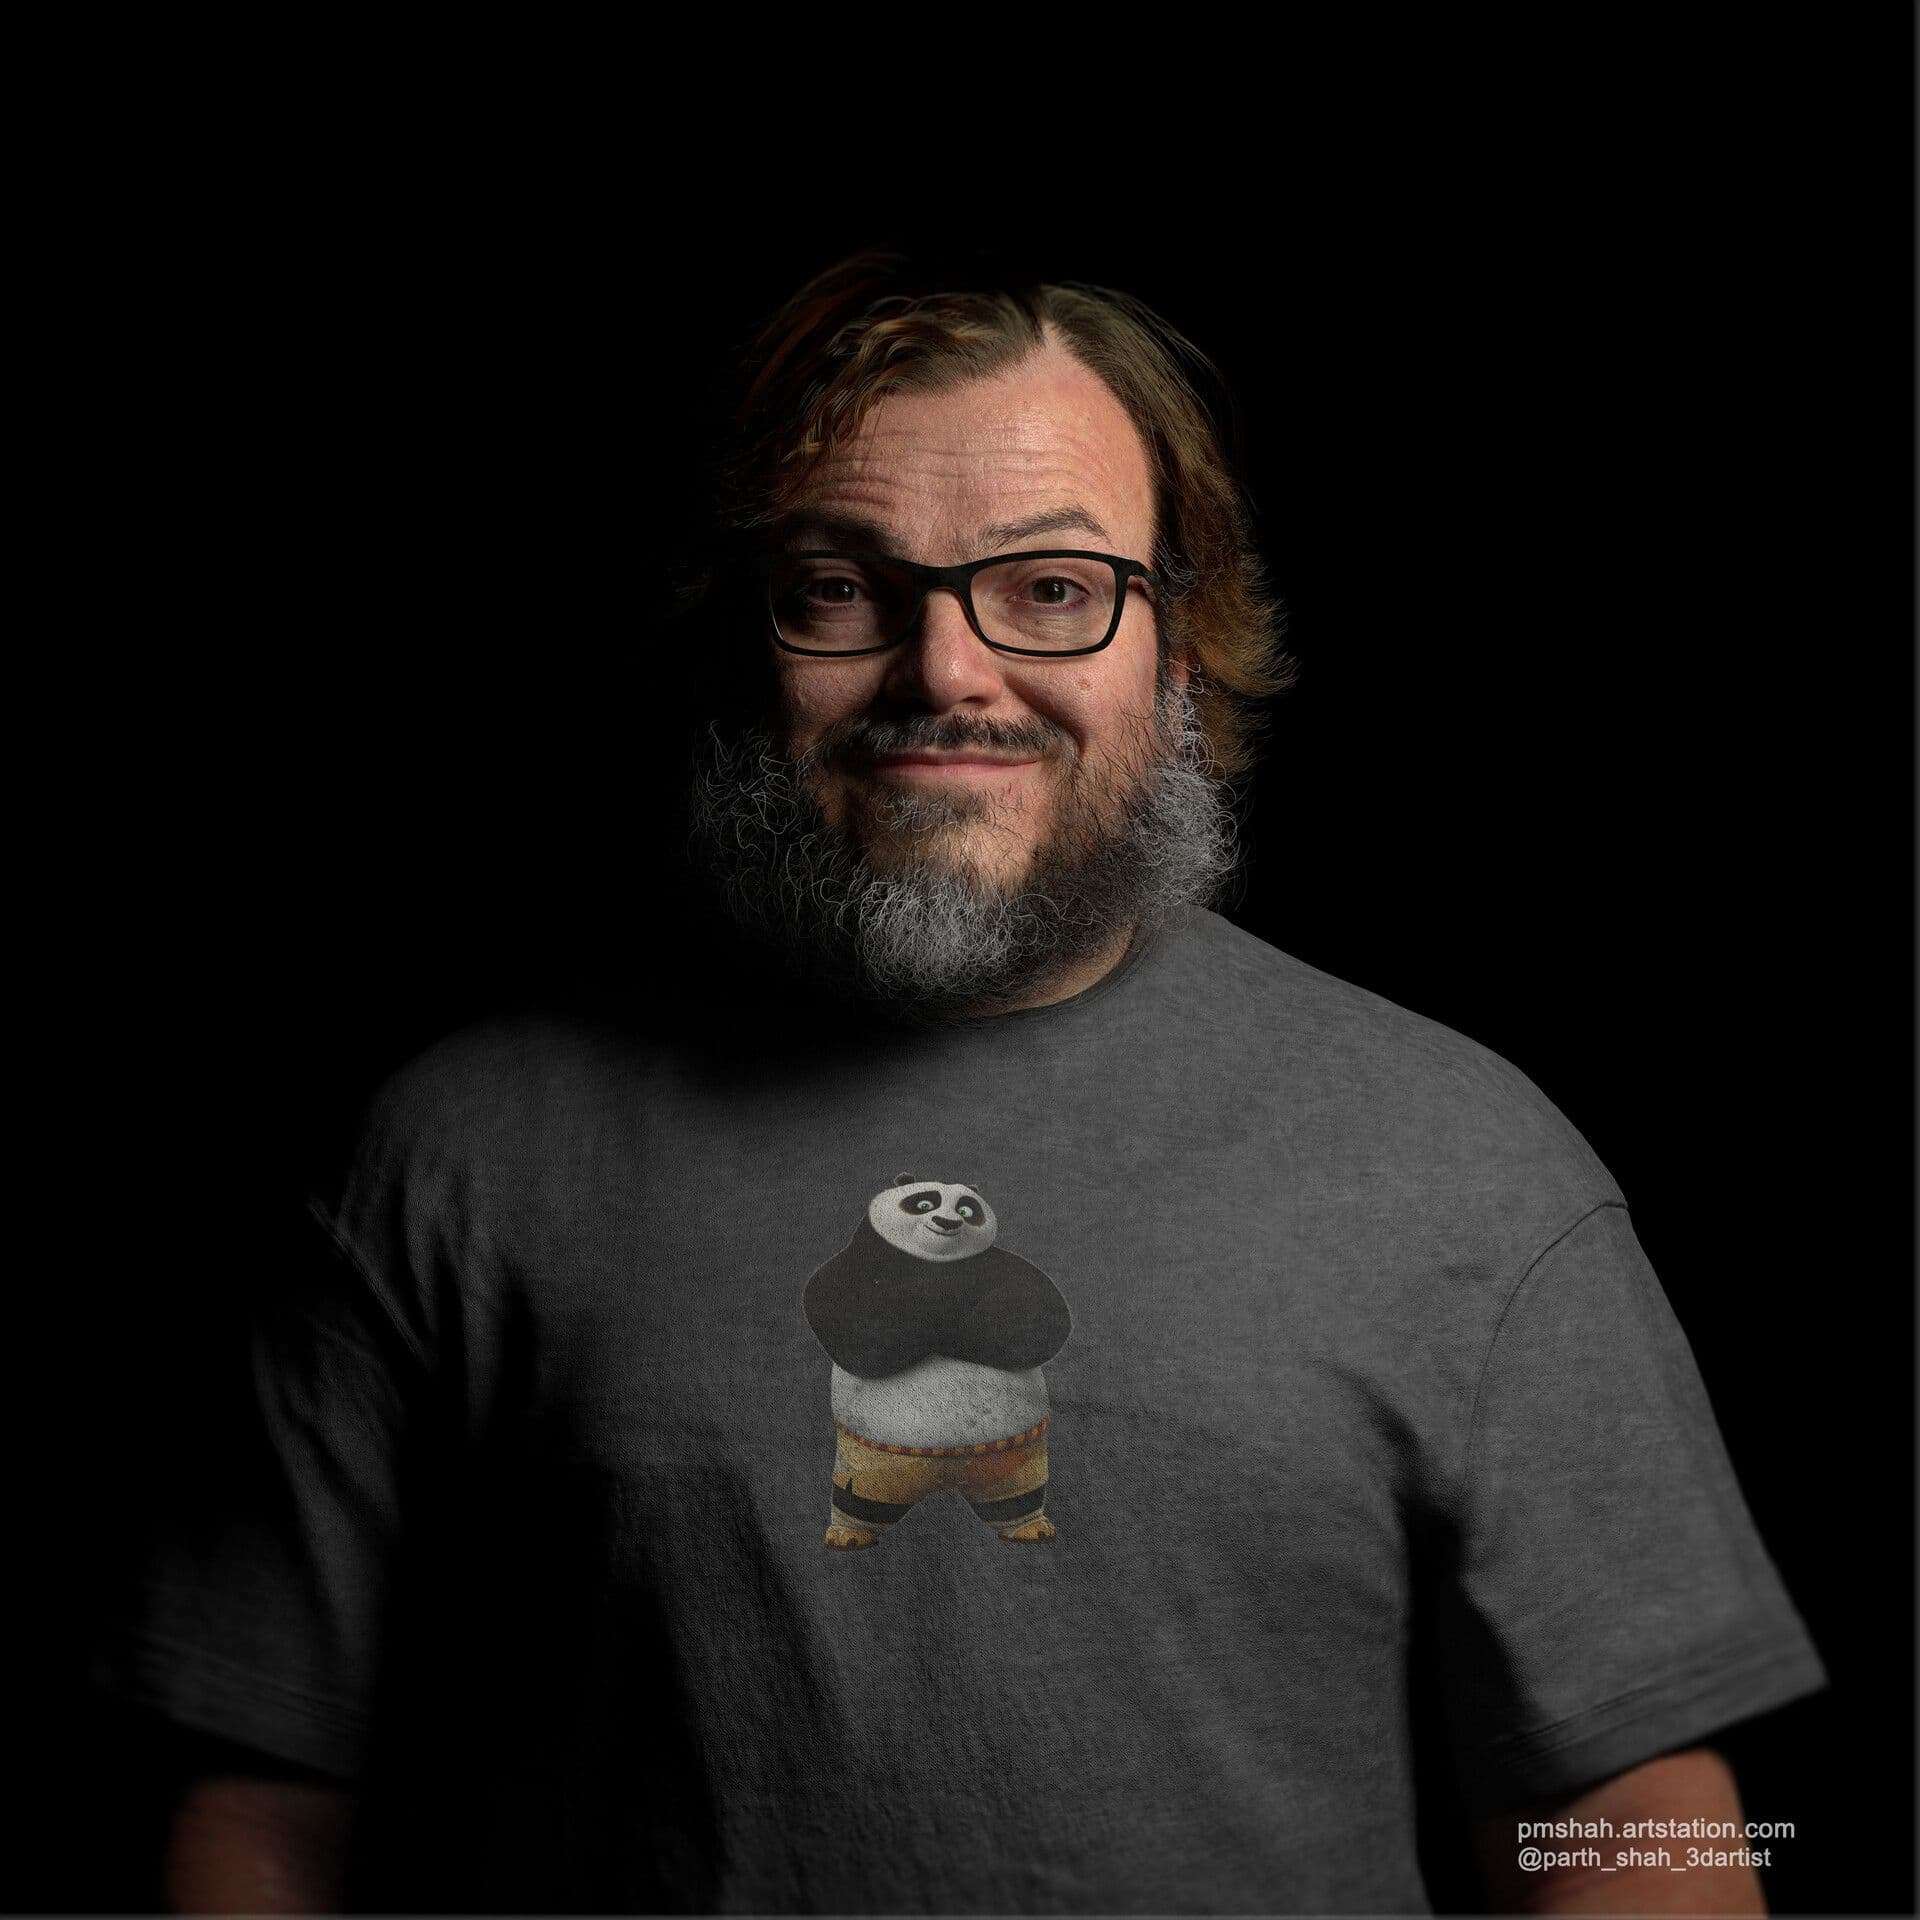
For the shirt, I created the body first and extracted the mask portion and started sculpting details on it. Marvelous Designer is another great option for garments for good results.
Texturing
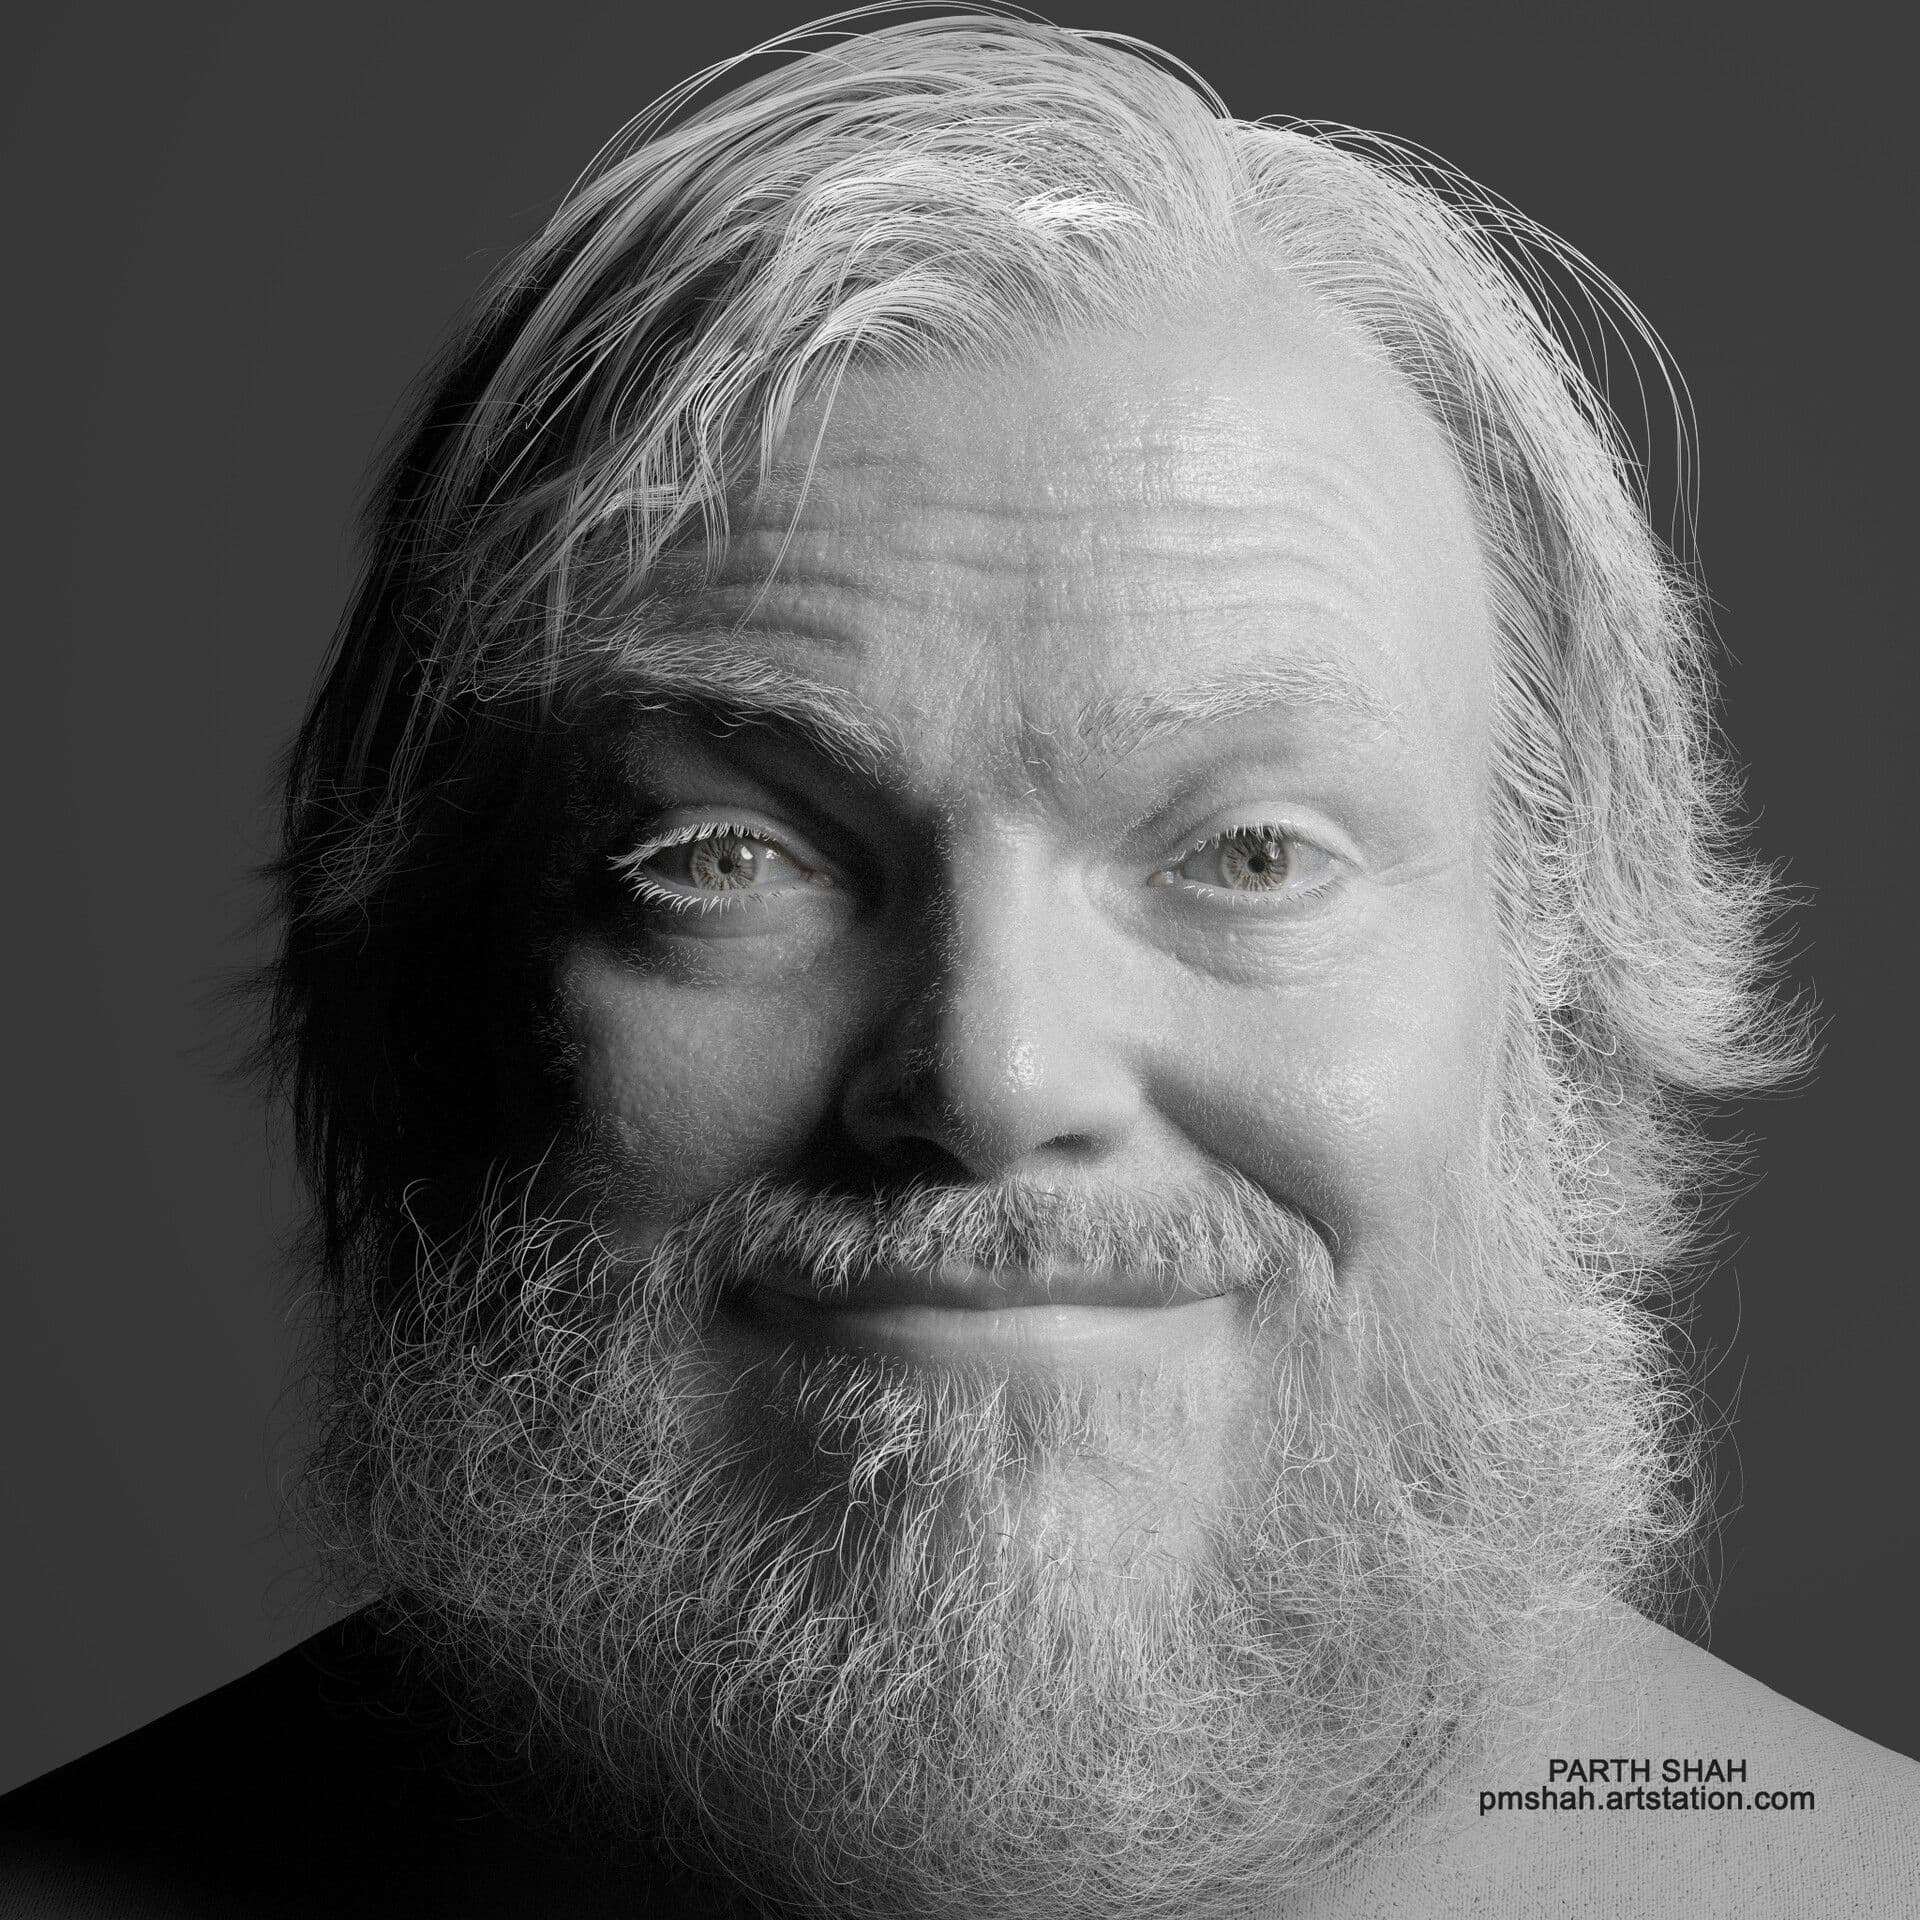
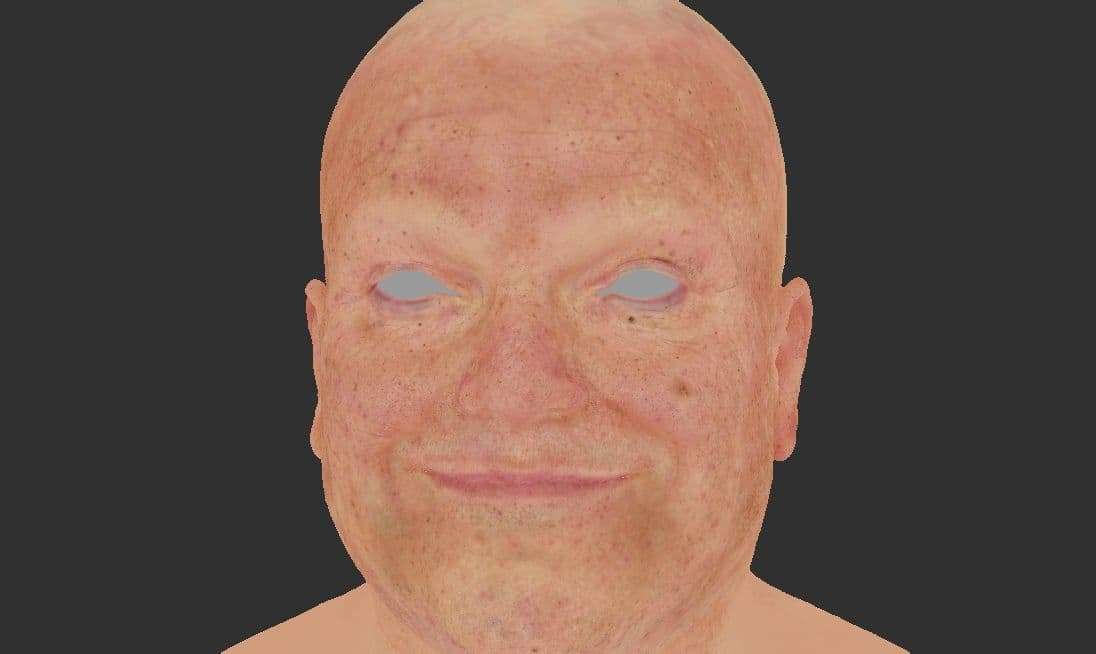
I textured the clothing in Substance Painter and created the fabric colour using all default available tools and procedural maps. For the skin and eyes, I coloured them all manually in Zbrush with default brushes.
For skin it is generally better to approach the texturing using cross-polarized photos or XYZ maps to get quick results. Mari is a better option for this workflow, but I wanted to try out more hand painted methods. So I used all default Zbrush tools and tried to achieve skin textures by painting and testing.
For skin diffuse and spec maps, I used all default brushed. However, I used a custom brush for displacement.
Details like skin and eyes I achieved by using a mix of custom and default brushed in Zbrush.
Skin is a very complex structure and has a unique flow on each person just like fingerprints.
To achieve a realistic head, all maps need to be of fine quality and the combination of those will result in a realistic model.
For skin I usually apply a first pass with skin pores on the head while studying the flow, patterns, textures, and slowly start adding details layer by layer.
Sometimes I have to apply the first pass of noise for micro details to feel a bit of cellular structure and then play with pores and wrinkles after that. This part of the process is dependant on personal taste - there is no right way to approach it.
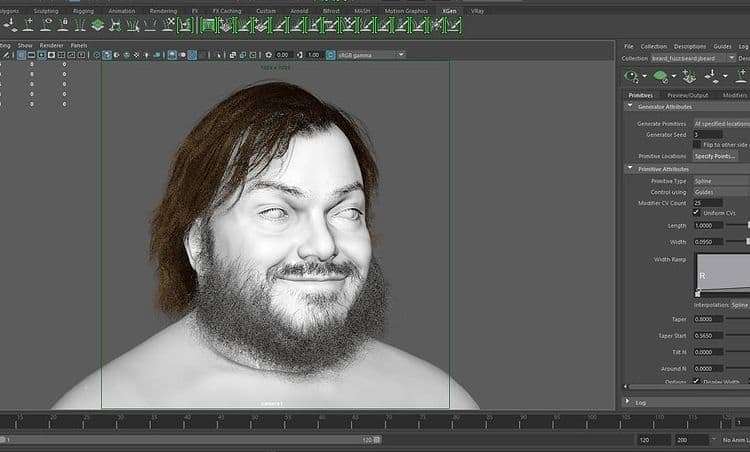
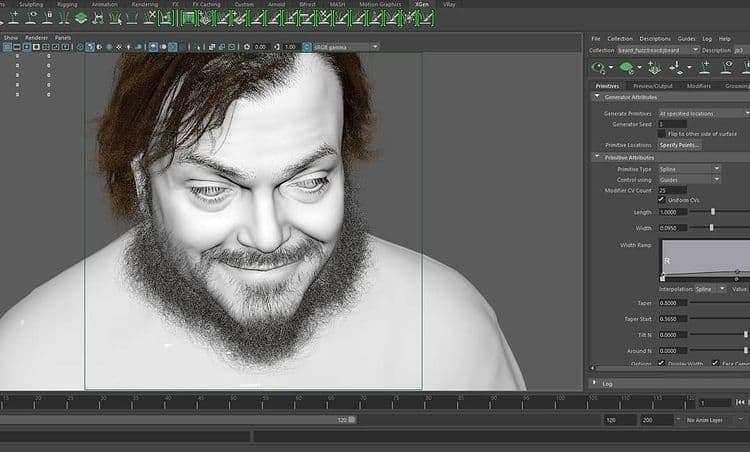
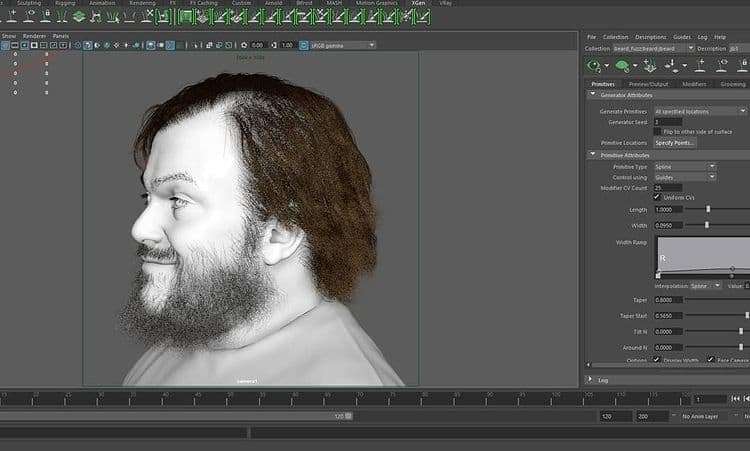
Hair
To create the hair I used Maya Xgen. I first tried to understand hair structure as blocking and separated all flows of hair in different descriptions for a single collection.
I placed guides and shaped them according to the hair flow. After that, I applied different modifiers and tried to establish realistic hair.
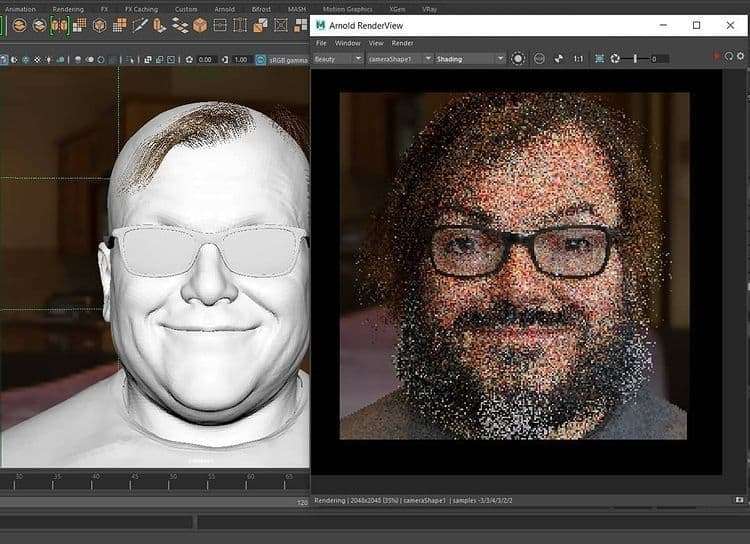
Lookdev
When approaching the lookdev of the skin, I used Arnold in Maya. I plugged all maps into a shader and applied values, during this process I had to change maps again and built on the details.
It was a lot of back and forth and I needed patience. I generally approach lookdev by first setting up a basic studio light and then moving on to the specular map, diffuse map etc..
After finalising the model, I played with different HDRI in the scene and did the necessary tweaks on all maps and forms. It's like an endless process and could be frustrating but the end result always pays off!
Rendering
All my renders are straight raw renders from Maya except black & white images. I used photoshop for Blur effect and name tag.
Again there's a lot to share and it is a really long process. There are a lot of artists who share their workflow and thanks to them, with time, anyone can achieve realistic quality in their work. If you are just starting out on your character modelling and texturing journey, I hope you can take something away from this article!