
Recreating a WWII Aircraft Engine in 3D
Gabriele Martinacci, a Hard-Surface Modeler based in Italy, impressed us with his recreation of a Curtiss-Wright R-2600 Twin Cyclone Engine in 3D and we asked him to share the details with us in this article.
Gabriele Martinacci, a Hard-Surface Modeler based in Italy, impressed us with his recreation of a Curtiss-Wright R-2600 Twin Cyclone Engine in 3D and we asked him to share the details with us in this article.

Gabriele Martinacci is a Hard-Surface Modeler who started his career as a Communication and Graphic Designer in Turin, Italy. He discovered 3D modeling and decided to take on a career change.
Gabriele impressed us with his recreation of a Curtiss-Wright R-2600 Twin Cyclone Engine in 3D and we asked him to share the details with us in this article. If you are aspiring to become a hard-surface modeler, this article is for you!
Born almost as a joke, this project is my second entry for my reel as a hard surface modeler. The initial idea was to model the entire iconic B25 Mitchell from the movie Pearl Harbor, used extensively during World War II. However, I got lost in the details, even the smallest, and I decided to split the project into two parts.
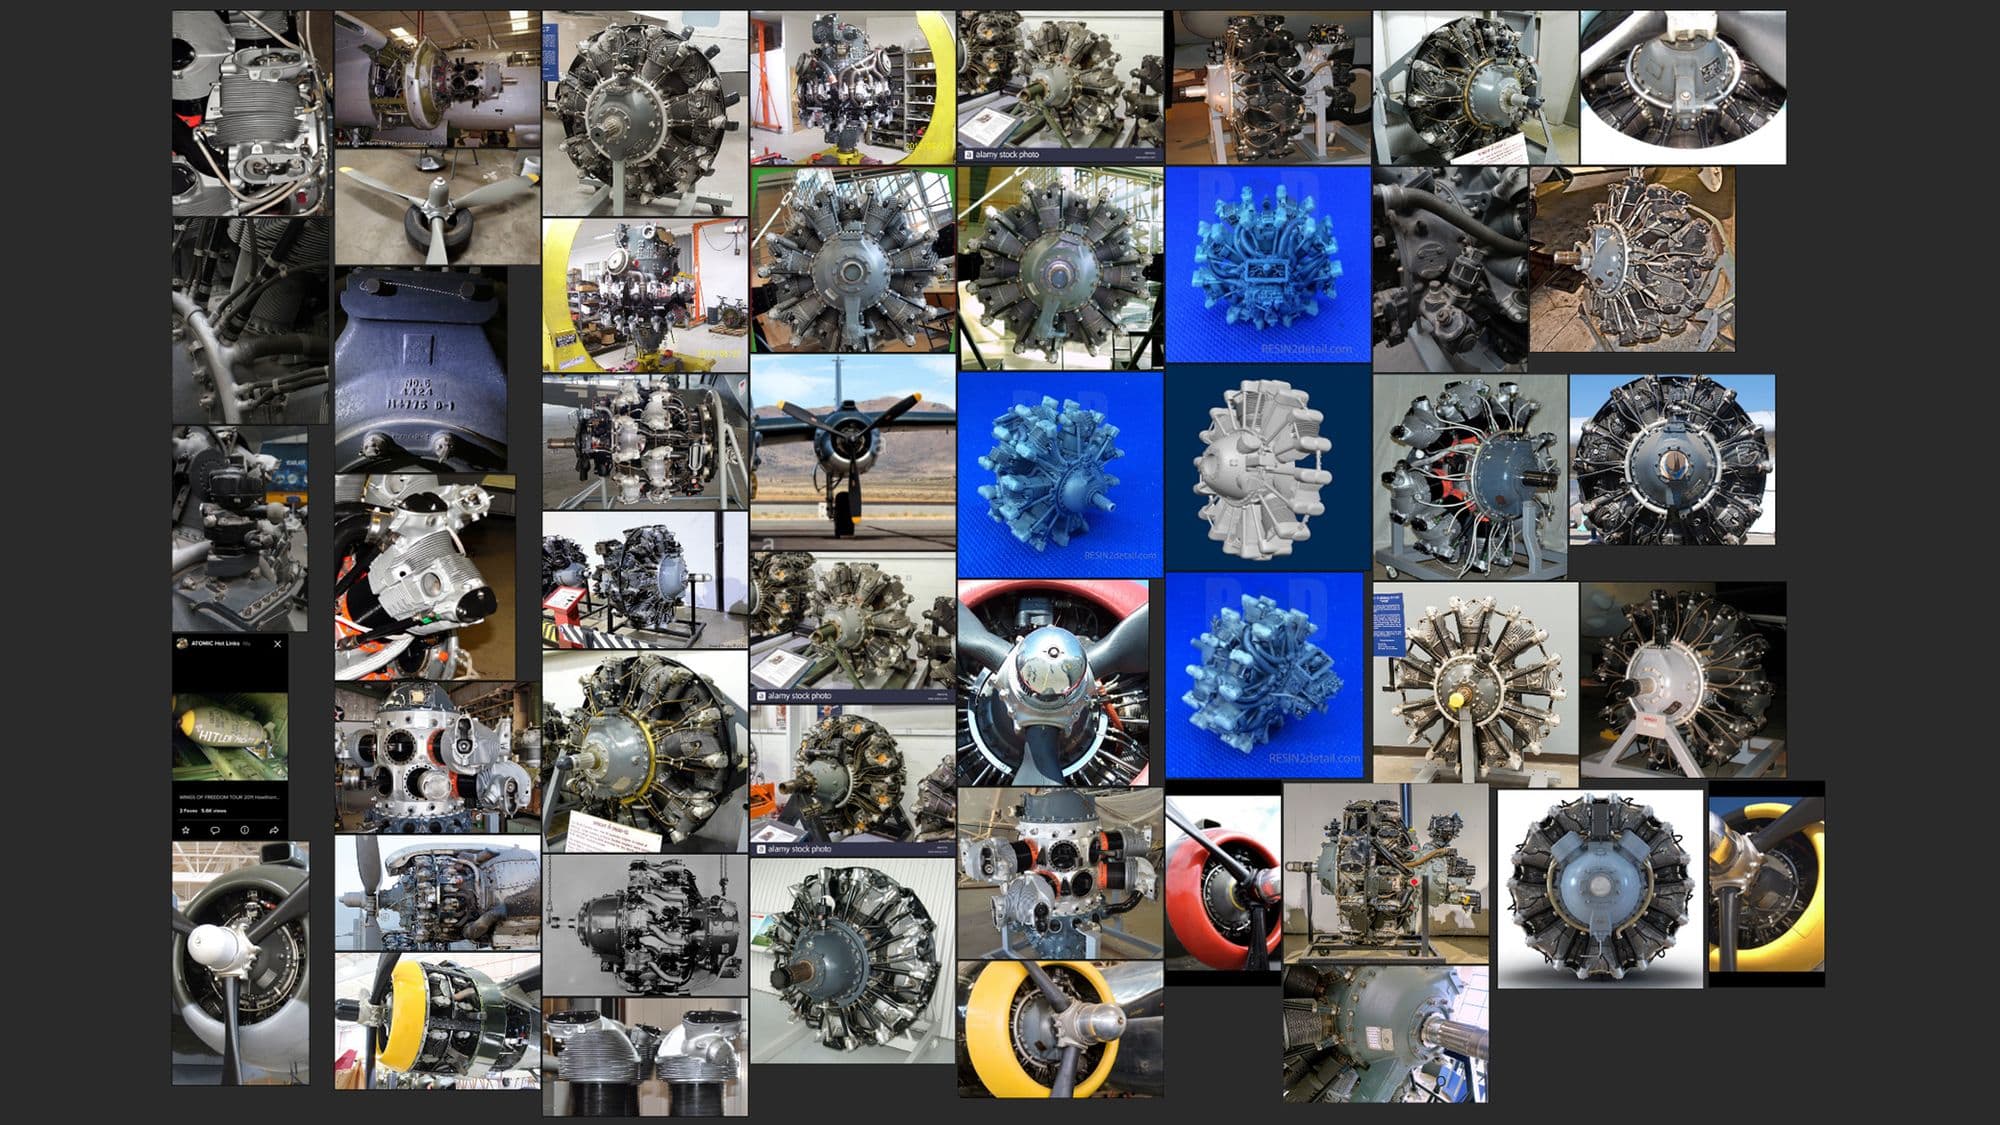
The first step of the project was the search for references. The object that I wanted to model and texture was not easy to find online, both because it is a very specific component of a larger object and because it is inserted inside the plane and, therefore, it is almost never seen uncovered. In addition, there are many variations of the same engine, each with either small or substantial differences.
Google Images didn’t help me much, and neither did Pinterest. I found almost all the material on Flickr, thanks to the great work of dozens and dozens of photographers who have photographed the engine in the smallest details in museums and events. Flickr is an ideal tool in the search for references as it almost always guarantees very high resolution photos and you can find almost anything.

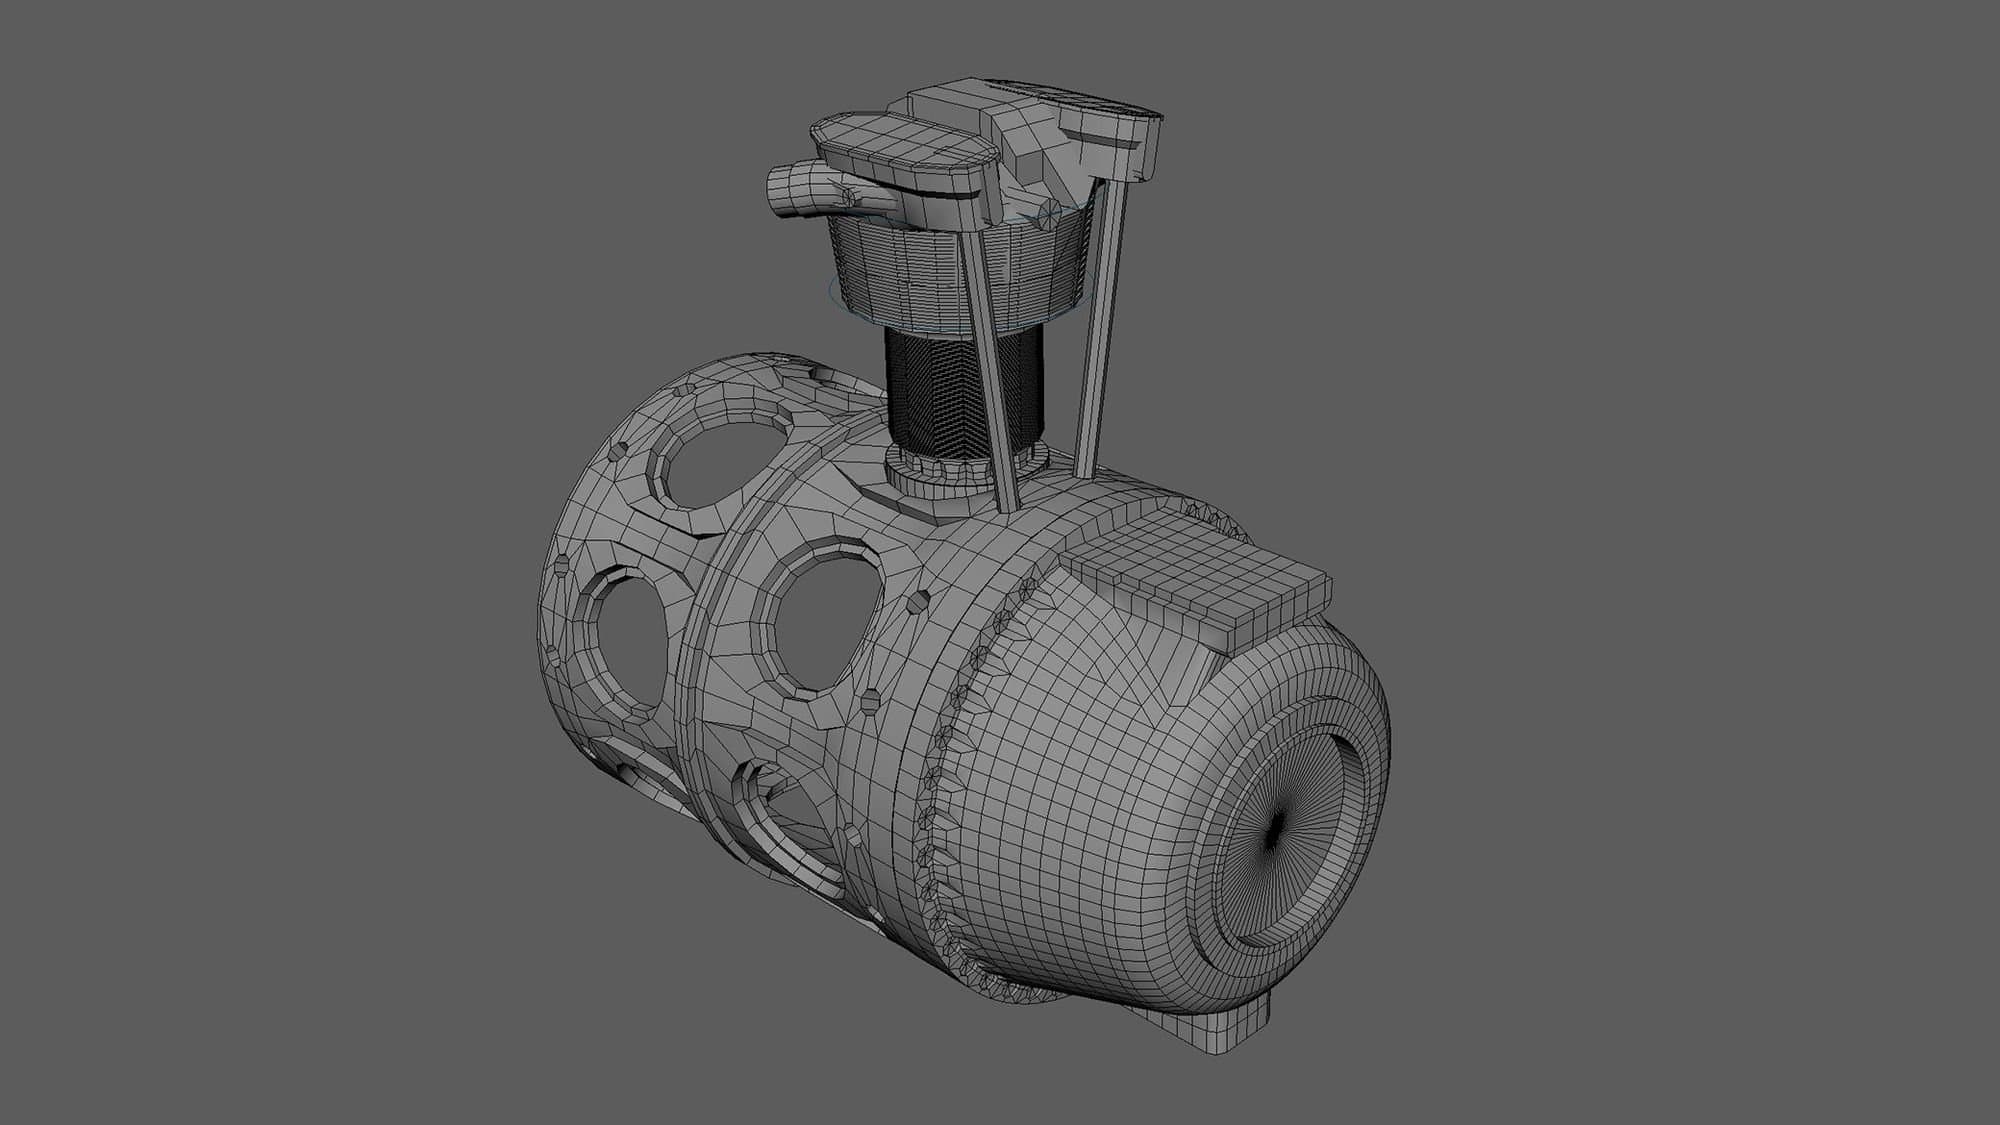
The second phase was the Blockout, in which I defined the volumes of each individual component. I usually tend to finish one mesh completely before moving on to the next one, except for the bevels, which I add at the end. In this way I manage to have an overall almost defined mesh, but also allowing for variations and modifications later.
In this specific case the definition of the volumes had been done totally by eye because I had not found blueprints with the various prospects. No doubt it was the most difficult part of the project. Getting each component to fit required a lot of patience and attention. Specifically, getting the volumes of the radiator heads took me five days, because I couldn't find reference from which I could clearly understand how they were made.
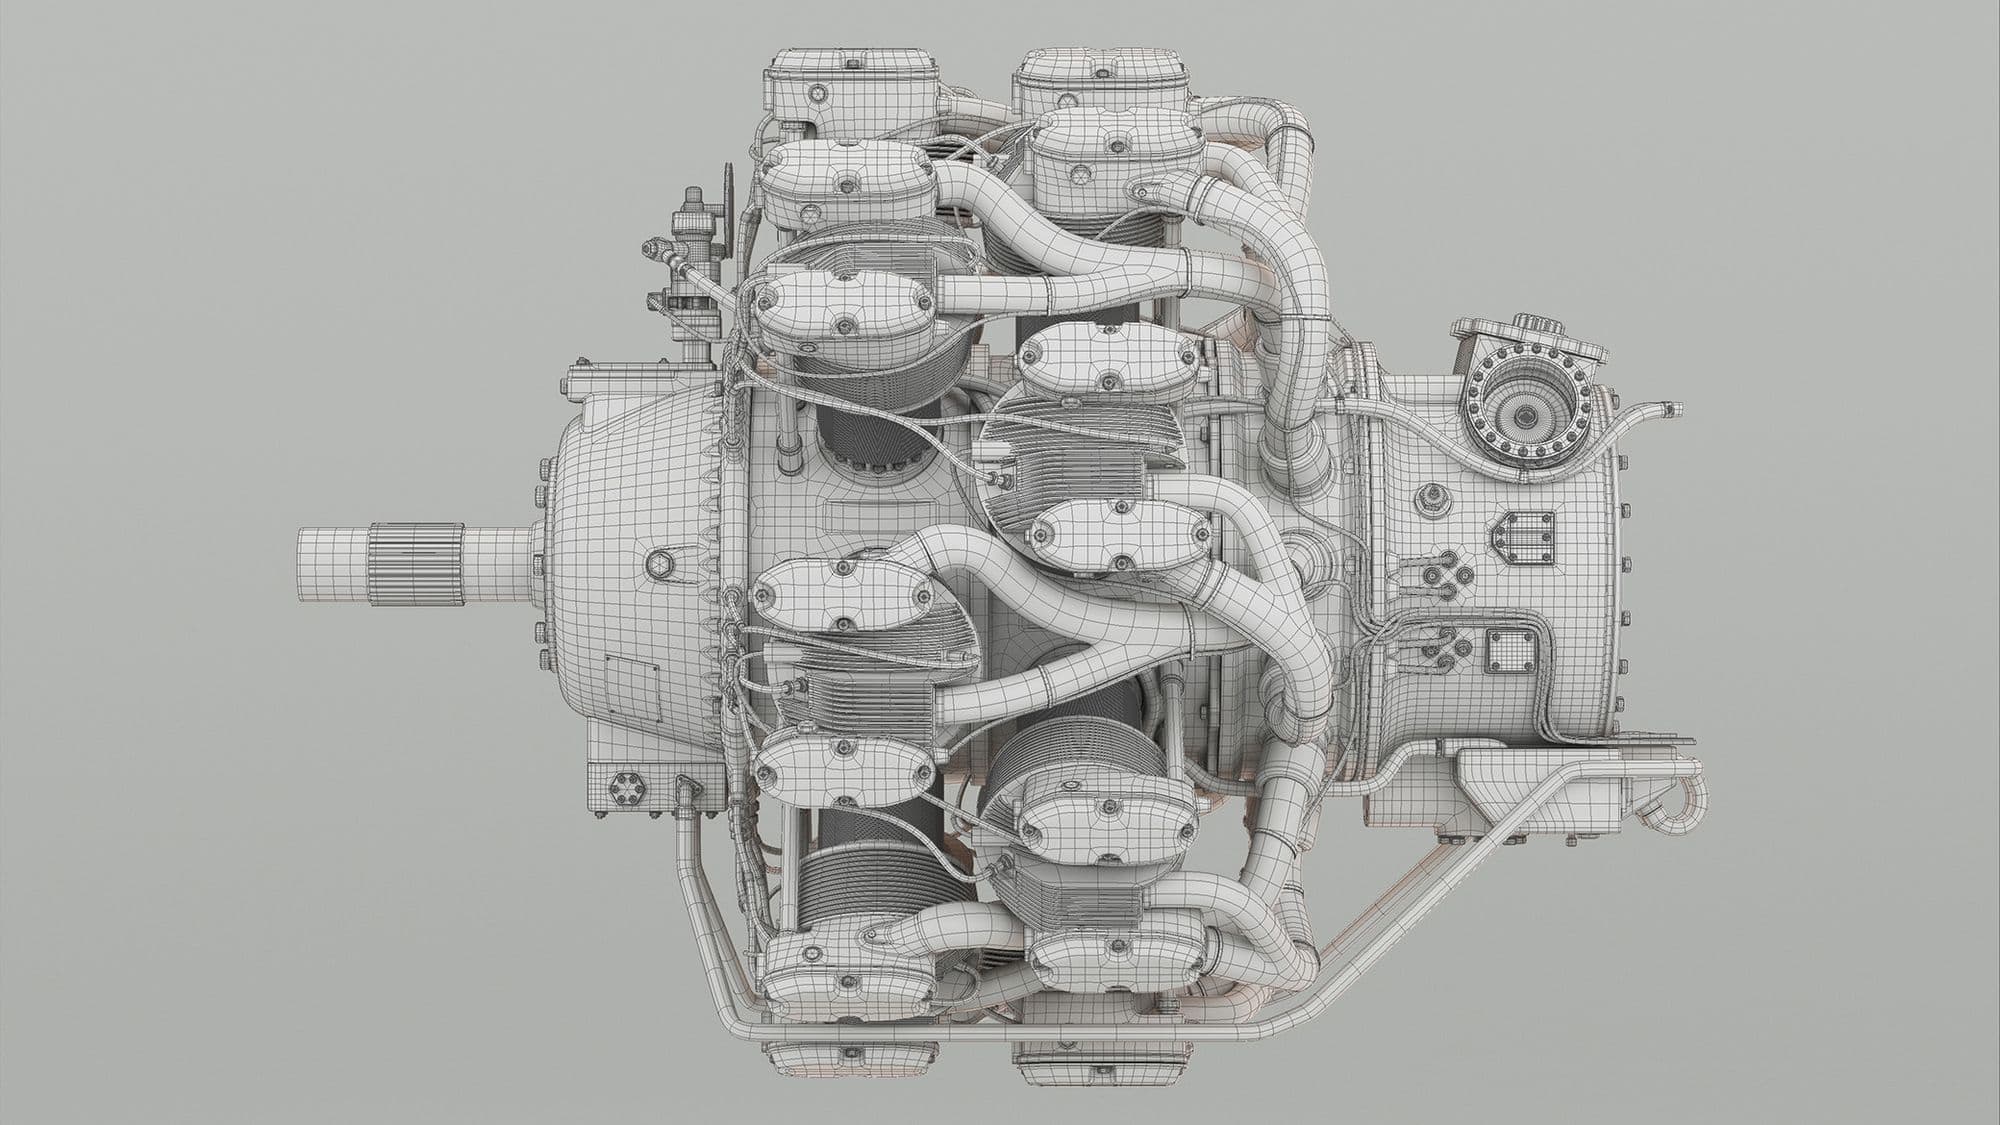
To achieve a good final result, a fundamental part of each project is having a correct topology that supports the mesh. This way, the subsequent deformations and subdivisions will be correct and will not generate problems.
Because this isn't a prop for gaming, I kept the mesh in quads, getting a High Poly mesh with 10 million polys. To get the cleanliness of the topology that I wanted, I focused essentially on understanding the resolution needed to get the details that I wanted. To do this I had to carefully evaluate every single piece.
I usually make a screenshot of the raw mesh, with dirty and incorrect topology, and bring it into photoshop - drawing over it what I thought would be the right edge flow. Then, I went back to Maya and I tried to recreate what I drew. It’s a process that takes time but gives great results. To get the right shapes I also used the retopology tools provided by Maya.
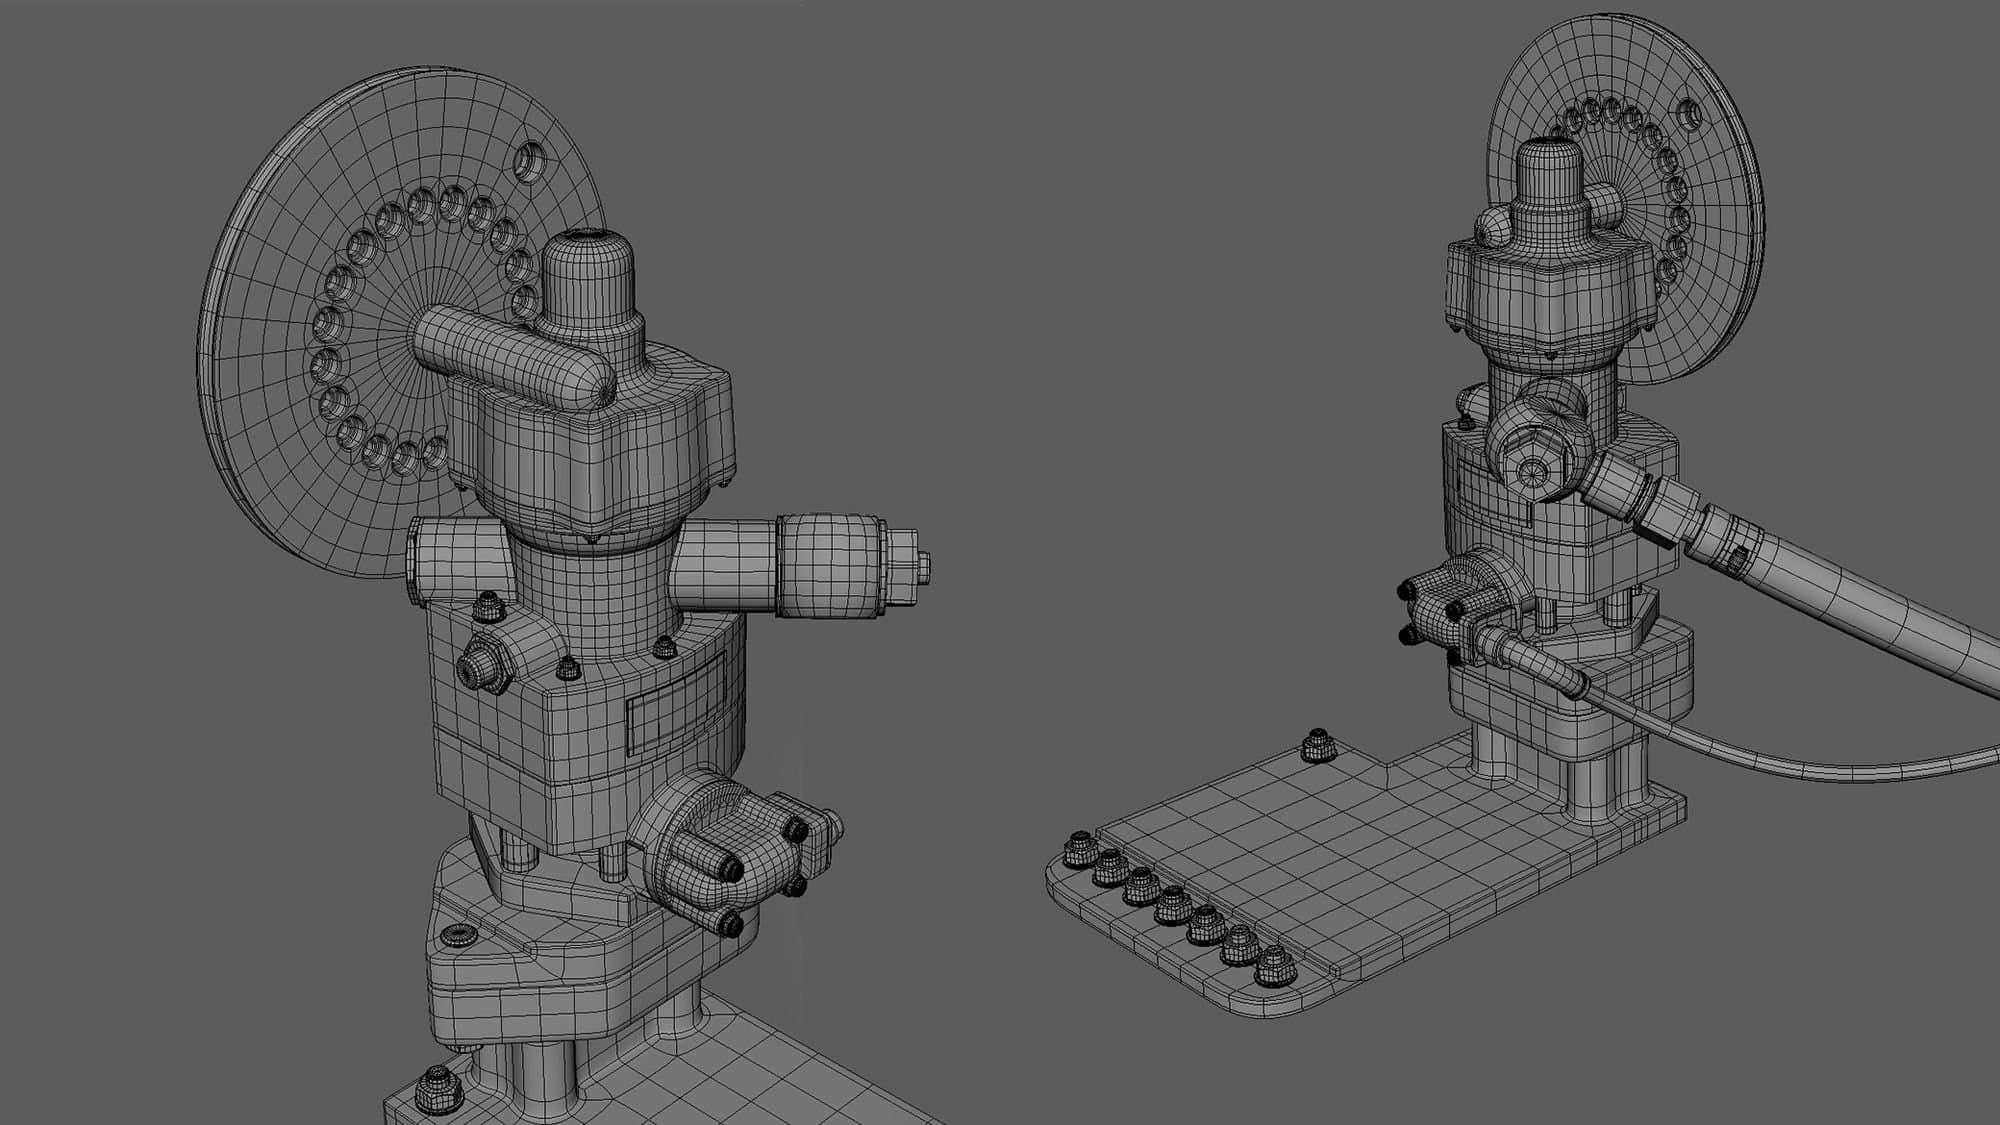
To get a result as clean and interesting as possible, and to prove to myself that I could model even the most complex shapes, I decided to model each real piece as a separate mesh. This greatly complicated things, as I could not have any interpenetrated objects, and edge flow was much more complex to handle.
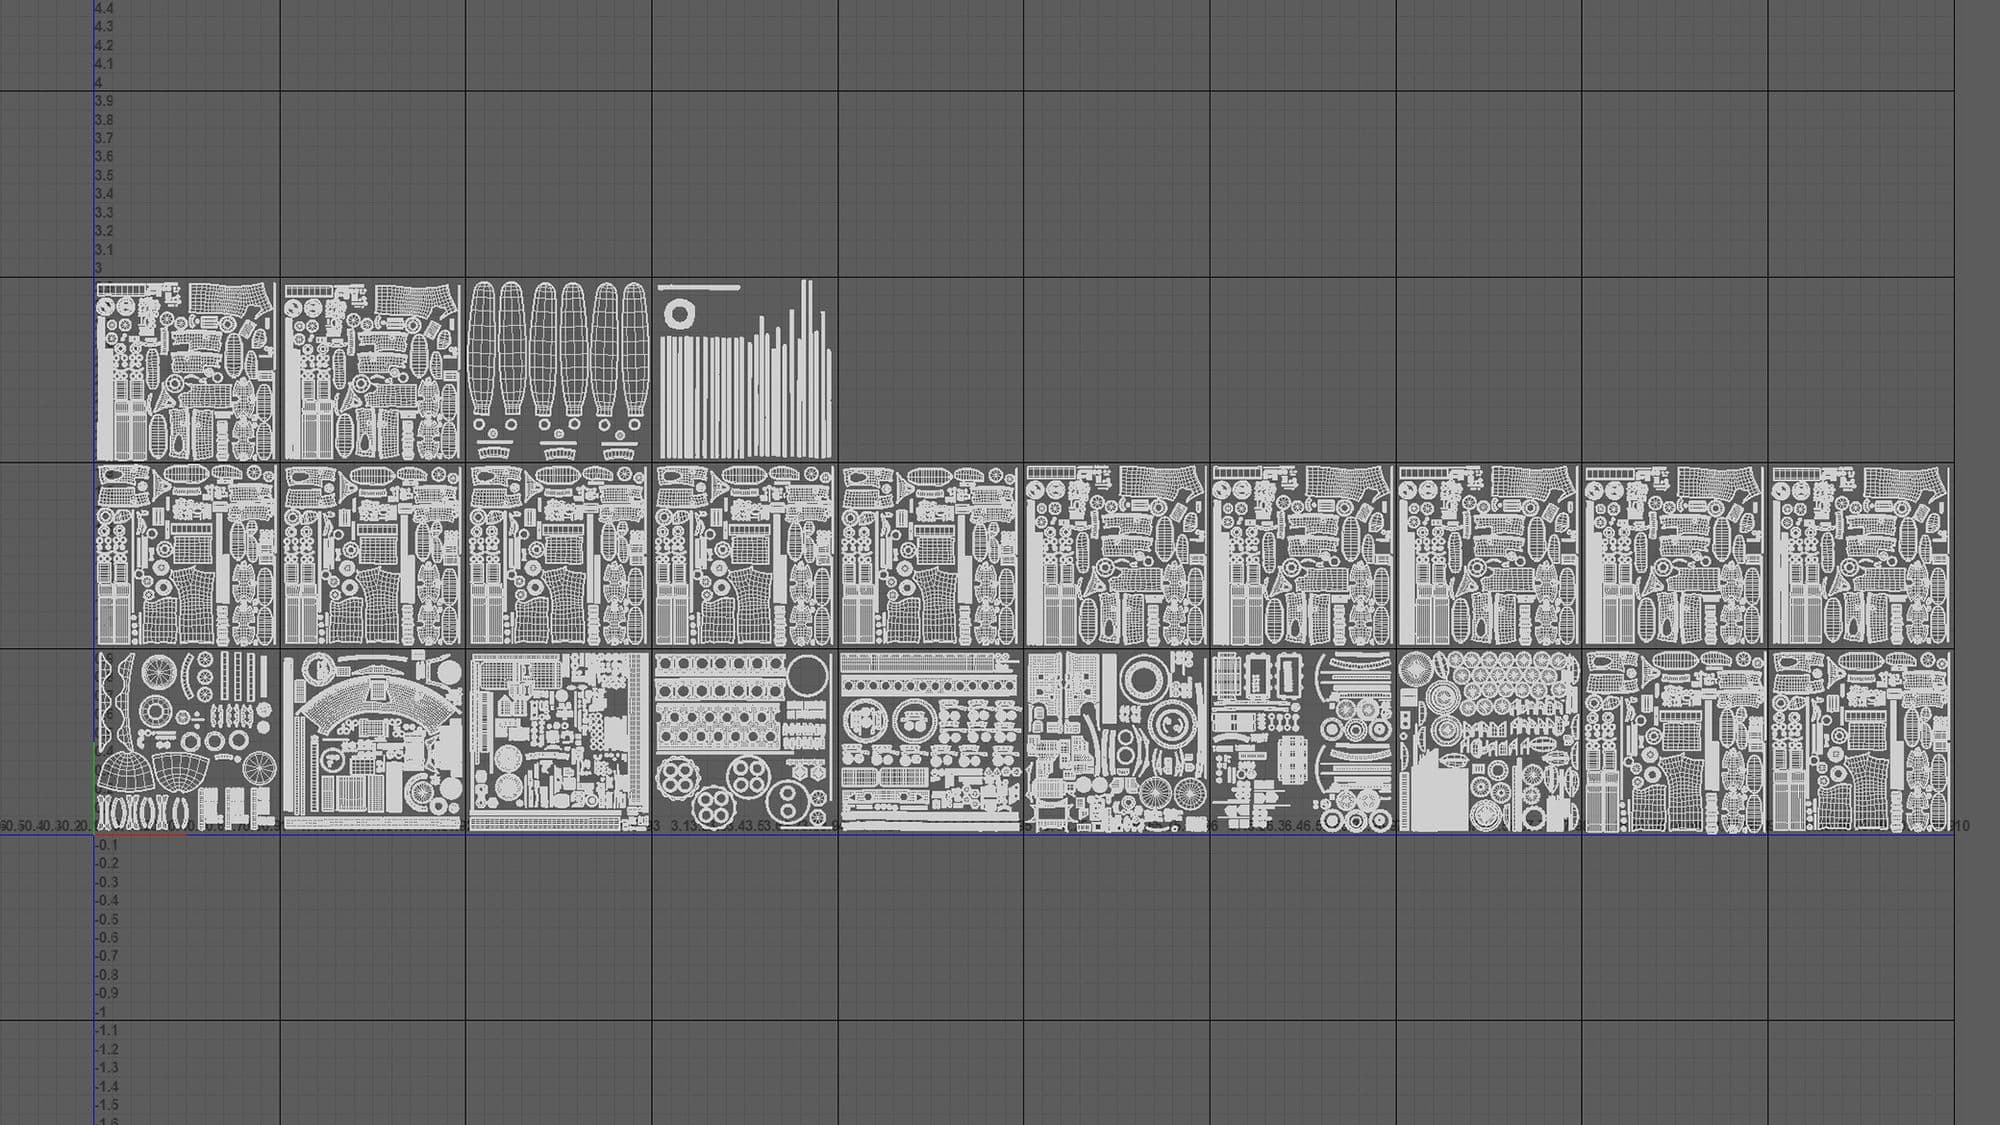
Since I had in mind to do close up shots and I wanted to push the details on the textures as well, I decided to divide the shells as much as possible, using a total of 24 udims. Of these 14 are the individual radiators. I wanted to separate them because I did not want it to be perceived, even if a little, that the textures were repeated.
The process was very long and laborious because there were so many mesh to work with.
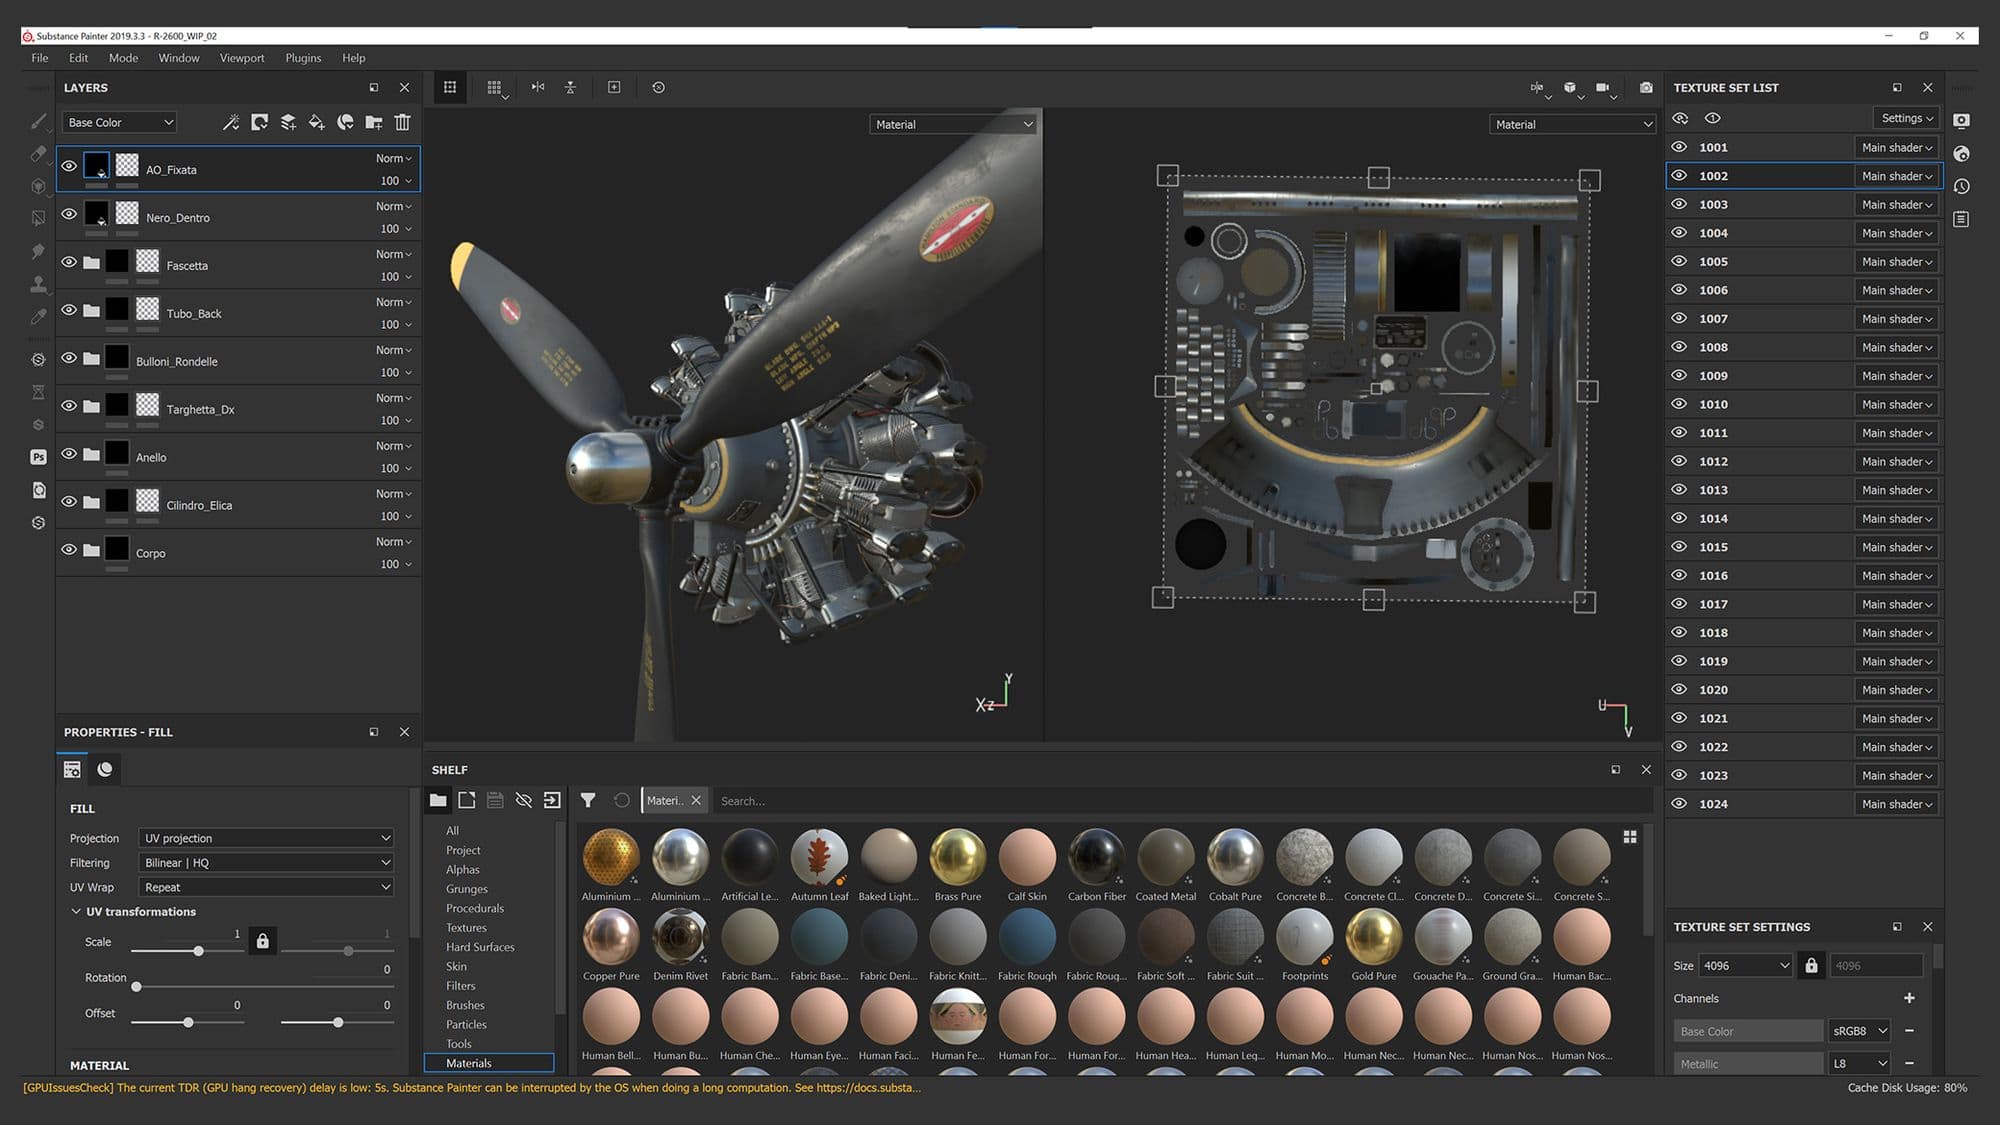
Once satisfied with the work, I moved on to texturing the model using Substance 3D Painter. Here, the research work done for the definition of the model was very useful because I did not have to look for further reference to texture.
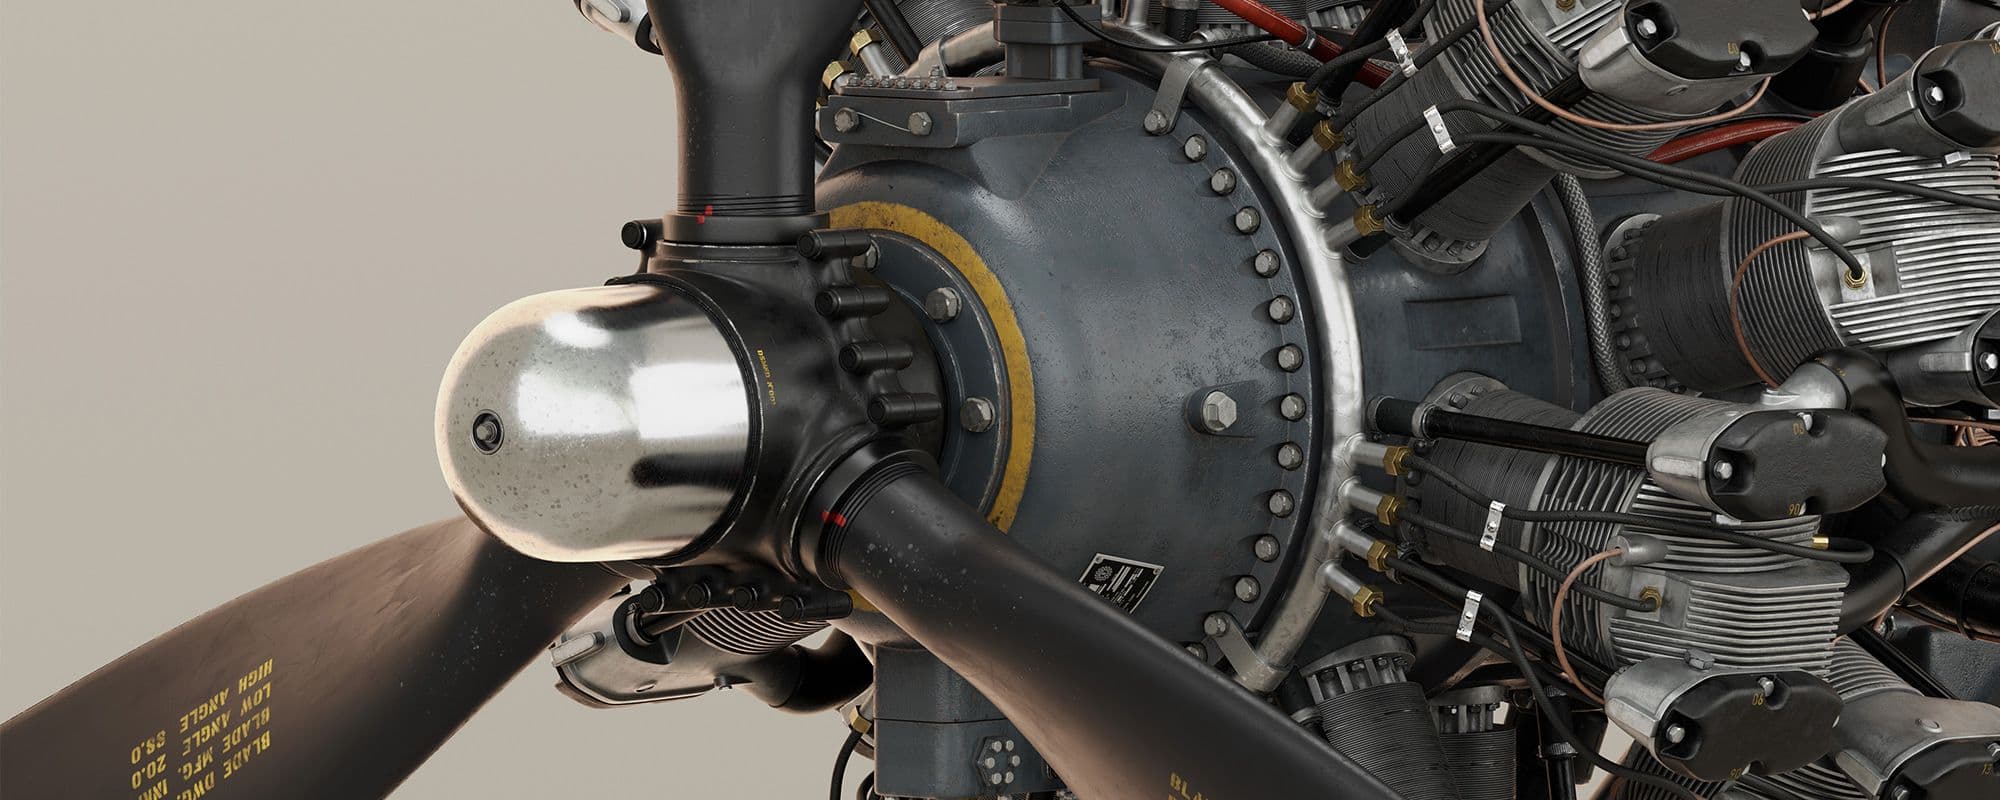
I have placed a great deal of attention in the achievement of the smallest details, such as the dirt caused by insects that slam against the front dome, or the signs of grease that flow from the radiators. This meticulous work took me a long time, and it put a strain on my computer. Since I don’t like to use many generators I proceeded painting almost every single detail and using fill layers with procedurals as little as possible. I think that this is a fundamental aspect of depth at work.
All the inscriptions, including the label and on the leiche were recreated on Adobe Illustrator, even using the original fonts. I finally decided to hide some easter eggs, some are inside jokes for me and for my friends but some are understandable by anyone. You know, I’m a big fan of LOST…
For this project I decided not to realise an environment or further prop as my intention was to go ahead and realise a new project, so I kept everything as simple as possible.
Lighting is one of the phases in which I have the most deficiencies for this I had to experience a lot. In the end I opted for a very simple HDRI studio to which I combined a front key light and a hot rim light. At this stage I received very valuable advice from the legendary Cornelius Dämmrich. He suggested I add one light at a time, isolating them from time to time. If even a light taken individually does not work, it must be adjusted. When each of them works alone then it means that the lighting is perfect.
The realisation of this project, like every other one, has taught me many new things. Specifically on the topic of topology.
I am not in a position to give advice, I have very little experience, but I will impart to you that which was given to me by one of my teachers, Silvia Mingolla. She said to me: "if there is something that you see that does not work or that you are not sure of, do it again or delete it!"
Don’t be afraid to start again if something doesn’t come out the way you want it to. Surely, on the second attempt you will come close to the perfection you had in mind, and if it is not on the second attempt, it will be on the third!
You can find more of Gabriele's work on Instagram, ArtStation and Twitter.