How to Model and Texture a Vintage Prop for your 3D Art Portfolio
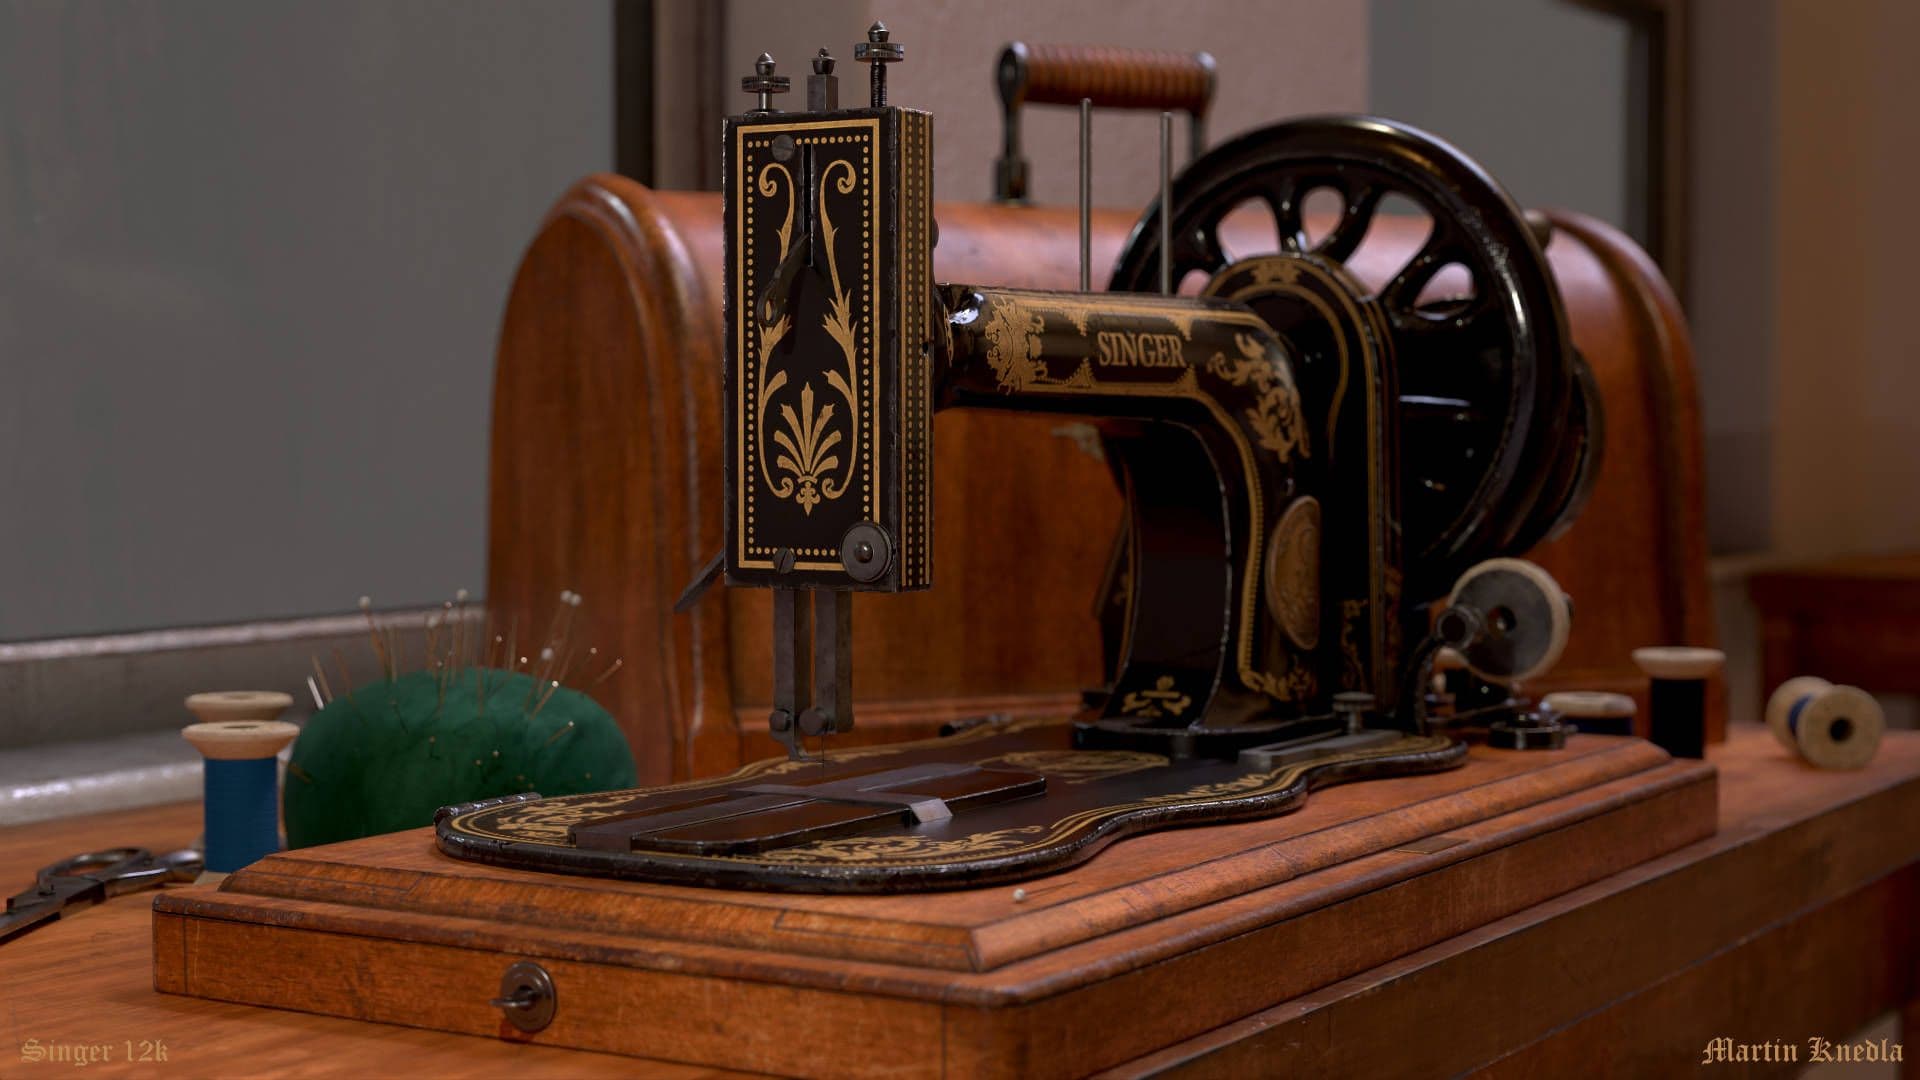
In this article, Martin Knedla, student at Breda University of Applied Sciences, shows off his Singer 12k Sewing Machine and gives you a step by step guide to creating vintage props like this one, for your 3D Art portfolio.
Aspiring Environment/Prop Artist, Martin Knedla, is currently studying Visual Arts at Breda University of Applied Sciences. Martin creates impressive props predominantly using tools like Substance Painter, Maya, and Unreal Engine.
In this article, Martin shows off his Singer 12k Sewing Machine and gives you a step by step guide to creating vintage props like this one, for your 3D Art portfolio.
Introduction
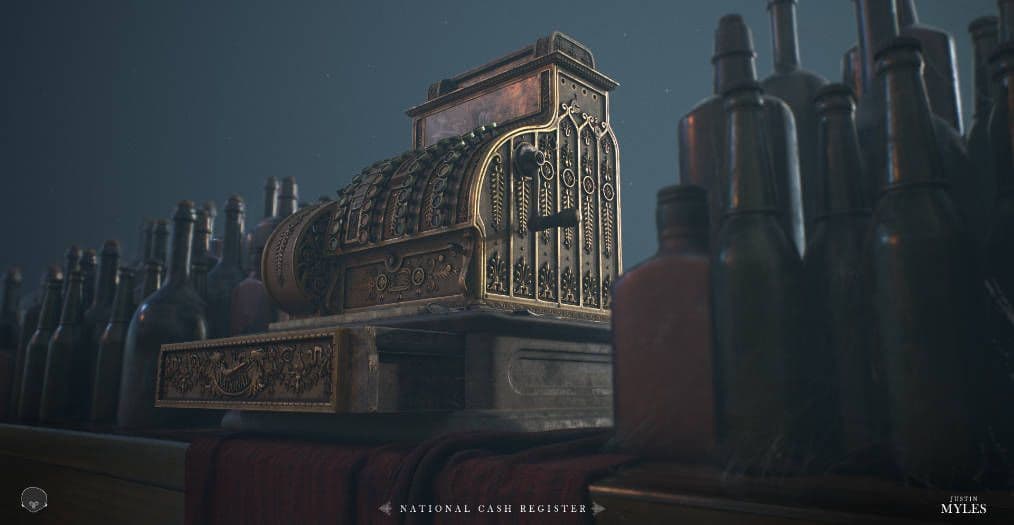
The intention behind this project was to create an antique prop to strengthen my portfolio as an environment/prop artist. I went through portfolios of several artists and found inspiration in two portfolio pieces, Coffee Grinder by Joakim Stigsson and Cash Register by Justin Myles. Those two projects inspired me to find my own antique prop and recreate it in 3D my main focus being practising texturing.
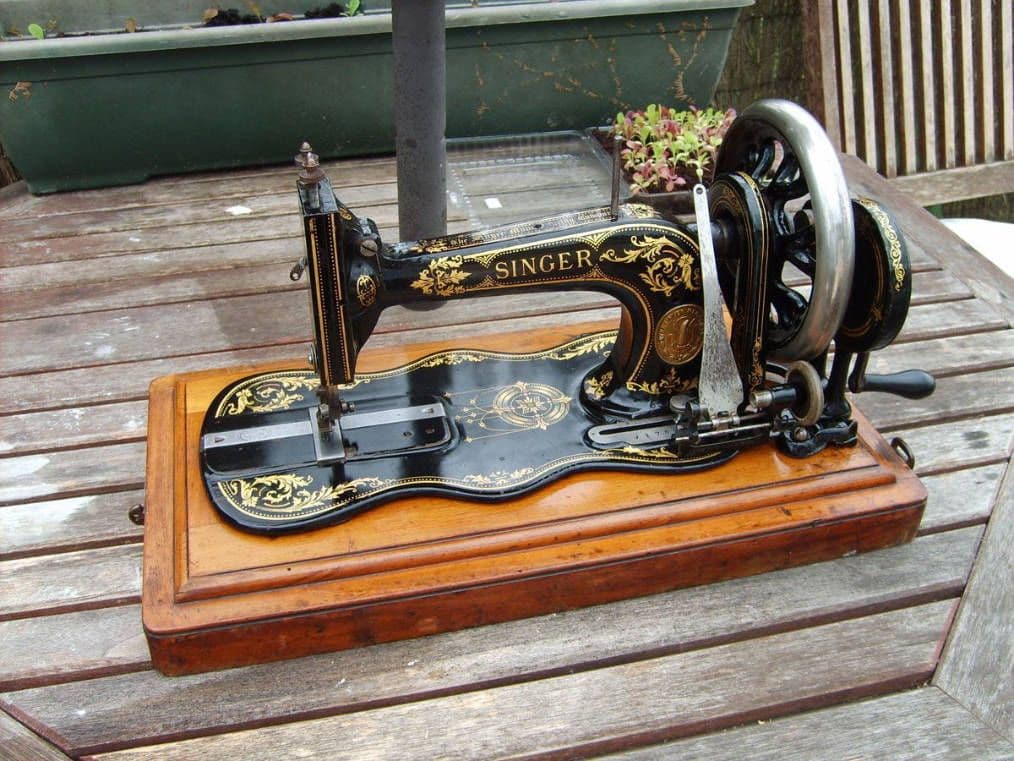
I quickly thought that recreating an old sewing machine would be cool, so I searched for one I liked and I came across Singer 12k: a sewing machine that was very popular also because of its looks. I decided that this would be the prop I would create. And that’s how this project started.
One experience from this project I can pass on is the choice of subject. I can’t stress that enough. Think carefully about what you want to improve on and think through if your prop will make you struggle with something you don’t want to focus on. I picked this sewing machine because I thought the golden patterns would be an interesting texturing challenge but in the end, creating them was way faster than the modeling stage. I just didn’t know how the sewing machine looked from certain angles which gave me a lot of problems to solve.
This brings me to the next point and that is choosing rather an object you own or you at least have access to, so you can take pictures from the angles which you wouldn’t find in photographs. It will make your job a lot easier and you won’t have to struggle thinking about what is connected where.
I didn’t have access to this sewing machine so I had to make it up by studying references and watching videos of people using this machine. That taught me something but it wasn’t what I wanted to focus on for this project, so choose your subject carefully.
Reference gathering
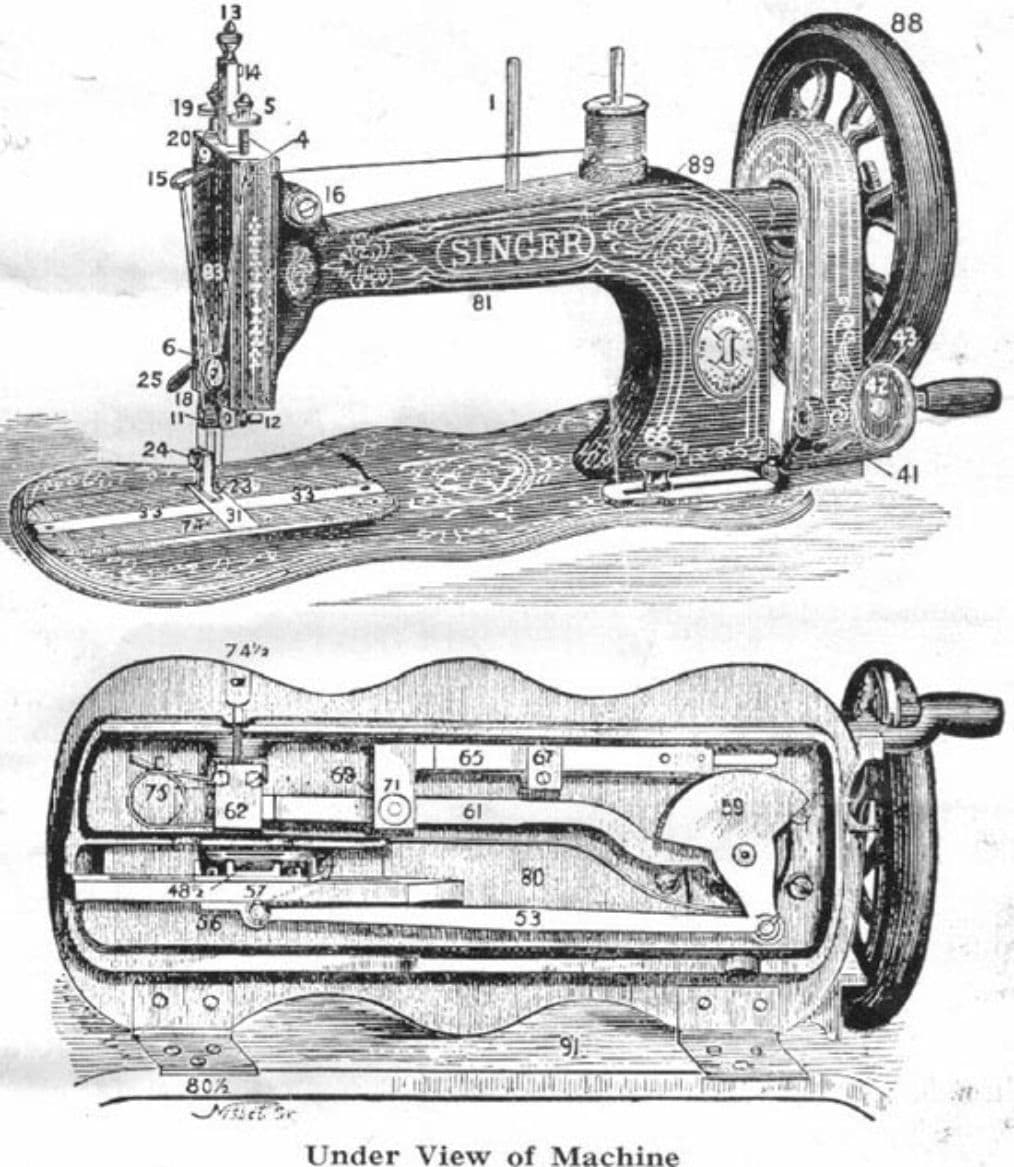
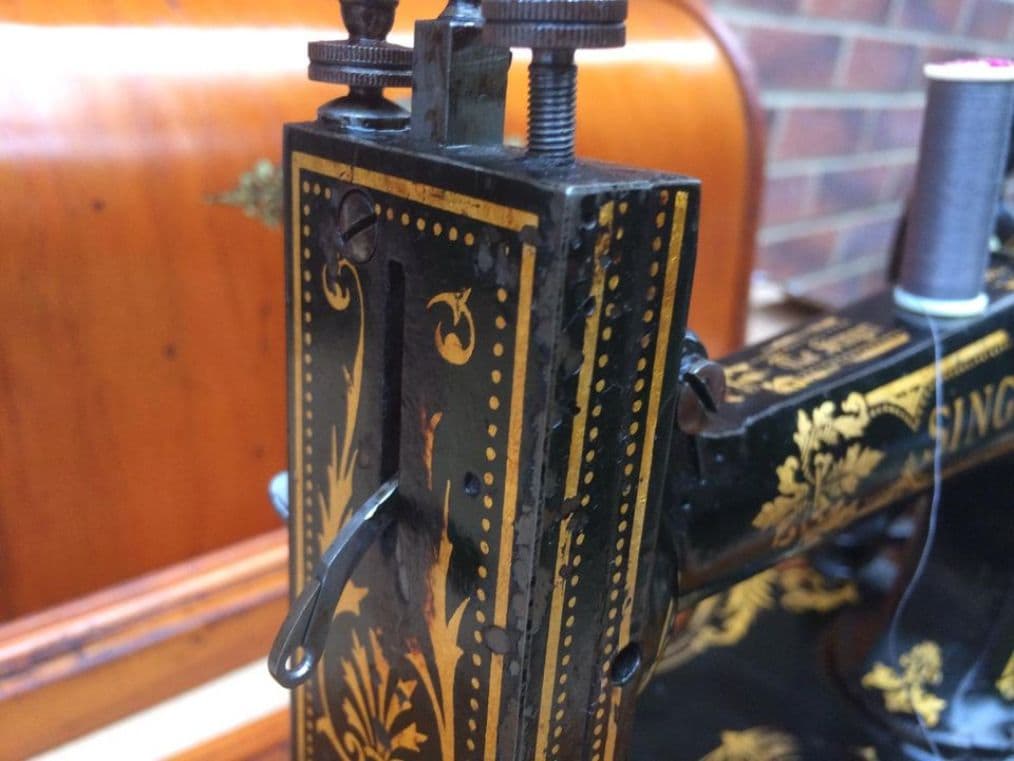
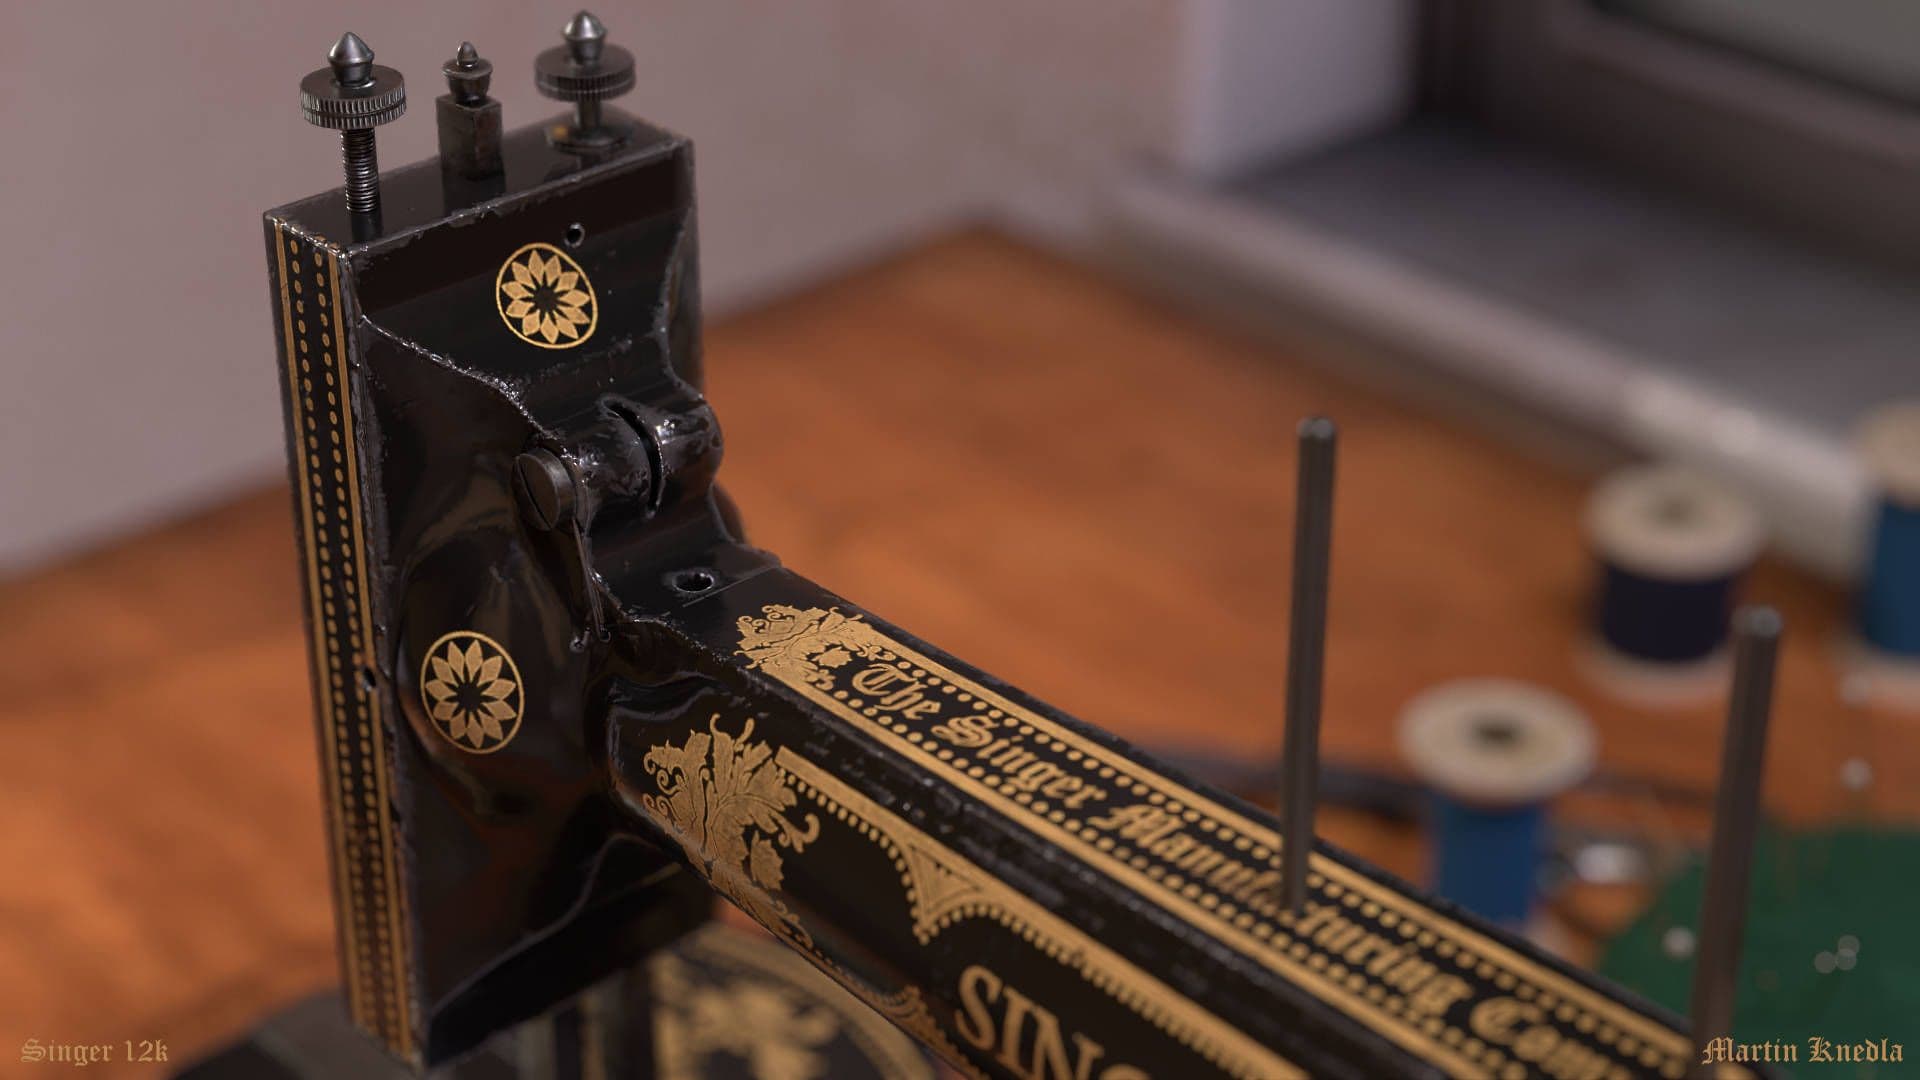
After I picked this sewing machine I started searching for references. The most valuable reference were blueprints of the sewing machine from profile and top that made making the base mesh a lot easier. Another reference I was looking for was close-ups that showed me interesting texturing detail information and I could even use some of them in the texturing phase for creating textures.
Online second-hand marketplaces proved to be very useful for finding references. Another valuable resource is YouTube; you will probably find tons of enthusiasts repairing your prop if you chose an antique object.
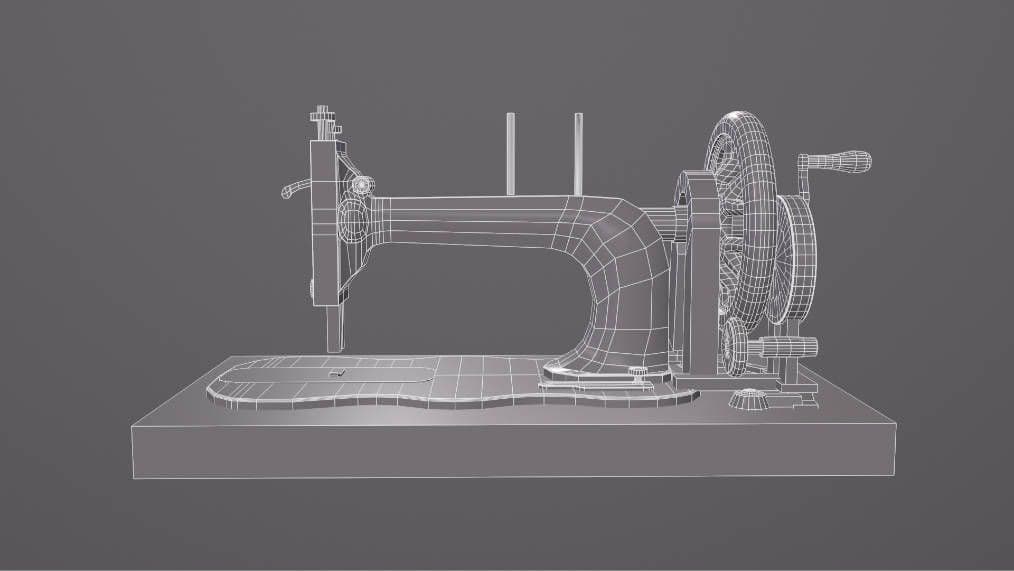
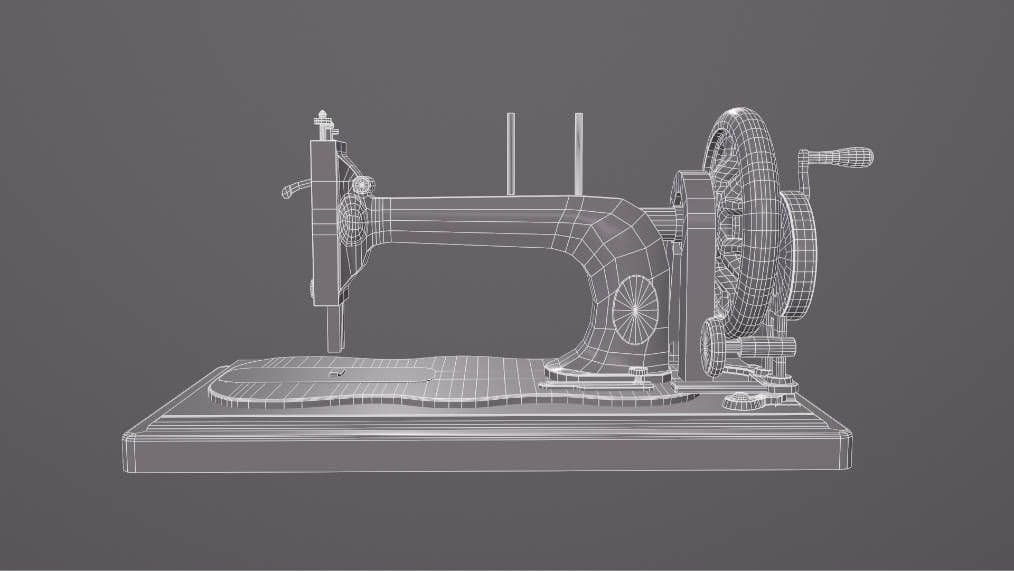
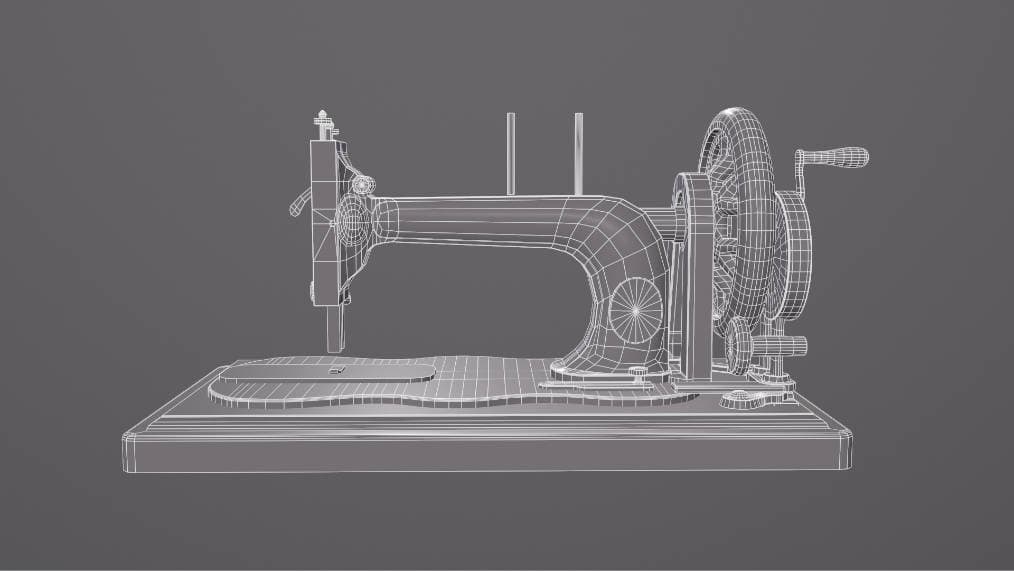
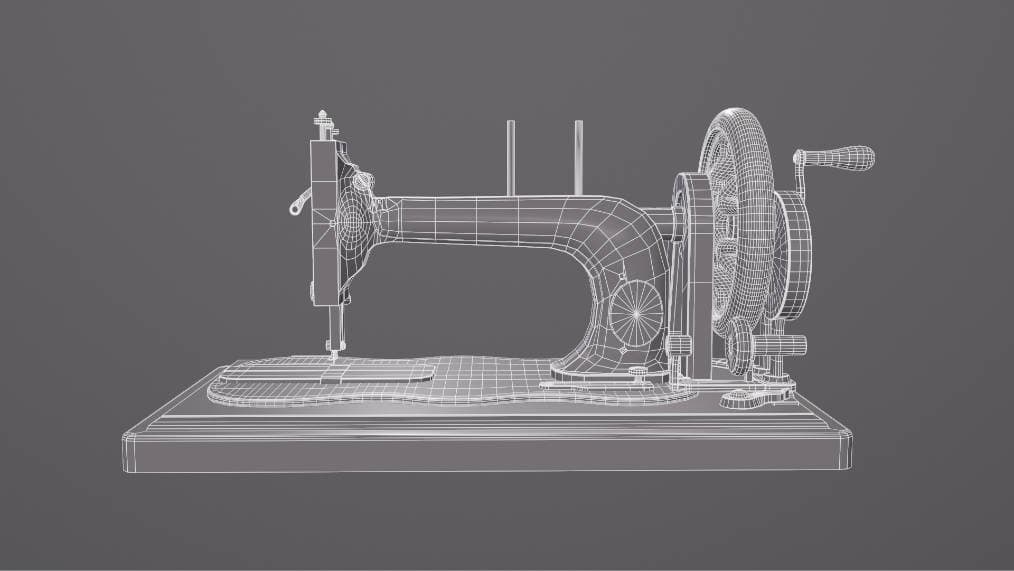
Modeling
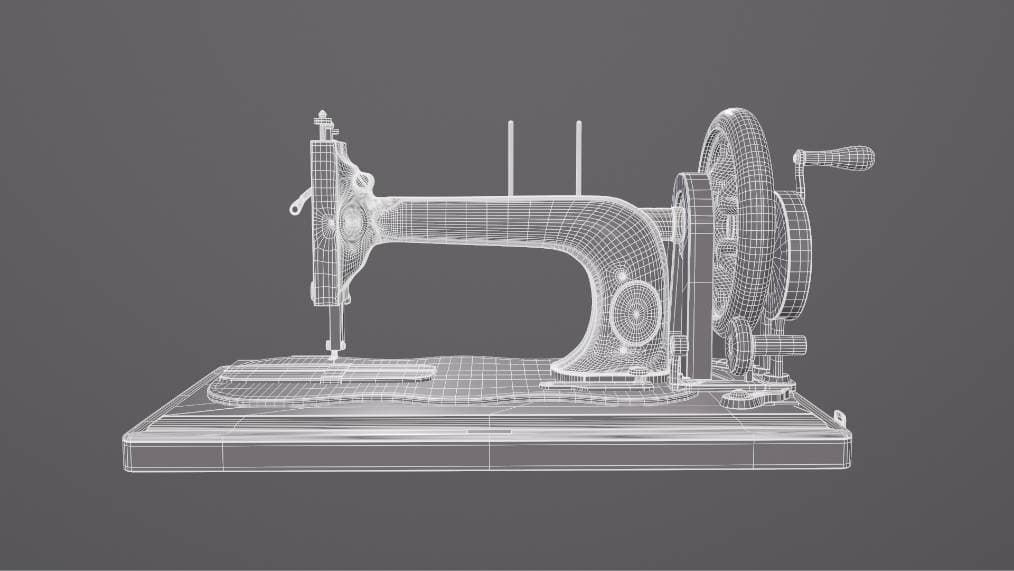
I started by outlining the basic shape. It is important to get the silhouette right and keep the measurements correct. Like when drawing, I measured what are the relations between the model parts and try to get to the same distances between objects and the same scale ratio. I kept the model very basic at this stage since I know I would tweak proportion and big shapes later. But with the geometry I know I will keep, I already make sure to keep it clean so I can easily build on top of it.
Once I nailed the silhouette and ratios in the model, I started modeling big details. I started modeling and connecting parts that were made just with primitive shapes before. I further refined the shapes and added bevels. I kept a nice polyflow because that is always useful not just for modeling but also for UVing. I am not making a game-ready mesh but I still make sure the geometry is clean because it makes the whole process easier.
Once I feel there is nothing to improve on, I look once again through the mesh and then move to UVing.
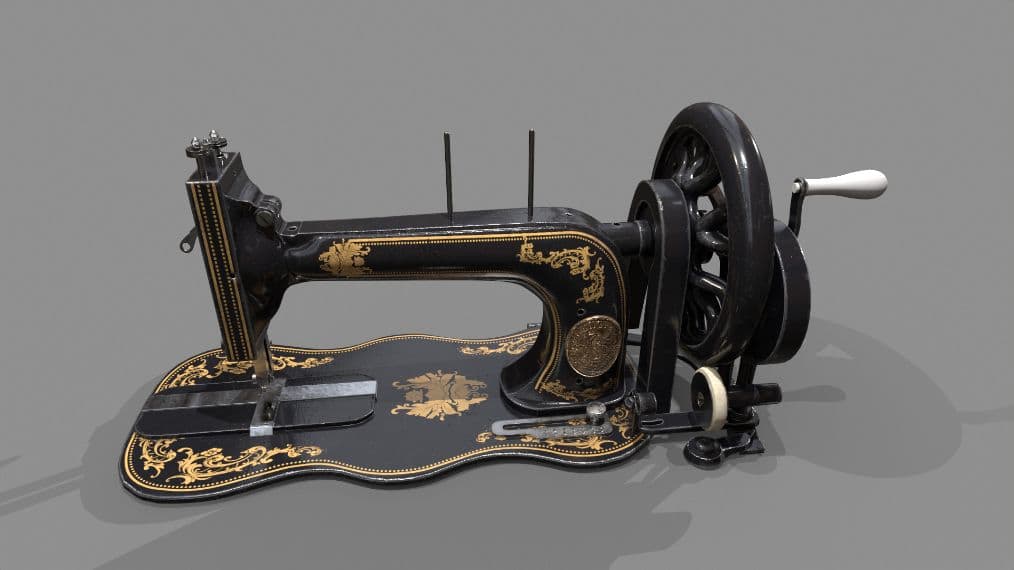
Since I wanted to show with this model my observation and texturing skills, I decided to keep it quite high poly and not make a low poly version. Thanks to that I had almost no baking issues but it also made the Substance 3D Painter scene very heavy, so it required a lot of patience for me during texturing. If you have the latest PC it’s probably not a concern to you, but if not, making the mesh more low poly will make it easier to manipulate in Substance 3D Painter.
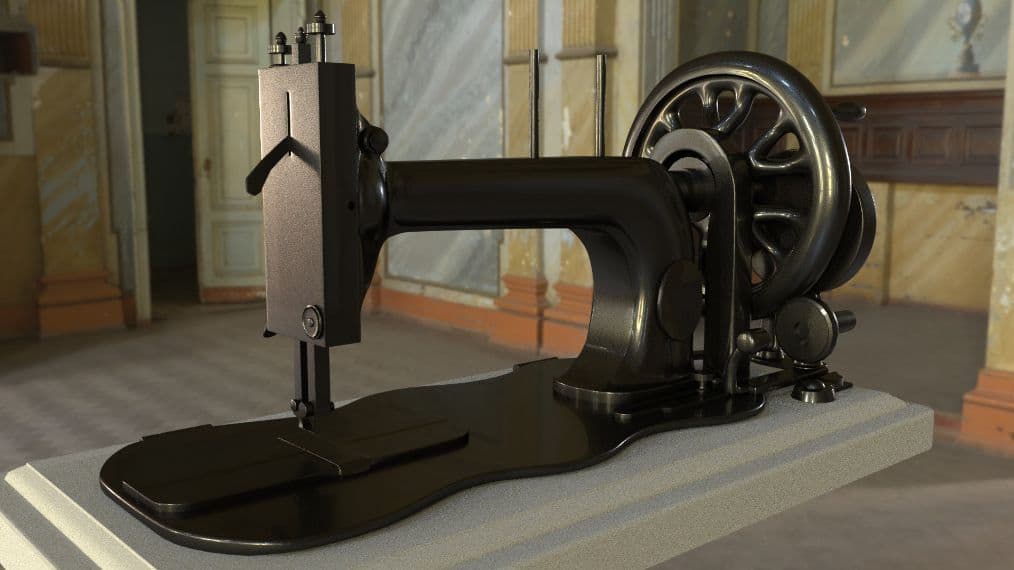
Once I had a model I was happy with, I set up a scene where I rendered it. Making renders from a different perspective makes me already think what areas will be seen more and what I want to focus on. It is also great for saving progress and most importantly it gives a great motivation boost for me.
Texturing
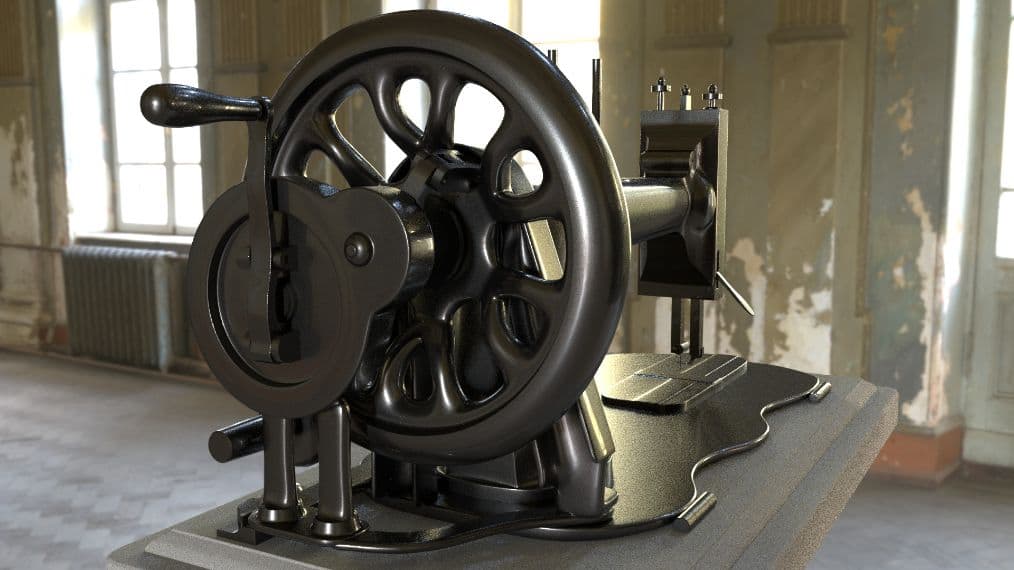
I unwrapped the model and moved to texturing in Substance 3D Painter. I started with some default smart material as a base, knowing I will change most of it. But it is good to already have something to work from. I studied the references I gathered and decided if I wanted a worn-out look or more of a new paint look. I decided on the middle ground so I could show some interesting damage around the edges but still show the golden patterns. With a full-on worn-out look, it wouldn’t be possible to showcase the gold because most of the patterns would be worn out.
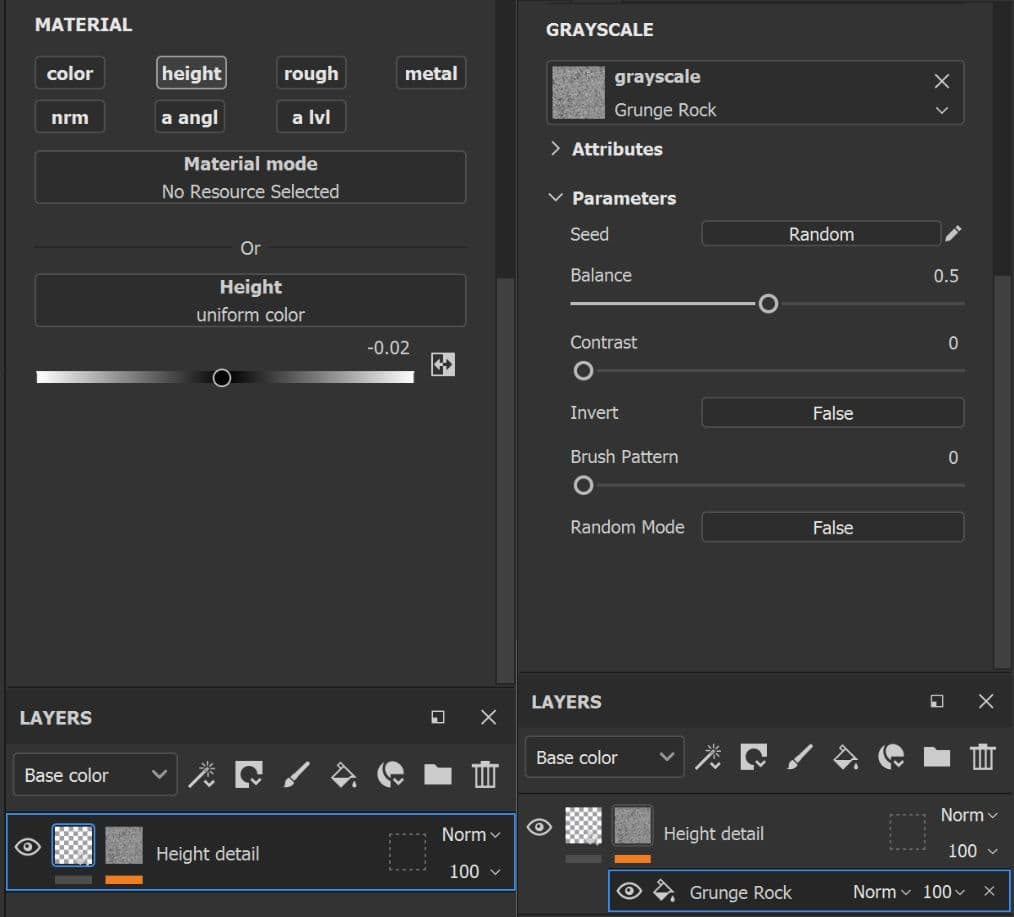
In Substance 3D Painter, I almost always use fill layers with masks. For example, adding height variation I would create a fill layer with height let's say -0.02, and then add a mask to the layer and there I put my grunge or texture. I don’t put my textures directly to the height fill layer because it gives me too little control over the height strength.
For the golden patterns I found some similar patterns online and even used some of them but most of the patterns I extracted from the reference pictures. Below I will show how. I also used some Substance 3D Painter default patterns, but I tried to limit the use of them as much as possible because they just look too familiar to work done by a lot of artists using the software.
When I was done with texturing, I looked over the model and try to fix either big issues I saw or small issues requiring a little fix.
And the work is almost finished! It is unbelievable. At this stage, I started doubting the quality of parts of the textures and thought of reworking parts of them. But after such a long time working on one model, naturally, I saw all the imperfections so I stopped thinking about any big rework because it would take a lot of time and it is questionable if it would have added much to the final result.
Scene assembling and render
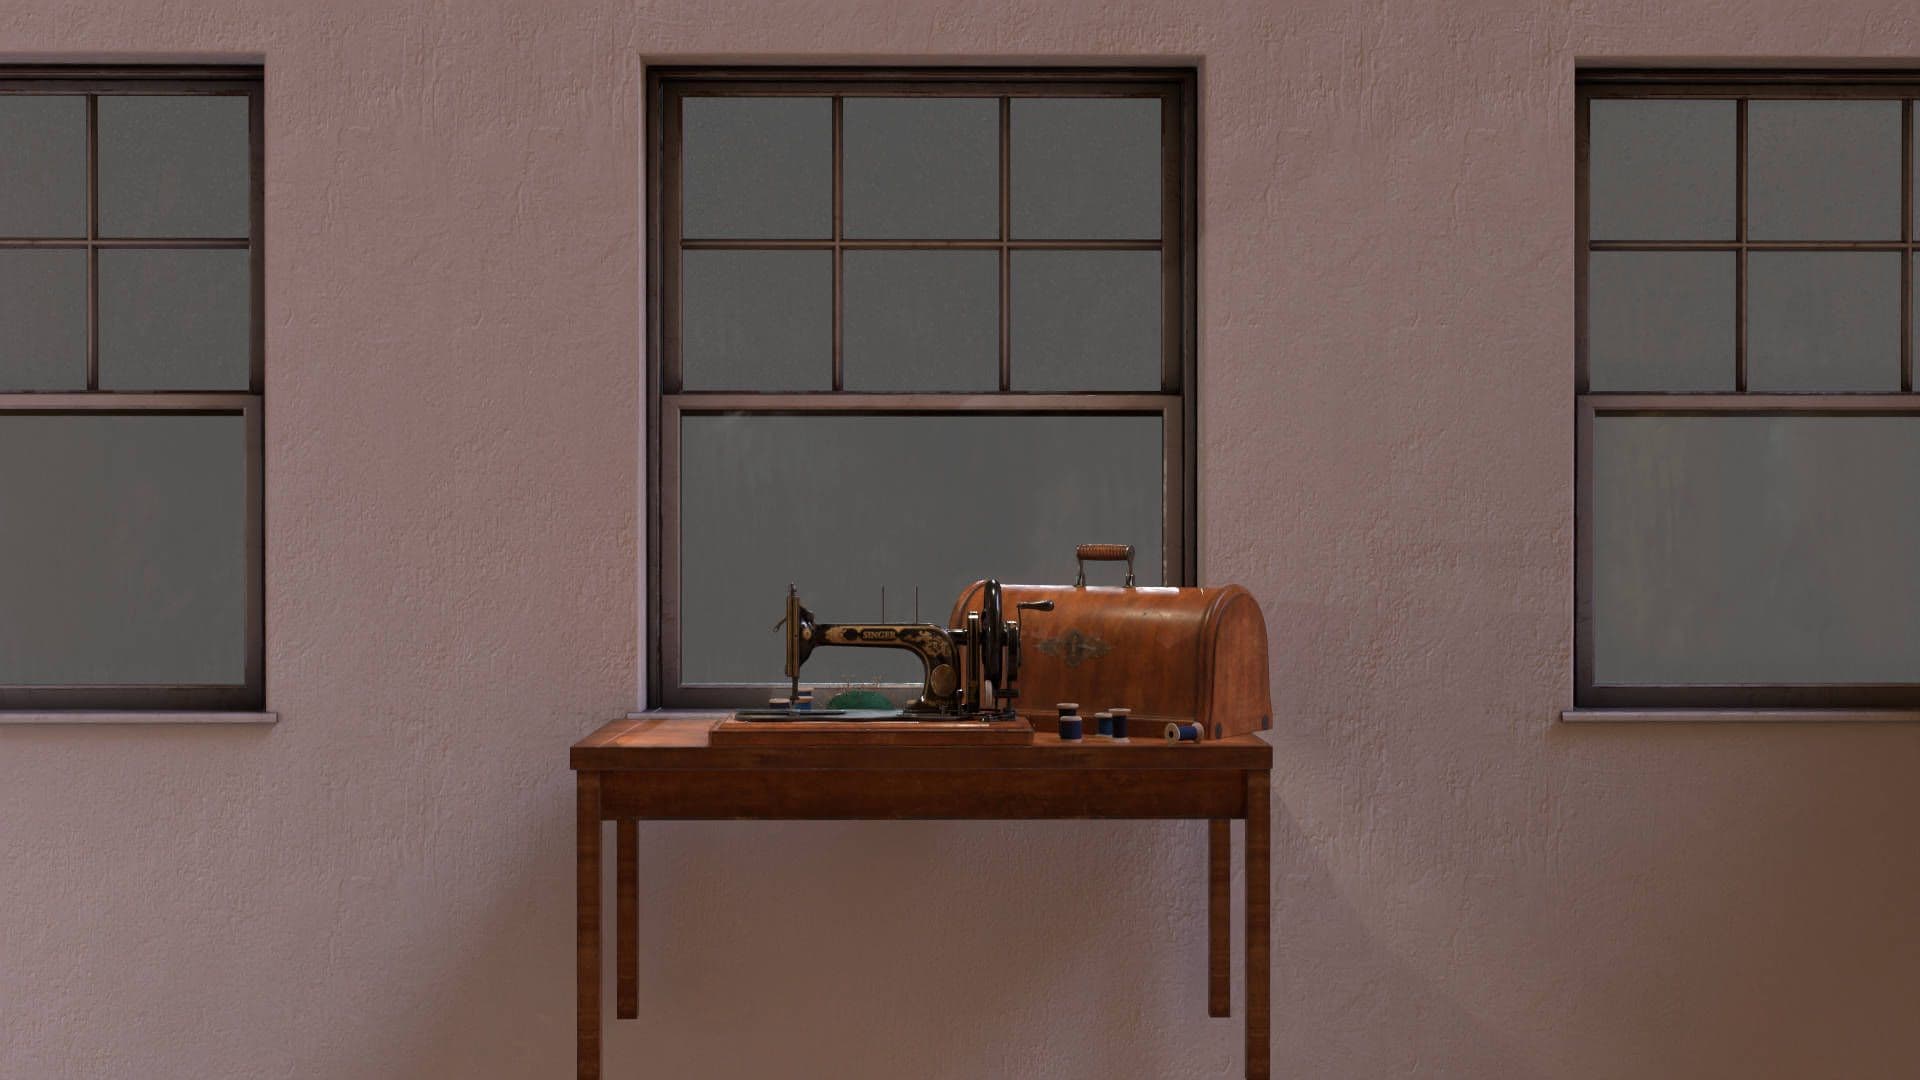
When it was time to render, first I thought about making a studio render with a white background but after some tests, it looked too sterile. So, I decided to make a few models around it and created a small scene. It was important for me to keep a similar level of quality even to the small assets around because I didn't want them to downgrade the whole piece. I took inspiration from pictures of tailor desks online and created a few assets you would expect in such an environment.
I rendered the scene in Marmoset which proved to be a great decision because it provides fast results of great quality. The limit of having the object in a realistic scene is that you have to avoid certain angles where there is nothing modelled.
I made sure that the viewer saw only what I wanted them to see. Tweaking the camera field of view helped me a lot in that regard. Now I just search for the most impactful angles to render and the work is done!