Exploring Software: Making a 3D Victorian Era Steampunk Gun in Blender
Passionate about Art, especially characters and props used in games, Eeshan Vaidya, takes the time to share how he created a Victorian era steampunk gun in Blender.
Passionate about Art, especially characters and props used in games, Eeshan Vaidya, takes the time to share how he created a Victorian era steampunk gun in Blender.

Eeshan Vaidya is a 21 year old aspiring 3D Game Artist and final year student studying video game design development. Passionate about Art, especially characters and props used in games, Eeshan takes the time to share how he created a Victorian era steampunk gun in Blender.
As a budding game artist, I was seeking to explore softwares and tools that would aid me in creating 3D game assets, and so I decided to get onto Blender.
Despite some fellow artists being of the opinion that Blender is not the Industry Standard, I was pretty excited to give it a try, so I did, and no, I did not go for “The Doughnut”.
While looking for places where I could start learning Blender 3D from, I came across this amazing Steampunk Gun tutorial by Thuan Duong and so I decided that it would be what I start off Blender with.
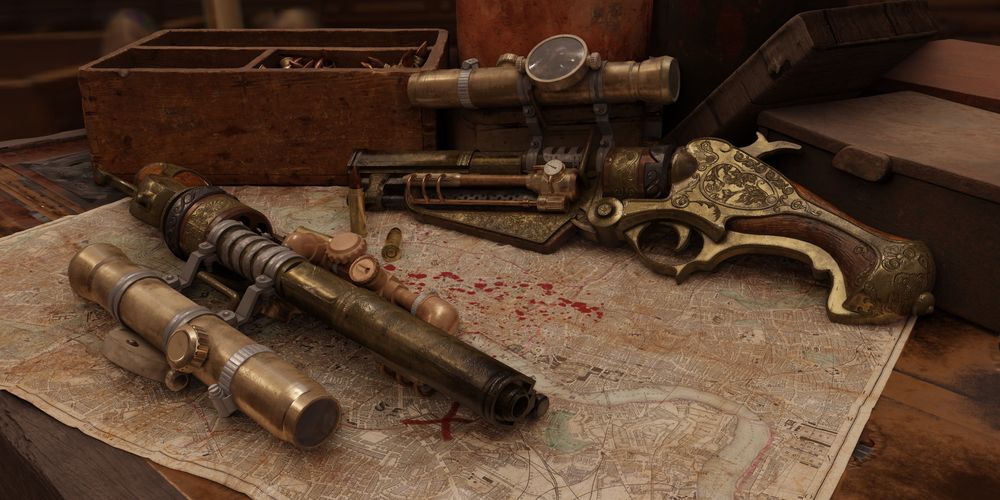
For the references, I used some images provided with the tutorial and some google searches to achieve some other details that I changed from that of the tutorial.

To start off, I had to get the proportions of the gun right in relation to a human Basemesh (approx. 180 cm). For this, I used a simple cube which could fit the gun in itself and set the cube to be 40 cm in length.
Next was blocking out the gun, part by part, keeping the proportions believable with respect to each other and the reference.
Then came the High Poly Phase where I started adding details to the blocked out mesh, creating the shape to match what I wanted (Modifiers in Blender are absolute beasts -one of the major reasons I wanted to try Blender). The gun eventually started taking shape.

Simultaneously, I started preparing the model to be taken into Zbrush by marking bevels and creases on edges (Yet another amazing feature Blender offers)
With the High Poly version done, I took the model into Zbrush for sculpting the engravings and other details such as wear and tear, scratches, etc. This was the best phase of the entire process for me, as this was probably the first weapon I spent quite some time on (got to learn a lot of things not to mention!)

After having sculpted the details, I came back to modeling, to reduce the polygons on the mesh even further than what I had on the mesh without modifiers applied yet. The target triangle count was around 40k tris and I was able to achieve a triangle count of 39,148 (rushed this phase a bit but I could have achieved a lower count, so please take your time with this phase).


In order to prepare for Baking, I now had to mark seams onto my model for UV unwrapping. To my surprise, Blender made the UV work pretty quick allowing me to spend more time on Baking.
Blender add-on's do make life really simple-I used the UVPacker add-on for this project.

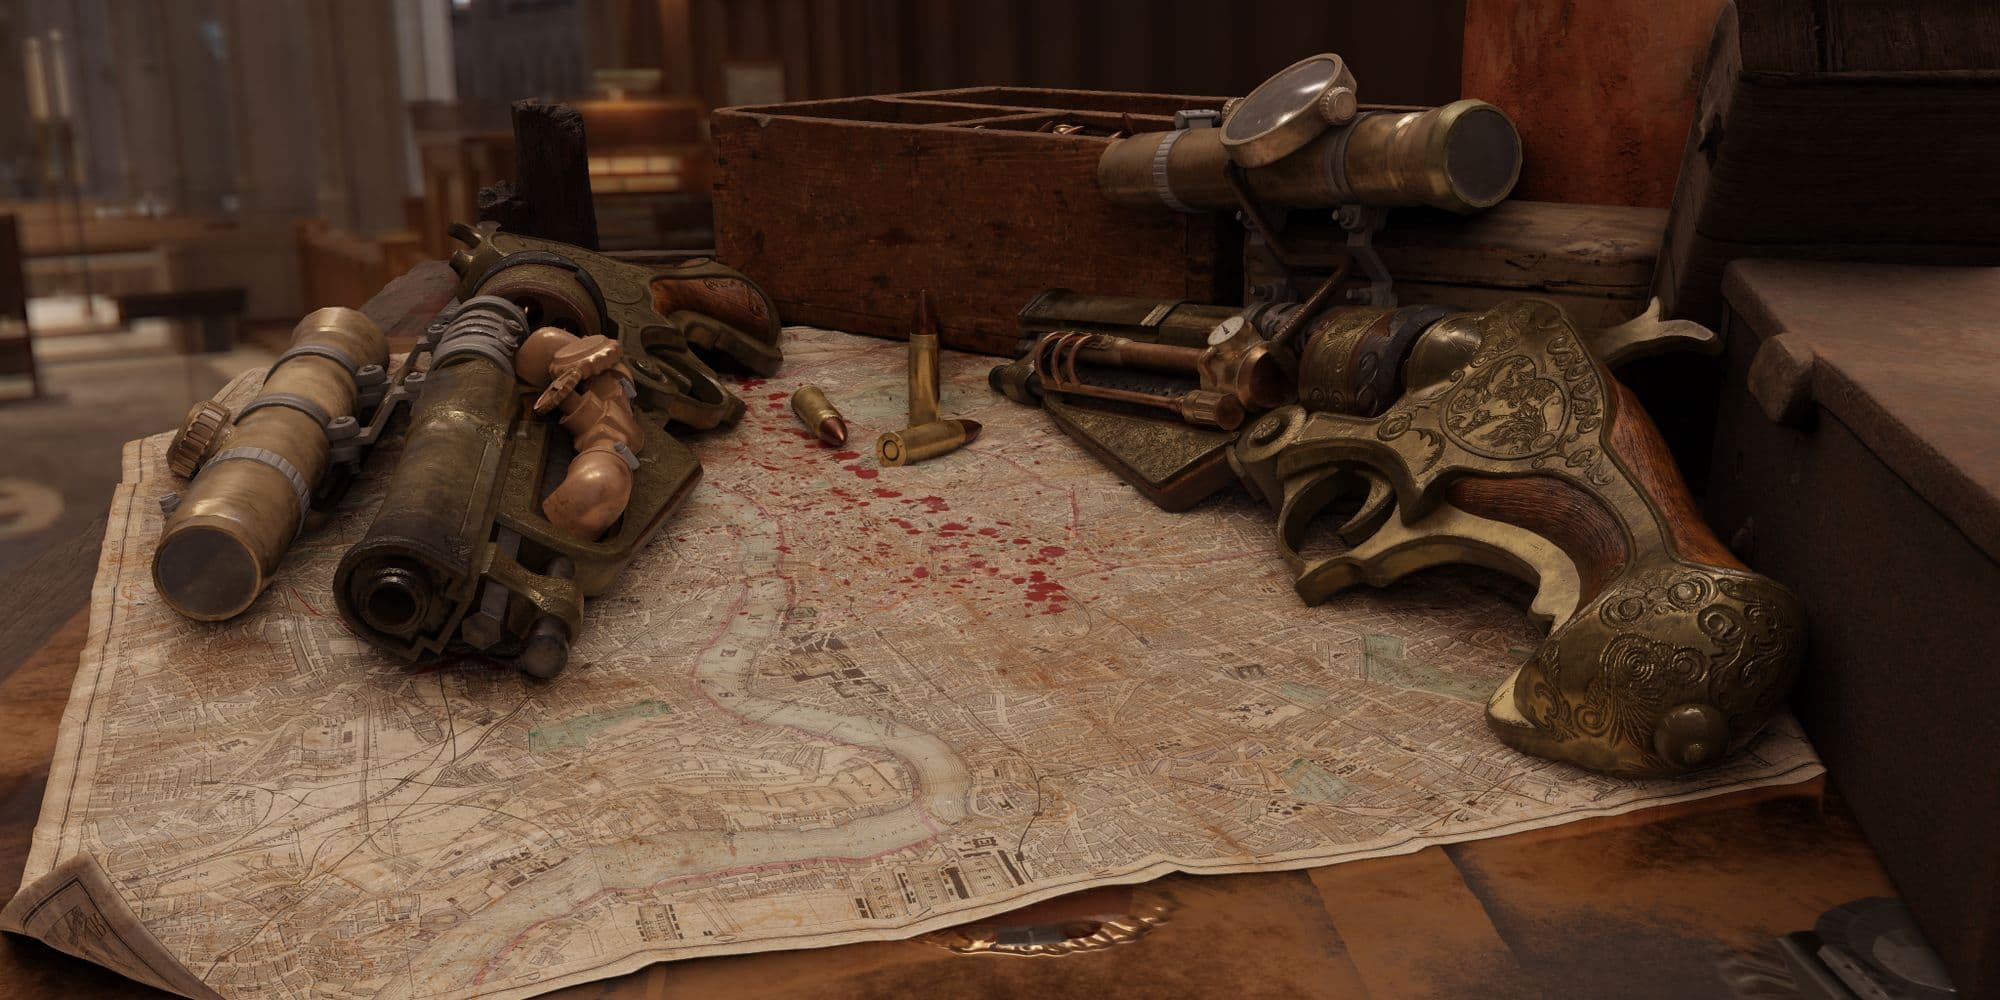
With the Low Poly model taken care of, it was time for Baking. I was pretty excited to Bake as this was my first full fledged bake project. Taking it over to Marmoset Toolbag 4, I baked the details onto the Low poly Mesh. Some skew painting and adjusting offsets was required to fix the bake, but more fixing to the normal map had to be done in Photoshop.


With Baking finally done, I could now get to the exciting part: texturing in Substance 3D Painter.
The base started off with blocking in basic colours for the bronze and copper parts- the signature steampunk colours.

I eventually started adding details like wear and tear of the metal, some scratches, the indications for the gauge meters, weathering, etc. The aim was to make it look as realistic as possible. Smart materials did come in handy for this project.
Using Smart Materials as a base and tweaking them further to get the desired look is definitely a good way to go about texturing, especially for beginners who can't create their own materials in Substance Designer yet.

After a lot of tweaking, masking and manual painting of the finer details, I was satisfied with the texture result, so I decided to export the textures out of 3D Painter, and set up the final scene in Blender itself.


The render setup was done with the help of a few downloaded assets compiled together. As for the lighting, 2 spotlights with Orange and Blue lights were used to contrast each other.

For rendering, I decided to go with Evee-the Realtime Blender renderer at 512 samples.
After playing around with the scene setup and lights, the final render came out to be satisfactory and like what I had expected.
This project definitely did teach me a lot of new things over the little knowledge I already had. It also helped in understanding the complete process of asset creation for 3D games. Although it was not an original concept, this was one project which I would consider as one of my best ones, teaching me a lot of things. Thanks to Thuan Duong for this amazing tutorial!
You can find more of Eeshan Vaidya's work on The Rookies.