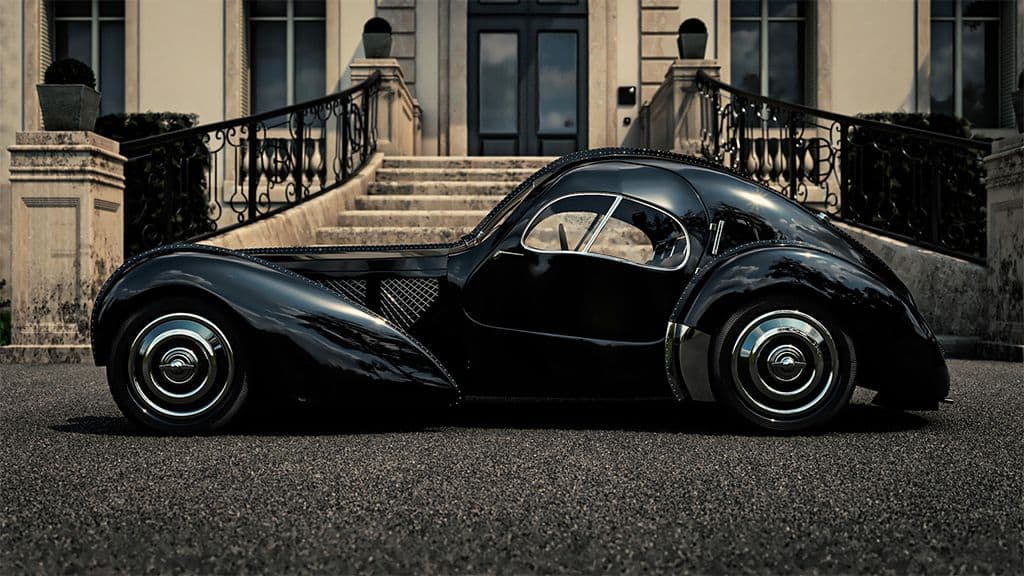
Photorealistic Vehicle Creation: The Bugatti Type 57 SC Atlantic
Aditi Sinha is a self-taught artist, aspiring to be a 3D Environment Artist. Aditi recently shared her latest portfolio piece, a Bugatti Type 57 SC Atlantic recreated in 3D, and we are please she was willing to share her process for creating photorealistic hard-surface props such as this one.
Aditi Sinha is a self-taught artist, aspiring to be a 3D Environment Artist. Aditi recently shared her latest portfolio piece, a Bugatti Type 57 SC Atlantic recreated in 3D, and we are please she was willing to share her process for creating photorealistic hard-surface props such as this one.
Introduction
As a student who really aspires to be an environment artist, I wanted to create something for my portfolio where I could show my skills in modeling, texturing, and the overall lookdev. Creating this project allowed me to move out of my comfort zone and challenge my skills. I hope this article helps you to understand my workflow and turns out to be useful for you.
To start with, here is the list of software I used for this project:
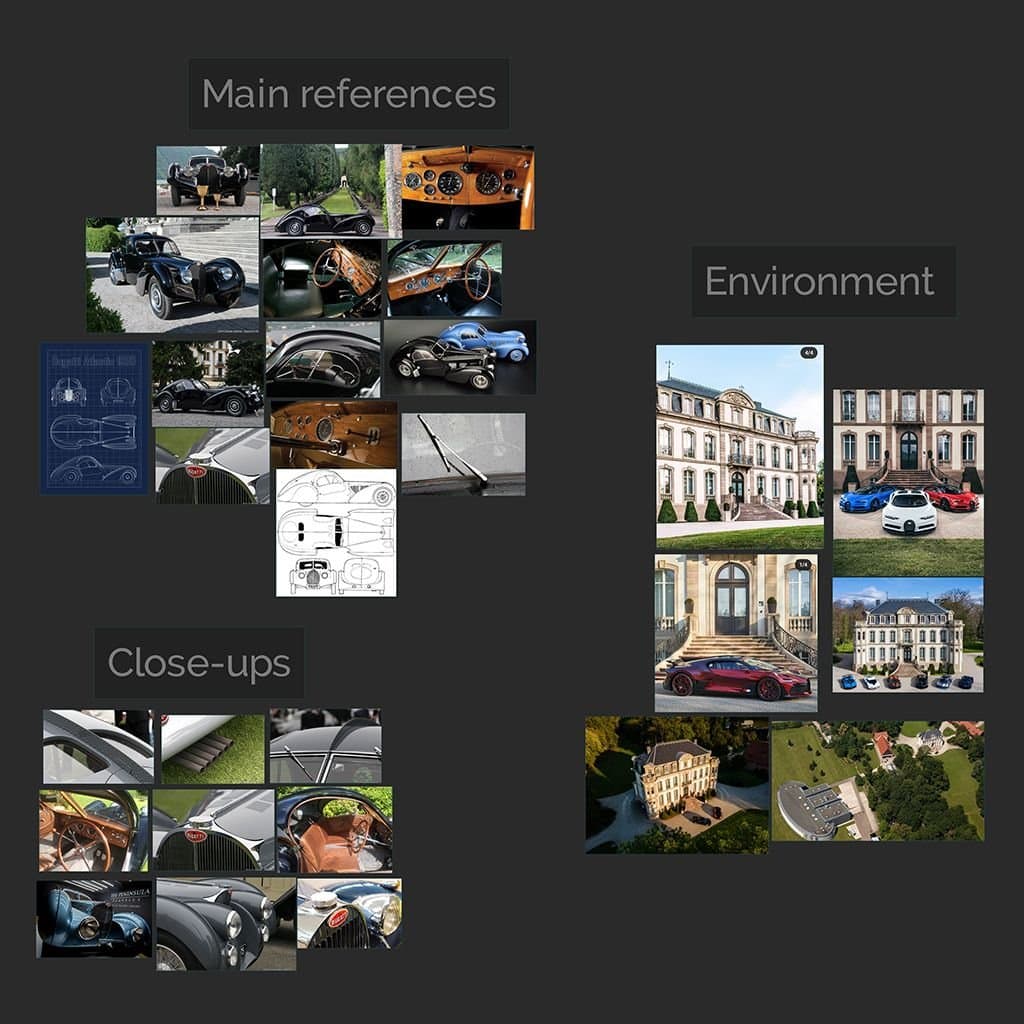
Before starting a new project you should always collect as many references as possible. This part for me is very important as it sets the very foundation of what you want to create. For this project I found some useful references on google, pinterest and YouTube. I researched some of the close-up references as I knew that I wanted to deliver little details.
A great tool like PureRef helped me easily collect and arrange the images.
Blockout and Modeling
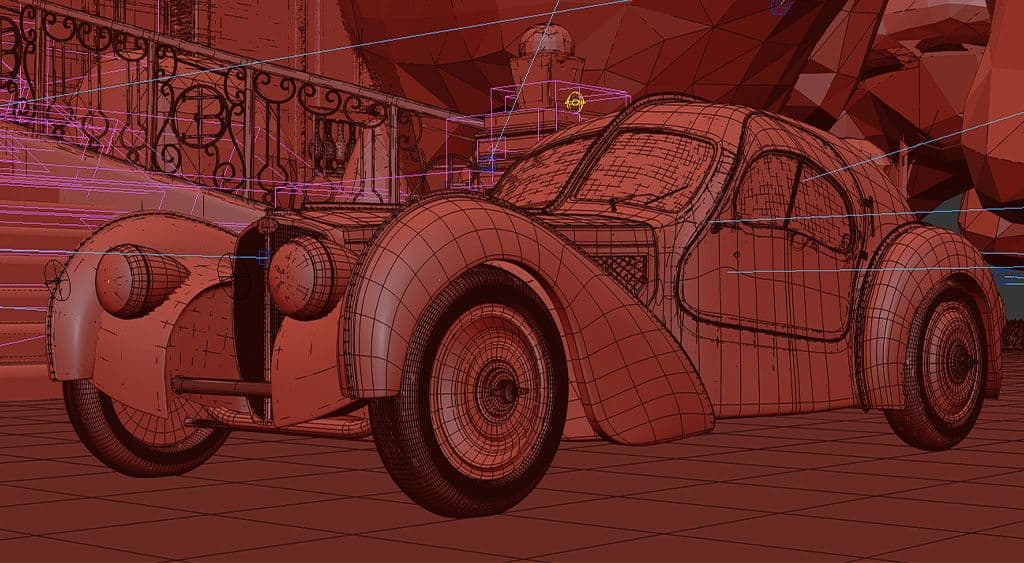
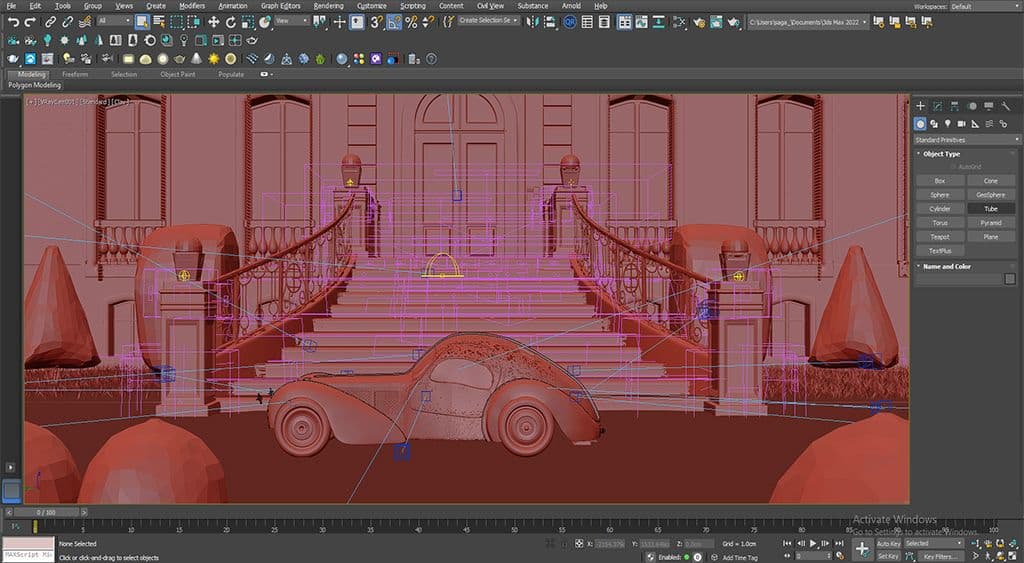
When it comes to modelling a car, having a correct blueprint really helps the workflow. I mainly work with Autodesk 3DS Max for modelling and my first step is to set up the blueprint and units correctly.
I strongly believe that to be better at something you should have a good observation.
This is the reason which pushes me to have an eye for details.
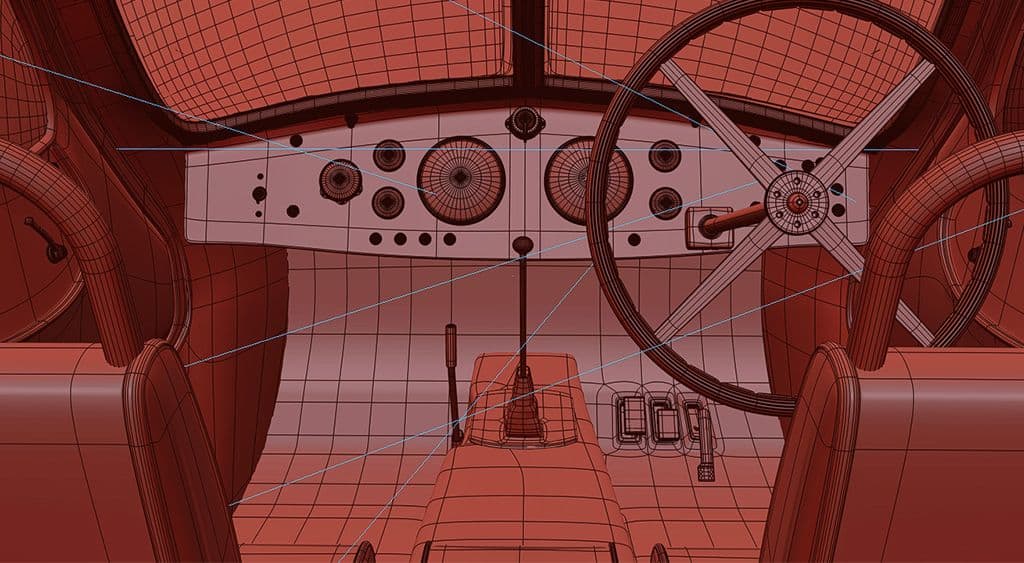
This car has a strong flow of curves and shapes, which is the most challenging aspect of the modeling. I recommend that to have a good topology, it is important to keep things in quads to avoid any shading issue, especially when you are trying to maintain the shape of the car. With a big project like this, pay attention to the polycount as well, you got both exterior and interior to model. Too many polycounts will definitely slow down your scene (also depends on the system you are working on).
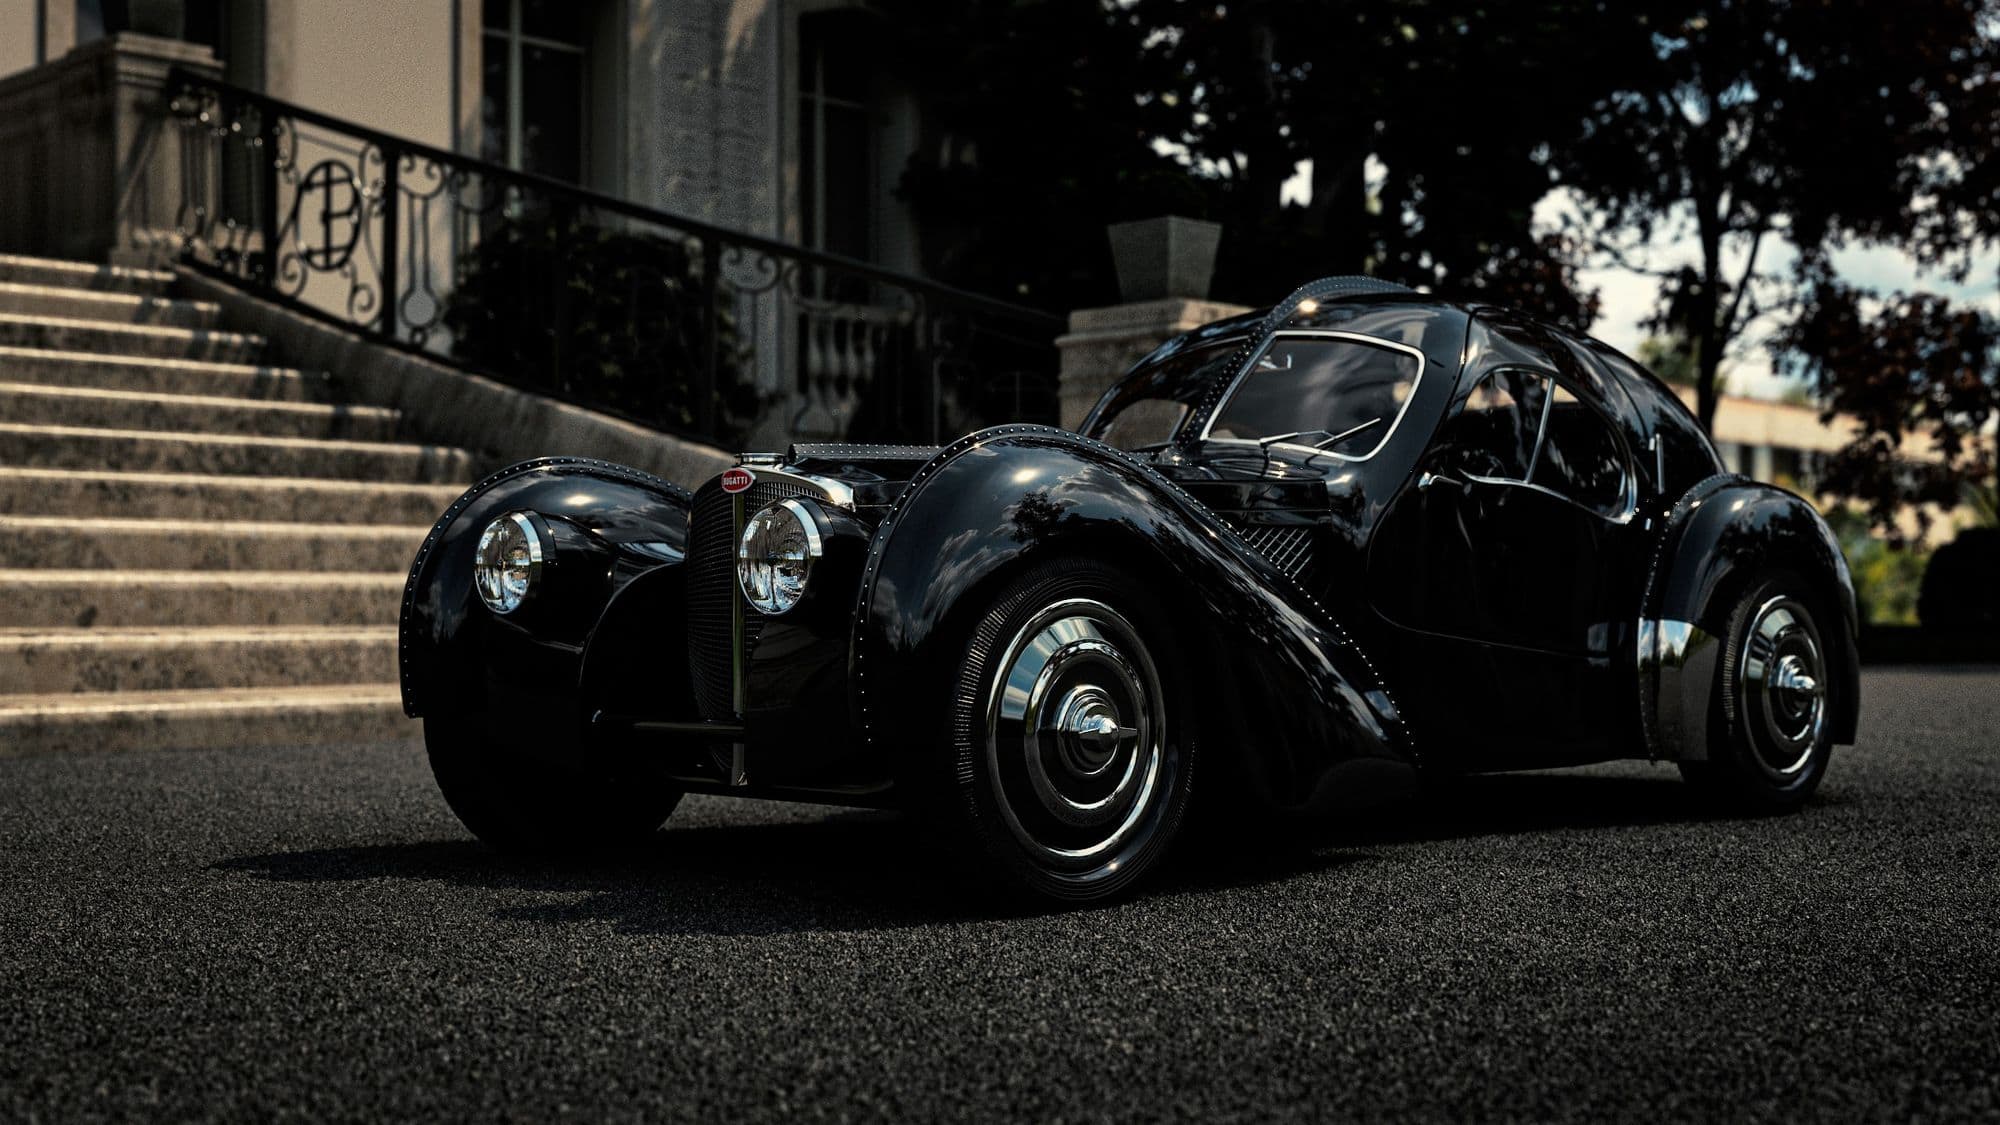
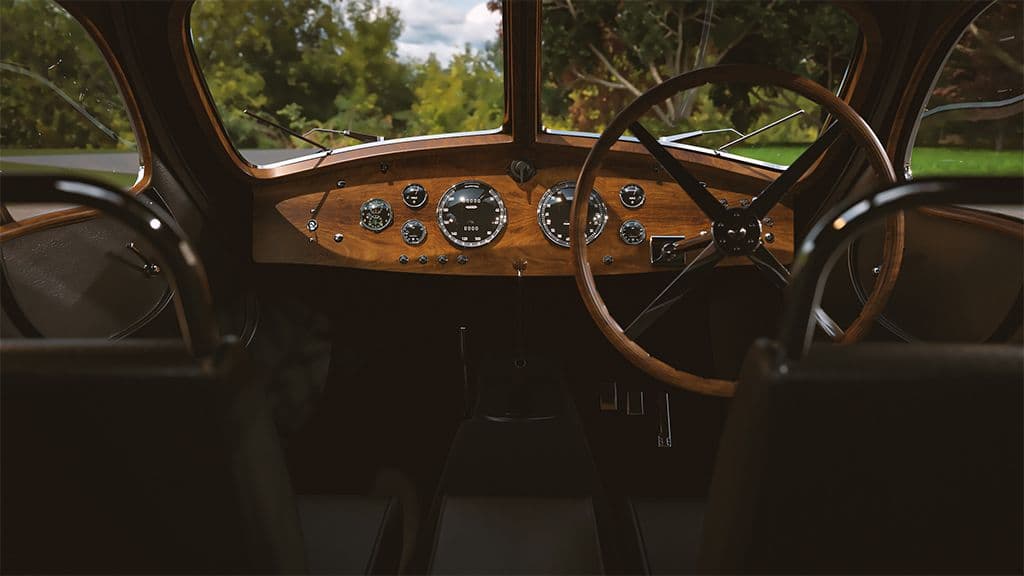
After finishing the exterior of the car, I started with the interior. This was a little difficult for me to proceed with, as I did not have any go-to measurements and blueprints. All I had was my observation skills. But, in the end I was satisfied with how the whole modeling of the car turned out. At this point, I wanted to present the car in an environment which justifies the aesthetic of this project.
What else could have been better than to actually model the original “The Bugatti Molsheim Factory?”
Eventually, I started modeling the building from scratch starting from the base, the stairs and slowly modeled everything on top of it. I made sure not to miss the details the building had.
I specifically liked modeling the railing using splines, trying to match the original design.
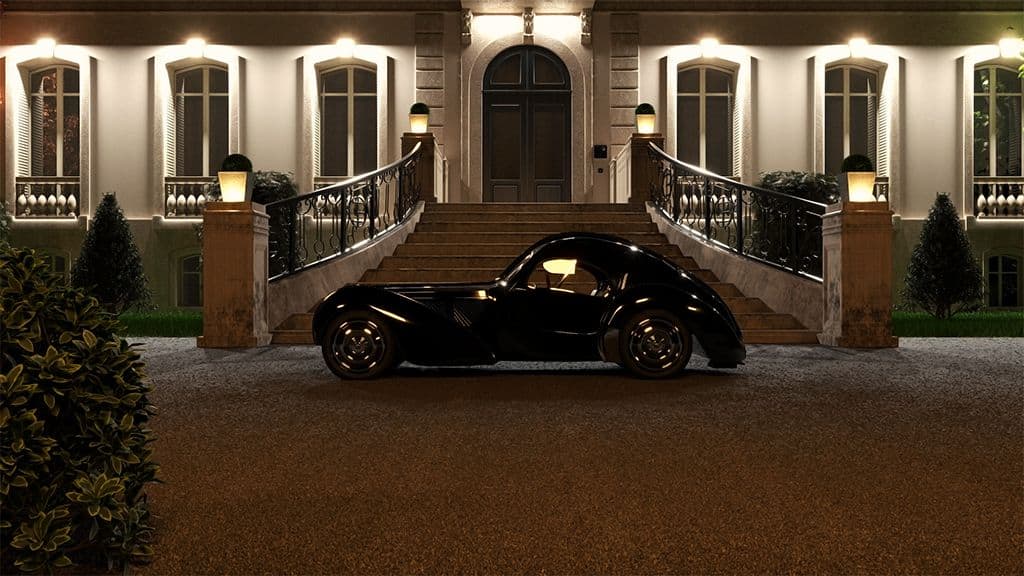
To make my scene look more rich and detailed, I added vegetation like a few trees and shrubs using the Chaos Cosmos. This is a great place for V-Ray users specifically, to find different useful contents.
In the end, I was happy with the overall modeling of the whole scene.
Texturing
For the texturing stage, I wanted to keep my scene pleasant and minimal instead of exaggerating the whole scene with too much dirt and rust. As for the car paint, I kept the whole thing clean and tweaked a few settings of the roughness. Created different glass materials in the V-Ray Physical material especially for the headlights of the car where I also added a Bump map to get the desired look.
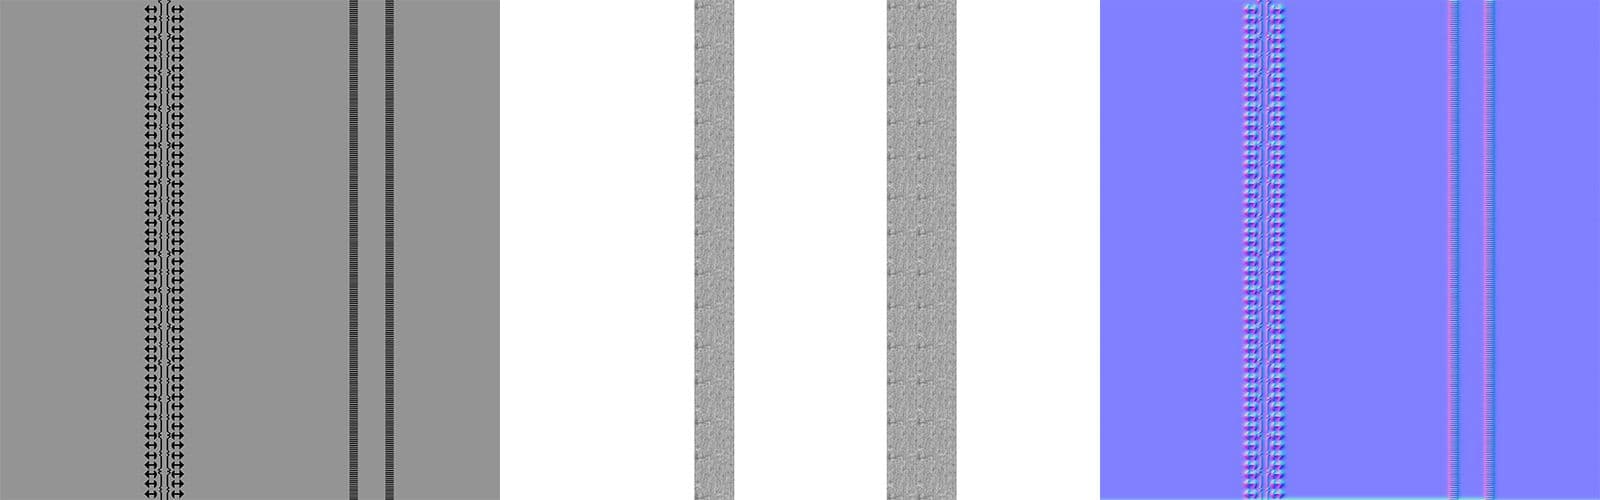
Also, for the tyre treads I created displacement map, normal map and roughness map in photoshop. I think this workflow is more efficient if you are not going for very close-up renders and gives a really good result. Later, for the building I applied some different marble materials, tweaked a few in photoshop and used the V-Ray Decal feature to add some of that required dirt on the marbles.
Important tip: Whether you are creating a simple prop or a whole environment, to get photorealistic results, it is essential to know about the basics of PBR (Physically Based Rendering) workflow.
Lighting and Rendering
Whether it's a simple scene or a large scale environment, decent lighting has the potential of making your project stand out. To start with, I ask myself few questions such as:
➤ What mood or emotion I want to deliver?
➤ What should be the main source of light for this particular scene?
➤ What am I trying to sell?
These questions helped me dig deep into some research and I decided to study my references closely. For this environment, a simple HDRI sky helped me bring out the correct amount of light and controlled the rotation until I was satisfied with the direction of the shadows. Also, I added a few V-Ray lights in the scene to give a different version to this project.
When it comes to the final rendering, I like to add a few render elements such as Ambient Occlusion, Reflection, Refraction, and some for light controls.This way it gives me freedom to control these elements later in photoshop to get the desired look.
Conclusion
I’ve learned a lot from this project and always look forward to challenging myself that pushes me to be better everyday. Thank you for reading this article, I hope I could give you some useful information. I would like to thank The Rookies for this great opportunity, and also my friend Sagar Sinha for sharing his automotive knowledge and giving me feedback in the creation of this project.