Translating 2D Concept into 3D Portfolio Pieces for Film and Cinematics (Part I)
Fiona Ng walks us through the process of creating her latest project Countess and Dog, sharing her workflow and techniques in Character and Creature modeling, texturing, as well as grooming.
Fiona Ng walks us through the process of creating her latest project Countess and Dog, sharing her workflow and techniques in Character and Creature modeling, texturing, as well as grooming.
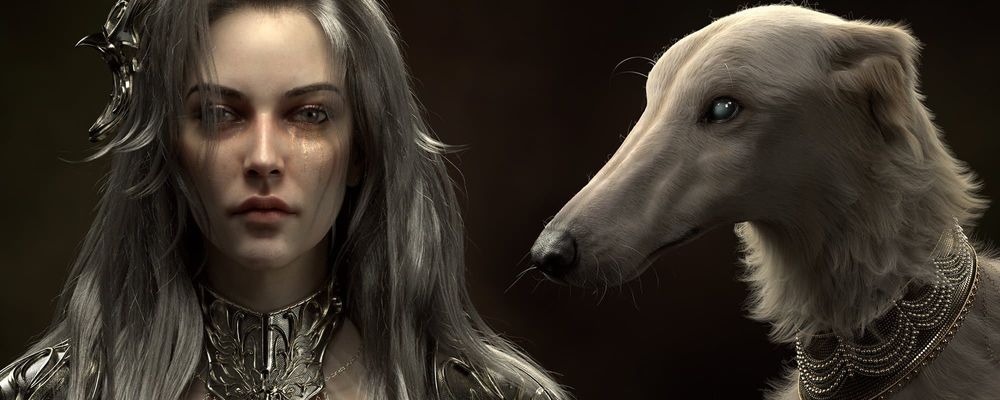
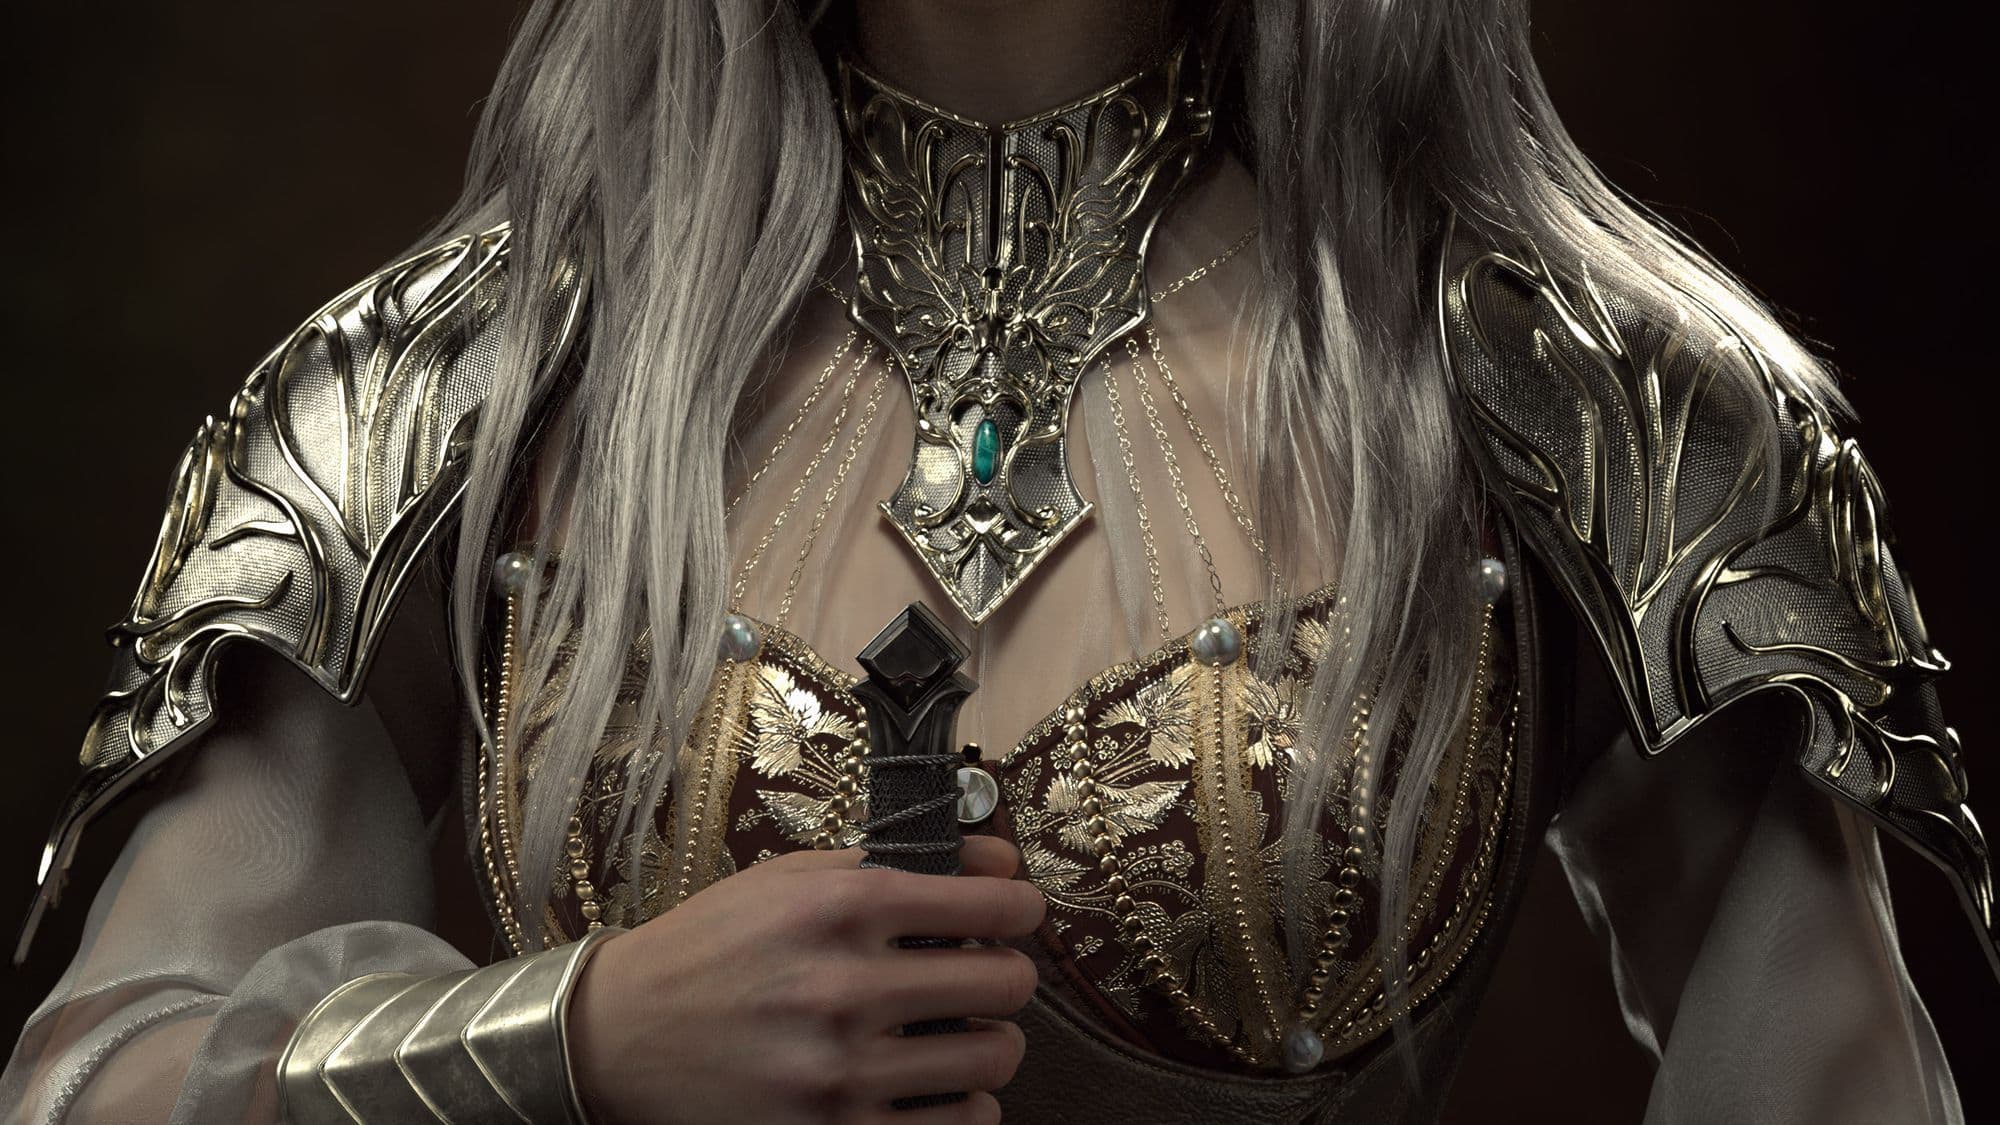
When picking a concept or subject to work on, I always target my search on not only an idea that speaks to me, but more importantly on areas I would like to explore further and improve my skills on. I came across Yi’s concept Weathered and was immediately drawn into it. I thought it would be a great way for me to get better at creating character costumes and realistic animals by translating this beautiful 2D painting into 3D.
Considering the goal of my demo reel class was to create two portfolio pieces within 10 weeks, rather than recreating the whole scene, I decided to split my time between the two main elements–the character and the dog, making them stand-alone pieces that could help highlight different skills and techniques in my reel.
The following breakdown is divided into two parts. I will go over my workflow and some key techniques used to create each piece. I hope by the time you finish reading this, you will be able to pick up a thing or two, and gain a better understanding in the process of creating 3D characters and creatures!
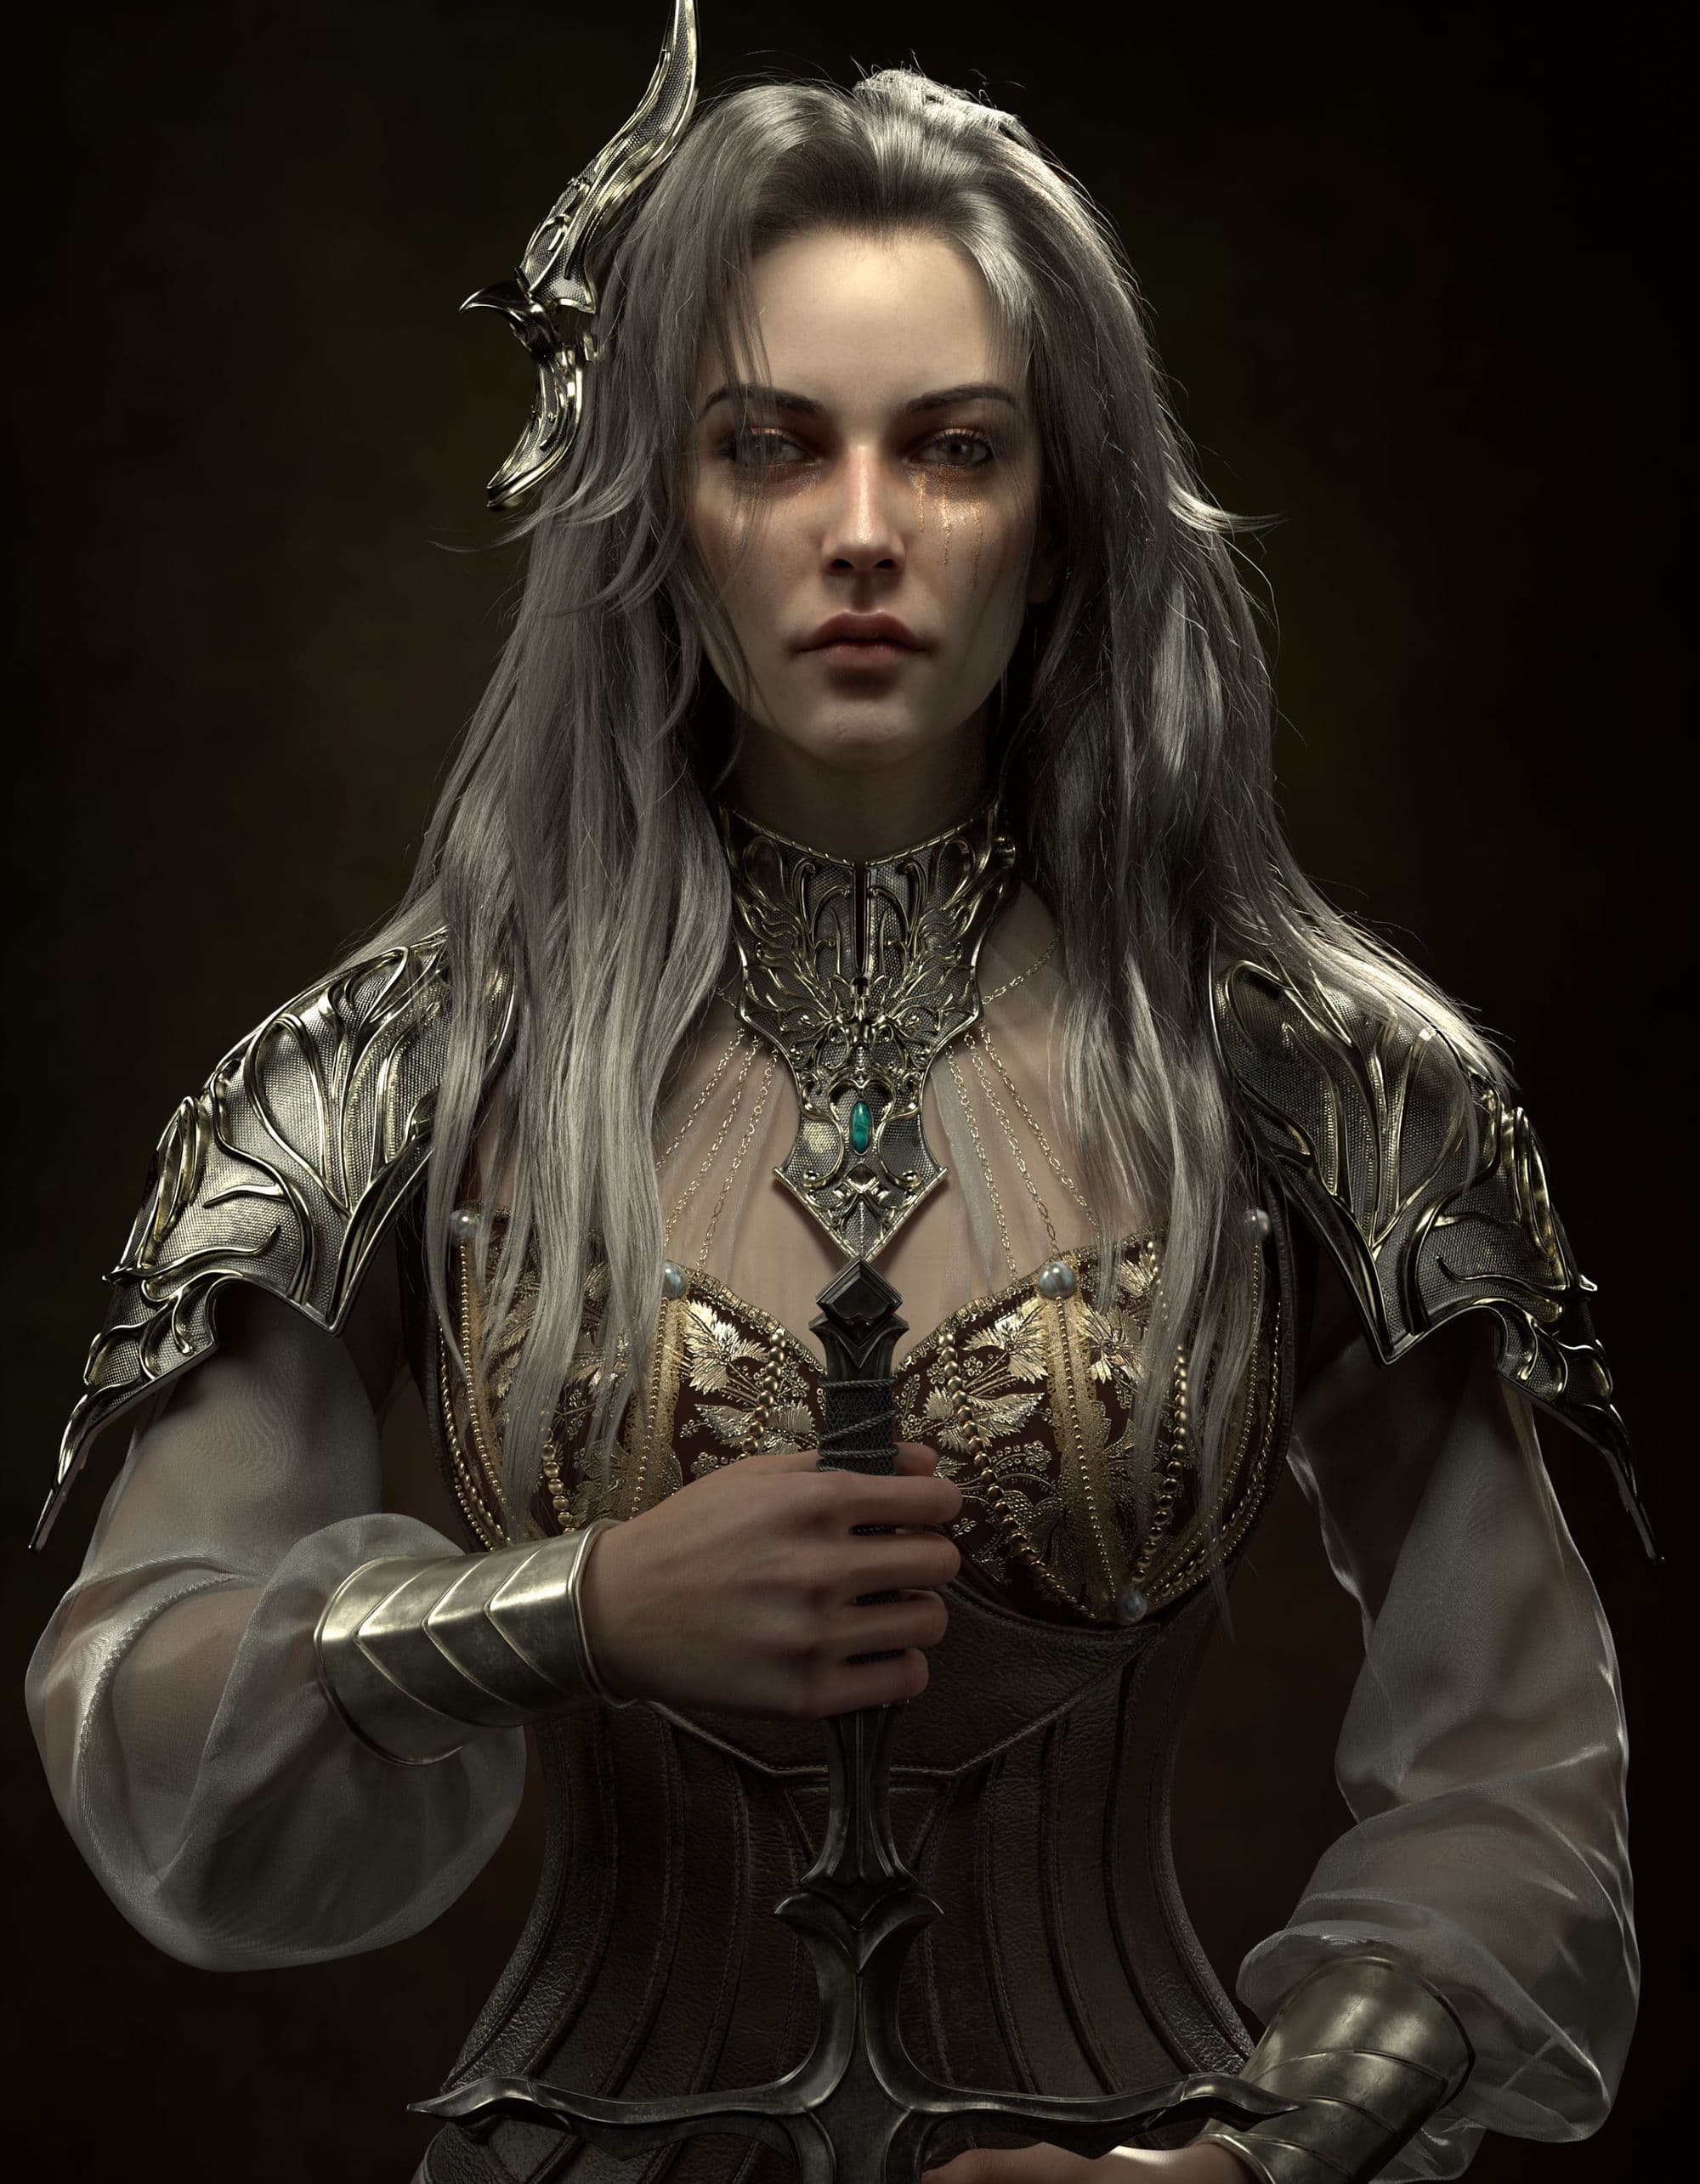
Part I: Character
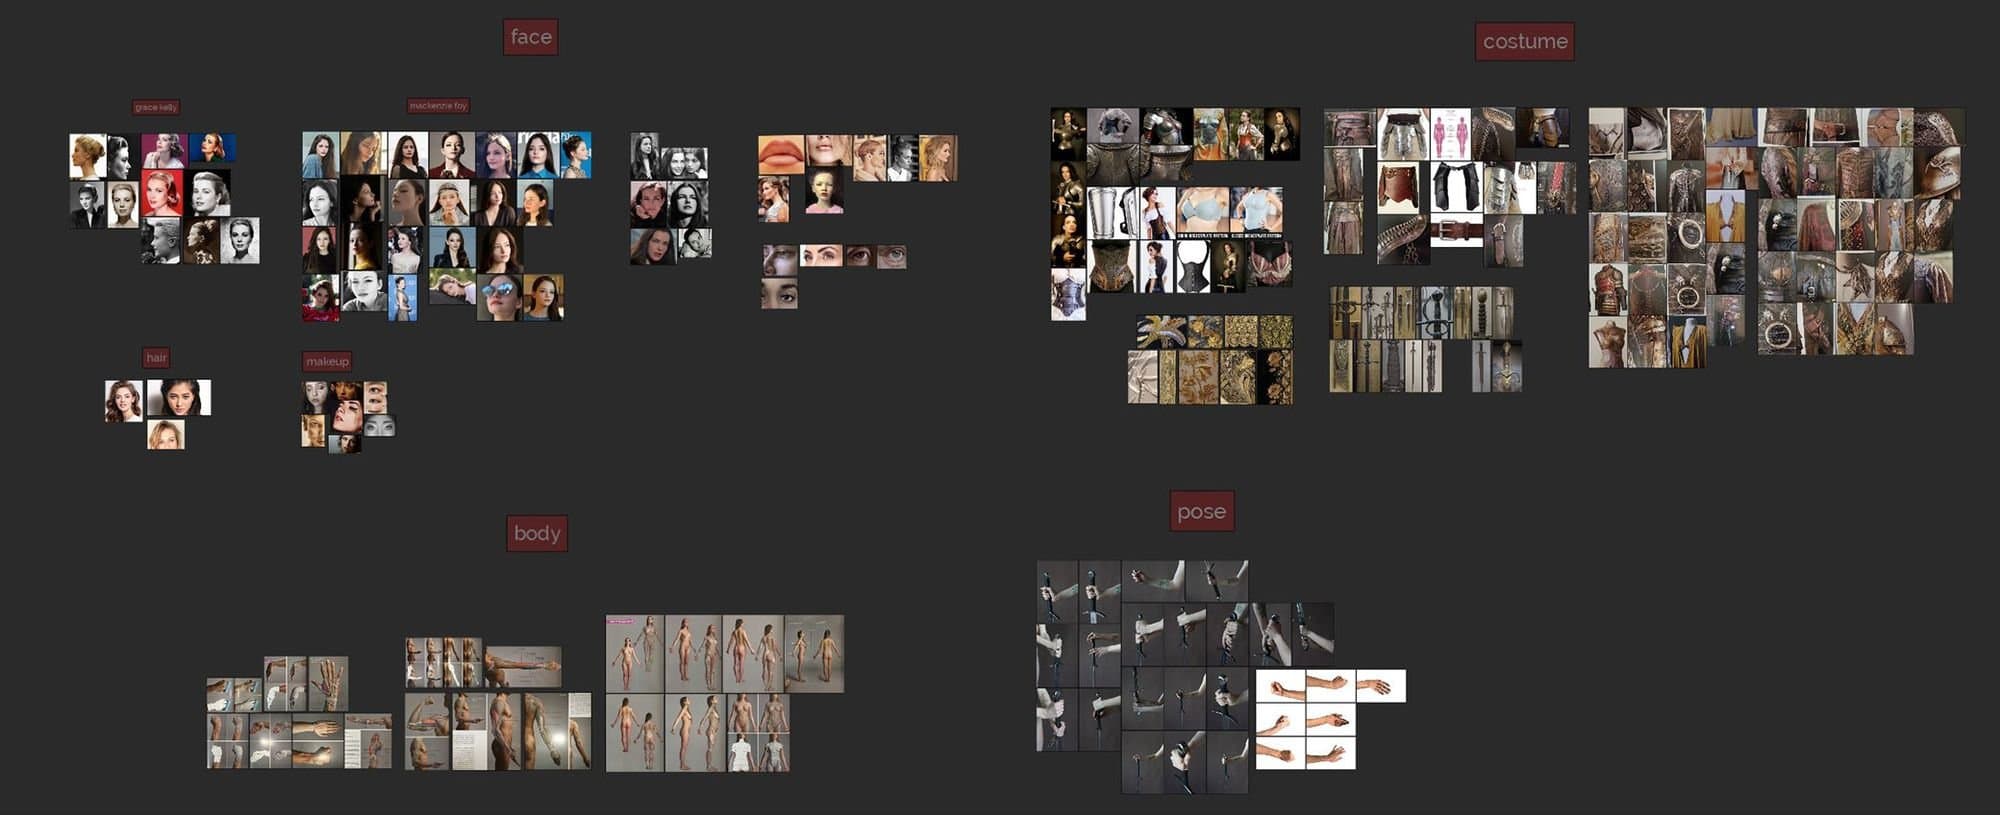
References
If you are not already using PureRef, this will be the first step! Before starting any project, I always make sure to gather my references. I usually add a lot more as I work, but to avoid distractions and frequently breaking my flow, I try to begin with listing out elements in the concept and collecting real-life photos that match closely. Since it is not always possible to find things that are of the exact resemblance, especially when this is a fantasy character, I also included a lot of images that I found relevant and inspiring.
For example, for the face, I picked a few celebrities with specific facial features that would work well with the concept, rather than trying to match the likeness of one specific person.
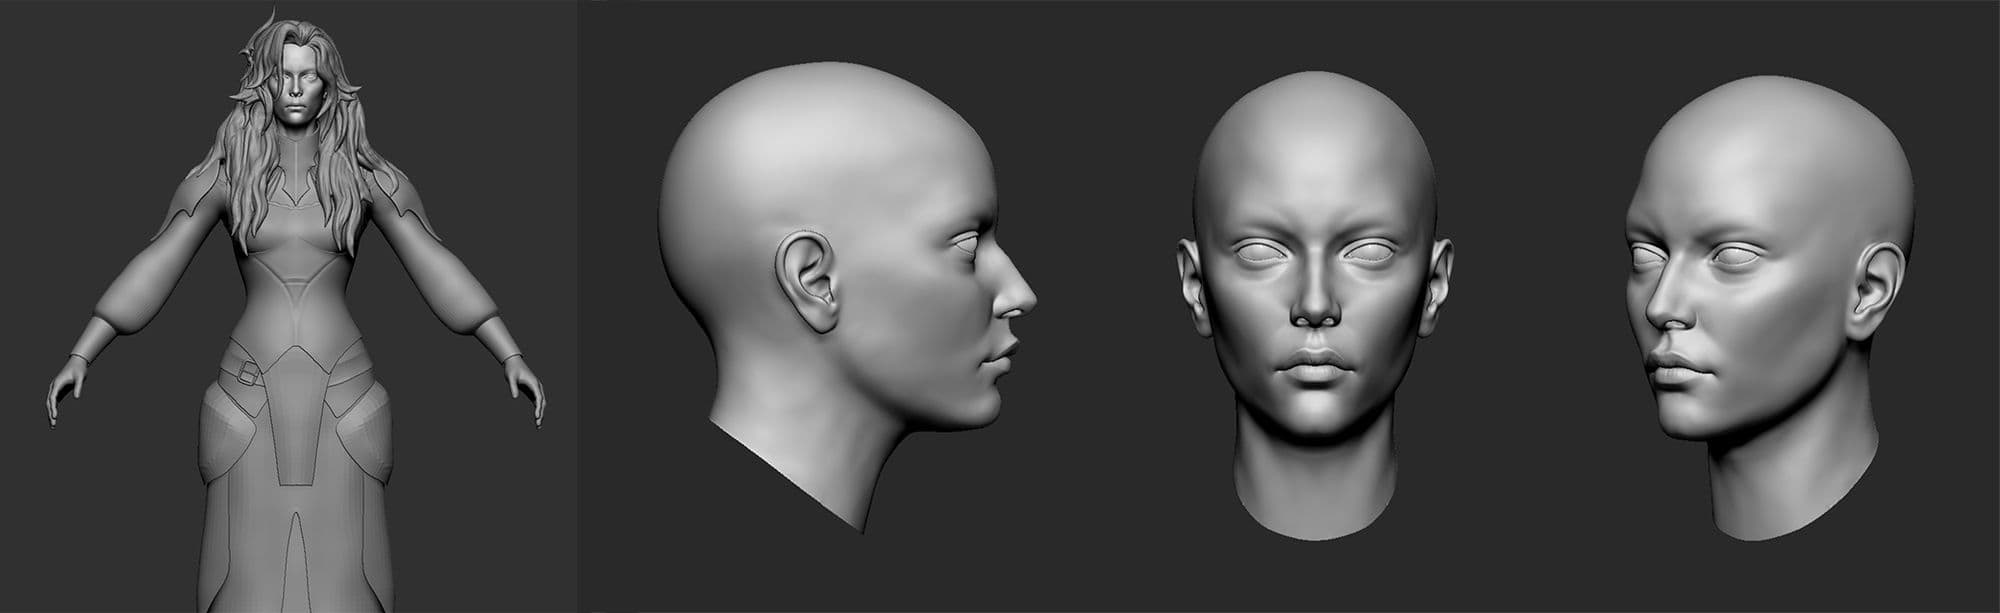
Sculpting Head and Body
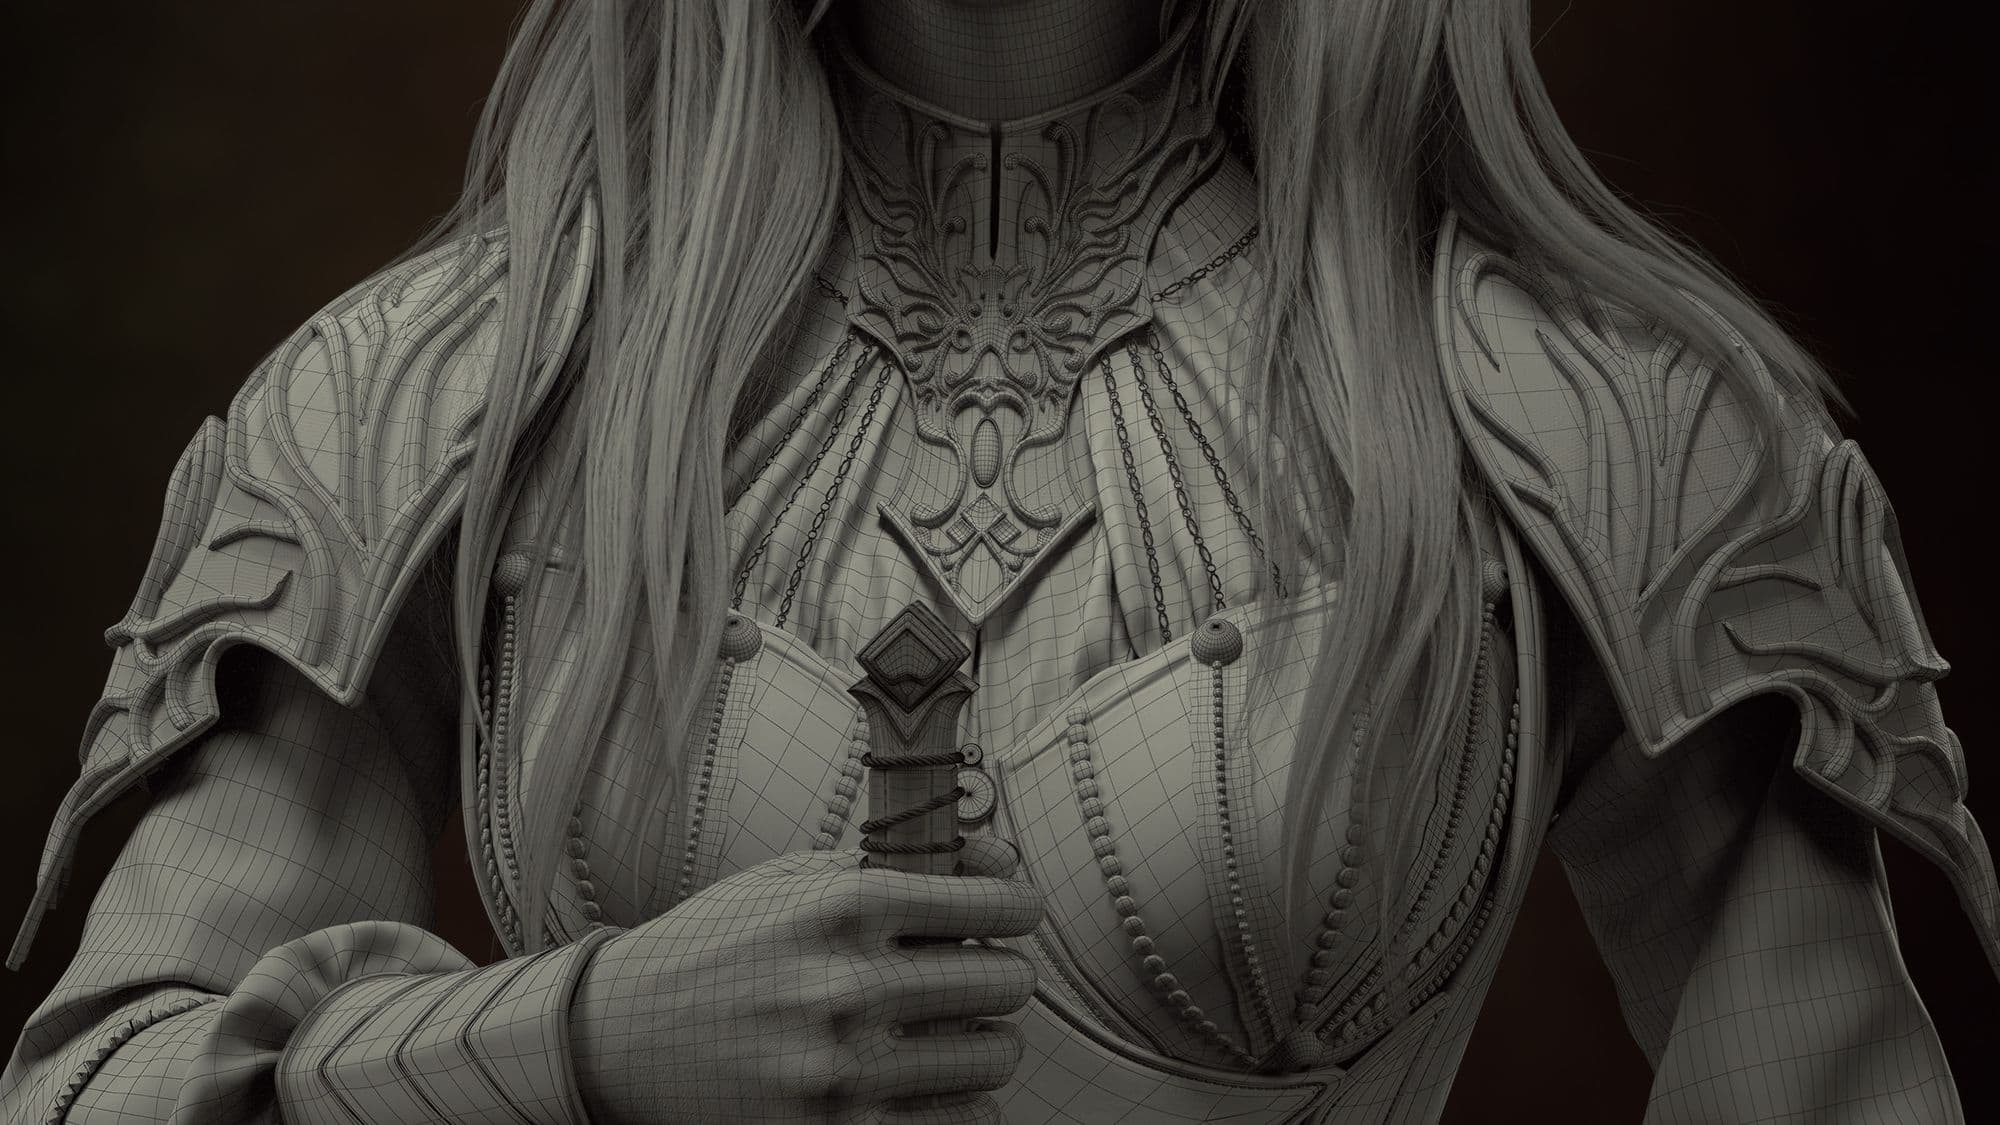
It is important to establish proper scale for your character to texture and shade correctly later on. For this project, I started with a generic base mesh and resized it to real-world scale. I adjusted the proportion and roughly blocked in the costume and hair before going into any details.
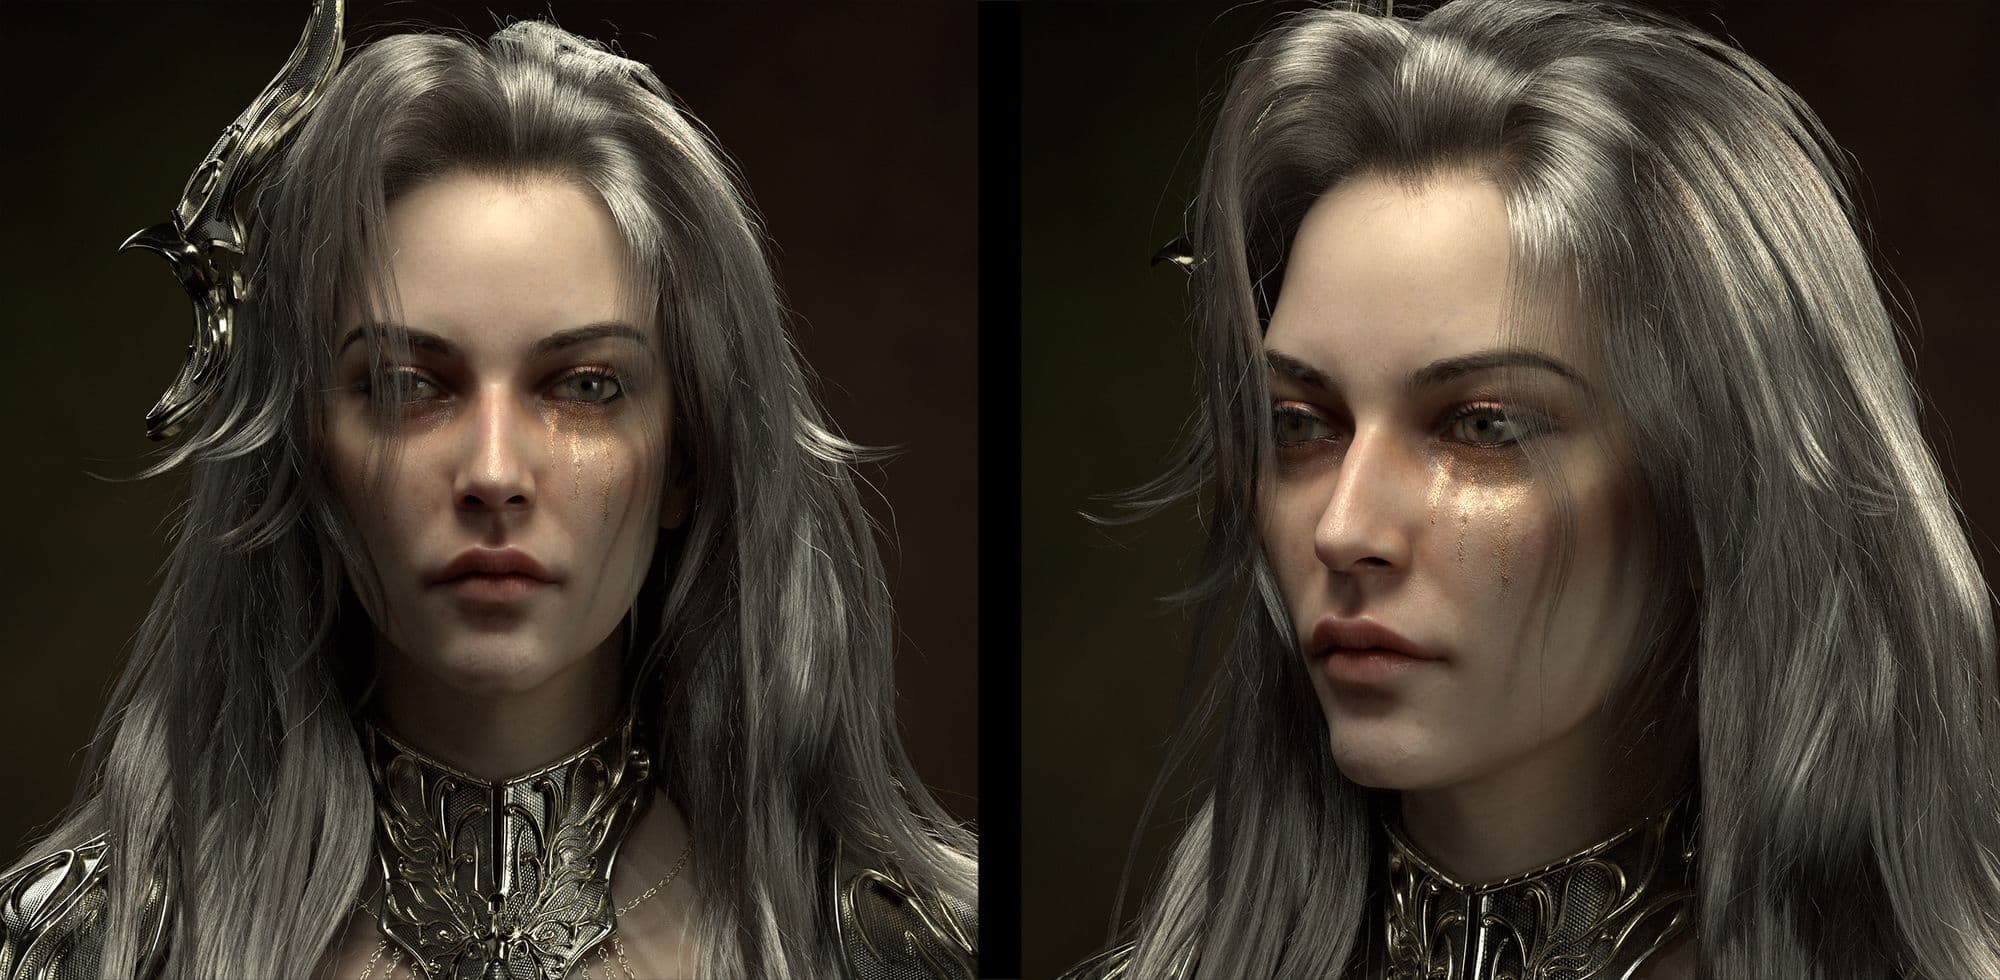
Sculpting the face was pretty straightforward but it can also become a rather time-consuming process as I find myself coming back to make adjustments quite often even at later stages. Besides the photos I gathered, I also used Anatomy of Facial Expression and head scans from 3d Scan Store as references.
Though I was aiming for realism, I decided to keep a bit of stylisation on the facial features to match closer with the concept. I find it very helpful to overlay scan data on top of my sculpt in Zbrush and activate Split Screen mode to compare the two side by side while I sculpt.
When I was happy with the primary and secondary forms, I used Zwrap to wrap my sculpt with a base mesh from 3d Scan Store, that way I have clean topology and UV to work with without spending too much time (automating steps like these can be a big time-saver but it is important to make sure you also understand how to do these manually!)
After cleaning up the projection, I separated the UVs into multiple UDIMs in Maya to give the face and hands a bit more resolution.
Tertiary Details
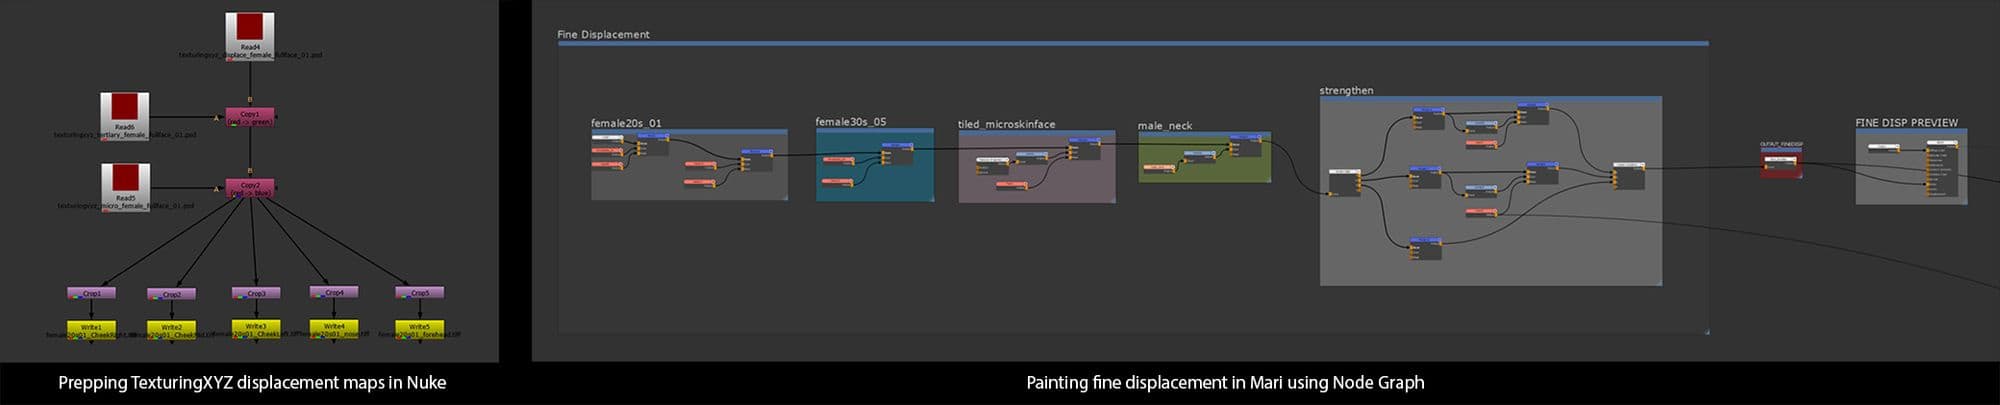
Before jumping into Mari to do the fine displacements, I prepped the maps I got from Texturing XYZ in Nuke. The idea was to combine Displace, Tertiary, and Micro maps into one single image by storing them into R, G, and B channels respectively. To do that, I connected them together with Copy Channel and adjusted the channels accordingly. I also used Crop to separate the outcome into smaller chunks. Having lighter maps makes projecting and painting in Mari much smoother.
Sometimes it is necessary to use different sets of displacement for certain areas on the model. Node graph helps keep this organised and non-destructive. As I painted, I also switched back and forth with a BRDF shader to check how the fine displacement would look as a bump map.
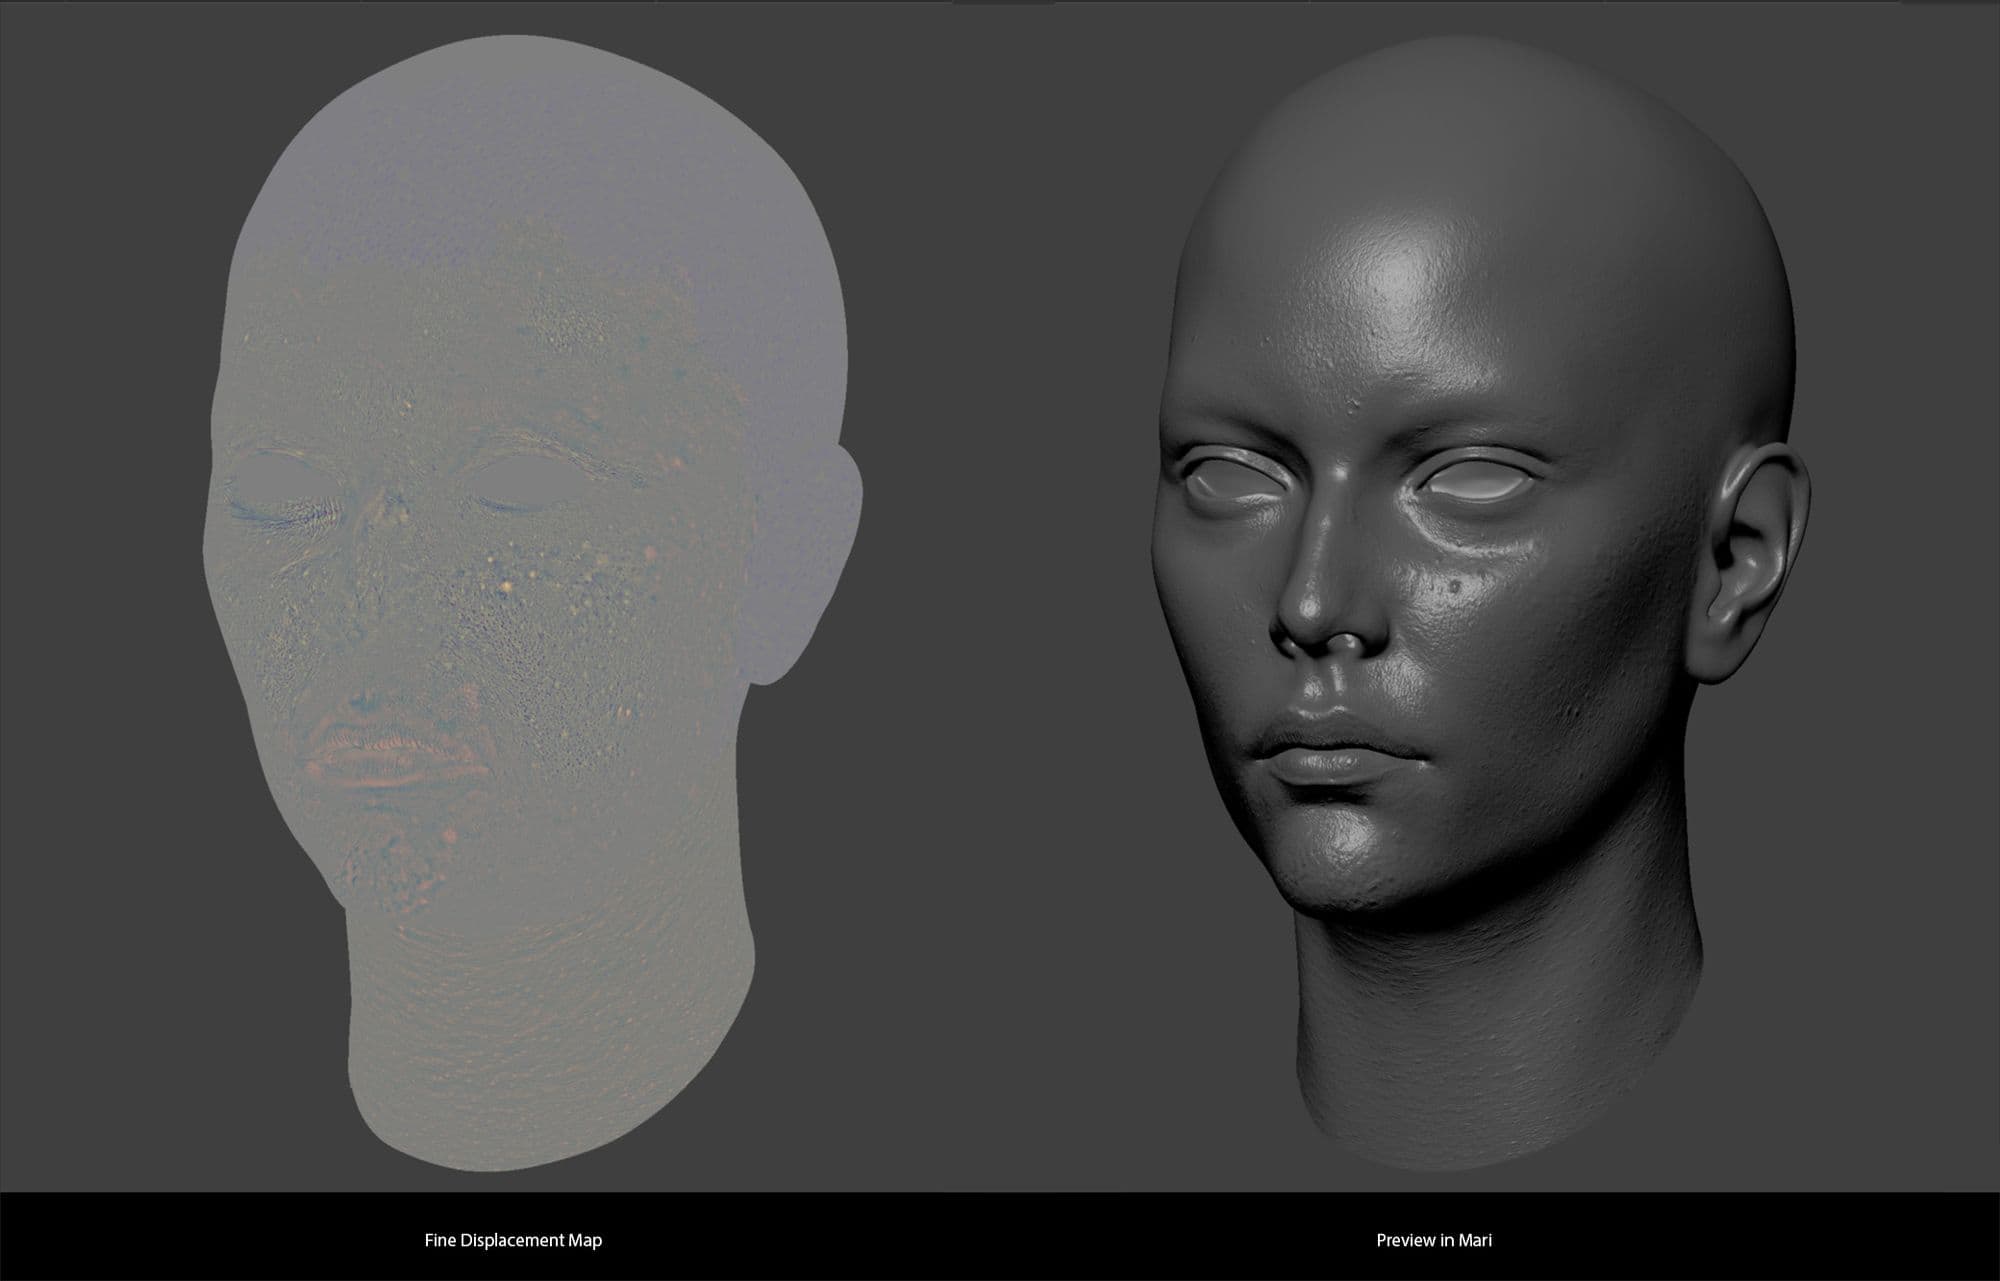
The resulting fine displacement maps of the head and hands were imported into Zbrush temporarily for me to refine the model and sculpt in more details. I used Morph Target and Layers here to keep the enhancement separated from the base sculpt. This extra step helped keep track of different sculpt adjustments as well as gave me the flexibility to easily fine-tune each of their intensity levels. As there were not many wrinkles and pores on this character, the effect of this step was pretty subtle.
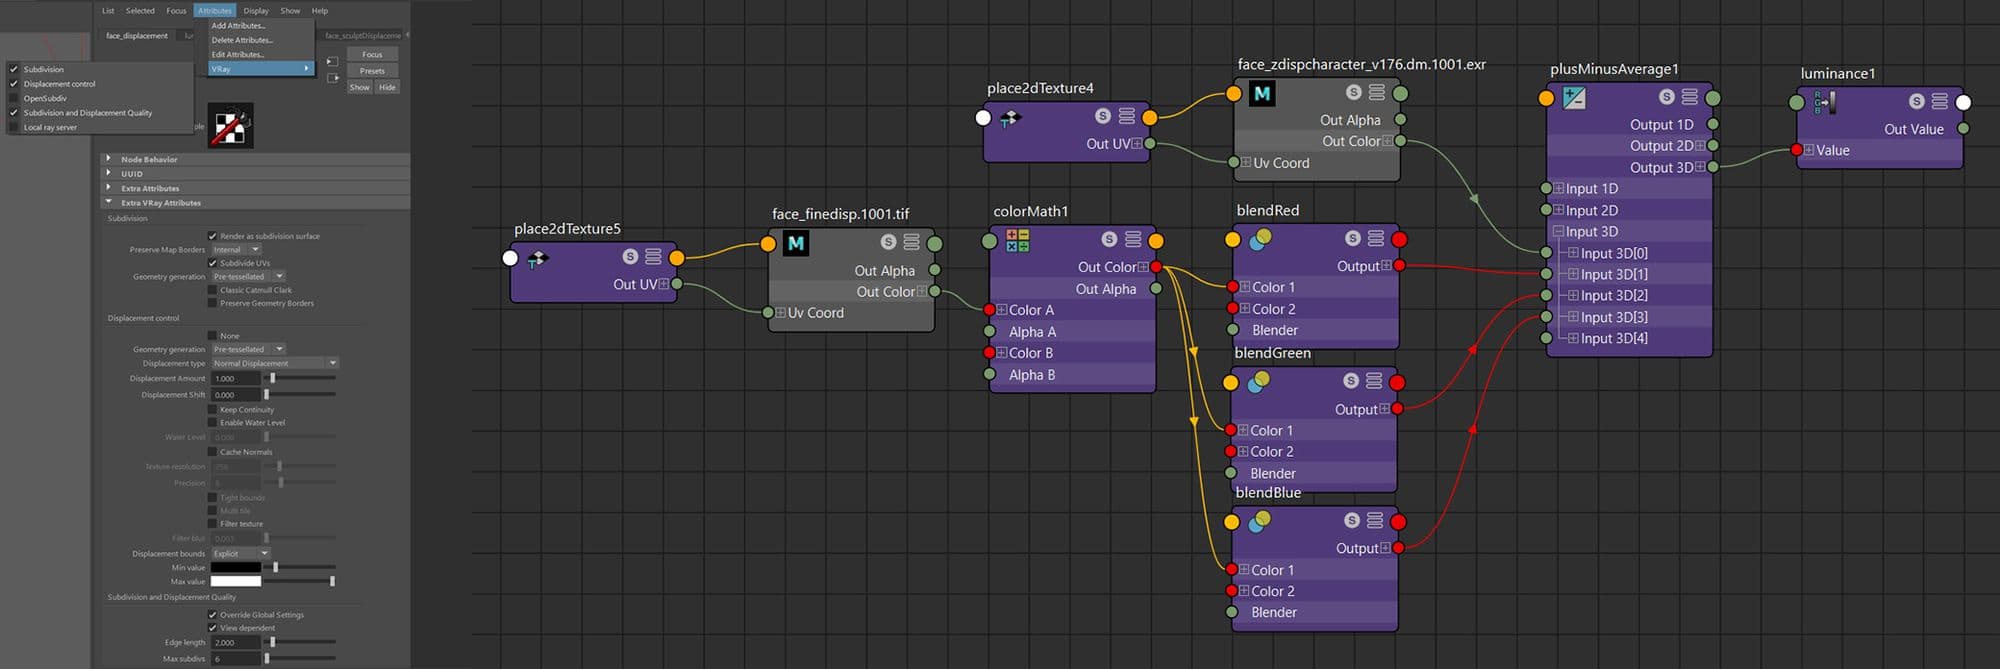
I then brought the model at its lowest subdivision into Maya, along with sculpt displacement extracted from Zbrush and fine displacement exported from Mari.
I set up the Vray displacement in Maya by adding the two sets of maps together with a PlusMinusAverage node. The fine displacement was also broken back into RGB channels with a ColorMath node, giving the ability to lookdev the skin details within Hypershade.
Skin Textures and Shader Development
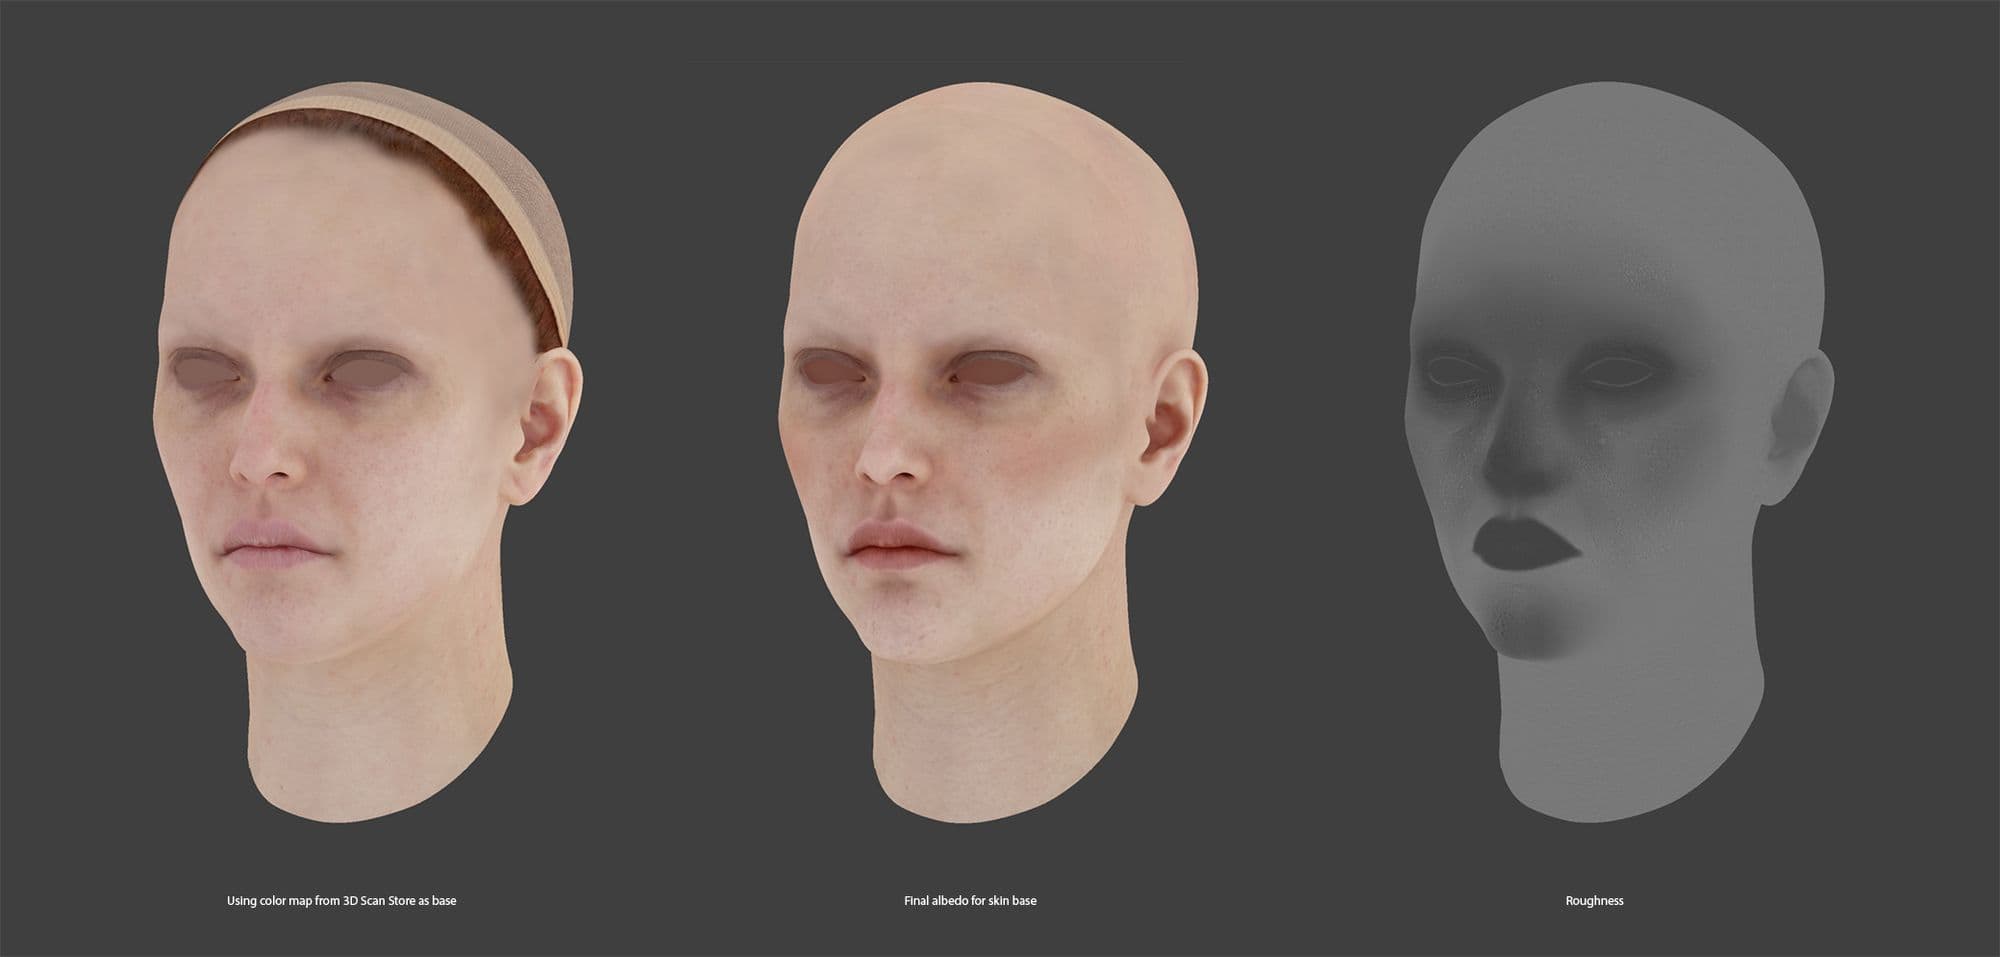
Because I used Zwrap to project the 3D Scan Store base mesh onto my sculpt earlier, I was able to adopt the color map that came with the mesh as a base for my albedo. To do that, I had to convert between polypaint and texture in Zbrush and export out a new set of maps that would work with the modified UVs.
I also baked and extracted a few utility maps such as Ambient Occlusion, Curvature, Cavity, and Thickness to aid with my painting process. I brought them into Mari as Radio Transmitters and Radio Nodes to declutter my graph and minimise the use of connection lines. Always try to keep your nodegraphs clean!
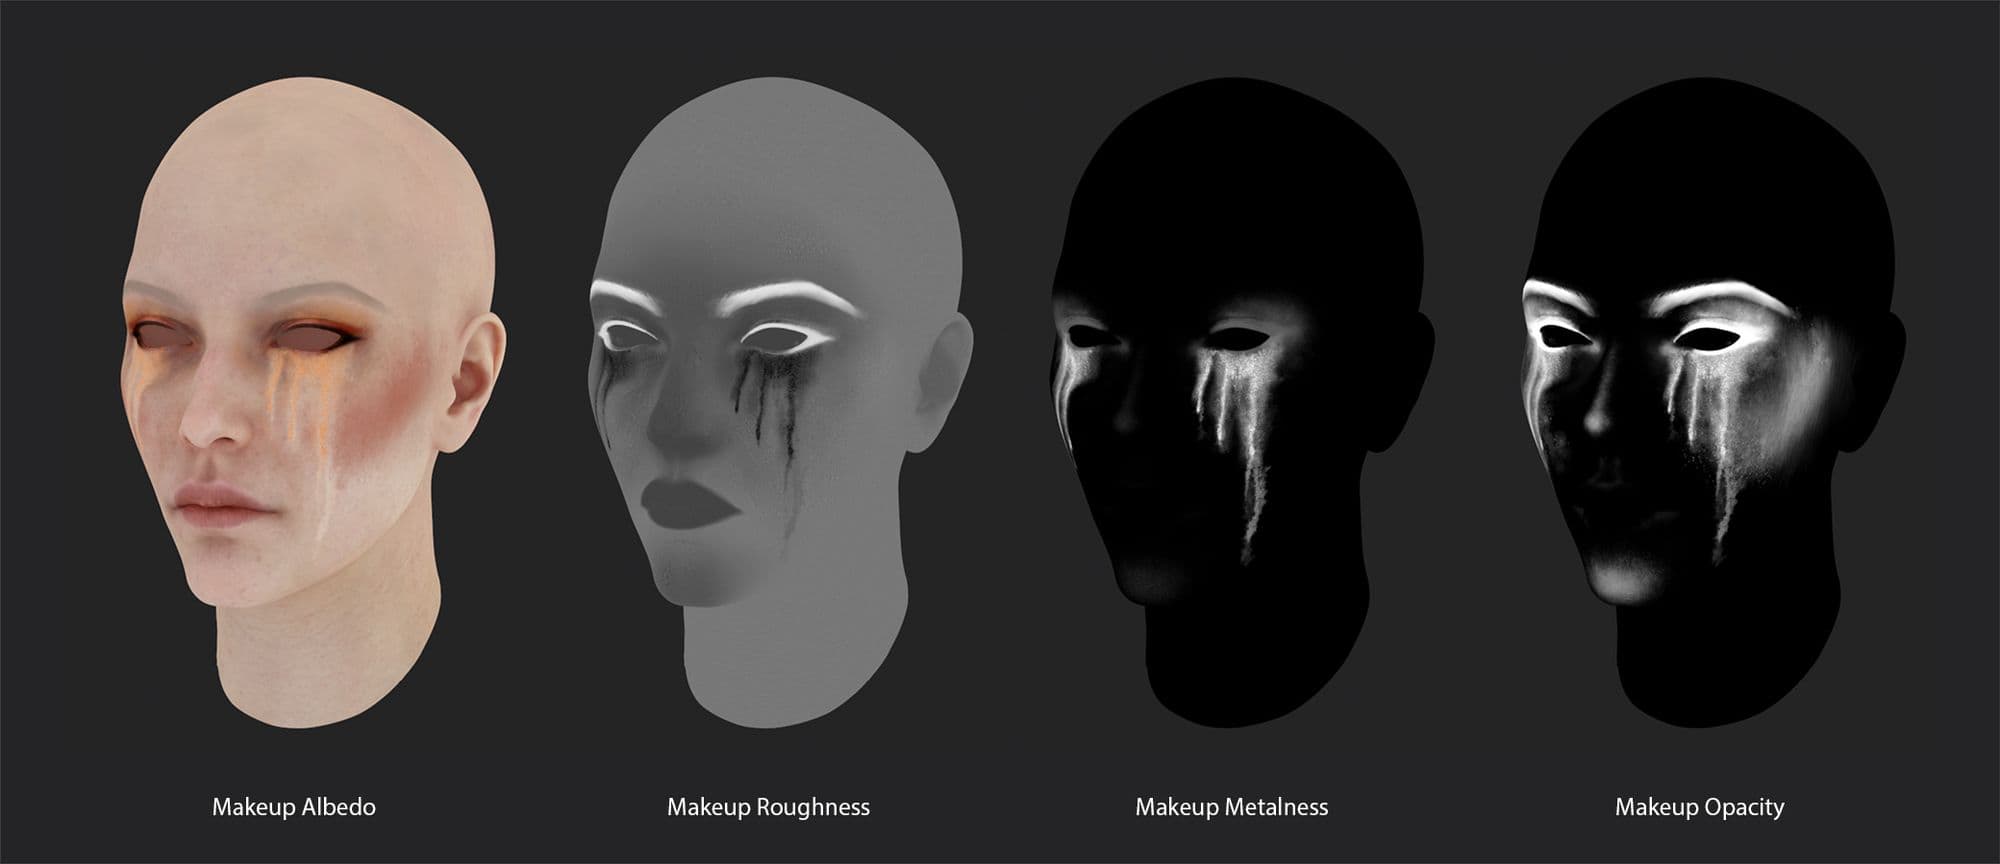
While albedo and roughness of the skin were created in Mari, I decided to use Substance 3D Painter for the makeup. It was just my personal preference, I find it easier to create the makeup as well as preview its effect here. I tried to apply different layers of makeup according to the order of how it is actually done in real life. Before setting up the skin shader in Maya, I also went back to Zbrush to sculpt in some glitter and tears to give the surface a bit more texture.
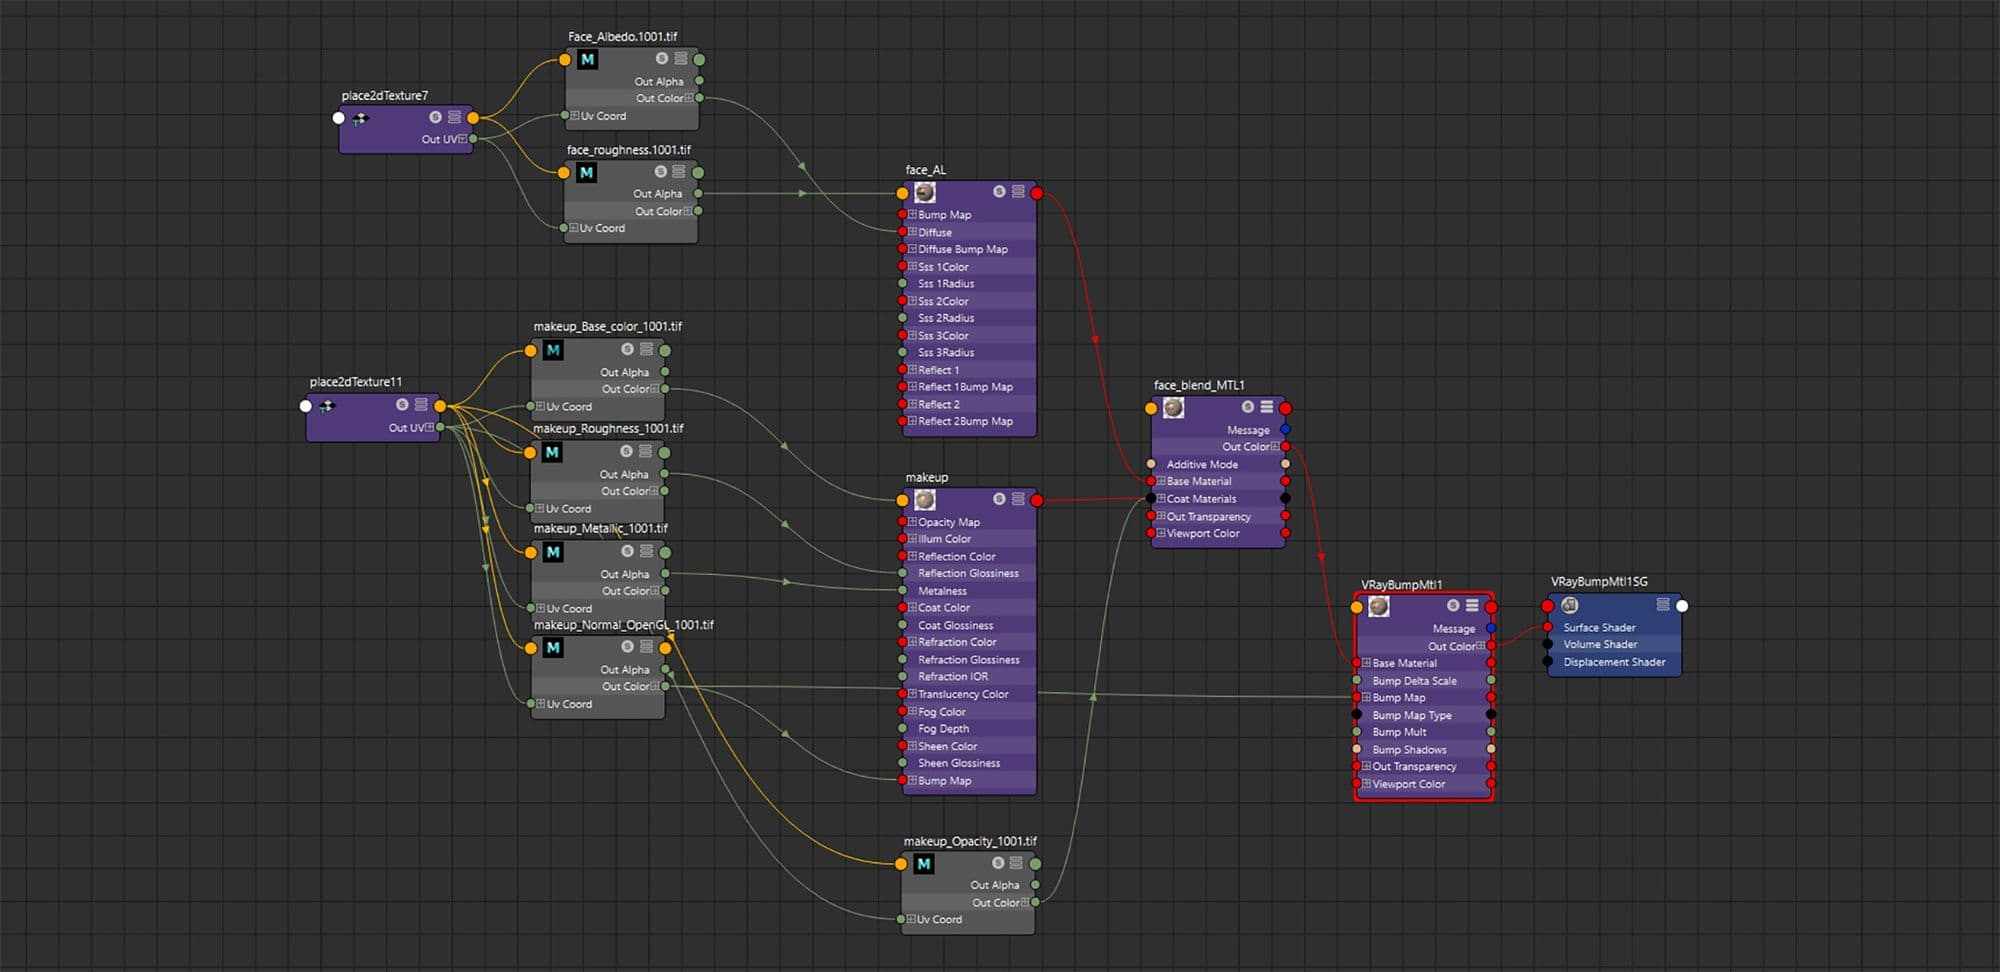
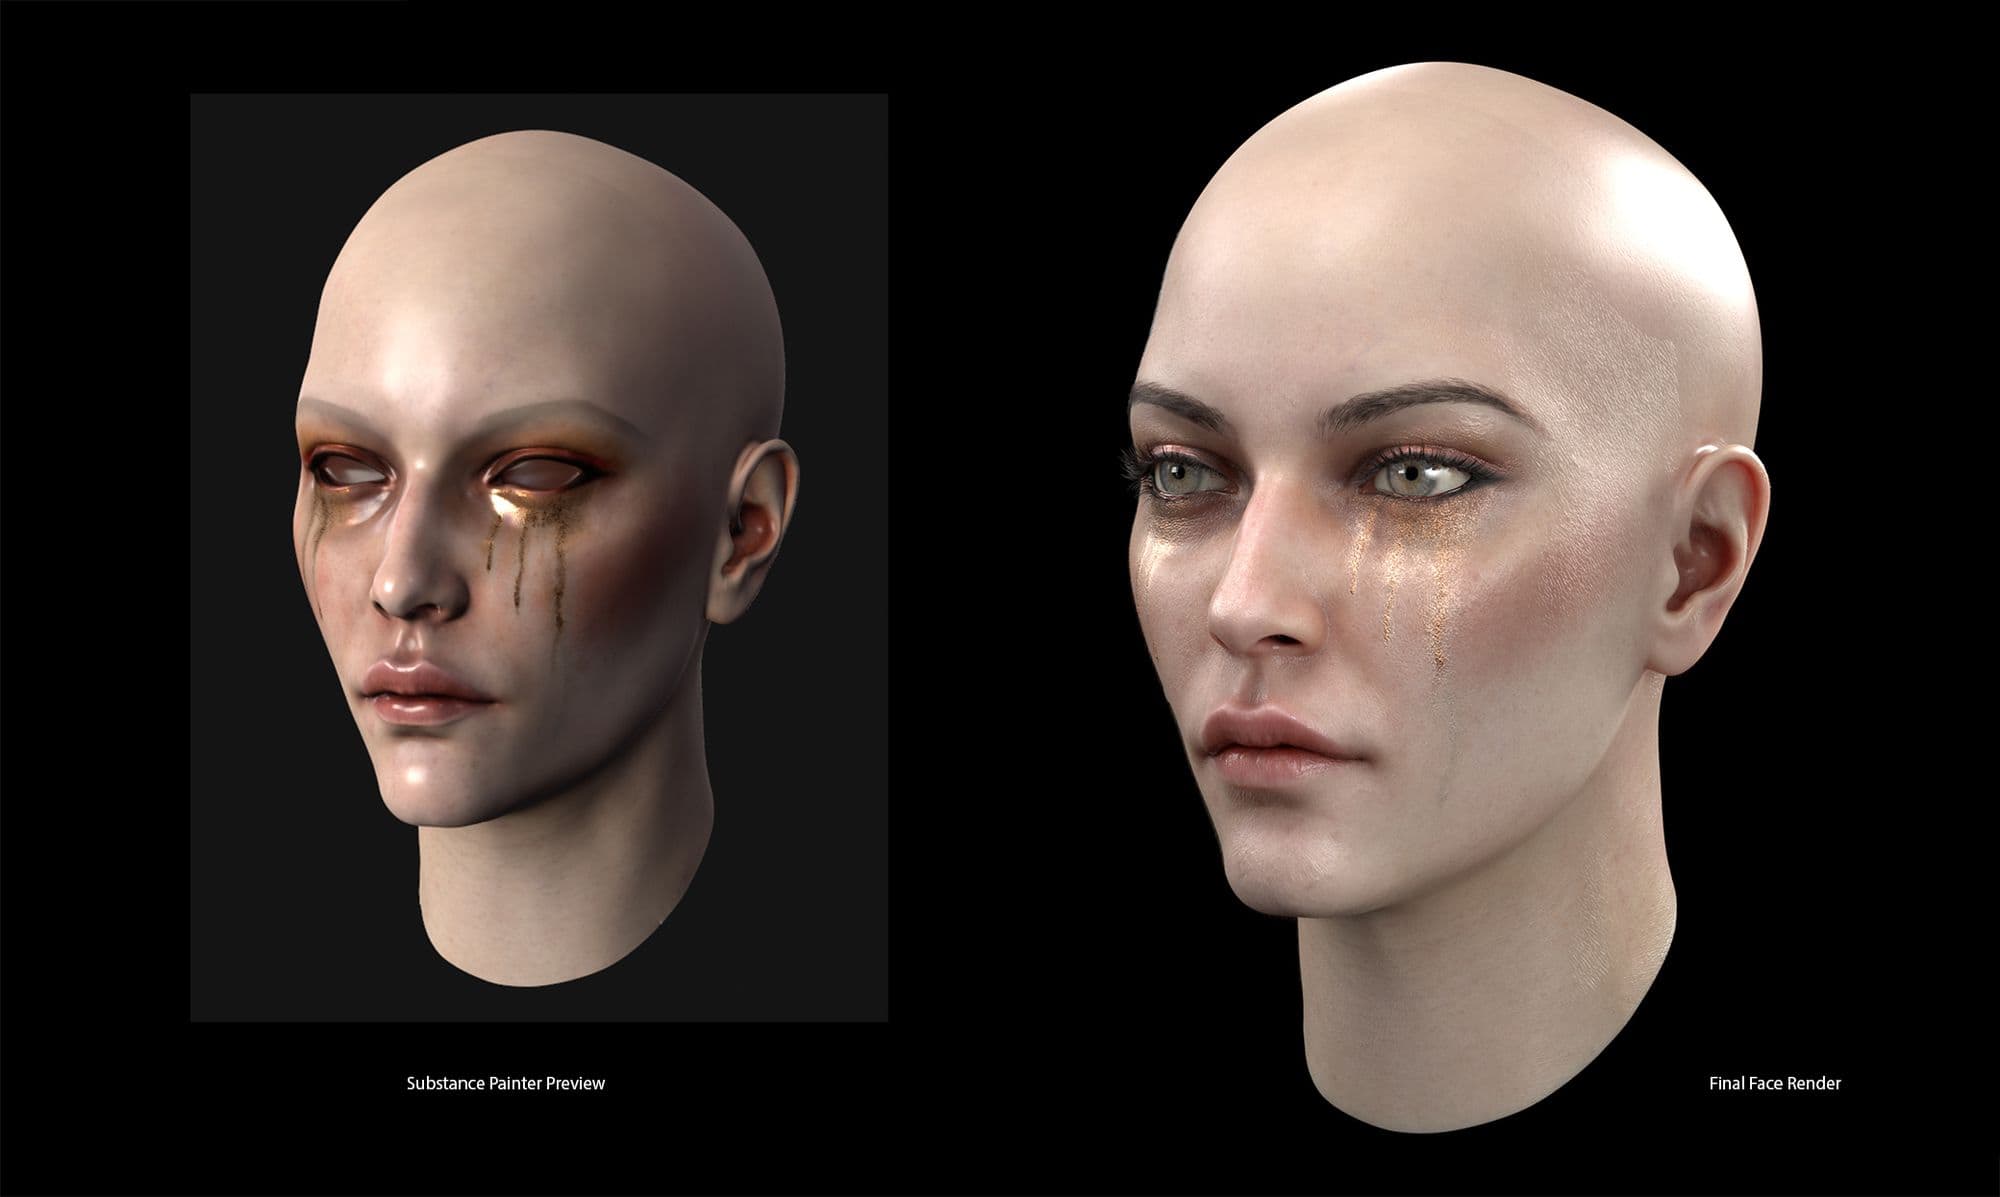
I used VrayAlSurface for the skin (with maps exported from Mari) and VrayMtl for the makeup (with maps exported from Substance Painter). The latter was then layered on top of the first as a coating by using a VrayBlendMtl shader. As adding subsurface tends to soften the details and tinting the color slightly, you may find the need to go back and tweak around the sculpt, displacement, and albedo to make sure they all work well together.
Grooming
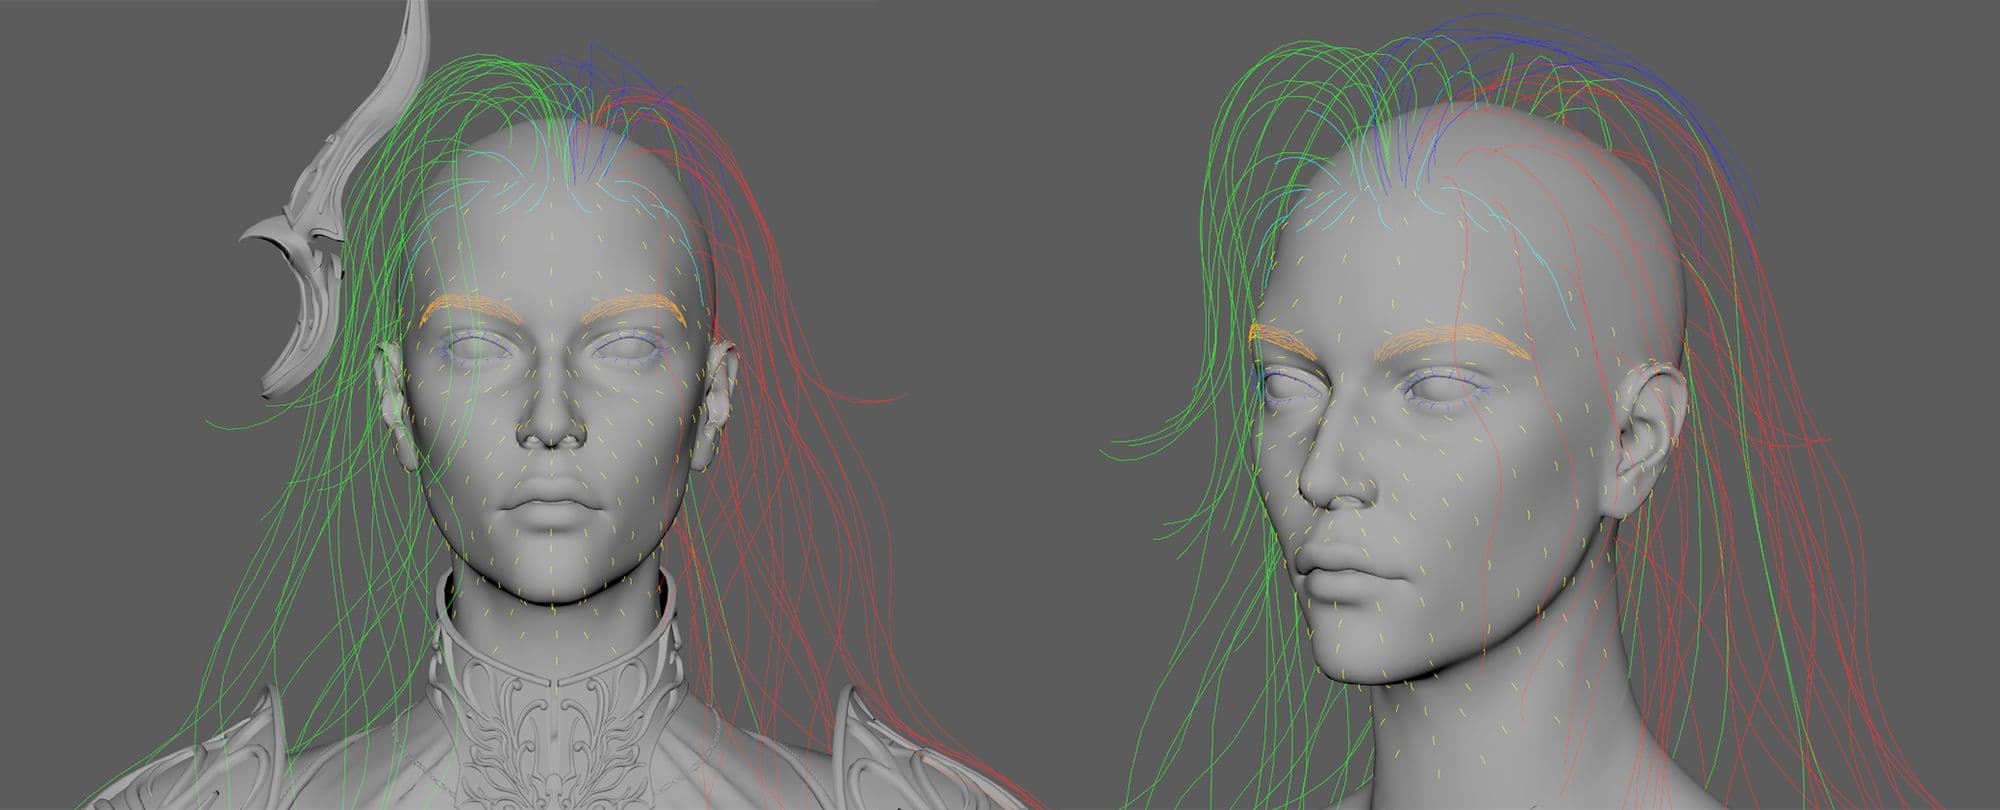
I will be covering more Xgen techniques in Part II where I walk through the process of making the dog. For this character, I first duplicated the head model and extracted different scalp meshes for main hair, baby hair, brows, eye lashes, and peach fuzz, then assigned each of them to a new Description. I prefer doing this than applying Xgen directly onto the main model because it is easier to manage and allows me to quickly and safely adjust the UVs. Make sure all the UVs sit between 0-1 UV space as Xgen does not support UDIM when painting maps.
The hair I sculpted when blocking in the character served well as a starting point for generating Guides. It did not only give a good understanding of the placement and direction of the hair but also provided a much better control over its volume and silhouette.
The final outcome was achieved by adding Clumping, Cut, and Noise Modifiers with some masks and simple expressions. I applied VrayHairNextMtl to all the Descriptions and picked a preset to begin with. To give it more variations to the individual strands, I connected a Ramp with VrayHairSampler into the main hair shader.
Costume
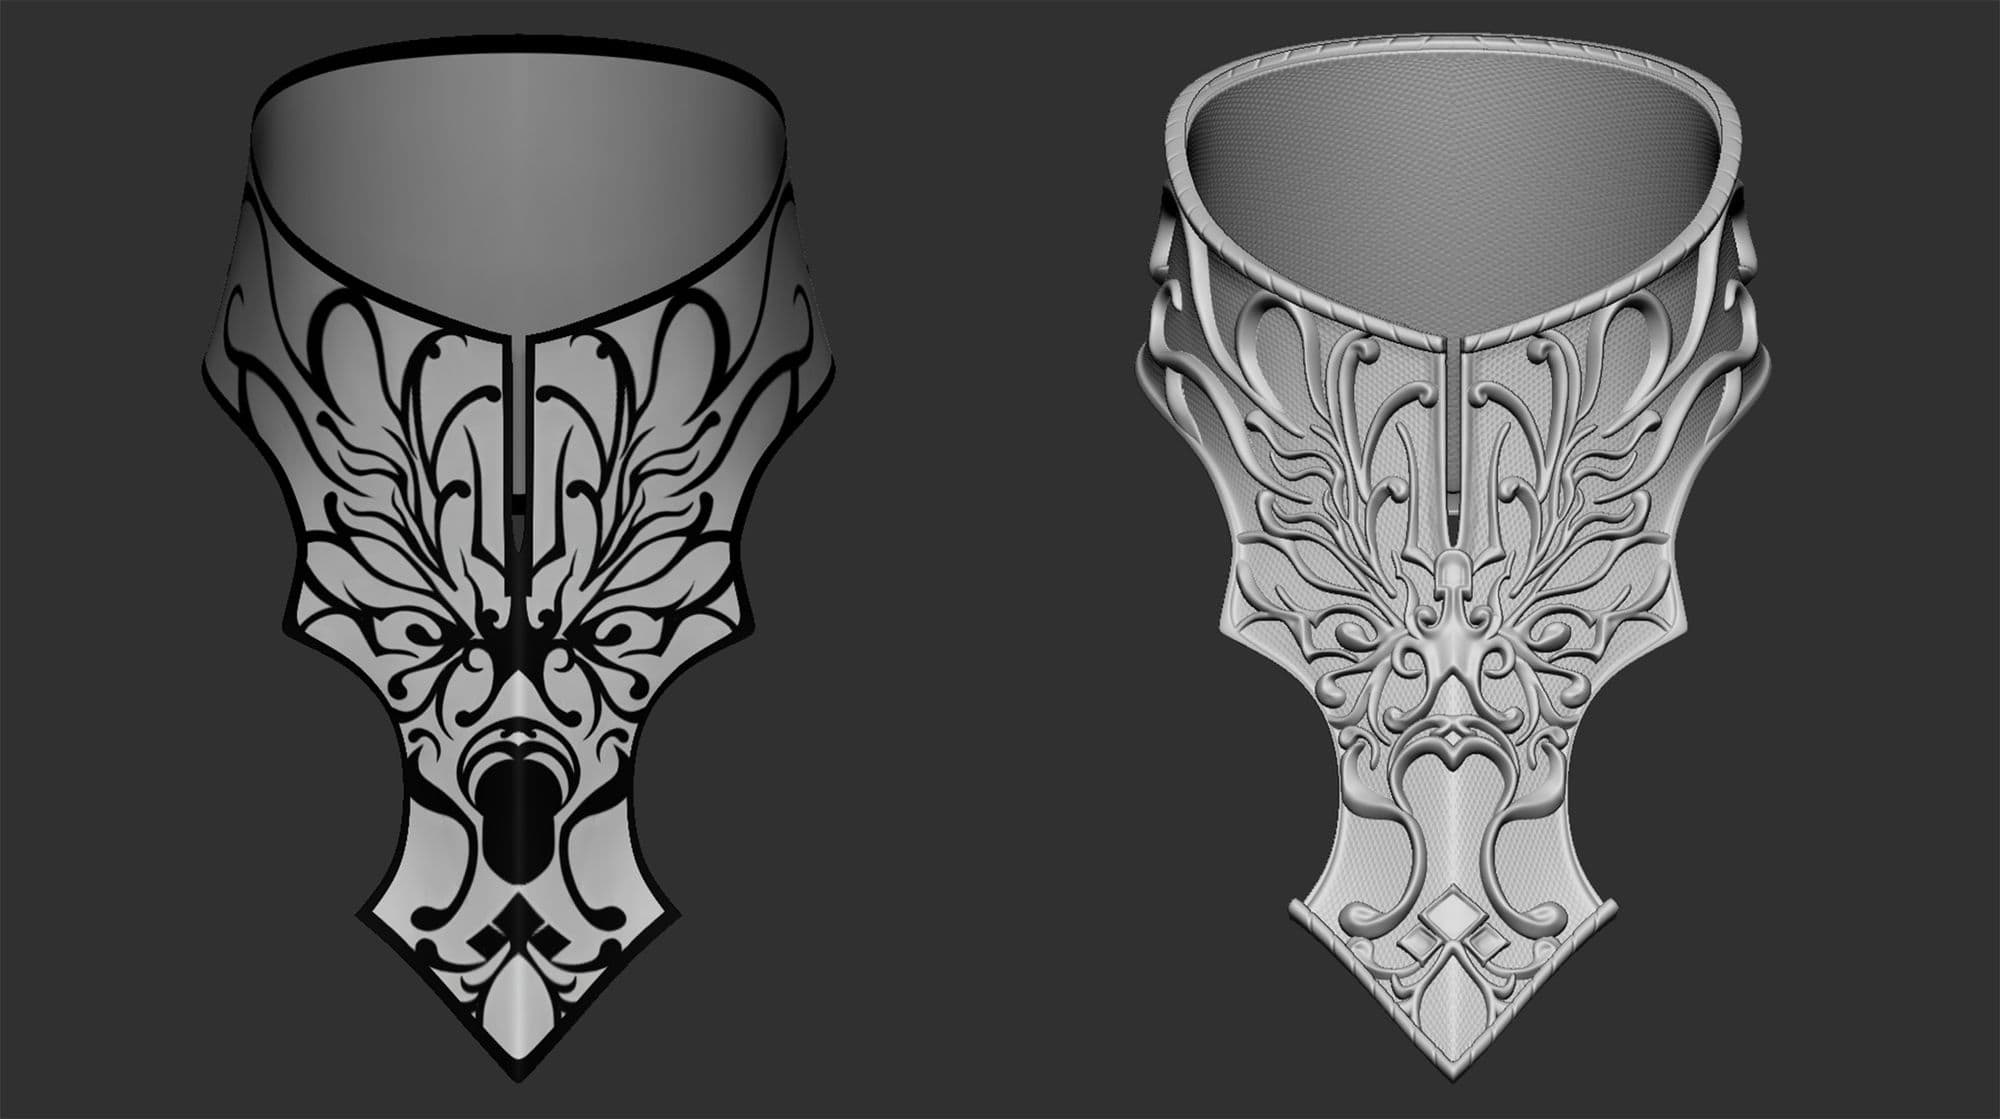
Creating the costume was quite a trial and error process for me. I wanted to practise doing hard surfaces in Zbrush so most of the metal pieces were created there with some cleanup in Maya using Quad Draw. For the decorative parts, I started by polypainting the patterns in black, sometimes with Sculptris Pro to get cleaner strokes.
When I was happy with the design, I used PolygroupIt Border to convert the patterns into polygroups, cleaned up the topology, and extruded the surfaces. By keeping the decorative parts as separate meshes from the base, not only the modeling process became much quicker, it made texturing a lot simpler as well.
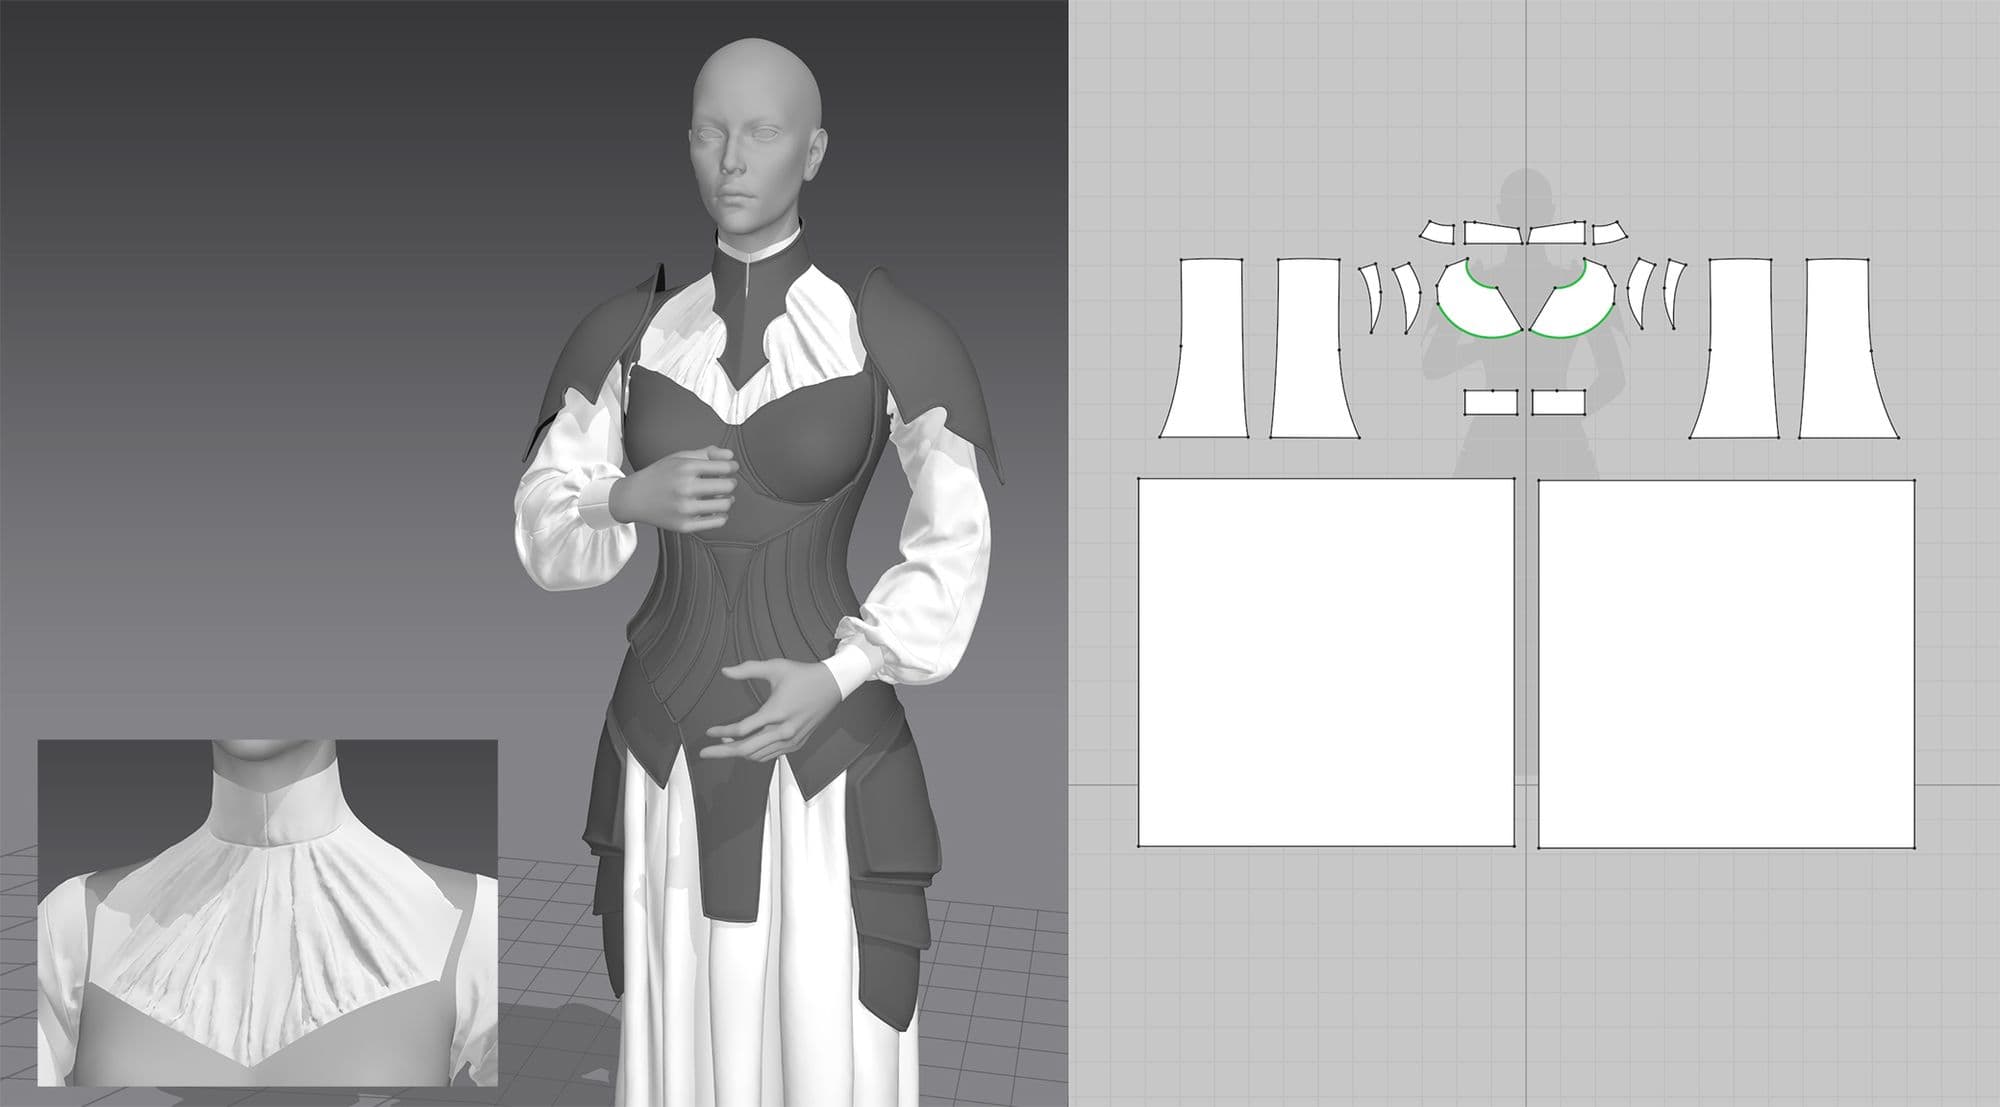
The fabrics in the costume were created using Marvelous Designer. I started laying out pieces in neutral pose and later brought in the posed mesh as Morph Target for the fabrics to simulate in place. It was tricky for me to get nice wrinkles on the chest area and have it look properly tucked in by just simulating with the corset. To work around this a little, I drew lines onto the avatar using Basic Tape Measure and attached the piece of clothing onto the model instead.
Retopo and UV were done within Marvelous Designer using the 2D patterns. I find this a very efficient way and often produces nice results but this can also be achieved using Maya's Quad Draw or Zbrush's Zremesher. The main point was to retopo on flattened surfaces instead of the simulated 3D clothings. Both high and low resolution meshes were then imported into Maya where I projected the details by transferring vertex position through UV.
All the pieces for the costume were brought into Substance 3D Painter for texturing. For the most part I created the base with tileables and layered procedural dirt and grunges on top. I played around the opacity of the fabrics a bit by creating masks with thickness maps and the pattern of the corset was done by projection painting.
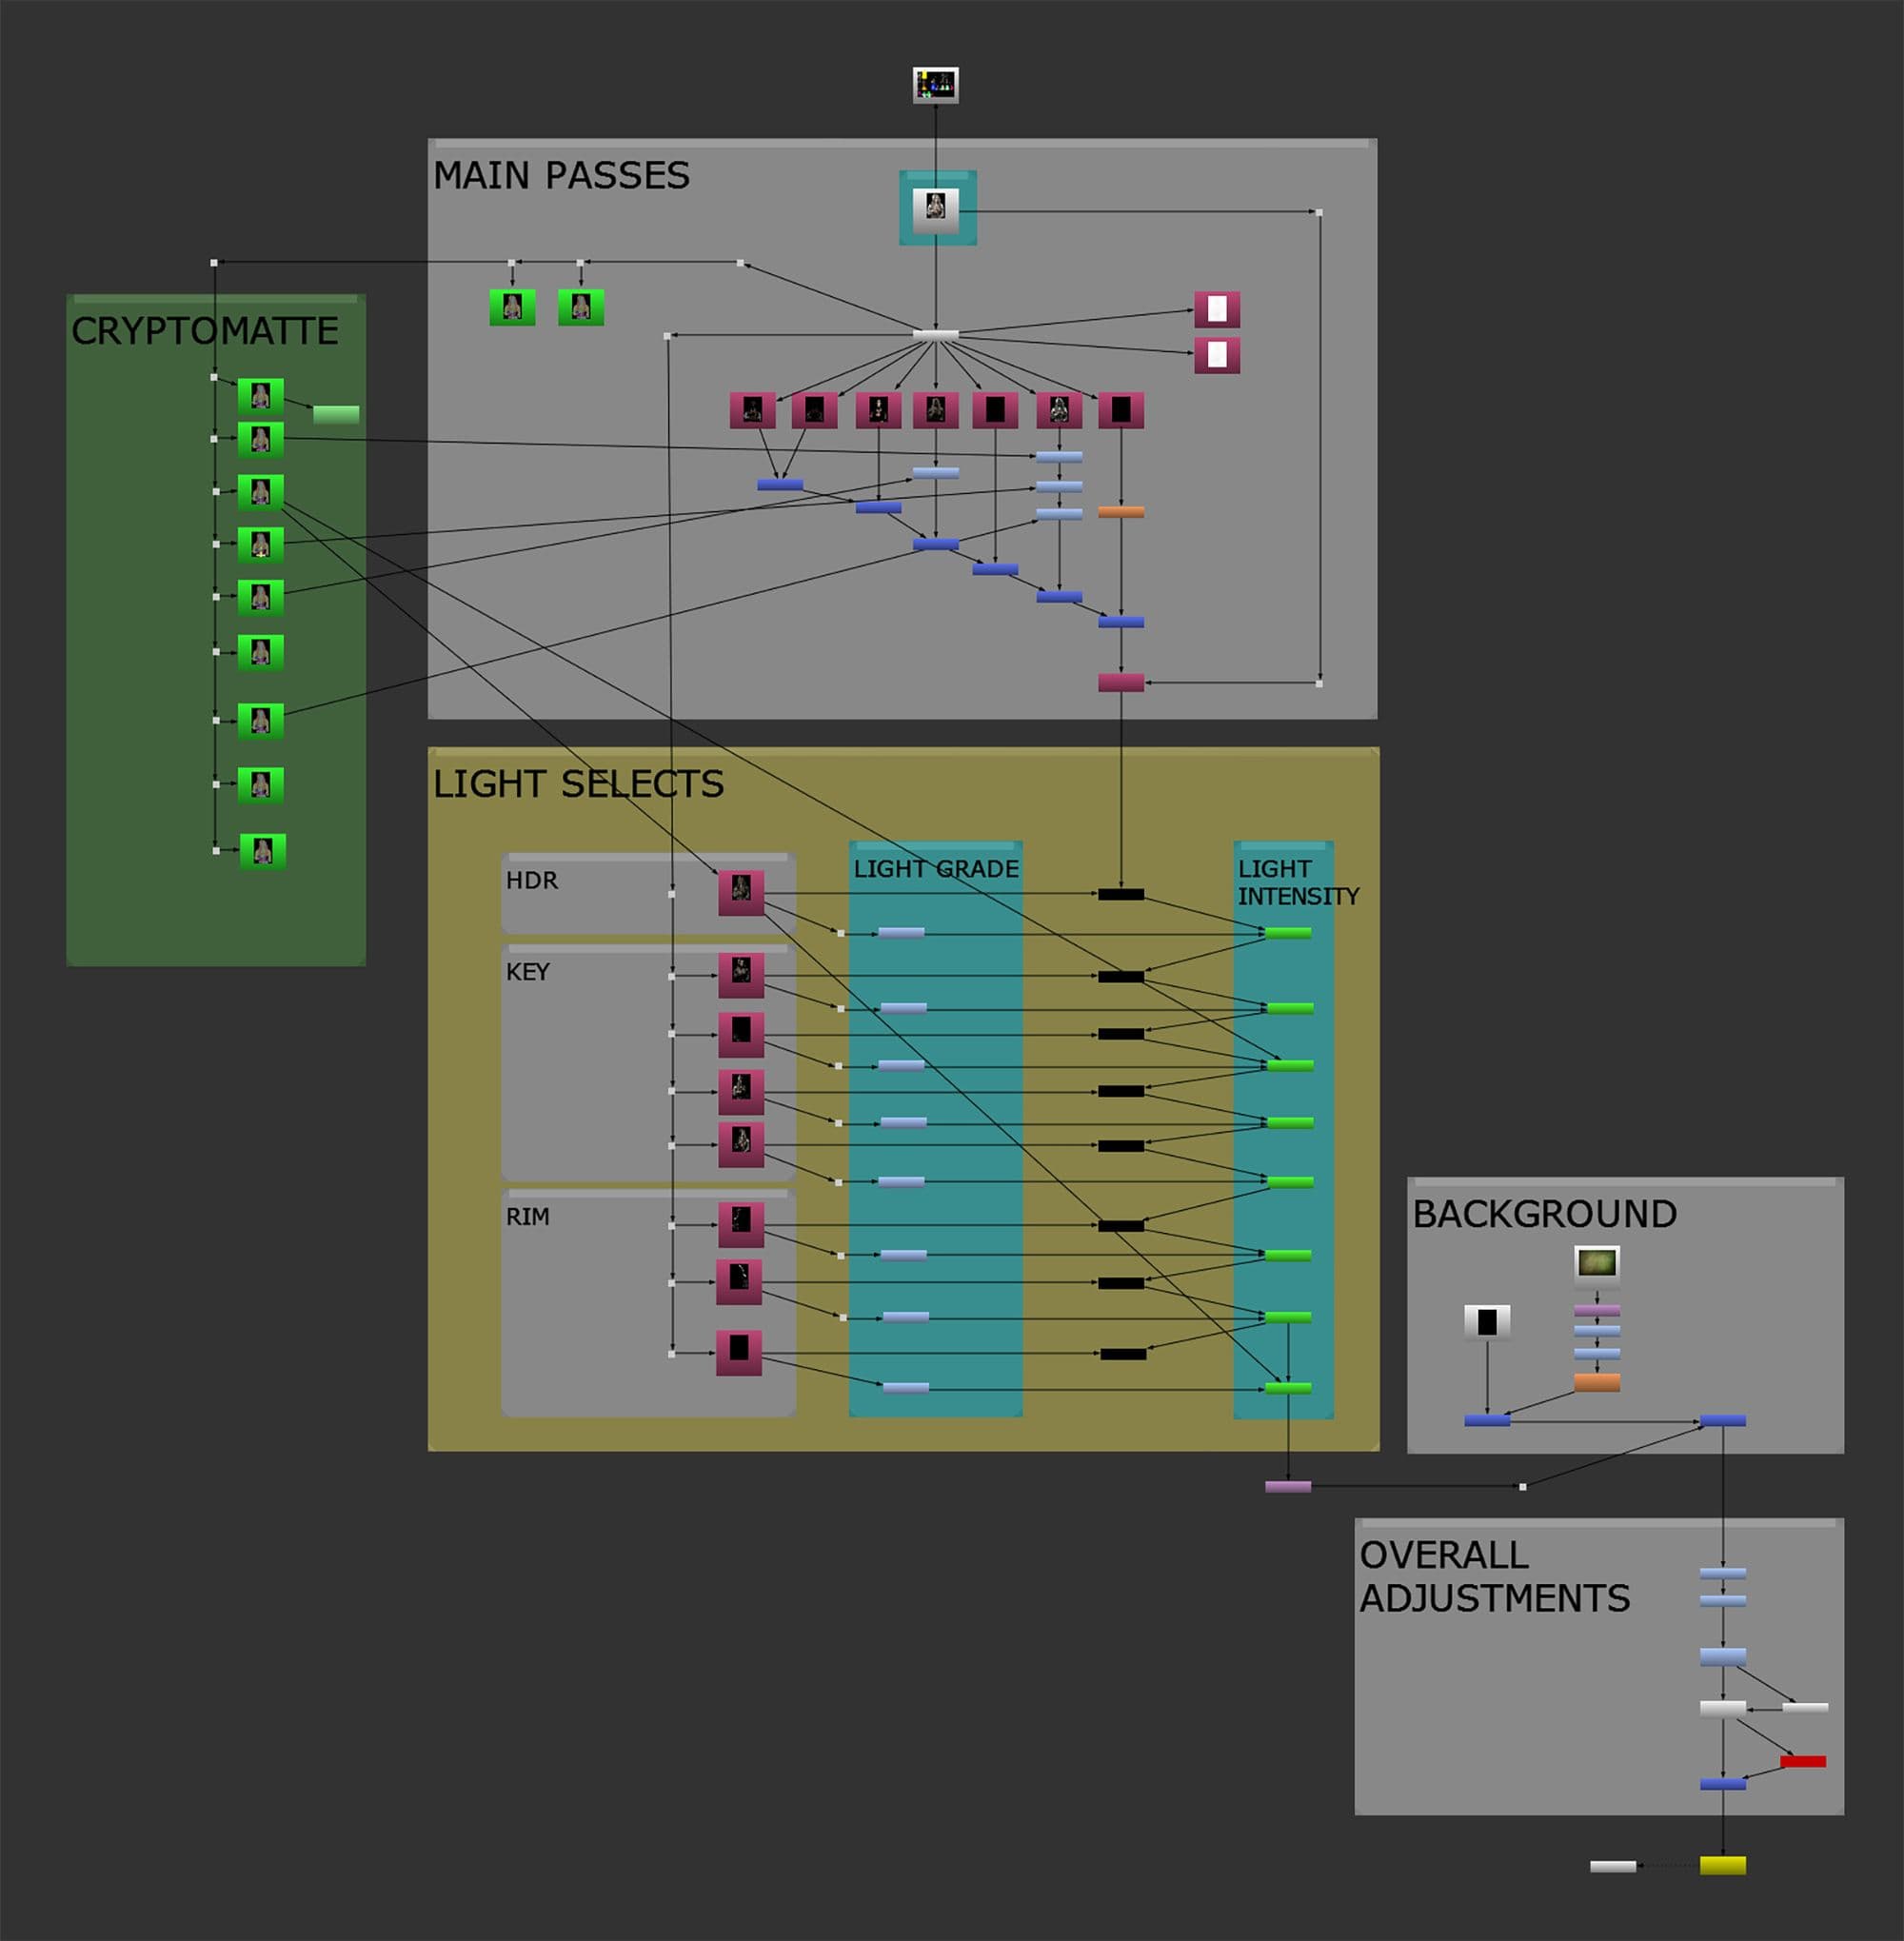
Lighting and Presentation
Instead of trying to get the perfect look straight out of my Vray render, I prefer to composite my scene and finalise the lighting in Nuke using Render Elements. One main thing I did was to create lights from various directions in Maya and assigned them to different Light Select groups. Even though I had a pretty standard lighting setup at the end, this gave me a lot of control and flexibility while I experimented with different lighting scenarios.
Thank you for taking the time and I hope you enjoyed reading Part I of this breakdown. I want to add that I do not always have everything planned out before I start a project. It often takes a bit of testing to get things to look the way I like. There is always something new to learn so take each project as a learning experience and don't be afraid to experiment with different techniques and workflows!
Please stay tuned for Part II if you are interested in learning more about the process of sculpting and grooming the dog.