Translating 2D Concept into 3D Portfolio Pieces for Film and Cinematics (Part II)
Fiona Ng walks us through the process of creating her latest project Countess and Dog, sharing her workflow and techniques in Character and Creature modeling, texturing, as well as grooming.
Fiona Ng walks us through the process of creating her latest project Countess and Dog, sharing her workflow and techniques in Character and Creature modeling, texturing, as well as grooming.
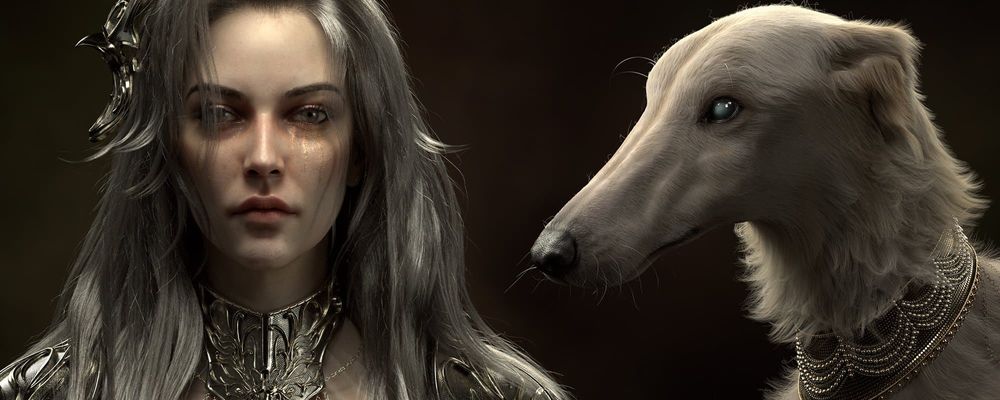
Welcome back to Part II of Translating 2D Concept into 3D Portfolio Pieces for Film and Cinematics. In the previous article, I covered my process of creating the Countess, a character based on Yi’s concept painting Weathered.
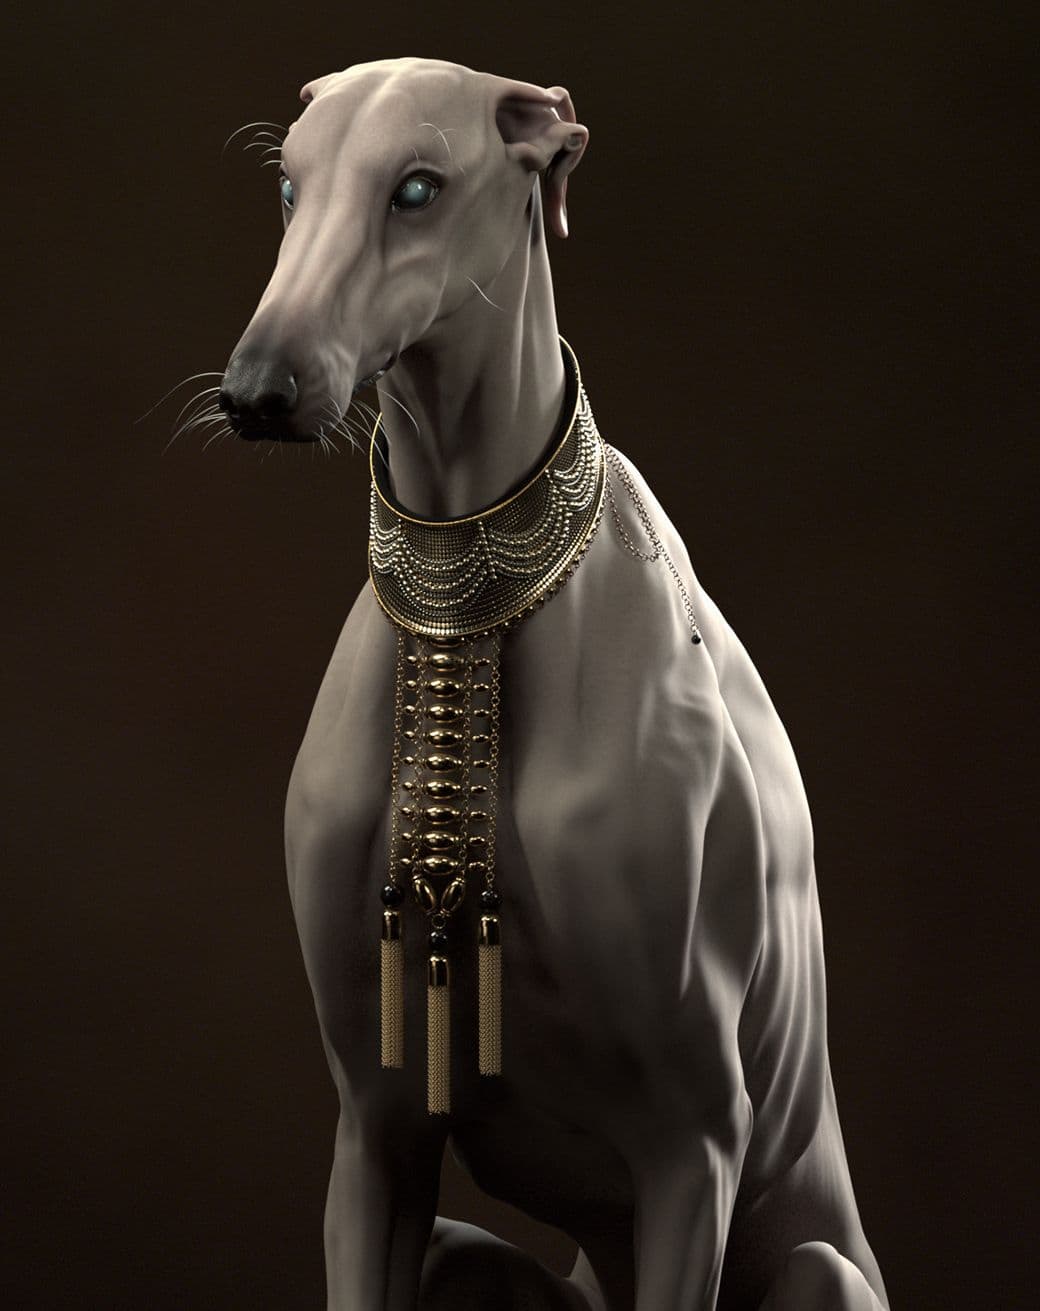
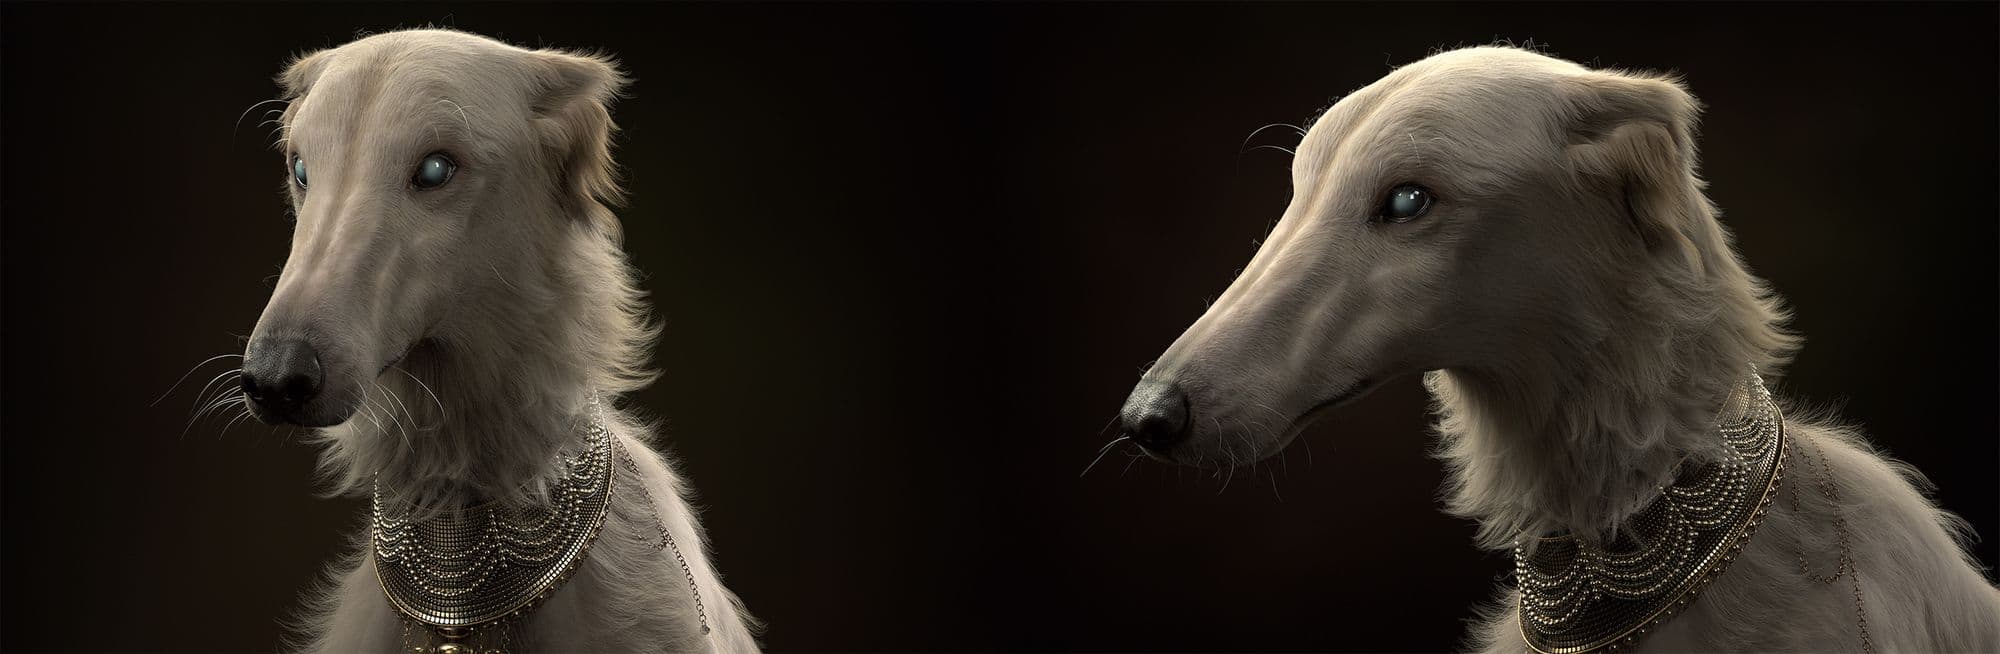
In Part II, I will walk through my workflow in making her companion, an old Borzoi hunting dog, sharing some of my techniques in modeling and grooming realistic creatures.
Part II: Dog
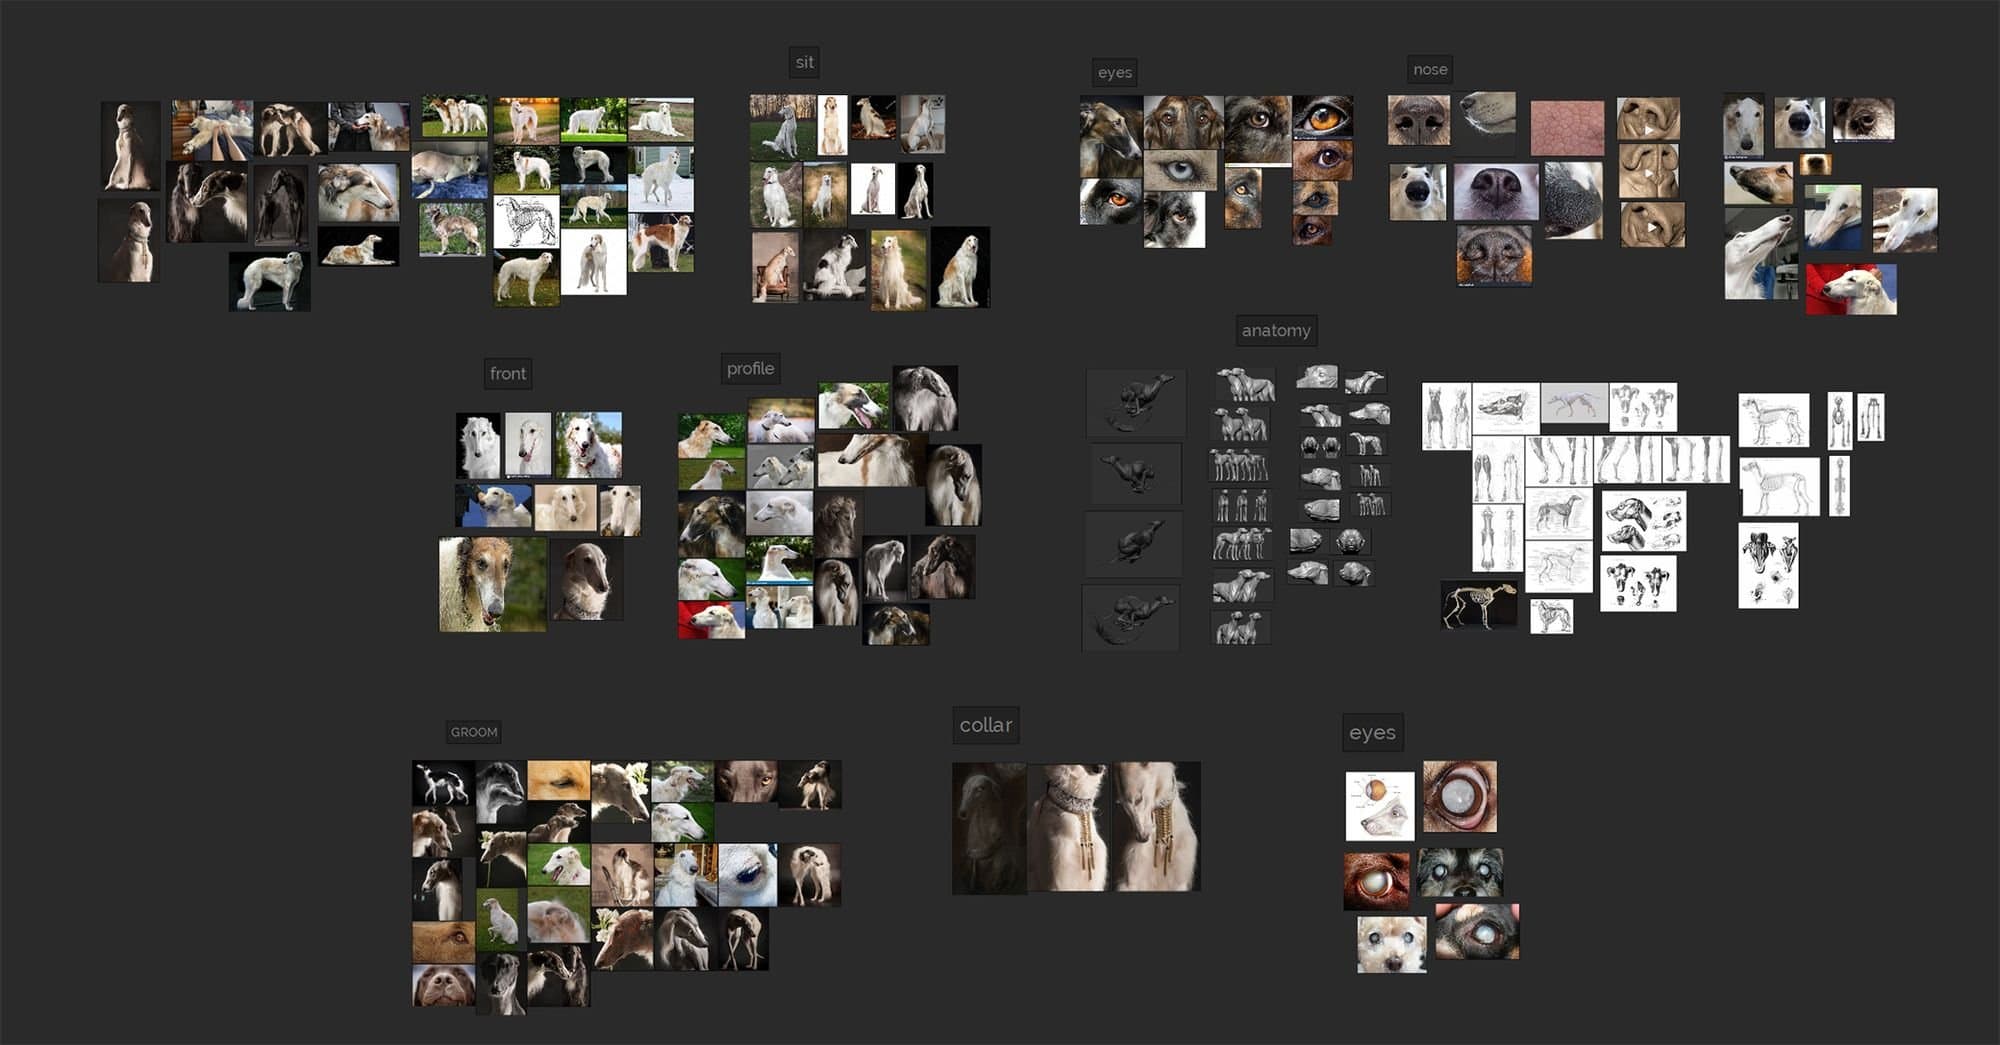
References
While gathering image references, I ran into some beautiful animal photography by Paul Croes. I decided to base my dog on one of his works as the Borzoi there has strong resemblance to the one in Yi’s concept. I also collected images of short hair breeds like Greyhounds to get a better understanding of the actual form and anatomy lying underneath the hair.
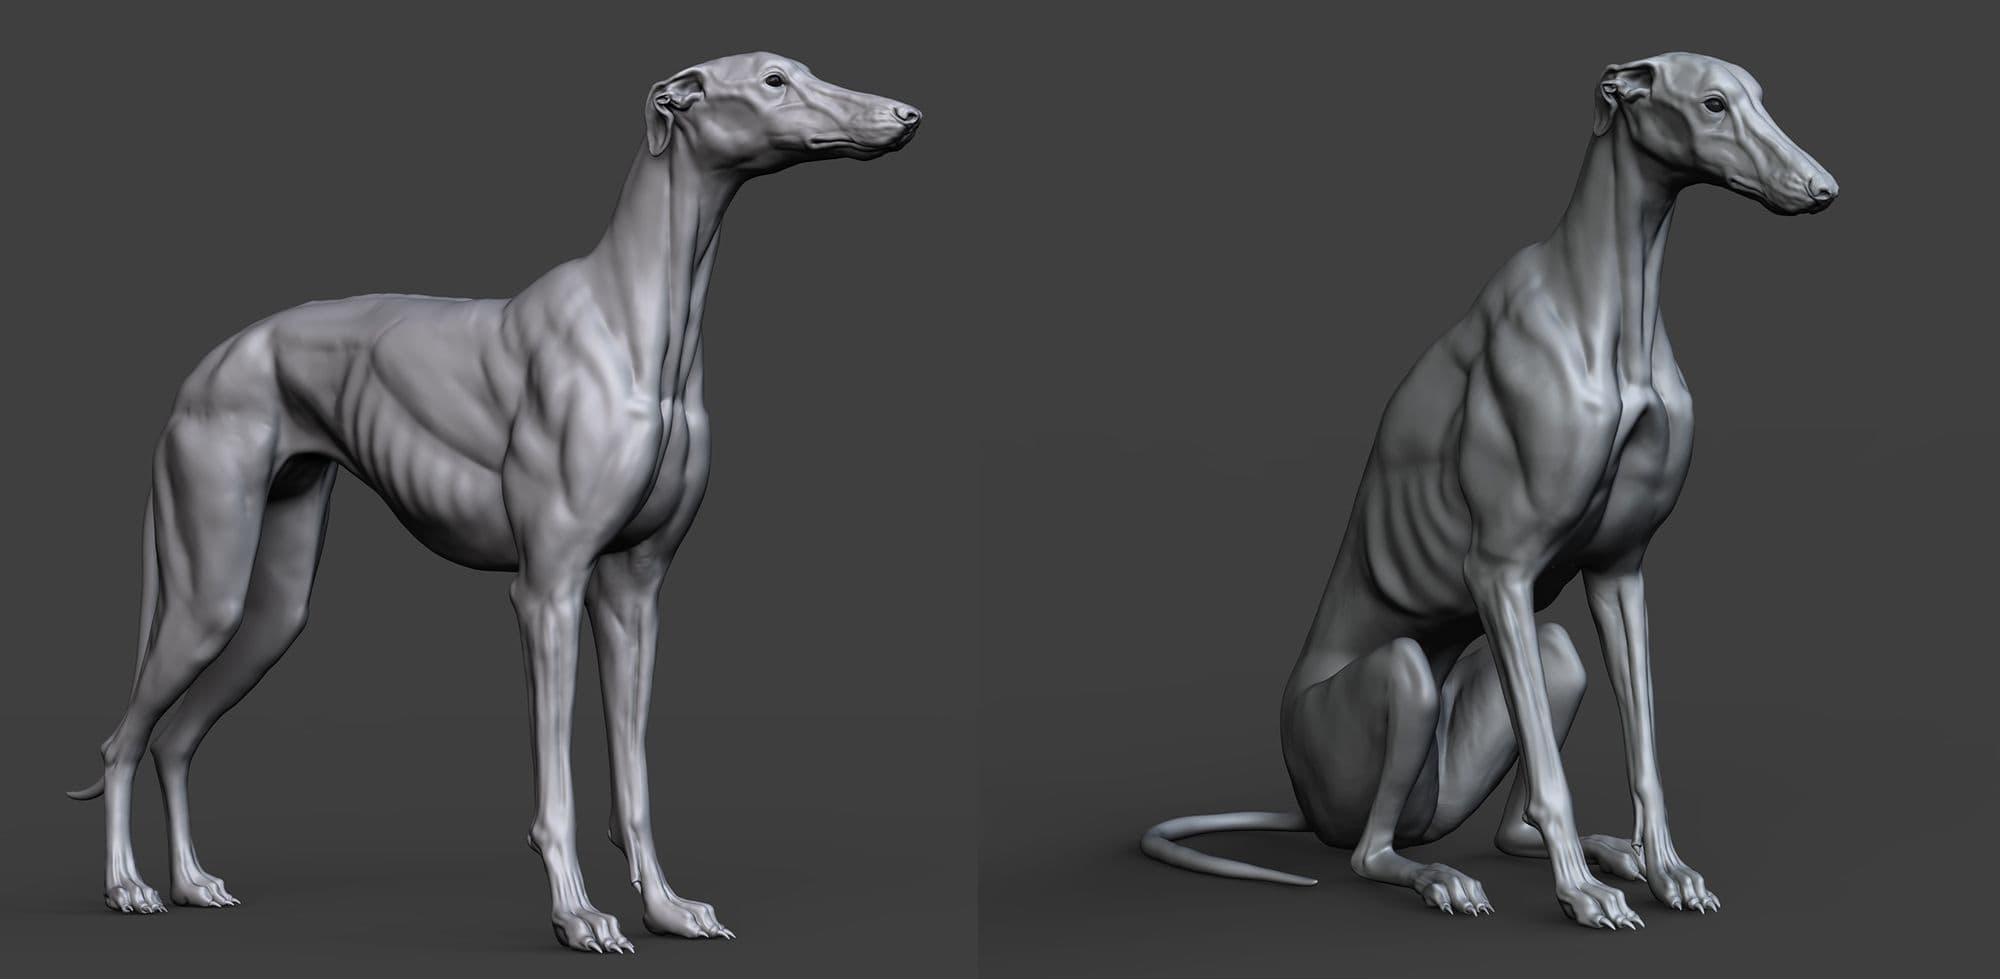
I started blocking the dog in a neutral standing pose with Zspheres in Zbrush, tracing over some anatomy references I imported through Spotlight to make sure the proportions were accurate to begin with. Since most parts of the dog would be covered in fur, I focused my time on getting the bony landmarks and facial muscles in place rather than sculpting skin folds and tertiary details that will not be seen and will make little impact on the directionality of the fur.
To keep things simple, I also posed the model before grooming as the dog in the concept is fairly symmetrical and it would only get more complicated if I were to do it after the fur was created. I did this the old fashion way, masking parts and rotating joints with Transpose tool.
I then separated the head, limbs, and tail into different Polygroups and did a quick Zremesher to retopologize the sculpt. ZremesherGuide brush was helpful in this step to give it a bit more control on the topology flow. I did not worry too much about perfecting edge loops as the dog was not planned to be animated. It is however important to still have clean topology and workable resolution in order for Xgen to work properly.
To project details back onto the mesh, I simply gave it a few subdivision levels, went back in time with the Undo History to set a restore point, and used Project History to bring the details back. Like the Countess, I exported the model at its lowest subdivision into Maya and spread the UVs into multiple UDIMs. I also prepared a scalp mesh for the groom, which is basically a duplicate of the mesh but with UVs rearranged into only one UV tile.
As mentioned in the previous article, Xgen does not support UDIM for its maps, so it is important to make sure all the UVs sit between 0-1 UV space. It is also always a good practice to lay them out as symmetrical as possible to save time texturing and painting maps.
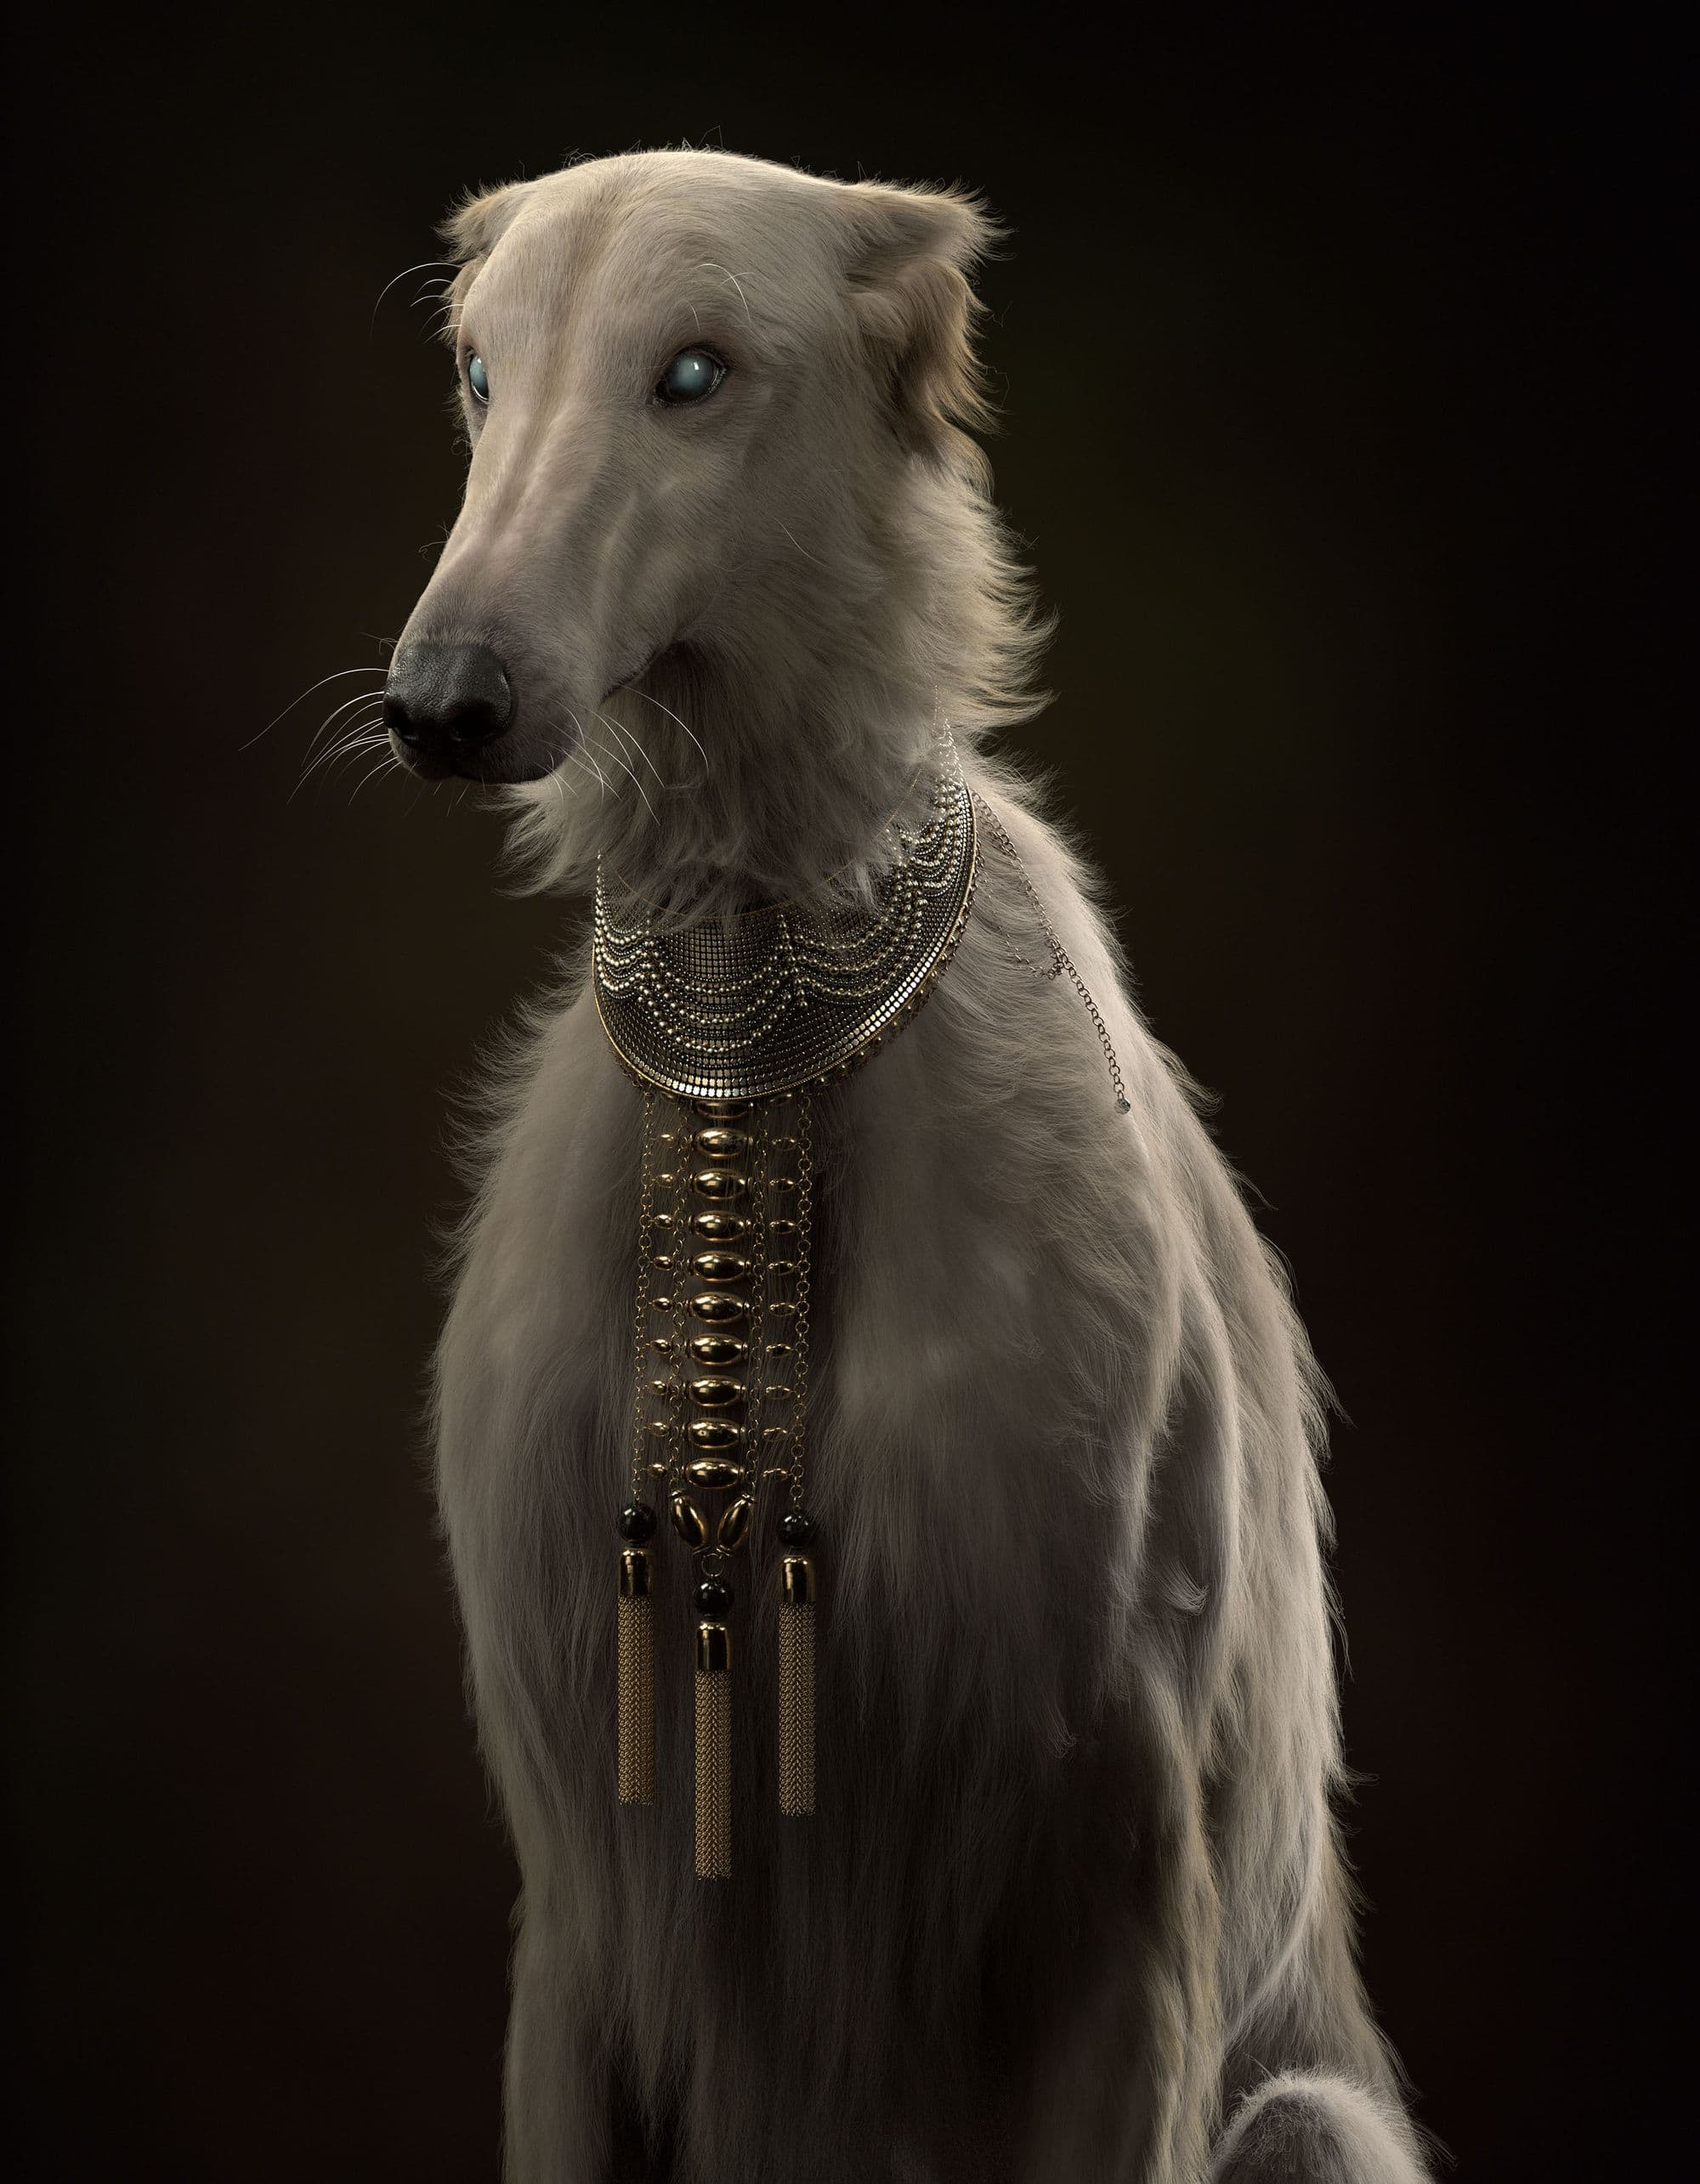
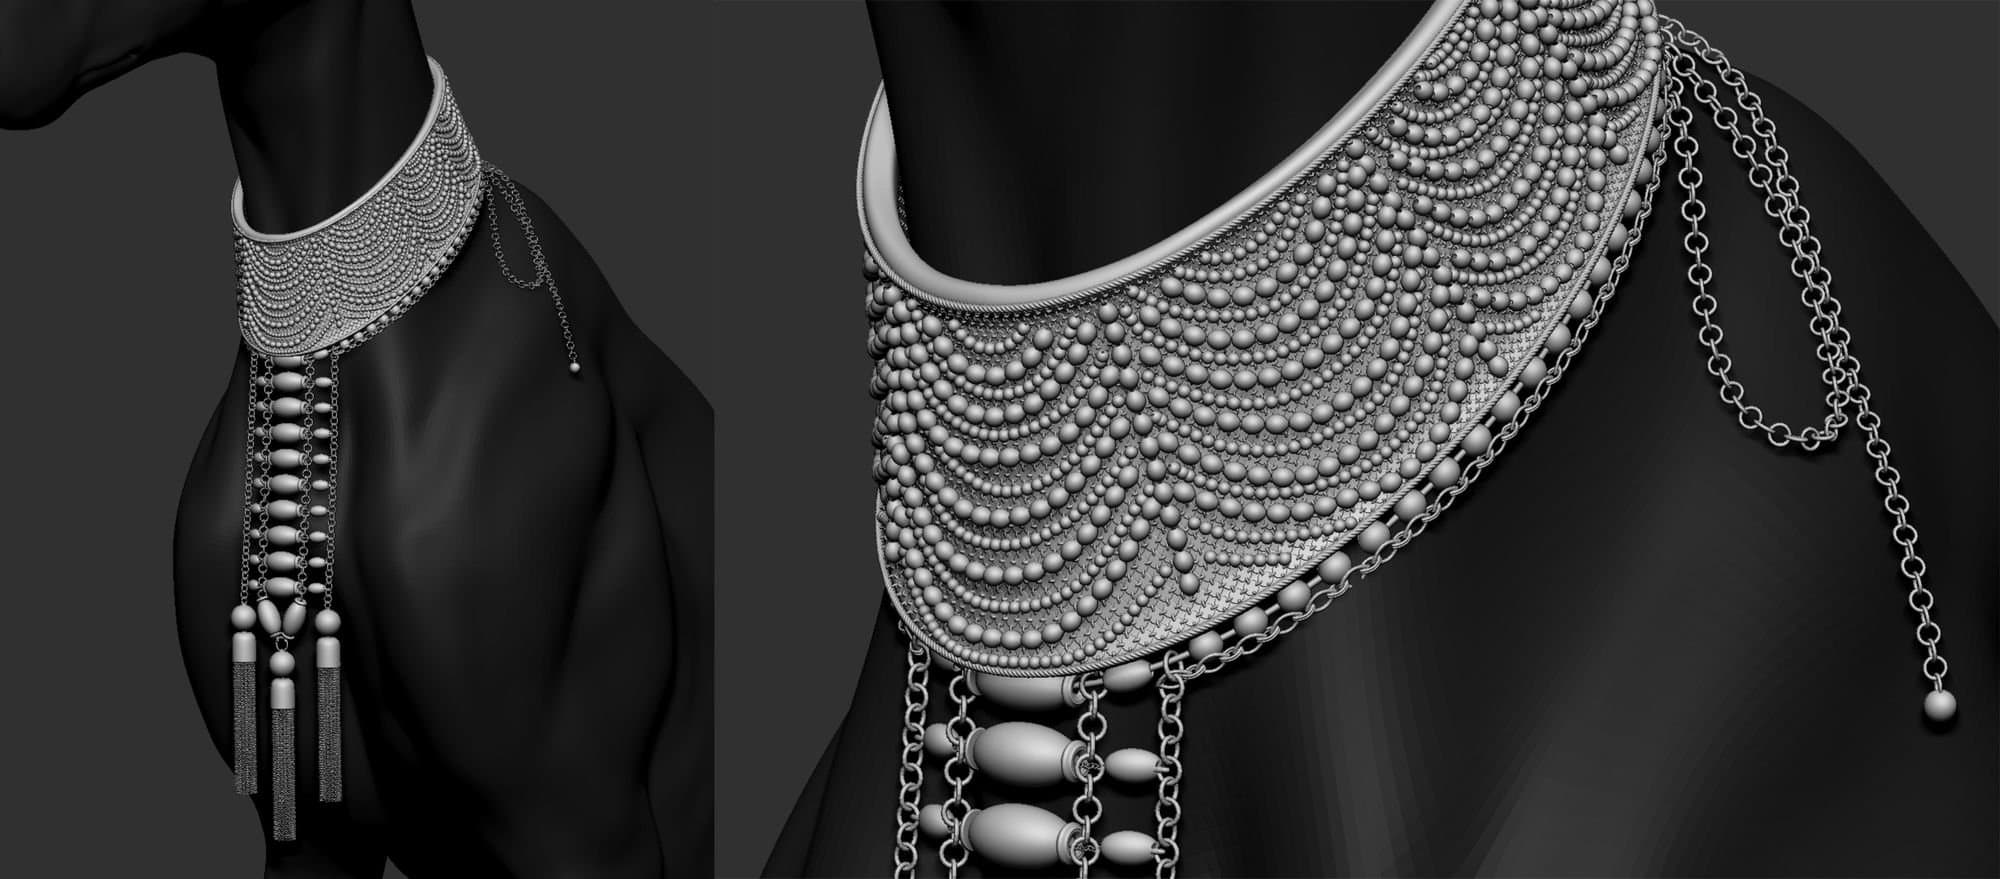
Modeling the Collar
Before moving into Maya for grooming, I spent some time modeling the collar as it would affect the way I place the guides. I first masked out the area where I wanted the collar to be and used Extract to get a simple geometry around the neck.
Enabling Curve Mode on custom made IMM brushes allowed me to create chains with any shapes. Instead of carefully tracing around the collar, I used Zmodeler to polygroup specific edge loops, Frame Mesh to extract curves by the polygroups, and clicked the curves to apply the IMM chain. I also used Dynamic Subdiv and MicroPoly to cover the entire surface with links. To finish off, I slightly nudged the individual beads and rings with Move Topological brush so they do not look too perfectly placed.
Texturing and Shading Skin and Eyes
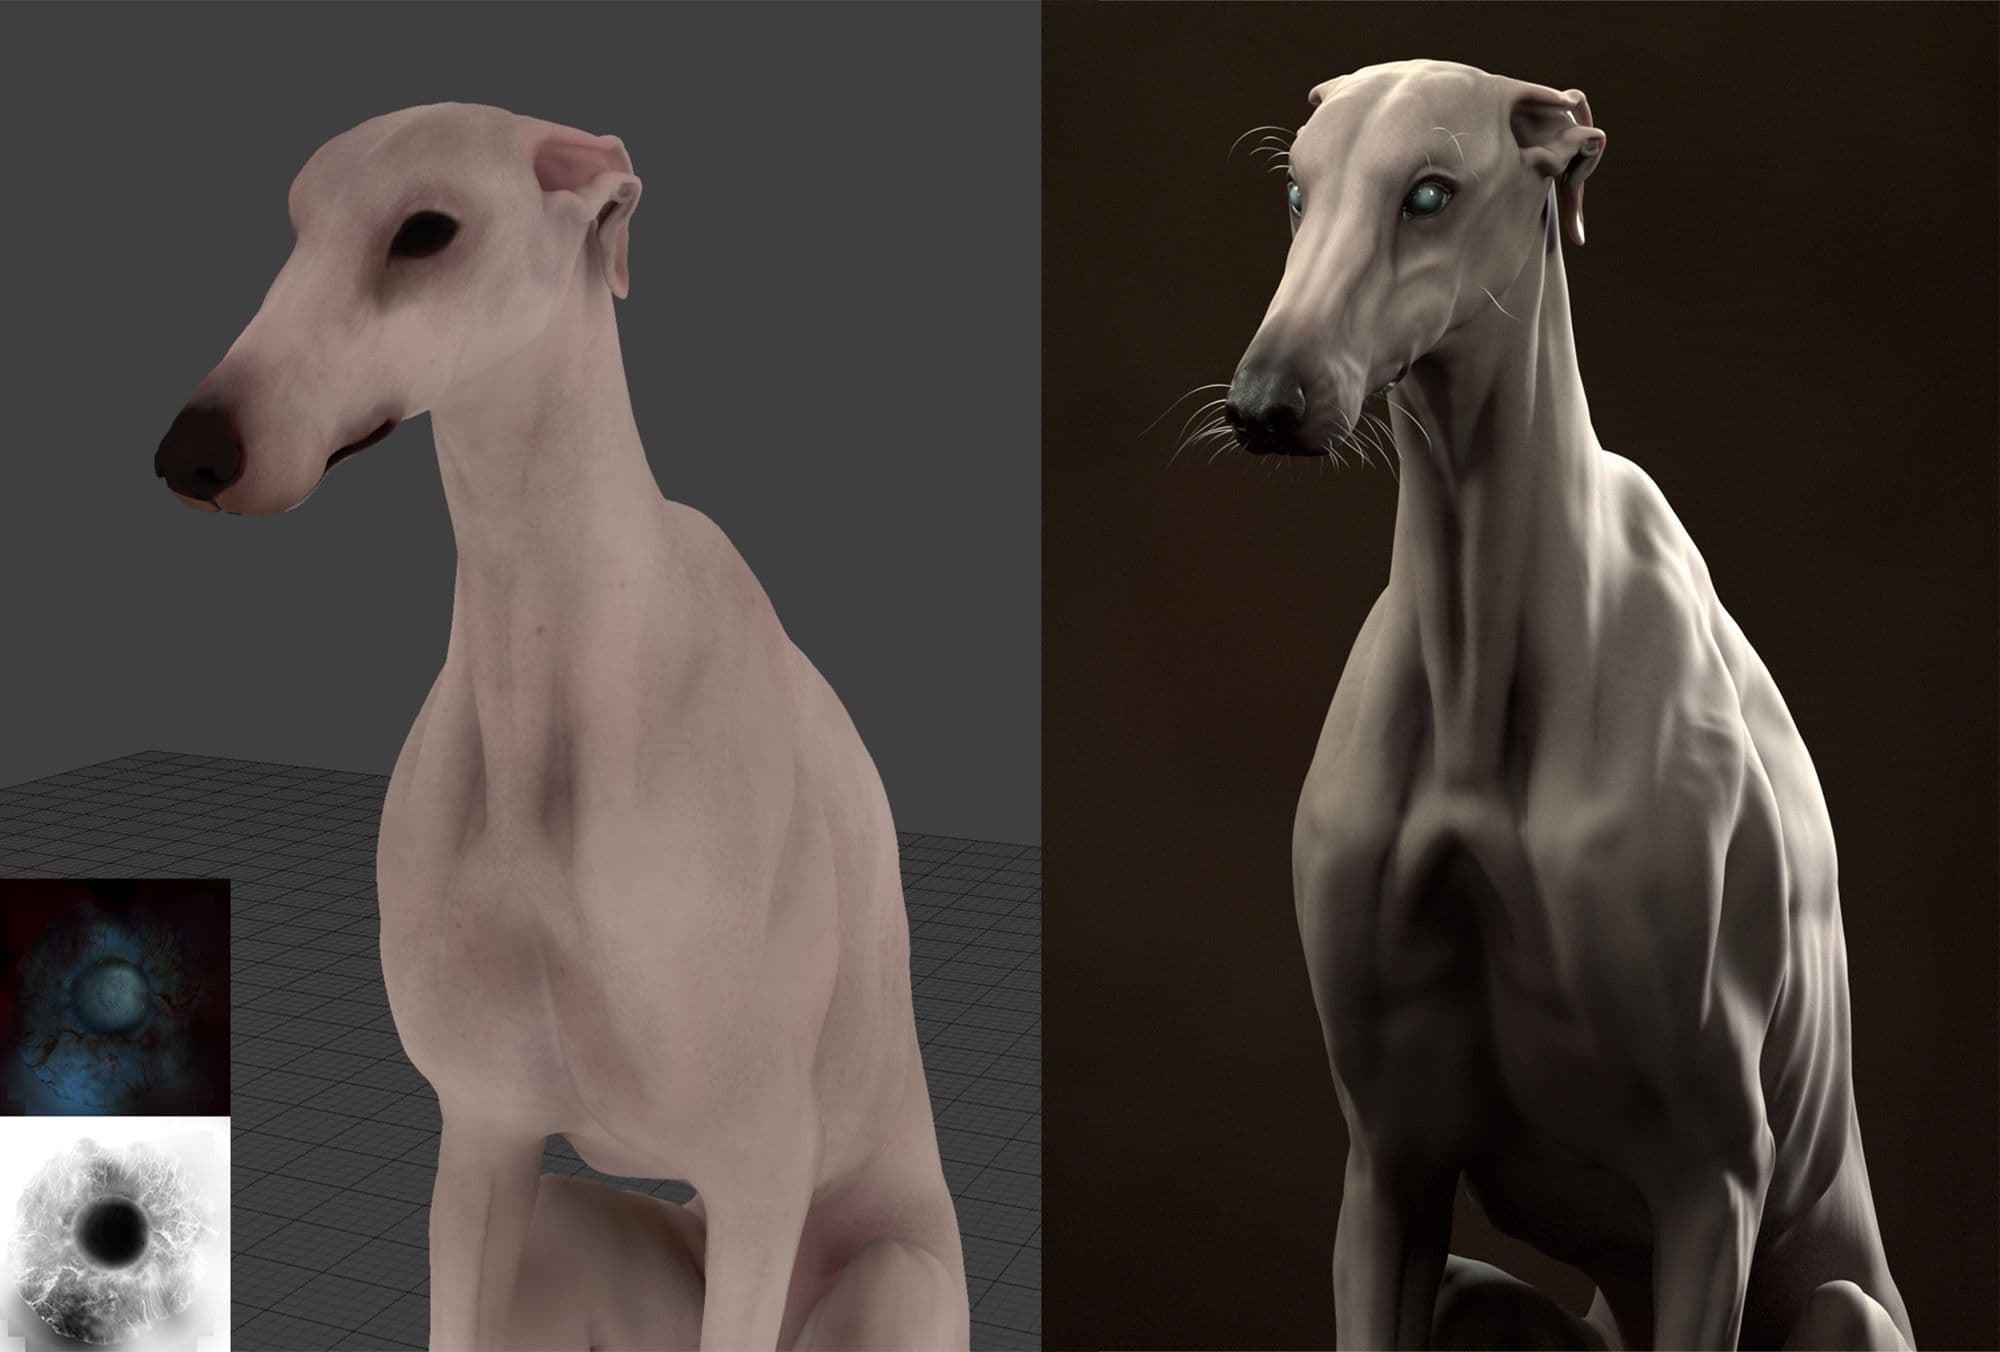
I kept the skin of the dog fairly simple as it is mostly covered with fur. I painted albedo and roughness maps in Mari and plugged them into a VrayAlSurface shader. For the albedo, the base was a tileable texture with procedural noises layered on top to create subtle patches and variation in tone whereas areas around the eyes, nose, and ears where hair was shorter were painted darker.
For the eyes, I used VrayAlSurface for the sclera, a refractive VrayMtl for the cornea, and VrayFastSSS for the iris. Sclera’s shader was blended onto cornea’s with a VrayBlendMtl, using a circular ramp as a mask to dial the amount of cataract.
Grooming with Xgen Core
Now we are finally ready for some grooming! First of all, it is crucial to set up a Maya project as Xgen relies on very specific file structure and naming system for it to work. By default it creates a new folder in the project directory when you start your first description. All corresponding grooming data, attributes and maps are then generated and stored within subfolders. Without the correct paths and names, Xgen may not be able to save or load properly.
I planned four separate Xgen descriptions for the dog: head, body, whiskers, and eye lashes. Instead of having multiple scalp meshes like I did for the Countess, I assigned all of them onto the same mesh through different sets of face selections. I also skipped the neck area that was covered by the collar to avoid unnecessary collisions.
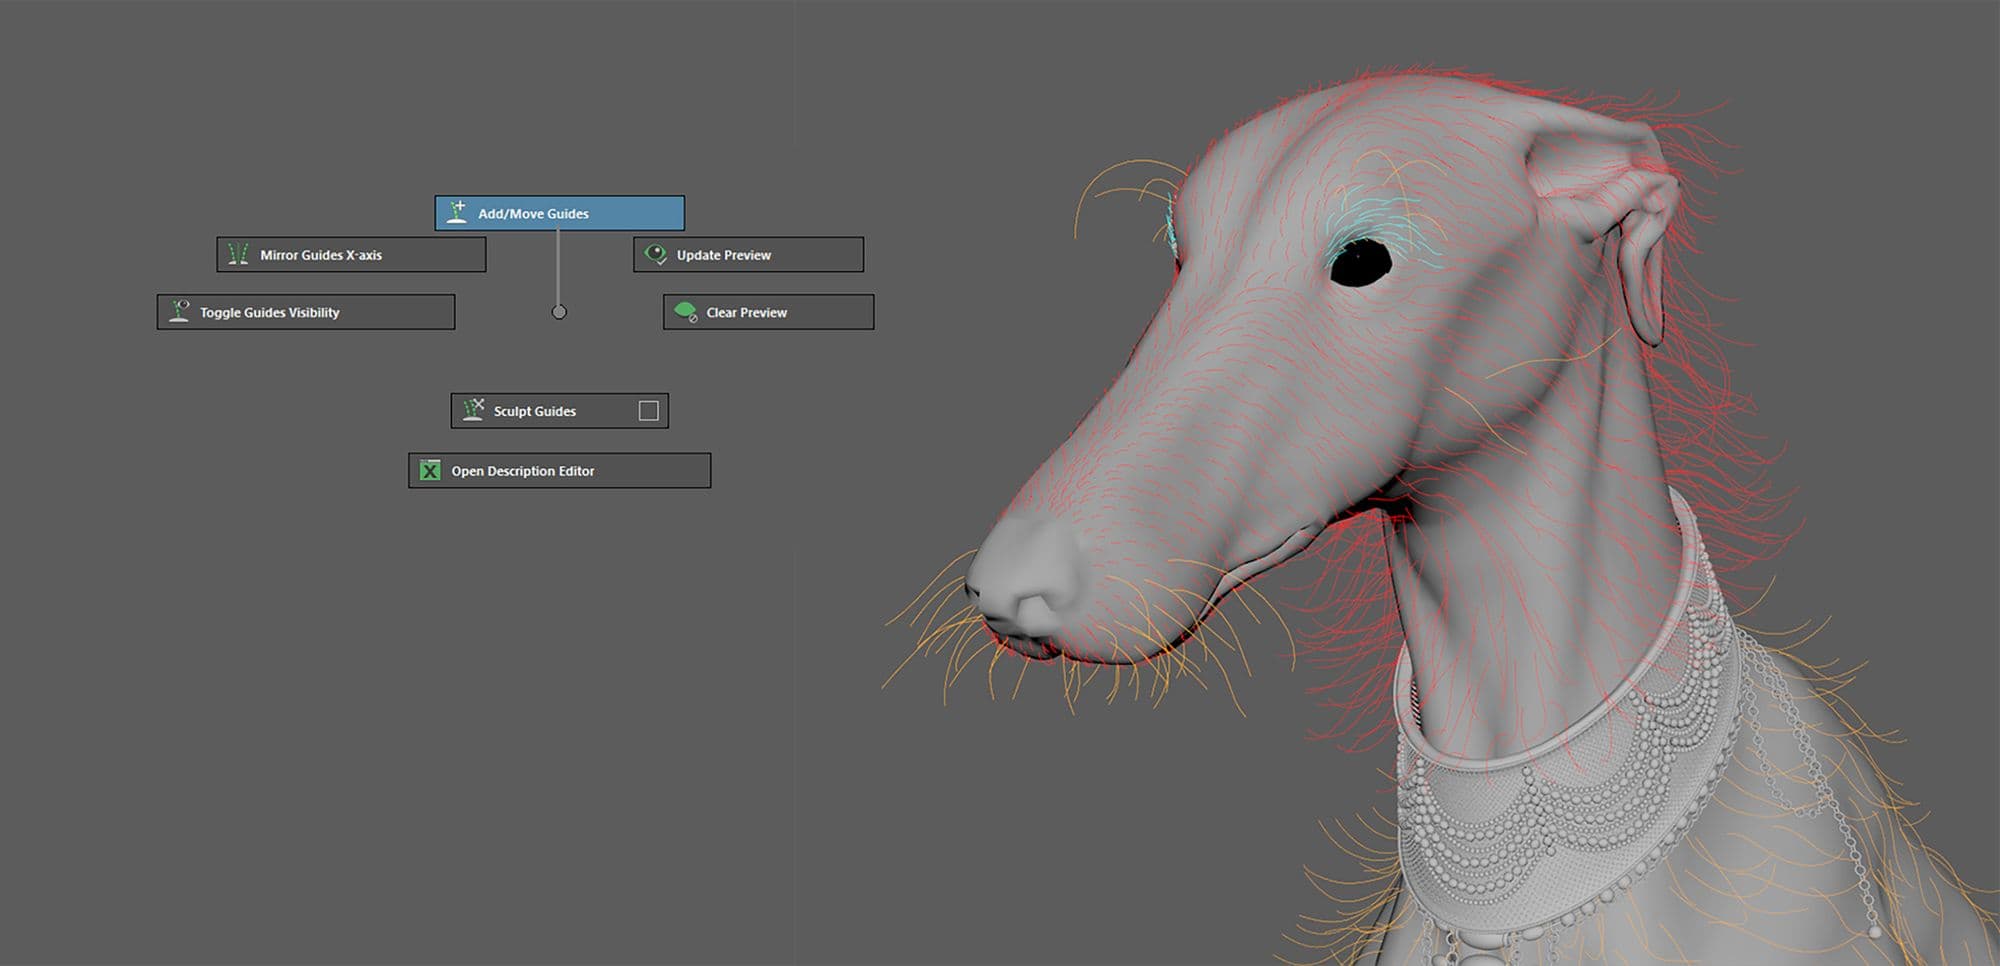
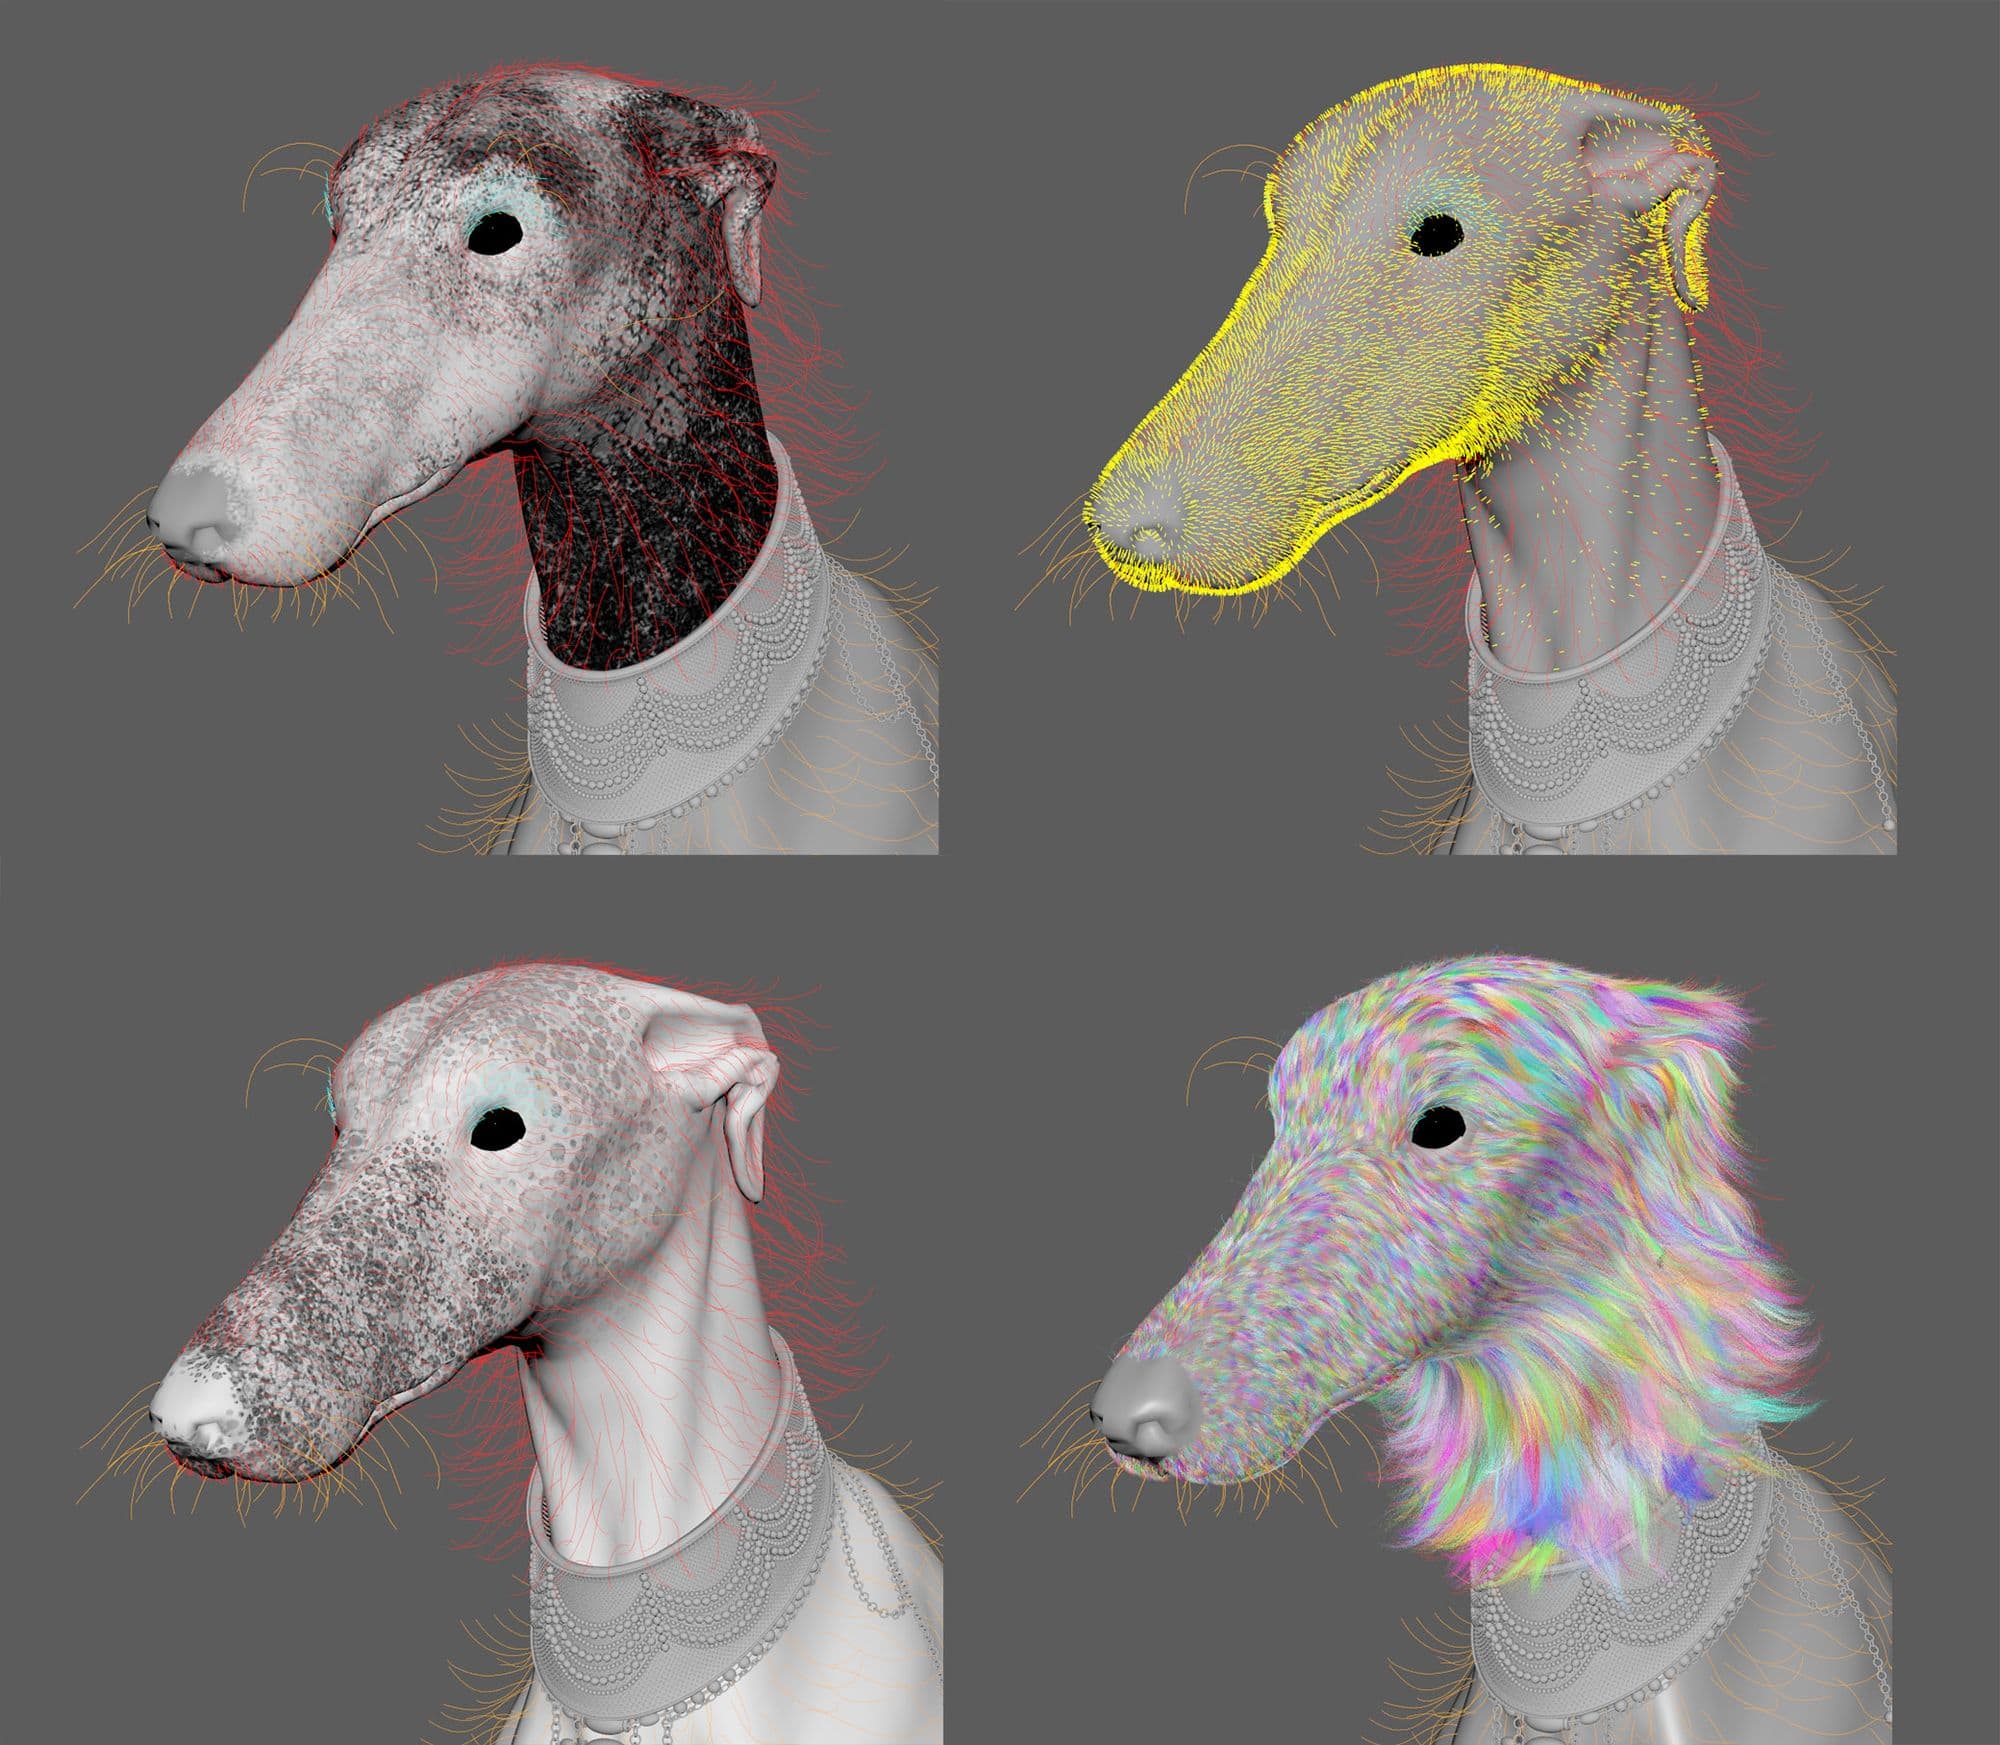
Guides and clumps are in my opinion the most important aspects of creating a nice groom.
The process of placing and shaping guides one by one can be rather time consuming and repetitive. I find this process more enjoyable and yields better results using a pen than a mouse and I like setting up shortcuts and marking menus in order to work smoother and faster.
Before I started, I drew over some of my image references to get a better sense of directionality and flow of the hair. I made sure to keep the distance between each guide consistent while I placed them, as well as to avoid intersections and sudden change in length and direction. After the first pass was done, I set up density masks and region maps to preview the fur. I tend to spend more time tweaking the guides, maps, and values to make sure the base is good enough before adding any modifiers.
I usually only stick with Clumping, Noise, and Cut when it comes to modifiers. For human characters, I would stack two to three layers of Clumping together, starting with bigger clumps that follow the guides, then breaking them up with randomly placed, smaller and denser clumps.
For animal fur, getting more specific with clumping density and placement would help add realism. Like the head of the dog, the region around the nose with shorter hair would have less and much smaller clumps compared to the neck area, so as around the eyes. This could easily be achieved by painting masks, which gives a lot more control than just dialing values and tweaking scale graphs.
Noise modifier helps breakup clumps, add strays, and define the texture of the hair. I started with a low frequency noise and added a couple higher frequency ones to get a more natural look. Randomization function is a very basic expression that I use often when working with Xgen modifiers. It makes a huge difference just by randomizing between two numbers rather than using one absolute value. Multiplying the function by $cLength can also take into account the length of individual strands for the effect to scale up or down accordingly. Xgen also comes with some sample expressions that can be quite handy as well. At the end of the modifiers list, I added a Cut to give some variation in length, making the tips sharper and more natural looking.
Even though I always follow the same logic when adding modifiers, it still took quite a bit of back-and-forth refining masks and tweaking values to get the result I was happy with. Unlike placing guides, which was pretty straightforward, modifiers require a lot more experimentation and art direction.
For the shading part of the fur, I started with VrayHairNextMtl and the white fur preset which has a fair bit of transparency in it. To use a texture file that was painted outside of Maya, I first added root_color to the custom shader parameter found under Xgen’s Preview/Output tab and created a placeholder ptex map.
I then located the file on my drive and replaced it with my own ptex painted in Mari. The shader will not read the file until you attach a VrayHairSampler node and connect the Out Color to the shader’s Diffuse Color.
I hope you find something helpful in this breakdown and make sure to check out Part I if you haven’t already!
Also big thanks to The Rookies for the opportunity to share my work.