Storytelling With 3D Environments: Creating Immersive Scenes
Lightbox Academy student, Laura Suonpera Lozano, shares how she created an immersive scene with 3D, with hopes to inspire you to tell your own story through CG Environment modeling and lighting.
Lightbox Academy student, Laura Suonpera Lozano, shares how she created an immersive scene with 3D, with hopes to inspire you to tell your own story through CG Environment modeling and lighting.
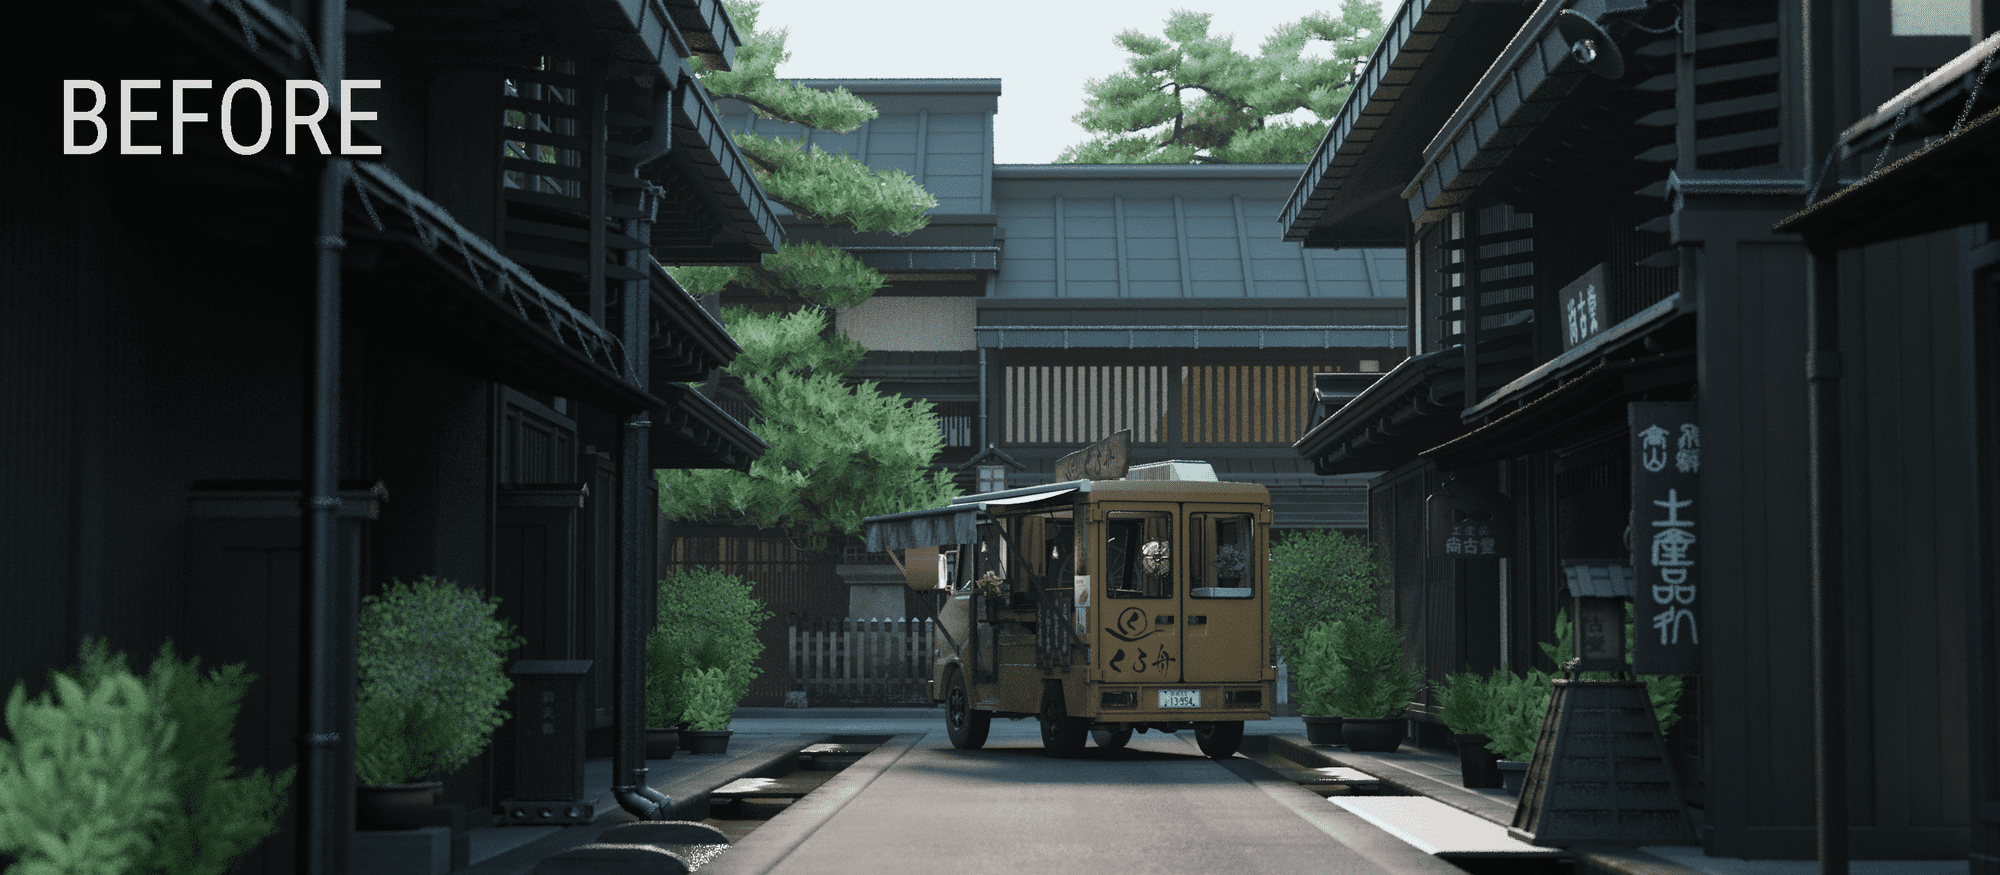
The idea behind this project was to create an environment that would let me play with the lighting and try to make it as immersive as I could. Weeks before starting this project I watched a documentary about Japan’s architecture and fell in love with its villages, so choosing one of the most iconic streets in Takayama as the setting was almost immediate and motivated me to start working.
I also wanted to create a Takoyaki food truck to practice my patch-modeling skills and fill the street with some environmental storytelling. I’ve always wanted to have a food truck in my portfolio, so this was the perfect excuse to make it and match it with the street’s aesthetic.
The first thing that came to my mind about planning this project was that it was bigger than anything I've created before (and I wanted to have it finished in less than two months!), so dividing it in smaller parts and making the creative process as efficient as I could, was essential.
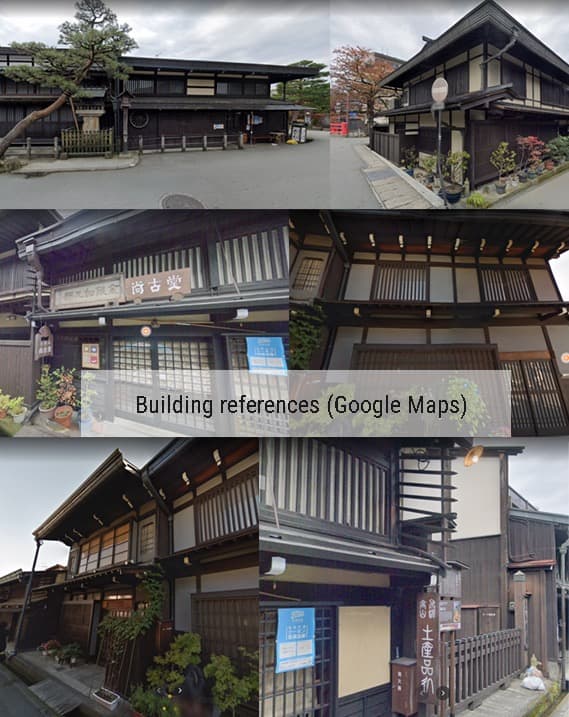
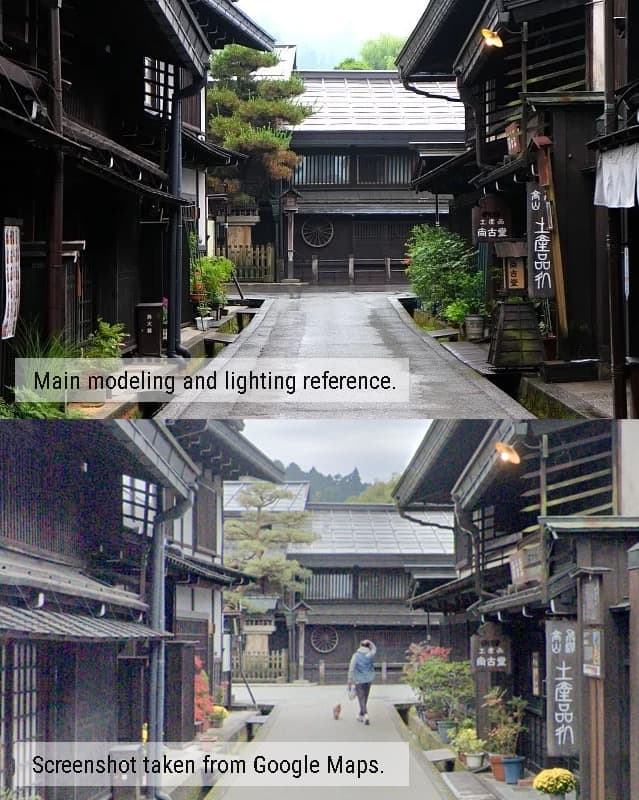
For the village references, I used a mix between the ones I found in tourism websites, documentaries and screenshots, that I took visiting the street in google maps myself.
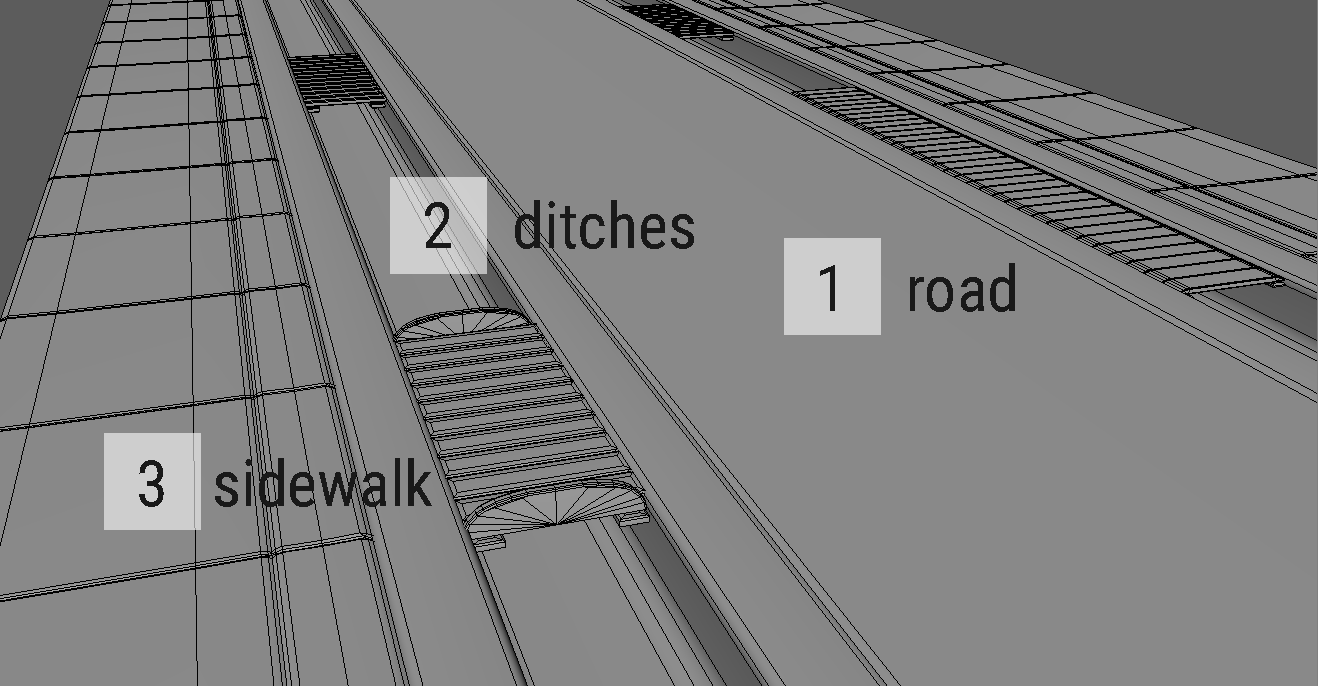
The street is composed of six different buildings that share some parts of their architecture, so I decided to use a modular modeling technique to create them. The road, ditches and sidewalks are also modular.
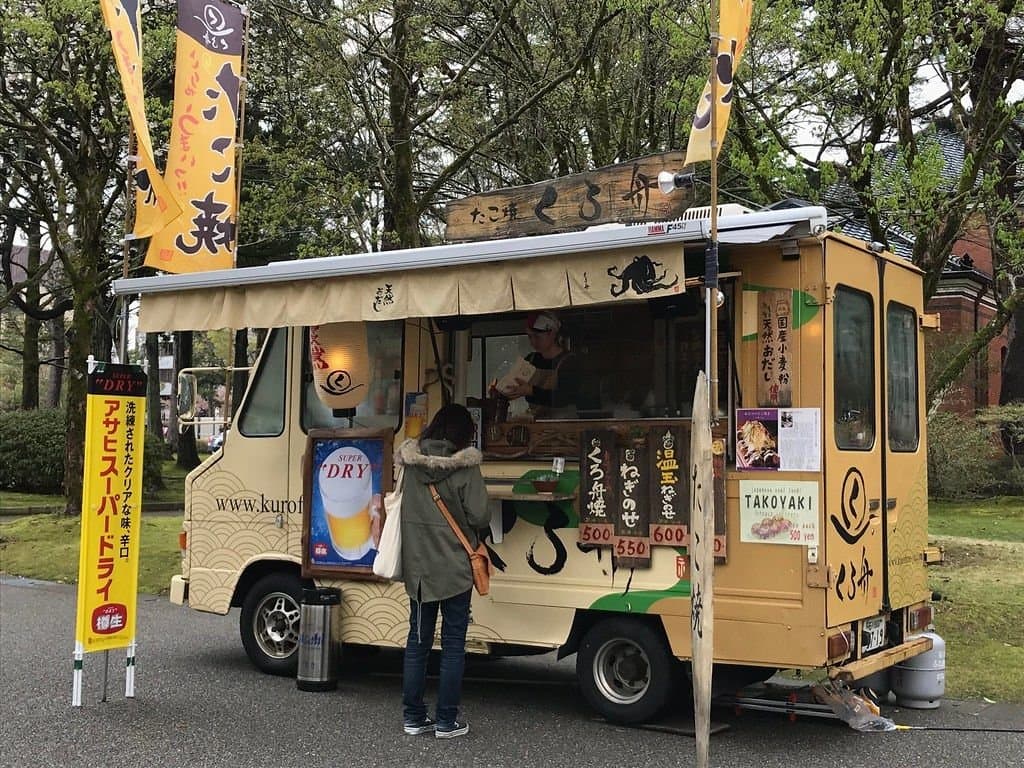
There were not that many Takoyaki Food Truck references and I needed one that matched the street’s colour palette, so I decided to use one of the food-trucks from the Kurofune Japanese Restaurant as my main reference since it had the vibe I wanted to go for.
Modeling the street
My main goal was to make the street look as similar as I could to the real one in Takayama, so before I started modeling it in detail, I created a block-out made of simple cubes and a basic humanoid model to make sure the proportions of my street matched the real one. Some of the references I used had people walking on the street and it helped a lot.
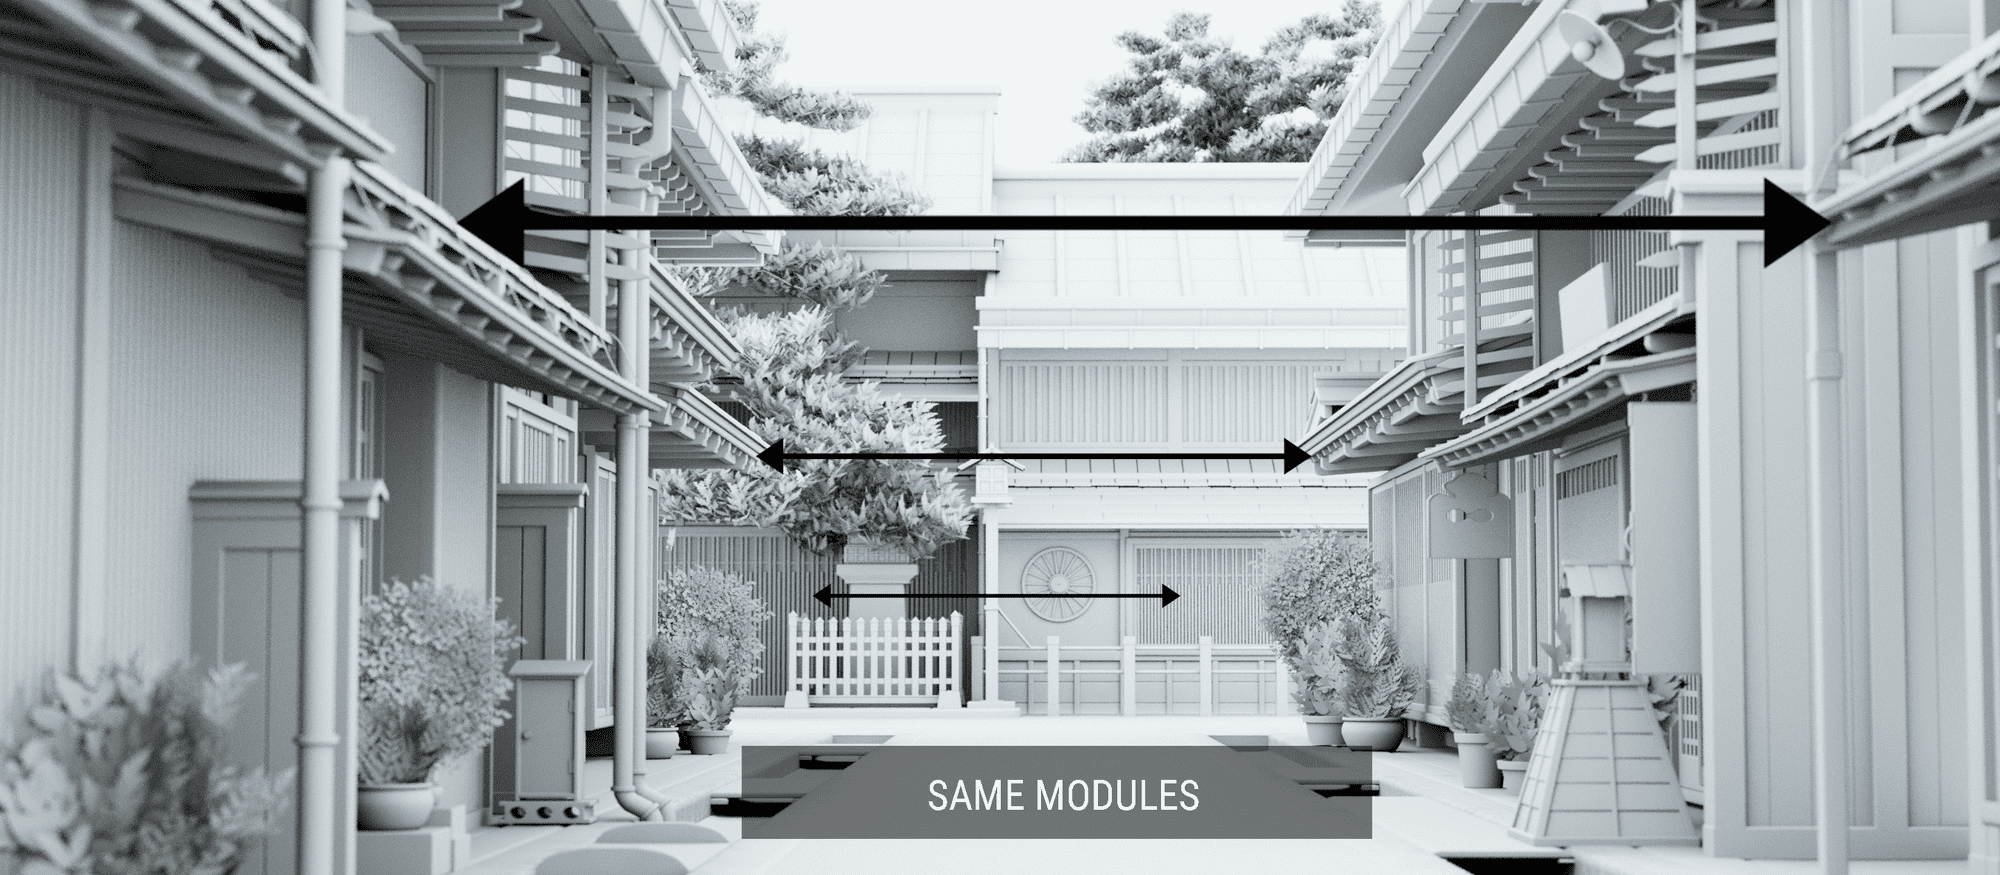
The street is made of different modules, and those modules are meant to be repeated so I tried to optimise the geometry and use the minimal number of polygons I needed to give them a nice shape, that way they could be used to create more buildings and the scene would be scalable.
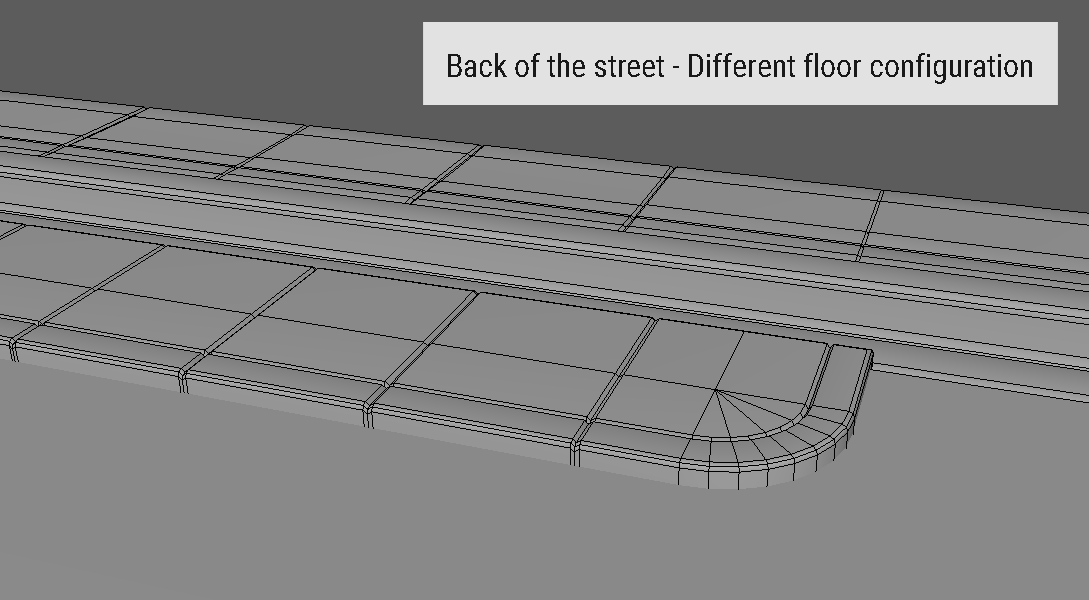
The first thing I modeled was the floor, it consisted of three modules that could be attached to each other and create different street configurations.
I modeled the buildings one by one. The first ones were the hardest because I had to create all their modules from scratch but once the modules were finished, I could use them in the following buildings with just a few modifications.
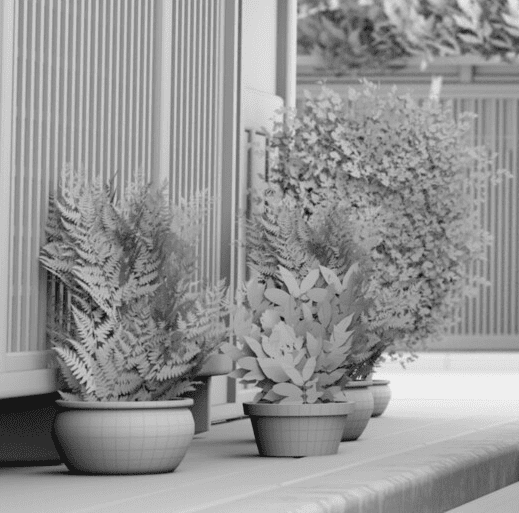
All the props that appear in the street were modeled using the box modeling technique. I made the trees and the plants using realistic leave atlases projected on planes with opacity maps.
Modeling the Takoyaki Food Truck
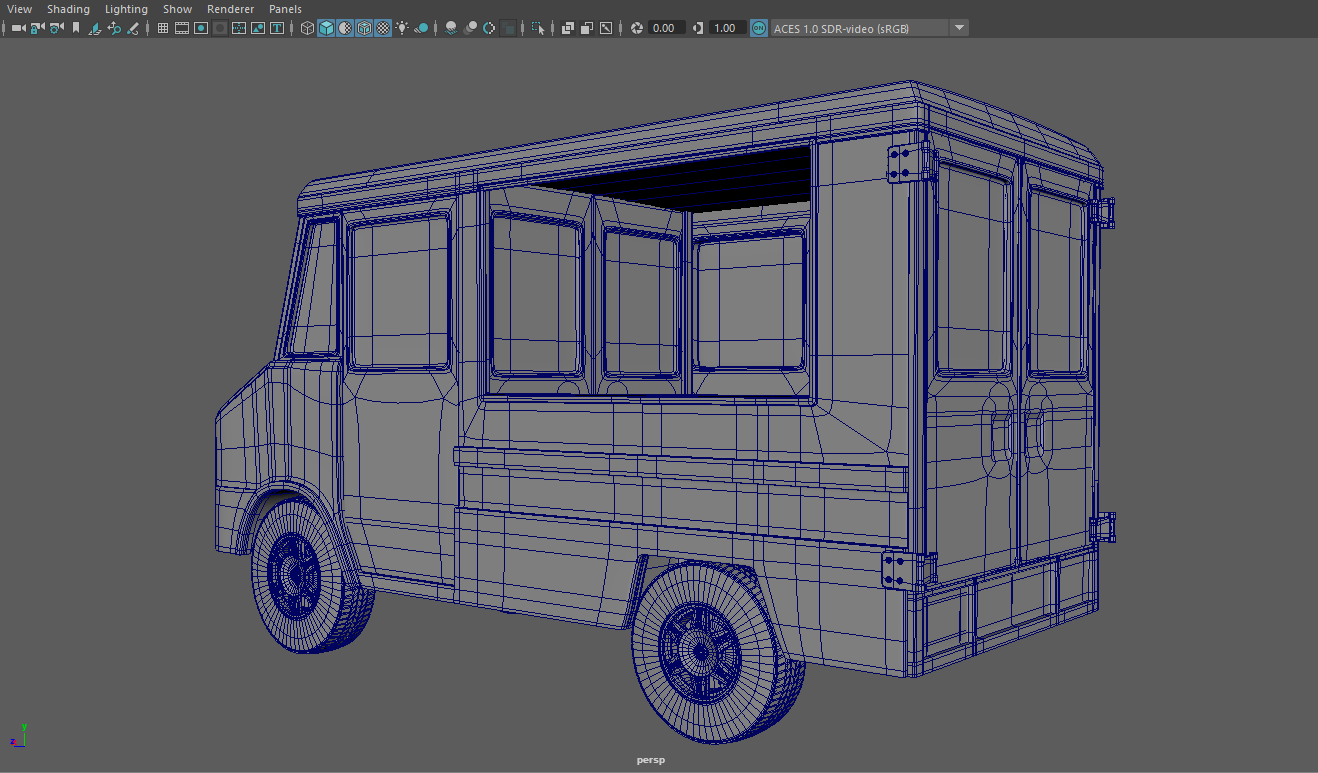
The food truck exterior was modeled using a patch modeling technique. I couldn’t find blueprints for the exact car that appeared on the reference, so I used ones from a similar model (Chevrolet P30) but there were disparities, so I edited them a little to make them look like the original car.
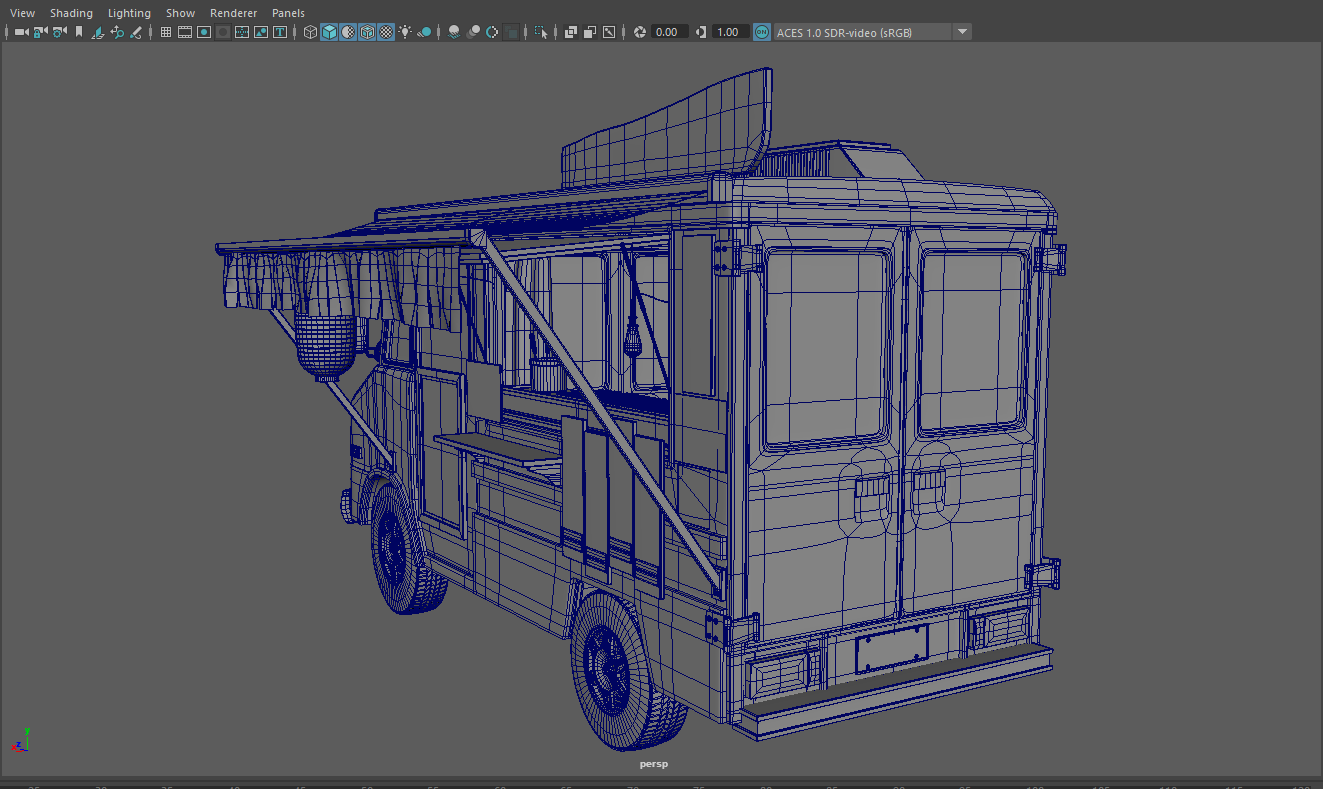
Once the truck's structure was finished, I started modeling the details to make it look like a real food truck. The reference had lots of detailing, so I made all the wheels, interior and exterior props with box modeling. I sculpted the fabric from the awning and the curtains with the maya sculpting tools to make them look a little more realistic.
Since the car I used in the blueprint was not Japanese, I changed details such as the plate and the driver’s seat to make it accurate.
Texturing and lighting the scene
Texturing and lighting everything was the part I enjoyed the most because it brought life to the street.
I chose a more saturated colour palette compared to the real-life scenario. The street is in an old village, so I wanted to give that feeling too; there is moss around the ditches and most of the objects have dirt or rust on their surface.
The ditches are filled with water and the bridges are a little bit wet. This was a very interesting part of the texture process because I had to create a mask in the bridge’s roughness map to attain that effect.
The water that’s inside the ditches is not physically simulated, I created it with a plane (a little bit bent on its sides) with a water material I created myself in maya. I didn’t want it to look like a perfect smooth surface, so I created a normal map from a real-life water image and applied it to the plane.
Texturing the food truck was the hardest part because it had lots of details and I had to create and project a lot of textures to make the posters. For its base colour, I decided to leave out some of the details from the reference picture because I wanted it to be more subtle in the final render, so I created a yellow Arnold car shader and modified it with masks I created in Substance 3D Painter to make it look old and more integrated in the environment.
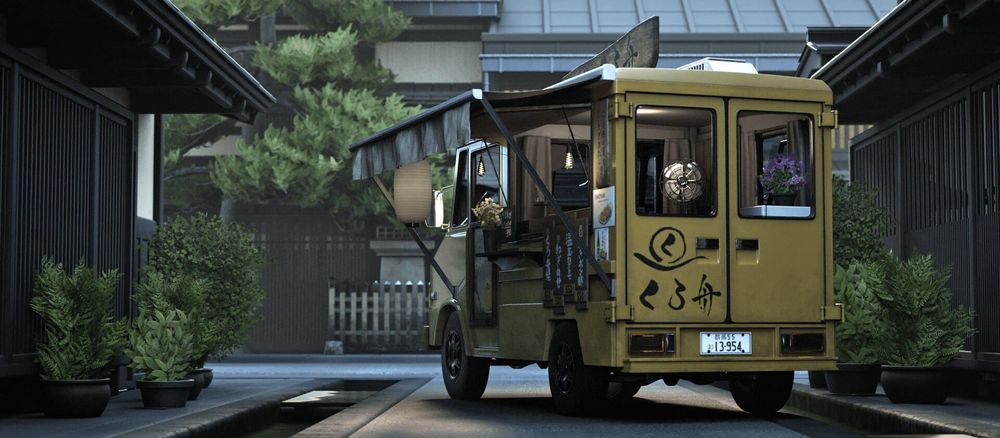
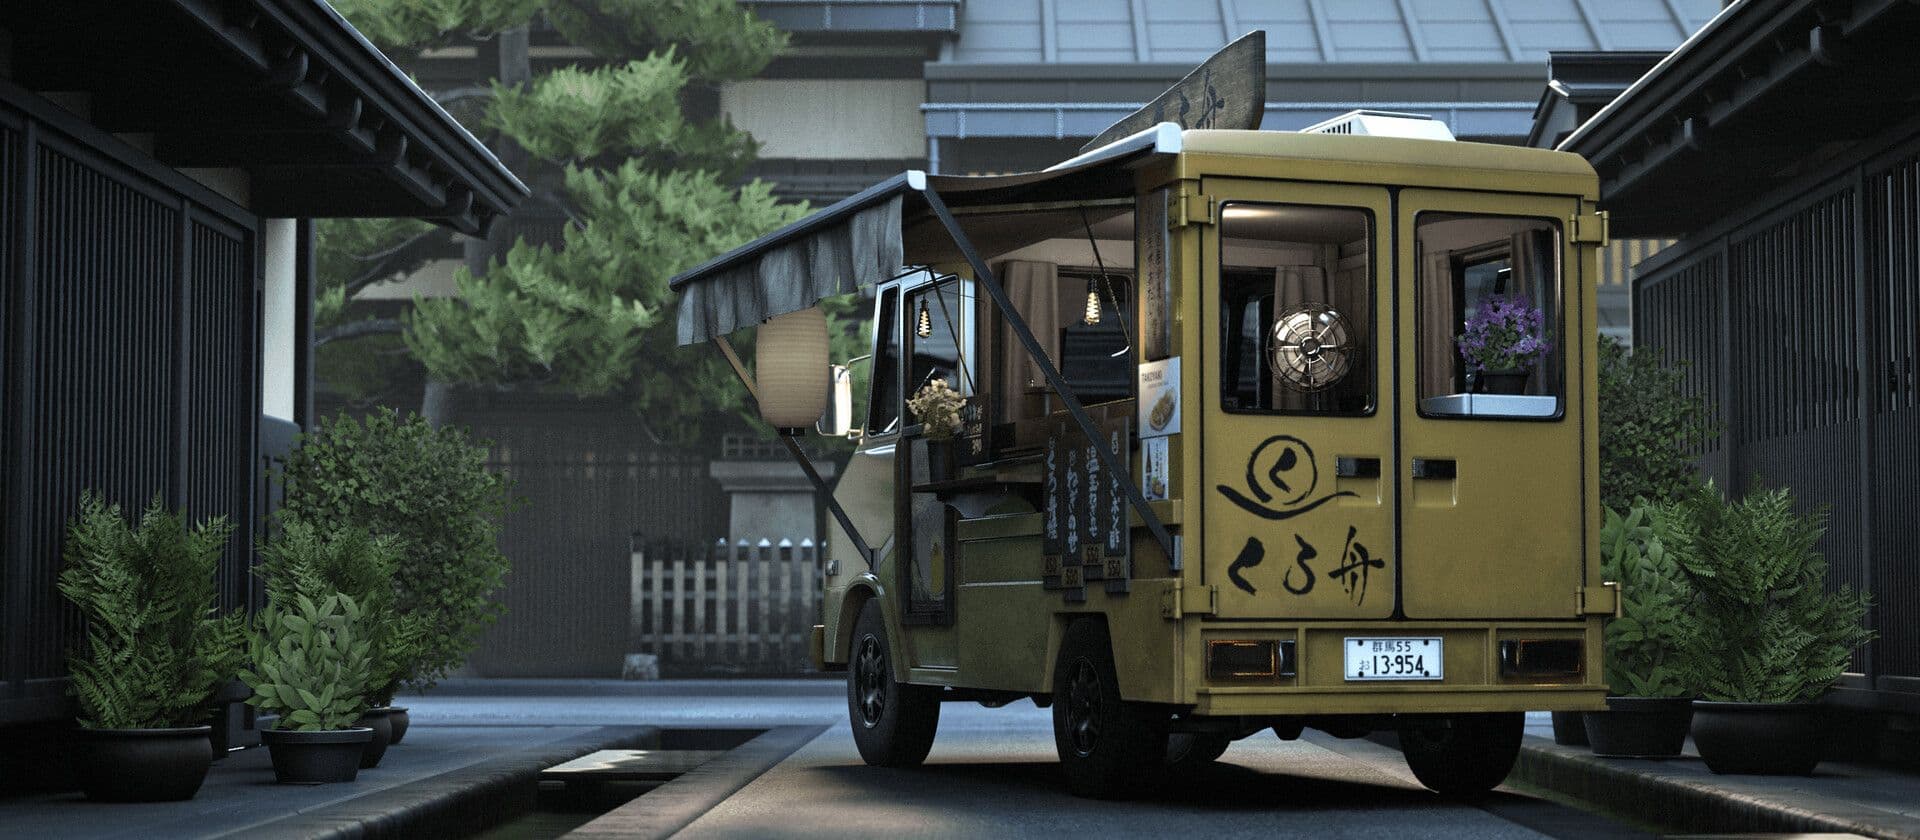
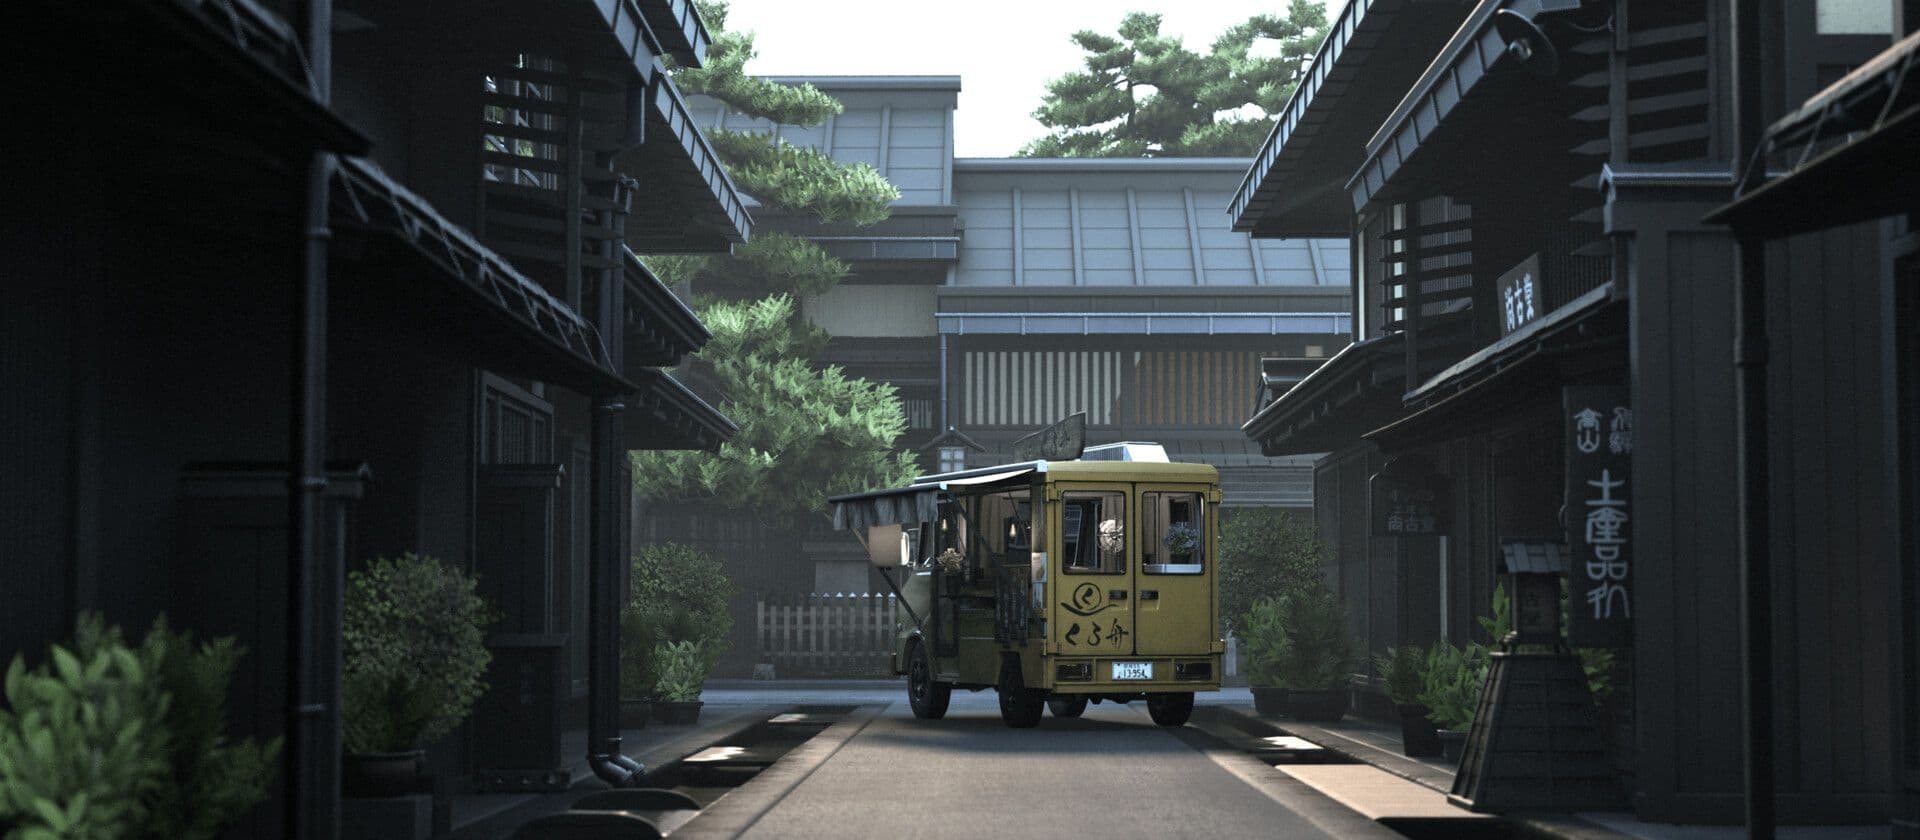
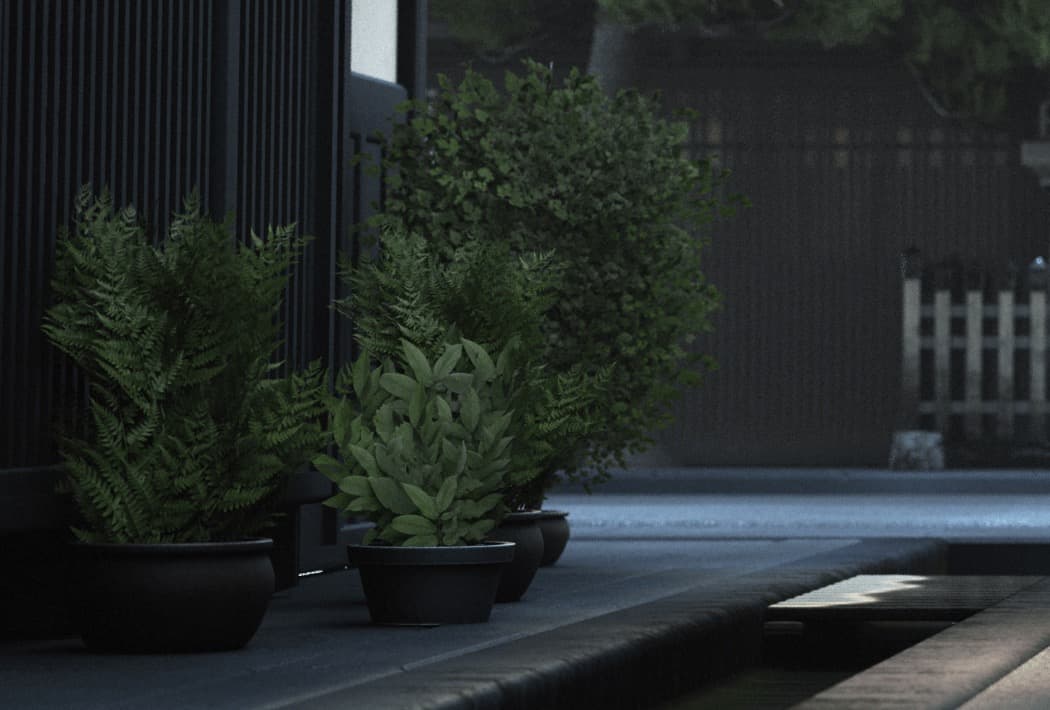
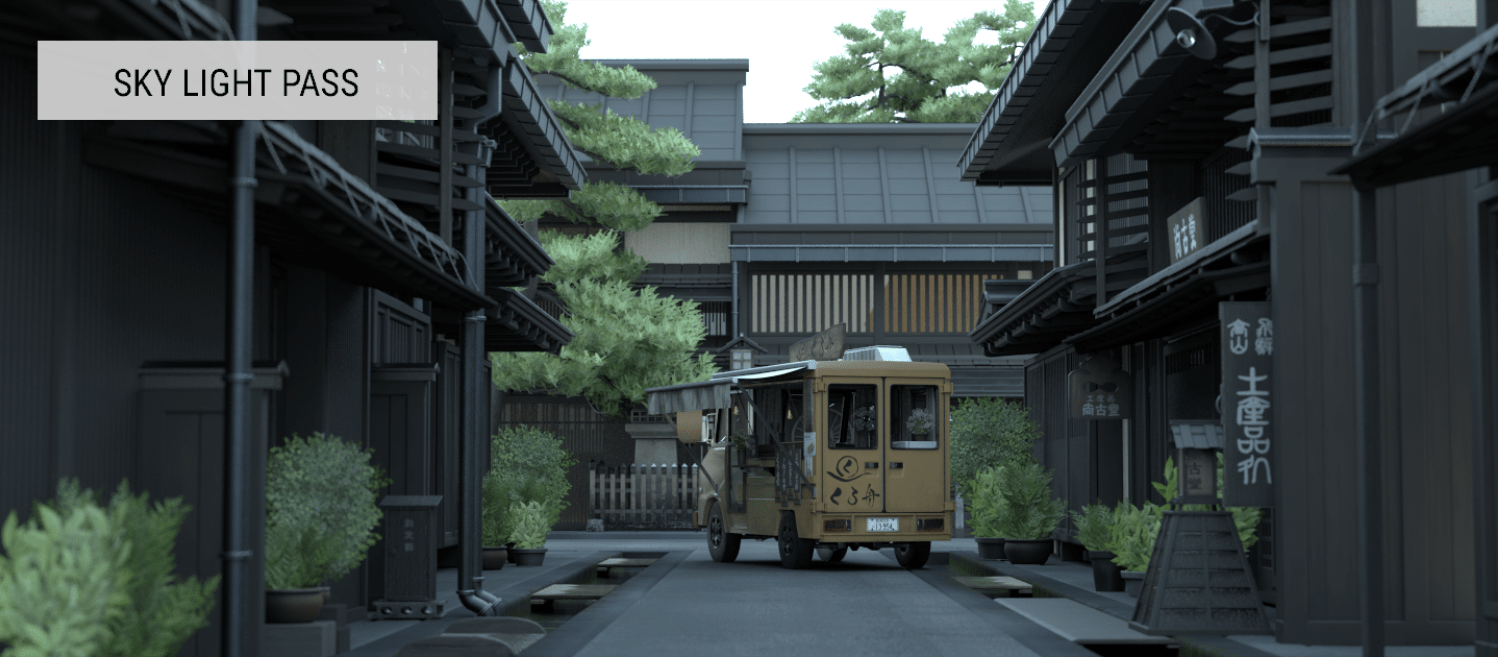
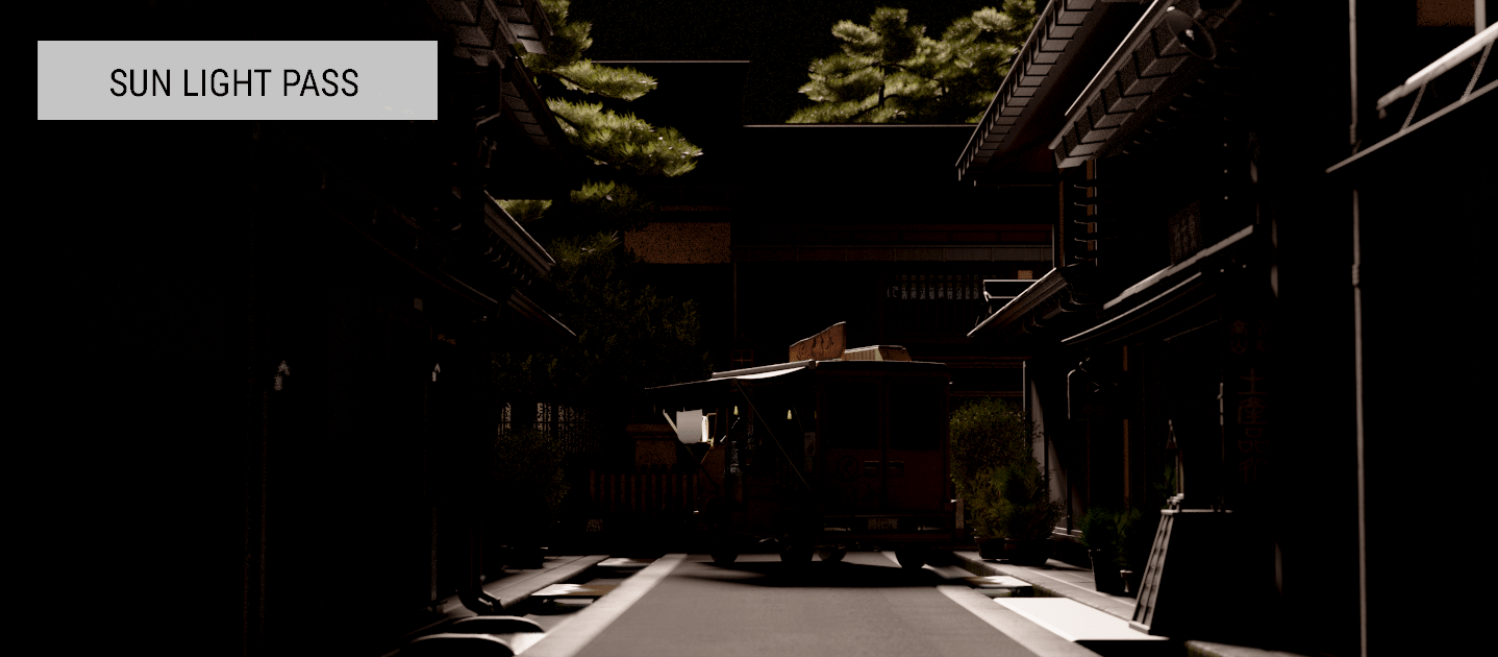
Now it’s time to talk about the lighting! I wanted a calm vibe, so I chose morning light that also plays with chromatic contrast since the back of the street has a cool light that comes from the sky, and the front of the street has a warm light that comes from the sun. Both collide near the food truck, so it also drives the attention to it.
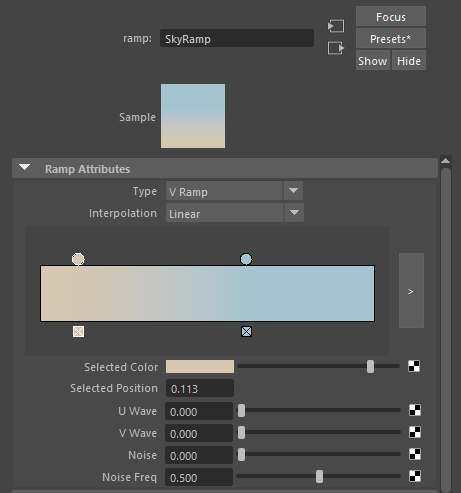
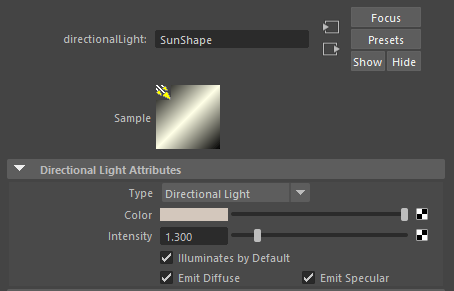
I created the sky light with a skydome light in which I created a yellow-blue colour ramp for its colour attribute, that way, it simulates how the sky looks when it’s dawning. I used a warm directional light to simulate the sun too. It’s my first exterior lighting, though, so I’m willing to learn more about it.
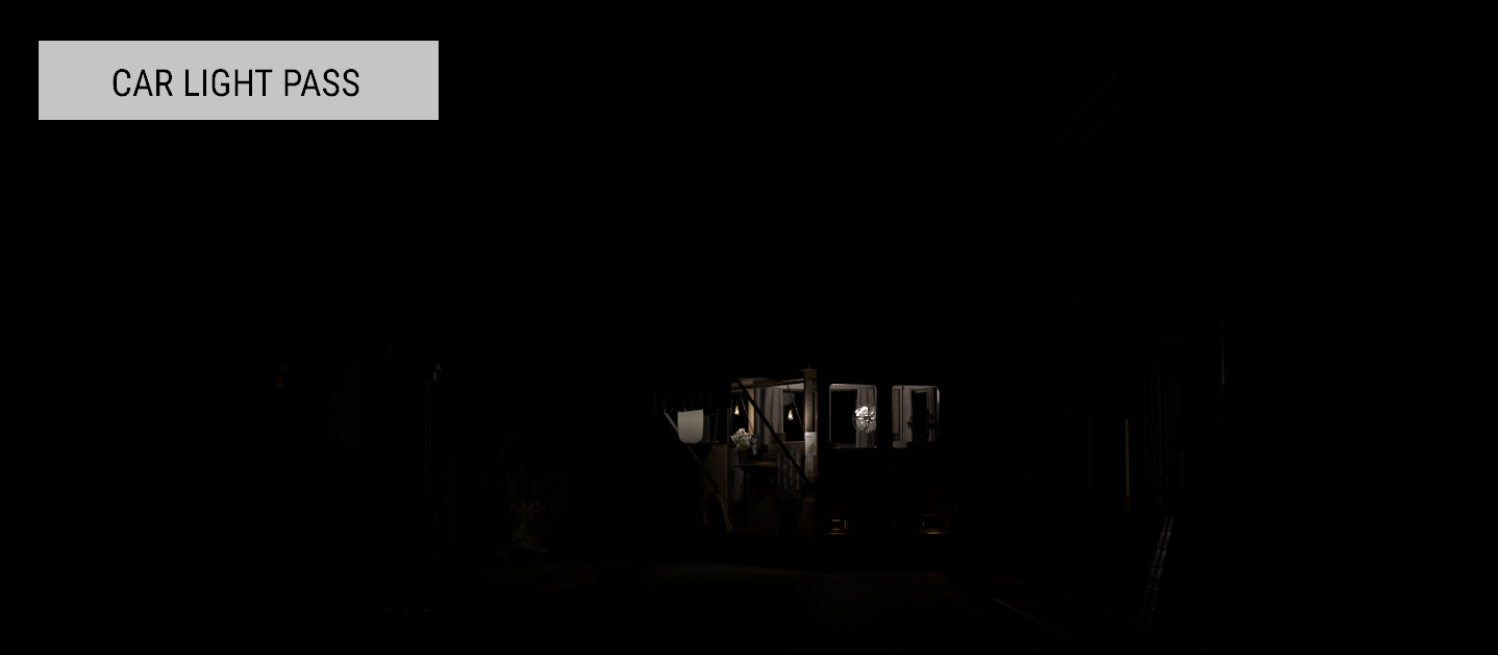
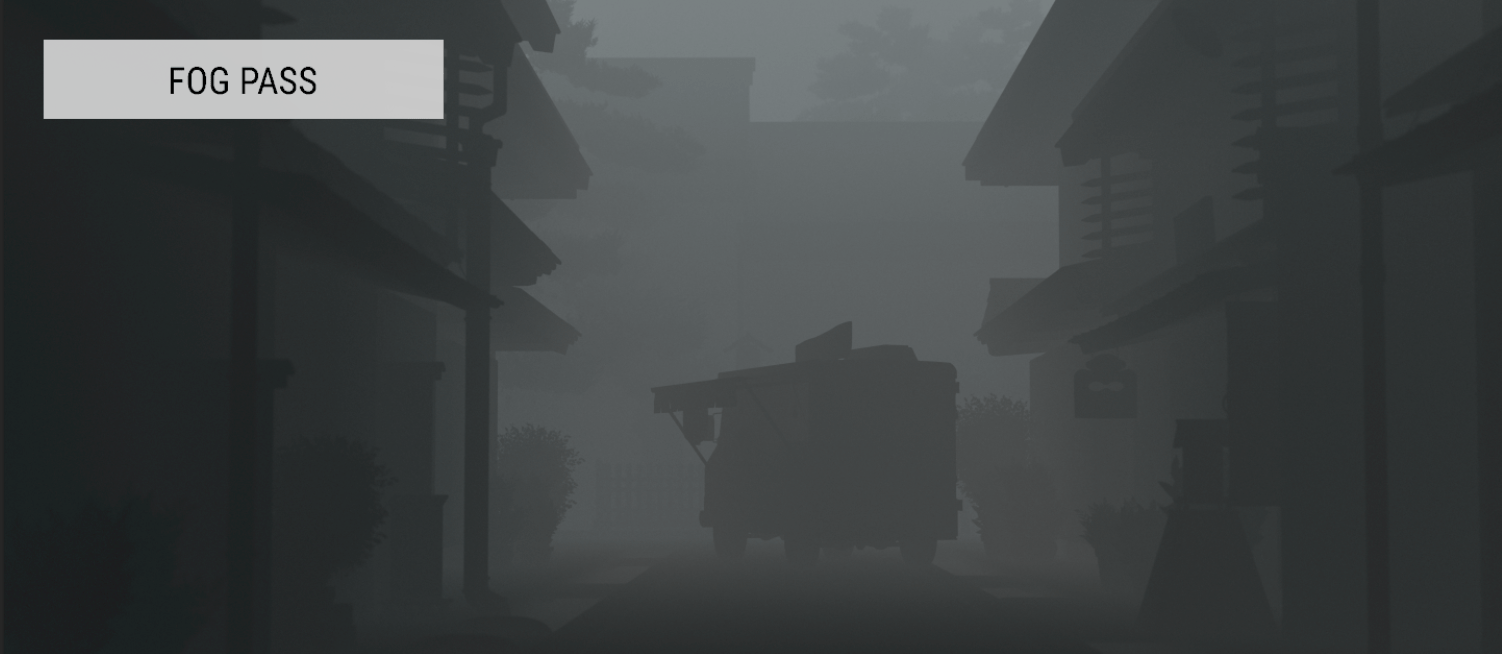
I also wanted it to create a heavy atmosphere to make the scene look a little like a dream, so I created fog using a maya fluid simulation. The truck has a warm point light inside to illuminate its interior and contrast with the street’s cool colour palette. The lantern and the light bulb filaments have colour ramps in their emission maps to generate the effect of the light coming from a certain point. They also have subtle warm point lights to illuminate their surroundings.
Rendering and post-processing
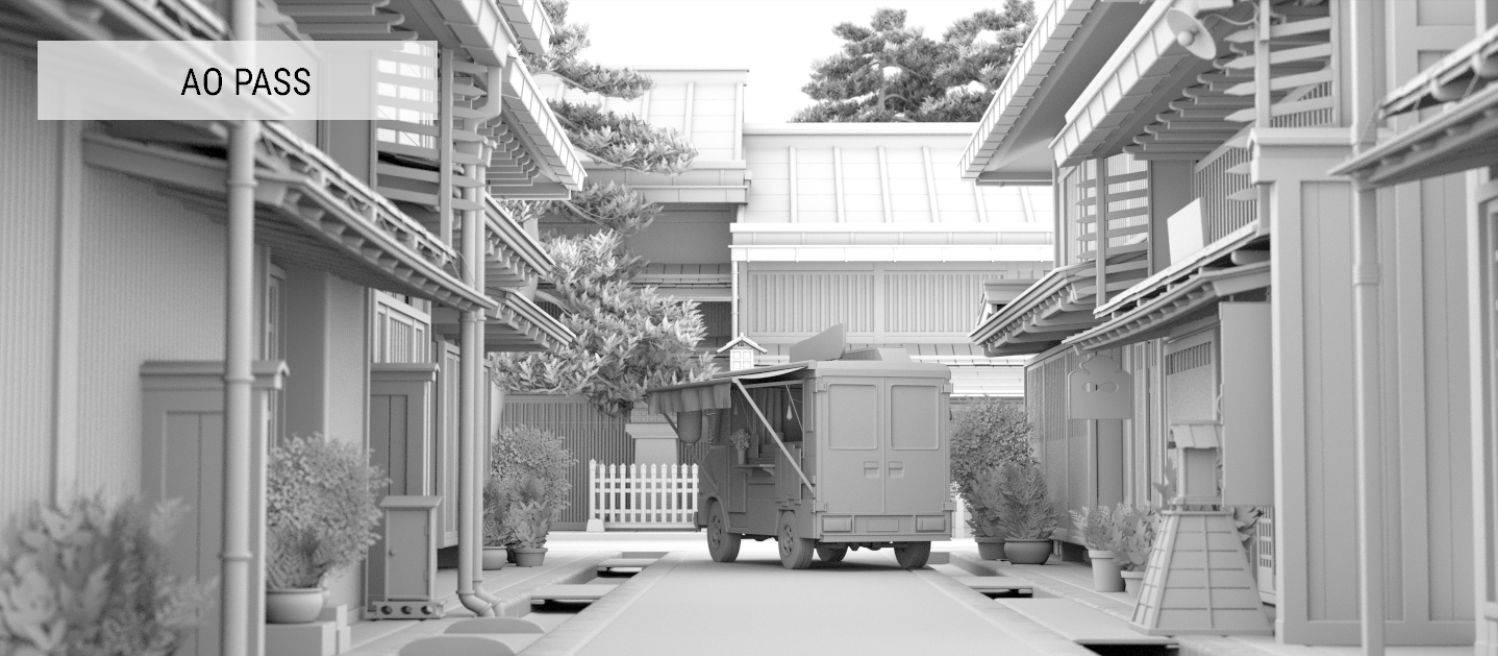
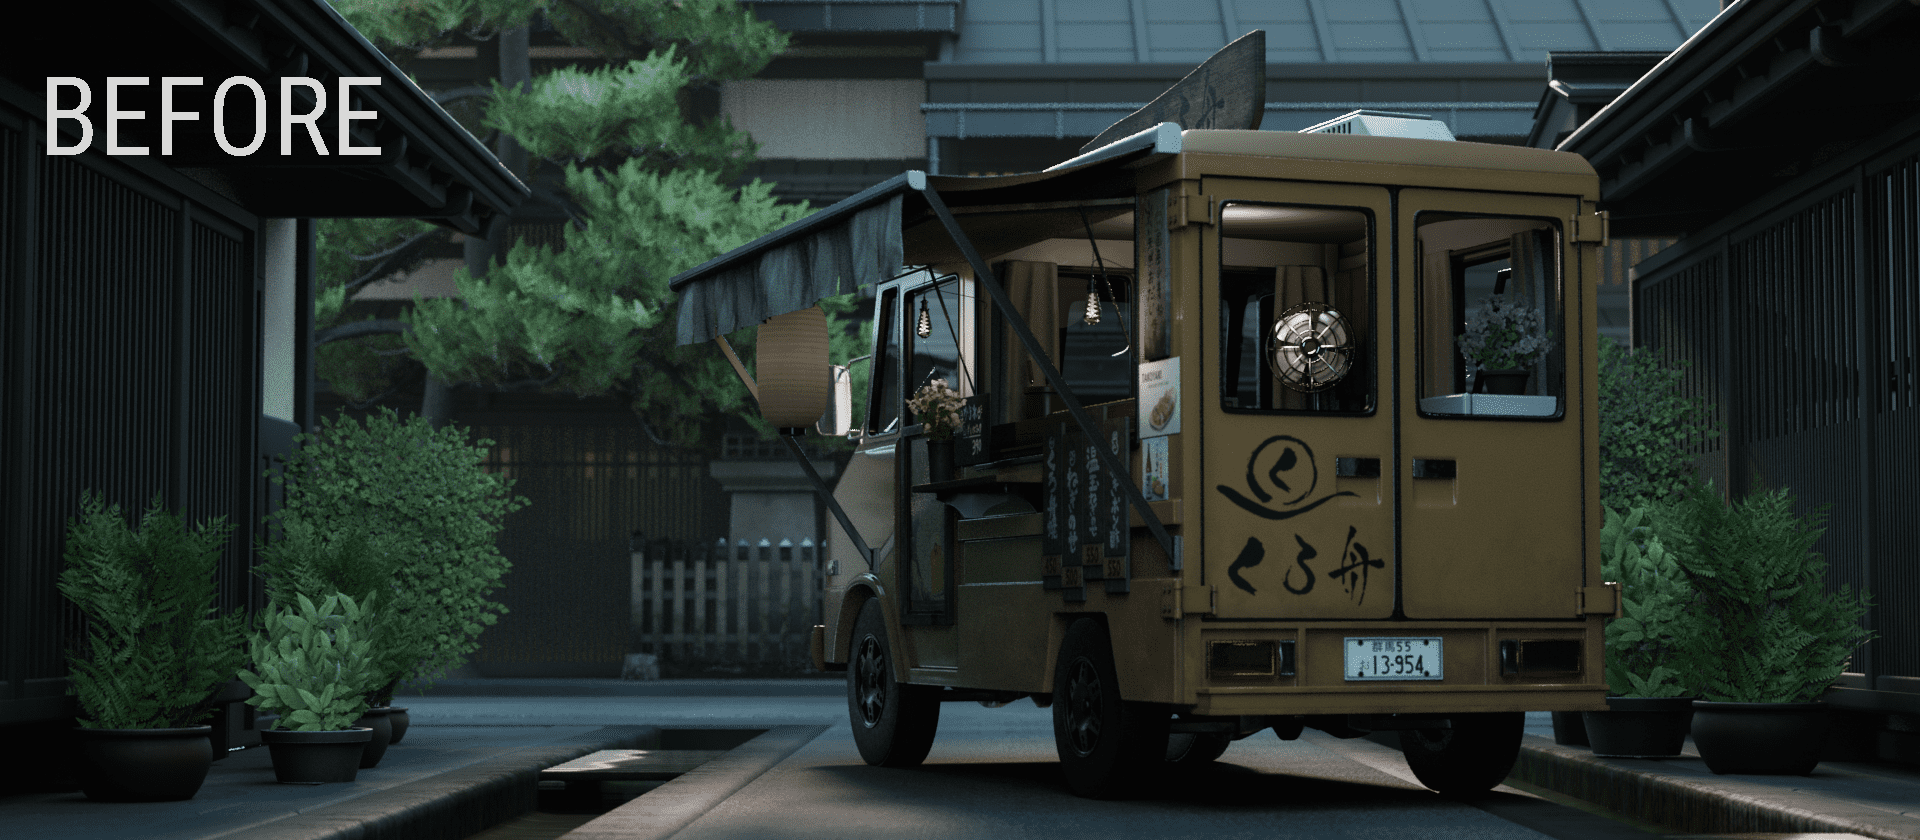
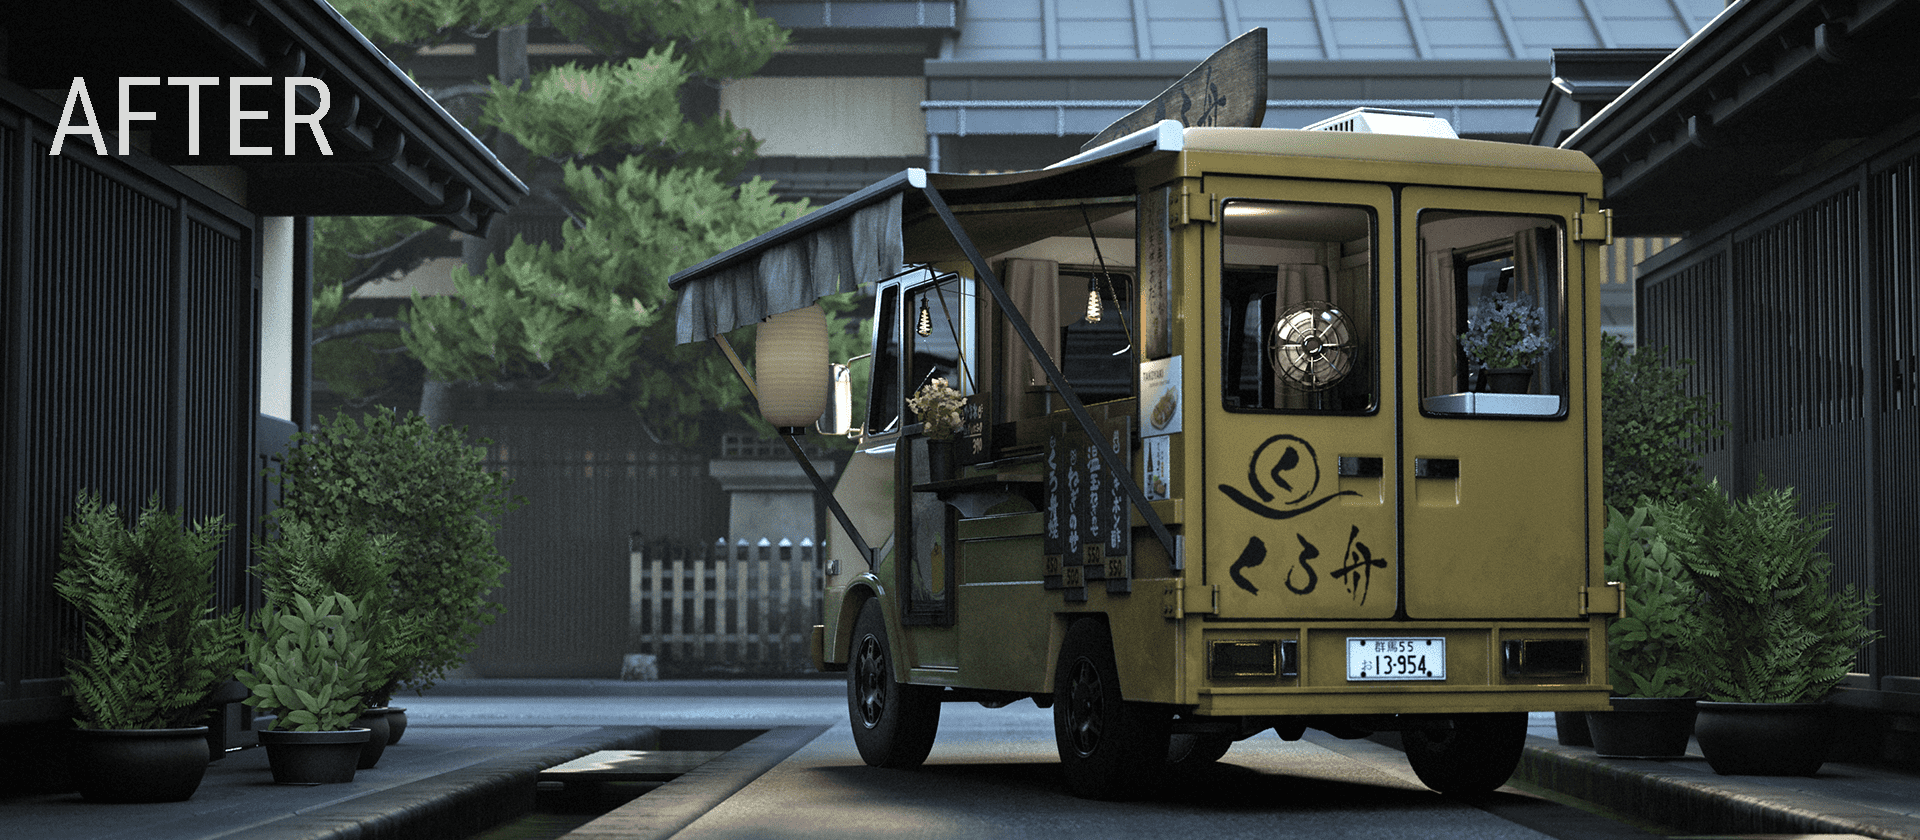
I noticed that in the beauty render, the plant’s subsurface scattering made them glow too much for the vibe I was going for; the truck didn’t stand out enough from the background and I also wanted to accentuate the fog and change the colours of the final render a little. That’s why I used Lightbox’s render farm to do a layered rendering to be able to apply post-processing to the final images.
The different passes were combined and edited with Blackmagic fusion to create the final look. I used a similar post-processing for both renders in order to make them consistent with each other.
I used a cinemascope aspect ratio for both renders to make them look like scenes that come from a movie and contribute to the environmental narrative of the scene.
Conclusions
Creating this piece was a big challenge for me and I learnt a lot. It also helped me to believe in myself and trust my ability. Months ago I wouldn’t have believed that I could create something like this. There are also a lot of things I’d like to improve, and it motivates me to keep learning and become a better artist each day.
I’m very grateful to my teacher Alberto Cano and classmates because their feedback and encouraging words helped me a lot.
Thanks to The Rookies too for this opportunity and thank you for reading this article, I hope it was interesting and had useful information!