If you are approaching your first realistic 3D Character Model, this article is for you! Han Jaepil, a student at CG5 Academy, has written this article explaining his workflow for his latest project, "Daniel Day Lewis".
If you are approaching your first realistic 3D Character Model, this article is for you! Han Jaepil, a student at CG5 Academy, has written this article explaining his workflow for his latest project, "Daniel Day Lewis".
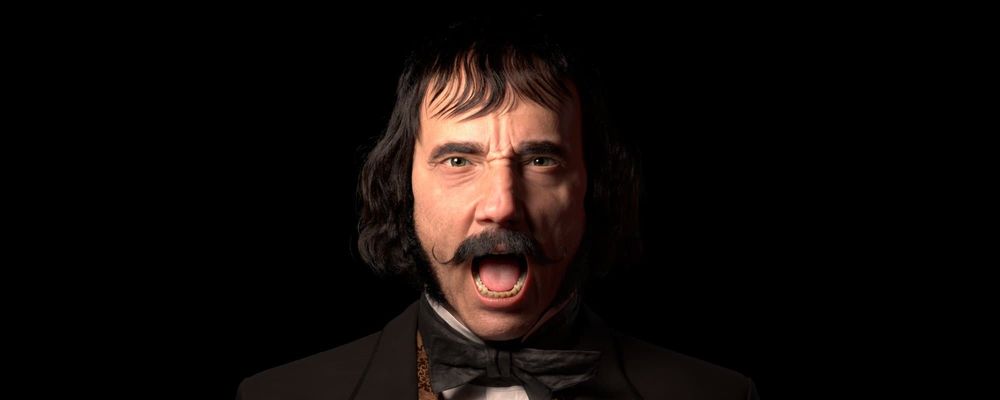
I worked on this project with the aspiration of developing my modeling skills and creating realistic 3D portraits of Daniel Day Lewis, in Gangs of New York.
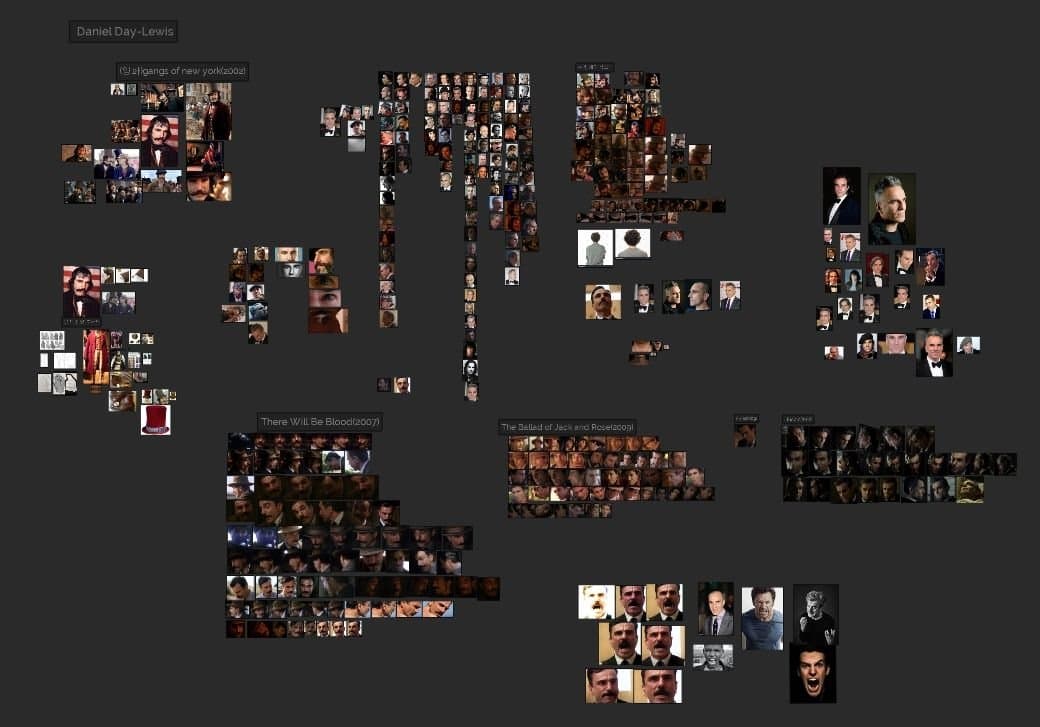
Before starting a modeling project, it is always great to gather some reference materials to help you get ready for your work. I would recommend you use PureRef and find the reference images for character modeling in advance, including the images of faces, hairstyles, facial expressions, and clothing.
A larger number of good references will not only enable you to watch characters’ traits more precisely, but also keep you from being distracted when you’re working.
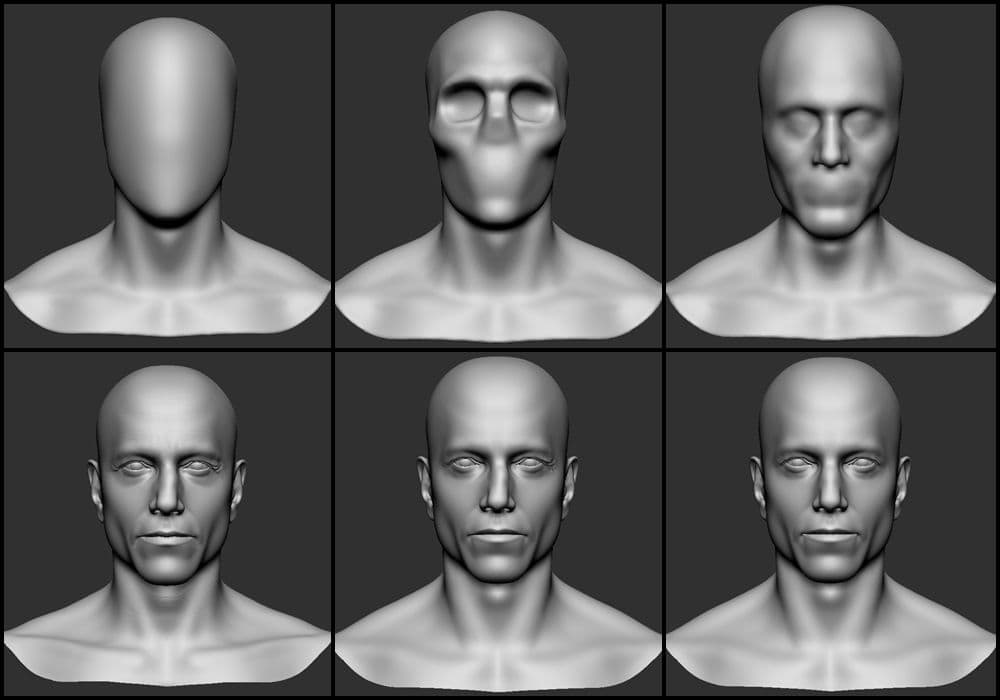
Sculpting the Head
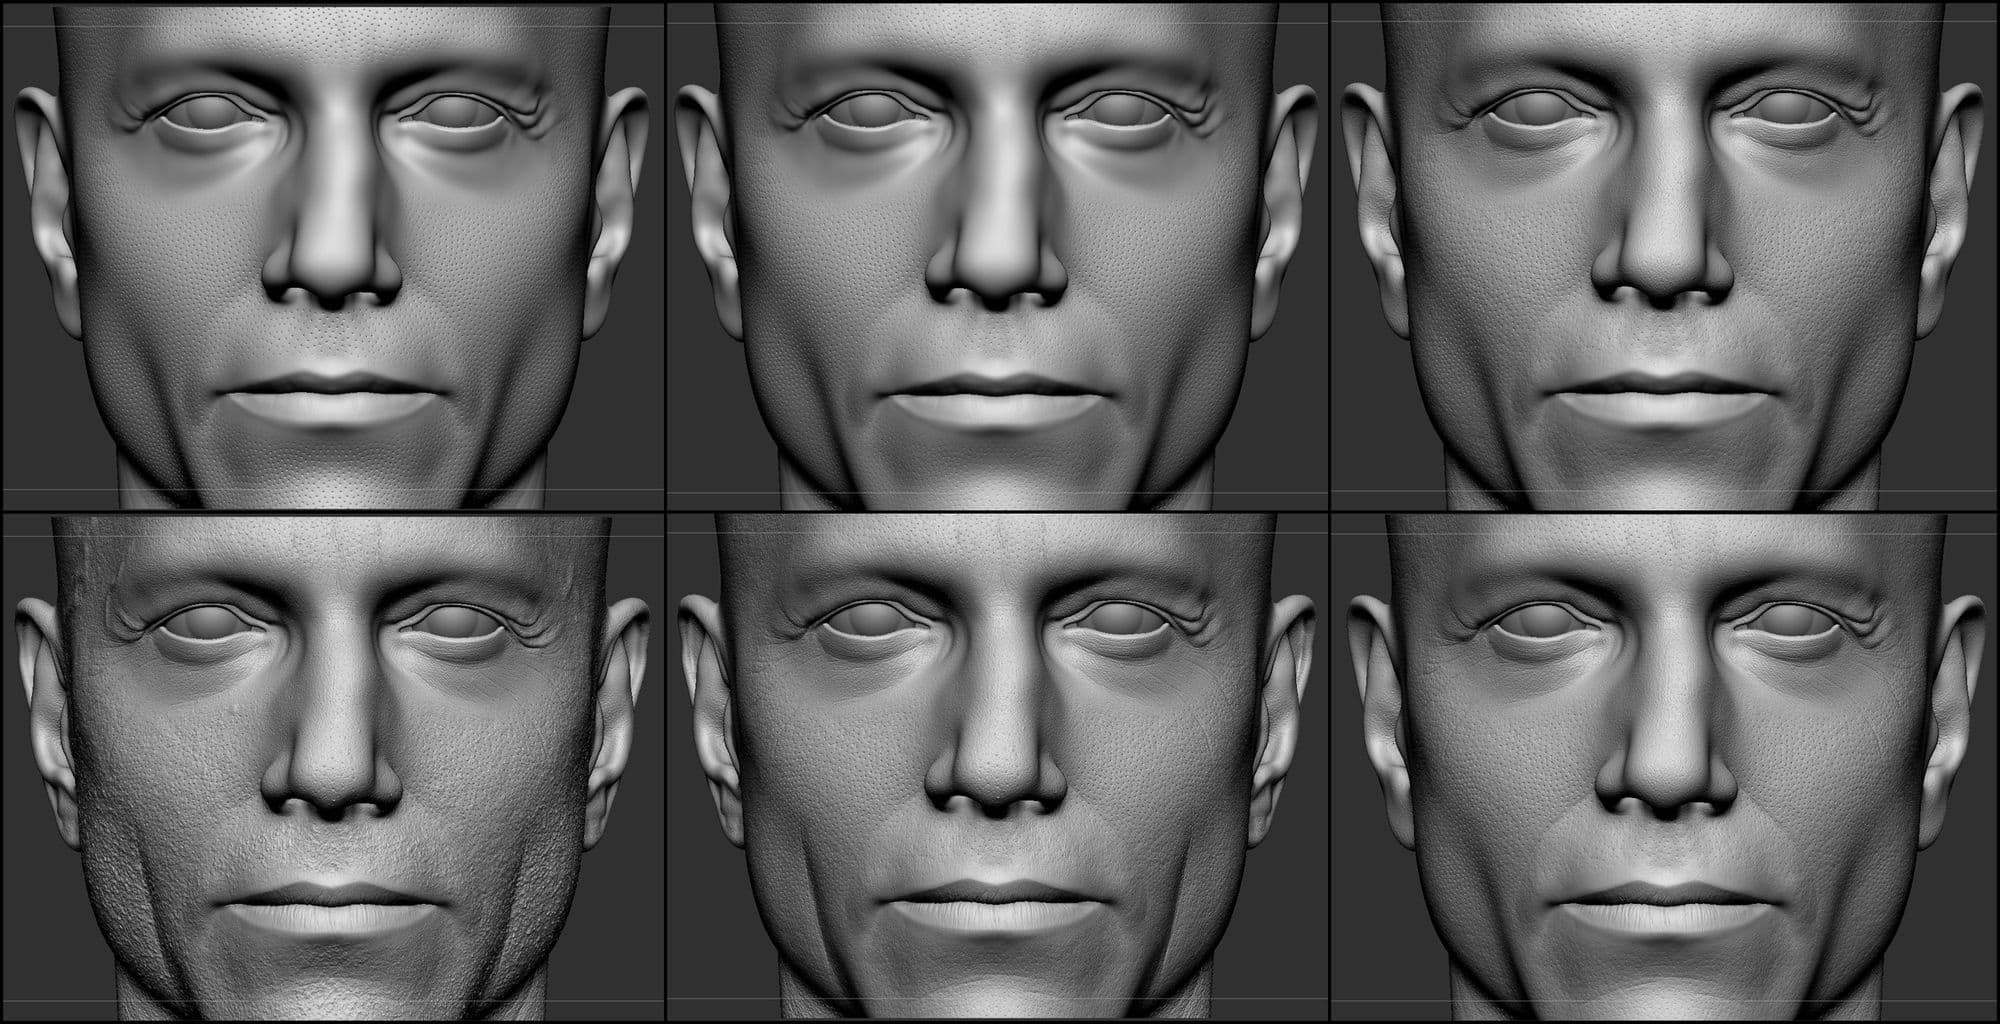
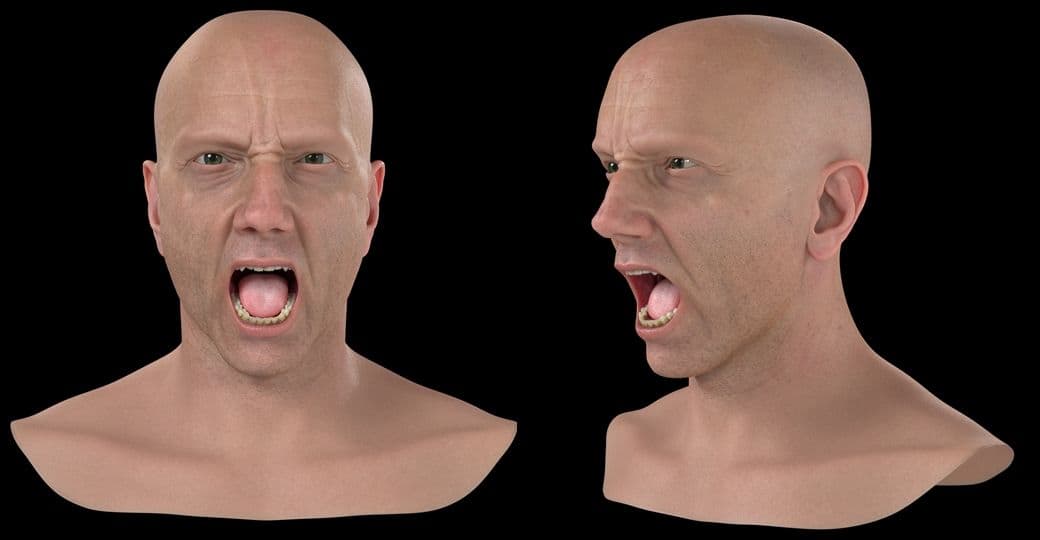
A base mesh for sculpting the head was created in Zbrush and orbital, nasal, and zygomatic bones were roughly sculpted using the data on human skulls.
I continued shaping the face by adding the skin over the bones sculpted so far. The knowledge of anatomy was obtained from a book entitled Form of the Head and Neck, as well as the knowledge derived from gathered reference materials.
I created eyeballs and lacrimal caruncles during the process of sculpting the head. Retopology was done using quad draw tool in Autodesk Maya and the UVs were arranged within UDIMs.
After that, I kept the face in symmetry, subdivided the mesh, and refined the details using Zbrush.
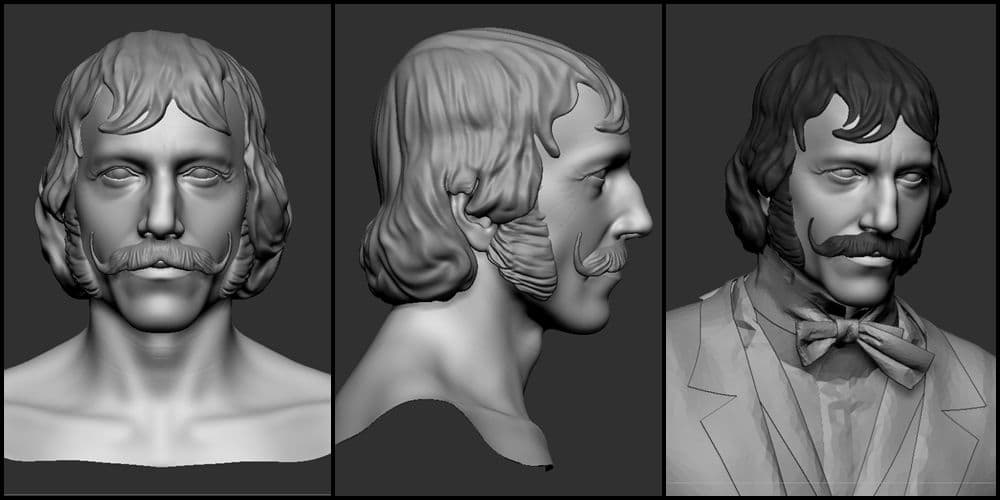
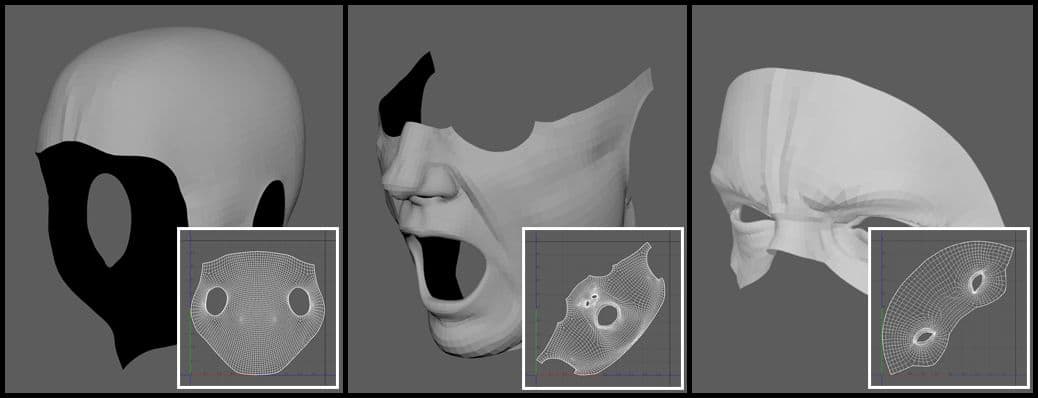
After cutting out parts of the face to create the desired shape, select and add cloth and hair for your character. In my case, I could find problem areas by using the camera angles from the reference image and by comparing my character with the one in the reference image.
Example hairstyles can give a very good idea of how much volume shall be given, especially when creating a hairstyle with Maya XGen—in other words, example hairstyles can provide a benchmark for future reference.
Creating Human Skin
In this project, my model was divided up to the maximum number of times, and then human skin details were sculpted through several steps. Those steps are as follows.
The first step is to create pores. You should store morph targets created in Zbrush before you start. Pores must be included in every area of the face except eyes, nose, and lips. After doing that, edges of the pores should be smoothed using morph brush.
The second step is to render the texture of the skin which has pores you created. To learn about skin textures, I recommend you to check out the images from Chris Pollitt’s Artstation.
The third step is to create the skin of the areas, or more specifically, eyes, nose, and lips where pores and skin textures haven’t been created. By using Skin Alphas from texturing.xyz, you can create skin for your character. A bumpy effect should be created on the skin which has pores. A bit of a roughness helps sell the realism more than super smooth skin texture does.
The fourth step is to create facial and lip wrinkles, and to add detail. You can add detail by creating fine-scale and medium-scale wrinkles. In my case, I started adding lip wrinkles using Skin Alphas and I used the brush to add more wrinkles.
The fifth step is to add pores and pimples on the end of character’s nose. This is done to make the skin really look like the skin that hasn’t been taken care of.
The sixth step is to add more details such as nodular acne, five o’clock shadow, acne scars, and veins to complete the concept of this particular character.
Rendering Facial Expressions
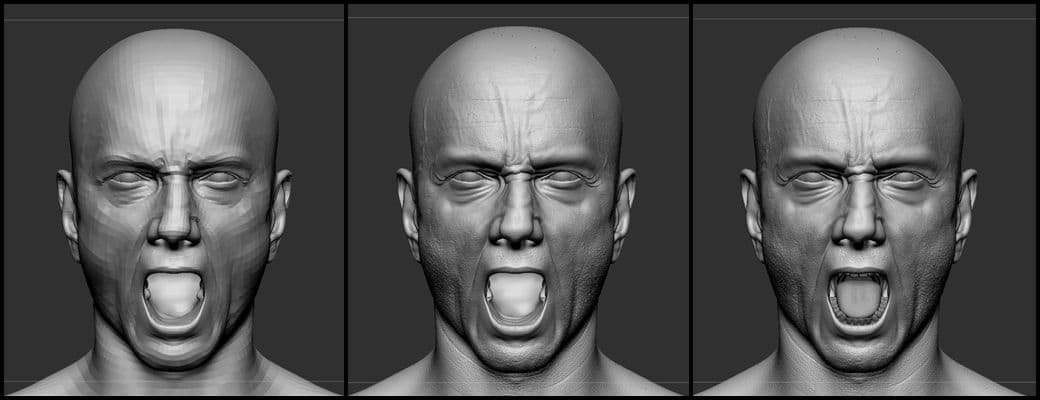
I consulted a book entitled Anatomy of Facial Expression and a reference photo of the actor represented with an angry expression to render facial expressions. You don’t need to use the Project All feature right away, but still I recommend you to transfer colours from 3D Scan Store’s base meshes to Zbrush using Zwrap before you render facial expressions.
The reason why I recommend this to you is that it is much easier to use Zwrap when the model’s face is expressionless. However, after that, I rendered facial expressions roughly by adjusting division levels many times and using the Move Brush.
I sculpted detailed areas including wrinkles, muscle volume, and veins. During this process, I looked at relevant reference materials. Furthermore, I modeled in a mouth cavity of my character and modified the shape and position of mouth in a way to obtain the facial expression that I wanted to render.
Applying Shadows to a Face
I made modifications to some areas, where the face skin colours that I transferred using Zwrap before I rendered facial expressions, needed to be changed. I used Polypaint to do that and I extracted colour and displacement maps.
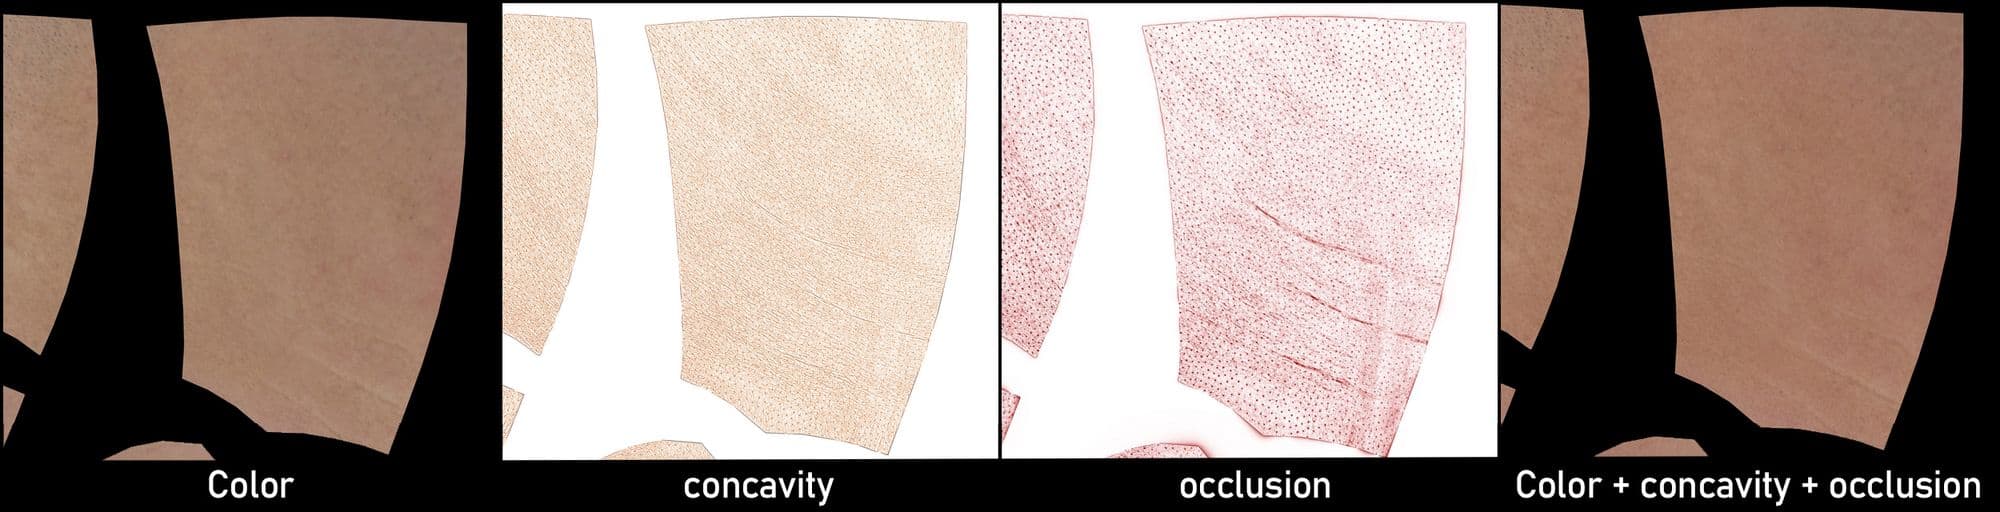
I extract concavity and occlusion maps from the displacement map that I extracted before, using Knald. If you try this, you will see that the details of the skin created in Zbrush are projected onto the concavity and occlusion map. You can detail the skin more thoroughly by combining two maps in Photoshop.
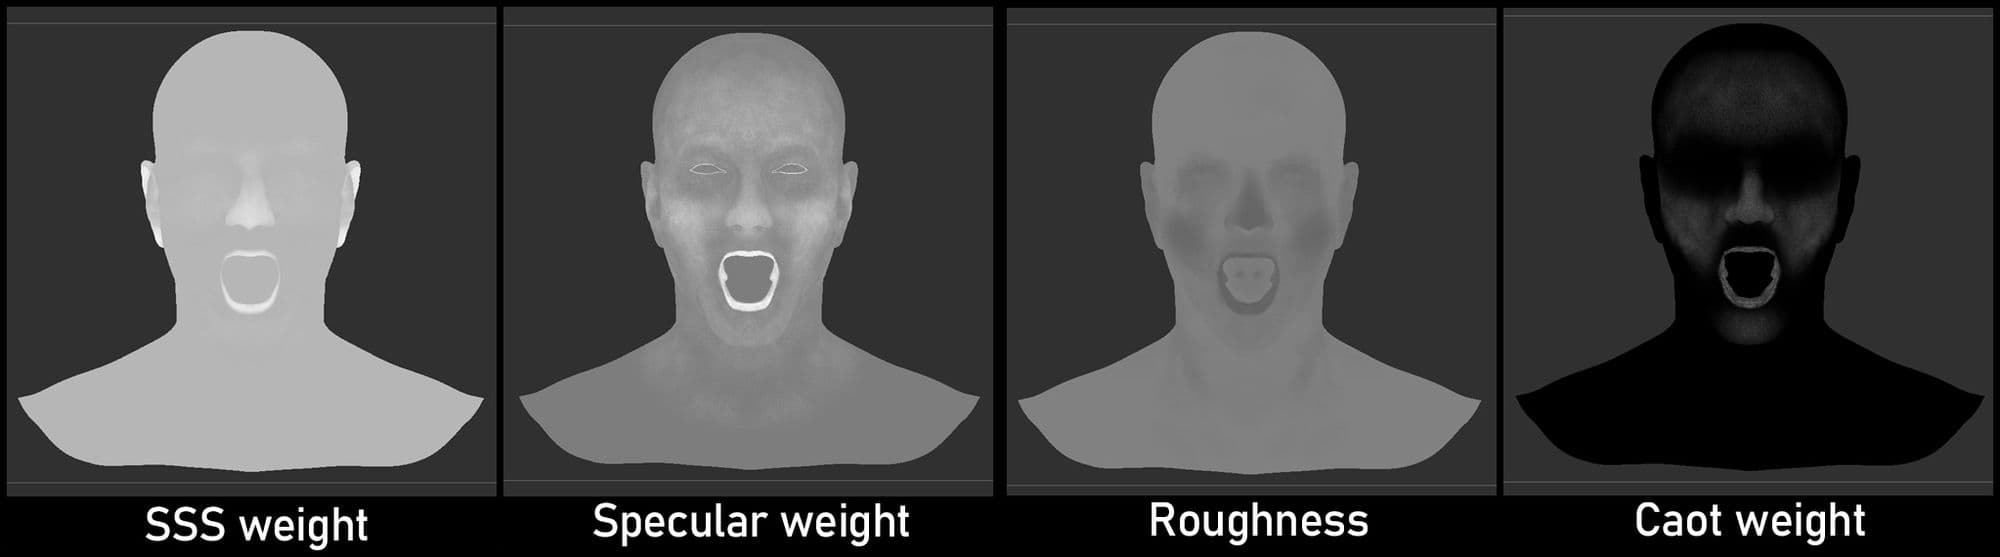
I also created and extracted a SSS weight map, a specular weight map, a roughness map, and a coat weight map with polypaint from Zbrush. After that, I sequentially set up the maps that I extracted in the aiStandardSurface, also known as the Arnold AiStandardSurface Shader, and checked whether the maps looked as intended.
After placing eyes and mouth cavity, I was doing the lookdev and realised that my character’s teeth look awkward. They were too clean, considering the setting of Gangs of New York. Thus, I used different colours to render a coated tongue and discoloured and decayed teeth. These modifications were made using Substance 3D Painter.
Creating Hair
To learn the basics of using XGen, I referenced XGen Tutorial released by Jason Hill. I started the process with dividing the work into three areas: creating the top, creating the eyebrows, and creating a beard. For the project, I prepared the meshes and UVs that can be used in XGen.
After defining the XGen Collection and Description, guides should be set up. You need to add spaces at regular intervals between each guide and make sure that the desired flow and volume of hair are created. You should import example hairstyles to Maya. They help you to create the desired volume more easily. I followed the same procedure to set up the guides for eyebrows and beard.
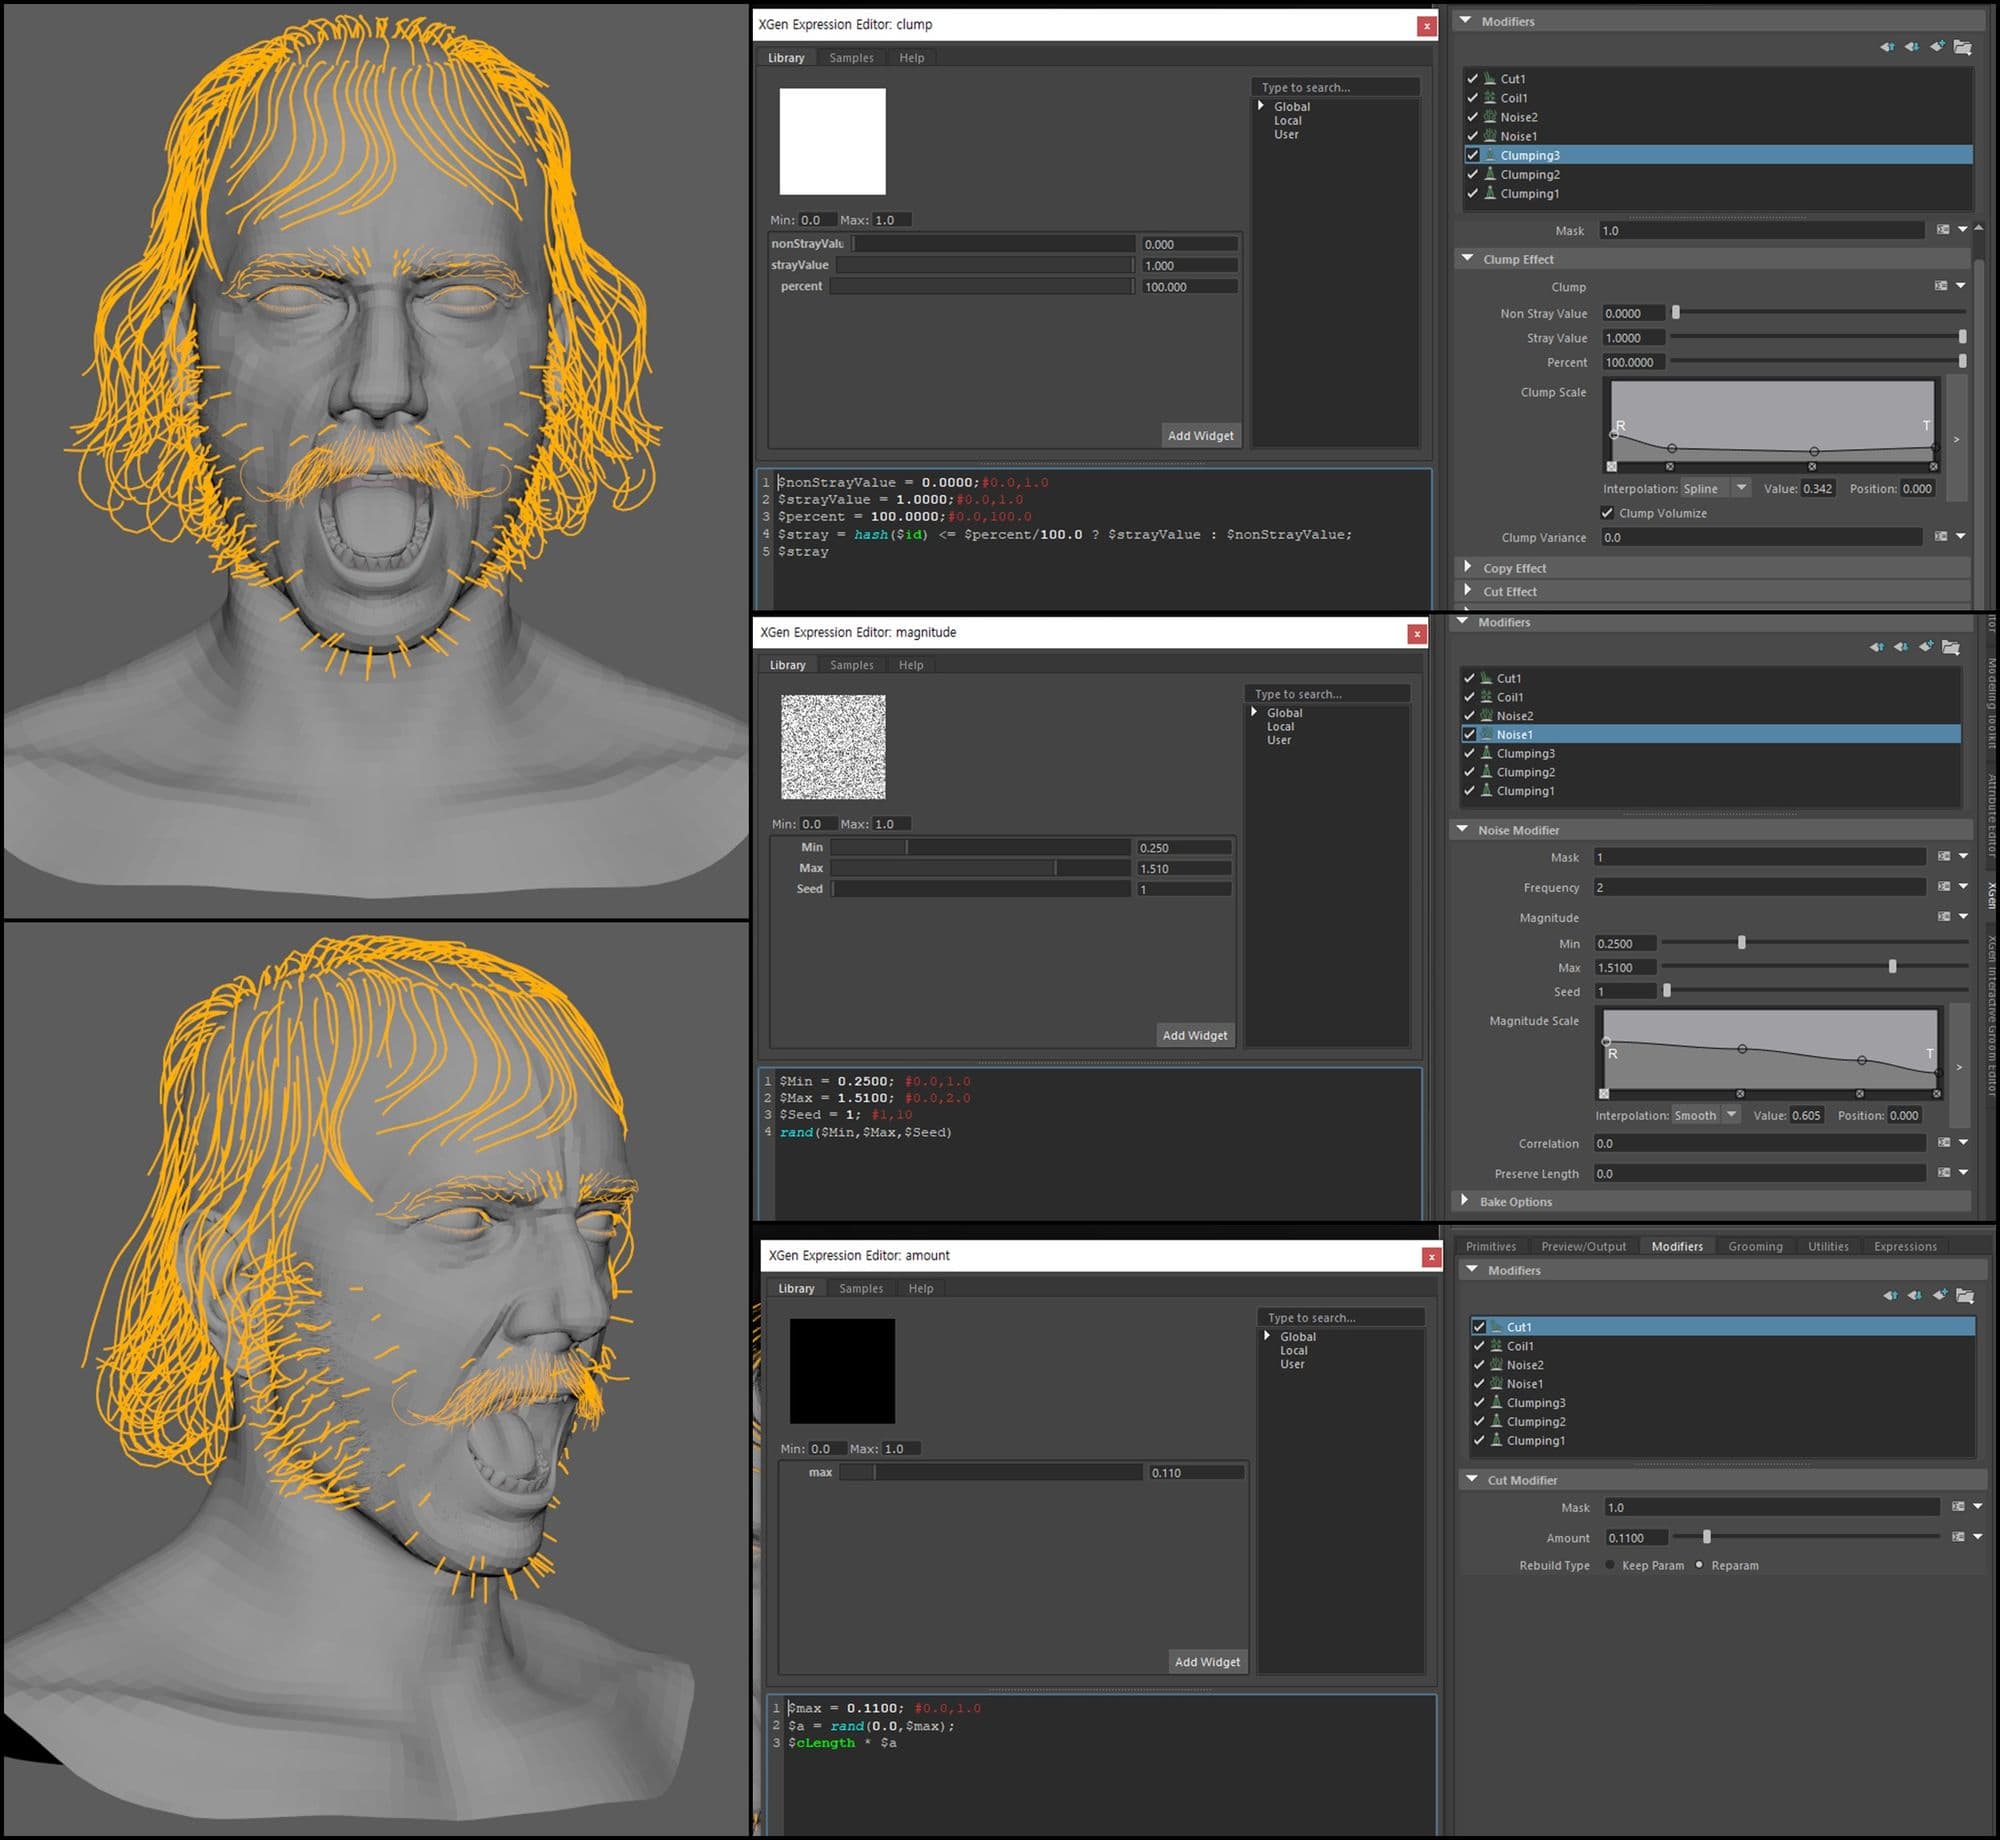
Once the guides are set up, the next thing to do is to create natural hair using XGen modifiers. I use mostly Clump, Noise, and Cut. I sometimes use Coil, but only when necessary. In this project, I combined two or three layers of clumps and split up clumps using Clump and added more variety using Noise and Cut modifiers. For eyebrows and beard, I used a much smaller number of modifiers.
You need to use the scale graph and functions to be on the right track. There is no easy way to be on the right track. You will just have to learn to use the scale graph by trial and error. However, I figured out that using certain functions in the XGen Editor can make hair appear more natural by adding a random variety.
I adjusted parameters in Arnold Ai Standard Hair shader and created a lookdev for the hair when the job that required me to use XGen was almost over. If you want to know about Arnold Ai Standard Hair shader, Arnold manual is a great option for you.
I would like to highlight that you need to be extra careful not to delete history carelessly when using XGen. If you don’t, all the guides will disappear and you won’t be able to restore them.
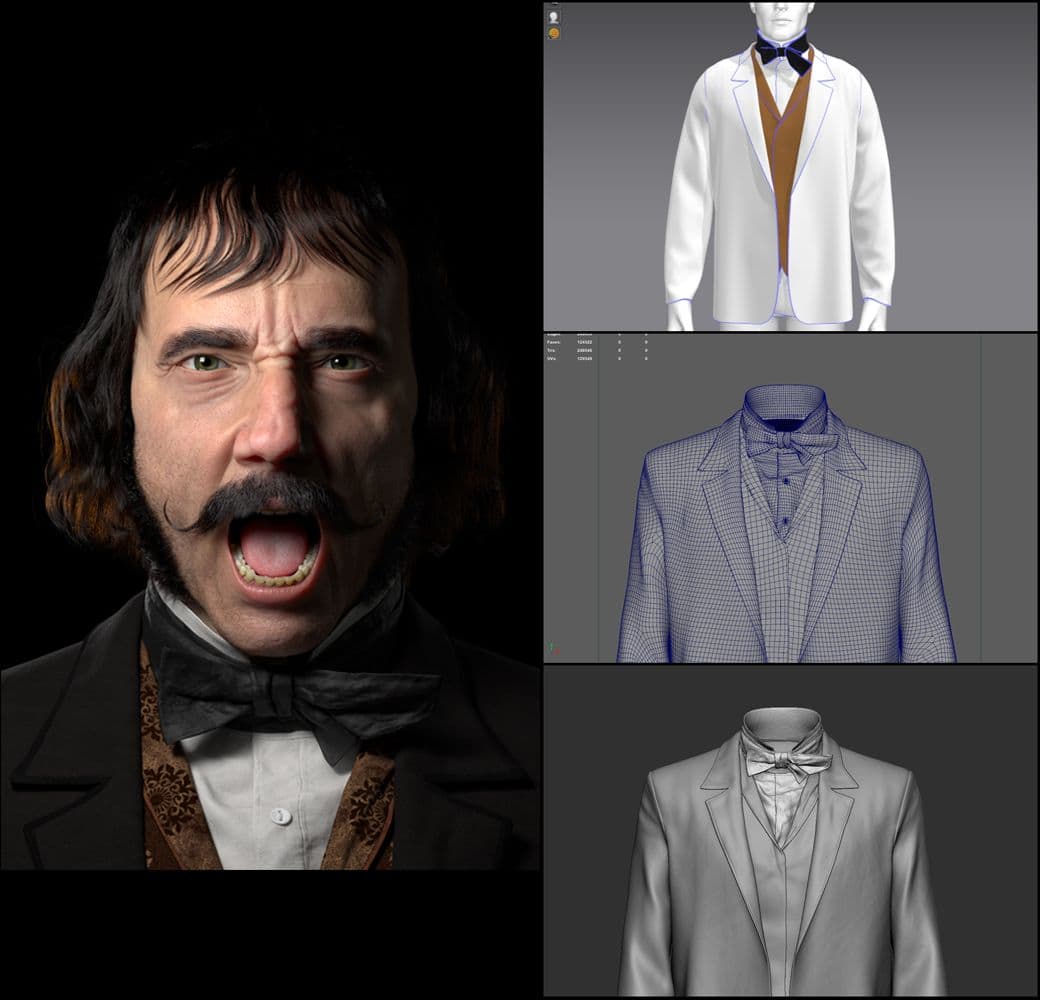
Creating Clothing
I made clothing, draped my clothing onto the desired pose, and made wrinkles on the clothes in Marvelous Designer. In Marvelous Designer, you can’t always make the wrinkles as you intended. However, they don’t have to be perfect since all the details of the wrinkles must be sculpted in Zbrush.
You should make clothing patterns as simple as possible, when you use Marvelous Designer. The UVs are laid out based on the clothing patterns. The more times the patterns are divided, the longer it takes to export them from Marvelous Designer to Maya for retopology. You can find out how to do retopology in Maya in the video tutorial of FlippedNormals.
I retopologised mine using Zbrush Zremesher to savetime After that, I used brushes including Fabric Fold Alphas Brushes to add details. I actually went to my closet, squashed clothes made of similar materials to the ones I created, studied the wrinkles on those clothes, and added details. However, there was a little difference between the colours of the models that were made in Substance 3D Painter and the colours of the models that were made in Maya. Accordingly, I had to change the colour through the rendering process in Maya to make them match.
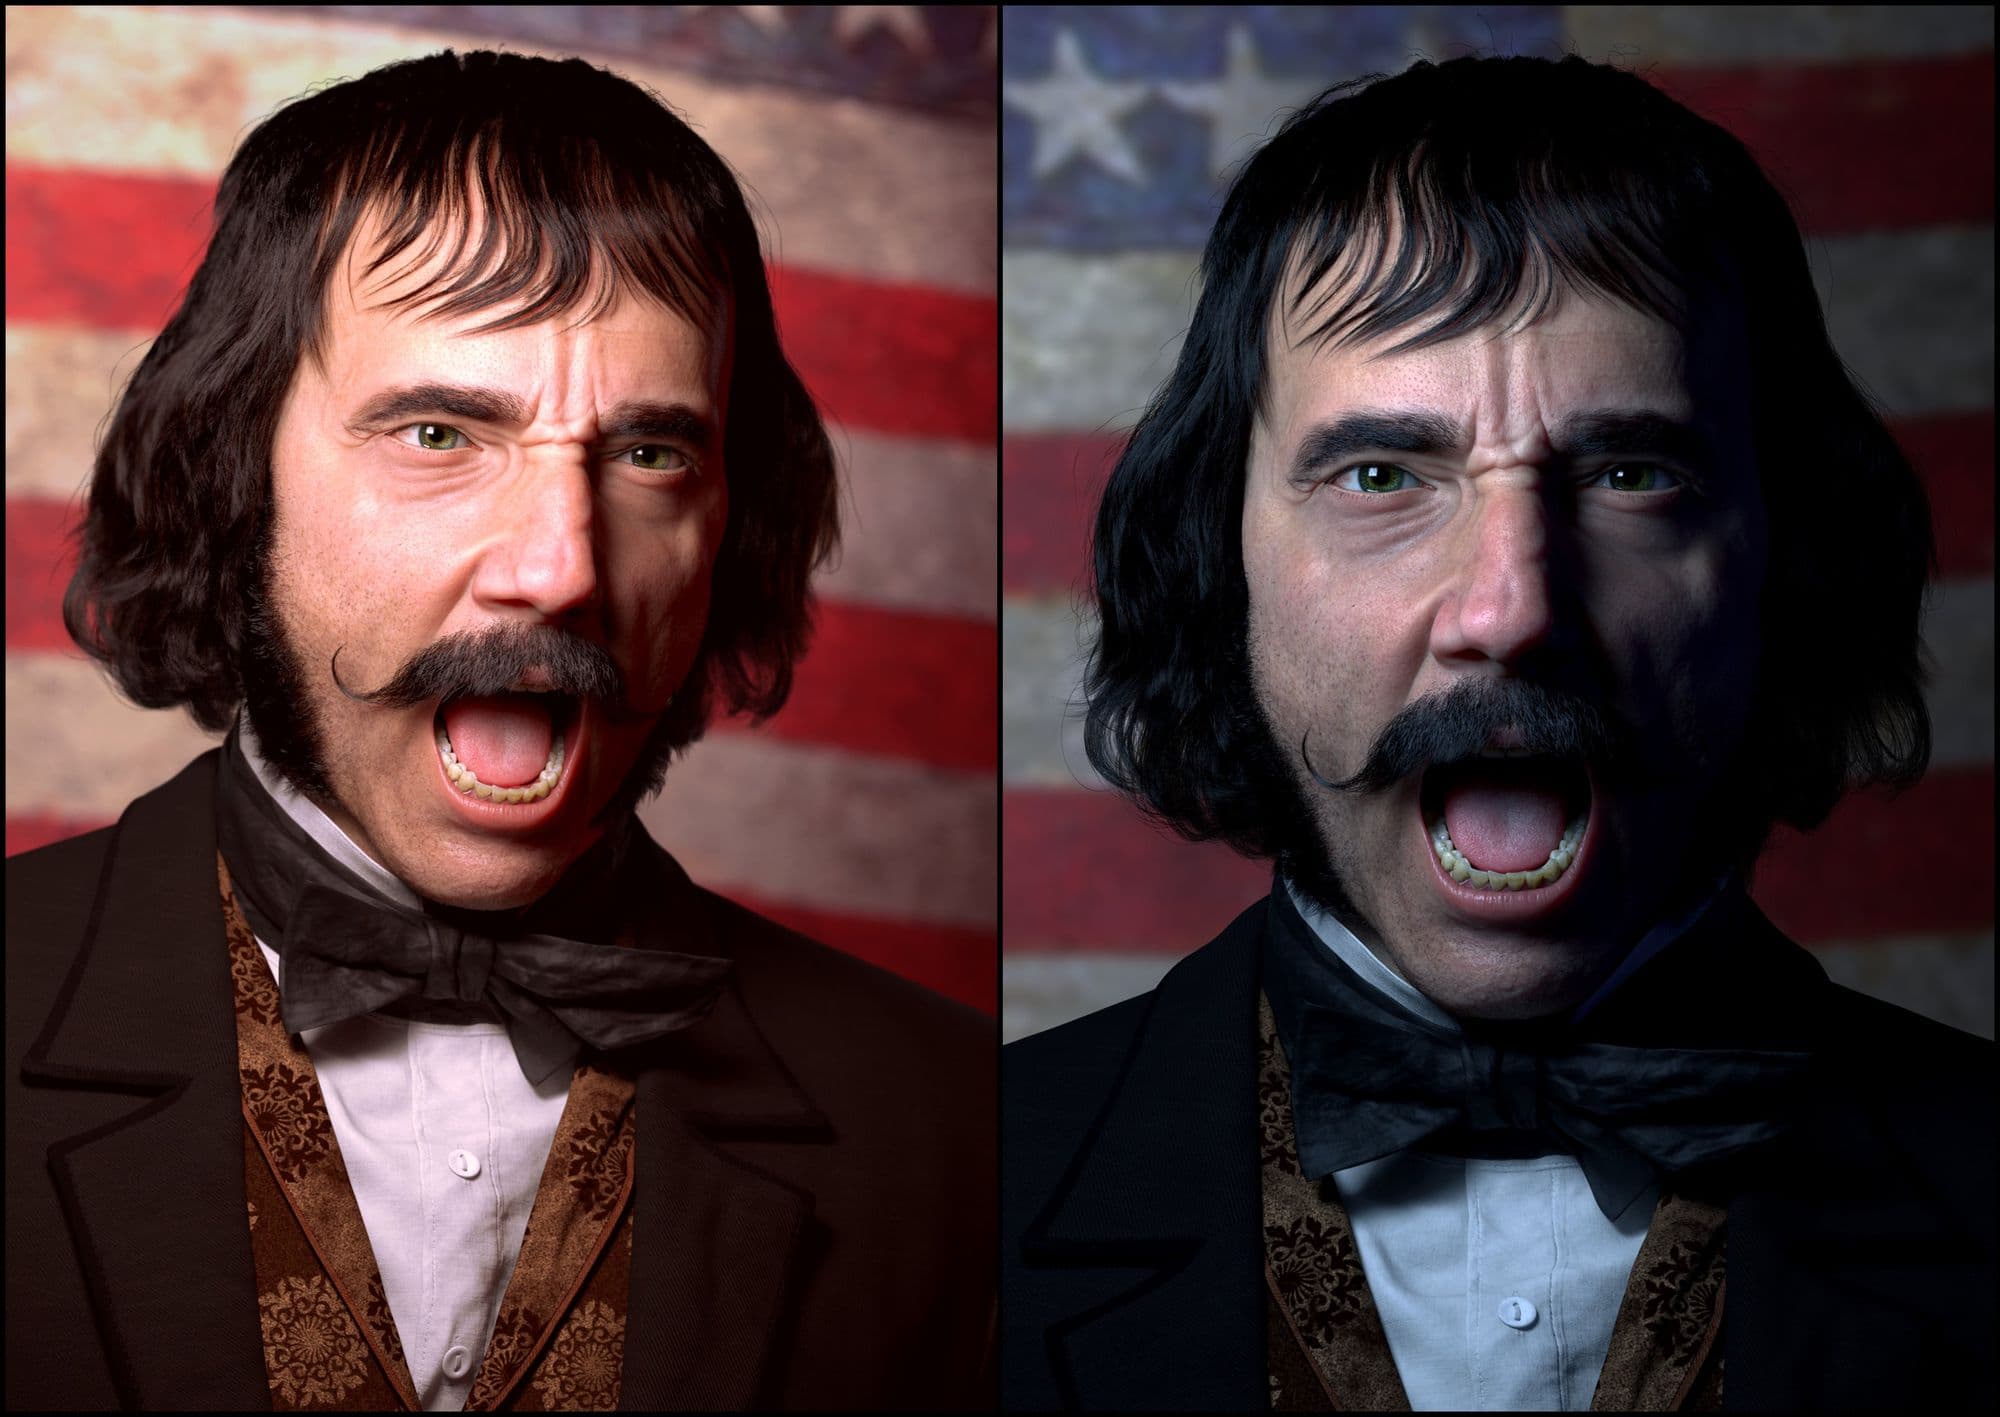
Finishing the Project
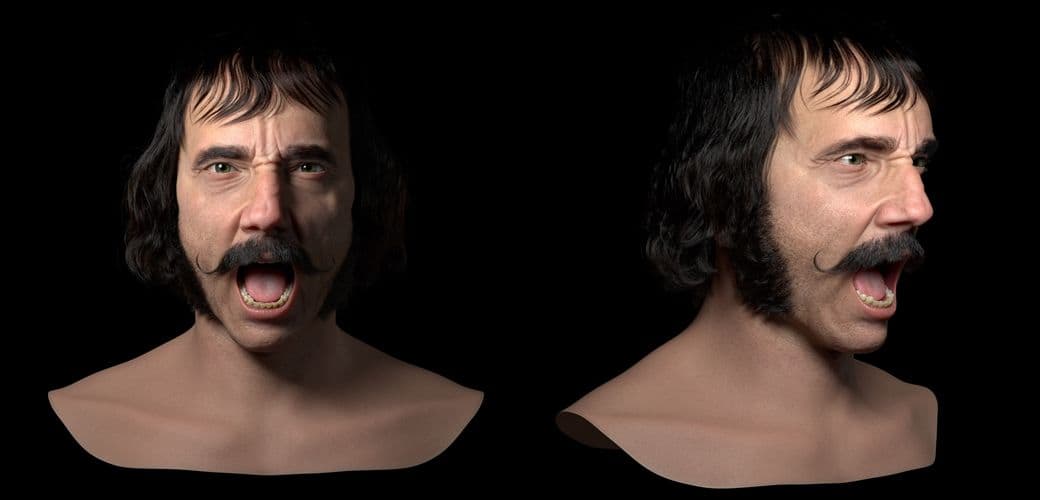
Now, it is time to add some light and background, set up the model to render it, and do the character lookdev. This is the phase of the project that I love the most. During this phase, all my hard work pays off. After enjoying looking at my character under various light conditions, I found the best images.
Thank you for your time. I used to have doubts about my abilities within the deeper layers of my mind, but this project has helped me push through the self-doubt. I also want to thank the teachers at CG5 Academy and my classmates for their feedback and encouragement. I’d like to thank The Rookies for giving me this opportunity. Hope you find this article informative!