The Forgotten Bedroom: 3D Environment Art Production Breakdown
Daniel Tolland, a Computer Arts student and aspiring 3D Environment Artist, gives an in-depth look into how he created an abandoned bedroom scene for his 3rd Year University project.
Daniel Tolland, a Computer Arts student and aspiring 3D Environment Artist, gives an in-depth look into how he created an abandoned bedroom scene for his 3rd Year University project.

Daniel Tolland is an aspiring 3D Environment Artist from Scotland, studying Computer Arts at Abertay University. This article features Daniel's latest project, through which he pushed his skills in Environment Art production, especially when it came to 3D modelling, texturing, lighting and storytelling.
This project was developed over 12 weeks and I dedicated several days a week to work on it. I had two other modules and a job whilst undertaking the project - planning ahead and having a clear idea of what exactly was needed to be done and when was extremely important to the success of this project.

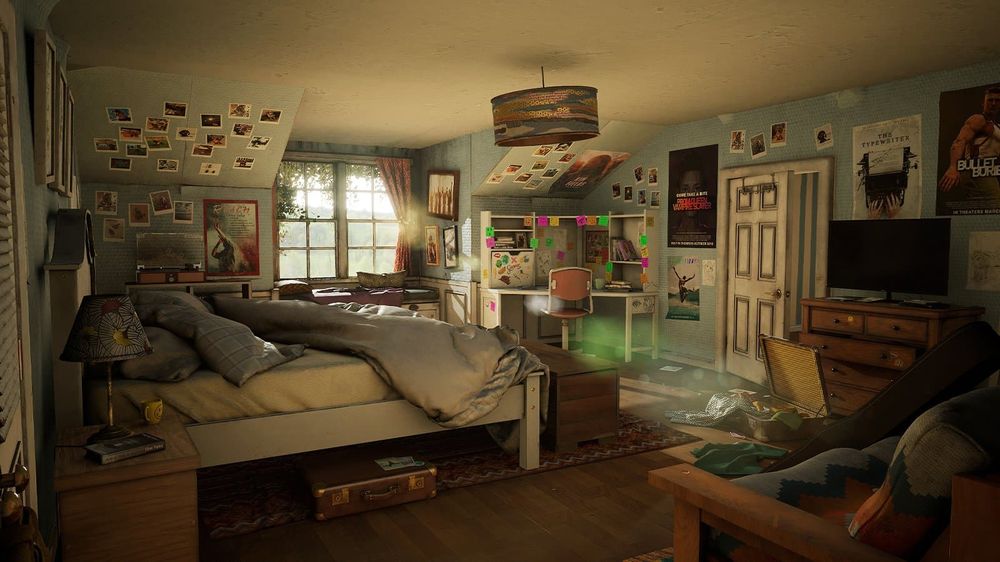
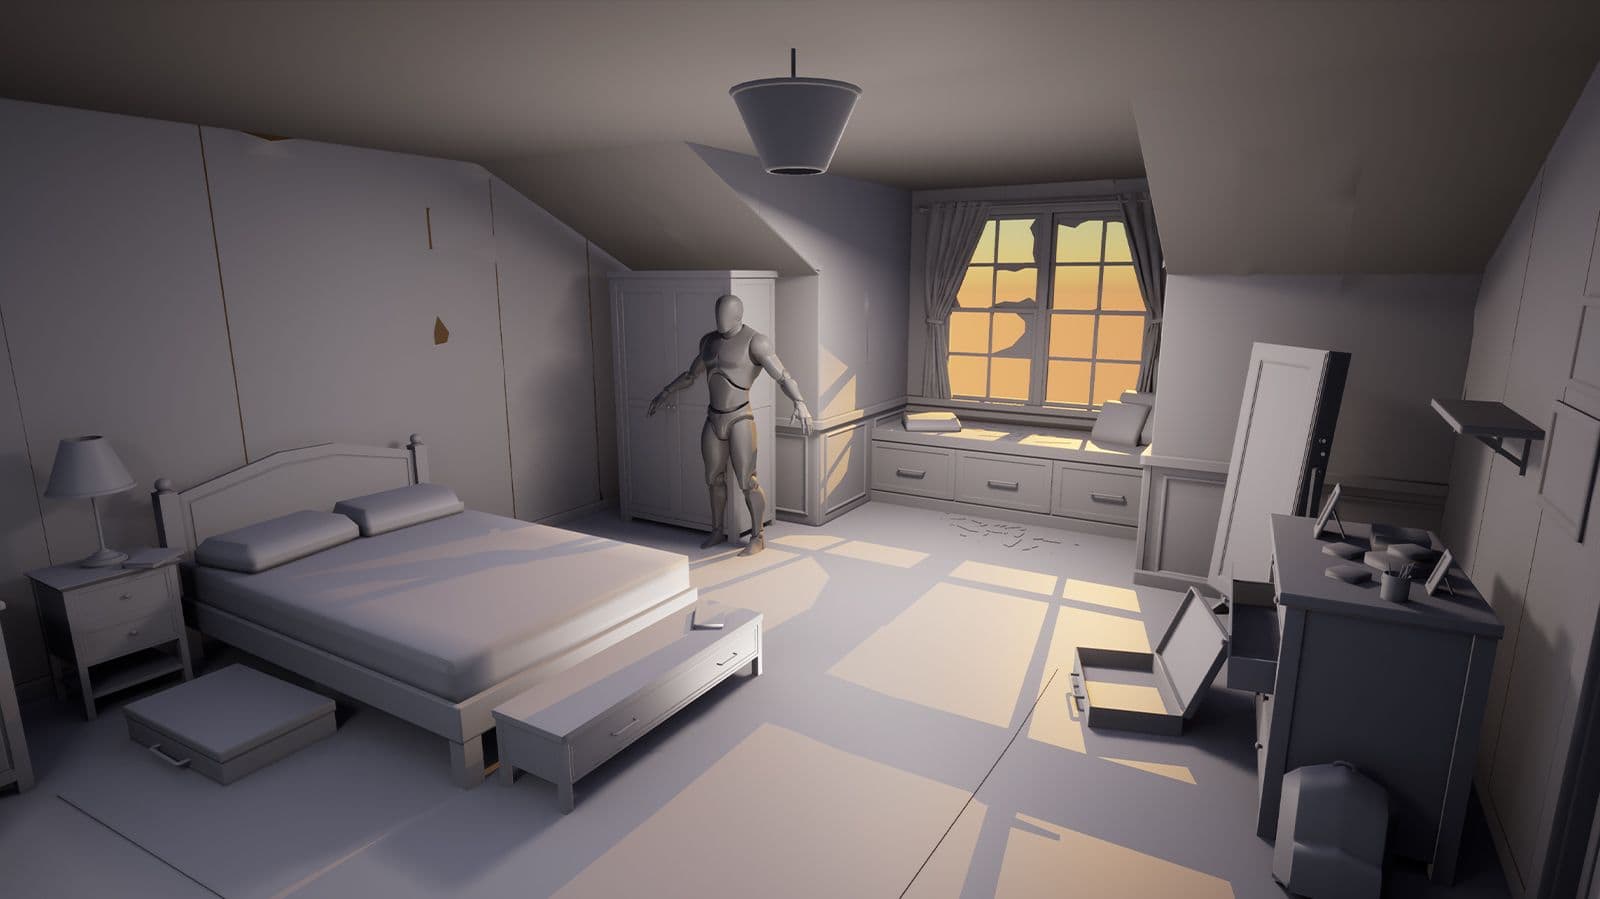
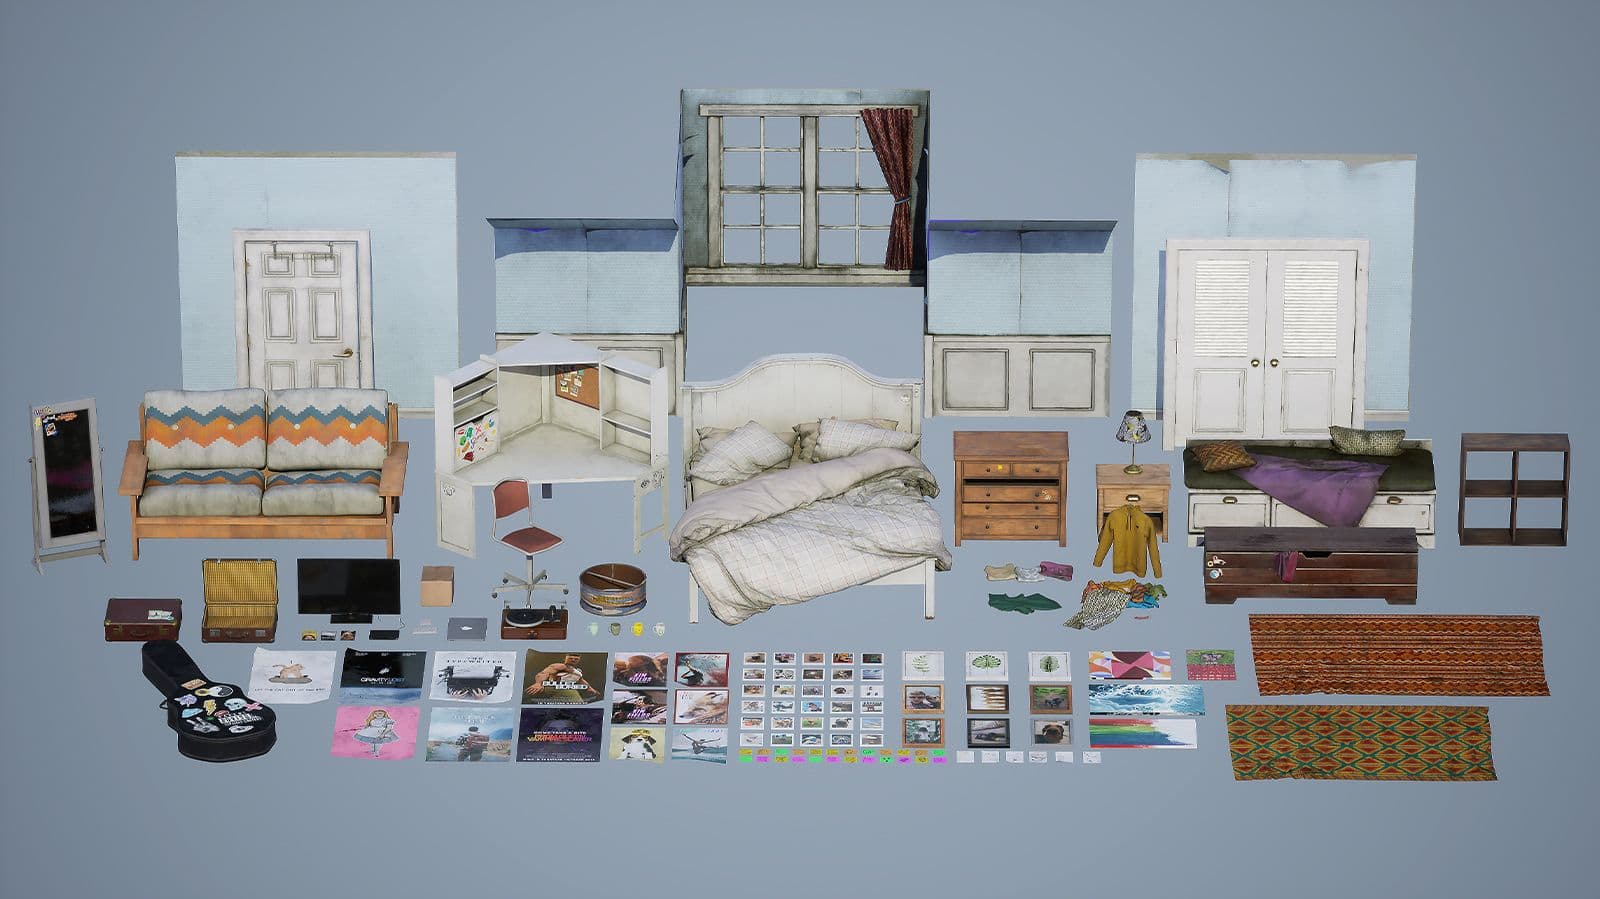
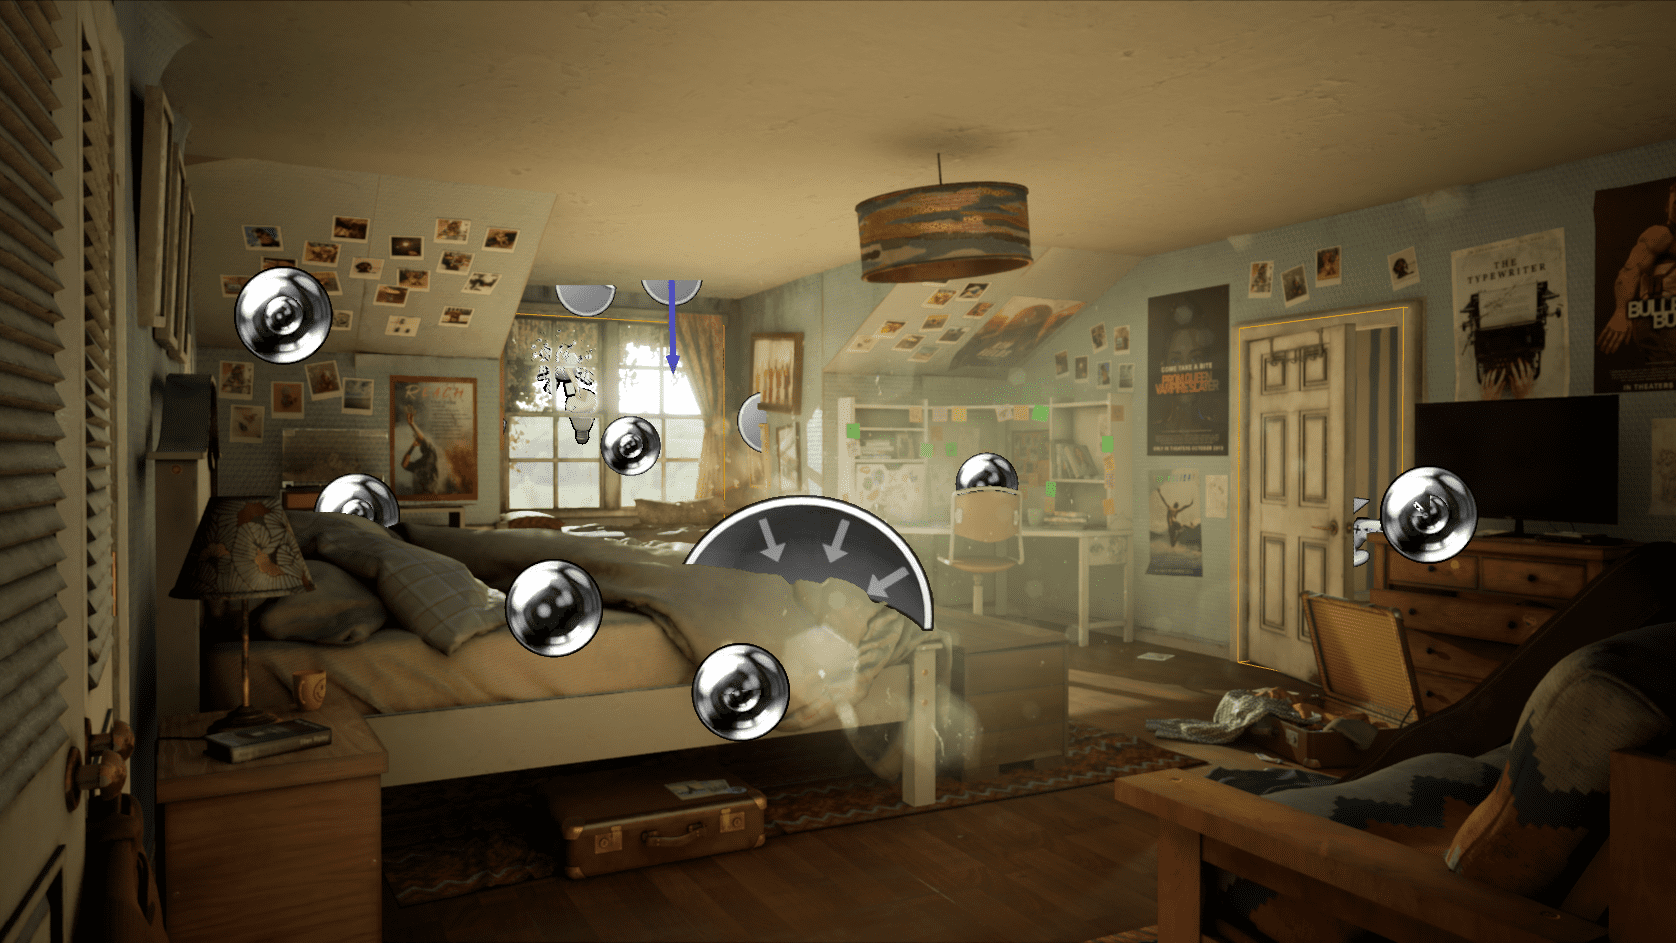
For this project, I wanted to create an abandoned bedroom that once belonged to a teenage character. The bedroom is in a farmhouse that is in the middle of nowhere. Not much given to us to understand why this house has been abandoned but due to the location of the house, the room has remained untouched and unexplored since it was left behind.
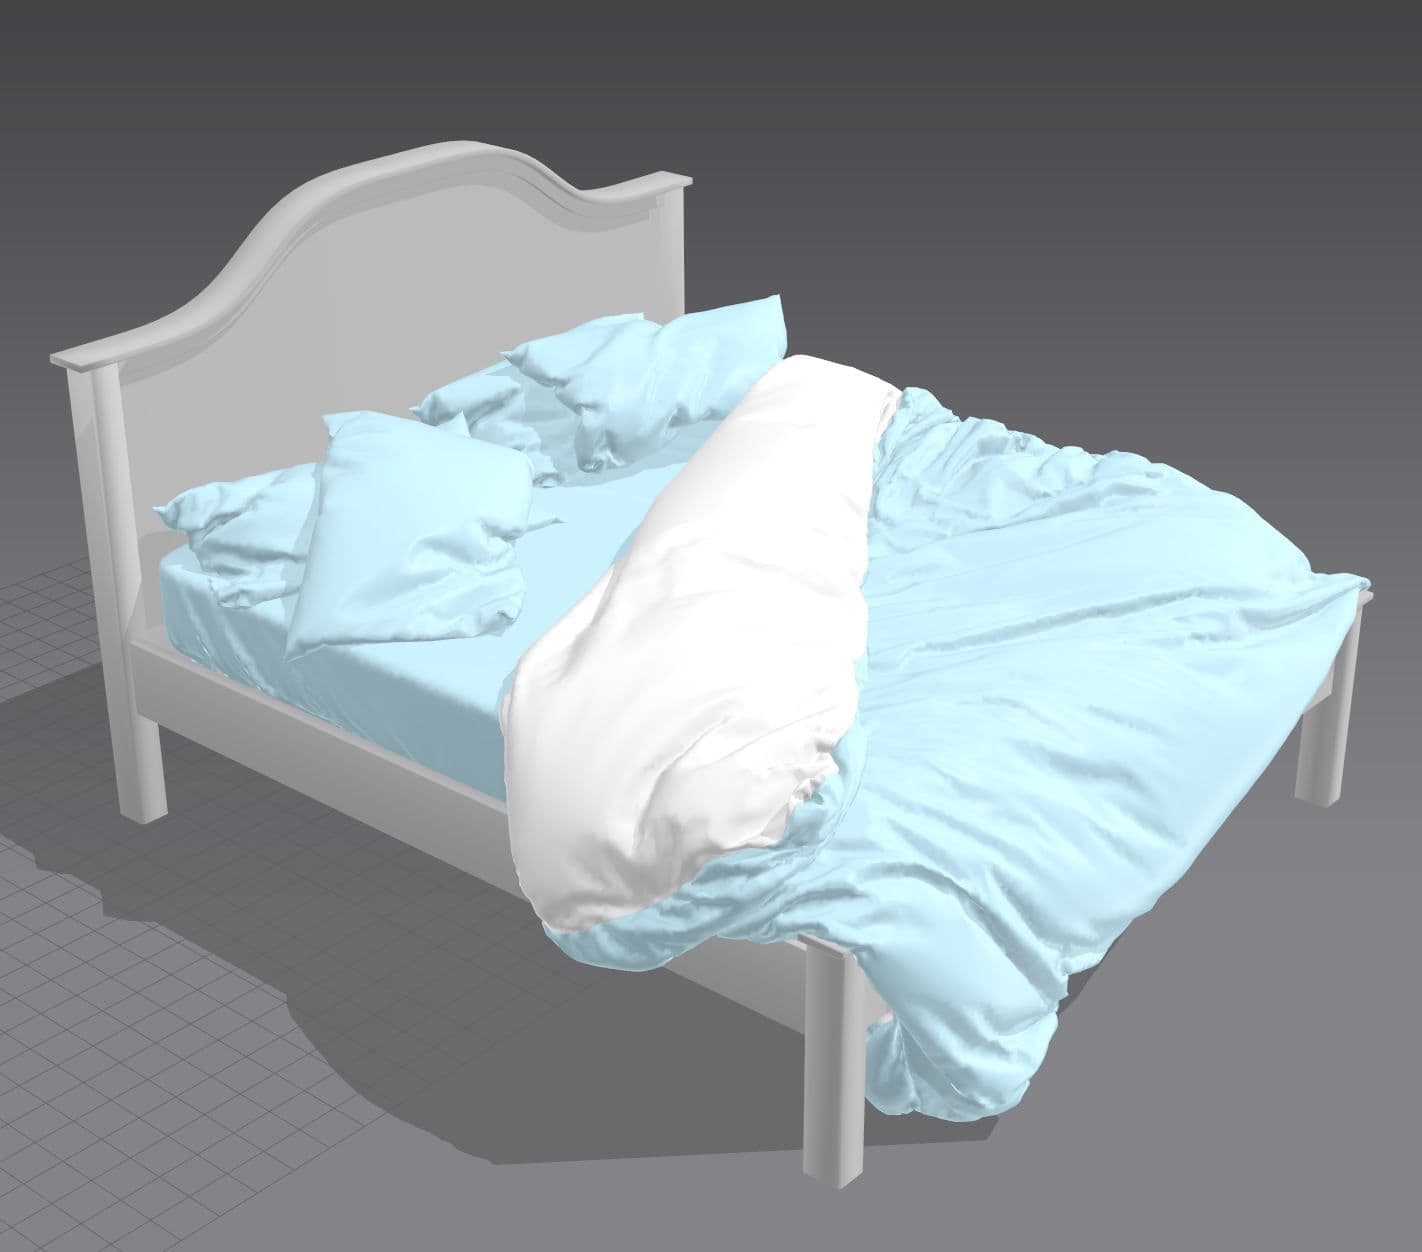
I decided to leave clues around the room that gave hints into what year this room was abandoned and give an insight into what might have been going on around that time. I wanted to convey that there was urgency to leave quickly by having the bed messy and unmade and a suitcase filled with crumpled-up clothes.
This environment was heavily inspired by a piece of concept art from “The Last of Us” by John Sweeney. What I loved most about this piece was its colour palette, mood, and lighting. The composition of the shot also influenced my scene, as well as the bedroom’s overall layout. Although this was the main starting point for the environment, I did not want it to be a complete copy of Sweeney’s original concept.
I gathered more references from games with similar scenes such as the “Life is Strange” franchise, “Tell Me Why” and “Everybody’s Gone to the Rapture”. With the help of these references, along with my own imagination, I was able to design my own unique bedroom.
In every project, it is always important to have as many reference images as you possibly can. I recommend using PureRef for this as it allows you to click and drop images from the internet and compile them into different mood boards quickly with little effort. I had references from my own bedroom, as well as other bedrooms I found on the internet. I also gathered images from furniture websites and would analyse these pieces of furniture to work out how they were assembled and the type of material they were made out of.
Remember to always use your references! Gather as many as you can at the start of a project but also update them regularly throughout. The more references you use, the better your assets will look when modelling and texturing.

I also looked at the work of other 3D artists that I admire. I analysed their workflows and dissected their projects to understand how they achieved them. Doing this helped to push my 3D artistic skills forward as I began to gain a clearer understanding of how other artists working in the Games Industry tackle their own projects.
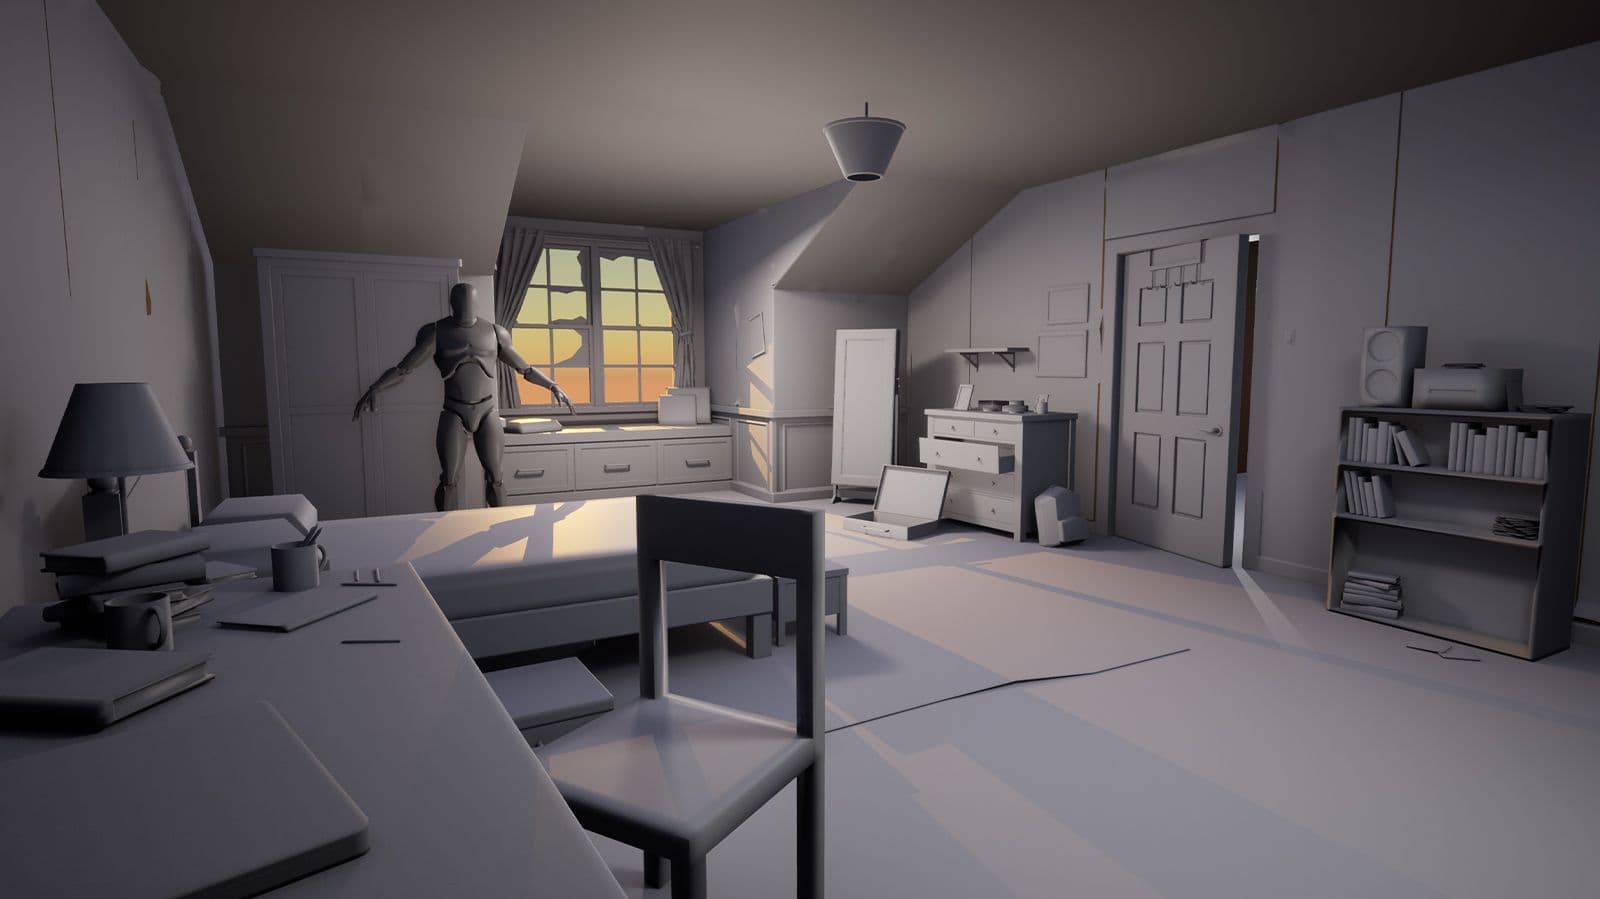
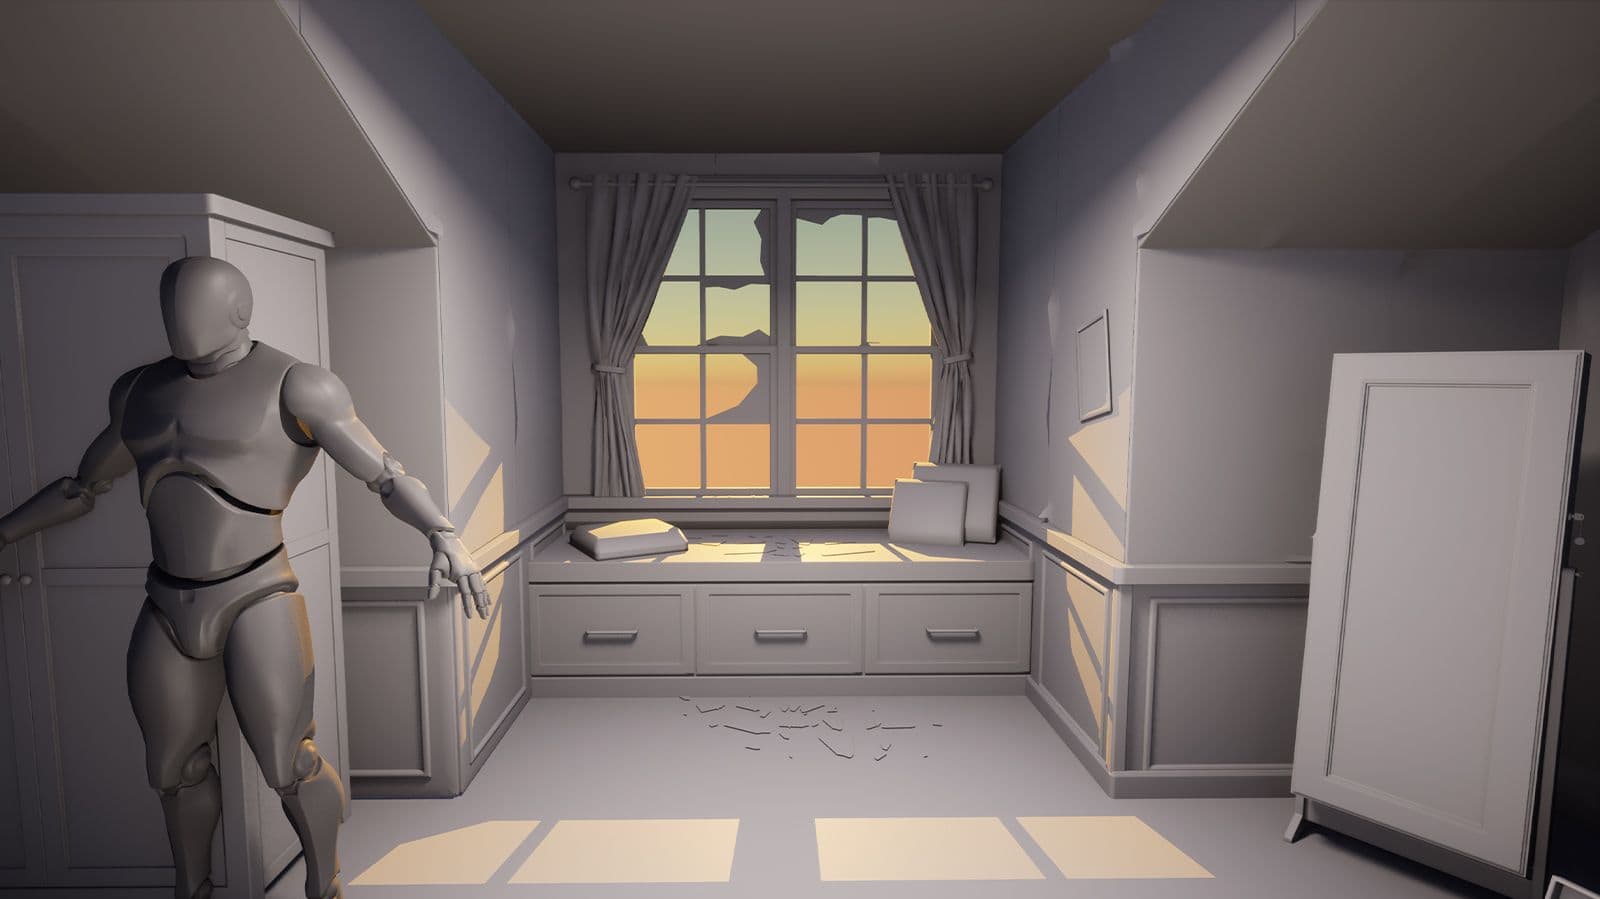
I used Maya to create the blockout of the environment. The initial blockout stage of a project is extremely important and should not be overlooked or rushed. It provides you with a starting point that allows you to visualise the space, height, shapes and forms of the overall environment. It also gives you the opportunity to experiment with camera composition early on so you can begin to build the scene around what the camera can see.
A blockout will often change several times throughout a project and that is okay. Iteration and experimentation are always important!
Some assets I created with more detail during the blockout stage as I knew that they would appear in the final scene. Other assets that I had not yet decided on the final design of were made with simpler, blocky shapes.
When blocking assets, it’s important to take scale into consideration. This will make the process of implementing them into the engine much quicker and more efficient. In order to help with this, I used the UE4 mannequin model both in the engine and in Maya. Placing this mannequin next to the assets I was making, I was able to scale them more to a size that would be accurate in real life.

Once I was happy with the initial blockout of the environment, it was time to transfer it into Unreal Engine 4. I made sure every asset was separate so that later I could delete the blockout version and replace it with the final asset. I took this opportunity to also experiment with lighting in order to see what I could create and get a feel for the mood I was trying to capture.
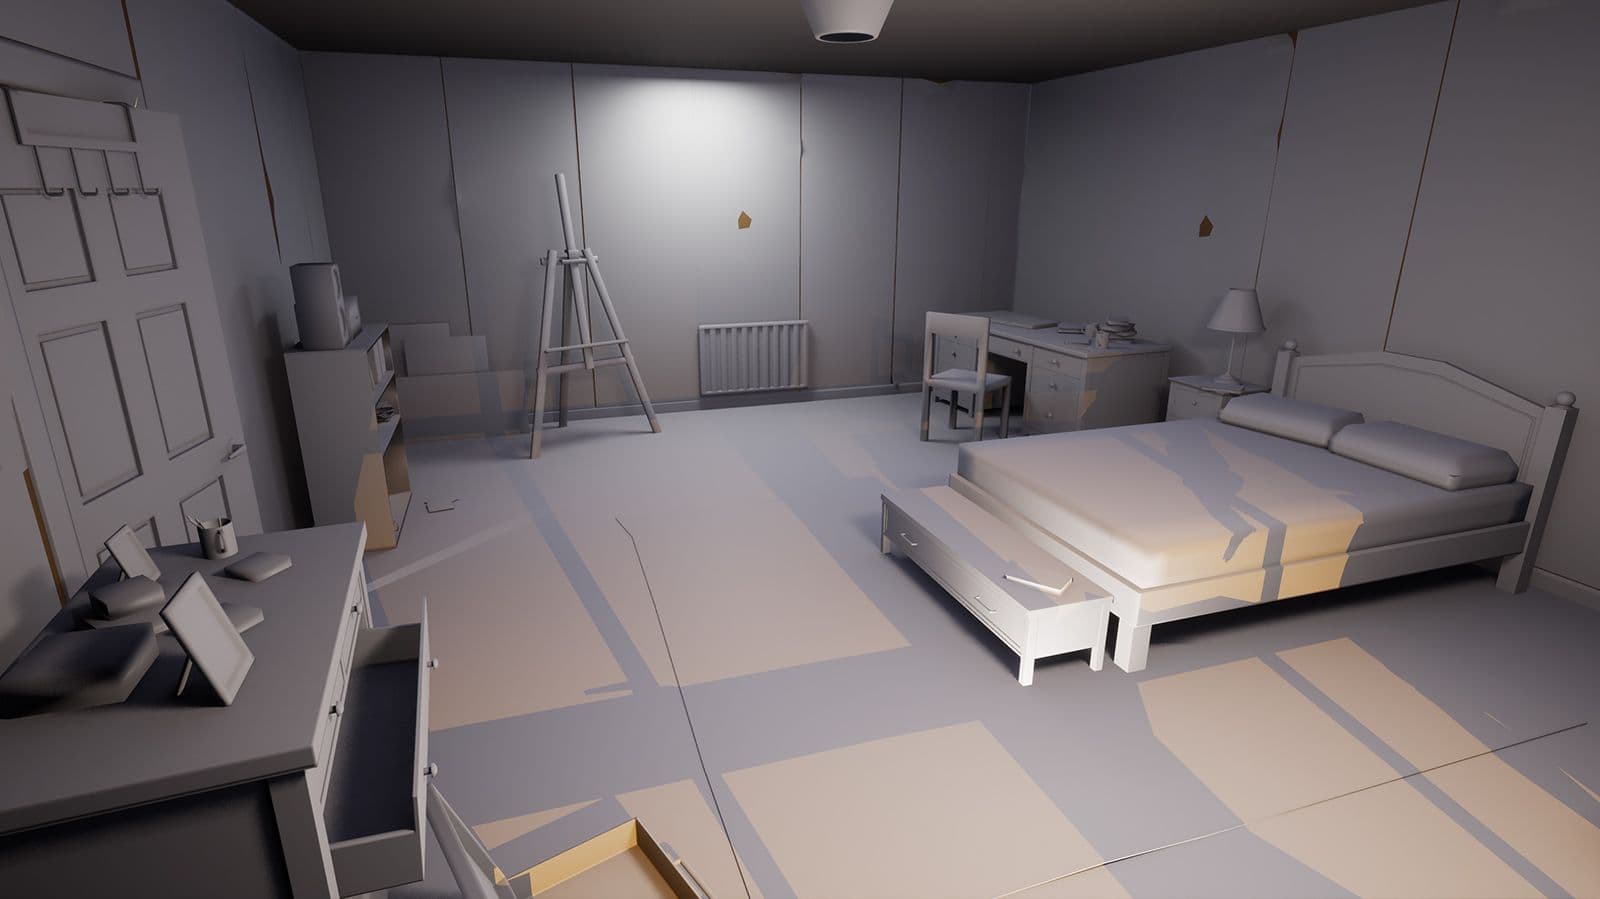
I started with a blockout version of each asset to give me a clearer idea of the shapes and forms that were needed. When it came to modelling the final assets, I would place the blockout to the side and use it as a reference to recreate the asset with more detail. In some cases, the blockouts were detailed enough to be able to just refine certain shapes to get the look I wanted.
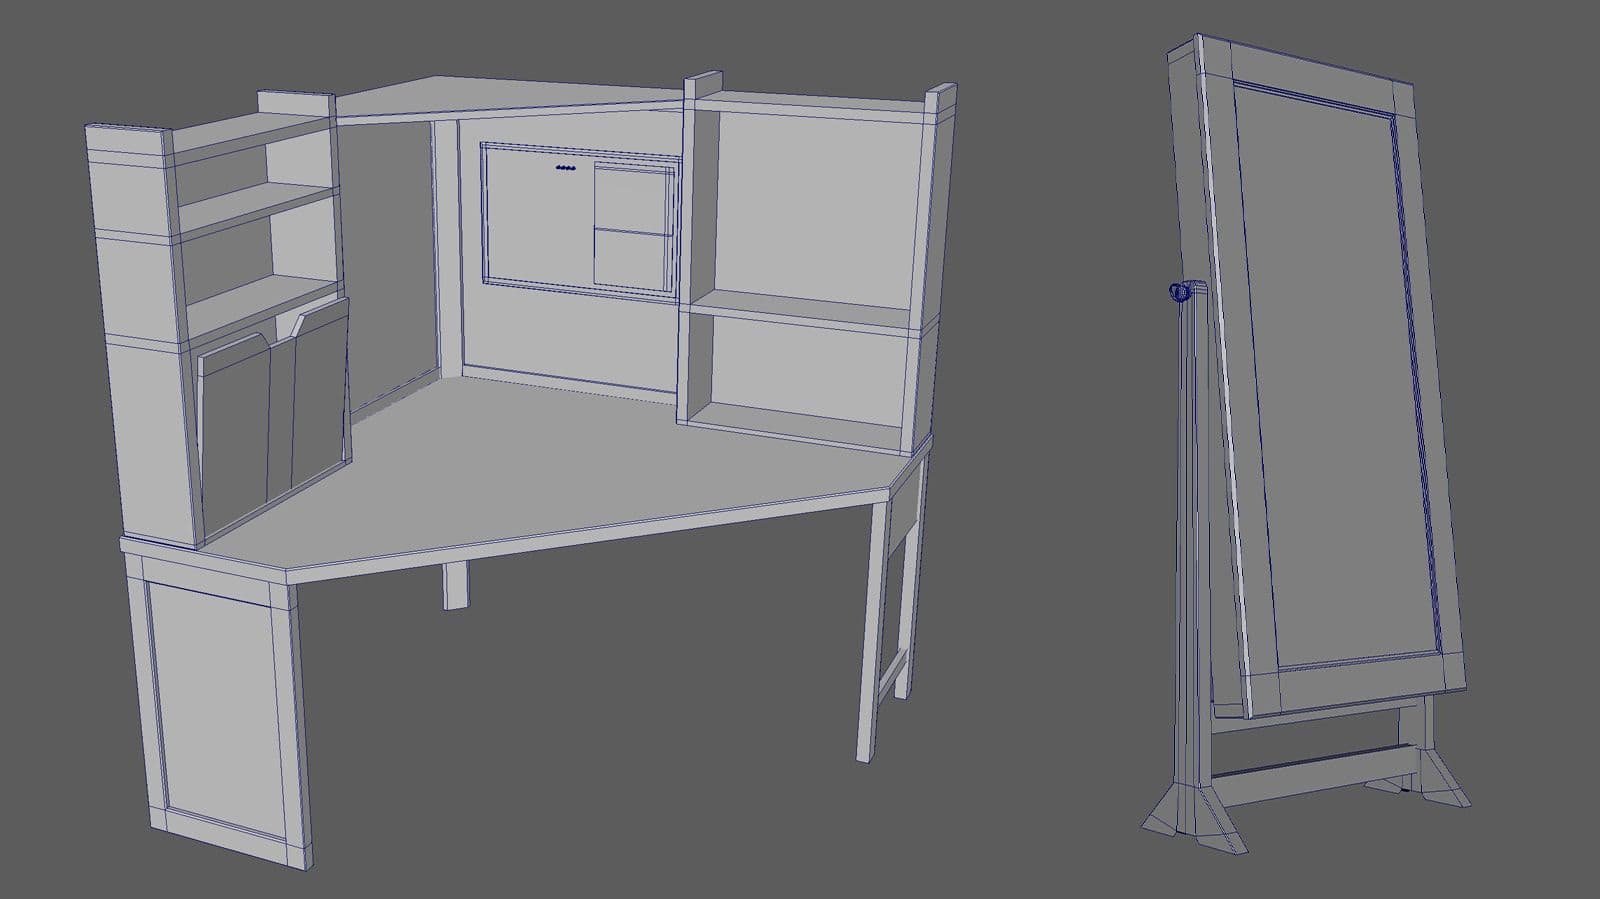
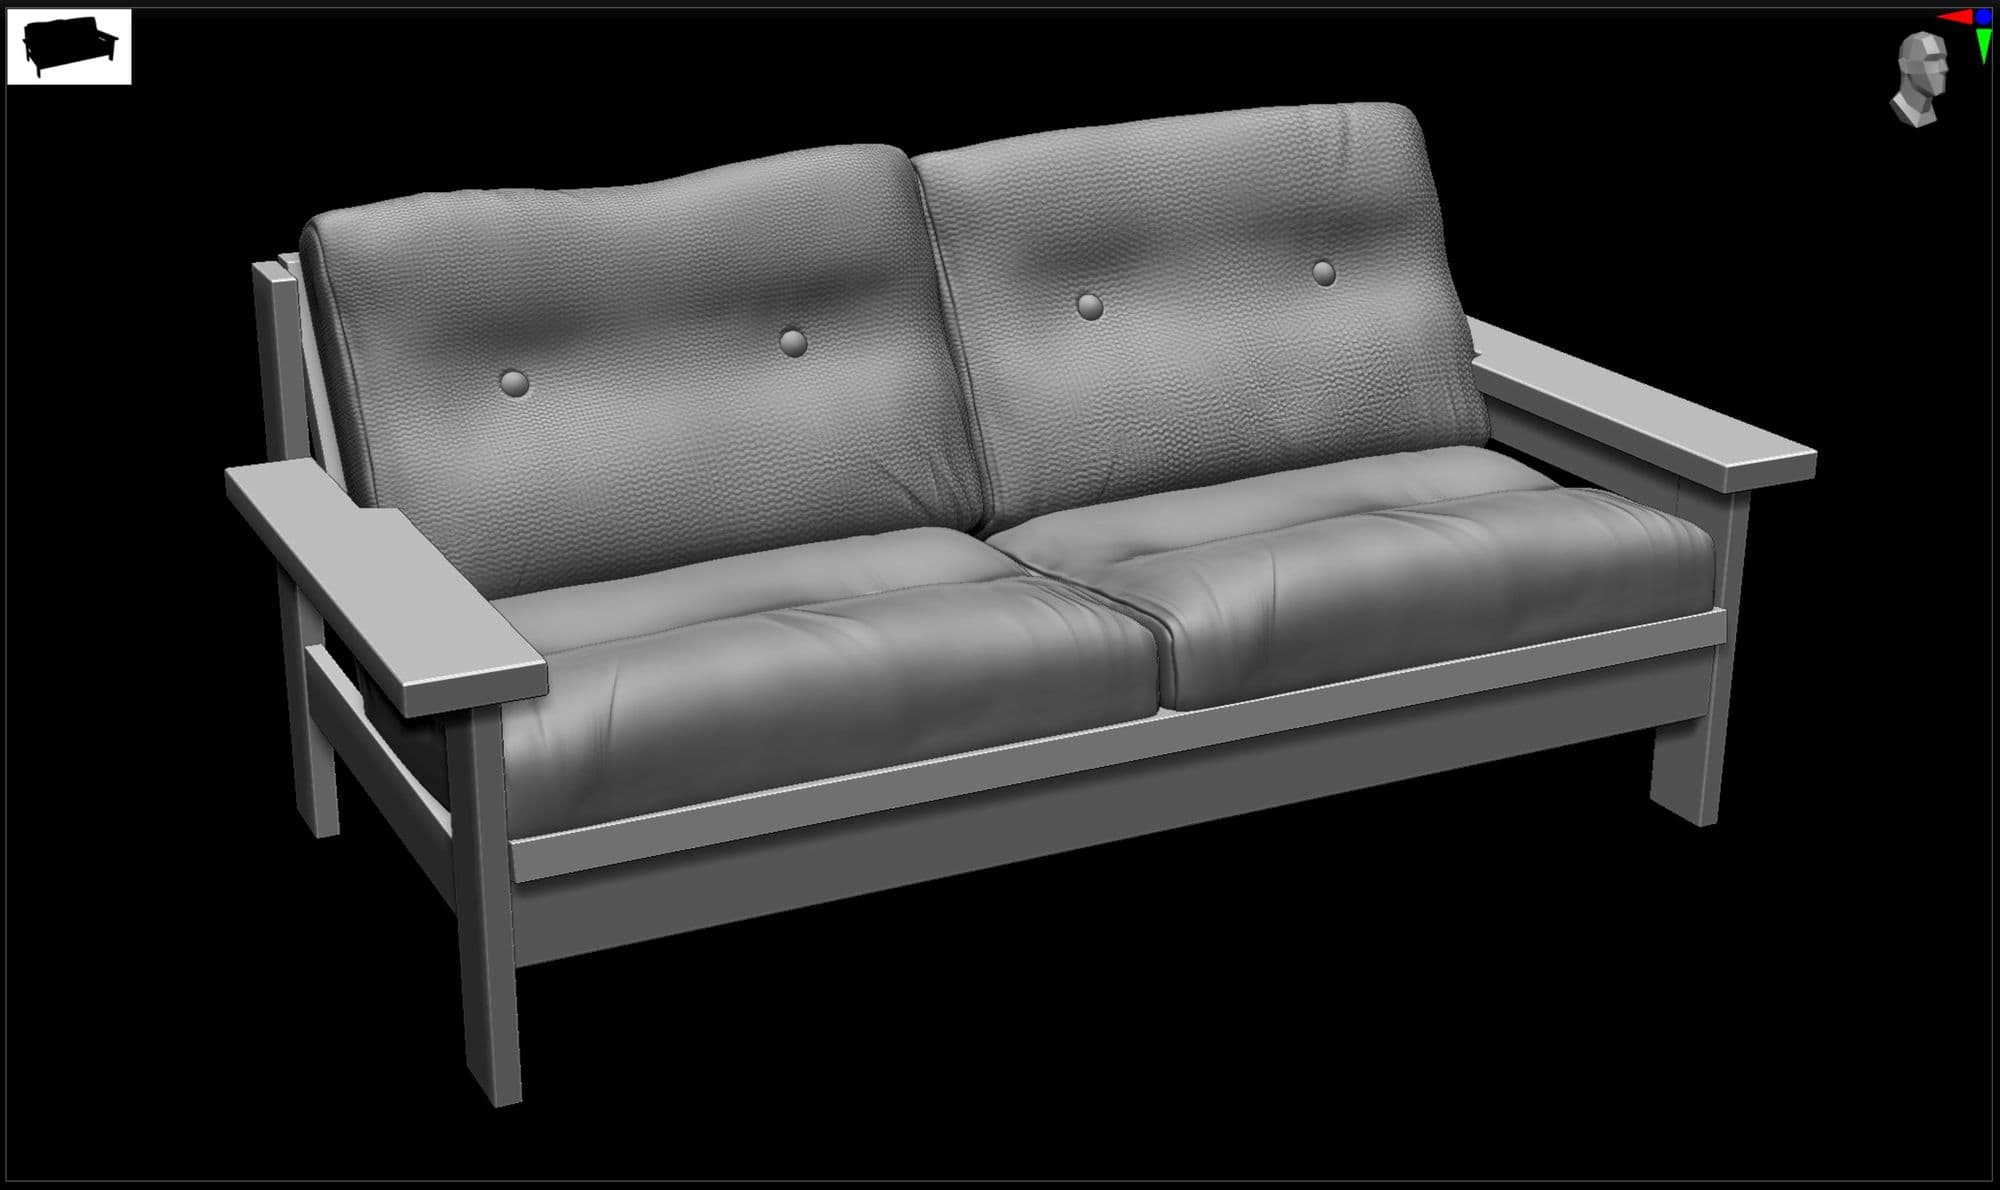
I tried to keep everything low to mid-poly, focusing on neat topology to avoid having to retoplogise later down the line. My original intention was to sculpt damage onto each asset inside ZBrush, but I found that I was able to create most of the damage from textures inside Adobe Substance 3D Painter. Certain assets, such as the sofa cushions were sculpted, manipulated and given texture inside ZBrush. I would later retoplogise them in Maya and bake them inside Substance 3D Painter.
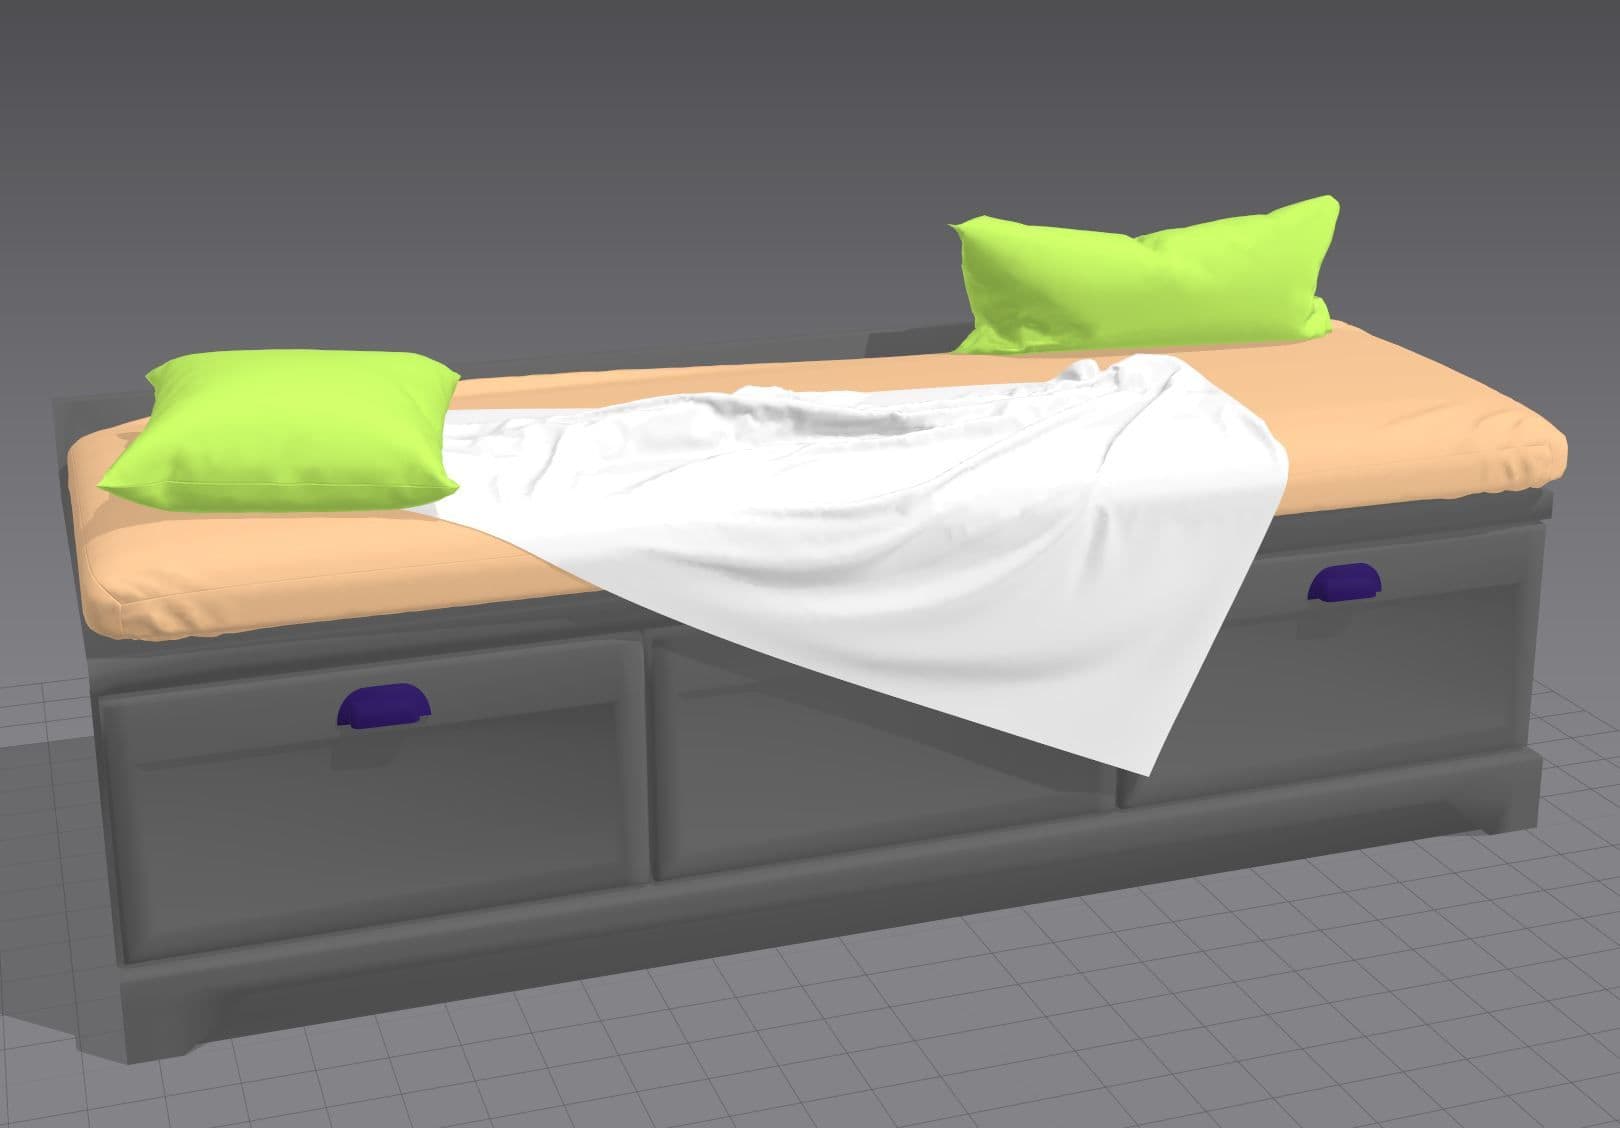
I decided to learn Marvelous Designer in order to create believable fabric with realistic creases and folds. Originally, I planned to sculpt the fabric in ZBrush but after researching the results Marvelous Designer can create, I opted to learn how to use it. What I was needing to create in the software was fairly straightforward to understand and get a hang of.
In this environment, I wanted to convey the idea that whoever lived in the bedroom before had to leave the house in a rush. I knew that in order to give a sense of this urgency to leave quickly, creating a duvet cover that was messy, creased and unmade would make sense. Inside Marvelous, I was able to manipulate the fabric in any way I wanted to create the types of folds I was looking for, whilst watching them organically fall into place in real-time.
As well as the bed duvet, I used Marvelous to create the rugs, window cushions, and the clothes inside the suitcase. Once I was happy with the results, I brought the meshes into Maya to retoplogise them and prepared them for texturing.
Texturing of assets is definitely my favourite part of the 3D production pipeline. It is exciting to add life to each asset, whilst coming up with stories about how and why they look the way they do.
I textured all my assets in Adobe Substance 3D Painter. Prior to this project, I had used this software several times but I wanted to really push my artistic skills and focus on the little details to create assets that looked realistic.
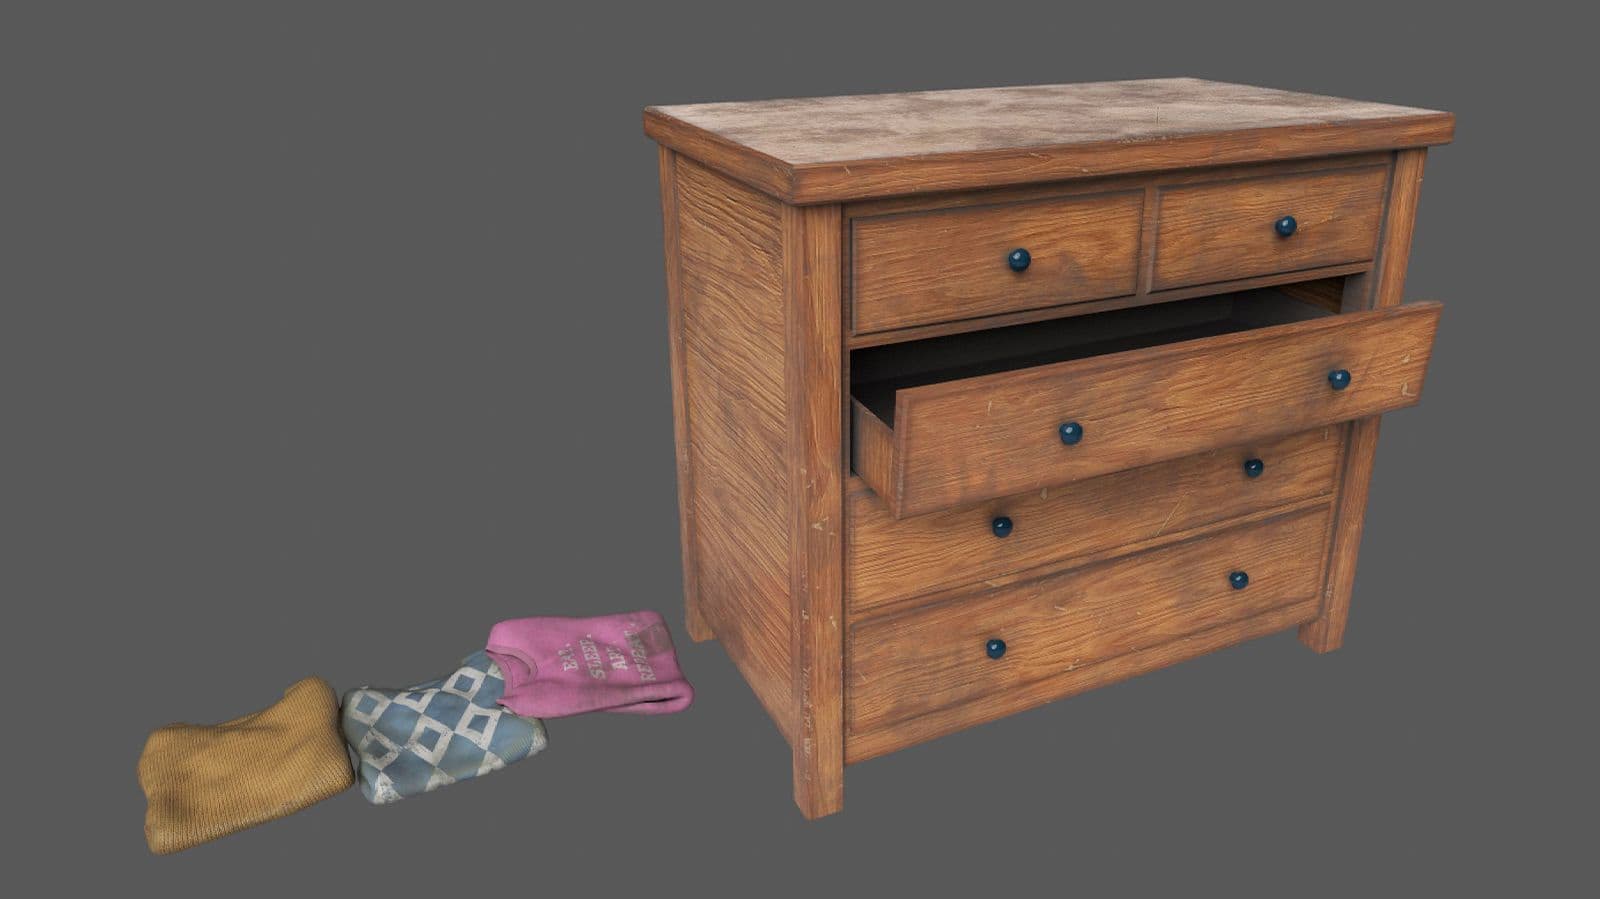
Each asset had to look unique with its own marks and damage and I did not simply want to rely on smart masks to achieve this. I found that hand-painting these little details gave me better results as I did not want anything to look procedurally generated. I thought carefully about why and where each asset would be damaged. For example, paint is badly chipped at the bottom of the bedroom door and this would have been caused by years of someone closing the door with their foot.

Although smart masks did not work well for scratches and damage, they were an excellent starting point for adding layers of dust or dirt on top of assets. They were also great at creating different Roughness variations. If these smart masks did not initially look right, I would play around with the values or erase sections by creating a new paint layer and setting it to Subtract.
Using various alphas and manipulating the height settings, I was able to create unique markings on my assets. By changing the height settings to a negative value, I was able to fake dents and damage on my assets without having to change the topology.
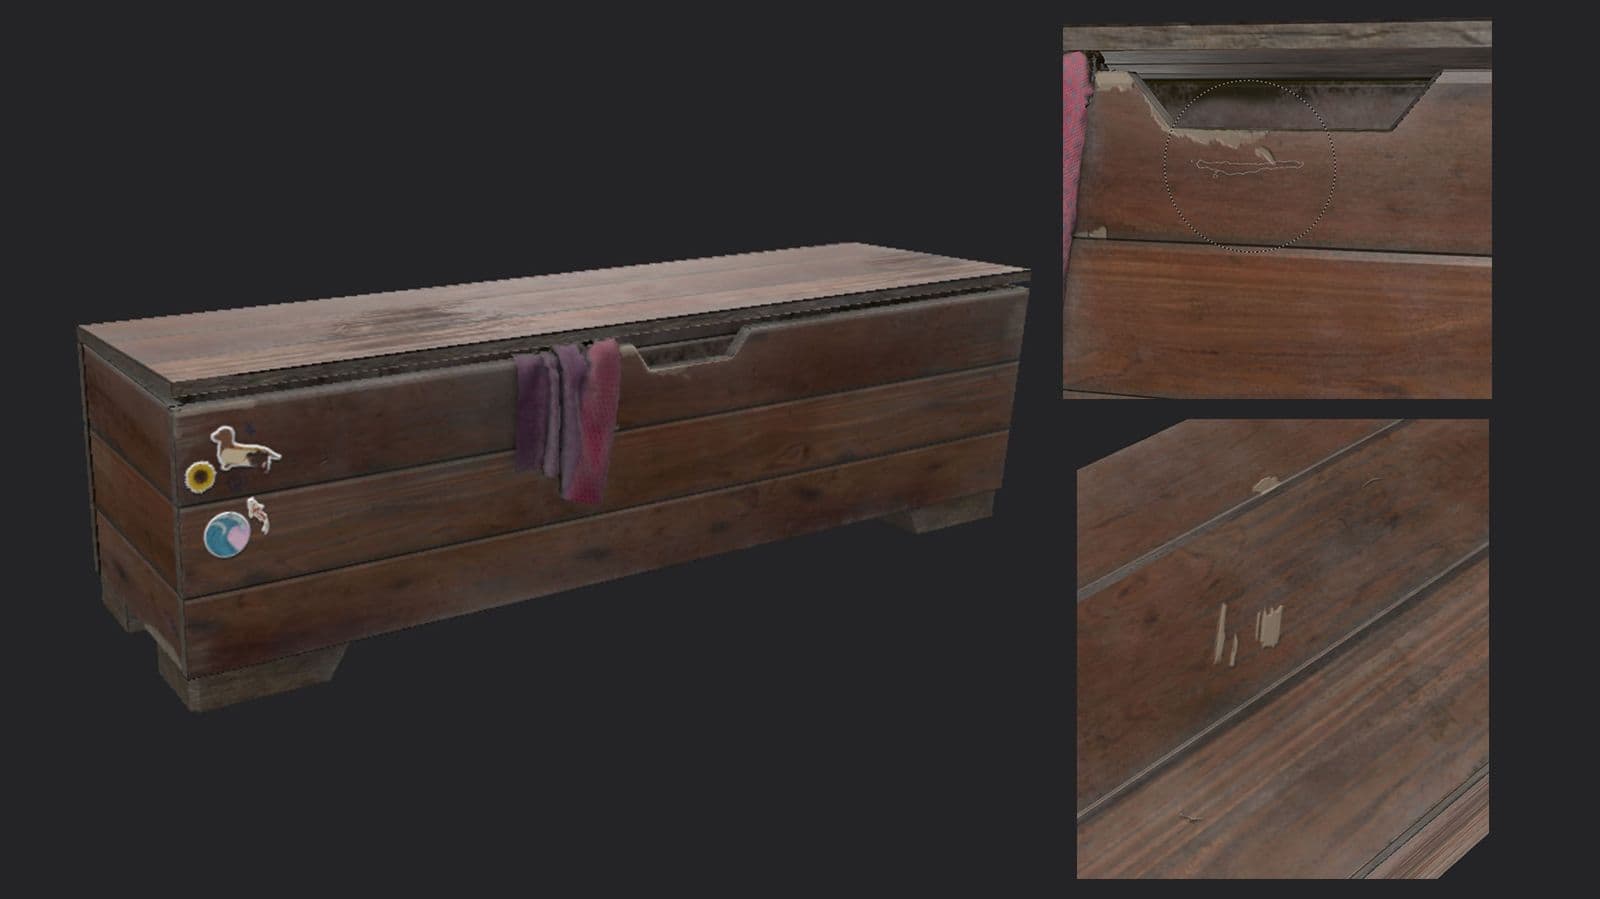
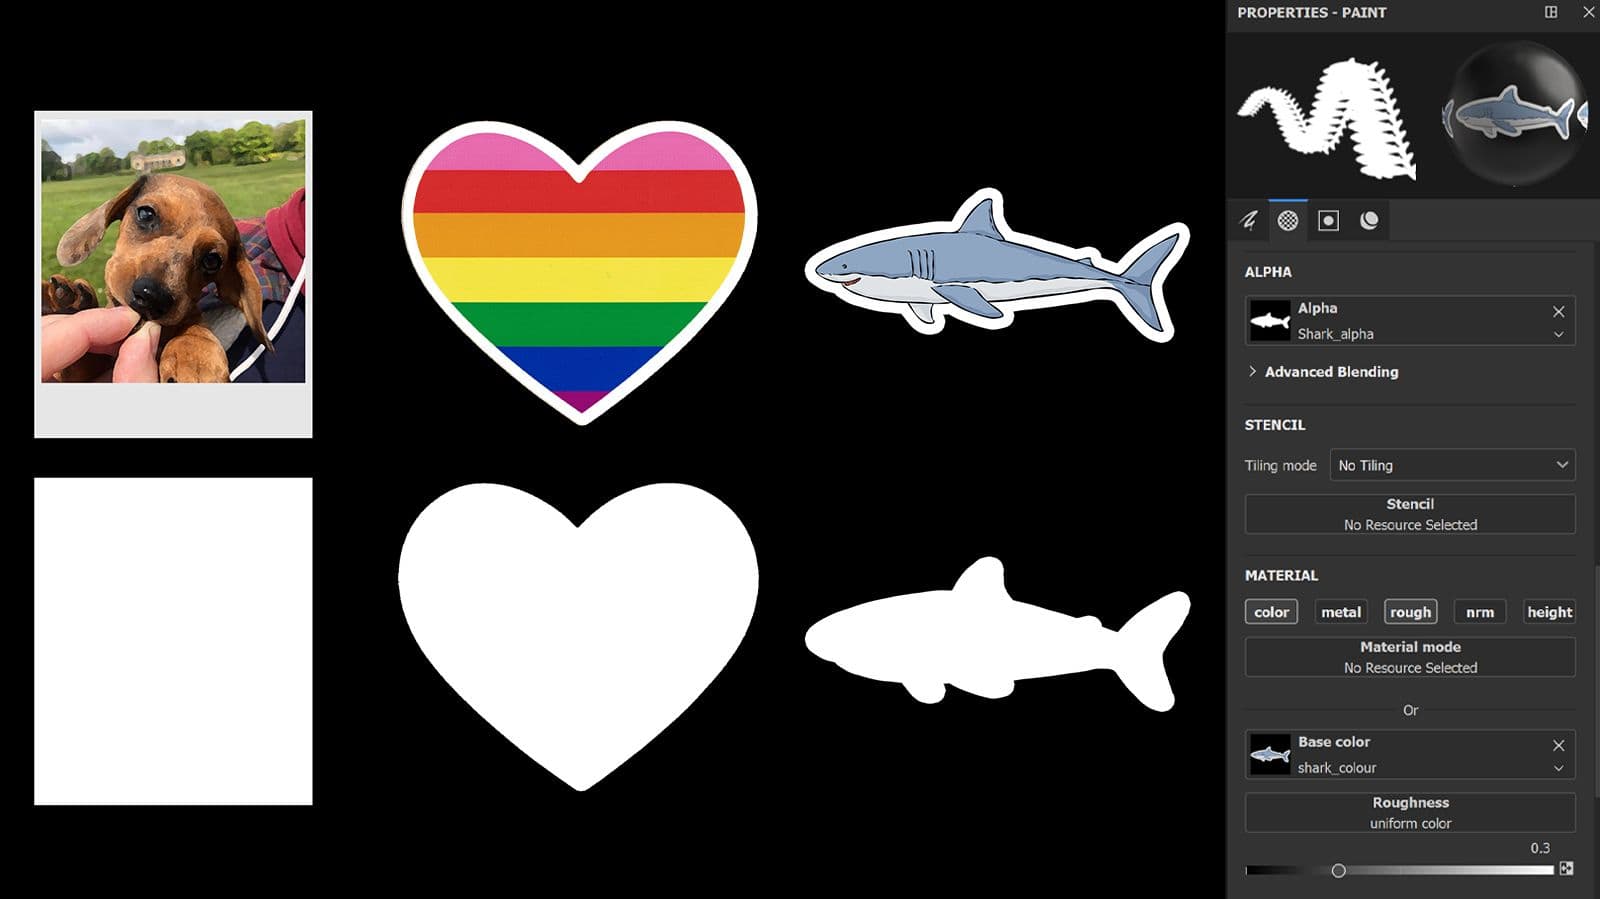
In order to add some more interest and make every asset personal to the character I had imagined living in the bedroom, I decided to add stickers to certain objects. I believe this matched the character's creative personality and made sense that she, would try to personalise these objects when growing up in this room.
The stickers were easily achieved with the creation of simple decals. To do this, I created two versions of the sticker: one with colour to be used as the base colour and one that was filled with solid white on a black background to be used as the alpha. Inside Substance, I simply created a paint layer and placed the alpha version into "Alpha", and the coloured version inside "Base Colour". From there, I was able to stamp these stickers onto the assets wherever I liked. I also added a layer of damage to each of the stickers by erasing parts of it by using the "Brush Corner" alpha that comes with Substance.
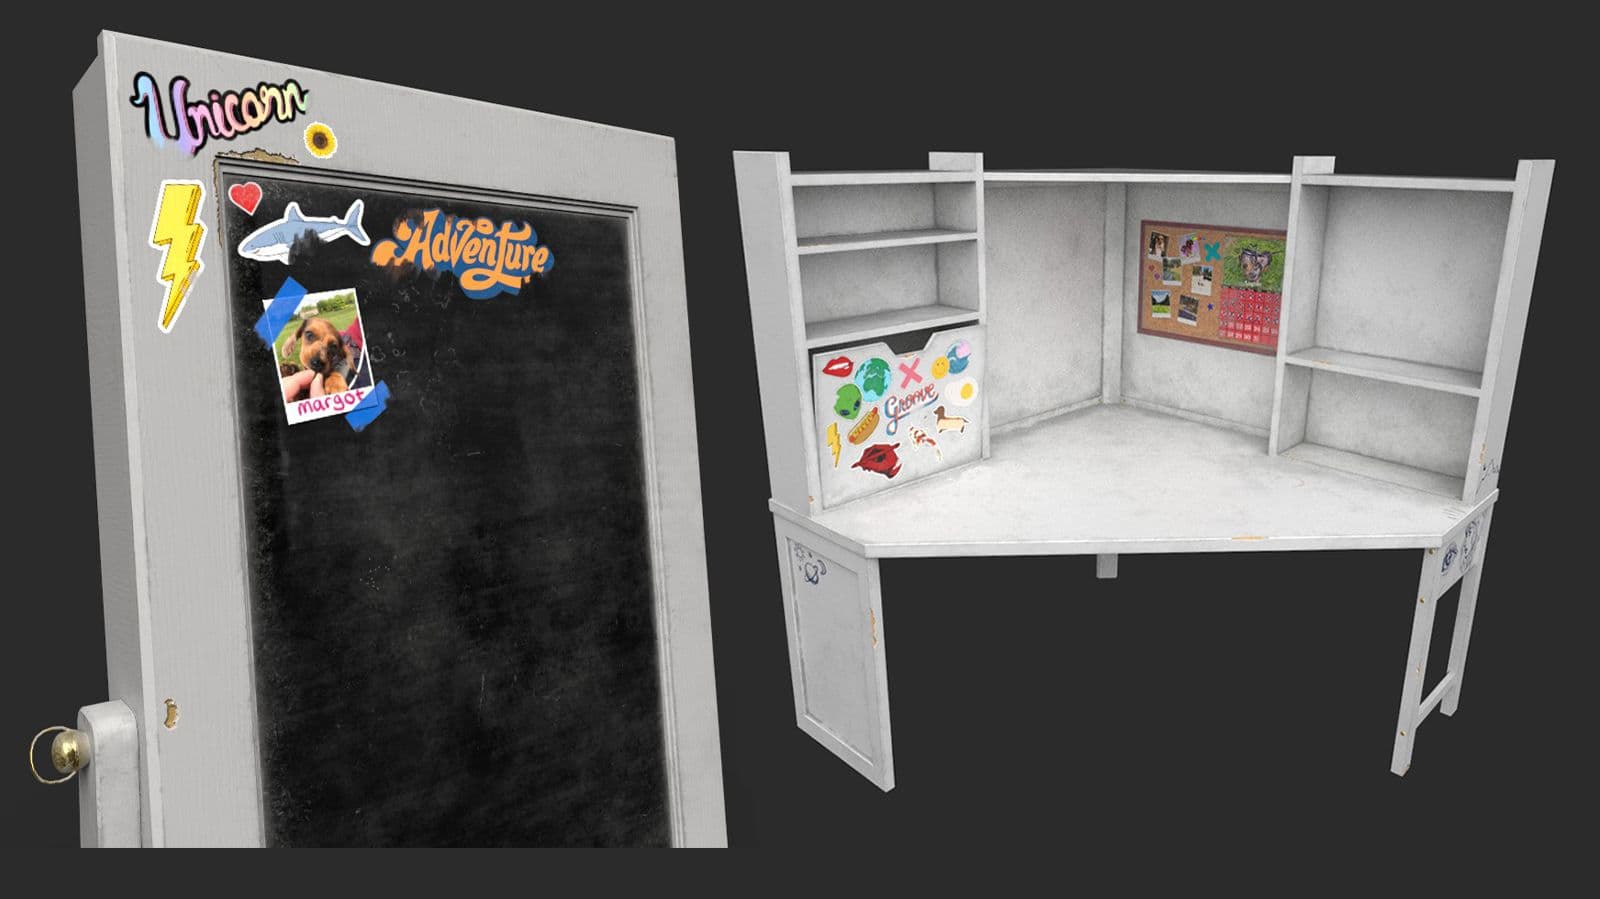
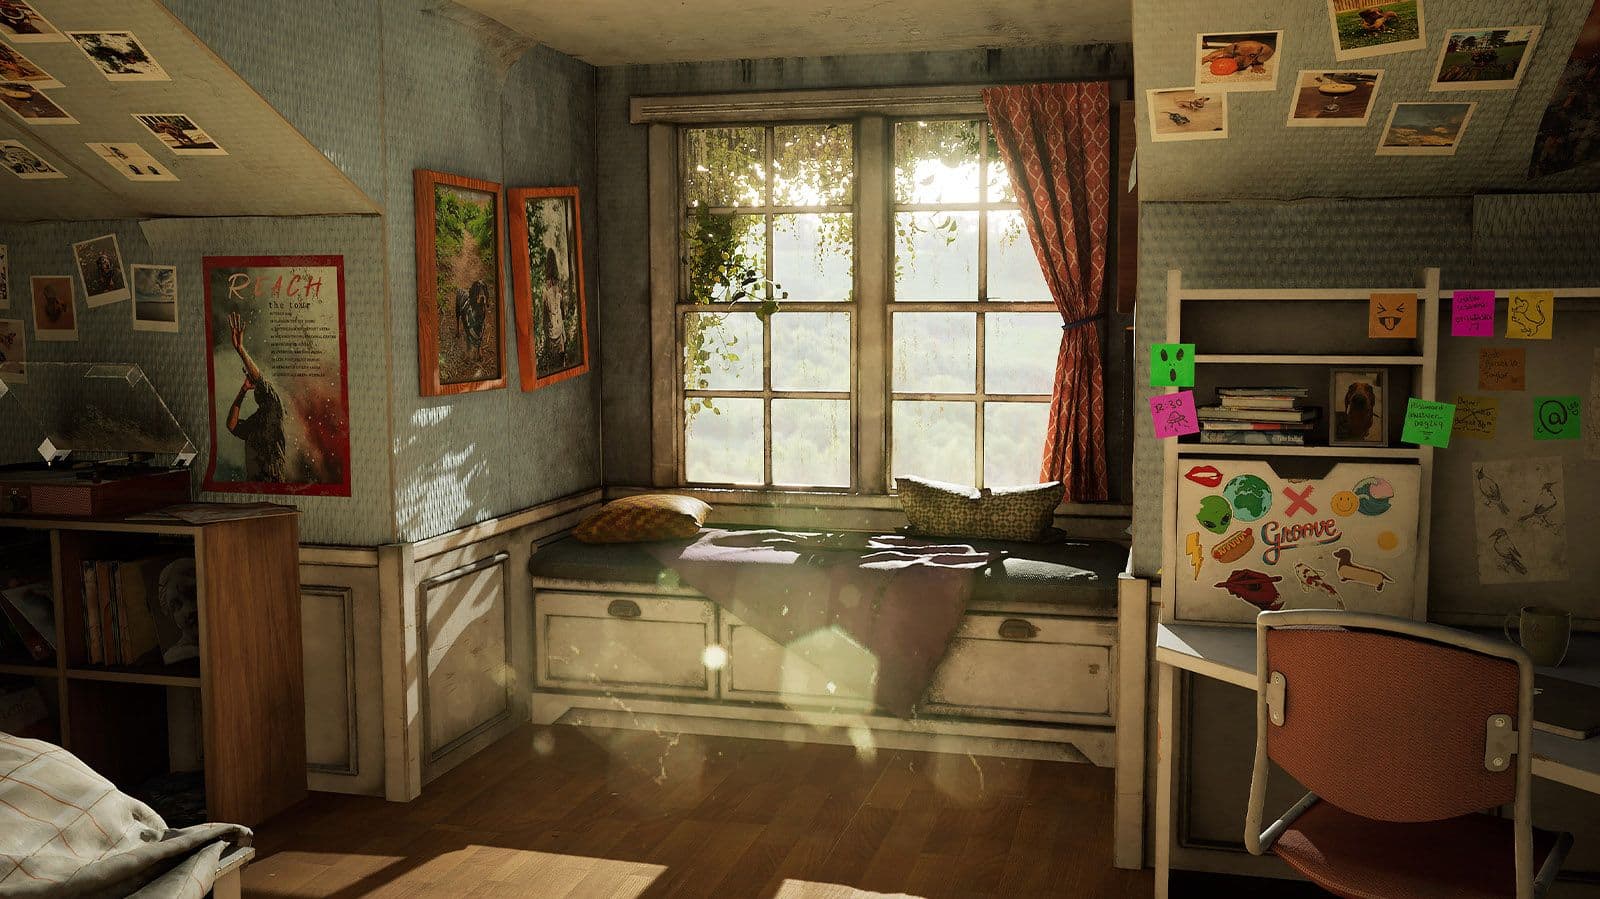
I always made sure to take into consideration where the assets were placed in the room when texturing in order to keep my textures cohesive and realistic. There is a smashed window panel which would have resulted in natural weathering on assets over the years. Assets closer to the window all have a lot more mould, water stains, and dampness on them.
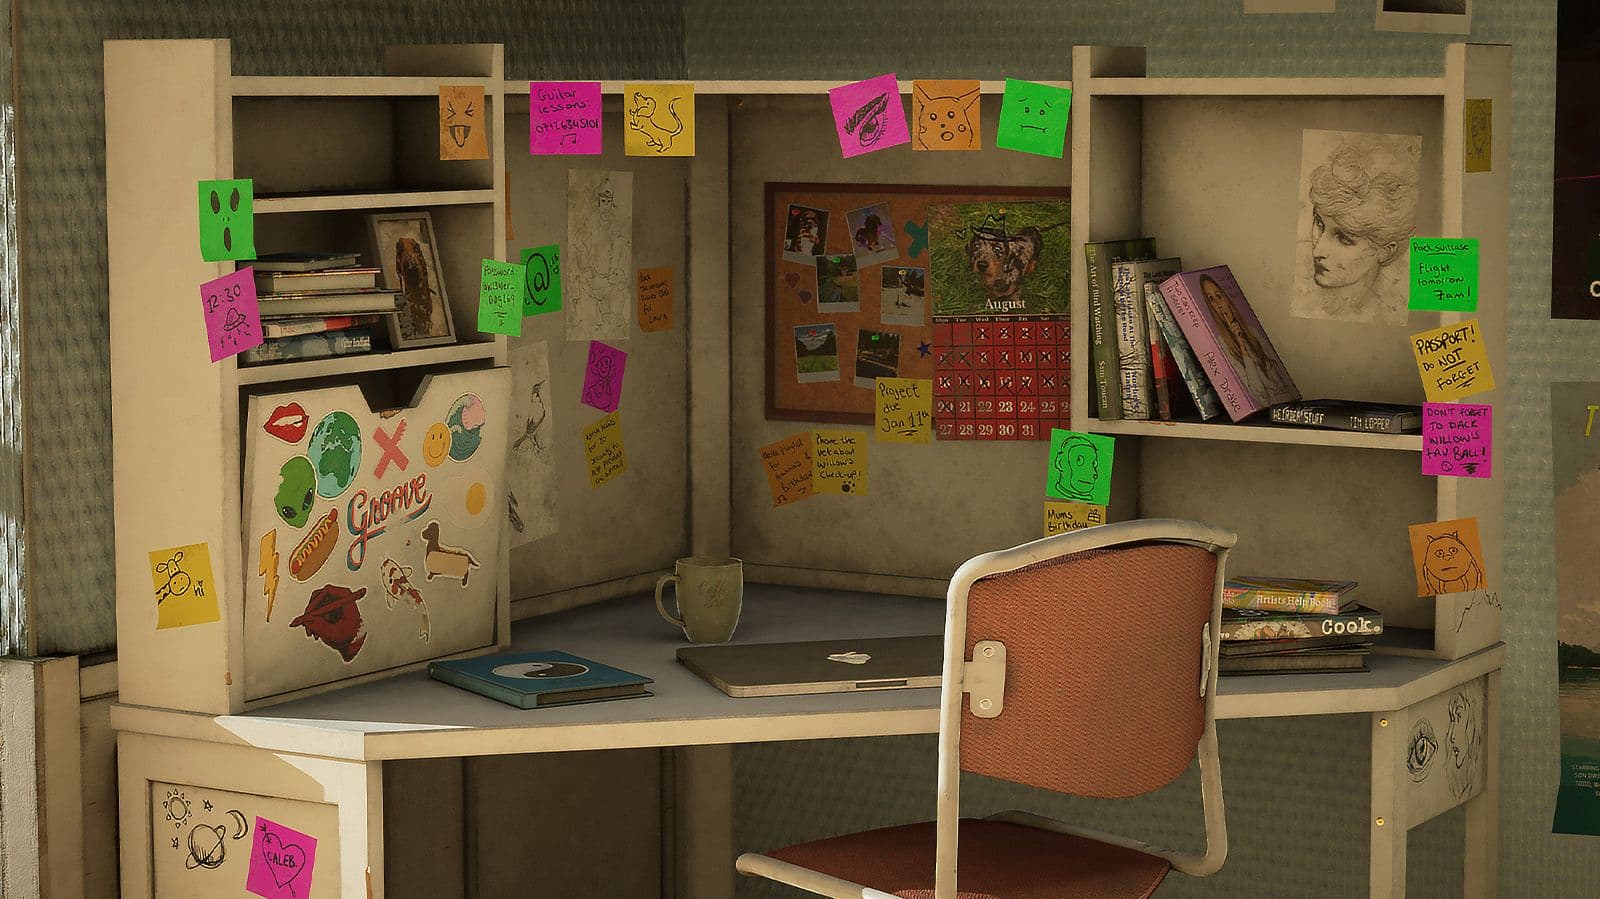
Environmental storytelling was at the front of my mind during the entire process of this project. I wanted to convey that this bedroom once belonged to a young teenage girl. In order to get a clearer idea of what to create, I thought about the type of person she was and made a list of her interests and hobbies.
She’s a student at high school with a love for art and music. She sketches out drawings not only on paper but on pieces of furniture. She has her own desk where she does her school homework and is surrounded by post-it notes to help her remember things. These post-it notes also provide an insight into what her interests are, who she is and what might have been happening in her life around when she left the house.
I found that coming up with a character helped me tremendously when designing the room and all of its assets.
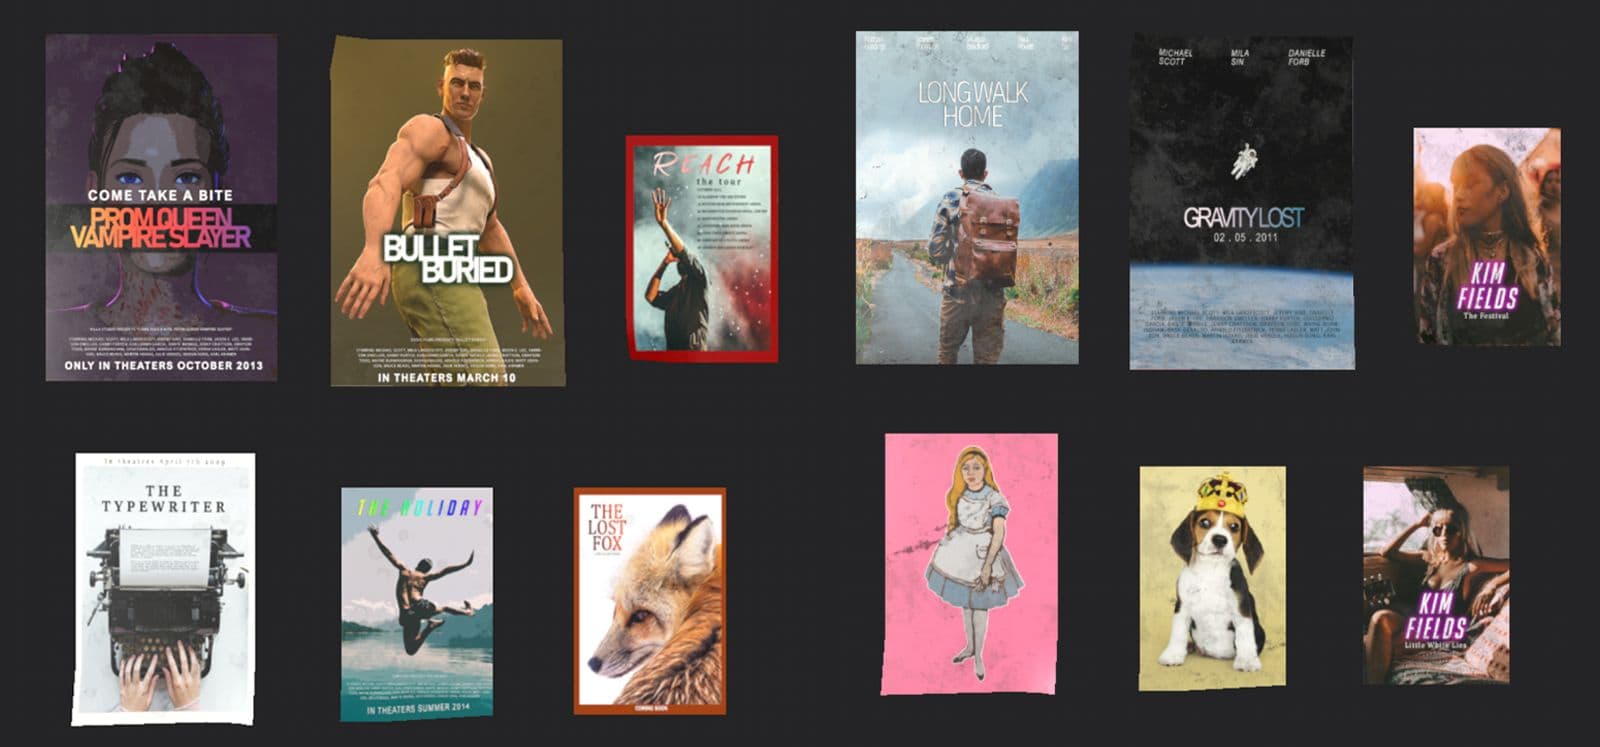
I wanted to make the world in my scene feel believable. I created my own merchandise of fake posters, records, books and DVDs. This added an extra layer of realism to the environment as well as filling it with fun little ‘Easter Eggs’ to look out for. I used images from some of my own personal projects that I had completed in the past during my time at University to create some of the movie posters (Bullet Buried, Prom Queen: Vampire Slayer), as well as editing royalty-free images.
In video games, I find it really entertaining when there is a nod to something that exists in real life. I wanted to create my own nods to real-life pop culture and entertainment so that when someone took the time to closely inspect the final renders of the bedroom, they would recognise some of references I was inspired by.

Throughout the project, I constantly experimented with lighting. In order to capture the overall mood of the scene, it was crucial that I had an interesting lighting setup. I wanted the room to be lit naturally with strong sunlight and rays coming through the window. There would be no help from artificial lights that could help brighten up the dark corners of the room and I had the challenge to make sure nothing became lost. I had to make sure the scene was bright enough without any of those dark patches but still look as if it was lit naturally. I stuck to warm yellow and orange tones to help replicate the natural colours that come from the sun.
I added exponential fog to the scene which helped to brighten up the room further and this was particularly great at brightening up the dark corners of the room. The fog, mixed with the bloom post-processing effects helped me to achieve the soft glow that comes through the bedroom window. By adding a dirt mask in post-processing and combining it with lens flares and bloom, I created particles that show in the sunlight that mimic the appearance of dust.
Throughout the duration of this project, I received feedback every week from my University mentors, fellow students, friends and other artists. This feedback was incredibly valuable and really helped shape how the project turned out.
I encourage everyone to seek feedback from both friends and other artists as this will always better your project. Someone else looking at your project will often spot errors that you may have become blind to after staring at a computer screen for hours on end.
It’s often difficult to know when a project is complete. As the creator, I will see every inch of the environment and could spend hours working on details that ultimately would never be seen in the final renders. As this project had a deadline, I had to make sure to not fall into this trap and quickly understand when to call my project finished.
It's easy to get caught up with what you are doing but something both my mentor and friends stressed to me was to take regular breaks and step away from the computer screen for a few hours or even days. This helped to refresh my mind and look at the project with a fresh pair of eyes. There were many occasions when I noticed mistakes or came up with better ways to achieve something after being well-rested.
This project was the most detailed environment I had ever created and it really pushed my 3D skills to the maximum. I learned so much and I had so much fun doing it. It only solidified for me that becoming a 3D Environment Artist for Video Games is absolutely the career journey I want to pursue. I look forward to creating new environments and testing out new techniques in the future!
Thank you for taking the time to read this post. If you have any other questions about this project or would like feedback on your own projects, please do not hesitate to reach out to me via my social media. I'm always happy to hear from other artists!

Artstation, Twitter, Instagram, LinkedIn, The Rookies
Email: [email protected]