
Painting and Developing Realistic Skin in Mari
Gnomon graduate and 3D Artist, Fiona Ng, shares her experience working on her Undead character to refine her realistic painting skills in Mari.
Gnomon graduate and 3D Artist, Fiona Ng, shares her experience working on her Undead character to refine her realistic painting skills in Mari.

Fiona Ng is a Gnomon graduate and 3D Artist with a focus on Modeling and Texturing for Film and Cinematics. In this article, Fiona shares her experience working on her Undead character to refine her realistic painting skills in Mari.
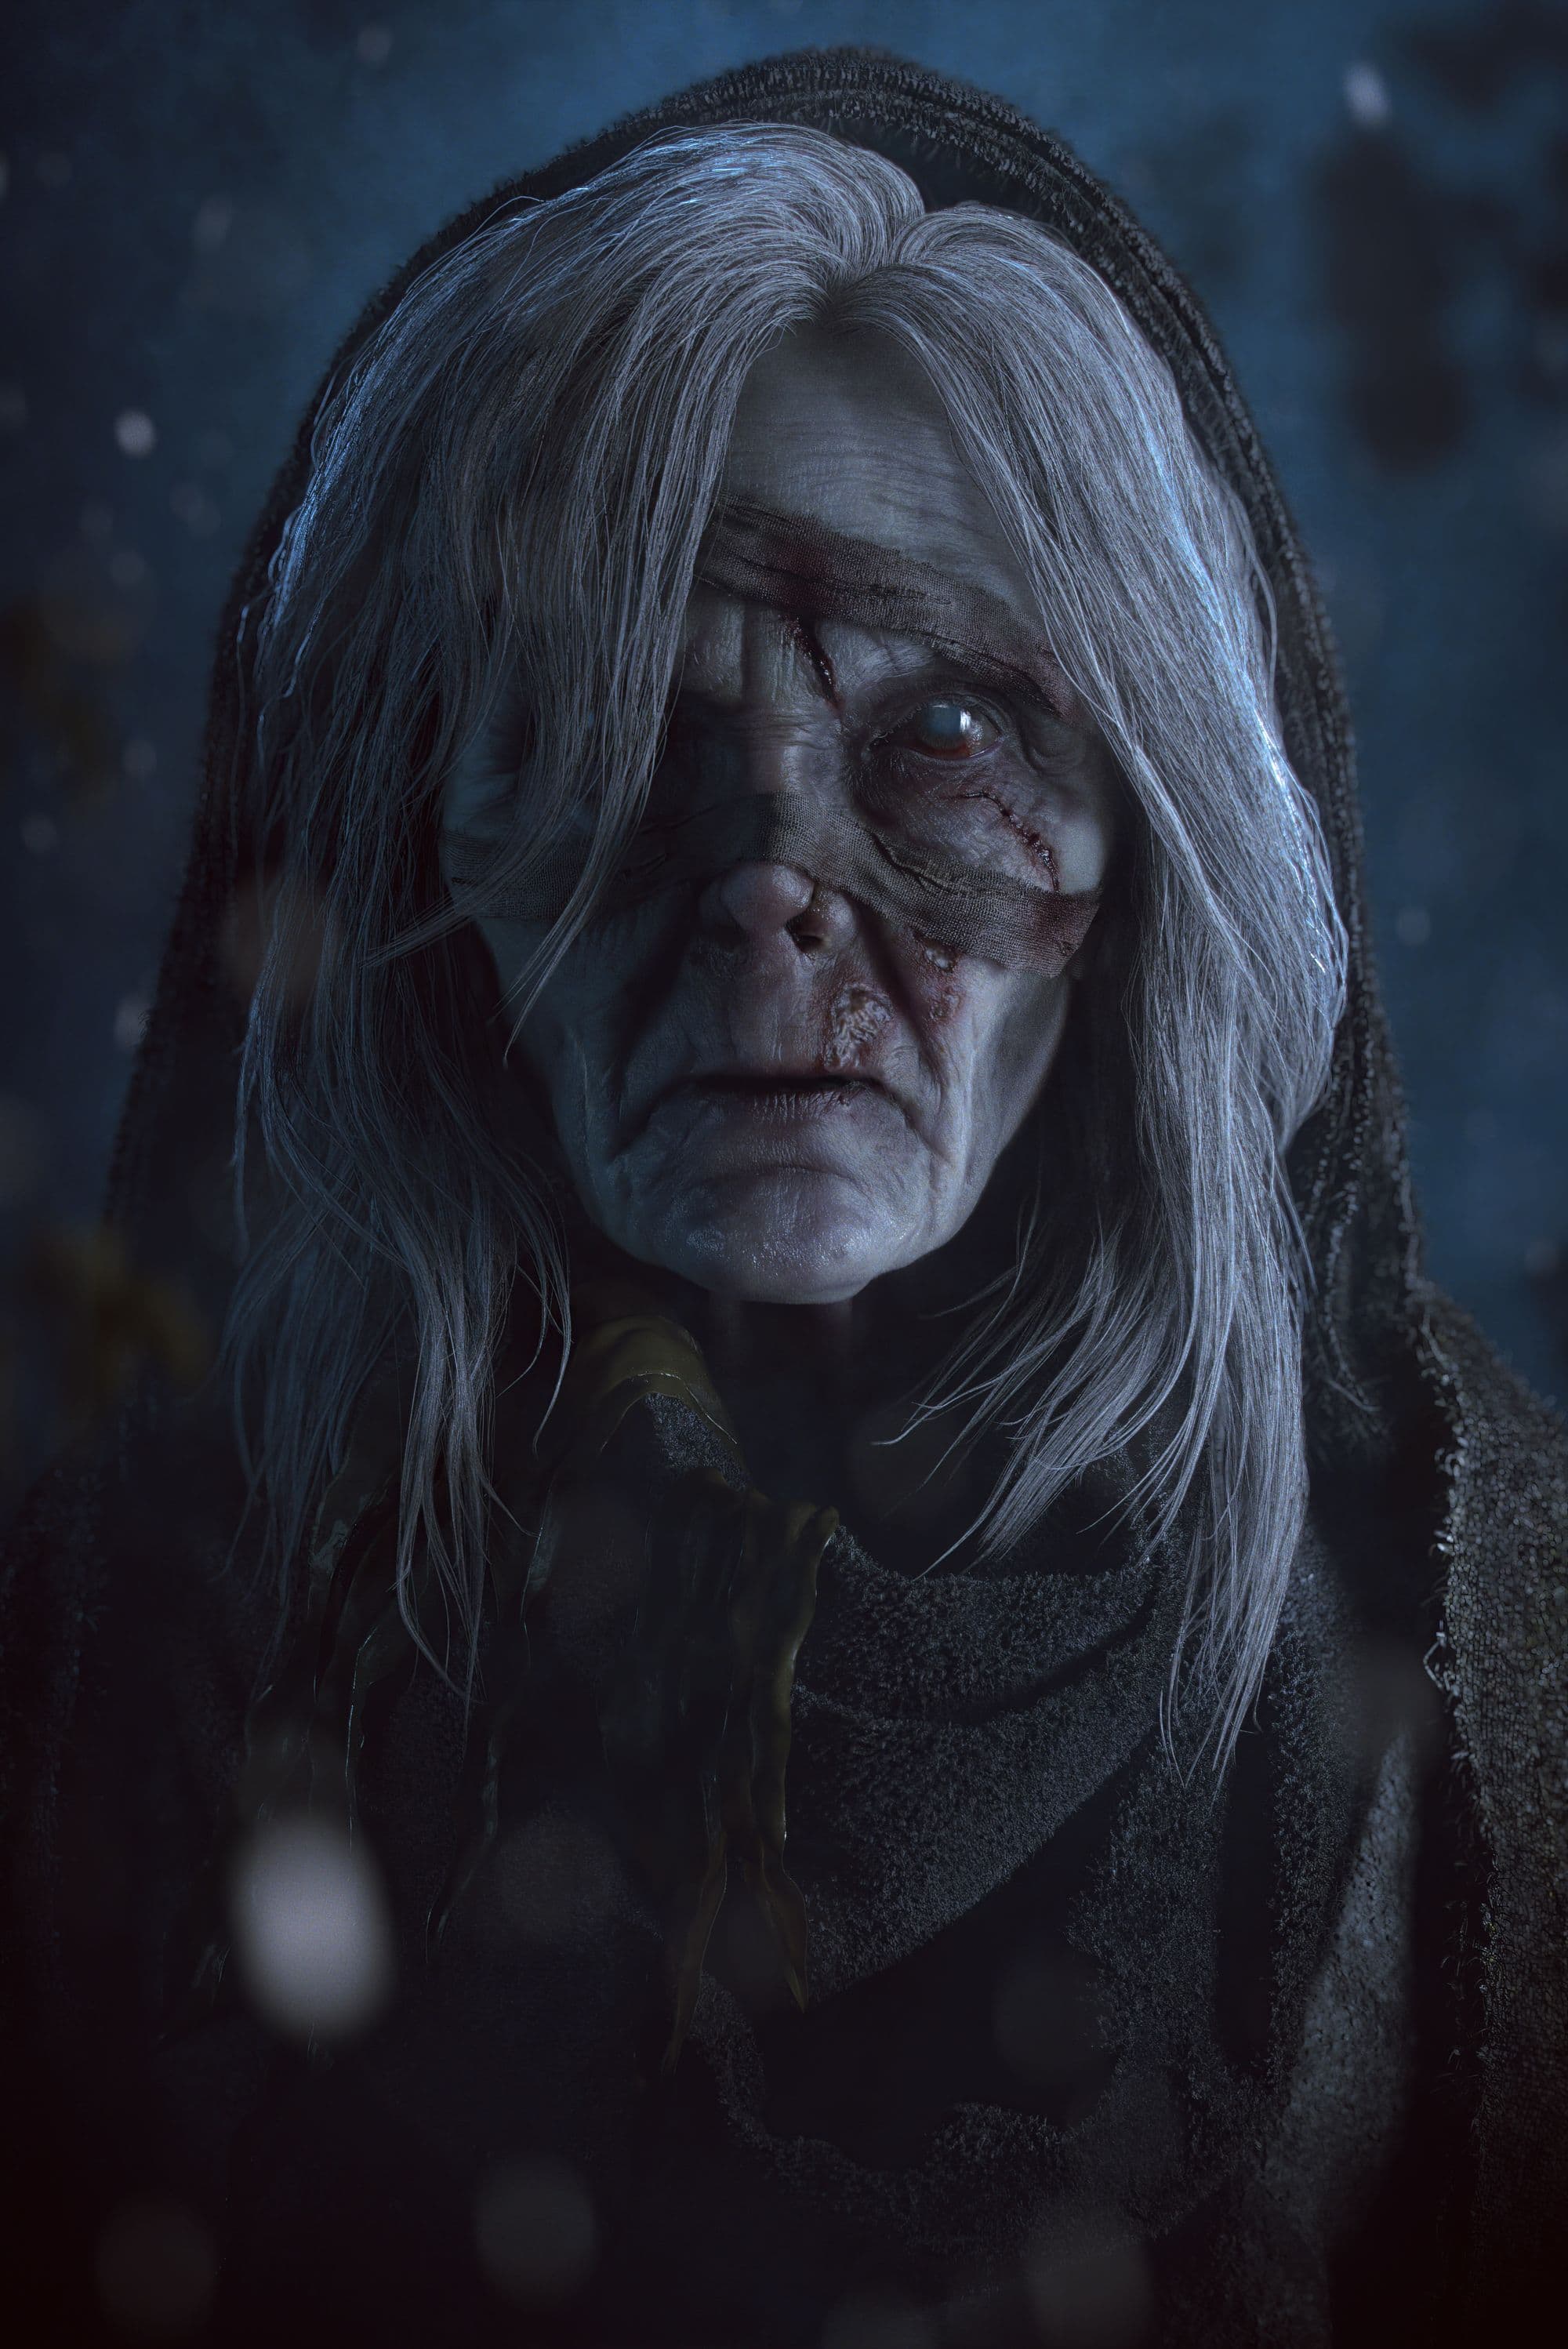
This piece was inspired by Sebastian Kowoll's ghoul concept I found on Artstation. I started this project wanting to learn more about painting and developing realistic skin in Mari. The concept was great as it suggests some mood and story behind the character while still leaving the face details ambiguous and open to interpretation for me to design it further. It was a very fun yet challenging process, and as I worked through the project I also picked up many other skills and techniques.
Softwares used: Maya, Xgen, Zbrush, Marvelous Designer, Mudbox, Mari, Adobe Substance 3D Painter, Vray, Nuke.
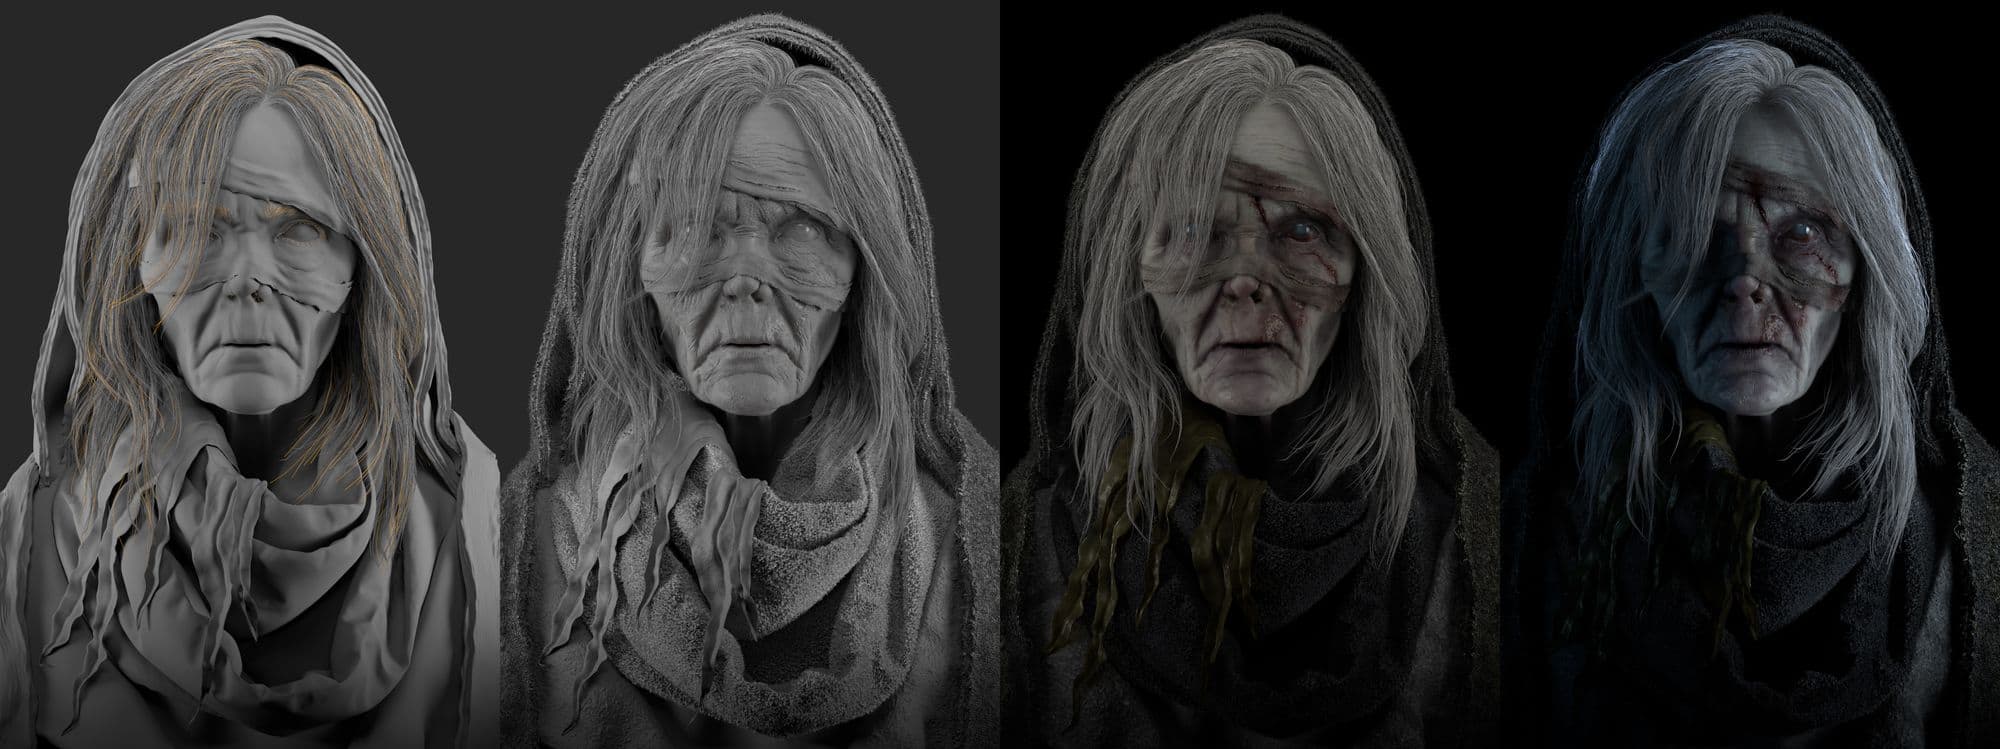
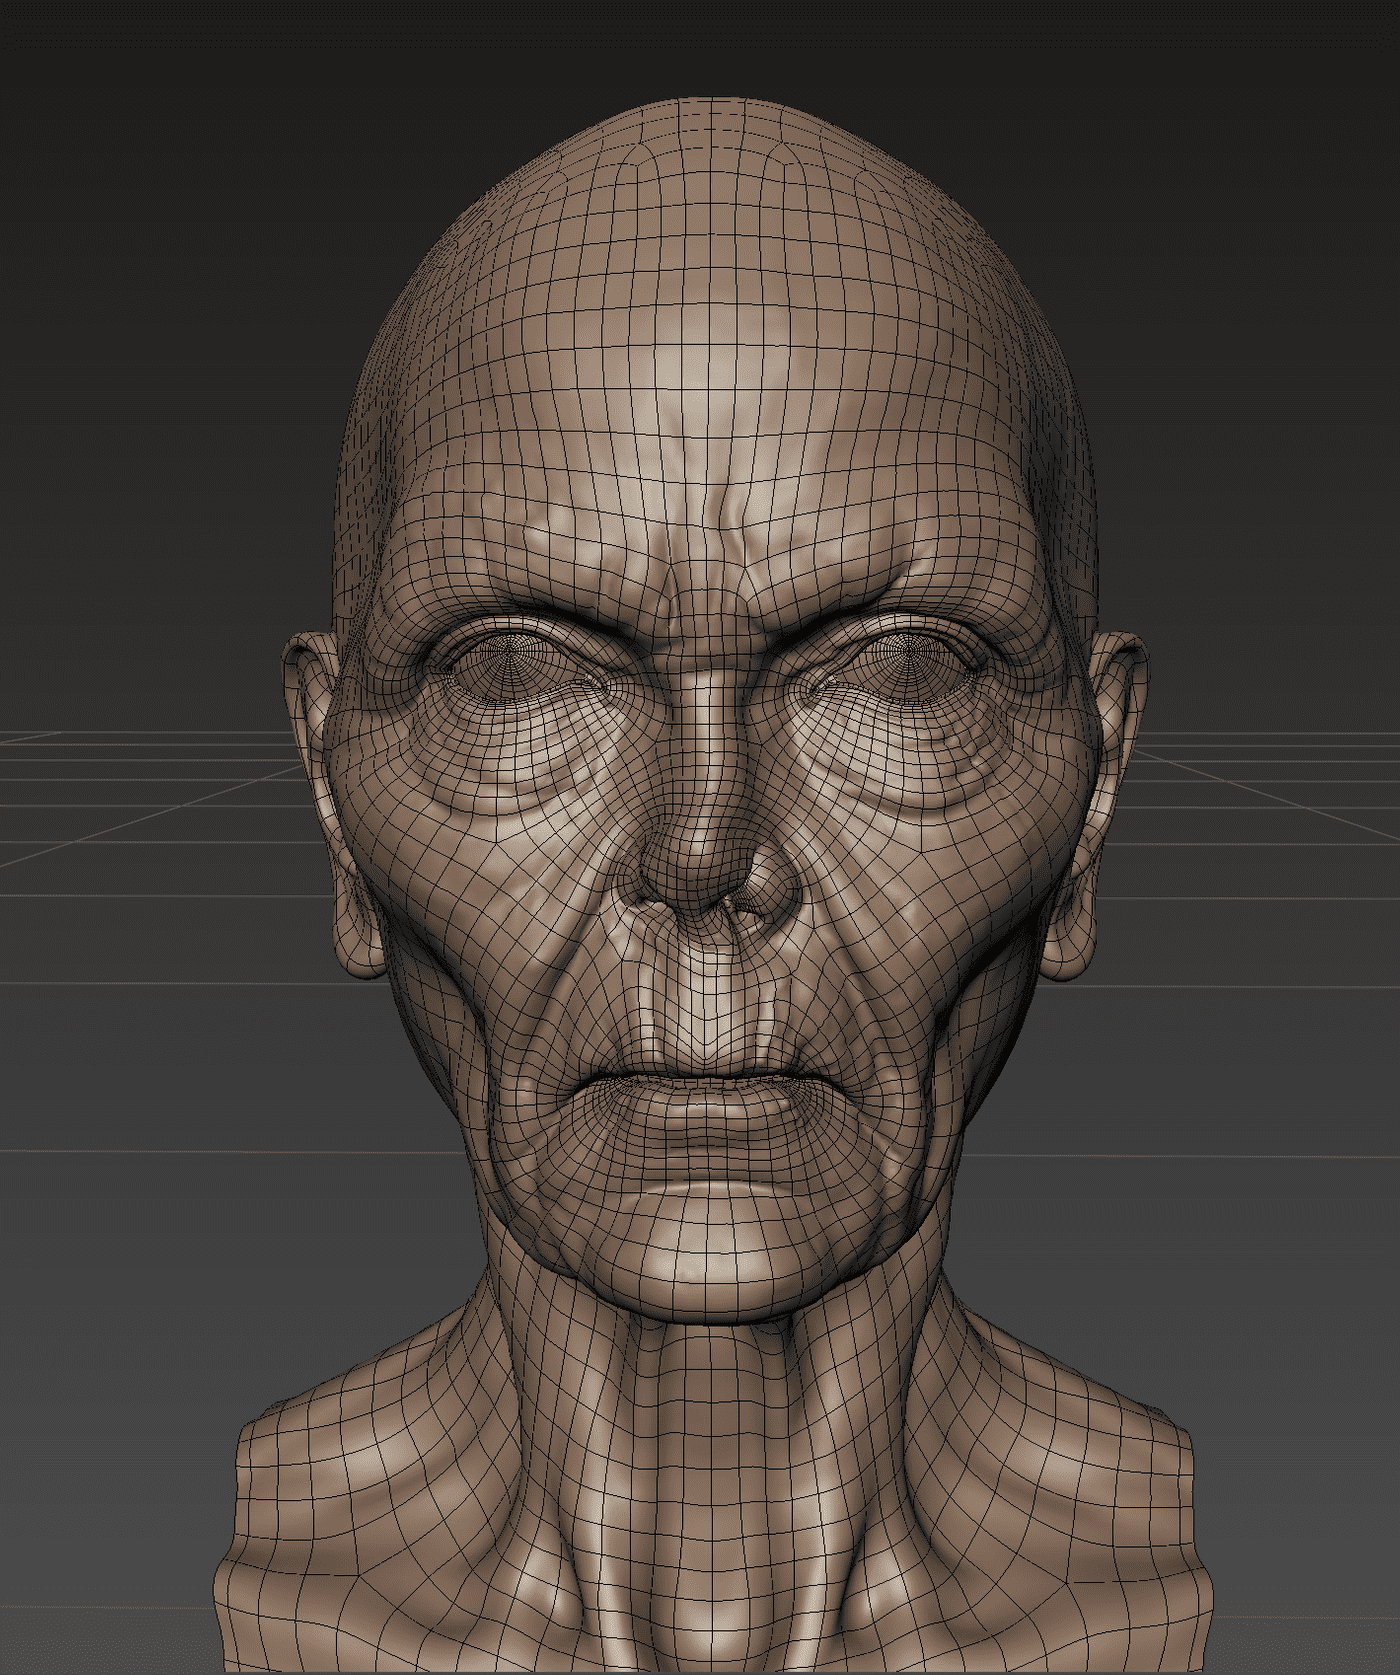
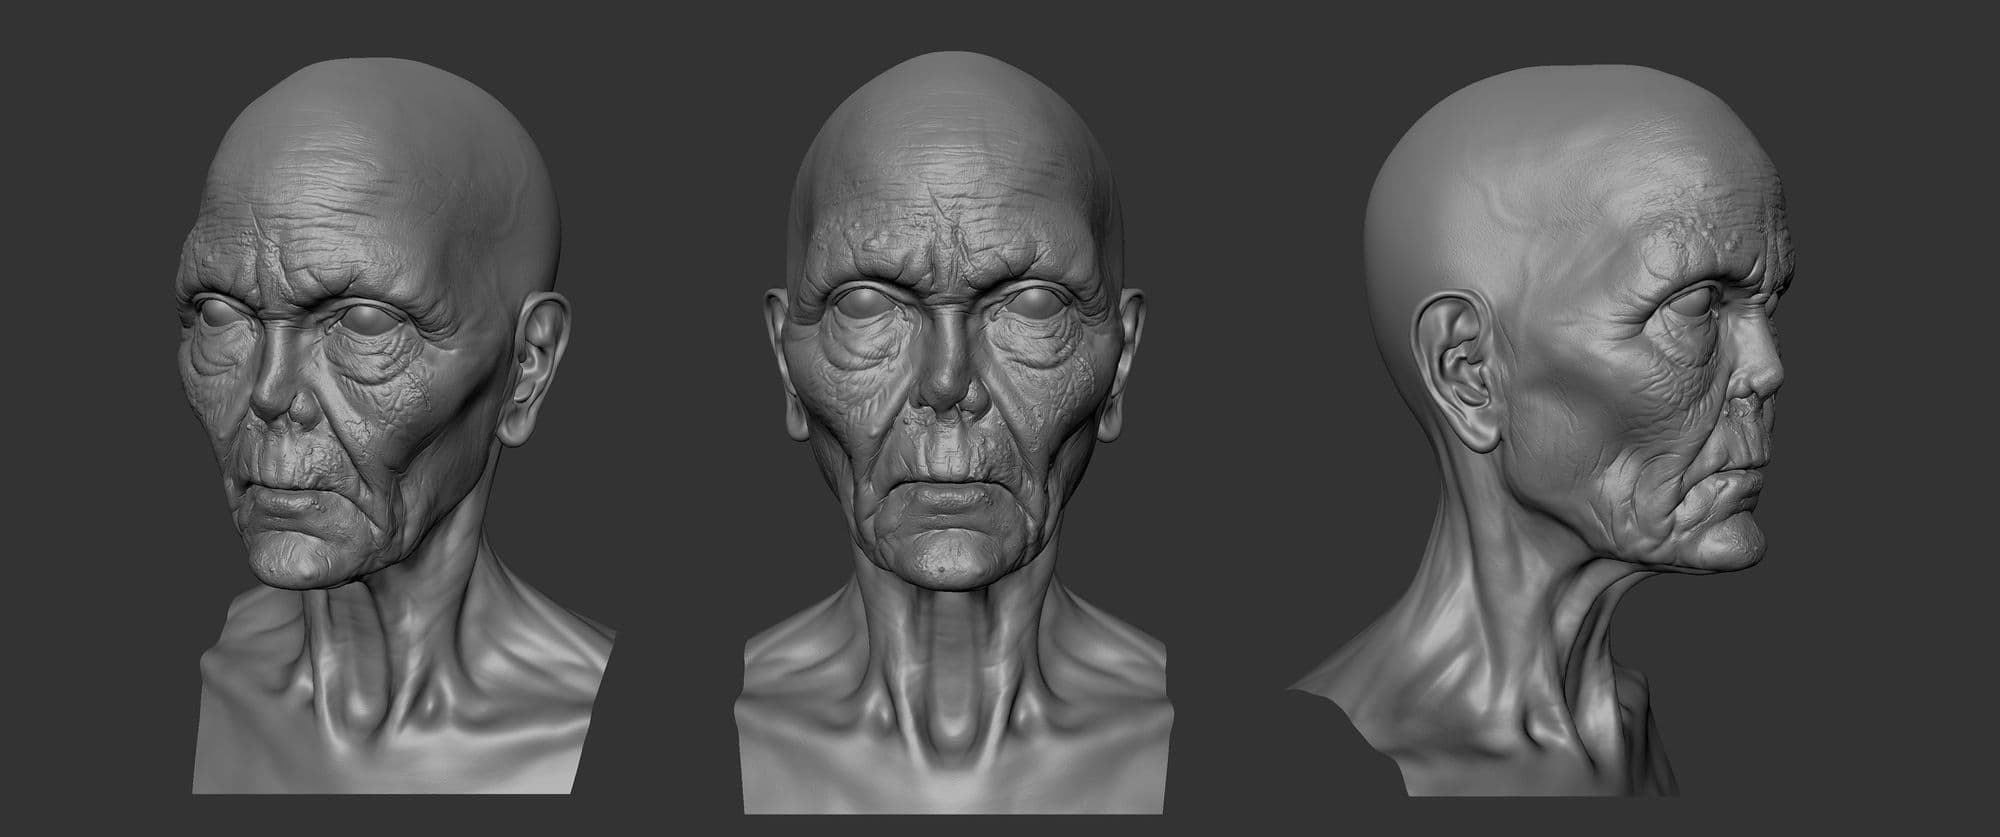
I started sculpting the head in Zbrush with the help of many references - anatomy books, photos and 3d scans. My sculpt in the early days was pretty terrible, by trying to study anatomy, understanding how people age and wrinkle, and mimic areas from scans and photos helped make it look a lot more believable. I kept coming back to develop the sculpt more even when I was working on the fine displacement and albedo maps, making sure they work well with each other.
Instead of retopologising the sculpt from scratch, I decided to use Zwrap to project a pre-existing topology from one of my base models. I made sure the topology is clean on the base model and unwrapped the UVs into 6 udims. It required a bit of cleanup afterwards but this saved me tons of time while keeping things fairly clean and symmetrical.
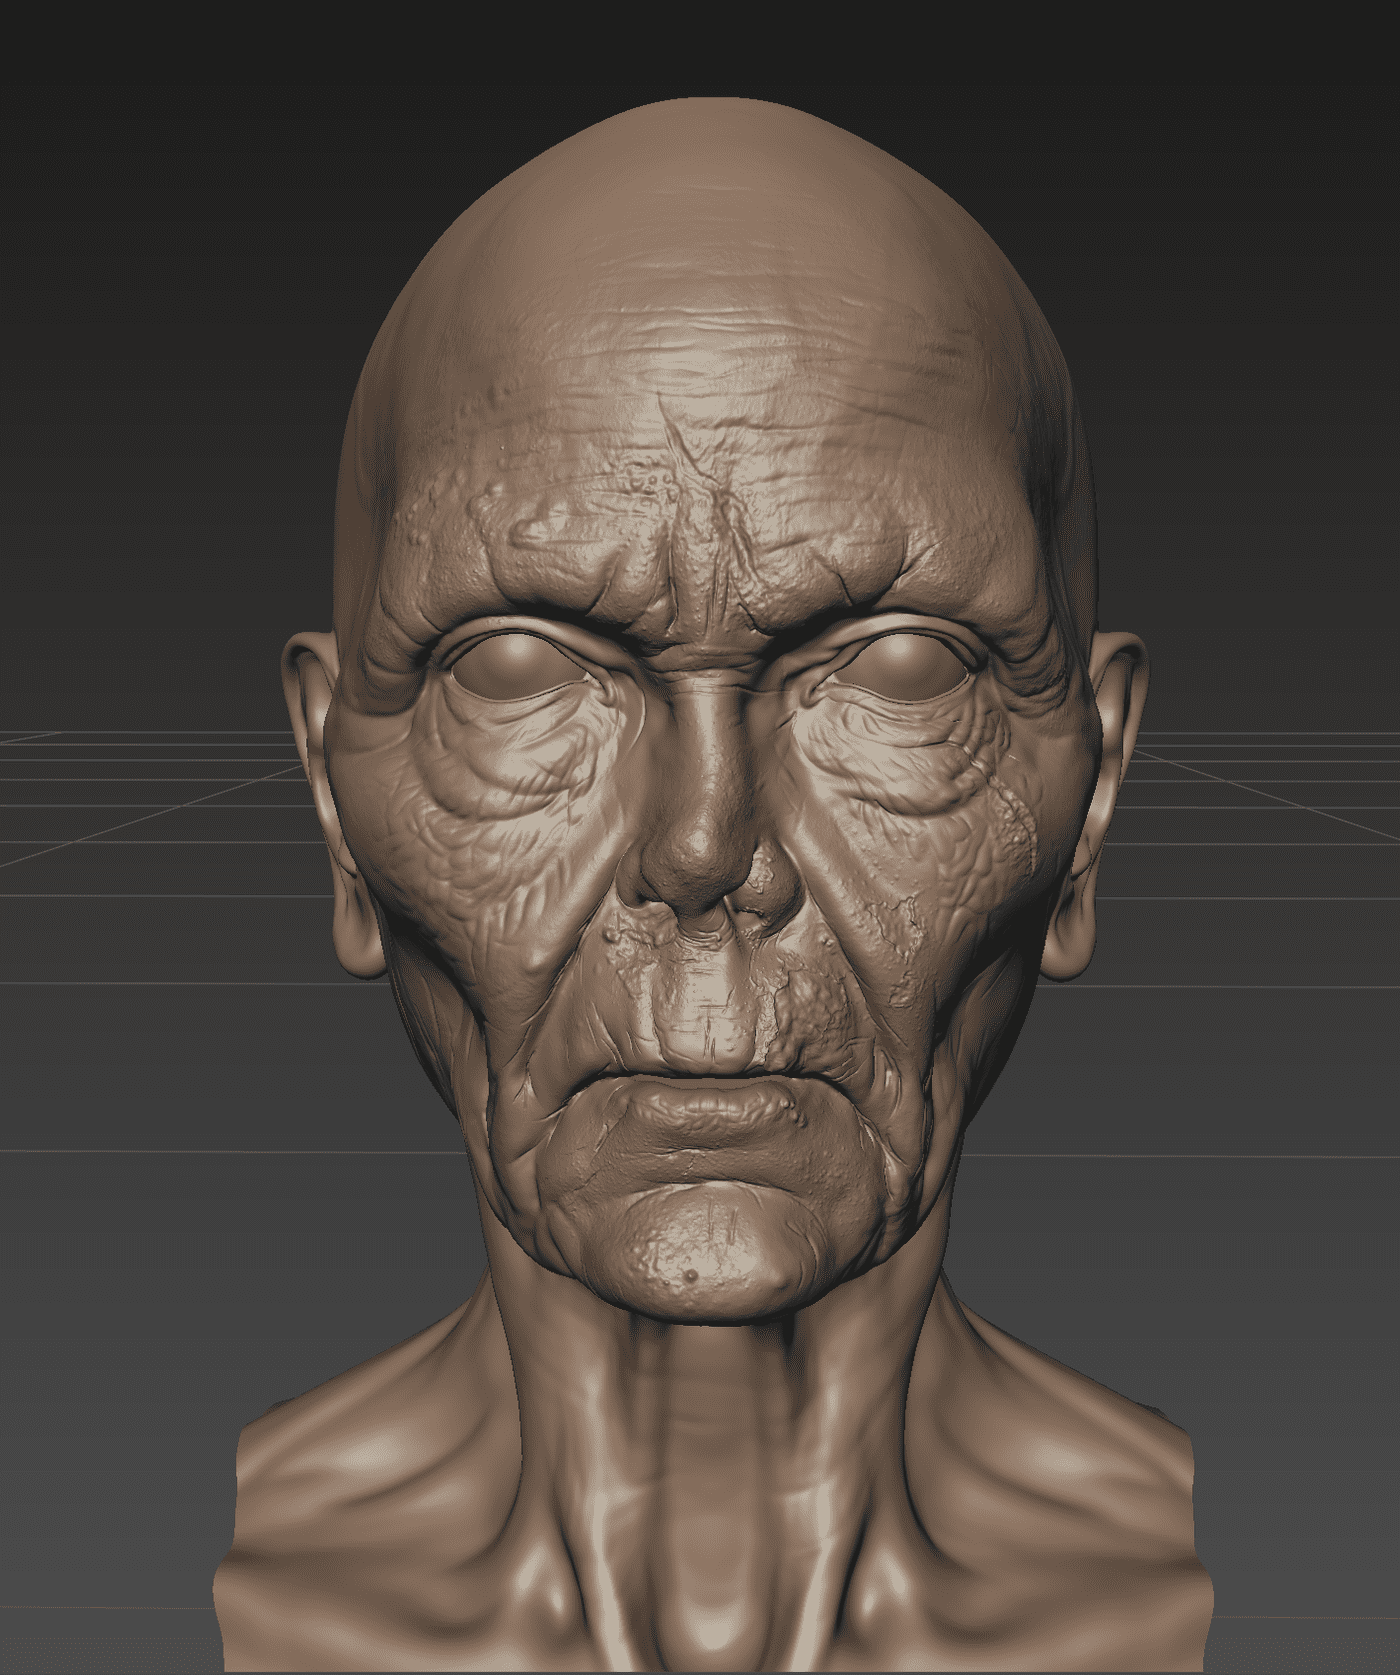
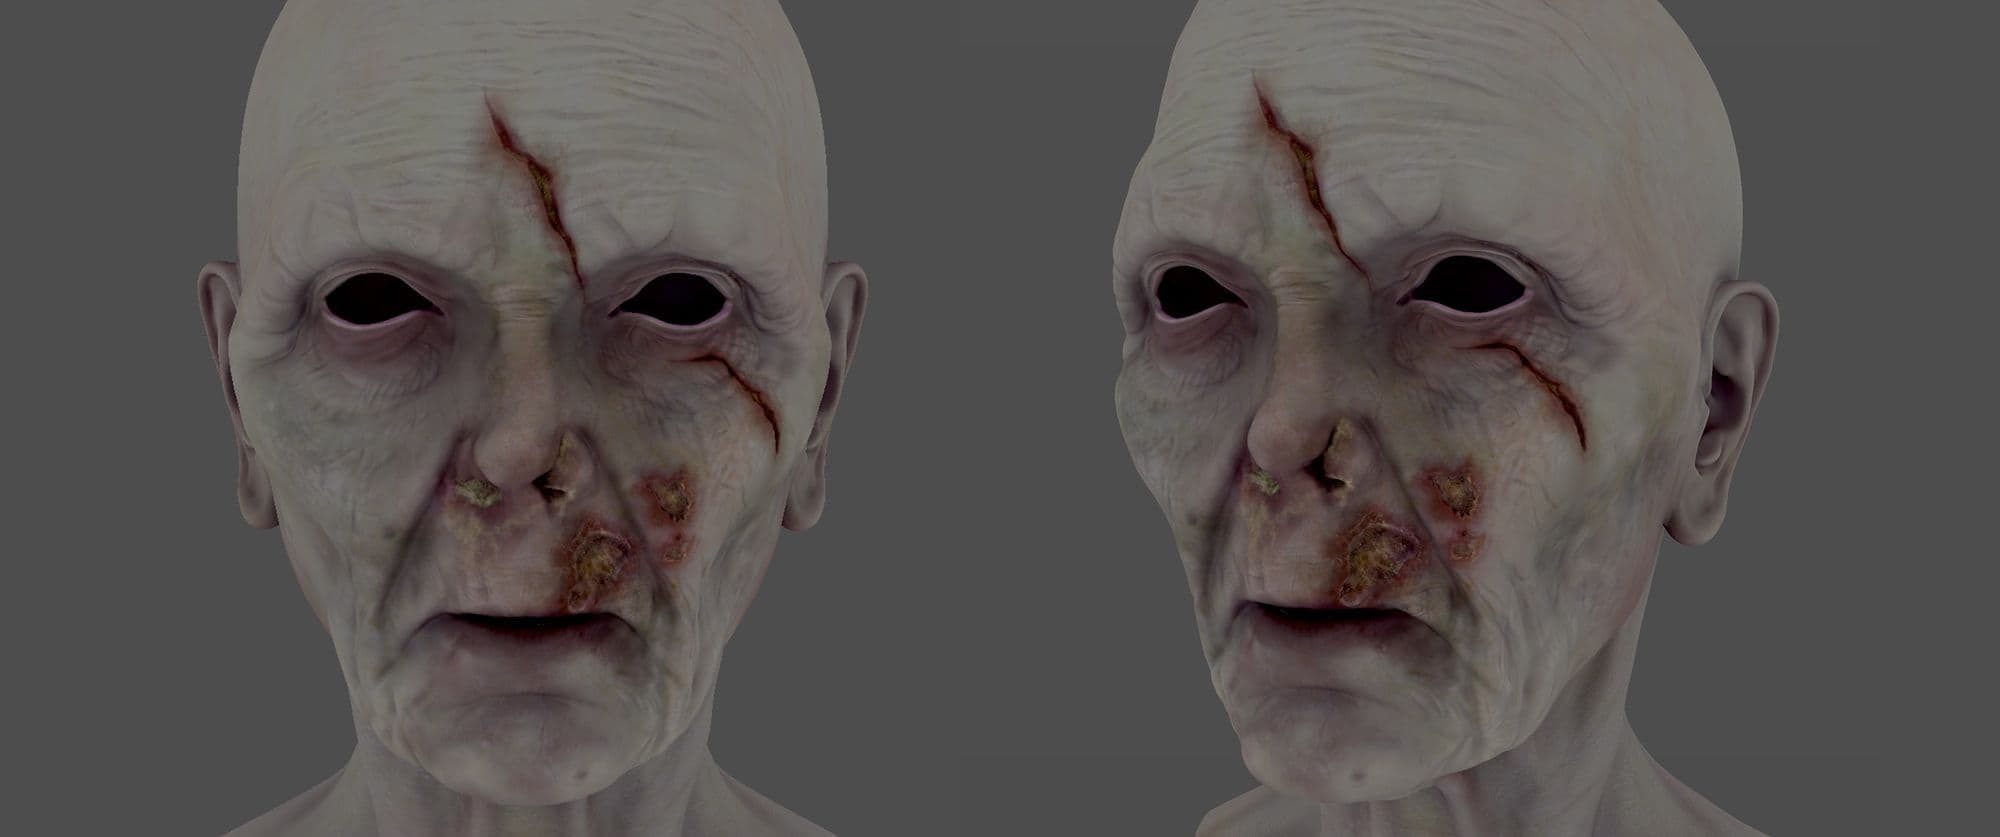
I painted the fine displacements in Mari by mixing and matching a few different maps from Texturing XYZ. I then exported the model and textures into Mudbox to refine and add details. Taking advantage of its powerful layer system, I am able to quickly carve into and exaggerate some of the wrinkles and pores, adjusting them in a non-destructive way.
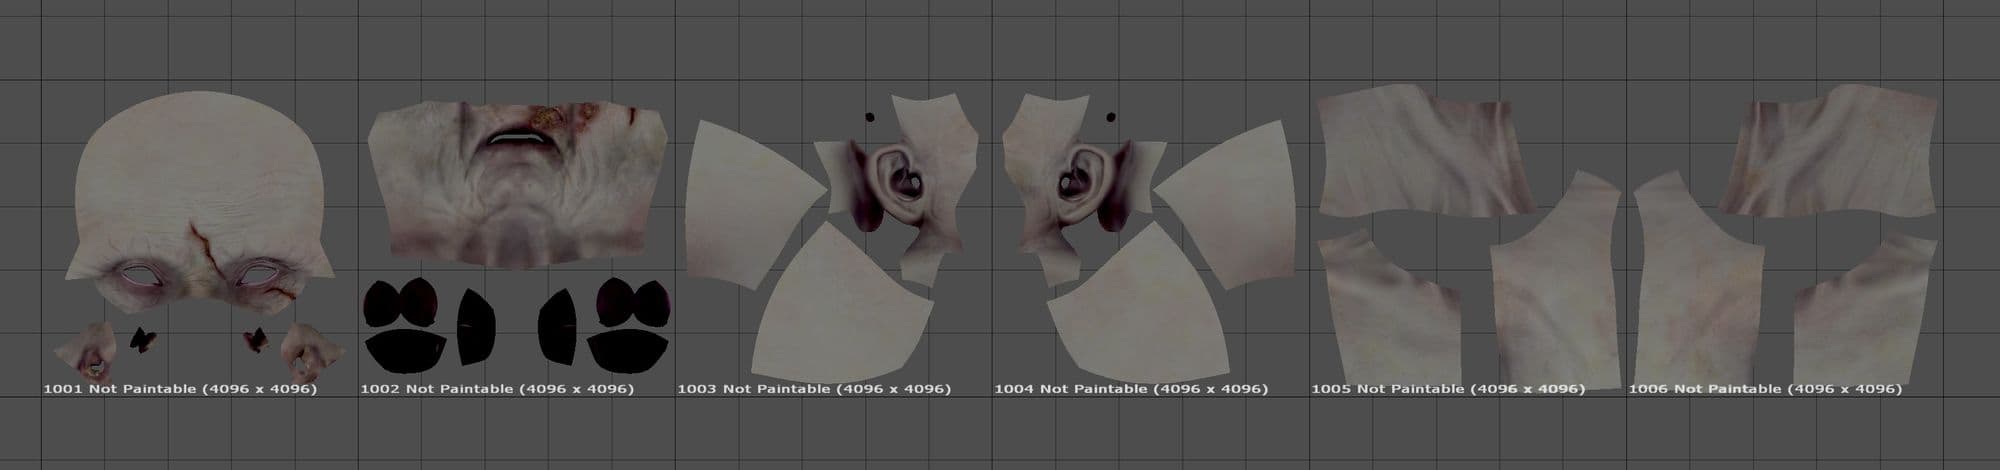
For the albedo, I first baked and extracted a few different maps to help with the painting process - AO, curvature, thickness, cavity. Everything is painted from scratch with the help of reference photos.
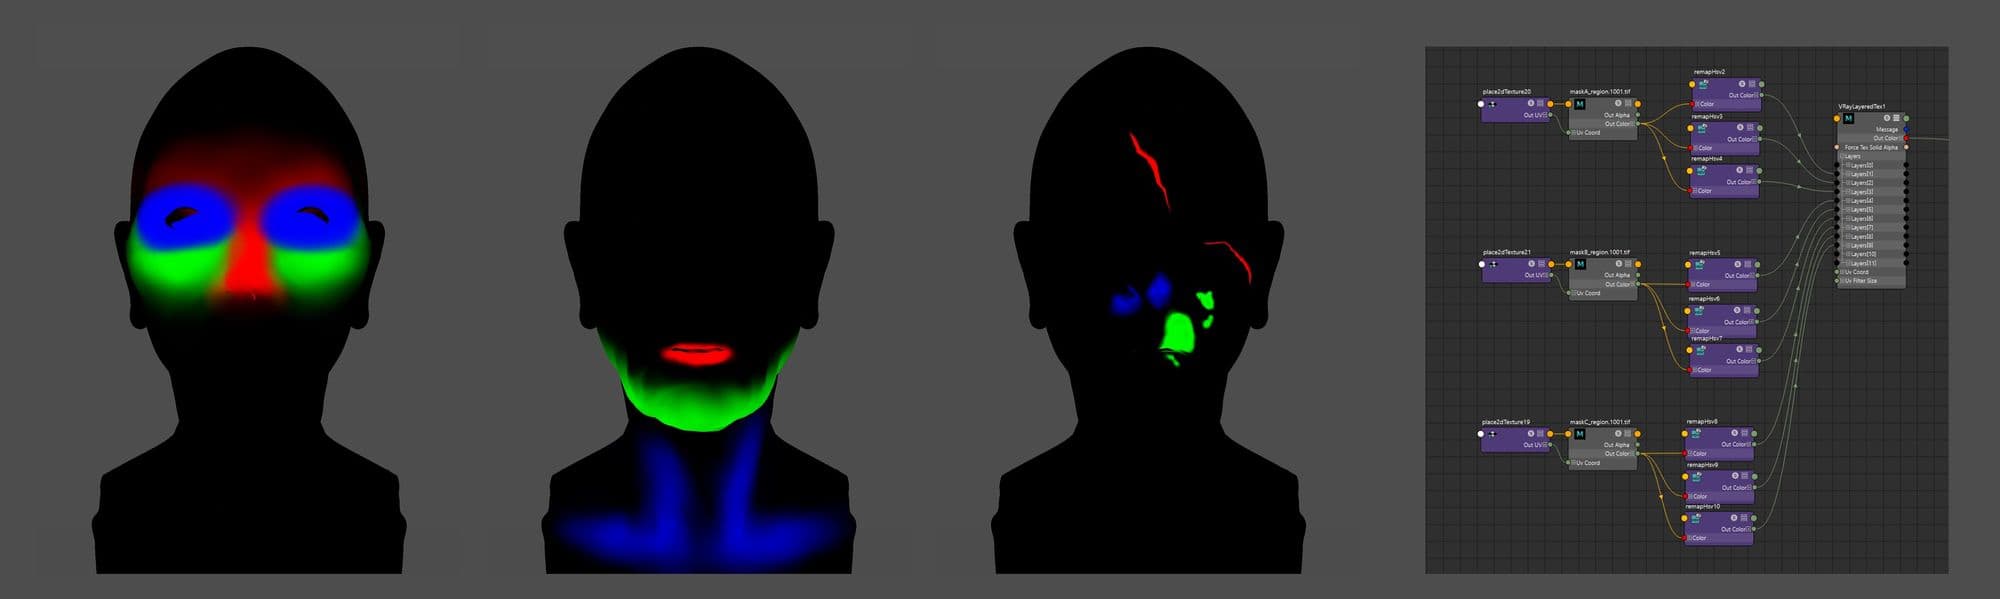
It was also my first time fully utilizing the node graph in Mari, here is a glimpse of how I organized my graph.
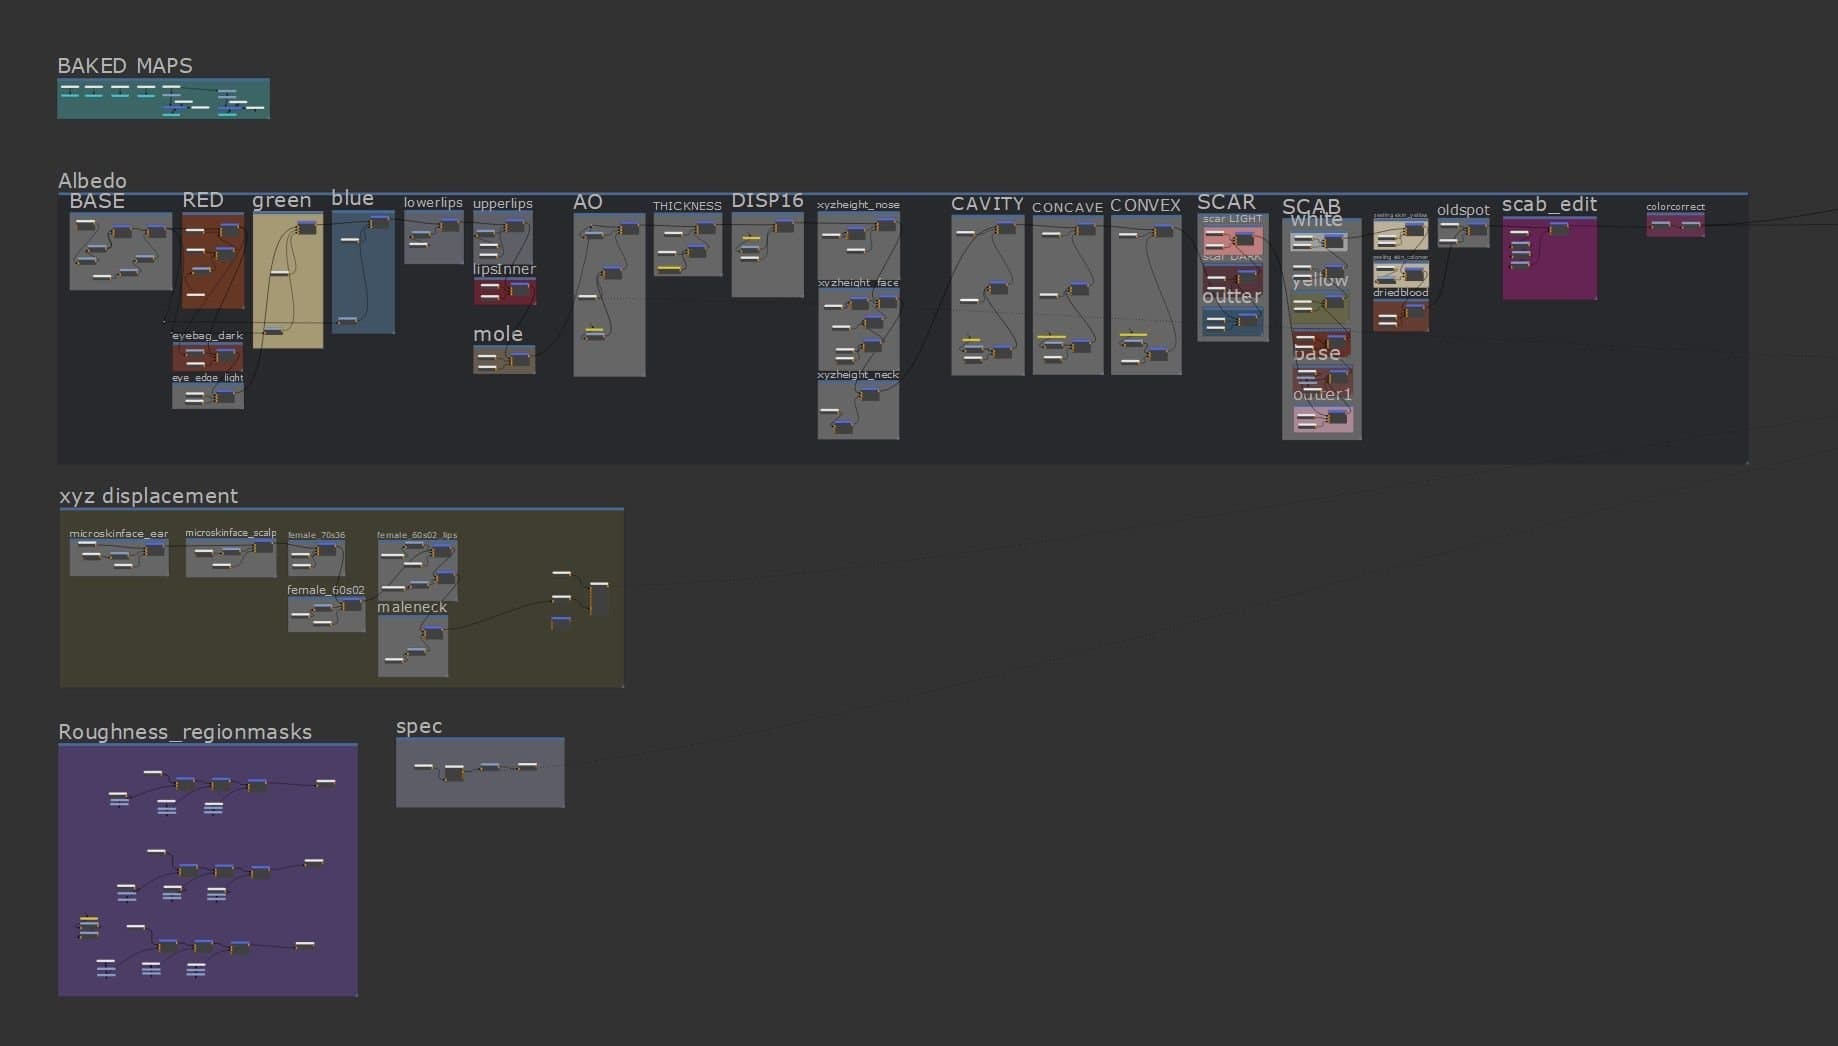
Before moving on to my spec/gloss maps, I made sure the sculpt, displacements, and albedo were all working well together as a whole. For this particular project, since there was more artistic freedom to how the skin could look, I decided to paint several region masks in order to have the flexibility to dial each of their gloss values independently during lookdev, without the need to go back and forth between Maya and Mari. This allowed me to get instant feedback and fine tune the values to the exact amount I want.
After the face, I went ahead to create the hair, brows, eyelashes, and peach fuzz with Xgen core. The rest of the costumes were sim in Marvelous Designer, detailed in Zbrush, and textured in Substance Painter. I also used Vray Fur to quickly add procedural fibers and threads to the pieces.

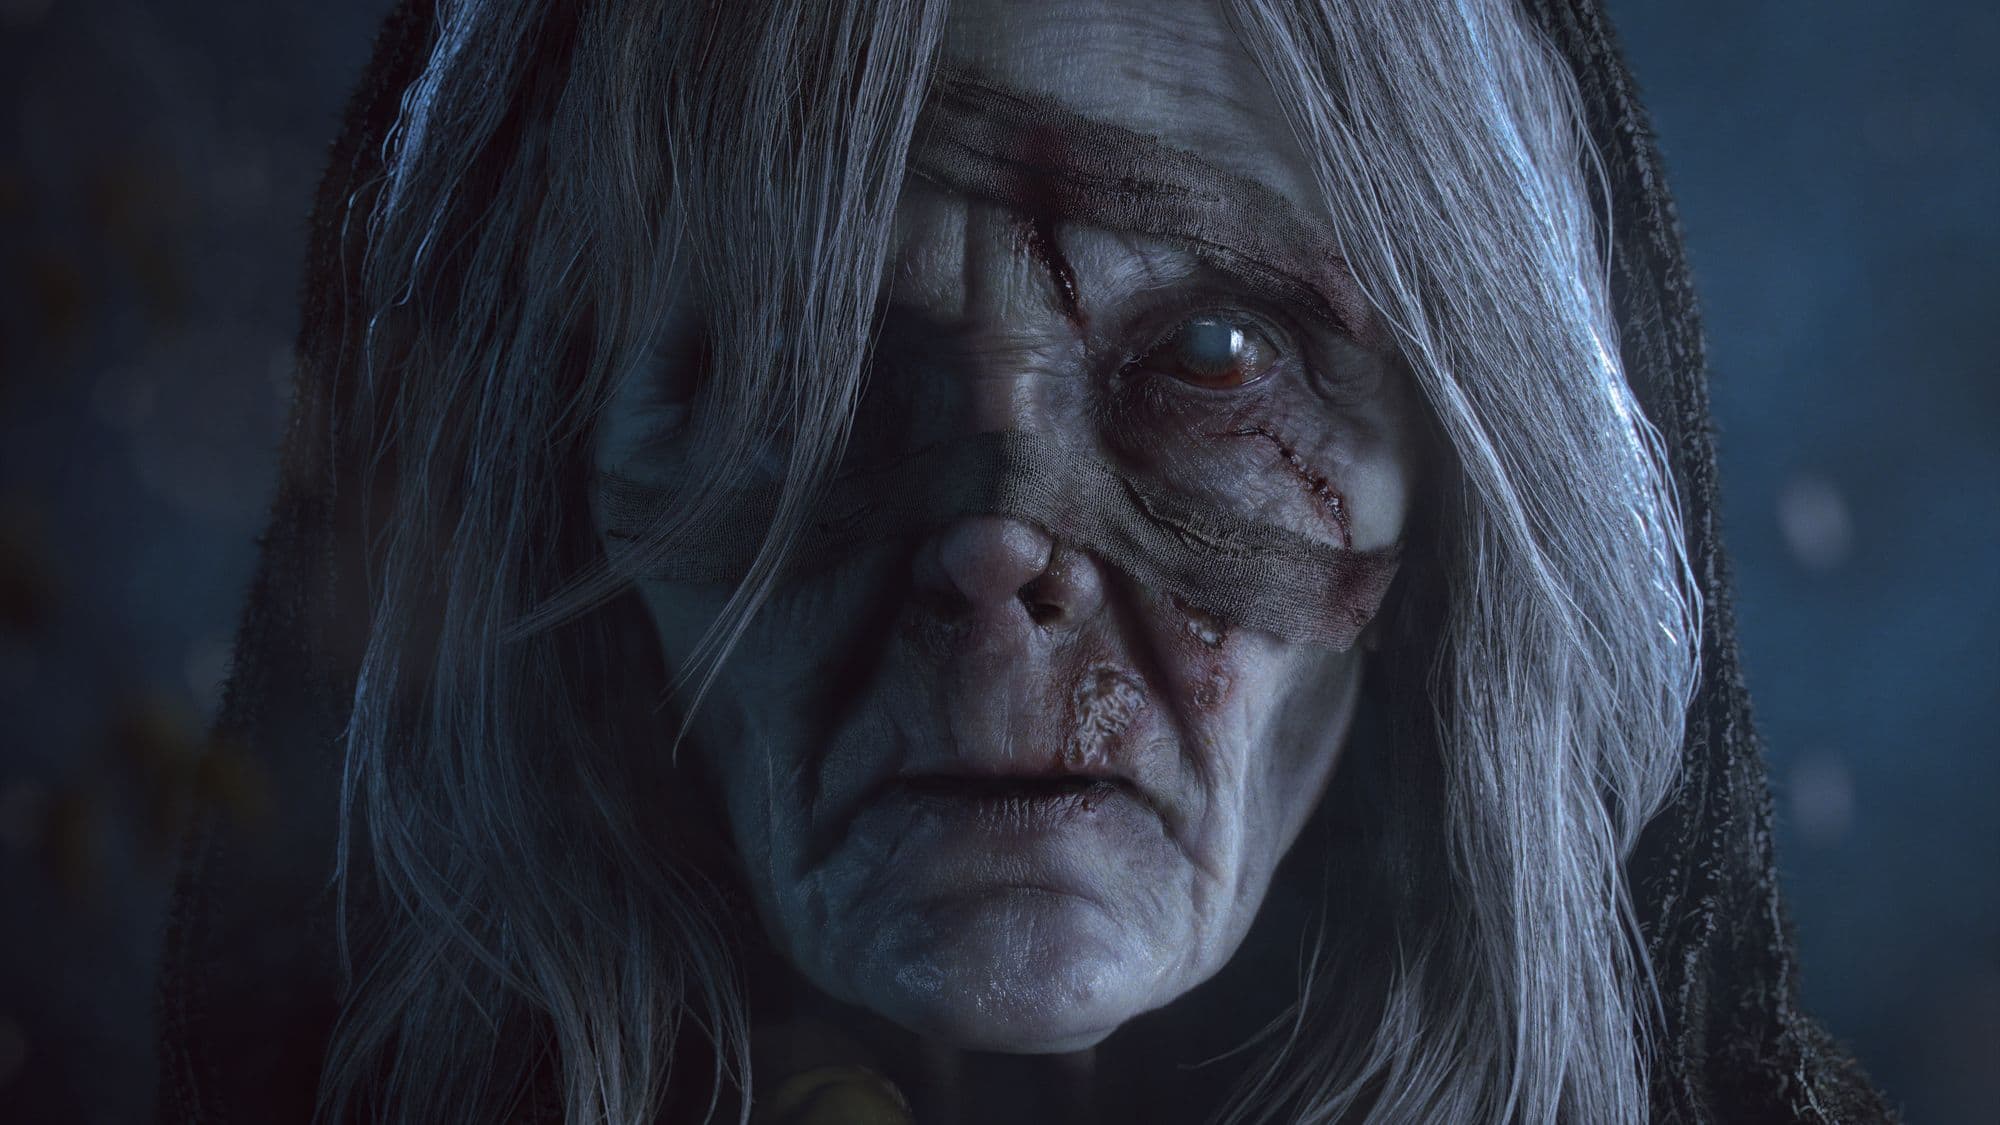
At the end I brought the render into Nuke for compositing. The ability to reconstruct the scene with render elements and to relight the character with light select passes, gave me full control to art direct the final image.
Thanks for checking out and hope you enjoyed the breakdown!
Feel free to get in touch with me on Artstation, Instagram, Linkedin, Website.