How to Make a Realistic 3D Character: A Modeling and Texturing Breakdown
Kevin Soltany, a 3D Artist and graduate of Gnomon, wanted to challenge himself with a project he had not done before: modeling and texturing a realistic 3D Character. In this breakdown he shares some of his tips and tricks.
Kevin Soltany, a 3D Artist and graduate of Gnomon, wanted to challenge himself with a project he had not done before: modeling and texturing a realistic 3D Character. In this breakdown he shares some of his tips and tricks. Read on!
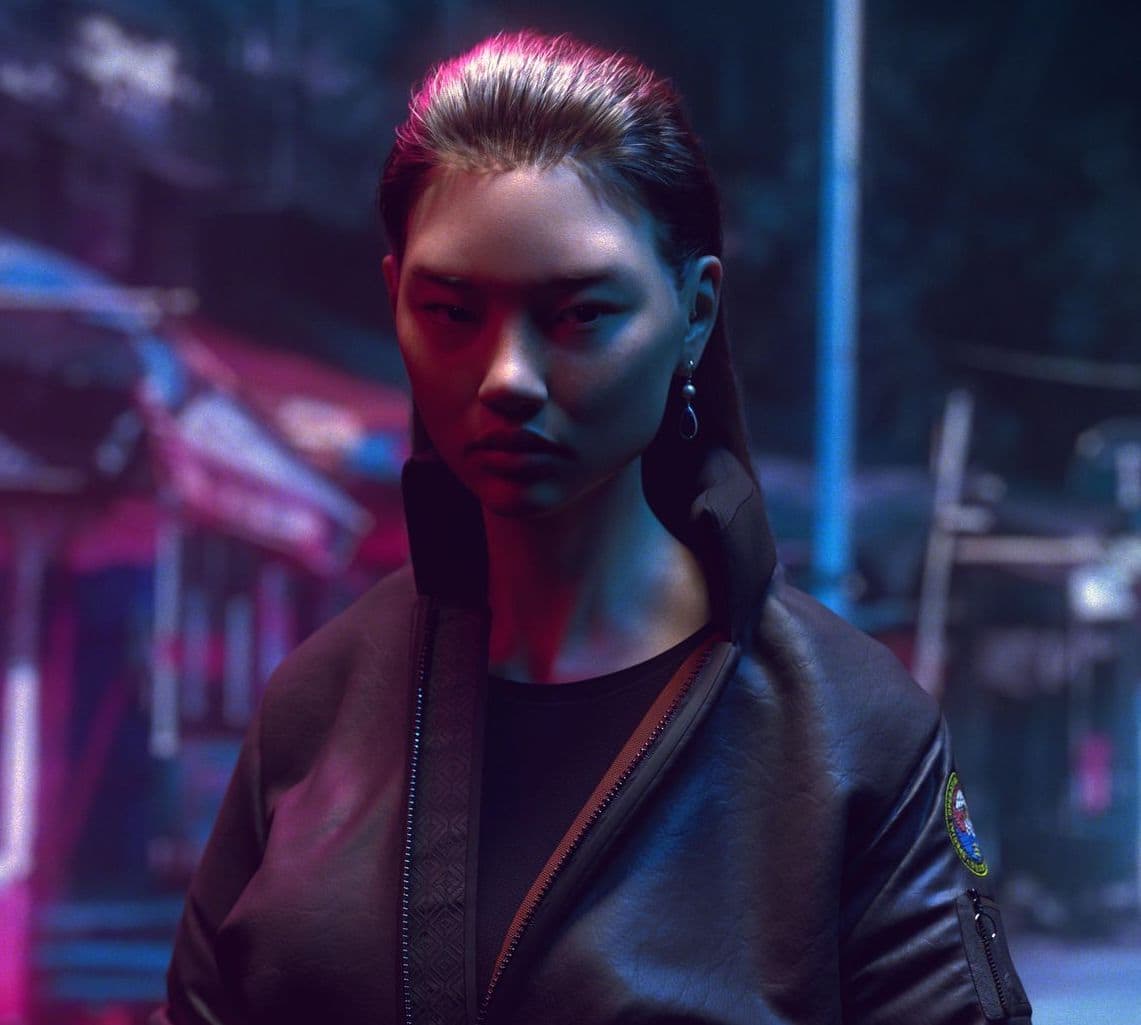
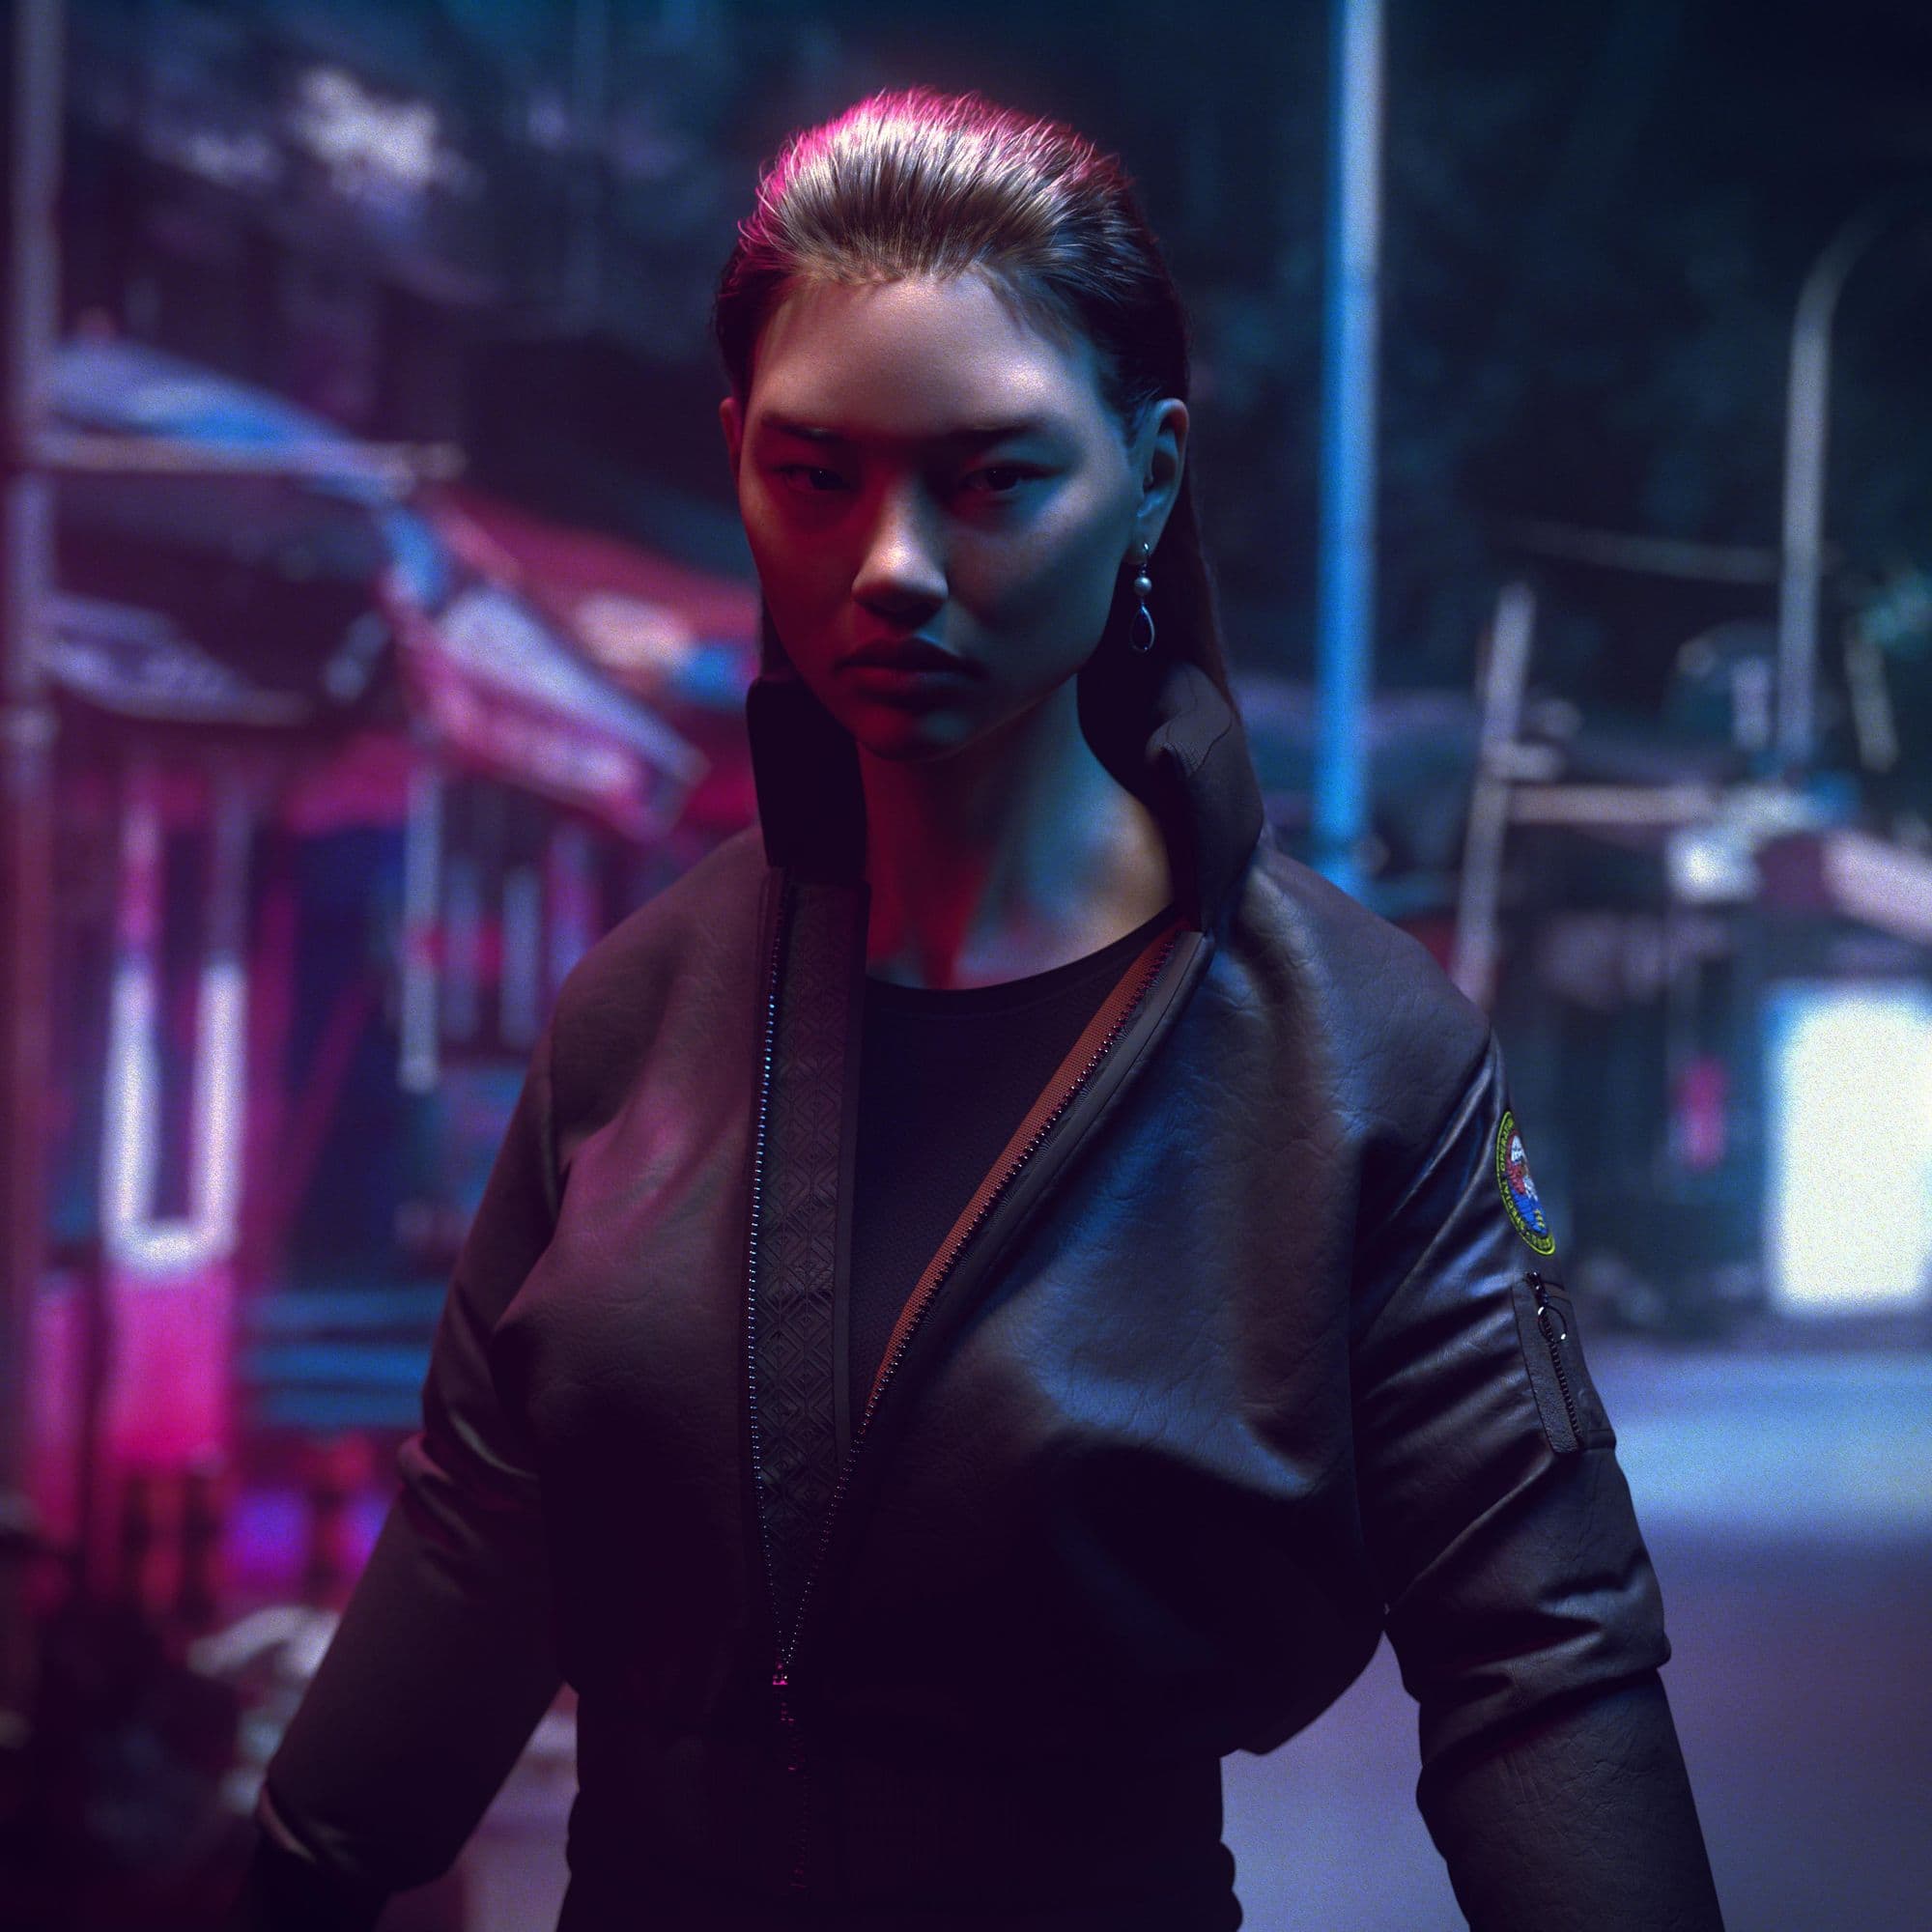
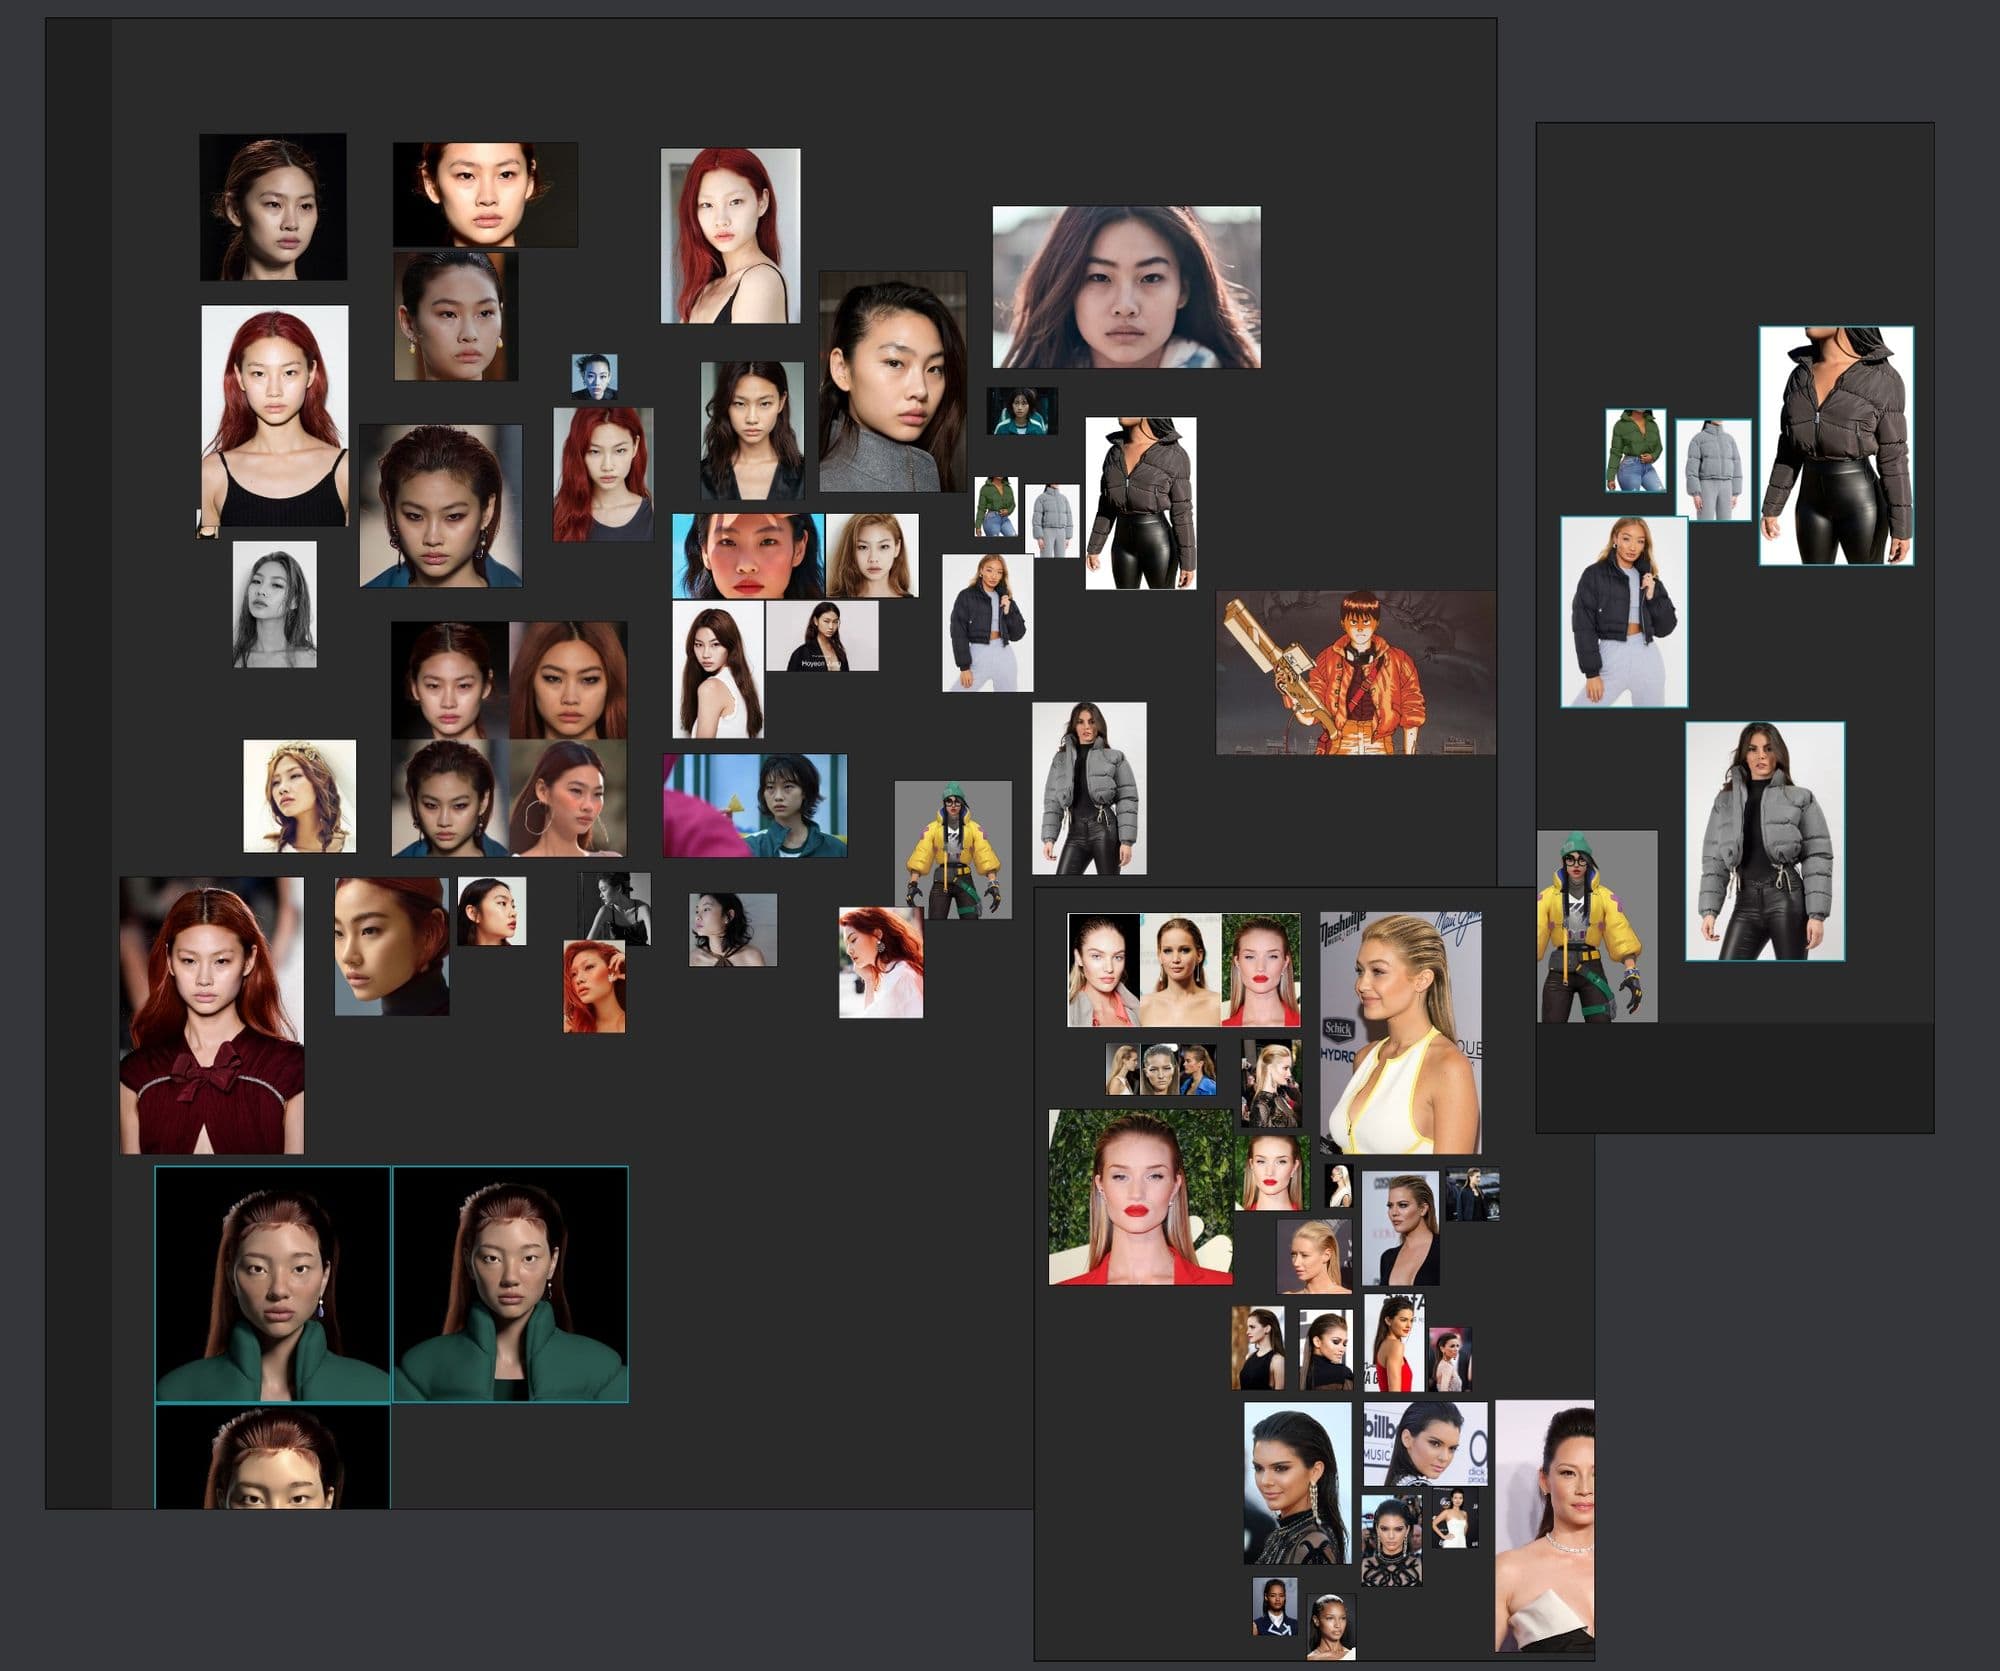
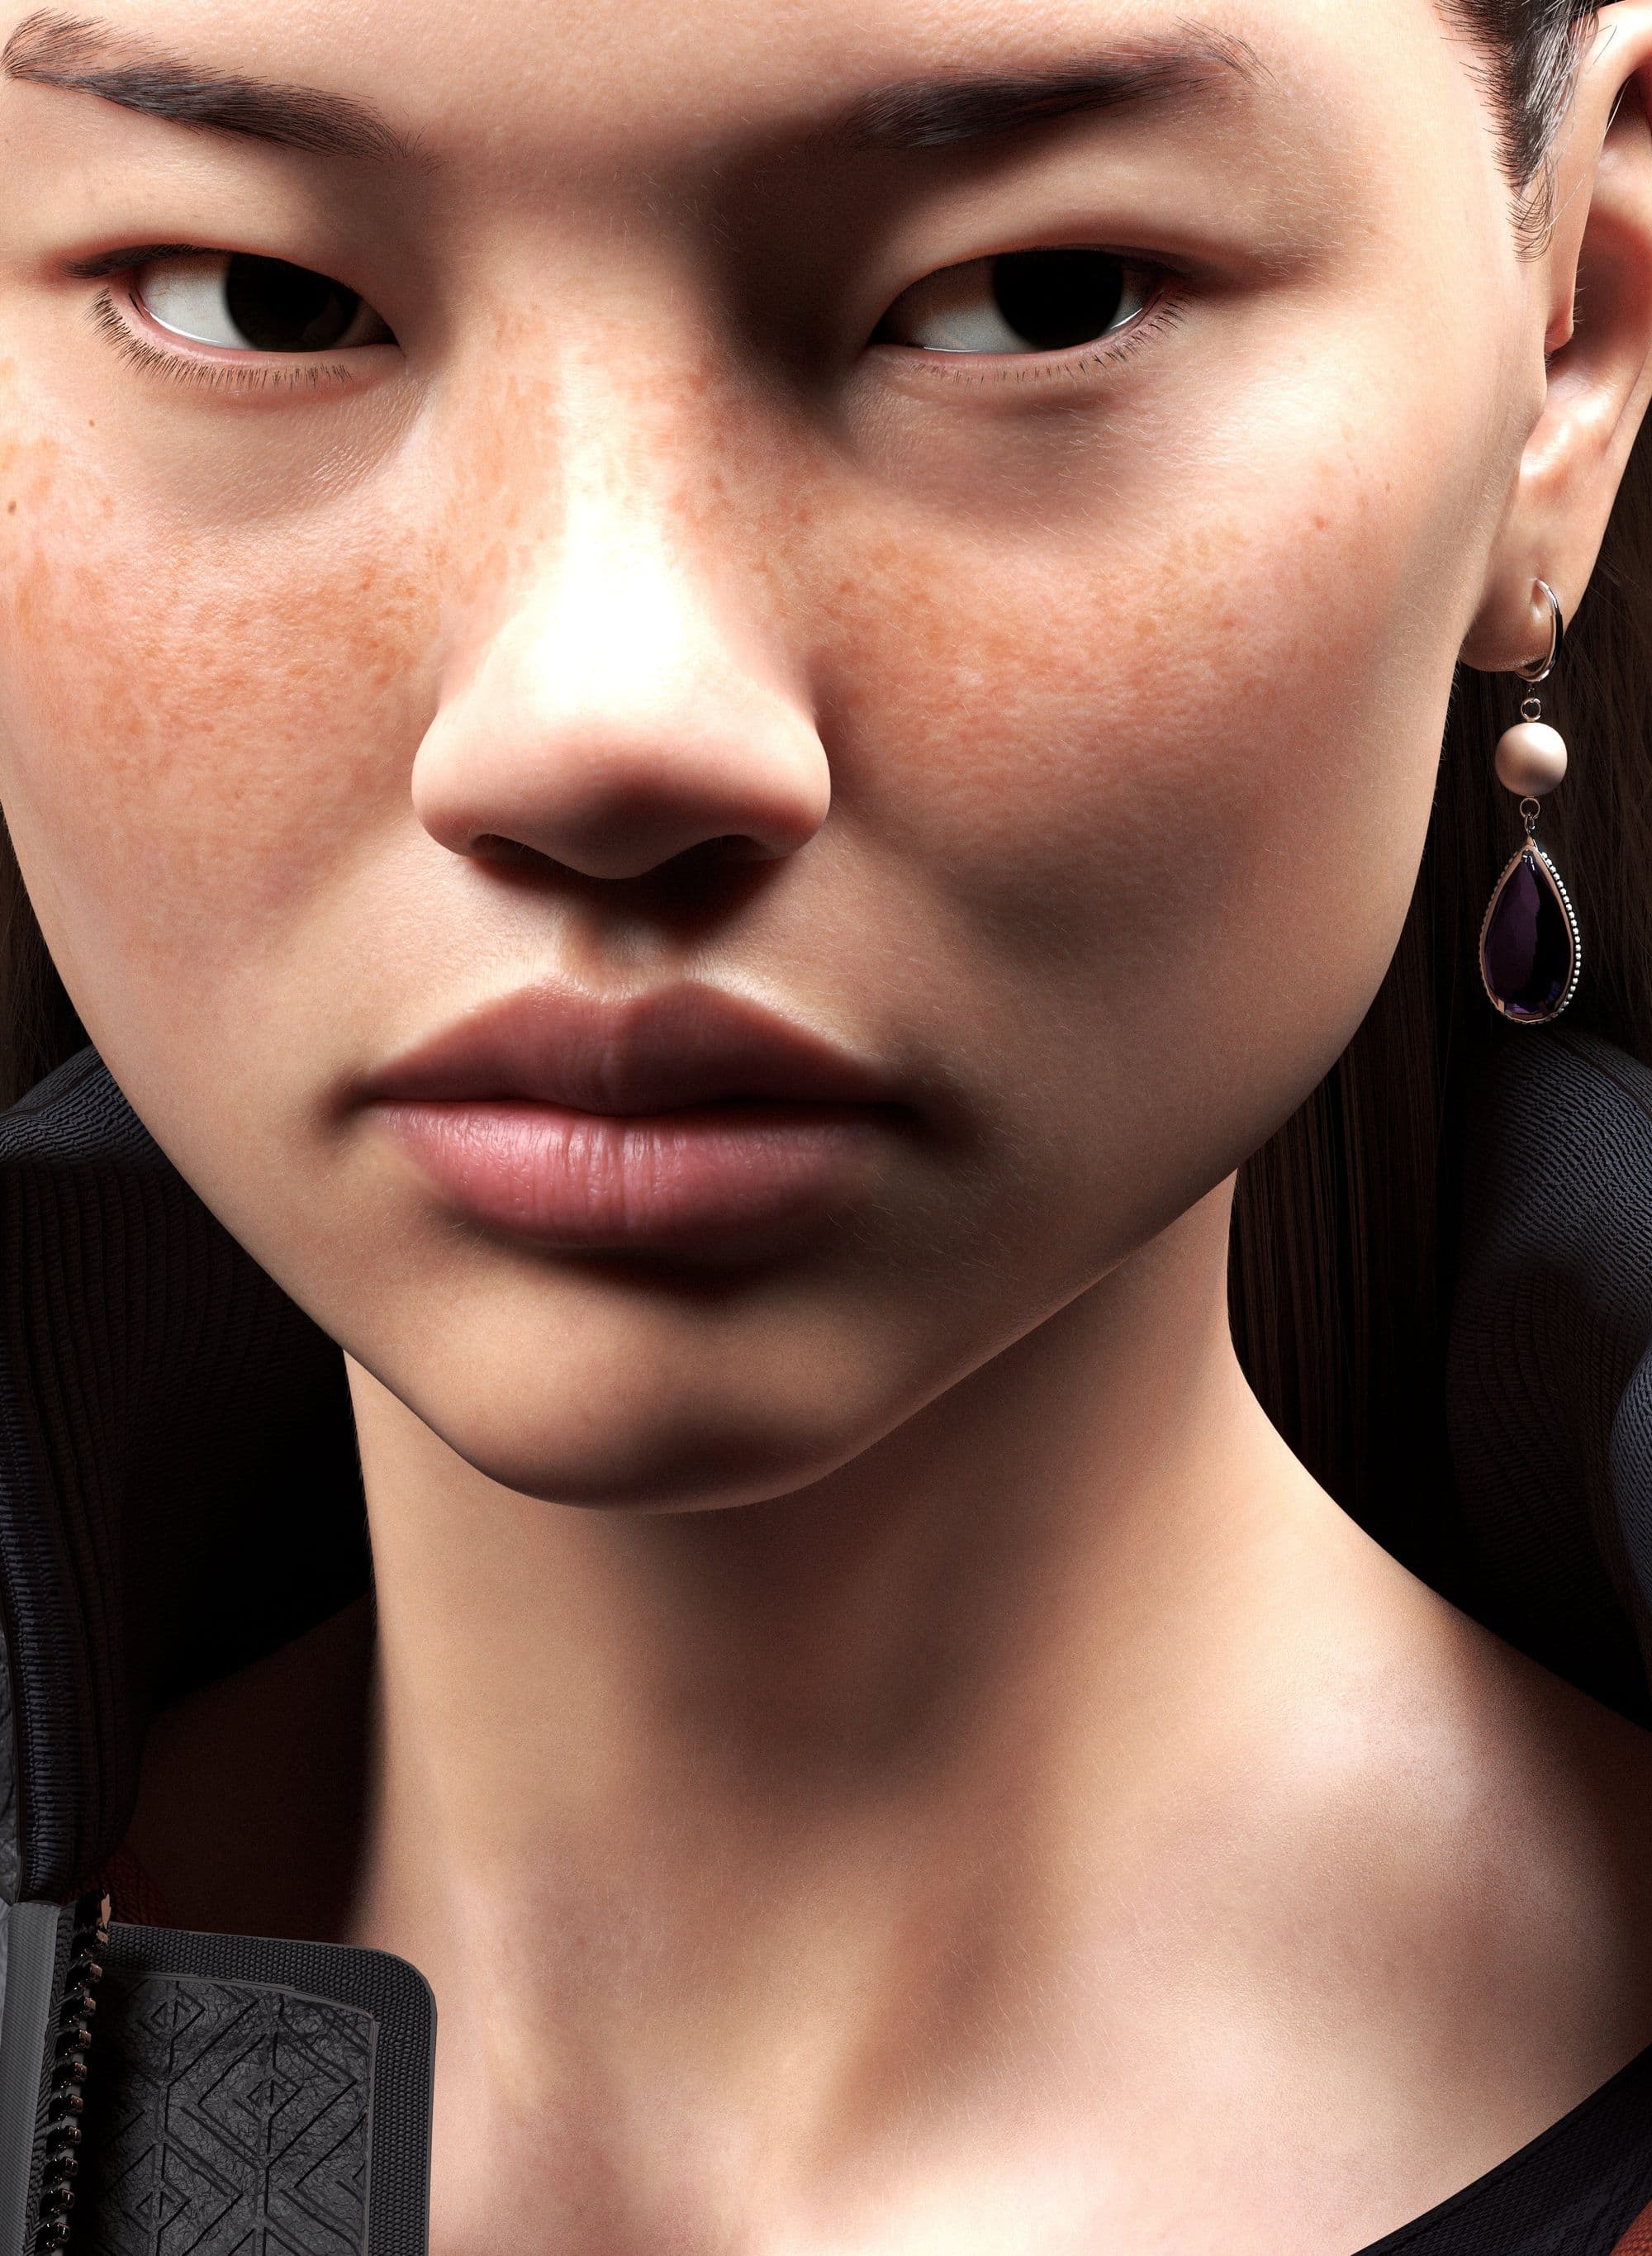
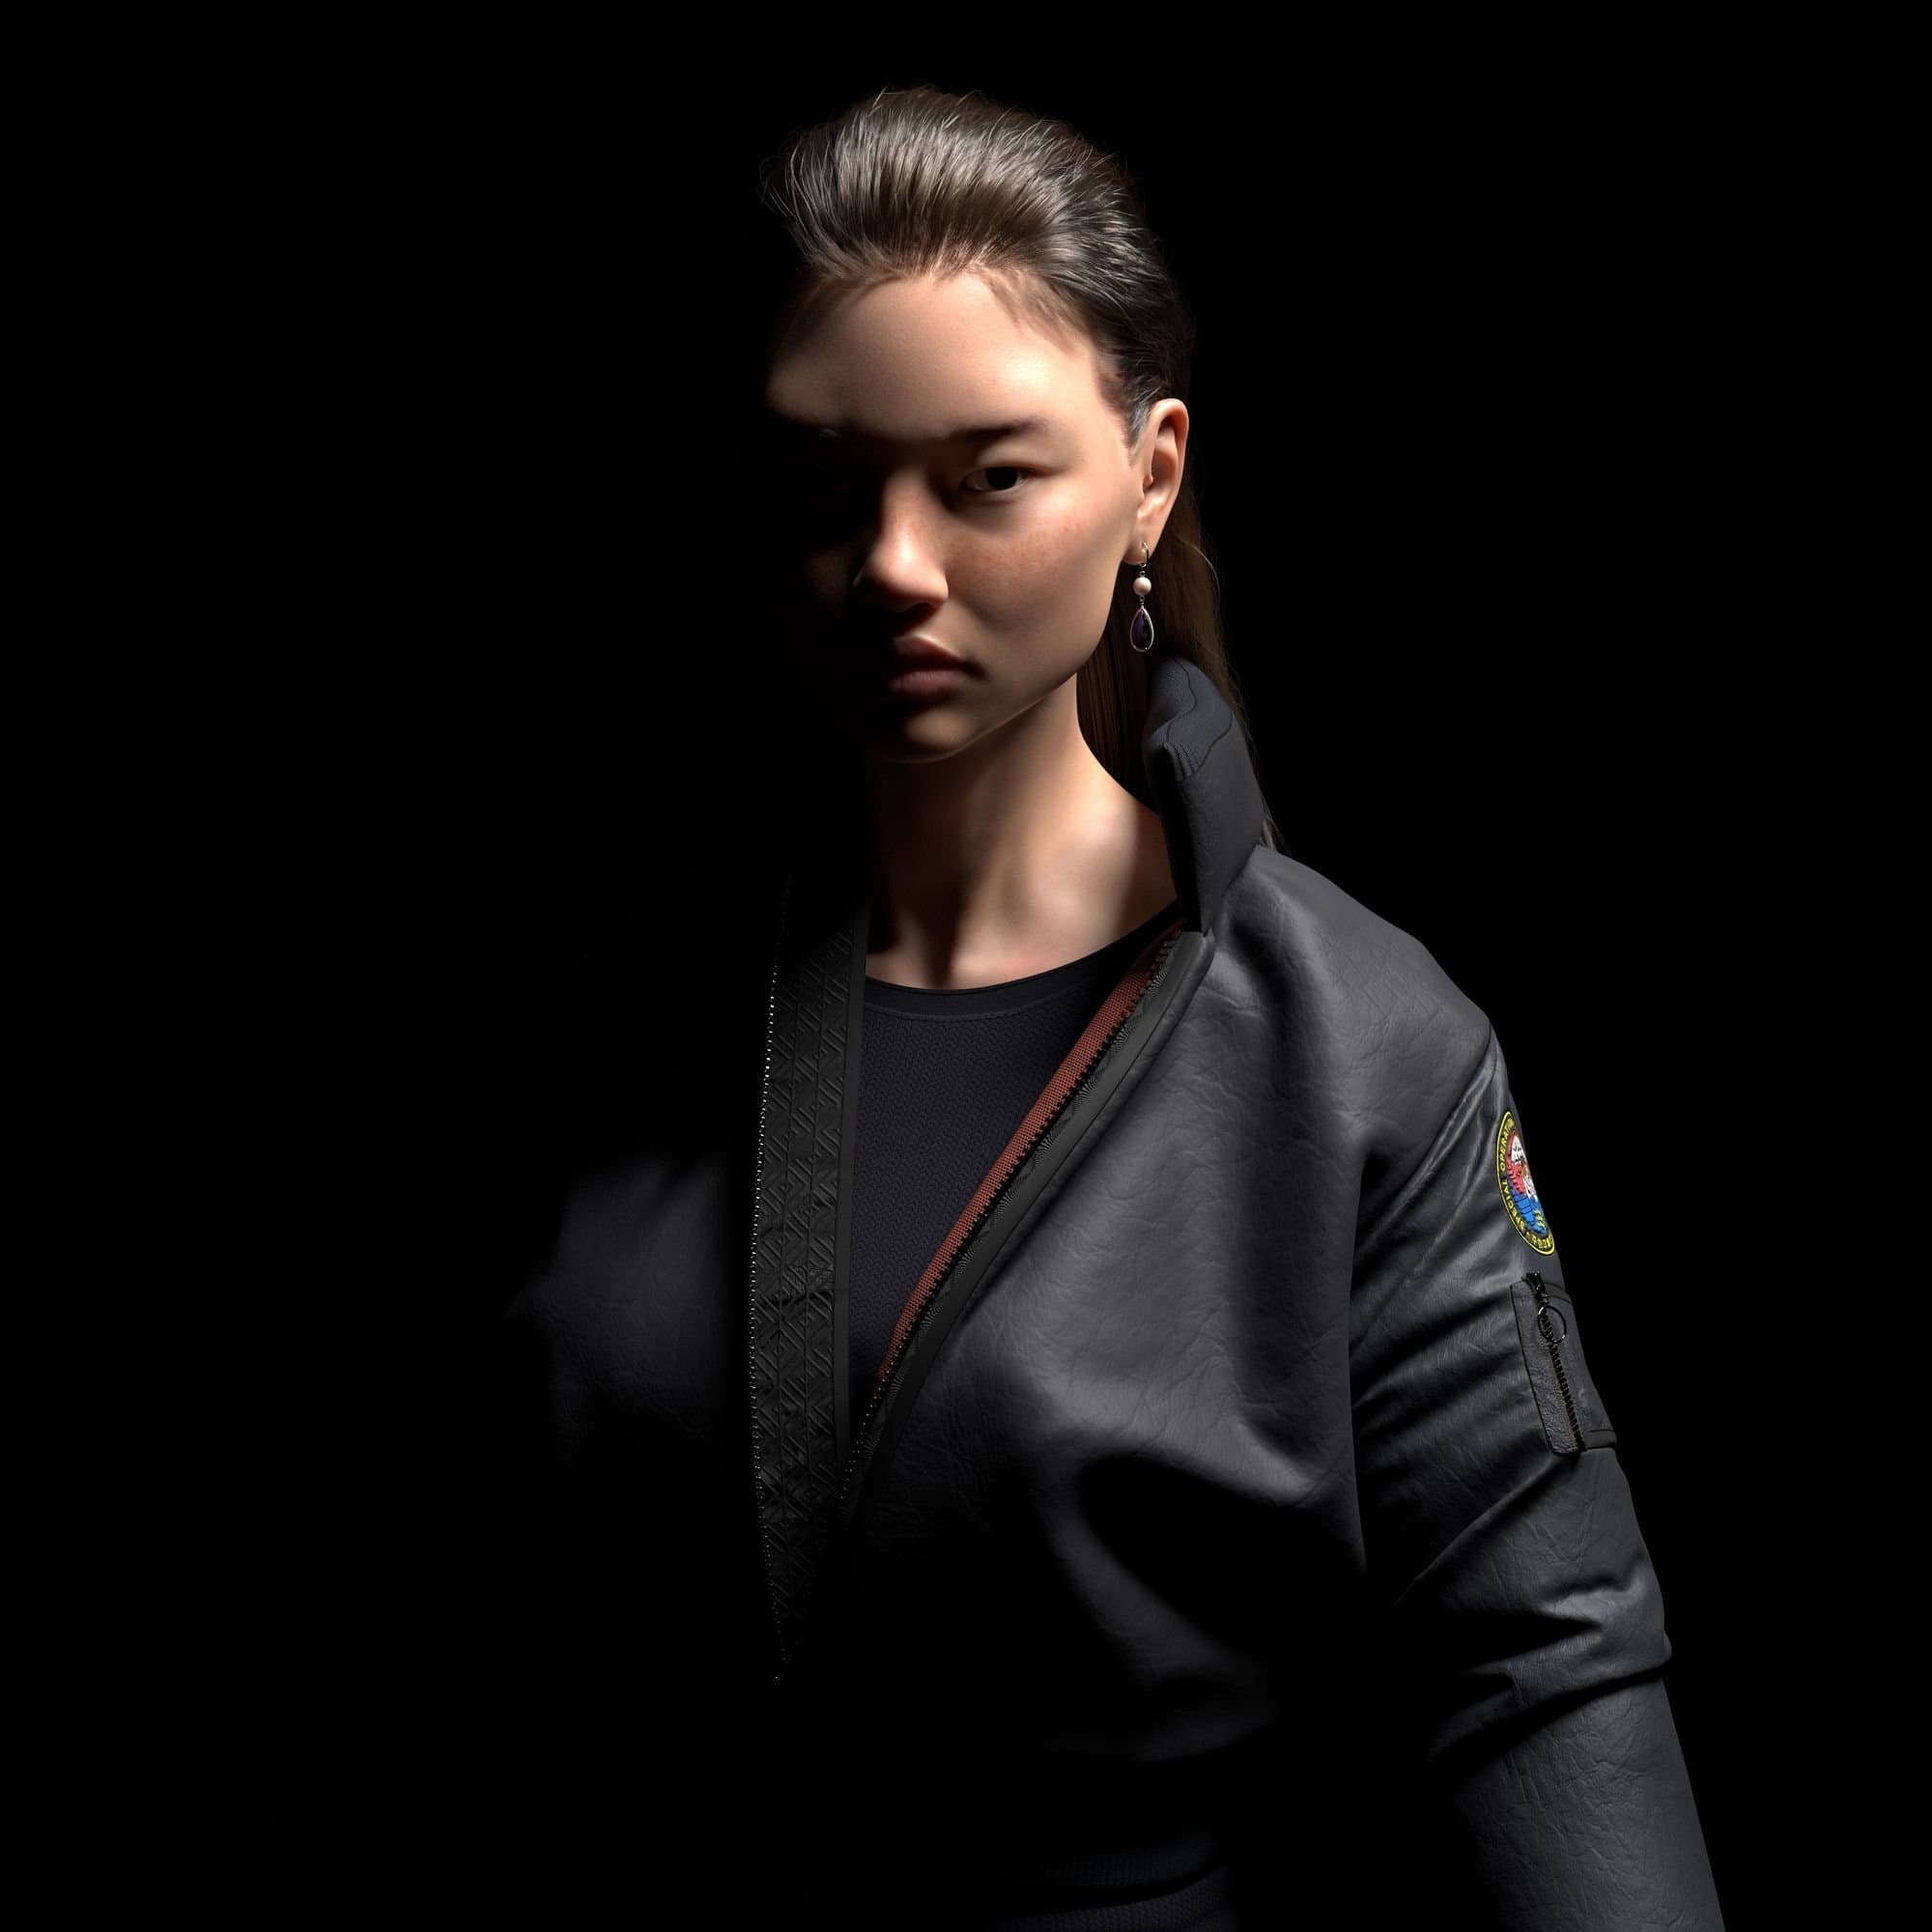
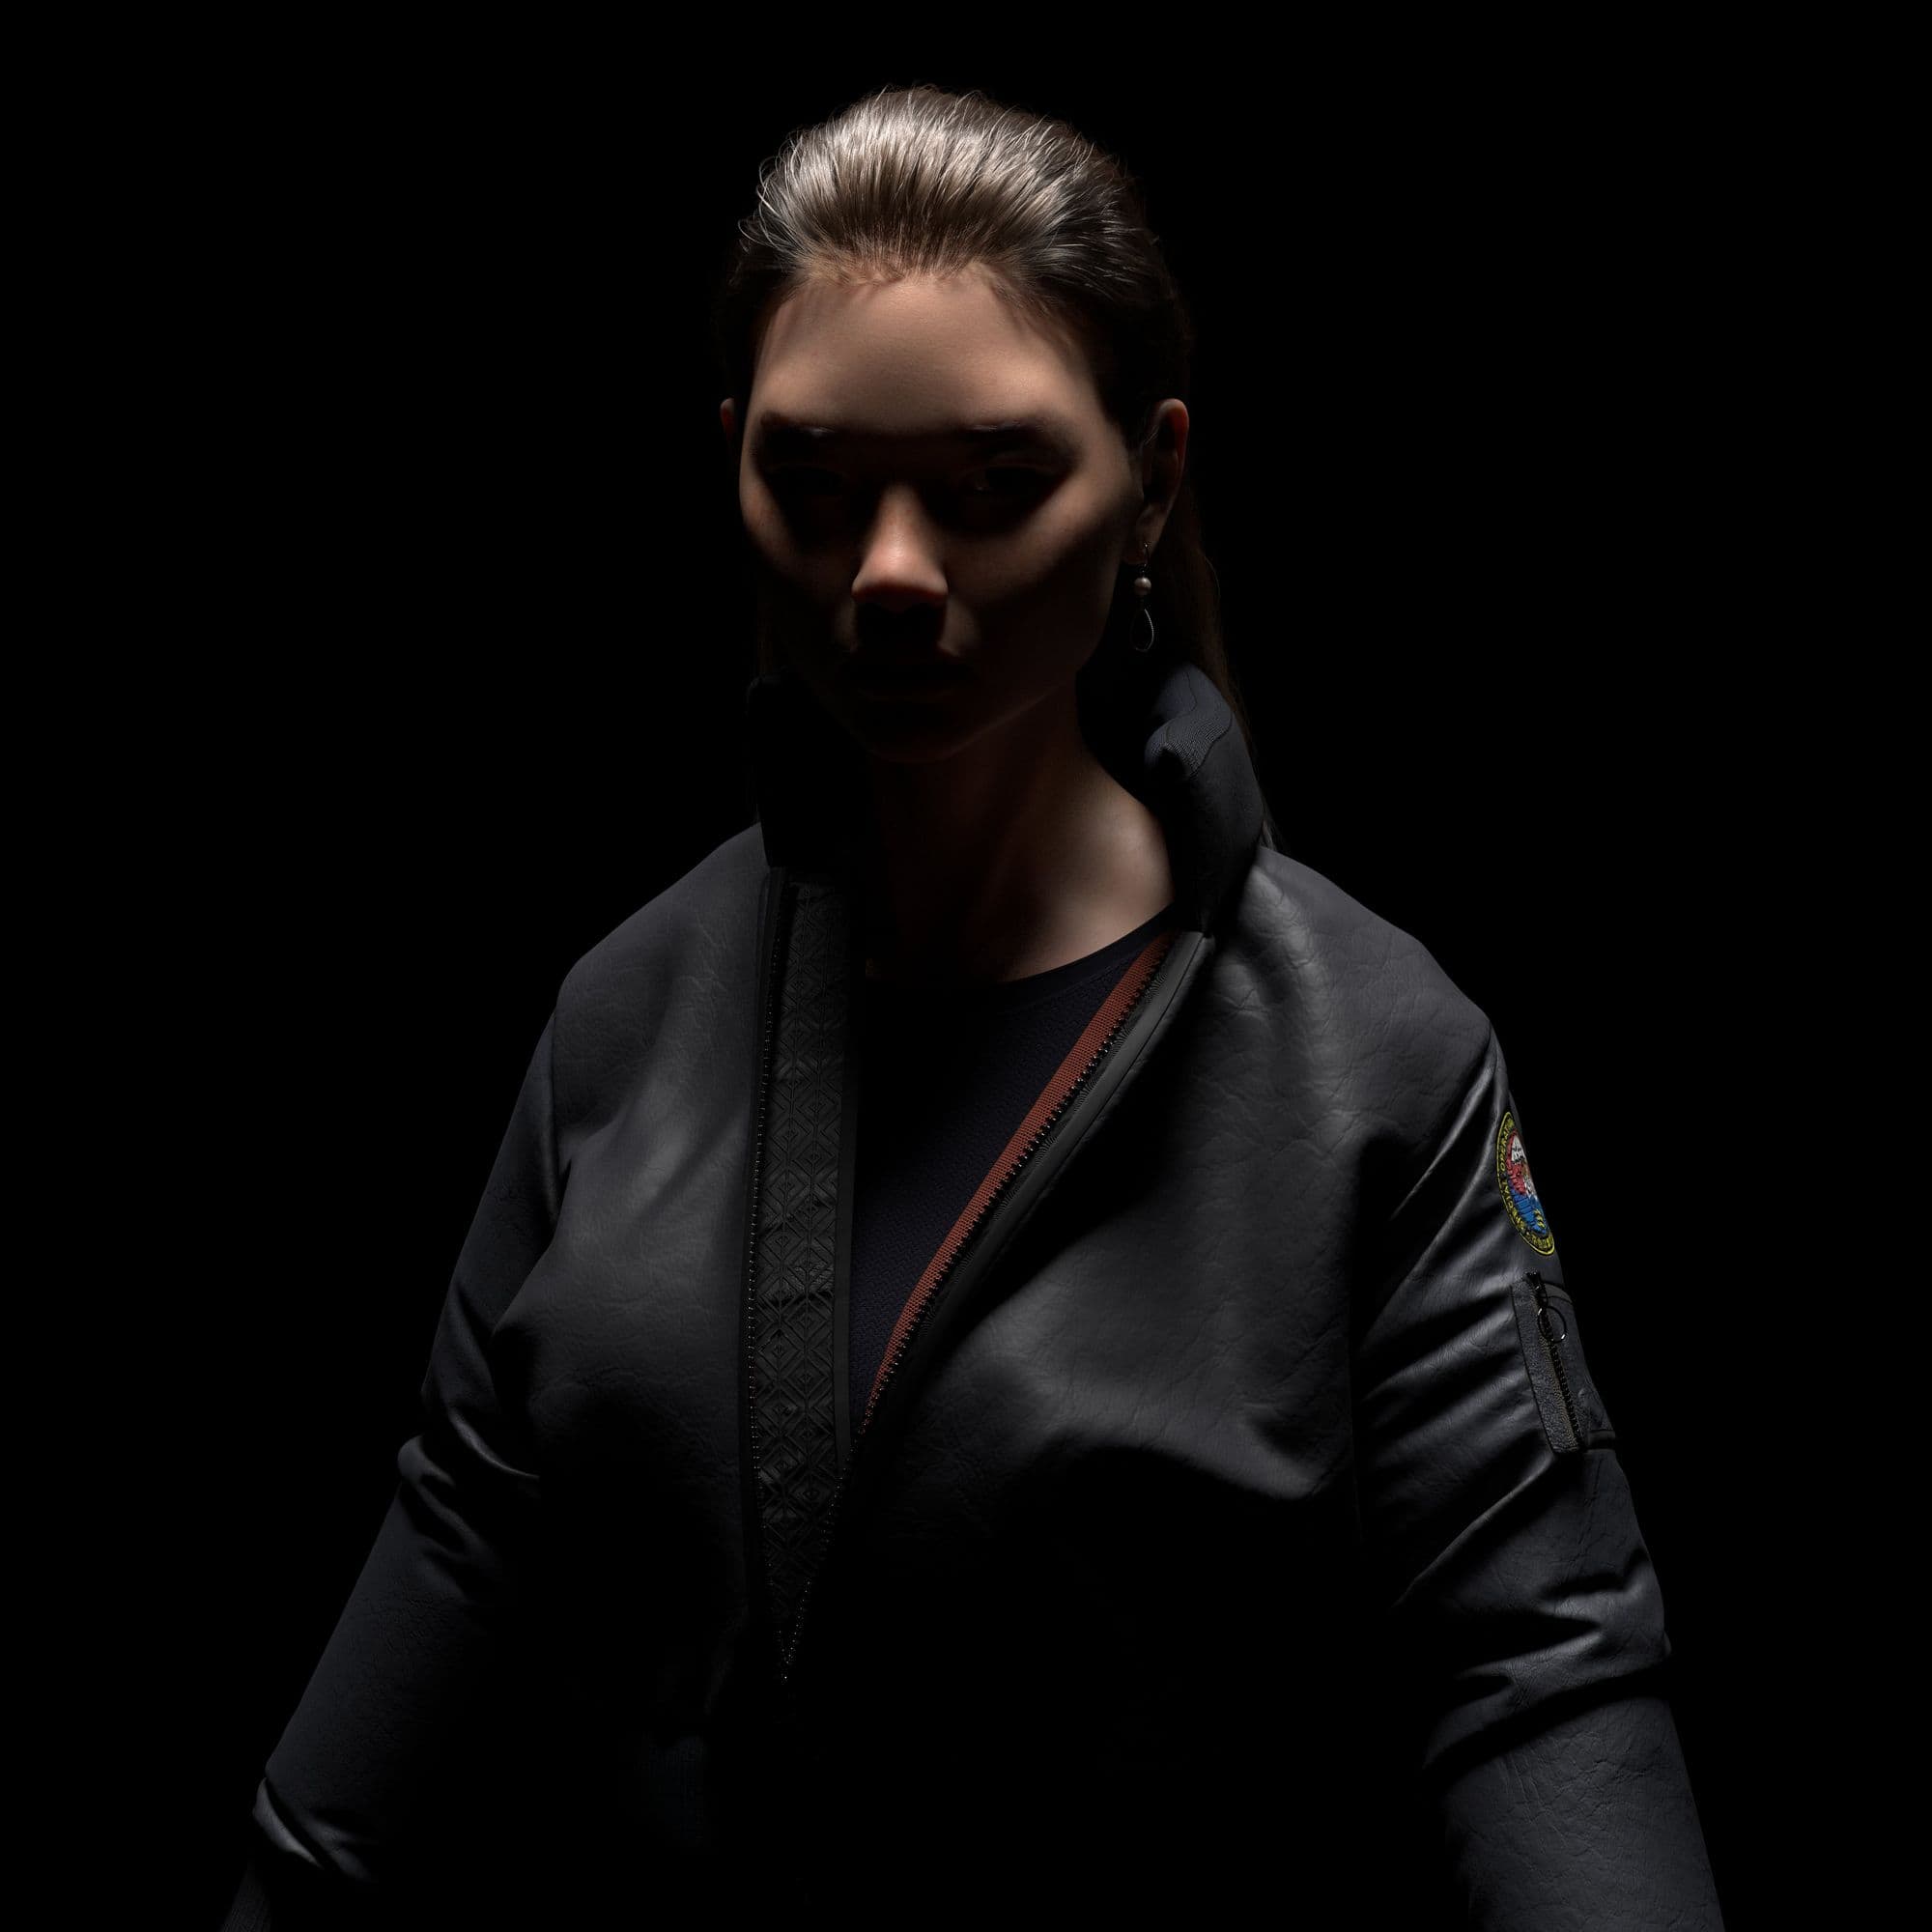
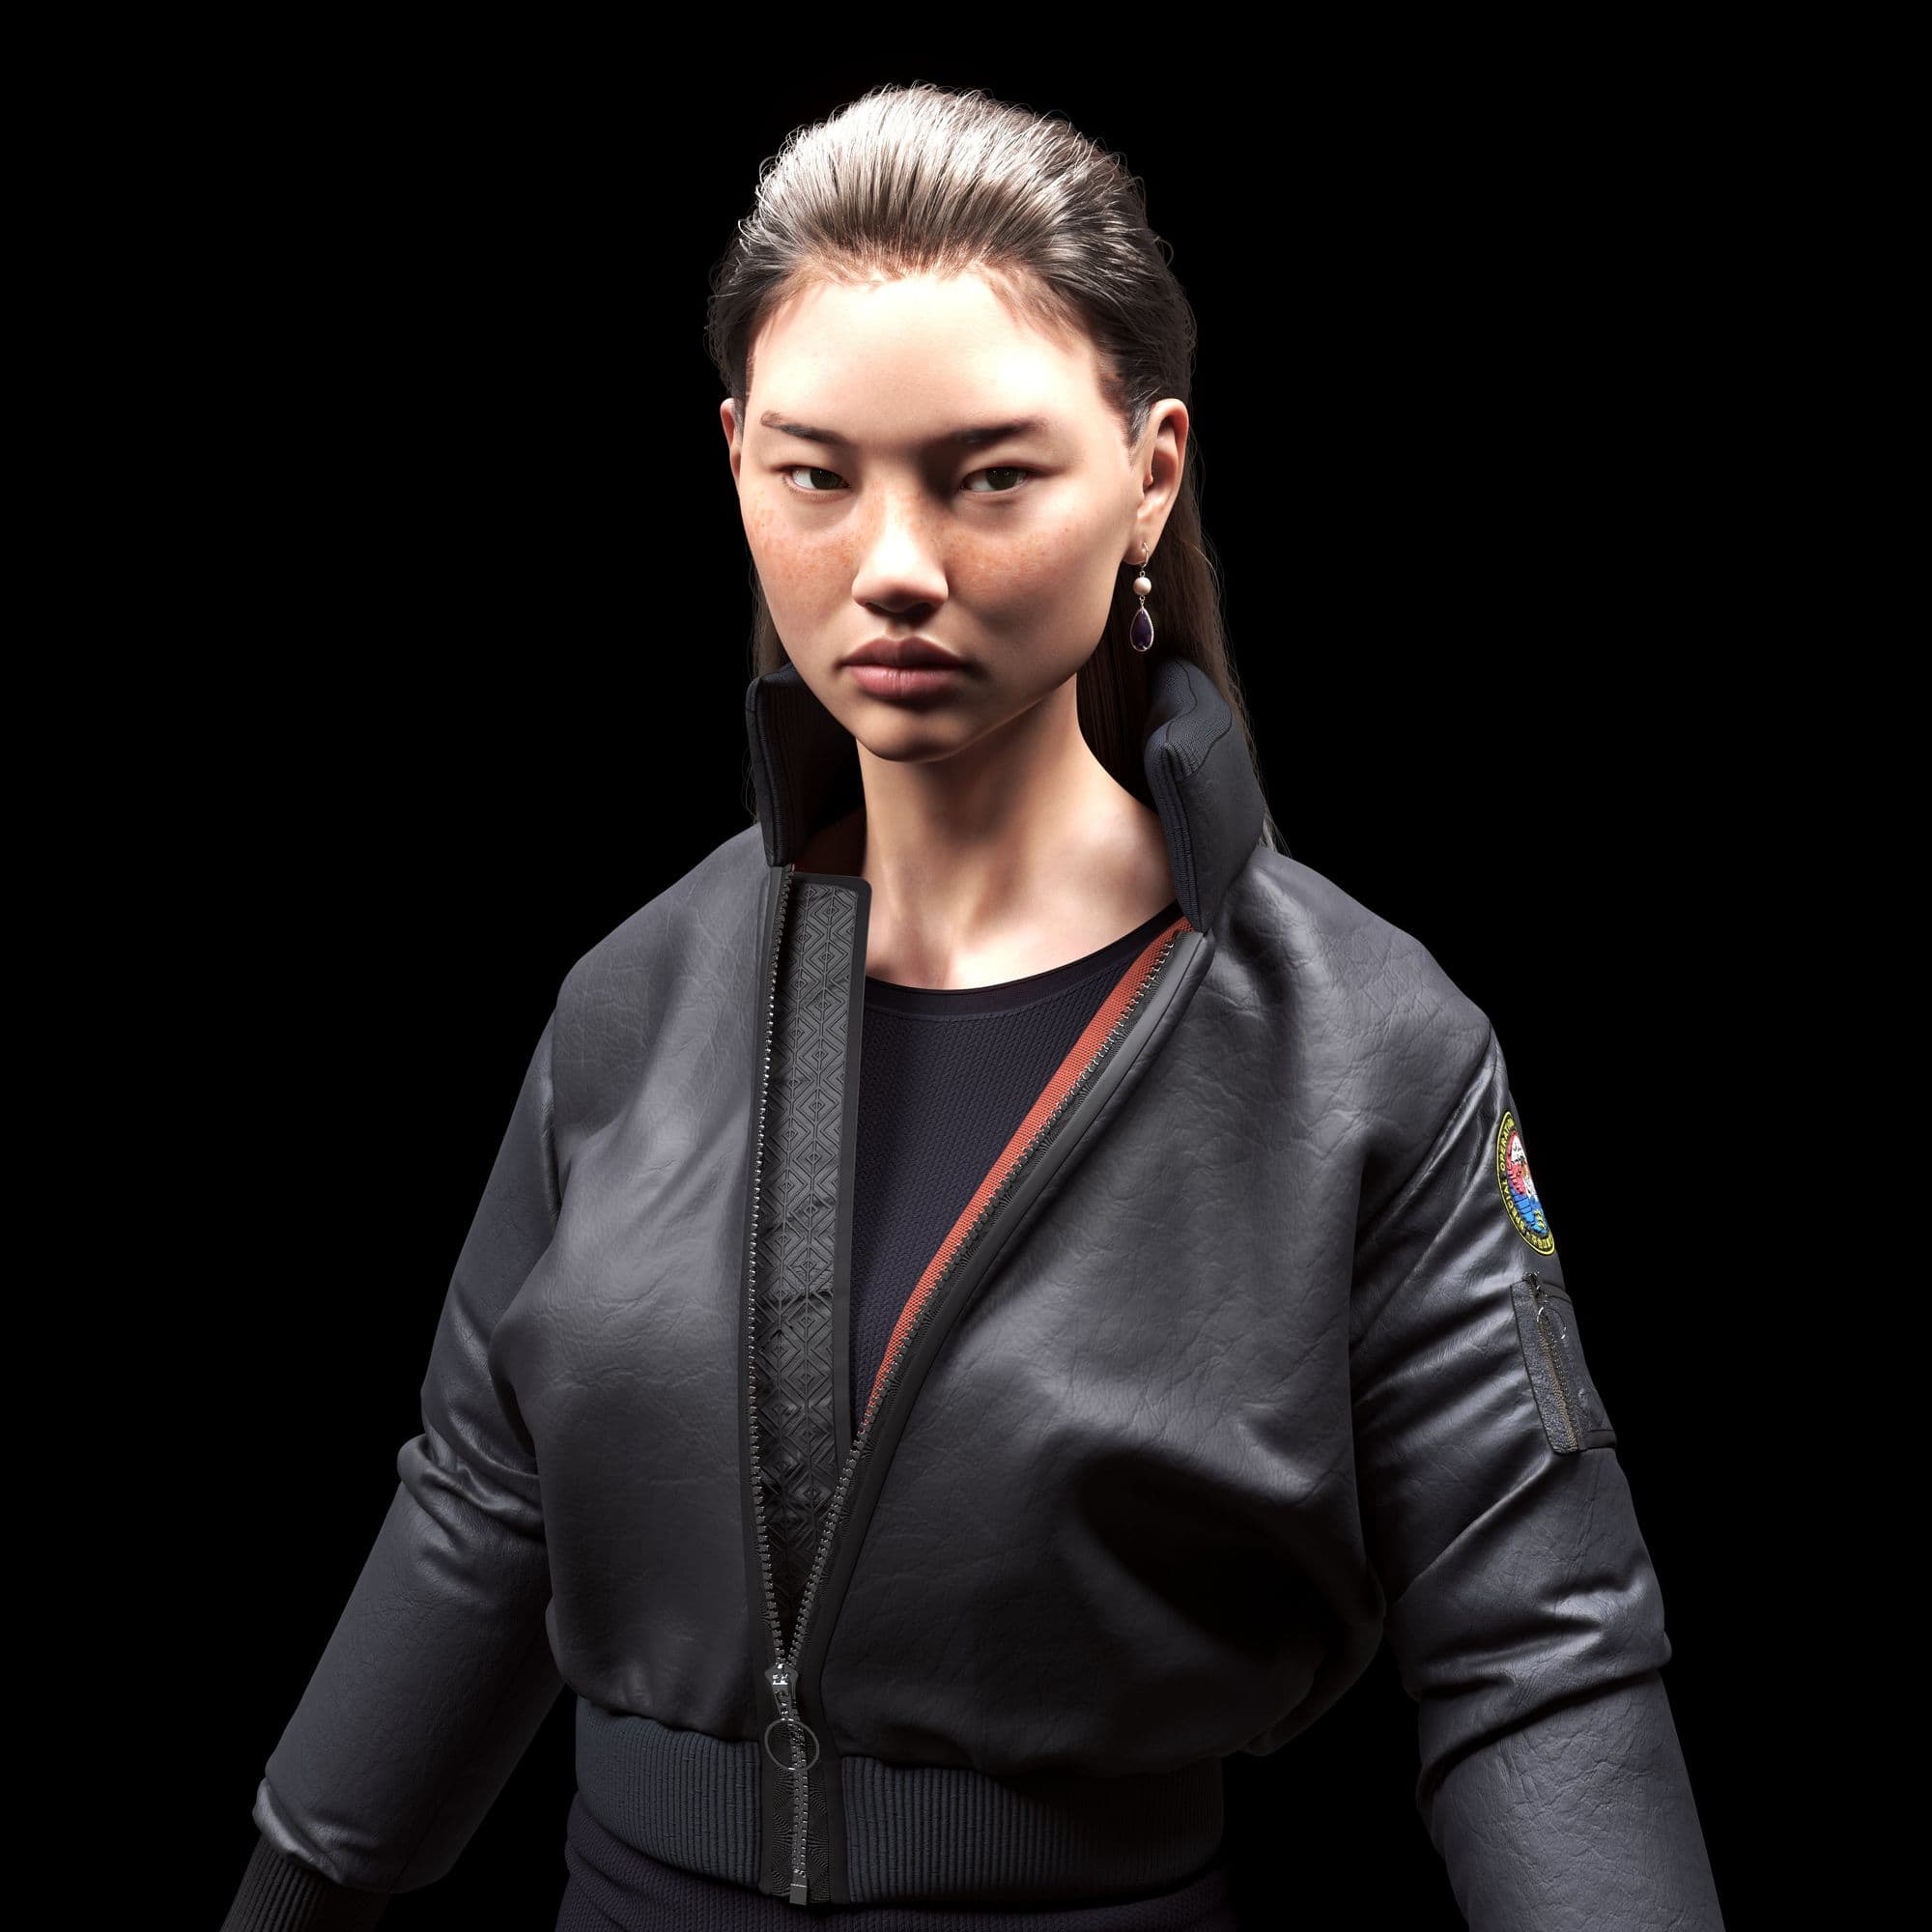
I was heavily inspired by the actress Hoyeon Jung that plays in the TV show Squid Game. Her looks was perfect for what I wanted to create, a moody scene full of questions. I wanted to capture the essence of her natural beauty so therefore I did not put makeup on the 3D model.
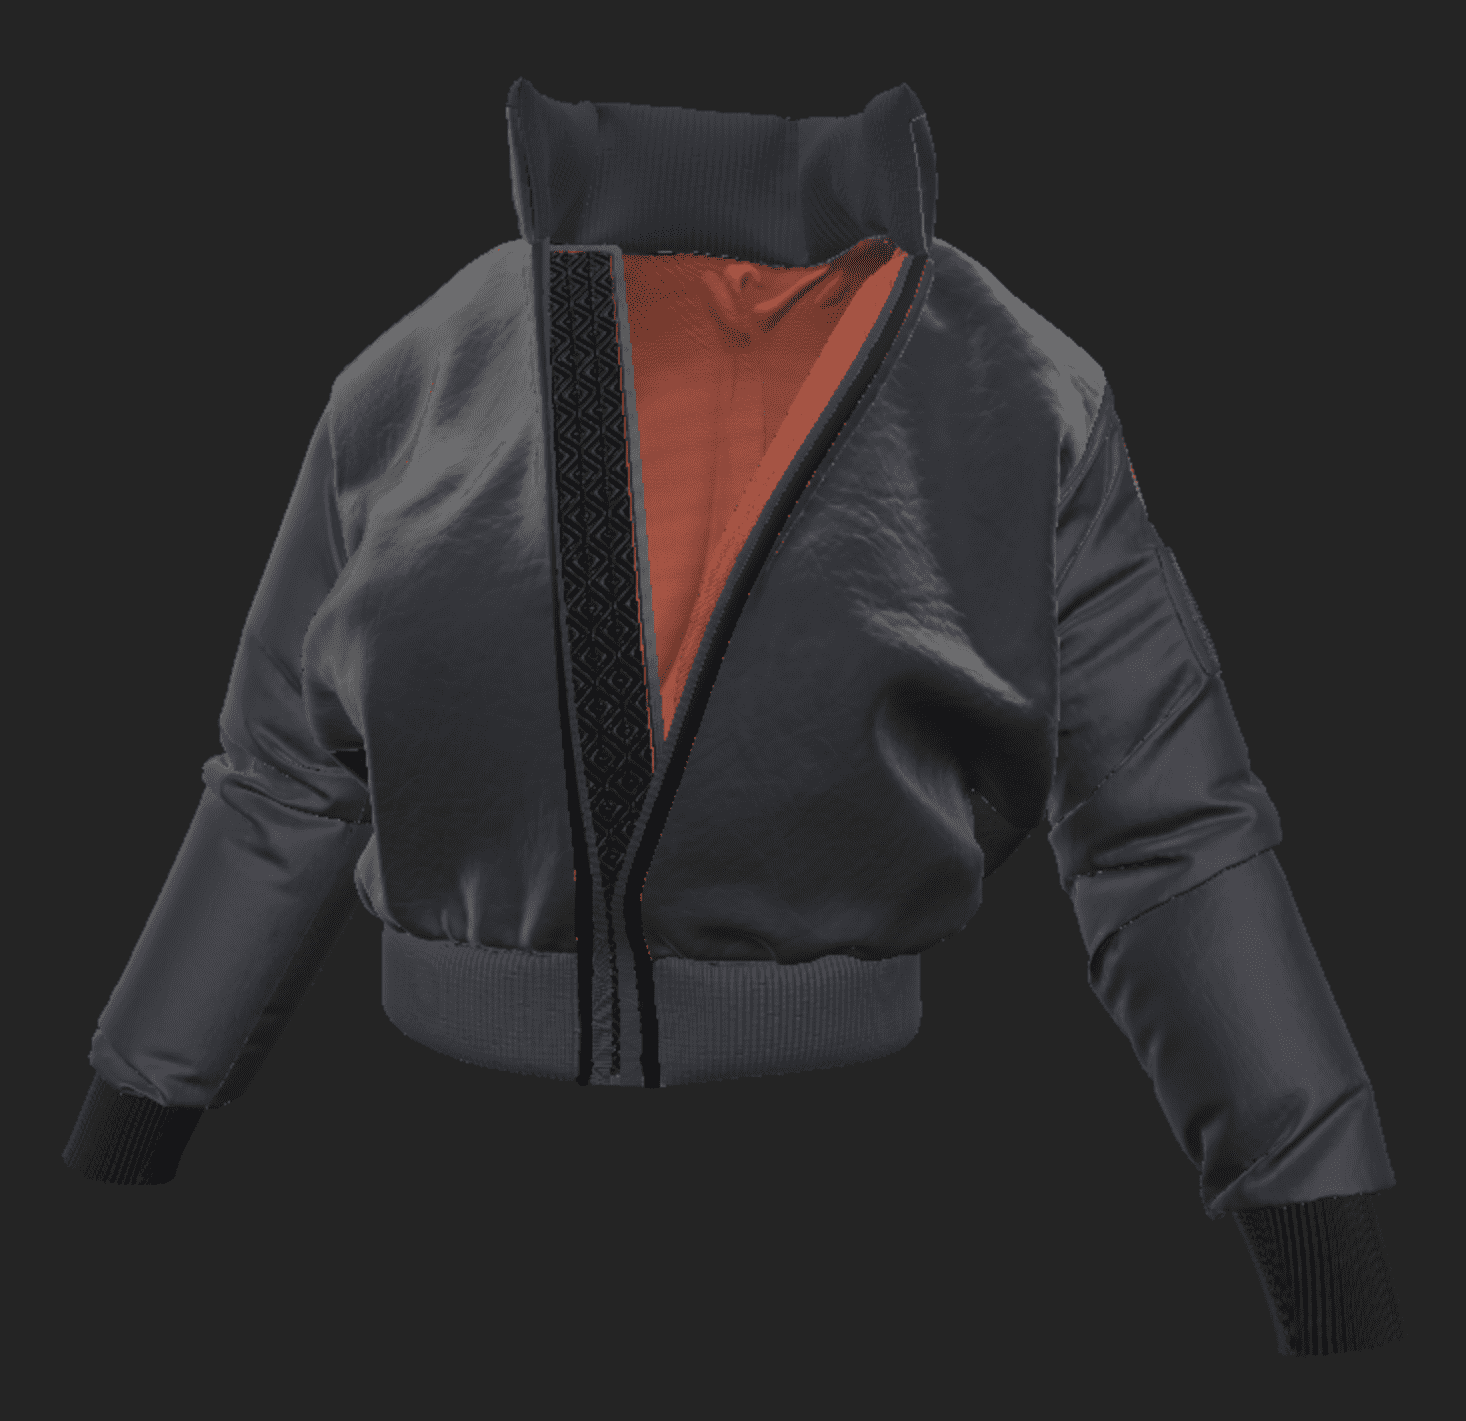
I started to gather references of the actress Hoyeon Jung using PureRef to stack my photos also looking at bomber jackets to create my own, including images of hairstyles.
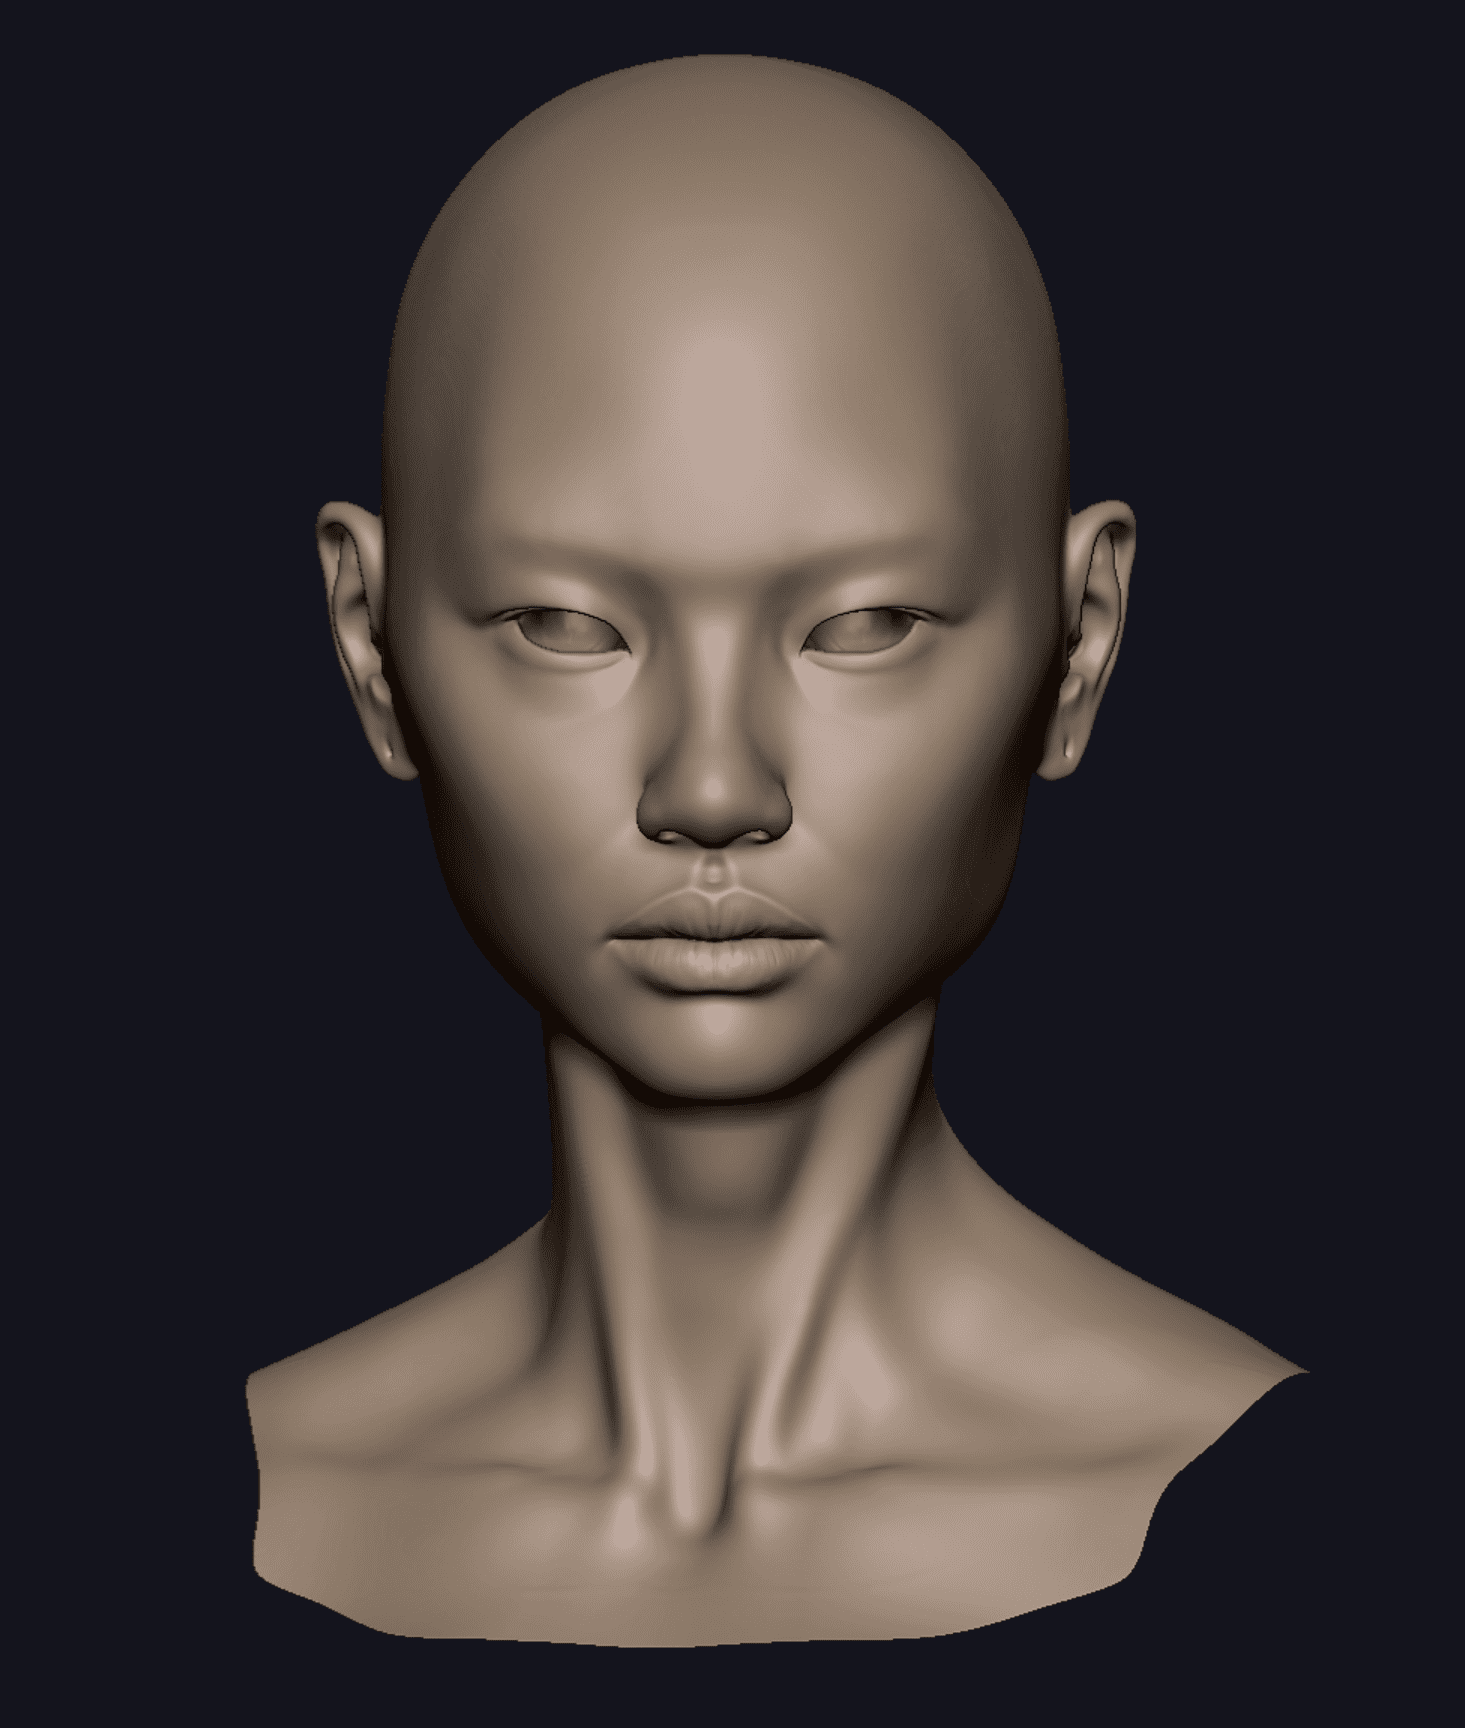
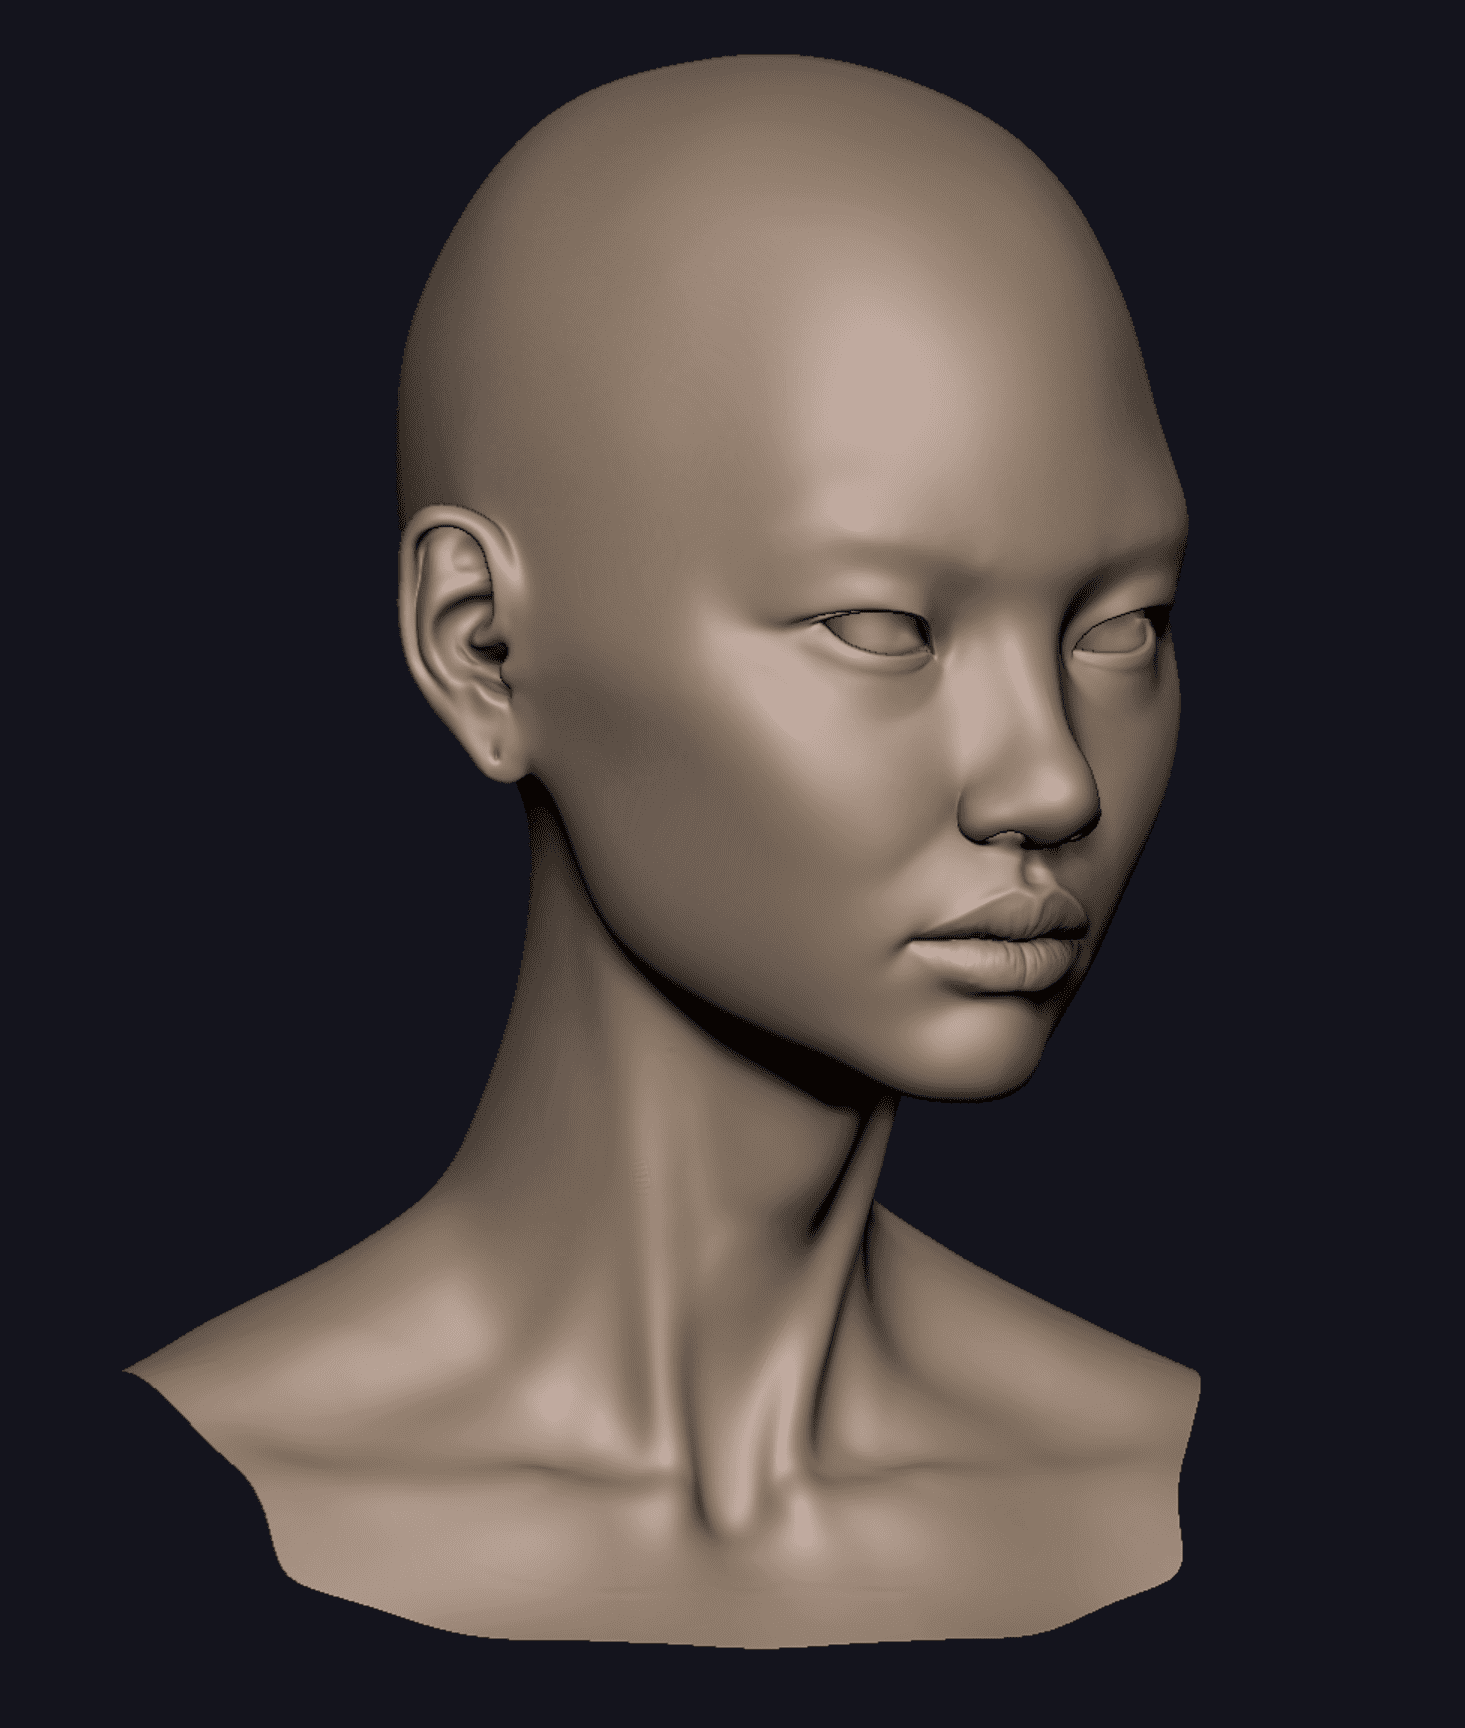
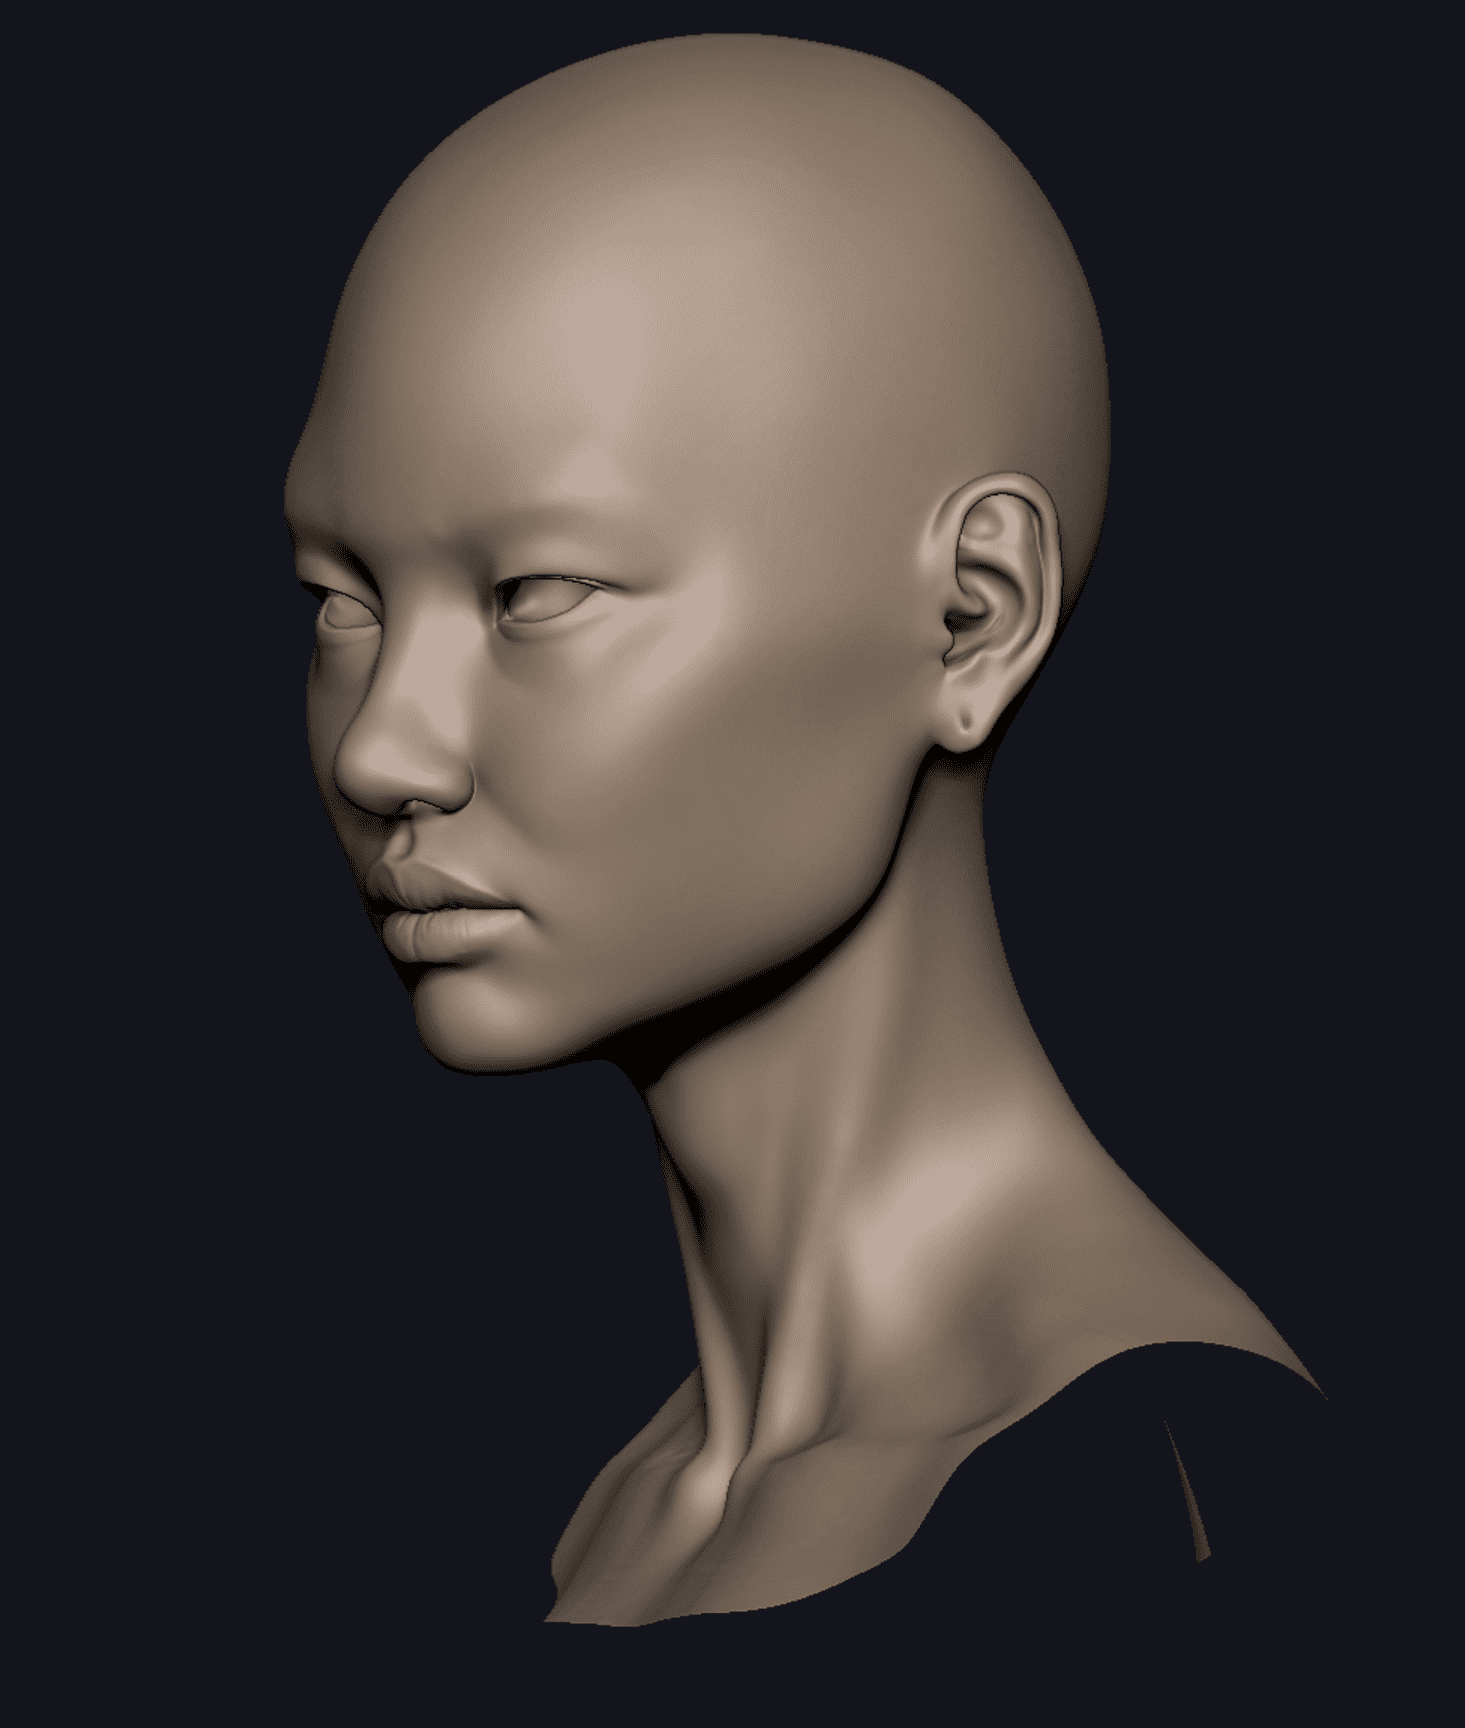
Sculpture
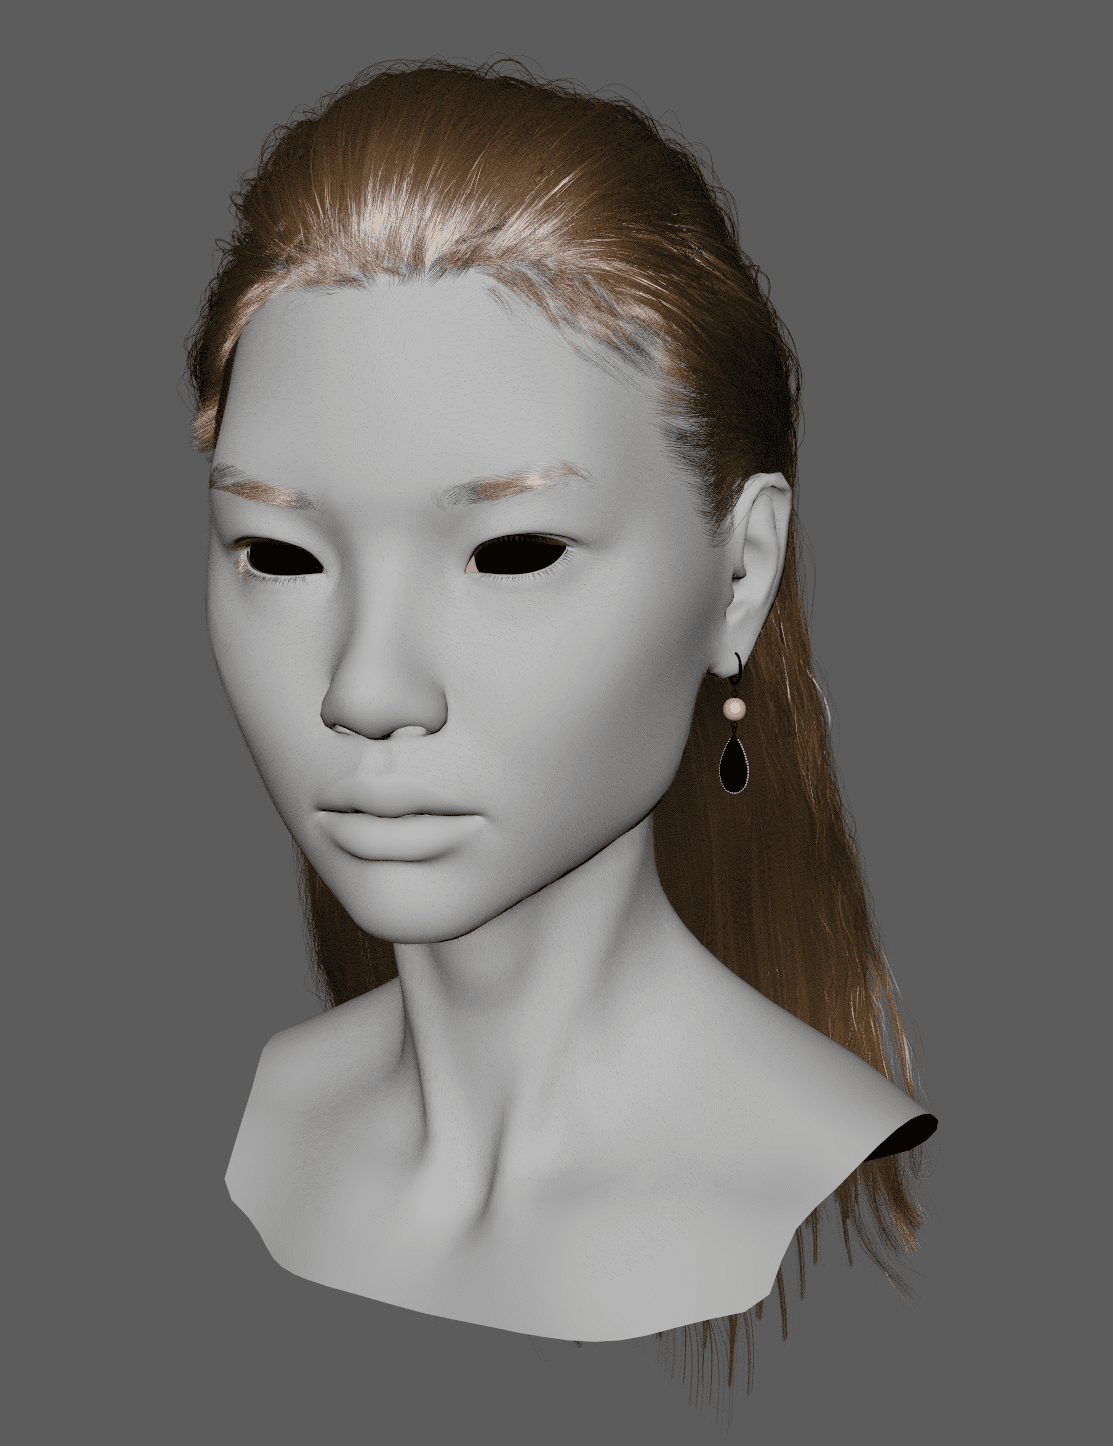
I started to sculpt her face in Zbrush, trying to match the shape of her face as closely as possible and then retopologising.
For the face, I used Texture.XYZ Multi-channel faces and face displacement maps and the face photoset for the albedo, using Mari. I knew from the reference that this actress had soft skin, so it was a bit of a challenge to not make the details of the face strong but to have enough details to see it and make it look natural.
Texture
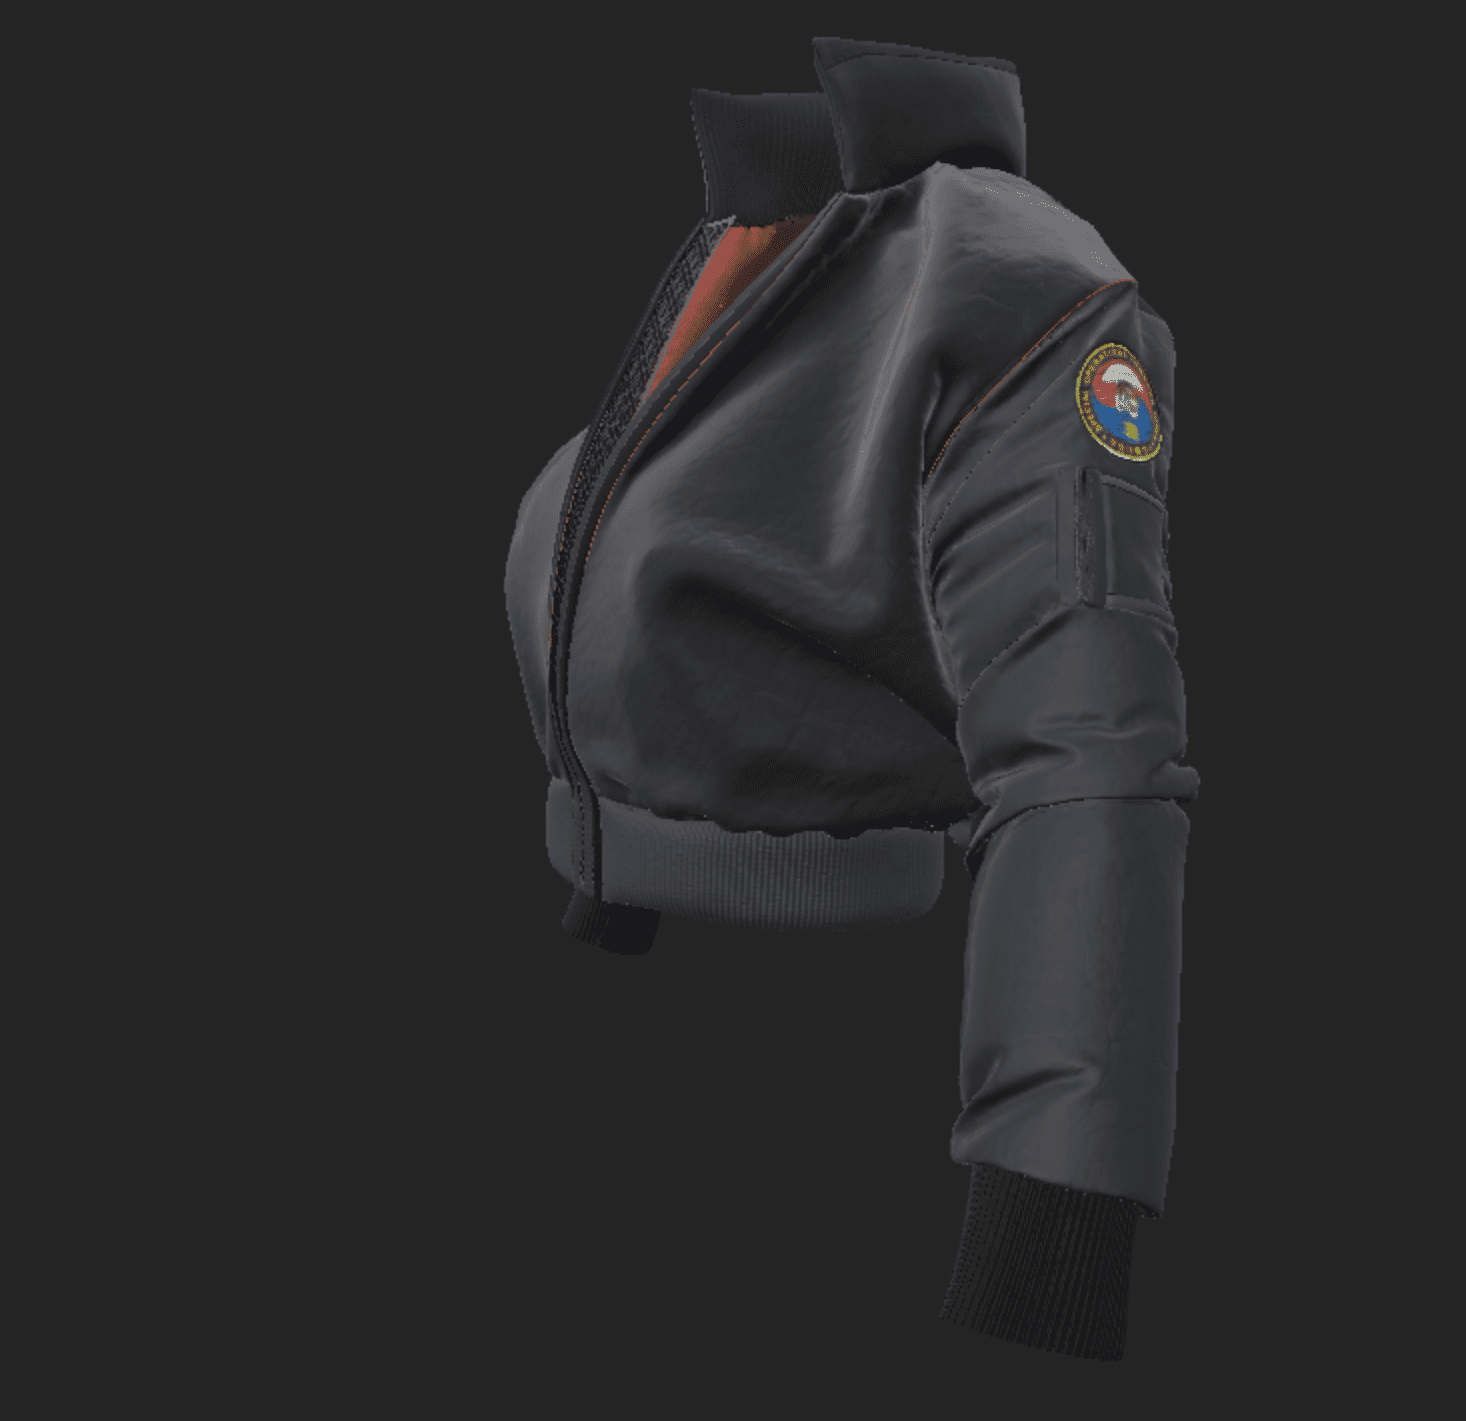
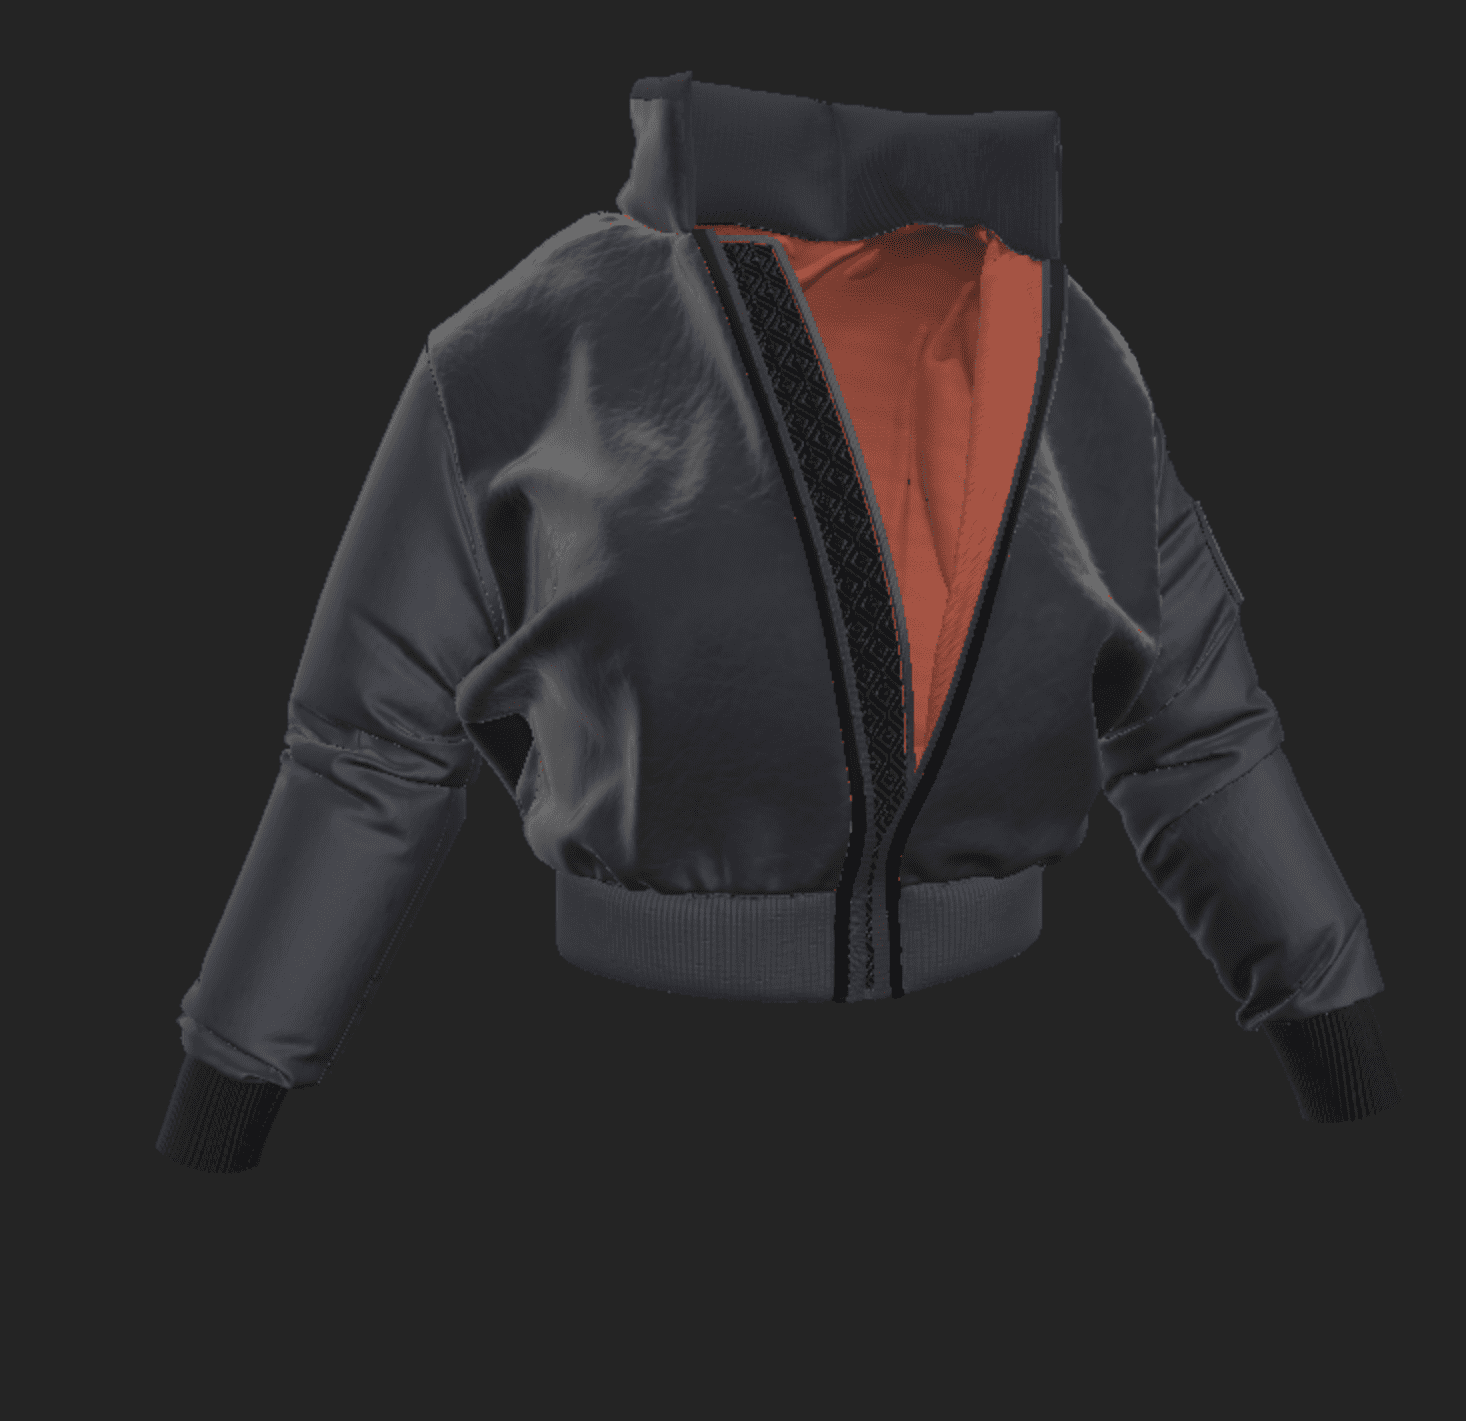
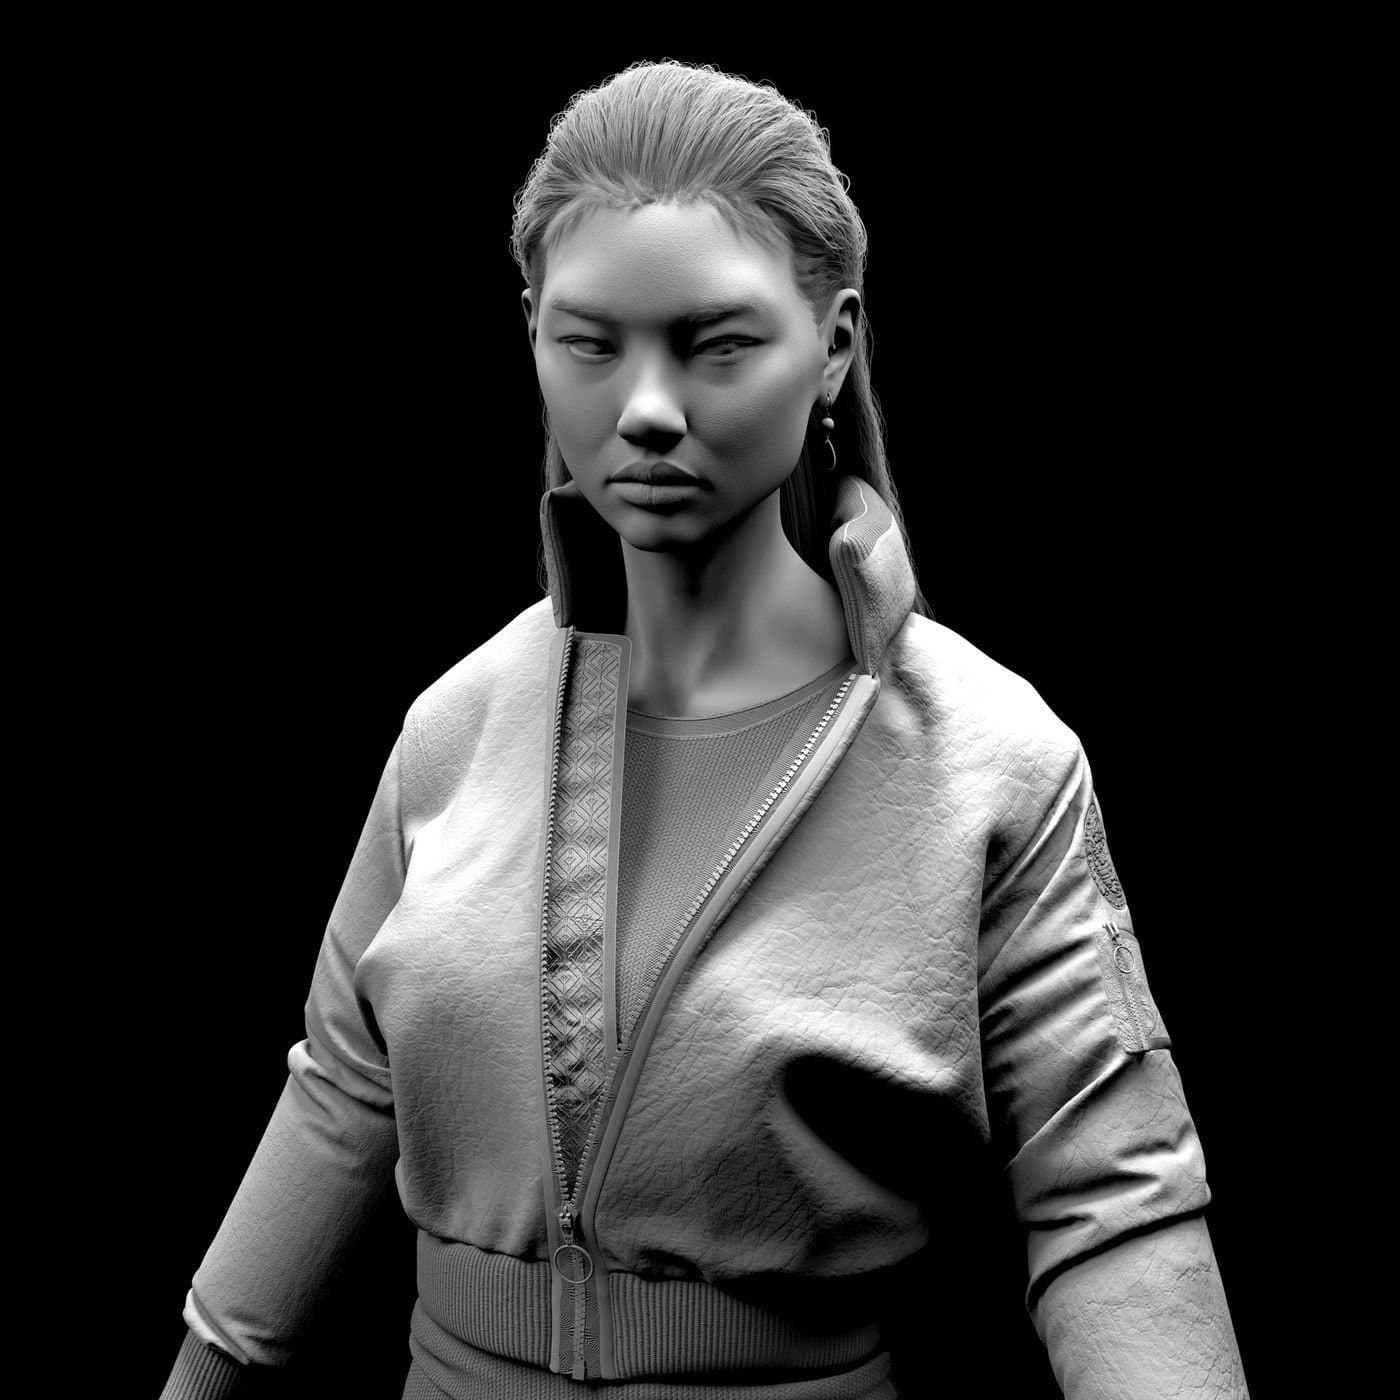
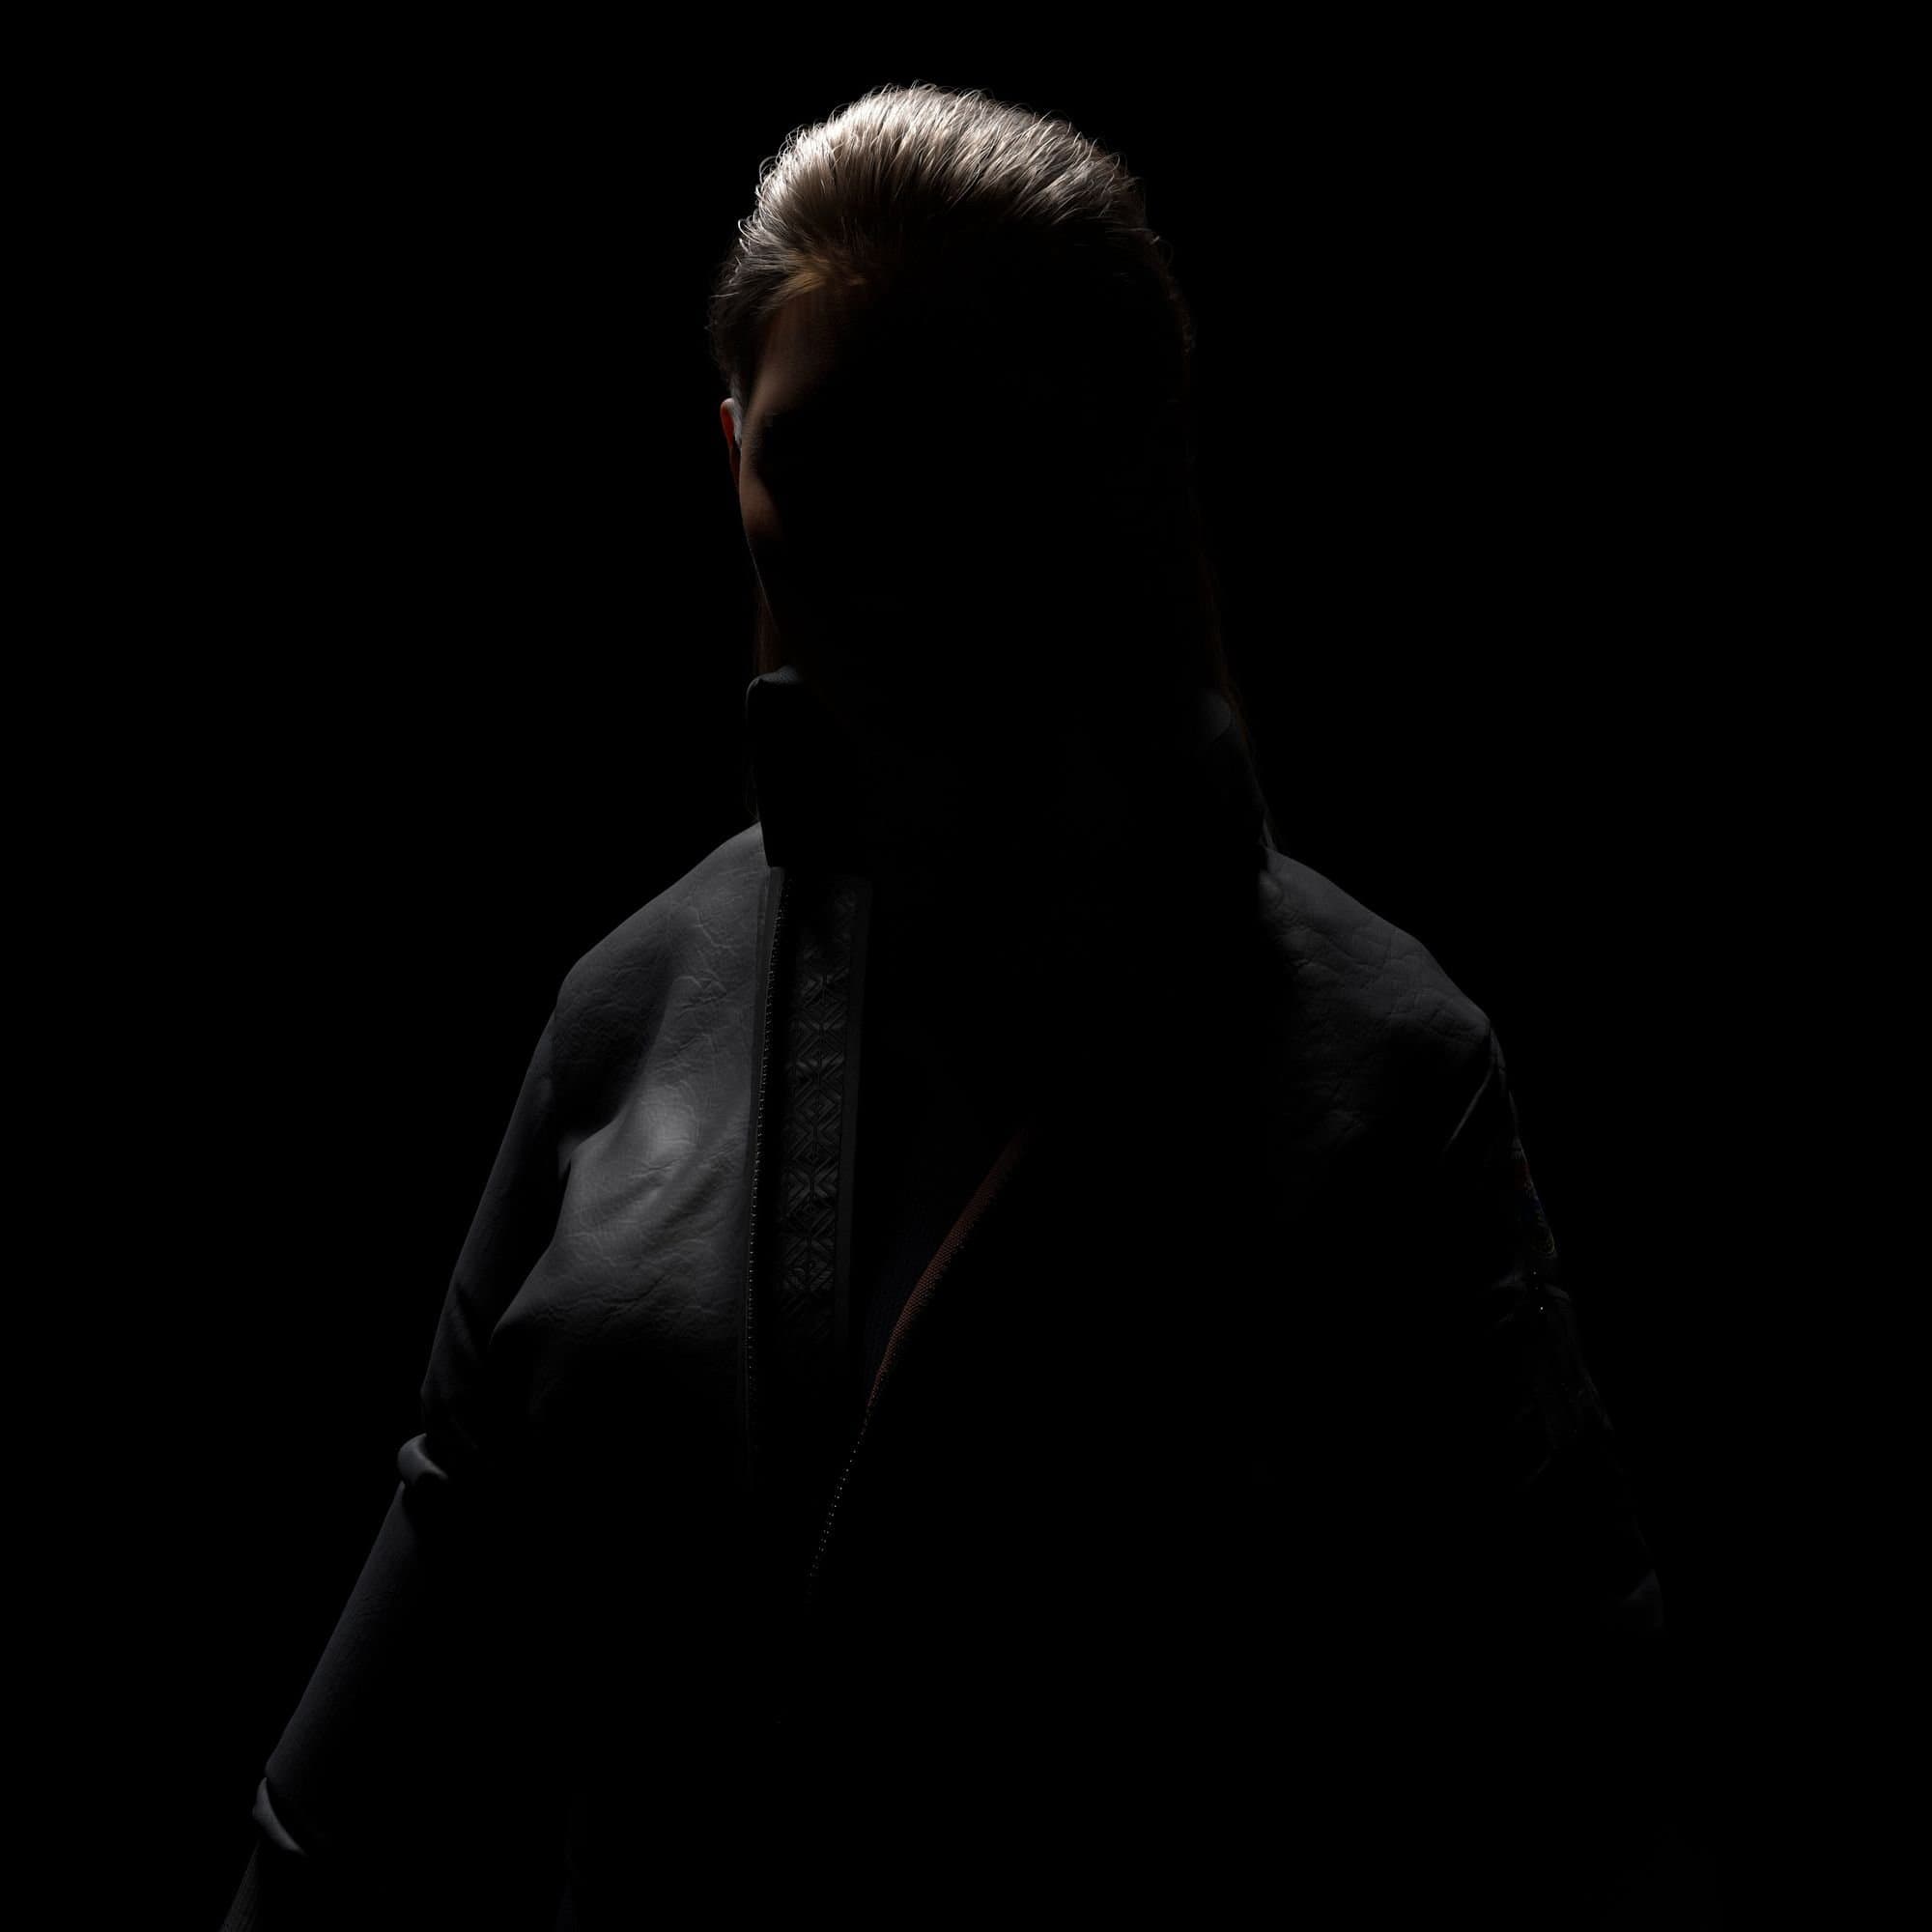
After I was happy with her face I started to create an iconic leather jacket in Marvelous Designer. The jacket was very fun to make because I never made a jacket before. I watched a lot of tutorials and built my own bomber jacket using the UV layout and retopologising the jacket with Quadrangulate. Then I brought the jacket in Zbrush to sculpt the finer details.
The texture of the jacket was made in Substance Painter. I used Texture.xyz leather material to have a leathery pattern on the jacket and used references to make it look realistic.
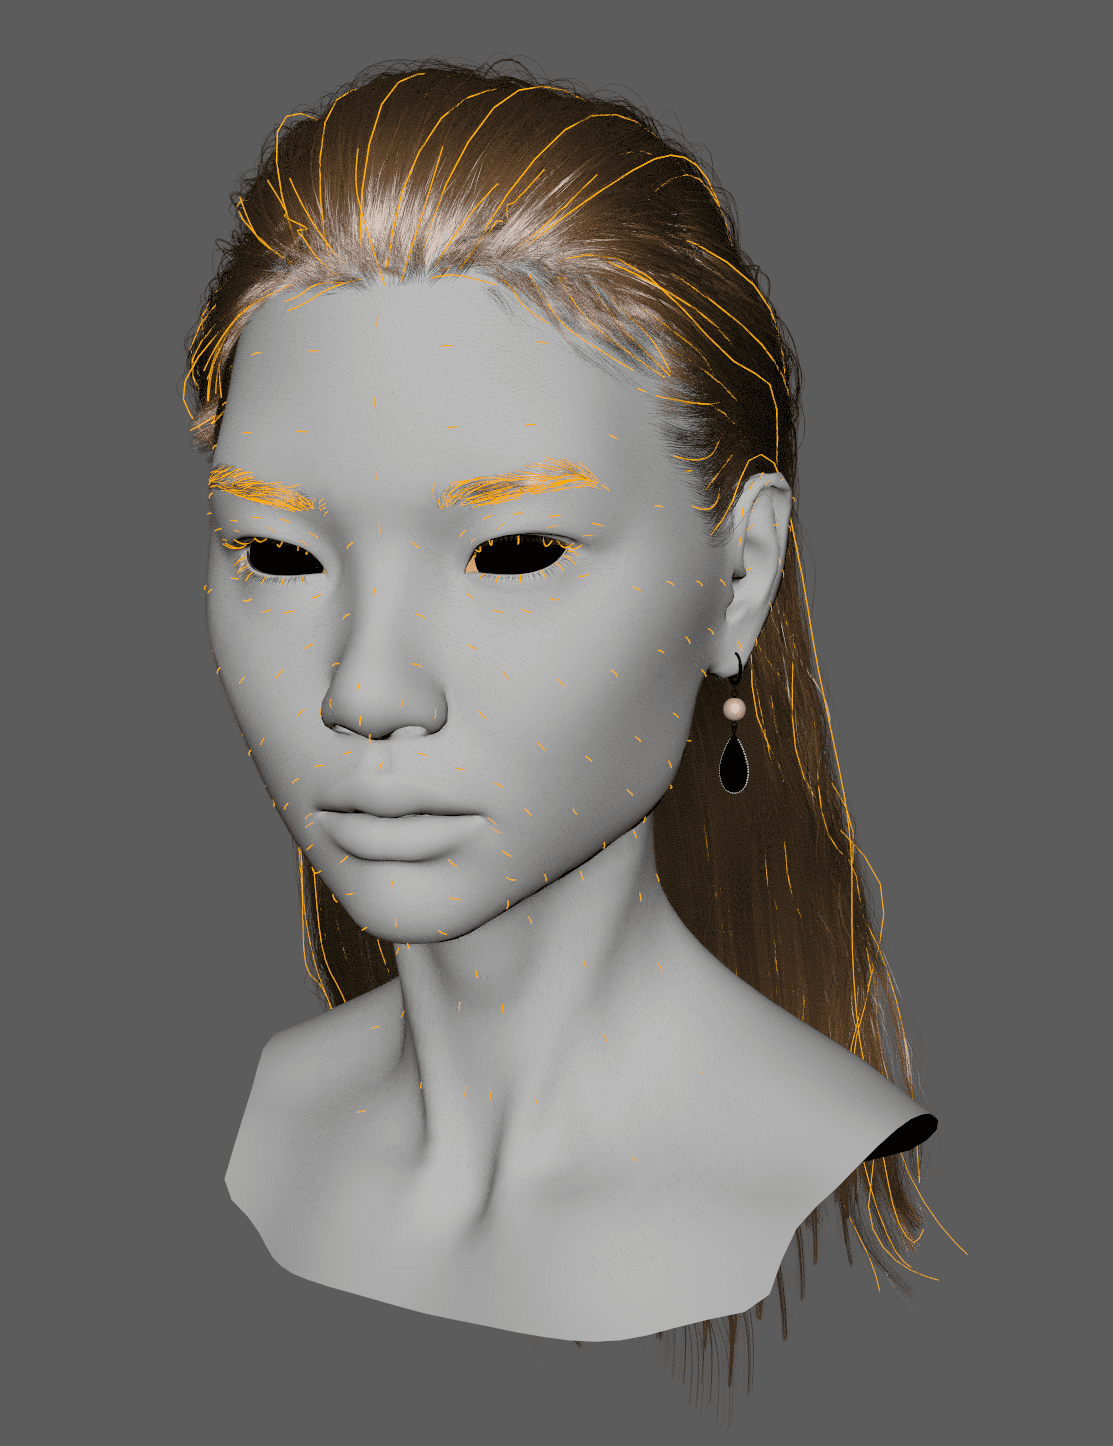
Hair Groom
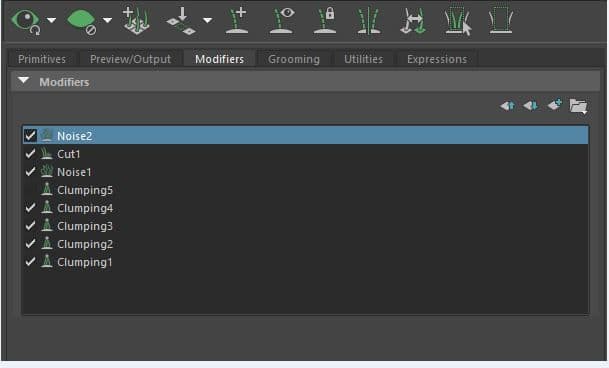
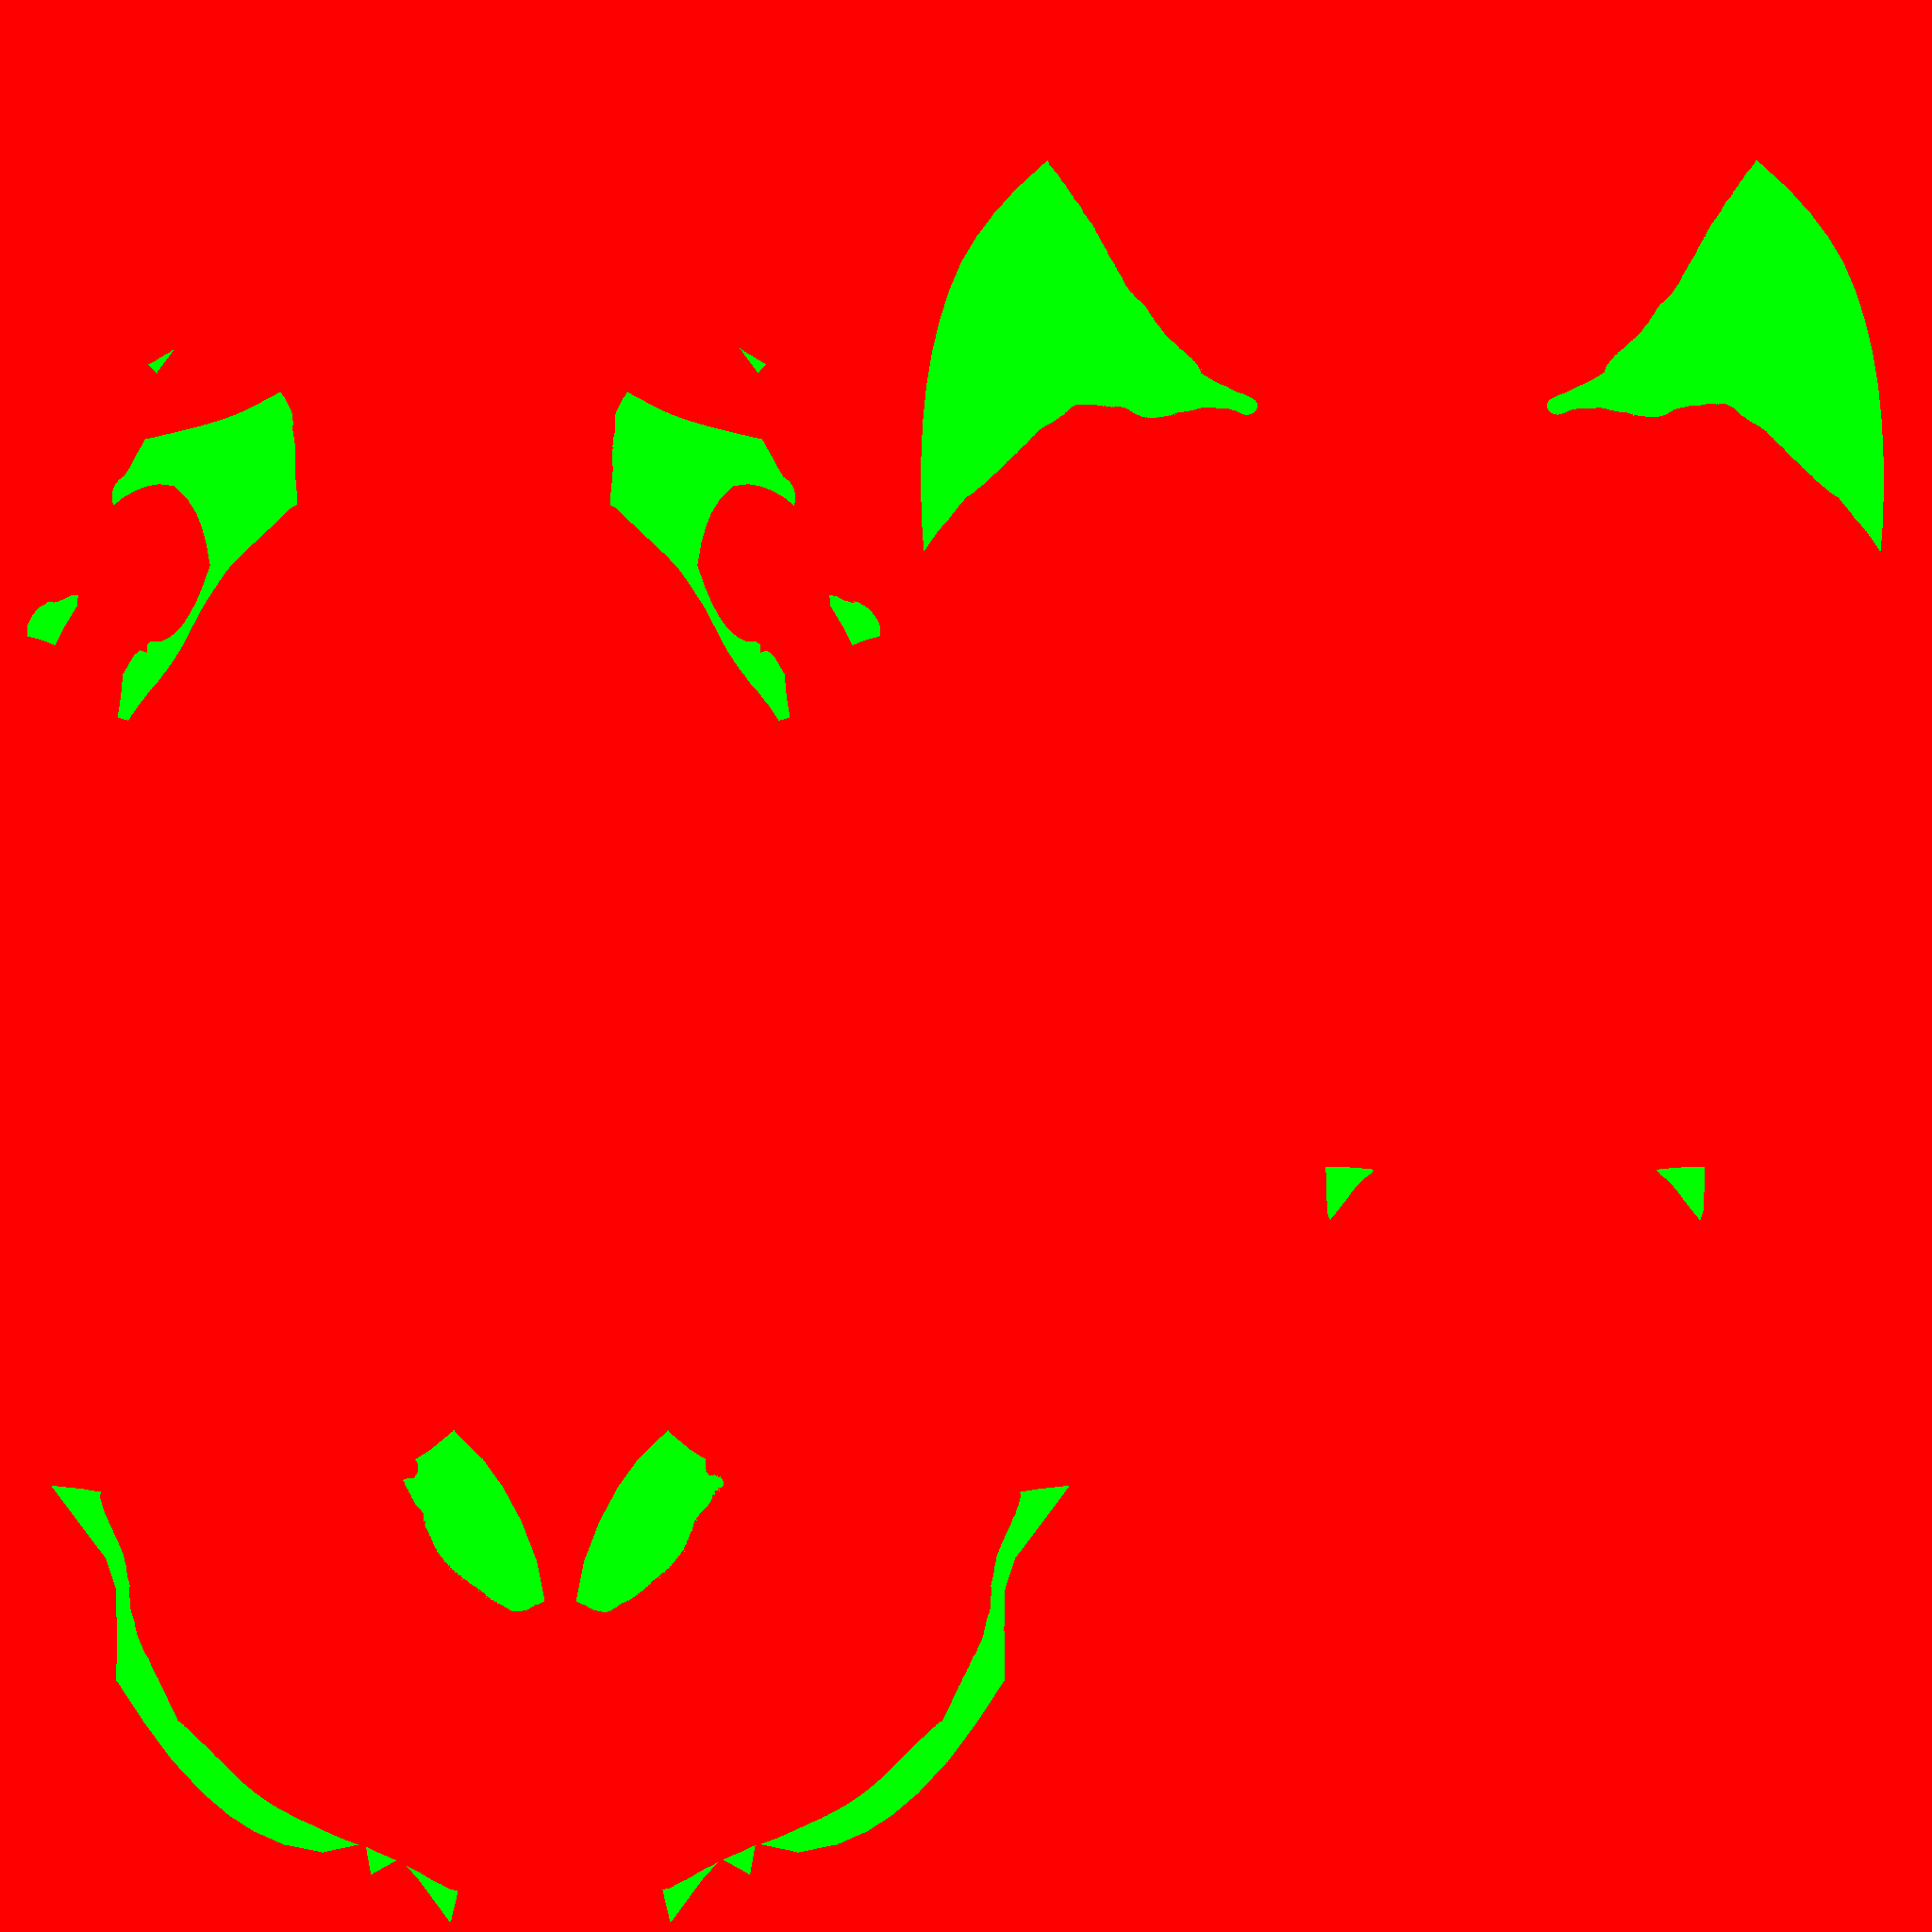
After looking at a lot of hairstyles I decided to create a slicked-back style using XgenCore it was my first time using the plugin and with the guidance of my teacher and watching tutorials from the likes of Hadi Karimi, I made it work the way I wanted. Below is a glimpse on how I use Modifiers and my mask for the hair in Xgen:
Clay render
Lighting and Composition
I created four V-Ray Lights with the intention of capturing the mood of the piece:
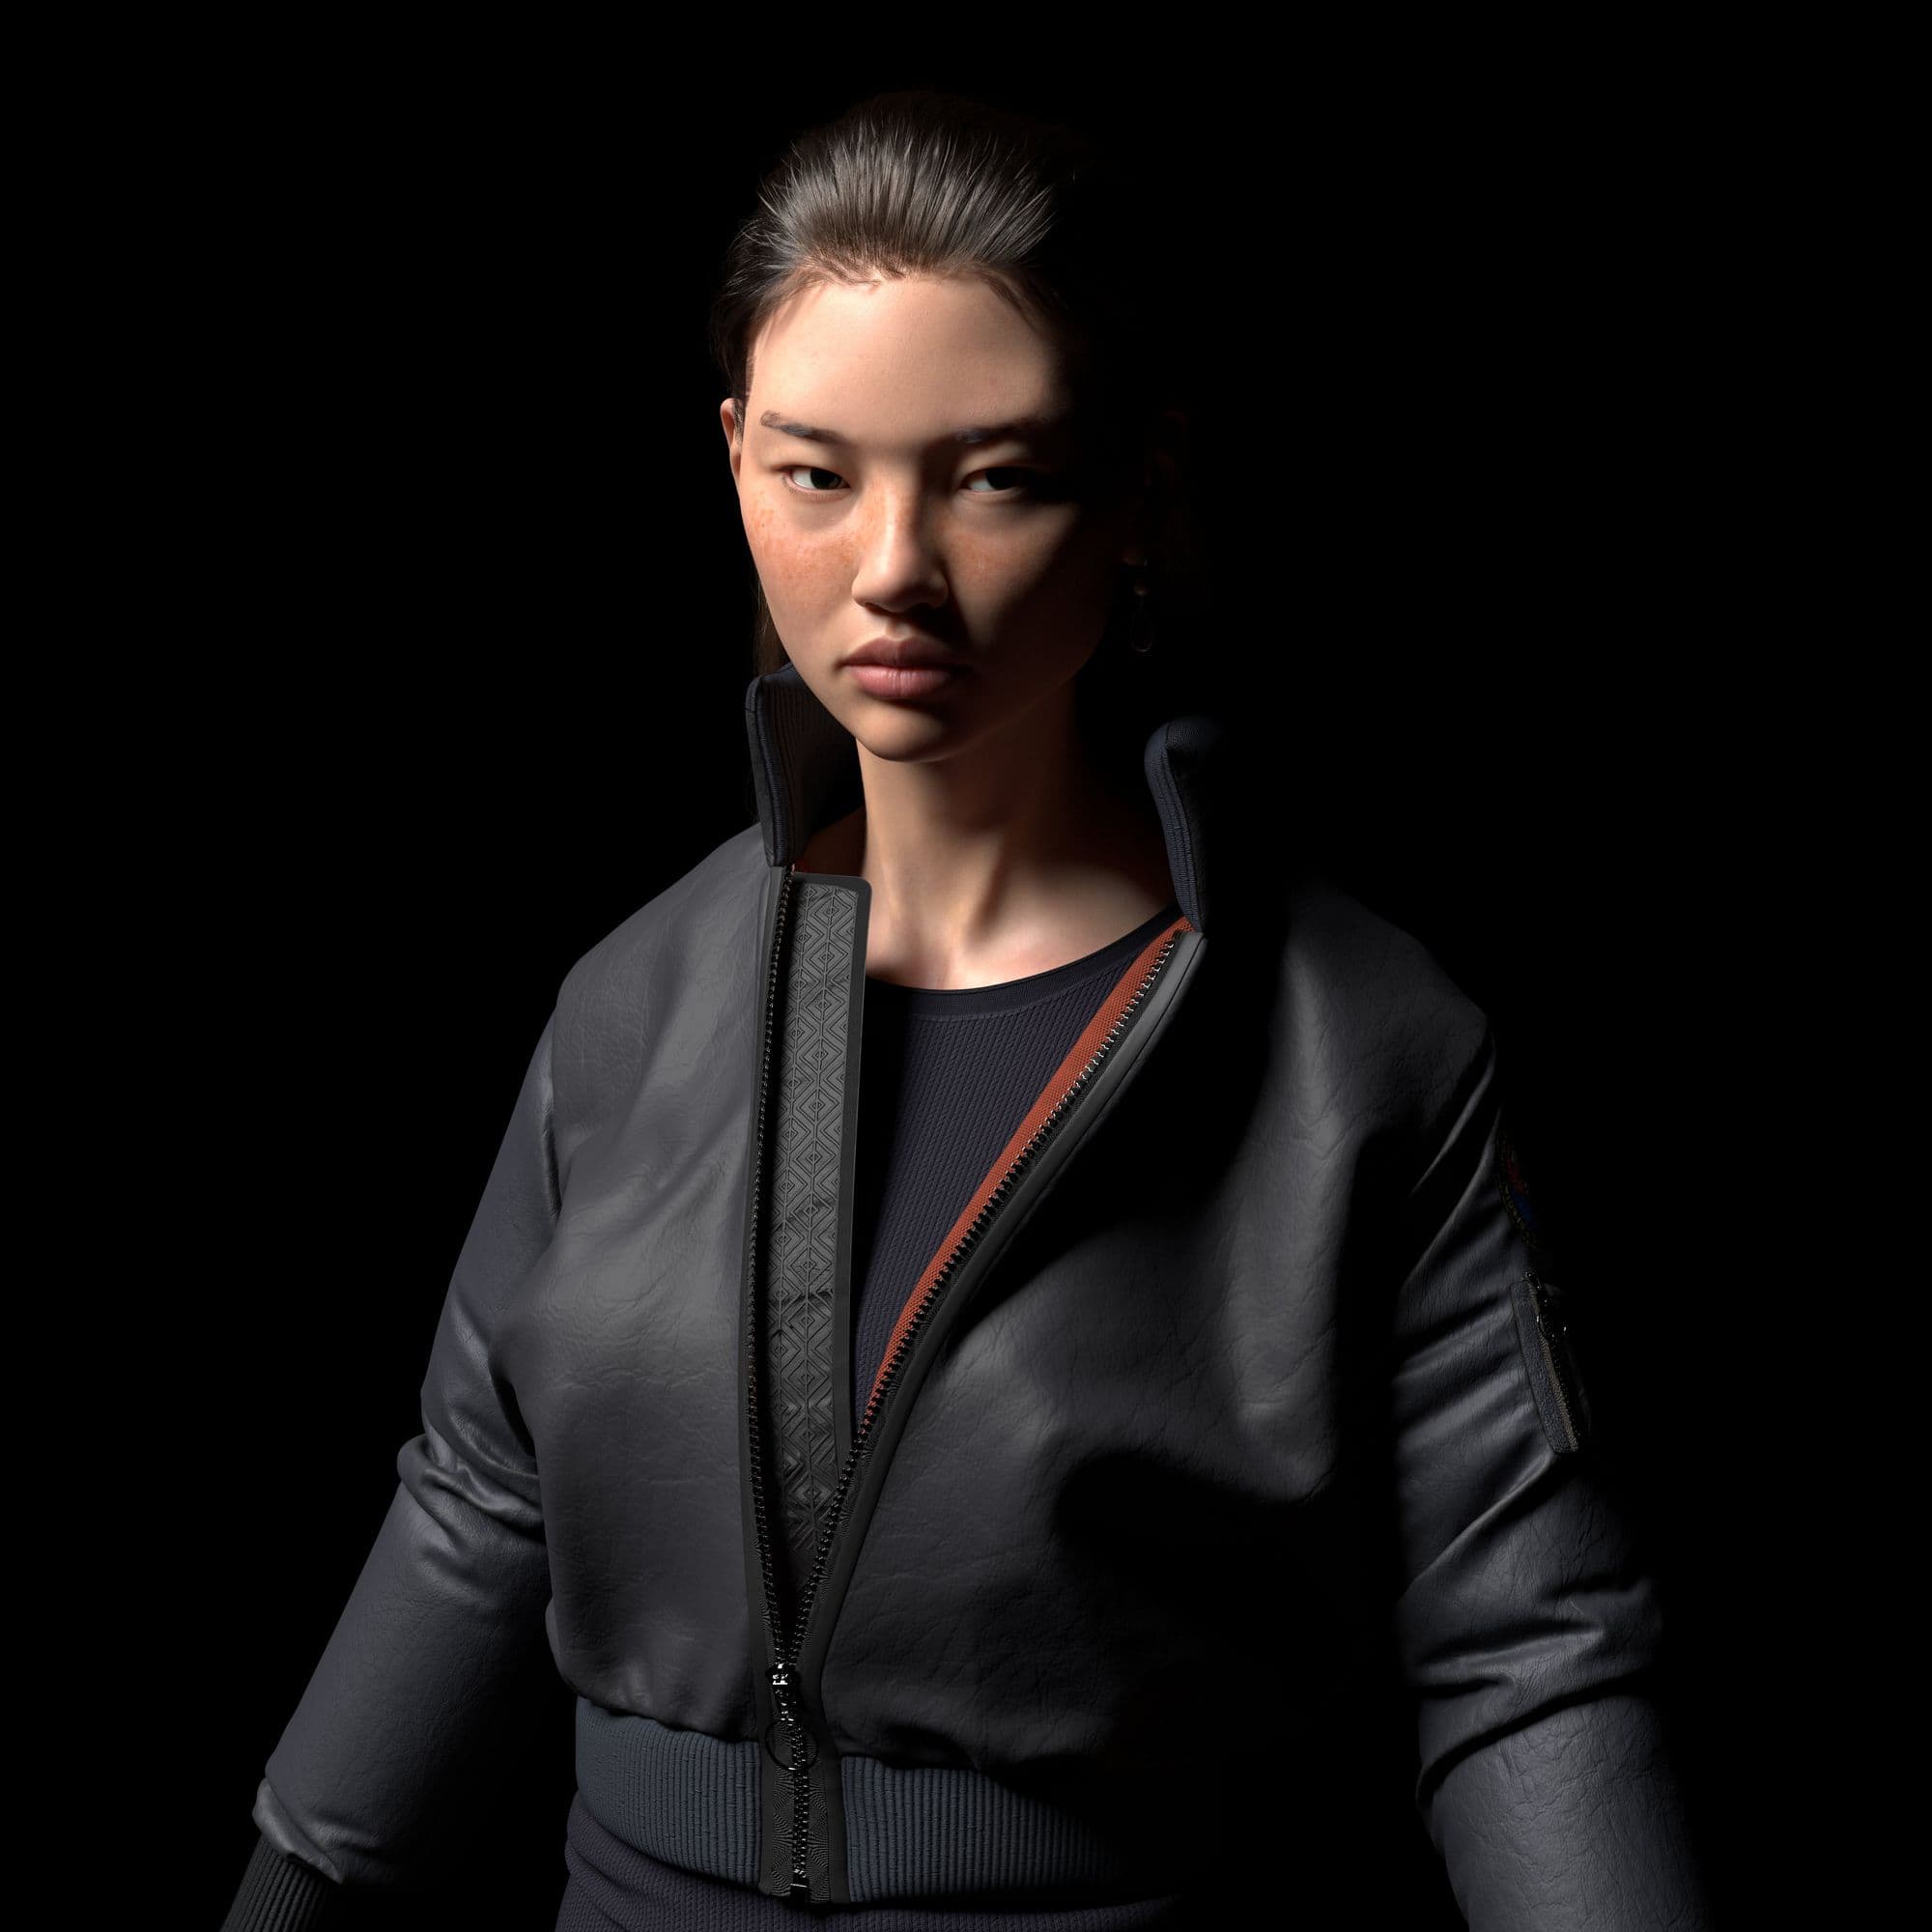
Final Image
After getting my final render in V-Ray, I went to NukeX, and with the help of my teacher, I started to do the final shot. The background is an image from the internet, and from there I composited it with a pink and blue colour palette because they are nice complementary colours and gave that moody and mysterious vibe I was going for.
I want to thank Miguel Ortega and Tran Ma for the help and knowledge that they share with me. I hope you guys enjoyed the breakdown of my character.