
Creating a Striking 3D Portrait: Things You Need to Know
3D Character Artist and student at BigRock Institute of Magic Technologies, Beatrice Ferretti, shares her process and tips for attempting your first realistic digital portrait.
3D Character Artist and student at BigRock Institute of Magic Technologies, Beatrice Ferretti, shares her process and tips for attempting your first realistic digital portrait.

Beatrice Ferretti is a 3D Character Artist currently studying at BigRock Institute of Magic Technologies in Italy. Beatrice set herself a challenge to attempt a realistic digital portrait. In this article she shares with us her process, and things you need to know when embarking on your own realistic 3D character.
Before I get started about my journey making Second, which quite ironically is my first attempt at making a realistic digital portrait, I feel obliged to first talk about my background and experience, so that my readers can understand all the steps that brought me, and could bring them, to a similar result.
My interest in 3D Modeling started in 2019, during my cultural exchange semester in Cyprus, where I was studying for my Cinematography Master’s degree as part of the Erasmus program. Being very interested in multiple fields, I first started learning CG as a self-taught student, following YouTube tutorials and buying online courses. I soon realised that the more I looked for answers, the more questions I had. I just couldn’t wrap my head around how the whole pipeline worked, why the tutorials were telling me to complete some tedious tasks that seemed nonsense to me. That’s why, after two years of self-teaching, I decided to commit to this whole 3D thing and to enrol at an actual Computer Graphics school.
The main options in Italy were BigRock School and SkyUp Academy: they both offer a 6-month course in Computer Graphics which aims to teach 3D novices everything they need to get started in the field. I opted for BigRock since it’s the most renowned, and has been around for about 15 years now.
At BigRock I learned a little bit of everything about 3D: Modeling, Animation, Texturing, Rigging and Compositing. It’s been a great way to finally understand how the whole pipeline works together, since the final thesis is a 100% CG short made from scratch by 200 students, each of them assigned to a specific department.
After the course, I was given the opportunity to join BigRock’s R&D team and was able to learn a few other programs and tricks, but at that point I felt like I understood the workflow enough to make a complex character by myself.
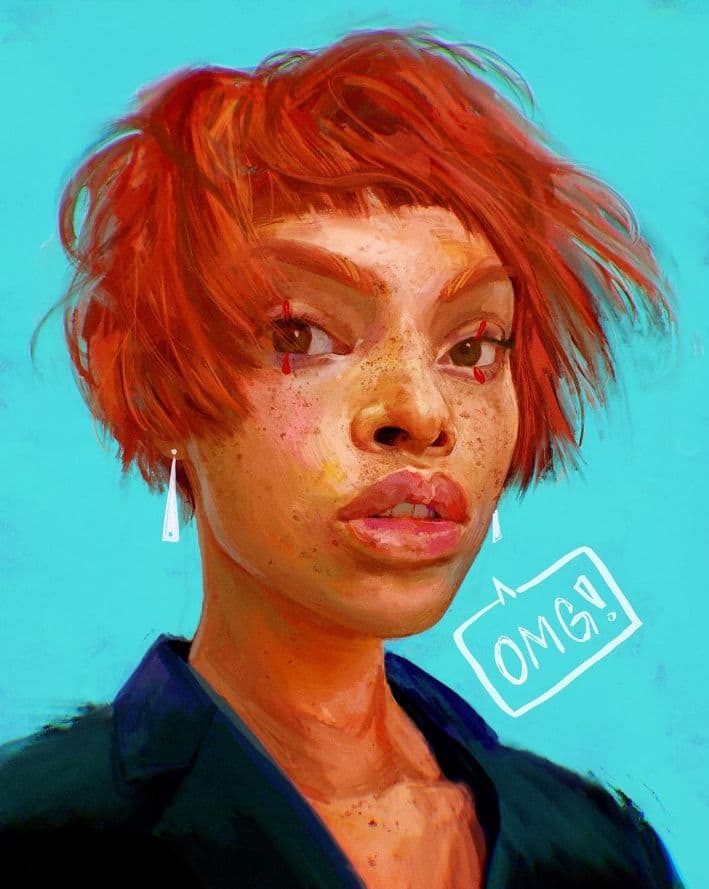
I’ve always had a thing for stylised characters of any kind, but especially female ones with a strong personality. Second was an attempt to leave my stylised comfort zone and venture into realism.

I ended up using the following software:
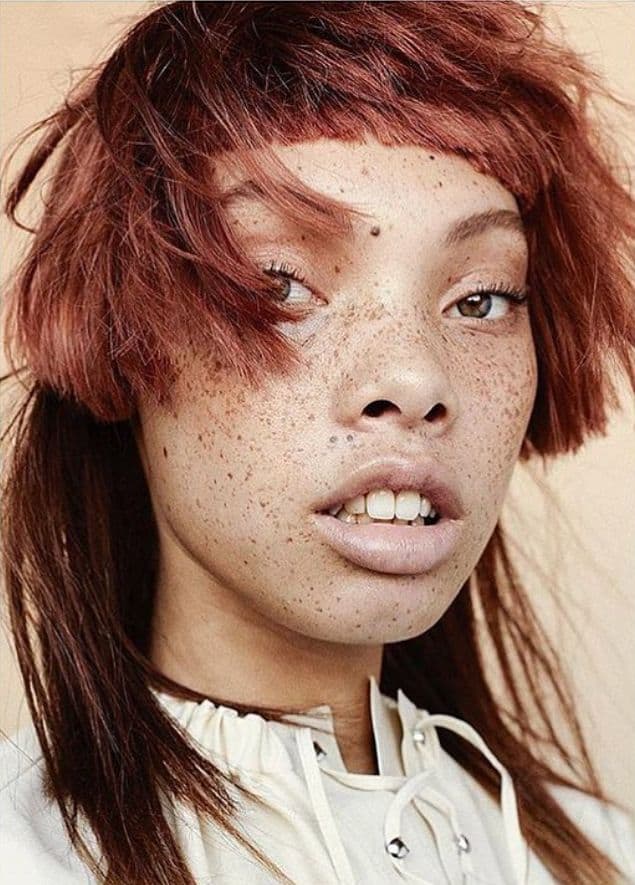
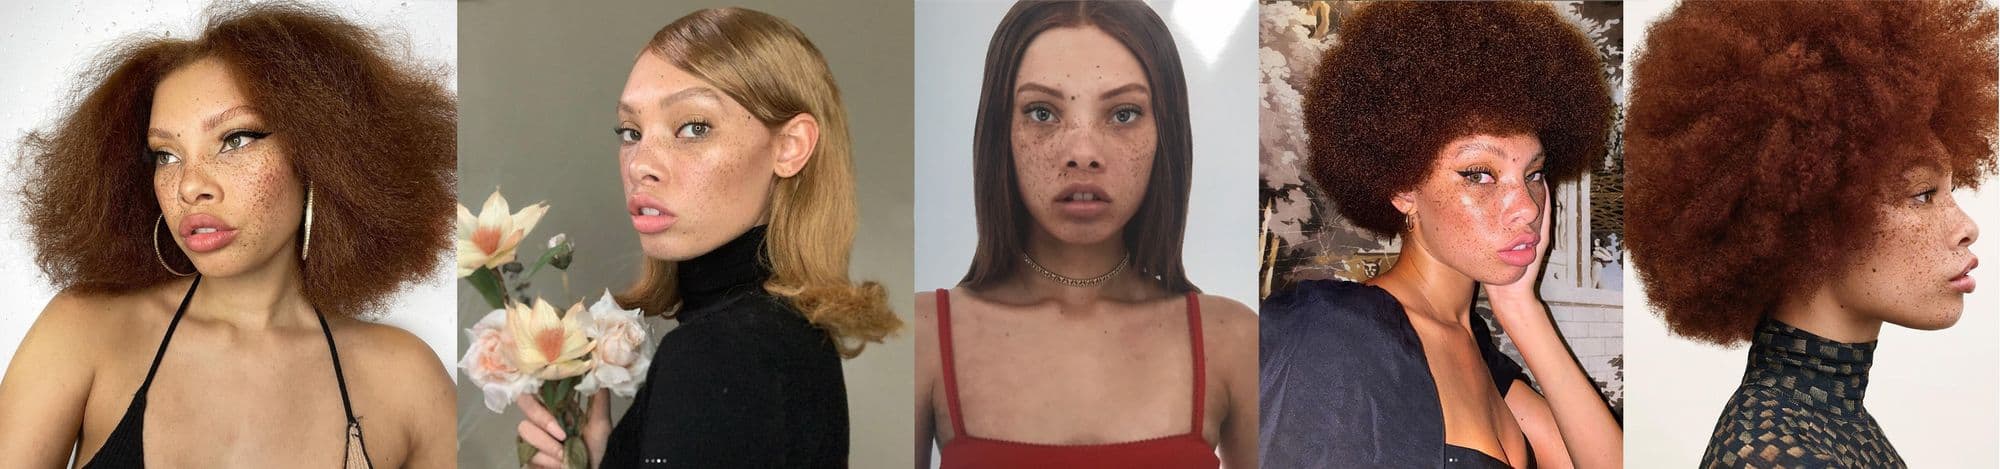
My main inspiration for Second came from this artwork from Alexis Franklin, depicting the Canadian model Aleece Wilson.
Gathering reference images is an essential part of the creation process, and I used PureRef to organise them:
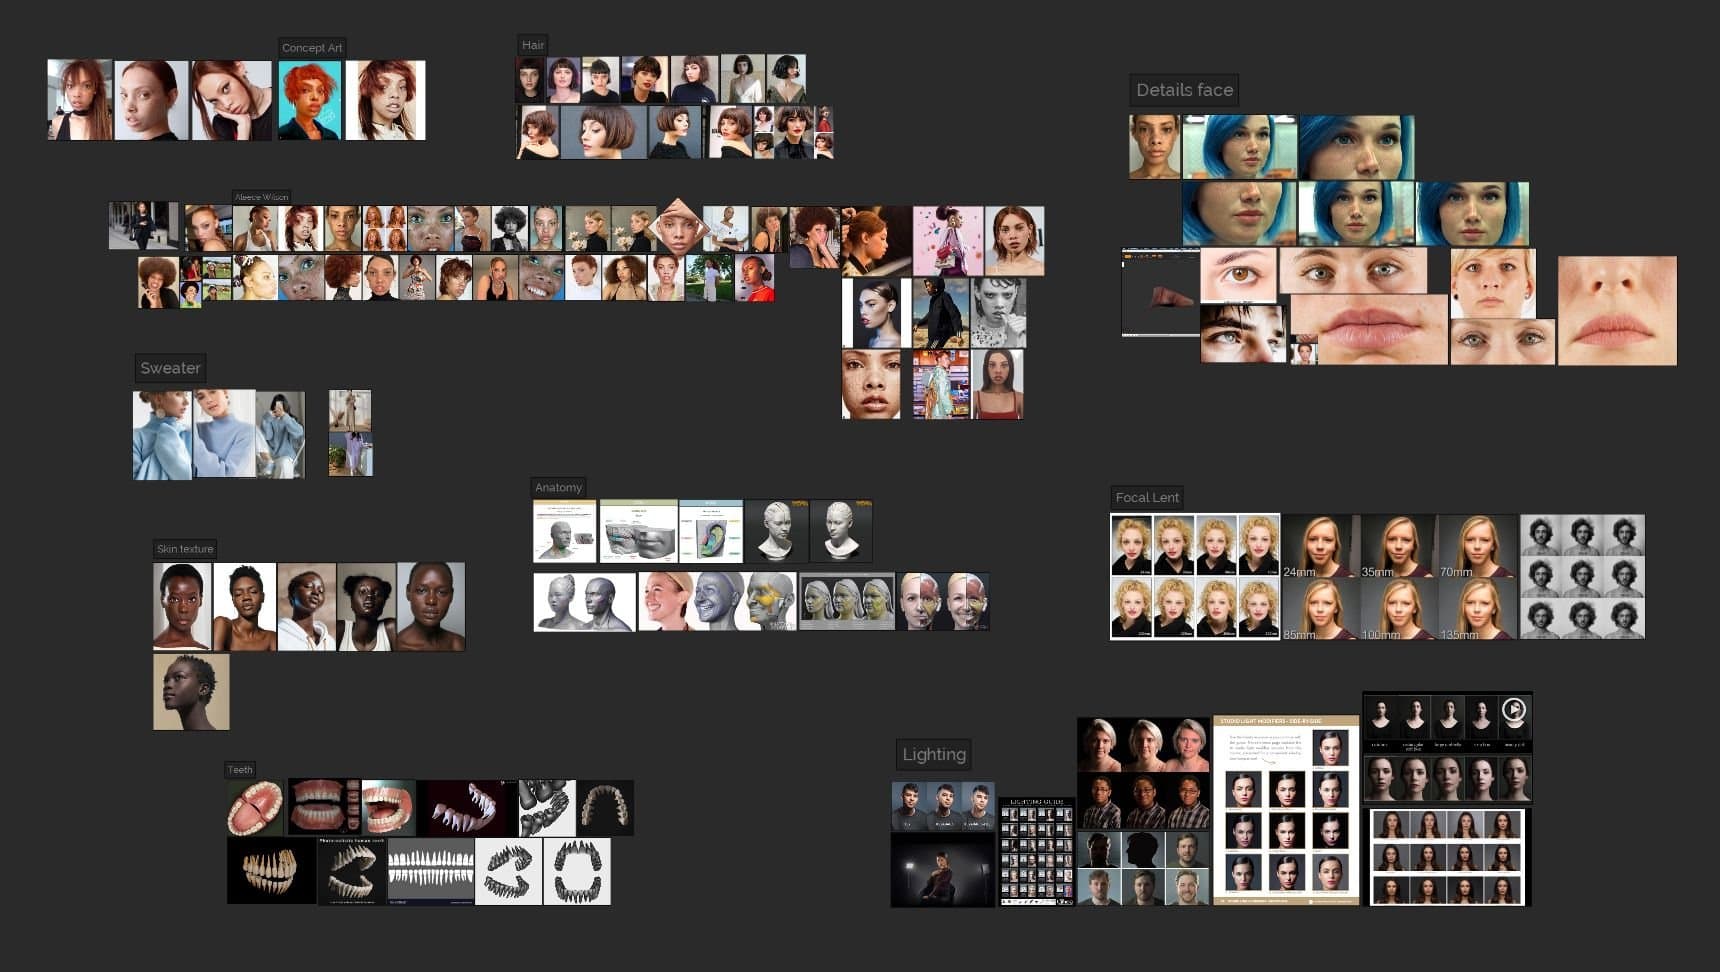
I find it very important to find photos that allow me to reconstruct a 360° picture of the subject to understand the correct proportions of the face.
Since I couldn't take the photos myself, I gathered enough images from different angles and then made a “fake” 360° using Zbrush’s Spotlight feature. I also had to make sure that the photos I was using were taken with a camera with a similar focal length.
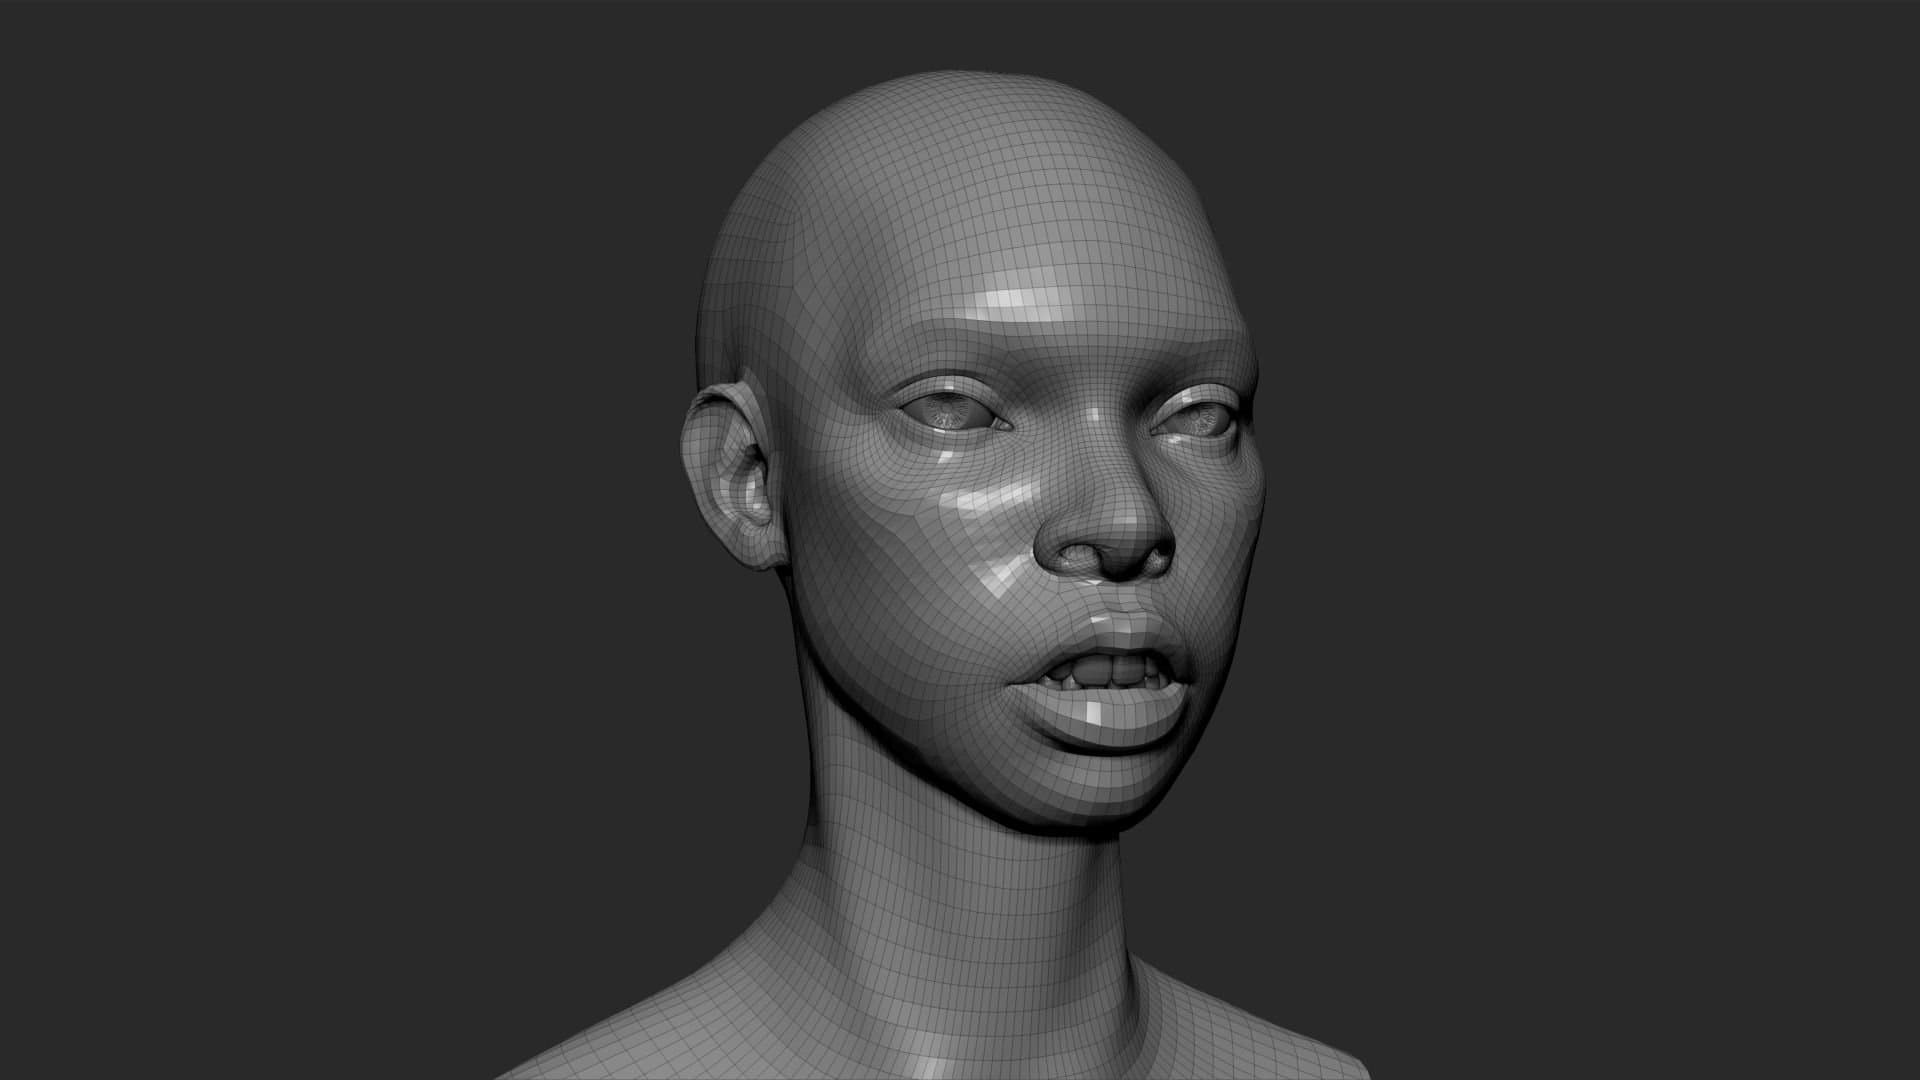
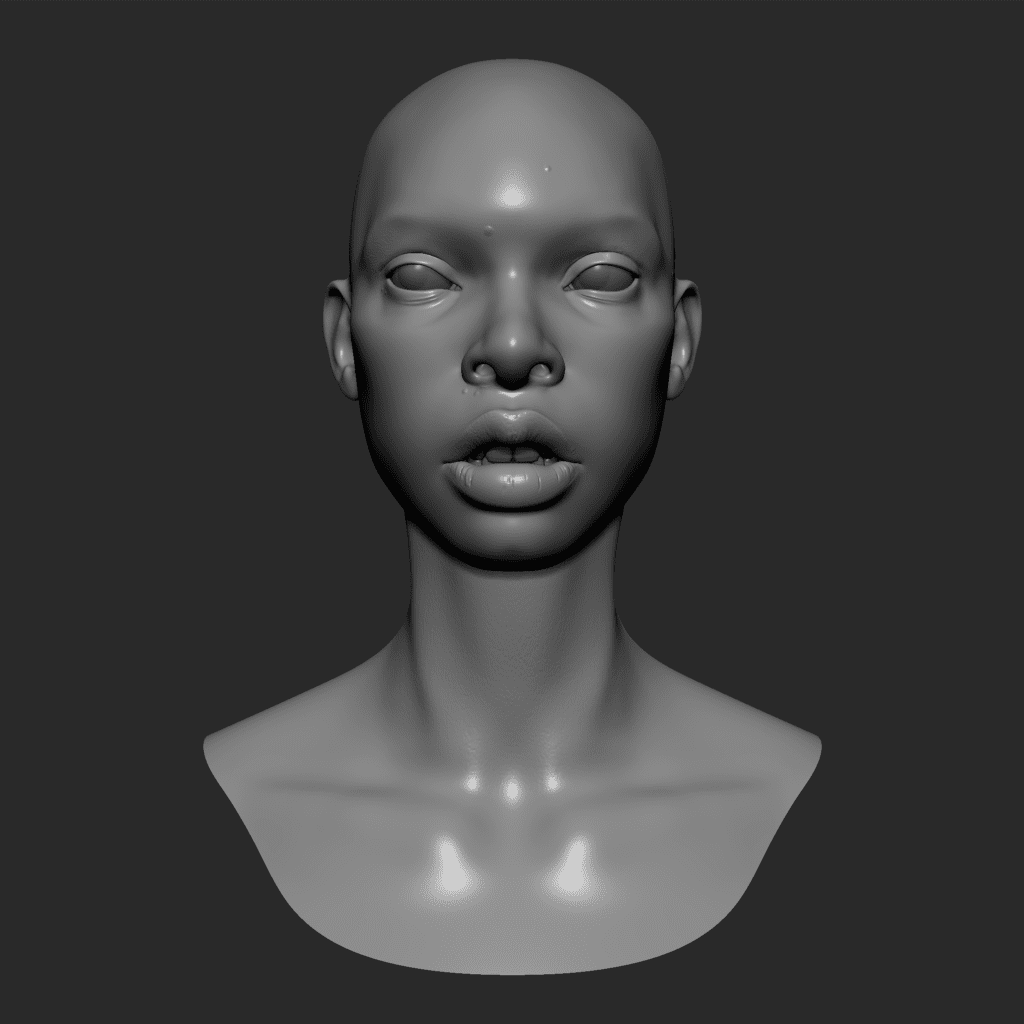
The modeling was made entirely in ZBrush.This time, I decided to avoid starting from scratch and found a head base mesh instead. I did this to adapt my workflow to production standards, since big companies usually have a specific topology and UV layout they use for every “digital double”.
Working this way, I had to make sure that I was keeping the essential edge loops in the correct position to allow for the right deformations.
Some people prefer to ignore the topology at first and then do a quick retopology later (usually using R3DS Wrap, which I’ll talk about later), but I wanted to adopt a cleaner workflow from the start. It’s just a matter of personal preference.
As far as anatomy goes, I used as reference the book "Form of the head and neck" by Anatomy for Sculptors, which helped me understand the shape of the face and especially the eyes, which I’ve always struggled with.
I adopted a “subdivision levels” workflow: instead of working with a dense mesh from the start, I divided the modeling procedure in steps and worked through every step at the right subdivision level.
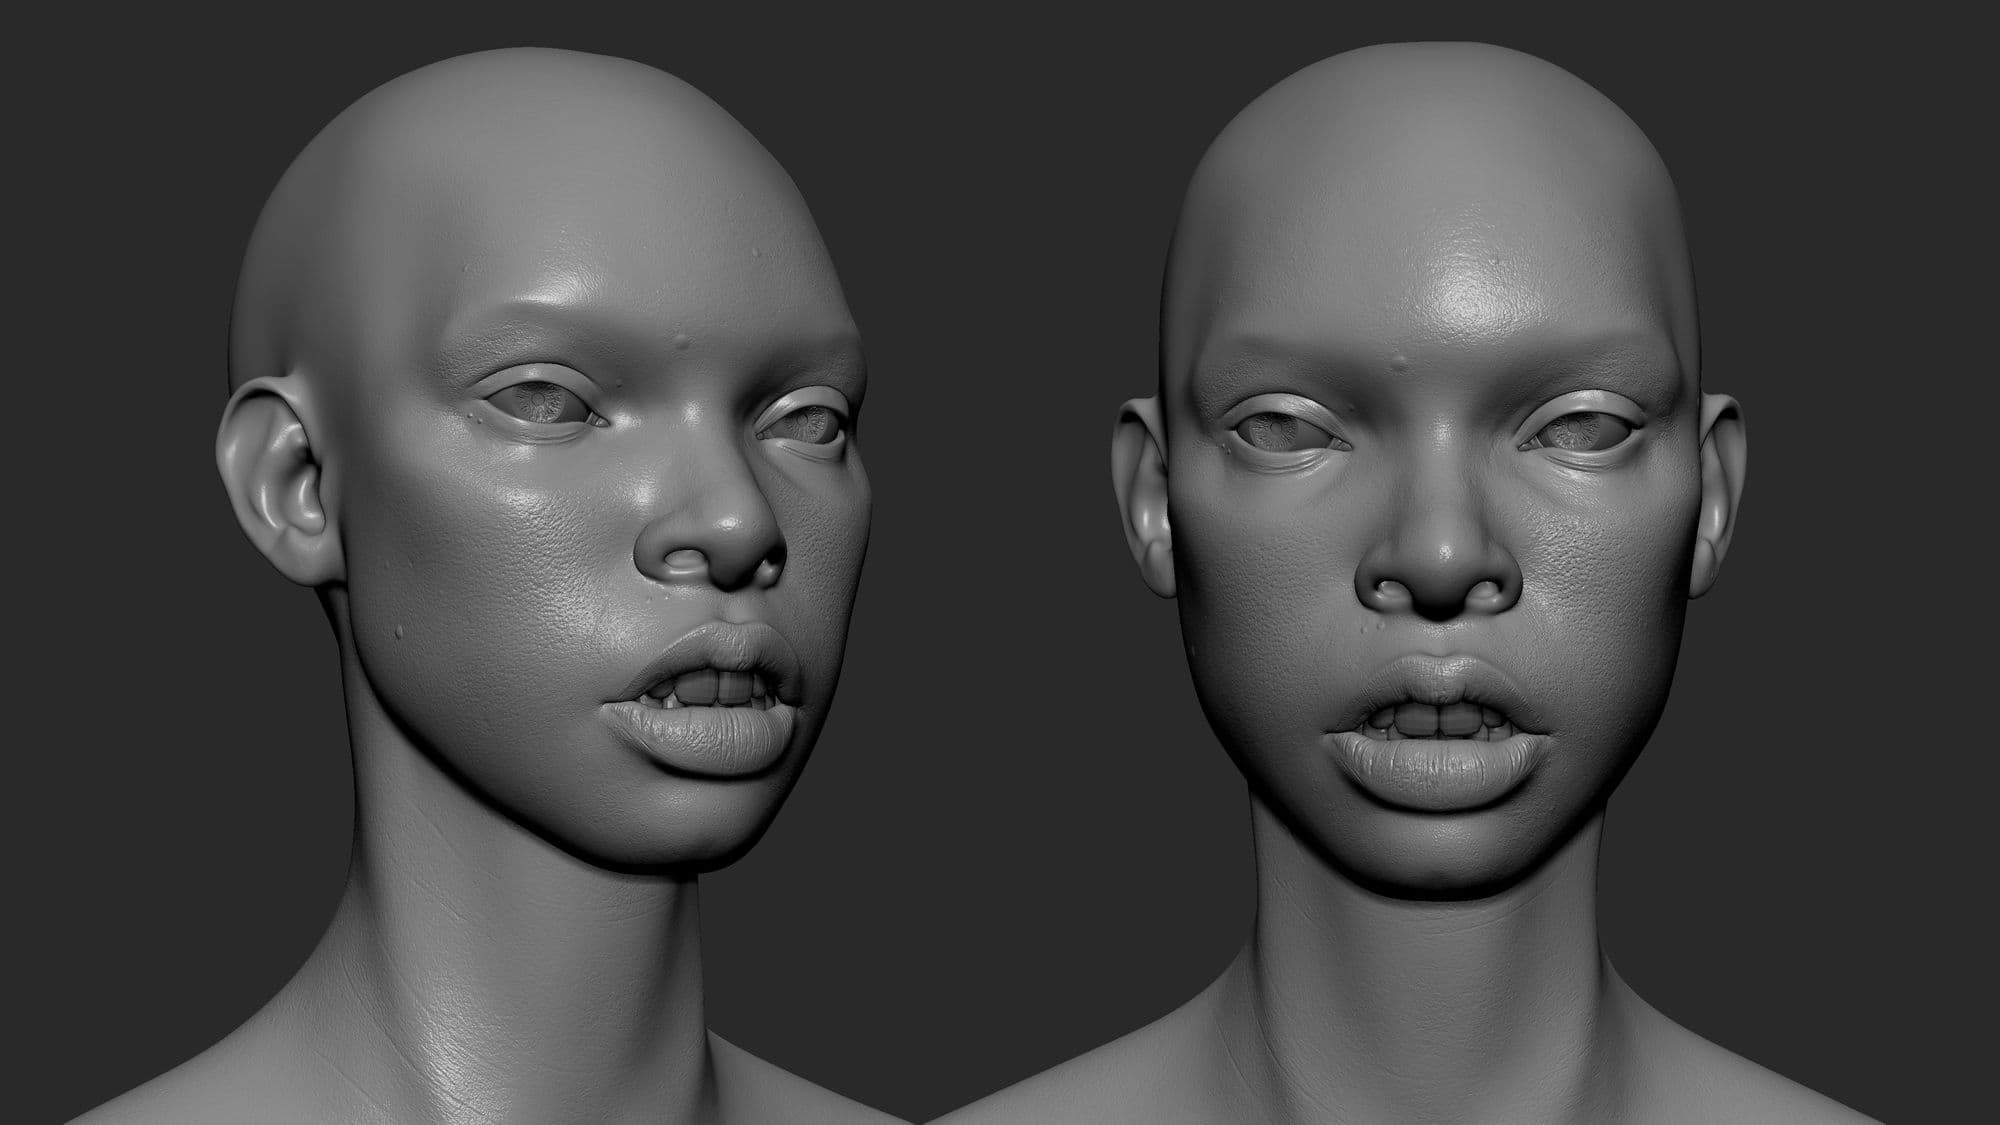
At level 1, I started roughly shaping the base volumes of my model. For example, her eyes were bigger and further away from each other than my base mesh, the lips were thicker, the ears higher up and the nostrils wider. Every time I moved something, I made sure that the loops were staying in the right position by relaxing my geometry.
At levels 2 and 3 I started adding details and carving out the secondary shapes, like the eye wrinkles, the groove under the lower lips, the inside of the eyelids etc.
At levels 4 and 5 I added micro details like the small wrinkles in the Lateral Canthus, while levels 6 and 7 were used for micro details of the skin.
Now came the most challenging part: how to add realistic skin details.
Some people manually sculpt these details down to the pore level, but it would be too hard and time consuming for a beginner, so I decided to use a displacement map, wrapped onto my geometry using R3DS Wrap.
R3DS Wrap is a node-based software with plenty of features, but the main one is to project a mesh onto another one, making their shape match. This is often used for quick retopology or to transfer details.The software itself is very easy to use, and there’s plenty of free tutorials online.
In this case, I used it to project a plane with the Texturing.xyz maps onto my low poly model. Before starting, I had to prepare my model: first I exported the second subdivision level from Zbrush and imported it in Maya.
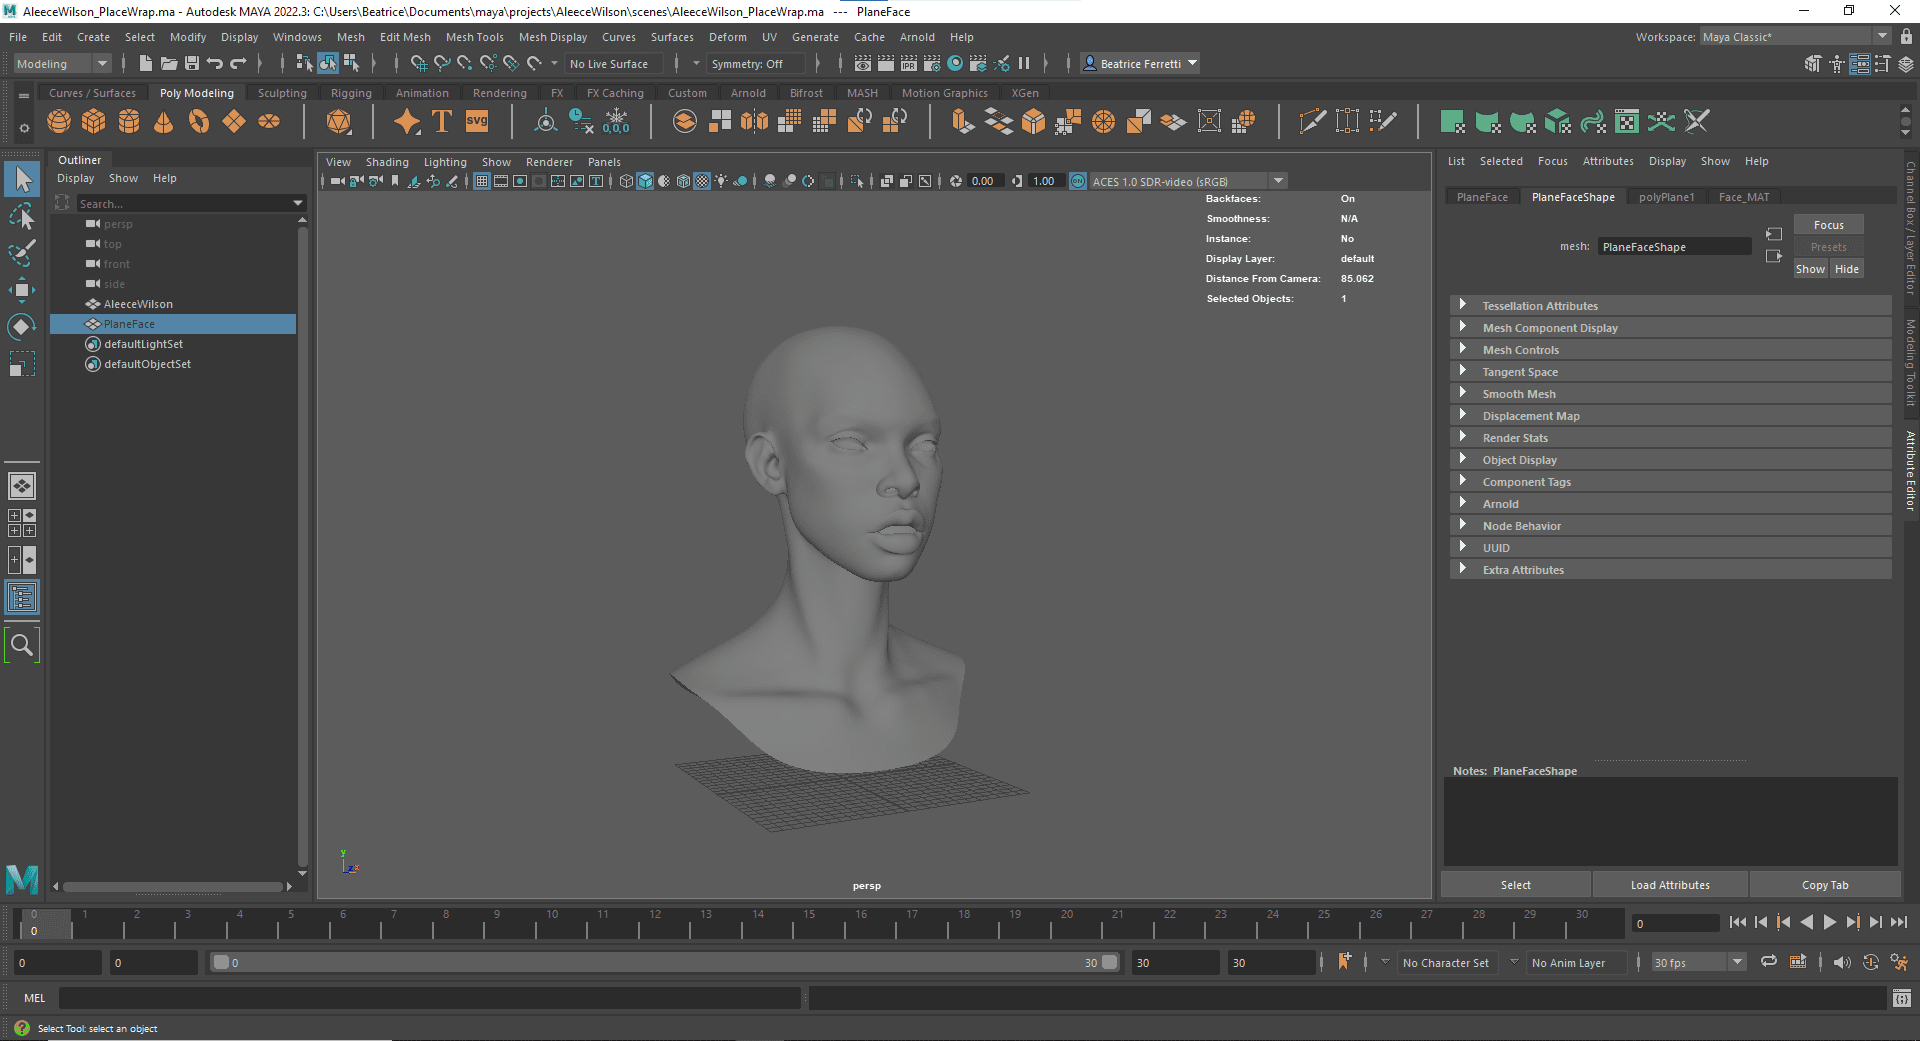
Then, I created a plane which I used to carry the texture map. It’s important that this plane has the same aspect ratio as the map being used. In this case, the map was 8402x4694 pixels, so I made the plane 84,02x46,94 and then scaled it to fit my face.
I then subdivided the plane enough to allow for a good “wrap” around my mesh, making sure my quads weren’t stretched.


Once I imported both my face mesh and my plane into Wrap, I gave the program some “matching reference points” to guide the wrapping procedure, and then applied it. The end result was a plane with the shape of my face model.
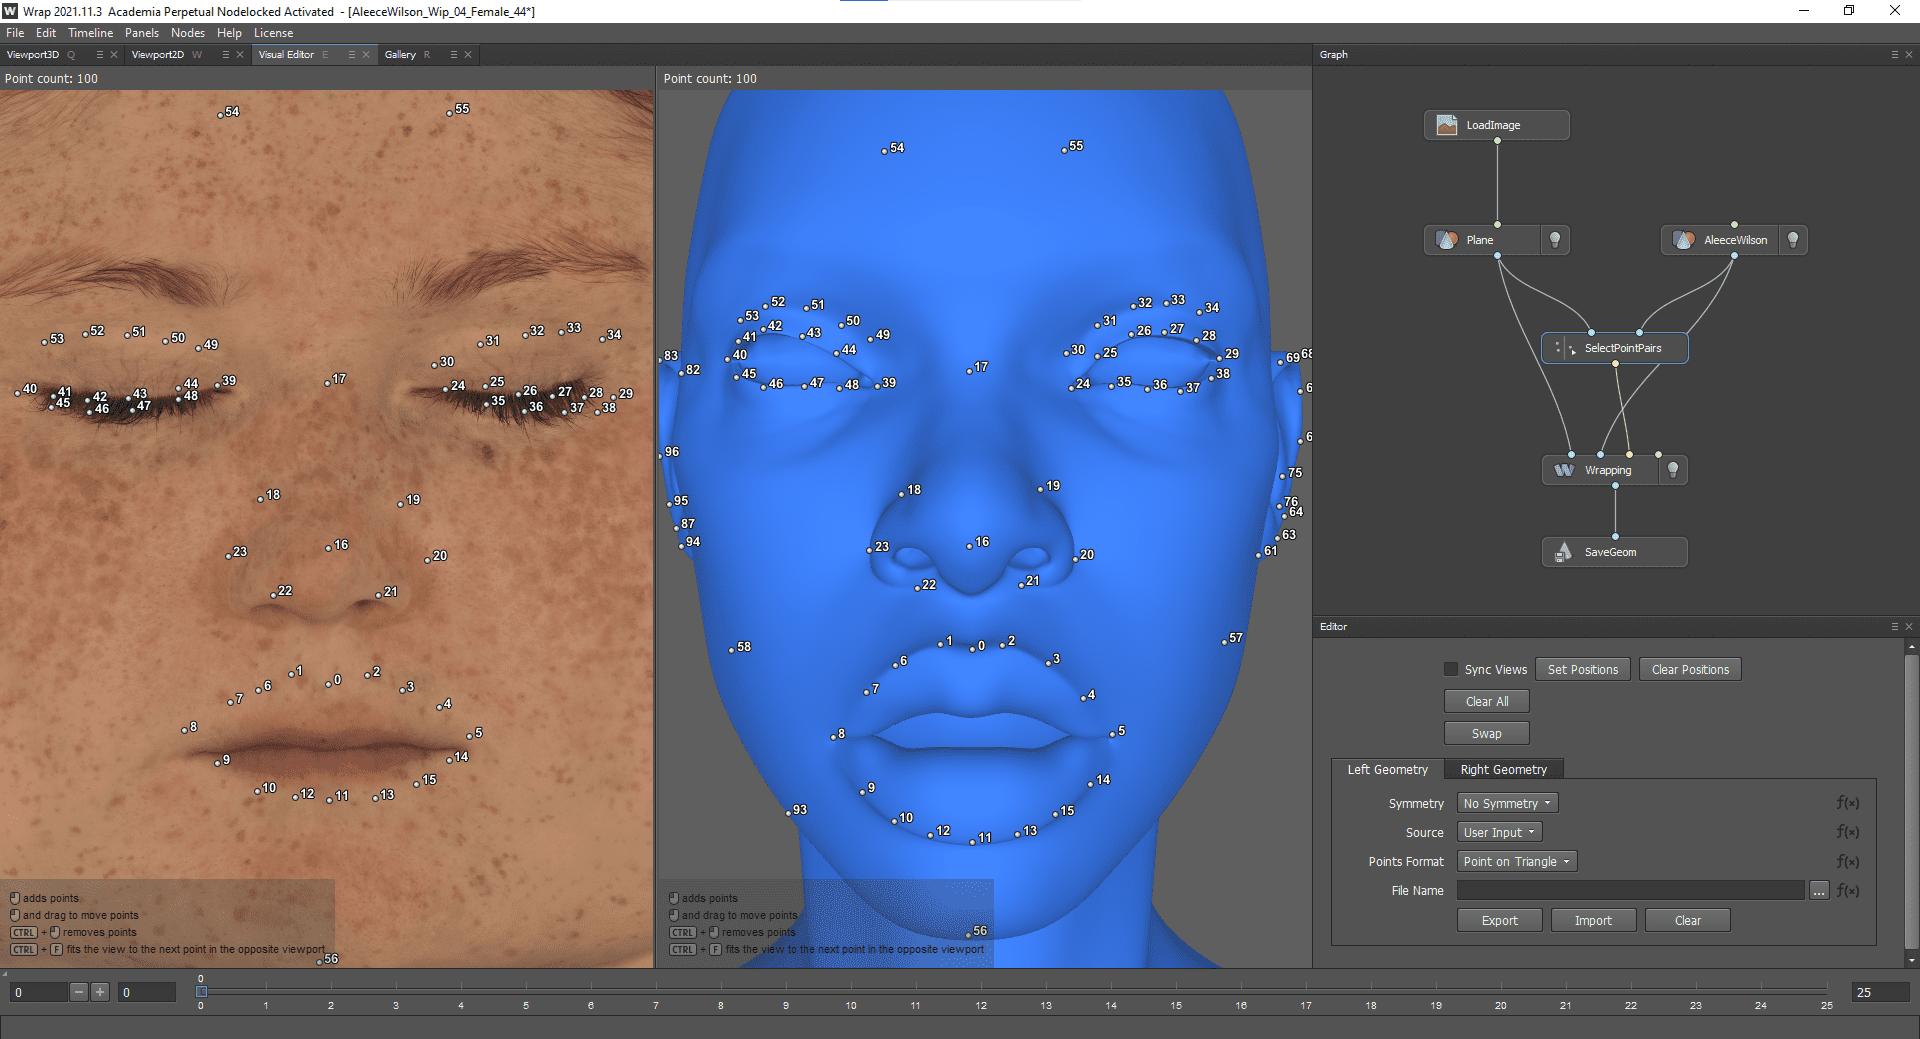
I then exported the wrapped plane to ZBrush, fixed some minor artefacts, made sure the two models fit perfectly onto each other and proceeded to bake the plane details and texture maps onto the actual head model.
For this step, I used XNormal, which is an ugly but useful (and free) program that quickly bakes any kind of map.
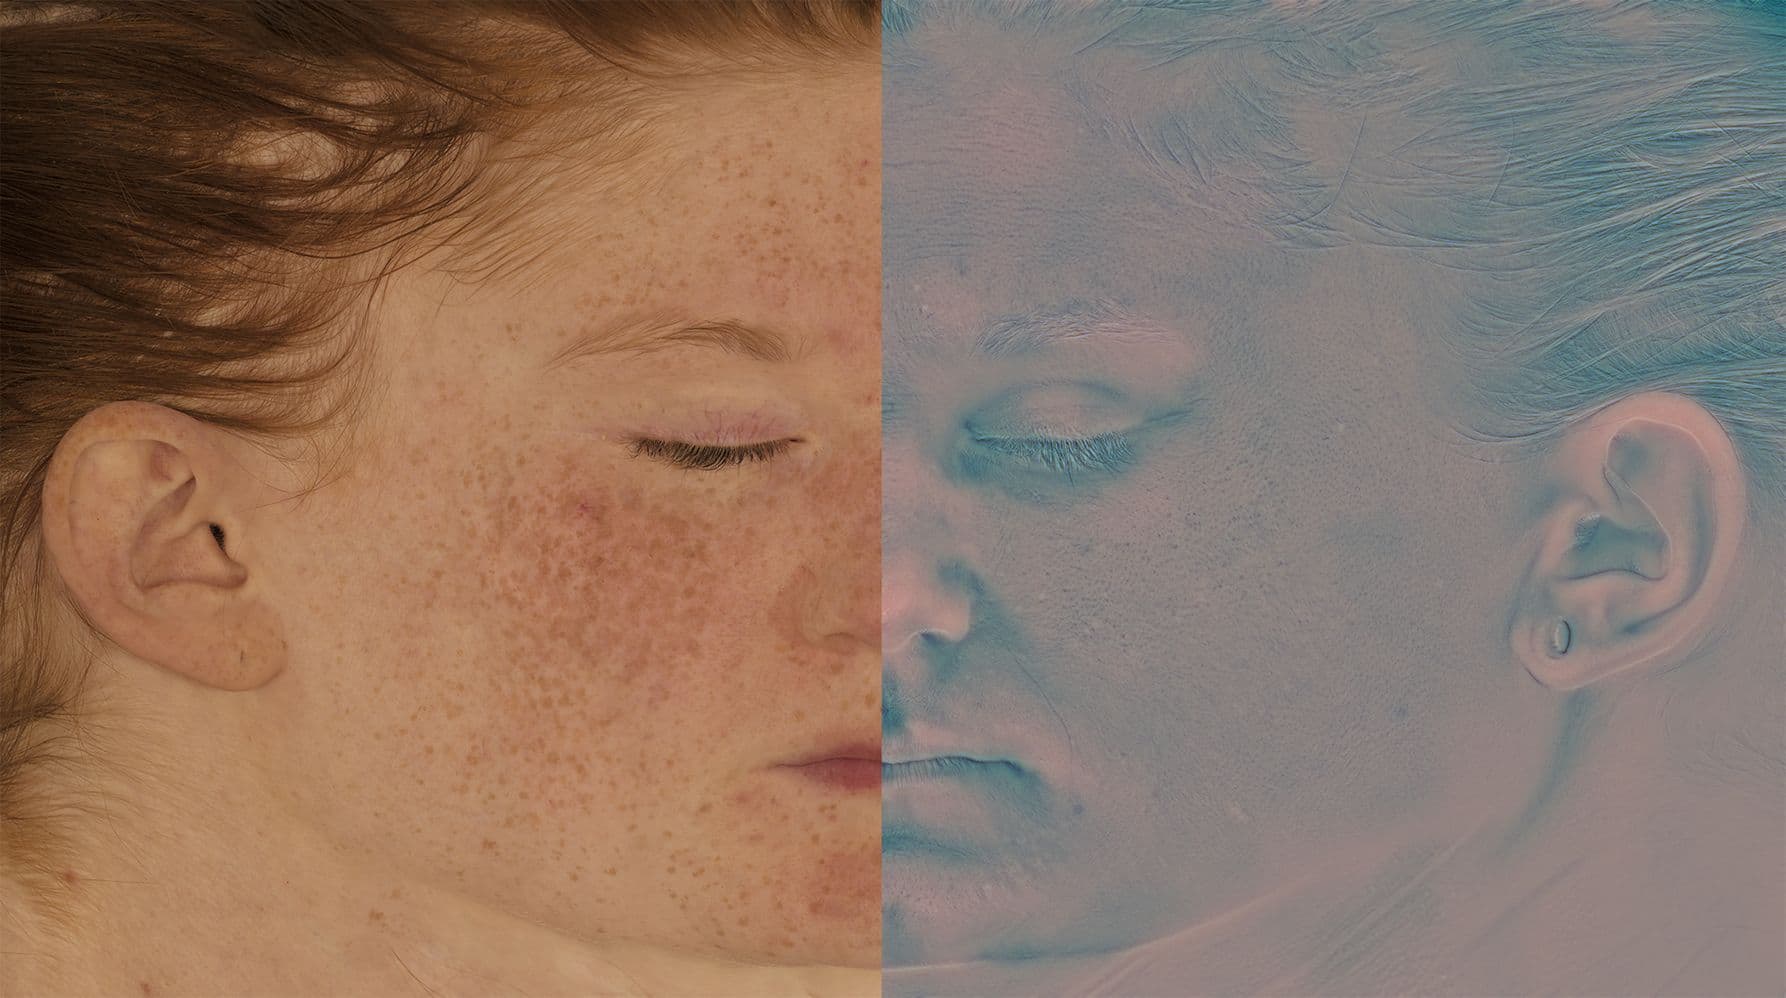
In this instance, since I was using a multi-channel displacement map (which uses different colour channels to store different levels of detail), I first imported it to Photoshop and exported the RGB channels separately, then processed them through XNormal one by one.
This allows for an easier management of the final displacement, giving the artist more flexibility than a single channel displacement with all the details together.
Now it was time to test it.
At this point I had decided to avoid using normal maps and only use displacement for the details. While this may be more resource-intensive and not suited for a game engine, it often gives the best result when working on realistic still portraits.
I used my second subdivision level model from ZBrush and then subdivided it four more times to get enough topology for the displacement to work.

I then set up my displacement maps in Maya/Arnold and tested it out on a flat grey colour with 3 very simple key lights.

This is a very important step, because every render engine handles displacement in a slightly different way, so it’s important to go back and forth between ZBrush and Maya to adjust the greyscale values until it works best.
It’s important to note that the end result of the displacement is also affected by the base colour (depending on how much ambient occlusion it has baked in) and most importantly by the subsurface scattering, which often “eats up” some of the displacement detail.
This means that this whole process can never be “linear”, but it needs constant adjustments and corrections between multiple programs.
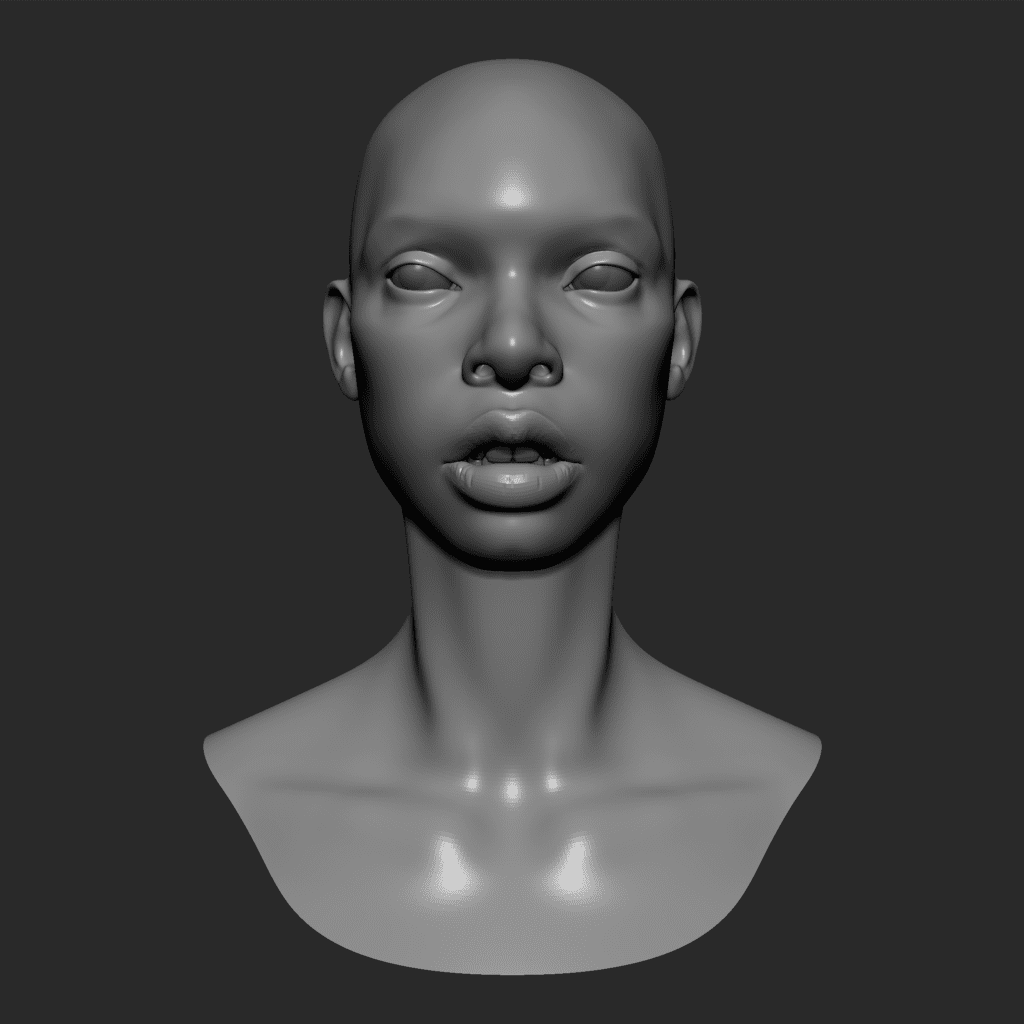
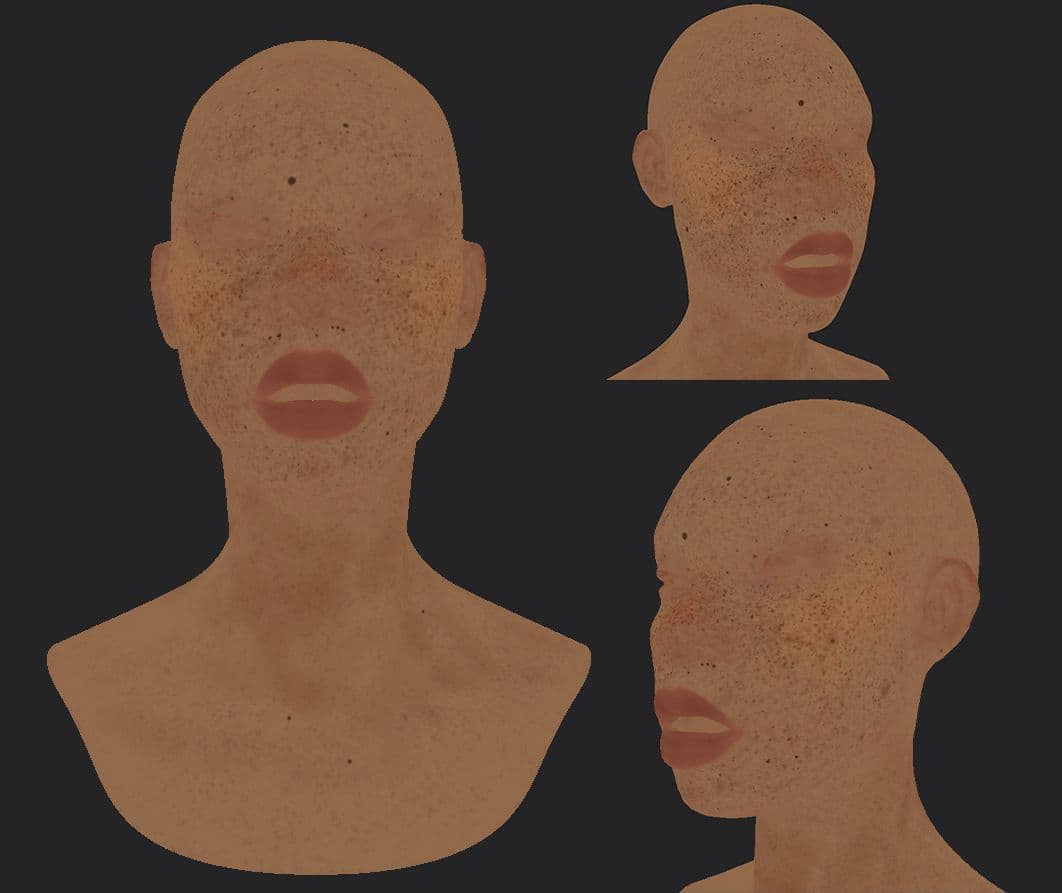
For the skin texture, I originally meant to keep the Texturing.xyz albedo map and only add freckles on top of it, but I wasn’t satisfied with the result, so I decided to remake it following this J. Hill video tutorial.
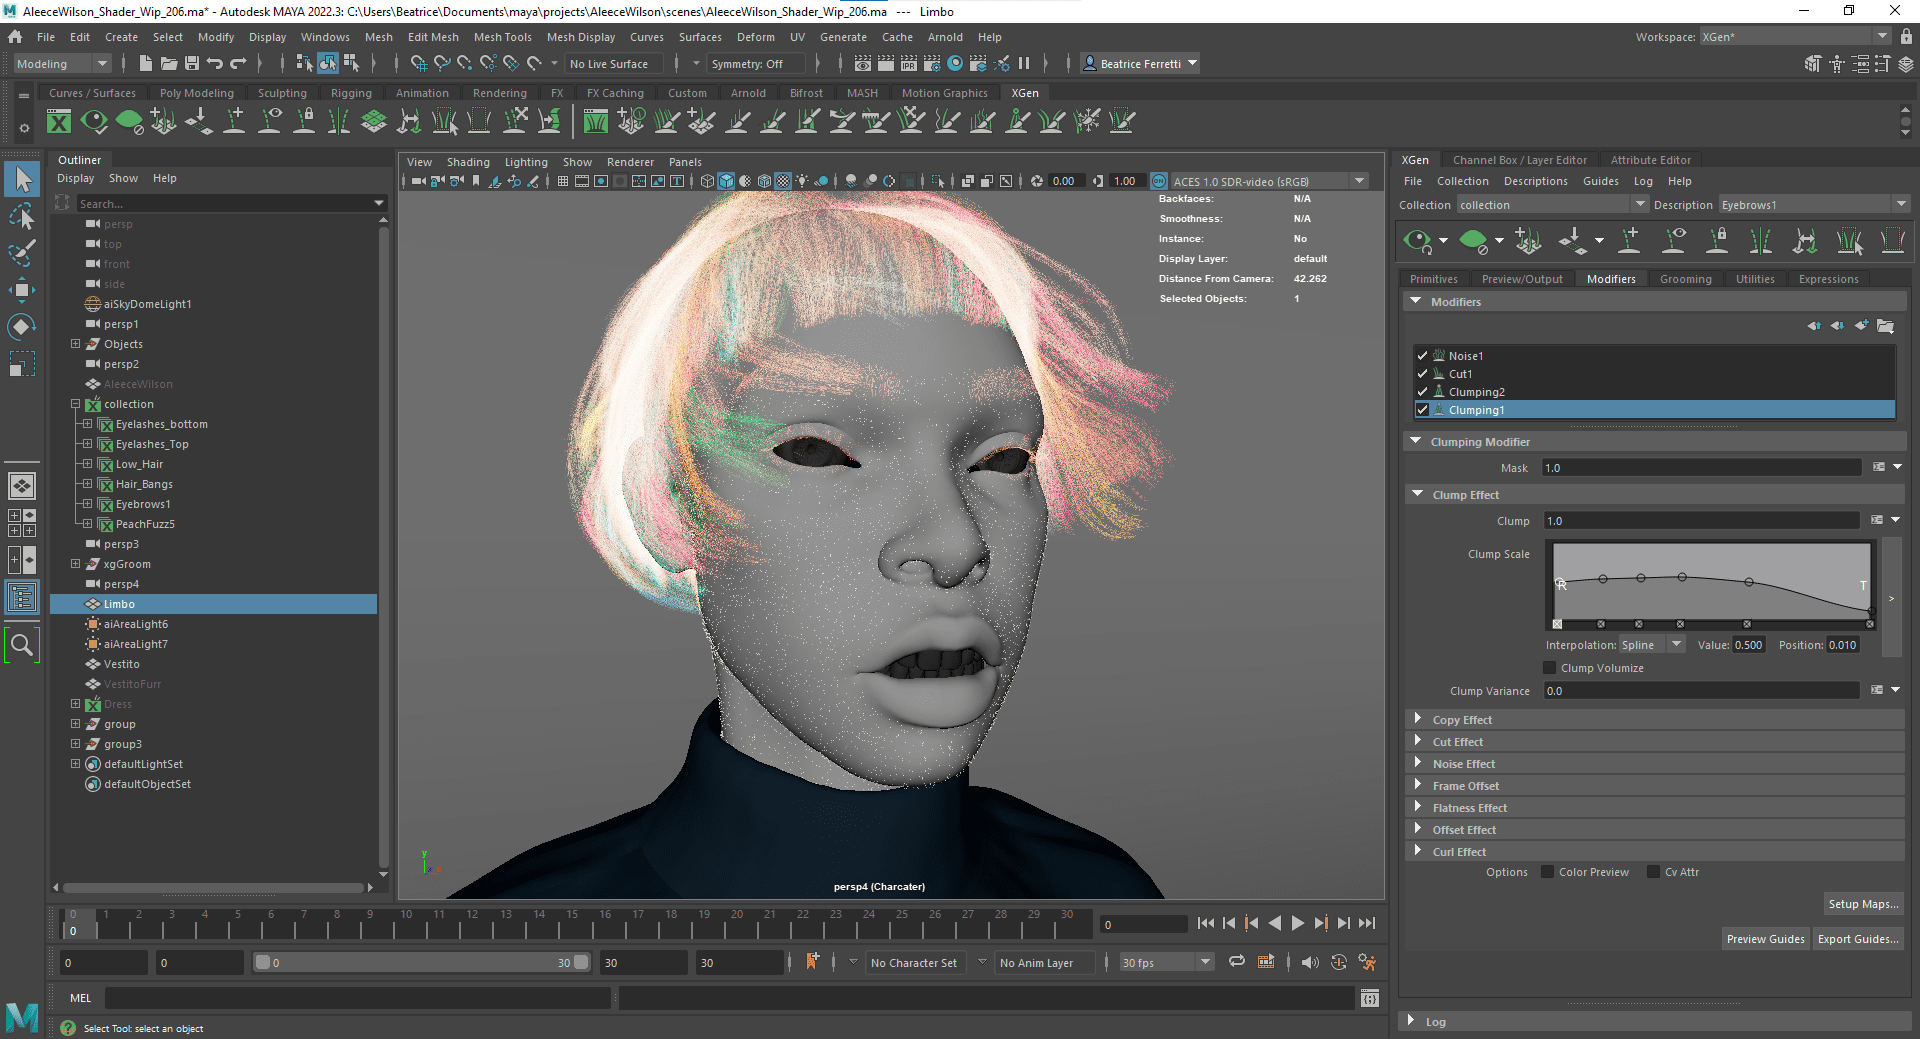
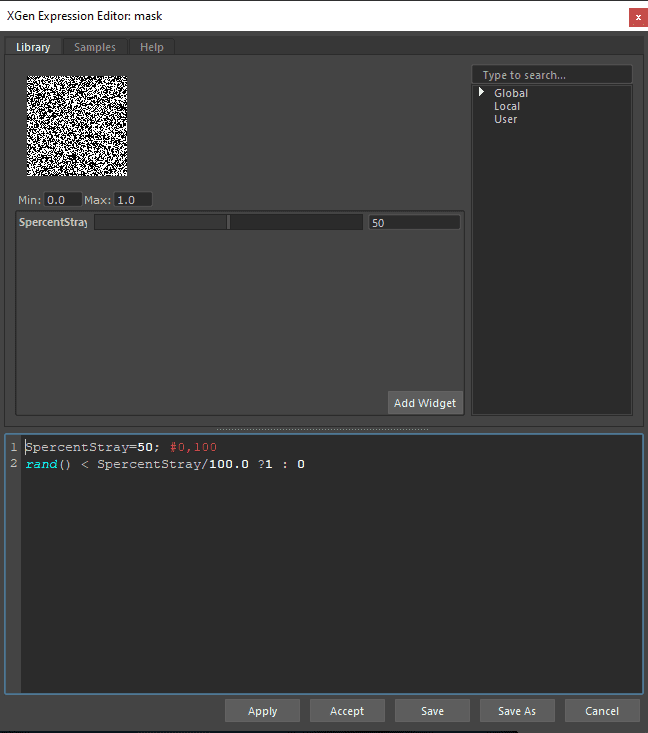
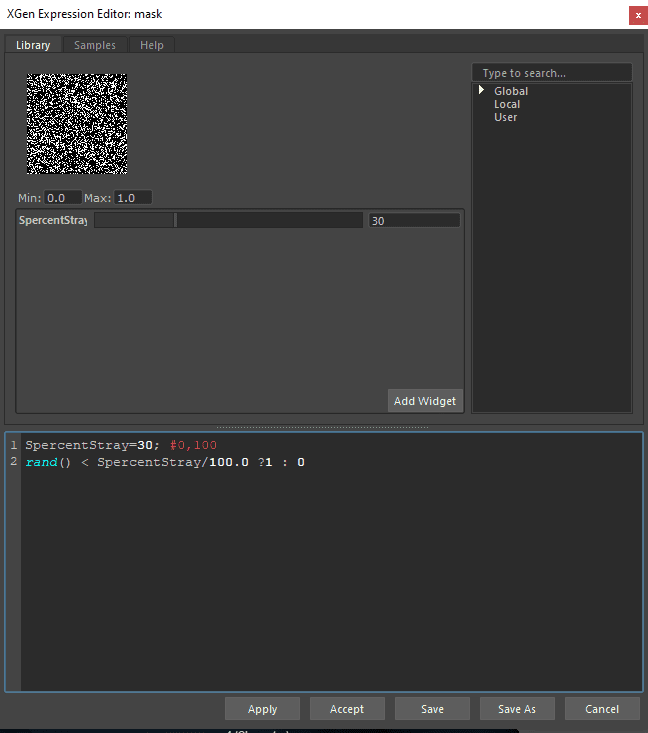
I decided to use XGen to groom all the hair on the model: eyelashes, eyebrows, hair, peach fuzz and wool sweater. Some people are okay with sculpted eyebrows and no peach fuzz, but I wanted to go the extra mile. The only other option would have been using Yeti (another grooming plugin for Maya), but I feel like it’s more suited for artists specialised in grooming and would not be worth it for a still render.
I started learning XGen by watching this tutorial series by Jesus Fernandez.
I decided to work directly on the main mesh without duplicating it and cutting it out, since my main one was already in the first UDIM and I wanted to work with masks instead.
After creating a collection, multiple descriptions (one for each zone with hair) and masks, I started drawing out the guides based on my reference and the haircut I had selected. Once that was done, I modified the hair behaviour through XGen deformers: mainly Clump, Cut an Noise with different formulas and, where necessary, using expressions (mainly to add randomisation to the hair direction).
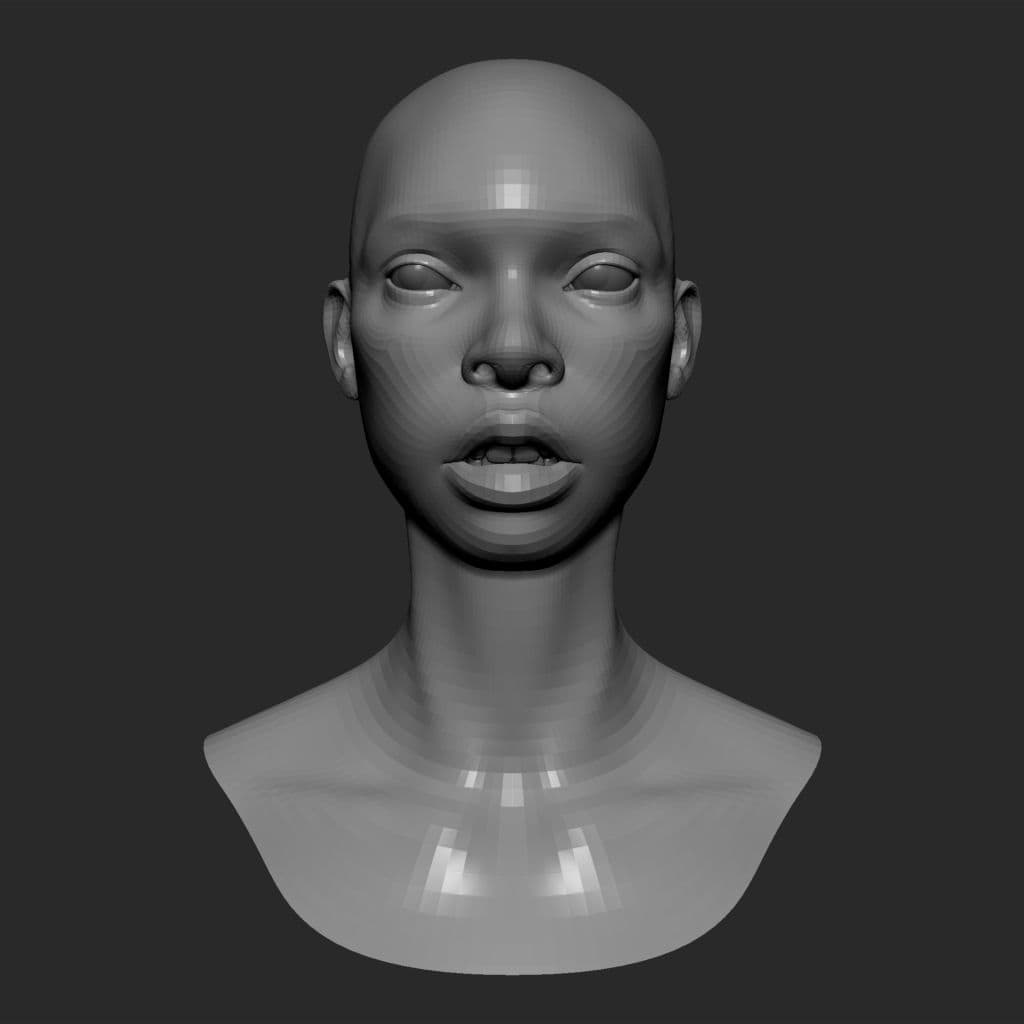
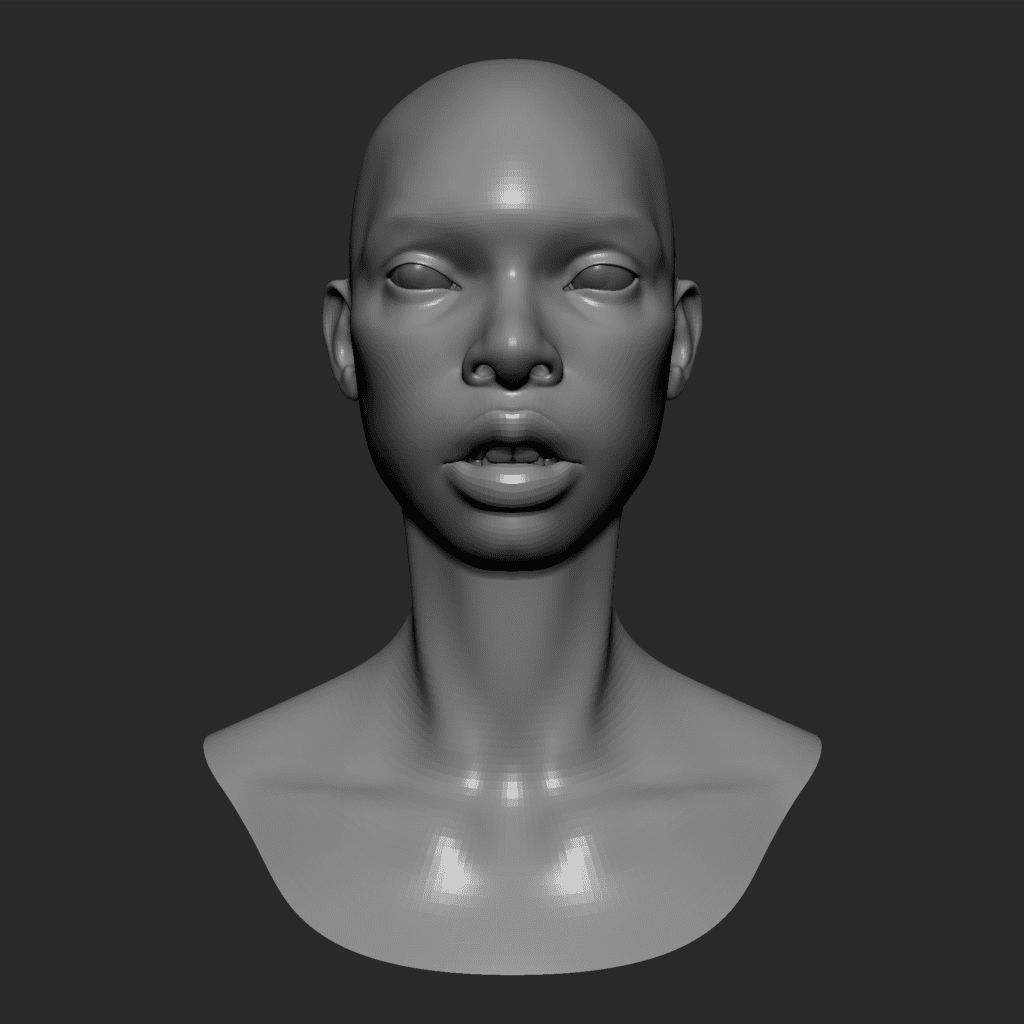
The last step was to light the scene in a way that would emphasise the right volumes for this model. Even the most perfect model can be ruined by bad lighting.
In this case, I simply used two lights, a frontal one from ¾ of the subject and a rim light behind it. I also added a free HDRI from PolyHaven which allowed me to have some more colour in the light bounces.

As a final step, I brought the renders into Photoshop and added a gray radial gradient behind the model to add a bit of variation in the background.
I wanted to give it a depth of field effect by duplicating my model layer, masking the parts in focus and then blurring the ones out of focus. After that, it was just a matter of colour grading with some Hue/Saturation and Levels.

This whole project took me two months to complete from start to finish, but I wouldn’t have been able to make it without a strong base knowledge of the whole 3D workflow.
Making a character is not just about Modeling and Texturing, it’s also about Shading, Lighting, Rendering and, weirdly enough, Rigging. If you don’t understand how deformations work, you cannot make sure that your edge loops support them the right way, even for a simple pose in a still render.
It was also tough to come to terms with the fact that no artistic workflow can ever be linear: I had to go back to the same step dozens of times before it finally worked.
This project really helped me stop comparing myself to other artists, and start looking at the gap between us as a difference in experience rather than talent.
While the artwork itself is surely far from perfect, I hope this article can help somebody feel less intimidated by realistic portraits and push them to create something similar.
Don’t hesitate to contact me if you have any questions, as this project was only possible thanks to the people who have been kind enough to help me with feedback, advice and support.
Thanks to The Rookies for allowing me to share this part of my journey, hoping someone will find it as useful as I found other artists’ progress on this website.
You can find more of Beatrice's work on The Rookies, Instagram, and ArtStation.