Make Your Own Steampunk House in 3D
Her first time creating an environment, Rookie Awards Finalist, Emma Scapolo, shares her experience creating an original concept and model with a steampunk vibe.
Her first time creating an environment, Rookie Awards Finalist, Emma Scapolo, shares her experience creating an original concept and model with a steampunk vibe.

Emma Scapolo is a student at Big Rock School near Venice, Italy, and a Rookie Awards finalist in the Virtual Fashion category.
With a passion for Art, when she became aware of the possibility of joining the Animation and Gaming Industries, she did not hesitate to forge her path.
In this article she talks about creating an original concept and model with a steampunk vibe.
Everything started because I wanted to do something different from my previous projects. I wanted to do an original asset, not copied, a fruit of my imagination that could give an extra boost to my reel.
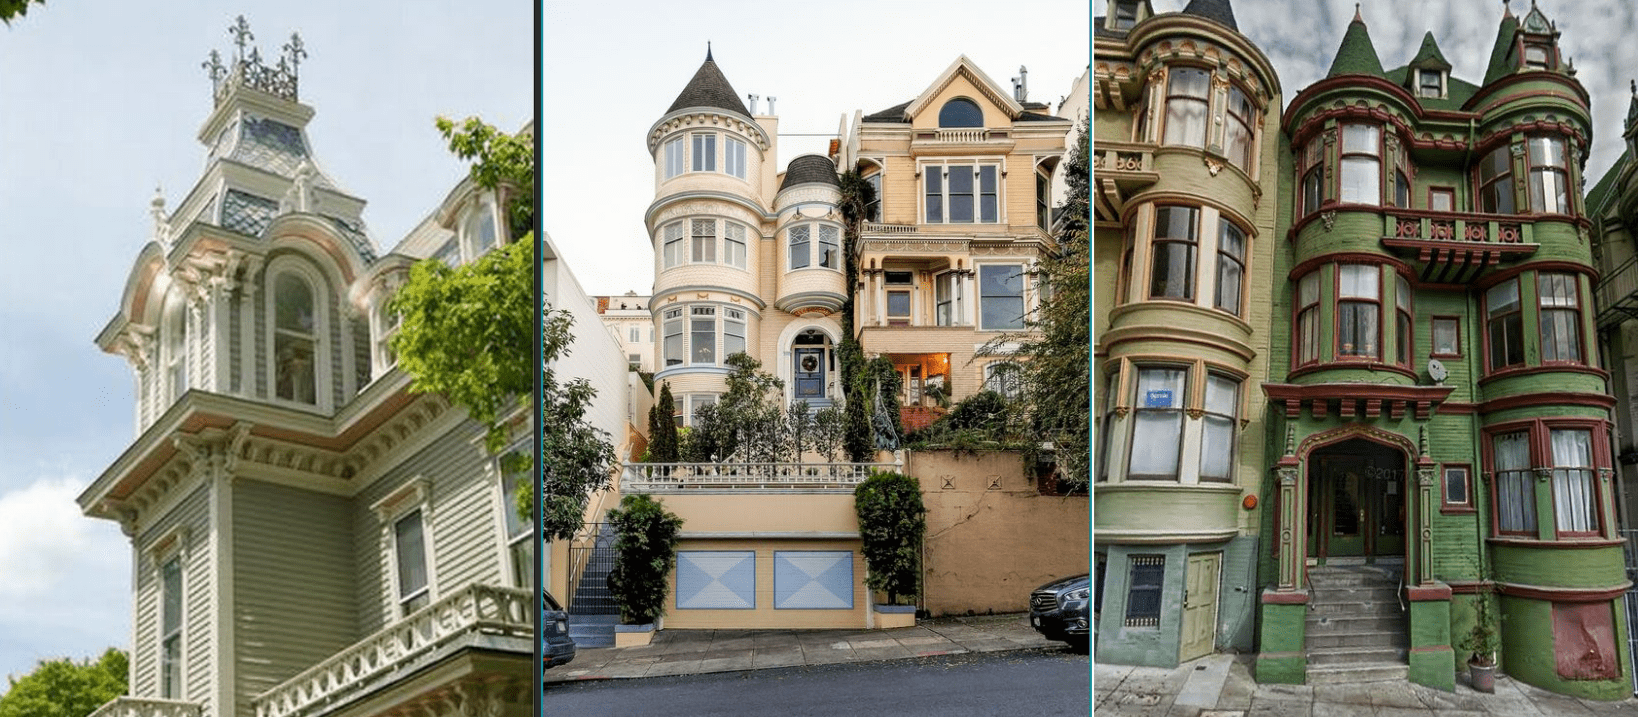
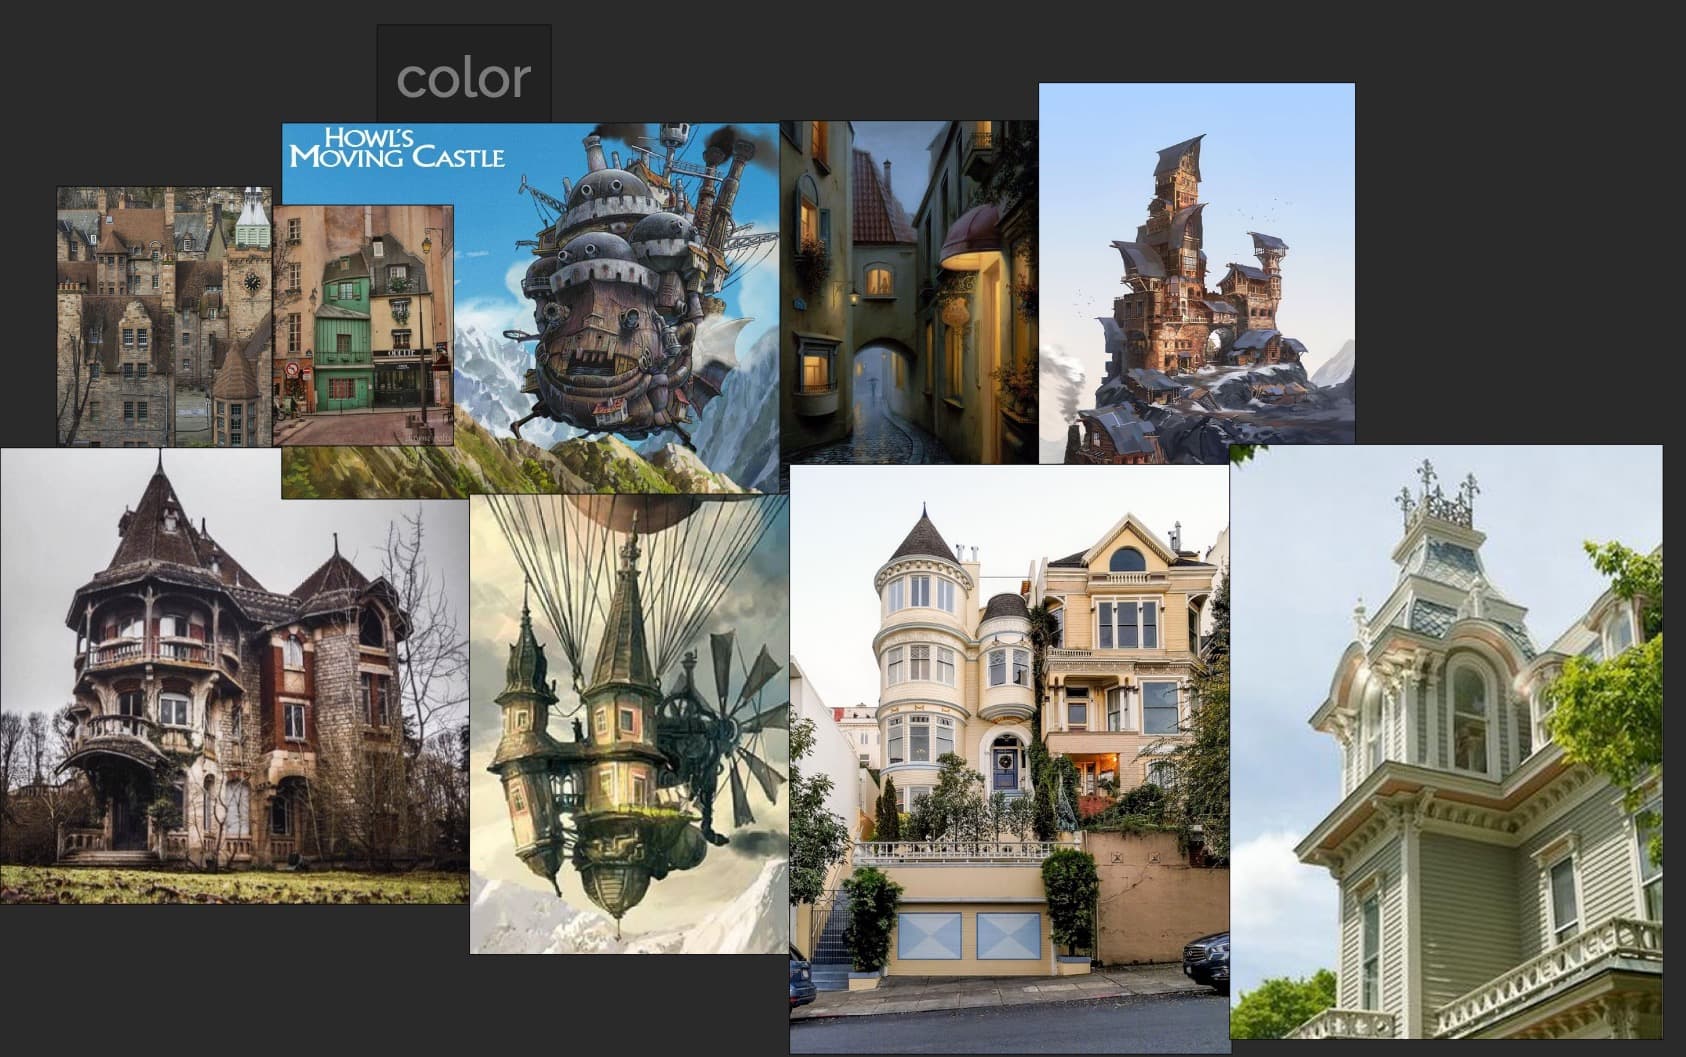
The reference research part was so long and tortuous. I found less references per se, and more ideas. I needed various references to recreate various shapes. The house did not have to address an exact period, but it had to bring different stylistic references, and taken from a fantasy style.
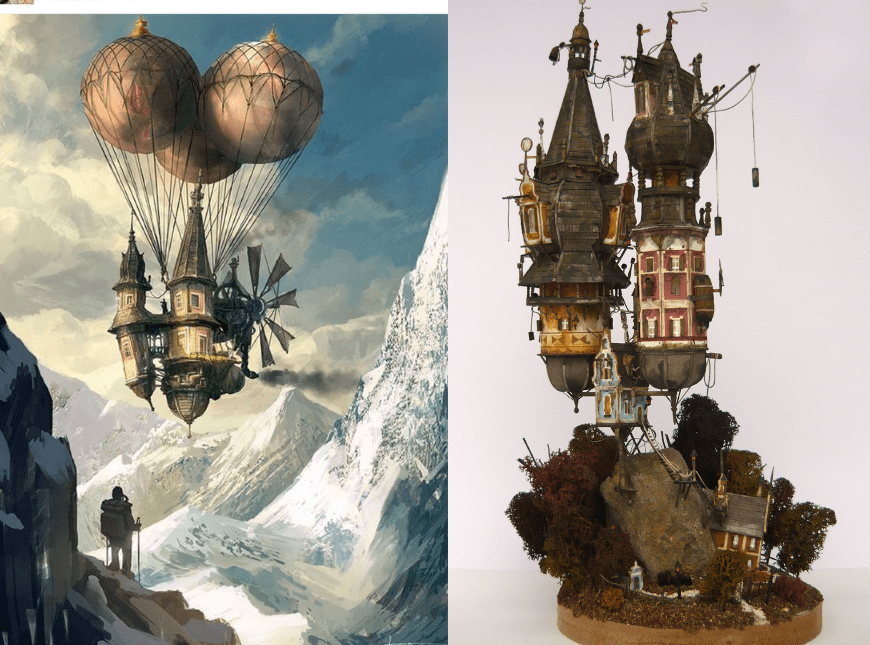
For the very first references I always refer to pics I already have on my Pinterest boards. This is how I found this amazing reference to the photographic book of Laurent Chéhère's "Flying Houses". With this fantasy inspired reference, I decided to build my own house, starting from a bit of fantasy reference.
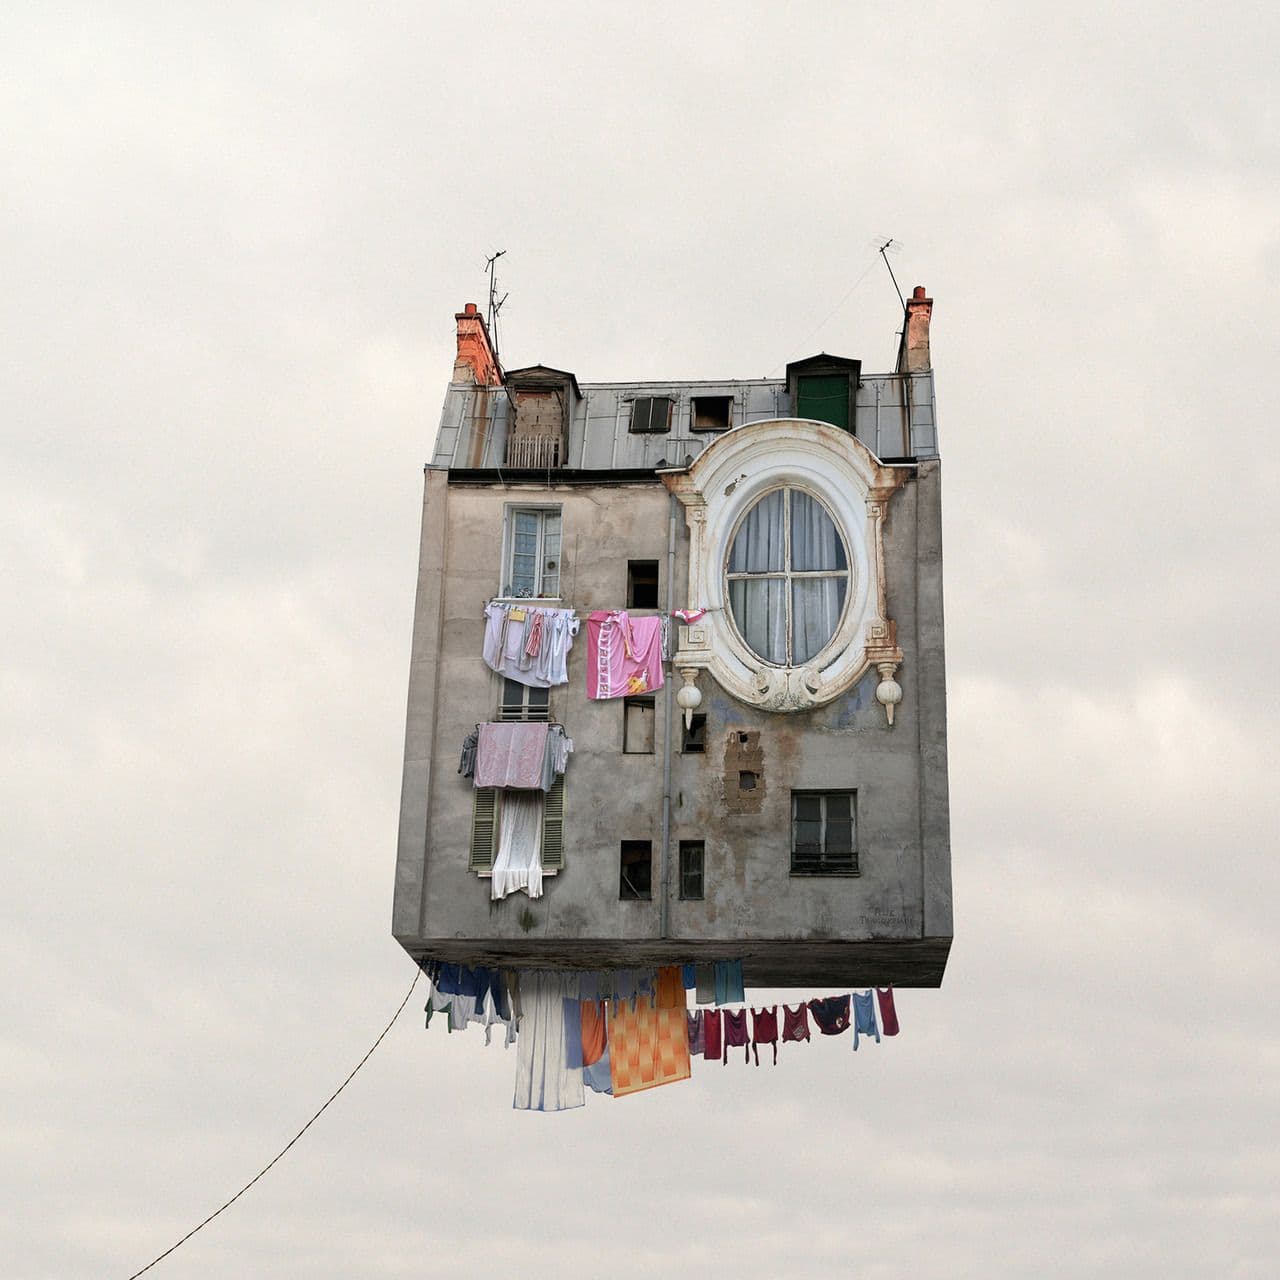
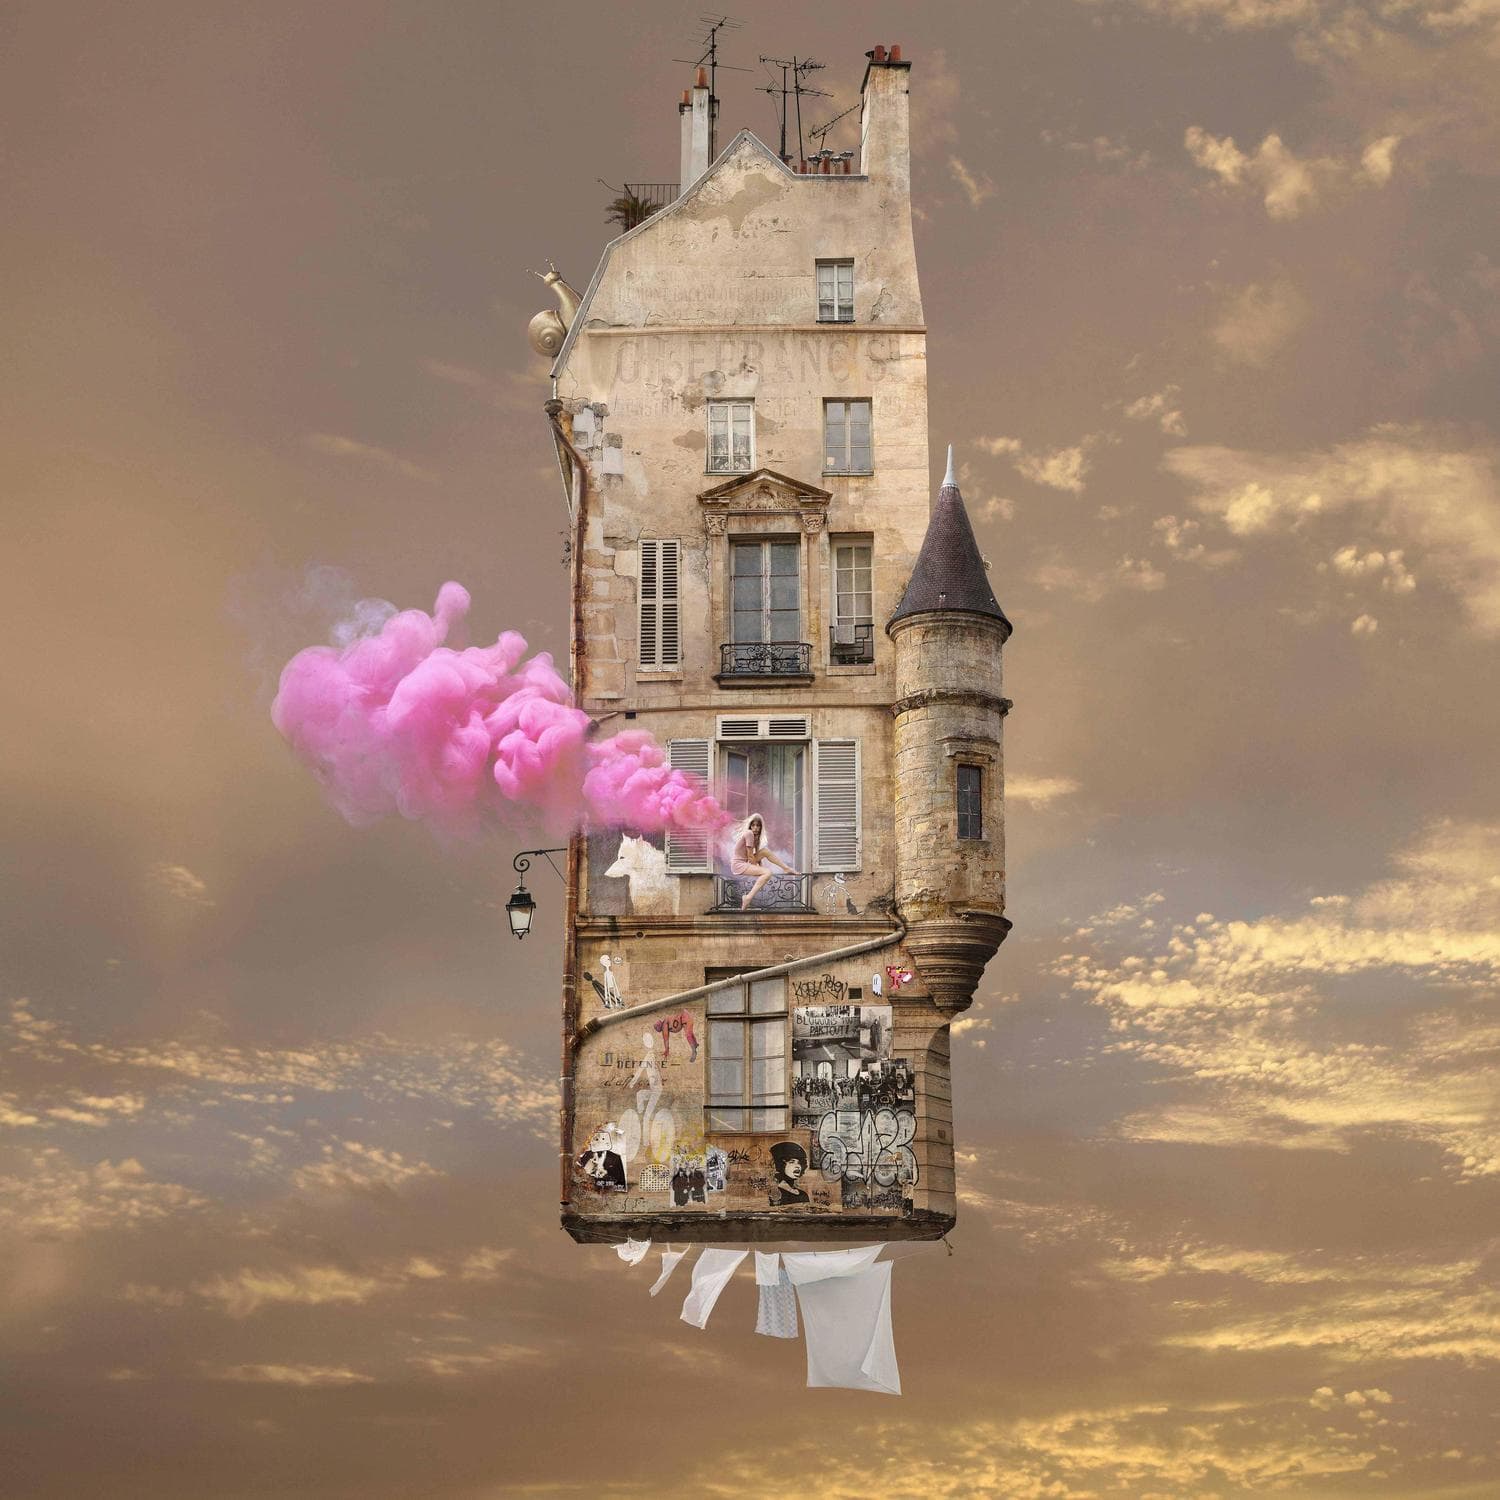
After careful skimming, I came to the two biggest examples that I wanted to follow. The fact they were grainy photos helped my imagination. I kept the references for the whole project on PureRef. I then combined the English Steampunk structure with a more bohemian fantasy taste.
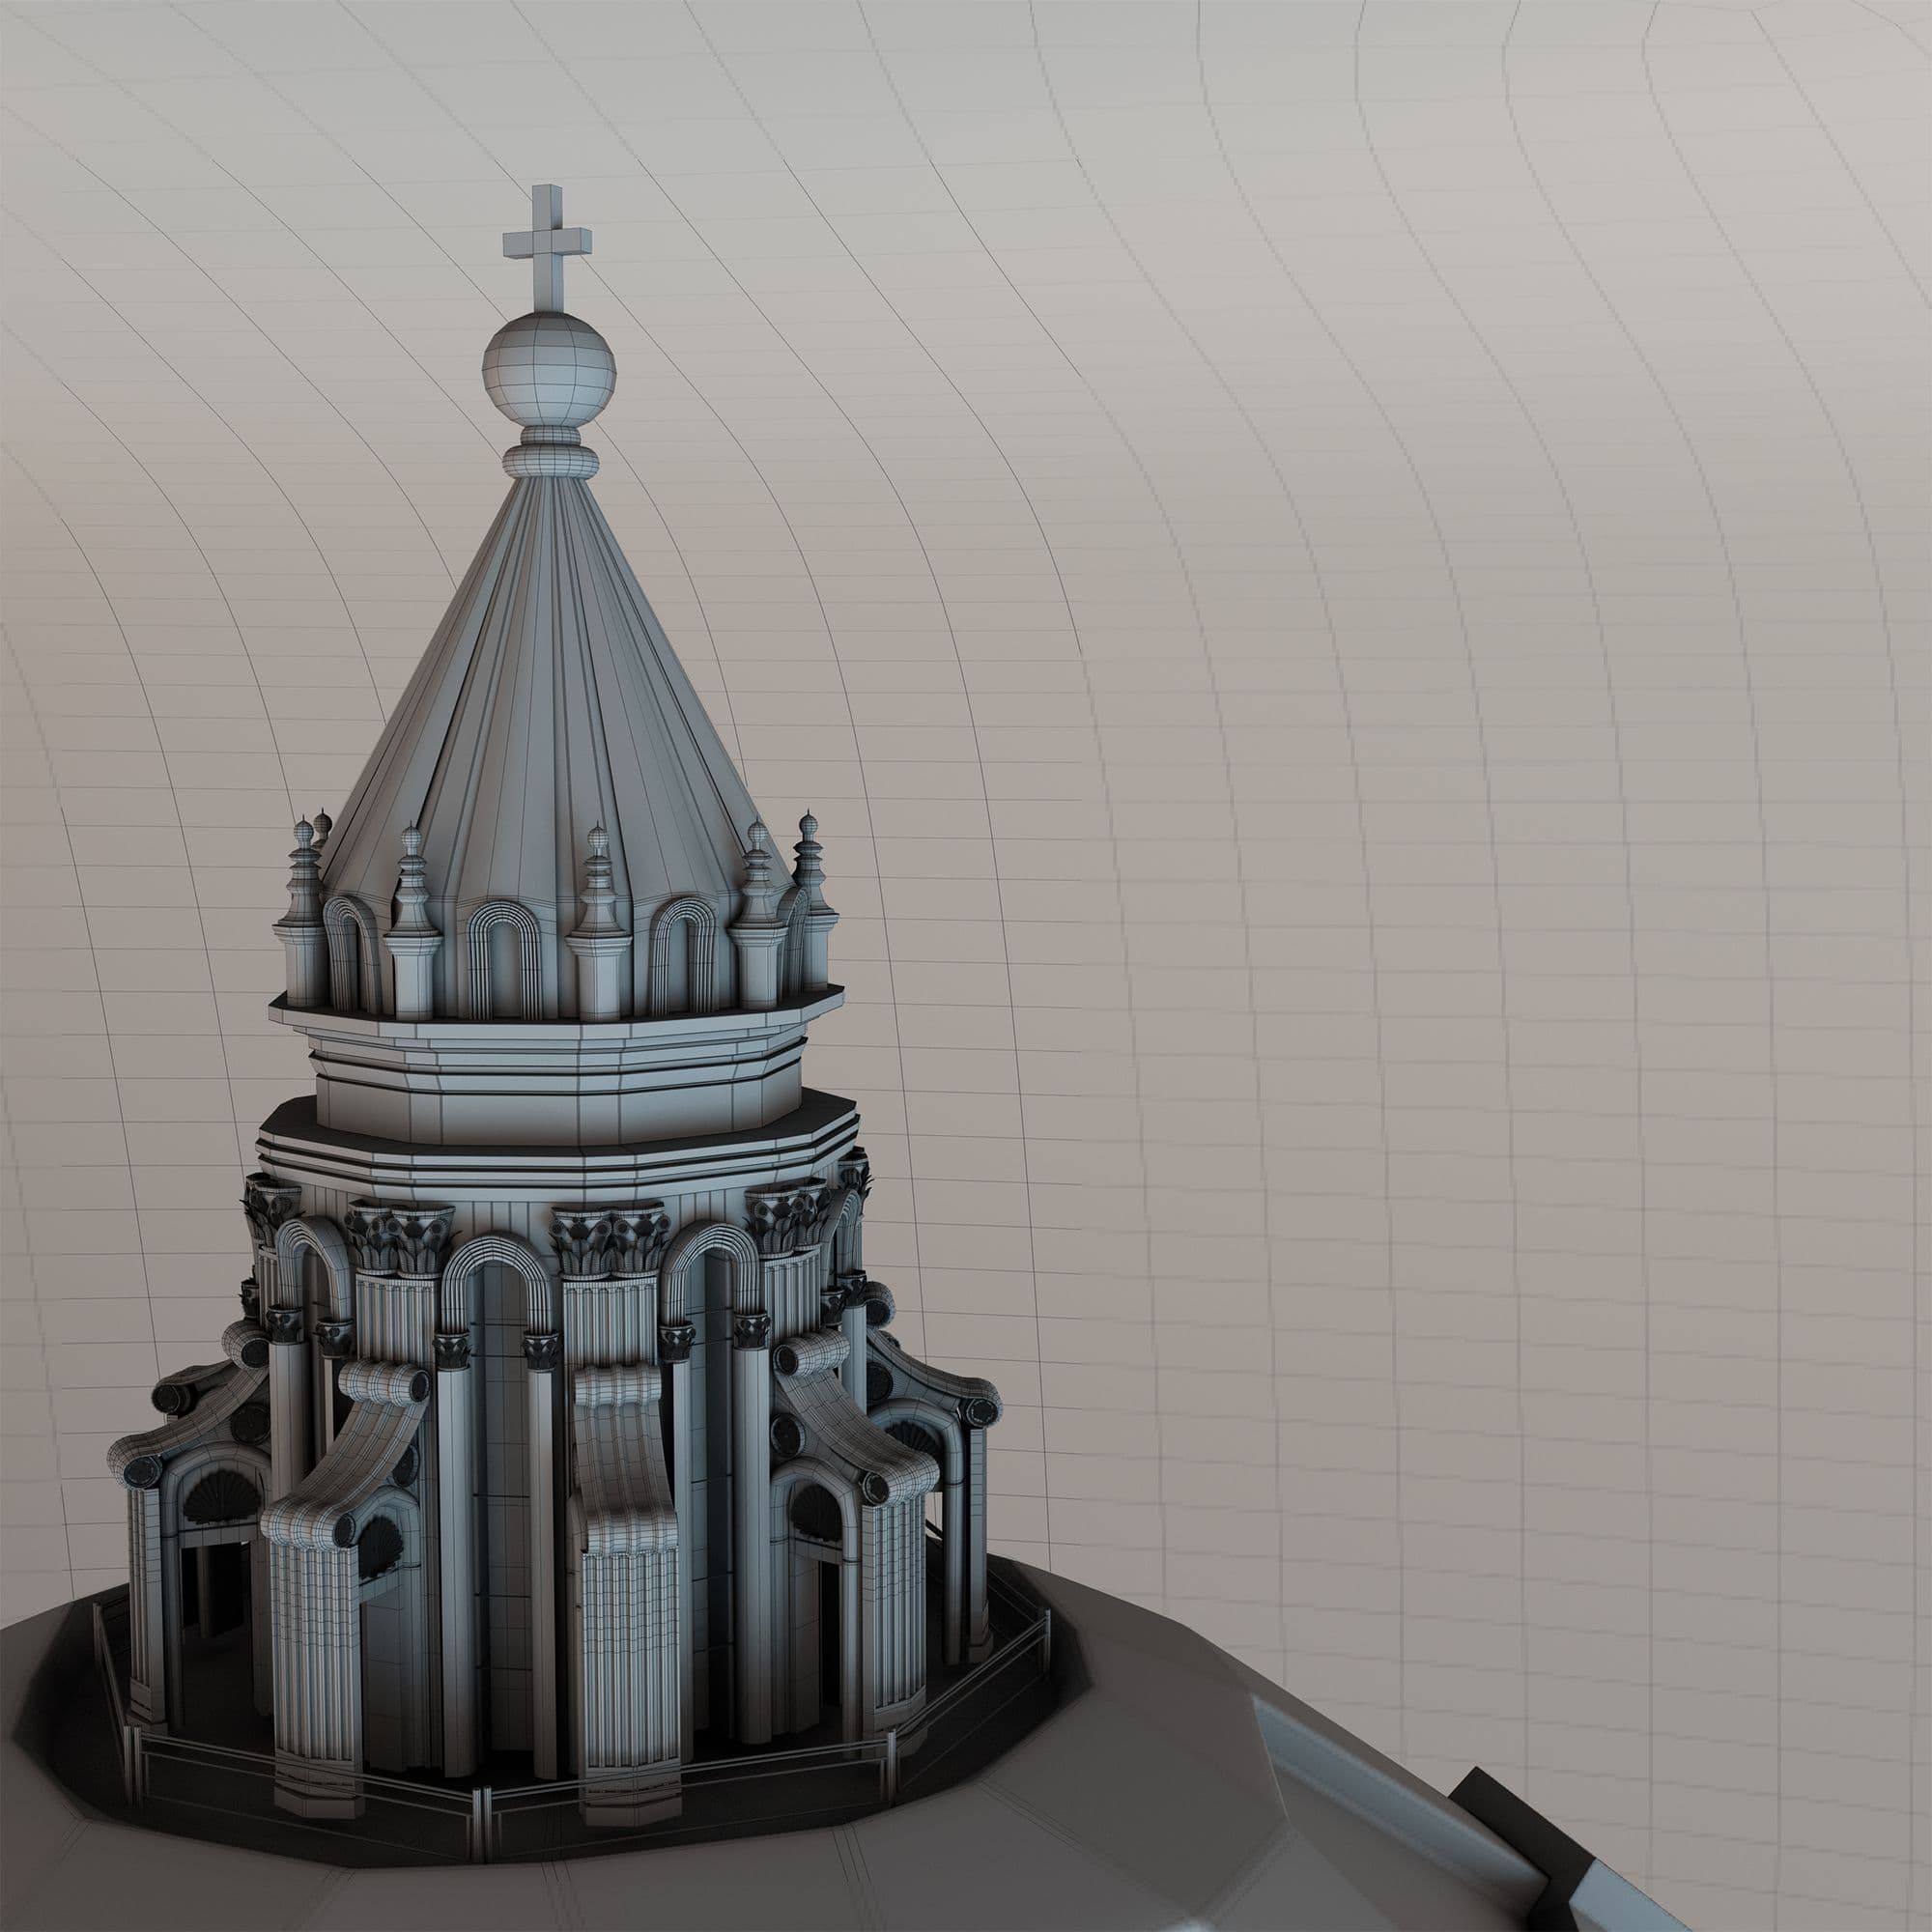
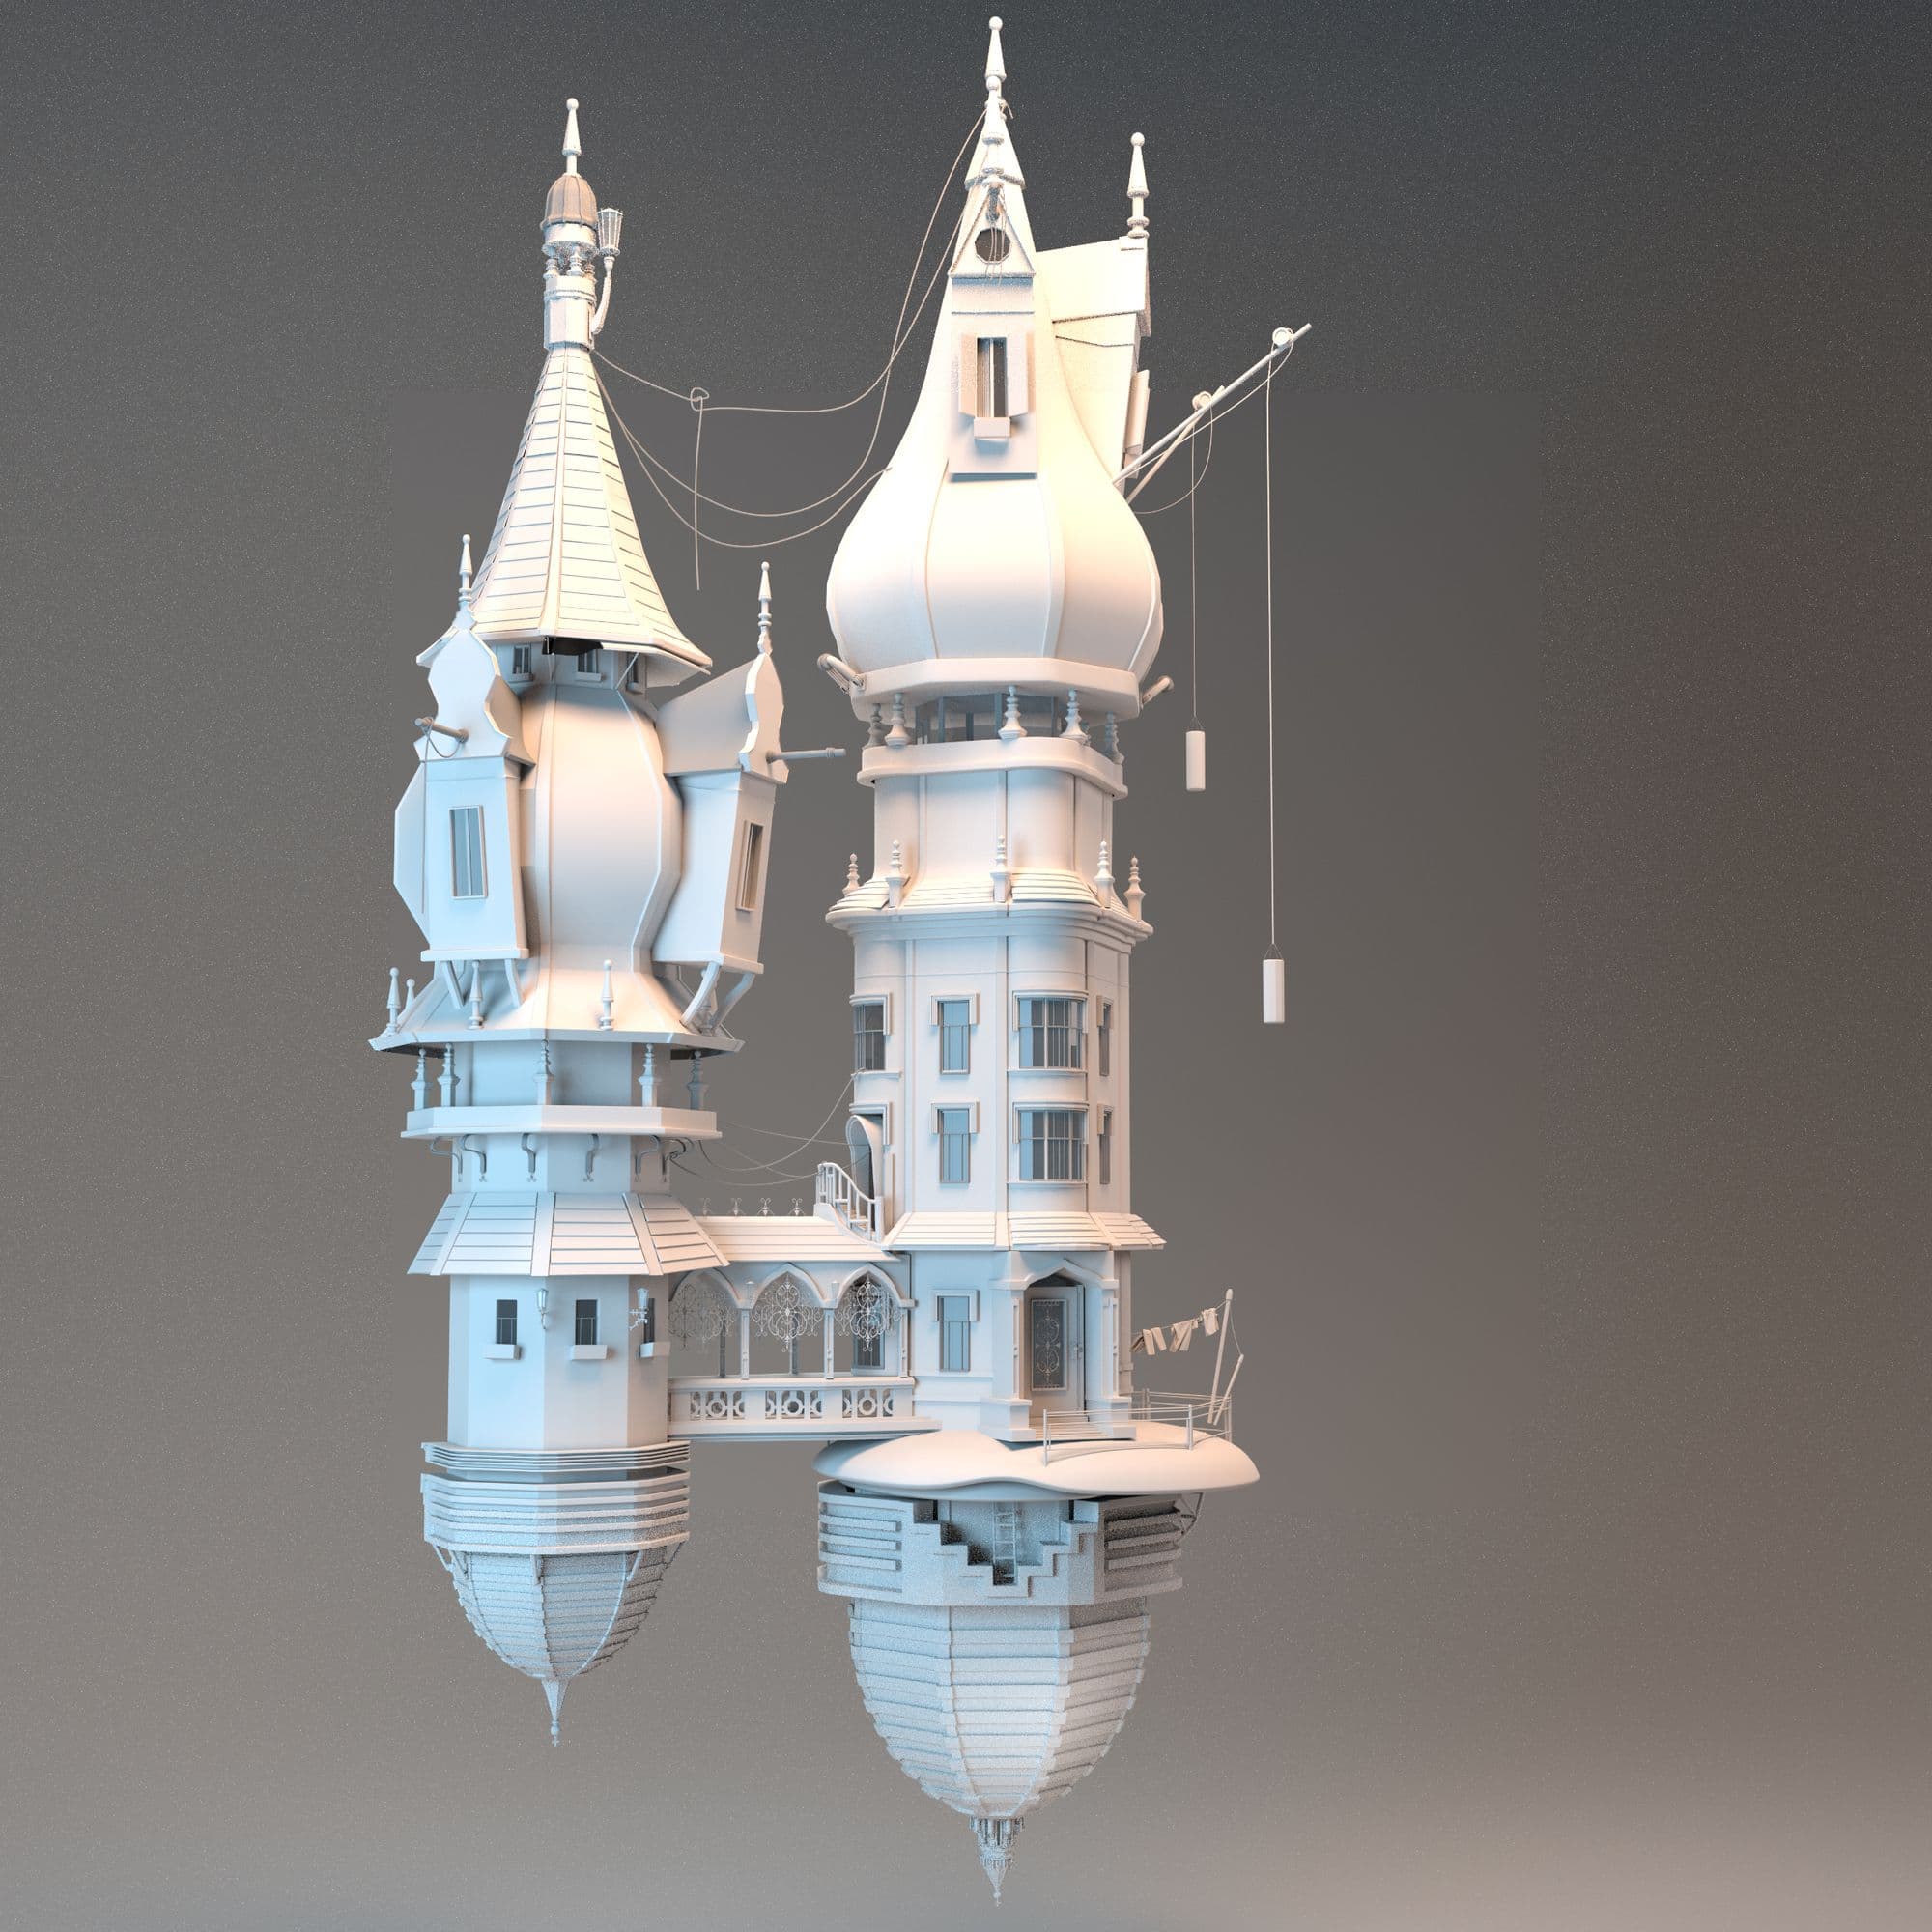
I started with the dome, which I deliberately took from the dome of Santa Maria in Fiore in Florence.
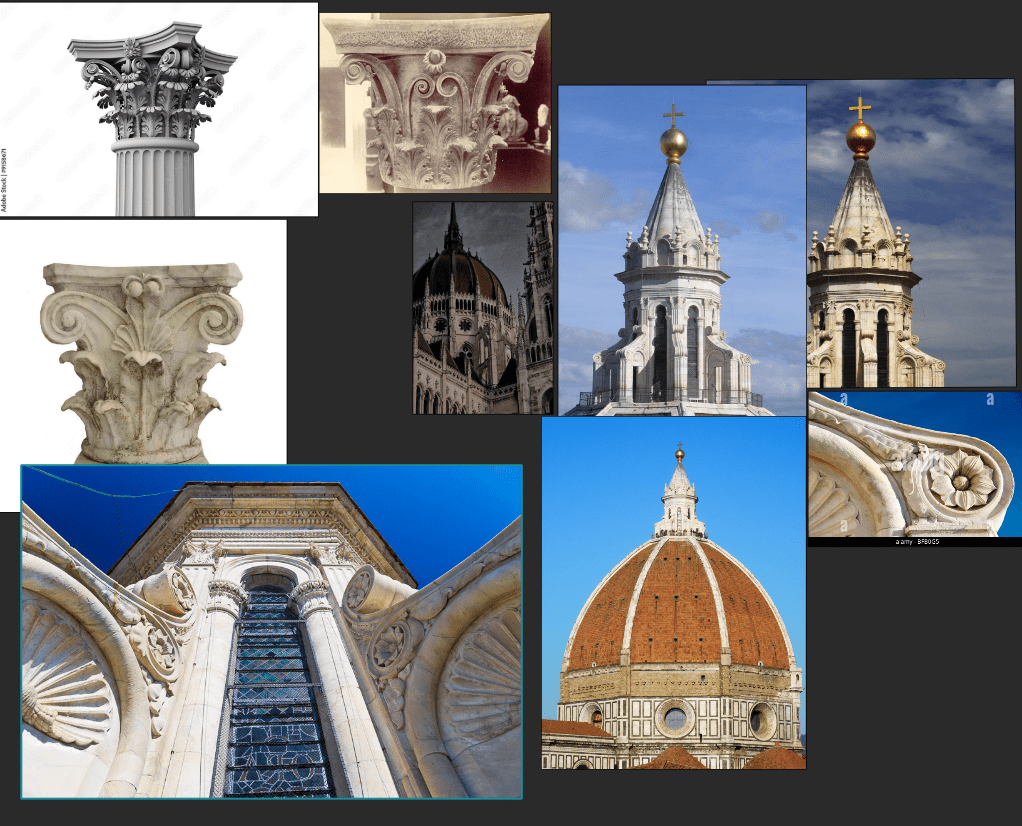
This was the "foundation" of the house, and I decided that in this case I wanted to completely remain faithful to the original. I knew the dome would be a very small detail dispersed in the scene but I wanted to give the right detail value.
Some of the decoration was made using Z-Brush because in this case they are natural elements (seashells, flowers, etc.) It took more time to understand the various dimensions and positions of the elements than actually creating the model itself.
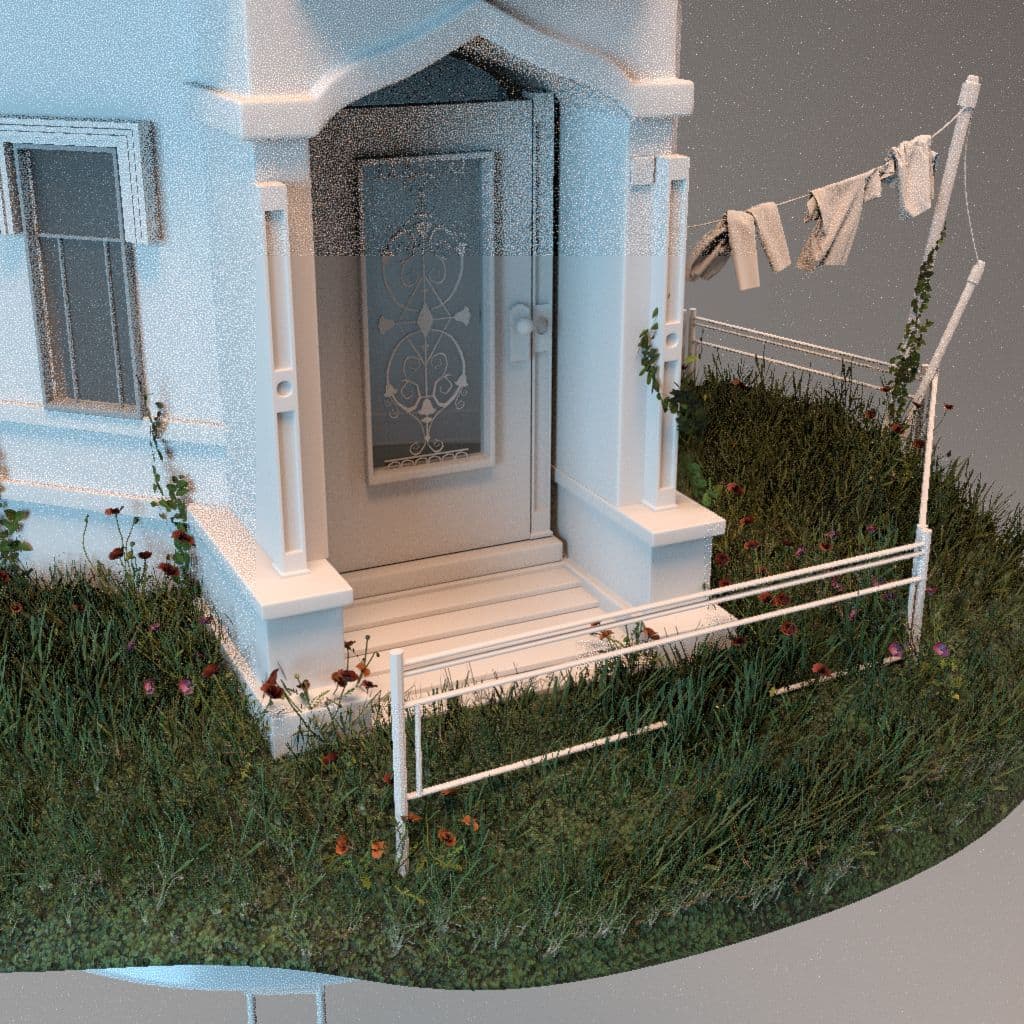
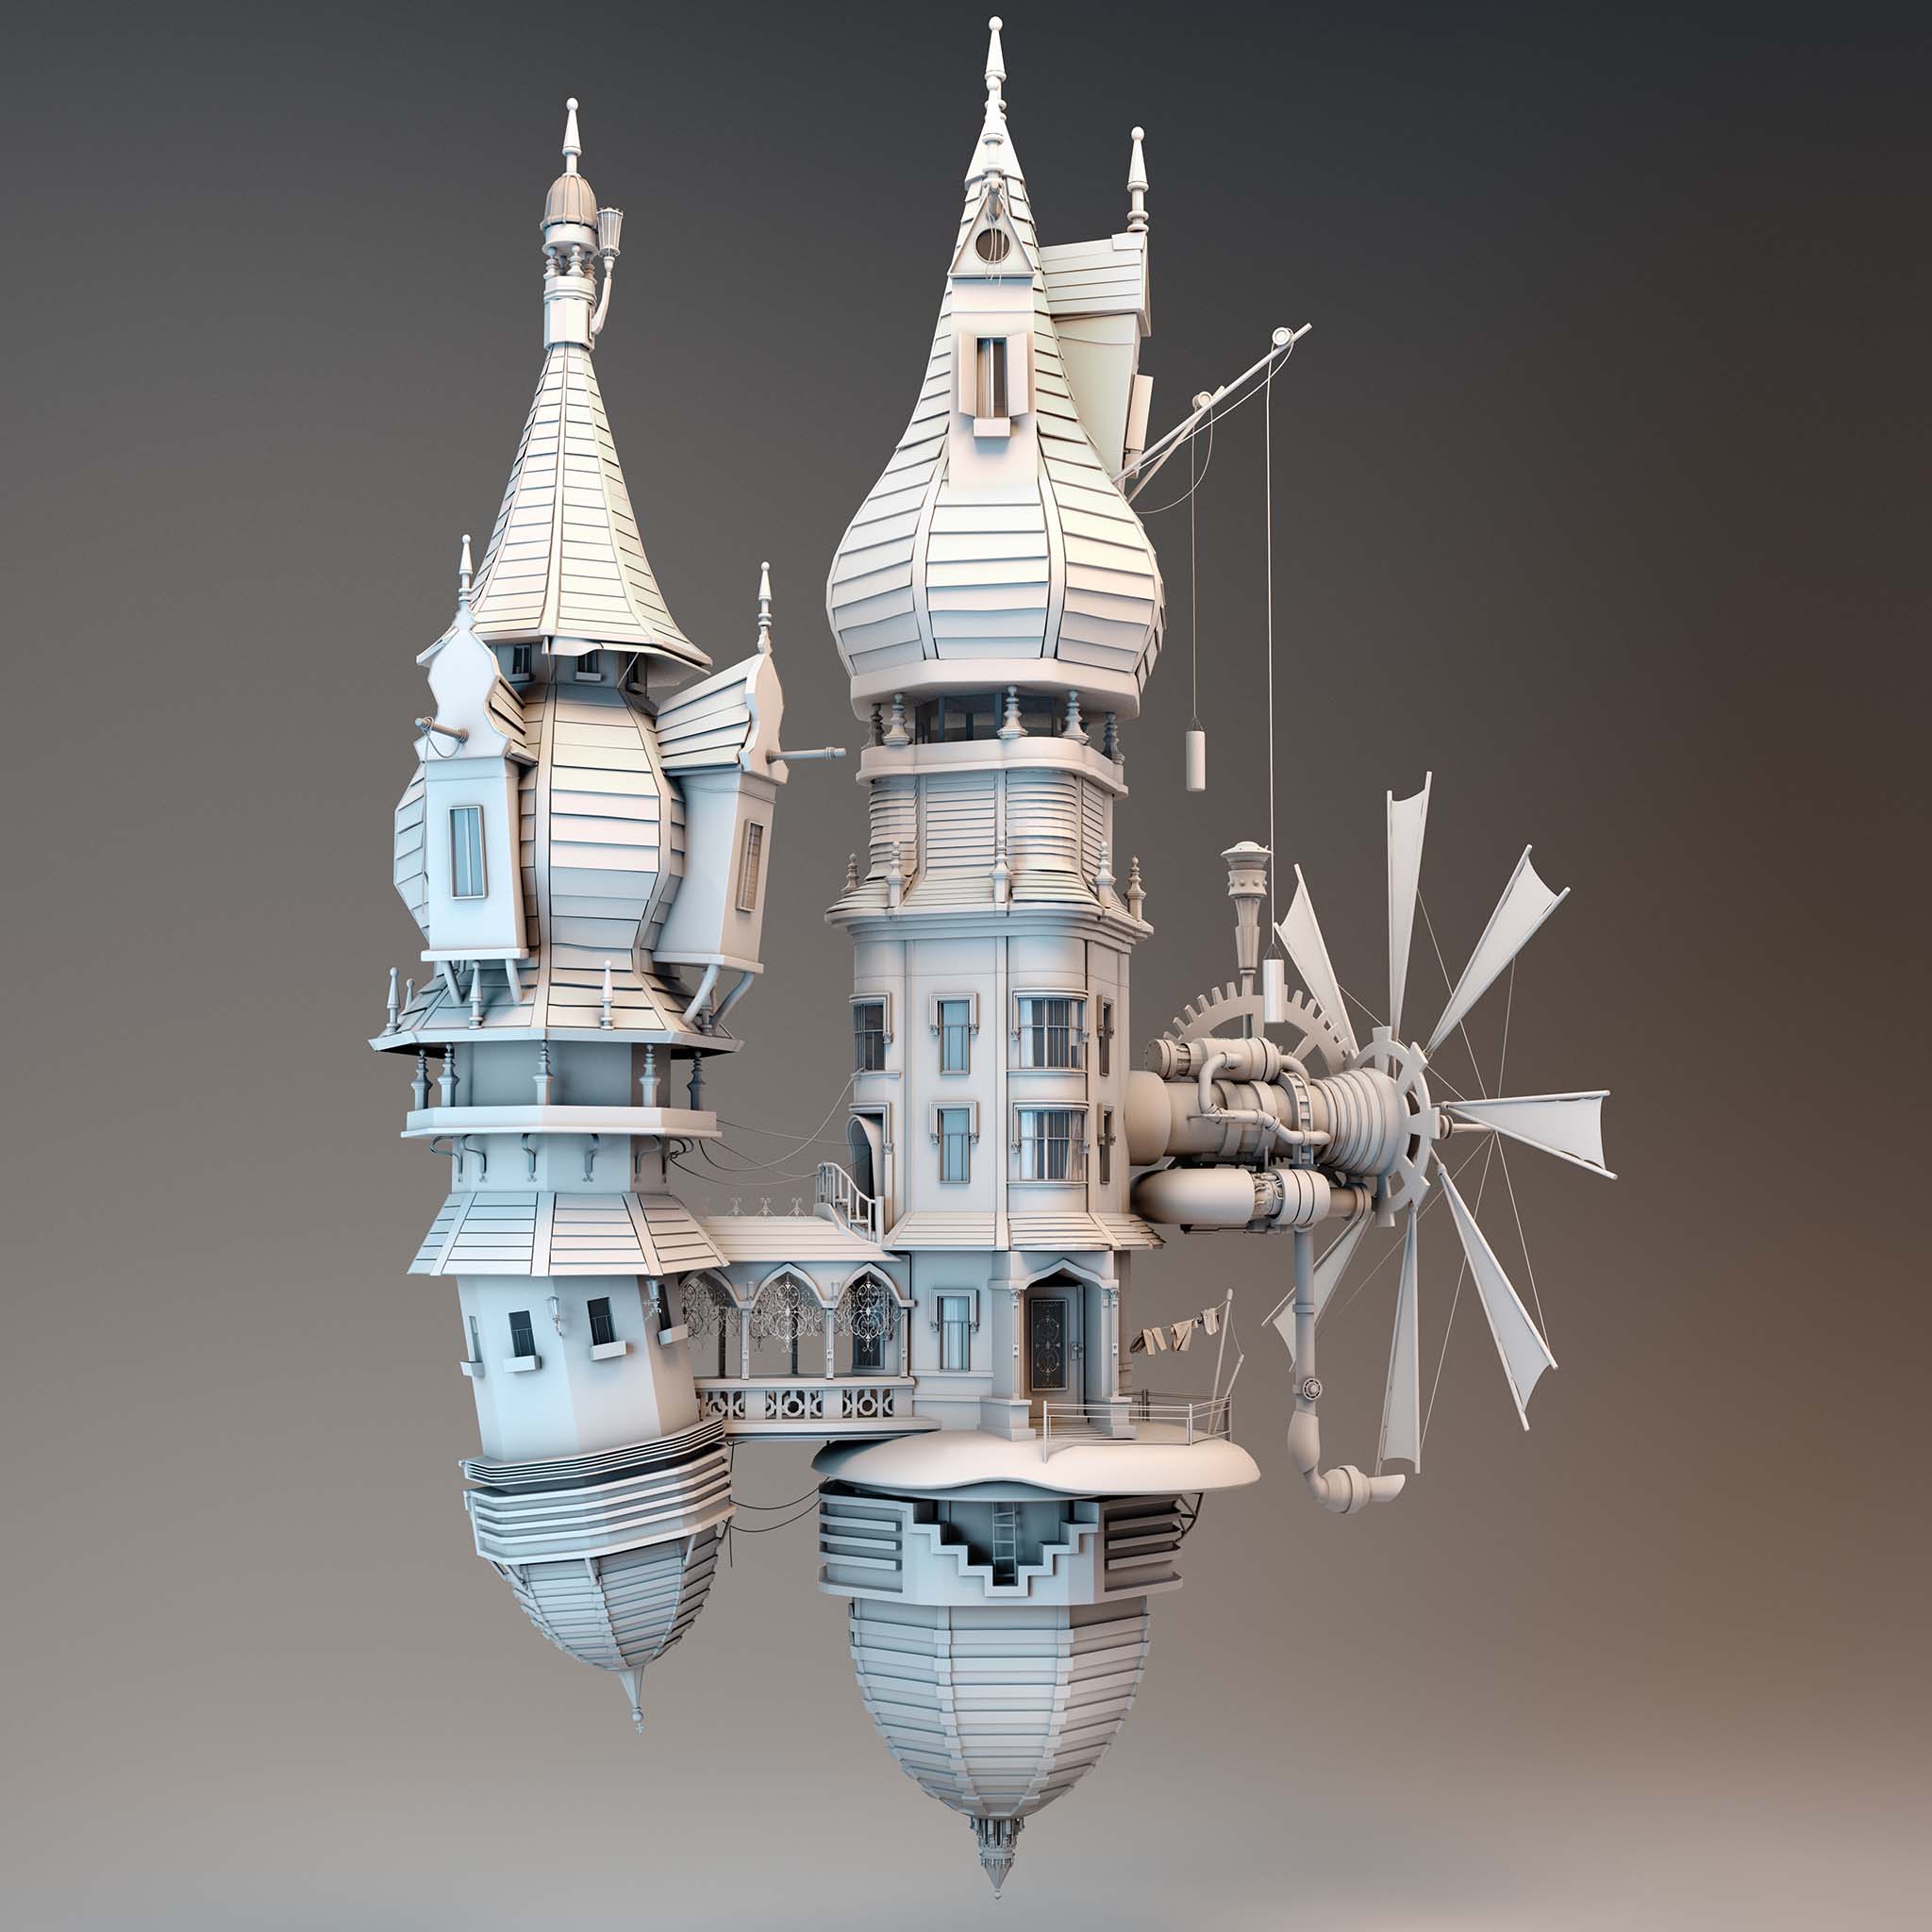
So, I first created all the big assets: the dome, the central body's house with its garden, and the house on the left. The connecting terrace was only made when the proportions seemed adequate to me.
It is very important to keep an eye on all the magnitudes of the elements on stage.
The chapel would have served to give the value of grandeur to all the other elements on stage.
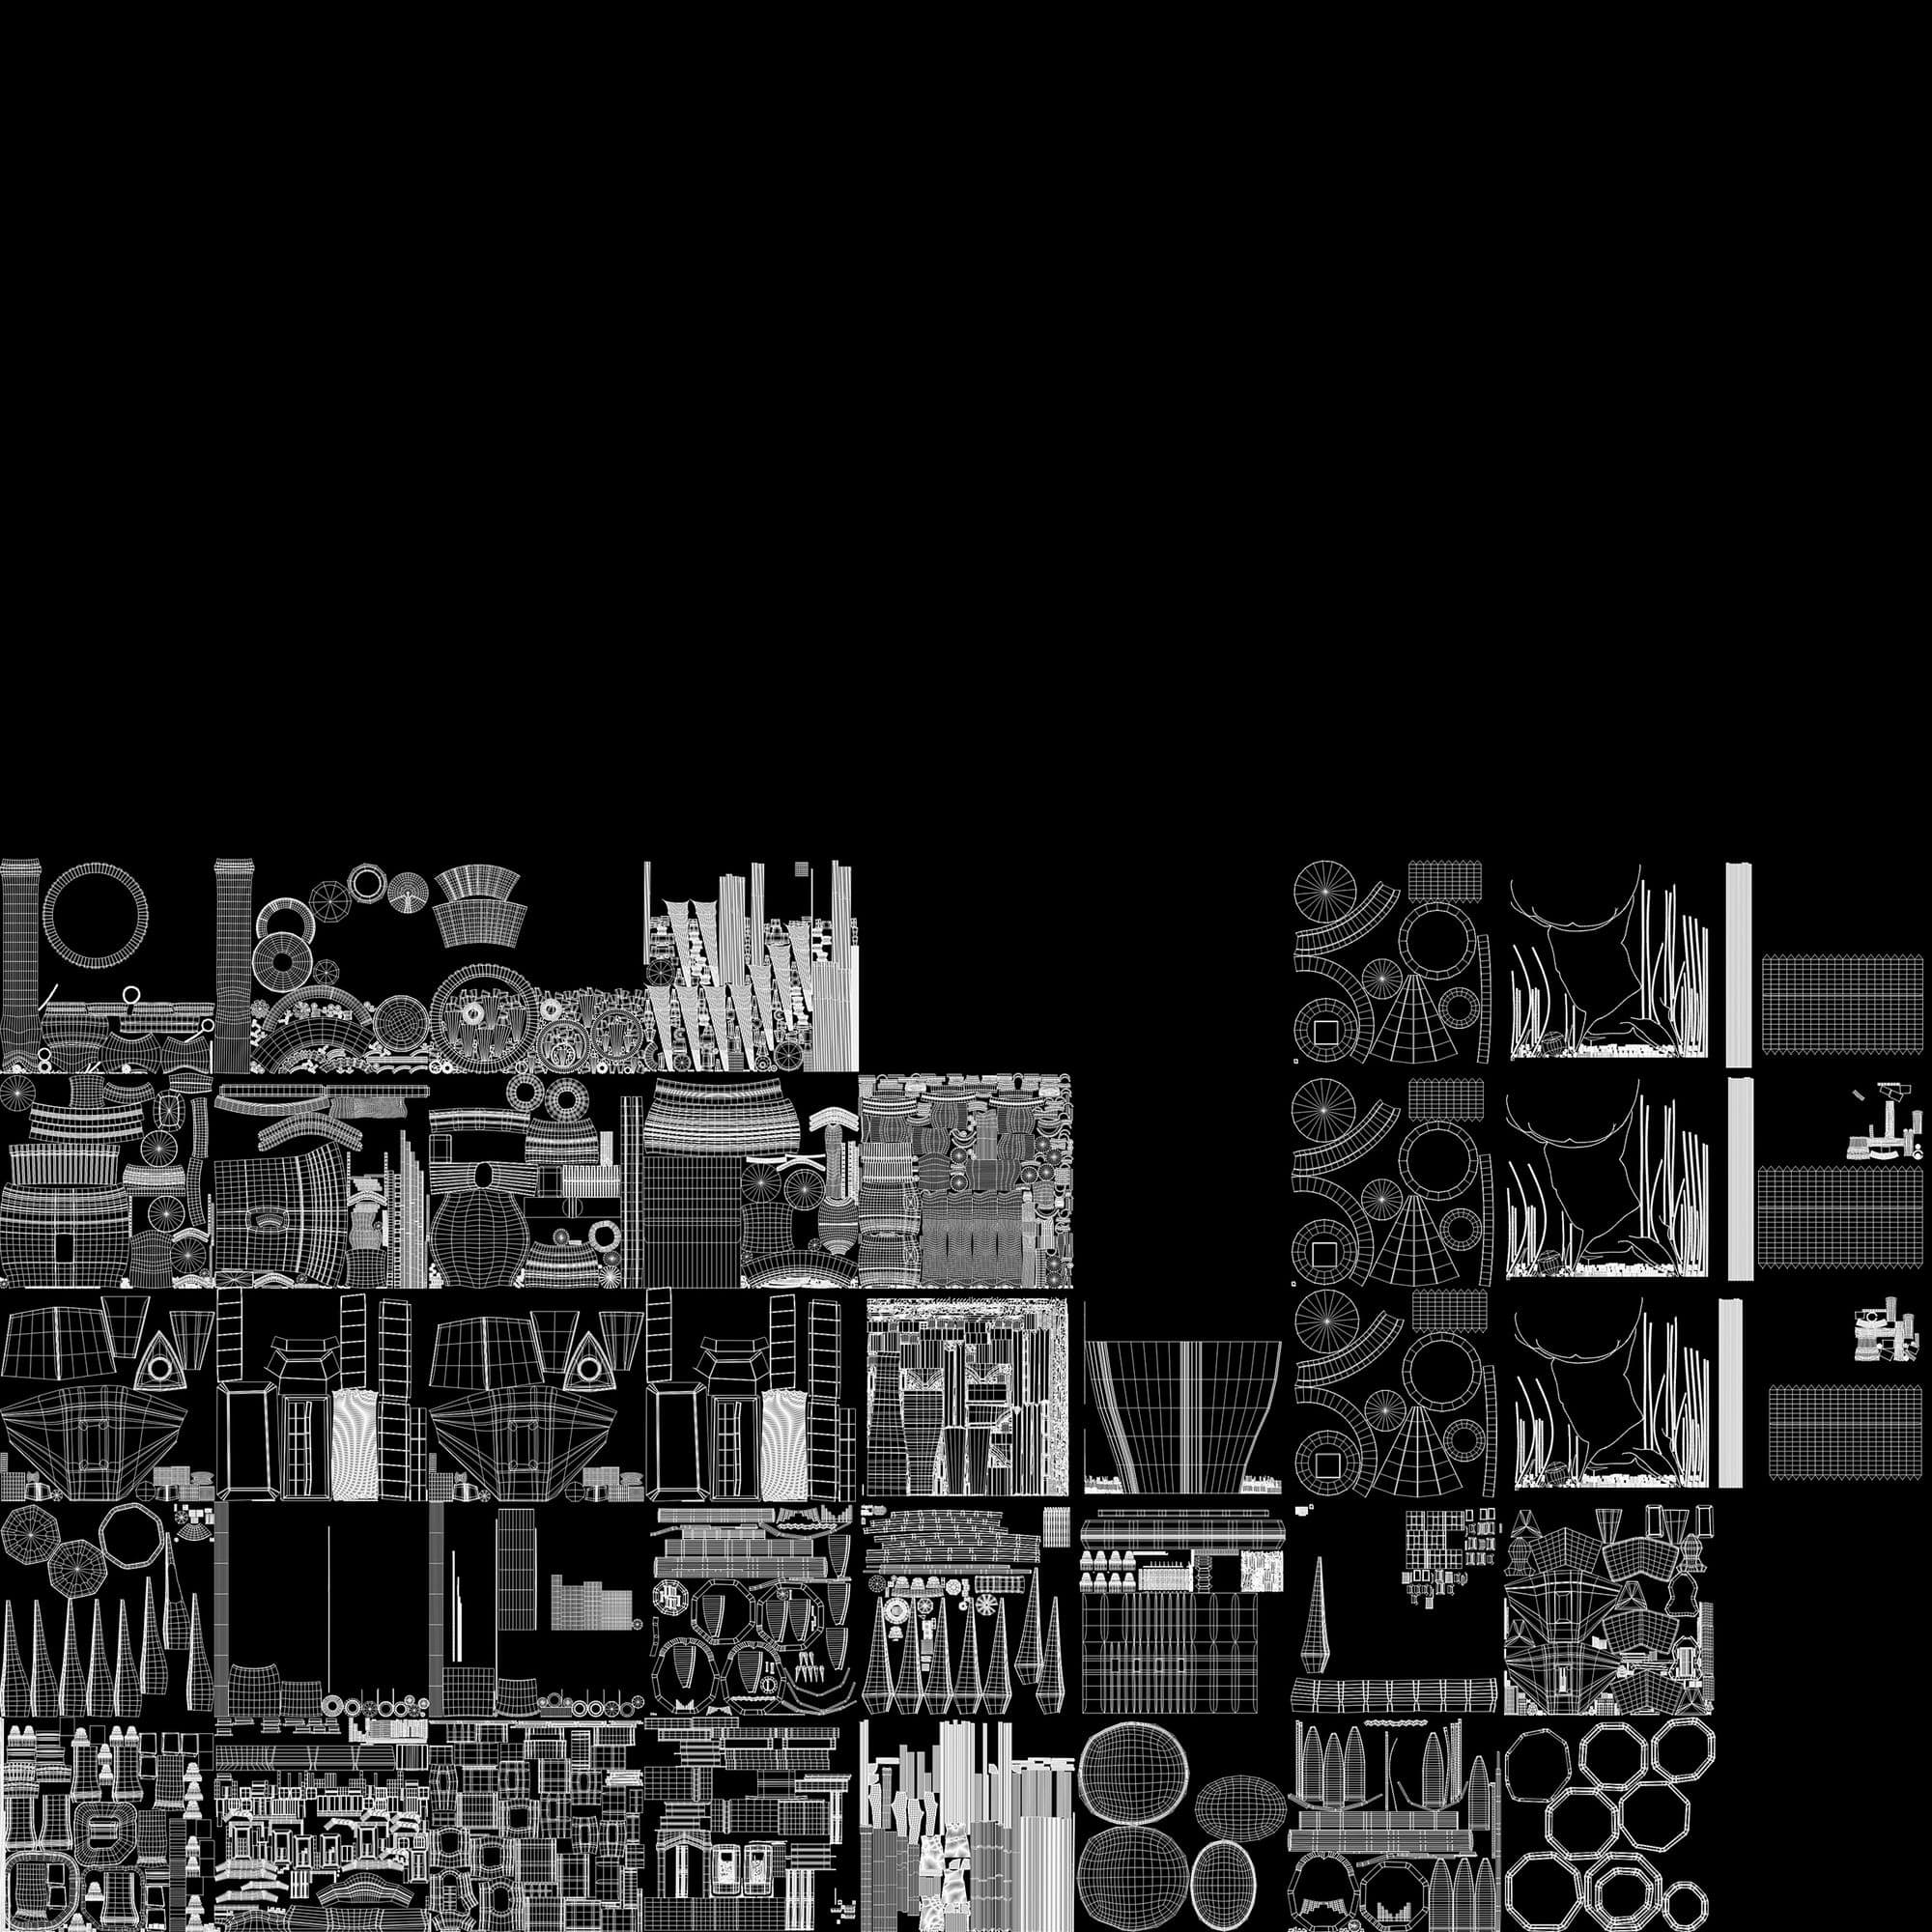
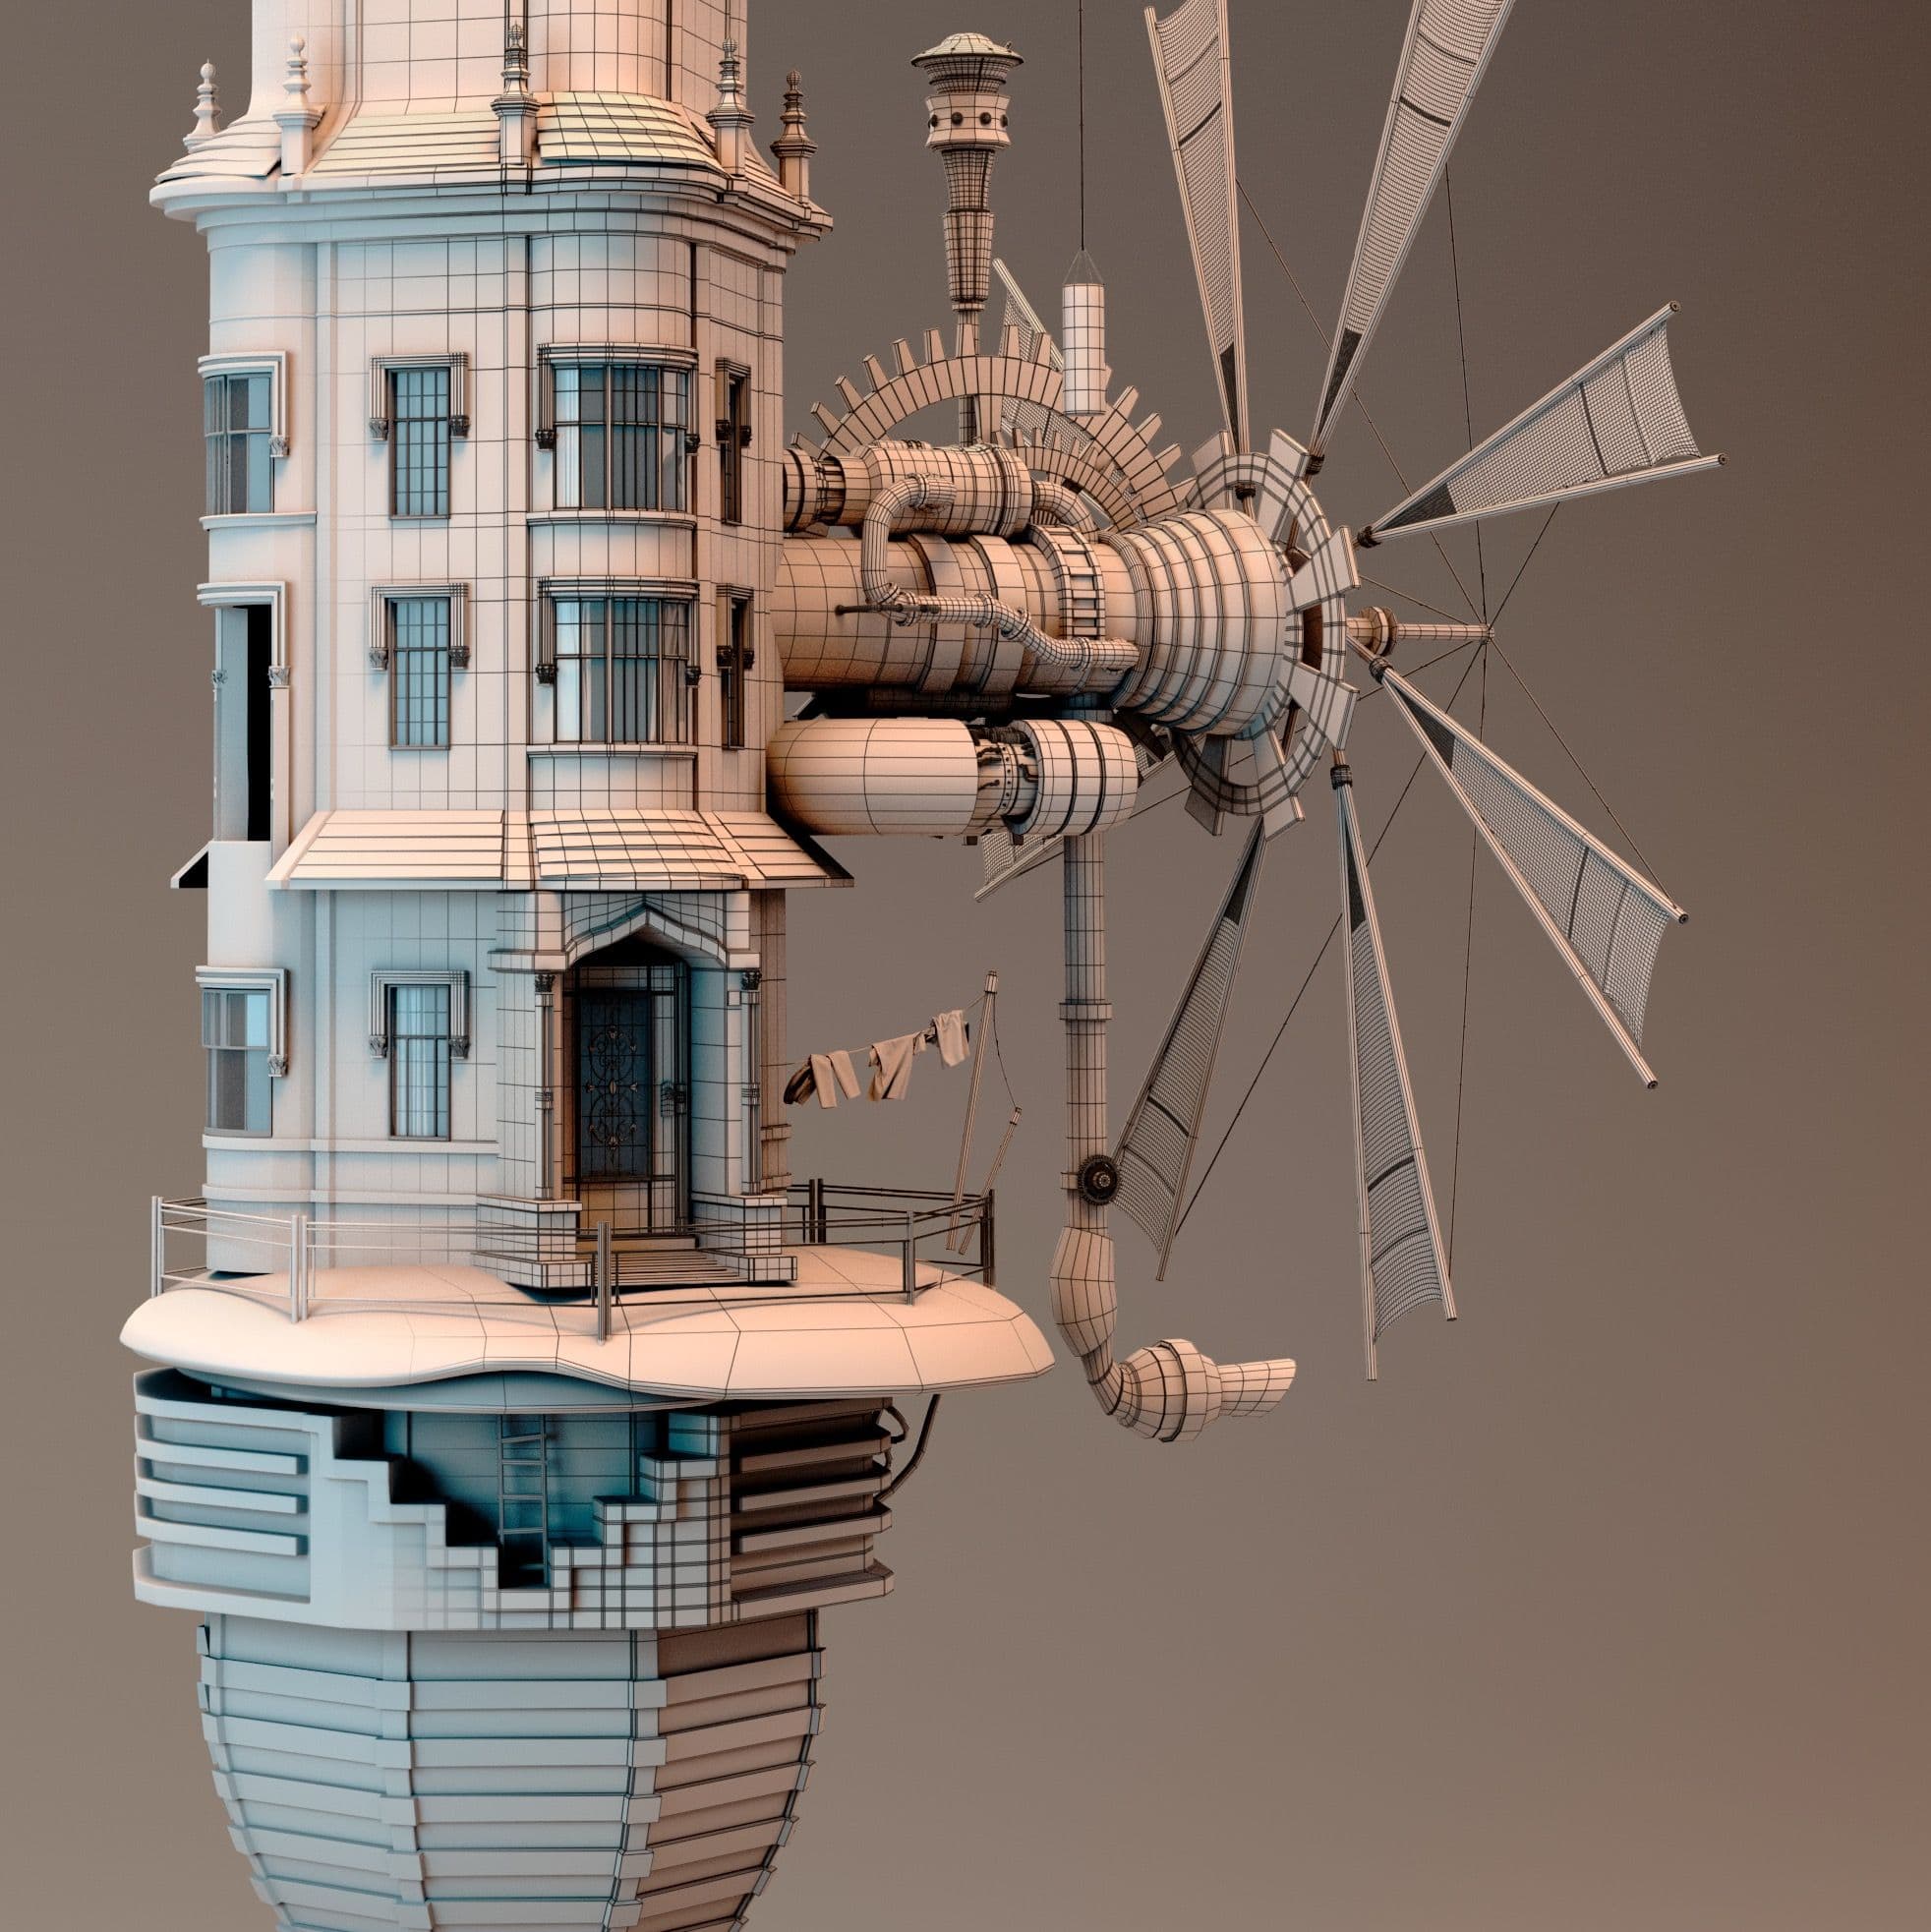
For me, the organisation of the UVs made a big difference.
It is imperative to proceed asset by asset with relative UVs, avoiding unnecessary modeling, thus speeding up your workflow.
I used more UDIMs, for the Us's arrangement. It was essential for me to organise the UVs to texture the big assets in Adobe Substance 3D Painter. I wanted to be in control of exploring what the final feeling of the textures would be. This would not be possible if the UVs were all topped, or too small. I had to leave the door open for how much detail I wanted to apply in the various textures when the time came.
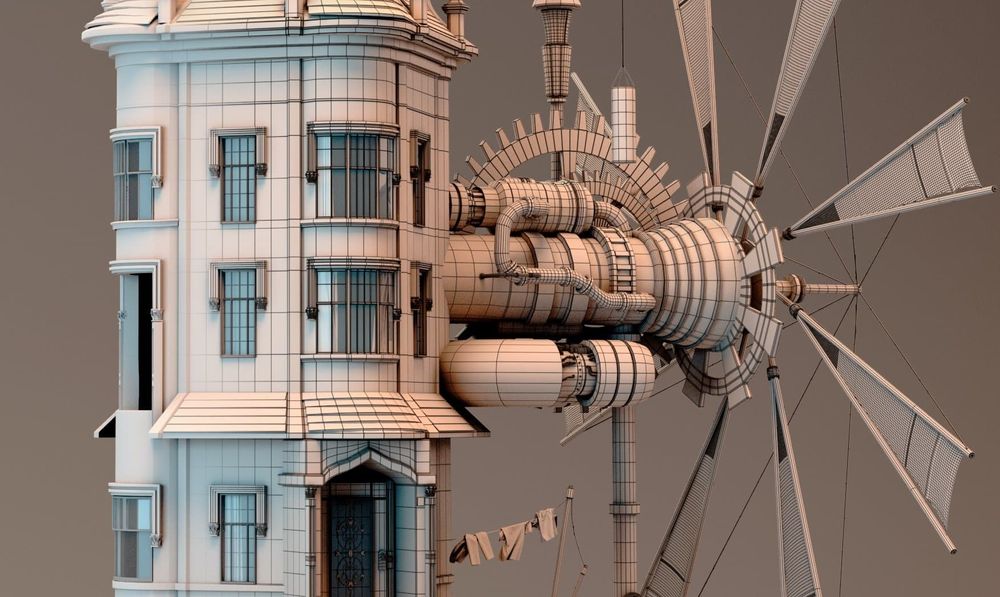
After creating a good base of assets (that could be reused) with UV included, I started all the definition of the details, decorations, positioning, etc. For example, the structure did not have a crooked second house, but was add as a stylistic detail later on.
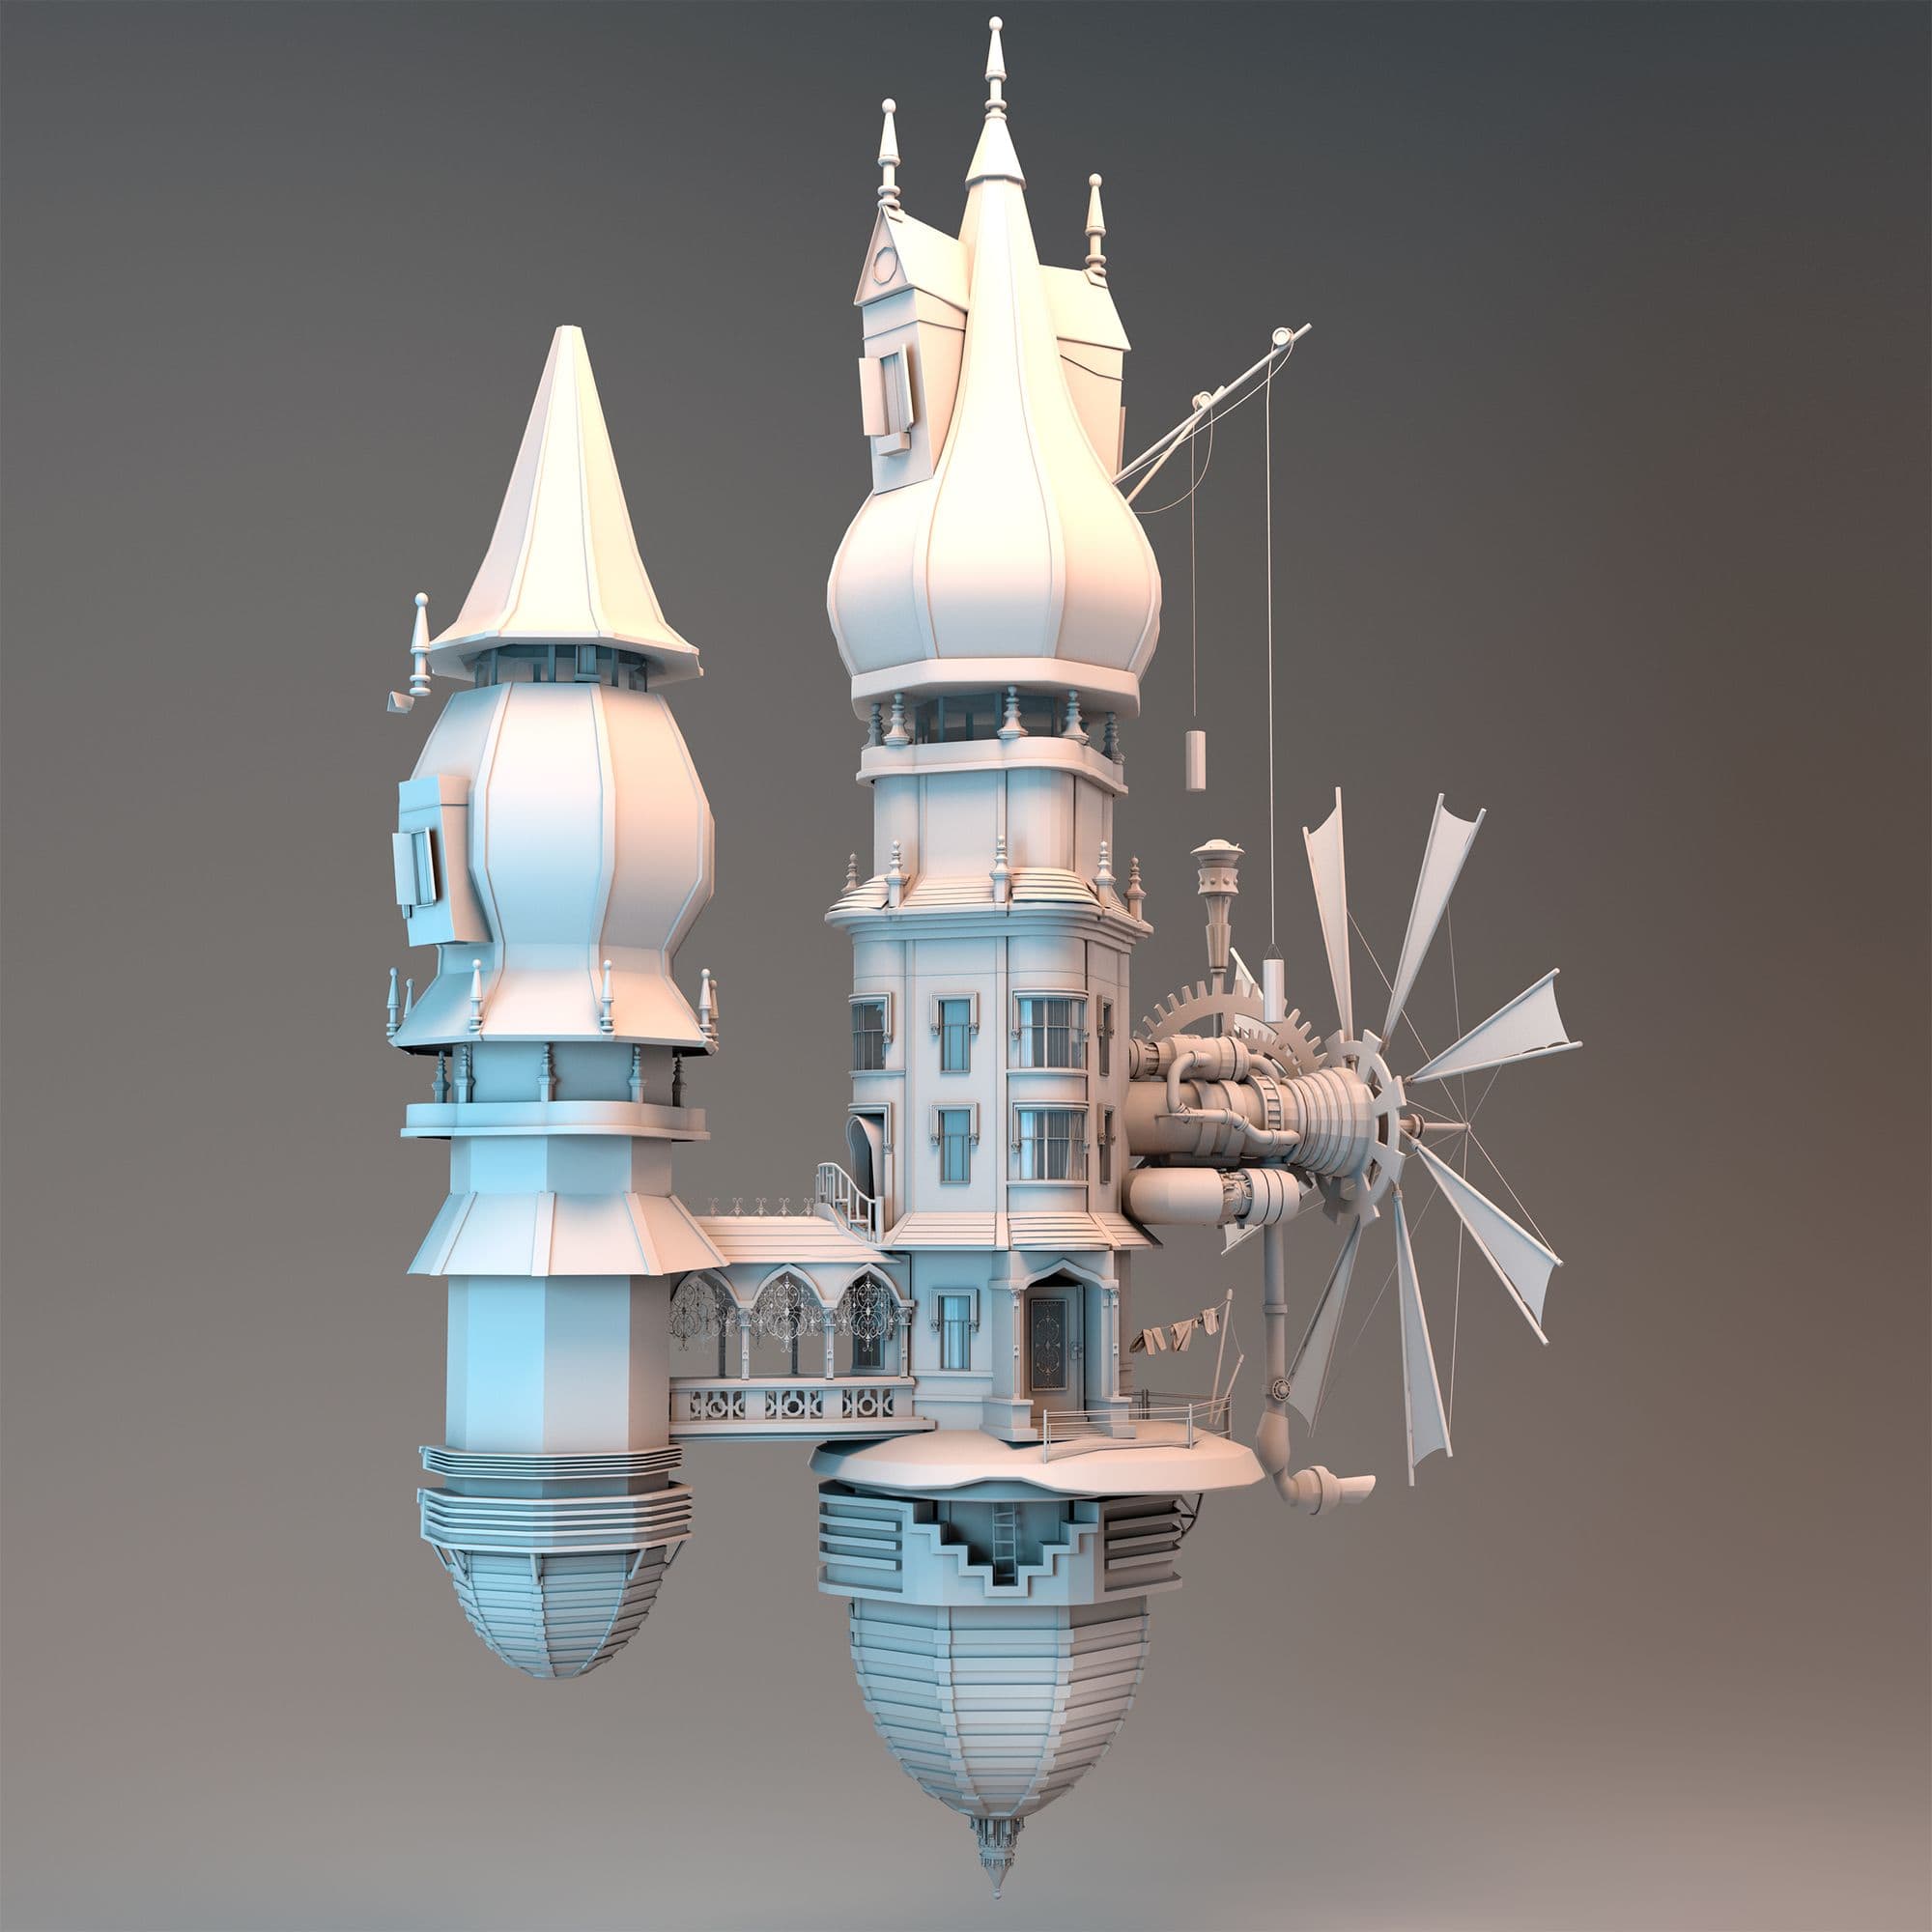
I have to say that another piece that took me a lot of time, was the engine. Following the logic of creating pieces that I could then duplicate, I created the engine section by section. I followed many different engine's references which had nothing to do with each other but somehow got me to a look I wanted.
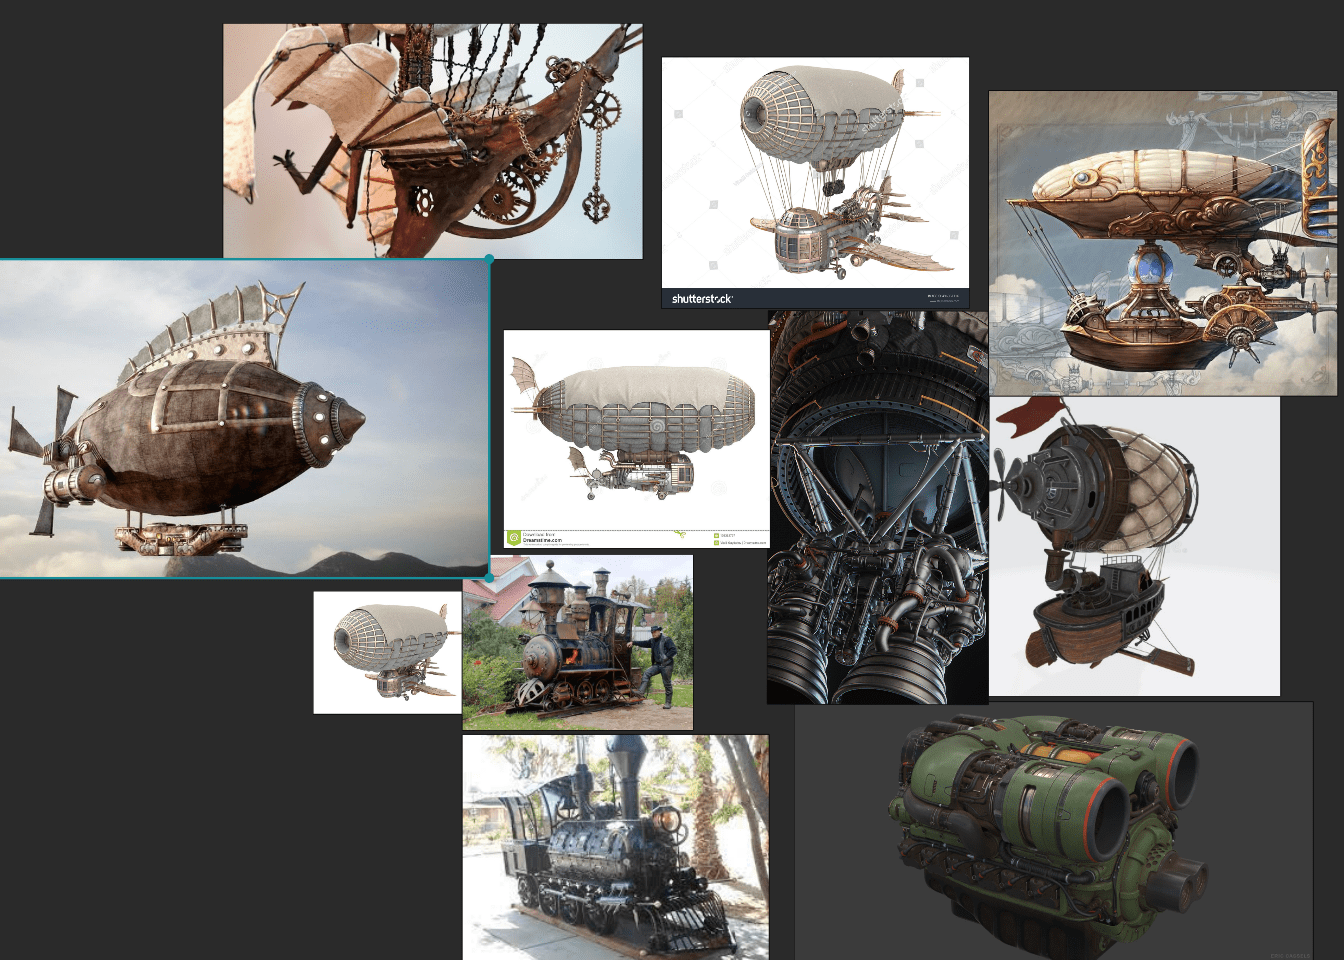
I would have liked to make an engine as realistic as possible, but honestly I haven't found references that could be adapted to my flying structure. The research for continuous references (which possibly also refer to the texture to be done at a later time) is fundamental. I notice that I couldn't design much by myself, and when in doubt, I looked for a reference: from the difference in size, to the detail of the decoration, to the inspiration of a garden rather than a window.
It is nice to have creative freedom with your own concept, but sometimes, complete freedom is not always so comfortable to follow.
The textures are made using basic materials then modified in Substance 3D Painter. First of all, I spent some time searching from good reference as starting point.
I didn't waste too much time on finishing details at this early stage. All the association of materials were made on Hypershade with some corrections and masks. I spent a lot of time defining an ideal palette to attribute to the house.
I made many variations to decide which one seemed more original to me.
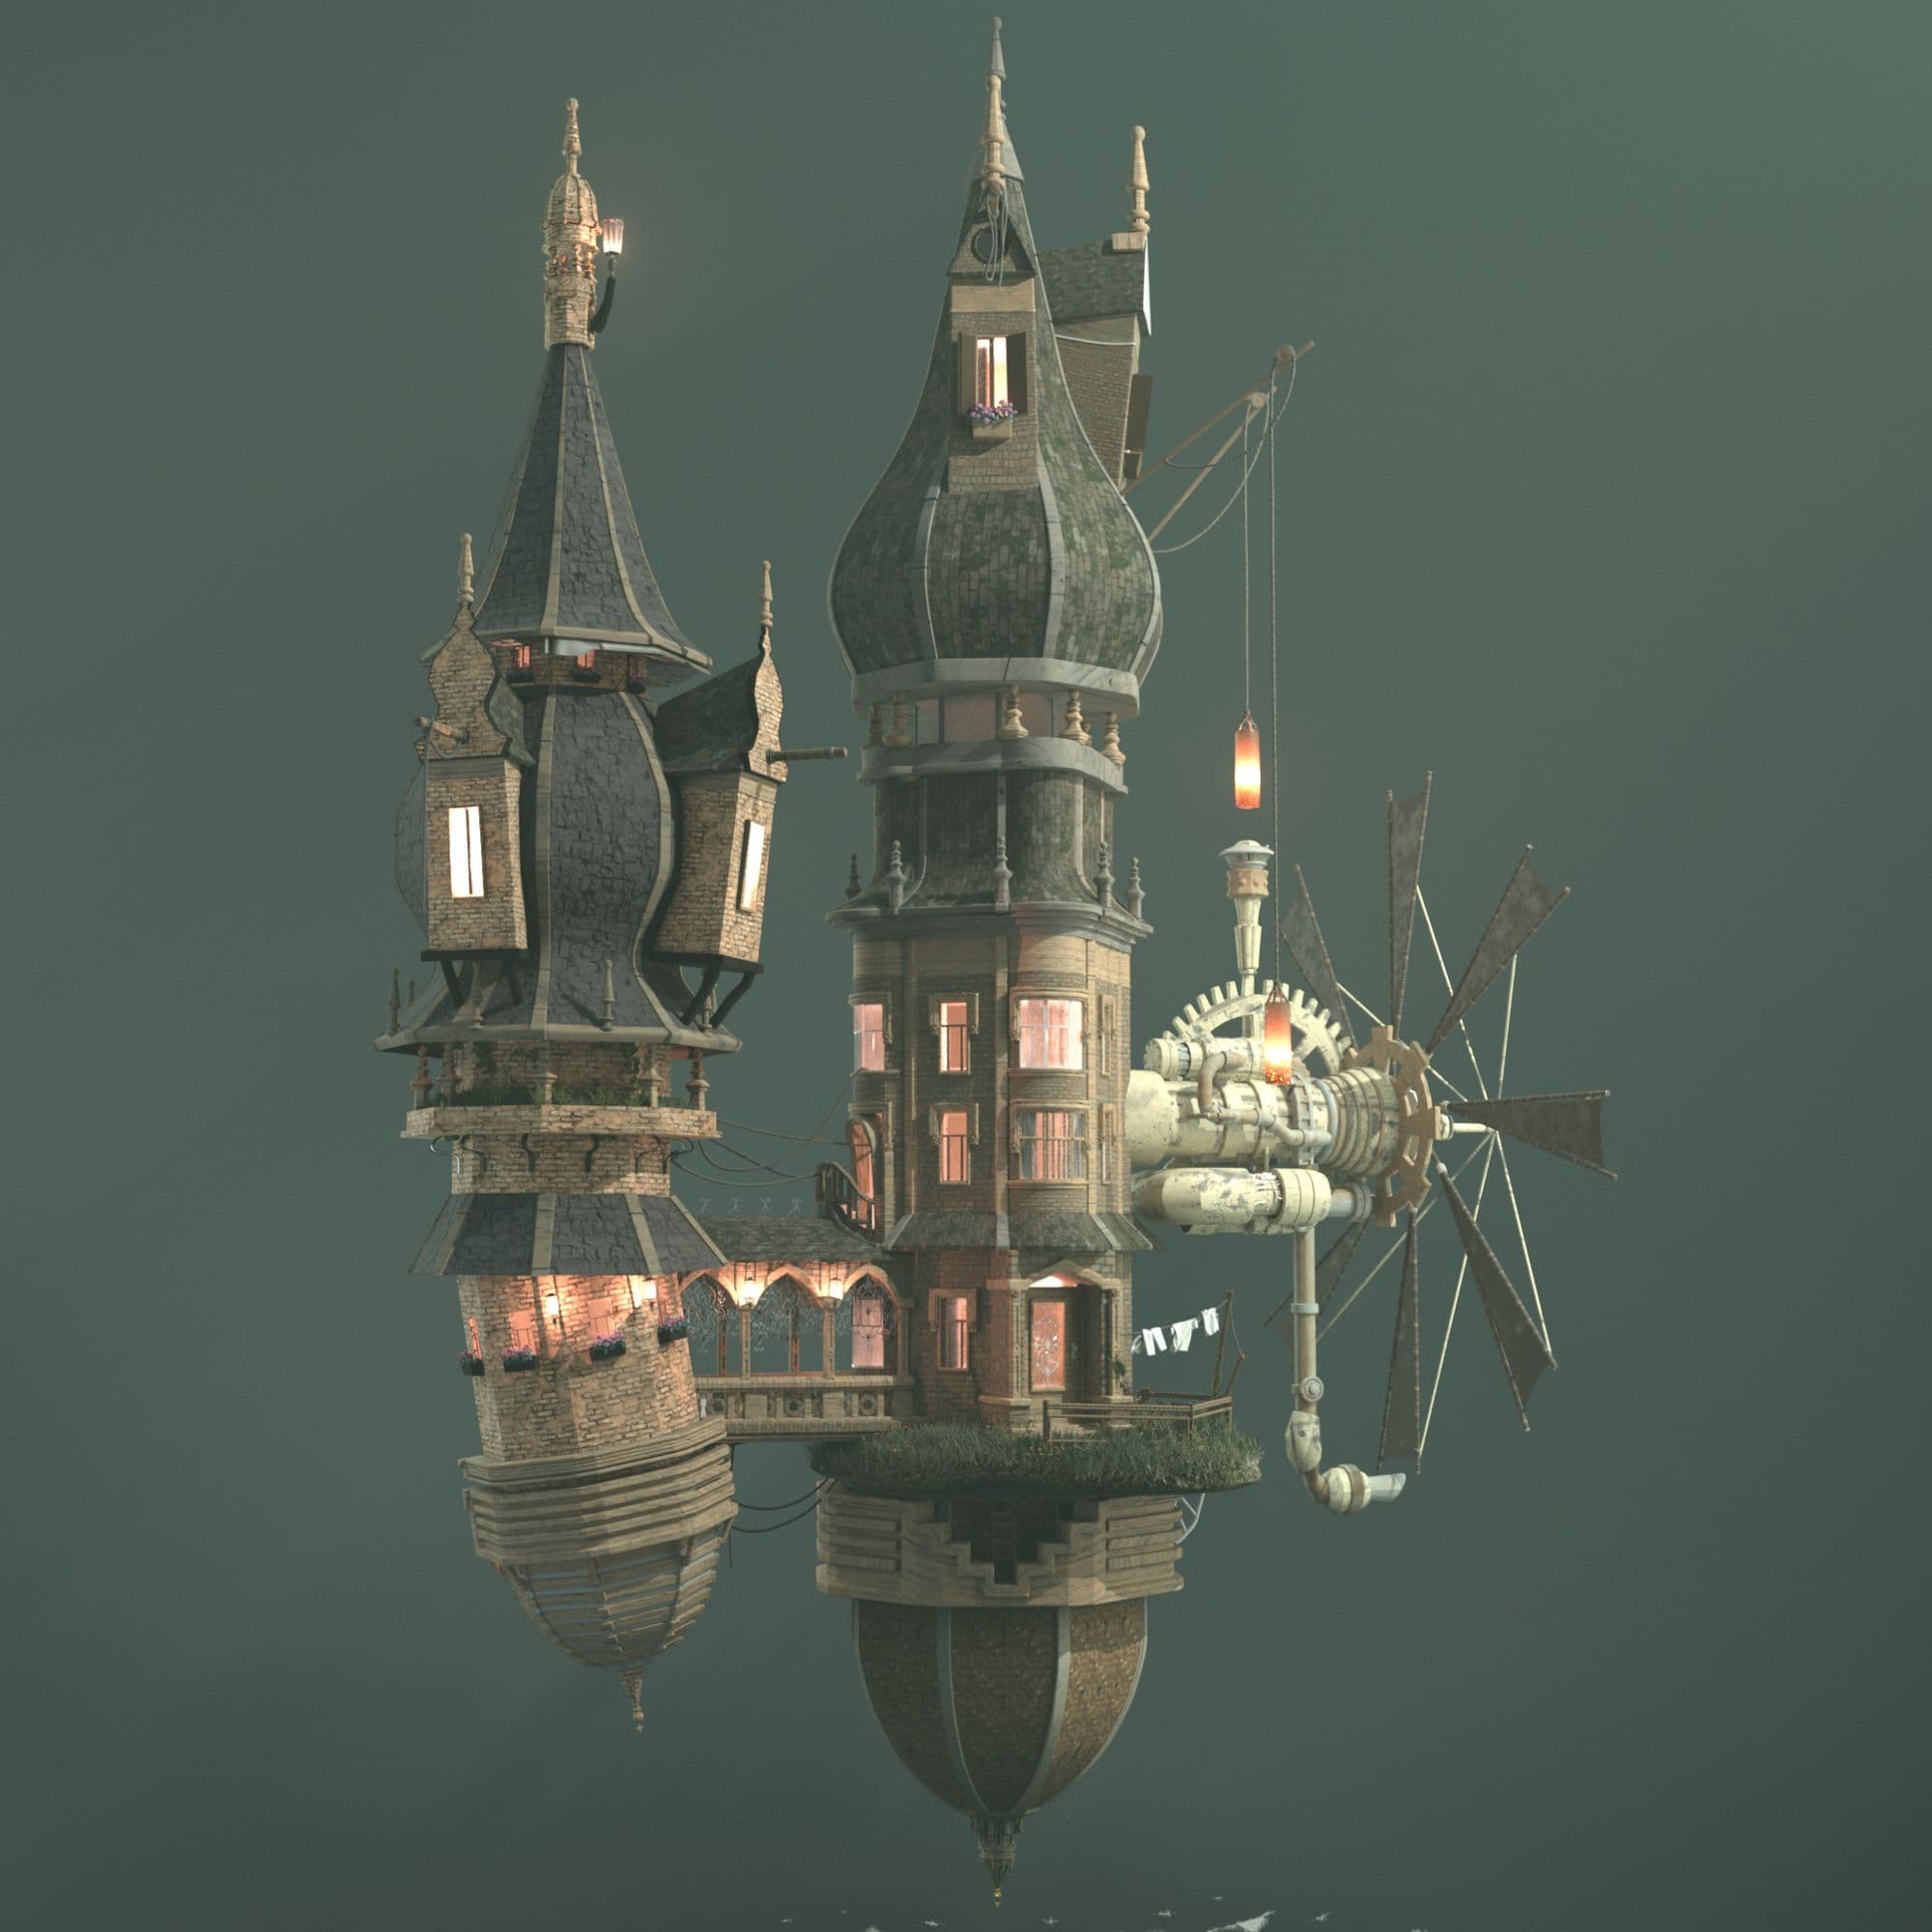
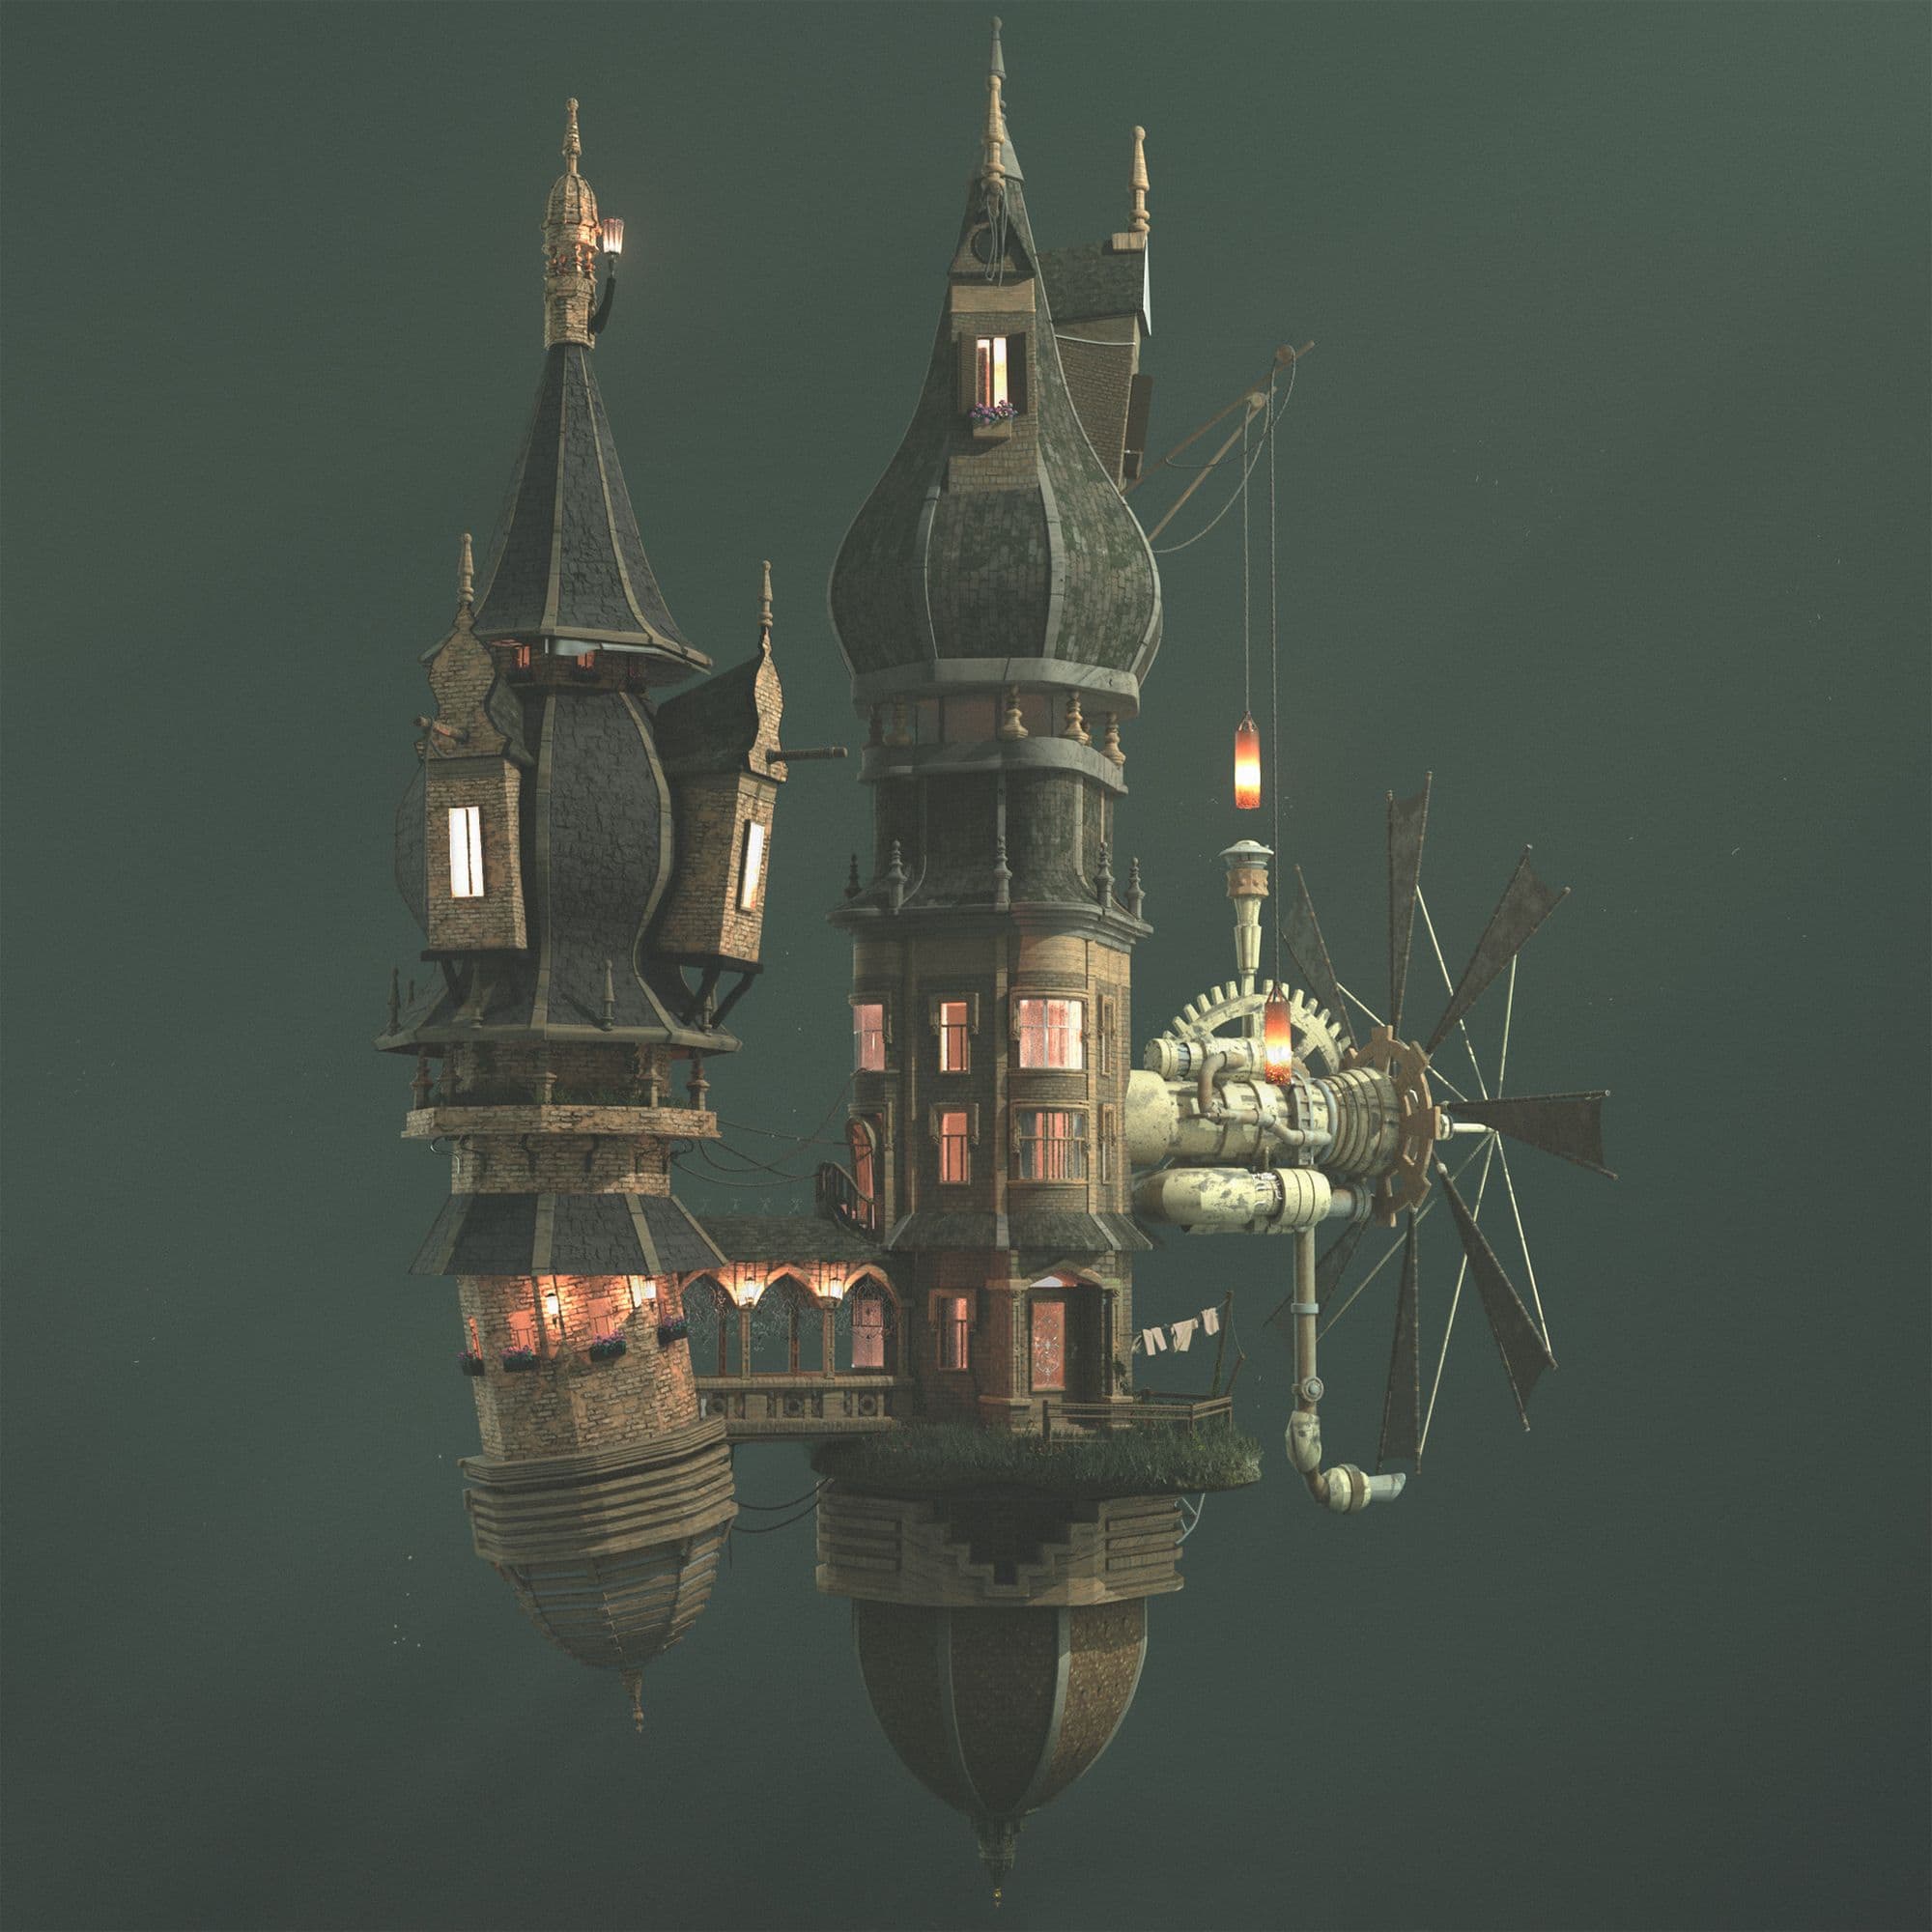
Below a list of the palette variants that I had imagined:
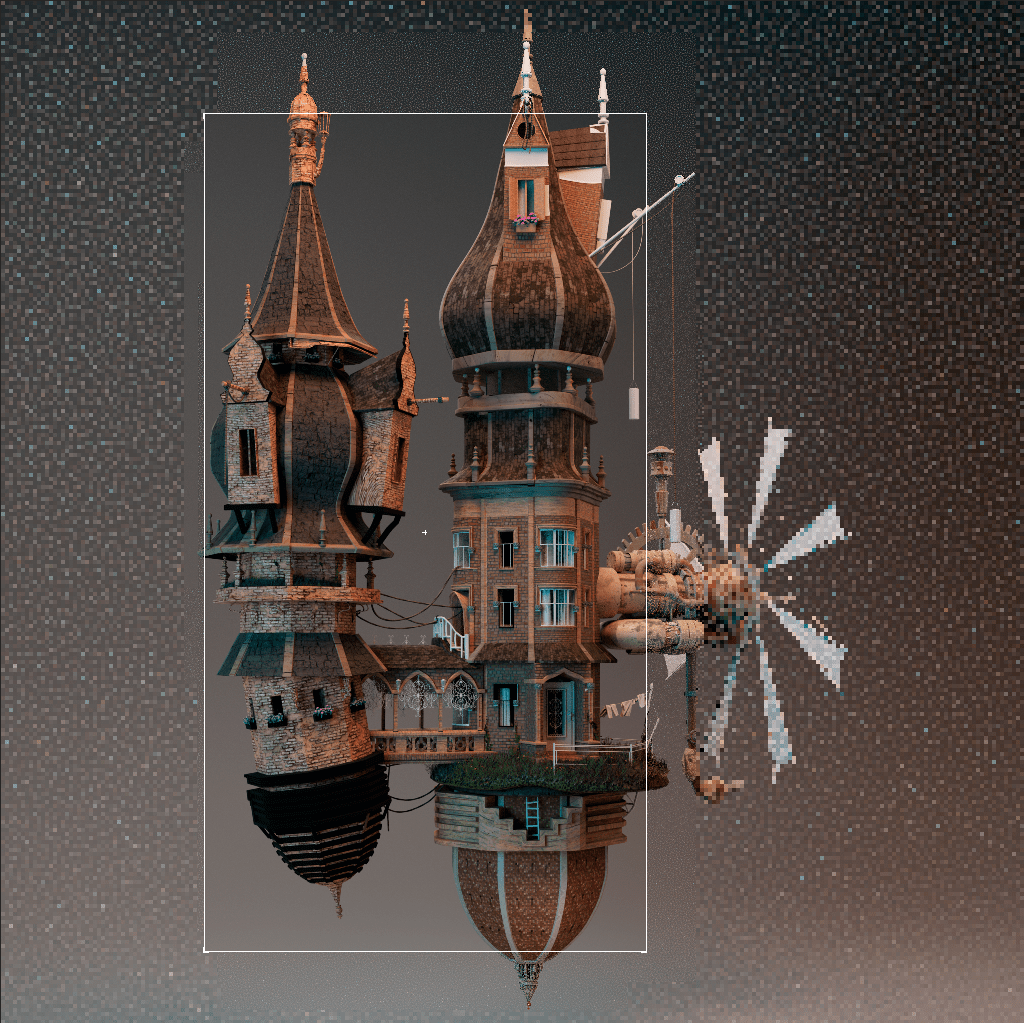
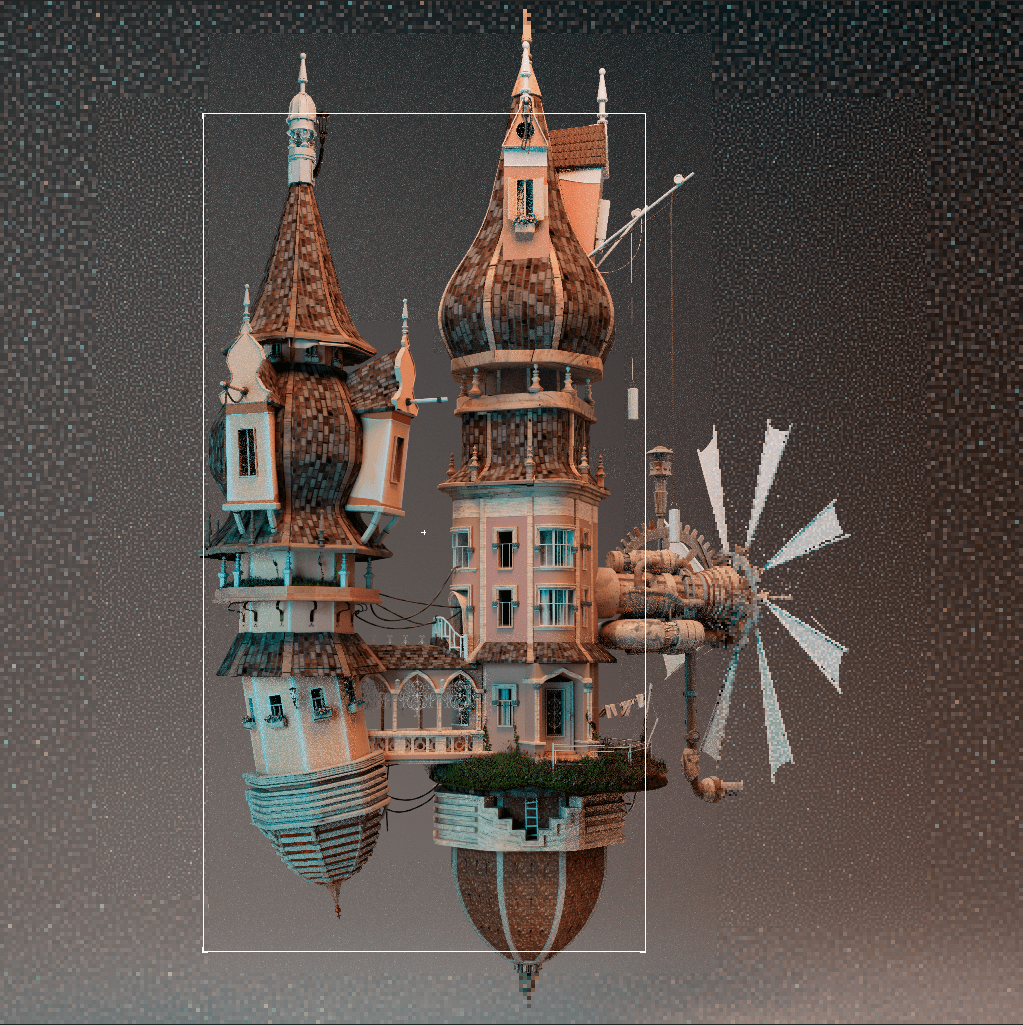
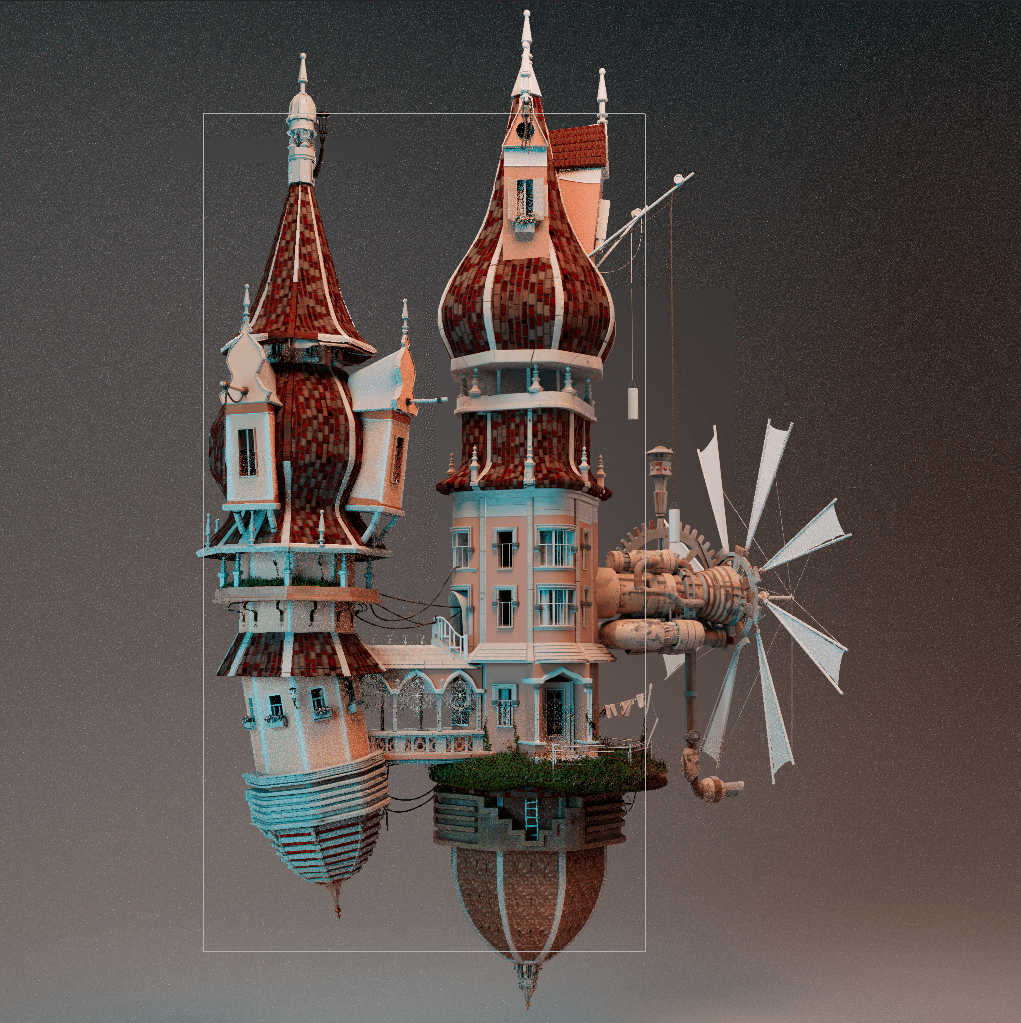
This was the first time I worked on an environment, so creating the palette variants seemed necessary to me. I made them by sending the entire scene to Arnold with the association of materials from time to time. At this stage, I hadn't yet given deep thought into the lighting - that was next to come!
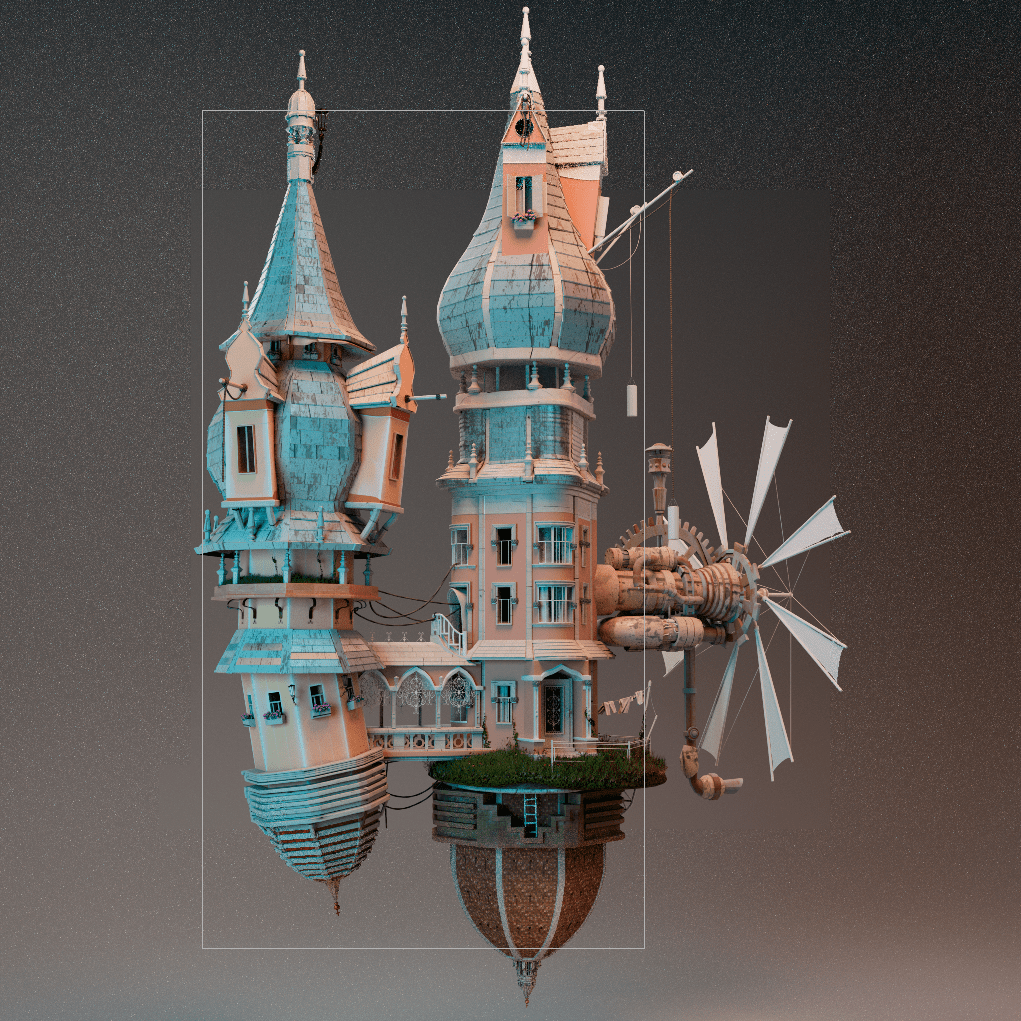
Once the palette had been defined, it was time to choose the scene's feeling. I consulted the @colorpalette.cinema, choosing which lights to assign depending on the texture.

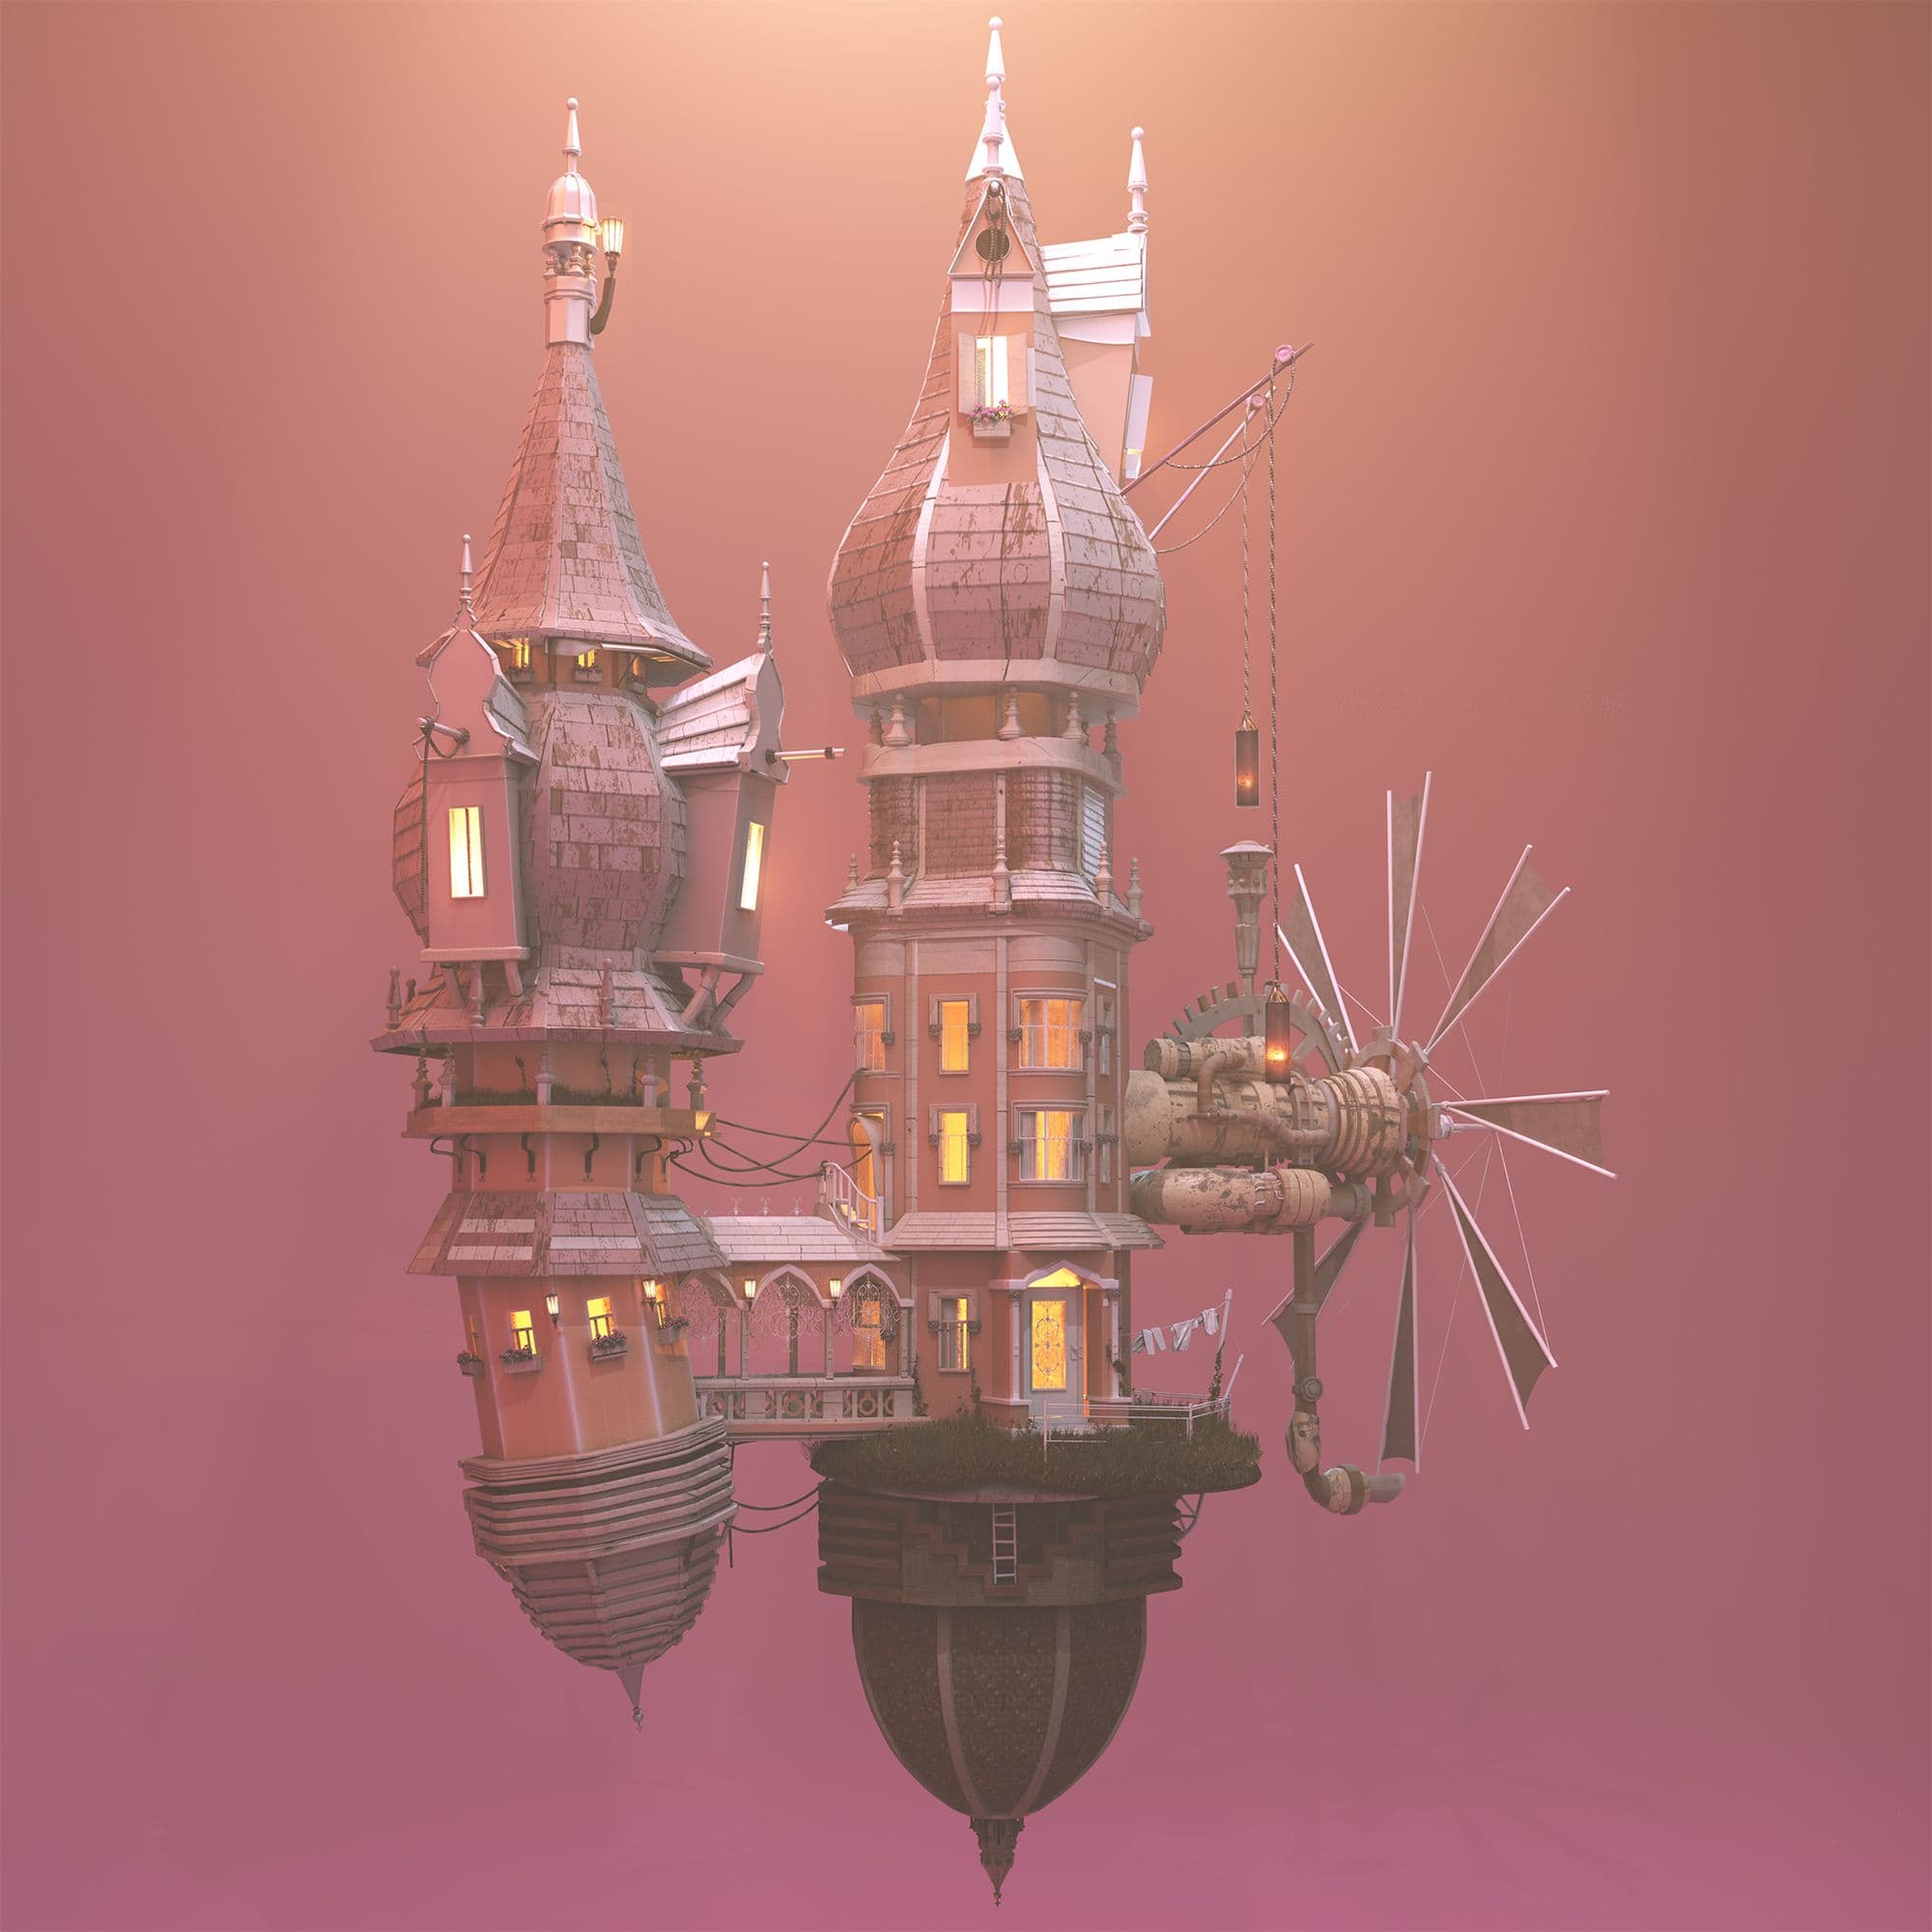
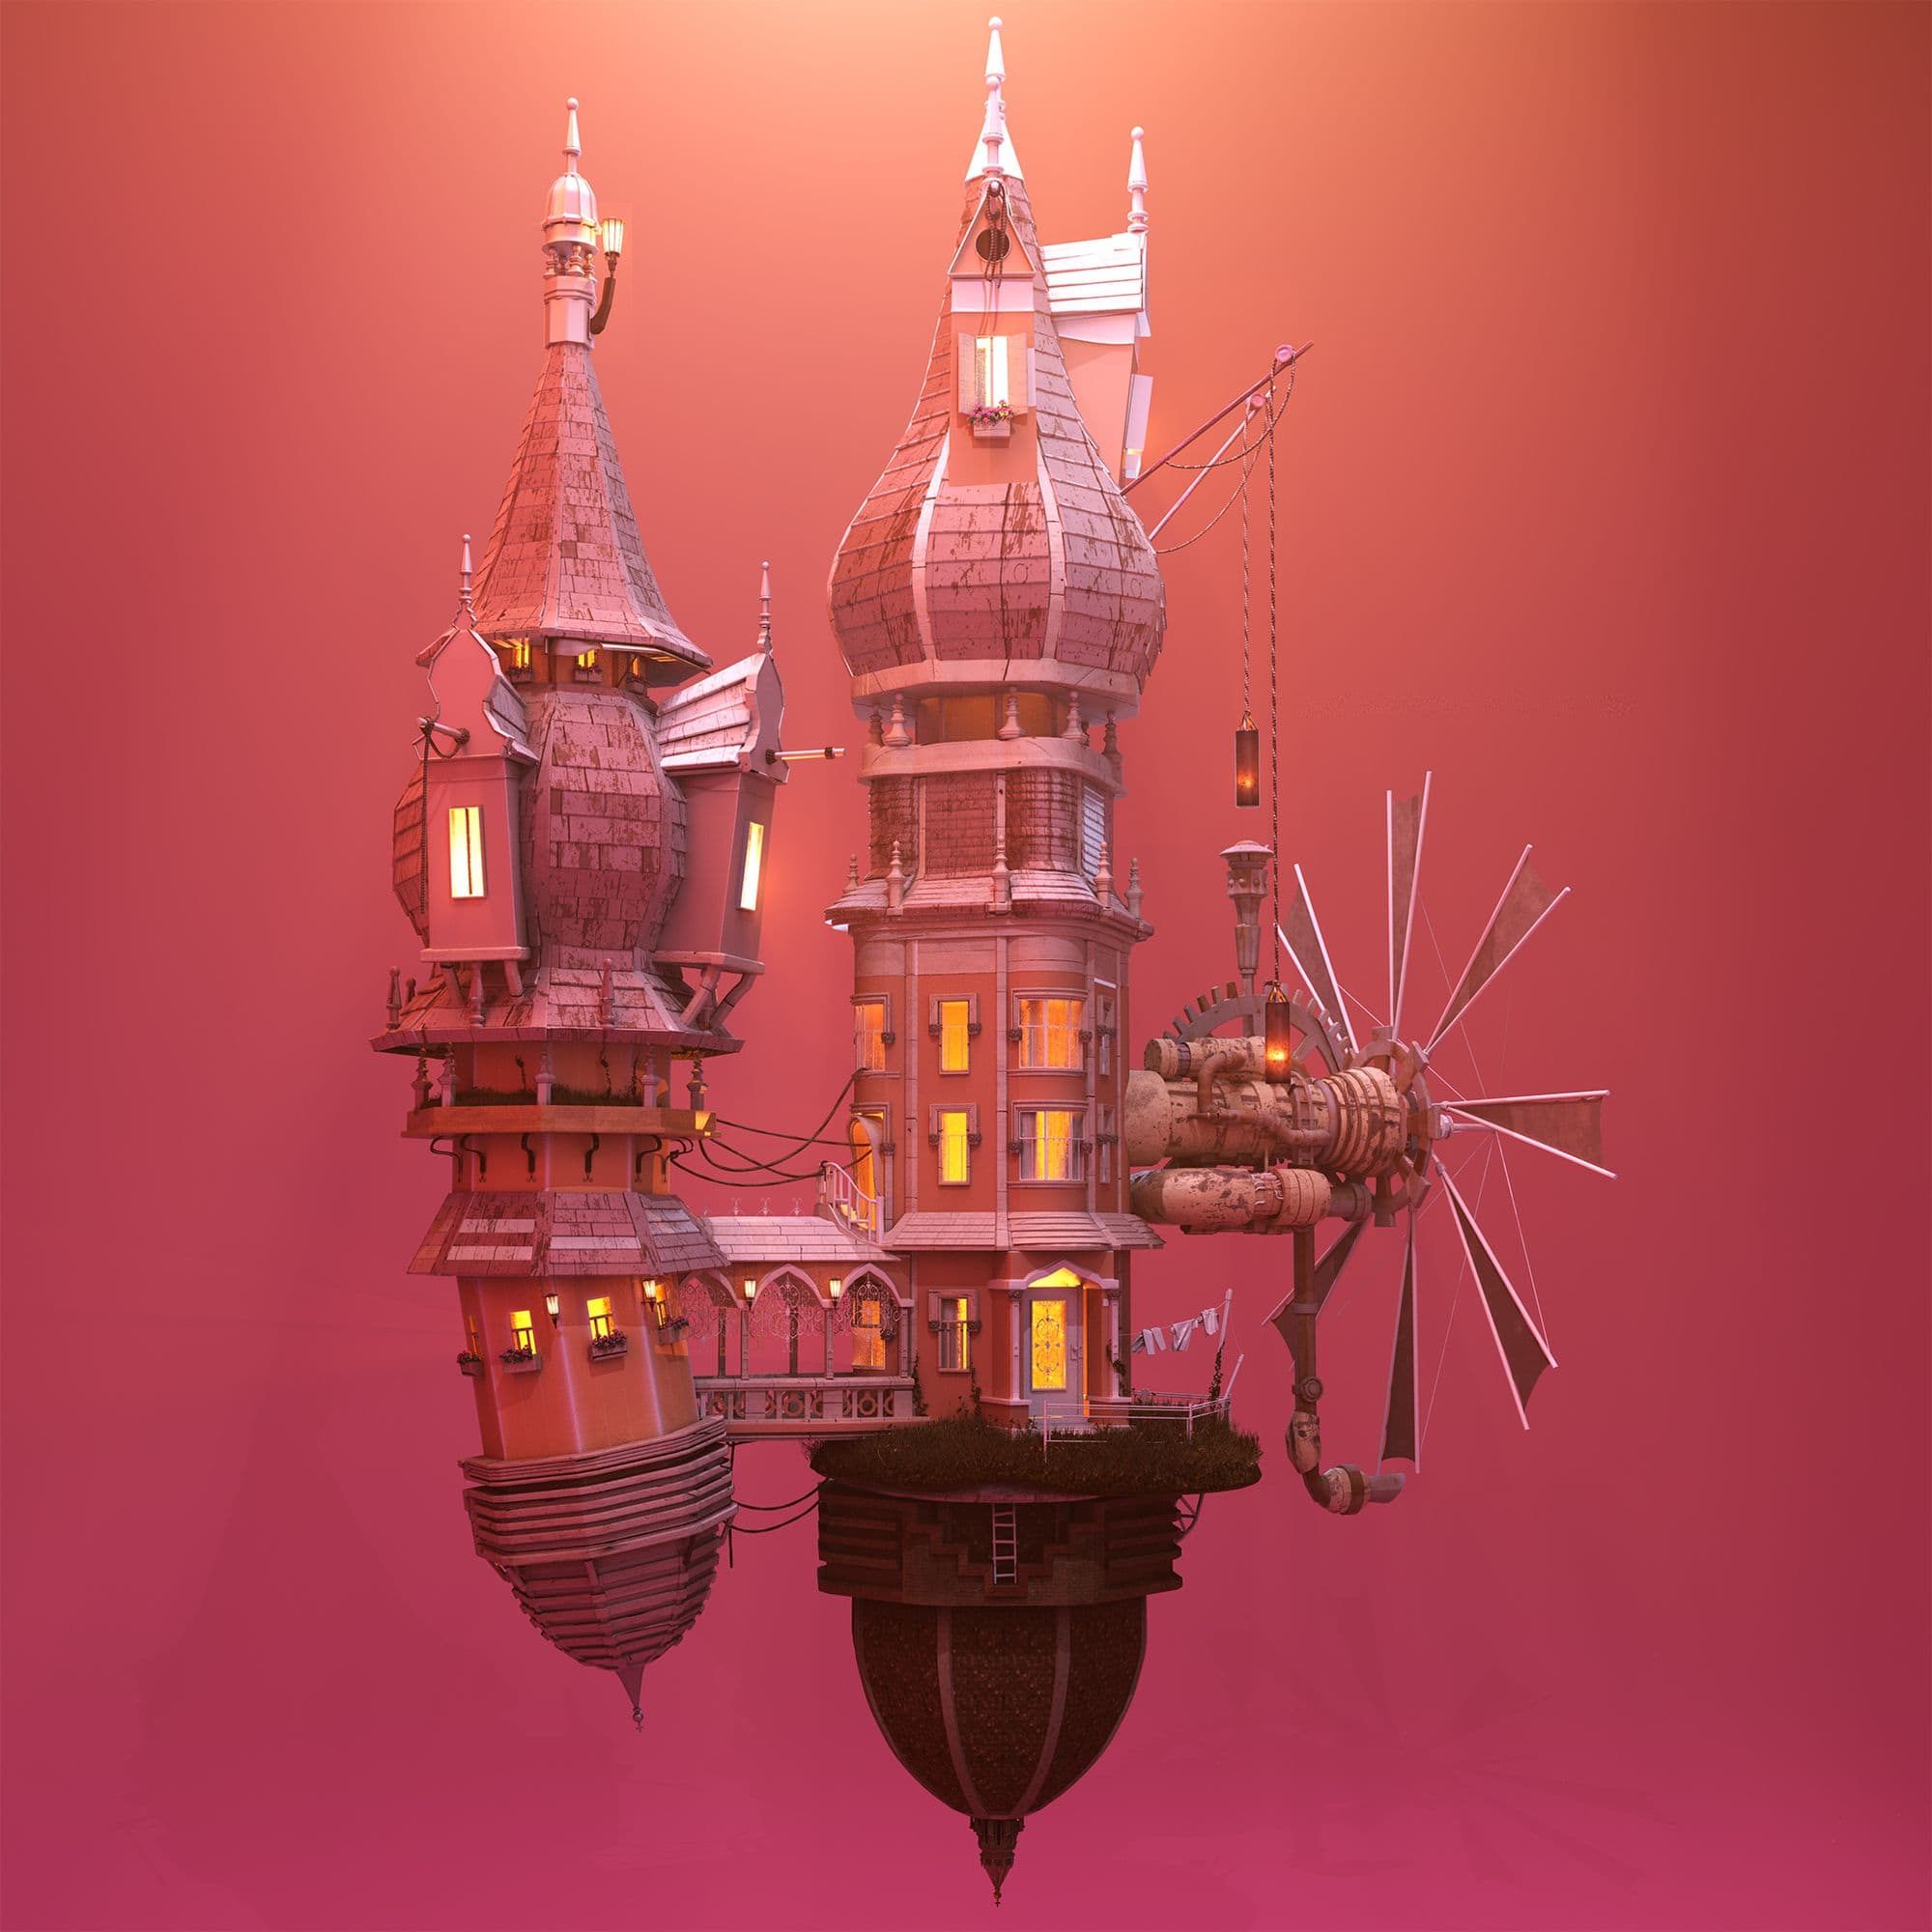
I thought of two possible alternatives: two textures and two lighting setups.
The palettes were taken as a starting point. I asked a colleague of mine (Rob Spartà) to take care of the lighting, based on the references I had seen.
I wanted to create two completely opposite environments, which refer to two different tastes and styles. I also did some post-production in post render.
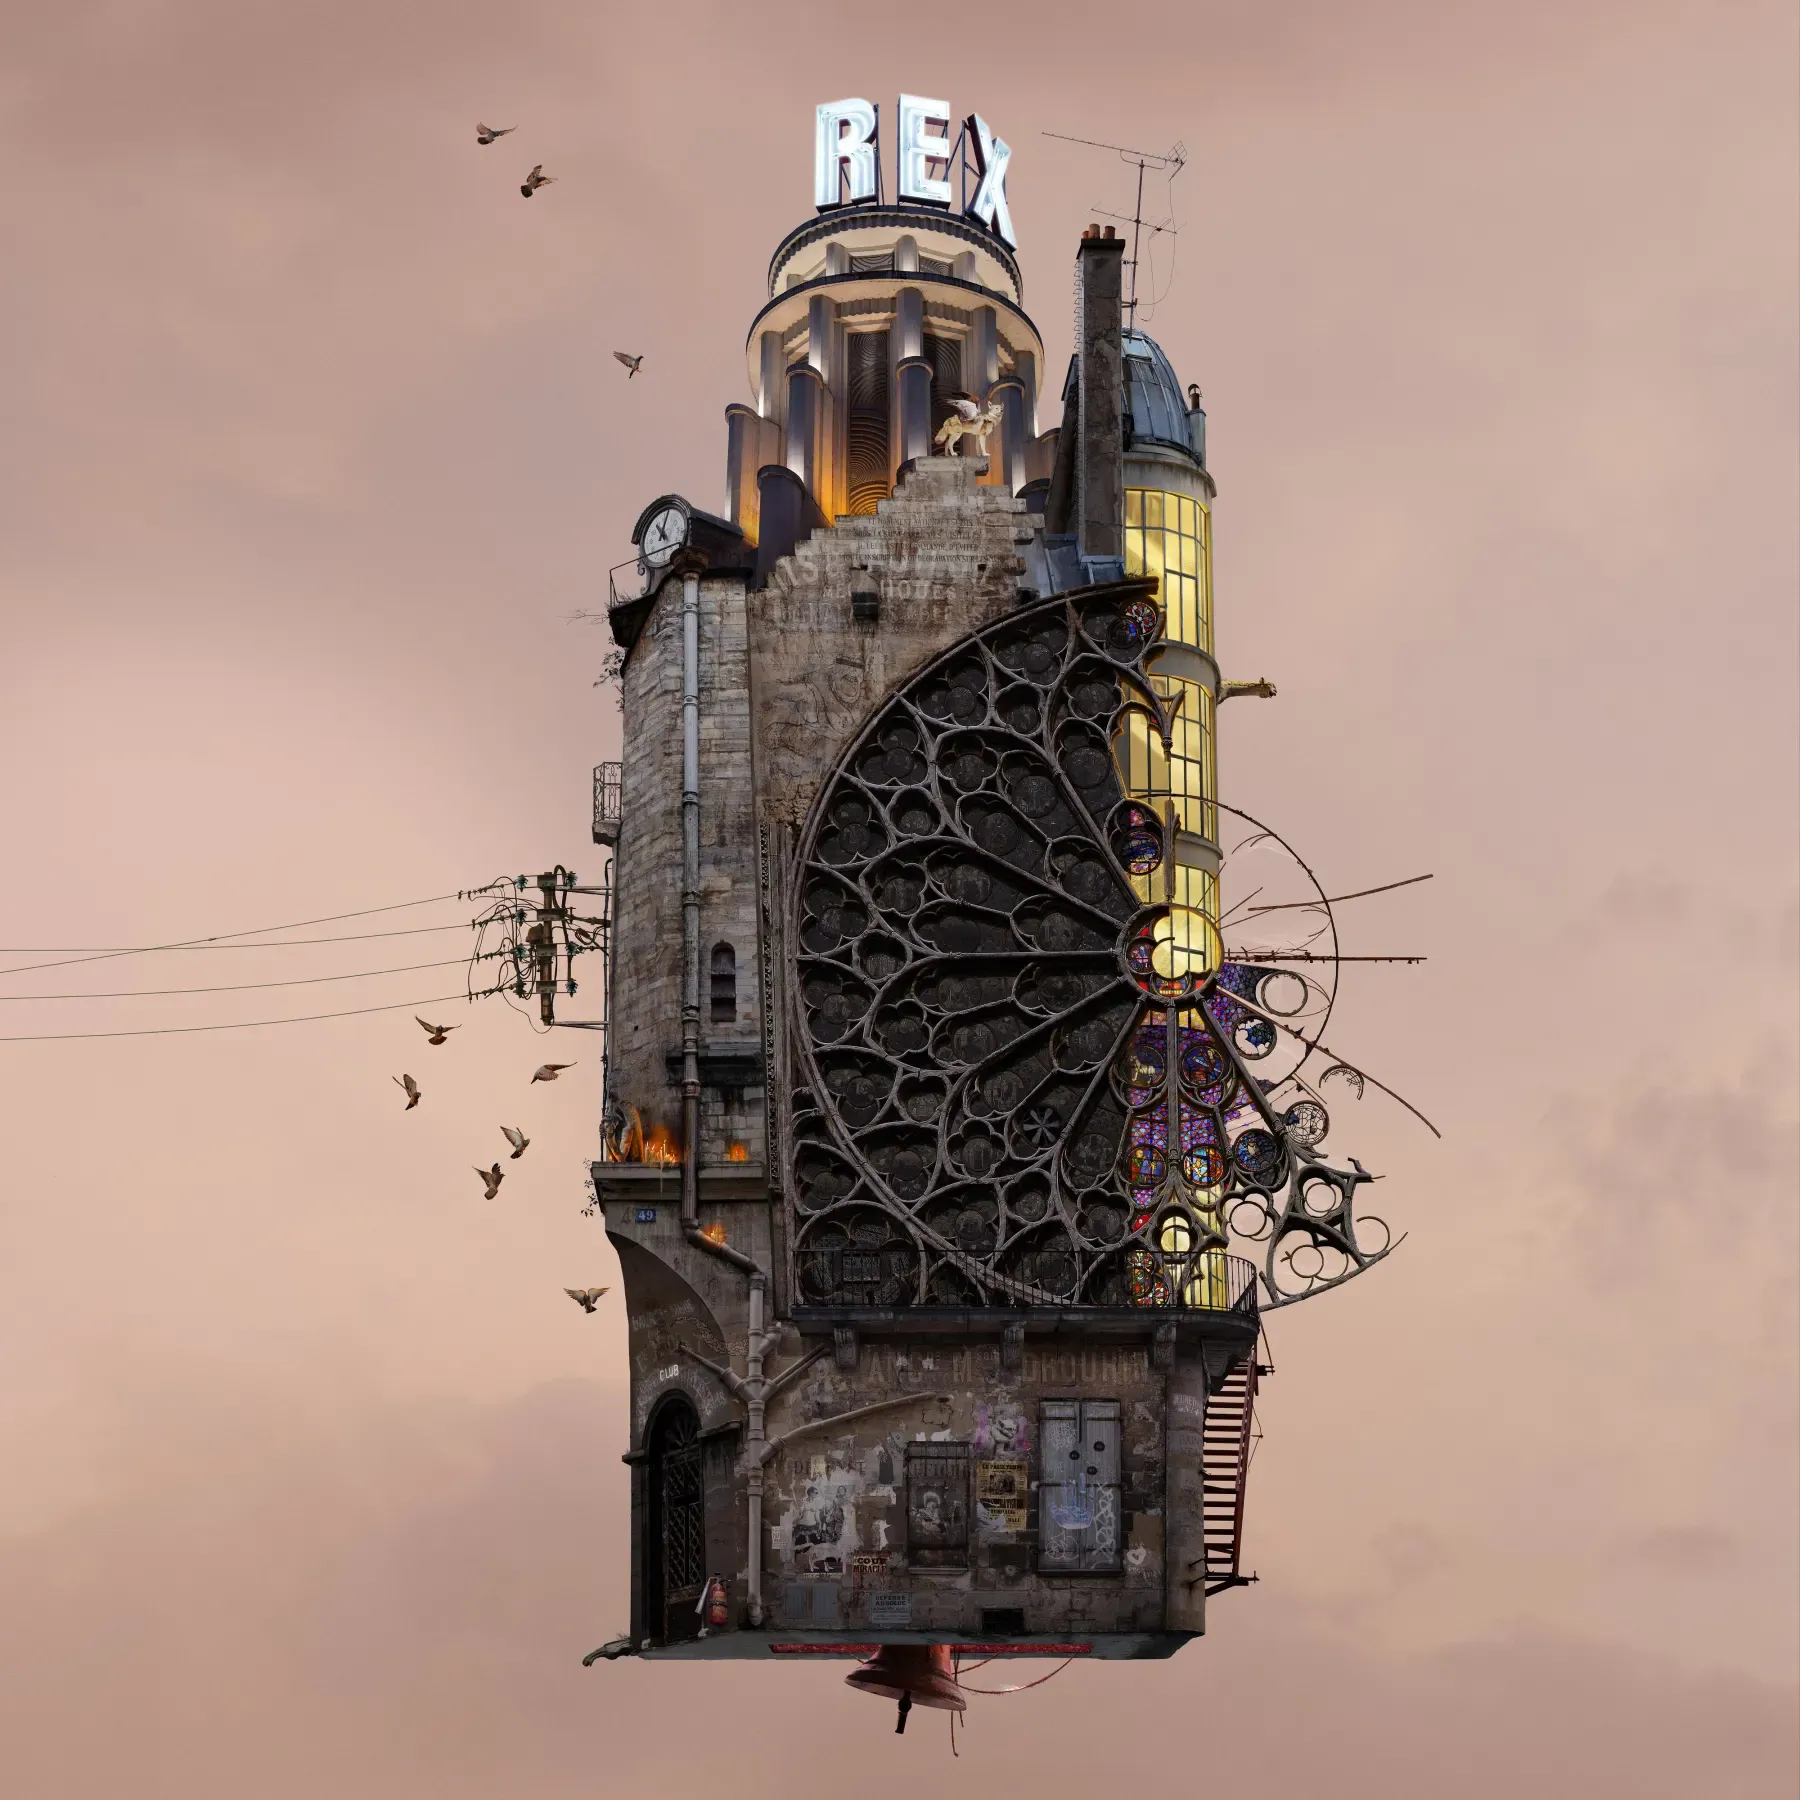
Below are the renders and the post comp result:
I am very happy with the final result. My Steampunk house (Steampunk and not only...!) was finally ready!
...well, almost ready, perfectionists always go back to where they had fun.
Thank you!
You can find more of Emma's work on The Rookies, ArtStation and Instagram.