The Treehouse: Creating 3D Environment Art Using Maya and Zbrush
If you are looking to create your own organic 3D Environment using ZBrush and Maya, this article is for you!
If you are looking to create your own organic 3D Environment using ZBrush and Maya, this article is for you!

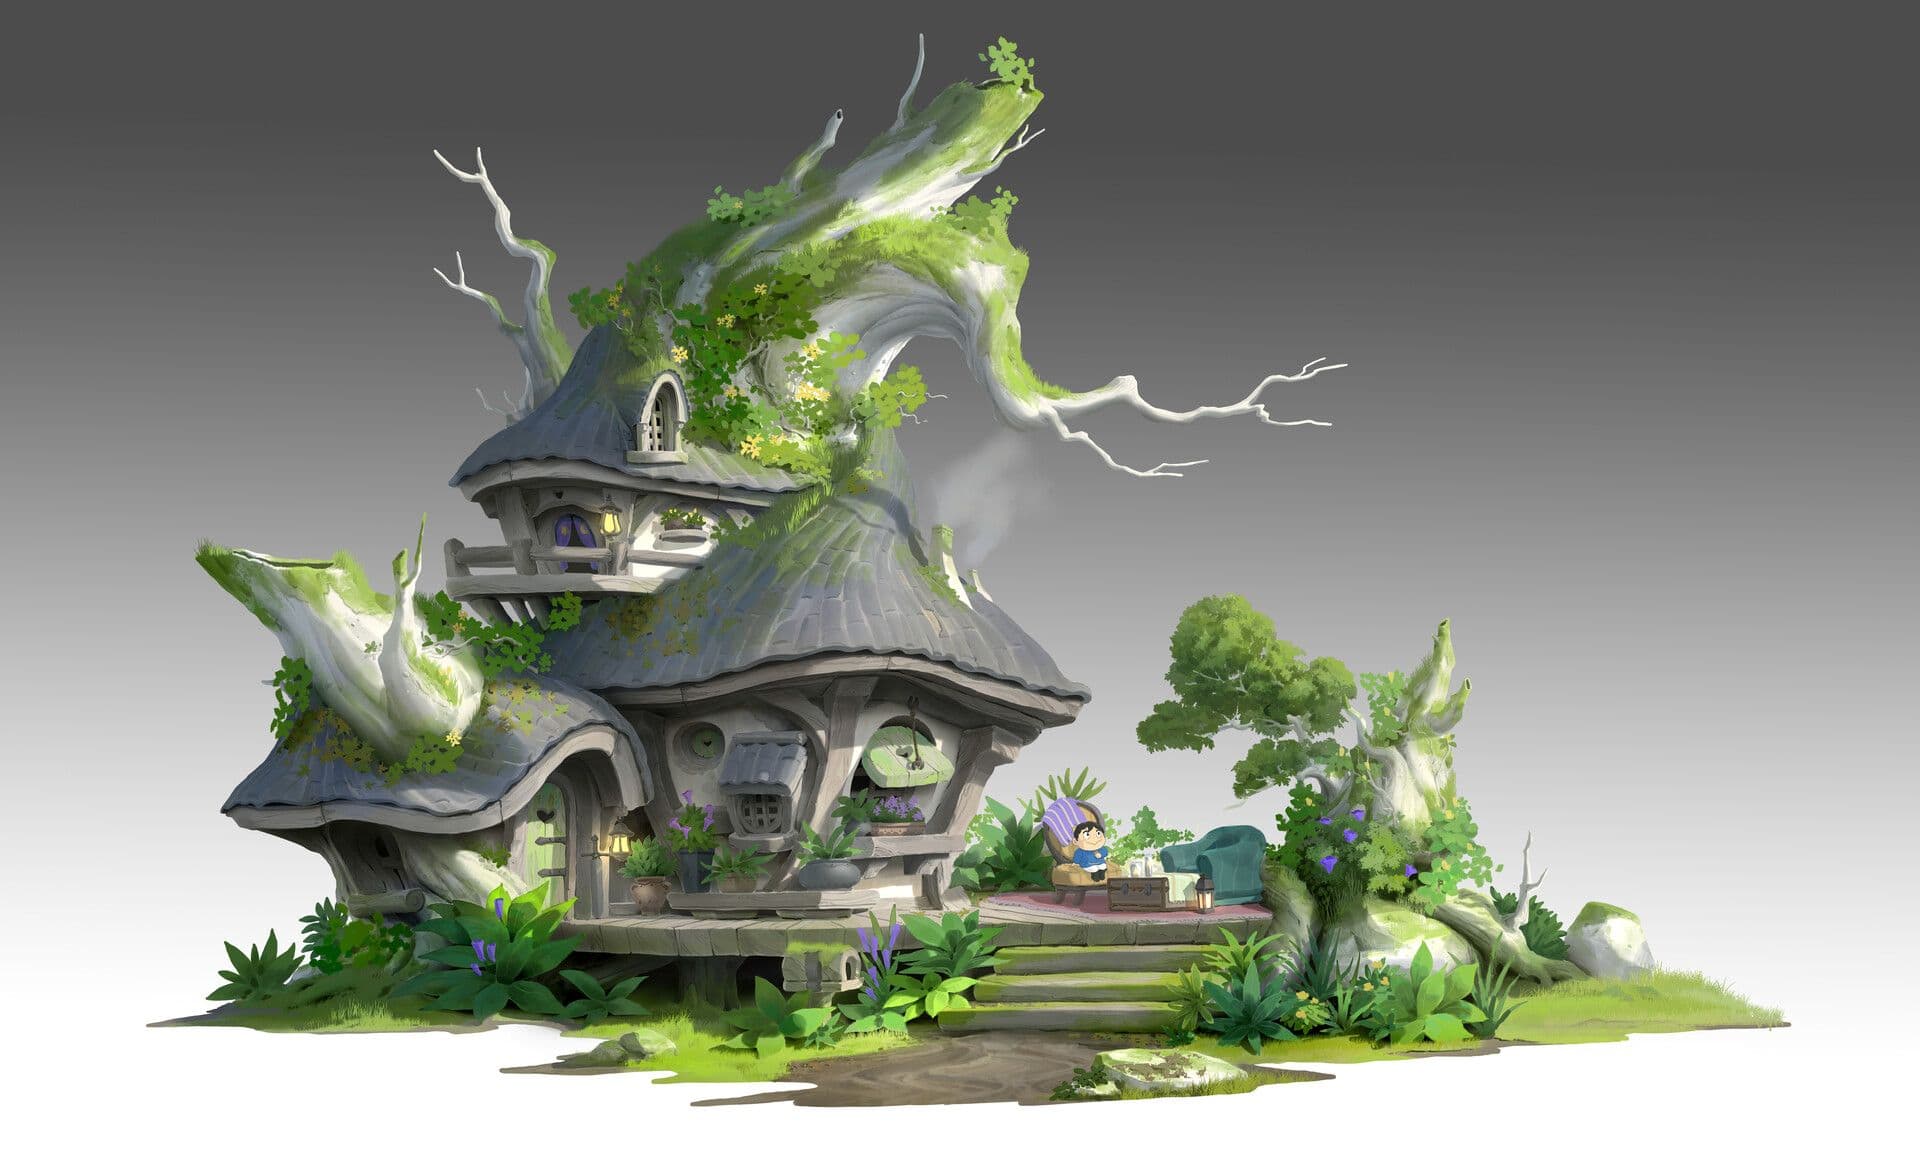
AnimSchool student, Malika Vododokhova, took on a project to build on her organic modelling skills. The Treehouse features in her Rookies portfolio, and showcases her use of Maya and ZBrush to create a 3D Environment.
If you are looking to create your own organic 3D Environment, this article is for you!
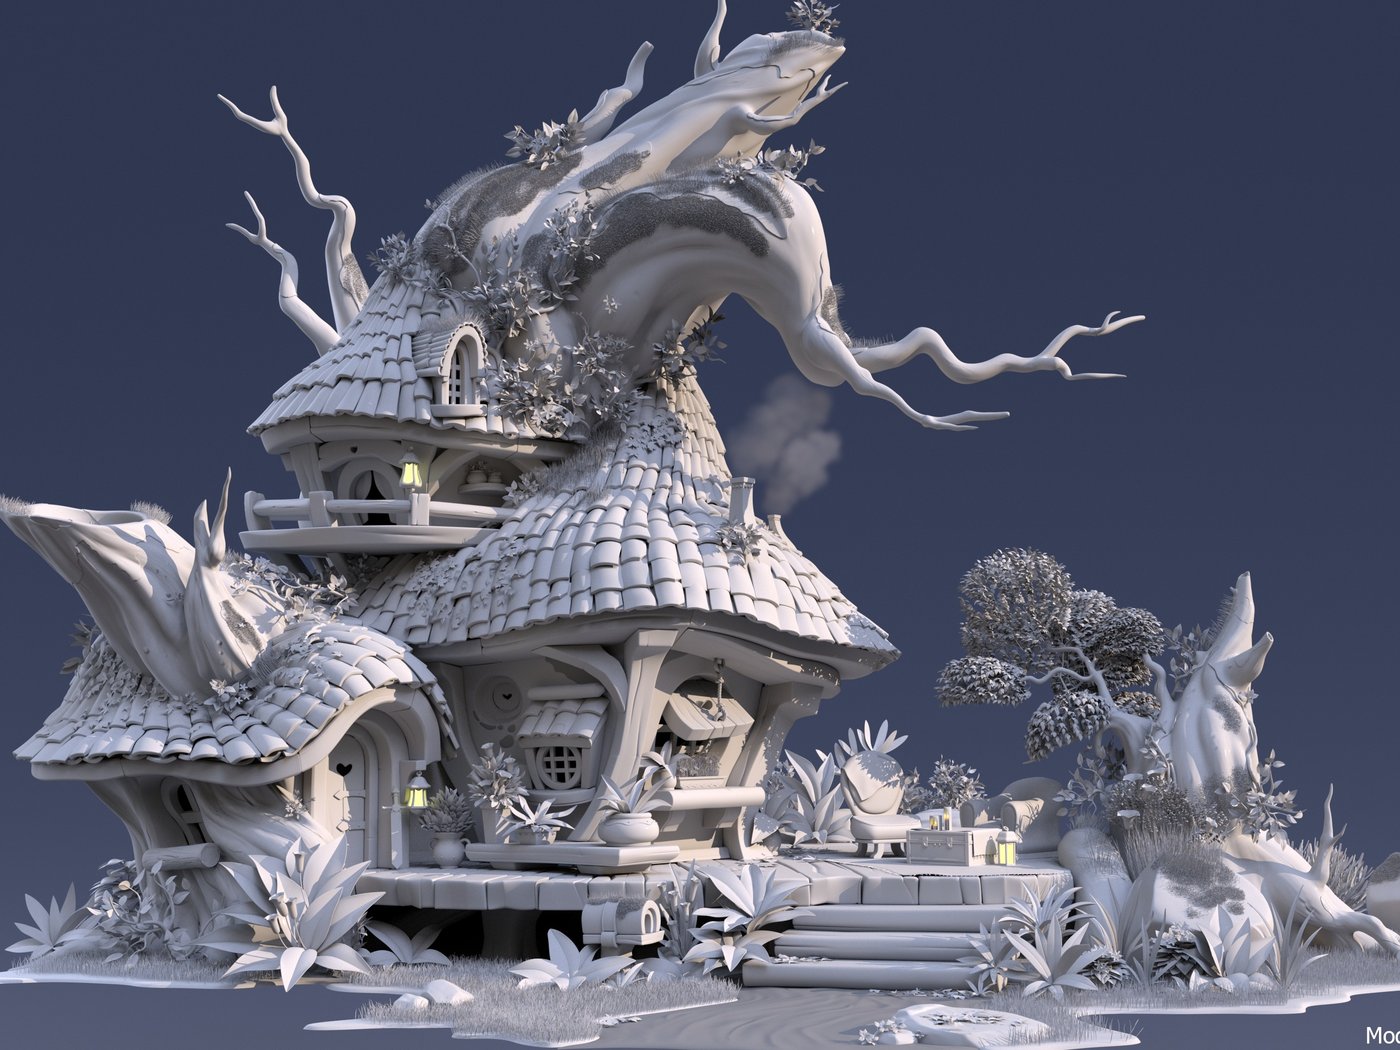
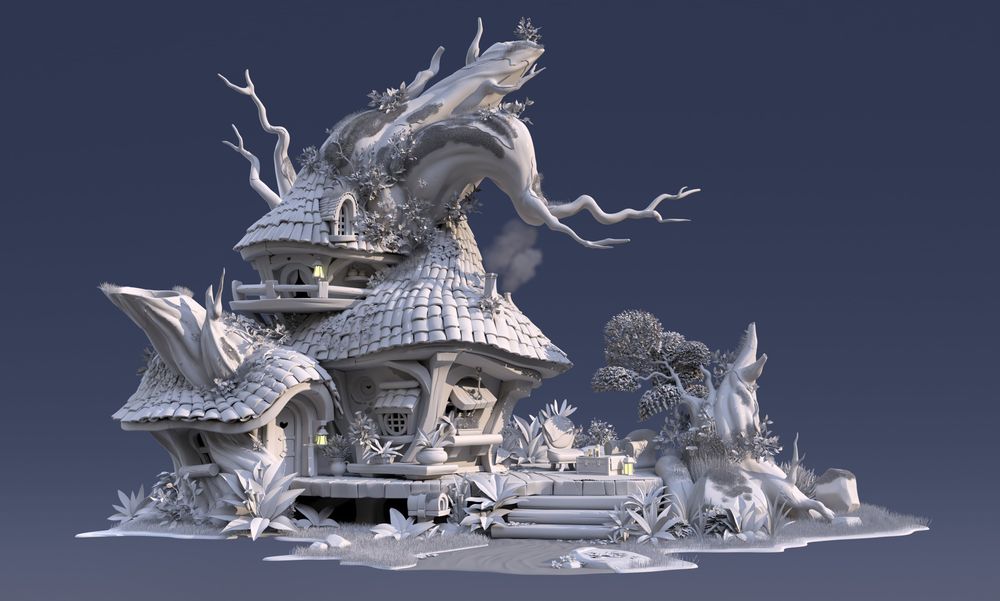
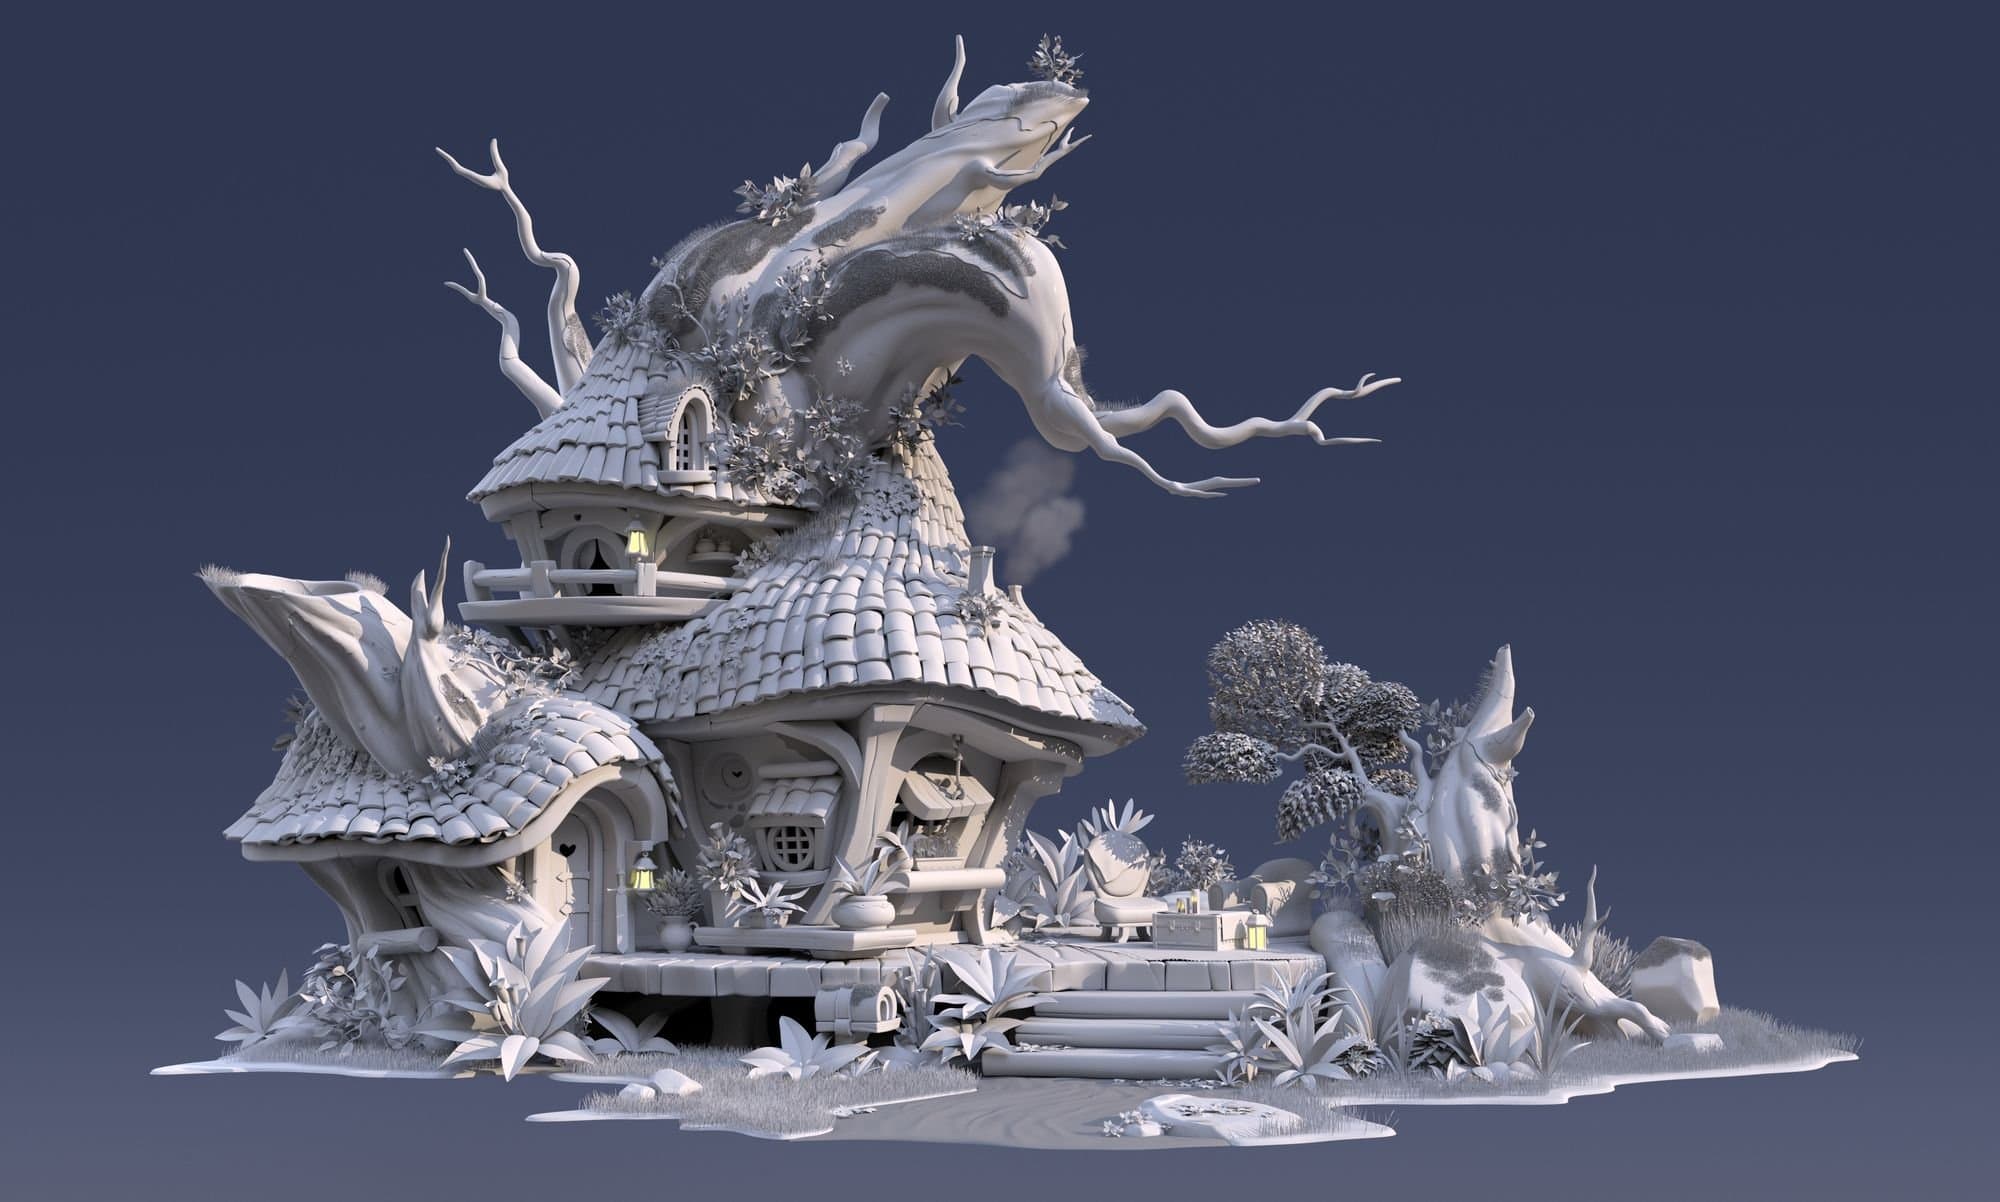
I created the Treehouse model during the Environmental Modeling class at AnimSchool. My main focus for this course was to learn how to model organic objects. I chose the Treehouse concept art by Yang Junchao because it fully met my search criteria. There is an abundance of greenery, wood planks, stones and much more.
I would like to thank my instructor, Koji Tsukamoto, for his guidance and feedback that helped me achieve the final result. I learned a lot working on this challenging project in this course, and in this article, I would like to share my workflow.
To achieve the end result of this model, I leverage several tools, plug-ins, and software:
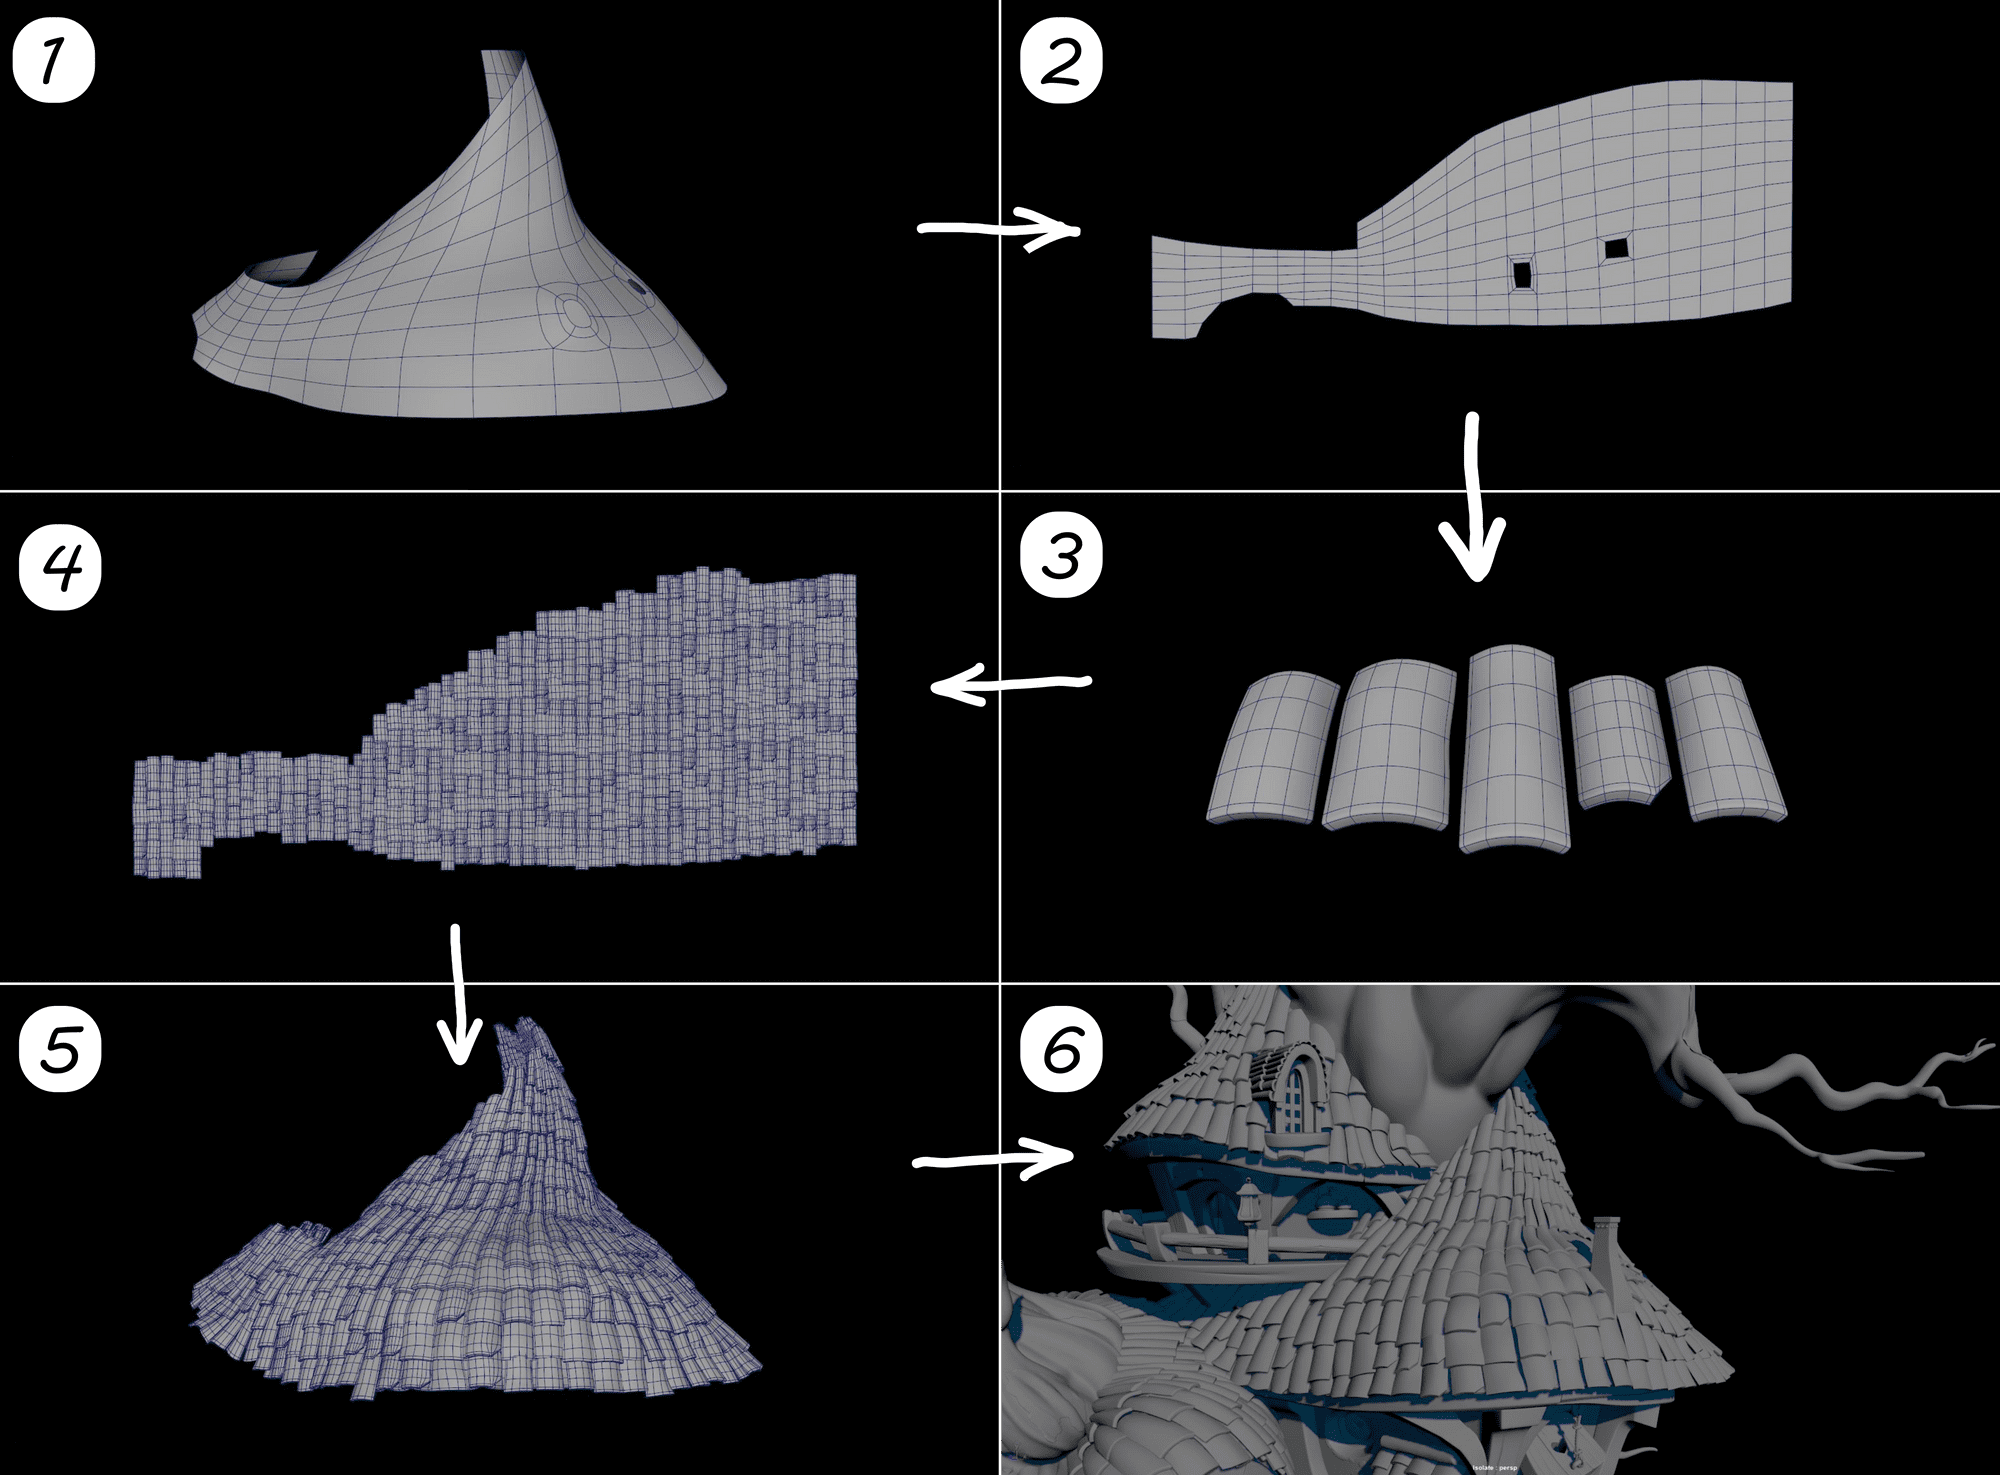
First, I explored the design and broke up the complex concept into small blocks that made my life easier in terms of focusing on separate parts.

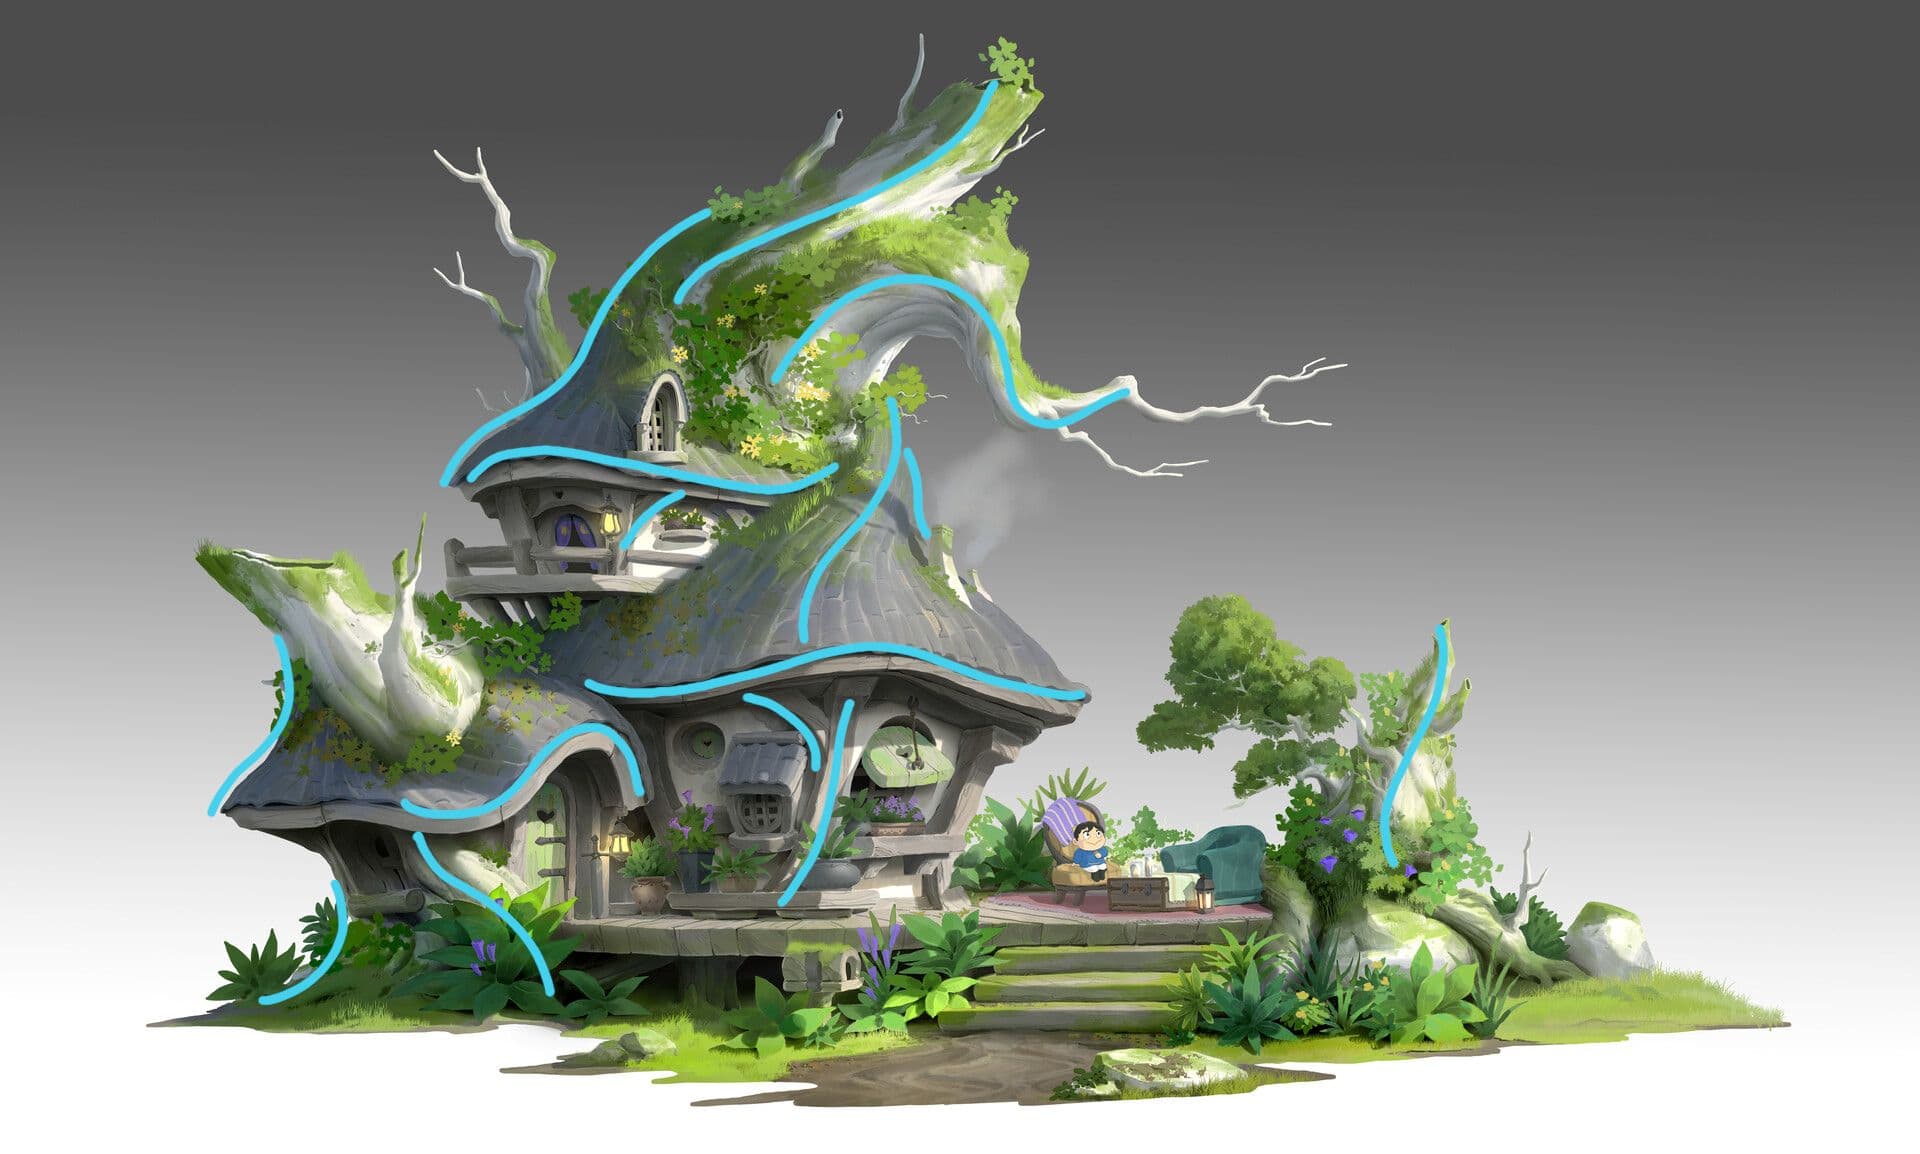
I tried to understand the shapes and realised that this design has mainly soft, wavy lines and transitions. Thus, I kept that in my mind during the working process.
Next, I blocked out the main shapes using simple geometric figures such as cubes, cylinders and spheres to match the concept art. One of my instructors from AnimSchool said that a nice blockout was 50 percent of the good result. I never miss this step.
The blockout stage helps you to better understand shapes, scales and objects' positions in the environment.
I changed it several times before I found the right forms.

The roofs were one of the tricky parts of this model because they have undulated shape from all angles, and taper towards the top. In that case, I created a basic shape of the roofs, which reflected the concept, and using a free tool - MopKnit tool, I created an unfolded flattened version. I also modeled a few roof tiles. Using the MASH tool, I made roof tiles on the flat unfolded version then I used the Wrap deformer and transferred the roof tiling to the original base shape.
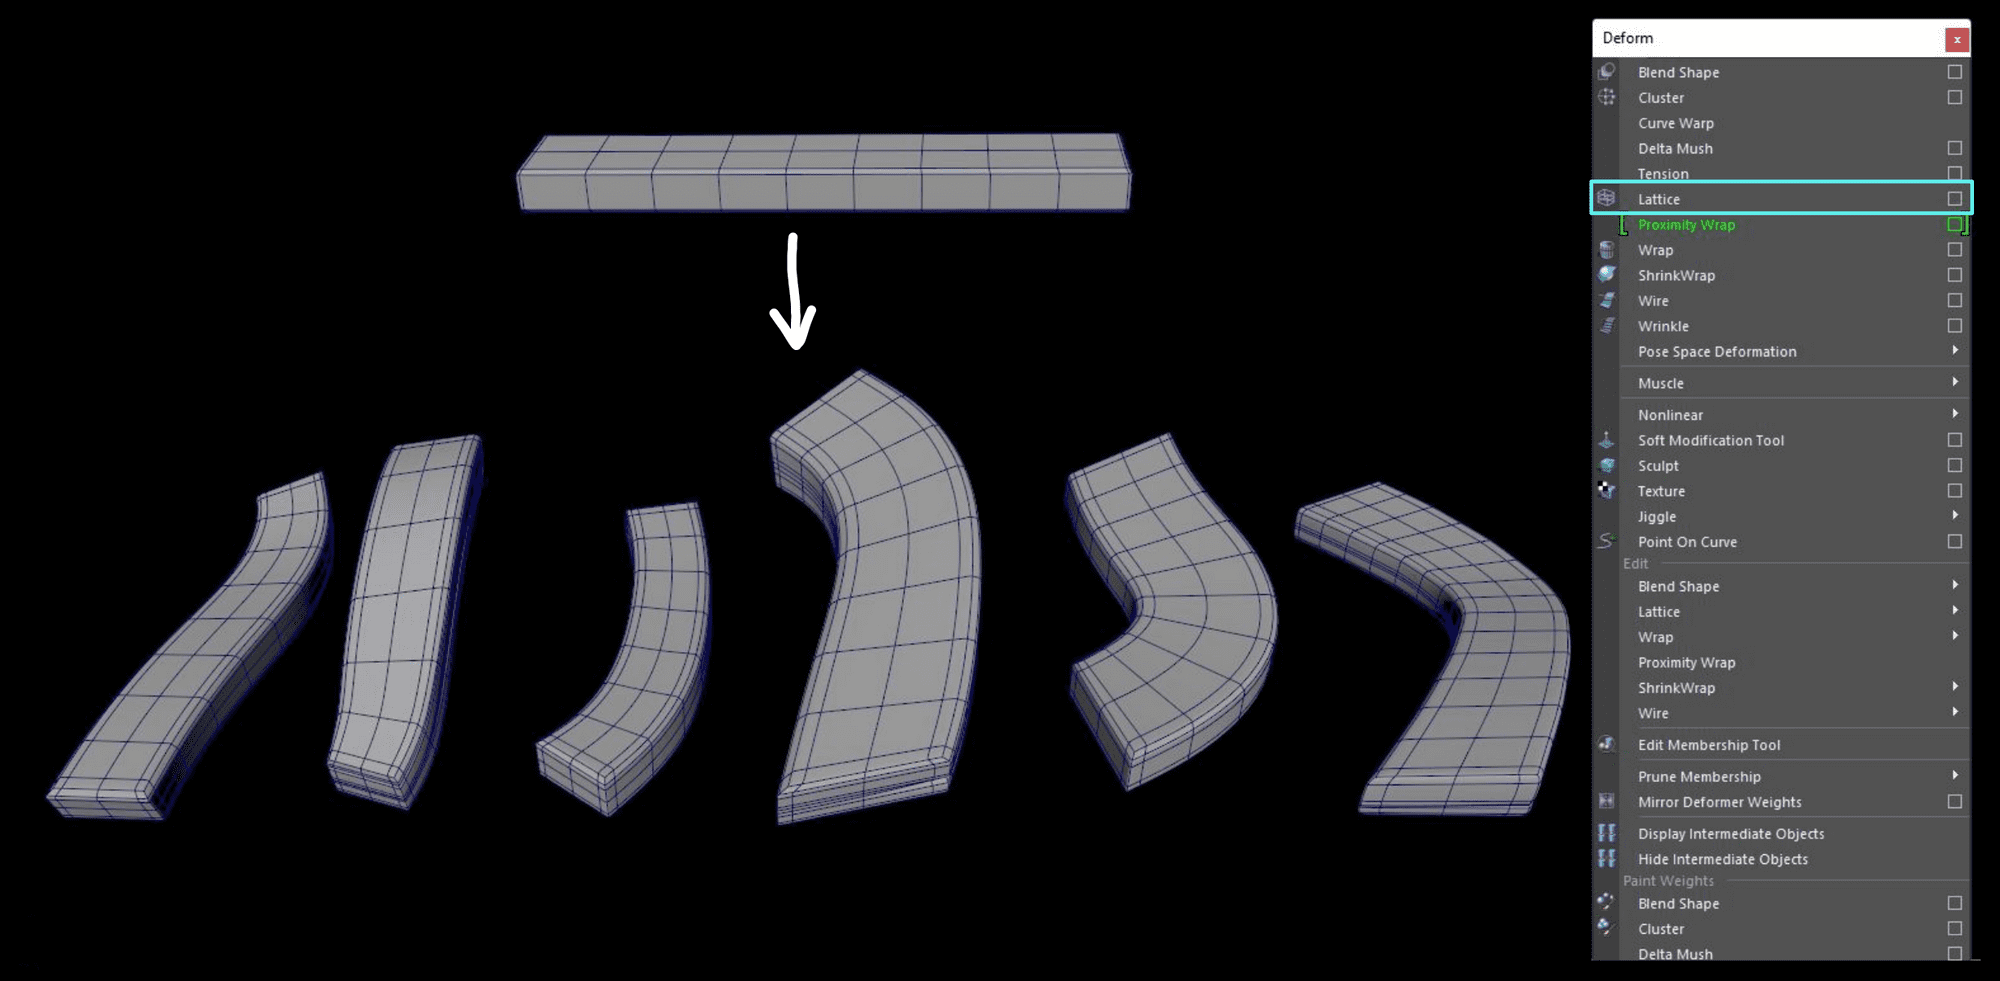
In this project, there were many duplicated and similar objects like plants or framing beams. To save time, I used the Lattice tool in Maya frequently. For example, I modeled one framing beam and then, using a Lattice, I adjusted beams depending on the direction and shape. The lattice tool helped me to make many beams with organically flowed shapes.
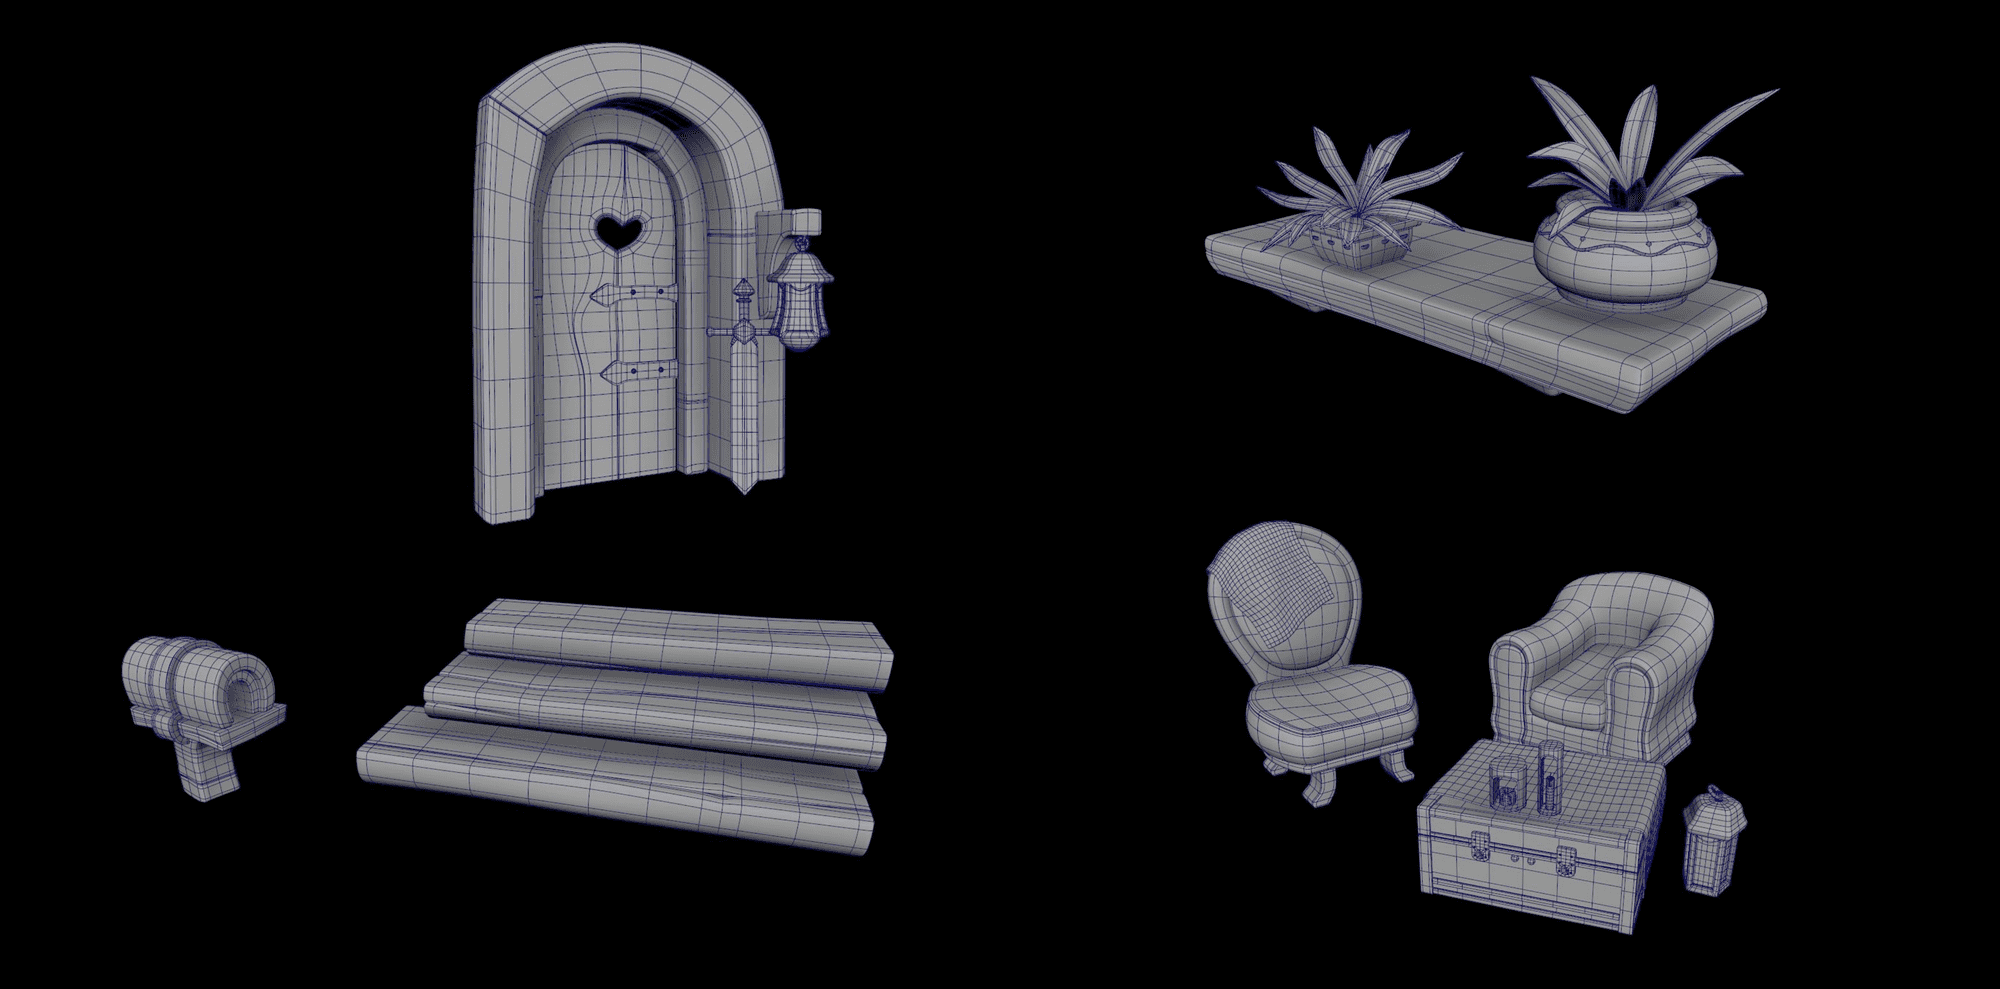
Speaking about topology, I tried to keep it clean and simple for all objects:
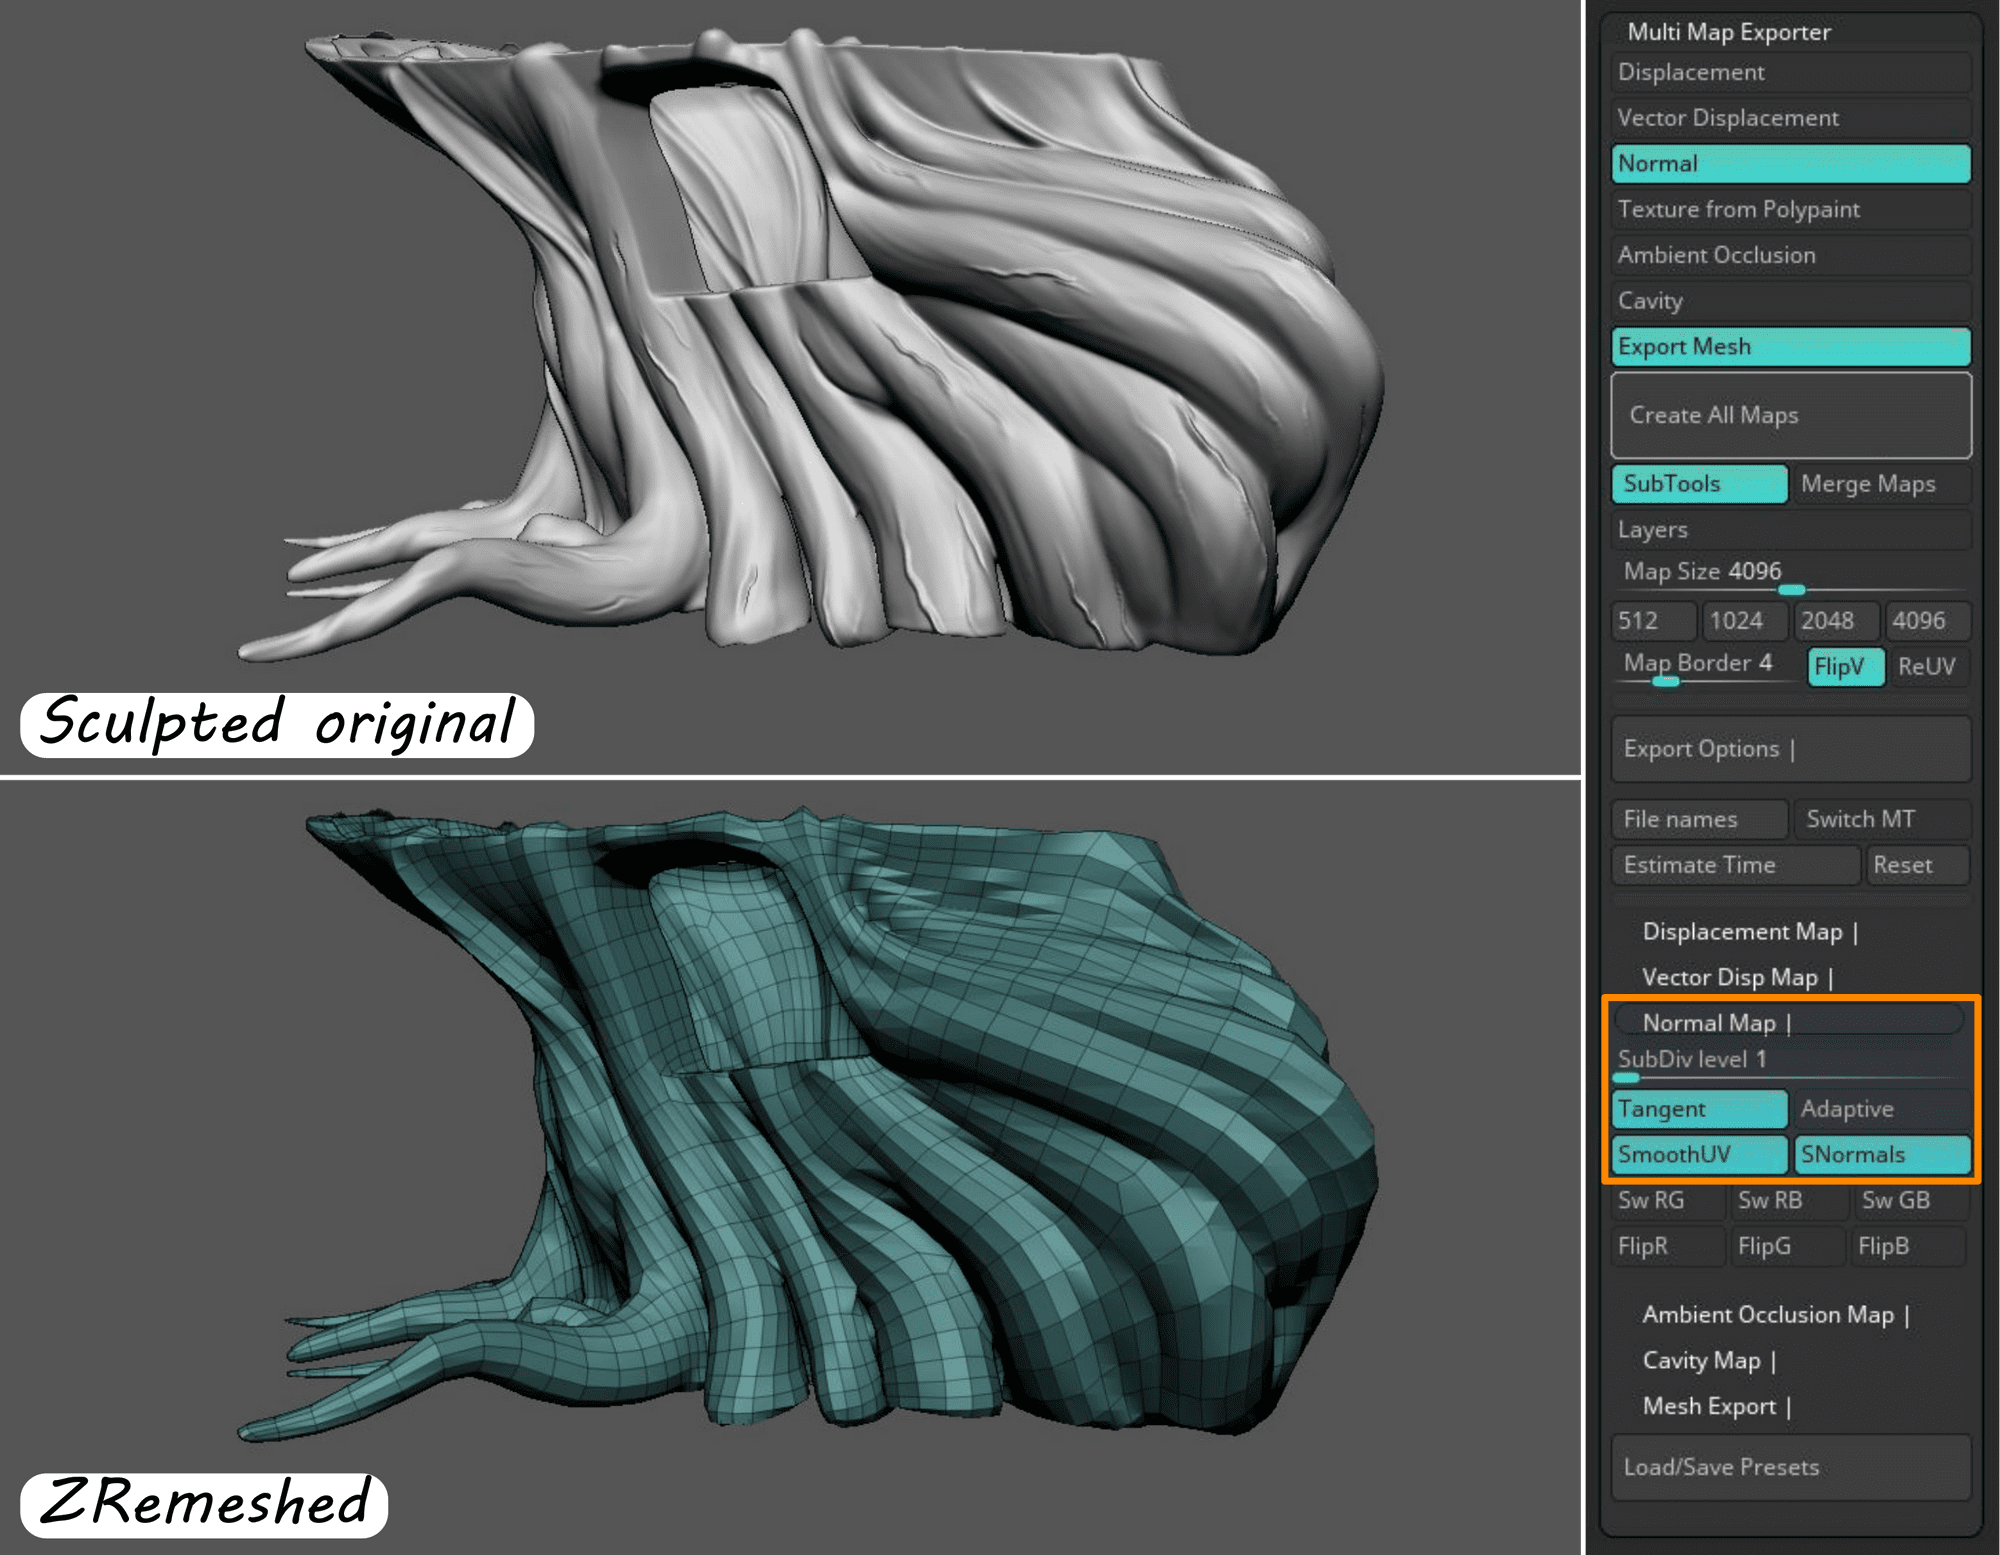
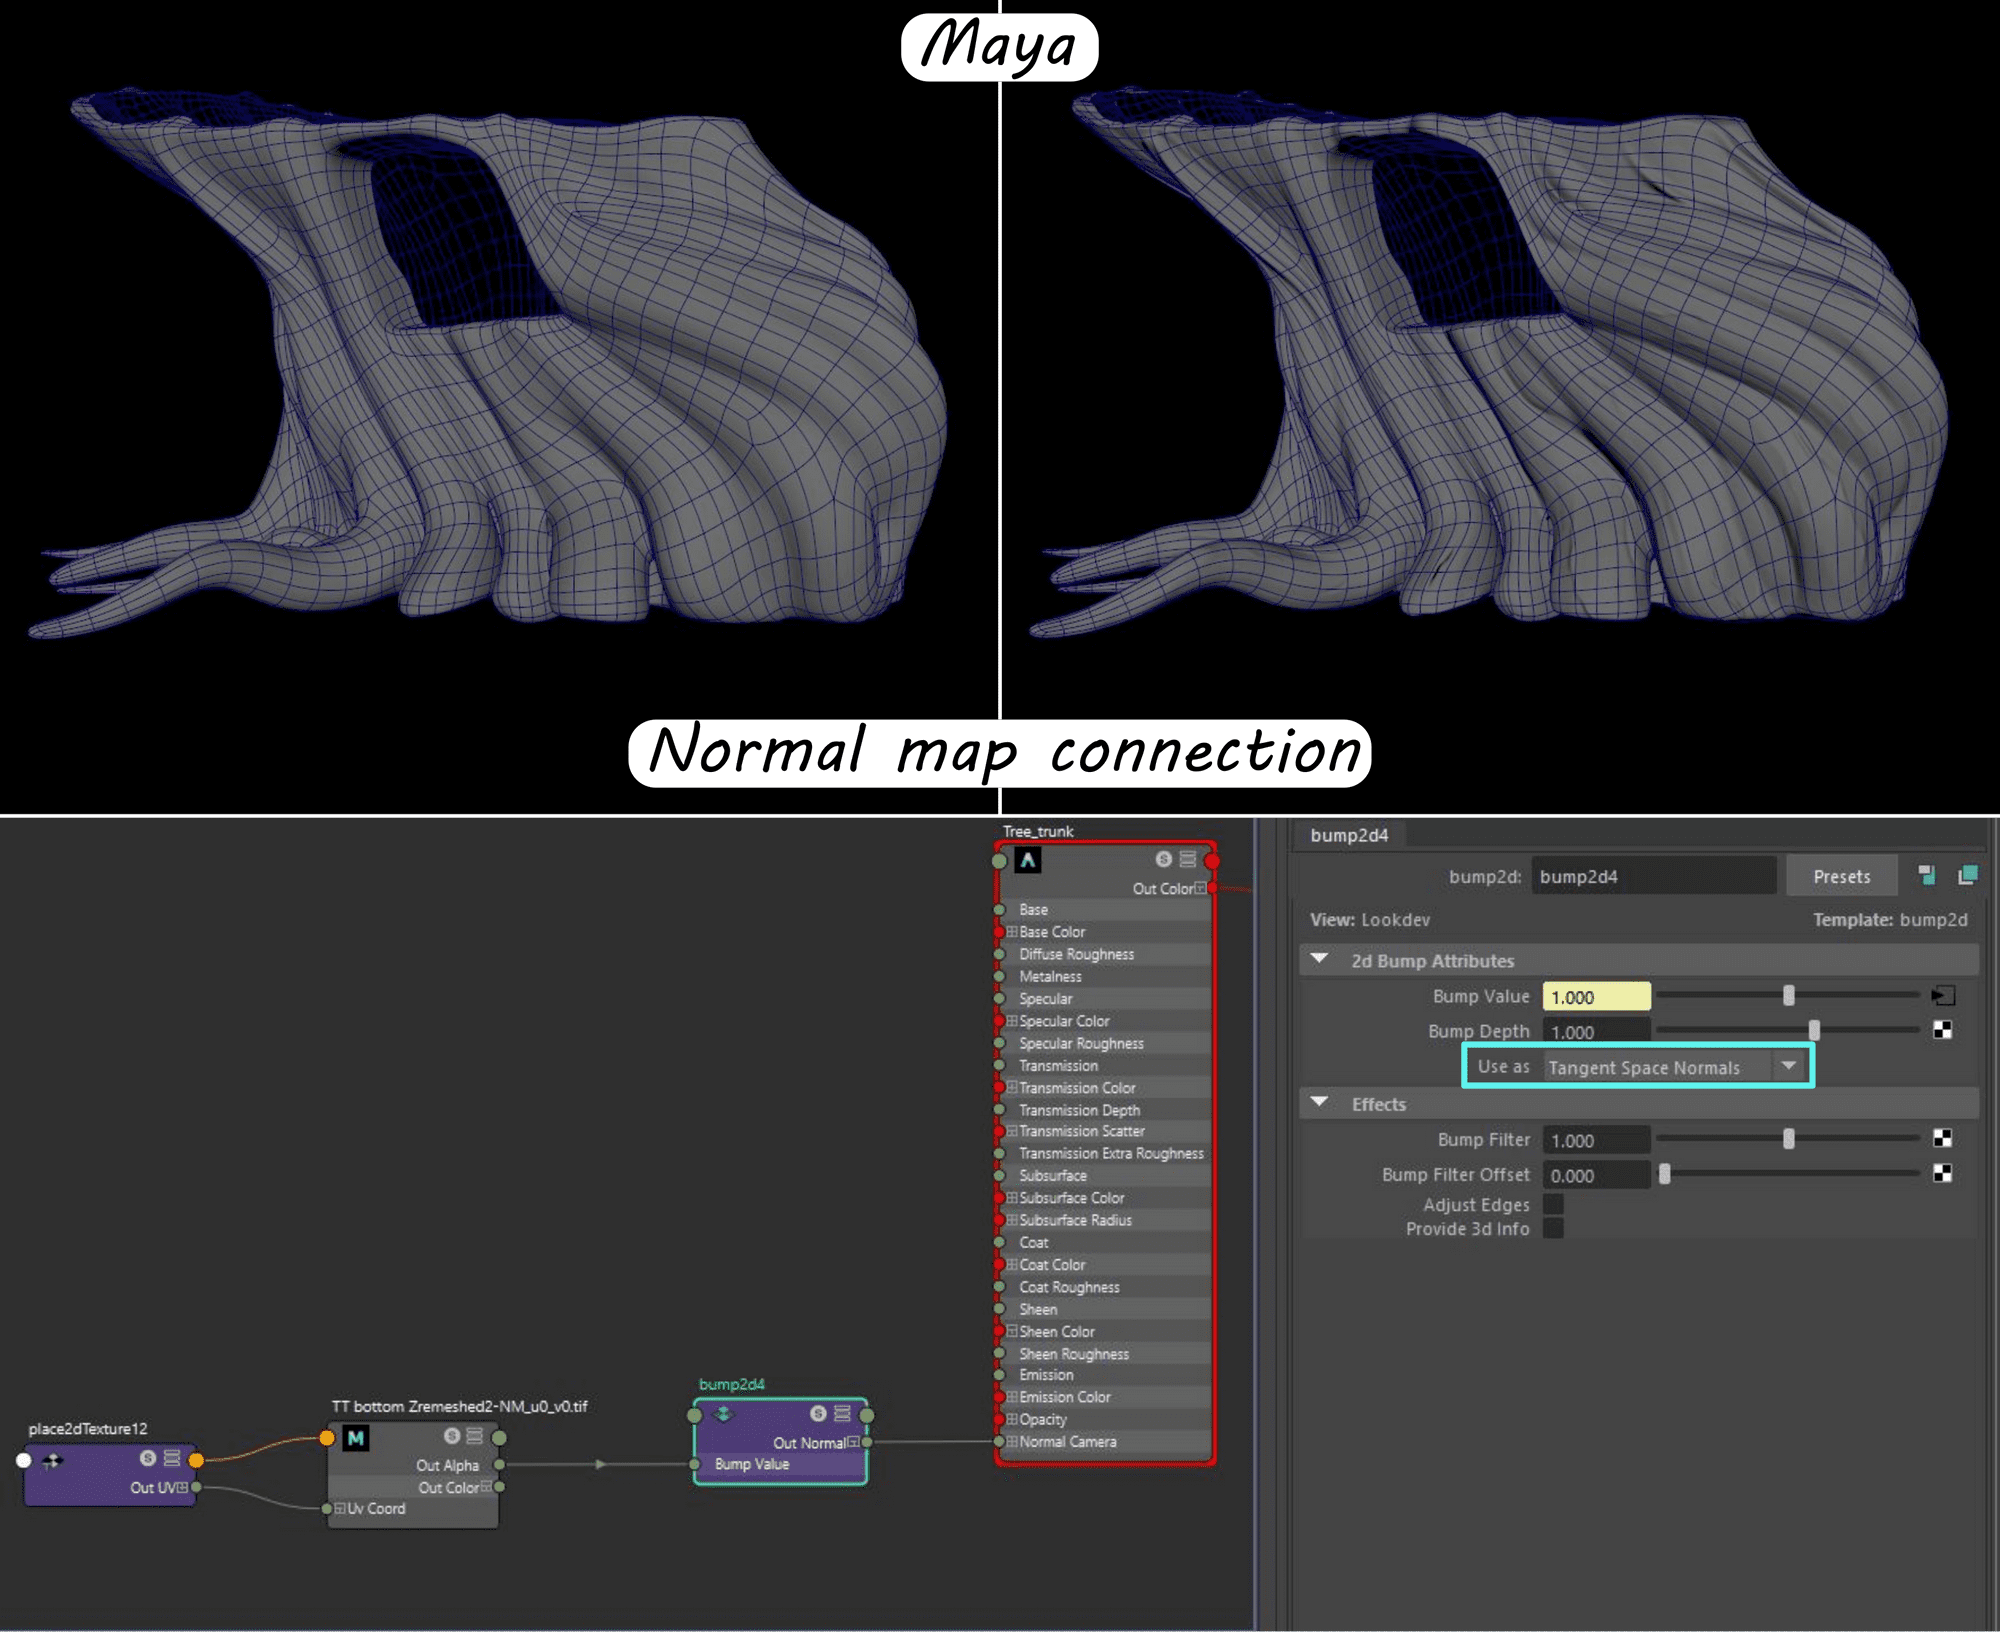
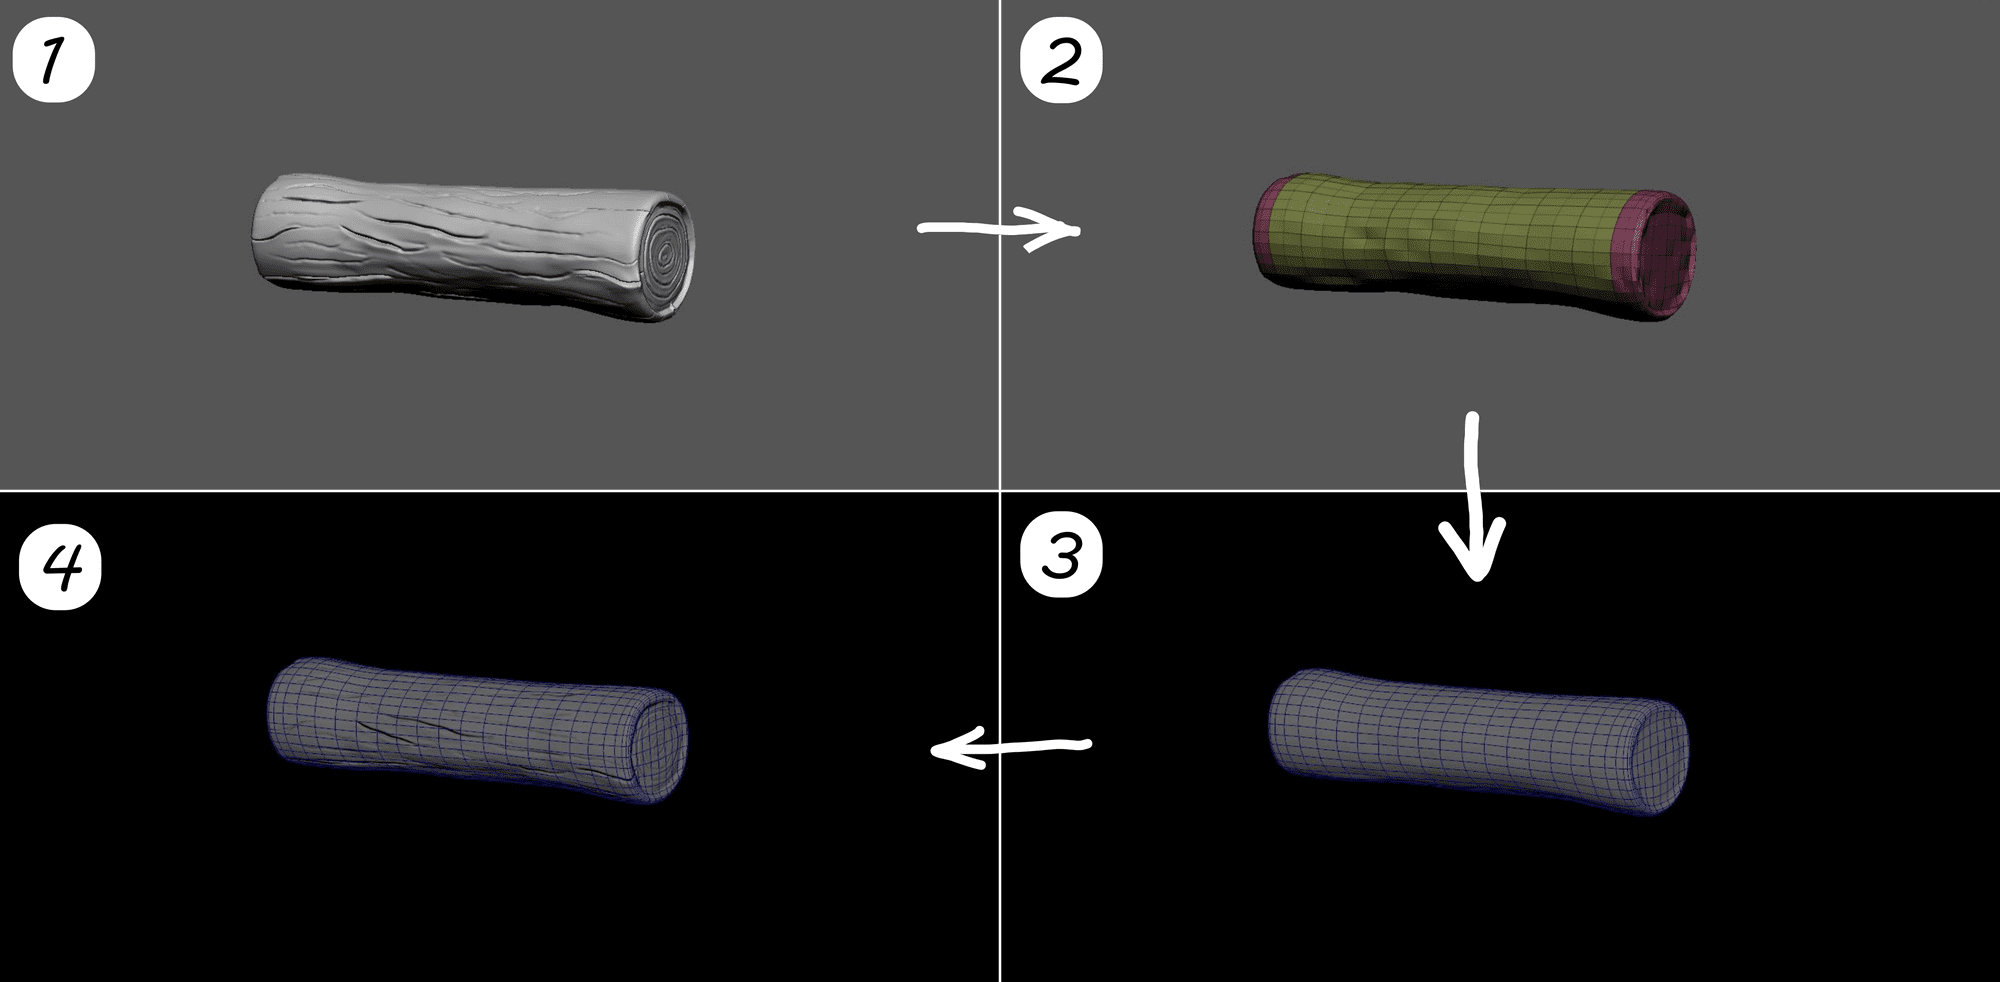
All tree trunks were sculpted in ZBrush. The main brushes I used for sculpting the trees were CurveMultiTube, DamStandard, ClayBuildUp, hPolish and Slash1. I remeshed the Dynameshed models using the ZRemesh tool to get the nice and less dense mesh, but I lost some sculpted details after that. I wanted to show tree structures and thus exported Normal maps of each tree's trunk and connected them to shaders in Maya.
I used the same approach for the path and logs:
I made grass and moss in XGen and applied different modifiers such as Cut and Noise to make them more natural. I divided large areas, for instance, the ground, into several parts, which gave me more control over it and allowed me to create variety.
Using multiple cubes and the Volume Noise deformer, I modeled a simple shape of smoke based on the concept art, then applied the Bifrost plug-in for Maya. With this plug-in, I transformed it into realistic smoke.
I used the Easy Treez tool to create lush foliage for a small tree on the right side. This tool helps to make unique complex non-intersecting branches.
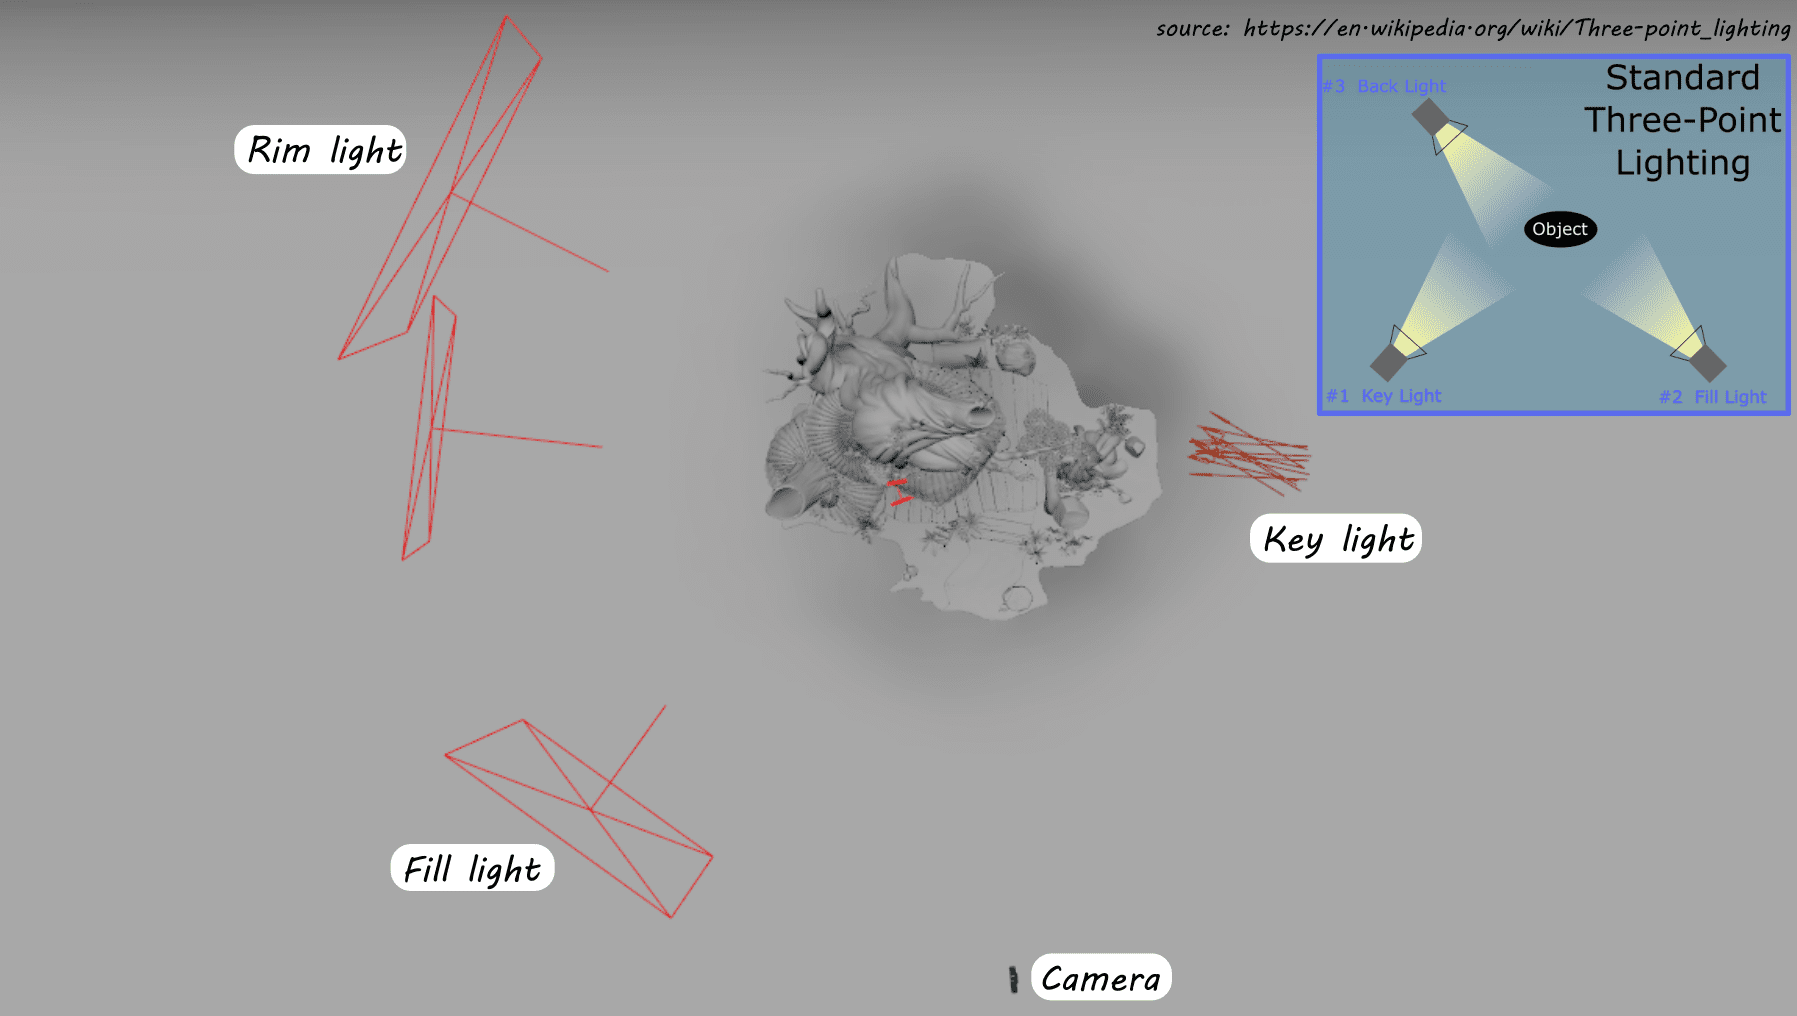
In this stage, I used standard three-point lighting that includes a key light, rim light and fill light - Directional Light and Area Lights in Maya respectively. I also used a Skydome Light with an HDRI image, Mesh Lights for lanterns and candles and highlighted dark areas using Area Lights.
To bring the scene to life a little more, I played with the light settings and applied different temperatures to light sources. The final scene was rendered with Arnold.
I was wondering how the Treehouse model would look in the night lighting, and so I experimented with settings and created the Moonlight version for fun.
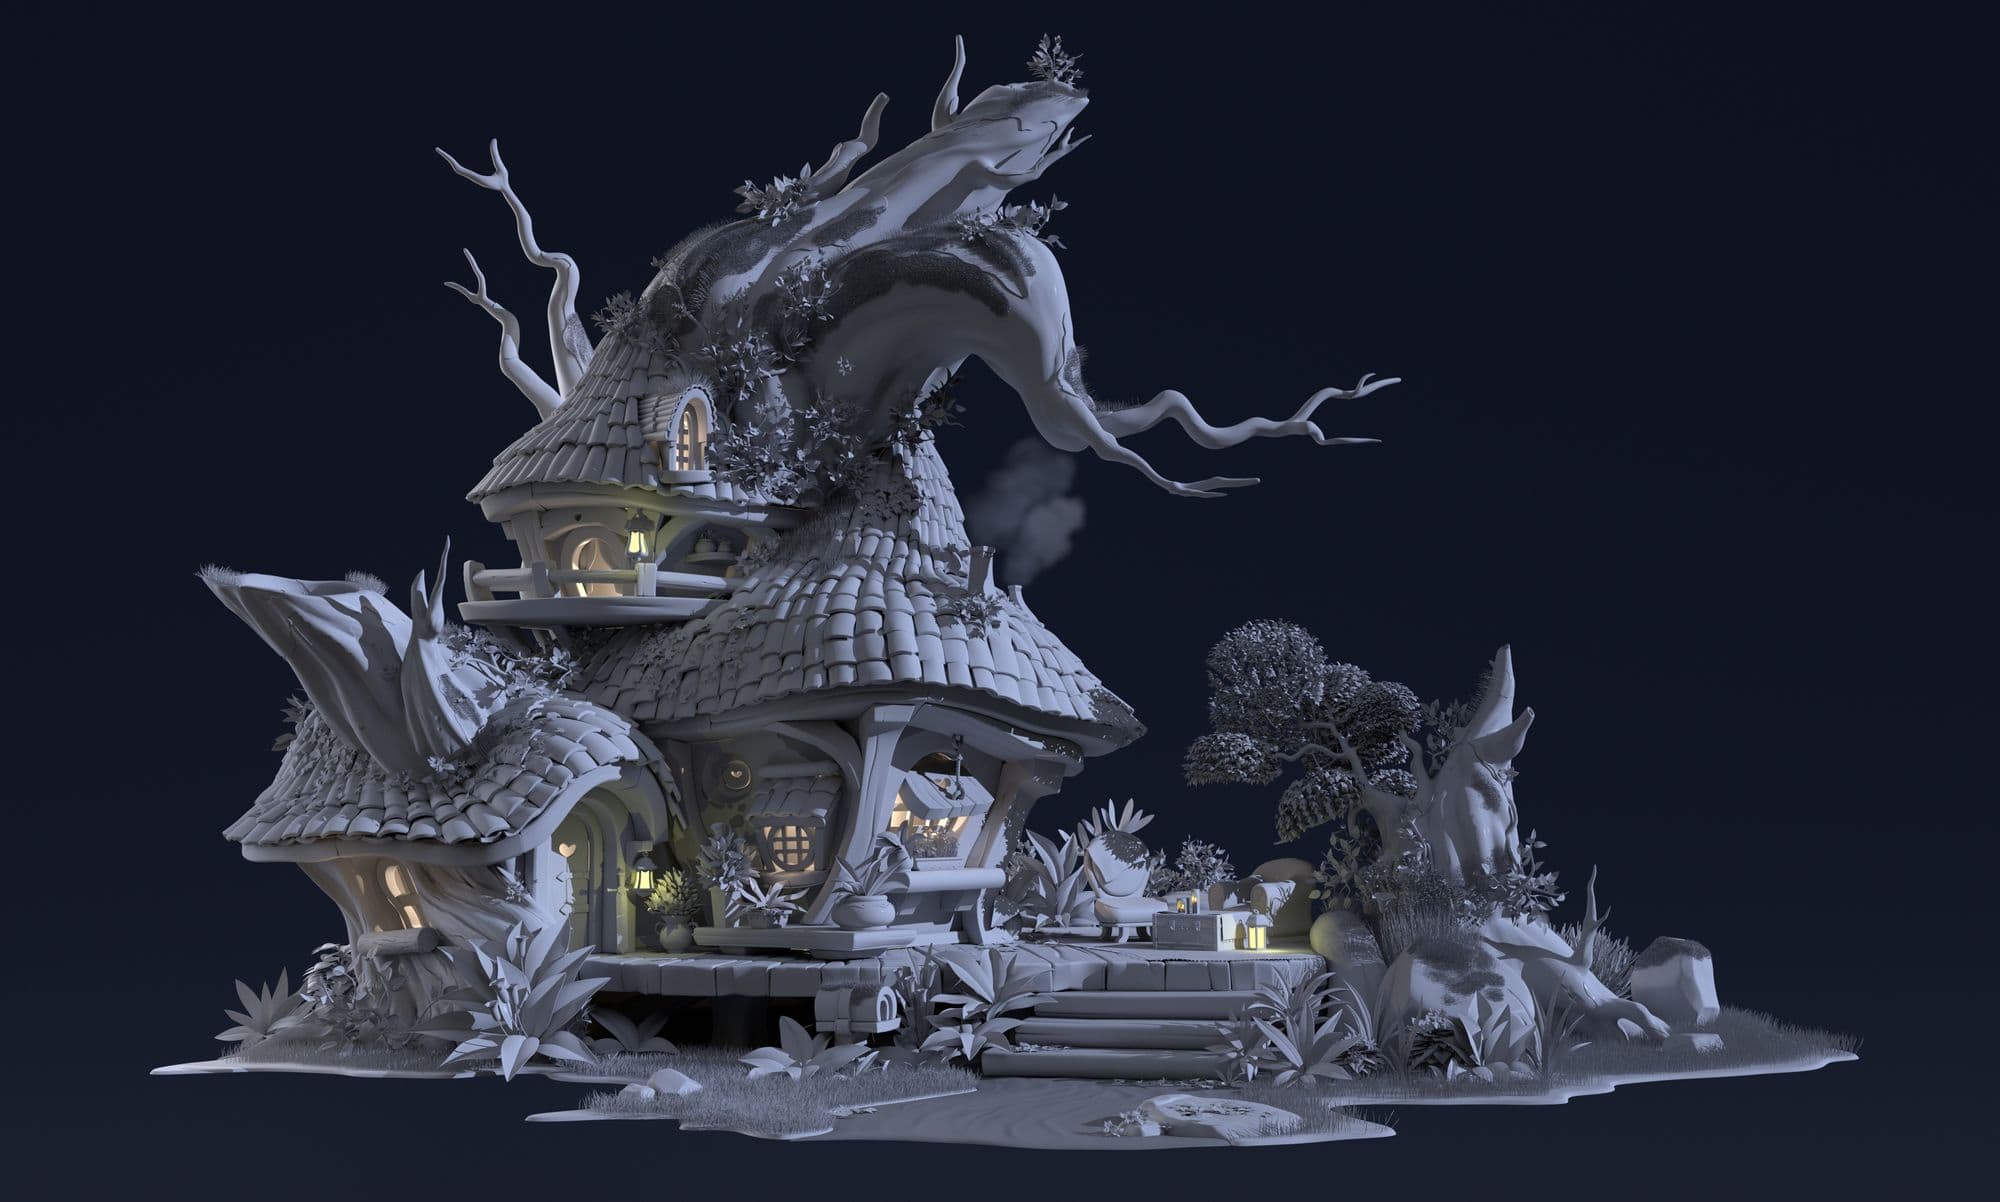
The hardest part of this project was to stop adding details. I like this environment design very much that I wanted to recreate every inch of it. To be honest, it was not easy to replicate the elaborate shape of the tree trunks but I am satisfied with the final result. The effortless part for me was sticking to soft and flowing lines throughout to keep the concept style.
In the end, I would like to thank the artist Yang Junchao for letting me use his design of the Treehouse, my teacher, Koji Tsukamoto, who gave me a lot of advice along the way and AnimSchool for the exciting and informative course. It pushed my 3D modeling skills to the maximum. I look forward to creating new environments and improving as a 3D artist!
Thank you for taking the time to read this article. I hope you liked it and it was helpful. If you have any other questions about this project, please, contact me via my social media. I'm always happy to hear from other artists and get feedback!
LinkedIn, ArtStation, Instagram, The Rookies