
From Concept to Final Render: A Stylised Miniature 3D Environment
Lightbox Academy student, Endika Pascua Penin, shares the process of creating a stylised miniature 3D environment from concept to final render.
Lightbox Academy student, Endika Pascua Penin, shares the process of creating a stylised miniature 3D environment from concept to final render.
Lightbox Academy student, Endika Pascua Penin, shares the process and workflow for creating an environment miniature in Maya and Adobe Substance 3D Painter, based on the Fallout videogame saga.
The idea came to me because, as a videogames fan, it's always inspiring to explore different worlds.
Fallout was one of the best experiences I've ever had gaming. Its music, the abandoned atmosphere and the chances of finding a dangerous enemy or an excellent ally at the next corner made me want to pay tribute to this world.

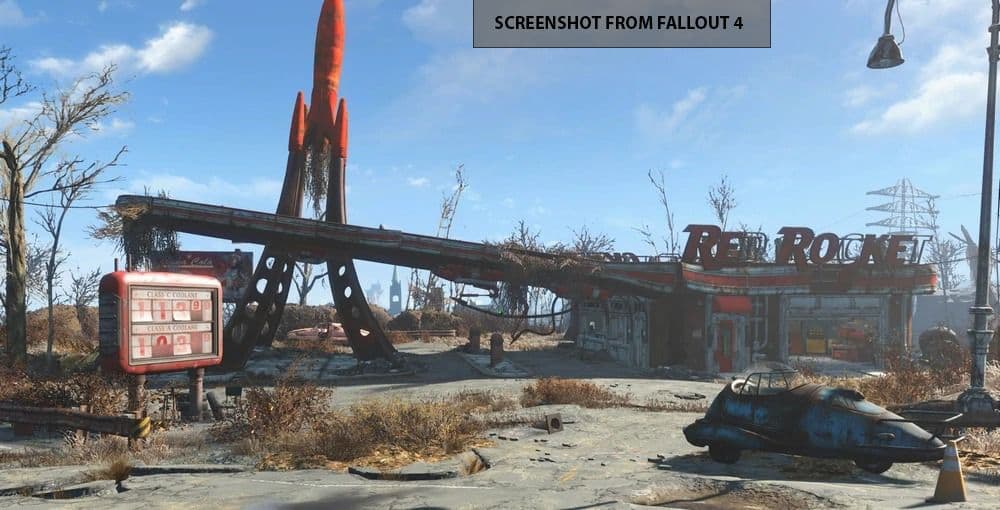
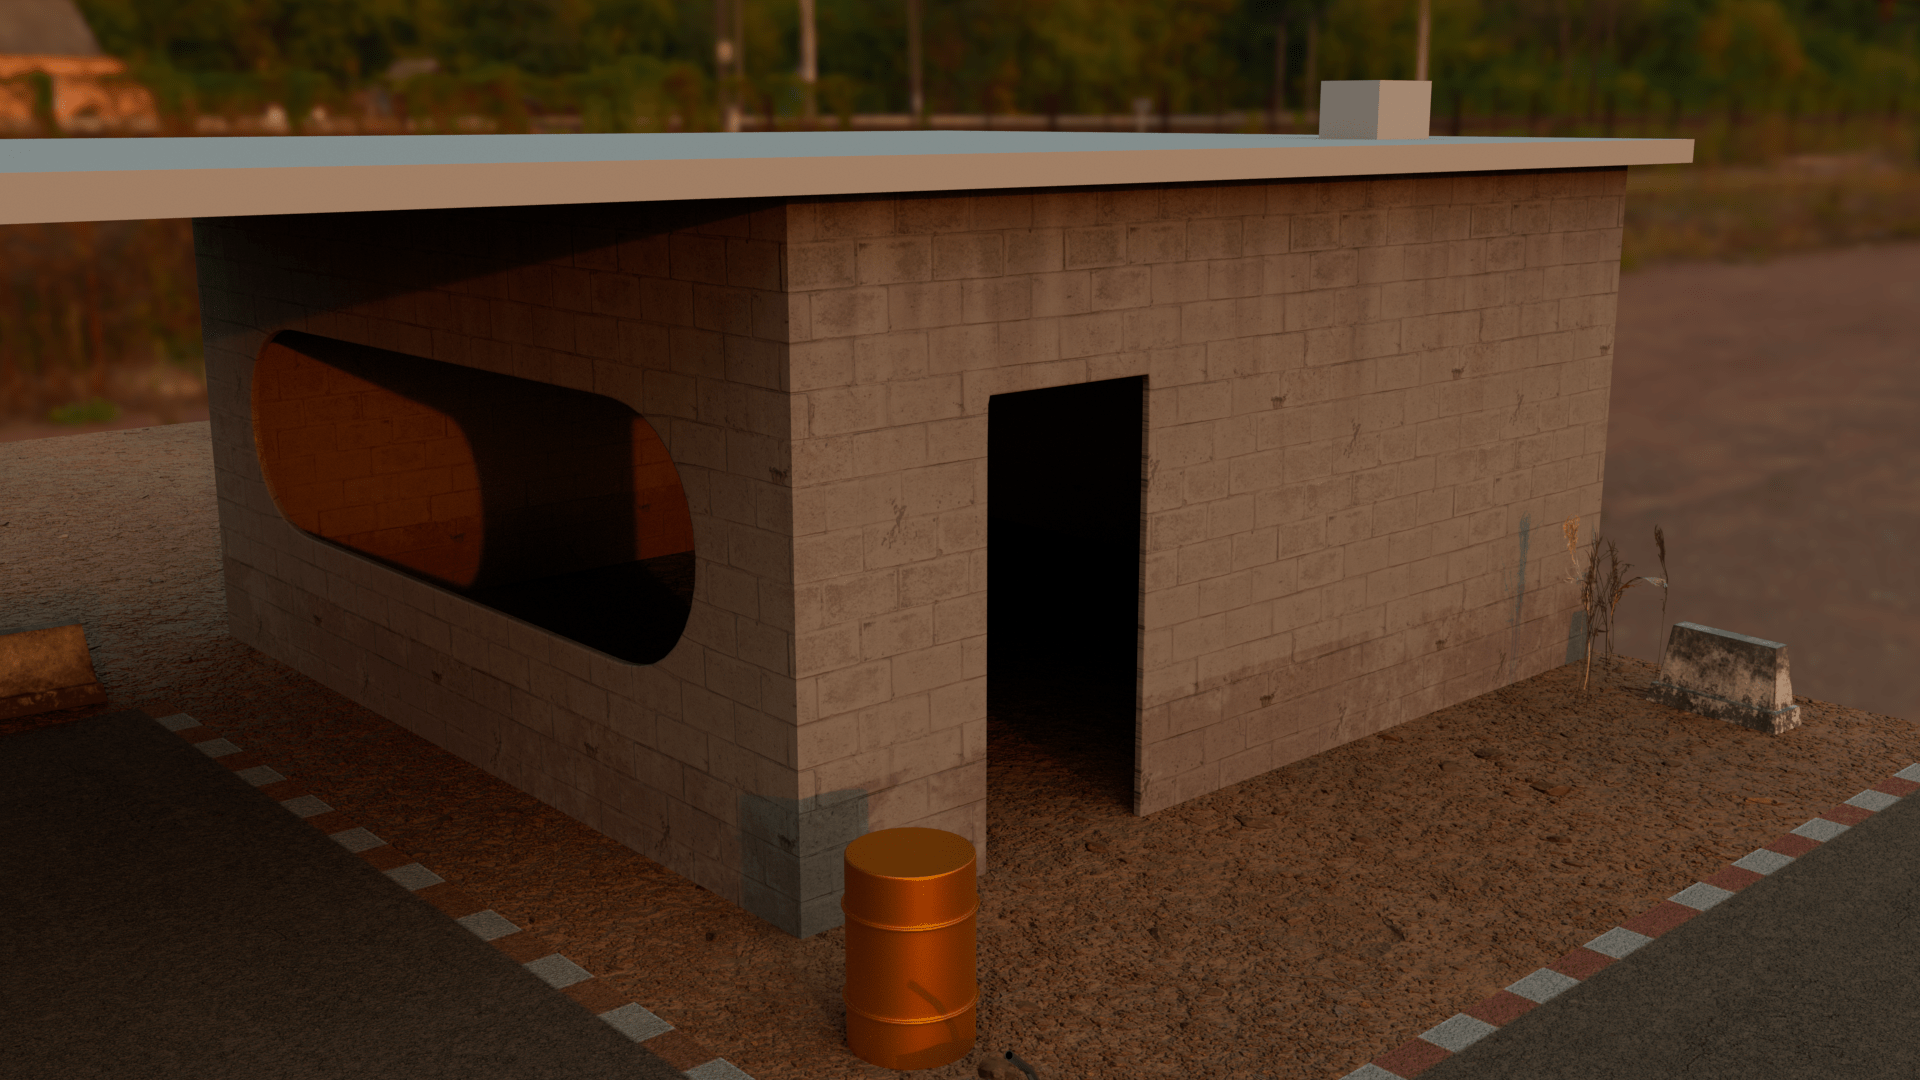
I decided to recreate one of the most emblematic places in the game, the Red Rocket Gas Station, in order to test my 3D modelling skills on abandoned places.
It also allowed me to include a vehicle so I could practice and apply new techniques.
Software used:
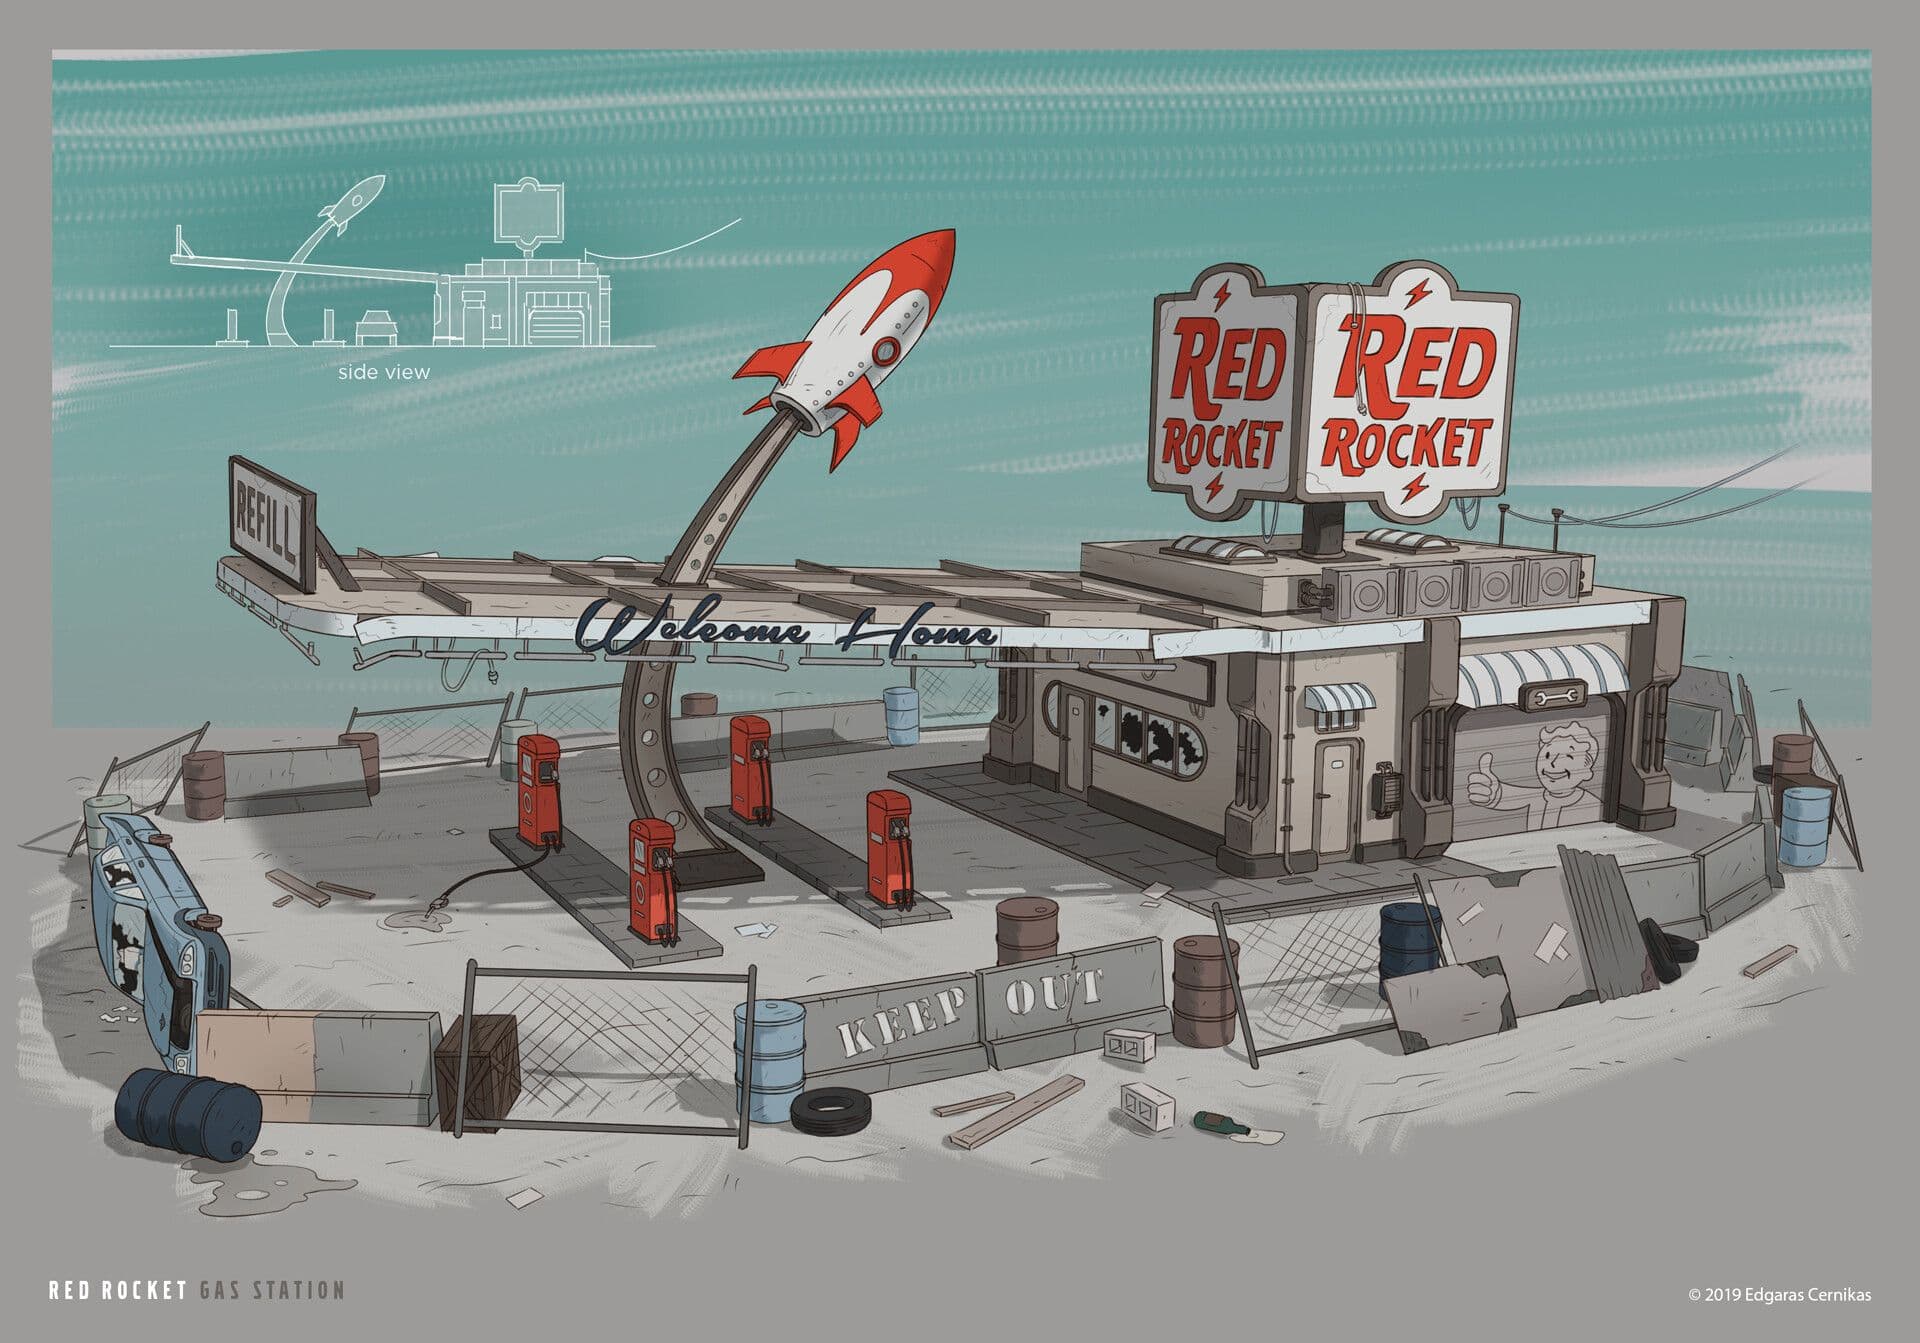
The scenes in Fallout are the visual definition of a post-apocalyptic retro-future. I started looking for references from the game itself in order to fully understand the environment and aesthetic of its universe.
I felt like the screenshots from the game weren’t enough, so I ended up looking for concept artists that already worked on Fallout fan-arts or designs. I’m glad I made that decision because it allowed me to practice working on 3D over concept artist work.
I asked permission to use an amazing concept of the gas station from concept artist Edgaras Cernikas. I was ready to start.
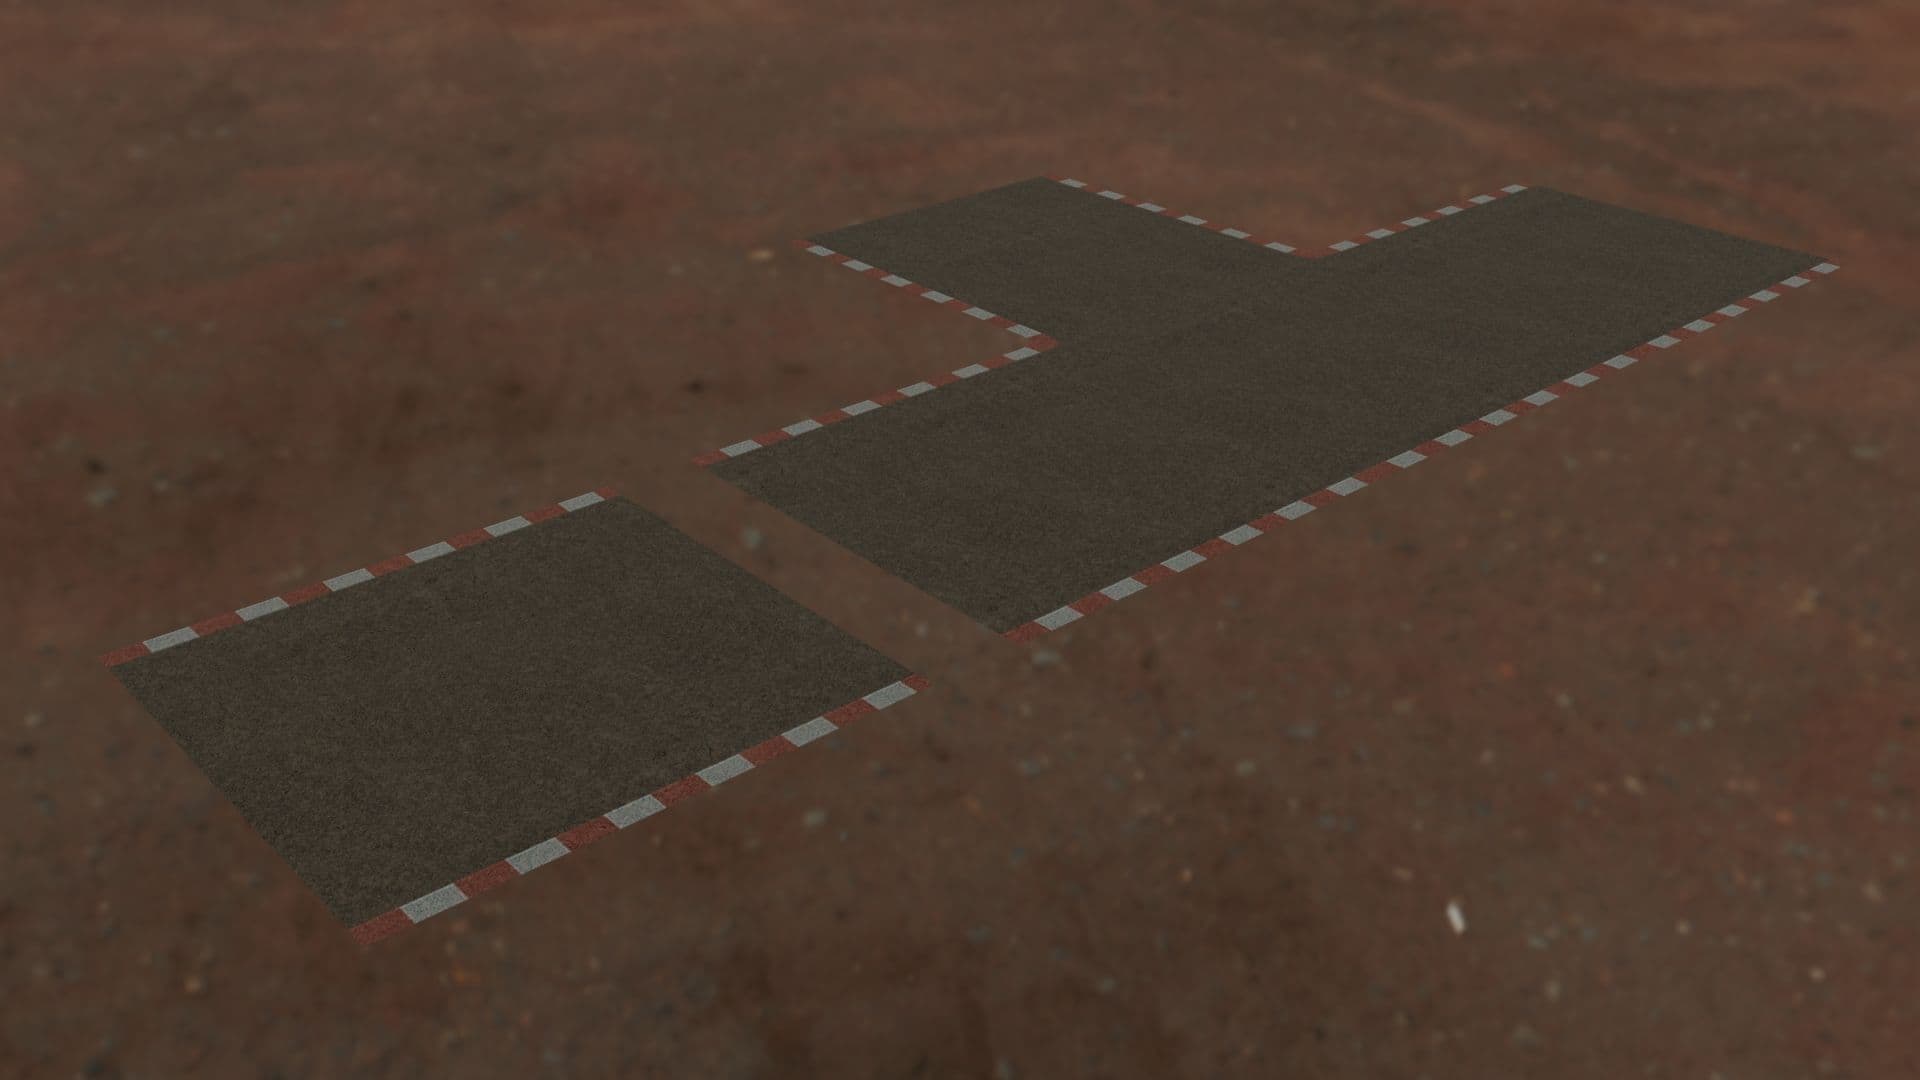
I had to make a road as an assignment, so I worked with layered textures and modular pieces adding some basic lighting as an approach.
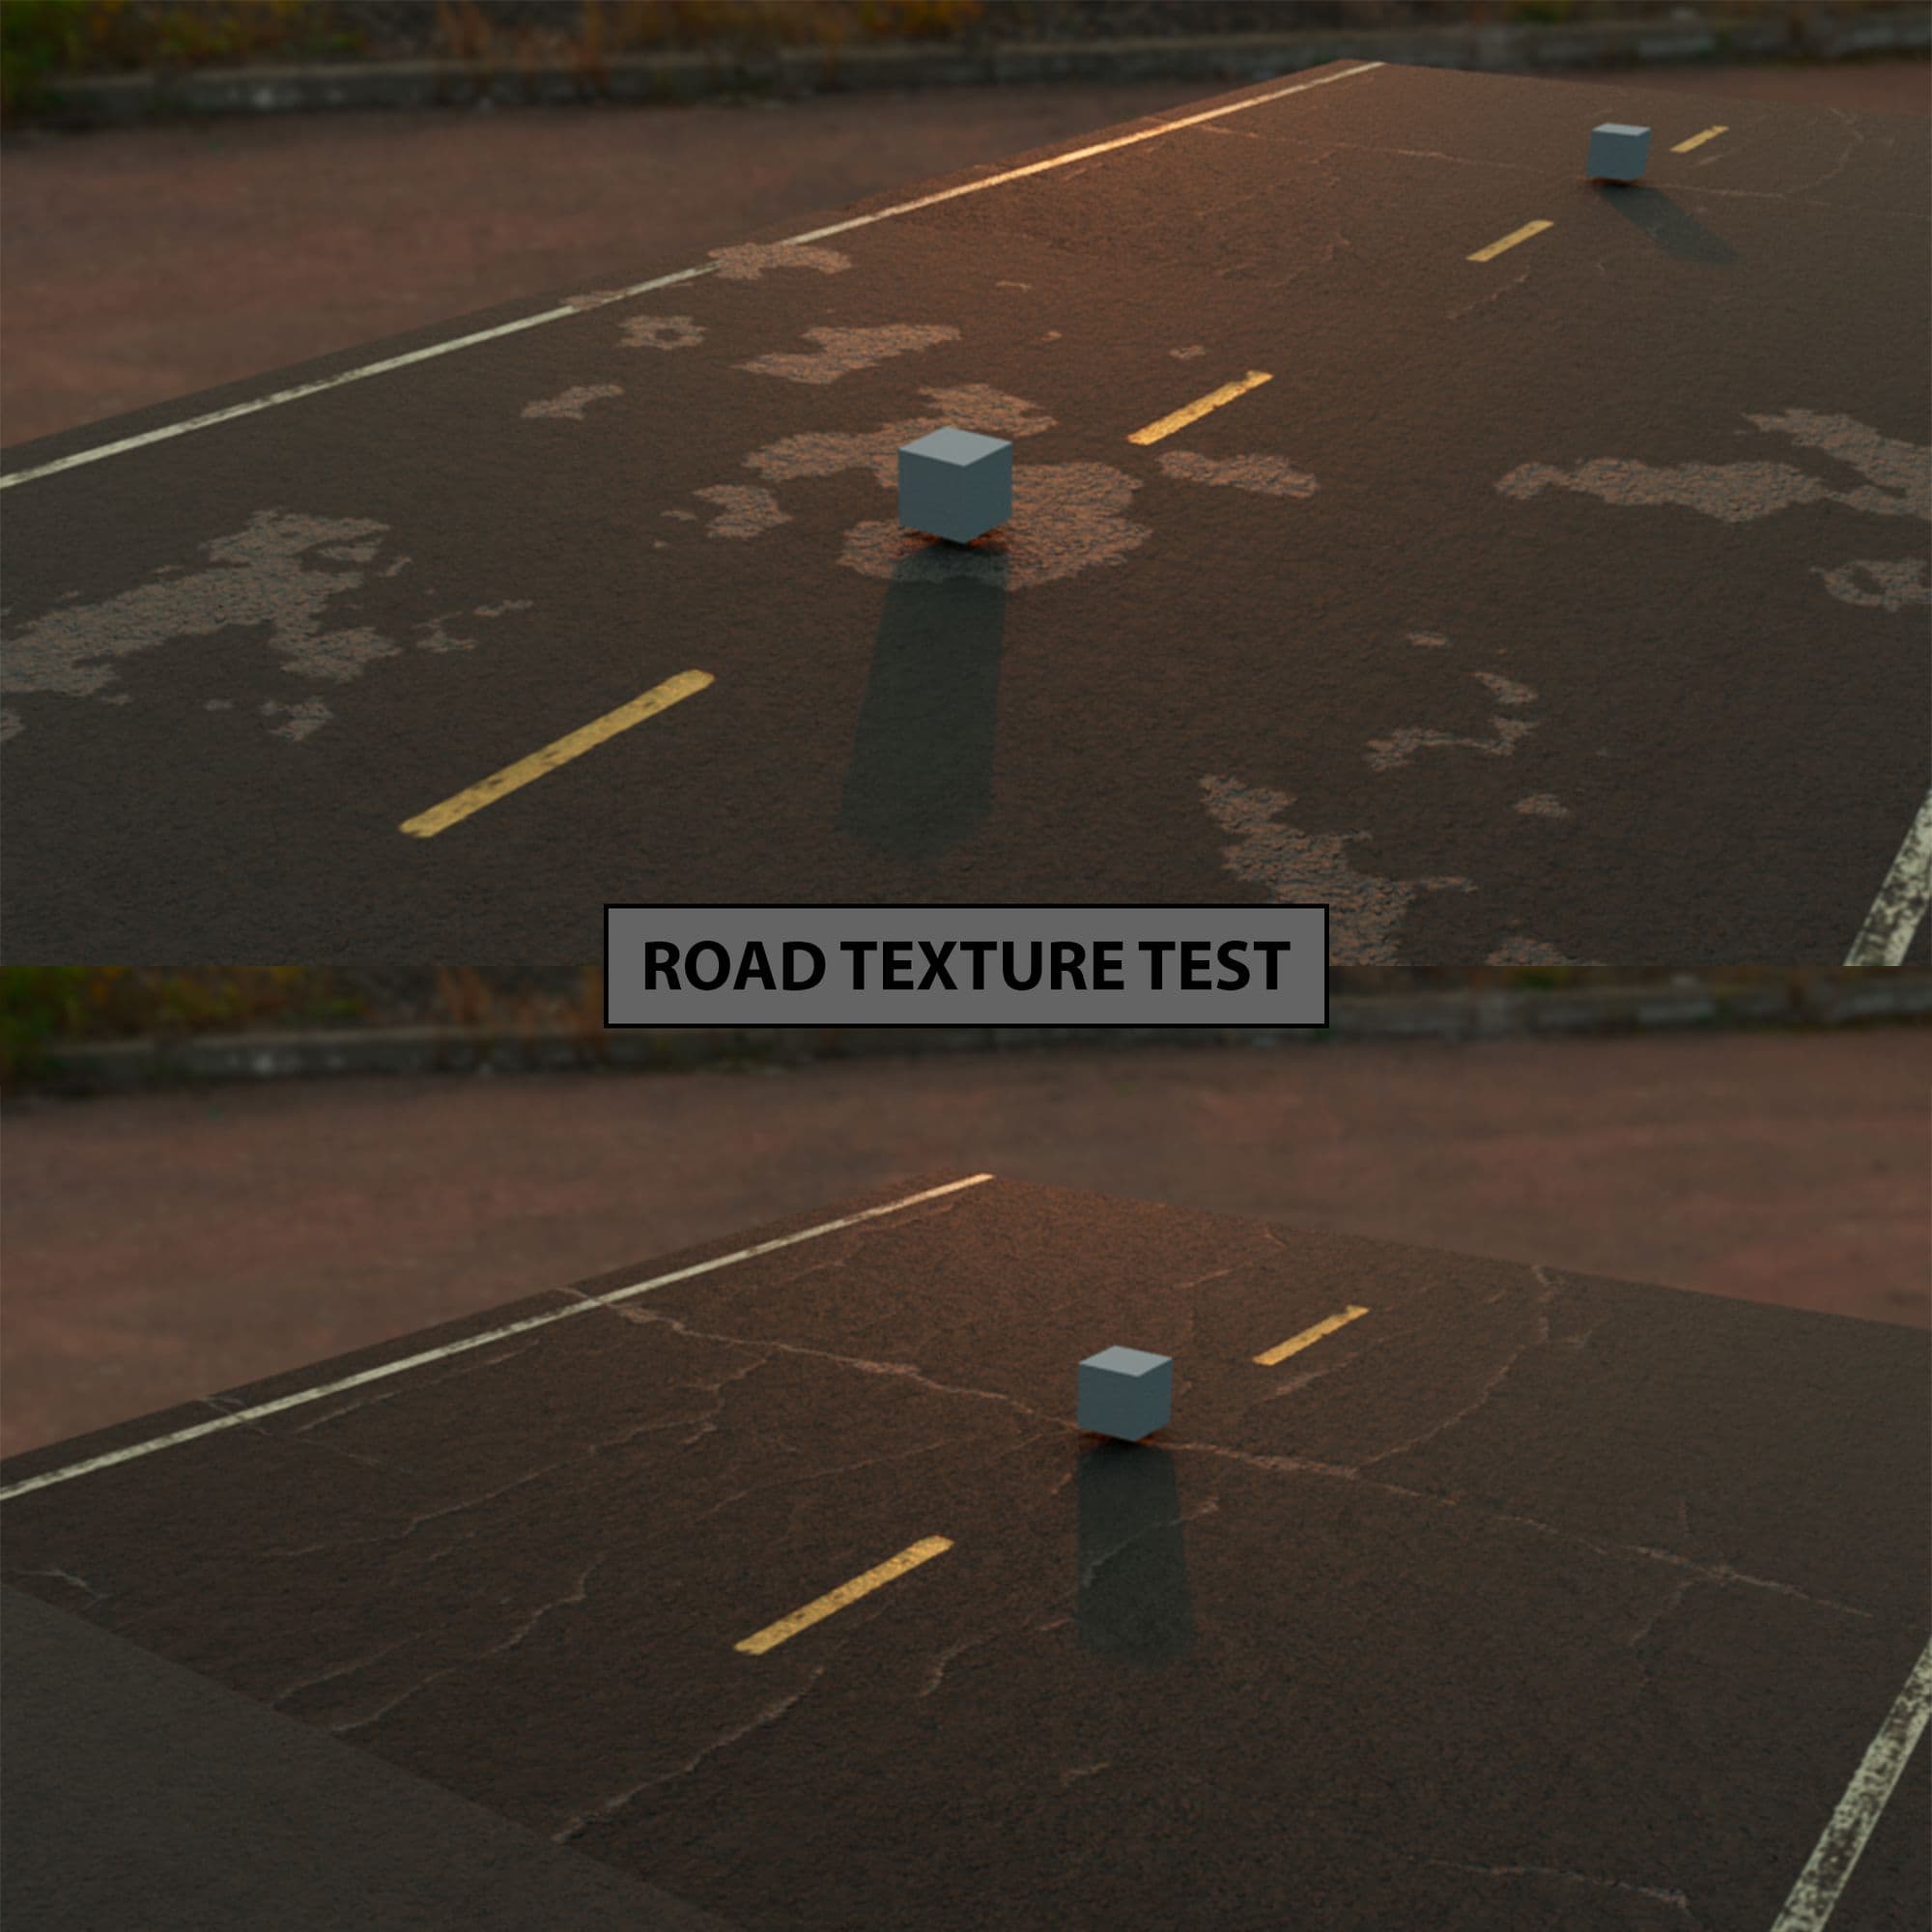
I ended up making only two modular pieces with less degradation. A basic square one, and a T-shaped one. I added the stripes over the main texture with photoshop. The advantage of making modular pieces is that I could assemble them as I wanted.
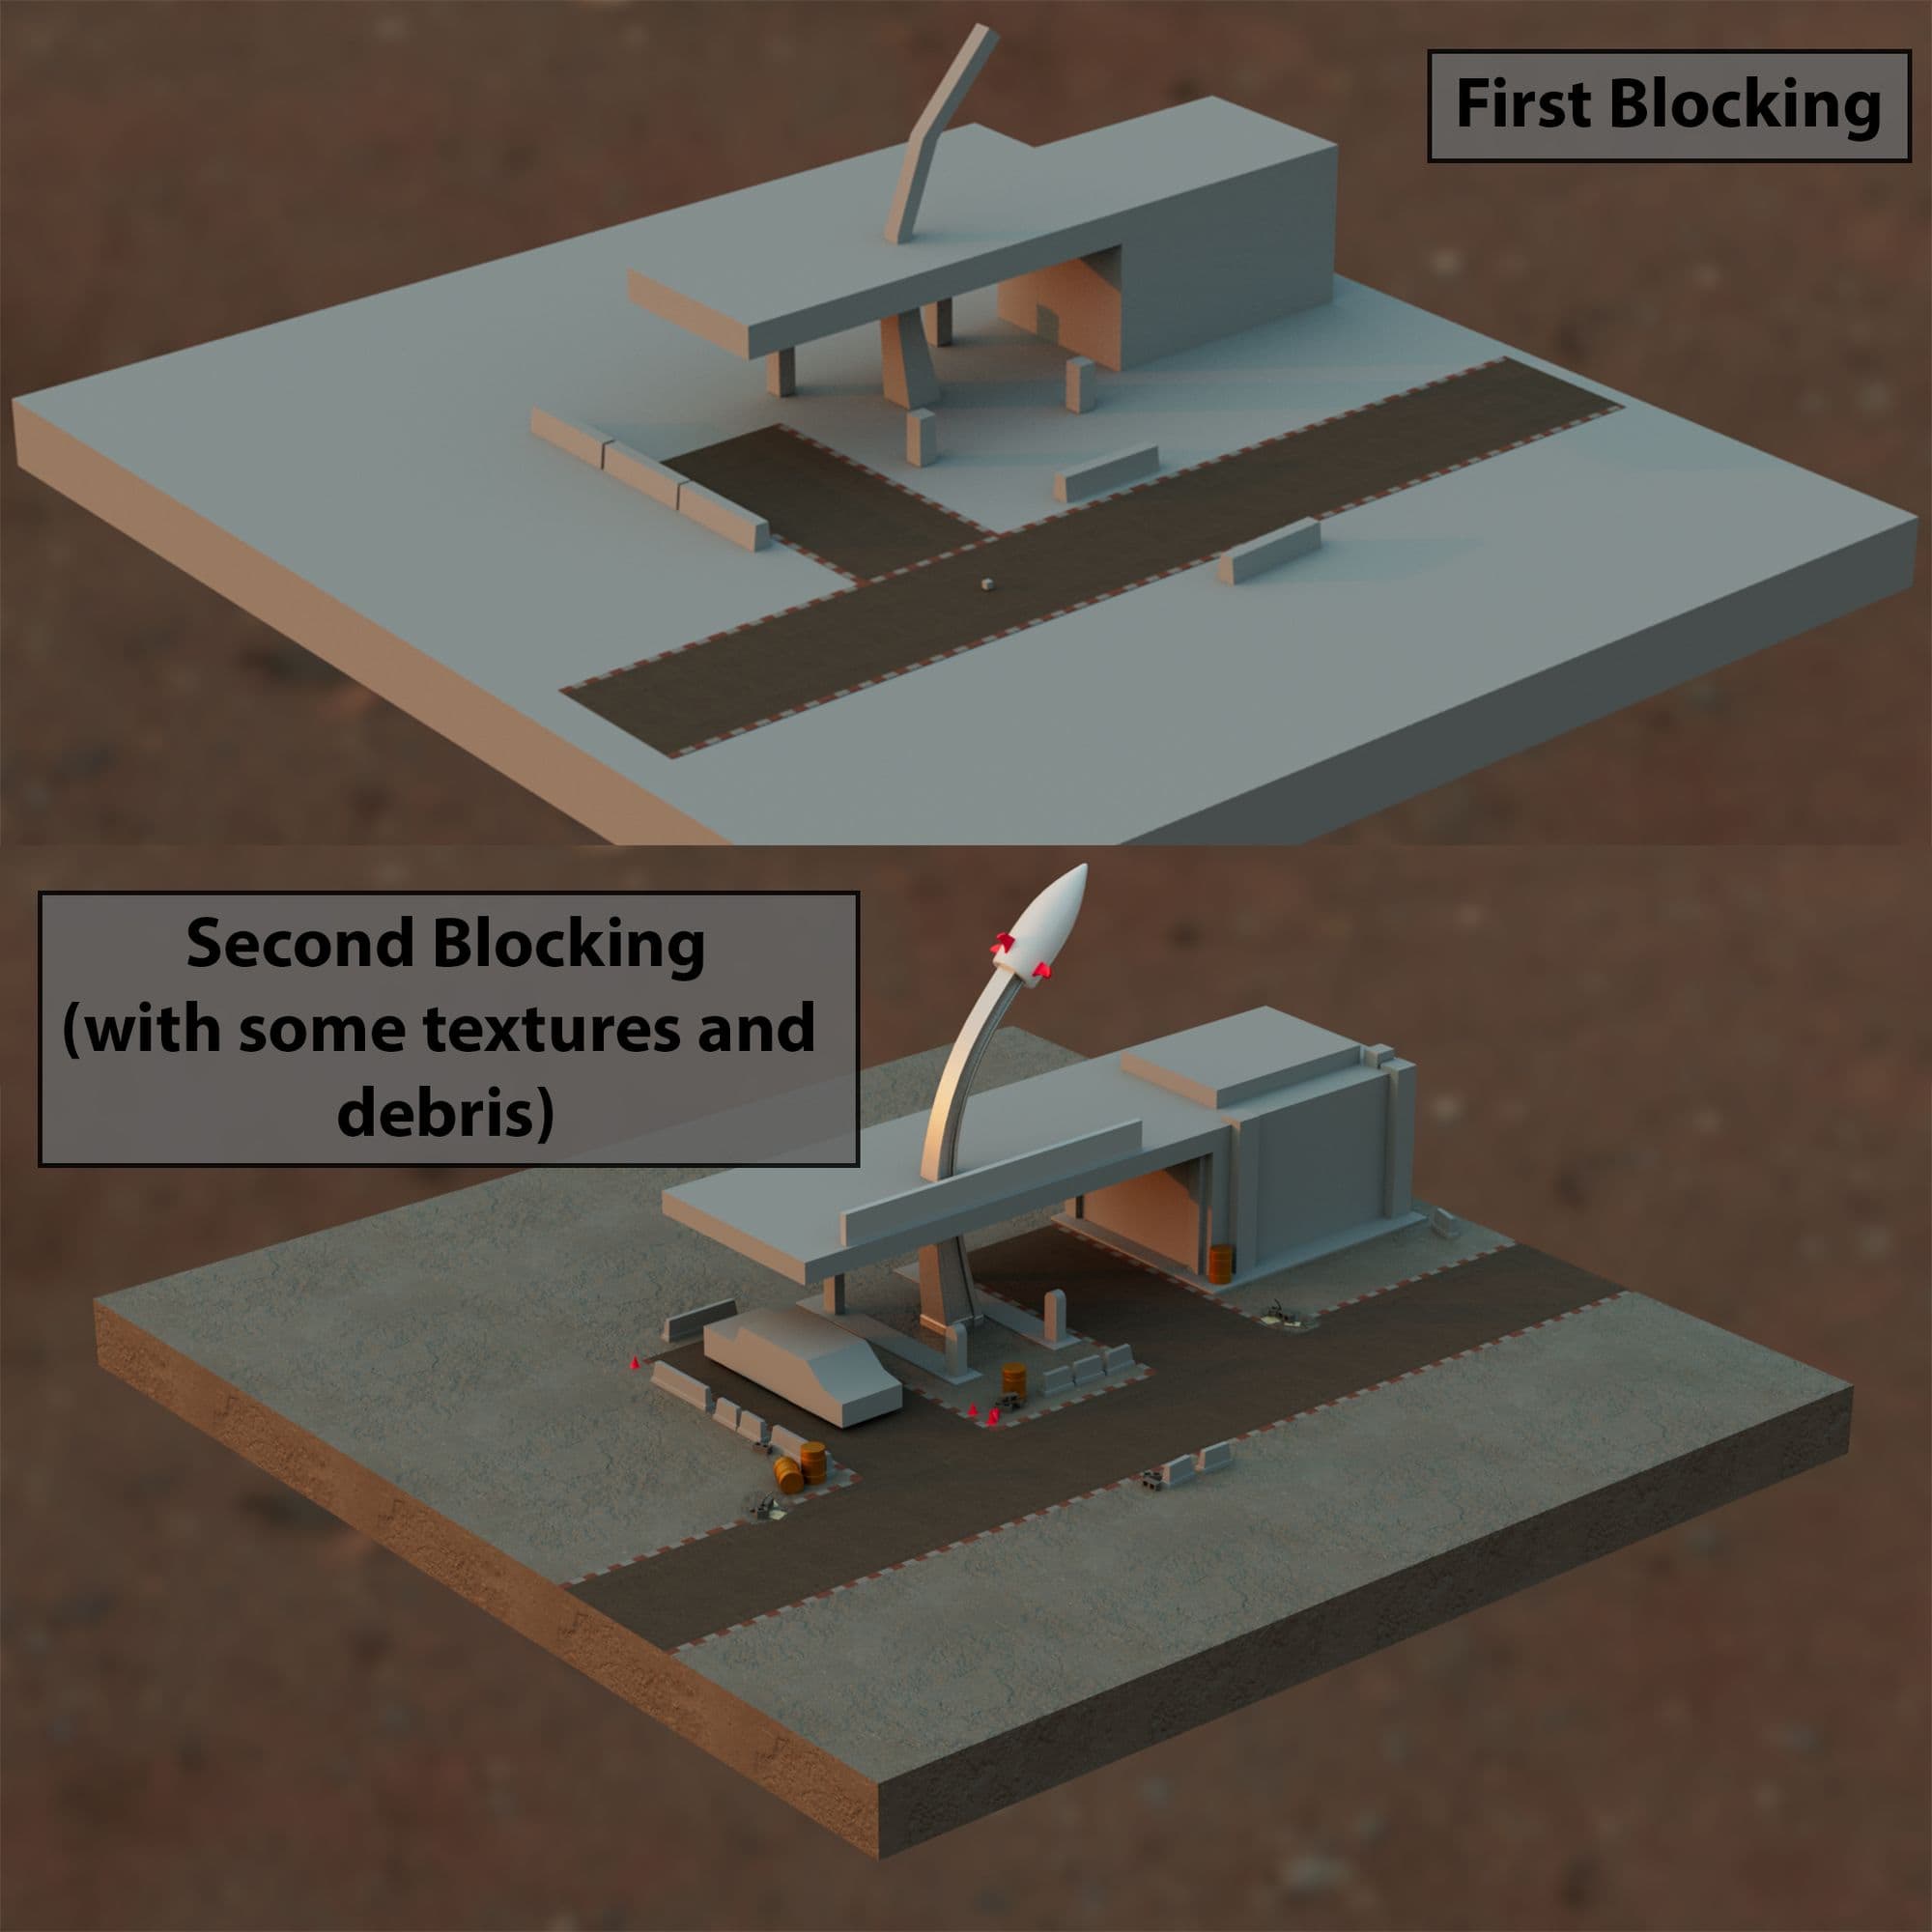
I wanted a general overview of the gas station so I picked an isometric view. I also started working over the main shapes, which were the building with the rocket and the placement of the road.
When I’m working on props, I usually start choosing the ones I think have the most presence in the scene. I pick up one and I work on it until it’s finished.
Most of these pieces were made using the box-modelling technique. I start with a basic shape, trying to have a clean geometry and working over it. Once it’s finished I work on its UV’s and then I texture them in Adobe Substance 3D Painter.
Working like this allows me to focus and I can give each piece the time it needs. The 3 main pieces of the scene were:
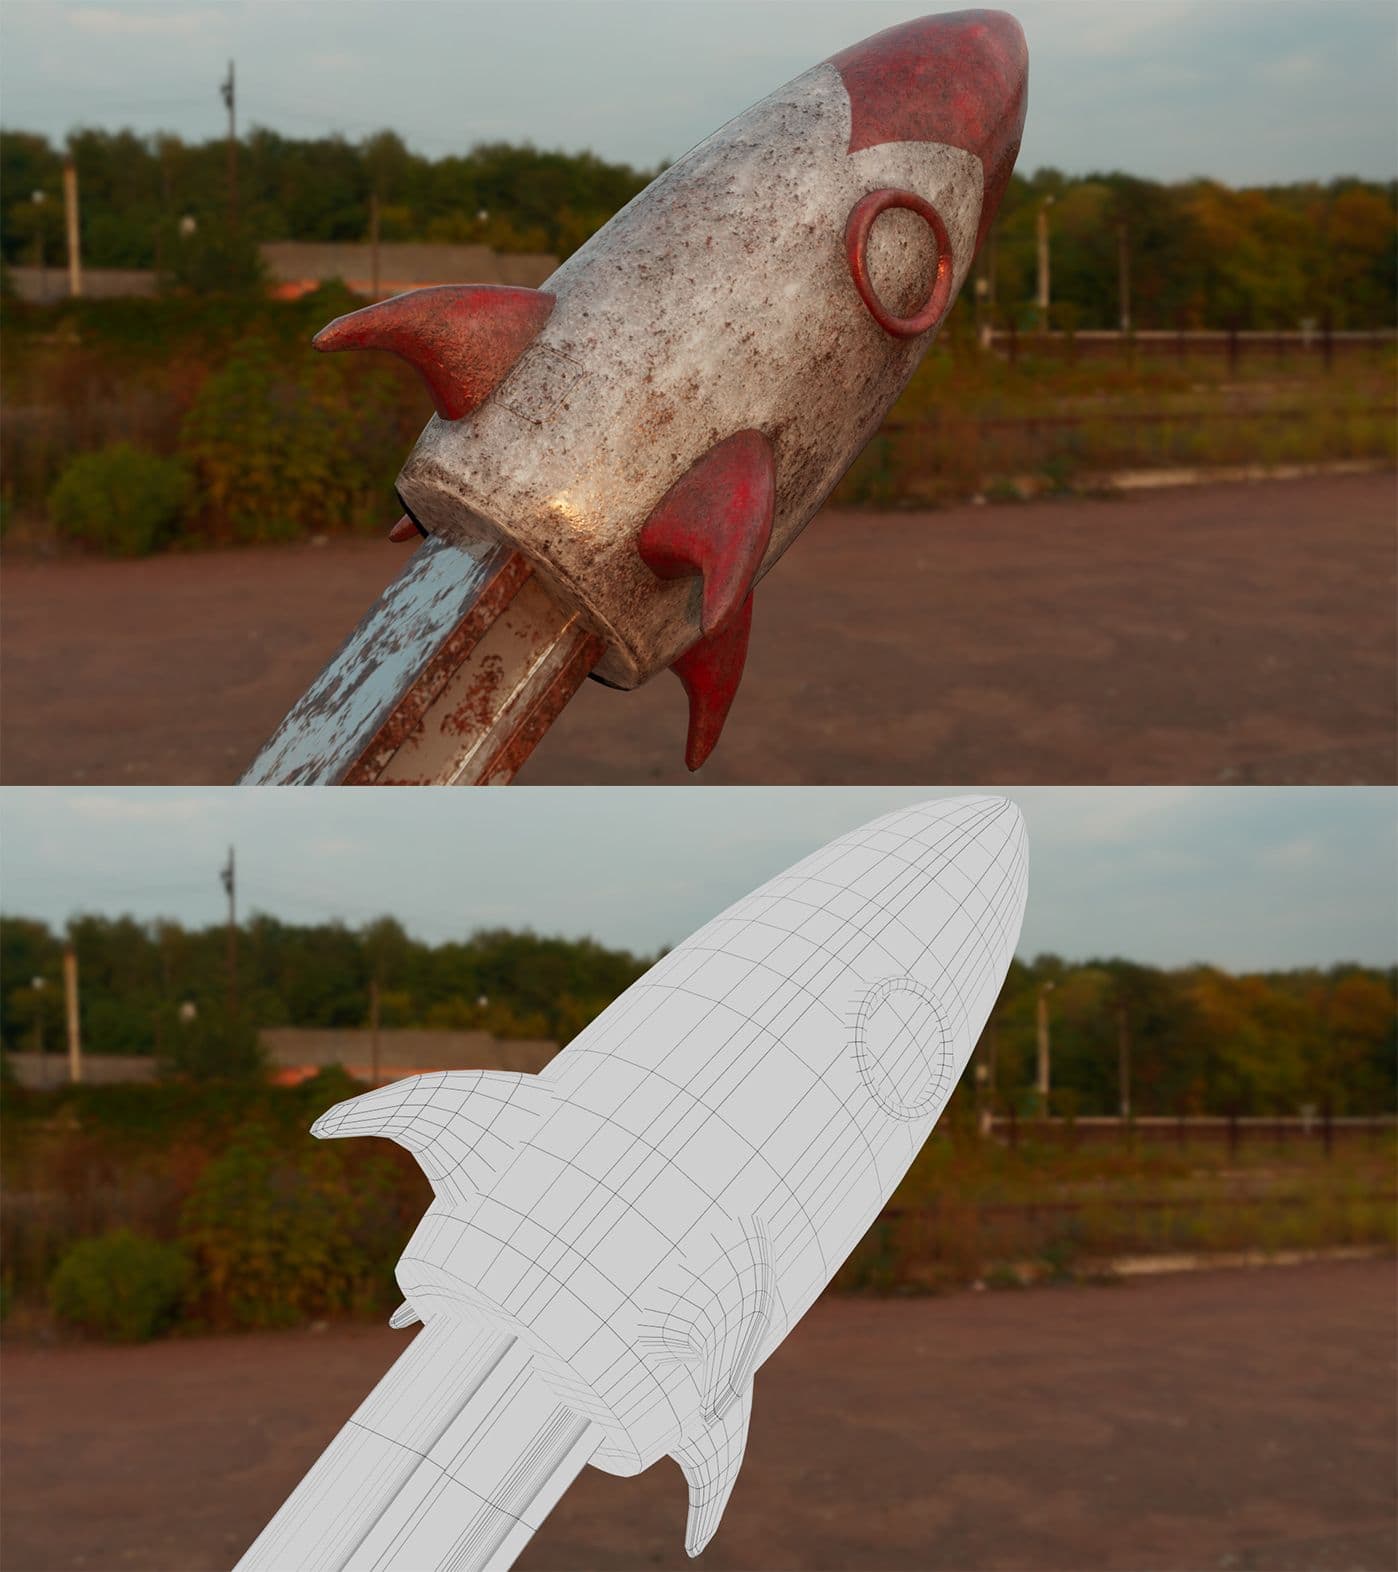
It all started with this prop, but I felt it was also the easier one of the lot. Red and white are the main colours of the Red Rocket company and the design fits with the 50s atmosphere.
It was my first modular building practice. It consists of 5 modular pieces (one inverted). It's important to care about topology, so the texture fits when the pieces are assembled.
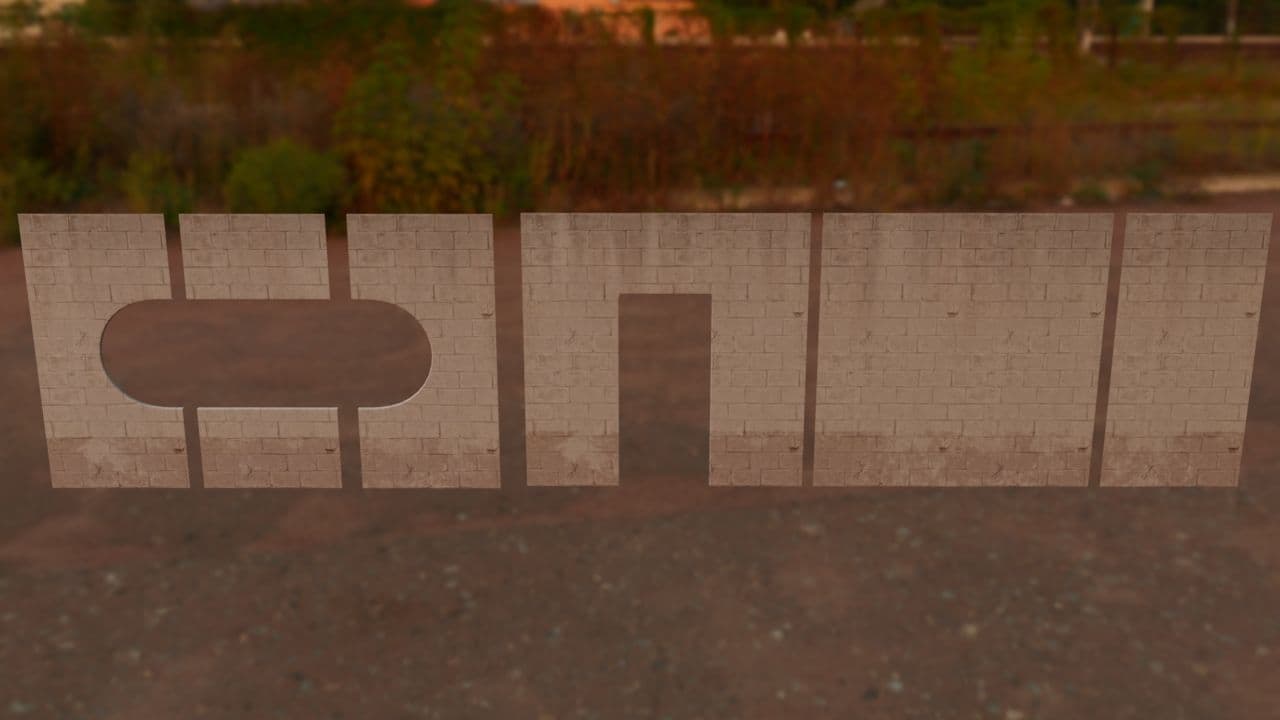
It also allowed me to work with different textures over the same object. I made two different Uv sets, one with the modular pieces for the tileable texture, and another one with the pieces already in place, for the deterioration.
I used the Arnold Mix-Shader to combine the tileable texture with the other one that added deterioration to the walls.
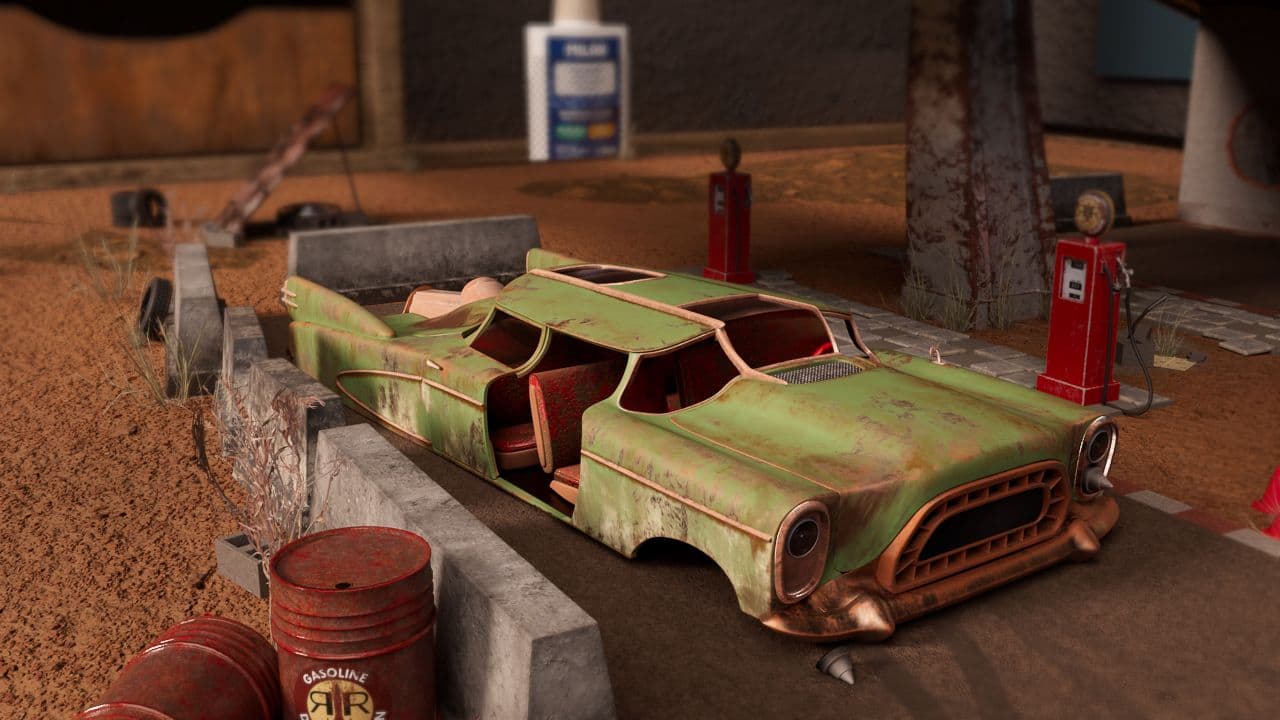
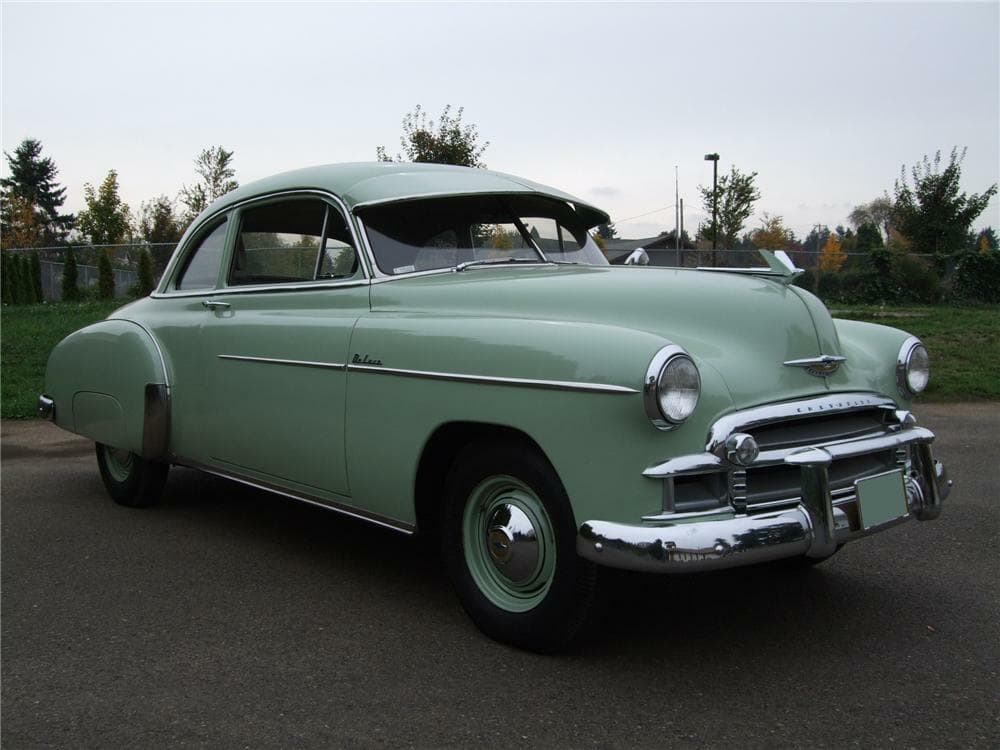
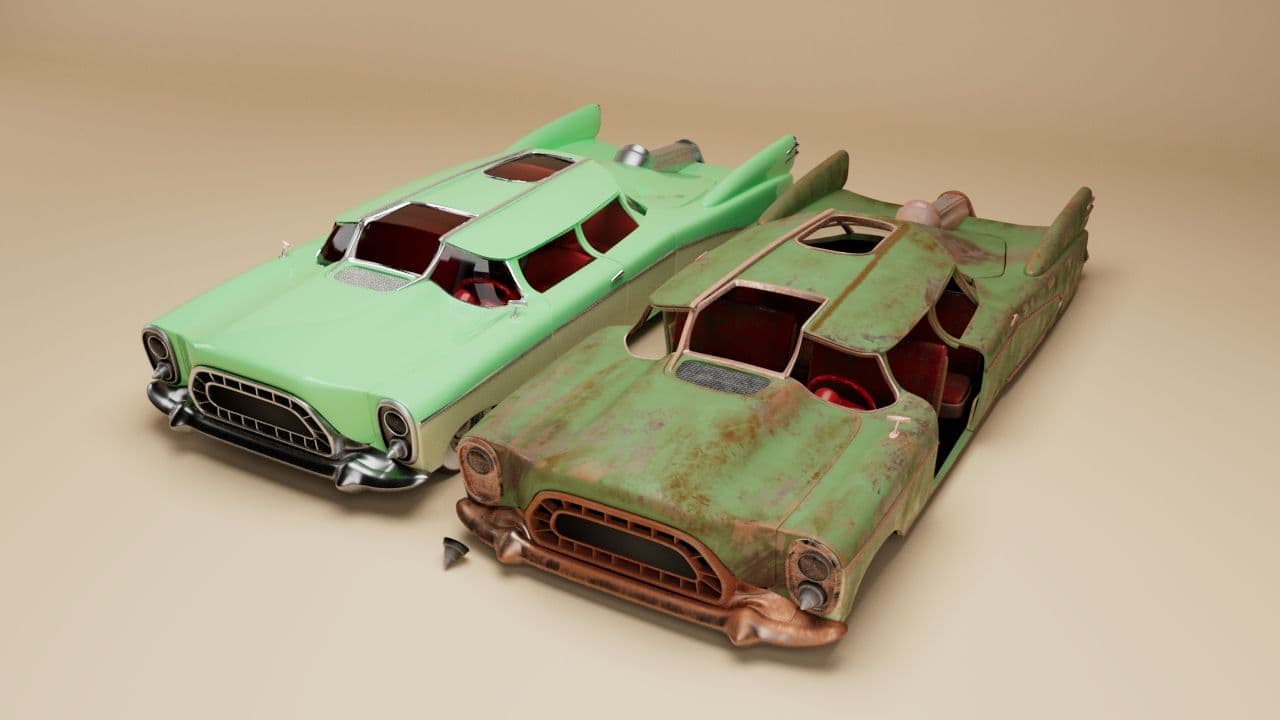
To work on the car, I choose one of the Car Models from the game: the Corvega Atomic V-8. A retro-futuristic car working with nuclear power, set in the 50s.

Since it was not a standard car, reference was limited, so I looked for old cars and tried to pick one that was similar to the one I wanted to make. The Chevrolet cars from the 1950s had a similar look so I used it as a main reference.
First, I made a brand new car with no damage at all, trying to have clean geometry and worrying a bit less about the poly-count at this stage. Once it was finished, it was time for the fun part, breaking it and make it look old and rusty.
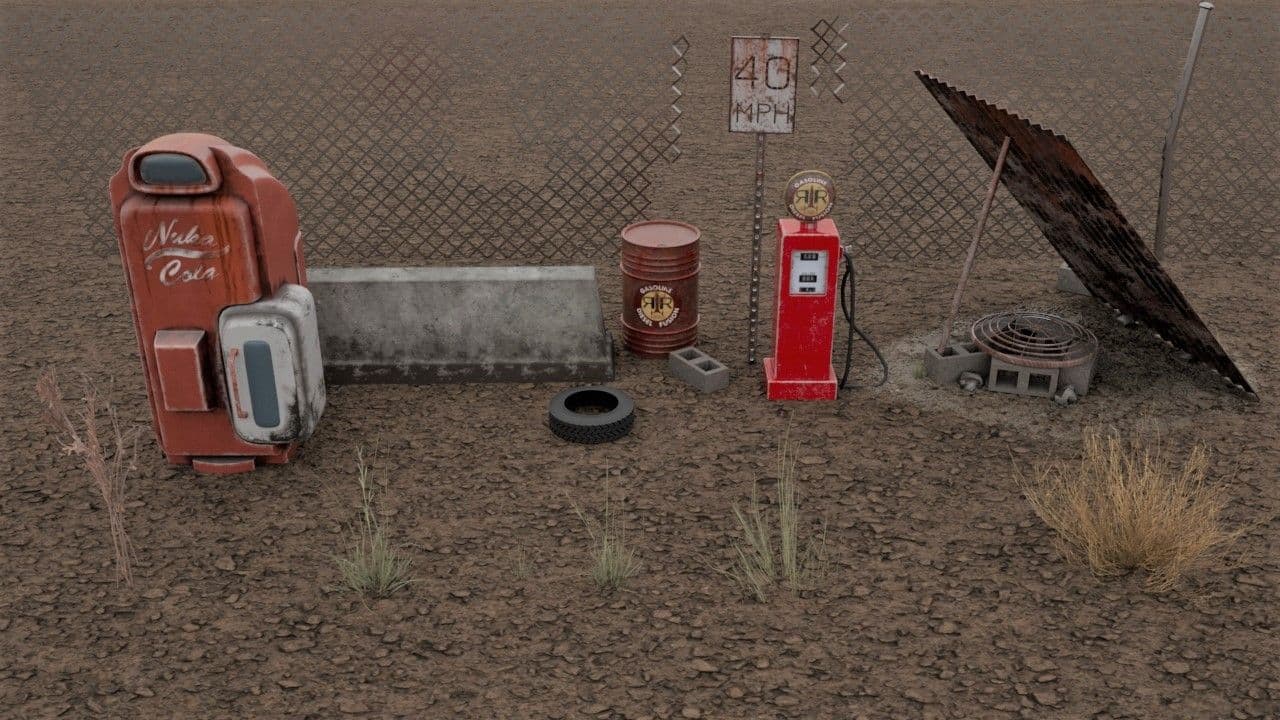
I added the rest of the objects, as well as the dry vegetation in order to have all the props before the deadline and trying to prioritise them by their importance in the scene. The Nuka-Cola machine for example, was a last minute addition, that I really wanted to work on, only if I had time.
All of the props were textured in Substance 3D, except for the plants which were from Quixel with an opacity map applied.
The gas station was almost finished, and everything was in its place, but something was off - the HDRI was not enough for an environment as big as Fallout and I felt like it lacked atmosphere. The isometric view was already making it look like a miniature so I decided to take that path.
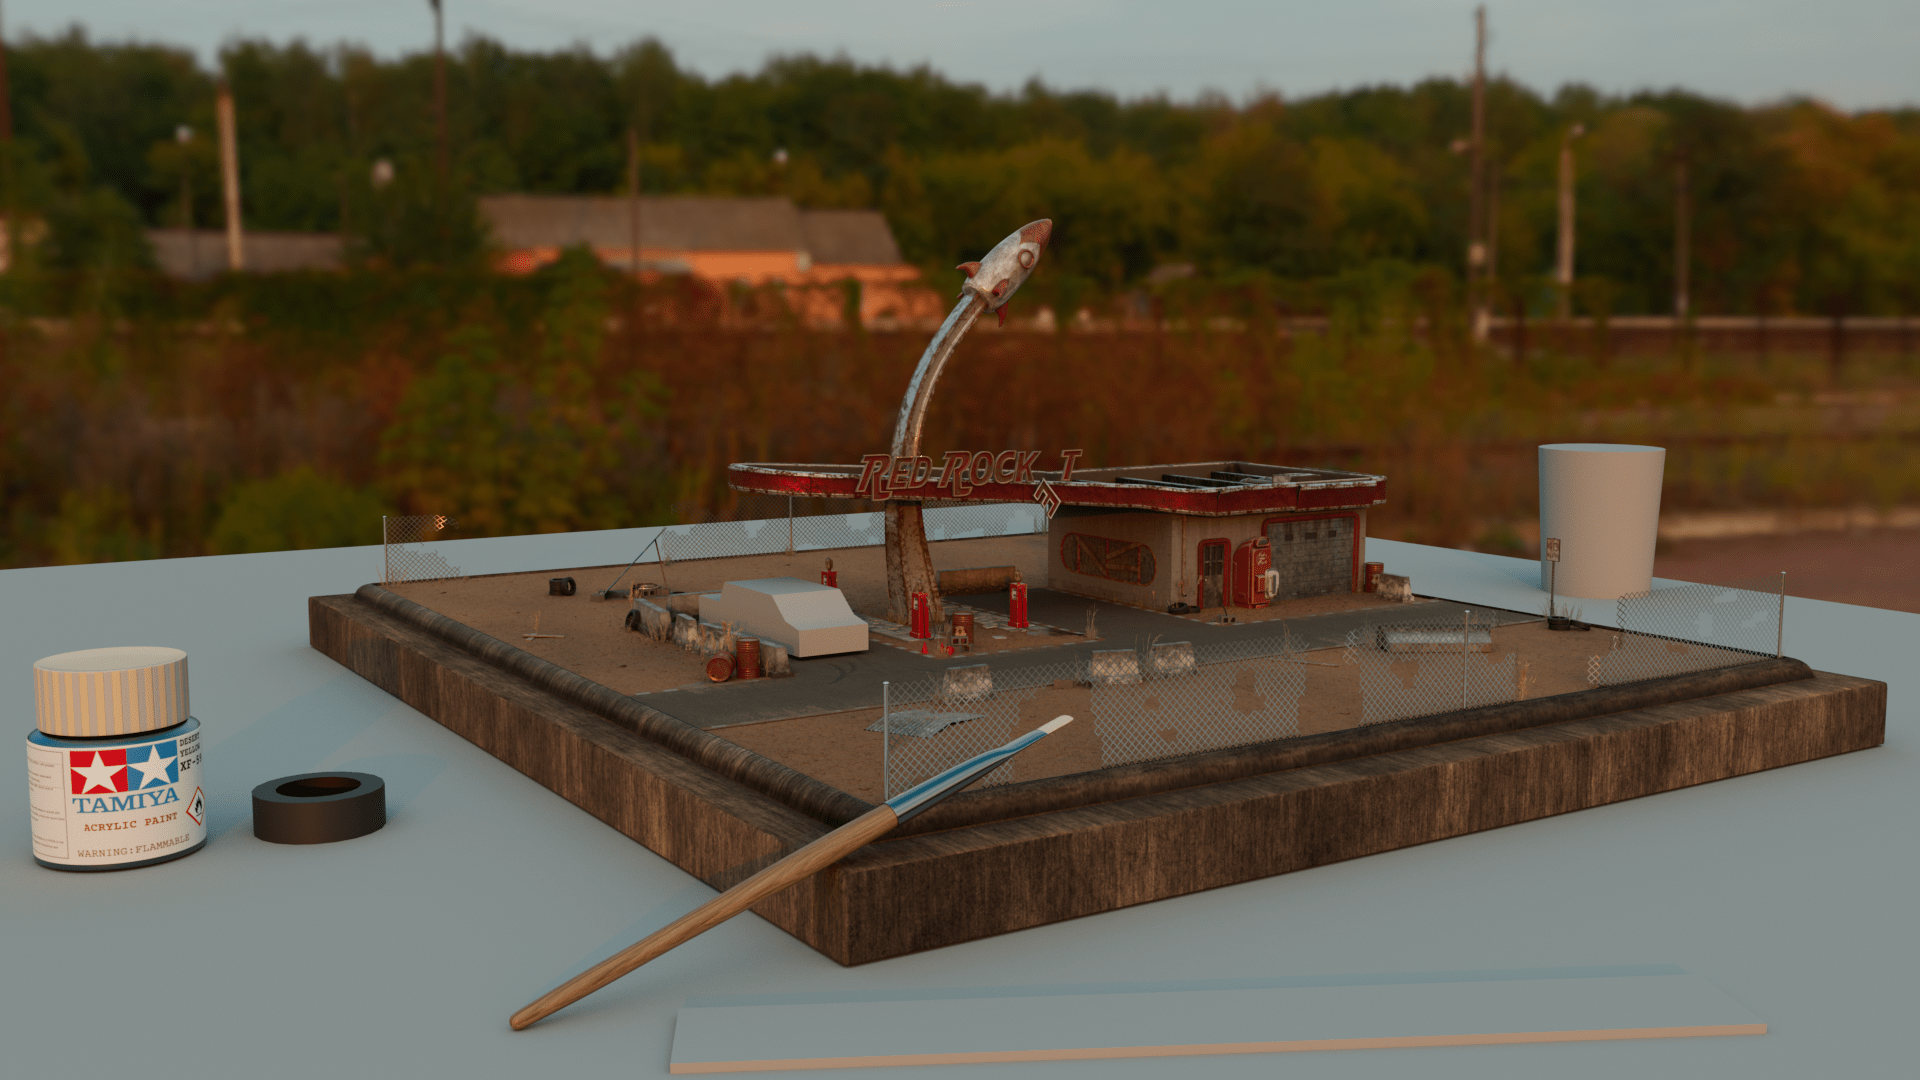
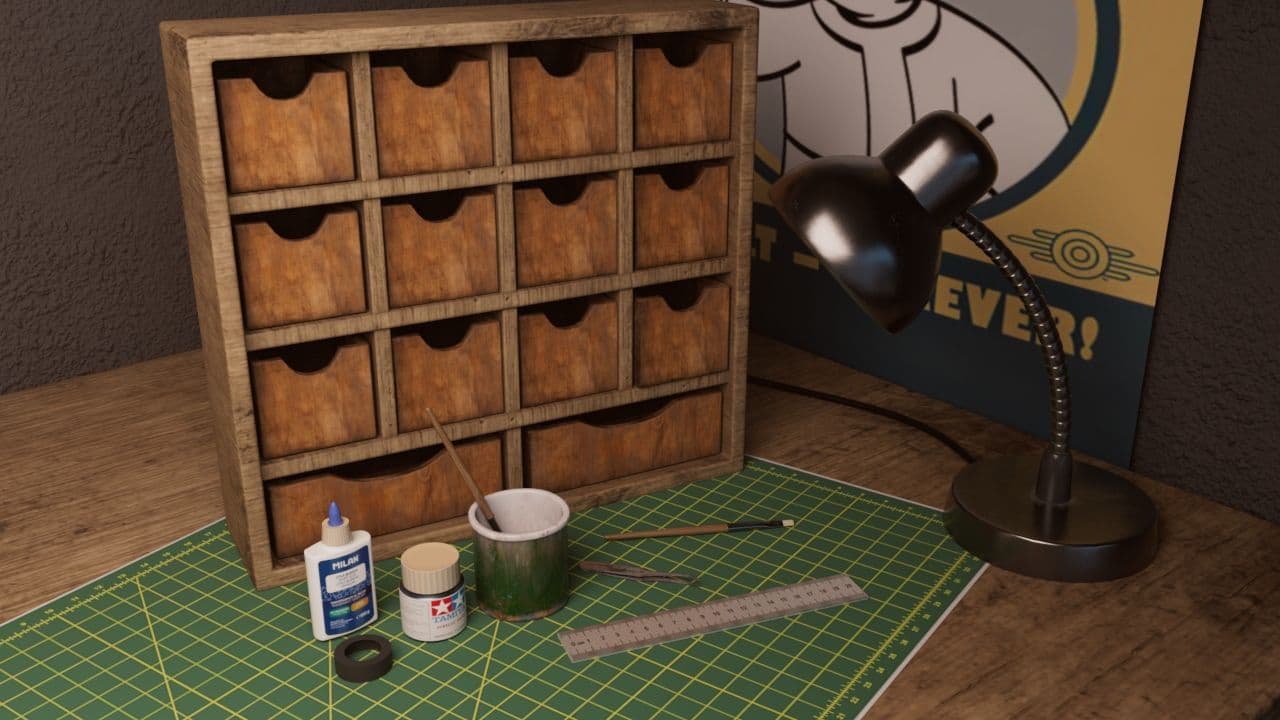
I searched for tools and modelling equipment, work benches and even some videos about miniatures in order to get close to something more realistic. I picked simple ideas like the paint pot and the pencil, so I could get to my deadline without losing quality and making it look alive.
At the same time, I started to work on lighting the scene again, now with a room in mind.
I placed every prop where I thought it fit best, always trying to keep the gas station as the main theme. I put some decals over the road and also added some duplicated props with an Ambient Occlusion material on them, so they wouldn't look like painted objects.
Now, the lighting was entering through a false window from the left, using a warm spot light with a gobo on it, giving the scene a more natural atmosphere.
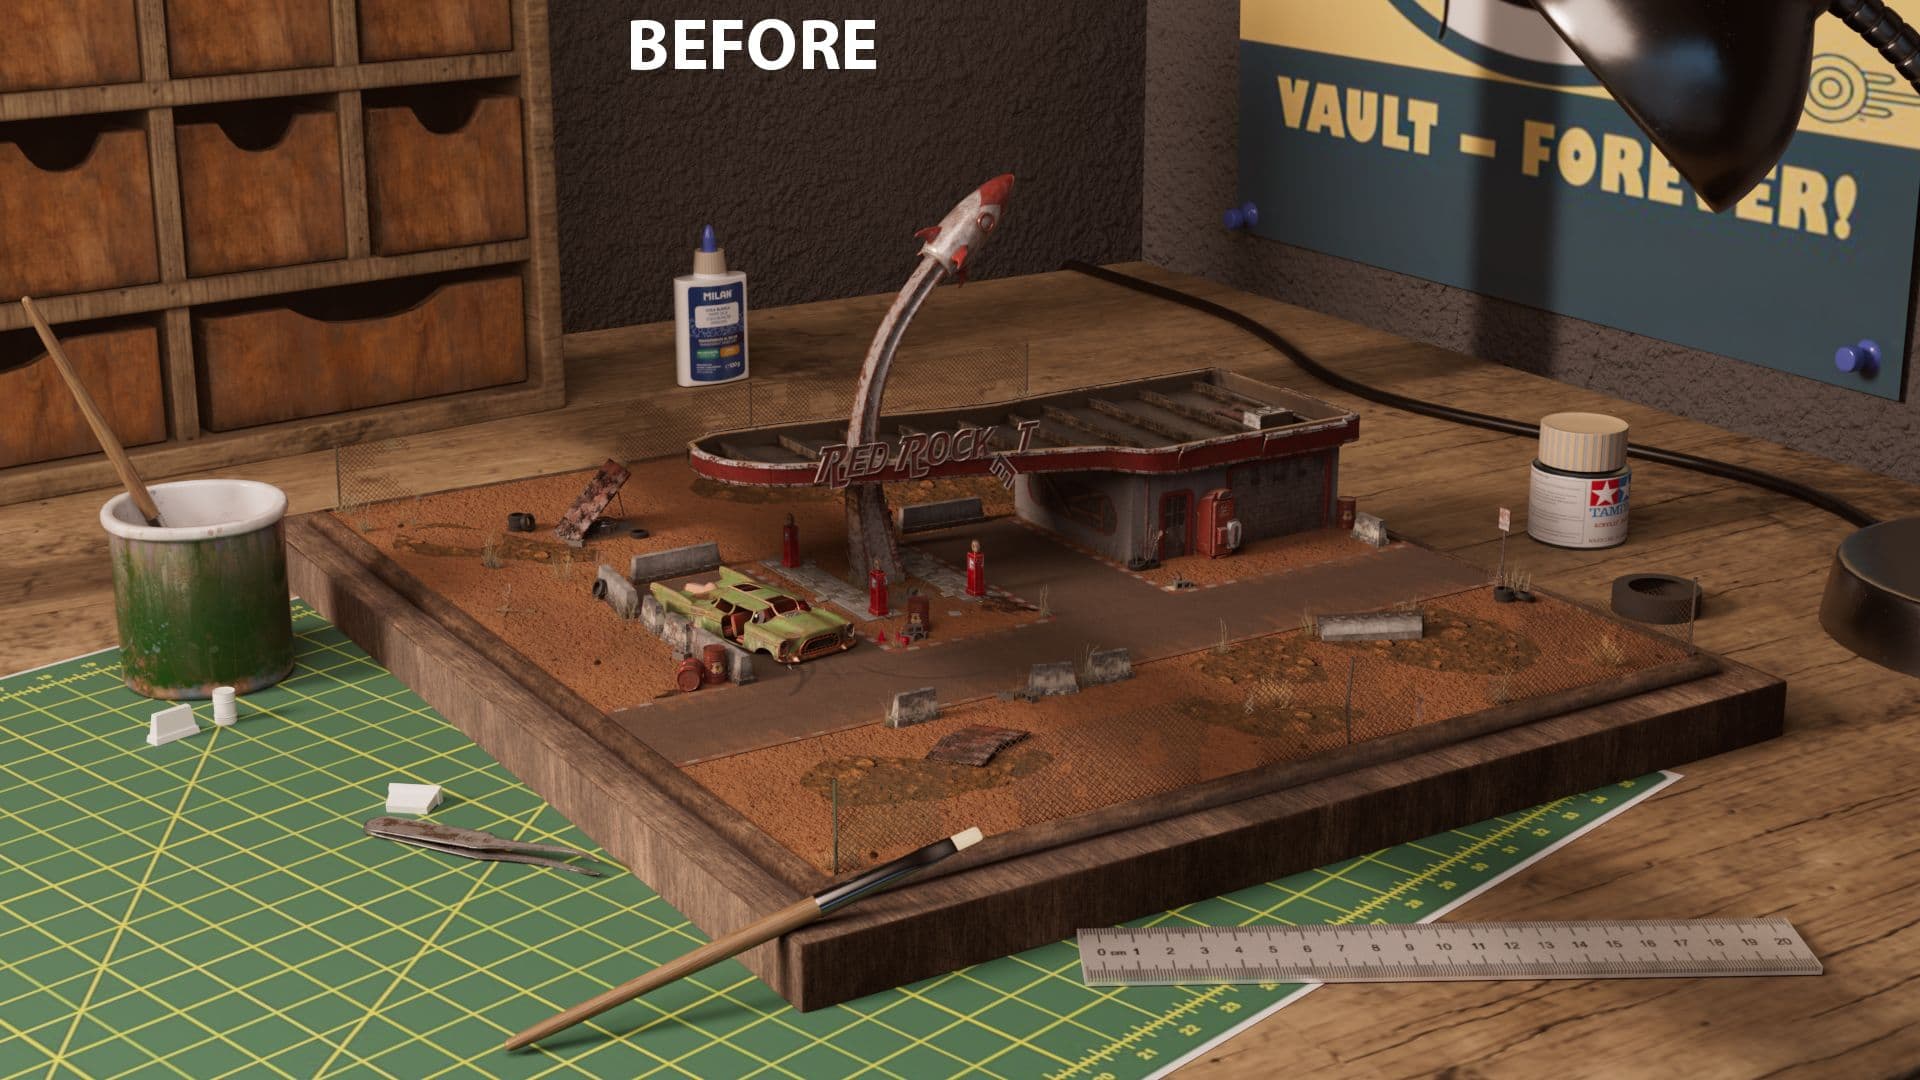
As a final touch, I used Photoshop to make a levels adjustment, then I applied the tilt-shift technique to maintain the focus on the miniature. Finally, a soft vignetting to all the scene.

I have never worked on a project as big as this, where everything could fall apart if the wrong decisions were made. Watching and making it take shape was a really valuable experience as an artist and I can say I feel so proud of the final result. It’s beautiful to see how ideas come to life.
I also learnt a lot of new techniques and how to deal with the feedback. I’m grateful to my classmates, friends and also my teacher Alberto Cano, for this amazing journey.
Thanks to The Rookies too for the opportunity to share and talk about my work a little bit further. I really hope that you, the one reading this, enjoyed as much as I did.
You can find more of Endika's work on The Rookies, Instagram, and ArtStation.