ArchViz: Creating a Stunning 3D Interior in Two Weeks
3D Illustrator and student at School-ing, Sebastià Mercadal, shares the process for creating his stunning and Highly Commended 3D interior render for the Rookie Awards 2022.
3D Illustrator and student at School-ing, Sebastià Mercadal, shares the process for creating his stunning and Highly Commended 3D interior render for the Rookie Awards 2022.

3D Illustrator and student at School-ing, Sebastià Mercadal, shares the process for creating his stunning and Highly Commended 3D interior render for the Rookie Awards 2022.
If you're looking for inspiration for your Rookie Awards 2023 Archviz entry, this article is for you.
When I decided to study again, I looked for a school where the teachers were the best in their field. A place where there was so much knowledge that it was impossible to learn everything. To me, that place was School-ing. Whether you are a newbie or a pro in 3D, you'll have the chance to learn a ton more.
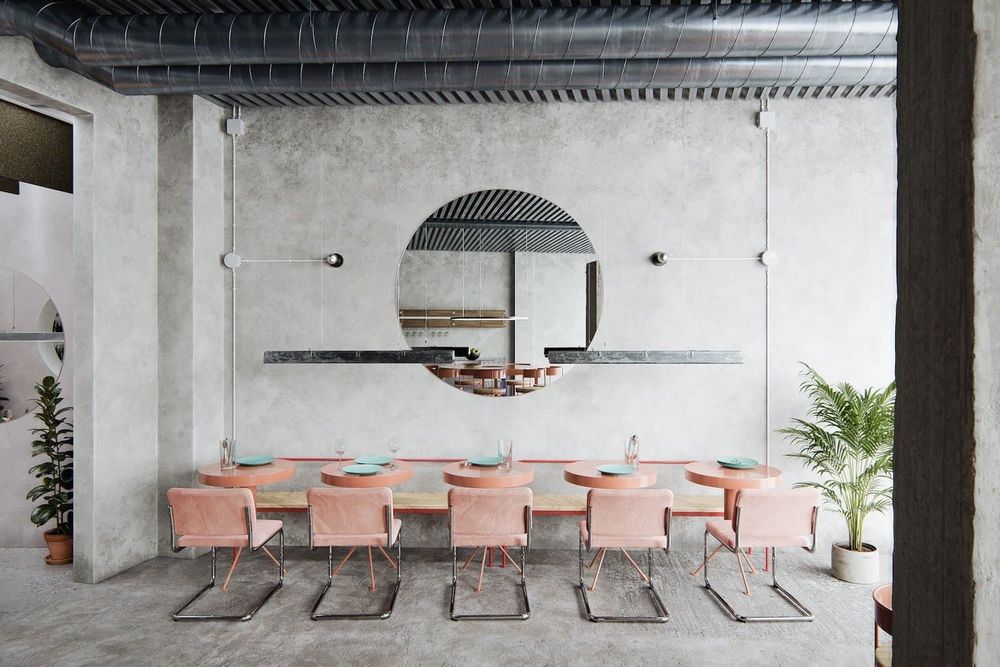
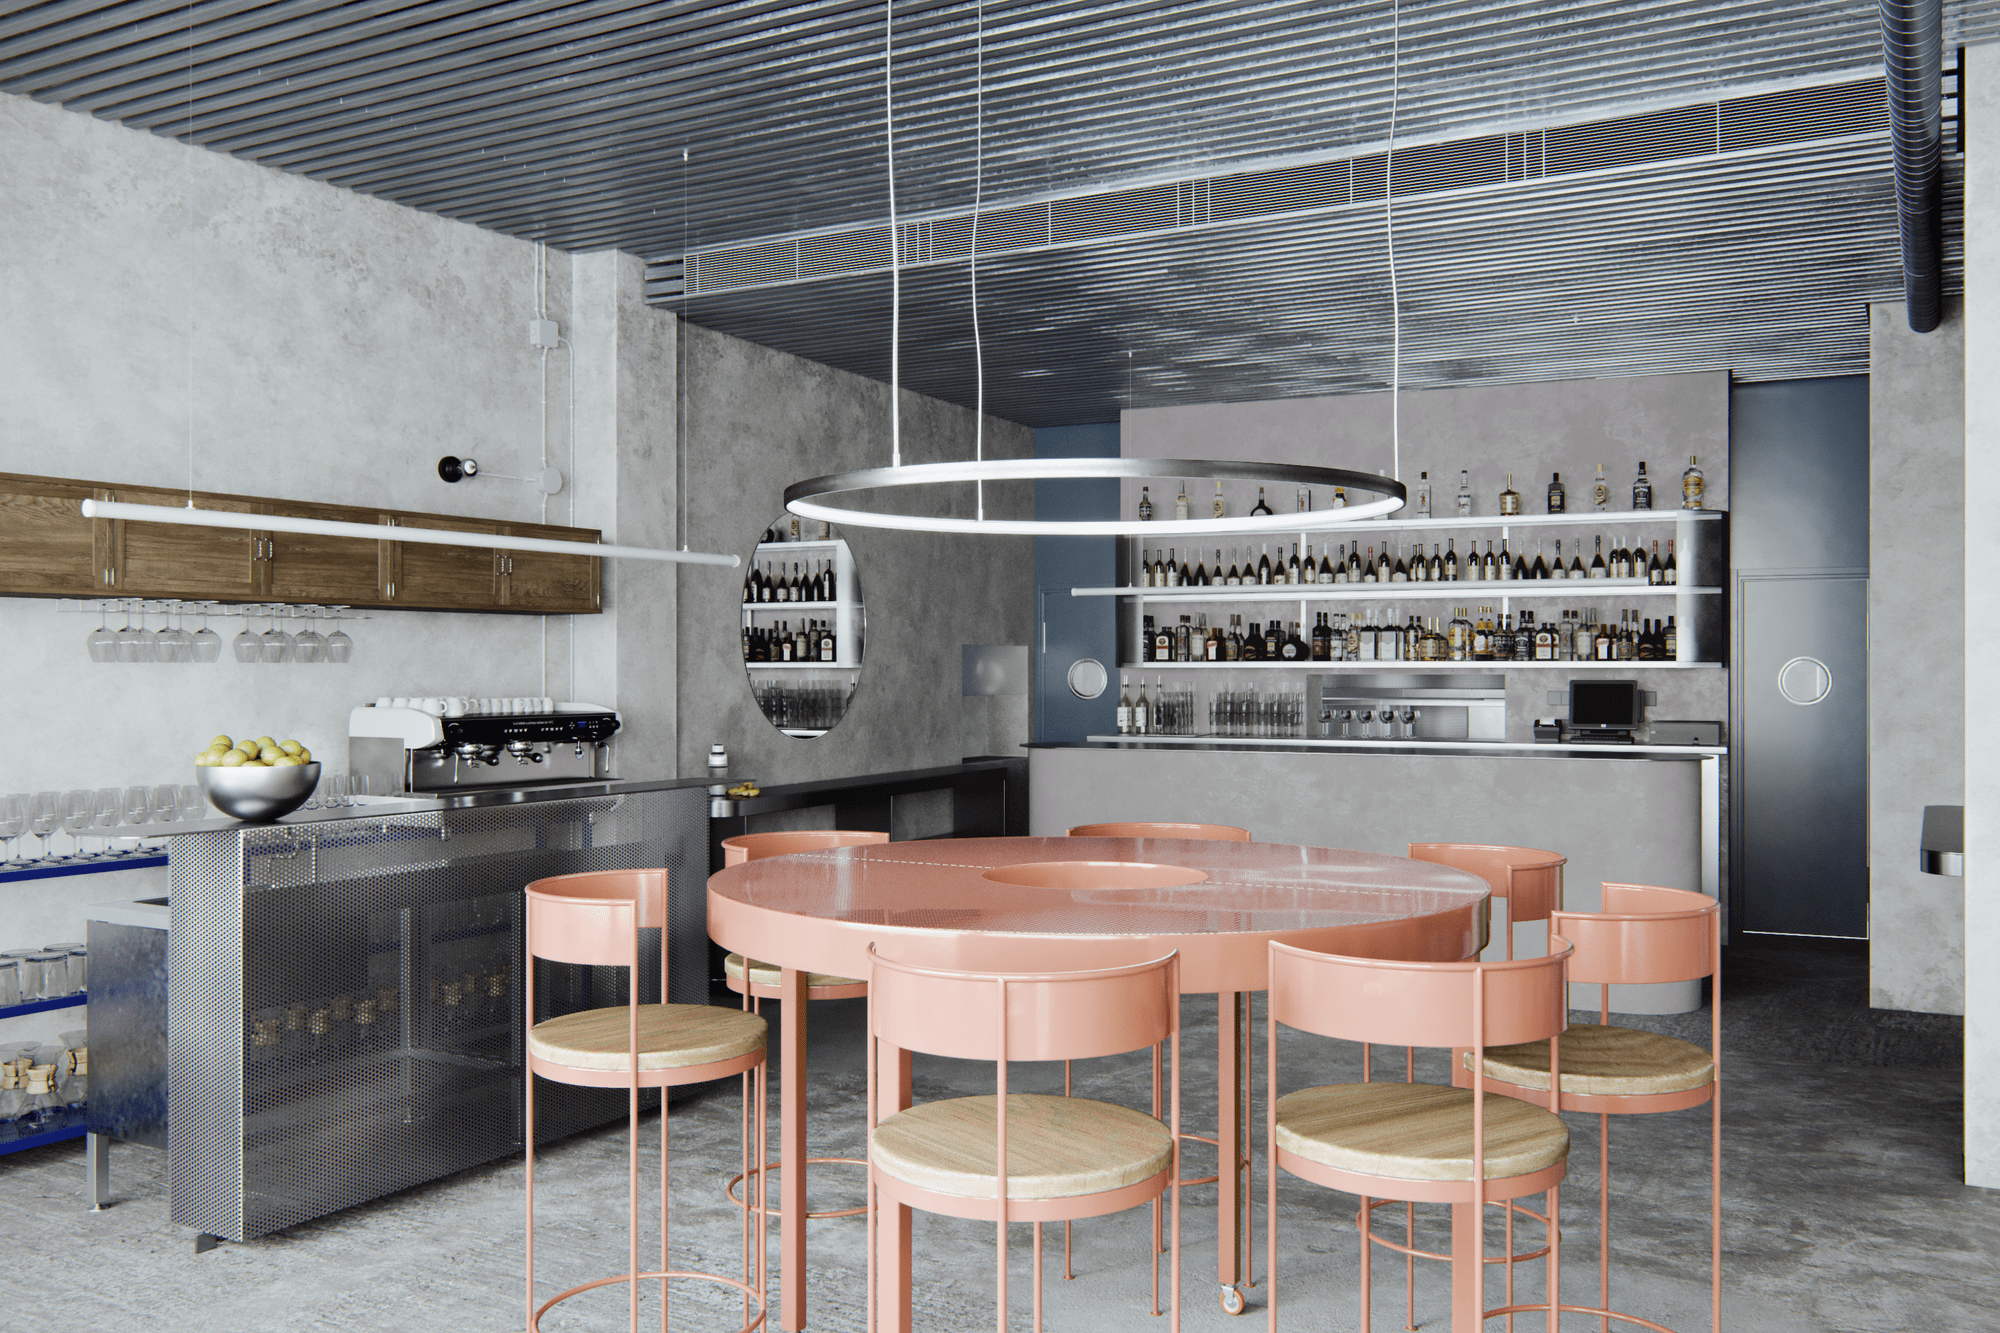
My Rookie Awards entry was the result an academic project at School-ing. Casa Plata is a restaurant and pub located in Seville. It was designed by Lucas y Hernandez-Gil in 2018. The goal of the project was to be able to recreate the local’s atmosphere and interior design using 3d tools paying attention to the modelling, illumination and materials.
I think the Rookie Awards is an amazing showcase to the world. In fact, I got a new job because of it!
Although it was an academic project, I had very clear deadlines: the final images had to be done in two weeks. So, being extremely organised was a must to be successful. I decided to split the work in three partial deadlines:
Dividing the process into small steps and submitting by the deadlines helps to optimise your time and be less consumed by insignificant details.
The scene has been modeled in 3DS Max. There are two main parts to the modelling phase: architecture and furniture.
Due to the minimum accessible documentation, the architecture of the project was modelled from a plan view. I used photos to guess the heights. It is a daunting task because there is absence of precise measurements, so you have to use your intuition to get the correct result.
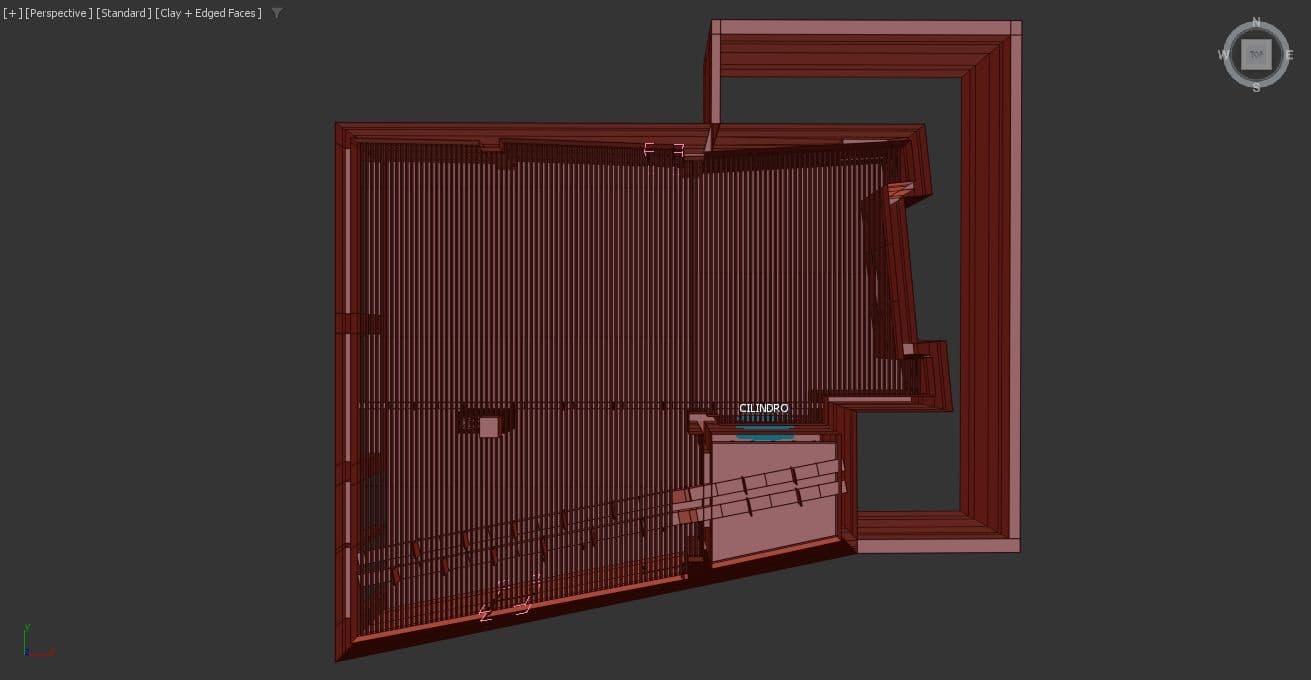
I use Railclone to simplify modeling tasks and optimise the scene's resources. It helped me to place the AC ducts, the metallic ceiling, and the electrical wirings.
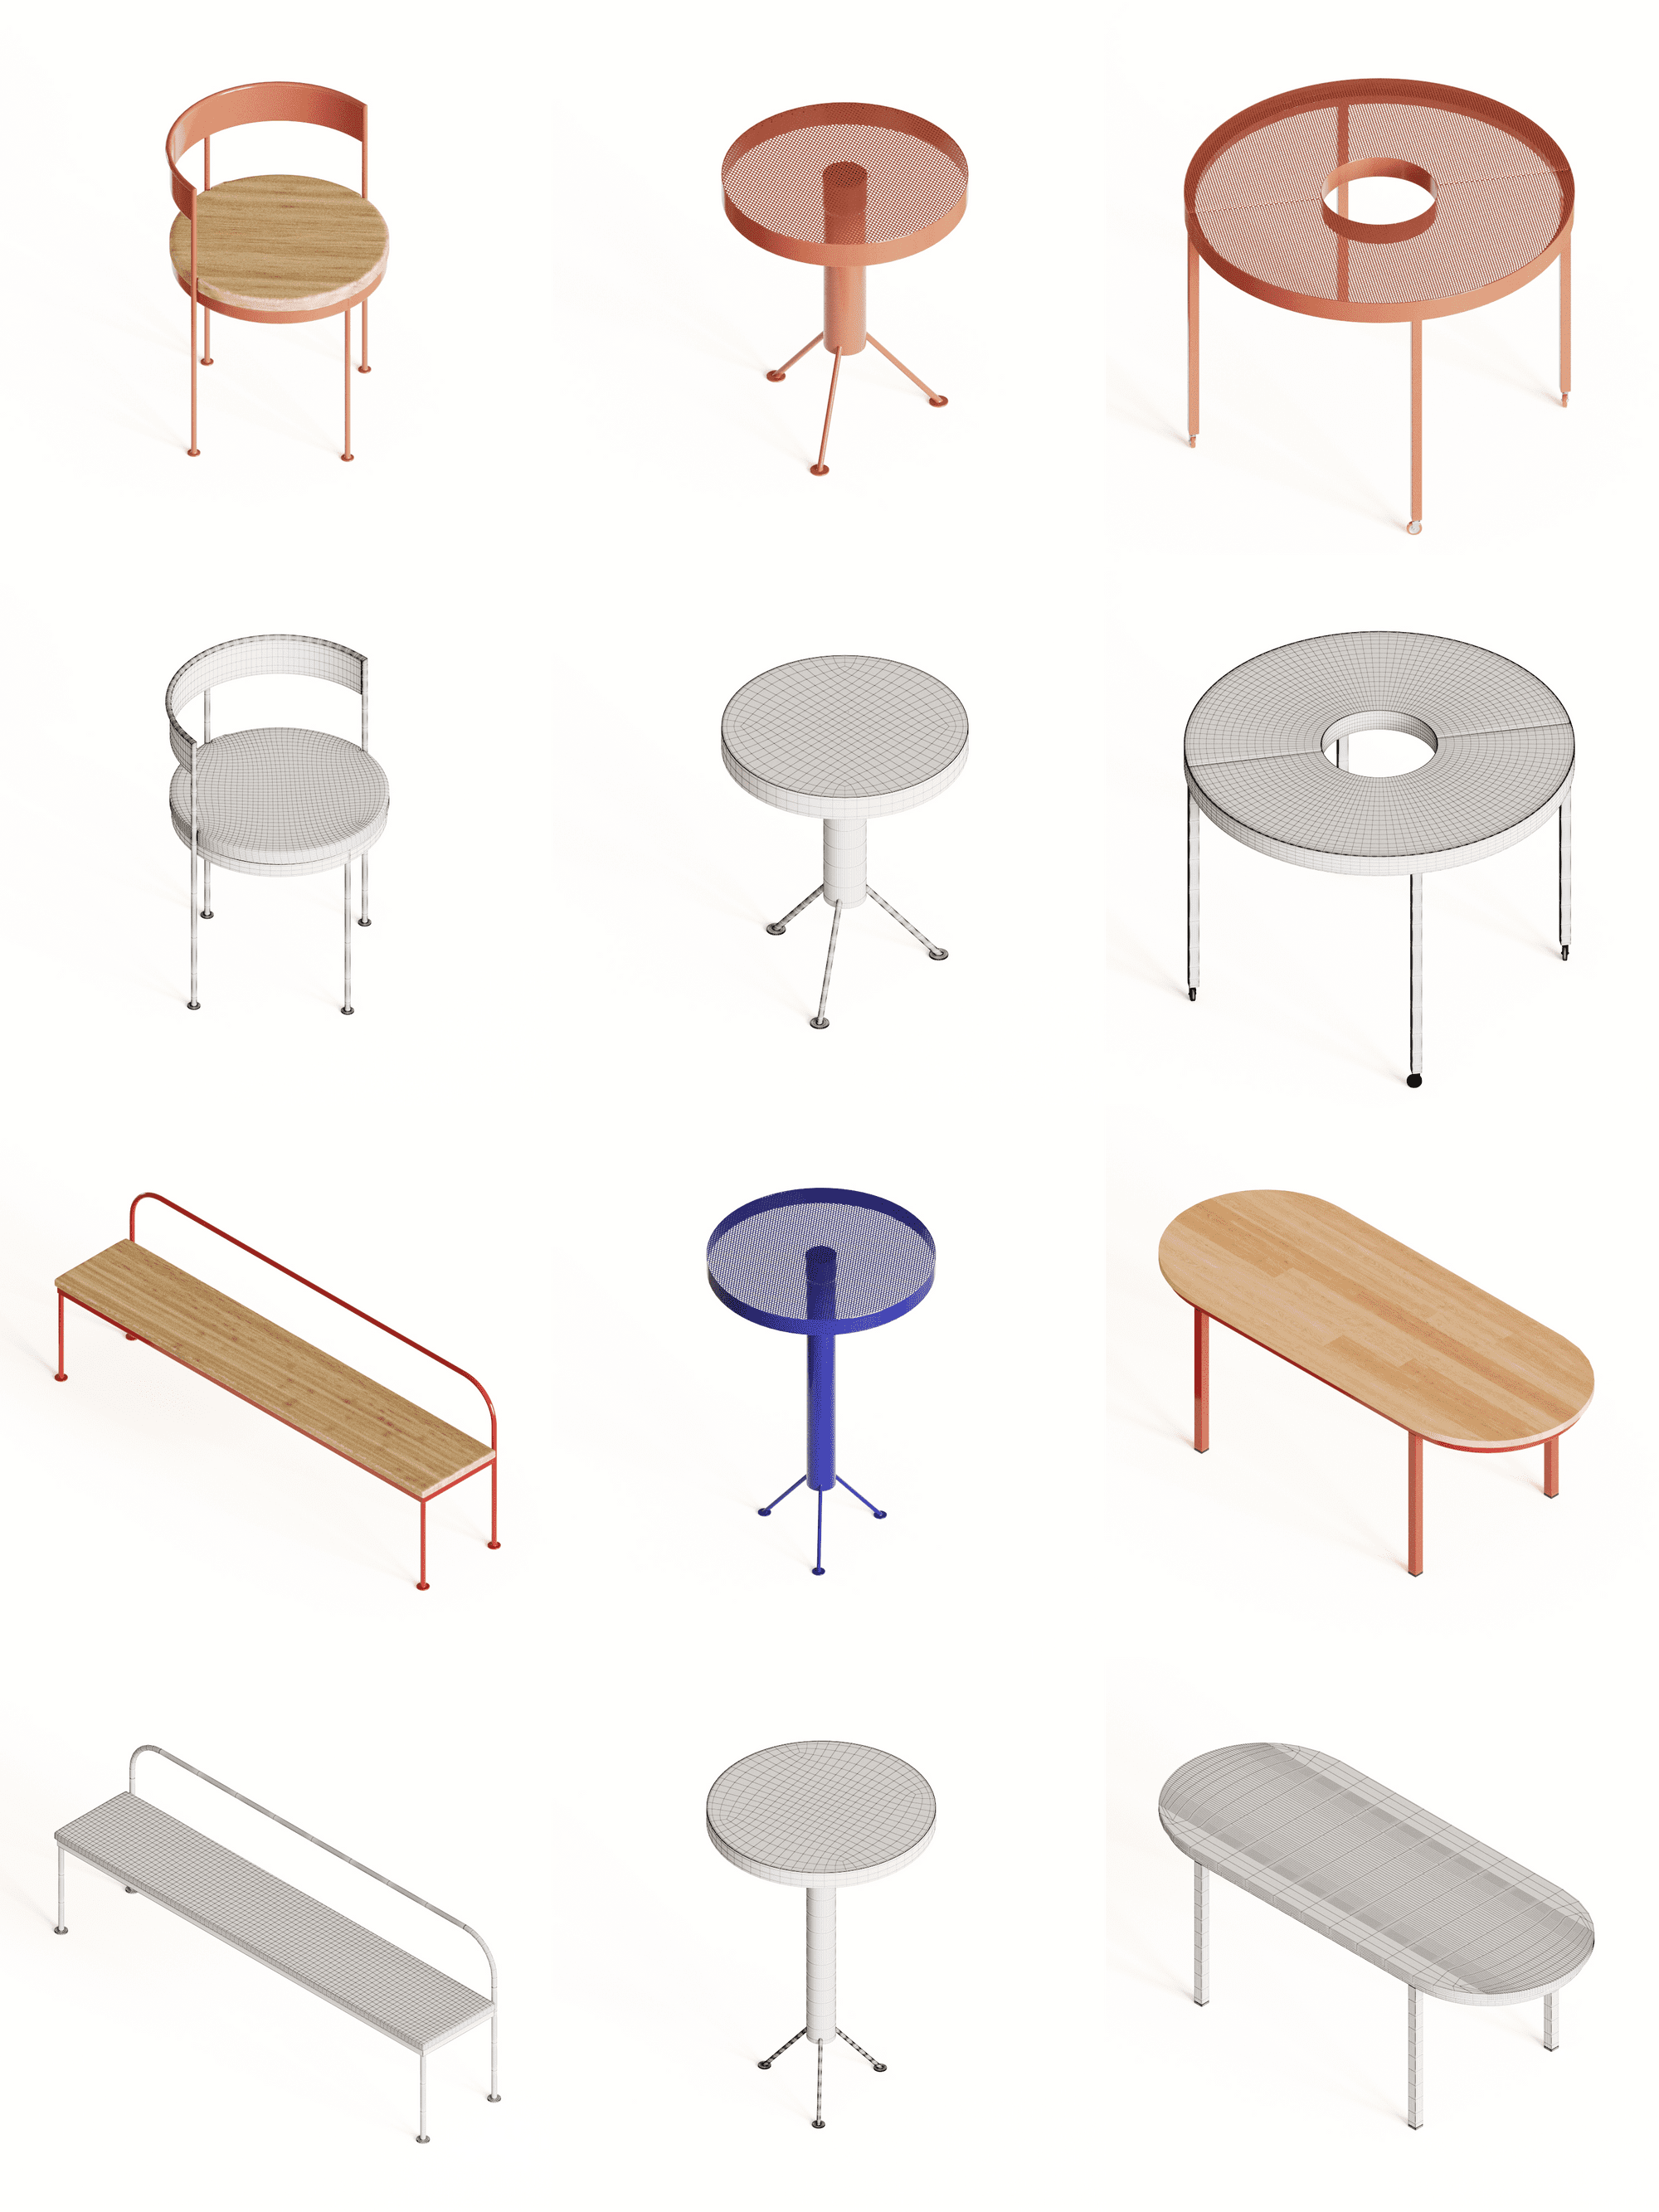
Kresta Design is the author of all the restaurant's furniture. They are custom and rare pieces impossible to find in the internet's most common libraries. I modeled them from scratch based on the maker's blueprints and some photos.
Turbosmooth modifier was a must to get better curves, so I followed quad modeling rules.
For the initial lighting, I created a dome with an HDRi of a narrow street. In HDRi Haven you can freely download this high dynamic range images and so many others.
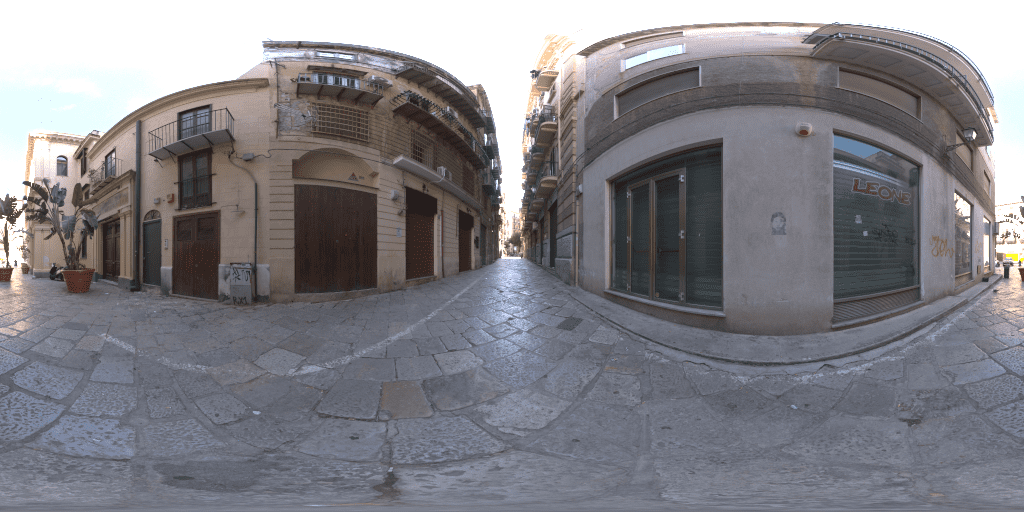
The dome's subtle light will illuminate the interior of the restaurant. The soft ambient light allows you to play with artificial lighting in a realistic way, trying to achieve a sweet spot where both complement each other.
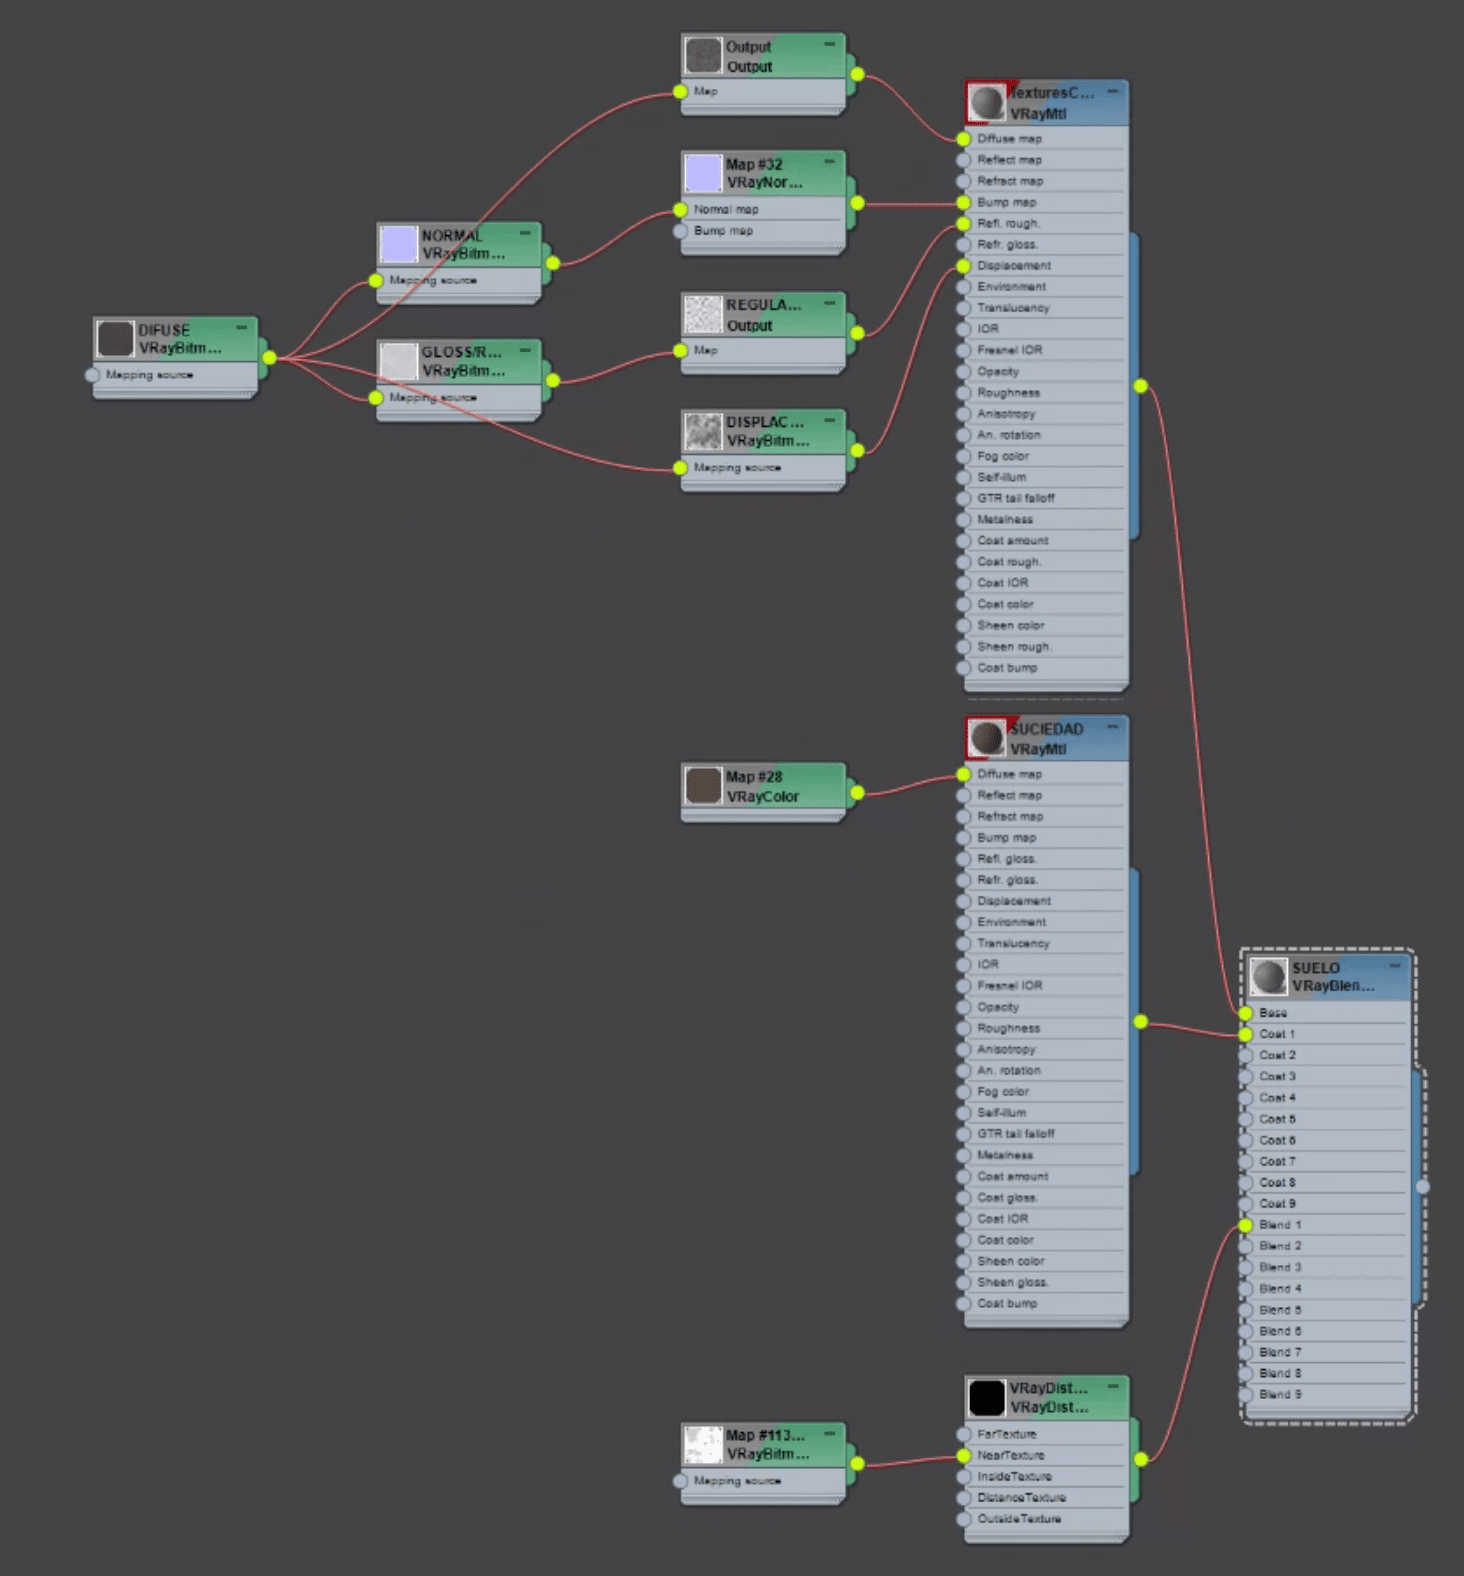
I always try to create very simple materials, and I use decals to give more detail to ones that will cover really large surfaces, like the floor or the walls.
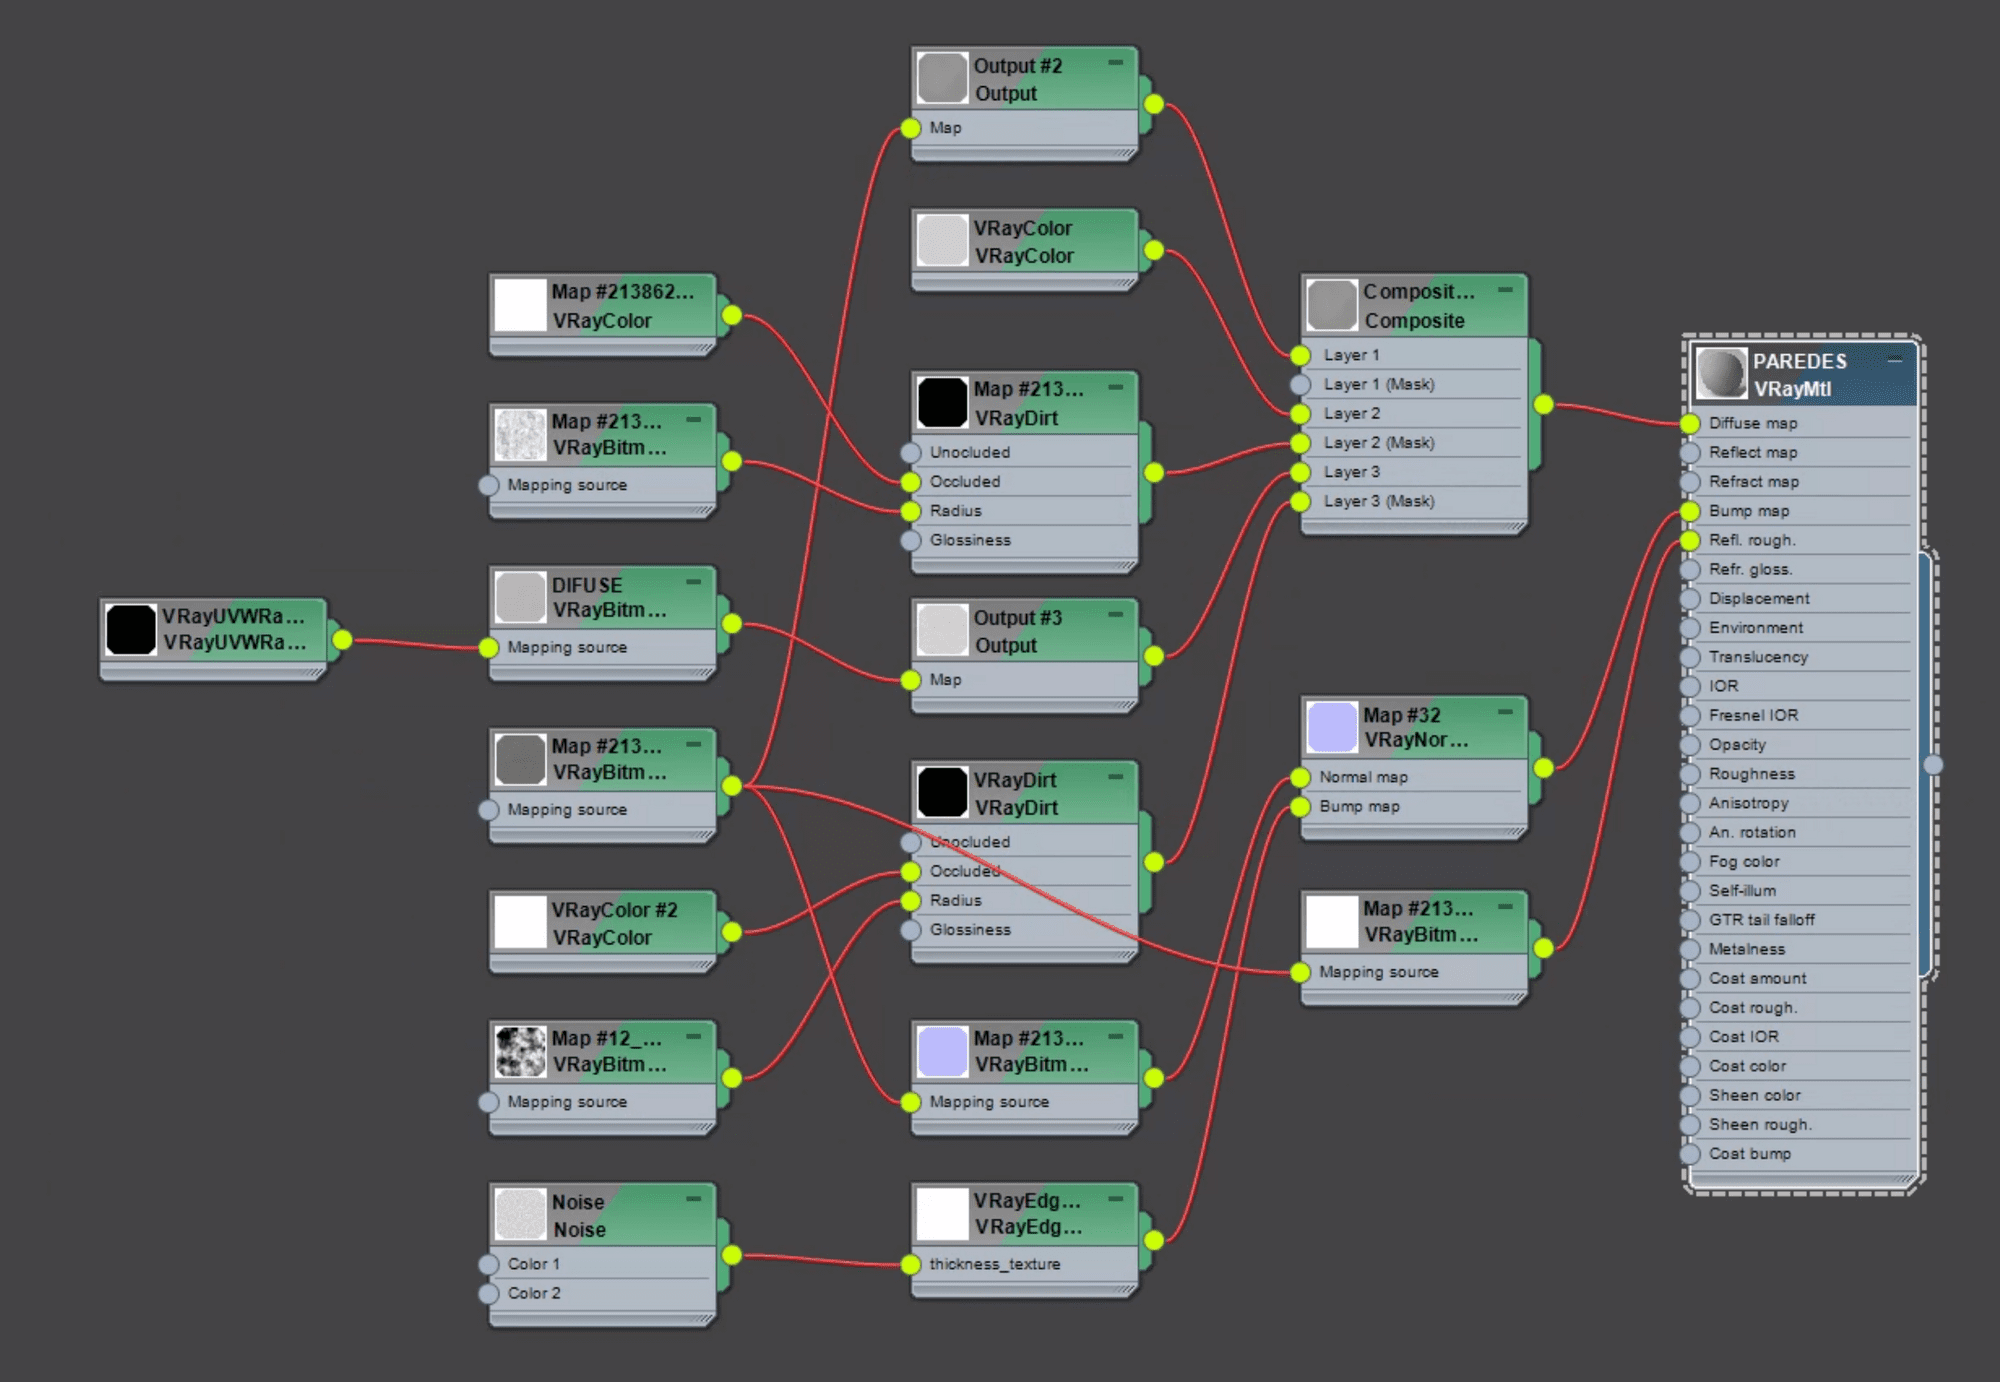
The wall material is the most complex in the whole scene: I used VRayDirt to create dirt masks that affect both, the diffuse and the reflection channel.
To me, post-production is one of the most important factors in the creation of the image: it can greatly improve or worsen, if it isn't done well.
In this case, I have done a very simple post-production with Photoshop. I compressed the highlights of the RAW image in the V-Ray frame buffer.
Once in Photoshop, I added CameraRaw to improve blacks and overall contrast. In addition, I applied curves adjustments on the elements that I considered necessary.
Finally, at the end, another CameraRaw has been applied to improve the local contrast and the general focus.
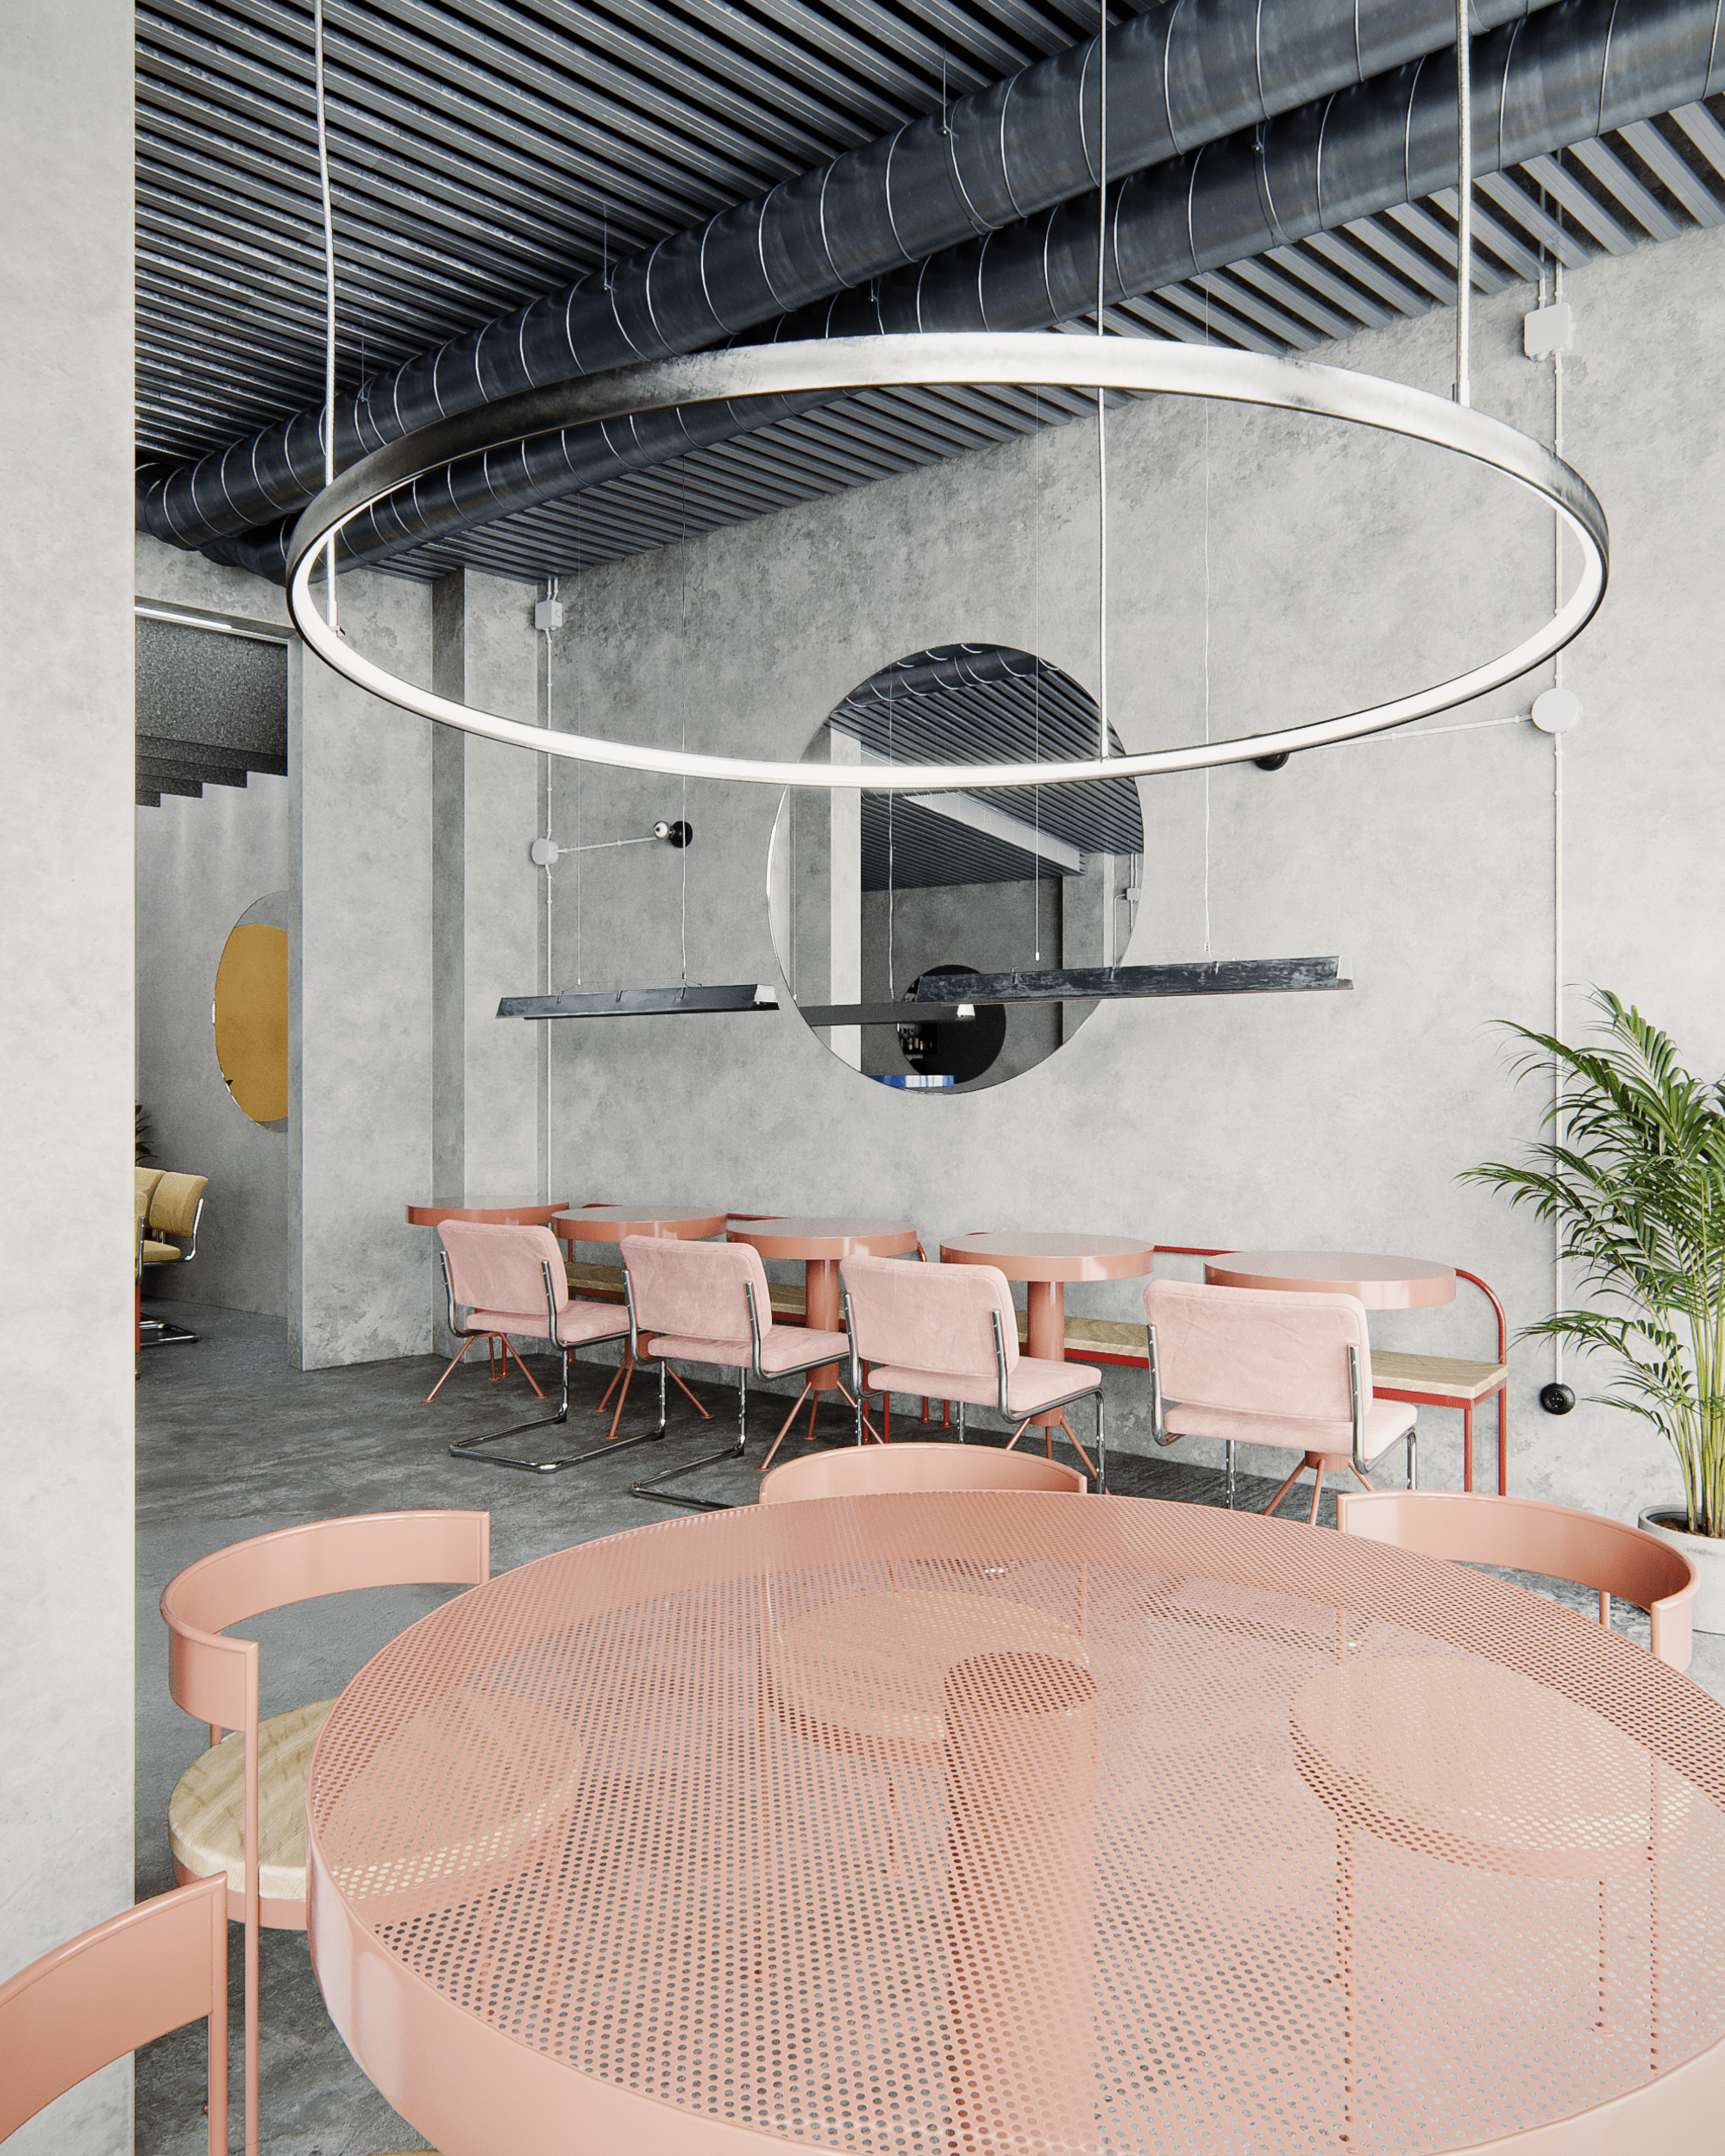
Hopefully this article helps others to understand a common workflow for getting interior computer generated images. In addition, I would like to share some other final images of the same project:

I want to thank The Rookies for the invite to write this behind the scenes and I hope you guys found it interesting. Find some of my latest work on my Instagram and Linkedin.