Building an Exterior Day to Night Scene in 3D
Follow along to learn how ESMA CG School student, Mario Latcher, explored the design, production and compositing of a 3D exterior scene.
Follow along to learn how ESMA CG School student, Mario Latcher, explored the design, production and compositing of a 3D exterior scene.

Mario Latcher is a student at ESMA CG School in Montpellier, France. Studying GCI for the last three years, Mario continues to hone in on his craft. For this school project he was tasked with creating an exterior day to night scene from design and concept, to animation, and final render.
Follow along to learn how Mario explored the design, production, and compositing of a 3D exterior scene.
At first we had to create a facade where we were free on the concept and the design for a day version and a night version. We were also tasked with creating an 11 second animation of a character in our scene. The purpose of these tasks was to familiarise ourselves with a production pipeline.
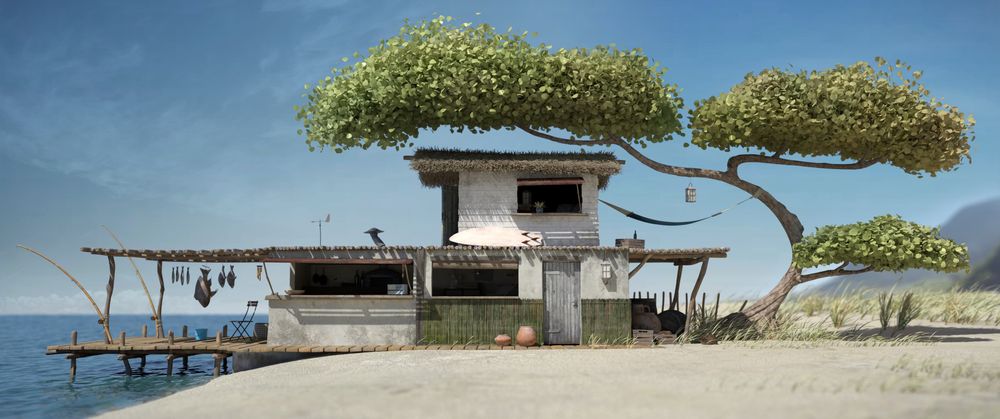
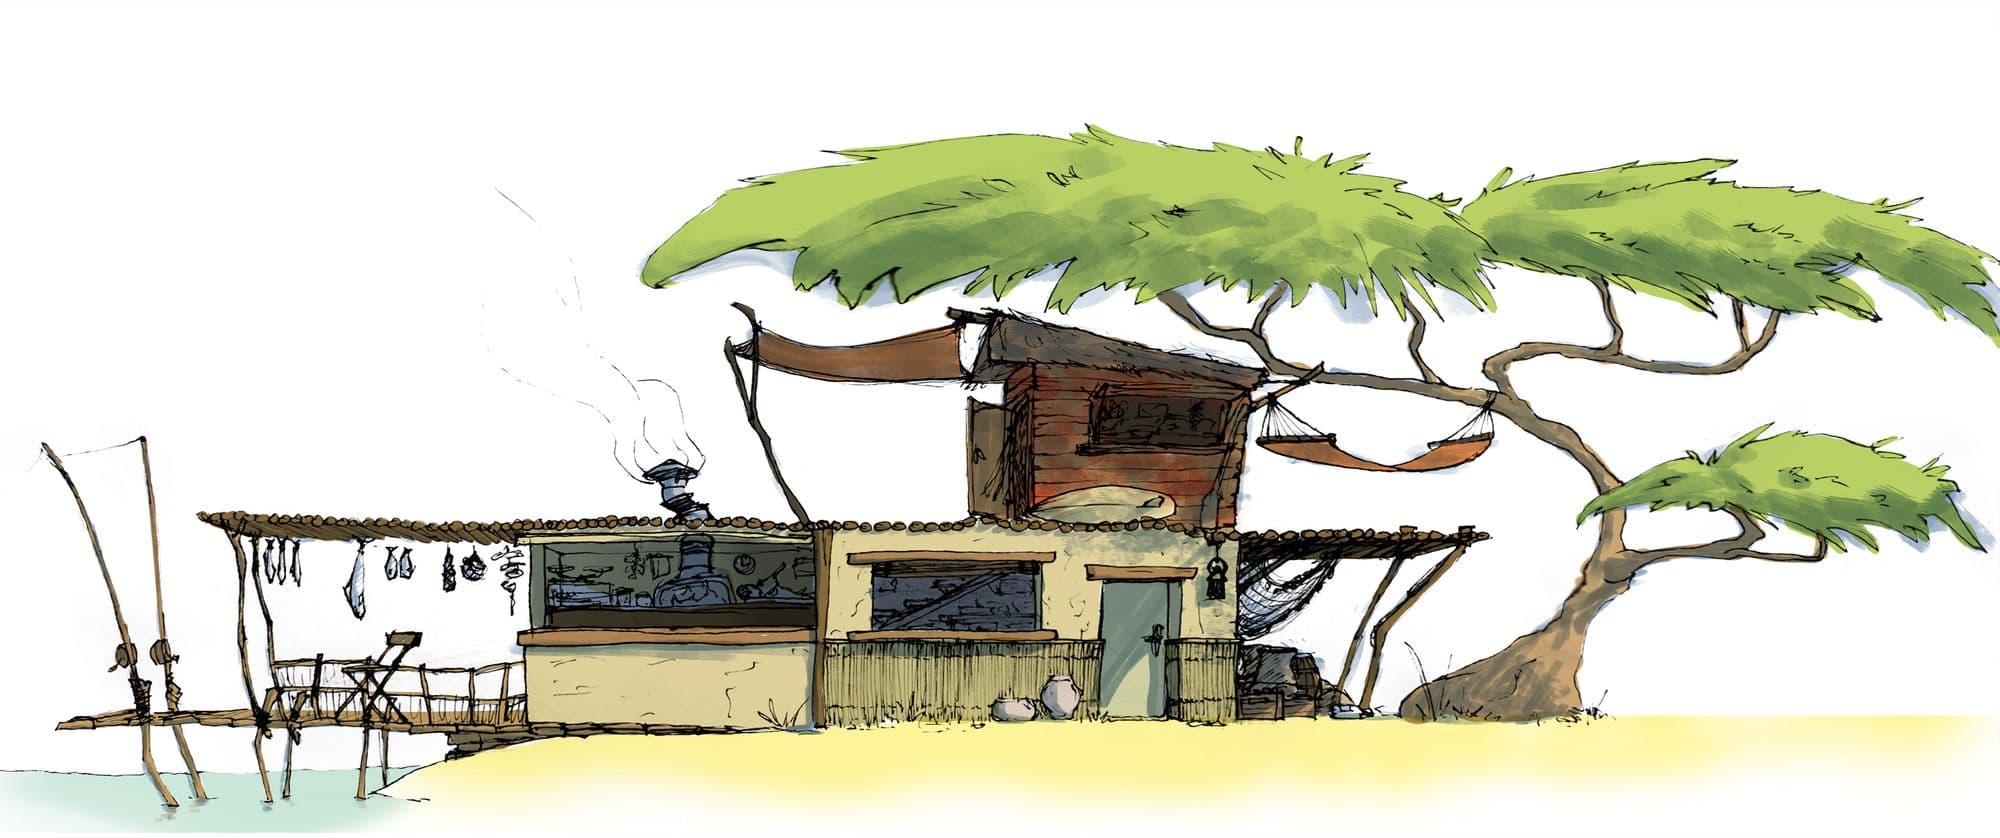
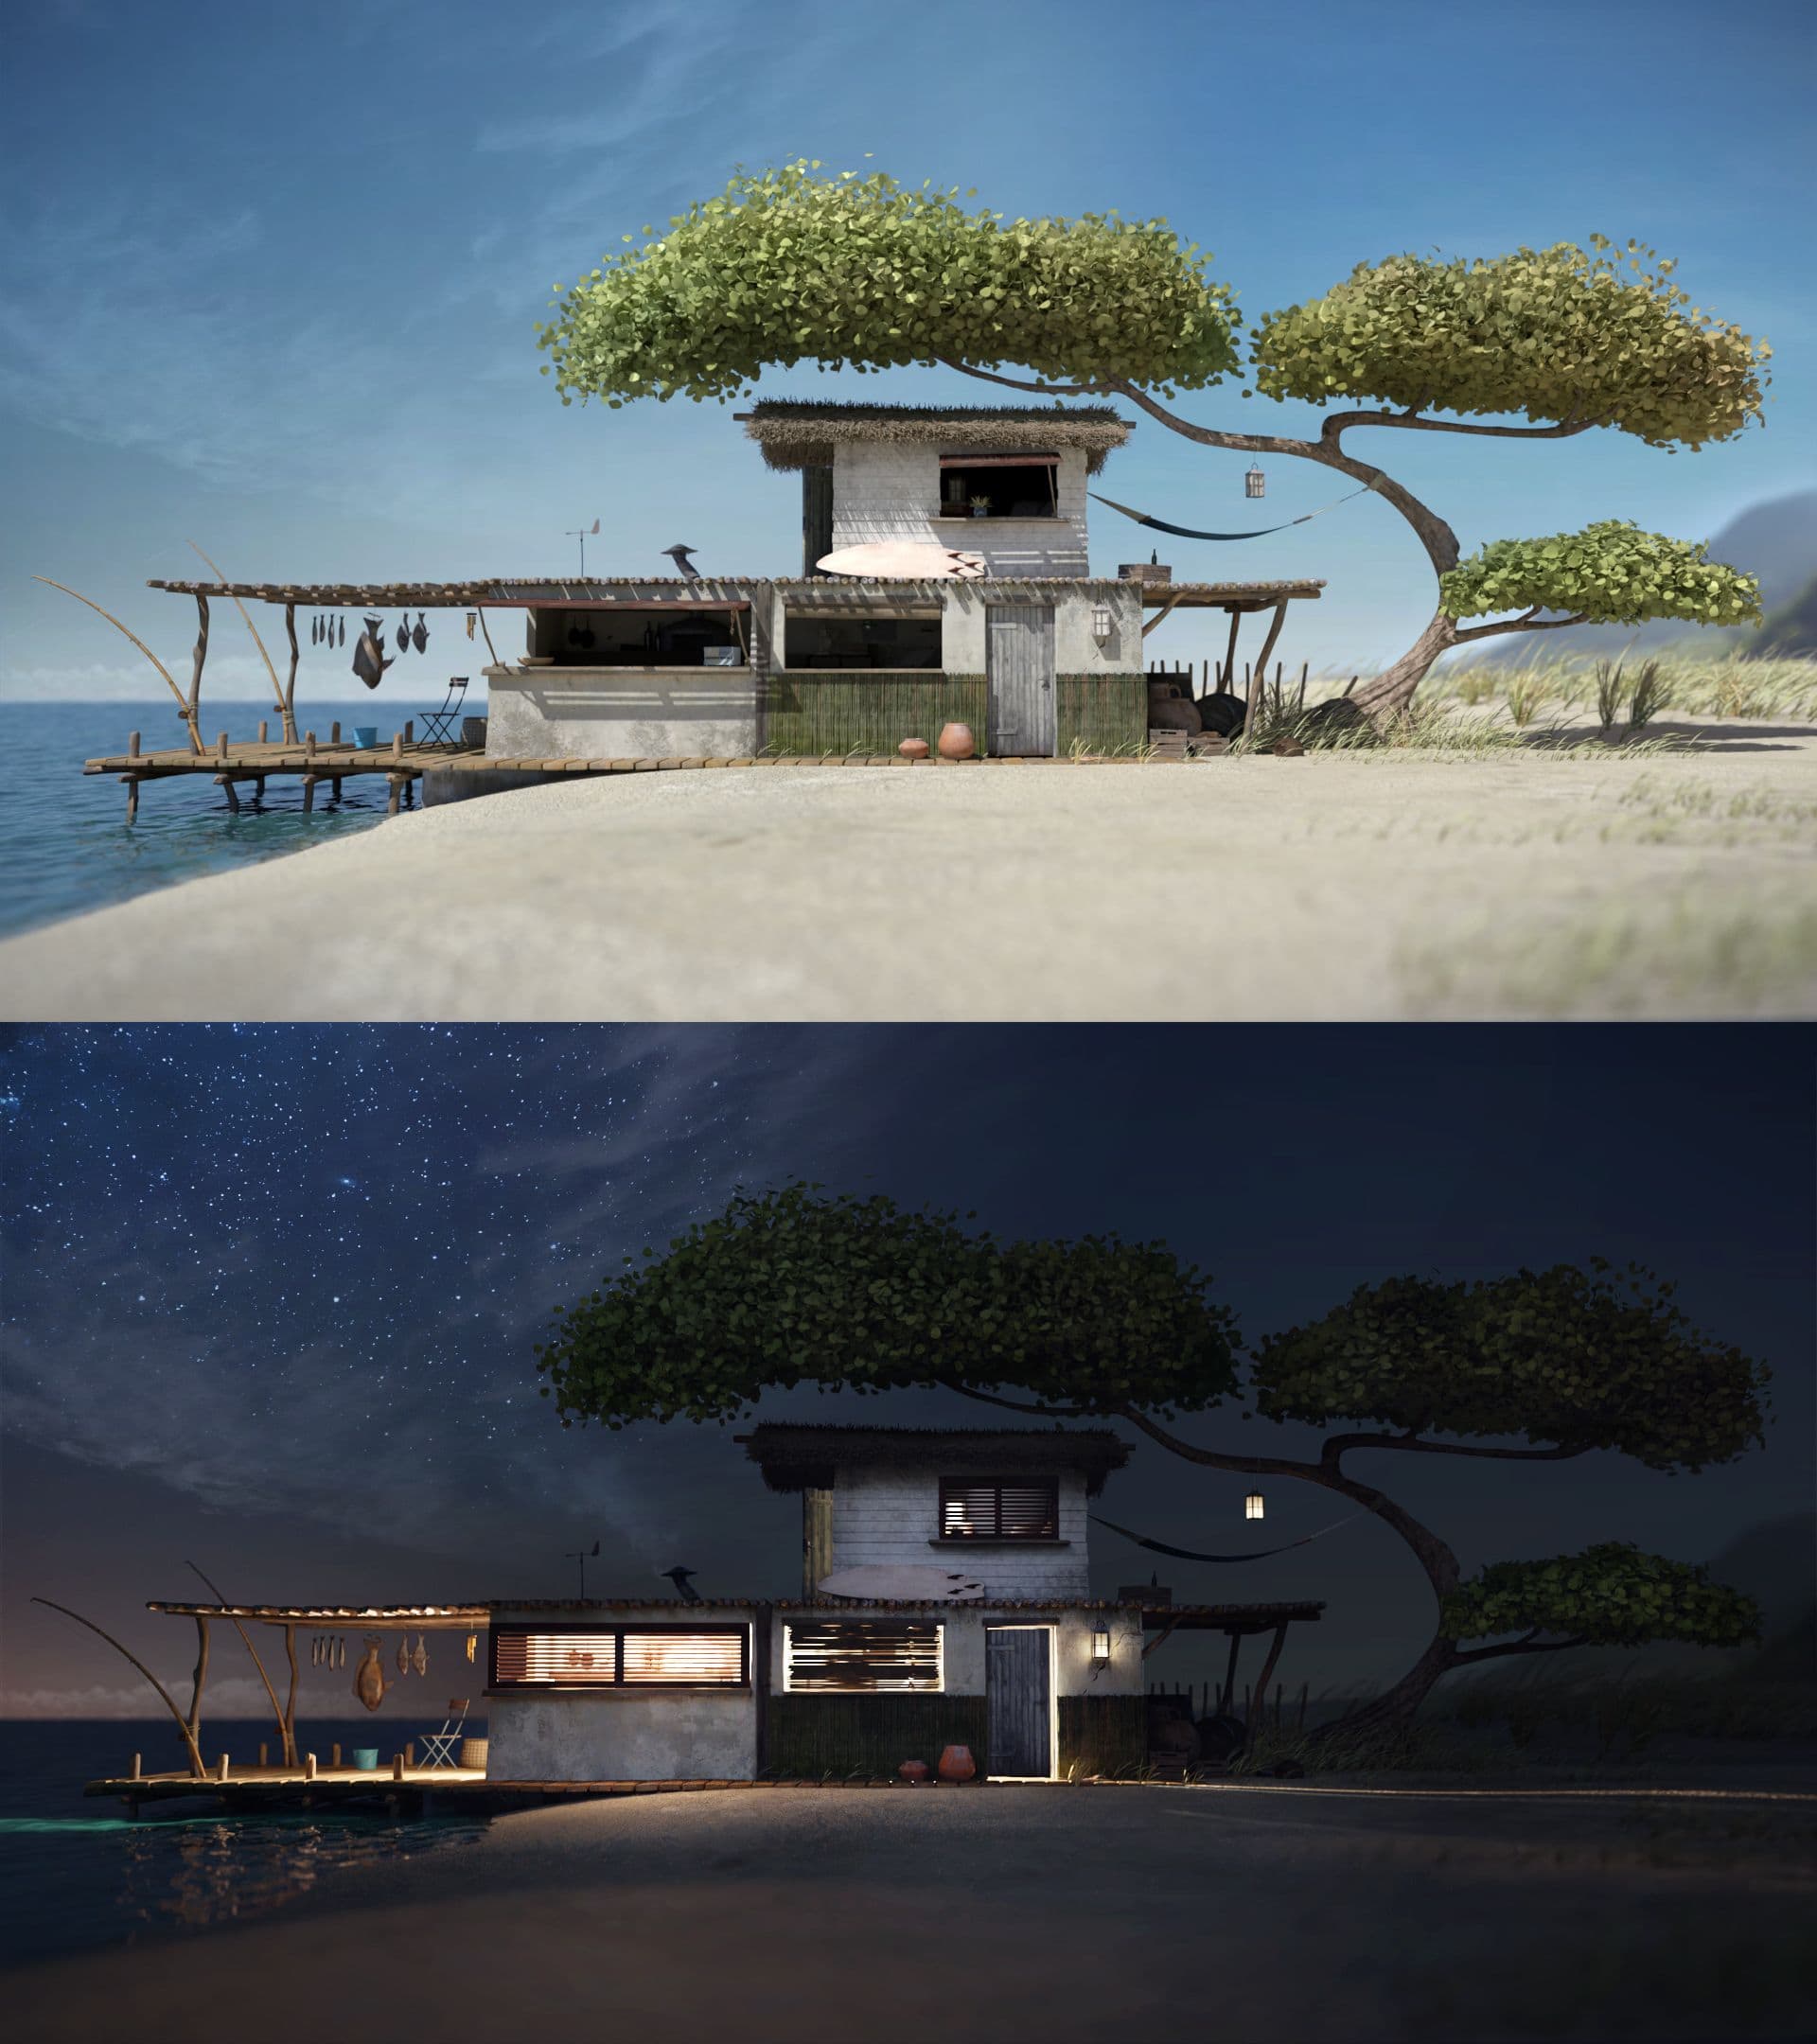
I wanted to play with the potential of 3D to create an imaginary place that I resonated with. So, I quickly turned to a cabin on the beach.
Through a lot of research and drawing, I found the design and the atmosphere that I liked.
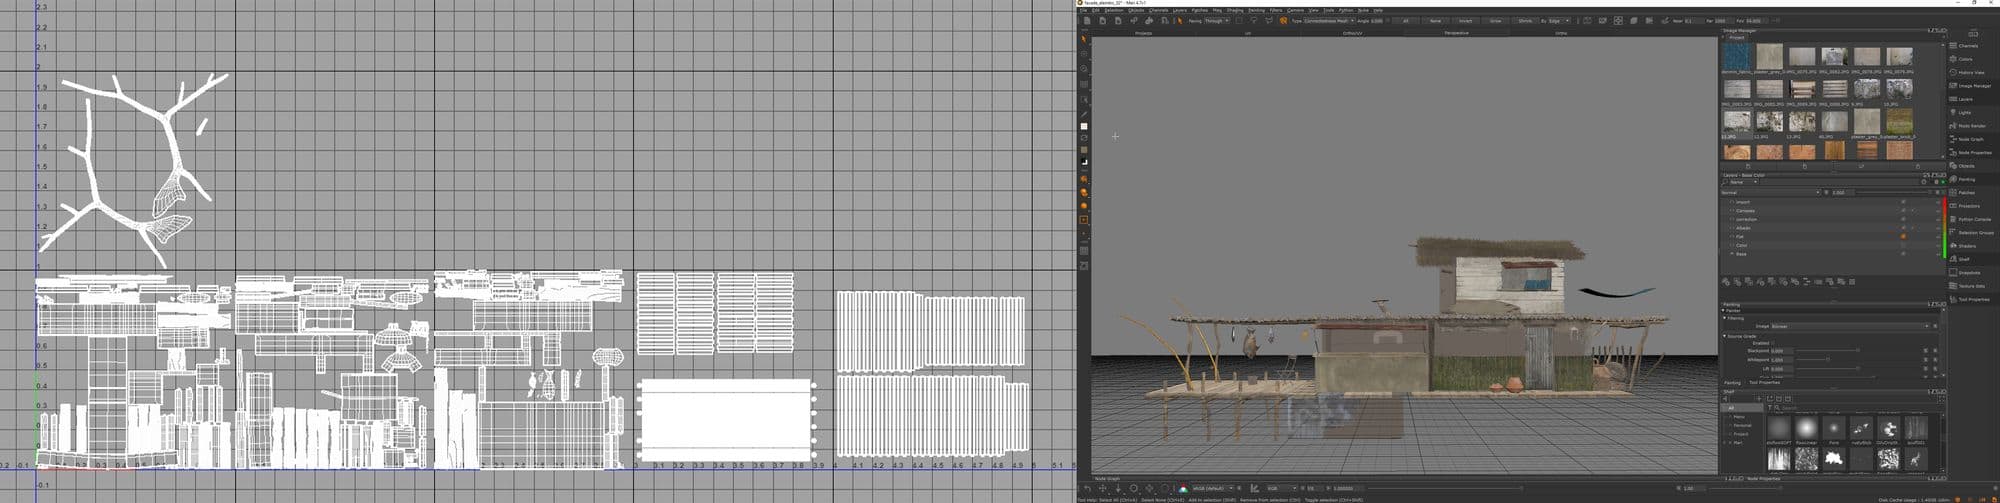
For this project I mainly worked in Maya. I started with a layout phase where I tried to keep a balance between shapes, proportions, and harmony in the placement of elements.
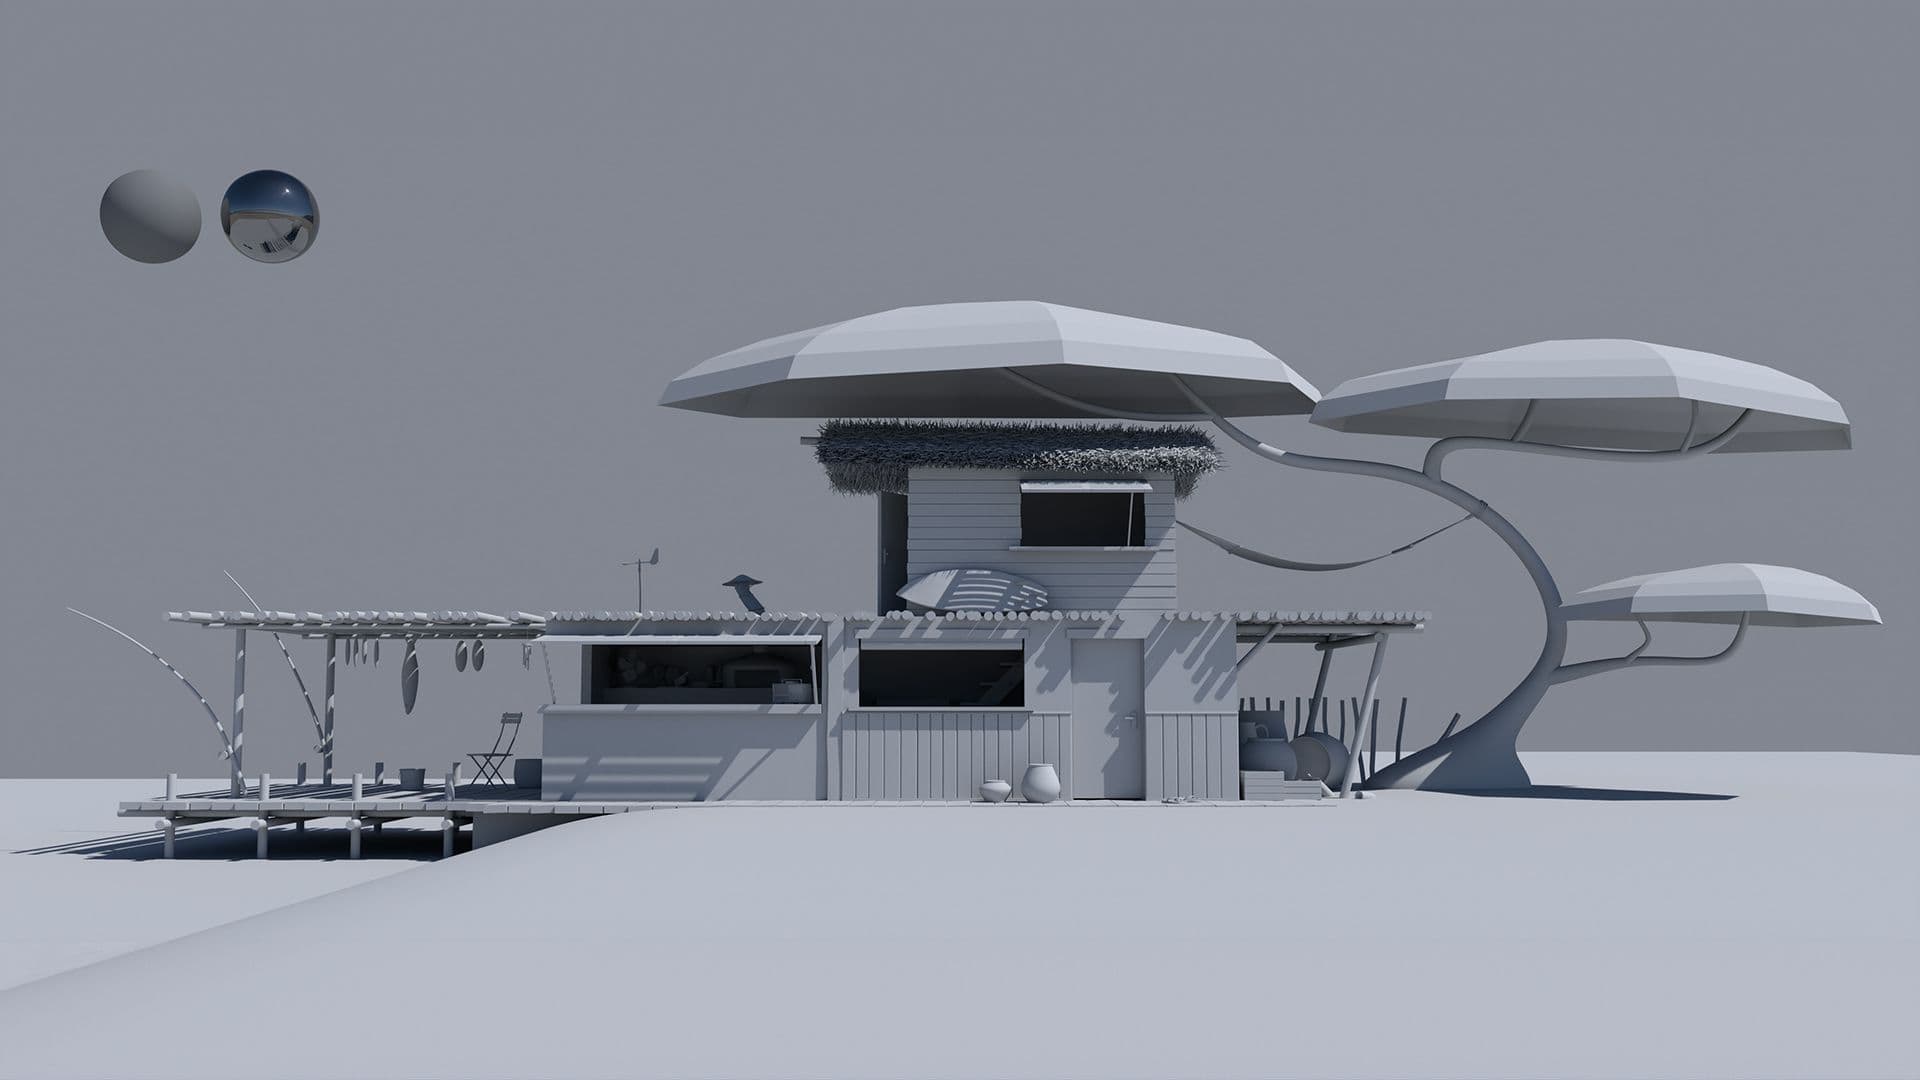
With this done, I started a quick posing of assets and a simple lighting setup to give to intention and a direction of light to see where the shadows would land.
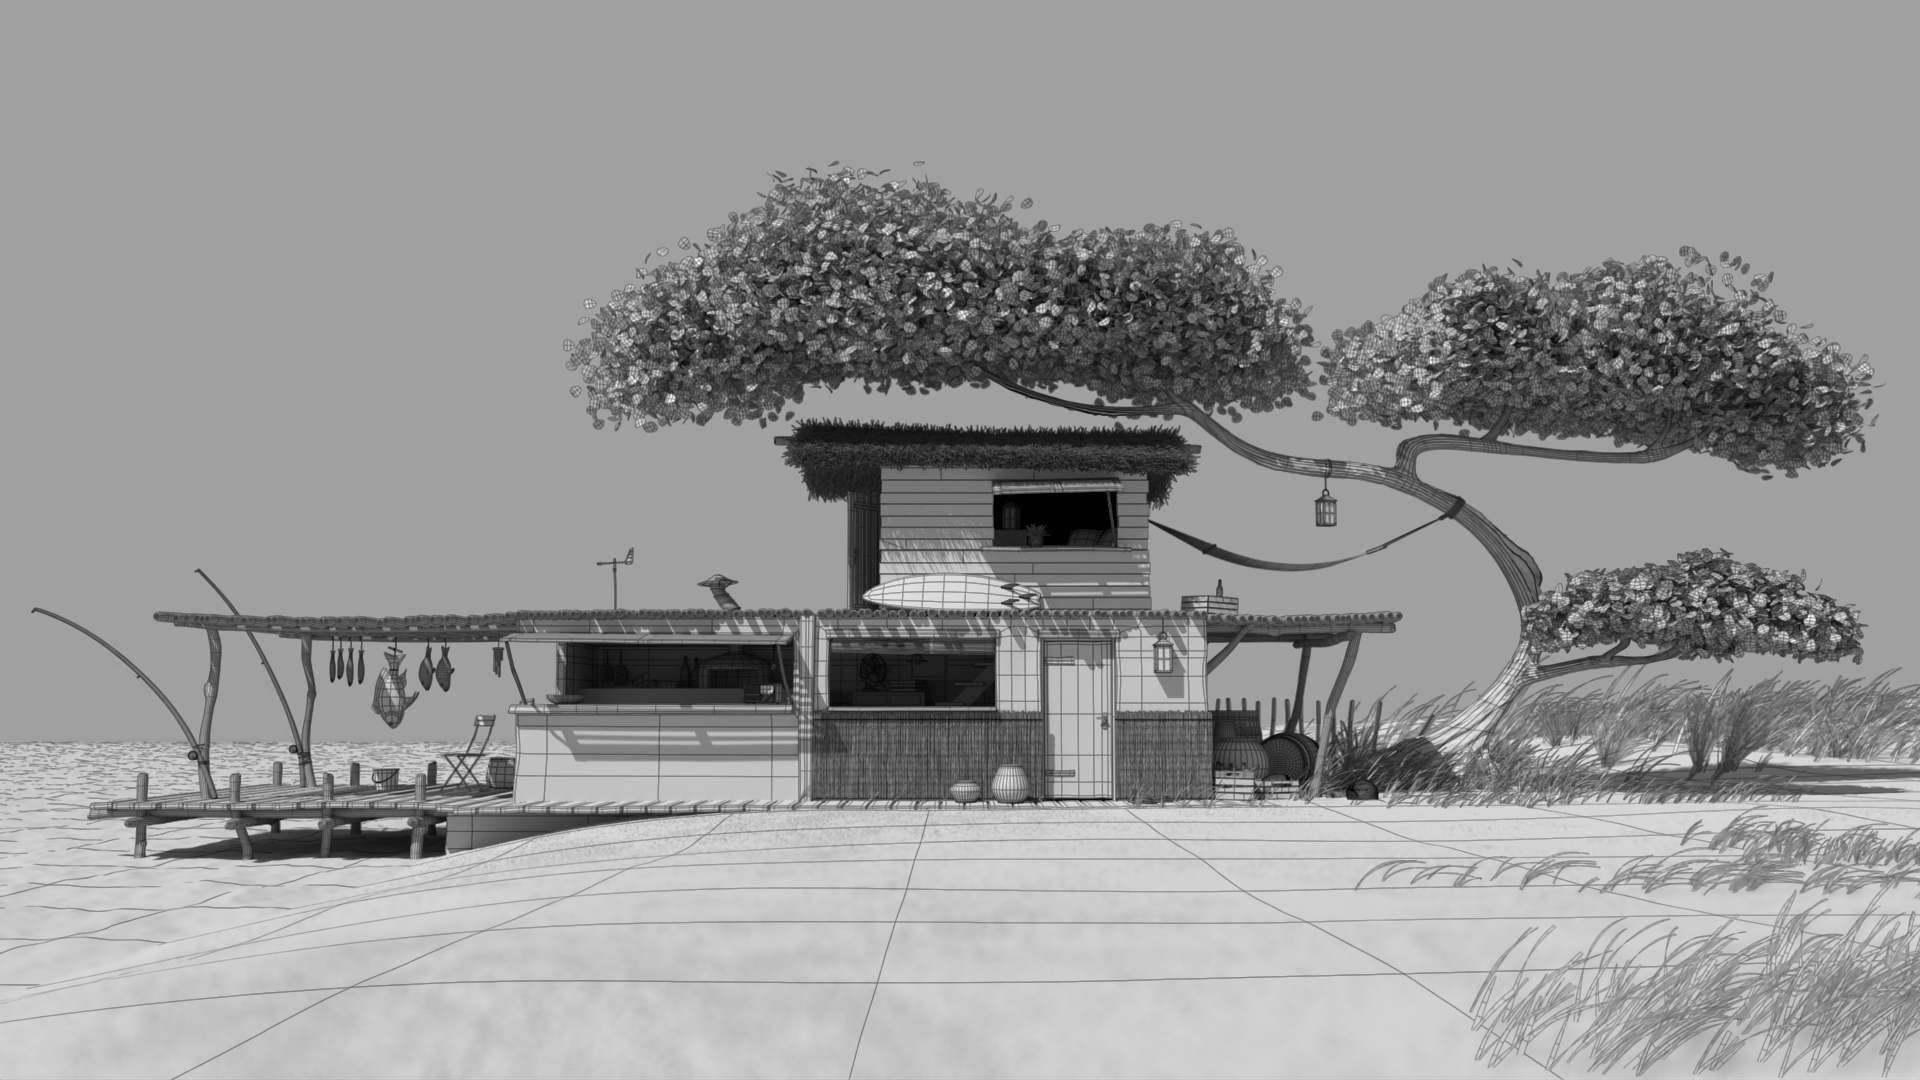
I then modeled in detail each element and object in the scene. Once the modeling and the UVs were finished, I moved on to the texturing.
I used, as usual, RenderMan for rendering. For texturing I used Mari. I did not know this software and it was very practical for me to paint in and especially to project my textures.
The thing I like in Mari is the way you can push textures. I did not use the nodal part to its full potential but it was really interesting as well.
I completed the few remaining small objects by quickly texturing them in Photoshop or directly in procedural mode with RenderMan.
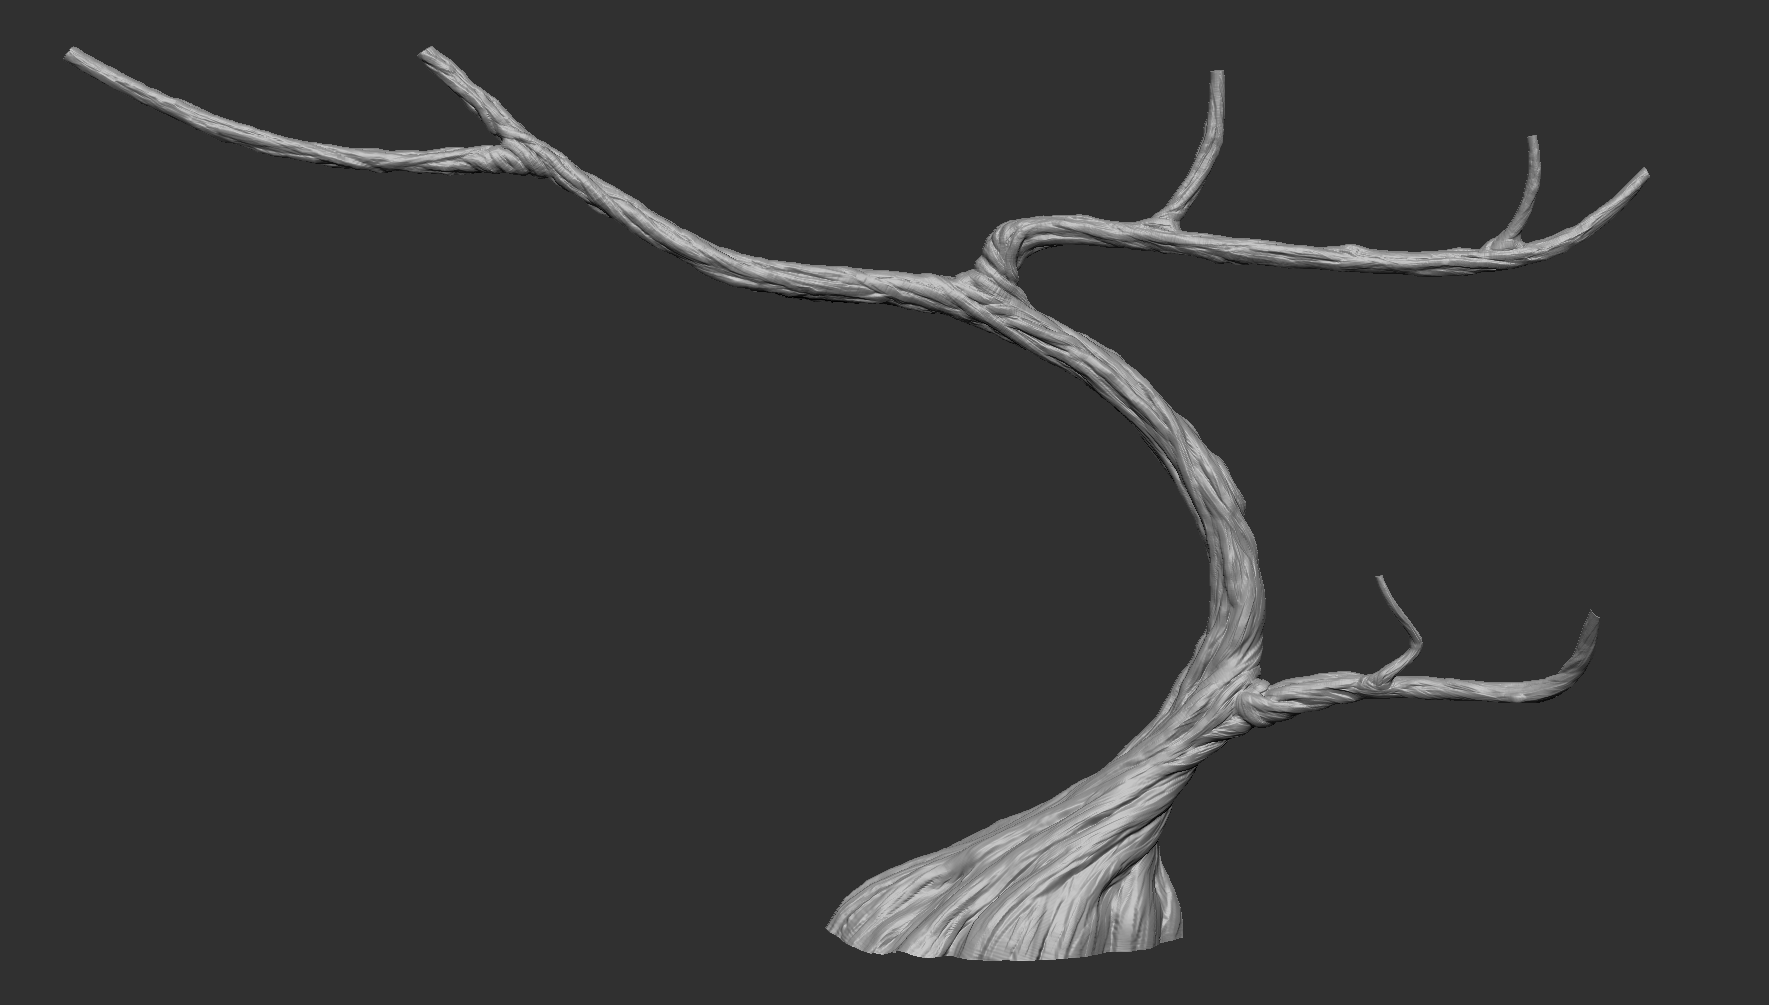
I sculpted the tree bark with ZBrush and I got the displacement maps to make the albedo. I also added a few more brushstrokes to add a little nuance.
For the leaves of the tree I looked for a way to stylise them to keep the shape I made in my drawing. The results weren't convincing, so I decided to simplify the shape and make it with mash.
Finally, for the water I used the “water” material from RenderMan. I used a cube to get the volume of water. With the right physical parameters of the water and the right lighting, I arrived at a convincing result. And above all, thanks to its “Time” parameter, I was able to easily animate this texture in my final animation.
For this short animation I felt that the best suited to this format was a gag. After several leads, I had the idea of: "A fisherman thinks he has caught a big catch because he is having trouble reeling in, but it is in fact only a very small fish."
I went on to make a storyboard, then a 3D animatic. To do this, I used the geometry of my facade and a simple cube that I animated. I also incorporated sound for general timing and cohesion with the atmosphere.

For the animation style I was inspired by the 3D movie "Asterix: Domain of the Gods" where the animation is very snappy/cartoony. It's dynamic and I think it's the best for the spontaneity of gags.
My setup at this stage included 5 shots, 5 cameras, and thus, 5 different Maya scenes.
When it came to choosing the main character, one very cool thing about ESMA is that we all have access to the characters from old school shorts. I went through the library and chose the character from the movie “It's a Cinch!” which fit well to the mood of my facade and the style of my story.
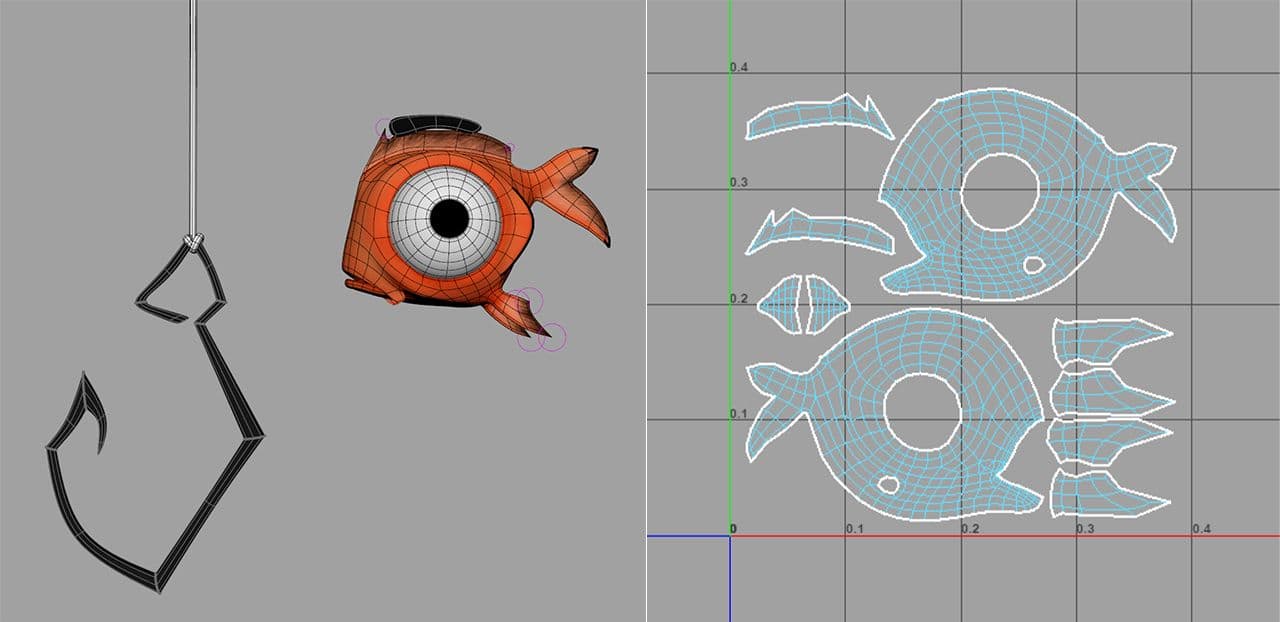
As for props, I had to create a simple fish and a hook model, and rig them. I quickly painted the albedo of the fish in ZBrush.
I also had to rig a fishing rod and hammock. For the fishing rod, I added joints to it and made an IK spine because I felt it would animate better like that than in FK. And I use cluster to constrain the curve that makes the thread.
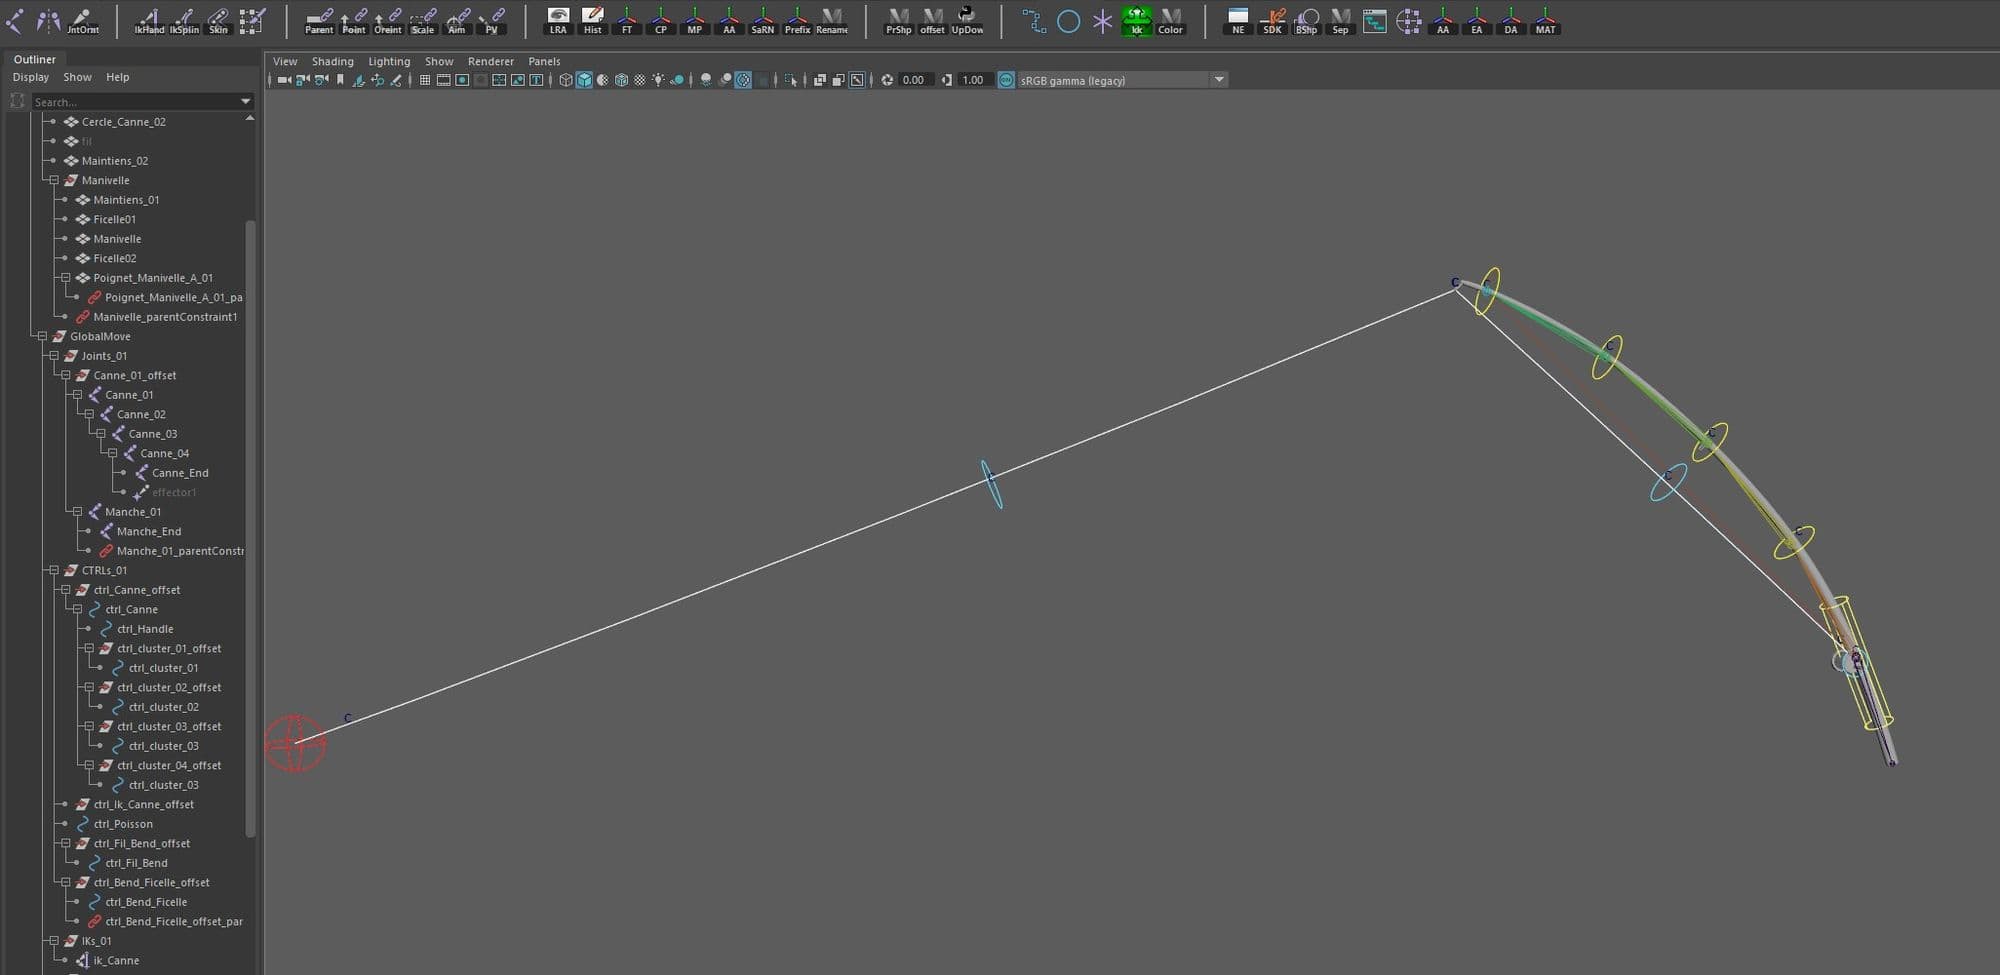
For the wire I used a curve to which I put clusters to be able to manipulate it. I also had to remove one of the two loops through which the line passed because I could not quickly find how to make sure that the string follows the deformation of the rod in that area.
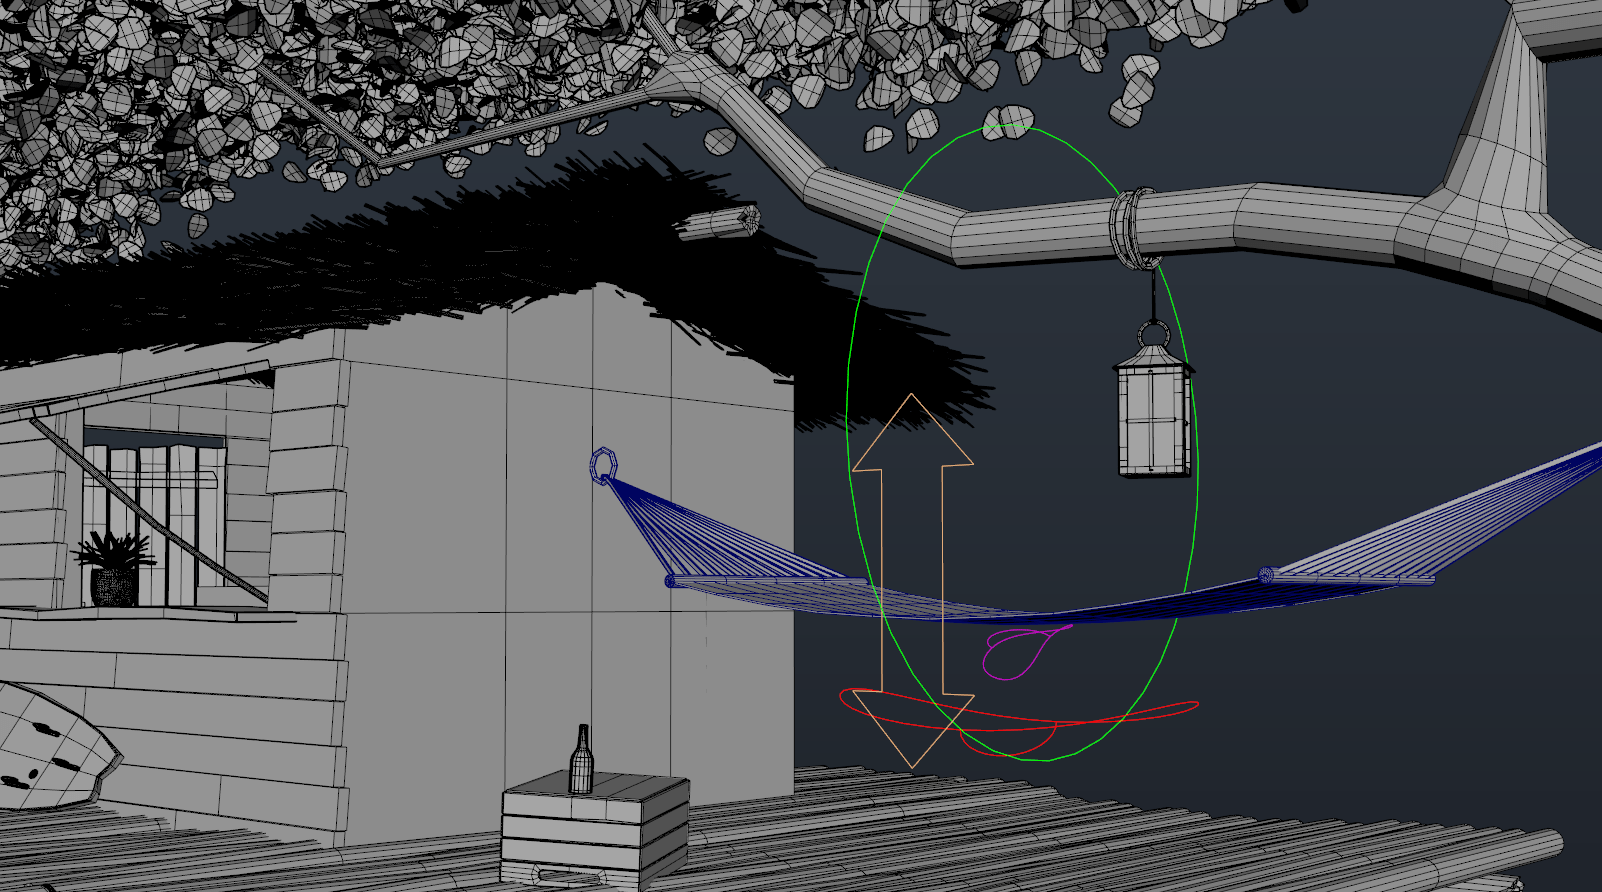
For the hammock I also created a quick rig so it can swing and also sag in the middle so my character would stand up.
With the above setup done, I spent a lot of time on this part because I love animating.
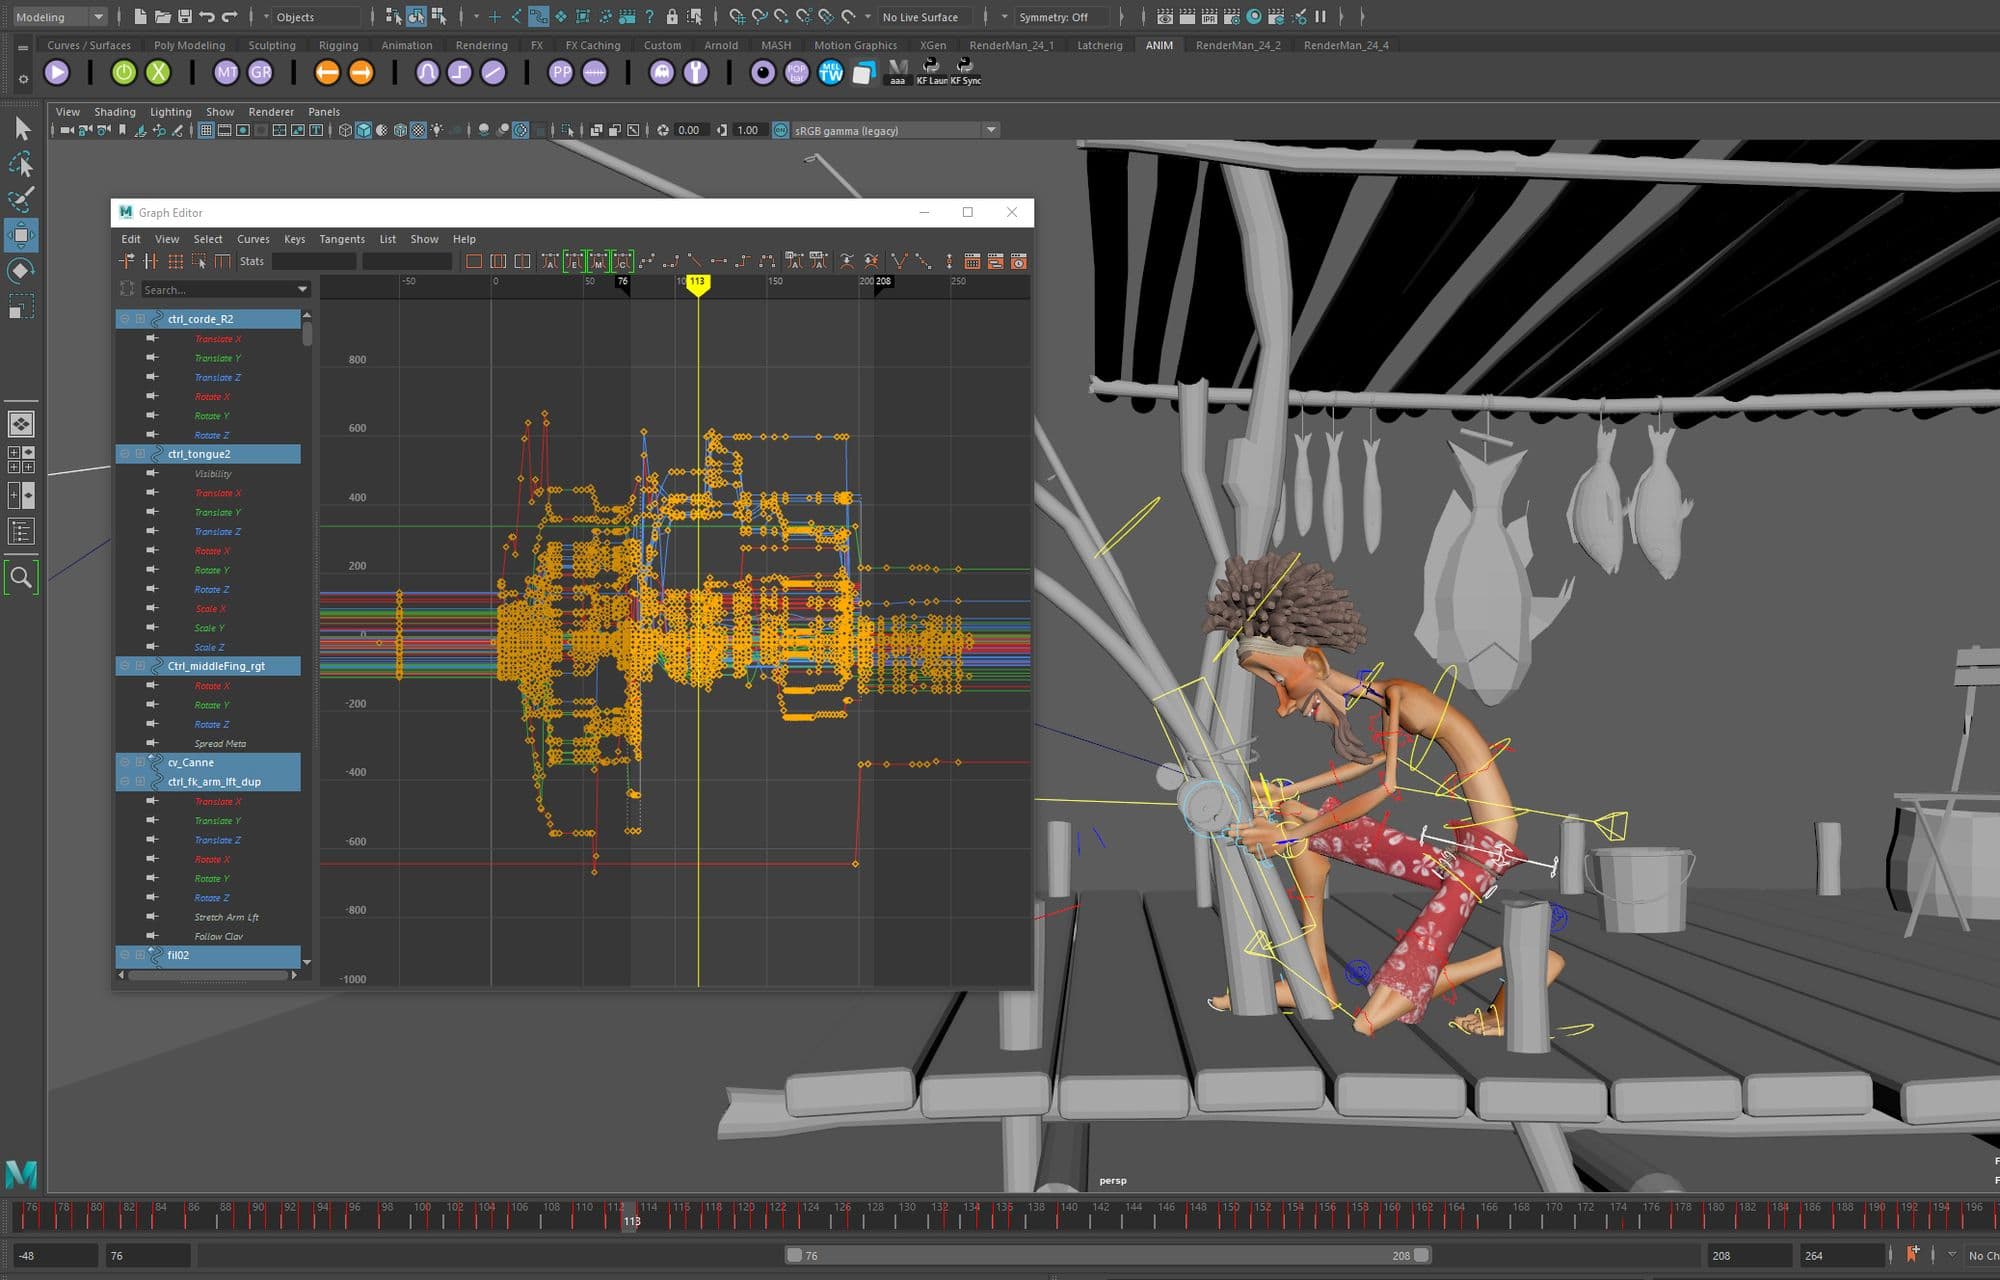
We did some animation exercises in this cartoony style during the year so I tried to replicate my learnings in this animation, such as short timing between key poses, appeal poses, big arcs or cool exaggerations.

I also had to do a lot of constraint switches. First with the hammock, when I made it swing and the character had to follow the swing and then fall off the hammock. I did the same in the next shot where the character grabs the fishing rod.
After all that, comes the time to render each frame. We had to render in 720p so the rendering time of our images was twice as fast as normal. I was coming in at about 4 or 5 minutes per frame.
I used DoF Maya for depth of field blurring. A particularity that I had was to render a curve. So I took out a few passes of AOVs and I launched my batch renders on my school's farm with Tractor.
Once all my images were rendered, I went to Nuke to do some compositing. Which I admit turned into calibration as I was already pretty happy with my lighting. I just needed to embed my background, because it doesn't show up when rendered.
Then finally, the last step: the final assembly. Since the preview I updated my progress in animation and rendering in my editing. I just had to put my versions end to end and then I reworked the sound by recording everything myself.
Thanks for reading to the end, or even just dropping by to take a look. It was a complex project in which I learned a lot, because I had to take on a lot of tasks in the animation pipeline.
You can also watch a breakdown video I made here. I hope you enjoy it as much as I enjoyed making it!
You can find more of Mario's work on The Rookies and ArtStation.