Engineer's Bedroom: Creating an Immersive Interior in Unreal Engine 5
With the freedom provided in his Advanced Seminar course at Champlain College, Jimmy Jiang embarked on a transformative journey to bring his desired project to life. Through ten weeks of dedicated work, he skillfully transformed initial concept art into an immersive 3D render.
This project created by Jimmy Jiang, a current Champlain College student, was born out of the freedom granted in his Advanced Seminar course at Champlain College, to explore his desired project and incorporate new learnings. With a focus on narrative storytelling and the utilisation of innovative tools like Marvelous Designer and photogrammetry, Jimmy dedicated ten weeks to transforming the initial concept art into a captivating 3D render.
From finding the right references to meticulous block-out and modeling processes, as well as the intricate texturing and lighting work, every step was taken to ensure an immersive and visually striking environment. If you are looking to uplift your environment portfolio, this article will give you some inspiration!
Around the time I was 16, I was granted the opportunity to use Maya for the first time, and I fell in love with the idea of making games. Not long after my first year of learning the program, I decided that I wanted to work in the games industry.
I created my project, "Engineer's Bedroom," as a part of my Advanced Seminar course at Champlain College where I had the opportunity to work on whatever project I desired. Of course, with an assignment as loose as that, there were a lot of considerations that I had to take into account.
Whenever I start a new project, I like to figure out what kinds of new learning I want to incorporate into it. For this scene, I was focused very much on how I wanted to tell a narrative and explore new tools like Marvelous Designer and photogrammetry. This project spanned over ten weeks, during which I turned it from concept art into a 3D render.
Finding the Right Reference
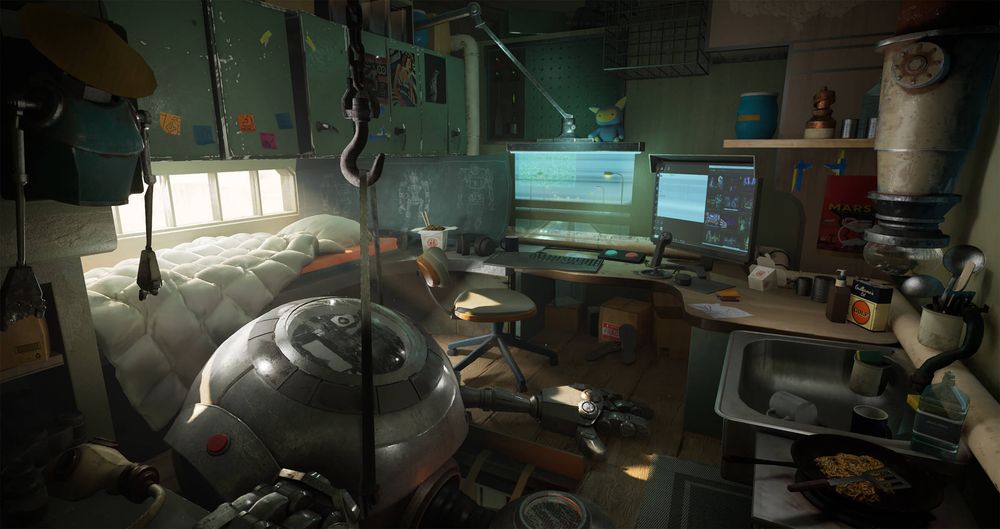
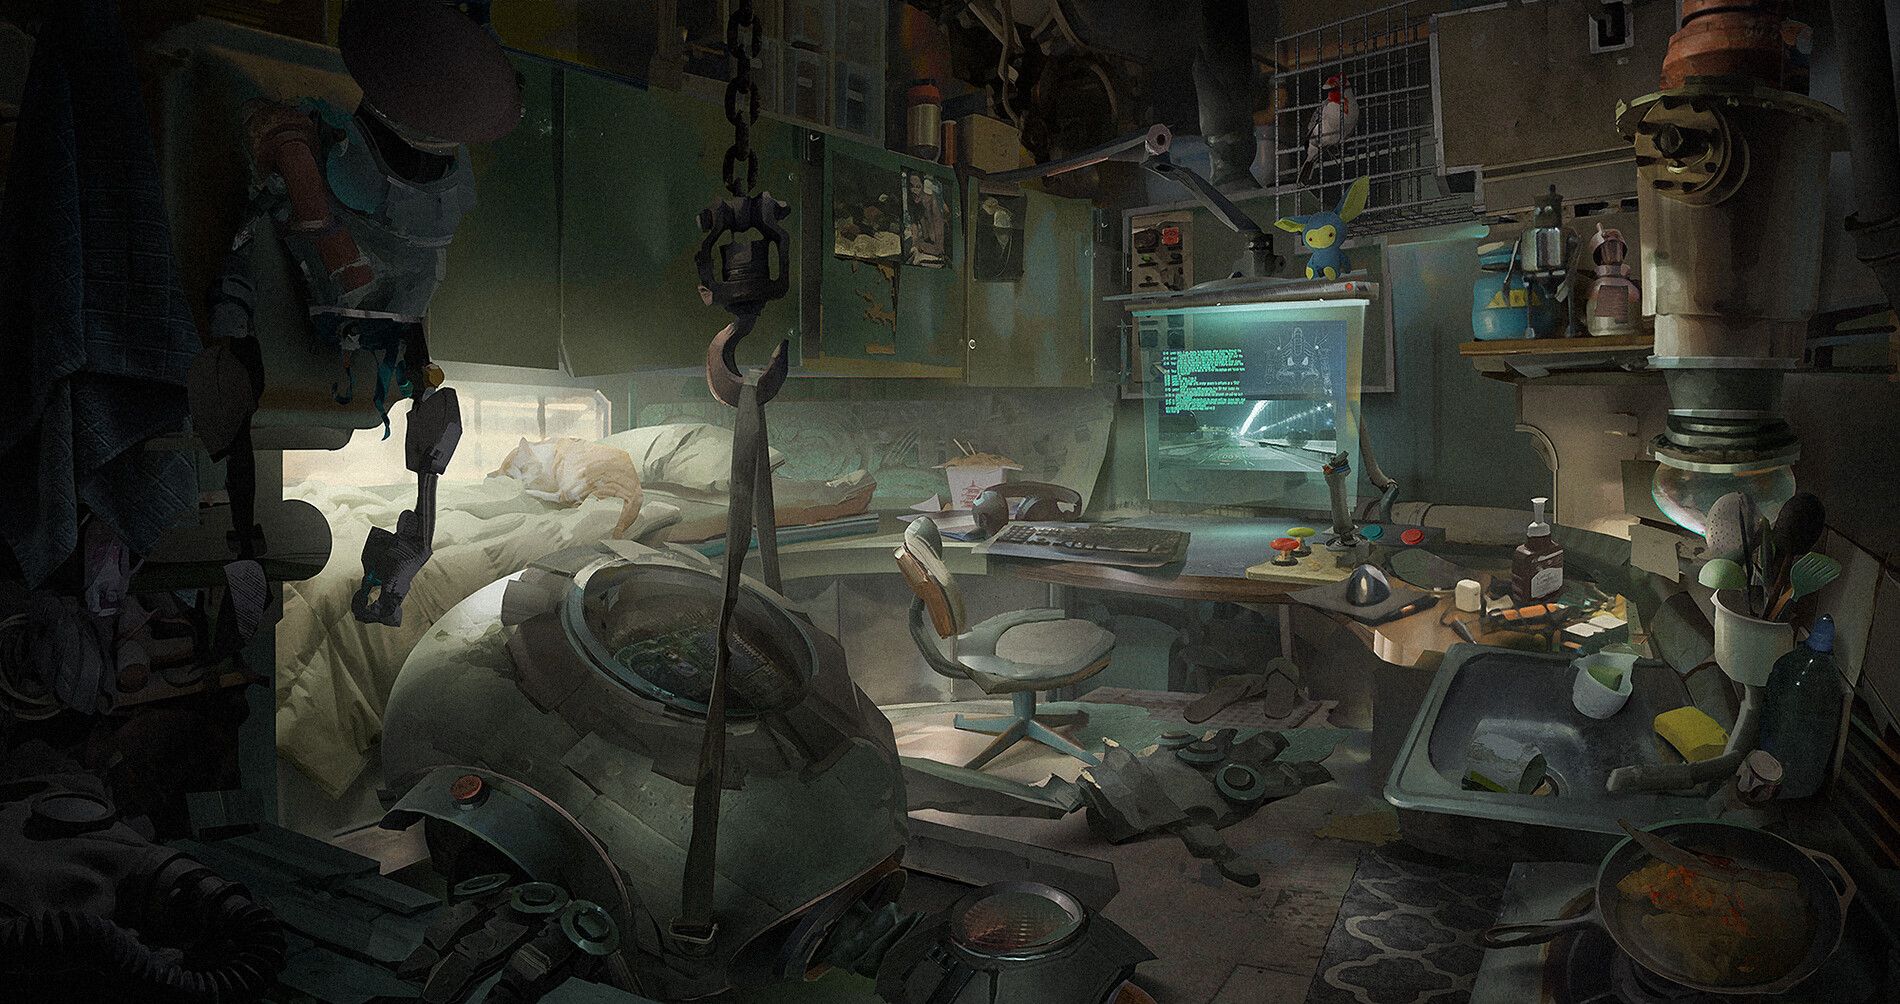
When I found the "Bedroom" concept art for my scene by Daniel Romanovsky, I knew that this was what I wanted to work on, but you have to take some creative liberties when you decide to work from loose concepts.
Material reads, scale references, obscure paint strokes, and objects are just some of the things that you need to keep in mind to create a successful and immersive 3D scene.
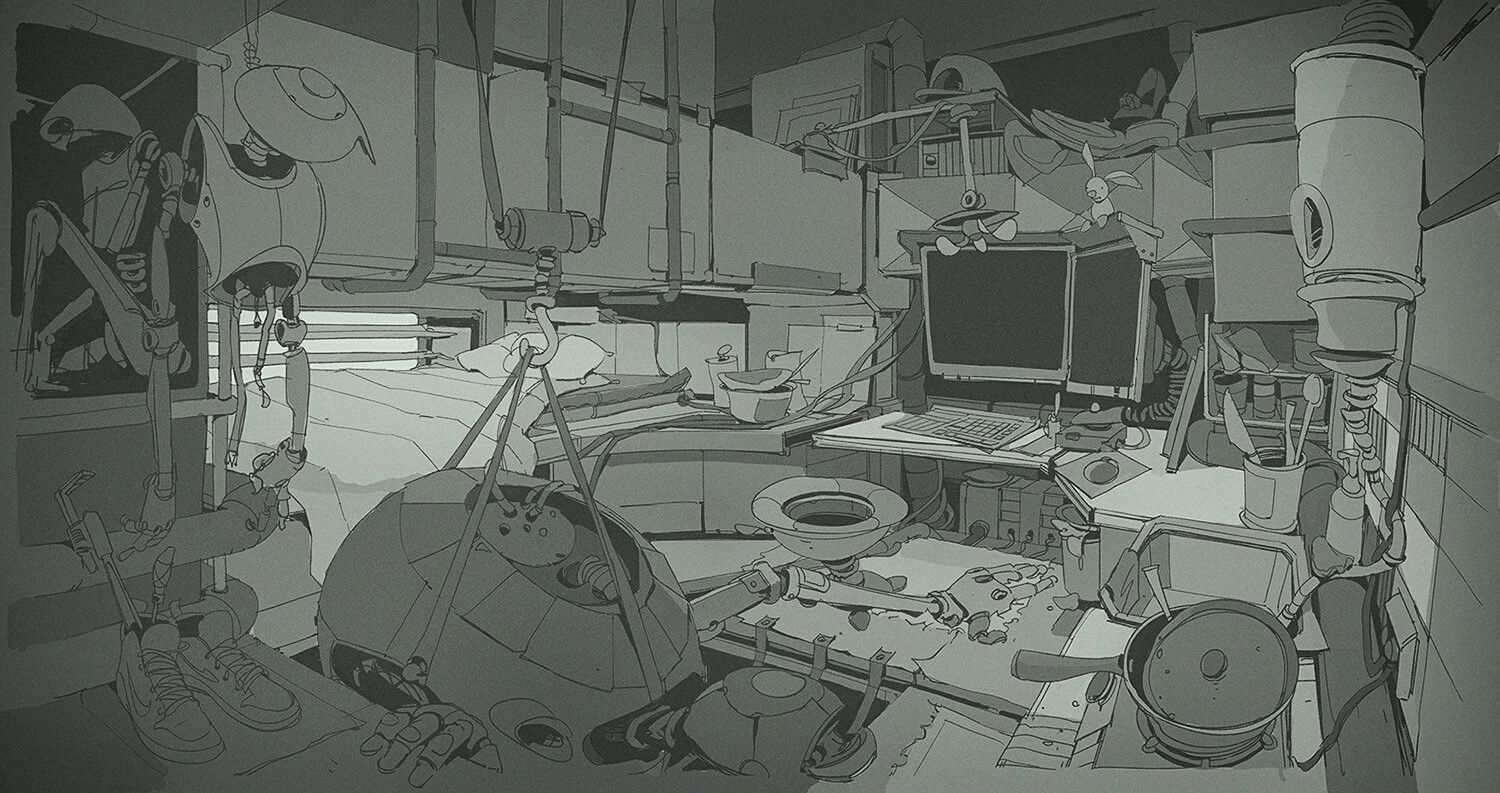
Daniel Romanovsky's Concept Art
I was very lucky that Daniel provided not only two pieces of concept I could reference but also the line art that had a much clearer sense of the objects in the scene at first glance.
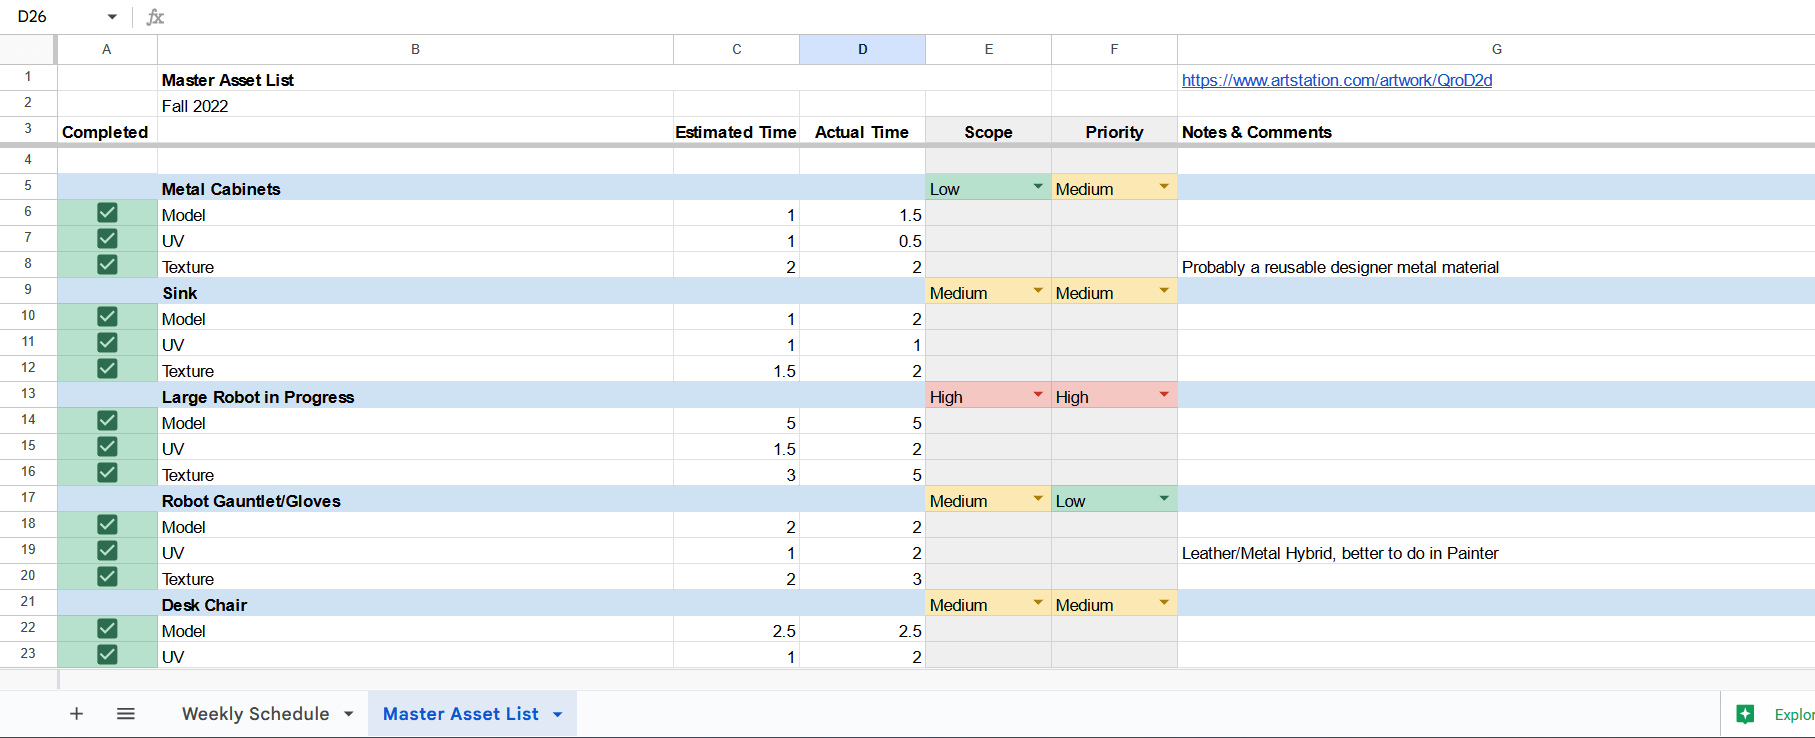
Pretty early in my process, I established everything I needed or wanted in my scene, organised by priority and scope so that I could make sure that I could finish everything within the ten weeks I set out for myself.
Master Asset List and Priority
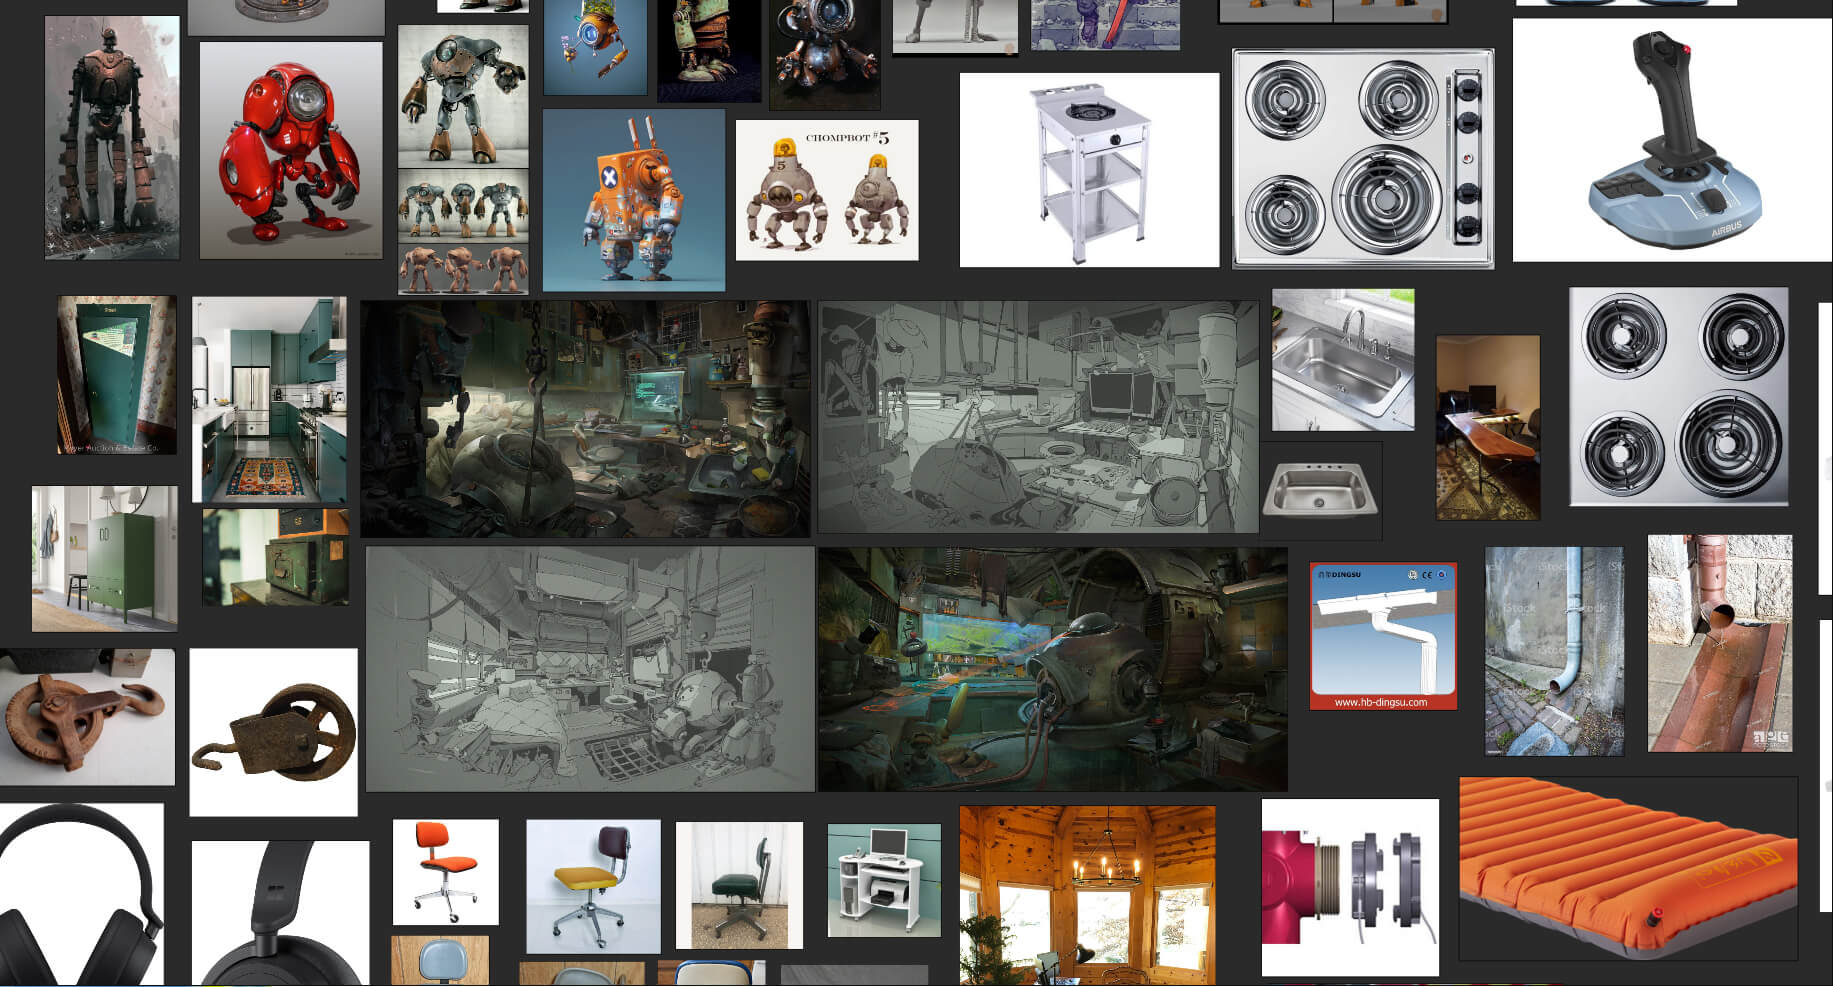
From there, I established a PureRef board of references for these objects I wanted to put in and figured out alternatives for the less clear parts of the concept arts, like the food in the pan and material definition of everything in the scene, for example. My board gets messy at times, but it works for me and my workflow.
Collection of References From the Internet
Block-out and Unreal Engine
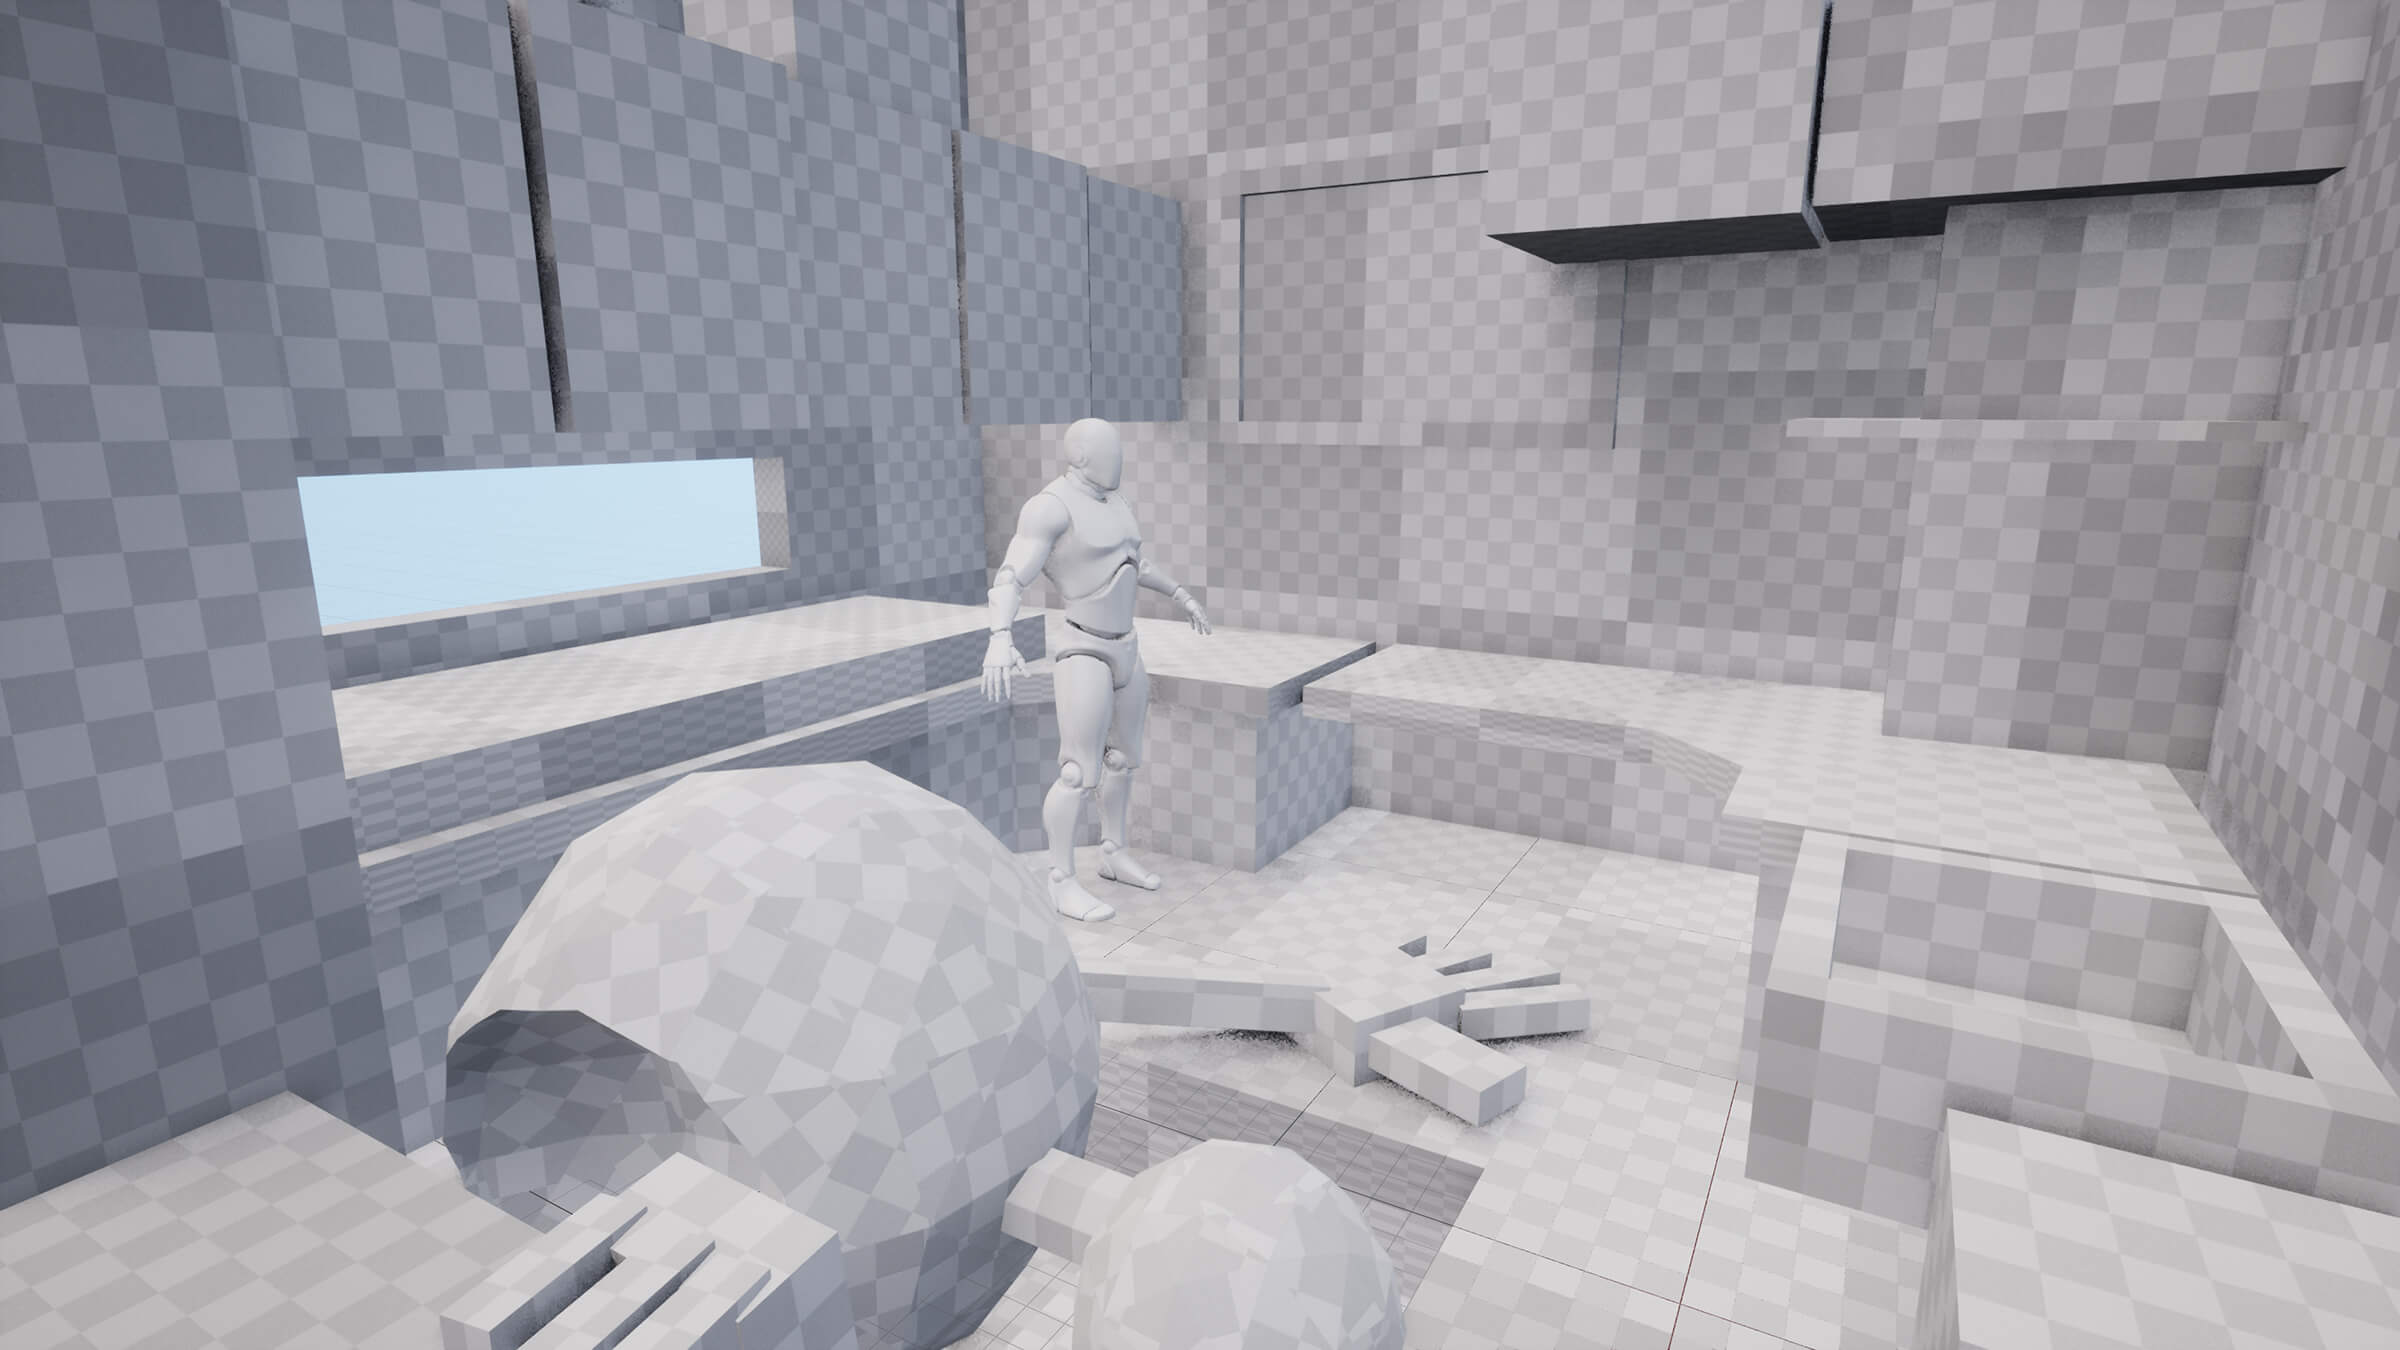
In a scene like this, I normally begin by making a block-out in my game engine of choice, which was Unreal Engine this time around. Making sure my cameras and lighting are set up early is very important in getting my material read right.
Initial Unreal Block-out
Matching the perspective of an illustration is not an easy process. Rarely, if ever, is concept art ever following perspective 100%, so making adjustments and creative liberties was very important in this step.
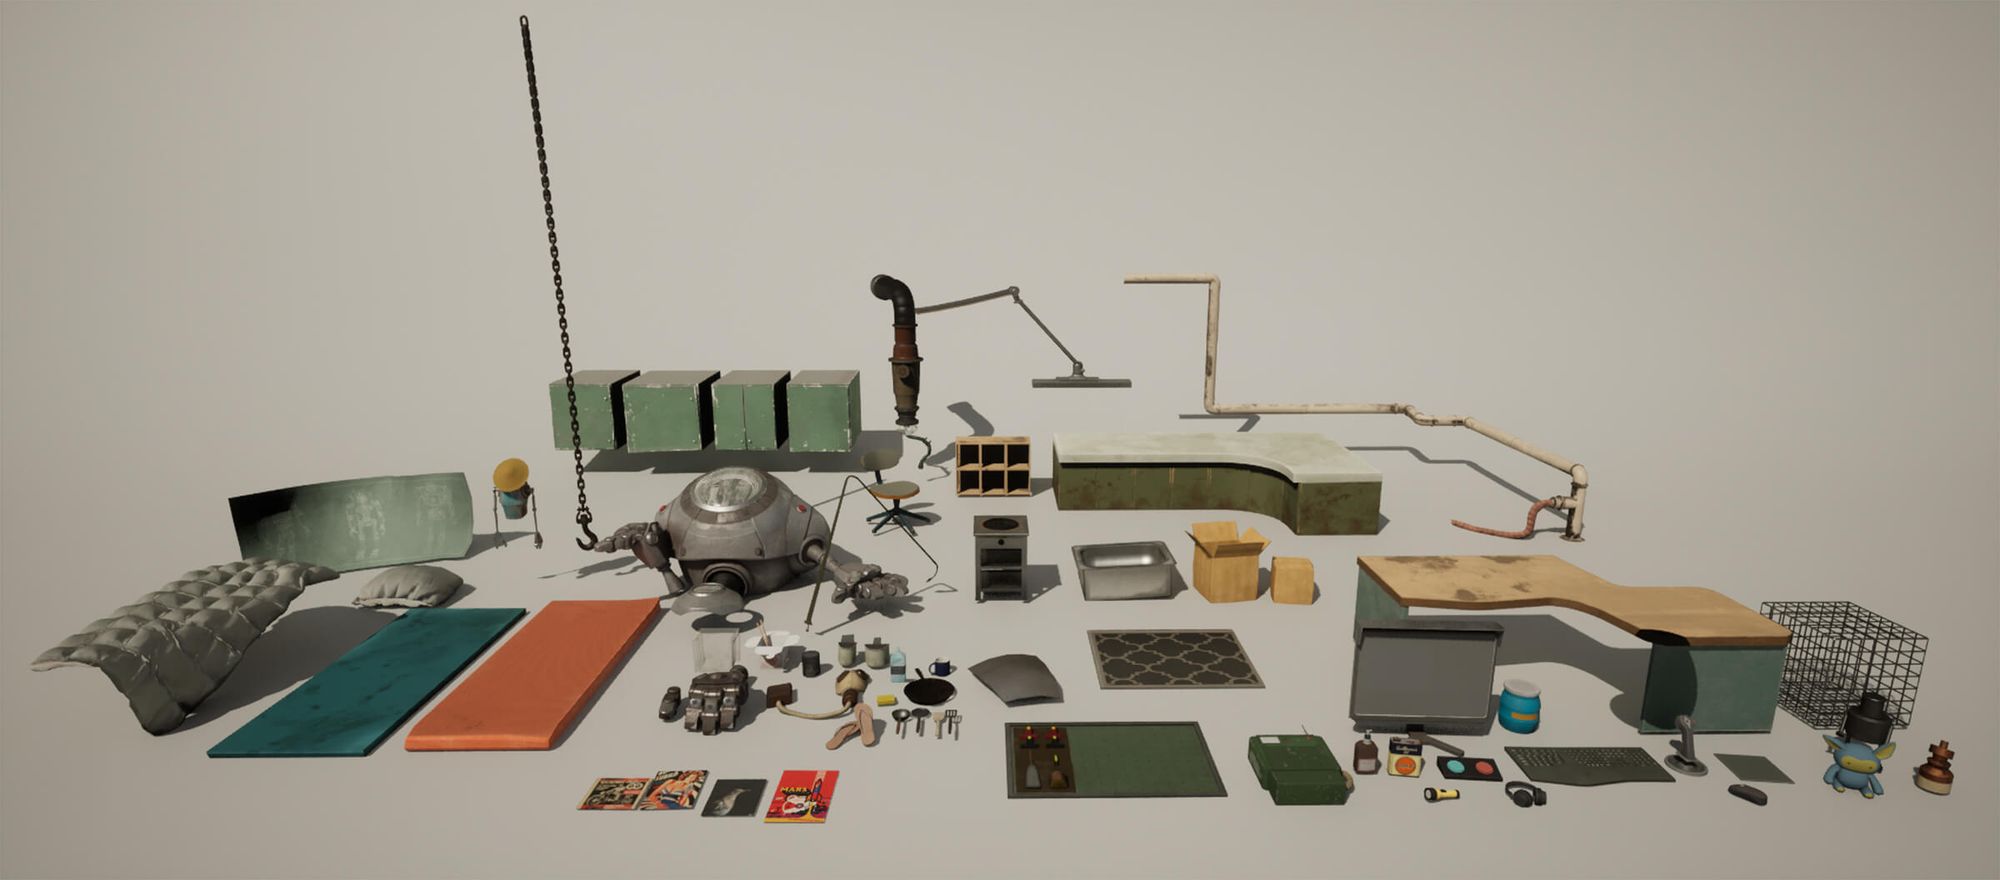
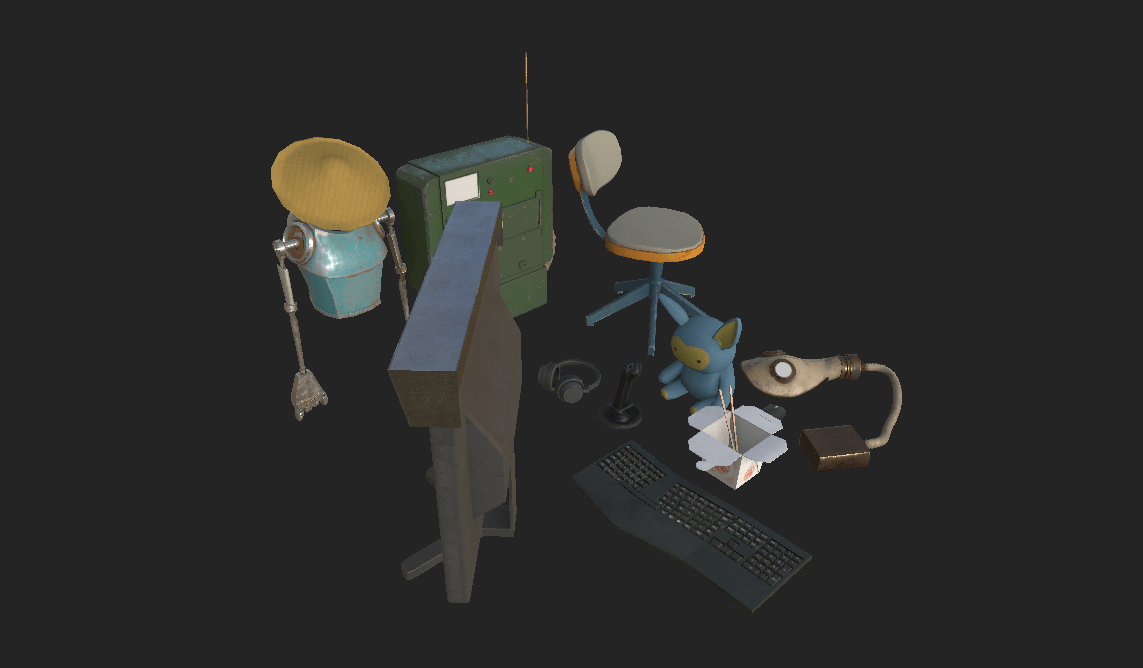
I blocked out the largest pieces to scale with my 6ft tall Unreal mannequin and exported them into Maya for me to begin the modeling process, which for most of my props luckily only needed some bevels and reinforced edge loops.
All Props in Scene
Marvelous Designer and Photogrammetry
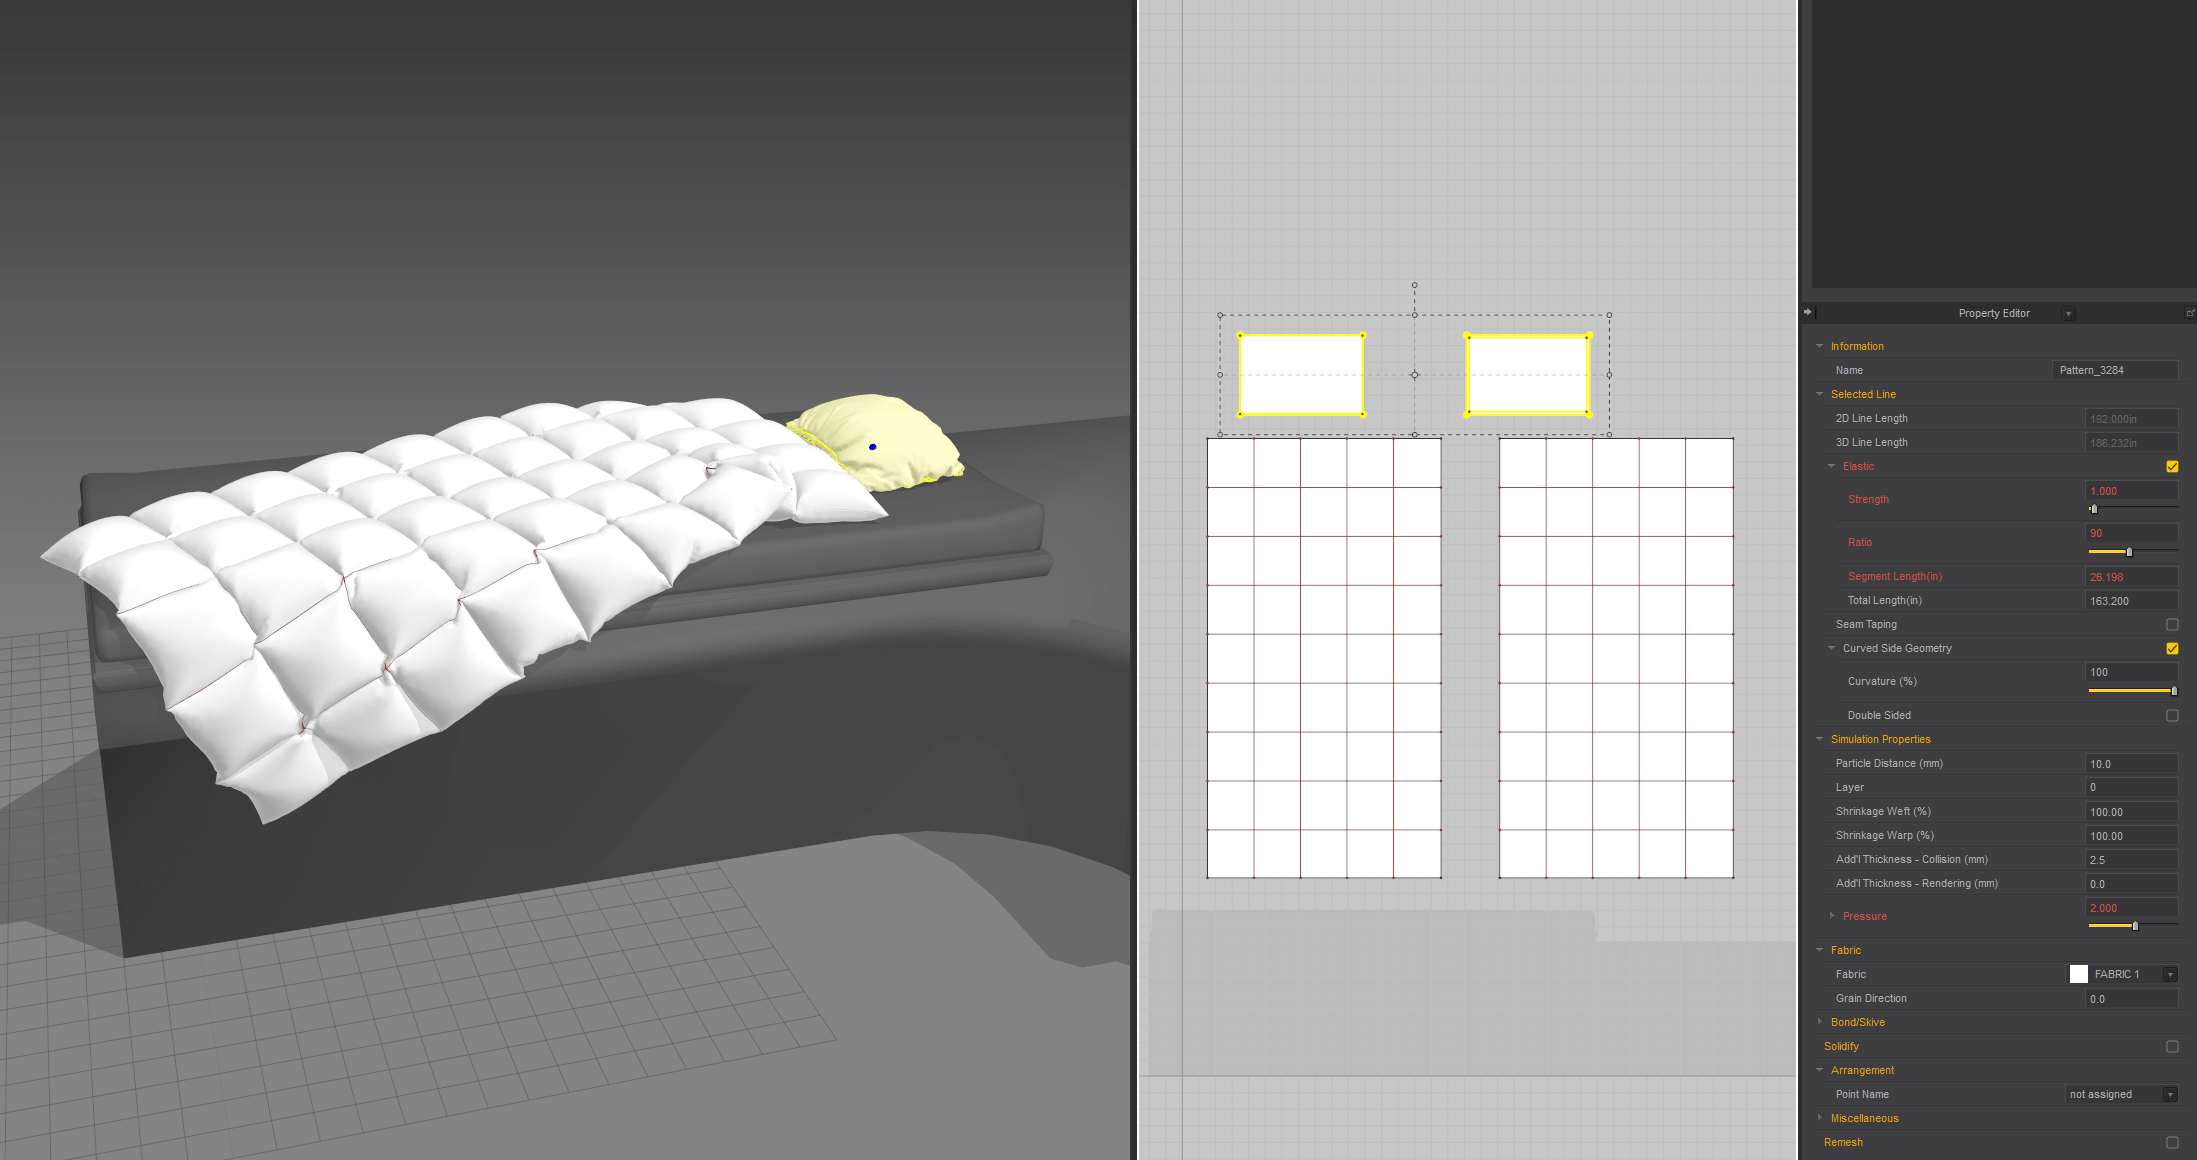
Marvelous Designer was a program I was very new to, and so I thought it would be a good starting point for me to use it to make my pillow and blanket. It's a super powerful tool to make anything that has to do with cloth. Fortunately, it was a relatively intuitive process of sewing edges of your fabric to create the shapes that you want. The blanket was the harder one of the two, requiring you to sew each individual top and bottom loop together to create that duvet pattern.
From there, I just played with the sliders to simulate something I was looking for. To lower the polycount of my Marvelous objects, I took them into ZBrush and remeshed them with ZRemesher to be baked and put in Maya and Unreal.
Marvelous Designer
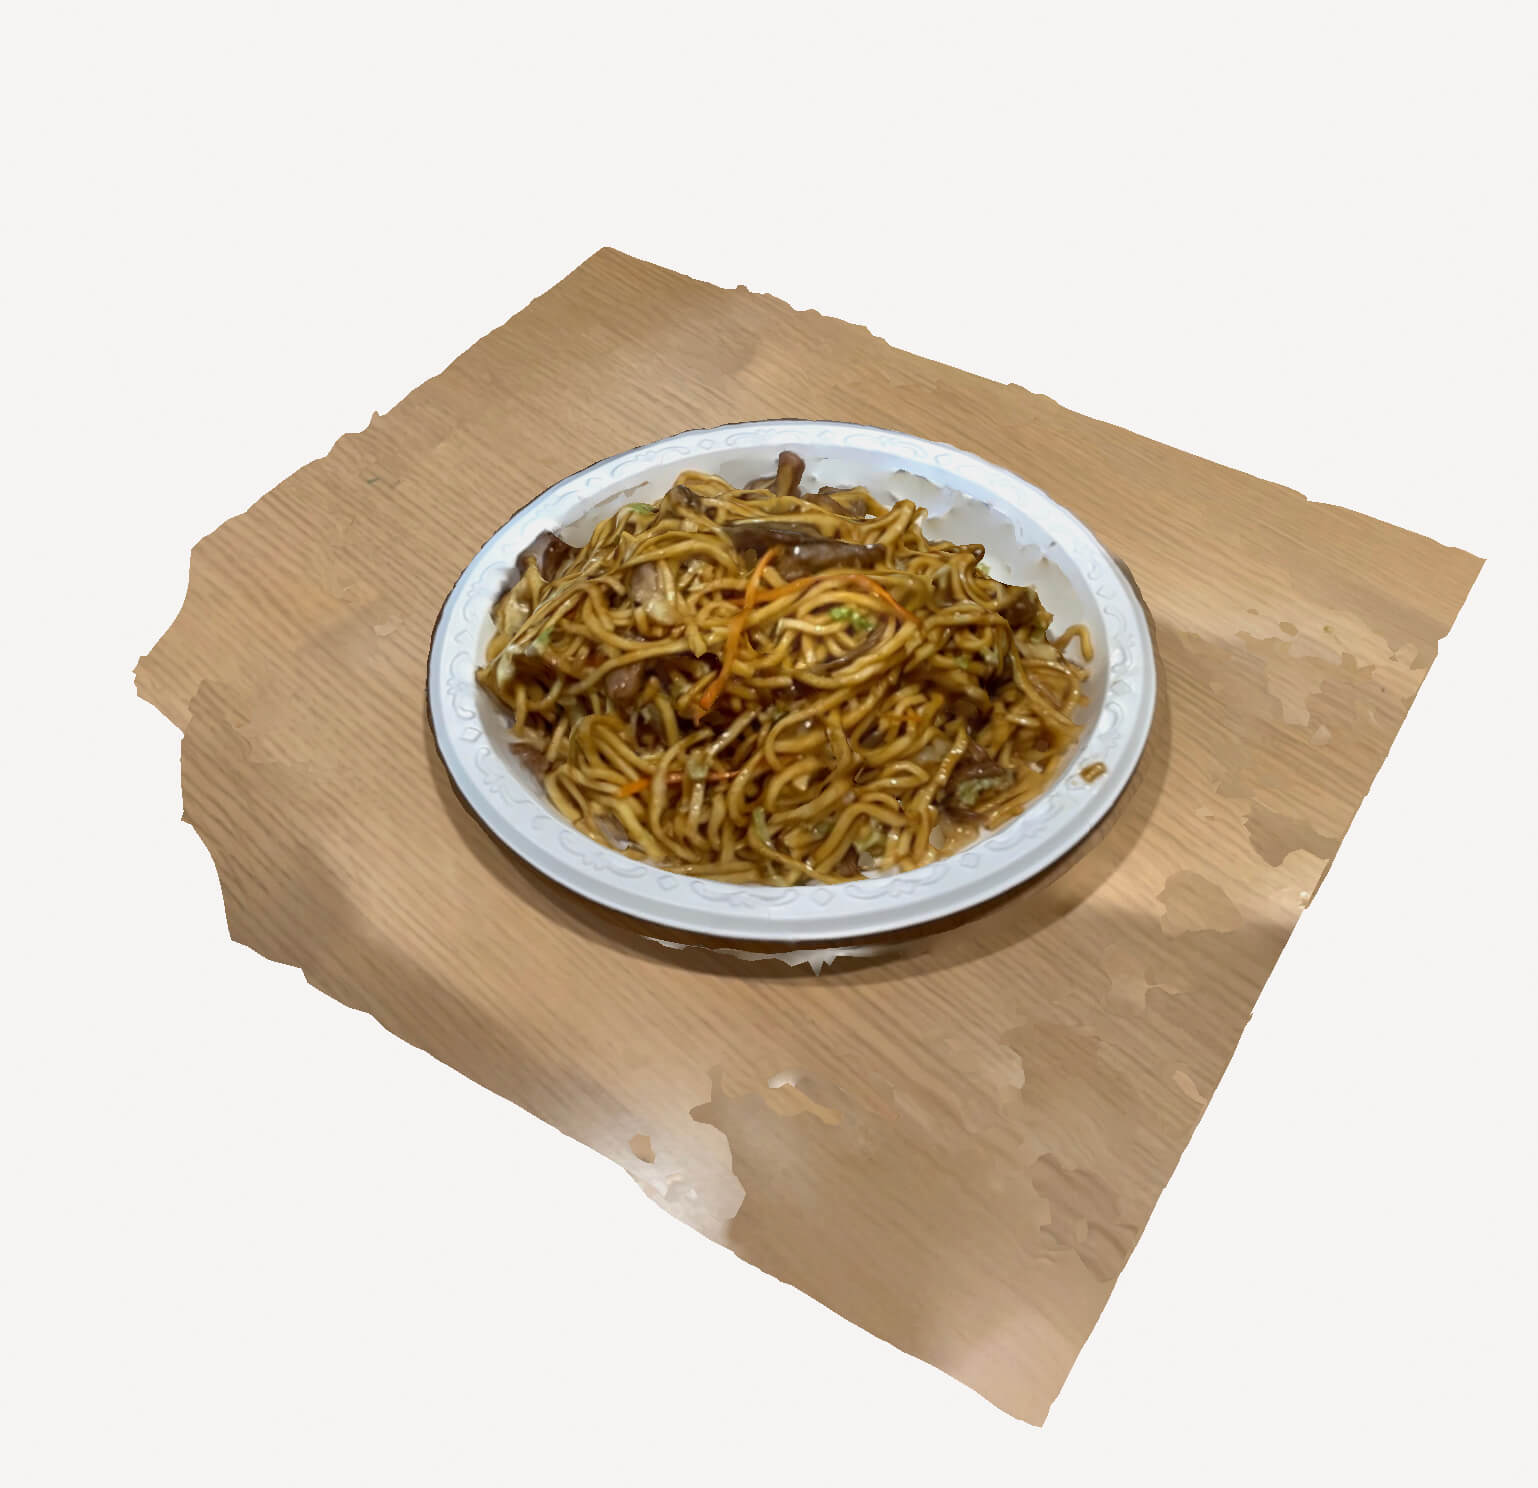
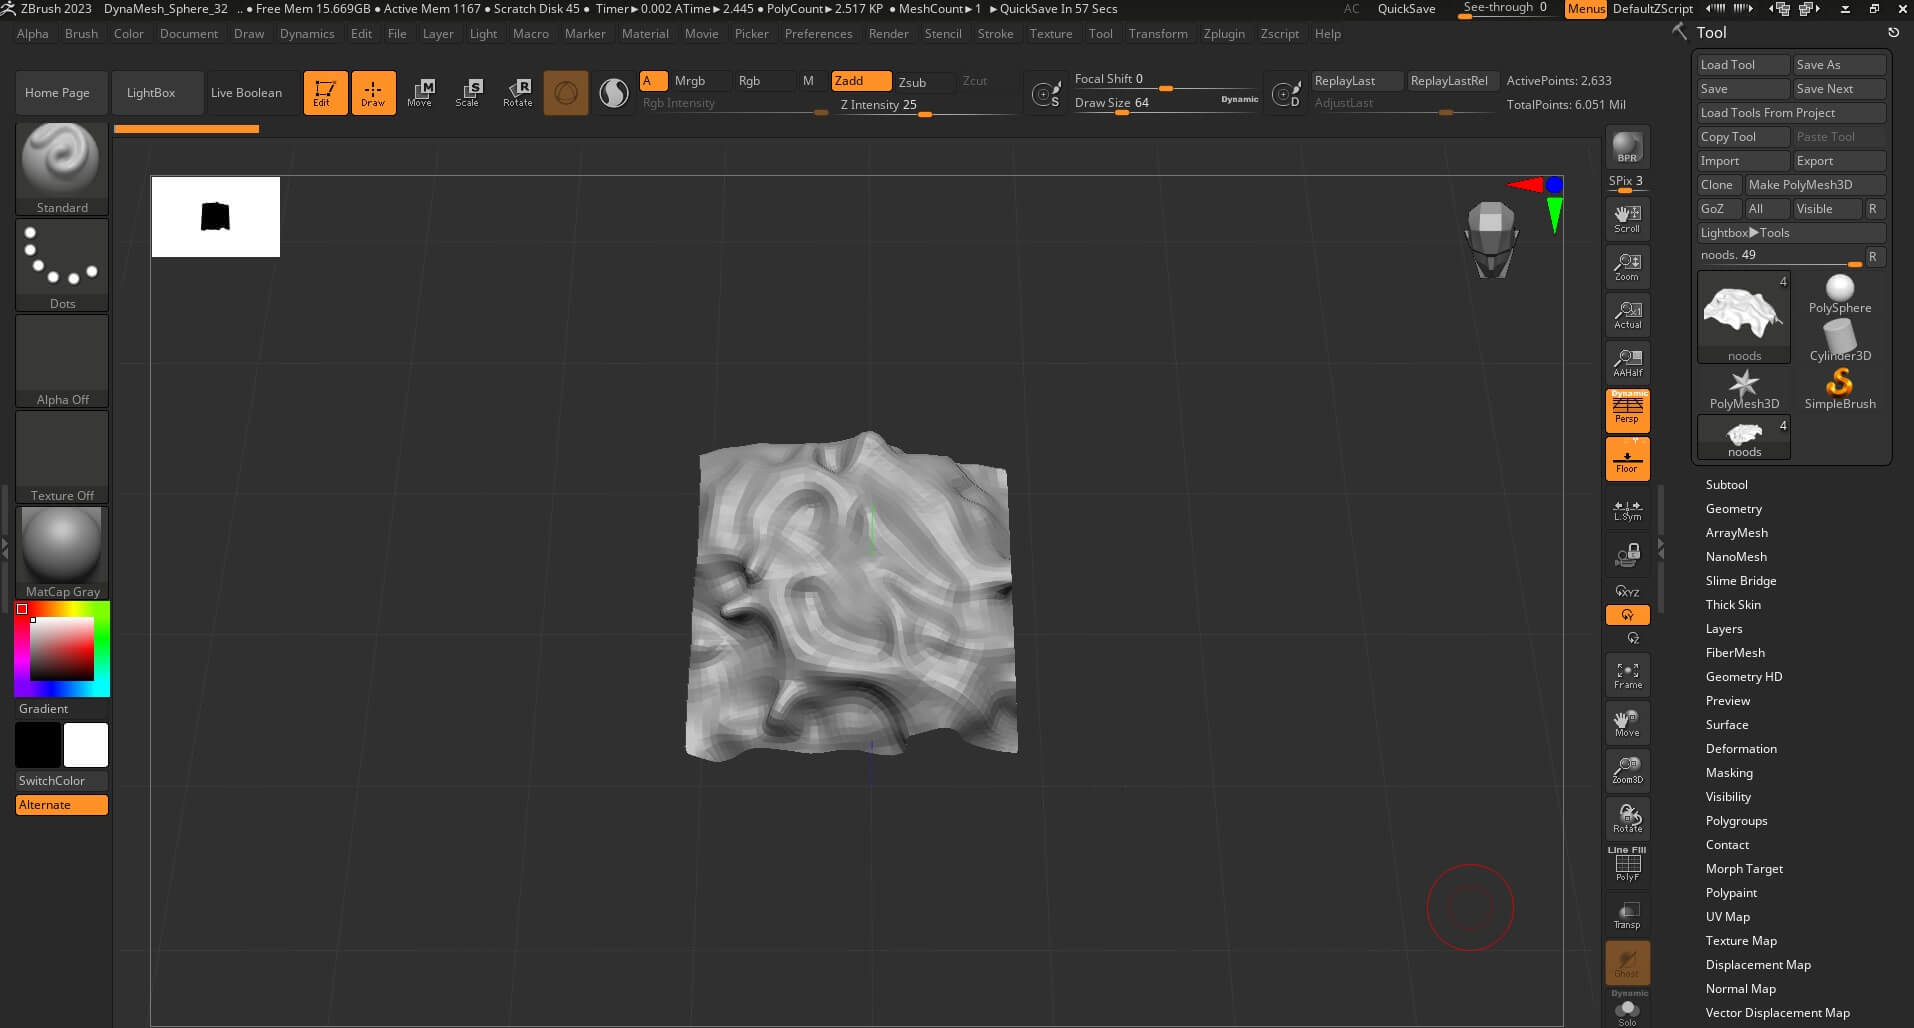
While I was pondering how I wanted to tackle the food within the takeout container and pan, I had a great idea to use Polycam for photogrammetry. It was an awesome excuse to get some Chinese food for dinner and utilise it within my environment. Getting the scan of my food was simple enough with a LiDAR camera on my iPad. From there, I spent some time in ZBrush to cut out only the important parts of the mesh and then ZRemeshed it to lower the polycount to be baked and put into Unreal as well.
PolyCam Scan and Remeshed ZBrush Noodles
Texturing
The time-consuming part started here. I took my nose to the grindstone once I began to model each individual asset. Most of my props went through the block-out to mid-poly workflow, which were then UV-ed and separated into texture sets that get taken into Substance 3D Painter to be individually textured.
Props from Painter
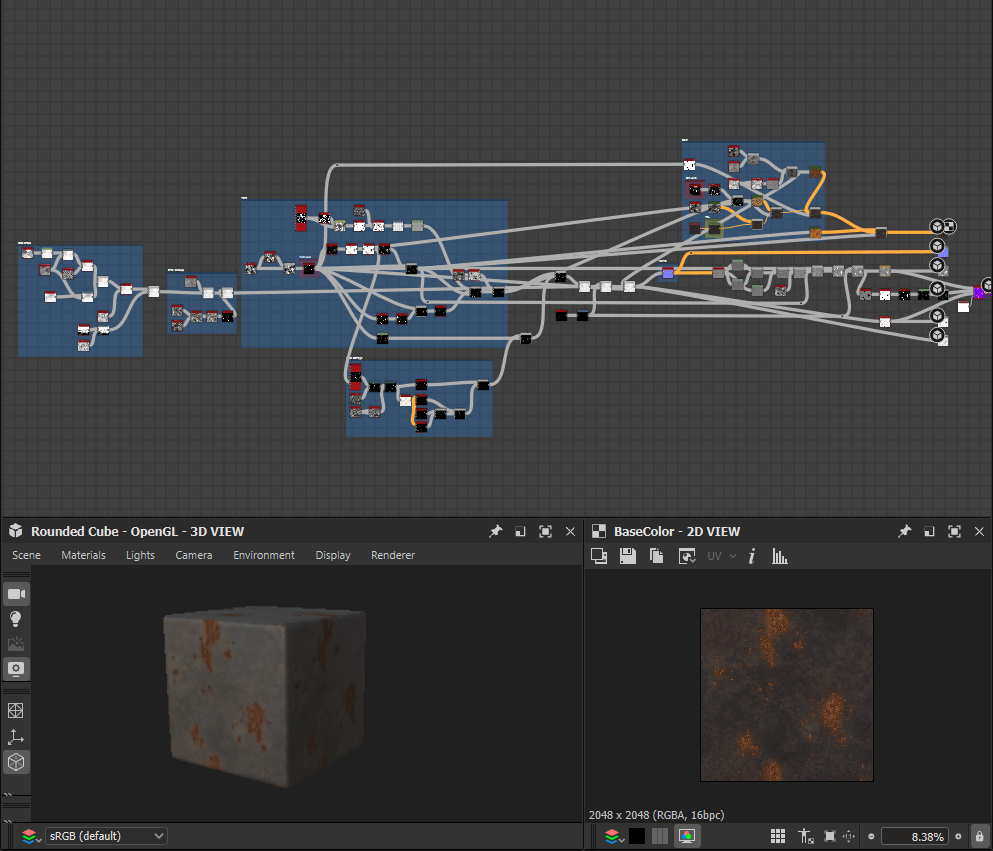
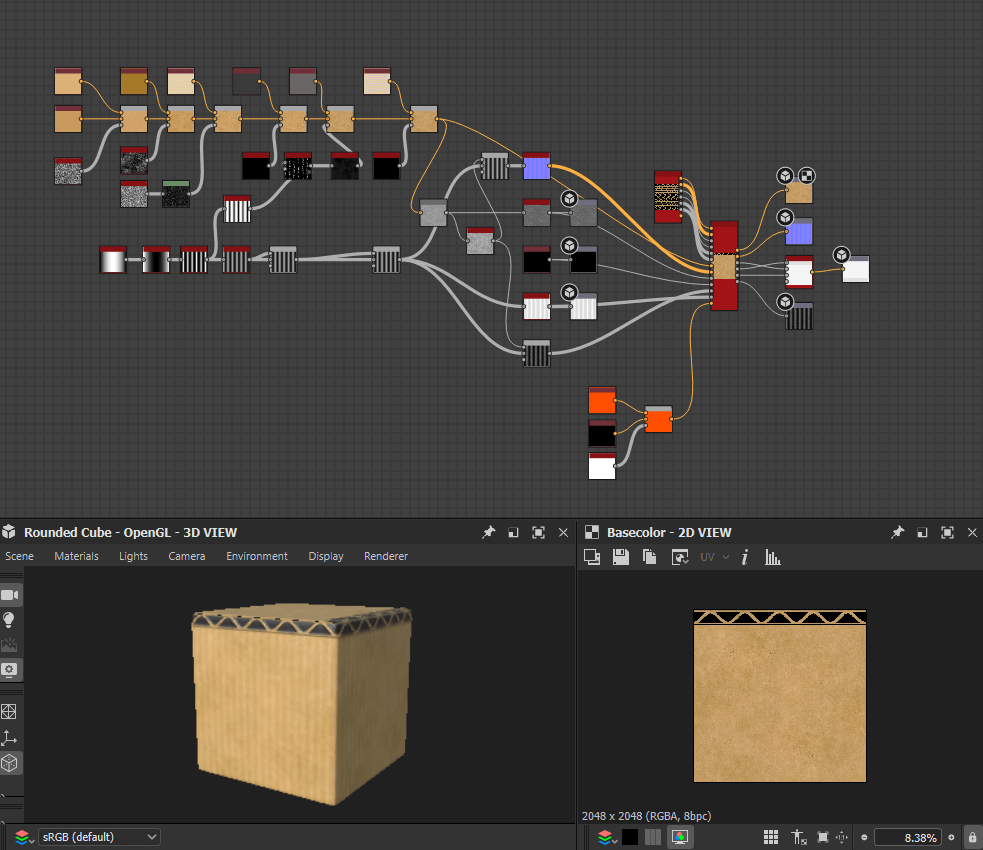
To speed up the texturing of many props in my scene, I created a metal base material in Substance 3D Designer that had adjustable sliders for rustiness and whether it was painted or not. I used it as a base for most of my metallic props in Substance Painter. Alongside that, I created a trim material for my cardboard that I was able to UV the boxes to, which worked to apply onto multiple variations of boxes around my scene.
Bringing everything together
After every block-out and texture pass that I made on a model, I'd go into Unreal Engine and reassess my lighting and set dressing setup. It was very important to me that I can direct somebody's eyes across the most important elements of my scene.
Don't be afraid to introduce more lights to add bounce lighting into your scene and brighten up your darkest parts. That way, no detail gets lost in your composition.
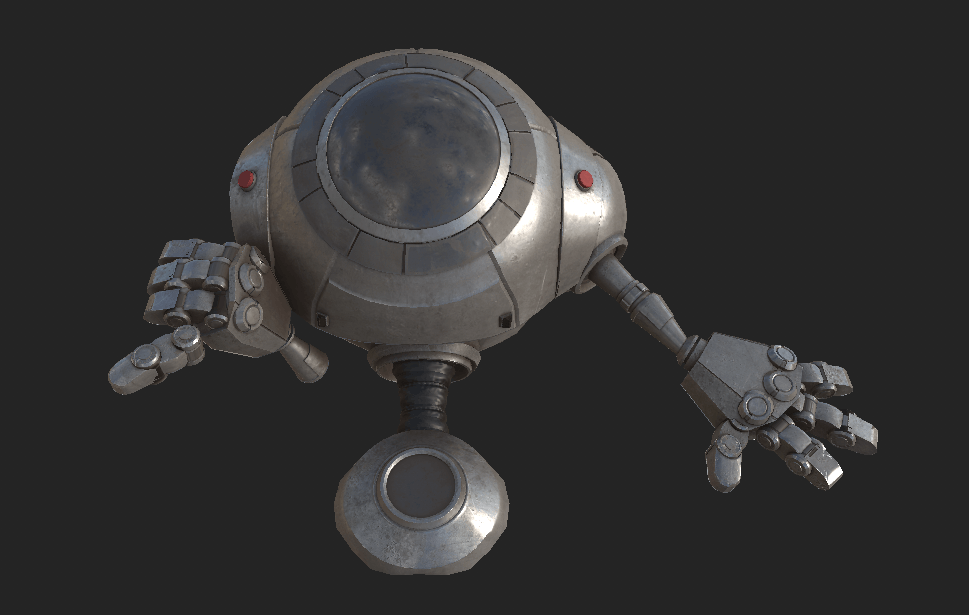
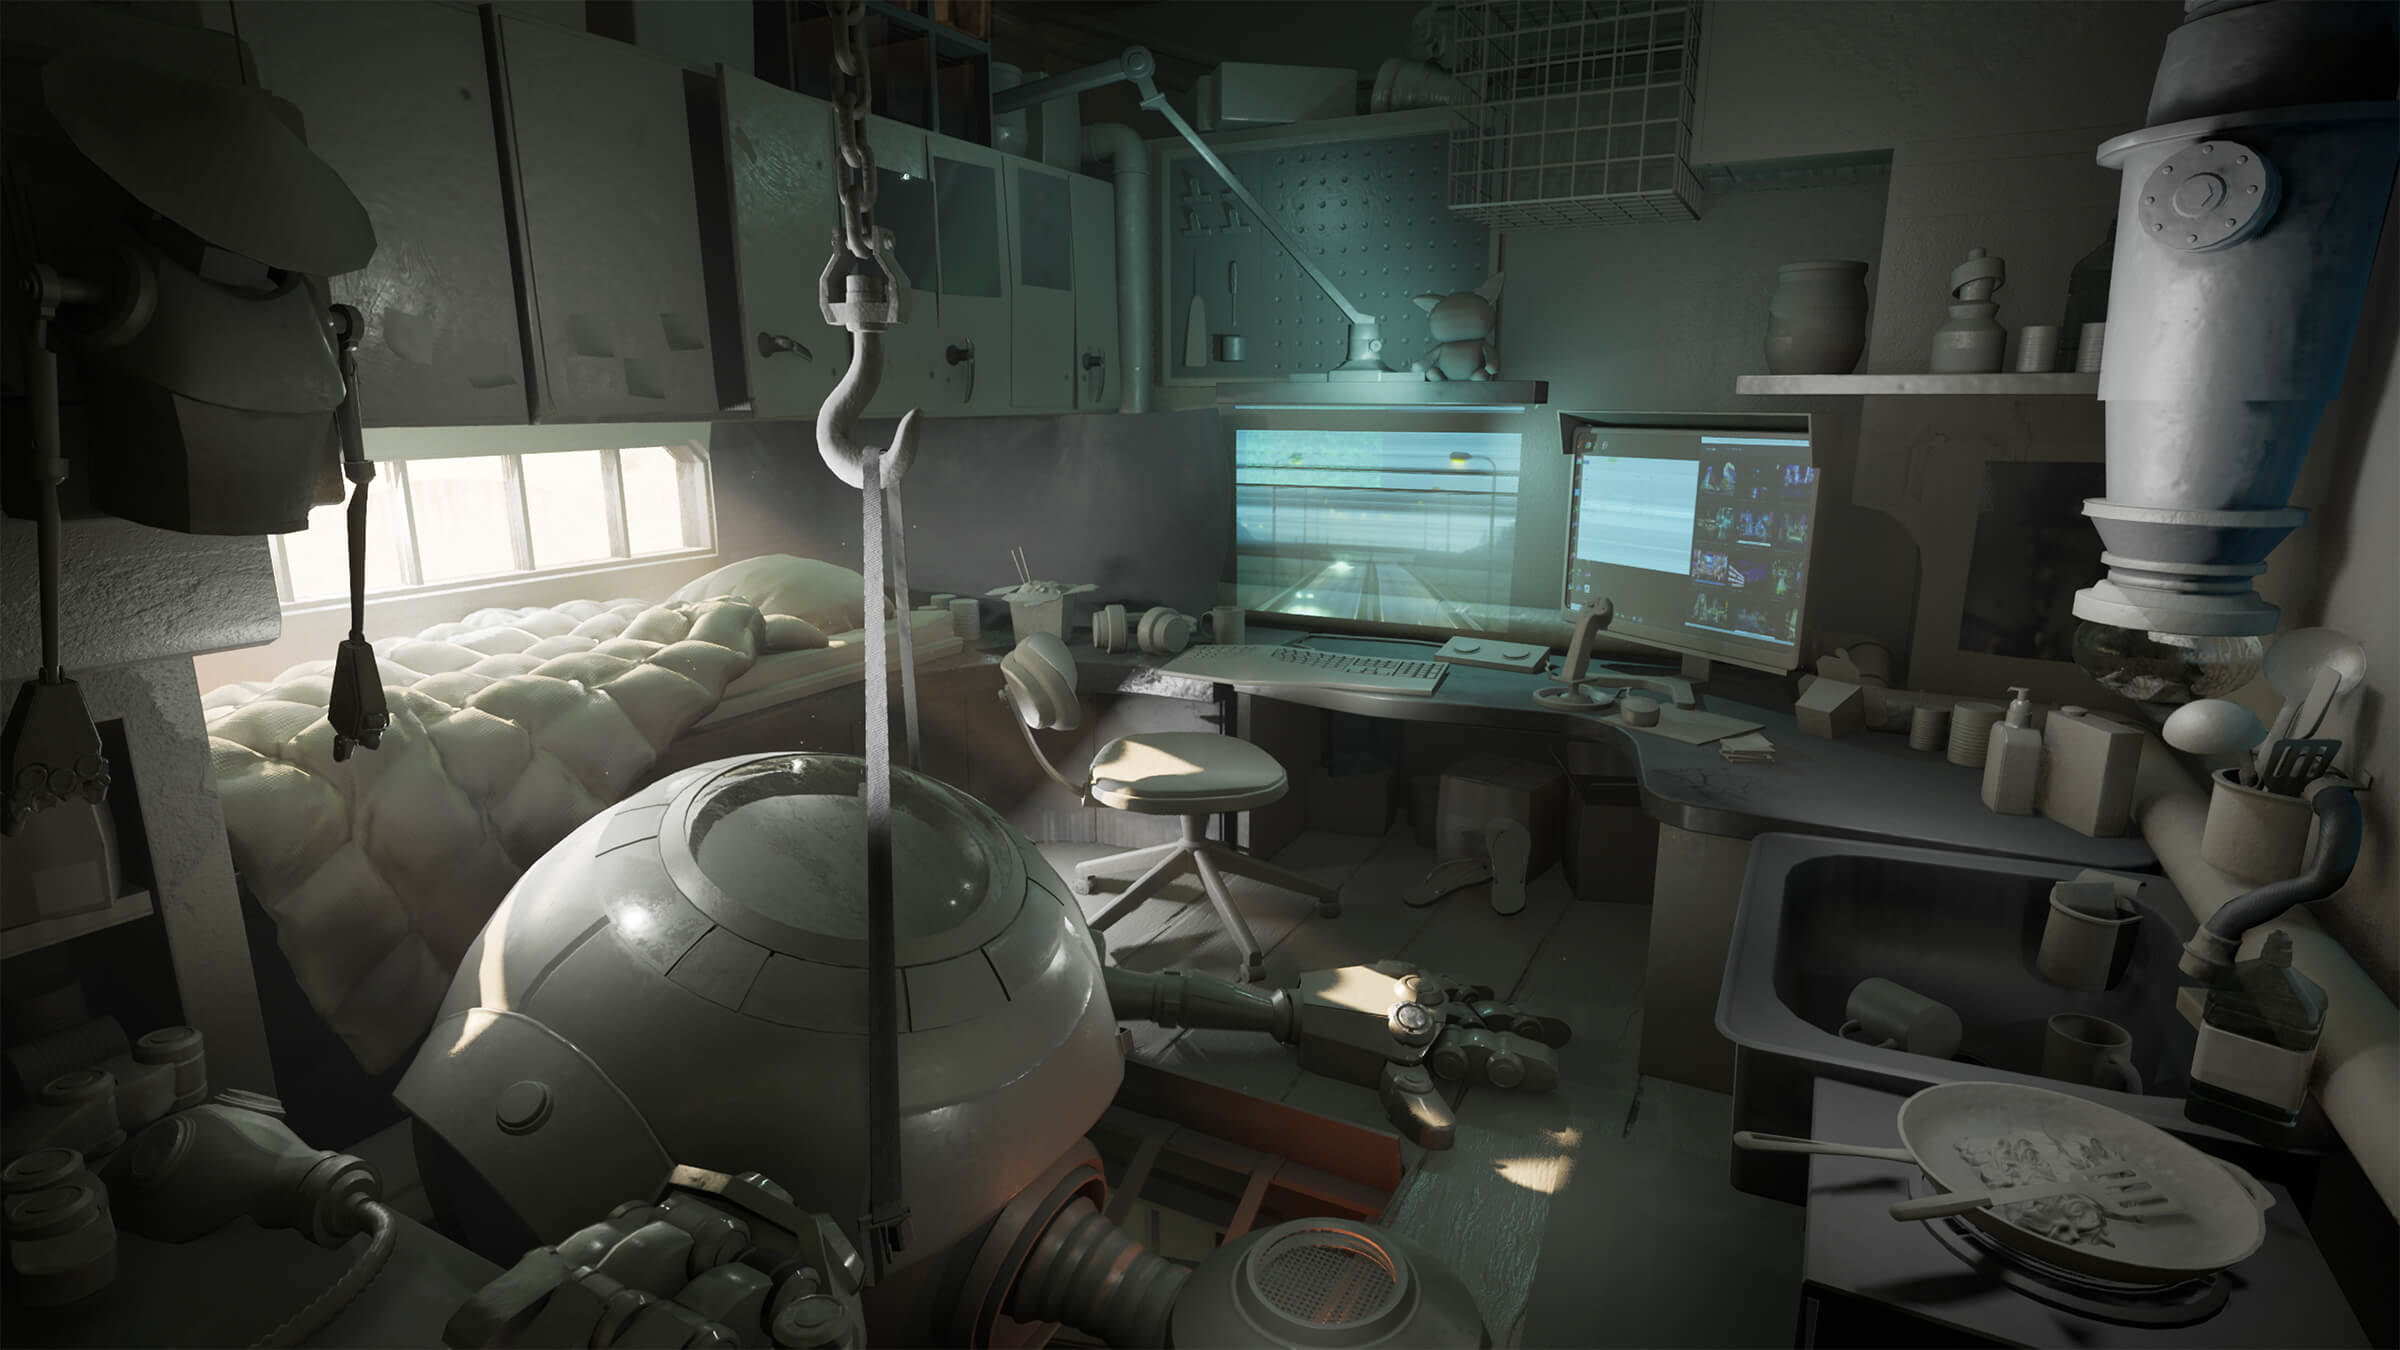
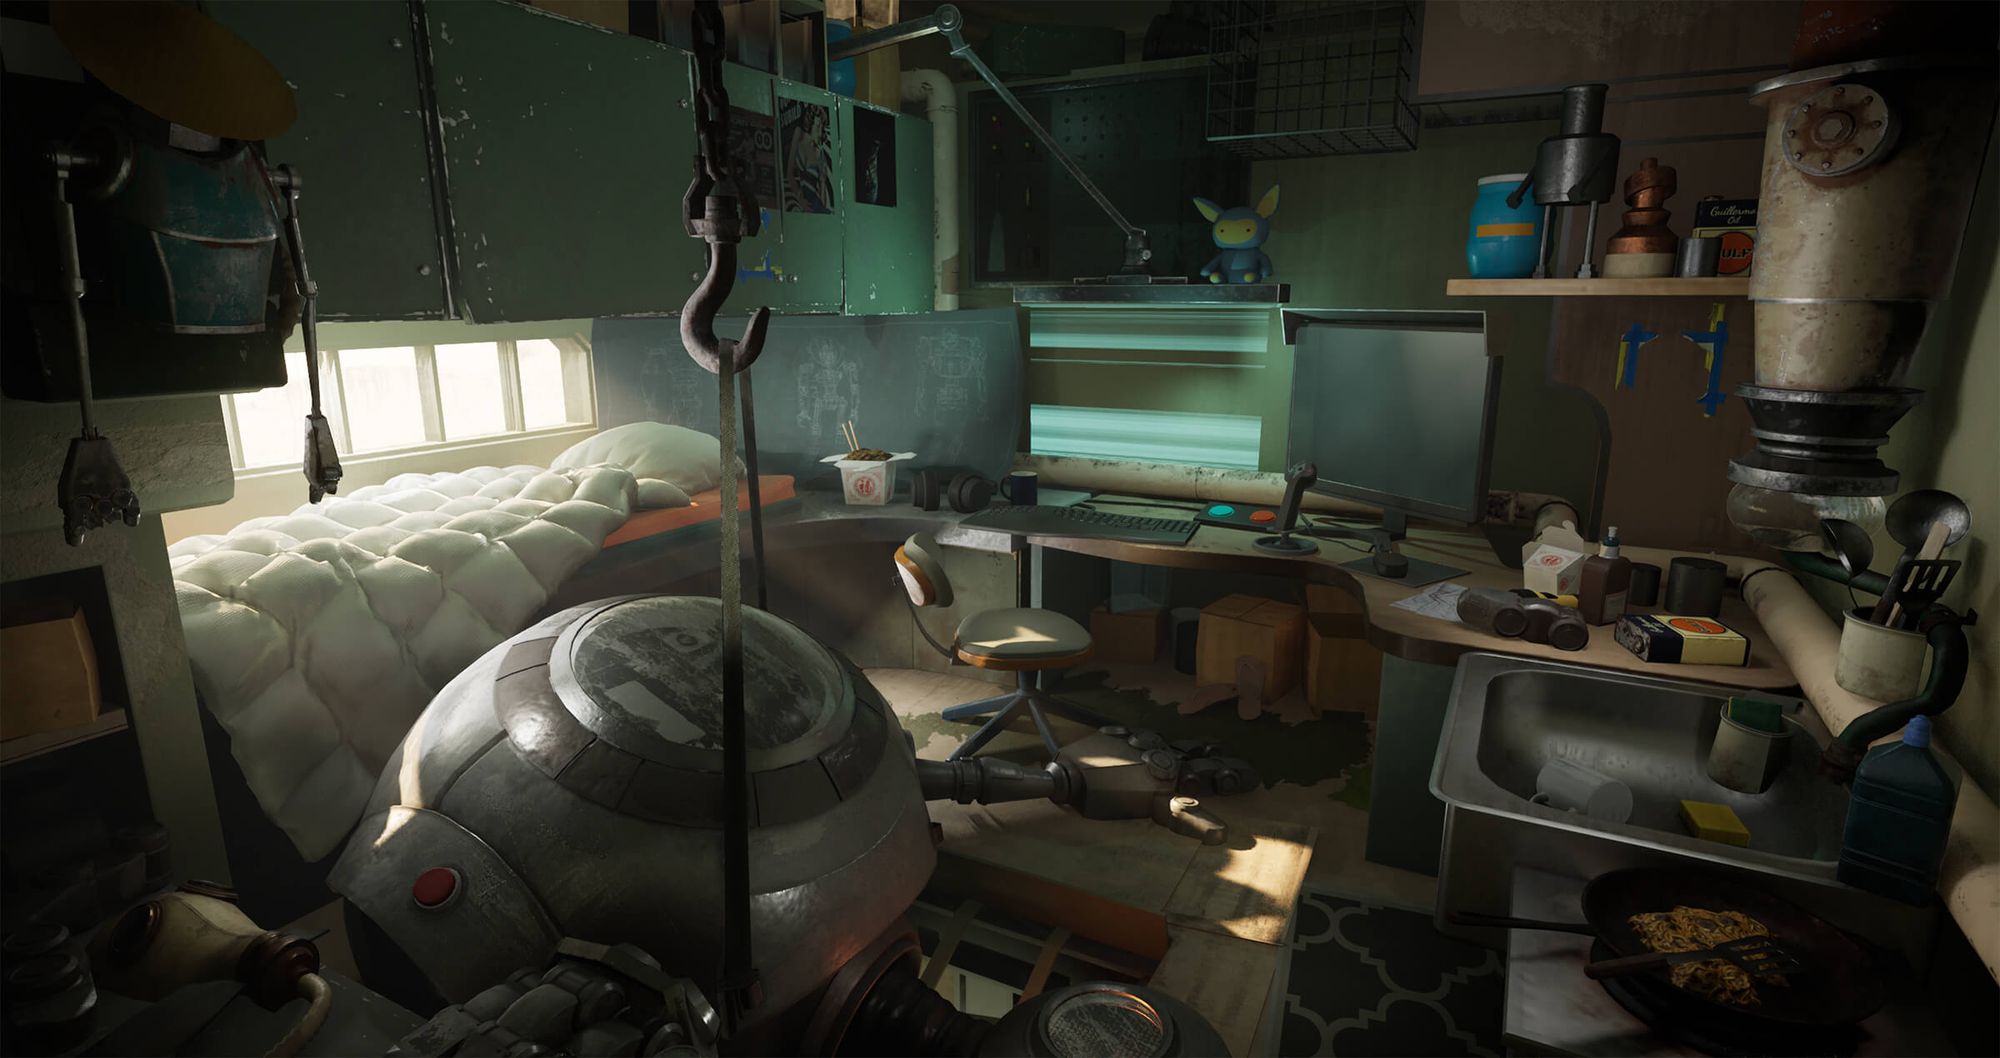
Lighting allowed me to create contrast within my environment that guides the player and viewer to my focal point, which was the robot on the left. The texturing and material definition all play a huge part in helping it come together, with the specular highlights and beams of light pointing you in the right direction.
Detail Lighting Render
To achieve the grungy look of the original concept, during some of my iterations of the scene, I introduced grime and destruction decals from Quixel Megascans into every nook and cranny of the environment. They helped to serve as additional detail that made the world feel lived in.
No Decal (Left) | Decals (Right)
The final touches in my environment were post-processing and the addition of some movement to the scene. It can't be overstated how important the last bit is to push your piece to the next level. FX, lighting, and post-processing are incredibly important to give your piece some life.
Normally, in my environments, I'd use foliage to convey movement, but since it was an indoor grungy room, I instead used hanging particles that I created in Niagara. I placed them into my god rays. To further that idea of movement, I introduced a scrolling shader to the monitor and hologram in the back.
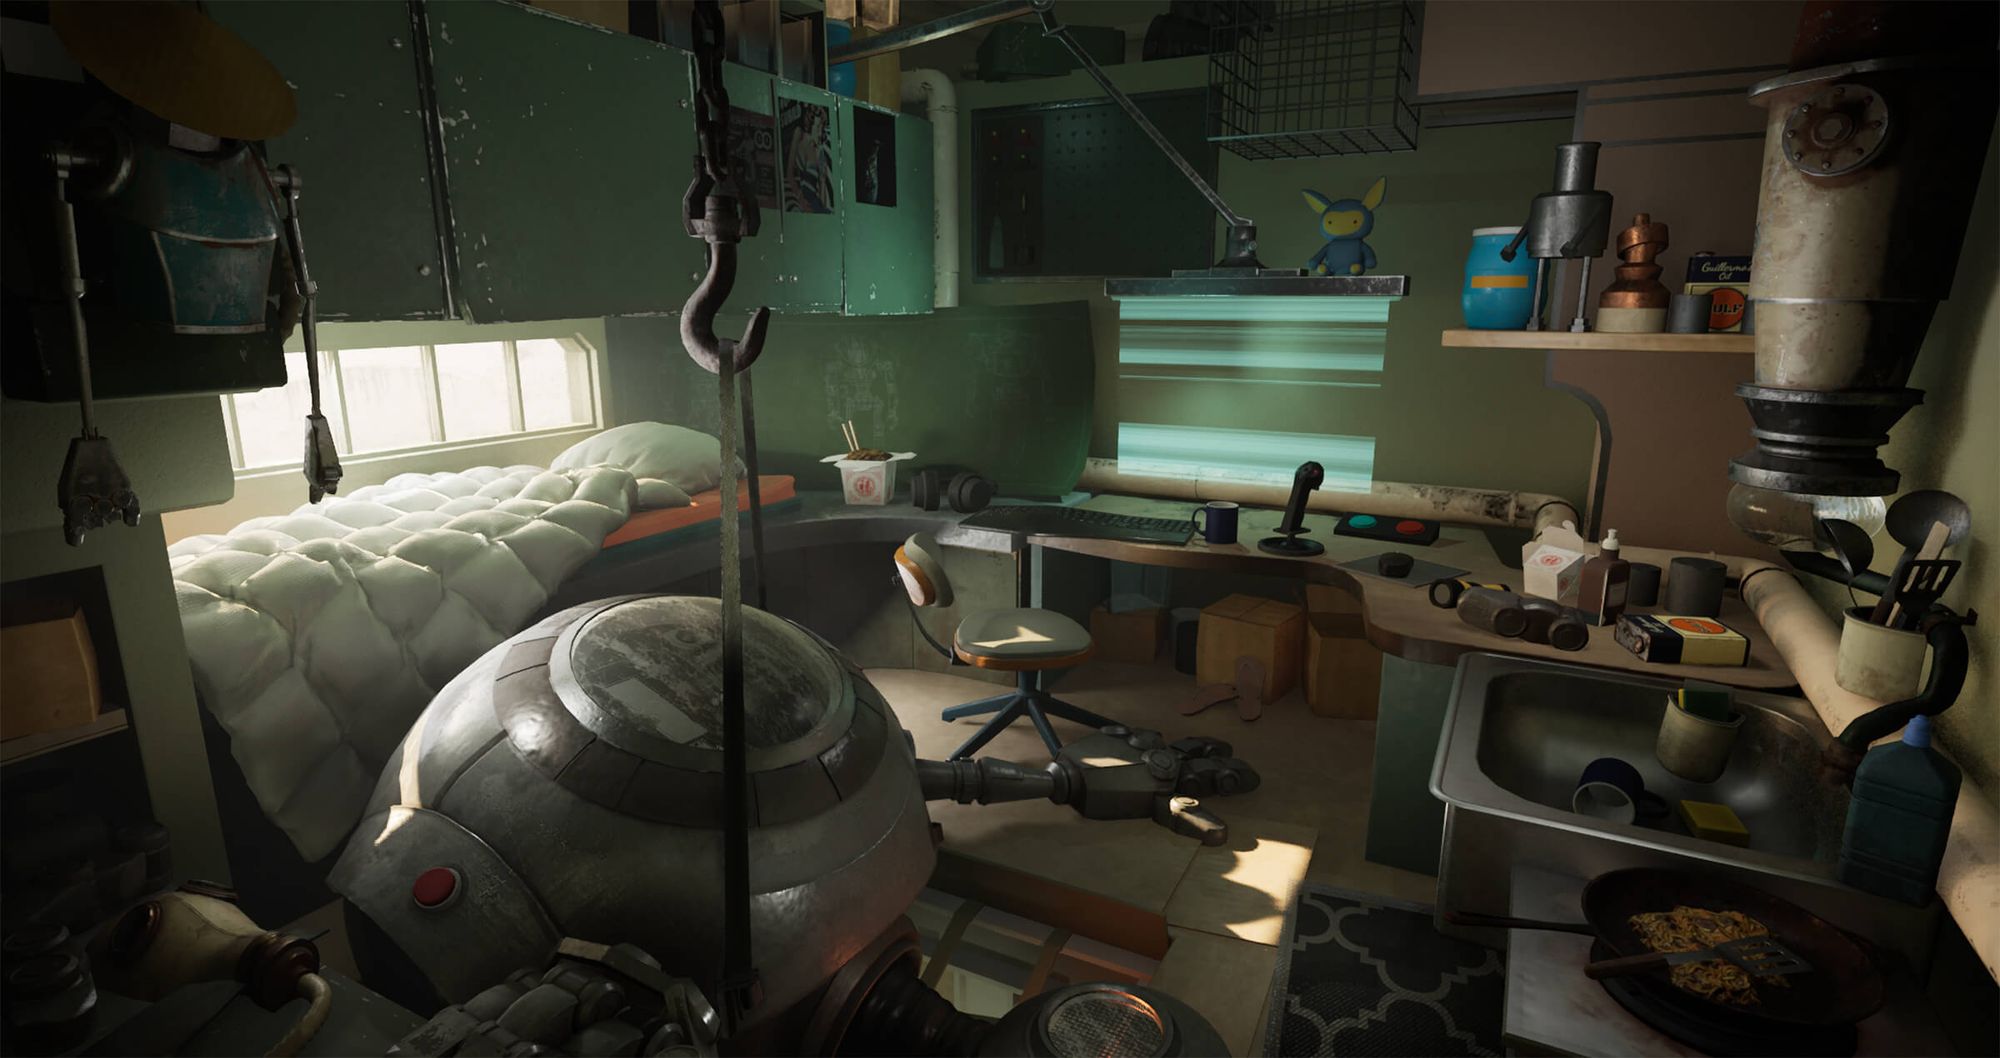
Final Render
Here's my final piece! Thanks for taking the time to read the article. It takes a lot of work to take a scene from concept to finish, and I had a lot of help and advice from amazing people to take this piece to the next level. I was able to learn a lot and speed up my skills in asset creation, lighting, and compositional skills.
Also a huge thanks to The Rookies for giving me an opportunity and a platform where we can all learn and grow with each other. If you have any other questions about my project or anything else on my portfolio, don't be afraid to reach out on The Rookies, ArtStation or LinkedIn. Or email me at: [email protected].