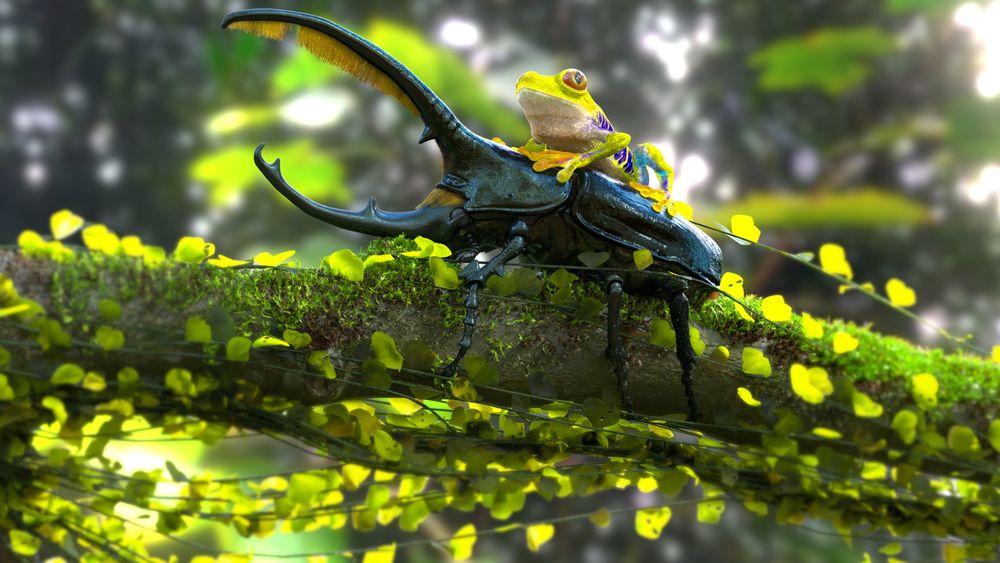
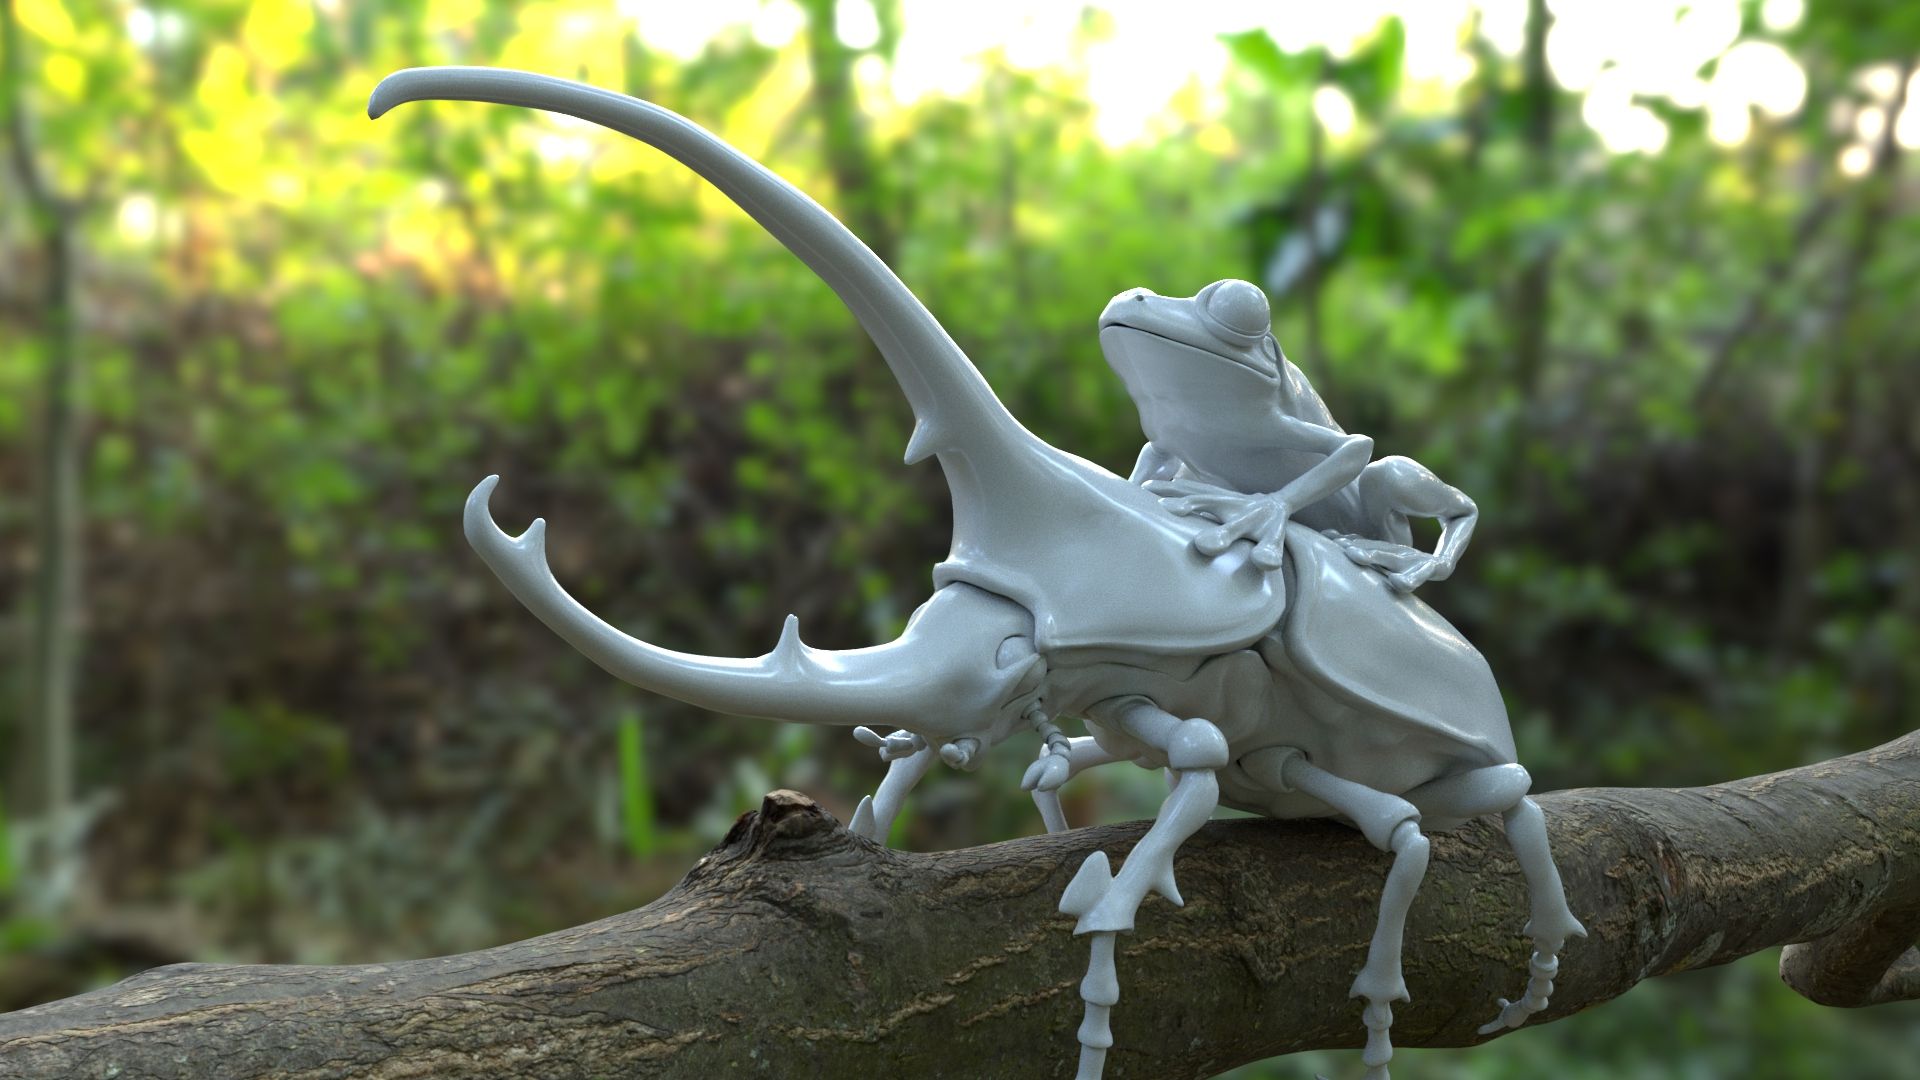
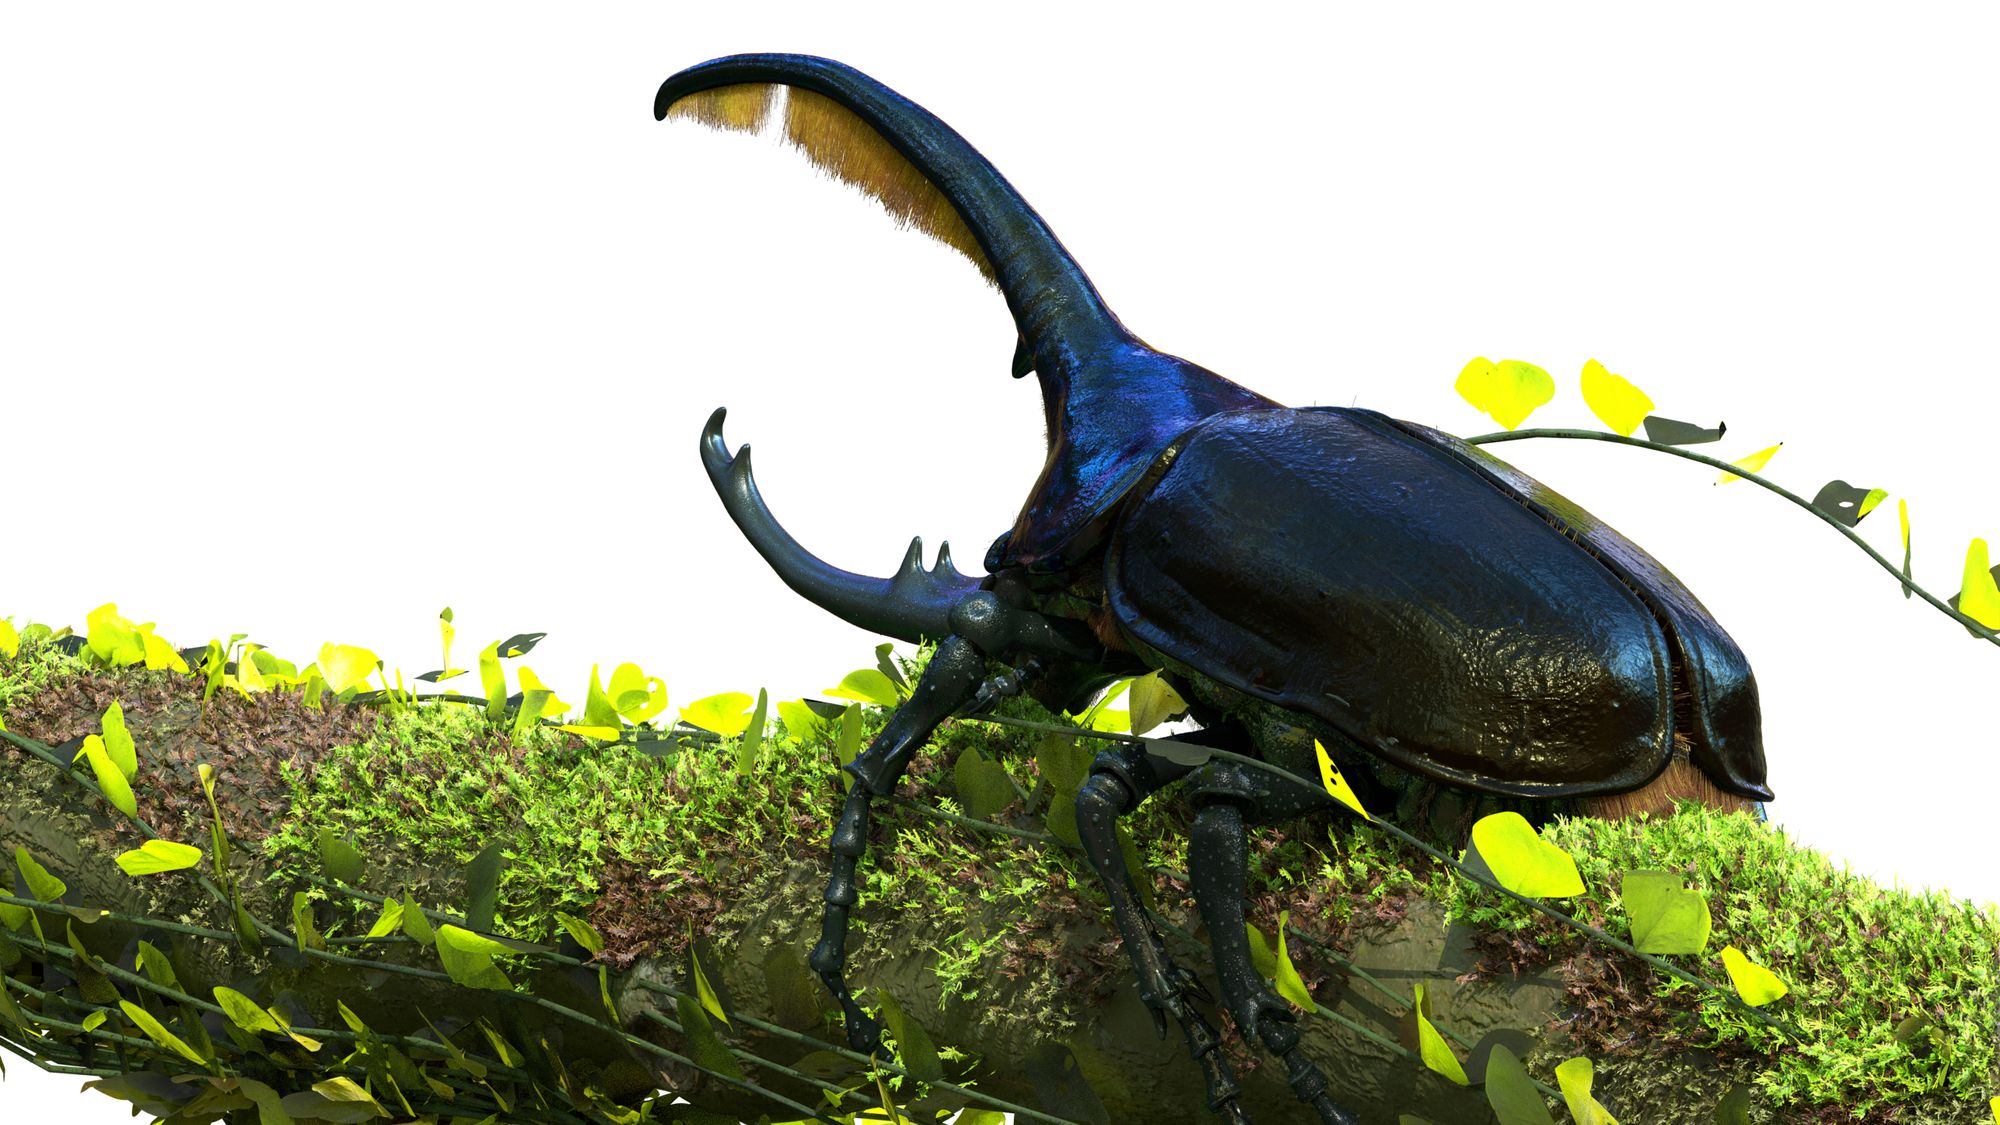
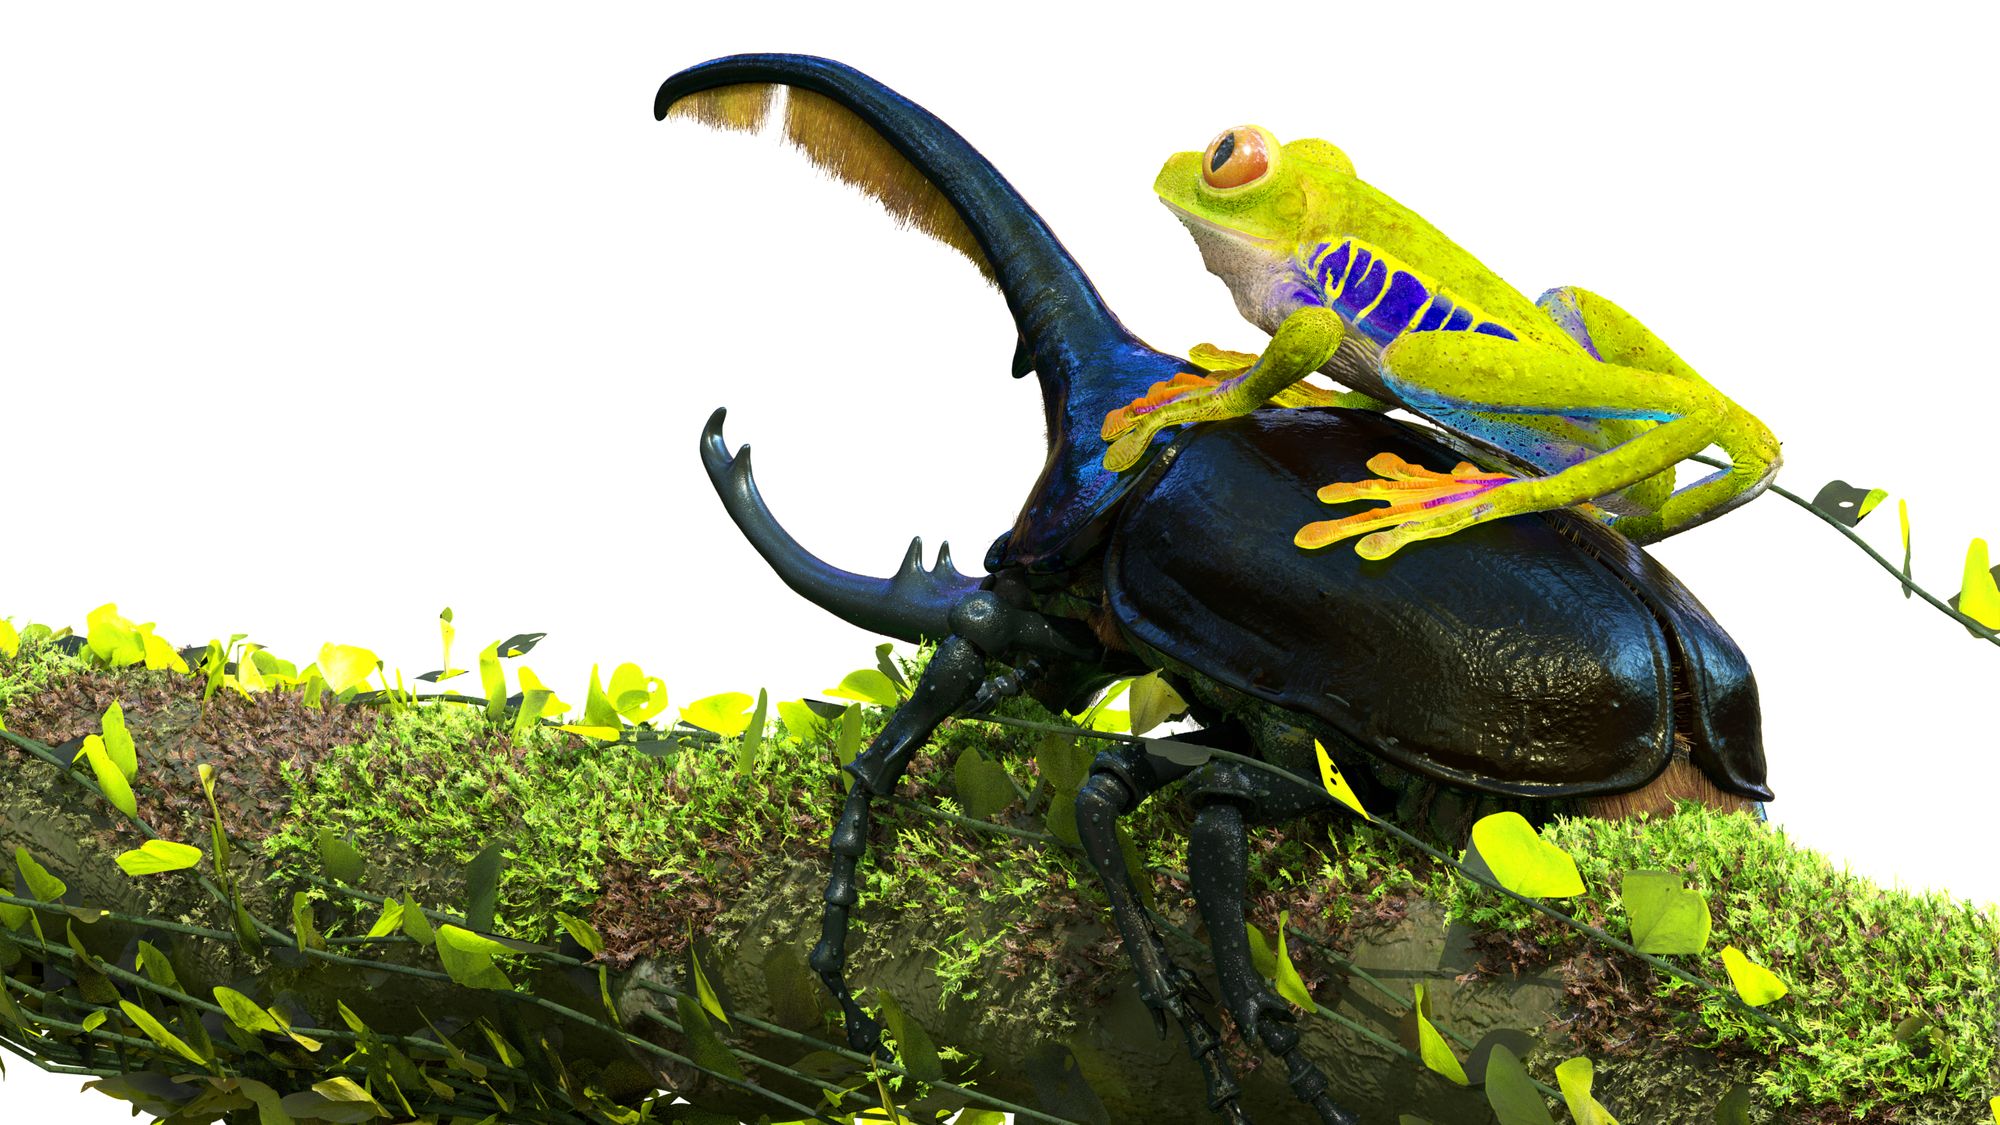
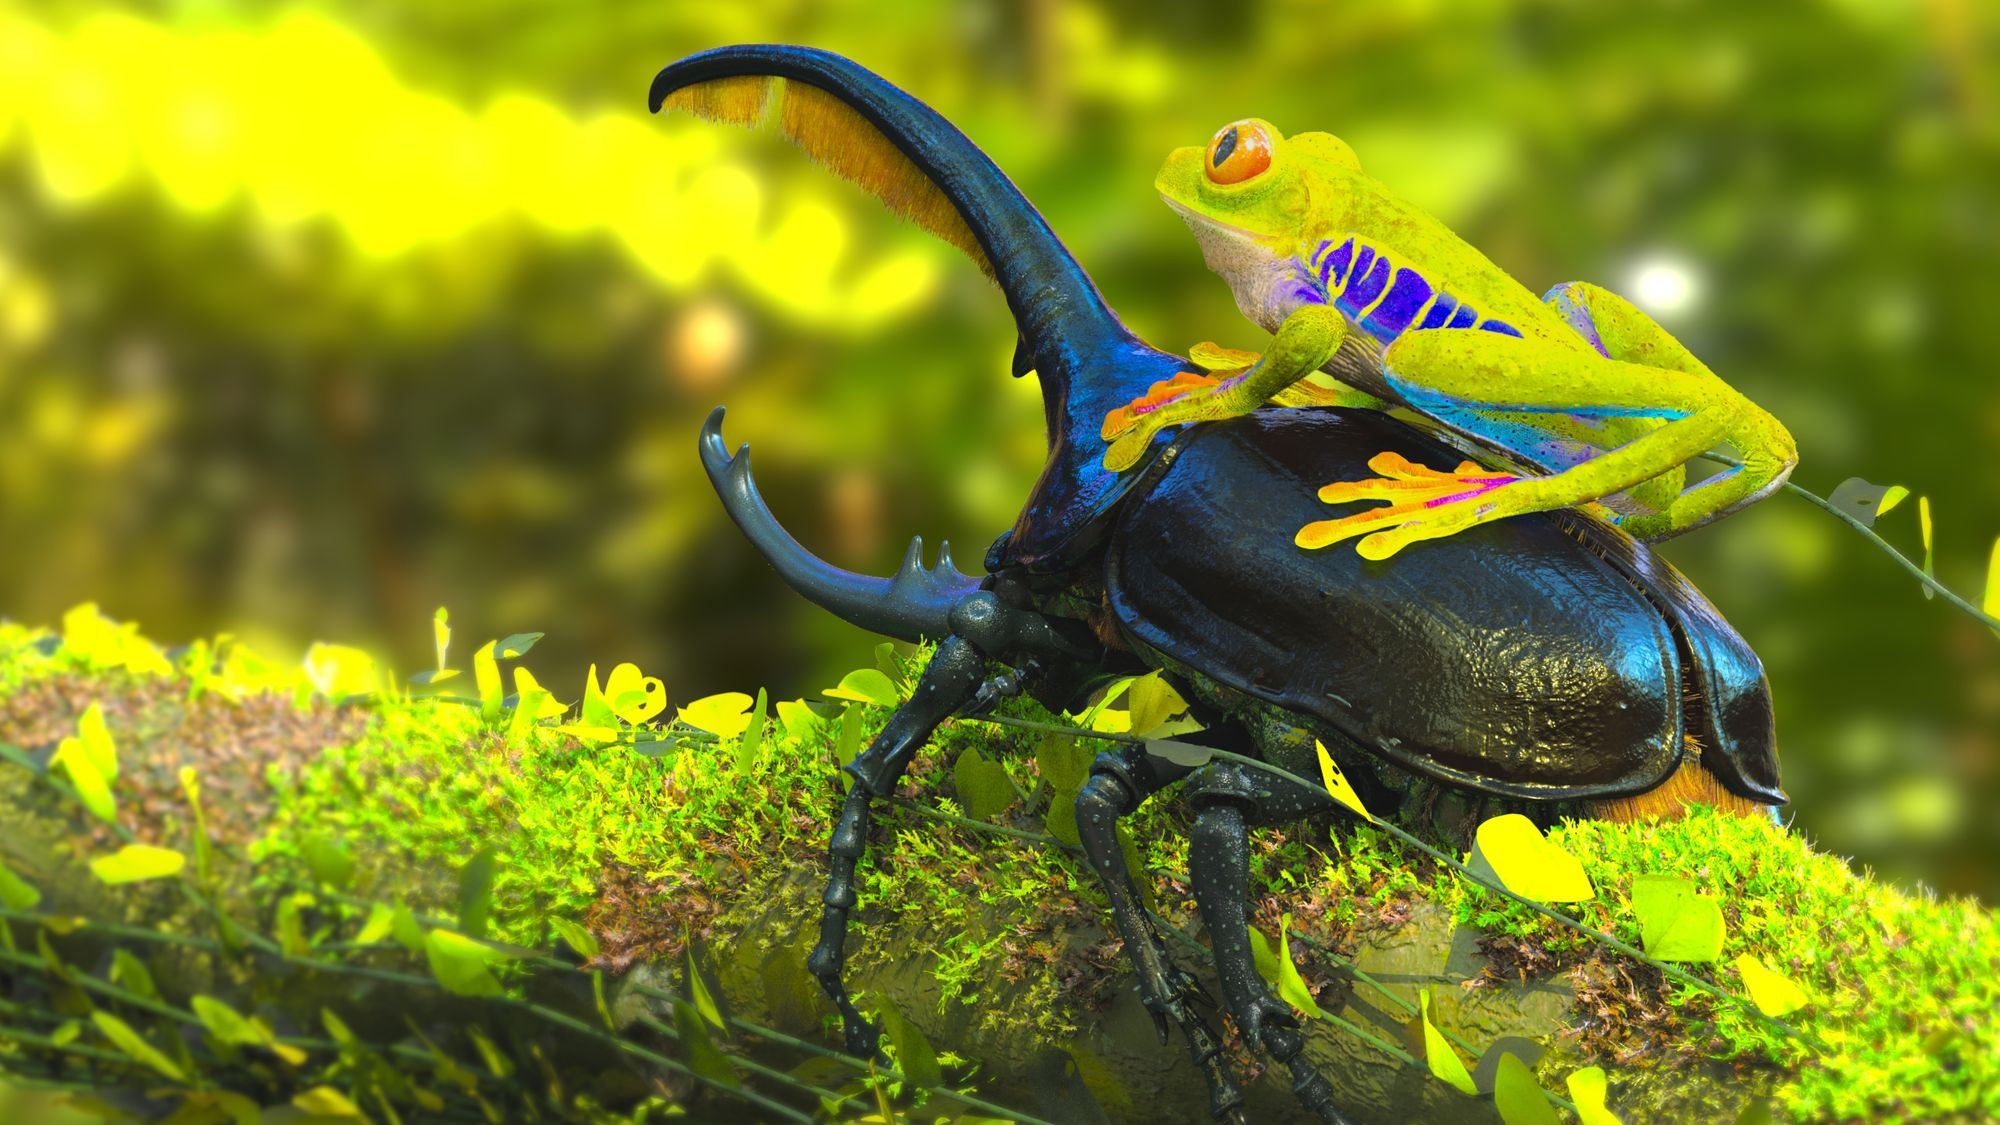
Unveiling Nature's Might: The Hercules Beetle and Red Eye Frog in Astounding Detail in 3D
Join Christopher Leder, a talented PIXL VISN graduate, as he unveils the challenges, insights, and stunning results of this captivating project. Immerse yourself in the breathtaking beauty and realism of these natural wonders brought to life through remarkable 3D art.
Embark on a fascinating journey into the world of the Hercules Beetle and Red Eye Frog, brought to life with meticulous detail using advanced 3D techniques. This article explores the process of creating these remarkable creatures, from in-depth research and reference gathering to intricate modeling, sculpting, and texturing. Discover the challenges, insights, and stunning results of this captivating project created by PIXL VISN graduate, Christopher Leder. Witness the breathtaking beauty and realism of nature's wonders captured in remarkable 3D art.
The Hercules Beetle is able to lift up to 850 times its own weight which makes it to the strongest animal on our planet.
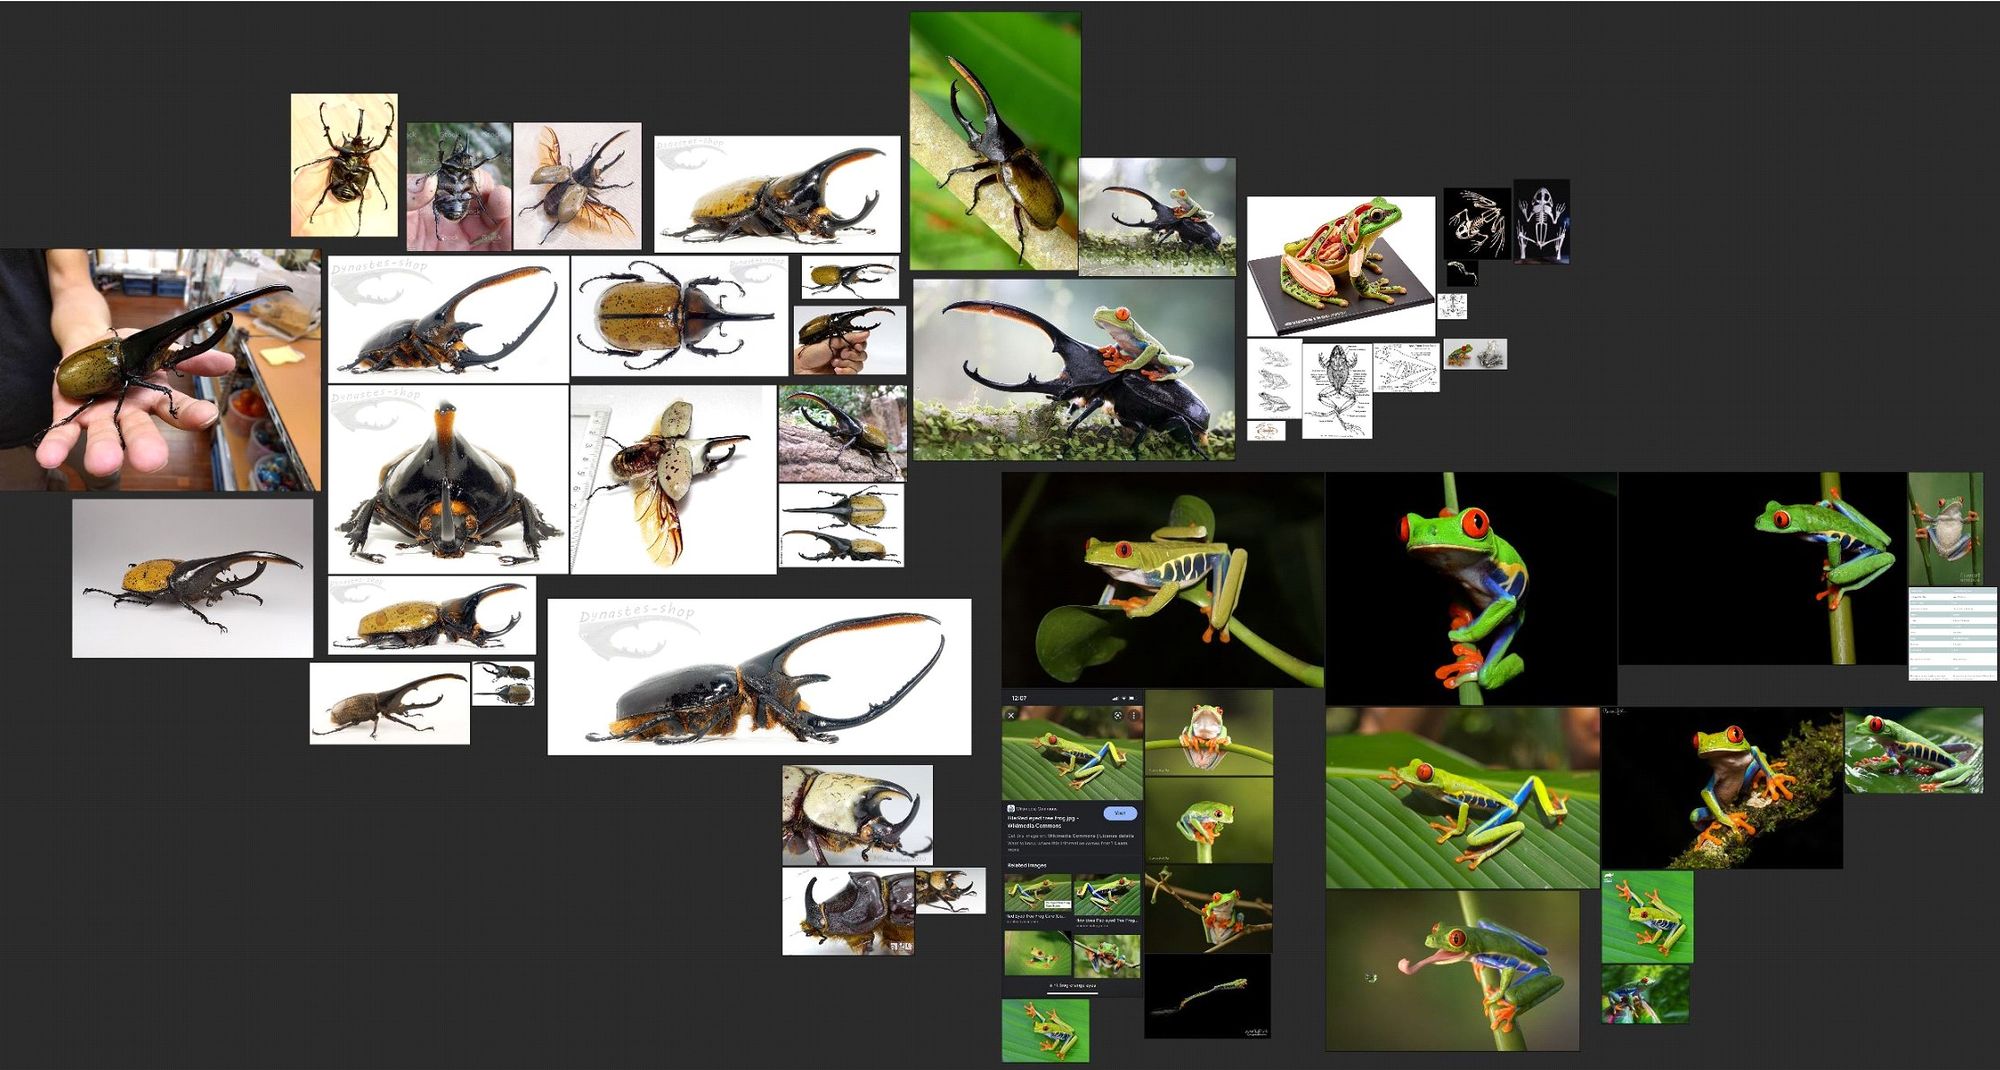
During the course of my second demo project I planned to create a Hercules Beetle and a Red Eye Frog. I spent hours online to find an awesome picture. I mainly used Google pictures and Pinterest. I didn't have an exact direction about what kind of animal I wanted to create. Of course, I found not one singular picture which means the decision for me was quite hard, but I am not regretting my choice.
References
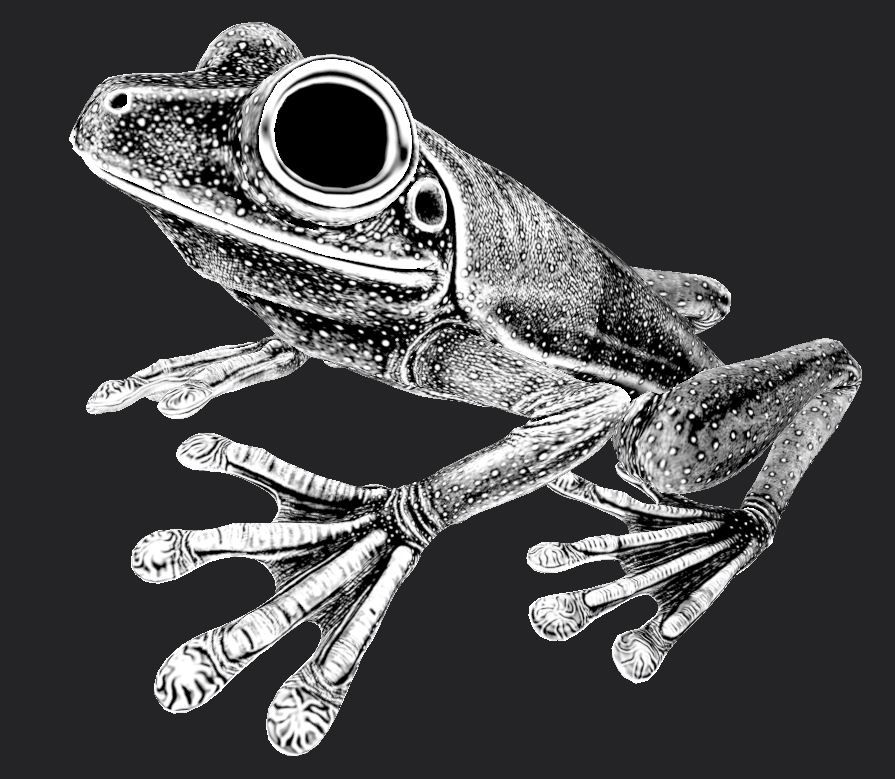
I really enjoyed doing the research for some good references. In this case, the search for references was extremely important. I was looking for references in relation to the colours, size, the anatomy and much more.
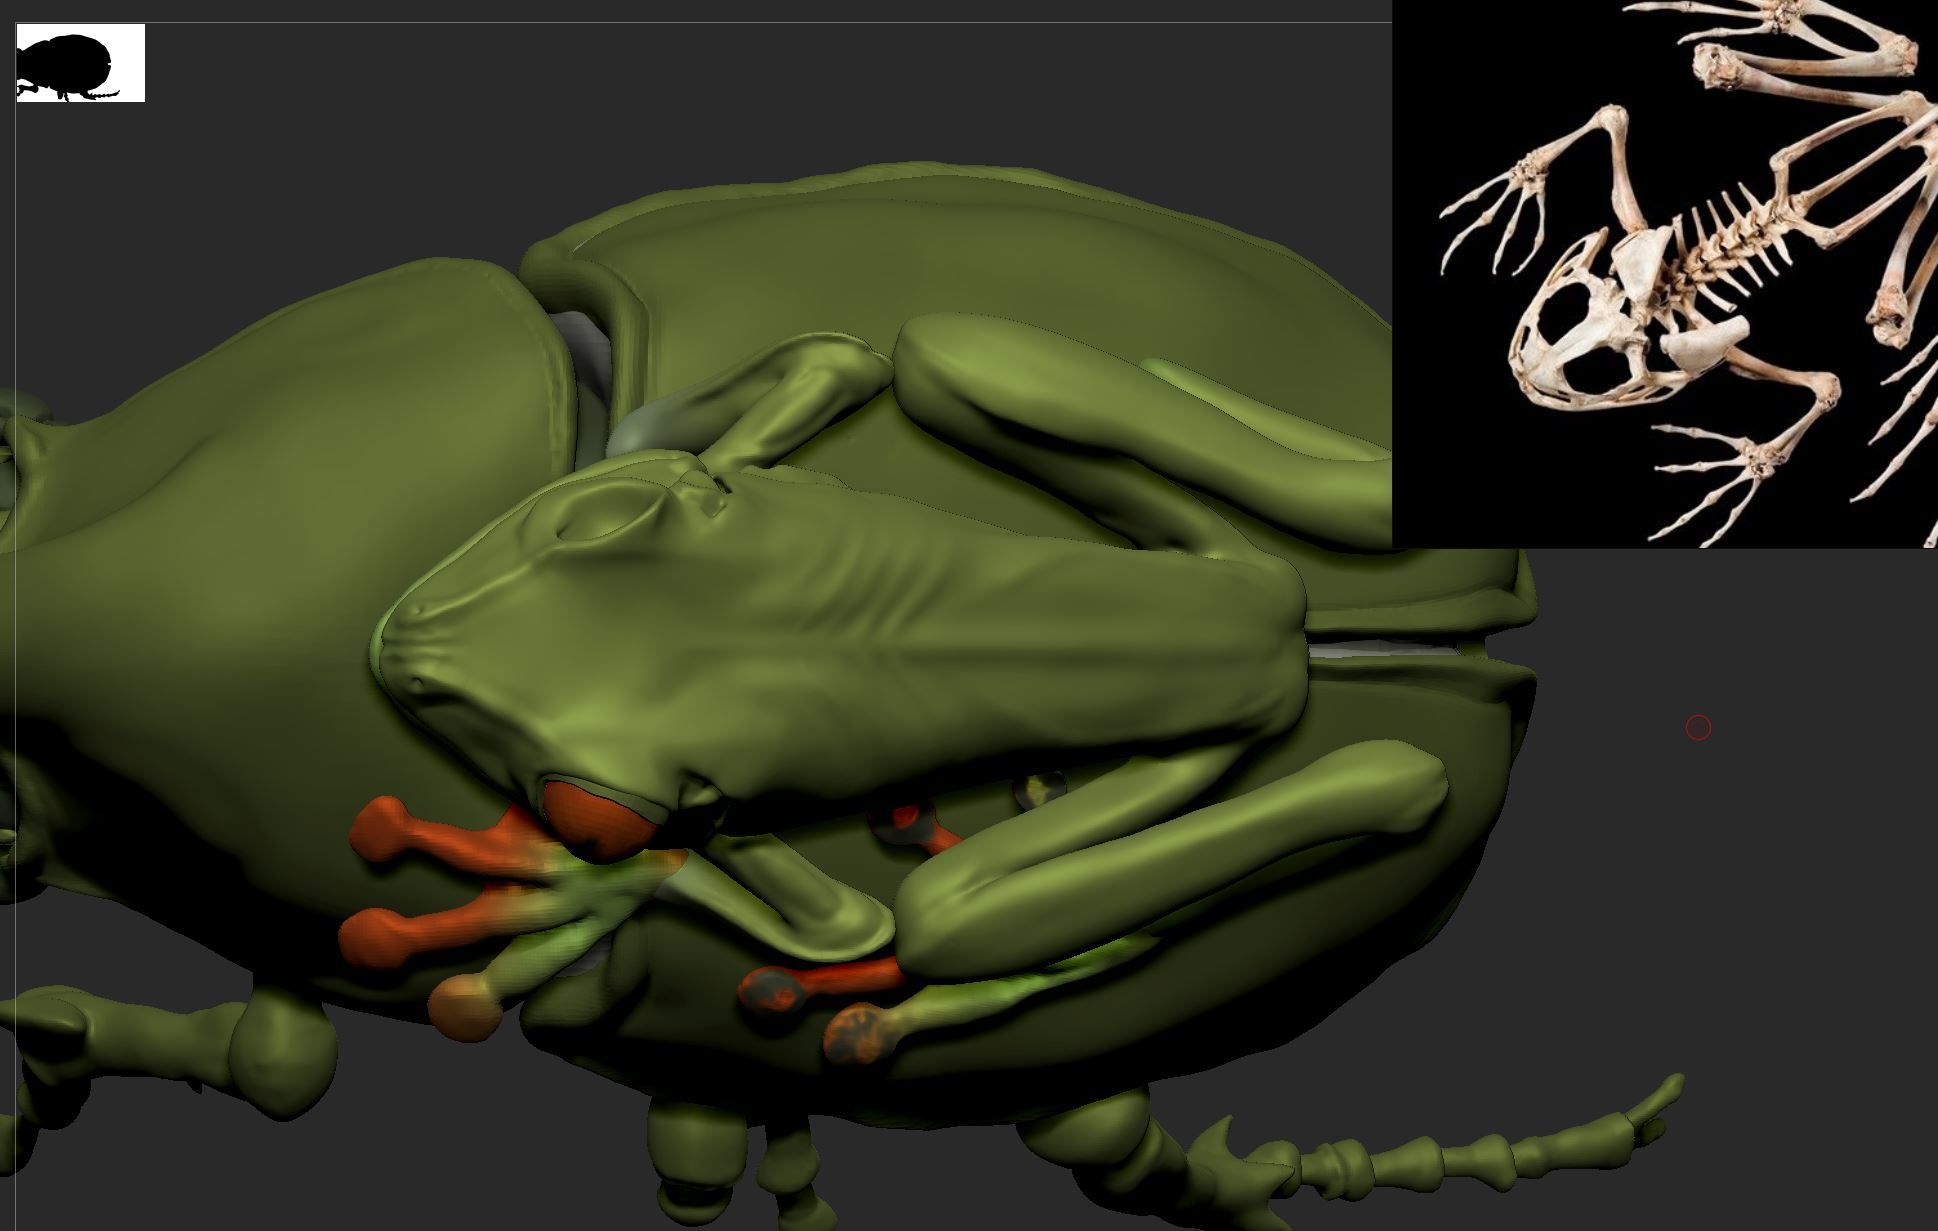
The special thing about this project has been, that I had to nail two very different kinds of animals. That means I was studying both creatures very closely. A huge help was to watch videos on YouTube for example; a very easy way to get a feeling of the real size and especially how they are moving, which makes it easier to understand the anatomy. Another option would also be to go into a zoo if you have the possibility.
The research was not only important for the modeling, but especially for the sculpting with ZBrush. It was also essential for the texturing. To collect all my references I was using the extremely powerful tool called PureRef. It's a very handy tool and you can install it for free, but I would recommend that you give them at least a small tip for their amazing work.
Modeling
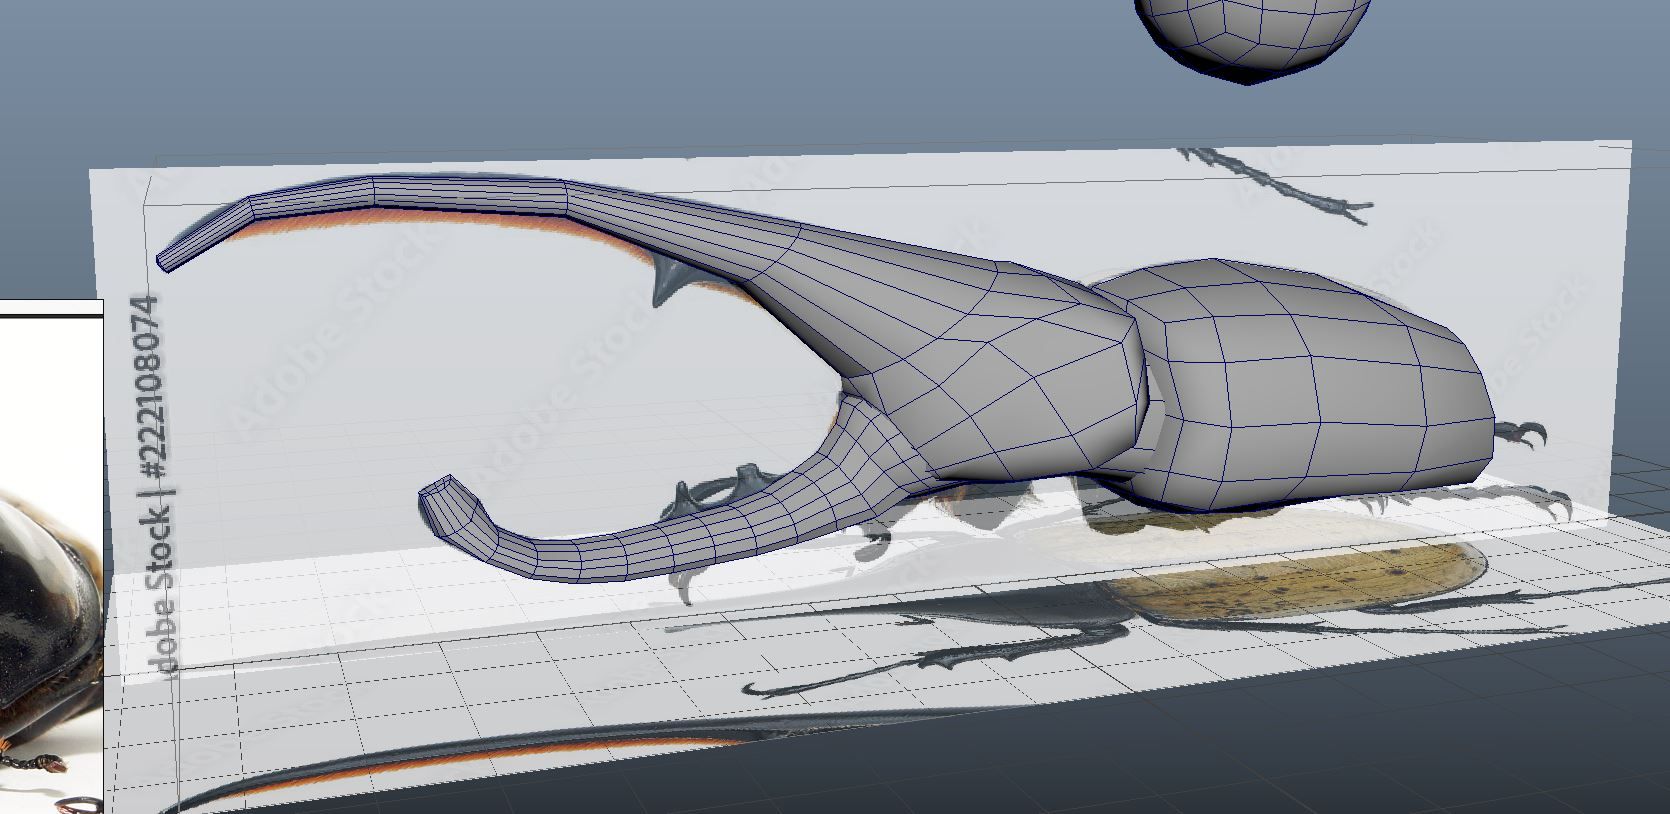
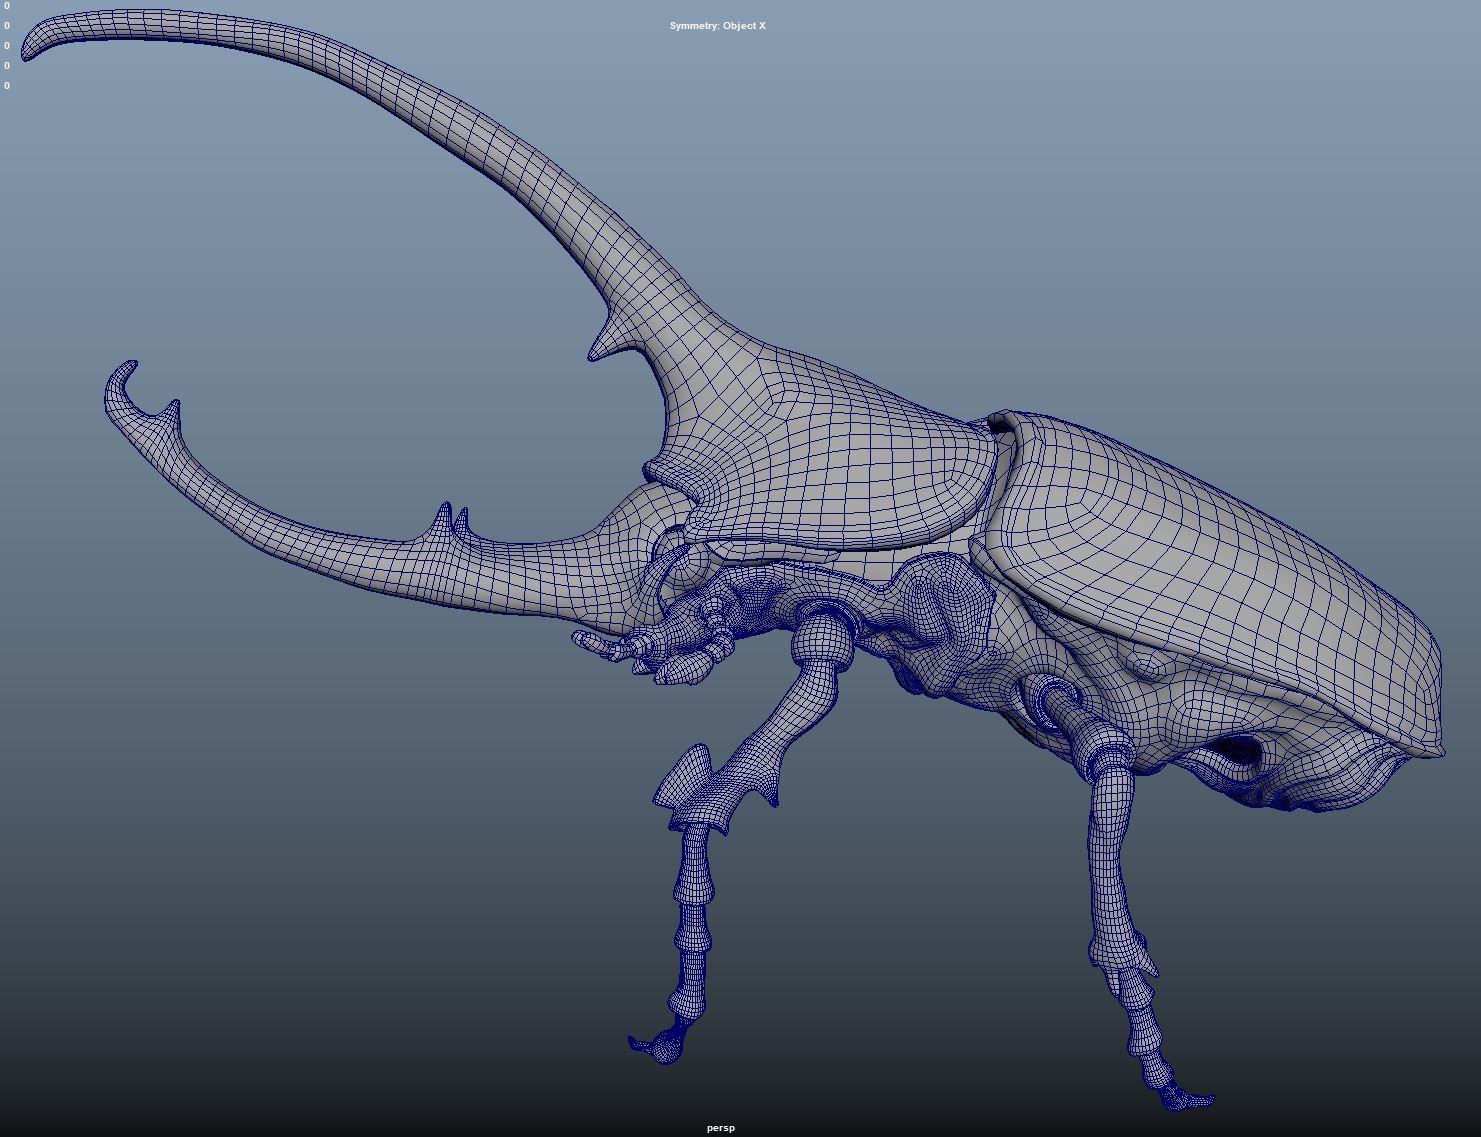
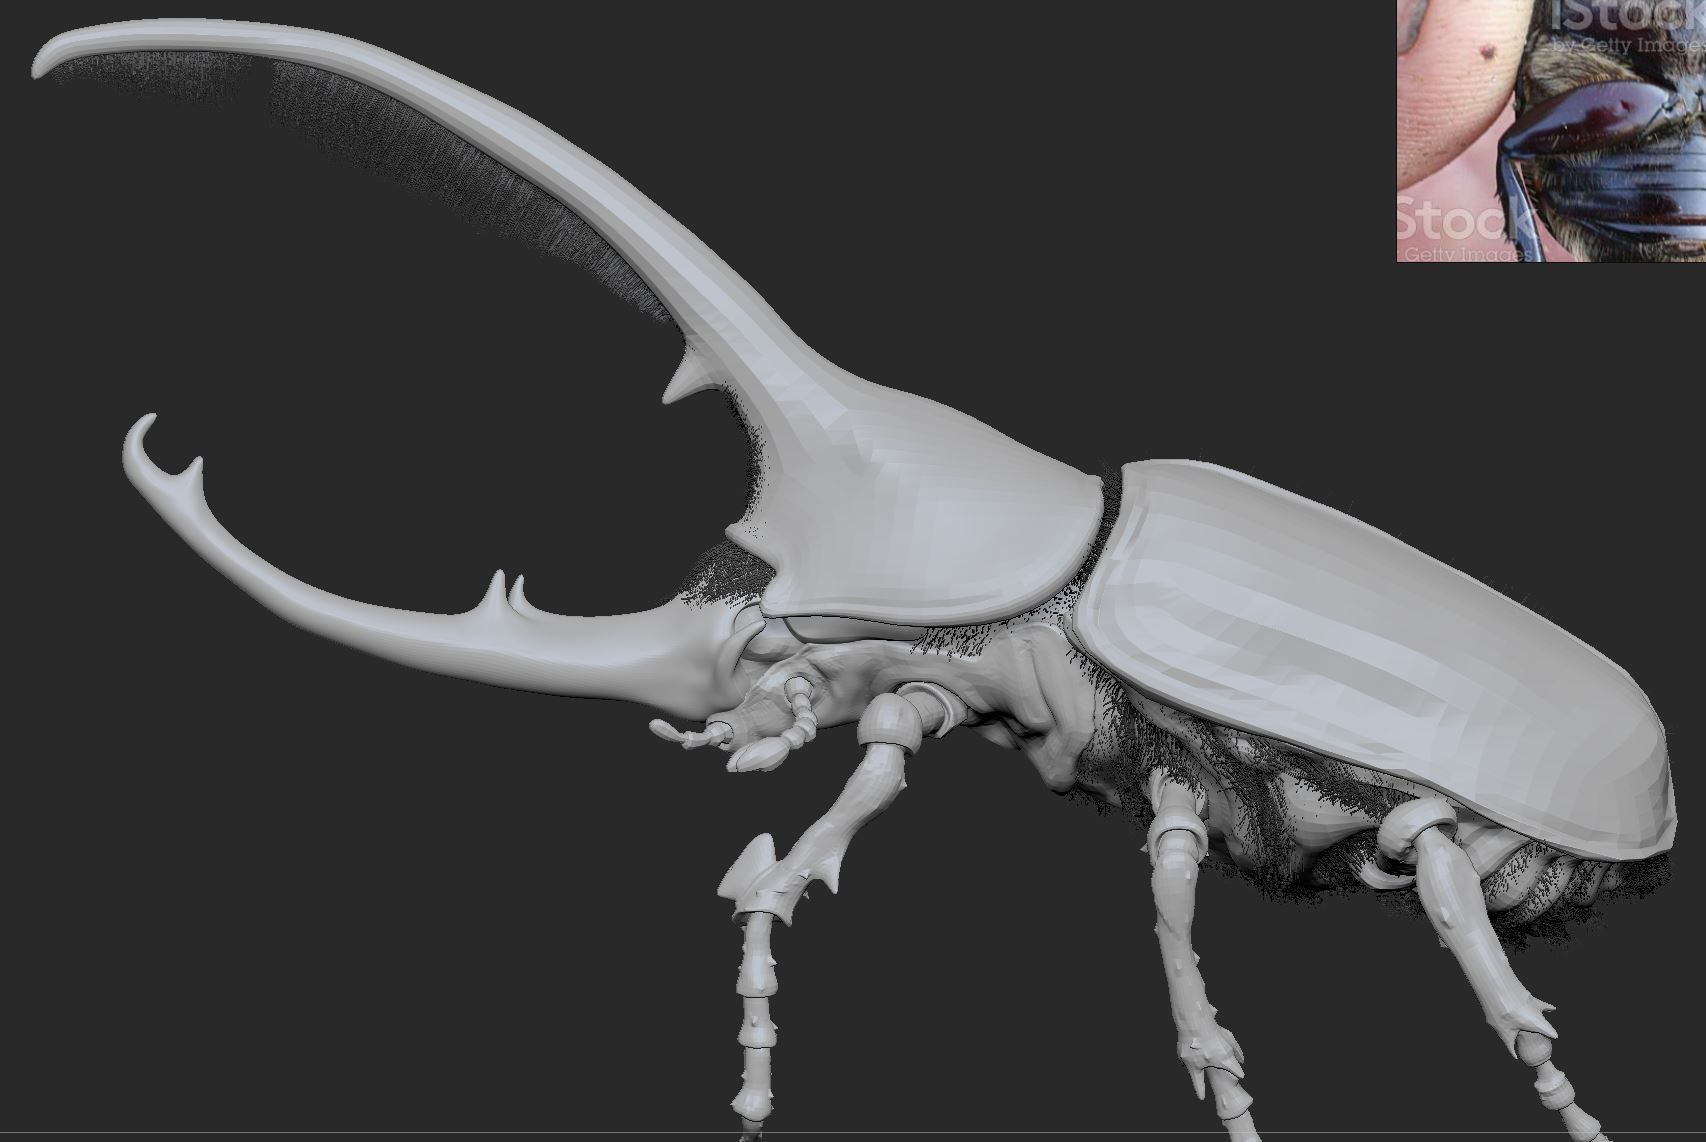
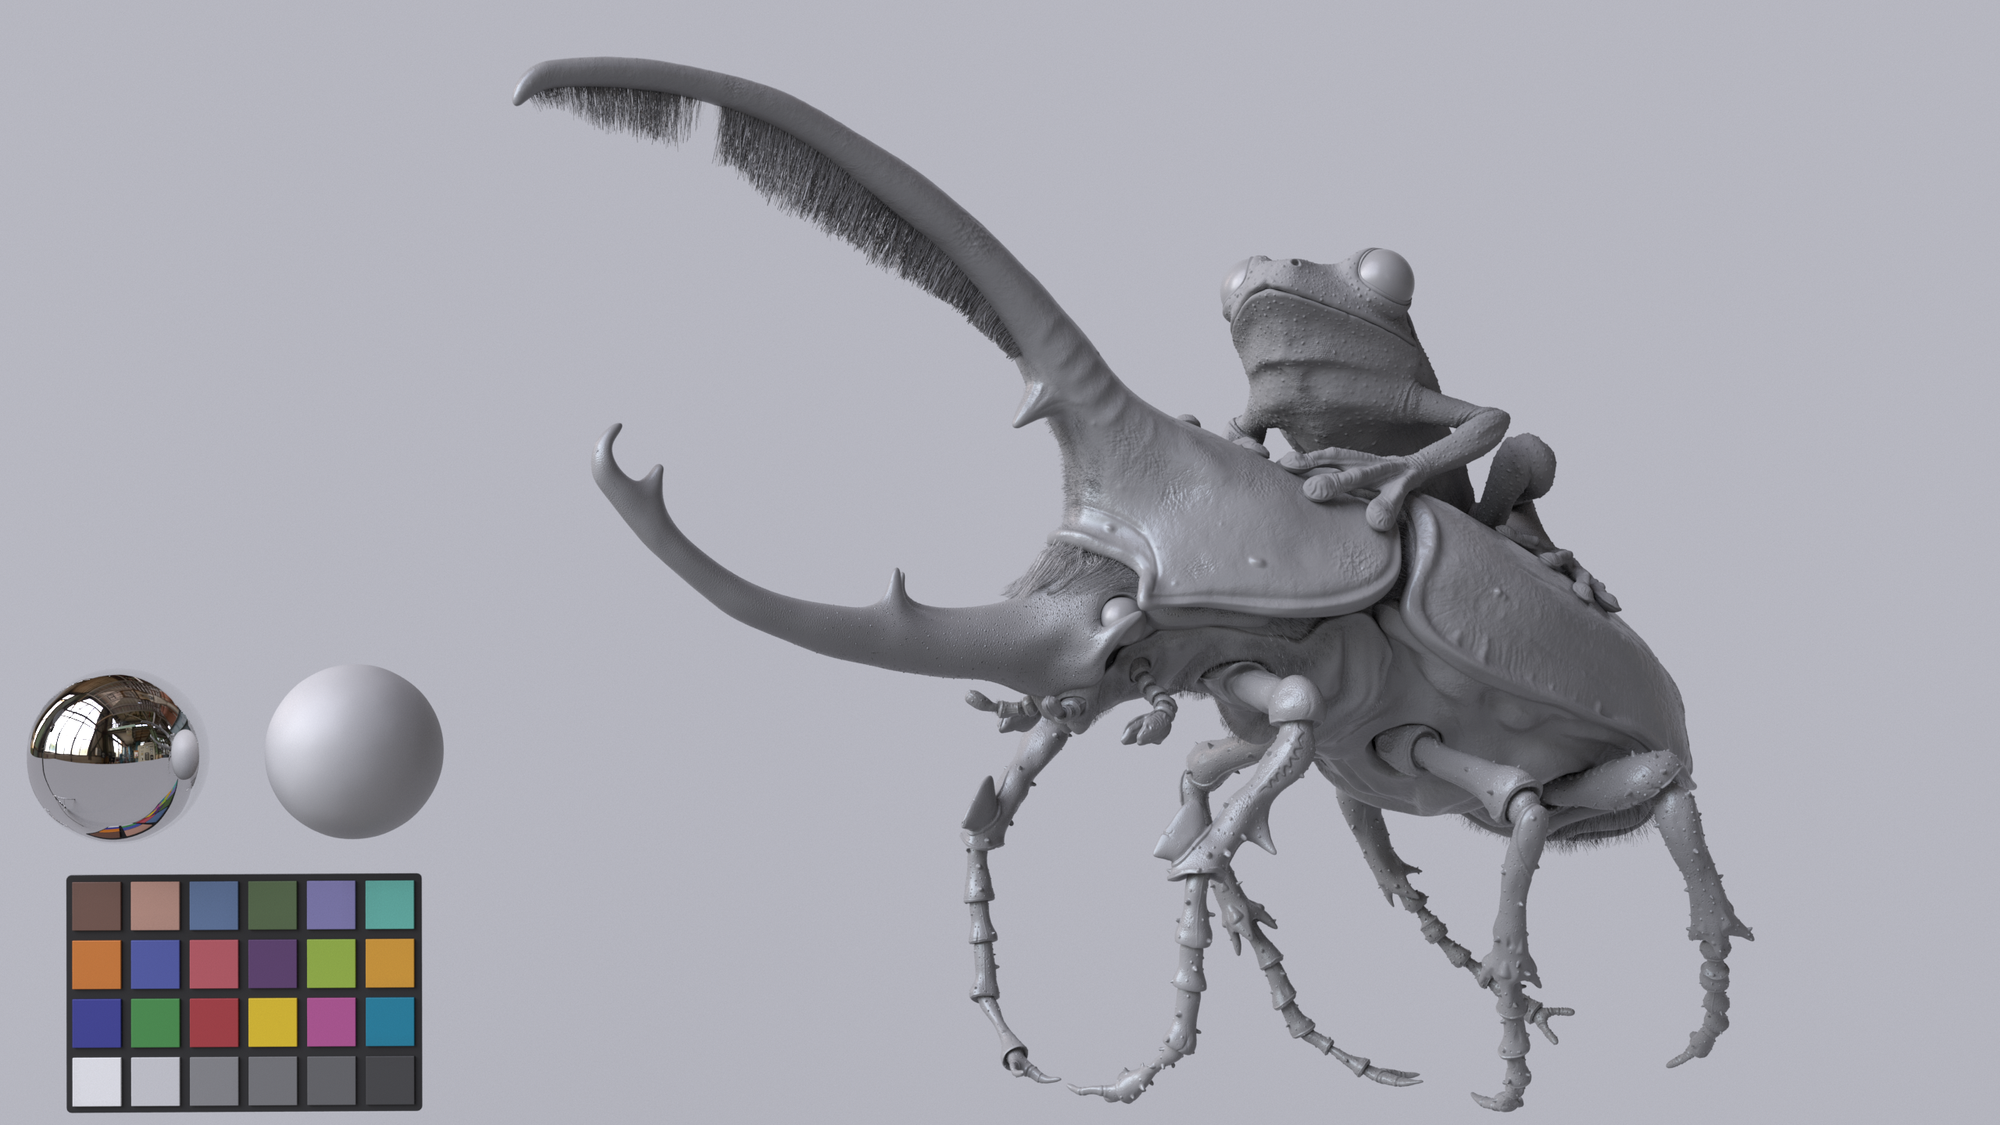
As soon as I had all the information and references that I needed, I started blocking the beetle to get from the beginning on the right size of it. At first I was modeling the rough shapes of the beetle in real-world-scale.
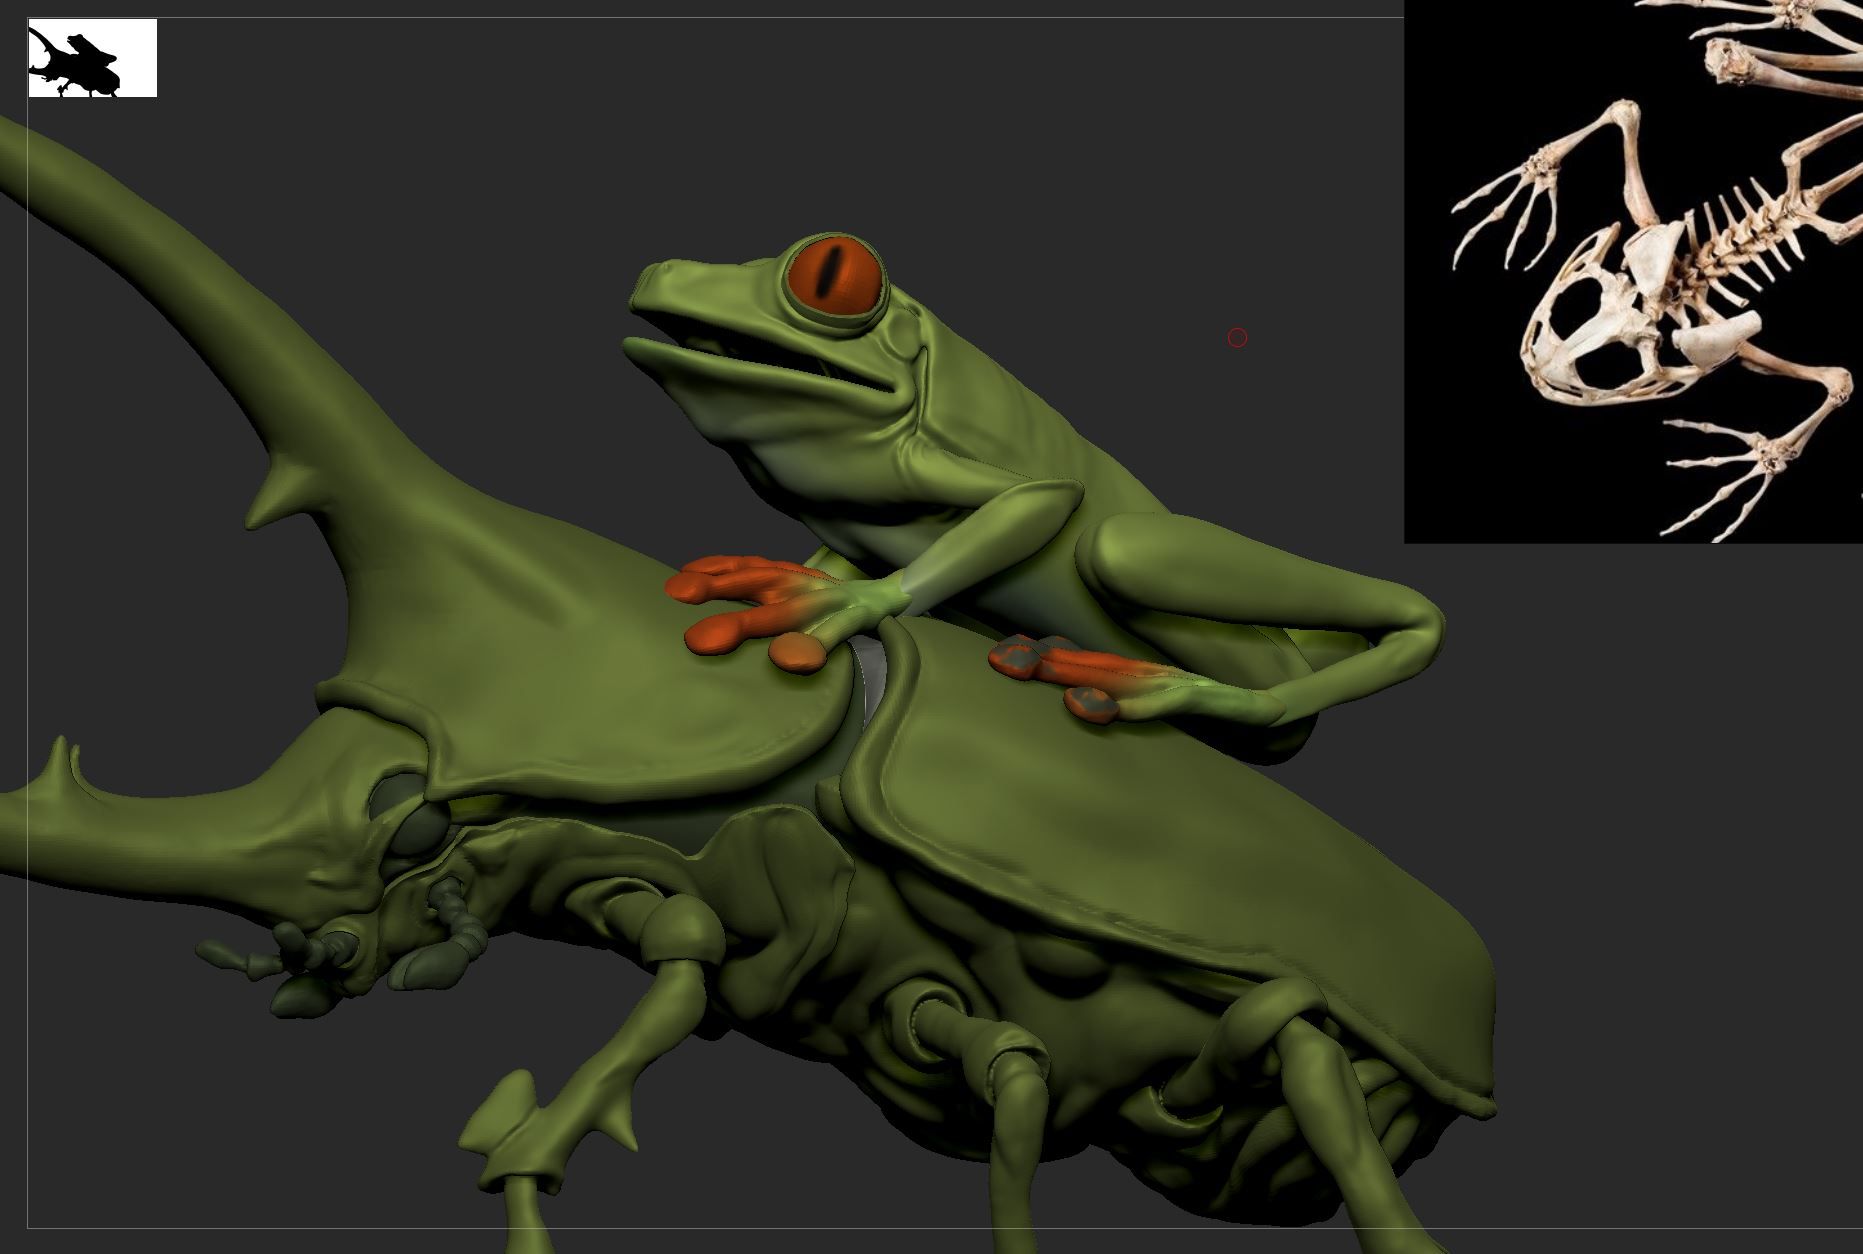
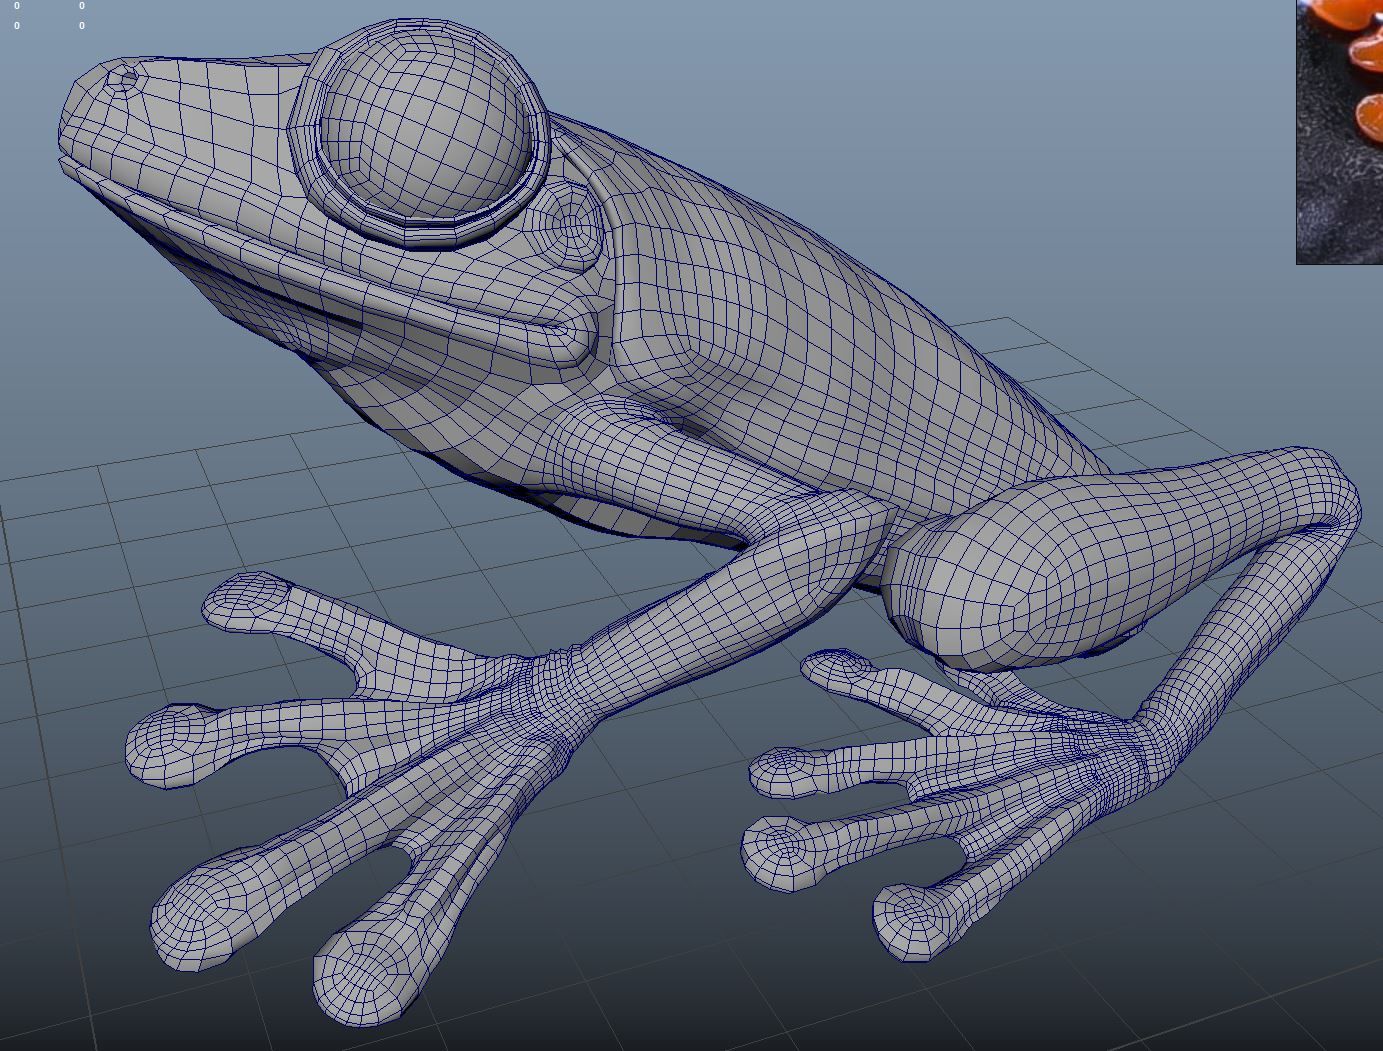
As soon I was happy with it, I imported it into ZBrush. I was modeling more details of the beetle and added the legs and the big horn. After that I did the blocking of the green passenger - the red eye frog.
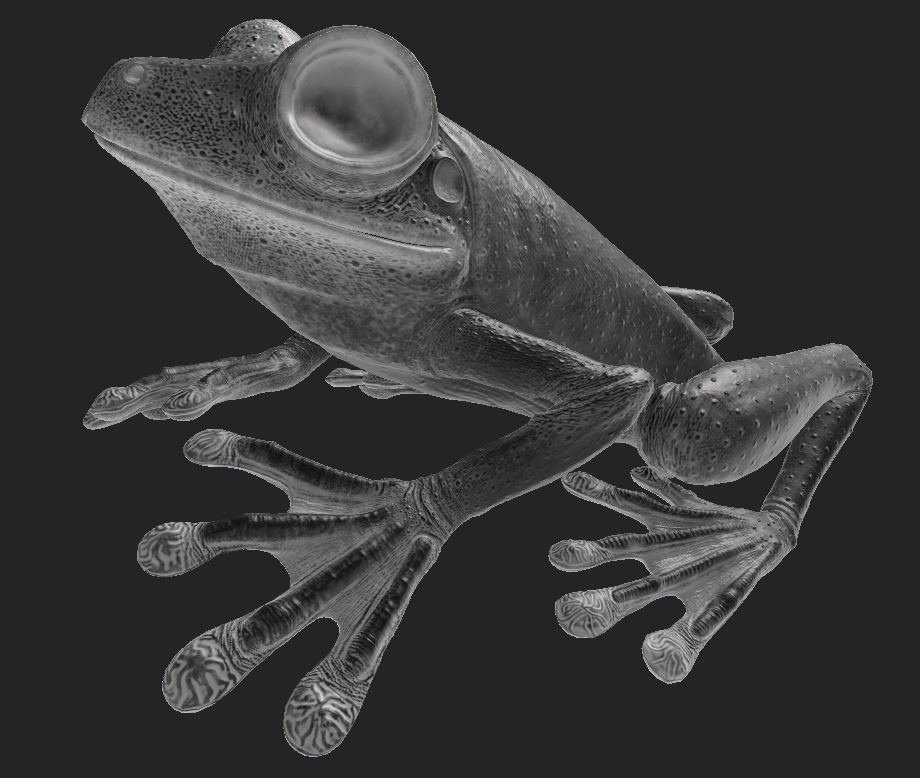
At the beginning of the project, I thought the modeling of the beetle will be tough, but to make the frog looking good was even harder. I had to study the anatomy of this animals intensely, to make it look believable. I had to put way more time into the modeling than actually planned. Luckily I got some amazing feedback from professional artists, which was extremely helpful and I am thankful for the critique and feedback.
Another huge help was to join some Discord servers like the CG Lounge or Artistsay and asking the people there for feedback.
As a junior artist it is very hard to see if something looks wrong. People who take time to give you feedback and want to help you is important and you learn a lot.
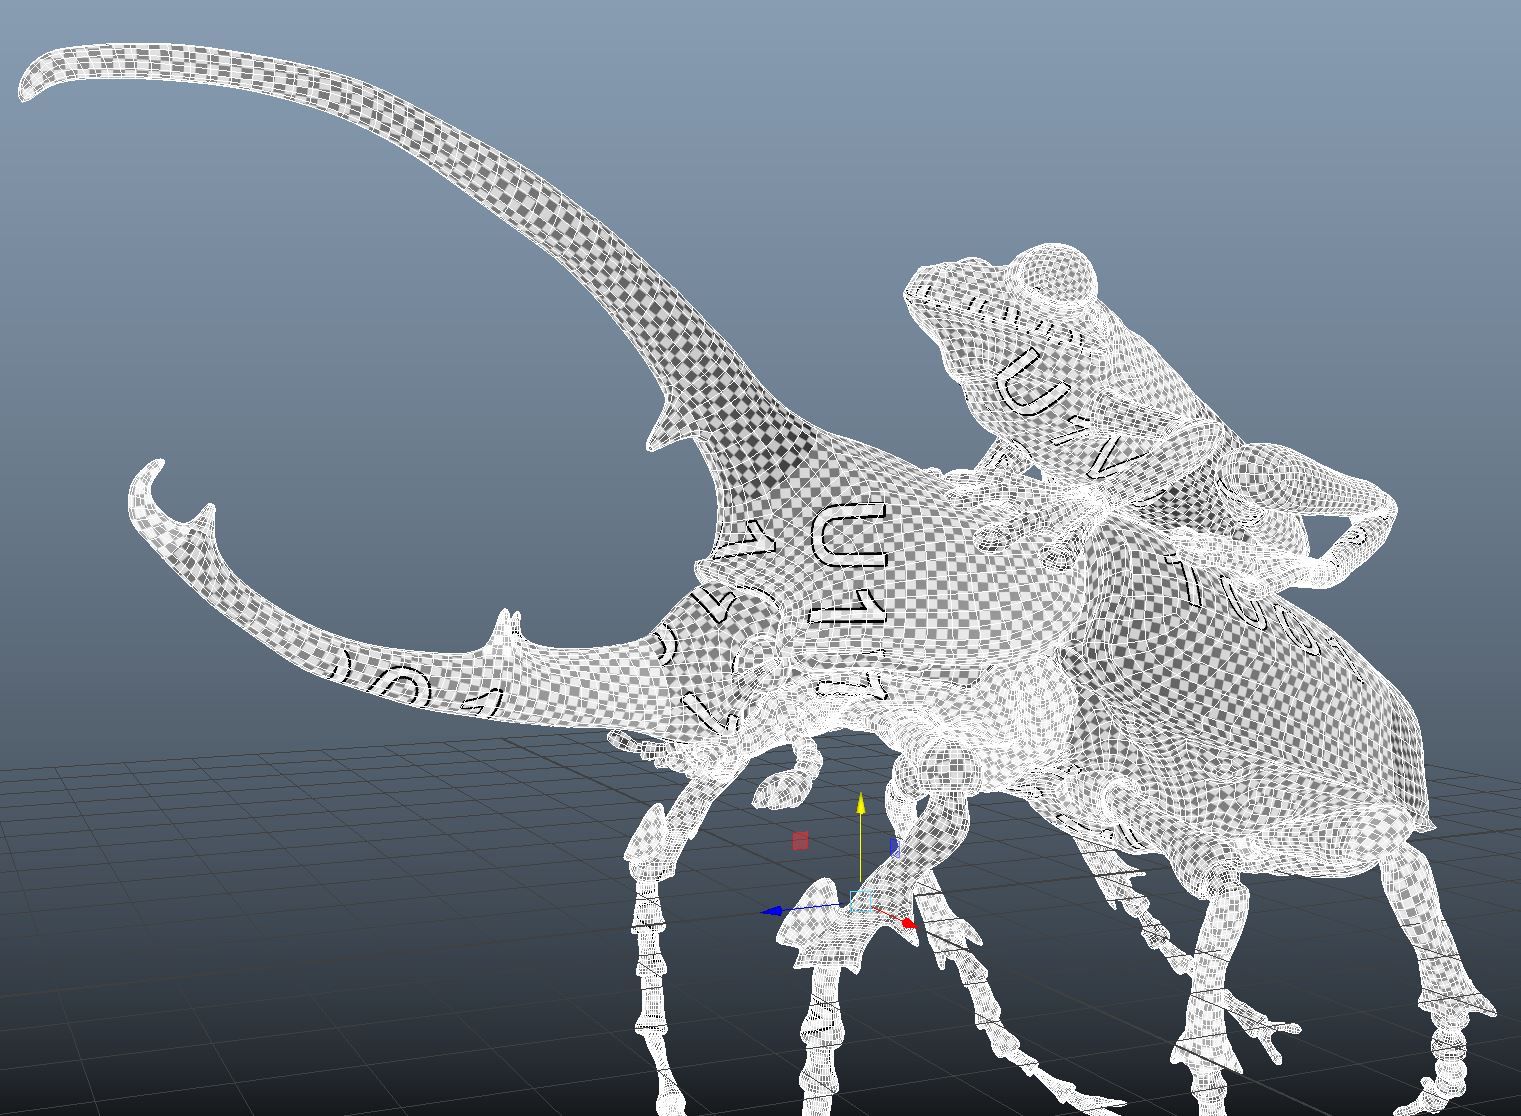
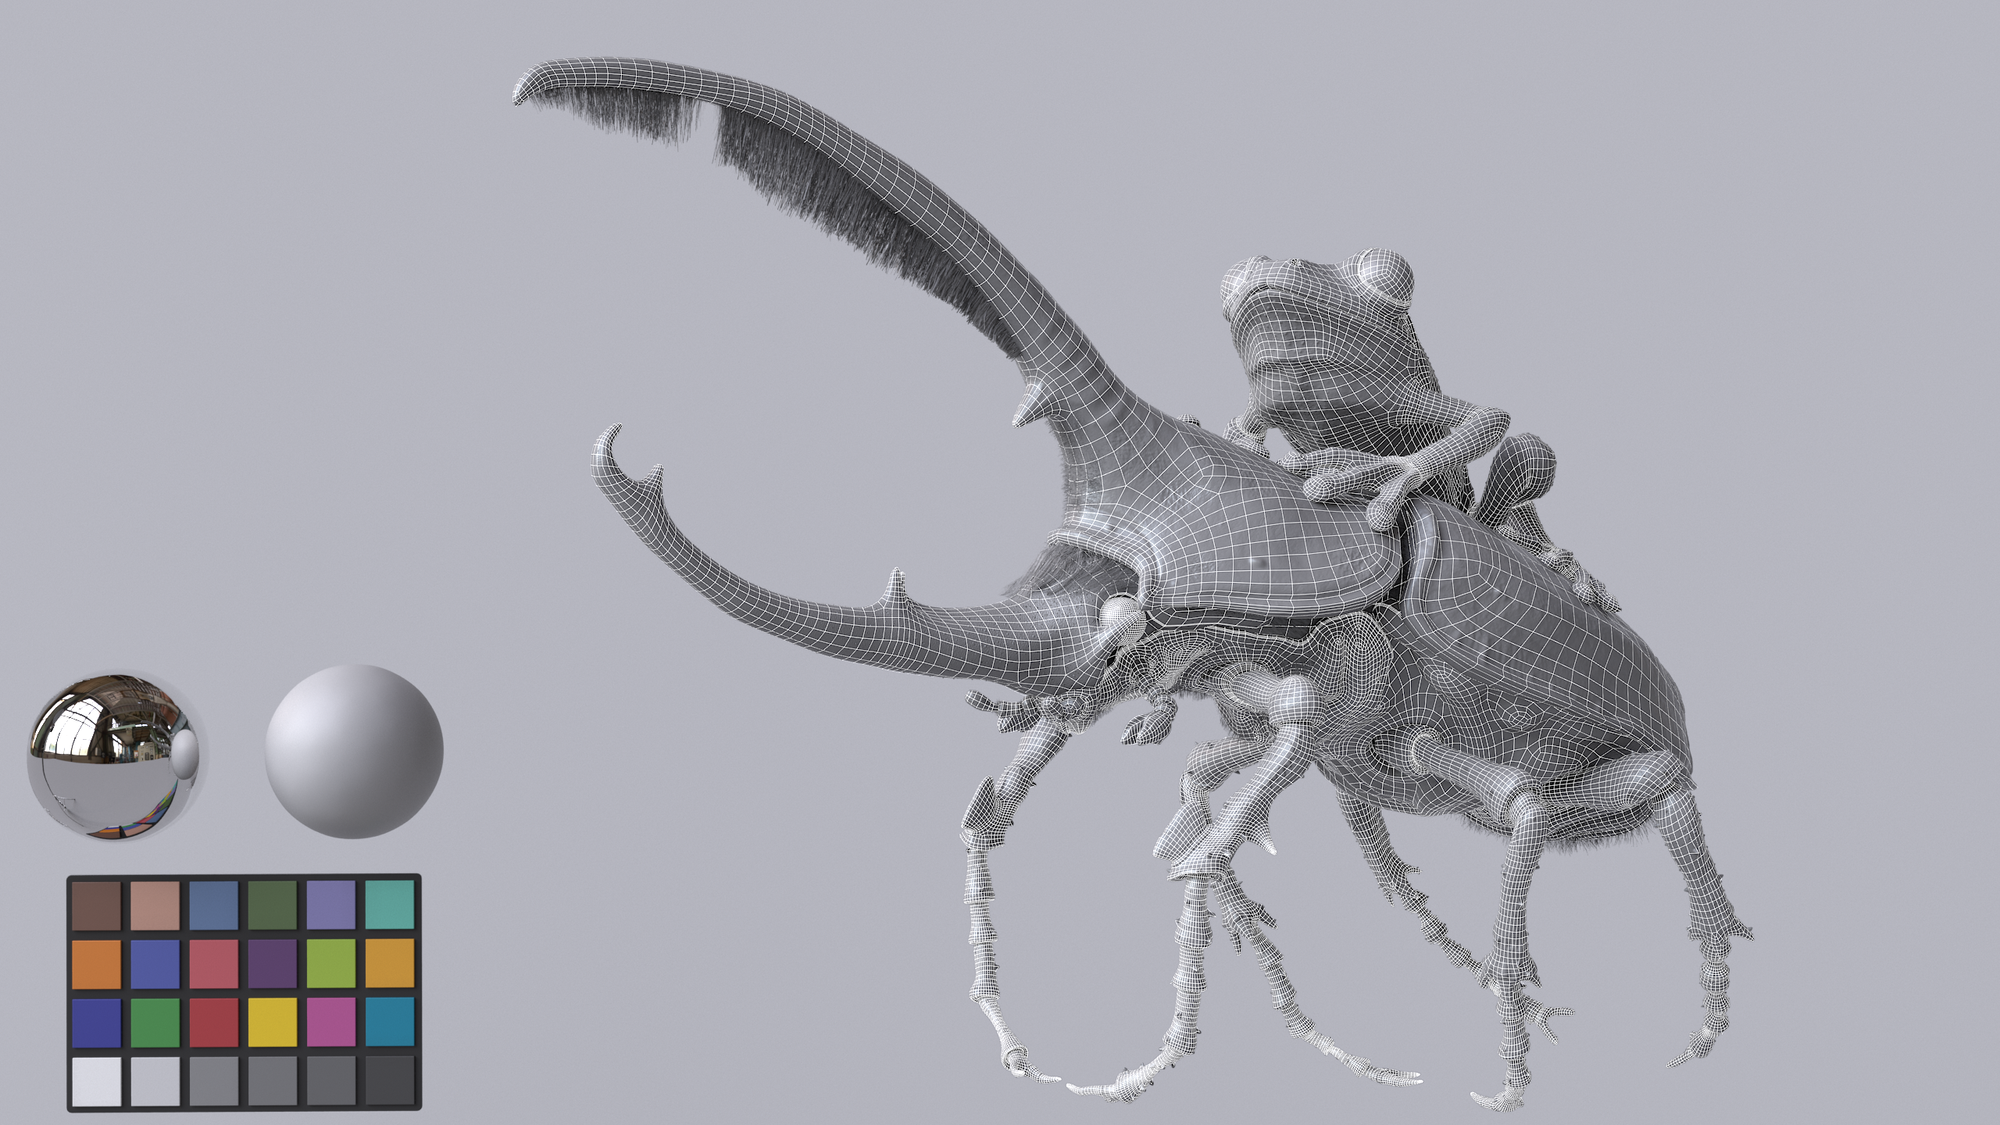
As soon as I was happy with the shapes, I imported the DynaMesh into Maya, to make a good topology. The job was done by using the Quad Draw Tool.
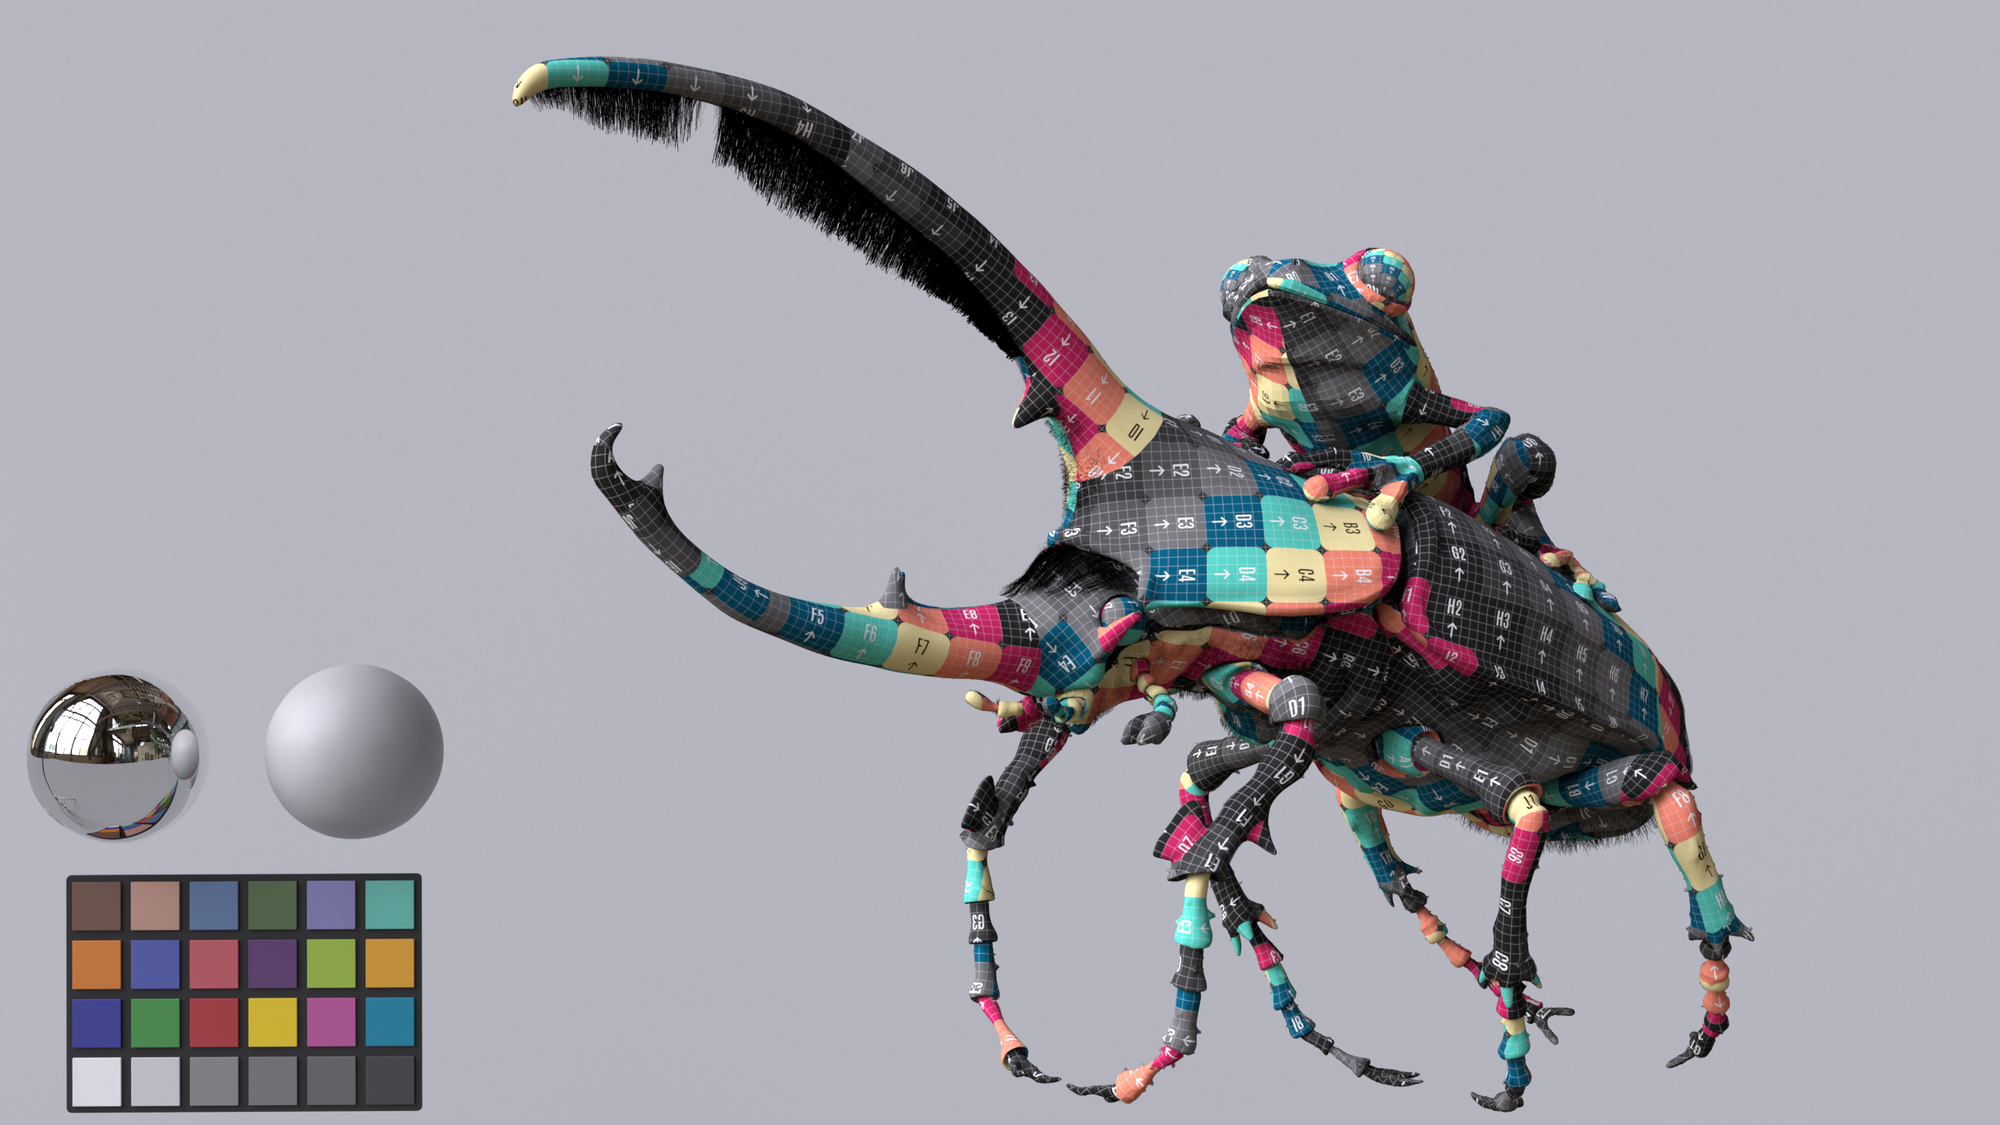
UVs and Texturing
After I created the new geometry of the frog and beetle, I made a proper UV layout to use displacement maps and of course also texture maps in general. I had already to think about how close I want to go for my final renders, to make sure I have enough resolution for the textures.
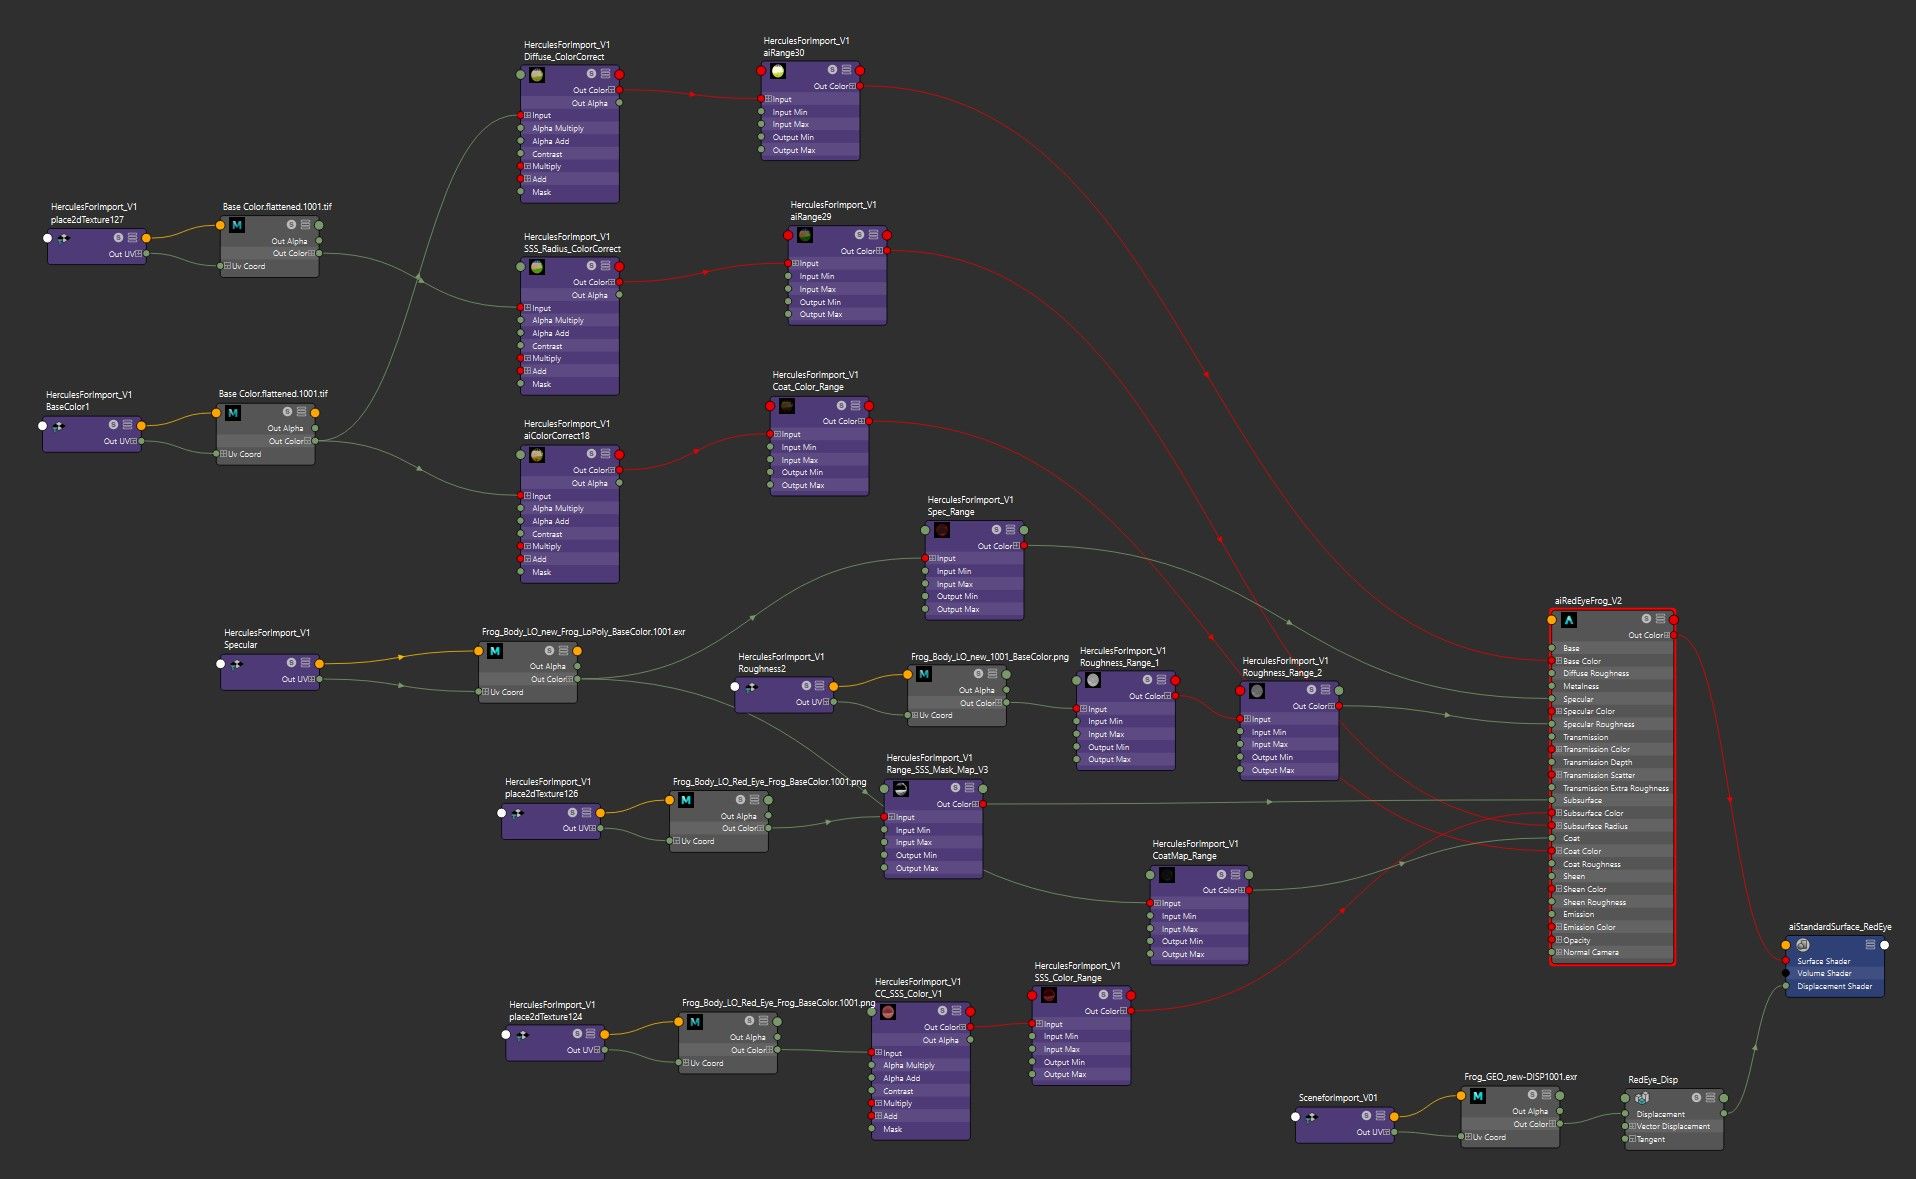
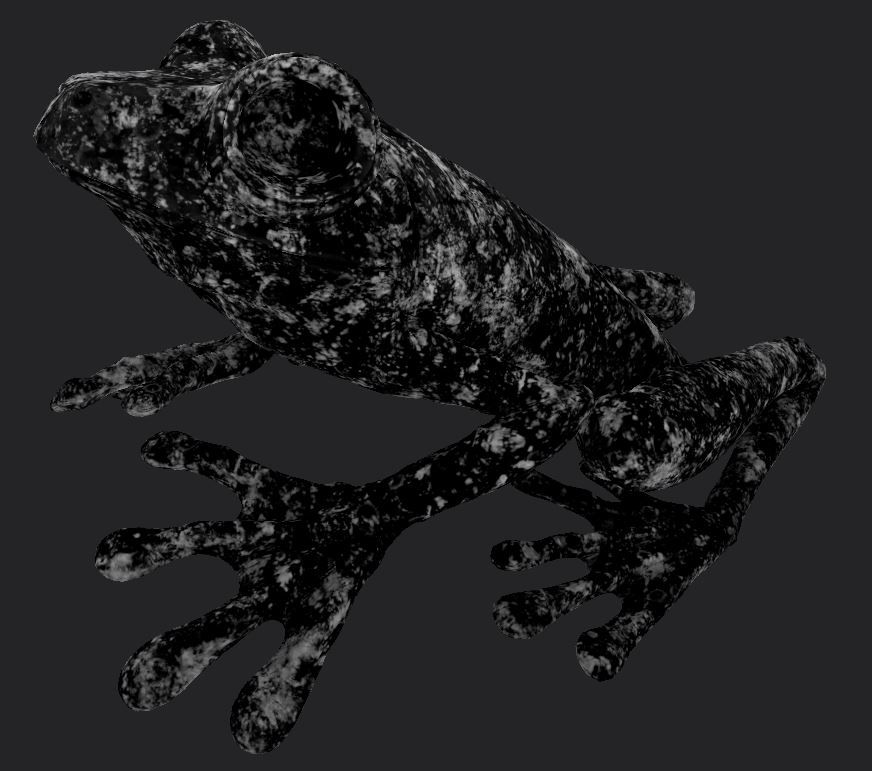
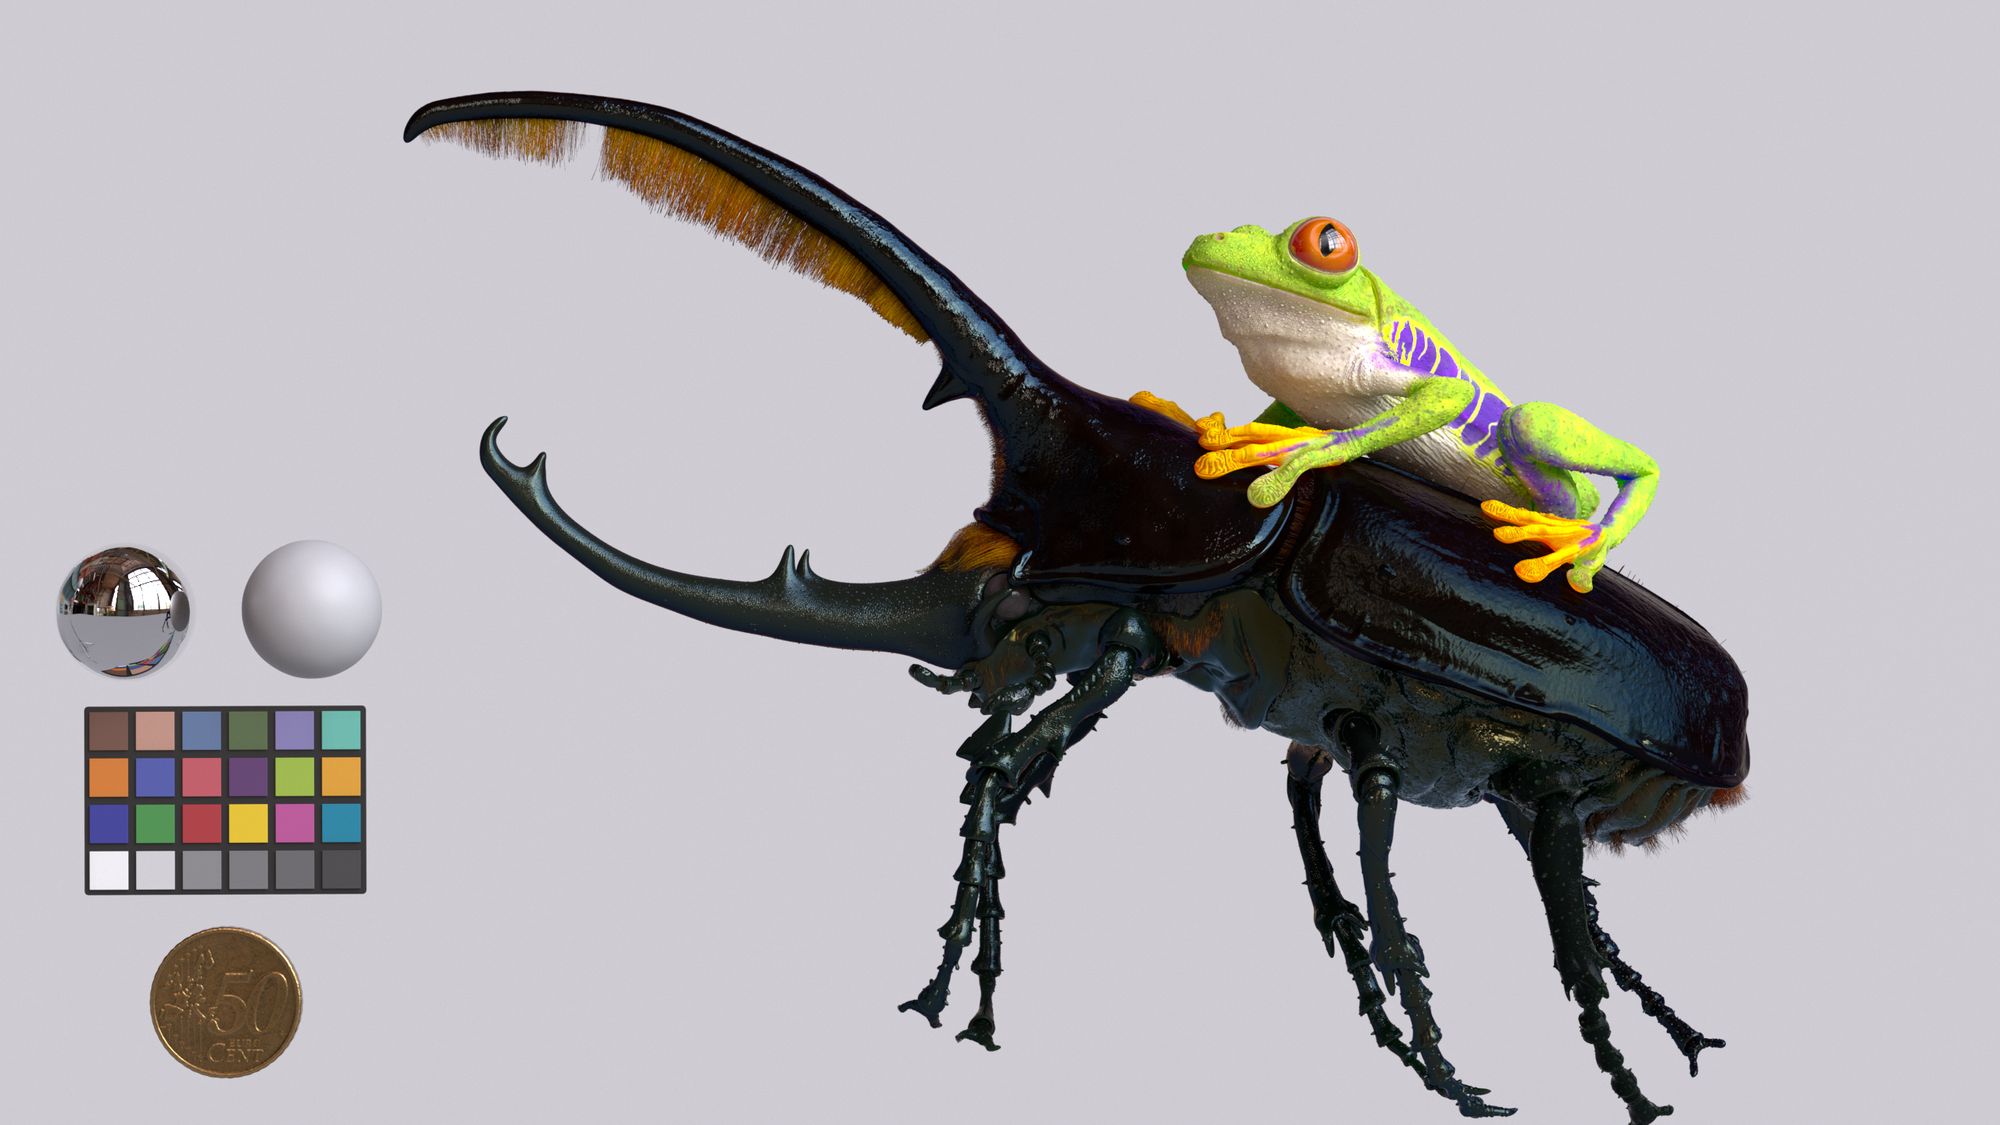
After I was done with the work in Maya, I brought them back to ZBrush to add all the details like skin, imperfections and so on. After the sculpting, I exported the sculpting work as displacement maps back to Maya for the Arnold shader. I used the same maps also for the texturing with Mari and Substance 3D Painter.
Time was flying so I decided to make the grooming of the beetle with ZBrush, because it was the fastest and easiest way to do it.
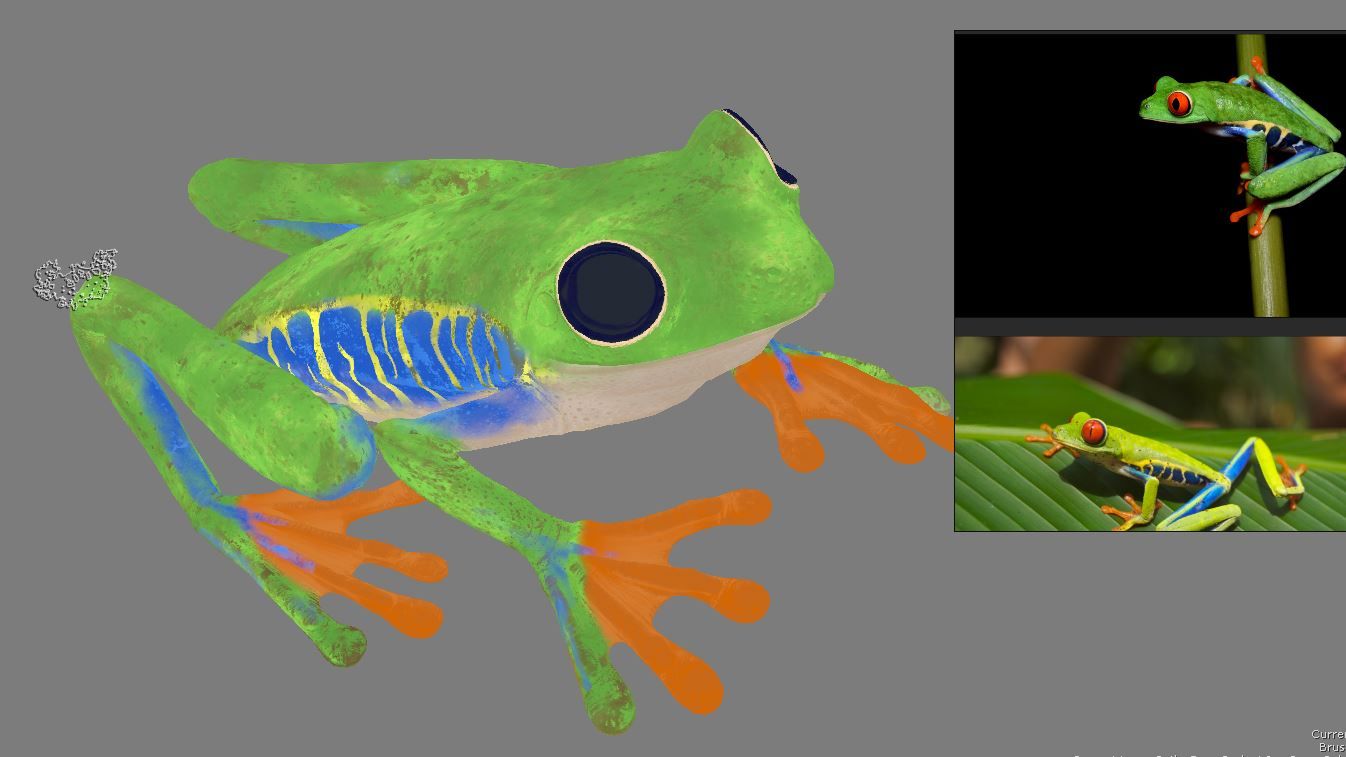
The next step was to create the textures. Like I already mentioned, the texturing was done with mainly Mari but I also used Substance 3D Painter. I used Substance 3D Painter to bake some maps and to create some masks which helped me a lot in Mari. It was kind of a challenge because I have never done the texturing like this before. Organic teturing is always a huge challenge, because there is no symmetry and everything needs a breakup to make it look believable.
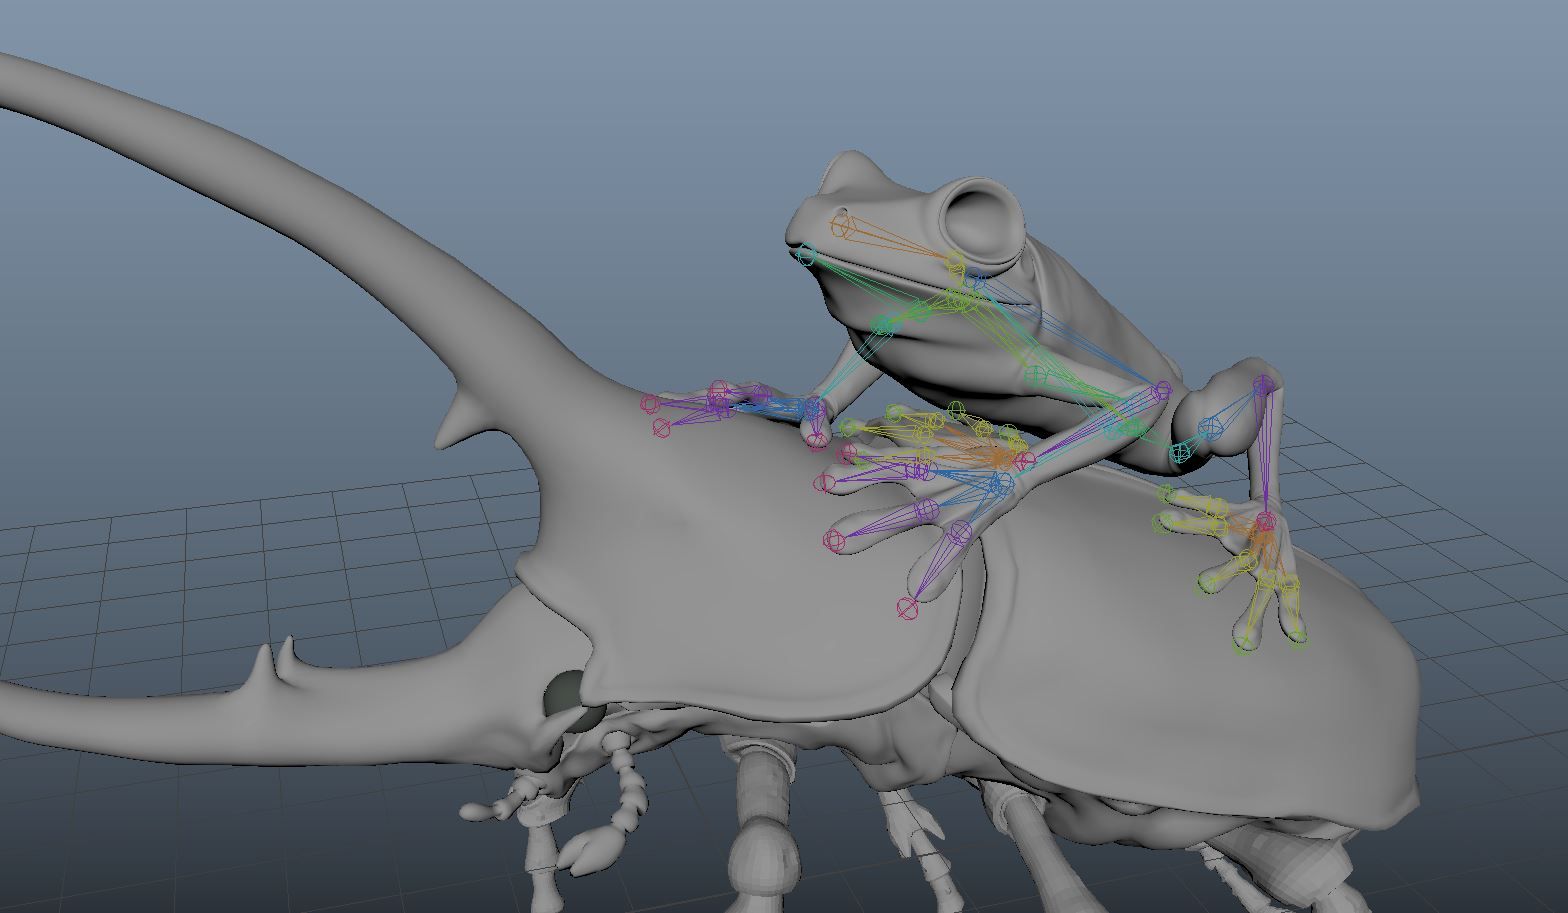
Rigging
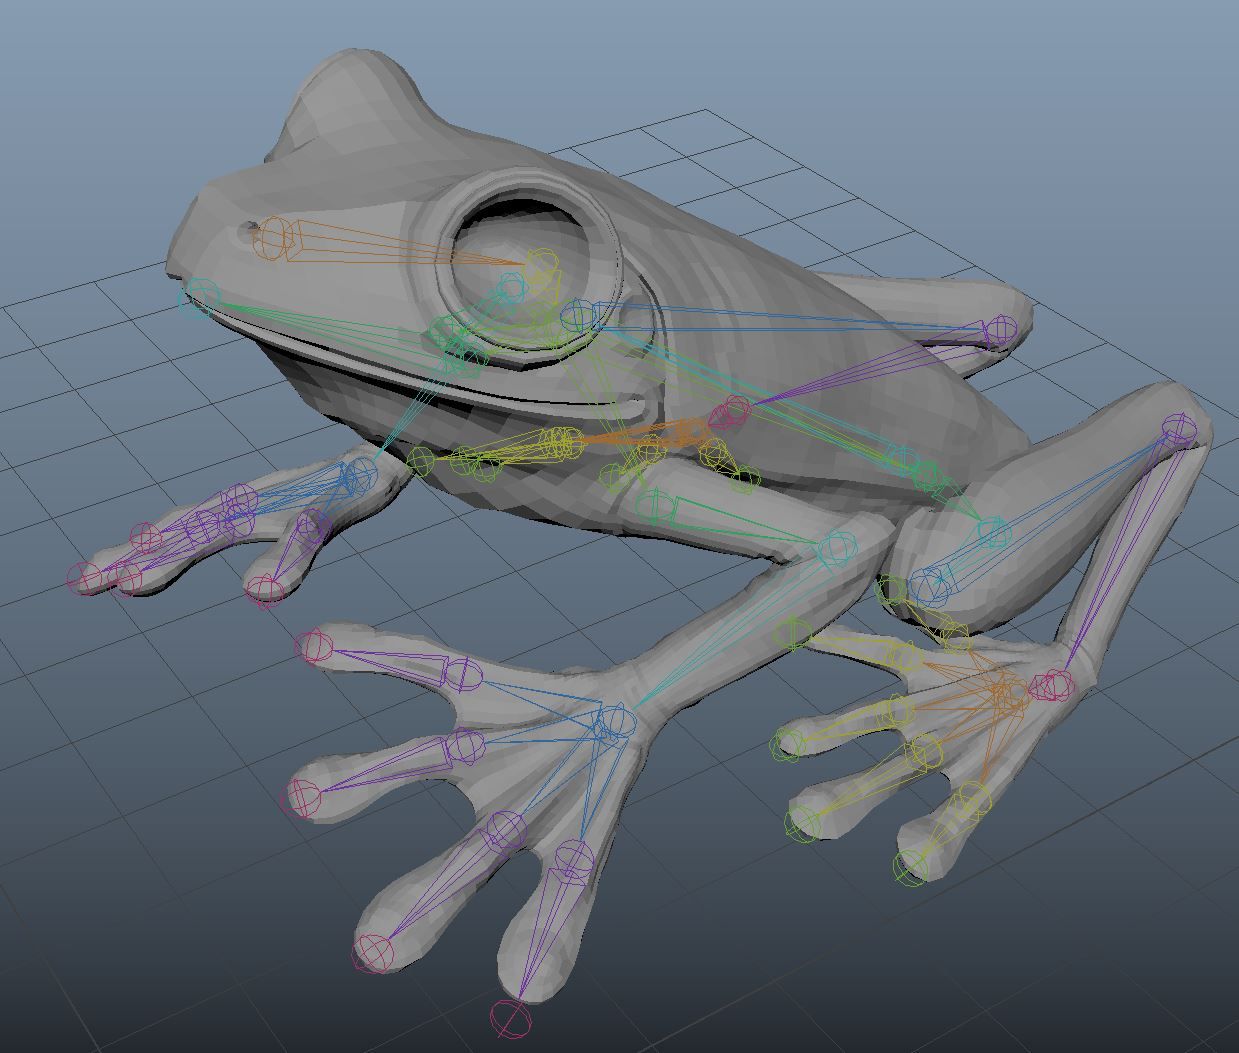
For the final posing of the frog, I had to do a simple skeleton and skinning. I did the rigging only for the frog, because the beetle is sitting on a branch, so it was not necessary and I saved quite a lot of time. If I had more knowledge or skill for animation I would have done a better rig.
Lookdev
Creating a visually appealing frog posed a significant challenge for me, as Lookdev is not my forte (yet). While my passion lies in modeling and texturing, I found Lookdev to be quite demanding. It involved meticulously crafting various masks in Substance Painter, consuming a considerable amount of time. Despite the difficulties, I poured my best efforts into achieving a natural look for the frog. Although there is room for improvement, I consider this experience invaluable as it allowed me to acquire new skills that will greatly benefit future projects, particularly those requiring Subsurface Scattering (SSS).
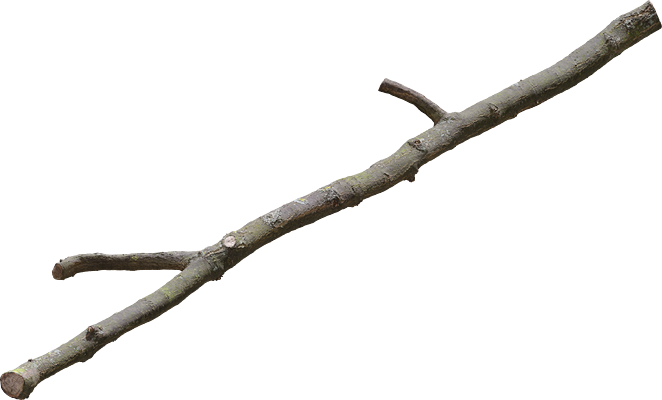
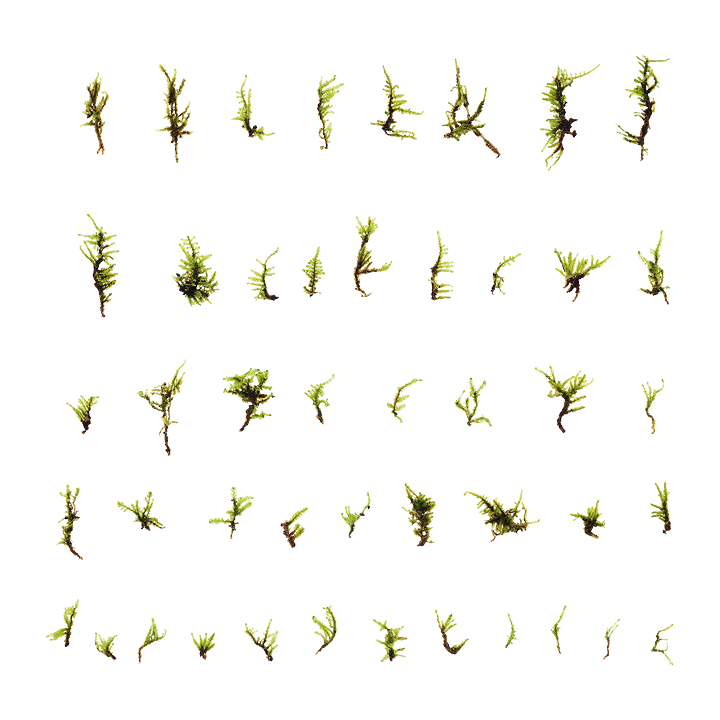
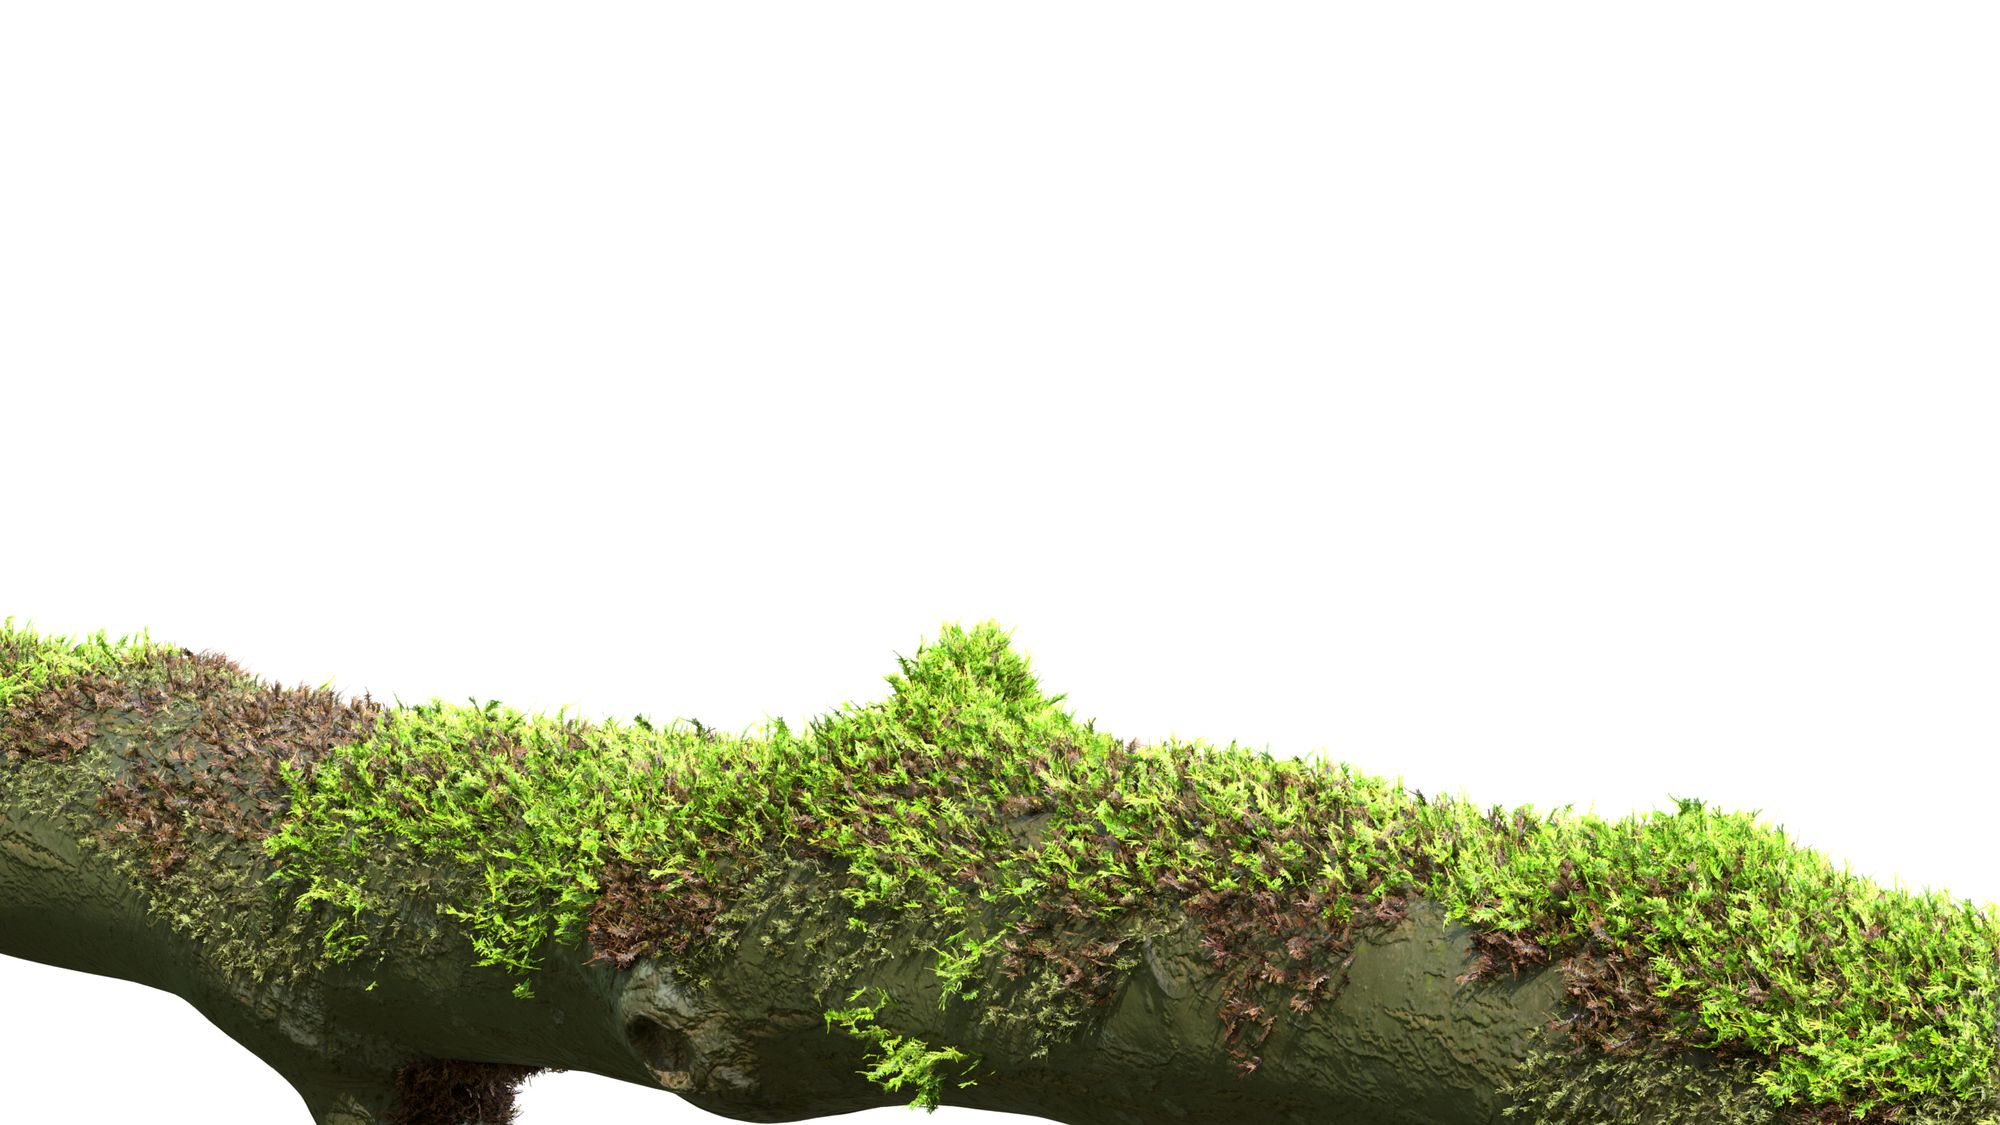
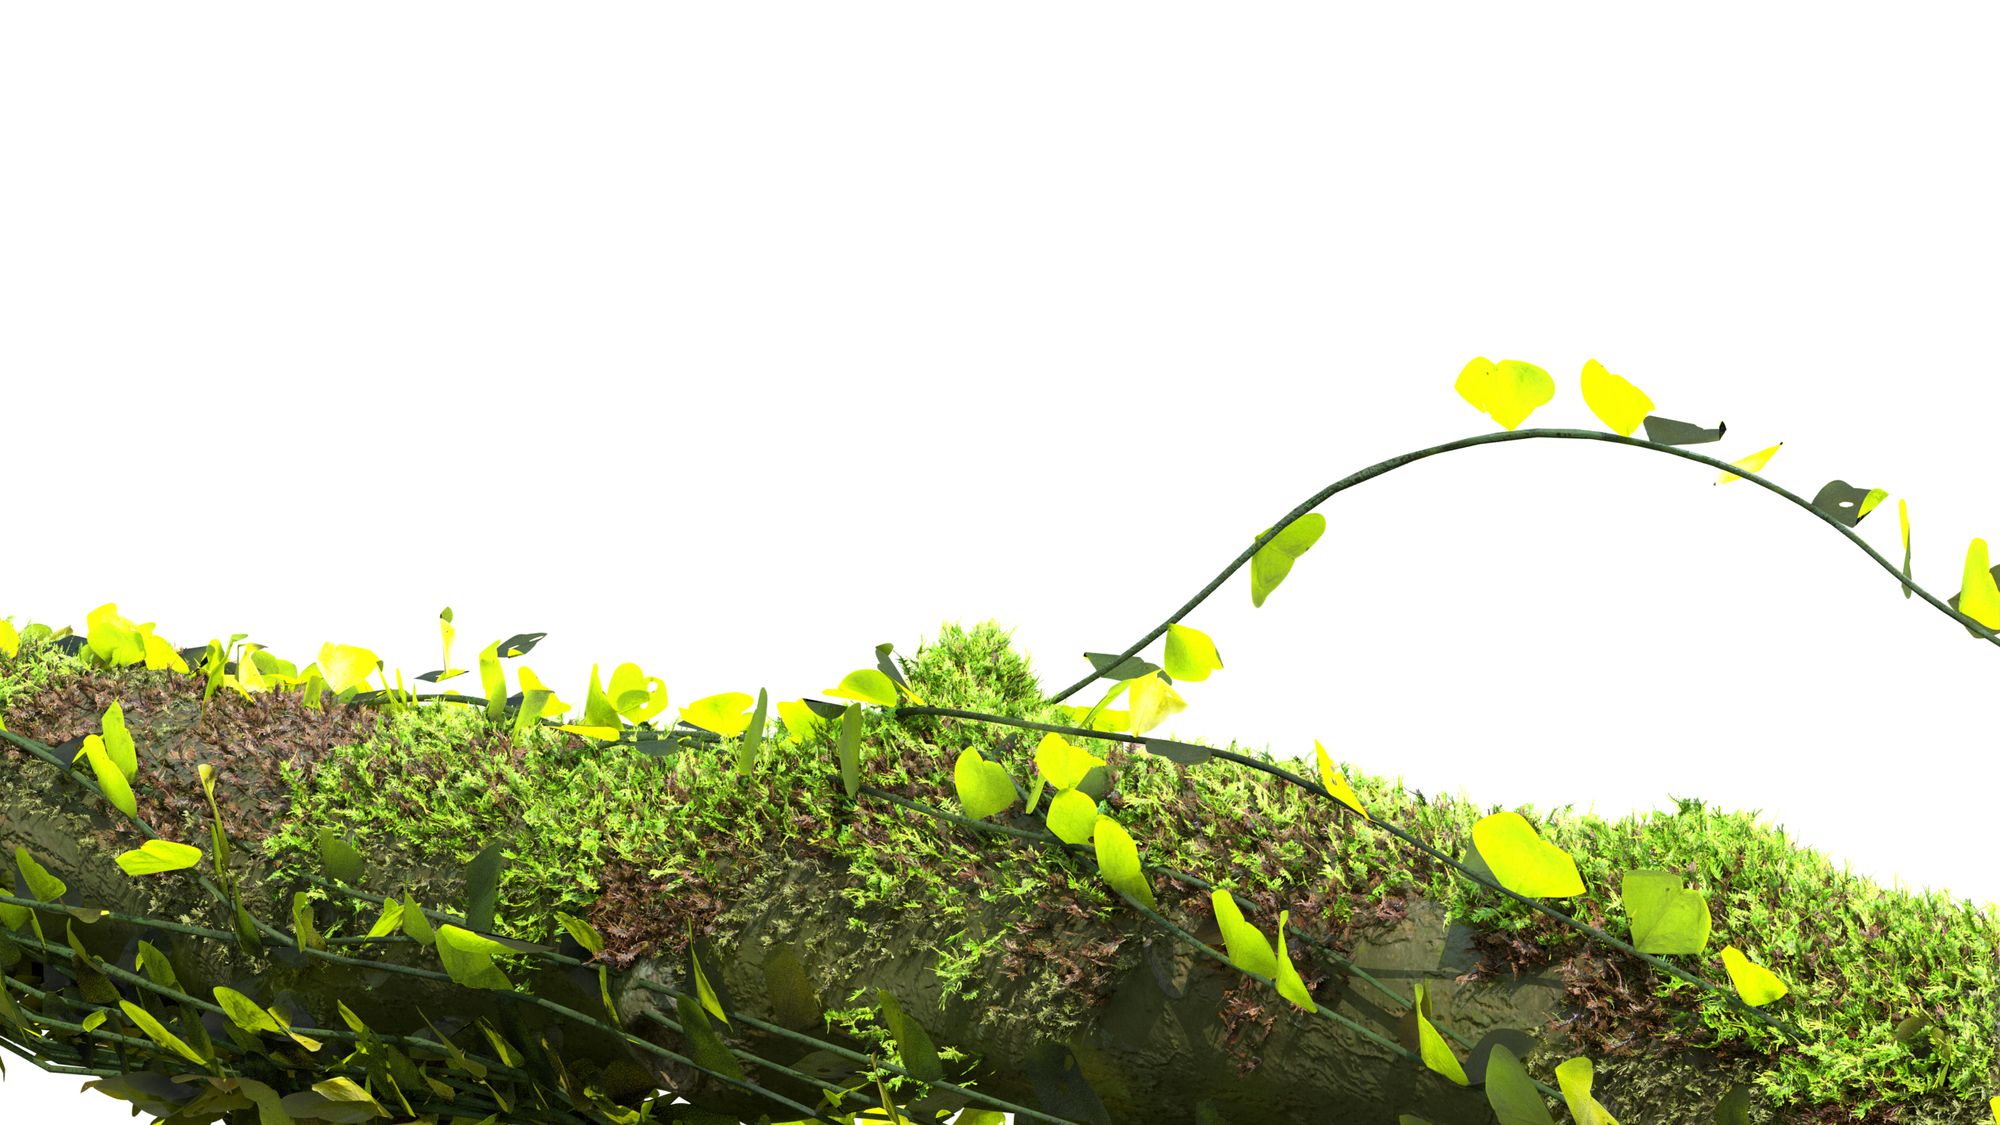
Building the scene was pretty easy. I found the branch and the atlases for the moss at Quixel.com.
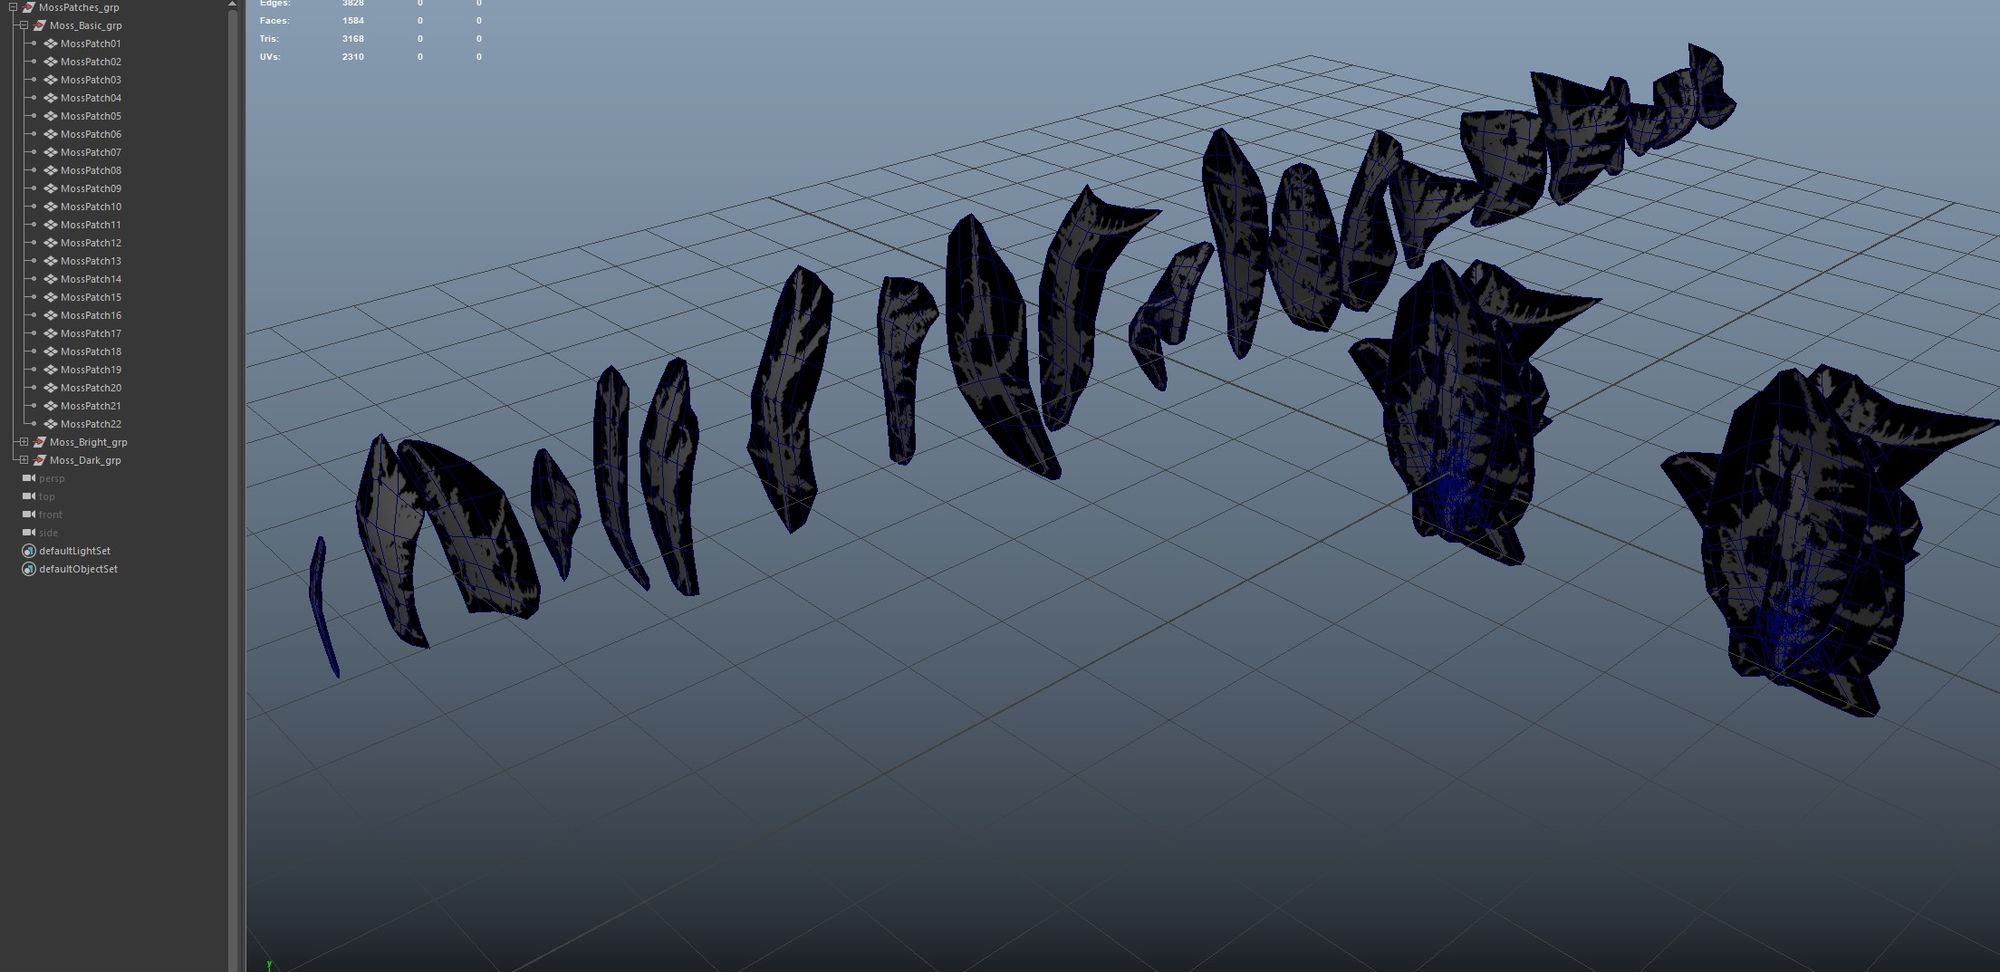
I created some low poly meshes for each moss patch. After that I deformed them randomly to make them not look flat. As next I have done three sets of moss. One with brighter, with darker and with normal green color, to create more variety. I only used the color correct node in the Hypershade for changing the color.
To save render time I was loading the moss patches as an instancer in my scene, so as not to have too much geometry to load. I also created three MASH systems for each set of moss and scattered them on the branch. For the moss scattering I painted three maps for each set of moss, to tell the MASH system where I want moss and how much I want. Additionally I used the frustum filtering inside the visibility node, to have the moss only visible in my film gate.
Last but not least the geometry of the sorrel was provided by Cedric Oberhagemann. I created a new shader for it.
Compositing and Rendering
I added my two creatures, some lights, cameras and I was ready to start rendering.
After rendering I had to do the post production with Natron, an open source compositing software. I have done some colour and lighting corrections. For the background I recorded a video of some bushes, and animated them in Natron. Unfortunately I couldn't use Nuke X for compositing, to use the crypto AOV´s neither the AOV´s for recreating the scene inside the 3D space.
Conclusion
For this Project I mainly used Autodesk Maya but this was obviously not the only software. I also worked with ZBrush for sculpting the details. I created the textures with Mari combined with Substance 3D Painter. Arnold renderer for the shading, lighting and rendering of this scene. Besides that I used Natron, Affinity Photo and DaVinci Resolve for the post production. I used PureRef for keeping my references organized.
Also in this case I taught myself new techniques for modeling, sculpting and texturing. And with every project I also learn more about time management and how to handle the pressure when the time limit is getting more tight.
At the end I have to say, that the research for this project was one of the most important parts because there were a lot of little things I had to take care of. Especially for the anatomy of this two animals.
I'm using an app on my phone to plan every project. I was putting myself time limits for every step like modeling, UV´s, texturing etc. This is always a huge help to not forget something and like this I knew when I was working too slow.
Thank you very much for reading and I hope you enjoyed it!