Creating a Full CG Sci-Fi City Environment with Maya, Arnold and Nuke
Marc Reuter, an Animationsinstitut of Filmakademie, Baden-Württemberg
student, crafted a Sci-Fi City inspired by Bladerunner 2049, adjacent to his Uni work, to emulate the movie's dystopian ambiance, delving into the creation of vast full CG environments for this passion project.
Marc Reuter is a student at Animationsinsitut of Filmakademie Baden-Württemberg. Inspired by Bladerunner 2049 he created this Sci-Fi City next to his Uni work as a passion project. The goal was to create something similar to the Cityscape from the movie and capture the dark, dystopian atmosphere. Explore the process behind this shot and get insights into the creation of large scale full CG environments.
References
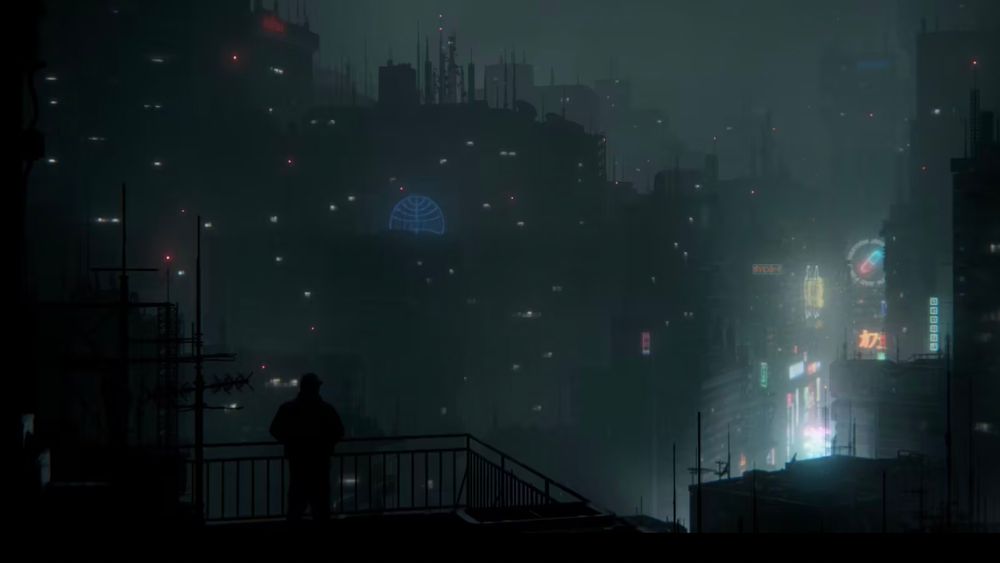
This shot is an homage to the movie Blade Runner 2049. Creating a big dystopian city environment has been on my to do list for quite some time as I am a big Sci-Fi fan. After watching the movie again for reference and inspiration I started to research architecture in megacities around the world and connected most with the ones in Asia. Pictures of Tokyo, ShangHai and Hong Kong at night covered in smog seemed to be exactly what I needed.
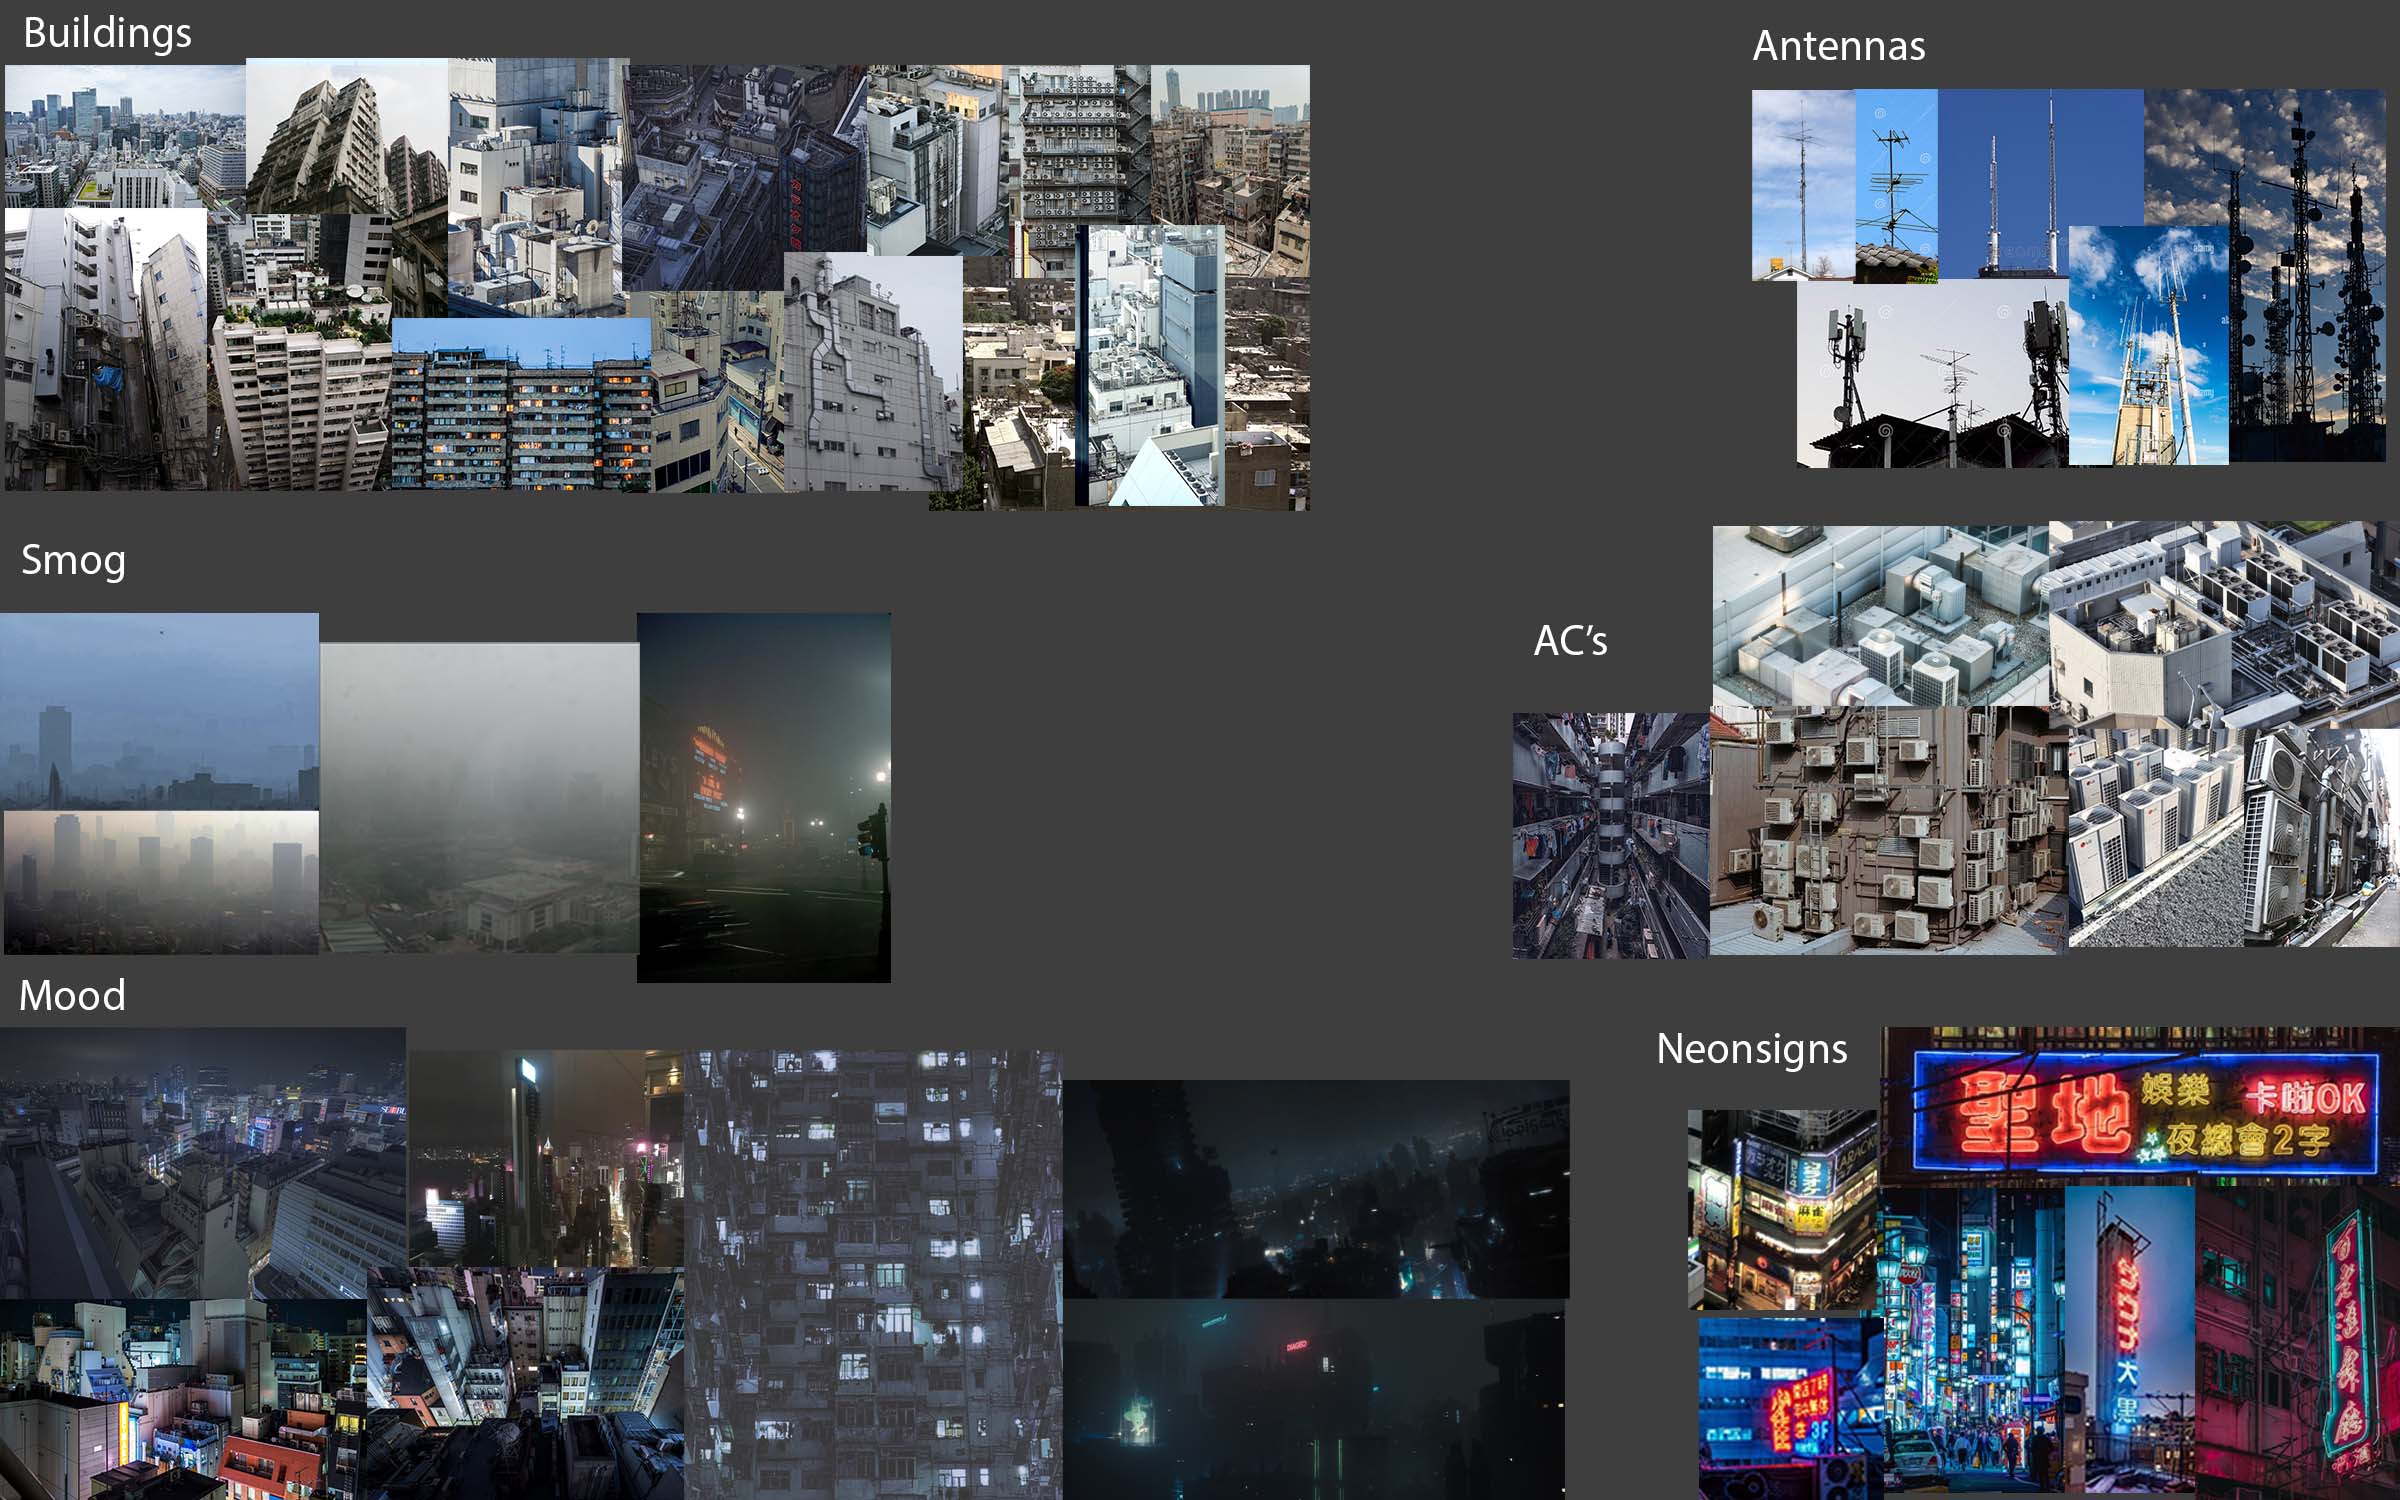
Soviet brutalist architecture inspired me a great deal as well as it looks and feels very dystopian. Big Environments like this need a lot of detail to feel realistic and convey a sense of scale for the viewer. To be able to include as many details as possible I looked up a variety of antennas, satellite dishes, air conditioners, window frames and other small things you would find on roofs or the walls of a building.
Concept
For this project I developed the concept while working on the shot itself. I started off with a simple blocking of cubes in Maya to get a basic composition and did some simple overpaints in Photoshop to get a feeling on where to place lights and holograms. While working on the scene I would do really simple overpaints to add details on the latest renders for faster iteration.
Modeling
After gathering a lot of references I immediately started the asset creation in Maya. I made one kitbash set for the buildings and one for details to scatter onto them.
For the detail set I created a large variety of assets, like water tanks, fire staircases, antennas, railings, air conditioners and more. I added some specifics but did not go too crazy in order to save on poly count for better performance. In the end I had a kitbash set with more than 100 assets. I also created some separate models with more detailed work only for the very foreground.
Examples of highpoly assets for the foreground
For the creation of the holograms I used Mash Networks in Maya and simple geometry to create small flares and streaks. One of the holograms actually is the pill from the anime “Akira”. I thought it would be a fitting easter egg for a sci-fi city.
The character in the foreground is a 3D scan of myself I took last semester when we had the chance to work with a high quality Person scanning setup at our university. I used RealityCapture to process the scan. Afterwards I did some remeshing and set up a very simple rig in Maya to pose the character.
Since most of the detail will be either very small or just barely visible in such a dark and foggy environment you could argue that it is unnecessary. Yet, I feel like if all those details were not there the shot would feel empty and artificial.
Detail examples: main alley(left) and rooftop (right)
Texturing and Shading
All the small billboard textures you can see are custom made in Photoshop. Some of them show advertisements for brands you would also find in the bladerunner movies, like Coca Cola or Atari.
I built a multitude of procedural shaders in Arnold for the kitbash sets and highpoly assets. This allowed me to create a lot of variation as I could have multiple instances of the same object with different shaders. Some of the shaders are pretty complex whereas others are very simple. The Holograms for example are just emissive materials with grid, noise and curvature maps driving the opacity.
Lighting
The lighting is actually pretty straight forward. As it is a city at night every light in the scene has to be somehow grounded in reality otherwise it would look off. So 90% of the lighting comes from holograms, neon signs or the window lights. I only used additional area lights to subtly enhance existing lights and brighten up the foreground a little.
The buildings actually have rooms into which I placed Arnold area lights. That way I was also able to create some nice volumetric light emitting from them.
As a last touch I added some red antenna lights. They really help to give the render depth and convey the scale of this city as well as making it visually more interesting.
Rendering
I used the Arnold GPU mode for Lookdev and Lighting because it is really fast and responsive but switched to CPU for the final rendering since it is more stable. I split up all the different lights into AOVs so I had more flexibility in comp. The lights from the windows, the holograms and additional lights all have their own AOV. This would help me later in compositing a lot.
Compositing
For the compositing I used TheFoundry’s Nuke. Since all the assets are organized into large group hierarchies in my Maya scene I was able to easily create masks for holograms or whole buildings using Cryptomattes. Adding some glow and a slight flicker helped to make the holograms really pop.
I created multiple procedural smoke and rain elements in Nuke by using some simple noises. I could then place those on cards and composite them where needed. As you would only see the rain where there actually is light I comped most of the rain elements where there is bright light using my holograms and glowing elements as masks. I additionally added a few single rain drops with a low opacity that fall in the foreground. You can follow the path of these drops if you go through the shot frame by frame. This further helped to integrate the rain in such a large environment.
As a last touch I added some chromatic aberration, lens distortion and lens dirt.
Conclusion
For this project I used Maya for the asset creation, Arnold for Lighting, Shading and Rendering, Nuke for compositing and Photoshop for some texture and overpaint work. Maya's Mash was a great help as I used it for scattering, instancing and the creation of holograms.
Creating this shot was a lot of fun and I really enjoyed working on it. The holograms were something I have never done before but in the end I found a workflow that is pretty simple while giving a great result. I learned a lot about lighting and composition and how they play together. In general I feel like this project helped me improve my workflow quite a lot when it comes to full CG environments.
Thank you for taking the time to read this article, I hope you enjoyed it.Thank you to TheRookies for giving me a platform to share my project.
If you like to see more of my work or ask any questions, find me via my Rookies Profile.