Stylised Unreal 5 Environment From Blockout To Final Render
3D College graduate, Mikas Jensen, is a passionate 3D artist who shares with us how he brought a Studio Ghibli-inspired 3D world to life in Unreal Engine 5.
3D College graduate, Mikas Jensen, is a passionate 3D artist who shares with us how he brought a Studio Ghibli-inspired 3D world to life in Unreal Engine 5.
In this article we explore Studio Ghibli-inspired artistry, where imagination soars and 3D worlds spring to life. As a passionate 3D artist and apprentice at Kong Orange, Mikas Jensen will explore how to craft a stylised Unreal Engine 5 environment; turning a blank canvas into a breathtaking masterpiece, one step at a time. Let the magic begin!
I will go through some of my steps of the process of creating a stylised studio ghibli inspired Unreal Engine 5 environment, we will go through these following steps.
As a graduate from 3D College, Grenaa, Denmark, I’ve got experience in the VFX industry creating VFX for shows, game cinematics, and movies as well as commercials. I am currently working in the game industry at Kong Orange, a game studio based in Aarhus, working on the game title Vokabulantis a stop motion and love-driven co-op platform adventure as an apprentice. Being a 3D artist generalist with a focus on environments, I am going to go through some of my process of creating a stylised environment in the unreal engine.
Here is a list of software and plugins I’ve used in the project:
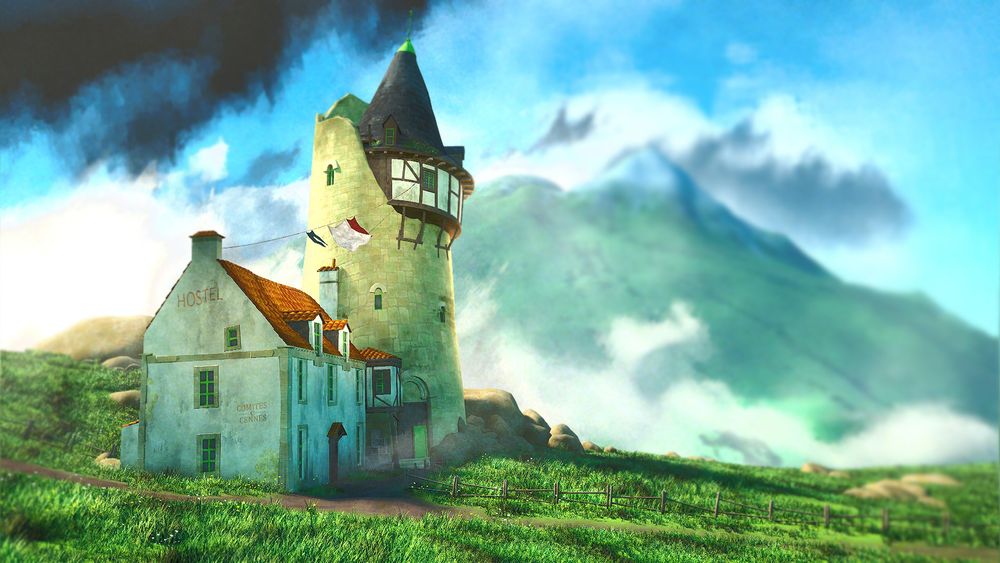
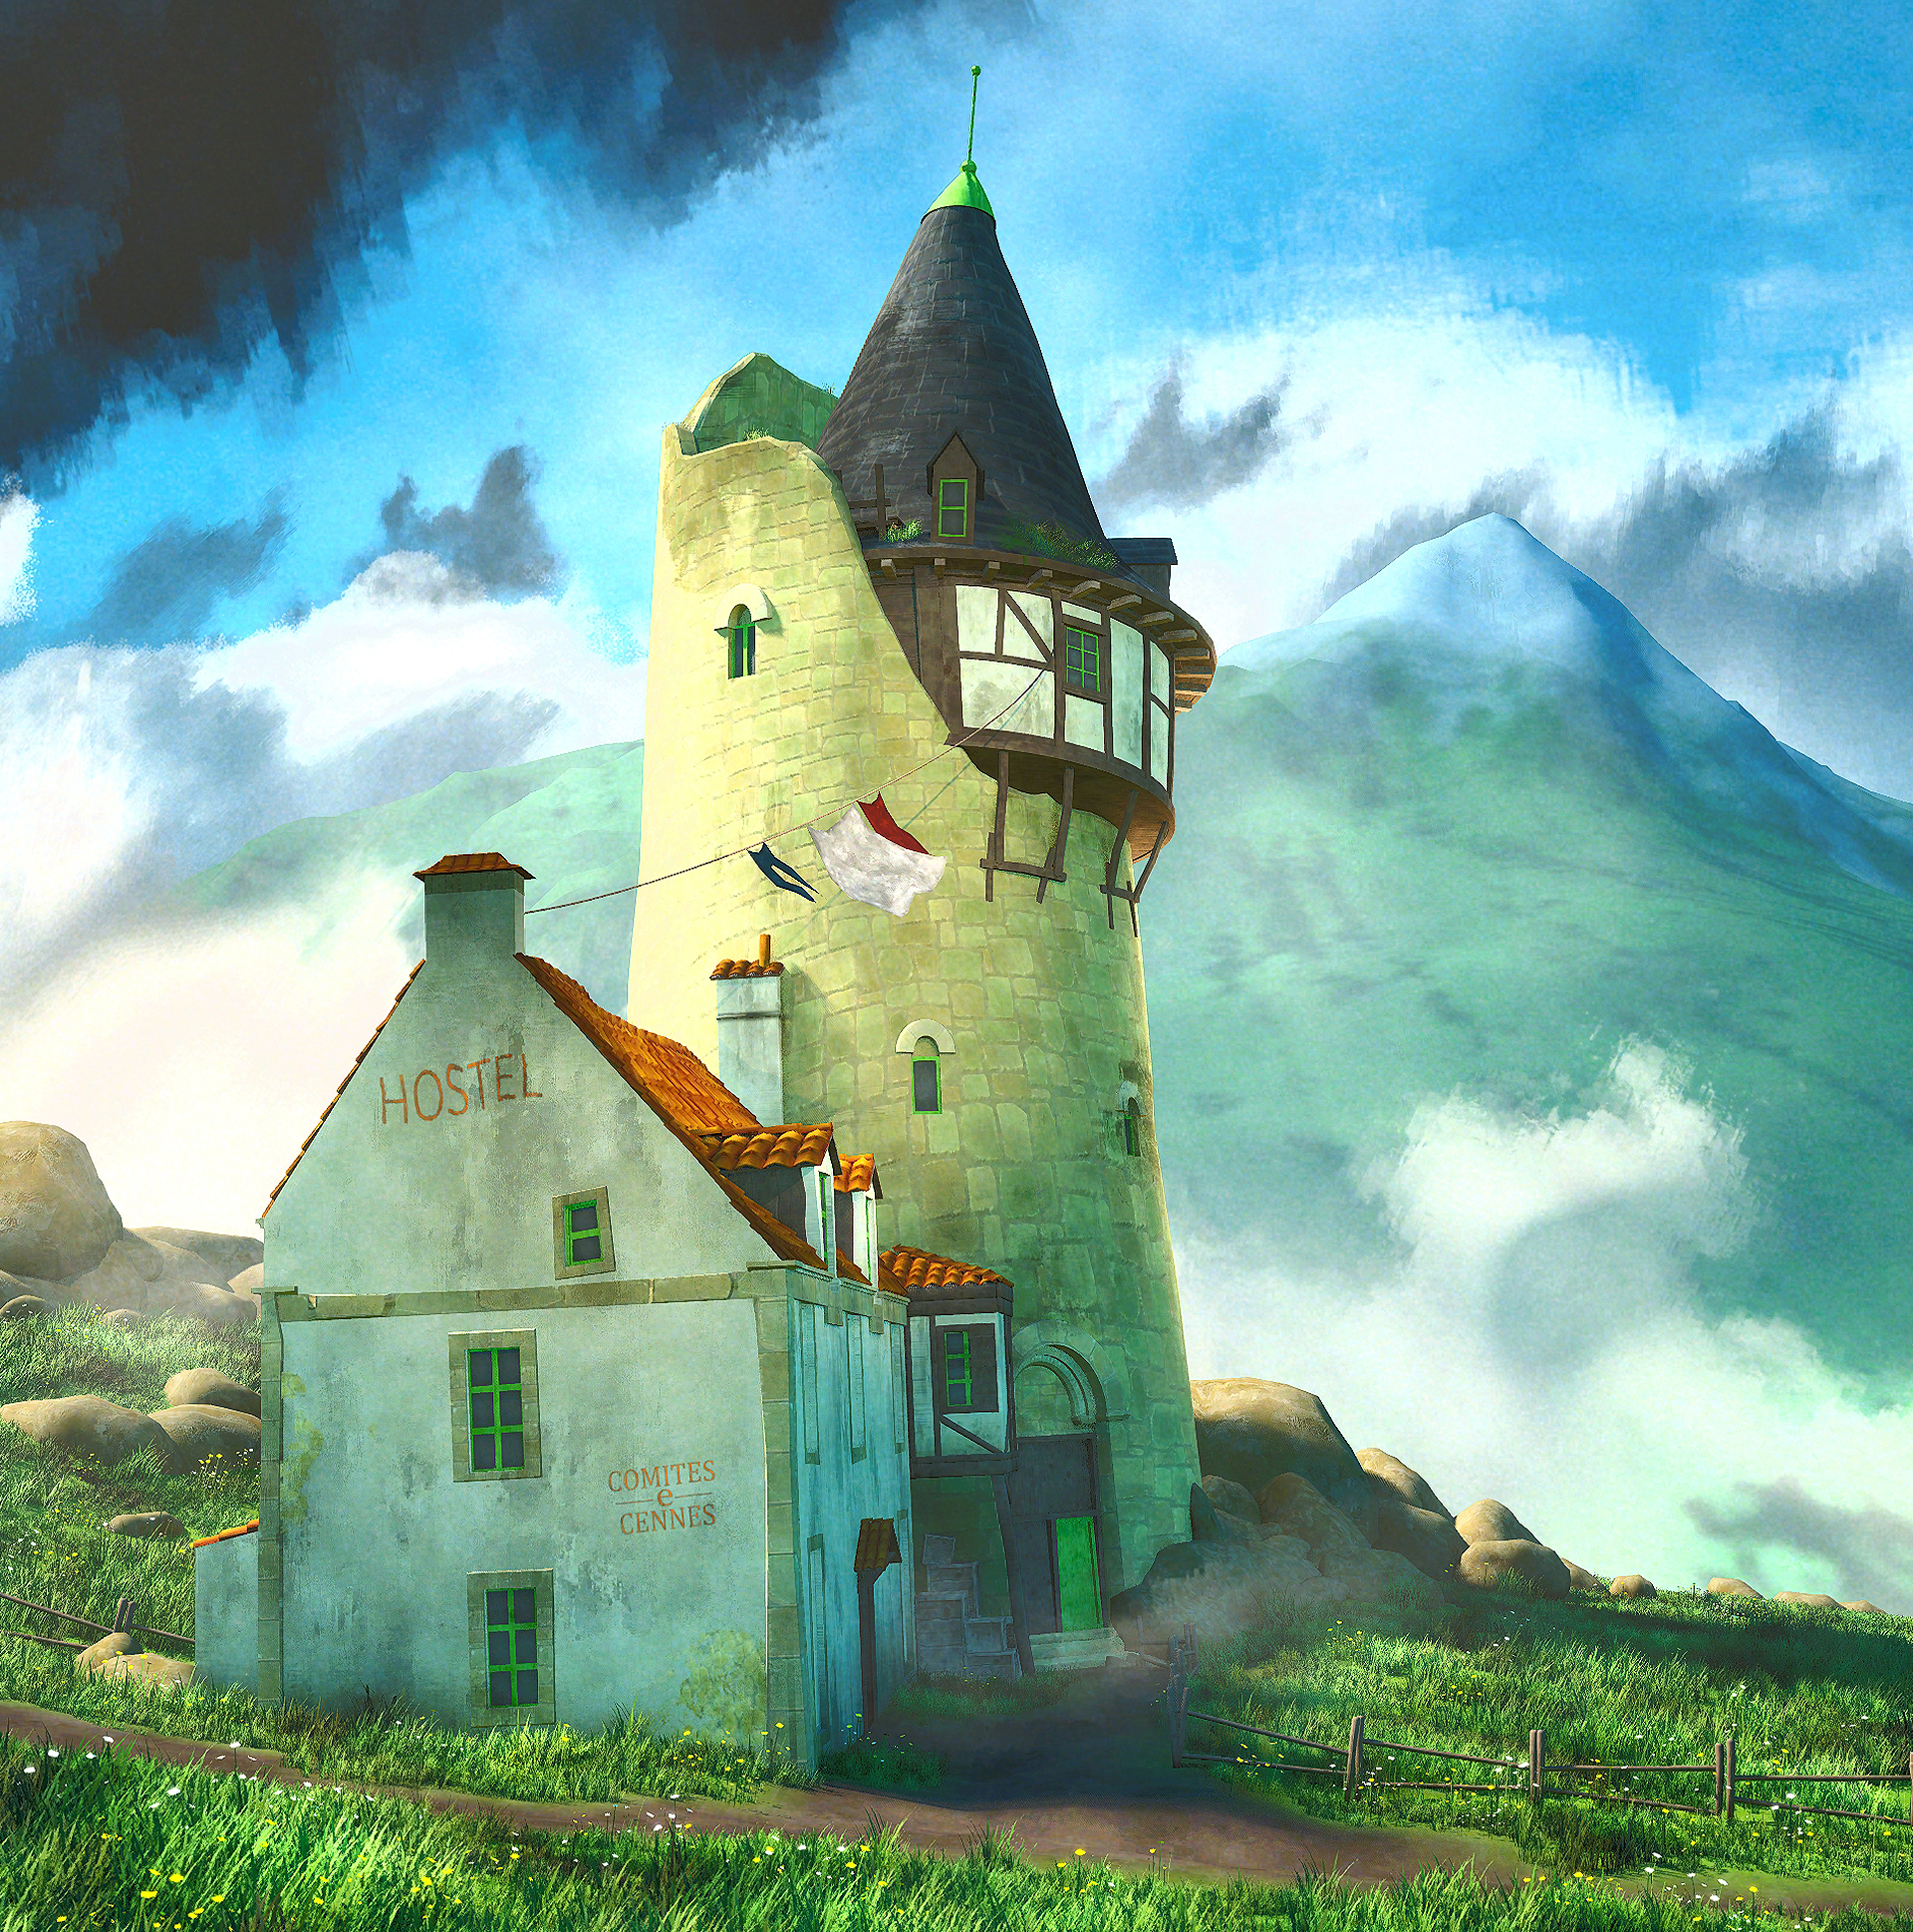
The main reference I used is by Alariko.


One of the biggest and most important start tasks for any of my projects is finding good references as it will serve as a guide and a place to look if at any point you feel lost in the process. When creating an environment and textures for it, I use Pureref as my reference gathering tool of choice can nothing but recommend it.
To start out on the 3D side of things start out creating a blockout with the bare bones to setup the scene and getting the camera in order.

It can be trial and error going back and forward getting a 2D image into 3D space, but it's a learning process; you get better at it with time!

Simplicity reigns supreme as I aim to create reusable assets that grace the entire scene; take the rocks, for instance – a single asset extending its magic across vast portions of the level.
As for stylised textures, keeping it simple, concentrating on form as well as the highlighting. This is also a good point to look at reference and start to figure out which kind of textures you will need, and define what part of your textures can be trimsheets, ignoring roughness and normal maps here.
A tip: use slope Grey/Color as it is very helpful to get the whole anime/ghibli vibe.


Setting the scene up in Unreal engine 5 I first of all normally start out by importing the blockout from Blender, and step by step building up the scene by model by model, replacing the blockout with final models.


For the foliage, I can recommend this video by Victoria Zavhorodnia when starting out with creating stylised foliage.
For the lighting setup, I started with Unreal's standard setup as a base, and then I honed the art direction by referring to my chosen references. In my case, I aimed for a vibrant mid-day light.


One valuable takeaway is to make use of additional light actors. As demonstrated earlier, they hold the power to dramatically transform the scene, casting highlights and infusing an enchanting atmosphere that aligns perfectly with your art direction.
I hope this shed some light on the processes that aid you in crafting a stylized Unreal Engine 5 environment. Remember to embrace simplicity and consistency, drawing inspiration from references and harnessing the creative potential of additional light actors. Best of luck, and enjoy the journey!
And don't forget to check out my socials. LinkedIn, Artstation, Rookies page.