Mr. Thready: A Journey into Game Development as an Artist and 2D Animator - Part 2
Join Flavio Díaz, a Voxel School graduate, in the second part of his game development journey as he explores character design and early 2D animation experiences. Discover the art of creating functional and captivating characters for gameplay, brought to life through animation.
Welcome to the second part of the game development journey! In this instalment, Voxel School graduate, Flavio Díaz, delves into the aspects of character design and shares early experiences with 2D animation. As Flavio discovered during this process, creating captivating characters is just the beginning; they must also be functional for gameplay and brought to life through animation. Join Flavio as he unravels the challenges and triumphs of this artistic endeavour. Let's dive in!
There are occasions when the very first of your designs seem to be the right one, and this was the case of Mr.Thready after much positive feedback from people. He seemed to gather a series of characteristics that made him look cute and at the same time a bit silly, so he could inspire a certain degree of kindness or empathy to the player. It's a pretty simple design and we didn't think it was necessary to keep thinking about it, although not everything was as simple as it seemed.
Something I had to learn is to adapt a design to the need to have a legible character at far distances. Especially in our case, we are talking about a colossal world for the character, so on many occasions the planes will be very general and the character a dot in space. This meant several readjustments on a visual level, especially for the thread pattern of the characters. When the camera zoomed out, all you could see was a bunch of proverbial crap! This led me to think of a way to stylise the thread pattern of the voodoo characters, among other things.
Design evolution (from left to right)
Another crucial aspect we faced was dealing with a character that despite being stiff and asymmetrical, needed to be functional for the gameplay. Moreover, we encountered a challenge with the unconventional 2D adventure gameplay, as there was no inventory for saving items. All interactions with objects had to be through animations, demanding a vast array of animated sequences and necessitating a meticulous design to execute them seamlessly.
While the character's core design remained intact, numerous fine-tuning adjustments were made to ensure a harmonious blend of visual appeal and functionality.
"How do I make this thing move?"
Now I want to talk about how it was to start animating without having any idea of how to do it or what tools to use.
The first thing we knew for sure was we definitely wouldn't use traditional animation. It would have been detrimental in terms of development, and I didn't know how to do it at a good level. So we only had the most obvious option, "Flash style" animations.
We knew it was the most used in similar games like Machinarium or Limbo, so we focused on finding a suitable tool. We went through many options, from Flash or Smooth Moves, to Unity 2D, which was the engine on which the game ran.
Finally we discovered Spine 2D, which is a bone animation software. We found it a very good option because it's a tool in constant evolution and quite easy to use.
Although maybe I had some instinct for it, at the beginning my animations were boring and too mechanical, and I couldn't get them to accentuate the personality of the characters. Of course, I watched many tutorials and examples of this kind of animations, but a book that helped me a lot to understand the basics of animation was The Animator's Survival Kit.
As with painting, no matter how much the methods and tools change, the basics will always be there, and this book is a classic that every animator should read.
0:00
/
In this video you can see what it was like to deal with the asymmetrical design of the character. At first we only had in mind his unstructured and broken appearance, dragging half of his body. We quickly realised that those first tests couldn't work for gameplay. It was slow and totally dysfunctional, so we had to find that balance between clumsiness and playability.
Finally we thought it would be best to give him movements similar to those of a toddler, with a certain rhythm and at the same time keeping the feeling that its limbs are loose. Of course, this is the result of a long time of dedication and learning.
0:00
/
Also, the fact of not having an inventory, meant the character interacts directly with objects, so many of these actions require specific animations. For this reason the decision to move to Spine was hard, since it meant throwing away hundreds of animations that we had already created. All of them had to be redone, but as they say, repetition is the mother of skill, isn't it?
0:00
/
Animation list in Spine 2D
0:00
/
Workflow and Spine 2D
Spine animation workflow is not complicated, but like everything else, it requires a learning curve to make it as optimal as possible. One of the most important aspects is to learn how to design characters and render them taking into consideration all their mobile parts. I guess everyone has their own methods, but personally I prefer to render the character in one piece and then proceed to separate it in pieces to have only one thing in mind at a time.
The preparation of the assets for bone animations is simple. You just have to keep in mind which areas of the image will be visible at some point in the animation, so that the pieces look like an integral part of a whole (something like a puppet) .Of course, the mesh tool is something that simplifies this a lot, but again, we were newbies at this , so we didn't start using it until later.
Unity Atlas image
As I said, we were beginners, and maybe too ambitious. Not happy with having the animation part under control, we wanted to add handmade lights that would affect the character with a script. Well, Spine allows us to add skins to the character, so we said, “why not?” So I created different skins to the character for each environment to simulate how the lights affected him.
You may ask, "why not use Unity's 2D lights?" Because we wanted everything to look as traditional as possible, and personally I didn't like the way the engine lights looked. A bit crazy, I know.
0:00
/
Different lights for different environments
Cute but dark
Voodoo People
I would like to go a bit deeper into this duality of the game. As I mentioned in the first part, our purpose was always to give the game a dark and violent feel in a "childish" looking theme. I think the best way to go deeper into this is to talk about the character design.
First of all, the intention was to approach the voodoo theme from a more serious and "realistic" point of view. There was quite a lot of documentation work behind, either through documentaries, photographs, articles, etc. All this with the purpose of providing us with a good source of ideas for design of characters and the story.
Voodoo References
This can be appreciated more clearly when we talk about the antagonist of the game, which is an old shaman called Bokor. He uses his black magic to capture as many souls as possible, and thus increase his army of voodoo zombies. And yes, ironically, he is also a voodoo doll.
Shaman "Bokor" Render and concept
Among his beads he carries a collection of "eyes" of his victims, through which he absorbs their souls. For this we thought the most appropriate thing would be, like any good villain, he would use others to do the dirty work. This is how we came up with the idea of the only character in the game that is not purely composed of threads. Undead Rat.
"Undead Rat" concept
It should be noted that being one of the last characters that I created in the development, by then I was already making good use of the Spine mesh. Probably, if the project had not been cancelled, I would have applied this more "three-dimensional" effect to the rest of the characters' animations.
0:00
/
Rat animation and mesh in Spine 2D
Basically it’s a rat corpse recomposed by rolls of thread by means of Bokor's magic.
To be honest, I remember all that stuff about eyes came from a simple picture of the seam ripper, which is a sewing tool used to tear off buttons. We thought it would be great to give it this "weapon". In fact, we had in mind to create a macabre death scene, where the rat kills our protagonist, and then rips out his eyes.
This leads me to highlight that one of the most relevant aspects of the game, is that despite being a Point 'n Click puzzle adventure, we had the possibility of dying.
This means there would be situations where an incorrect resolution of the puzzle, could result in a violent death.
"Death by Spider" concept
Unfortunately, this is something we didn't have the opportunity to implement before canceling development.
Where do these guys come from?
To tell you the truth, in general, the process of character conception wasn’t necessarily methodical. Sometimes a character was born out of the need to solve a problem, others were planned from the beginning as part of the established story, and sometimes they emerged from another character, as in the case of the Undead Rat and Bokor. I guess it's not unusual, considering that there was no art director to set guidelines. It was just me and my mate discussing via Telegram.
"The Peddler" in his mobile store
A practical example of this is the design of The Thread Brothers.
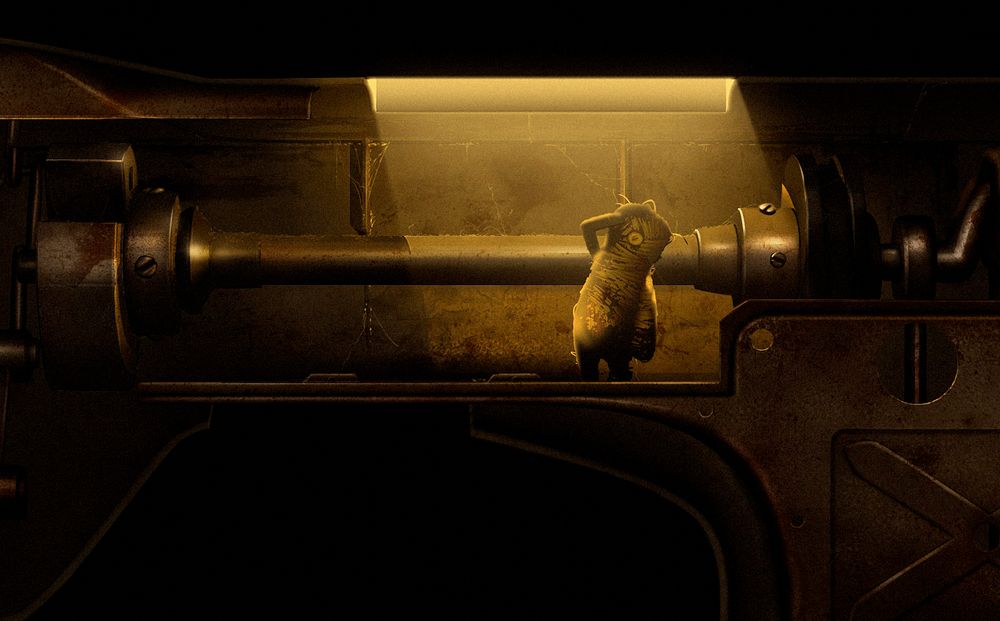
Developing the sewing machine level, we were discussing the idea that here is when Mr. Thready discovers he is not alone. We needed the introduction of the first characters you meet in the adventure.
Well, being a place full of tools and mechanical pieces, all the ideas went around the fact that the character should be a kind of clever survivor, who is equipped with different pieces he can use to his benefit.
Some sketches of the "junk collector"
This guy would surprise our protagonist at the beginning of the scene, with a deceptively hostile appearance, but in reality a future ally. That's how we first came up with the design of the older brother, who looks like a tough guy who has been through a thousand battles.
But there was another need related to the gameplay. We needed our ally to be able to get into small spaces, in order to help us solve puzzles. And of course, for that we needed him to be smaller than the main character.
We really liked how the design of the older brother looked, and we didn't want to discard it, so we decided to make it a kind of "2 in 1", The Thread Brothers.
"The Thread Brothers" concept and first meeting
0:00
/
That's all!
Although there are many more interesting things I would like to share, I hope that at least it has been enjoyable, and perhaps useful in some way.
I encourage anyone who wants to start their own indie project, to try it without fear of failure. What you learn along the way is worth it.
JUST DO IT!
0:00
/
You can reach out to Flavio via his Rookies profile here.