From Architecture to Creature Building: A Student Journey
Kristel Rindlisbacher Guzman has evolved from her days of architectural drawings to 3D character design. In this article she shares her journey and a featured piece in her Rookies portfolio.
Kristel Rindlisbacher Guzman has evolved from her days of architectural drawings to 3D character design. In this article she shares her journey and a featured piece in her Rookies portfolio.
From a young age, Kristel Rindlisbacher Guzman has been captivated by the world of drawing and painting. Her early passion for art eventually led her to pursue a career in Architecture in her home country of Bolivia. It was during this time that her artistic journey took a transformative turn, evolving from two-dimensional drawings to three-dimensional architectural visualisations, and eventually 3D character design. In this article she shares her journey as well as a closer look at one of her pieces in her Rookies portfolio.
As Kristel embarked on her Master's degree in Architecture in Switzerland, she discovered that no longer limited to architectural visualisations alone, she could open herself up to endless creative possibilities in 3D.
Kristel's initial artistic hobby, which she had devoted considerable time to, soon evolved beyond a pastime. Transitioning from her role as an architect in Switzerland, she made the bold decision to turn her passion for 3D Art into a full-time profession.
While her focus initially centred on Architectural Visualisations, Kristel's quest for artistic fulfilment led her to PIXL VISN | media arts academy in Germany. Here, she dedicated her time to creating intricate creatures brimming with shape, colour, texture, and personality!
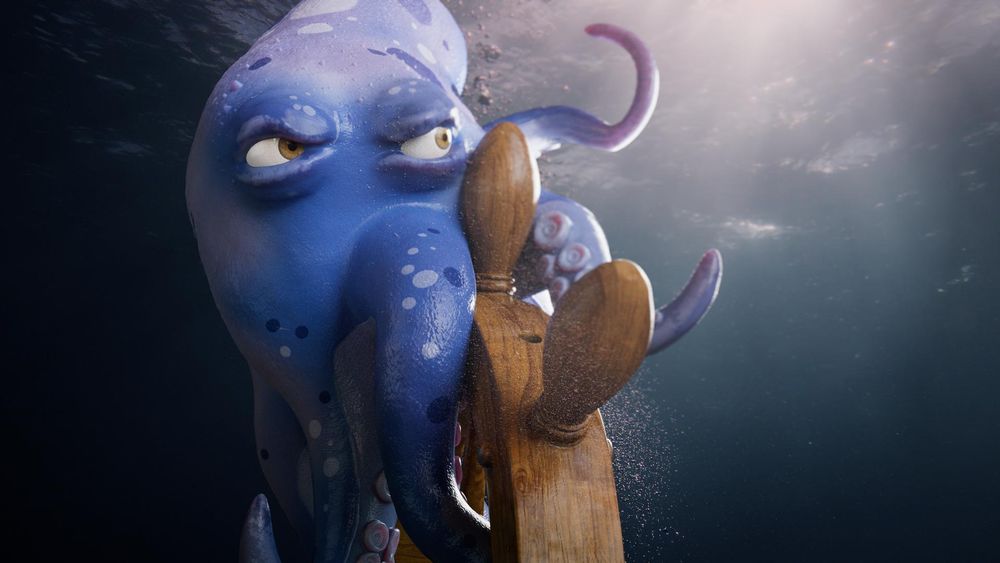
This project is based on the concept of the artist MzM. Octo is part of a bigger project of mine, and after some valuable feedback from my texturing mentor, I decided to split it out and feature it on its own.


The journey begins with seeking references, particularly for colour and texture. Then, I hopped into ZBrush, utilising Zspheres to meticulously shape Octo step by step. I tackled the head, then the arms, and went on to sculpt the intricate details, from realistic anatomy to cartoony eyes.
A different process for the creation of the ship's steering wheel. Here I started by doing the blocking in Maya getting as close as possible to the original shape. All this based on many reference photos. I go back to ZBrush and give it some details and other imperfections.


The octopus skin's texture is unique, inspiring me to create custom brushes for sculpting. I crafted my own alphas to achieve this special texture. I then used Maya for an optimal mesh and UVs, returning to ZBrush for high-to-low poly projections.
At the end of this first phase, the octopus and the ship's steering wheel are exported as hi-low poly to start working on Mari.
For the texturing, I followed the artist's concept to paint the octopus and the steering wheel and kept to using the original colours.

Before starting to paint in Mari, I imported hi - low poly to Substance 3D Painter to bake mesh-maps and export curvature, thickness and ao. This helped me painting colour details in both meshes: the Octo and steering wheel.


Later, I imported the meshes to Mari. Everything starts with the creation of Iso masks for the different parts of the concept: the body and eyes of the octopus and the steering wheel of the ship.
After this I created groups of nodes to work with each of these masks separately. Later I imported the mesh maps into geo chanel nodes. With the help of colour and painting nodes I started giving this project colour.
The most important thing I have learned in this project is to have used the Colour Range to Mask node. It is an option in Mari extension pack where you can carefully apply masks to the different colour tones of your reference photo. This is very important for example, to recreate the wood of the steering wheel and give it a cartoony look. This was very difficult, but after checking many references and spending many hours in Mari, the result was satisfactory.


At this point I exported all channels from Mari and jump to Maya to set up the scene and start rendering.
What in most cases I do after importing the meshes, is to work on the cameras. In this case I used three different camera position. Lights are also very important.
For this project I wanted to emphasise the face and the expression of the Octo. In Maya I created three different V-Ray materials, with eyes and skin will have a little bit of sss to emphasise the flexibility of the muscles. Over this I add a bit of glossiness with a special mask to give it a different effect.
In V-Ray I created nodes to apply the displacement maps and give them the necessary values to make them work properly. I then applied a V-Ray dome with a suitable HDRI to have a soft light and interesting reflections. After this I did many rendering test to control the lights. What I do at the end are also the render layers: three different ones to control the final render, the clay render and the wireframe render.


Nuke is a powerful tool. For me it is very important after the rendering is ready to give it the final touch.


In fact, when the rendering has good results, only small adjustments are needed in Nuke. In addition to this, the background and a couple of effects are added to finish telling the story of Octo, the Pirate Octopus.

I have learned a lot in this project. The importance of having good and sufficient references. Going back and forth from ZBrush to maya doing tests on the displacement maps. In Mari doing tests on nodes to know which one is the most effective for the project and in V-Ray for Maya doing a endless number of render tests to take the best of it.
Thanks to the Rookies for this great opportunity!
You can reach out to Kristel via her Rookies profile here.