Leveraging 3D Design and Visual Effects Expertise in the Digital Fashion Space
Pieter-Jan Ahenkona, a 3D VFX artist, and Motion Designer, delves into one of his student projects, highlighting how he applies his versatile 3D design and visual effects skills in the digital fashion arena.
Pieter-Jan Ahenkona, a graduate of Karel de Grote University College, is a 3D VFX artist and Motion Designer with a primary focus on apparel creation, animation, CFX, and simulation. He possesses a well-rounded skill set as a generalist in the 3D digital fashion field, encompassing tasks such as texturing in Substance Designer, garment creation in CLO/Marvelous Designer, and retopology/modeling in Blender. His expertise extends to resimulation, Lookdev, lighting, and animation in Houdini, showcasing an end-to-end proficiency in various aspects of 3D design and visual effects.
In this article we explore one of his student projects and how he leverages his 3D design and visual effects expertise in the digital fashion space.
The Project
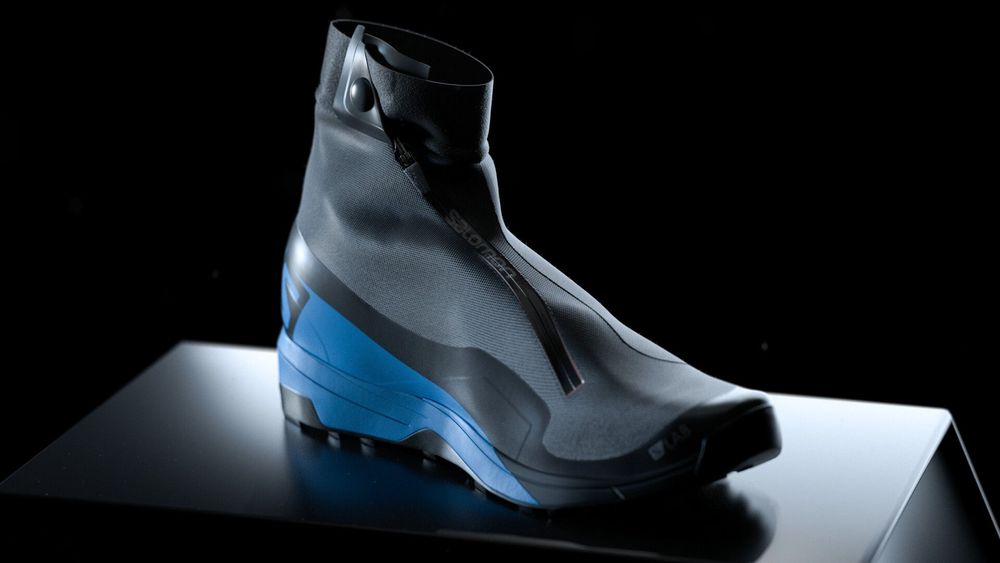
In this project I present a study of the Salomon S/LAB XA Alpine 2. I've been a longtime fan of the Salomon brand and in this piece I present my modeling, texturing, lighting and motion design skills. All assets and materials were made by me.
Step 1: Modeling The Sole
I started off modeling the sole in Blender with real world references as planes inside of the scene. No special techniques were applied at this stage, just pure hard surface modeling. This particular sock has a shoe inside of it to maintain the form and support the foot while running, so I added an interior mold for the sock. As soon as I was satisfied with the result of the sole I exported it to Marvelous Designer.
Step 2: Creating & Simulating The Sock
I imported the sole and traced the top part, simulating the traced pattern on top of the sole. I froze the pattern as it settled down on top of the sole, providing the sock with a base to stitch onto. The mold was imported into Blender and added on top of the pattern, creating an underlying structure for the sock. The sock was simple to make—I looked up some sock pattern references, traced them, and modified the pattern to resemble the alpine shoe. I exported the mesh as an .fbx file for texturing. At this stage, I also did my retopology in MD & Blender, sending the mesh back and forth between these apps until I achieved the desired result.
Step 3: Texturing
I imported the mesh into Substance 3D Designer, and since Marvelous Designer provided a clean UV layout, texturing in Ds became a breeze. I created two base knitting patterns for the sock and the elastic at the top. The rest of the shoe was made out of plastics, so I created one main plastic material and variants for the different parts.
Close-Up
I added a few imperfection details in Painter, mostly Triplanar dirt, scratches and other details. At this point the shoe is ready for export to Houdini.
Step 4: Look Dev
At that stage, I gathered all the assets to verify if everything had been exported correctly. I staged all the assets in Houdini Solaris with the Karma XPU render engine. I used a simple HDRI and backdrop to see if everything looked fine. If that was the case, I could proceed to building the environment.
Step 5: Environment Building
For the environment, I began by creating a biome in Blender. However, I eventually simplified the concept by developing a geometric procedural environment through a combination of polyExtrudes and polyBevels in Houdini. The objective was to craft an abstract mountain landscape. Additionally, I implemented a procedural snowflake particle system using VOP in Houdini.
environment test_01
Step 6: Animating & Rendering
I created a straightforward exploded view animation and incorporated rotations for the shoe. To achieve the commonly used fast-to-slow-mo effect in product animations, I adjusted the timing of the explode animation. The only challenging aspect of this animation was ensuring the right angles and proper lighting for a compelling visual impact.
0:00
/
One of the many flipbooks
0:00
/
Final Movie
Step 7: Post-Production
At this point in time when I am writing this article I have already transitioned to DaVinci Resolve. But in this project I used After Effects and Photoshop. I do simple things in post like adjusting the color values, contrast vignetting and adding grain.
Thumbnail
Conclusion
I am proud of the end result. It quickly became one of my most liked projects by the community. It’s very rewarding to hear all the positive reactions.
The project itself went very smoothly besides that it was one of my first Houdini projects, and I had to do continuous research on the syntax, technicalities and language of Houdini. I now feel a lot more confident in navigating the software.
I want to thank The Rookies for giving me the opportunity to platform my work and look forward to posting more content on the platform.
You can reach out to Pieter-Jan Ahenkona via his Rookies profile here.