3D & Digital Special Effects Students on Creating an Ambitious Group Project
Discover insights from the team behind The Foreigner, a project submitted to the Rookie Awards 2023, as they reflect on their experience crafting an ambitious portfolio piece. Gain inspiration as they share learnings from experimenting with new skills to create a cohesive cinematic shot.
In this article the team who created The Foreigner, a group project entered into the Rookie Awards 2023, share their experience working on an ambitious project for their student portfolios. The team share their learnings on a project which allowed them to experiment with new skills and integrate them into a cohesive cinematic shot. Read on for inspiration!
About the Team
We, a team of five—four students pursuing a Master’s Degree in 3D & Digital Special Effects at ARTFX SCHOOLS, Montpellier (François-Clément MICHEZ, Thibaut MASSON, Maximilien DUSSAP-GALLET, and Vincent QUET), along with one student from ESMA, Toulouse studying a CG Animation & FX Master Degree (Maëlle COUZINIER), collaborated on our most significant project to date. This marked our first experience working as a full team on our biggest project so far.
Project Goals and Inspirations
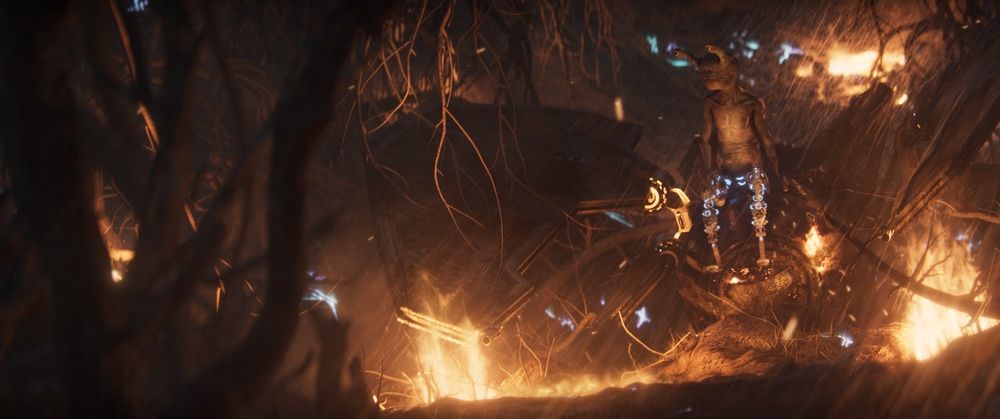
During the summer break, we conceptualised a project for our demoreel—a story of an alien crashing into an unknown planet, drawing inspiration from District 9 for the protagonist. This endeavour allowed us to experiment with new skills and integrate them into a cohesive cinematic shot.
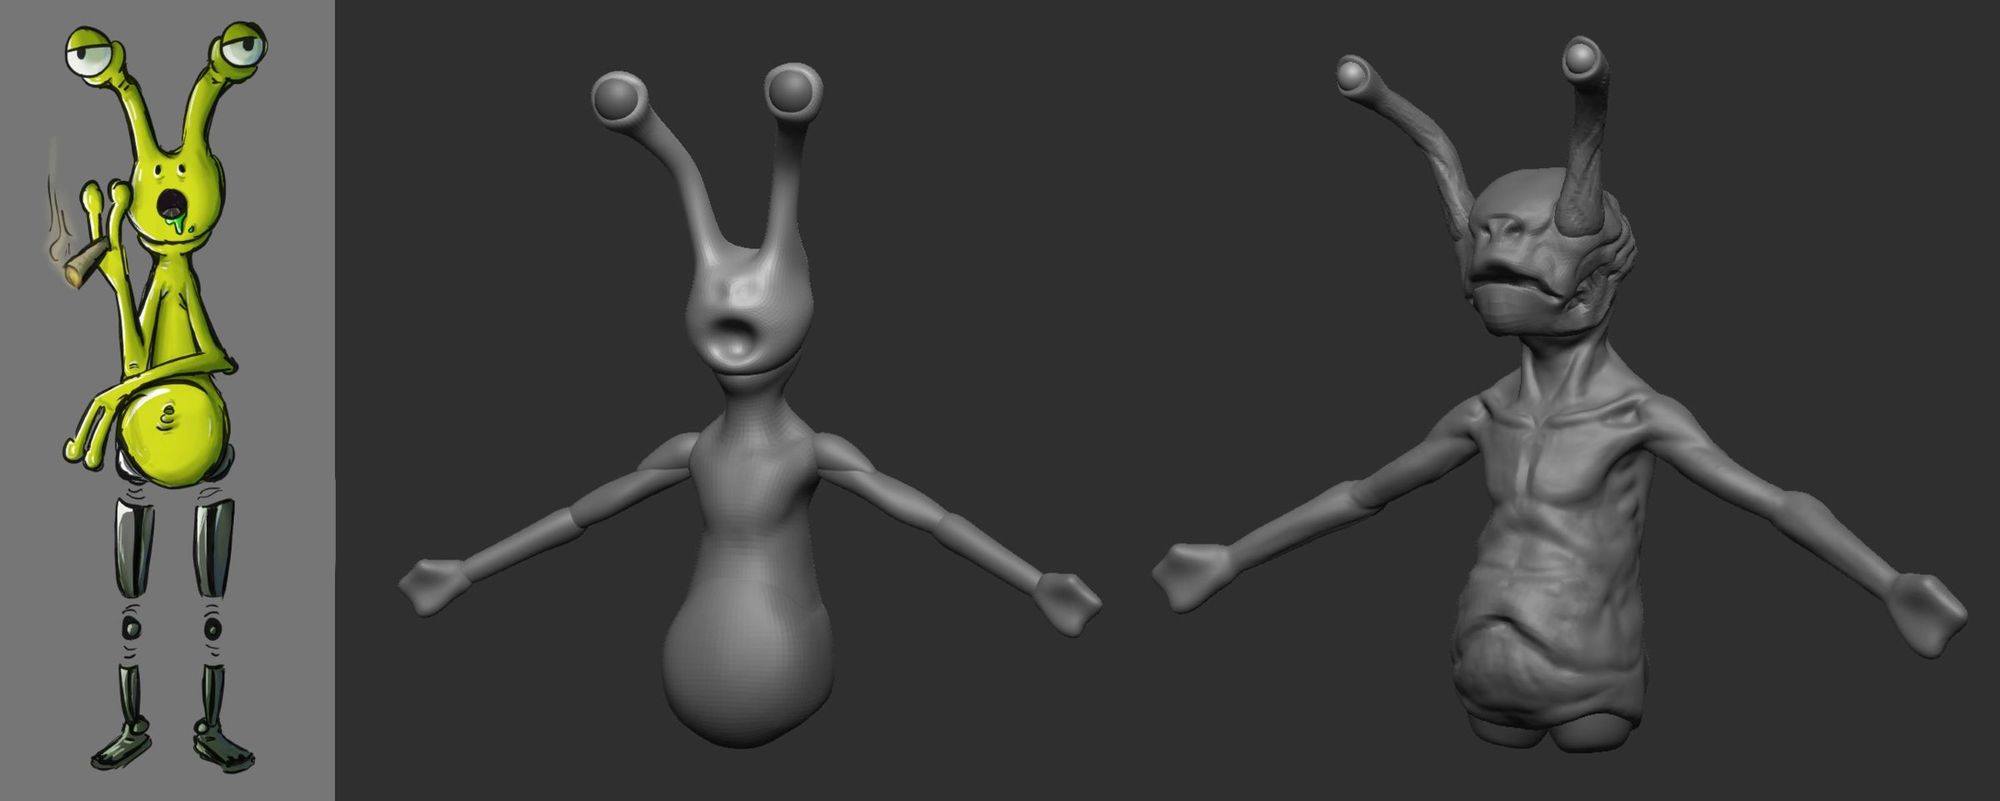
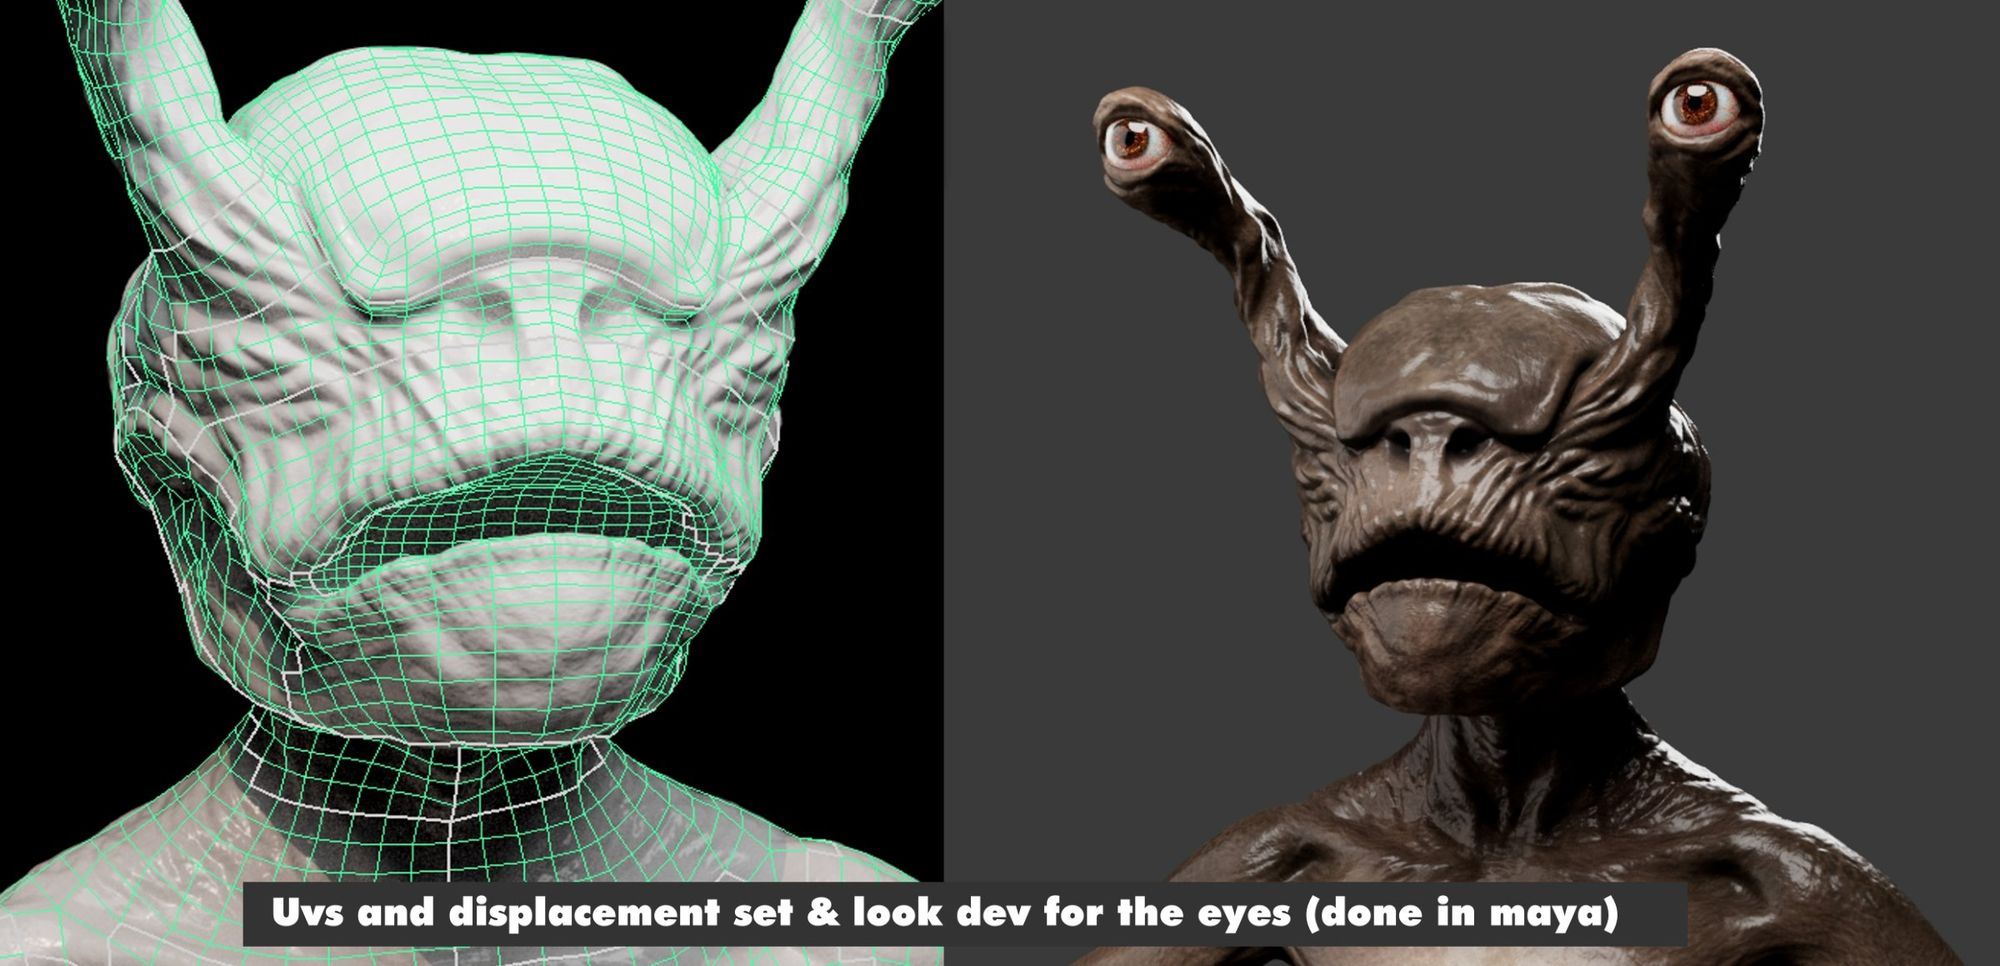
Thibaut MASSON: Starting with a cartoon character sketch by by Francois Clement MICHEZ, I transformed the design into a more realistic alien (changing the original design and moving to more human anatomy) using ZBrush.
Once all components were combined, I began refining the initial details using the "clay buildup" brush instead of the "soft clay" and the standard brush. This method, particularly with the "clay buildup" brush, was effective in sculpting muscles, adding a layer of realism. To streamline the process, I used "ZRemesher" before advancing to medium details, eliminating the need for retopology in Maya. Working with subdivision levels allowed me to export displacement later in the process.
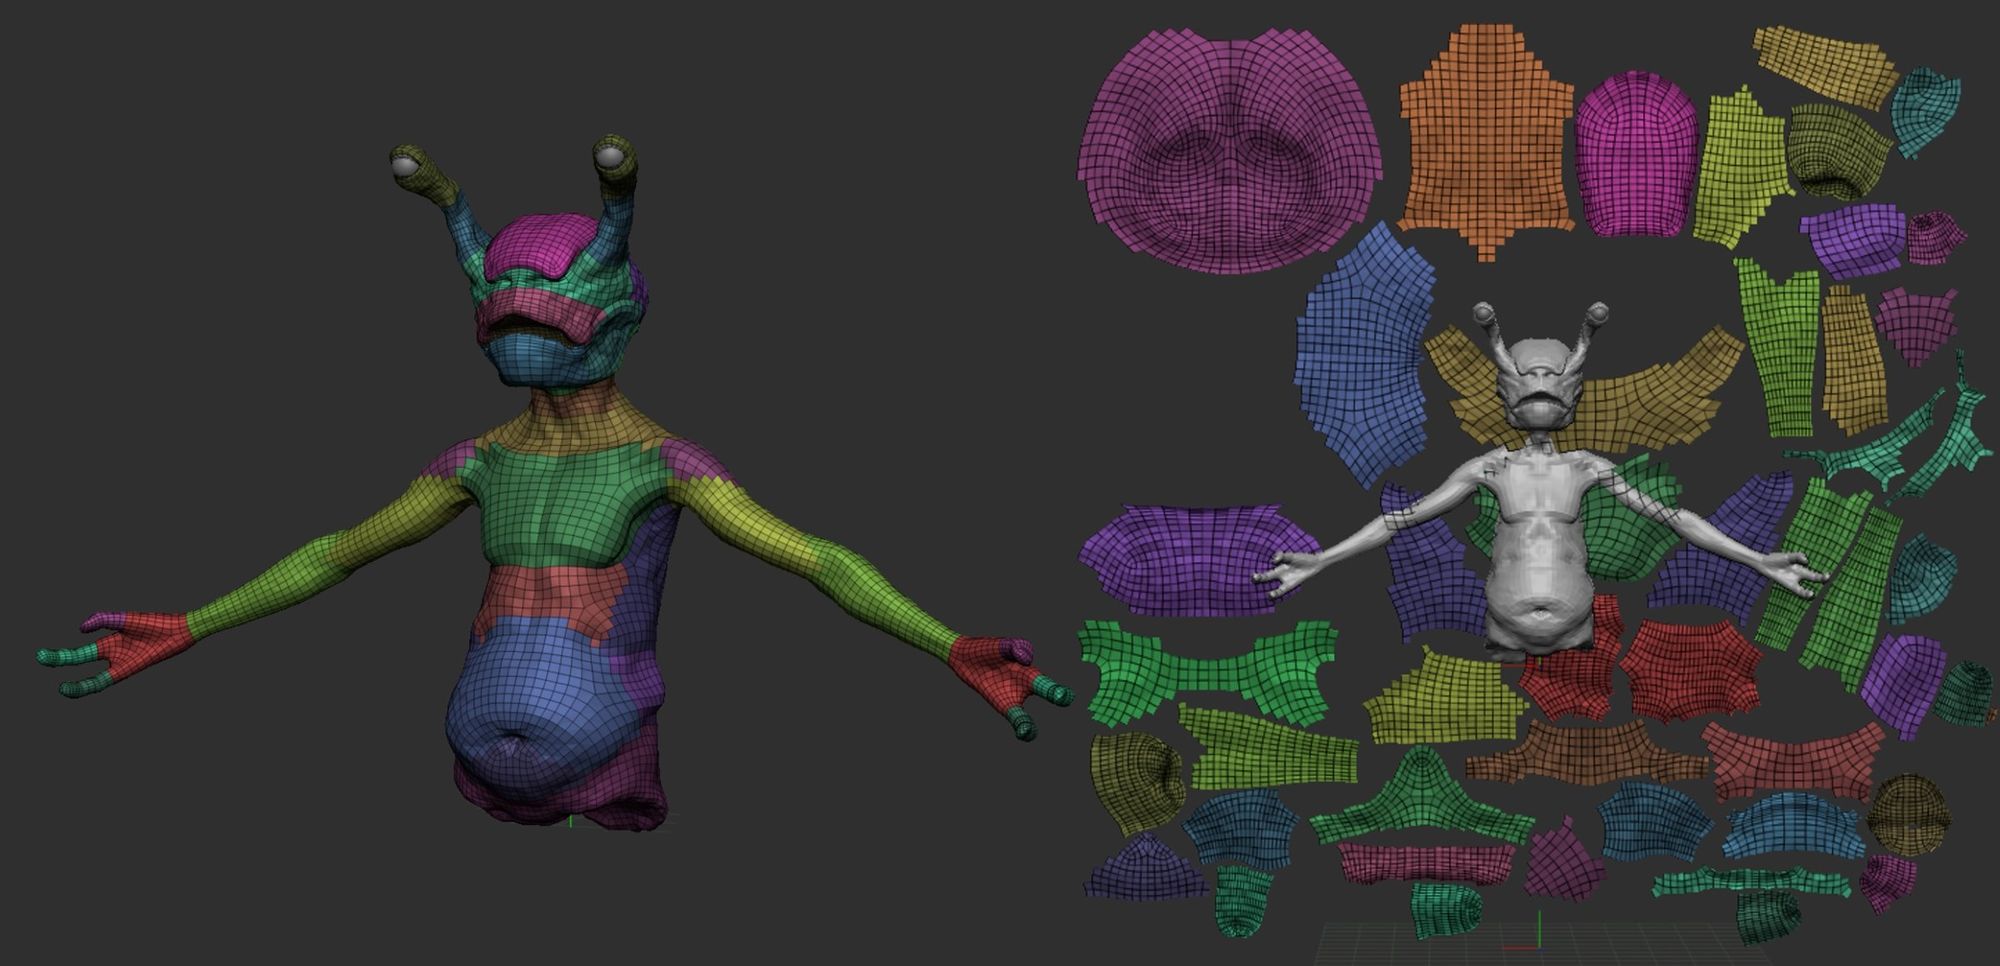
Once the model had the right amount of detail, I was able to use alphas to add this last level of realism on the skin.
Then, it was time to export the model to Maya to do the UVs, as it was easier for me. After that I started a basic polypaint to help the texture artist. Then I exported all the maps to him.
Modeling / Rigging
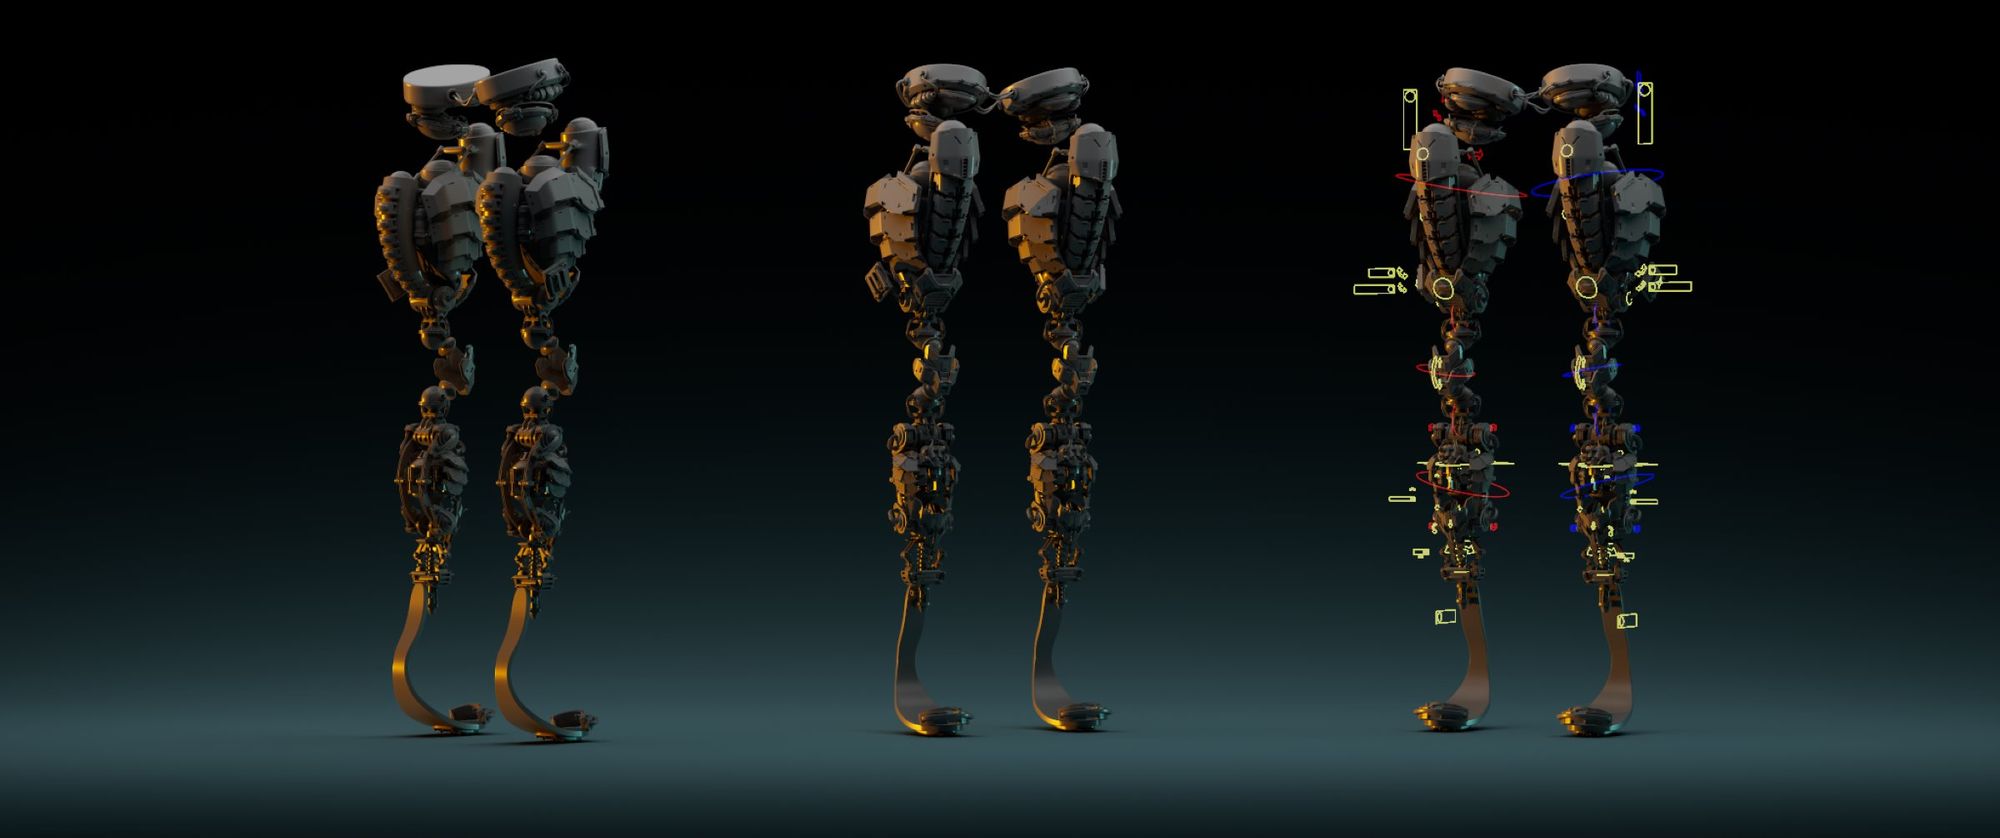
François-Clément MICHEZ: Since I'm not an expert in modeling, I knew it would take me longer to do it. First, I gathered many references to design the mechanical legs. My main goal was to make them look like an athlete's prosthesis but with futuristic parts that would move independently. Luckily, while modeling, I talked to Maximilien, our Texture Artist, who agreed to handle the UVs. It was kind of him because it helped me focus more on the rig while the UVs were being done.
As the modeling was happening, I was already considering the rigging of the character. My goal was to create a model that would be almost "ready-to-rig." This meant I only had to add constraints to the geos and groups, in addition to making sure the pivot points were in the right place. It worked on a lot of small parts of the legs, but for the bigger part, I had to connect them to joints for proper rotation.
I talked to Maëlle, our animator, while making the rig. We agreed that she would change some parts of the rig while doing the animation in order to meet her needs.
Animation / Rigging
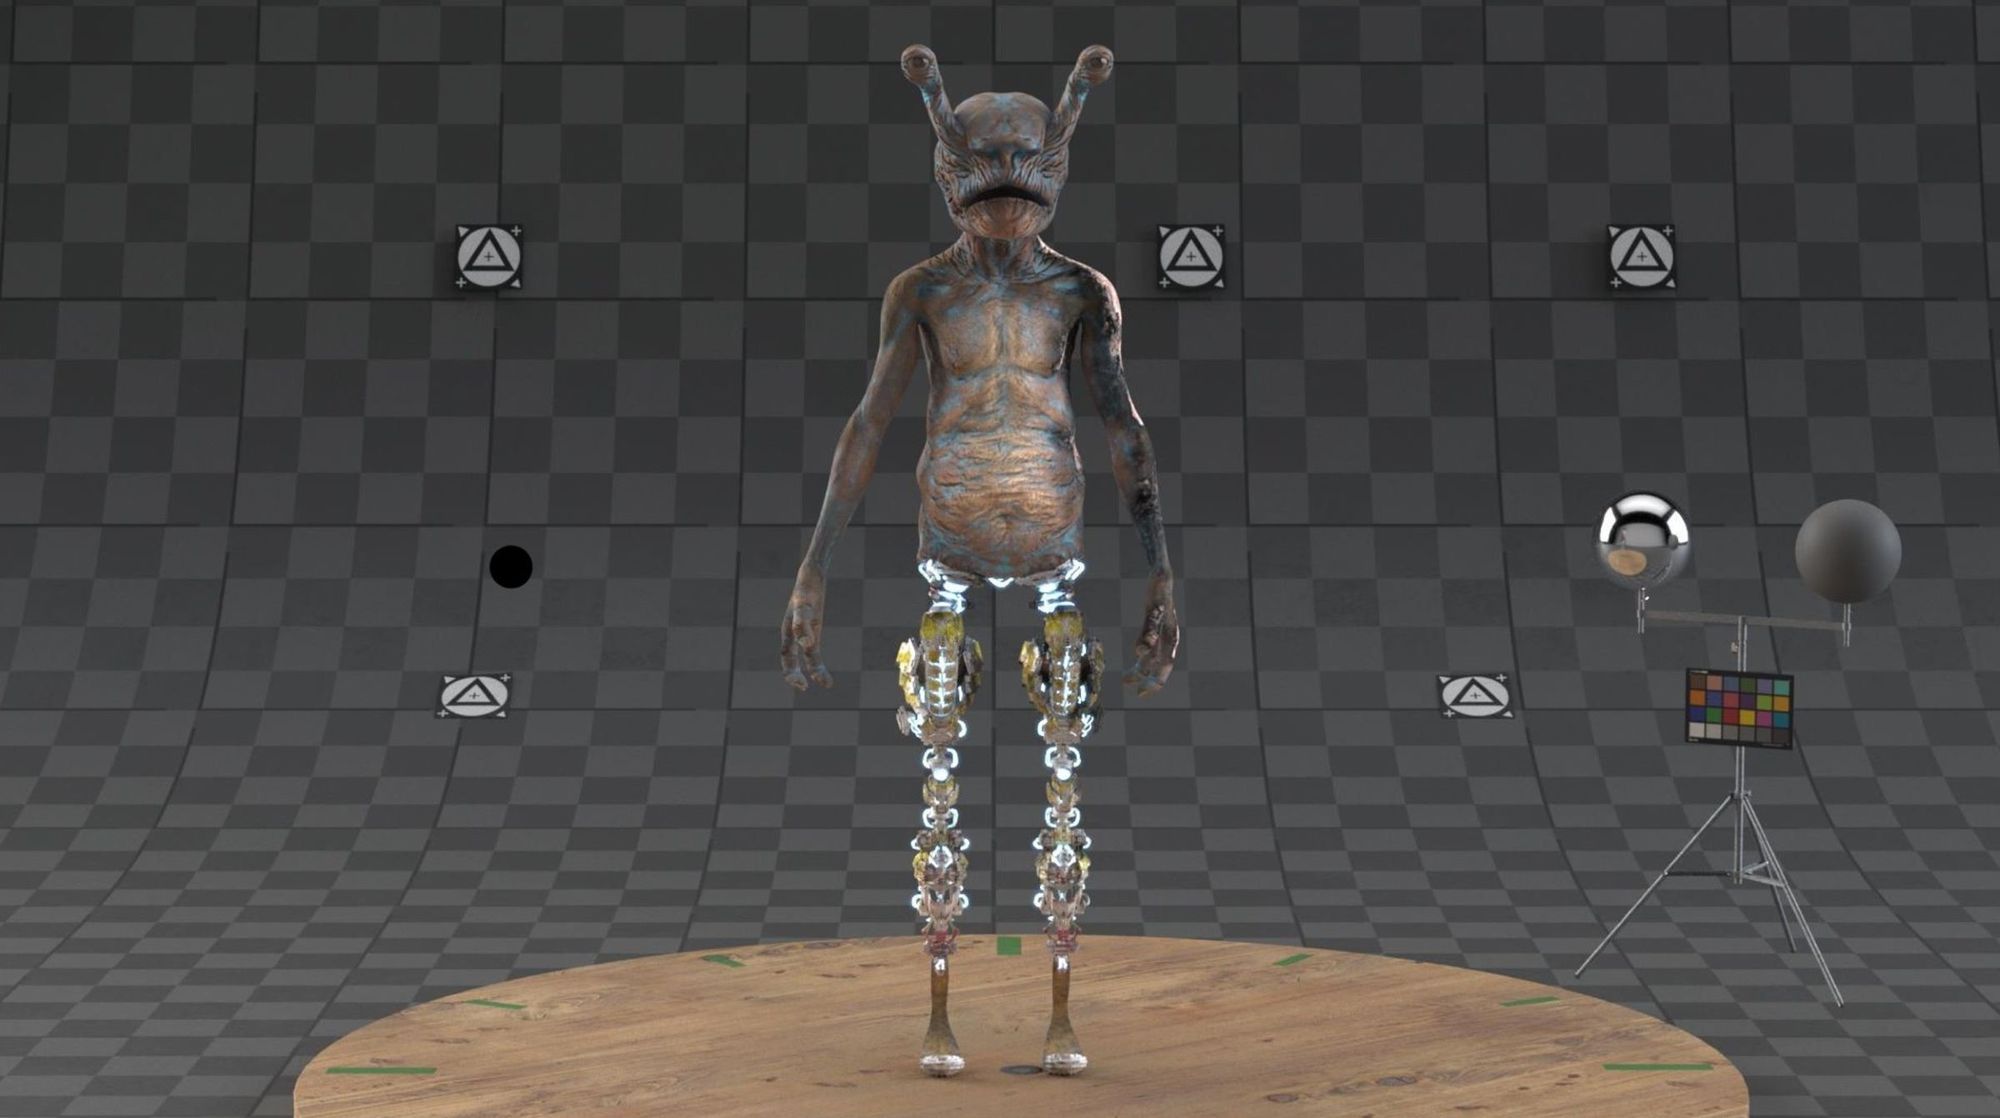
Maëlle COUZINIER: I was in charge of the animation work during this project. First, I tested the rig by doing some posing. The most technical parts of the character were the legs. A lot of parts could move so I tested them to understand how they were working. I then did small retakes on the rig, like parent spaces for the IK hands.
To clearly define our vision, we shot reference videos for the animation we wanted. I then looked for more precise references for some movements like the walk, the jump, etc.
After that, I started the animation. Subsequently, I initiated the animation process. Initially, grappling with the character design posed challenges, especially considering it was my first experience working on an alien, with the eyes proving to be particularly difficult. To add an experimental touch, I ventured into manipulating gravity, a challenging task given the extraterrestrial setting. Despite time constraints, I heightened gravity for the jump at the outset, successfully delivering a result that met everyone's satisfaction.
Texturing / Look Dev
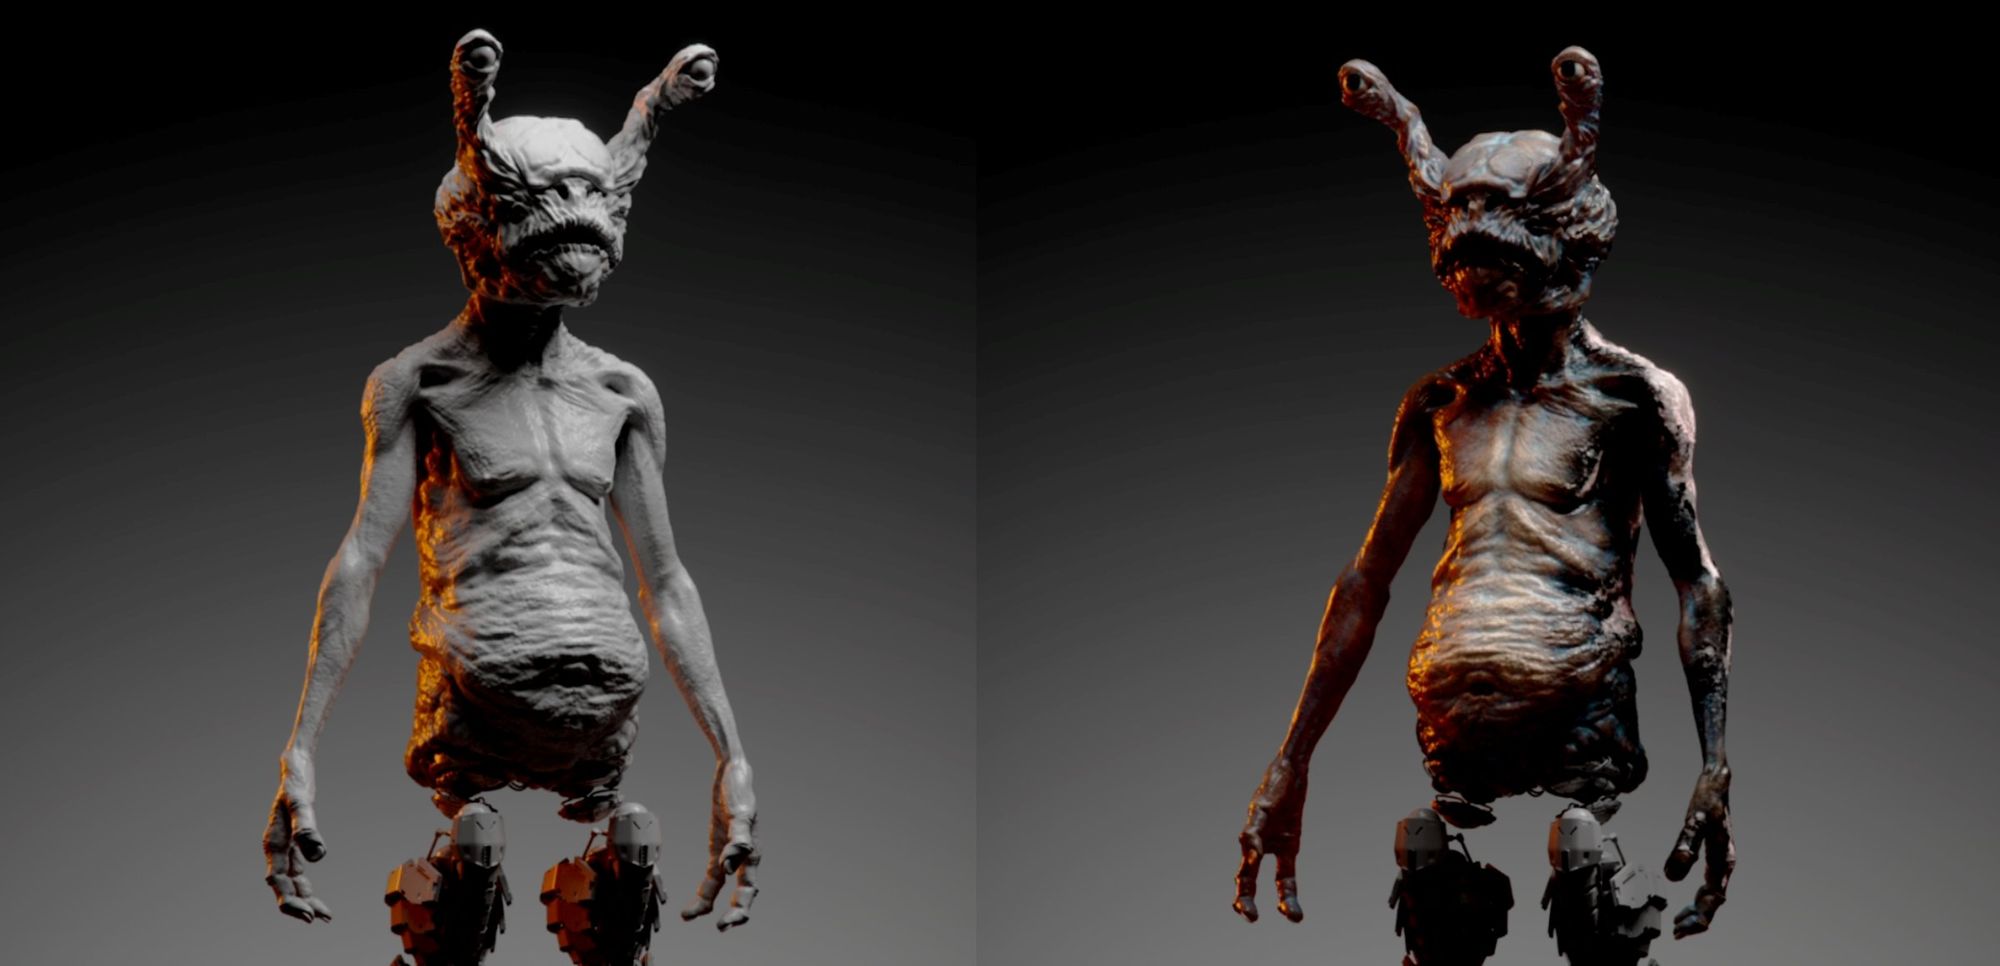
Maximilien DUSSAP-GALLET: I handled the UVs for the legs and their texturing. Initially, I optimised the UDIMs for 2K texturing, providing greater flexibility in the texturing phase. Utilising Substance 3D Painter, I aimed to narrate a story through the texture, emphasizing the impact of heat on the characters.
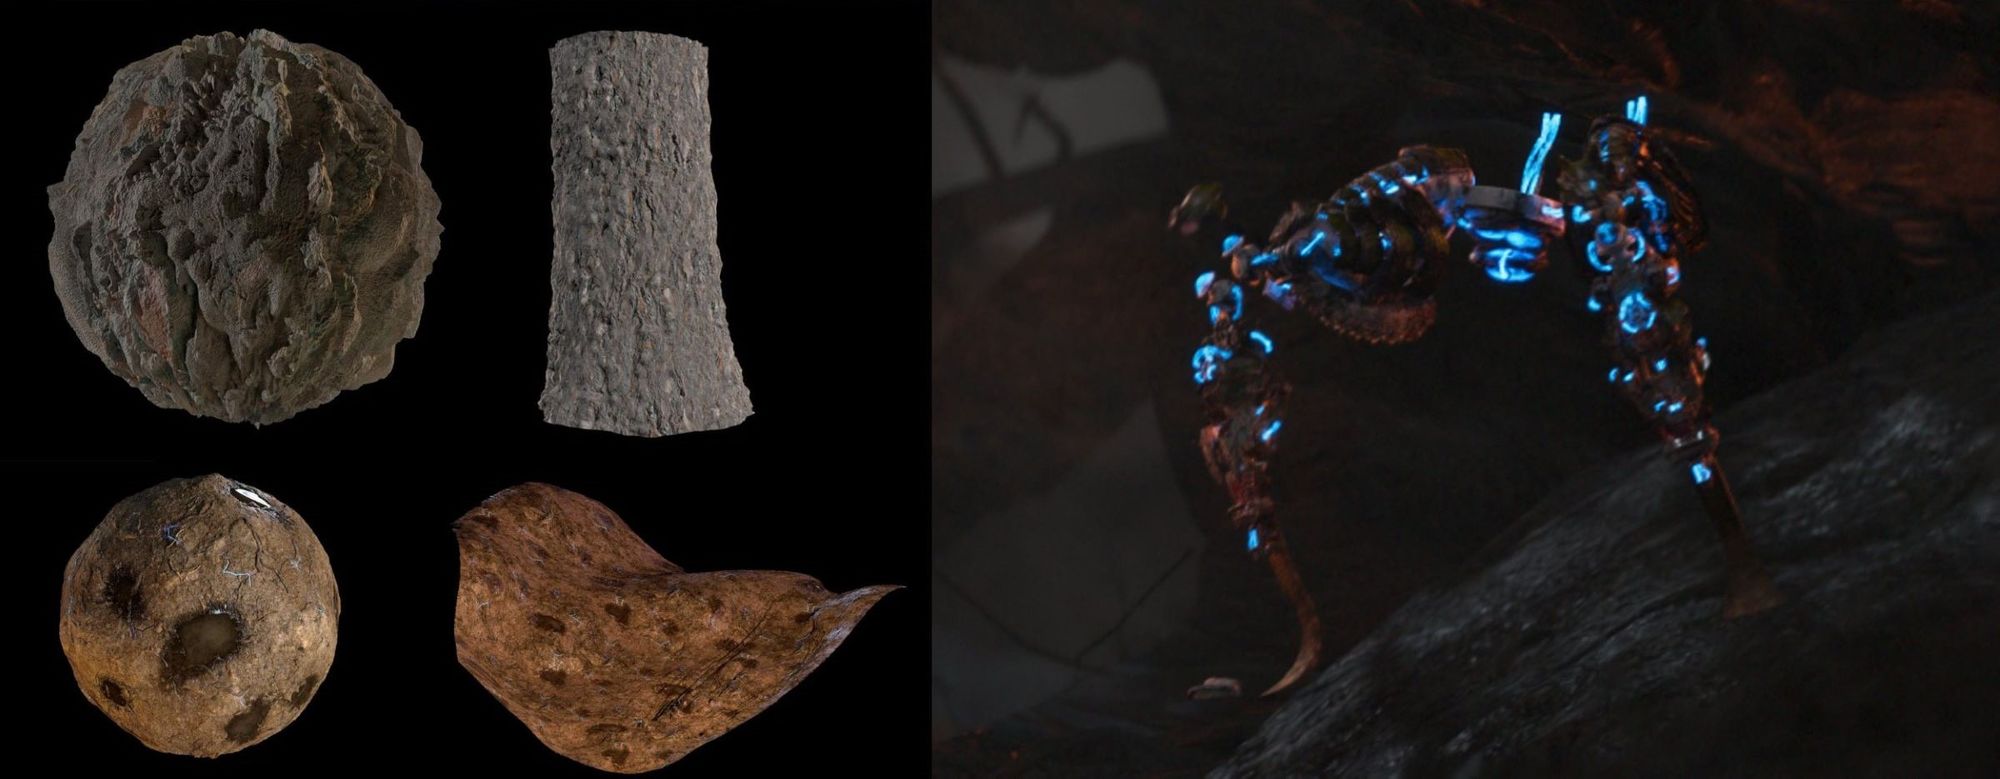
In the dark scene, we looked to make the characters stand out by incorporating a light source into the legs. I utilised different masks, including the curvature map, polypaint base, and cavity map, to enhance the alien's body with various effects. Additionally, for the legs, I incorporated storytelling elements by introducing a prominent burn mark to the body.
I used different techniques to add texture to the environment, enhancing rendering speed and efficiency while adjusting texture quality based on camera proximity. Detailing the ground with elements like rocks, roots, and rain puddles, I aimed for a sci-fi ambiance, incorporating subtle light cracks. The entire floor was crafted using Substance Designer for its procedural features. For the concealed trees, I opted for less detailed work, leveraging photogrammetry with Adobe Substance Sampler. Utilising a nearby burnt forest patch, I built an image bank and experimented with Sampler, resulting in a satisfactory outcome for this shot after a few adjustments.
FX
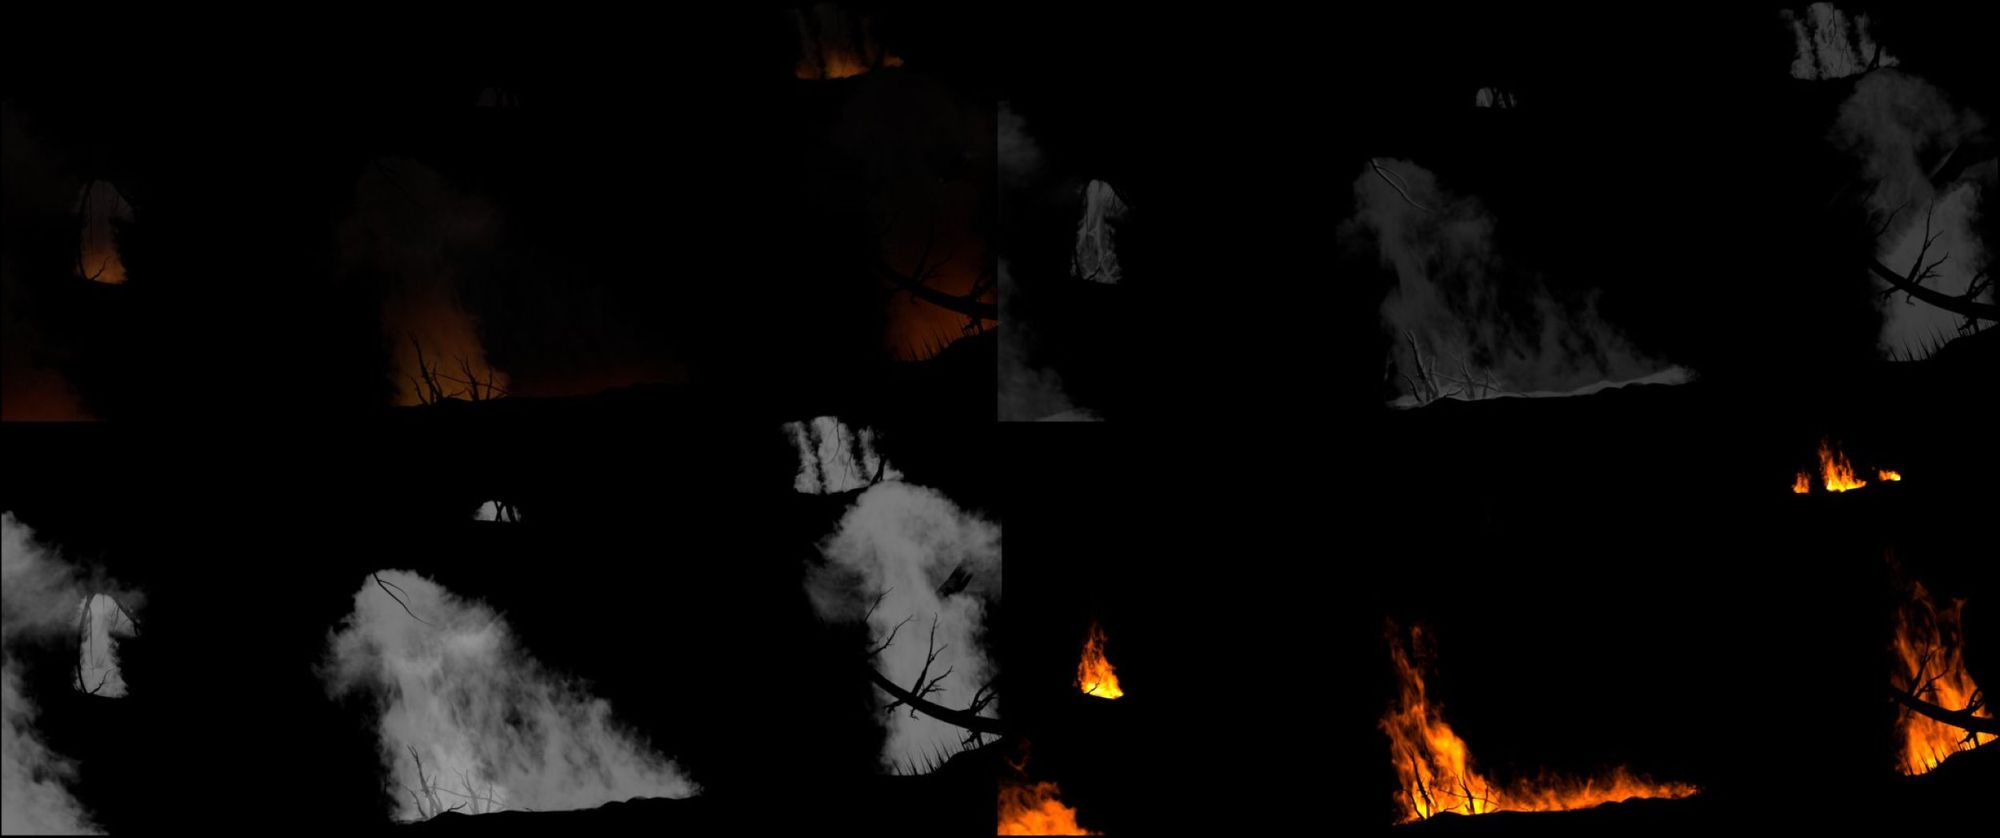
Vincent QUET: Regarding the FX, our aim for this scene was to incorporate numerous flames, heavy rain, and intense fog. Given my initial exposure to a large project, I delved into multiple tutorials to grasp the effects I intended to create. Experimenting with different approaches for the same effect, I sought the optimal solution. Creating the fire proved both engaging and challenging, requiring a delicate balance between realism for accuracy and exaggeration to accentuate the flames.
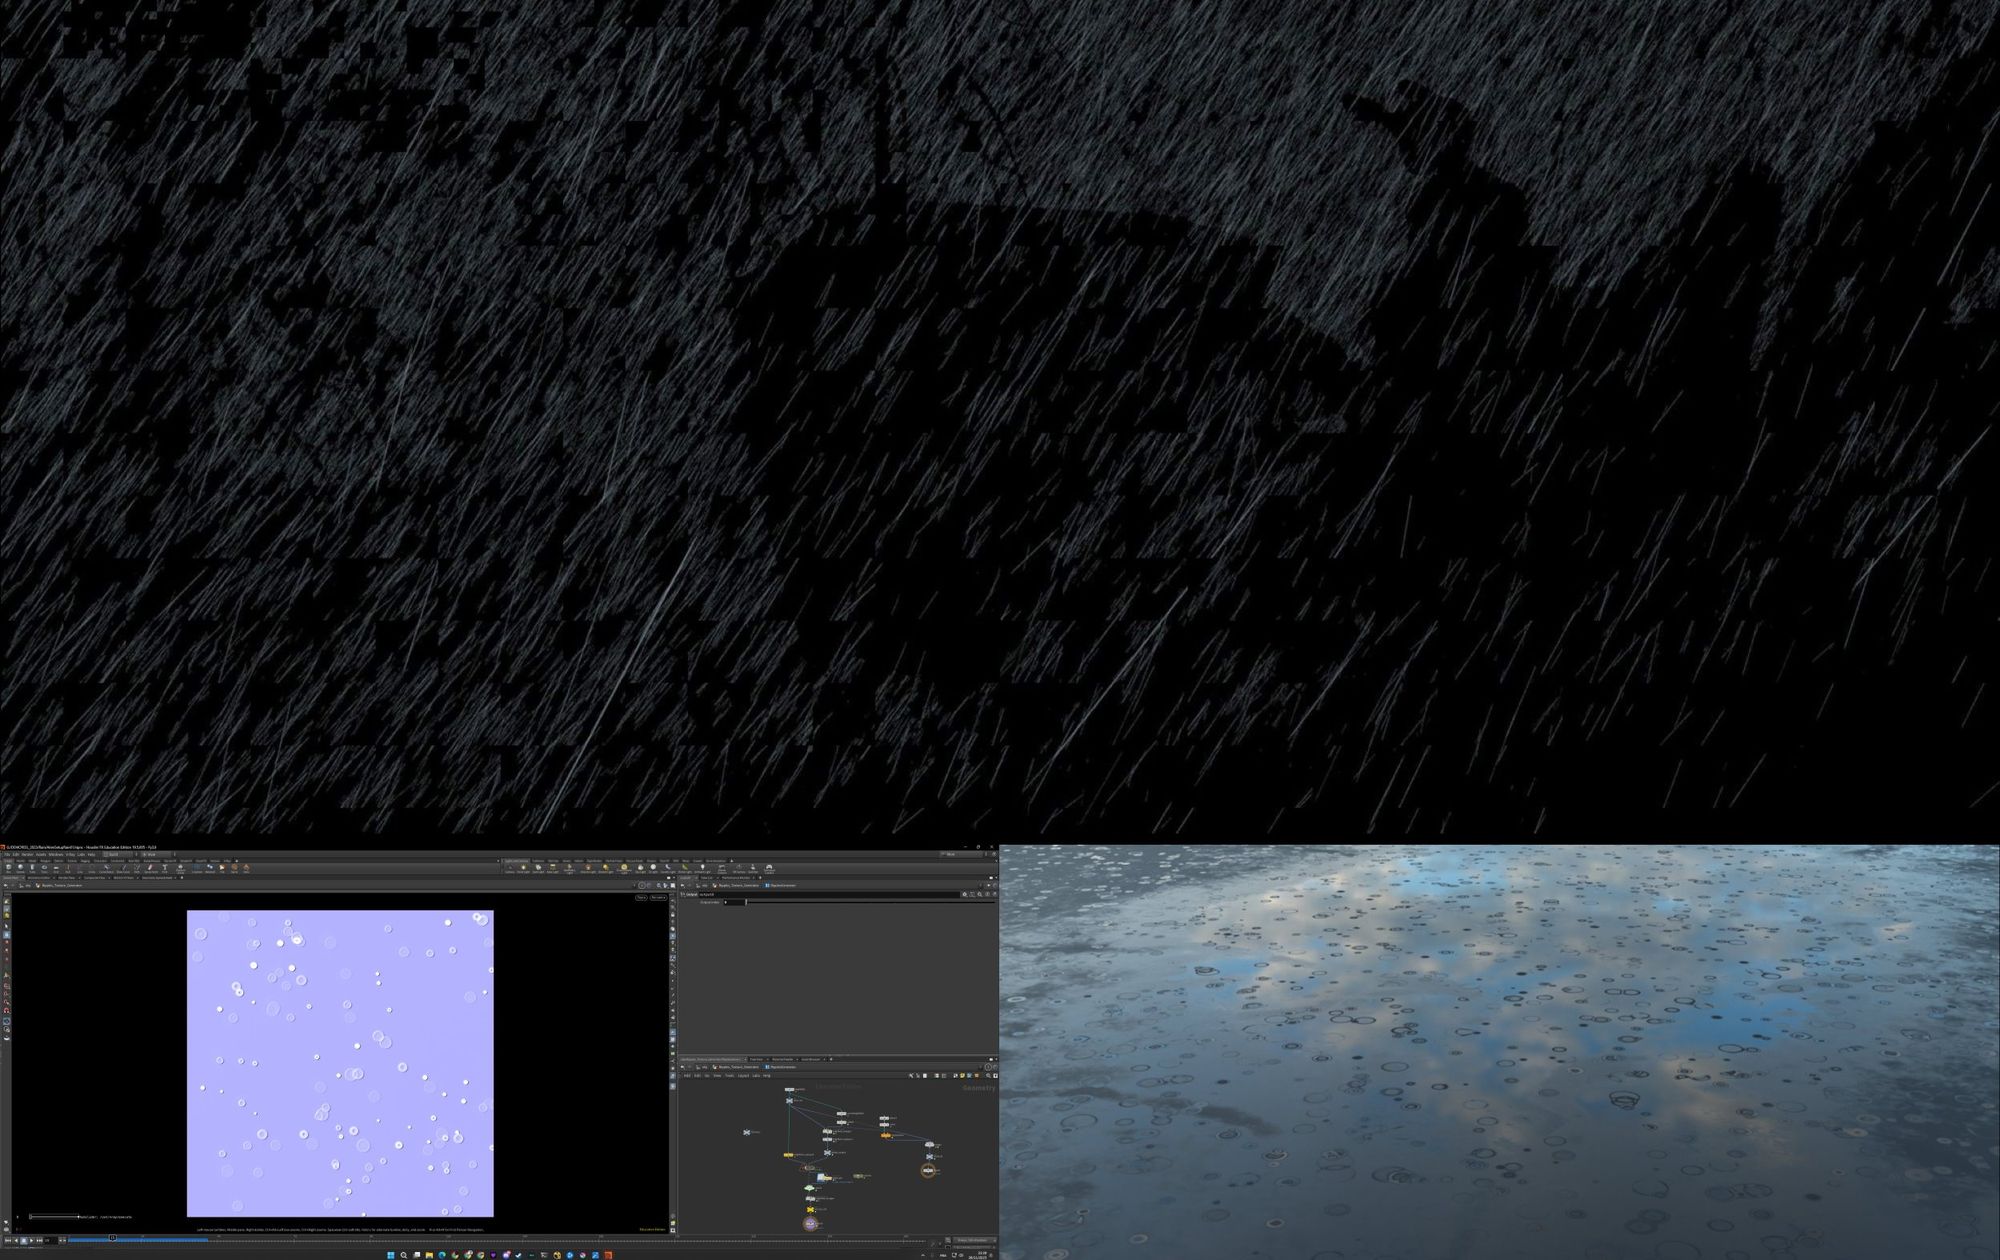
For the rain, I opted for two variations. The background rain had a less prominent scatter to expedite rendering, while the foreground rain featured a substantial scatter for a spectacular effect, aligning with the shot's ambiance. Additionally, I crafted a 2D texture to simulate ripples, although constraints prevented its inclusion in the final composition.
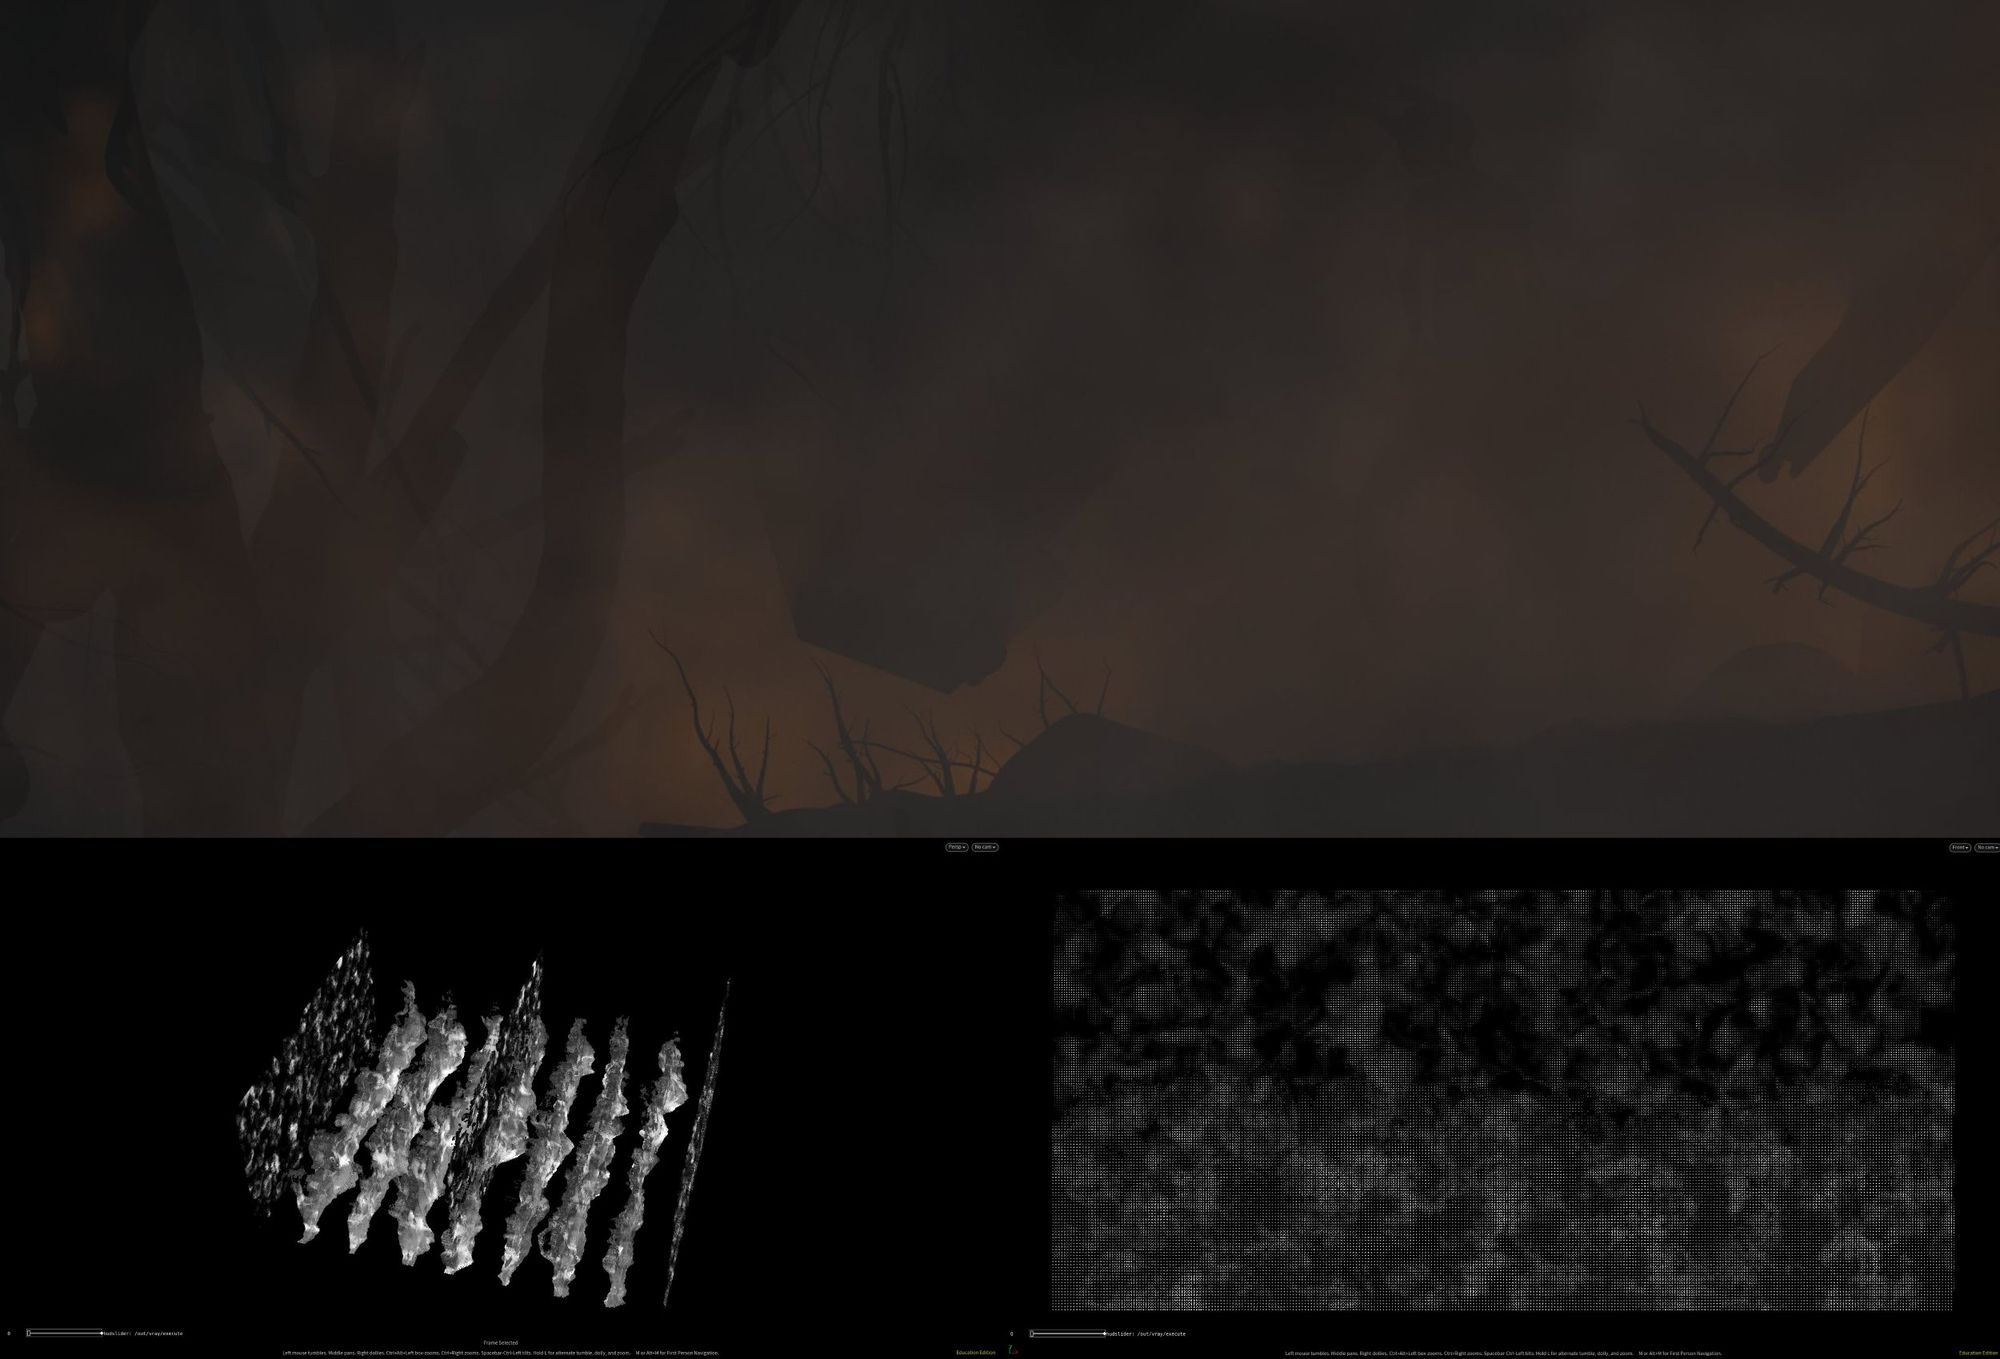
And as the final FX, I created a procedural fog. It was made so we could link it to the camera and create the atmosphere we wanted to have for this particular shot.
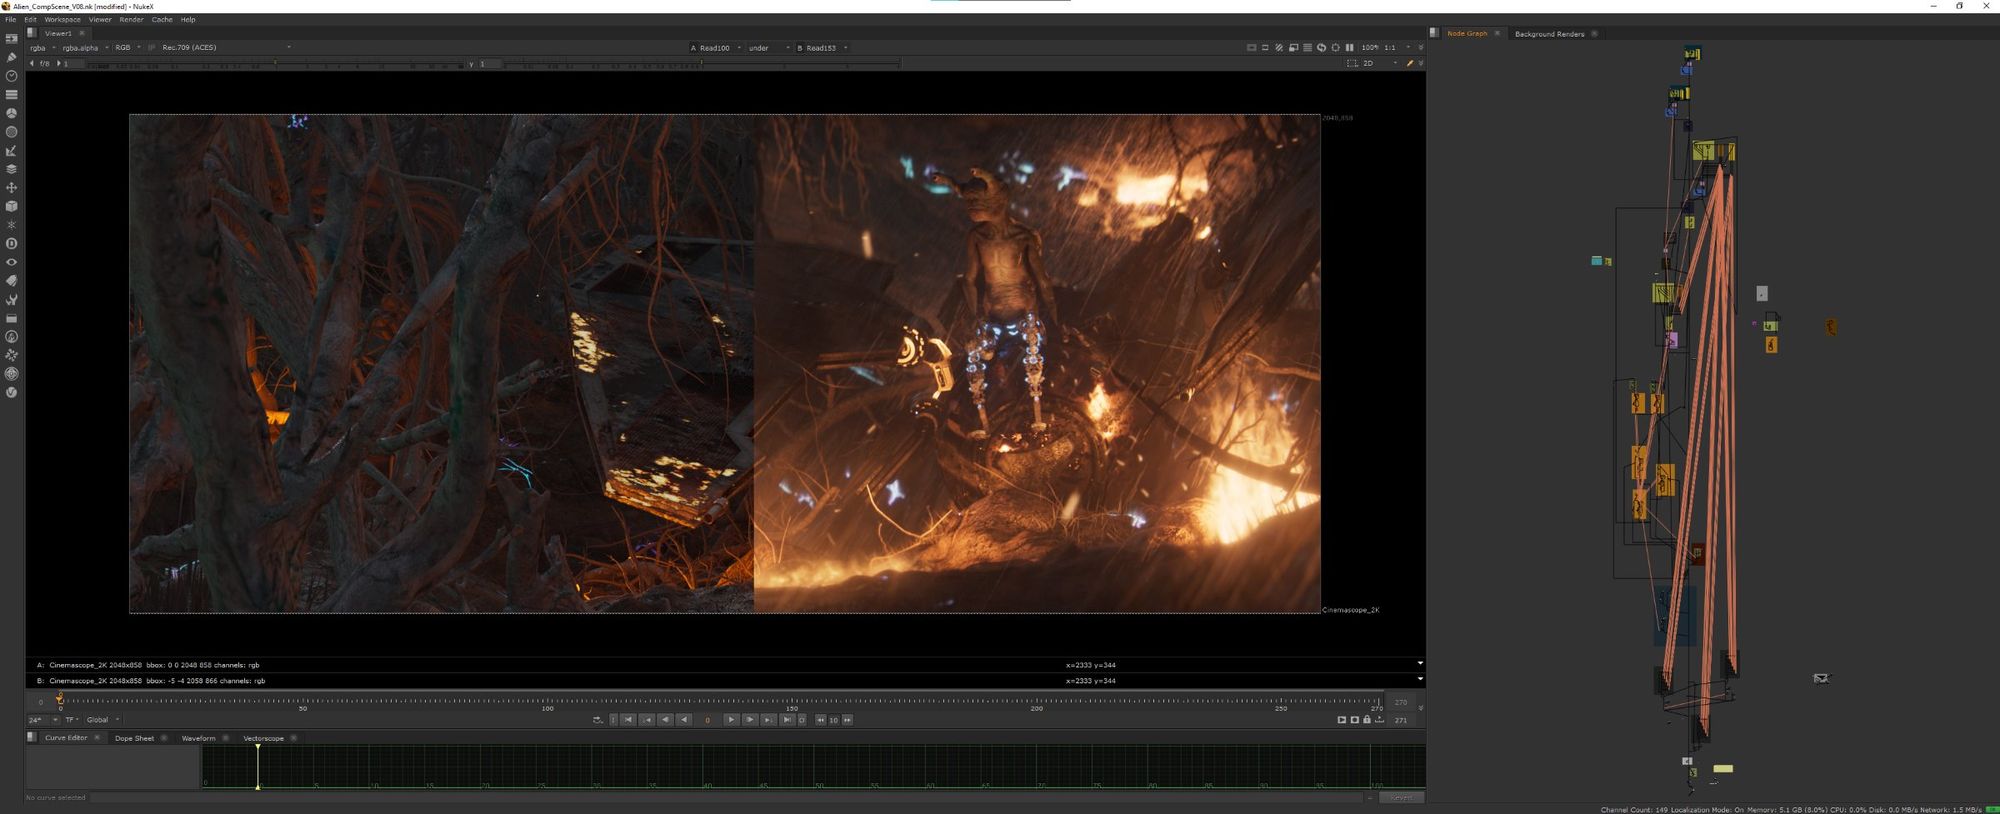
Rendering /Lighting/Compositing
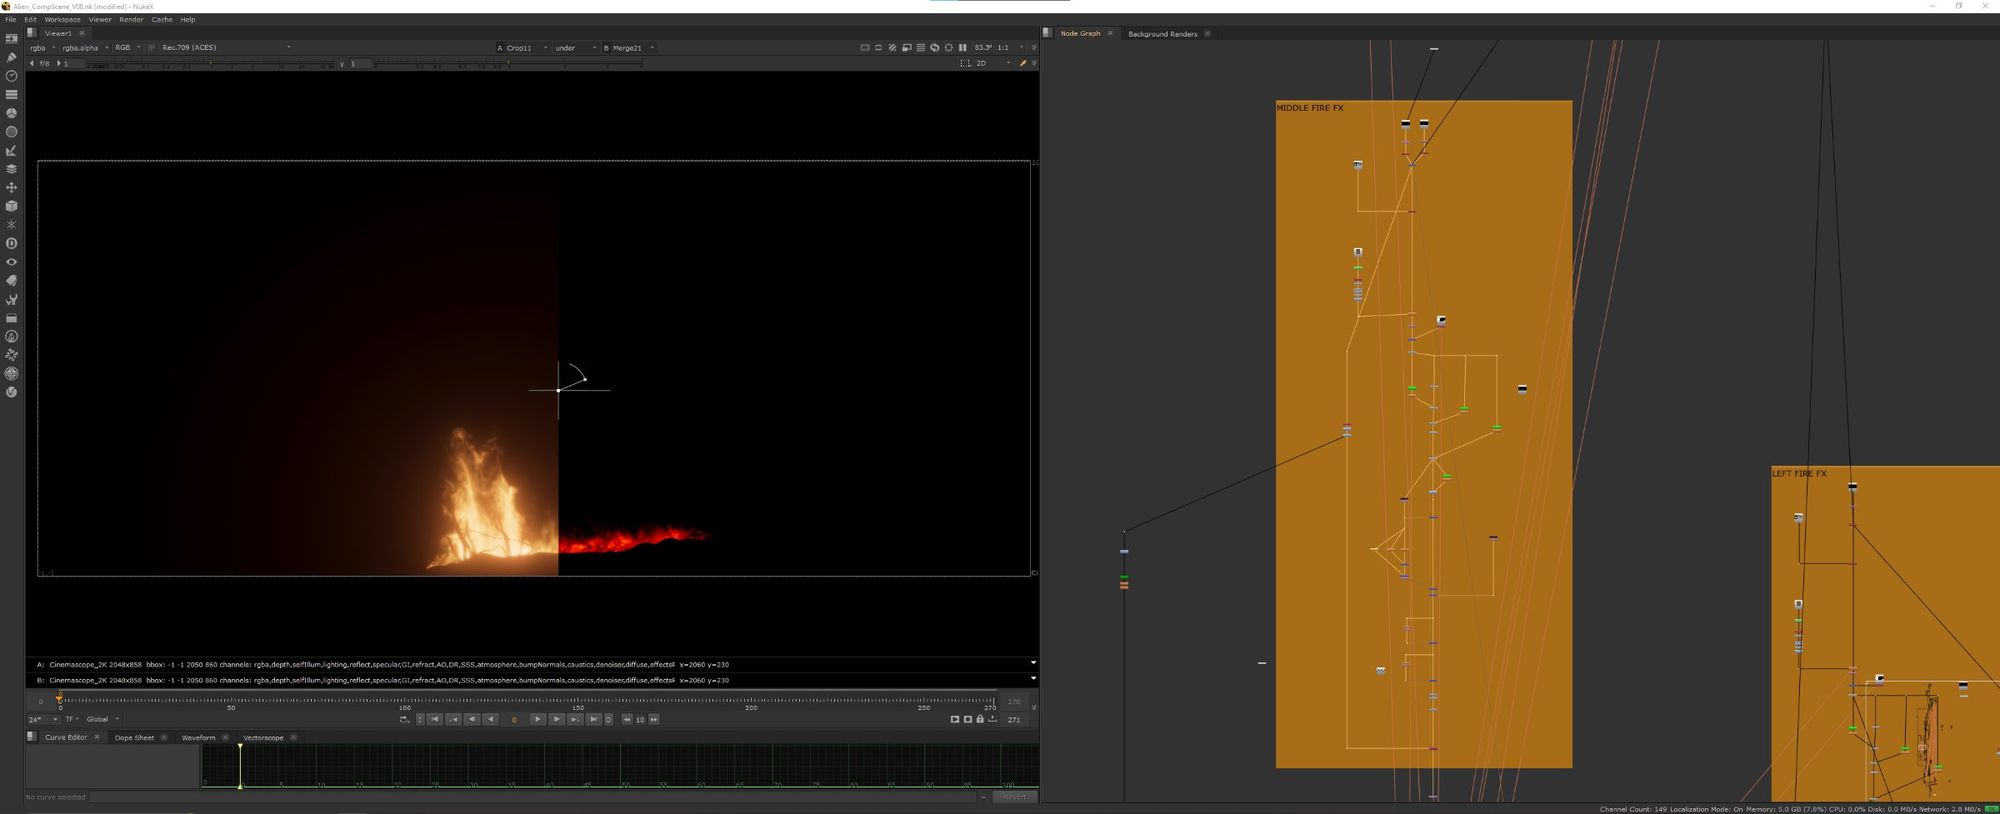
François-Clément MICHEZ: After completing the final scene setup with the environment, there was a final step remaining: lighting and compositing. It was my first experience lighting an entire scene encompassing the environment, a character, and props. Following the establishment of global illumination, I focused on lighting areas with fire. Rather than pinpointing exact intensity or color, I aimed to position the light thoughtfully, knowing that compositing would play an important role in enhancing the overall look. To ensure full control, I rendered every light pass and material AOVs for comprehensive adjustment in Nuke. This presented a new challenge, as I had never composited FX into a scene with matching lighting before. Fortunately, the outstanding FX render allowed me to manage colour correction seamlessly.
The main challenge was getting the right exposure for the different elements so the scene wouldn’t look like an HDR. That’s why I changed the brightness of the fire lighting in Nuke. I did this by using a random expression for the gain. Then, I animated a second adjustment to match the fire's intensity. This would allow me to match my lighting done previously (thanks to the light passes) to really blend the Environment Lighting with the FX.
Final Breakdown & Thoughts
Overall, this project serves as a representation of our third-year journey as VFX students. Starting from a modest idea that we initially doubted would gain much traction, it unexpectedly evolved into our most significant undertaking, presenting challenges over nearly five months. This experiment taught us valuable lessons in exploring new rendering engines, teamwork, and bridging different software to establish our pipeline. The project is a memorable achievement throughout the year, and it holds a special place in our minds. In essence, even amid uncertainty about possessing the necessary skills, we dedicated ourselves to bringing this project to life, and we take pride in its successful realisation.