Jamey Richards, undergoing specialised training at CG Spectrum to become a 3D Character Artist, aspires to sculpt characters from his childhood and original designs. Explore his latest Anatomy Study and glean insights into his learning journey.
Jamey Richards is currently training to specialise in digital sculpting and modelling at CG Spectrum, to become a 3D Character Artist. Aspiring to start a career sculpting characters, some he grew up with and others of his own design, Jamey shares details of his latest Anatomy Study and what he has learned along the way.
The funny thing about learning an artistic skill, is that no one can teach you exactly how to do it. You can watch demonstrations, take instructions and receive advice, but in the end you will need to be courageous, exploring for yourself and finding your own way to it. This is true because: while the medium may be the same between two artists, no two artists are the same. It is you that wields the tool in your hand, and as with everyone’s uniquenesses, we each have our own instinctive ways of creating. While workflows can be outlined and processes detailed, step-by-step, it is good to remember that the act of making art is deeply personal.
With this said, every artist’s individual approach should be underpinned by the fundamental principles of the craft, and can benefit from sharing in the experiences and insights of their peers. Although there is no map that leads us from start to finish, it’s helpful to have a guide; to get started, to refer back to throughout the journey and to keep oneself on track. This is all I aim to share here; some advice for sculpting an anatomy study in digital software, some details about the tools I use and why I choose them, some tips I find helpful and a reminder of the building blocks that form the foundation of sculpting an anatomy study.
Preparation
Reference
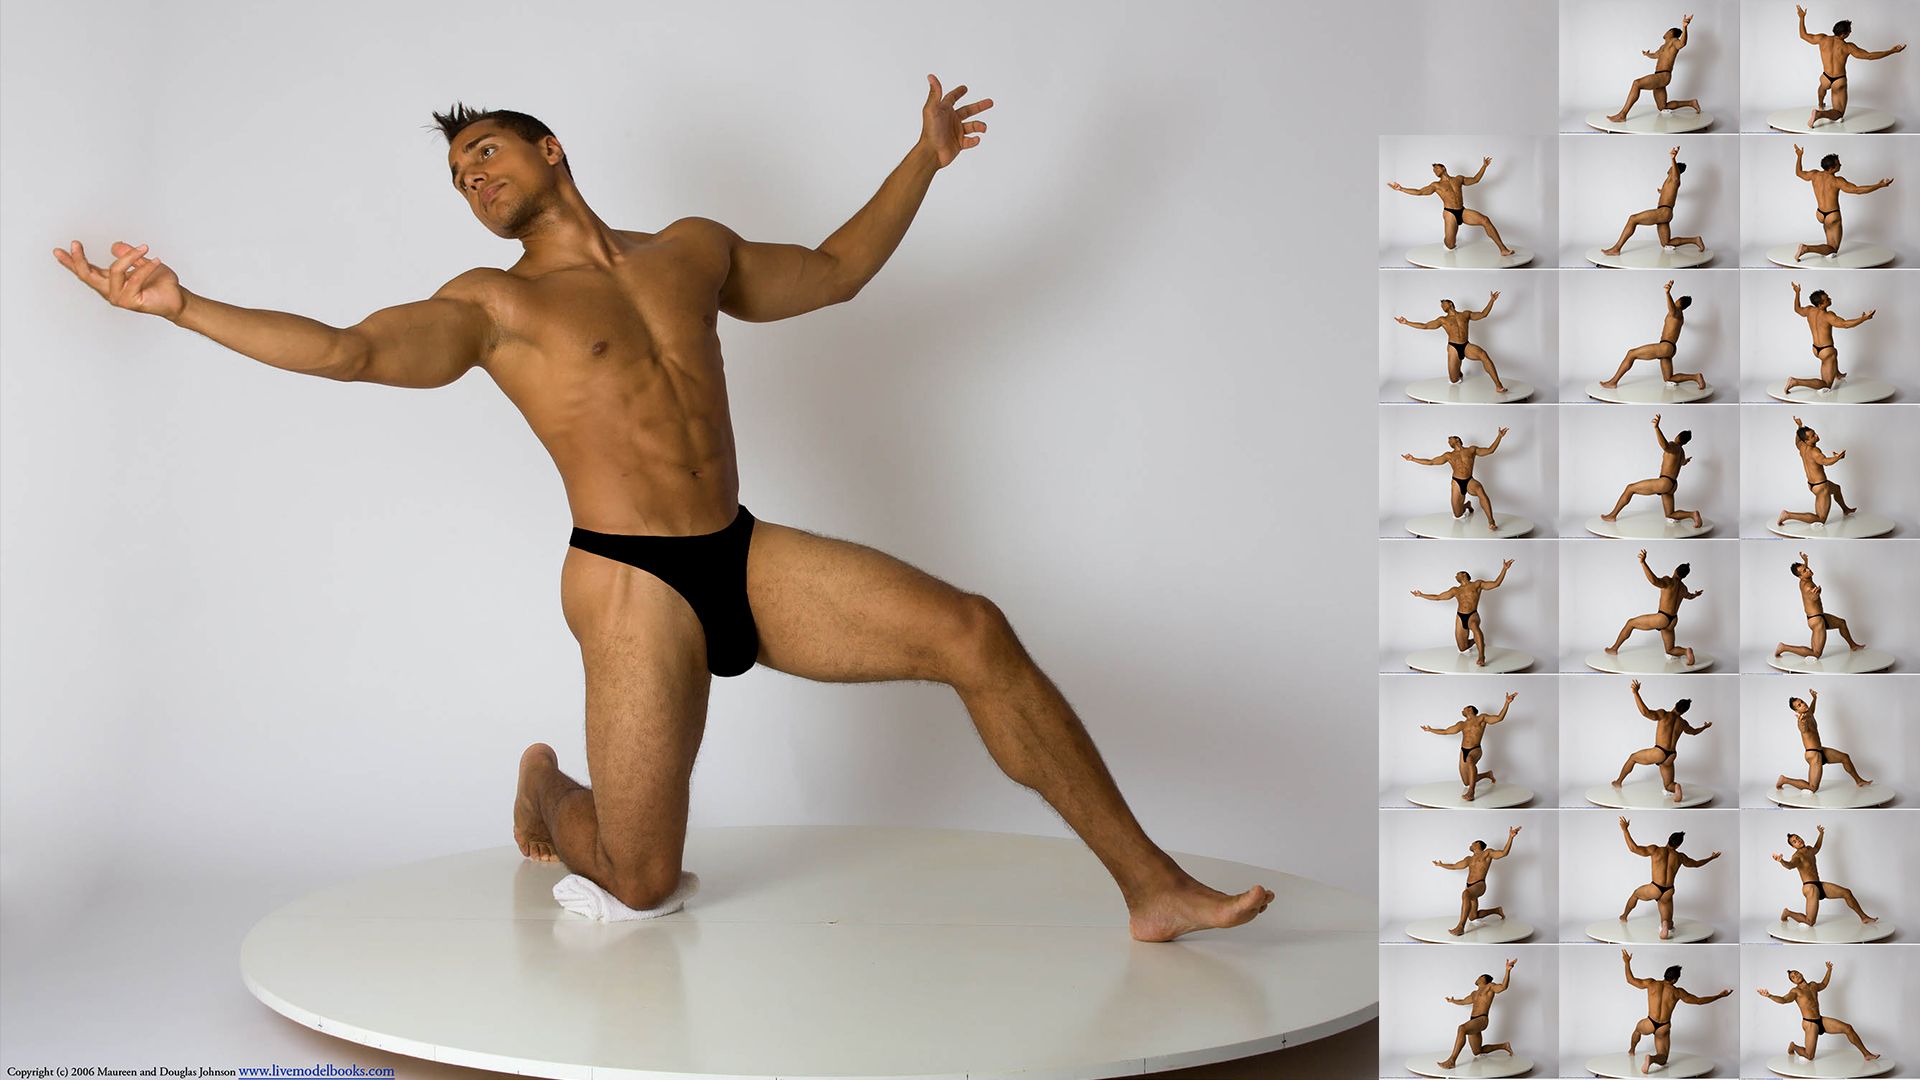
An anatomy study is exactly that: a study. It is the process of attaining knowledge. In order to study you need a resource to learn from, which in our case is a collection of reference photos. To set yourself up for success and to learn as effectively as possible, ensure you have high quality images to work with. Ideally, you will have several images of the same model, striking the same pose, under the same light source. These should be of a high enough resolution that you can clearly make out the details, as you will want to see what is happening with the more subtle forms that make up the figure. By using unambiguous images you will remove the unknown from your study and enable yourself to focus on developing your sculpting and observational skills unhindered. For high quality photos of figures in turnaround poses, I recommend Posespace.
Posespace Provides High Quality 360 Degree Turnaround Image Sequences of Posed Models
Anatomy
Knowledge of anatomy is the the next on the supply list. While you may not have an extensive understanding just yet (after all, that’s why we sculpt our studies), this is no reason to hold off from beginning. Your knowledge will develop through practice. When starting out, arm yourself with some good books on anatomy, keep them open and refer to them throughout your study. I recommend Atlas of Human Anatomy for the Artist by Stephen Rogers Peck. Personally, I’ve found that jumping right in, using the books as reference and learning anatomy while sculpting, is a more preferable and productive way to study than hours of reading and memorising.
The funny thing about learning an artistic skill, is that no one can teach you exactly how to do it. You can watch demonstrations, take instructions and receive advice, but in the end you will need to be courageous, exploring for yourself and finding your own way to it.
With this approach you’ll become more invested in studying specific areas of anatomy as they come up in your sculpts. This is also a great trick to get going and push through any procrastination. Your growing knowledge of anatomy will support and supplement your reference photos, as it provides you with an understanding of what is happening beneath the surface of the skin, which helps you draw conclusions on your observations when the reference is ambiguous.
Observation
Observation is the cornerstone of an anatomy study and a core skill to develop. To observe well is to learn to look without bias and to see with truth. Over time your observational skills will become refined and you will be able to override your biased mind, which thinks it knows an object better than what your eyes see. Start by taking a few quiet minutes to familiarise yourself with your reference images, imagining the forms as they may be in real life. Nature is nuanced, and the more you practice looking with intention, you’ll notice that there is a lot more variety in the world around us than we imagine in the pictures of the world we hold in our mind. It’s with these variances that we can add a level of realism to our work and create digital works with a human touch.
Sculpting
The Technical Stuff
I work with Maxon ZBrush, so this is what I will be referencing from here on. However, as I don’t rely on any particularly specialist functions within the software while sculpting an anatomy study, I’m confident my workflow can be adapted easily to other programs.
I’ve found the best way to approach sculpting an anatomy study in ZBrush is to create a digital workspace that resembles the real-world as closely as possible. With this in mind I temporarily ignore everything that relates to good topology, subdivisions and other technical aspects of modelling for production. I also bypass any assistance and features that come with the software, such as; automatic symmetry, the lazy-mouse and brush varieties. The focus of a study is on; broadening anatomical knowledge, developing observational skills and practicing sculpting fundamentals, which means we can forget the pipeline workflow, for now.
In ZBrush, I recommend starting with a simple DynaMesh Sphere 128, working with DynaMesh enabled and using only two brushes; the Move Brush and the Clay Buildup Brush. That’s it. I won’t be sculpting any detail that would require Sculptris Pro, so that can be turned off, and I’m not working towards a refined model, so there’s no need to use the Smooth Brush or an overly dense mesh either. Finally, I avoid using a MatCap Material. I find it helpful to use a Basic Material with a single light, the position of which I am able to adjust in order to assess my forms through the shifting shadows and highlights. For a great Plastiline Material I like to use, I recommend Glauco Longhi’s ZBrush Setup Pack.
The Process
In the case of an anatomy study, the primary forms outline the bulk of our sculpt, defining the silhouette and capturing the gesture of the figure.
The fundamental tenet of the sculpting workflow, as in common with so many creative workflows, is: To develop a work in stages of increasing complexity, beginning with the large and simple primary forms, followed by the medium-sized secondary forms and finally, adding the small features of the tertiary forms.
Secondary forms are added into this, defining the peaks and valleys that give shape to the muscles and where some areas of the skeleton can be seen under the skin, known as the bony landmarks. The secondary forms converge and create lines that flow through the primary form, enhancing the figure’s gesture with movement and energy while also defining the proportions. The tertiary forms are the small details such as wrinkles, hair and the texture of skin, which are added as final touches to finish an artwork. Unless my study is of an isolated feature, such as the eye or mouth, I won’t be adding tertiary forms.
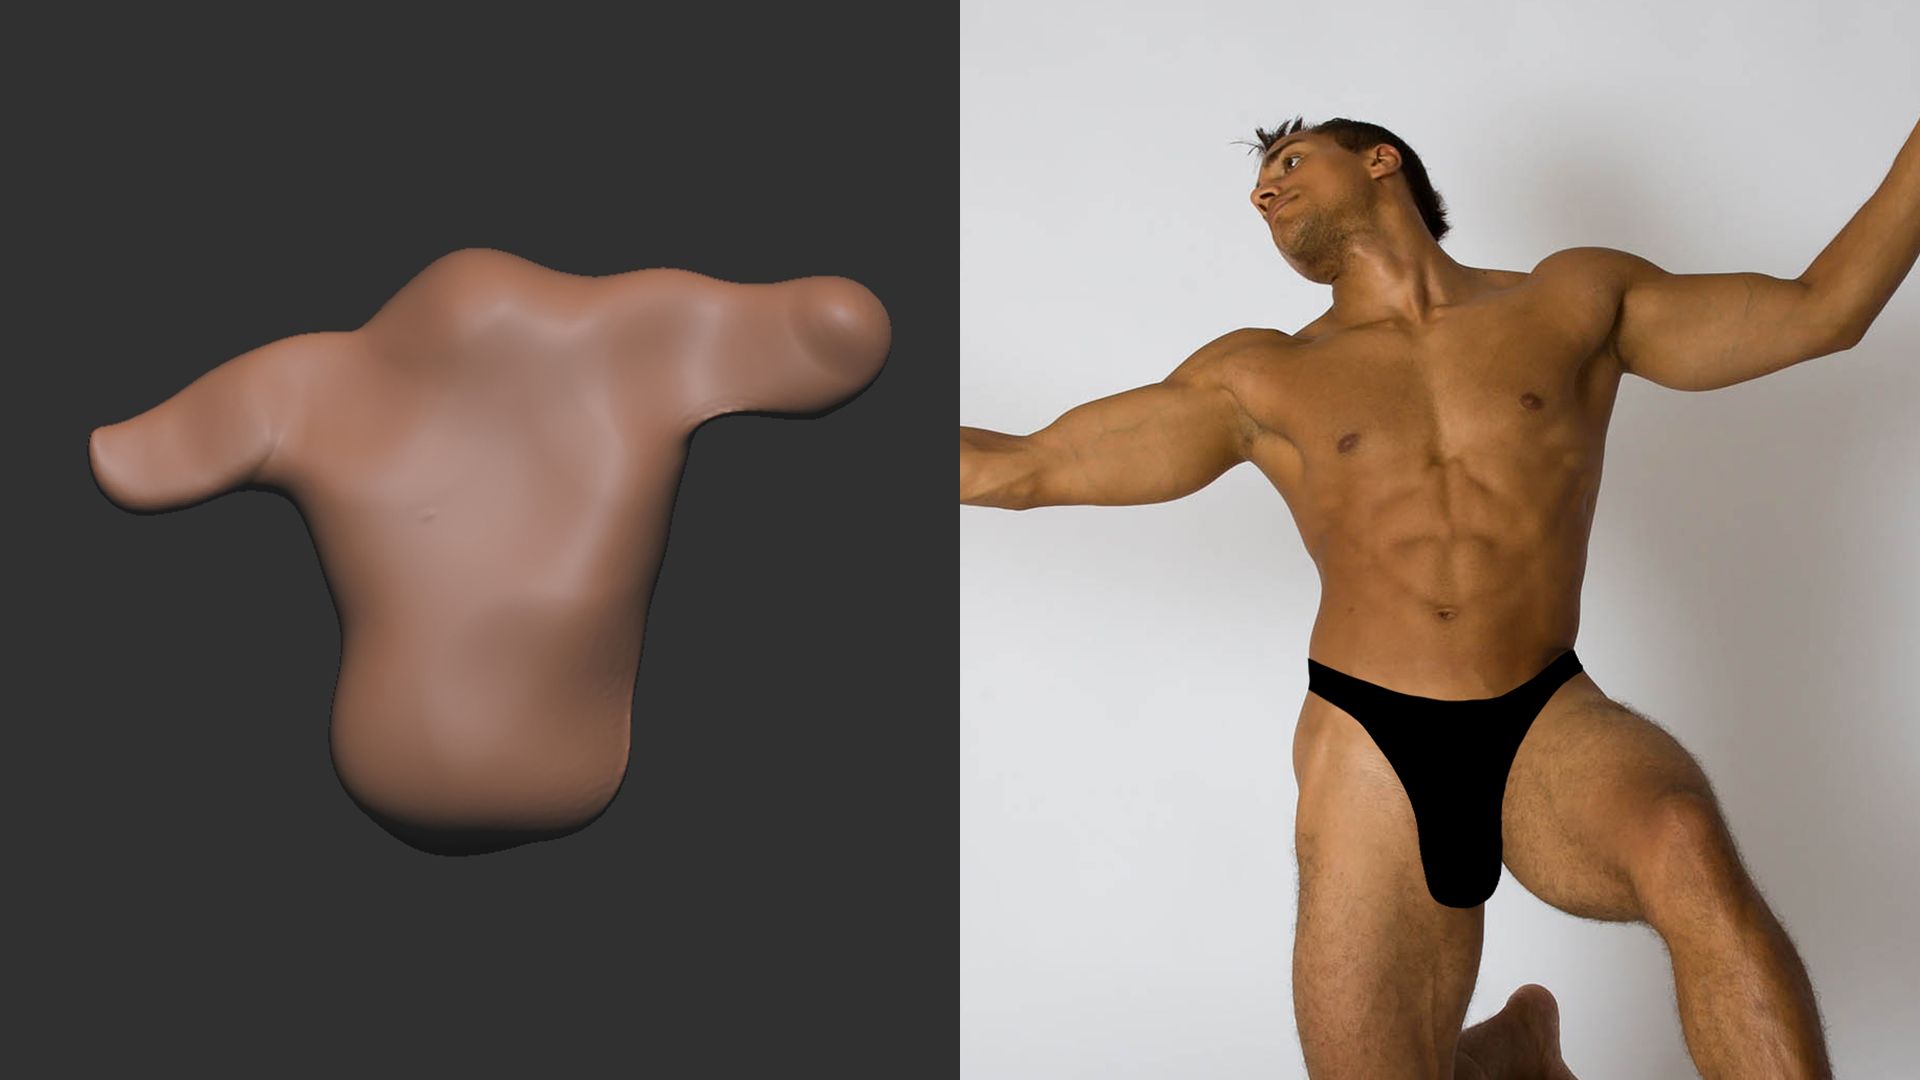
Primary Forms
Beginning with my DynaMesh Sphere and using only the Move Brush, I push and pull my digital clay to match the silhouette of the figure in my reference photos. I cycle through the images, considering the model’s pose from each angle while rotating my sculpt to matching the orientation. In each view I work and shape the digital clay to match the revolving silhouette. A great way to check your work as you advance through this early stage is to alternate between; matching the sculpt and the figure and matching the negative space around the sculpt to the negative space around the figure. Where the positive shapes of the figure and the negative space of the environment converge, the outline of the figure forms and determines the silhouette. I know I’m done with the primary forms when, after a few revolutions around my sculpt, I can’t find any more adjustments that can be made using the Move Brush alone.
Stay Loose and Quickly Define the Primary Form of Your Model by Matching the Silhouette from Each Angle
The Framework
With the primary form as a foundation, I prepare to add the secondary forms. To set myself up for more fun and less frustration down the line, I first sketch in a framework. I use this framework to orient and position my secondary forms, and also as a means of measuring and maintaining correct proportions. This is made up of reference points, the most important of which are the bony landmarks, and guides, such as the centre lines that run down the length of the body. With a torso study I lay in the collar bones (clavicle), sternum, thoracic arch and hip bones (anterior superior iliac spine) on the front, and on the rear, the shoulder blades (spine of the scapula), 7th vertebrae and sacral triangle at the base of the spine. I mark in the hips and the rib cage around the sides and connect the spine of the scapula to the clavicles atop the shoulders via the acromion process, which I mark as rectangular depressions. I finish off my framework by cutting in a centre line for the spine and another down the front, which I’ll use later to position my pectoral and abdominal muscles.
Sketch in the Bony Landmarks and Other Observable Elements of the Figure to Act as a Guide for Secondary Forms
Before blocking in the forms of the muscles, I make any final adjustments to the overall proportions that may be needed, using the distances between the landmarks as reference points. As an example, in my sculpt I check if the ratio between the acromion processes and the suprasternal space to anterior superior iliac spine is the same as the ratio between those same distances in the reference images. This applies universally, no matter what area of the body you’re studying: simply compare the distance between two defined points against the distance between another two points and so on. Now I can finally begin adding the broad shapes of the secondary forms, where the fun begins.
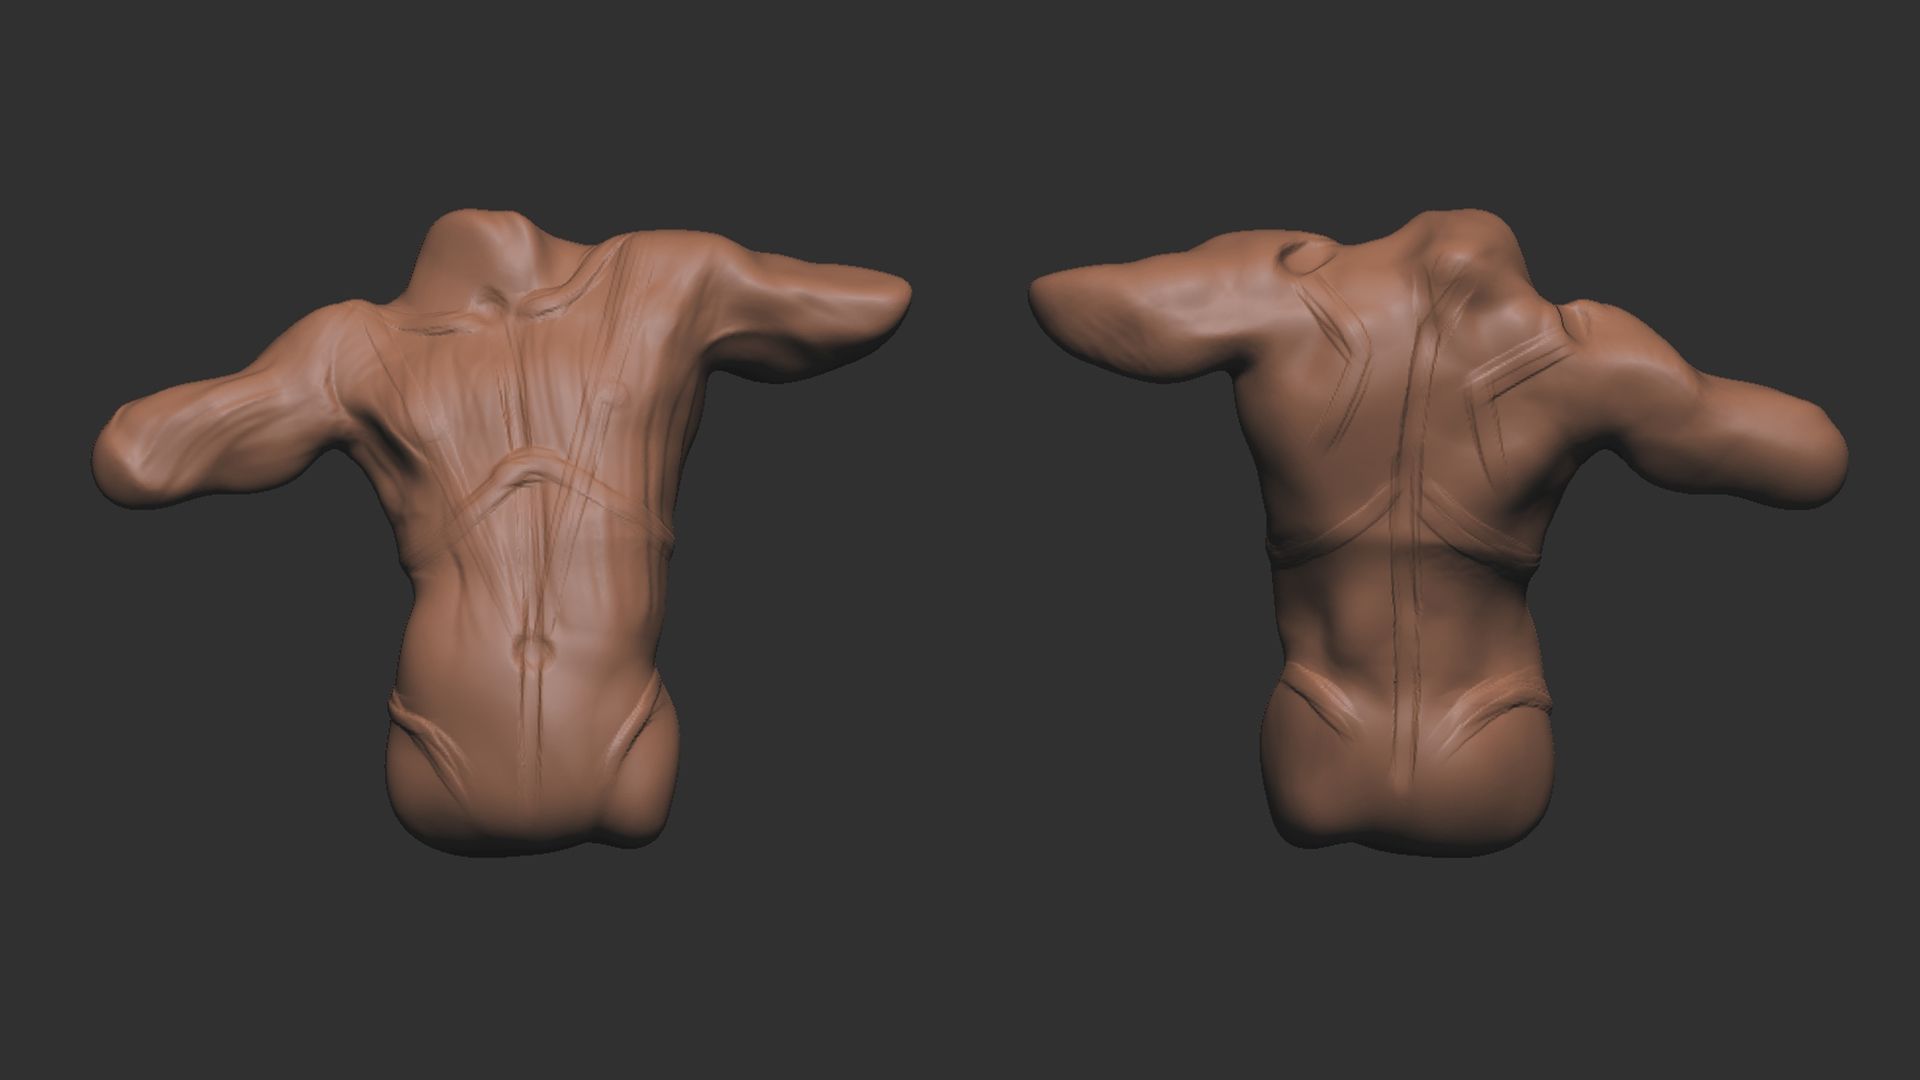
Secondary Forms
This is an exciting part of the process, where the sculpt starts resembling the figure in the reference. The book, Anatomy for Sculptors, has some great depictions of the human form simplified into simple, block-like shapes. Using the framework to apply these planar shapes to the forms observed in the reference images, it’s with ease and pleasure that I block-out the secondary forms of the figure. To add clay to my sculpt and build up my forms, I use the Clay Buildup Brush, for which I lower the Z-Intensity and vary the pressure of my stylus on my tablet. I like to begin with the muscles that are most well defined, such as the pectorals on the front or the trapezius on the rear. If I’m adding a lot of bulk I work perpendicularly across the muscle with heavy strokes, before moving along the length of the muscle, in the direction that the fibres run, in lighter sweeping strokes. This alternating direction gives an effect similar to cross-hatching when sketching and the non-uniformity of the clay buildup brush adds a texture that catches the light and helps define the surface. Maintaining a simple approach, I use only the Clay Buildup Brush in this hatching workflow, adjusting the pressure of my hand and the size of the brush while using the alt/option key to alternate between adding and removing mass. I continuously move around the sculpt and evaluate it against the reference images, considering both general anatomical knowledge and the specific pose as I slowly build up the forms of each muscle.
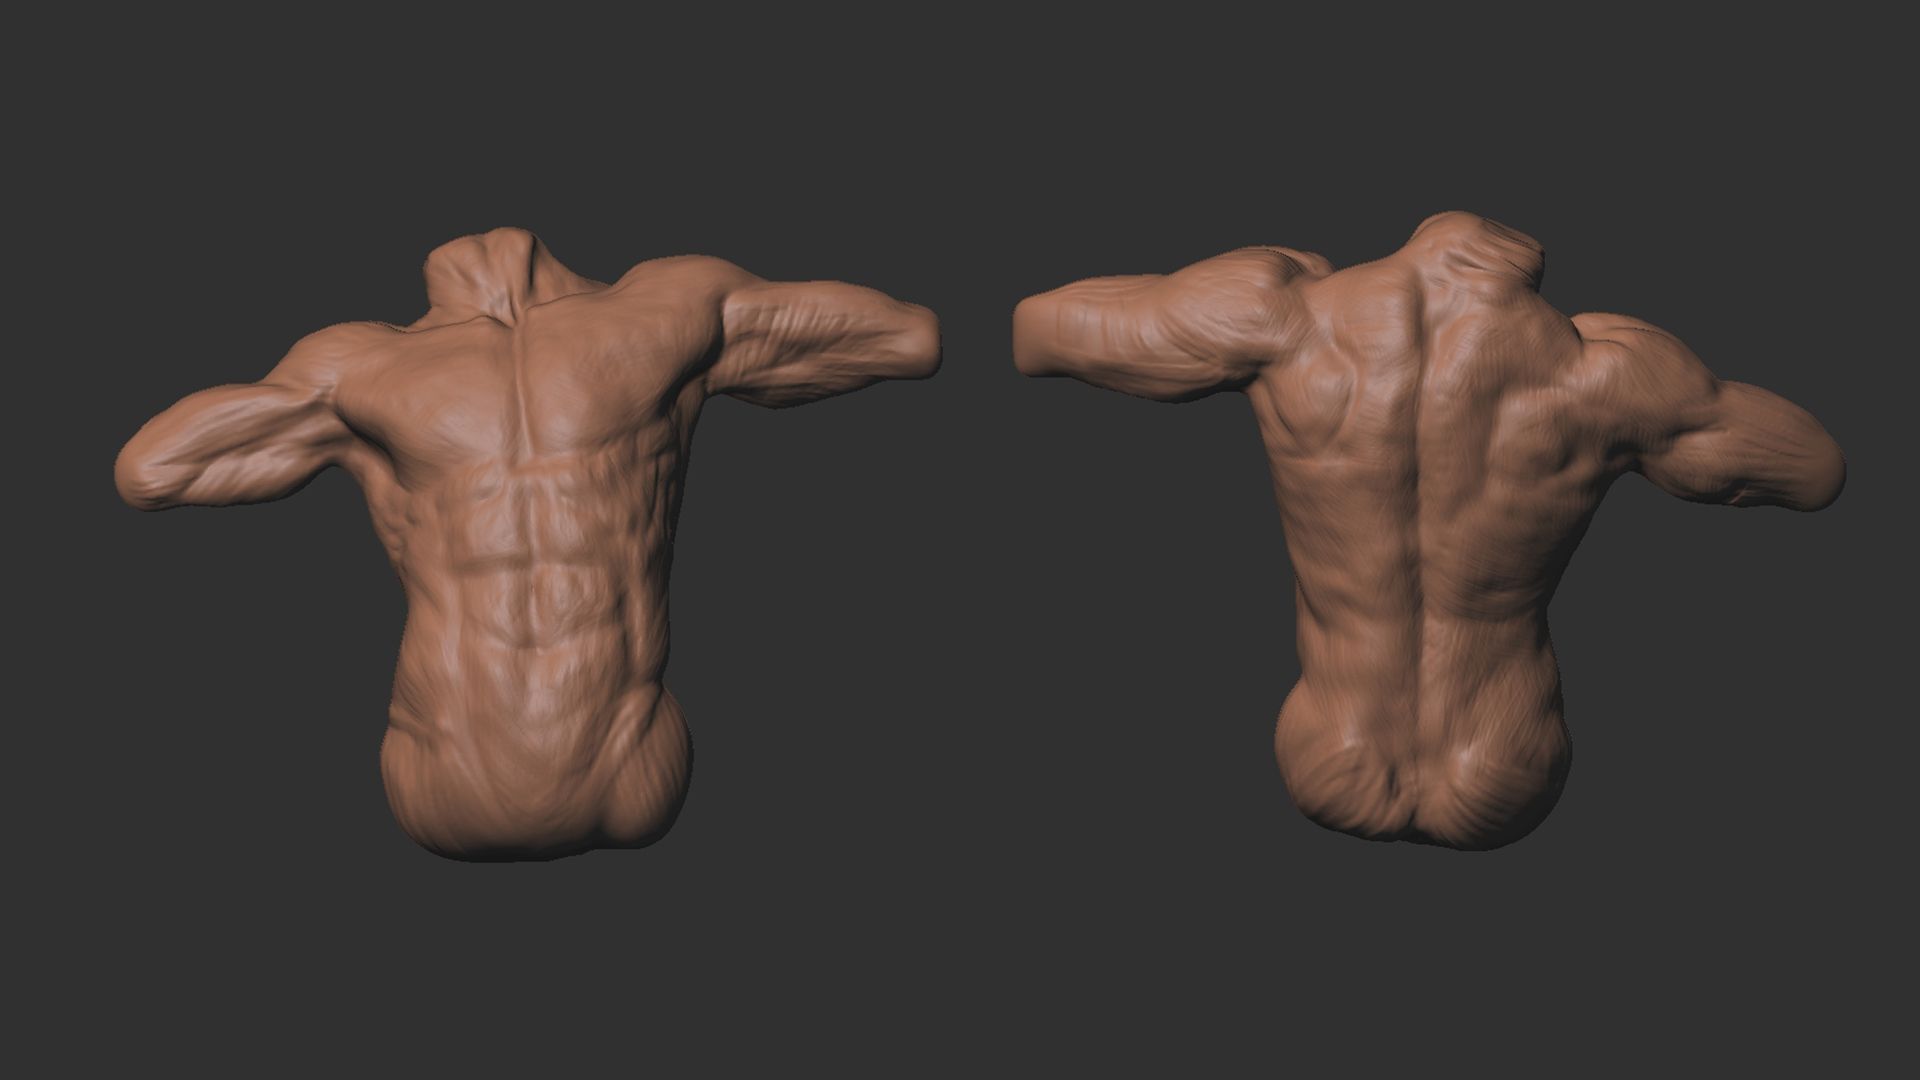
Using Anatomical Knowledge and the Framework of the Bony Landmarks to Add the Bulk of the Secondary Forms to the Primary Figure
This is the part of an anatomy study that is most enriching: What you perceive in the reference photos may be different to what you know about anatomy, and vice versa, however you will find that observation and understanding work in unison and drive the progress of one another. Through this dance between observation and understanding, we advance our comprehension of anatomy by applying it through a hands-on practice. Your understanding of anatomy will help you make sense of areas that are obscured in the figure, such as the undulating bumps and depressions across the back of the torso. By contrast, you will also notice eccentricities in the anatomy of your subject that, when applied to your sculpt, will add the realism that comes with observing life.
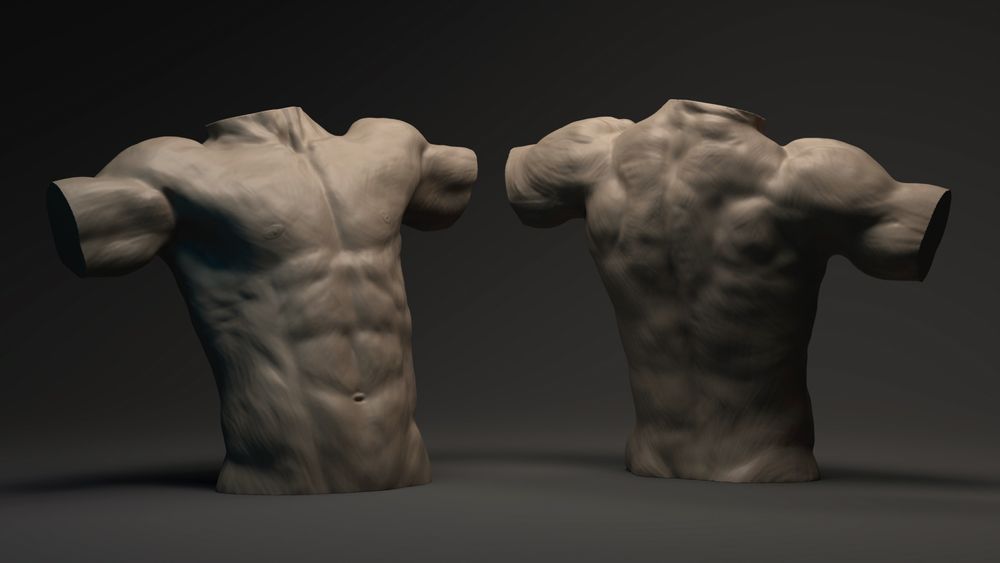
Finishing Up
As the shapes of the secondary forms settle, I begin sculpting less and scanning more. First I check that, when sculpting my secondary forms, I didn’t skew my overall silhouette or volumes. If adjustments are needed, I’ll use the Move Brush at a large size with small movements, preserving the sculpted surface while correcting the general form. I also need to check the overall volumes of the secondary forms and how they flow into one another and through the entire figure. This is where the use of a Standard Material rather than a MatCap Material becomes invaluable: By rotating around my sculpt and simultaneously repositioning my light source, I can dynamically shift the shadows and highlights to evaluate the forms as they relate to one another.
As I become more satisfied with the all-round anatomy of the figure, I prepare for a final pass. I set my light source to match that in the reference photos, so that I can work toward as close a likeness as possible. I start to soften the definitions between the muscles, adding bulk to create the layers of fat and tissue that are found between the muscles and skin, bringing the sculpt closer to reality. I progressively reduce my Z-Intensity and work with an increasingly light hand, as a way of polishing the surface without using the Smooth Brush. This is great practice for getting in tune with the pen pressure of your tablet.
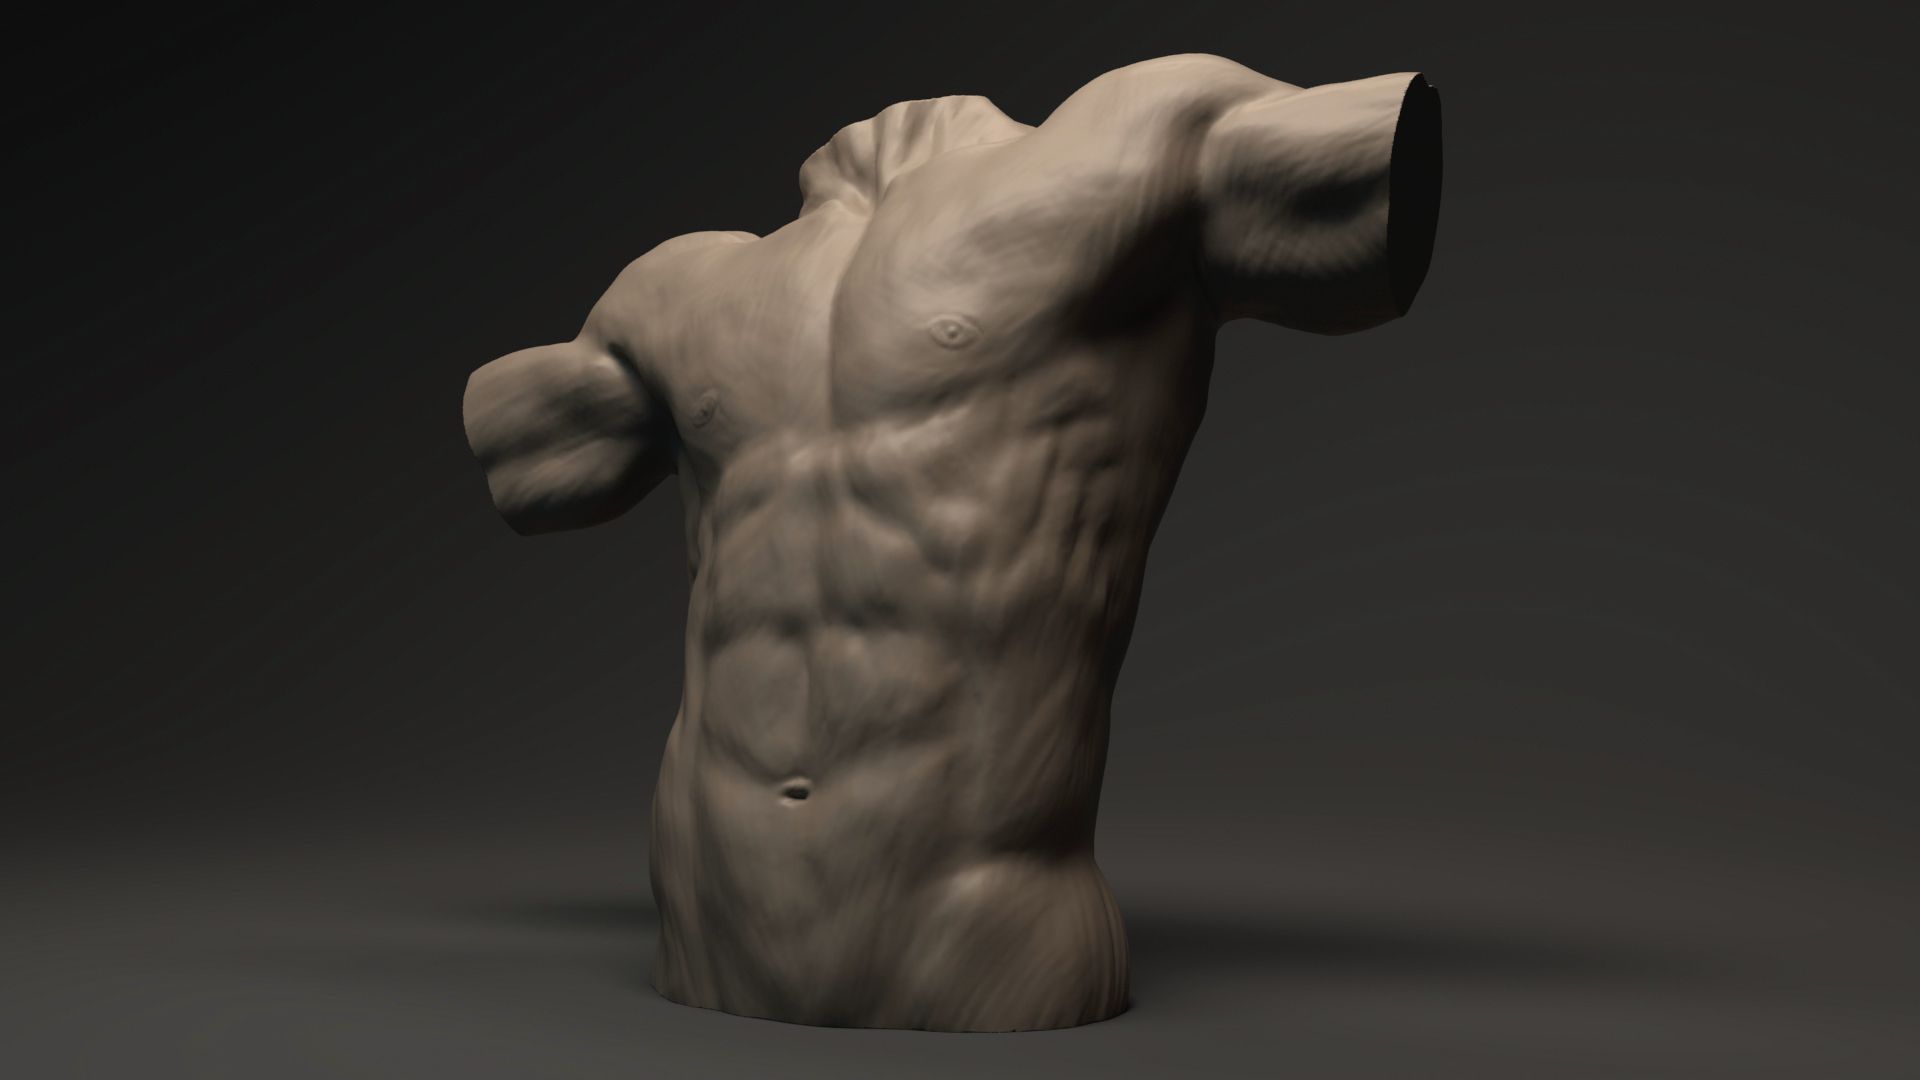
Refine the Secondary Forms with Multiple Light Passes, Capturing the Realism as Observed in the Reference Images
And now for the hardest part: knowing when to stop.
Remember: This isn’t a finished sculpt and it never even needs to see the light of day. This is practice. A training exercise in which the goal is to progress your craft, by expanding your knowledge and understanding of anatomy, honing your observational skills and practicing your sculpting. No software, guides, advice, tips or tricks are going to be more beneficial to the development of your skills than practicing them.
The Finished Anatomy Study
Tips
Don't Stay Still for Long
Always be moving around your sculpt. During the primary form stage, make large movements to check the big shapes and overall form against the silhouette. As you move into the secondary forms, make your movements smaller but even more frequent, as you rotate around smaller forms and consider them against the gesture and flow of the figure. Finally, your movements will continue along the surface of your sculpt, as you evaluate for uniformity and refine the surface.
Don't Be Afraid to Use Artistic Licence
If your reference image is unclear, obscured or poorly lit in an area, or perhaps you don’t have the exact angle you need, use your anatomical knowledge to fill in the gaps. Be bold and define the area with confidence, it will make more visual sense than trying to replicate exactly what you’re seeing if that’s unclear and you will be practicing your recall of anatomical knowledge.
Don't be Precious
These works are for you, for practice, not for your portfolio, so don’t get drawn in and try make them perfect in every way.
Practice makes progress.
You will learn more and you will advance faster by sculpting many anatomy studies: Ten one-hour-long studies will further your development much more than one, ten-hour-long session, in which you sculpt a single study.
You can reach out to Jamey via his Rookies profile here.