Procedural Artistry: Creating an Intricate Kimono Pattern with Substance 3D Designer
In this article, Marco Oliveri explains how he used procedural texturing in Substance 3D Designer to create a 3D garment pattern inspired by the "uchikake" kimono.
In this article, Marco Oliveri explains how he used procedural texturing in Substance 3D Designer to create a 3D garment pattern inspired by the "uchikake" kimono.

When we came across Marco Oliveri's latest project, we wanted to learn more about how he achieved the garment pattern. Inspired by the elegance of the "uchikake" kimono, Marco, a Skyup Academy graduate, meticulously analyses references, shapes, and procedurally creates elements like cranes, flowers, and vegetation. With a focus on detail, he explores the challenges of texture resolution, element coherence, and the creative freedom offered by Substance 3D Designer. The result is a wonderful 3D render that highlights the power and versatility of this software.
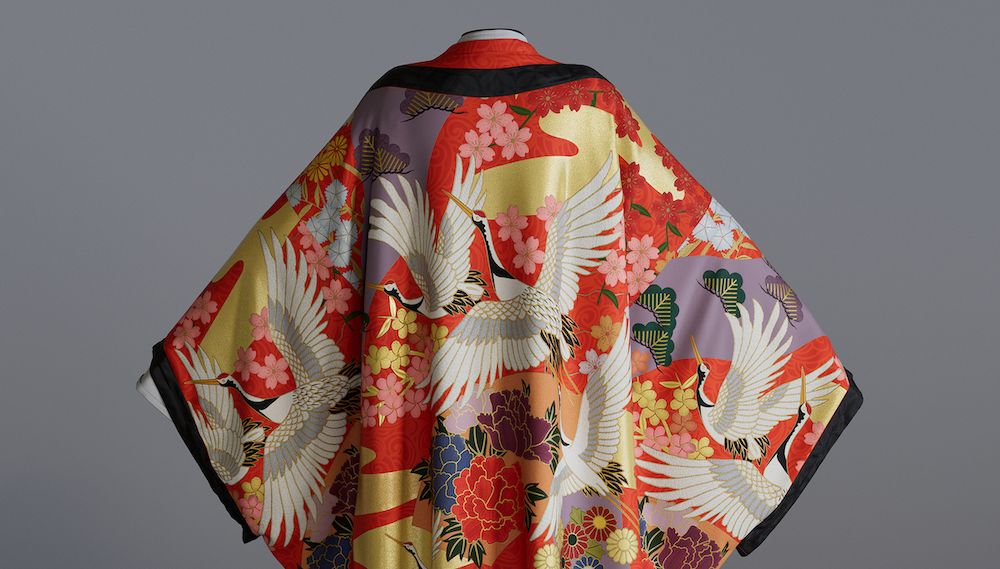
One of the first things I do is to look for a main reference to follow. I usually select multiple options and then I choose one of them. For this project, I chose an "uchikake", a kind of kimono used nowadays by brides for their weddings. Two things that particularly caught my attention in the embroidery are: the presence of cranes, a fascinating and elegant animal; and the great variety of flowers.
The most important thing at this point is the analysis of the reference: identifying the repeating pattern (in this case I recreated a vertical one) and breaking it down into its individual elements, taking into account their possible variations in colour or shape of the same element.

After an accurate analysis, we move on to the creation of the various elements in Substance 3D Designer.
When creating procedural textures, especially if they are complex, I start by recreating simplified versions of the various elements, without adding too many details. At the end of this process, I have a whole series of B&W silhouettes, which I position inside the pattern afterwards, so that they’re coherent with the original reference. This preliminary work has its advantages since the input of each element in the node tree can be conveniently replaced by its updated and more elaborate version.

Cranes were one of the few exceptions among the procedurally created elements. Since the deadline was quite tight (I had to complete the project in less than three weeks), I decided to trace them from the reference using Adobe Illustrator (it would have taken several hours or days to create them in Designer, since there are six different ones).
In this case, I created three types of B&W masks for each crane:

Having an old version of Substance 3D Designer, I couldn't use the new path and spline nodes, so I had to look for another method to reproduce certain seams.
I started recreating the stitching effects of the different parts of the body. After a few attempts, I realised that I needed to create an embroidery that followed a curve and in this I was helped by custom knots from Igor Elovikov’s IE Curve Toolbox. I used a combination of the basic IE Curve node along with the IE Area Splatter, which scatters a shape using multiple curves that drive the angulation of the seams. Among the various parameters that can be set in the node, there is also the density of the scatter and this helped me to make the embroidery as thick as the reference. This way I was able to create an embroidery that followed the inclination of the several shapes of the crane's body.
For the golden inserts, since this kind of embroidery would have been quite small in the final pattern, I went for a simple pattern that recalled cross stitch, which I adopted for other golden embroideries too, in order to have a certain consistency in the project. I created this effect with a Tile Sampler and used the brick as the base shape. Once the various elements were blended, the cranes were "sewn".

As you can see from the reference, there is a wide variety of flowers, so I tried to group those with a similar shape and embroidery, in order to build a node tree that could be used for all the flowers.
I took one of the most iconic flowers, the cherry blossom, as an example to show some of the steps I took to get to the final result.
I started creating the shape of the petal: the nodes that I used most frequently in this process were the Warp and the Blur HQ together with the Threshold. I used these two in combo to soften the edges which are sometimes too sharp or to delete some unwanted details. Finally, I used the Splatter Circular to position the petals and other smaller details.

Once the basic shape was finished, I moved on to the creation of the embroidery: this part of the process had a very "trial and error" approach since I attempted various ways to create the embroidery effect and, as I worked on it, I gradually noticed errors that I had to fix in order to achieve what I wanted. I therefore created a basic embroidery with a Tile Sampler, using the petal silhouette as a mask, and I slightly altered the linearity of the threads to break the procedural nature of the embroidery. I also adjusted the edge of the petal to make it more realistic through a Vector Warp, using the partially blurred basic silhouette as a normal map. Finally, I added the fiber details of the individual threads through some Noises nodes and other little things to break up again the regularity of the embroidery.
I then moved on and assembled the petals. To give a more organic effect to the flower, I used multiple Splatter Circular Nodes (each node had a single petal in a different position) to have complete control over the overlapping of the petals. Once assembled, I added the pistil and other golden elements (always imitating cross stitch) and the flower was finished.


I would also like to focus on the colouring of the "Big Flowers": after having created the Height, I spent some time thinking about how I could replicate the shades of colour on the individual petals (since they were rather non-homogeneous) while remaining within the procedural approach. After realising that each level of corolla could be traced back to a circular shape, I created a B&W mask starting from a blurred circle (of the same diameter as the designated level of corolla) to which I applied a Warp using the petals’ height as gradient input. Furthermore, linking a Transform node to the circle allowed me to move the shape from the center of the flower and therefore move the colour shades only in certain areas of the petals, so as to recreate the same organic effect as the reference.


Another relevant aspect of the pattern is certainly the presence of grass and vegetation. Since most of it was golden in the reference, I recreated it using the cross-stitch technique, as explained before. An element that required a longer process was the bush, which had a rather particular type of embroidery, characterised by this zig-zag effect of the threads. I experimented a lot in this case as well before arriving at the final result, and that’s why I want to focus on it, too.
As usual, I started with a Tile Sampler and then I created a B&W mask that had the zig-zag pattern, thinking I could use it in the Mask Map Input of the Tile Sampler. Not getting the desired effect, I decided to link it to the Pattern Distribution Map Input, finally arranging the threads in order to follow the zig-zag pattern. Another difficult aspect at this point of the process was finding the right combination between X Amount and Y Amount in order to have the same number of threads as the reference. So, as for the flowers, I added the details of the thread fibers, some variations to break up the regularity and I finally scaled the pattern to match the reference. Once the embroidery was complete, I followed a similar process to the one I adopted for the flowers, using the B&W masks of the bush and branches to limit the embroidery area to tidy up the edges.

The branches with leaves were in the end created very simply using the usual Curve Toolbox (but the same process is possible with the new Designer nodes), tracing a curve and then scattering the leaves along it.
The assembly was a somewhat complex process, but having already set up the node tree at the beginning using the basic shapes of the various elements, it was simply a matter of replacing the old inputs with new and elaborate ones. Subsequently, I balanced the height of the individual elements also based on the level of importance within the pattern.

In addition to the main pattern for the outermost part of the kimono, I created two other simple materials for the innermost layers: cotton and satin.
After having collected the weaving scheme references for each of the fabrics, I created the horizontal and vertical threads with two Tile Generators and then combined them using a Tile Sampler as a mask in which I had recreated the positions of the weaves. After this, I used a Safe Transform node to scale down the texture and add the final details.


In the case of cotton, I slightly altered the weave with a Warp and then used a Multi Dir. Warp to add a "fraying" effect.

In the case of satin, I decided to create a Japanese pattern called "seven treasures", which symbolises eternal peace and happiness (I chose this symbol because it seemed to be a good omen, given the type of kimono), and I integrated it onto the base fabric.
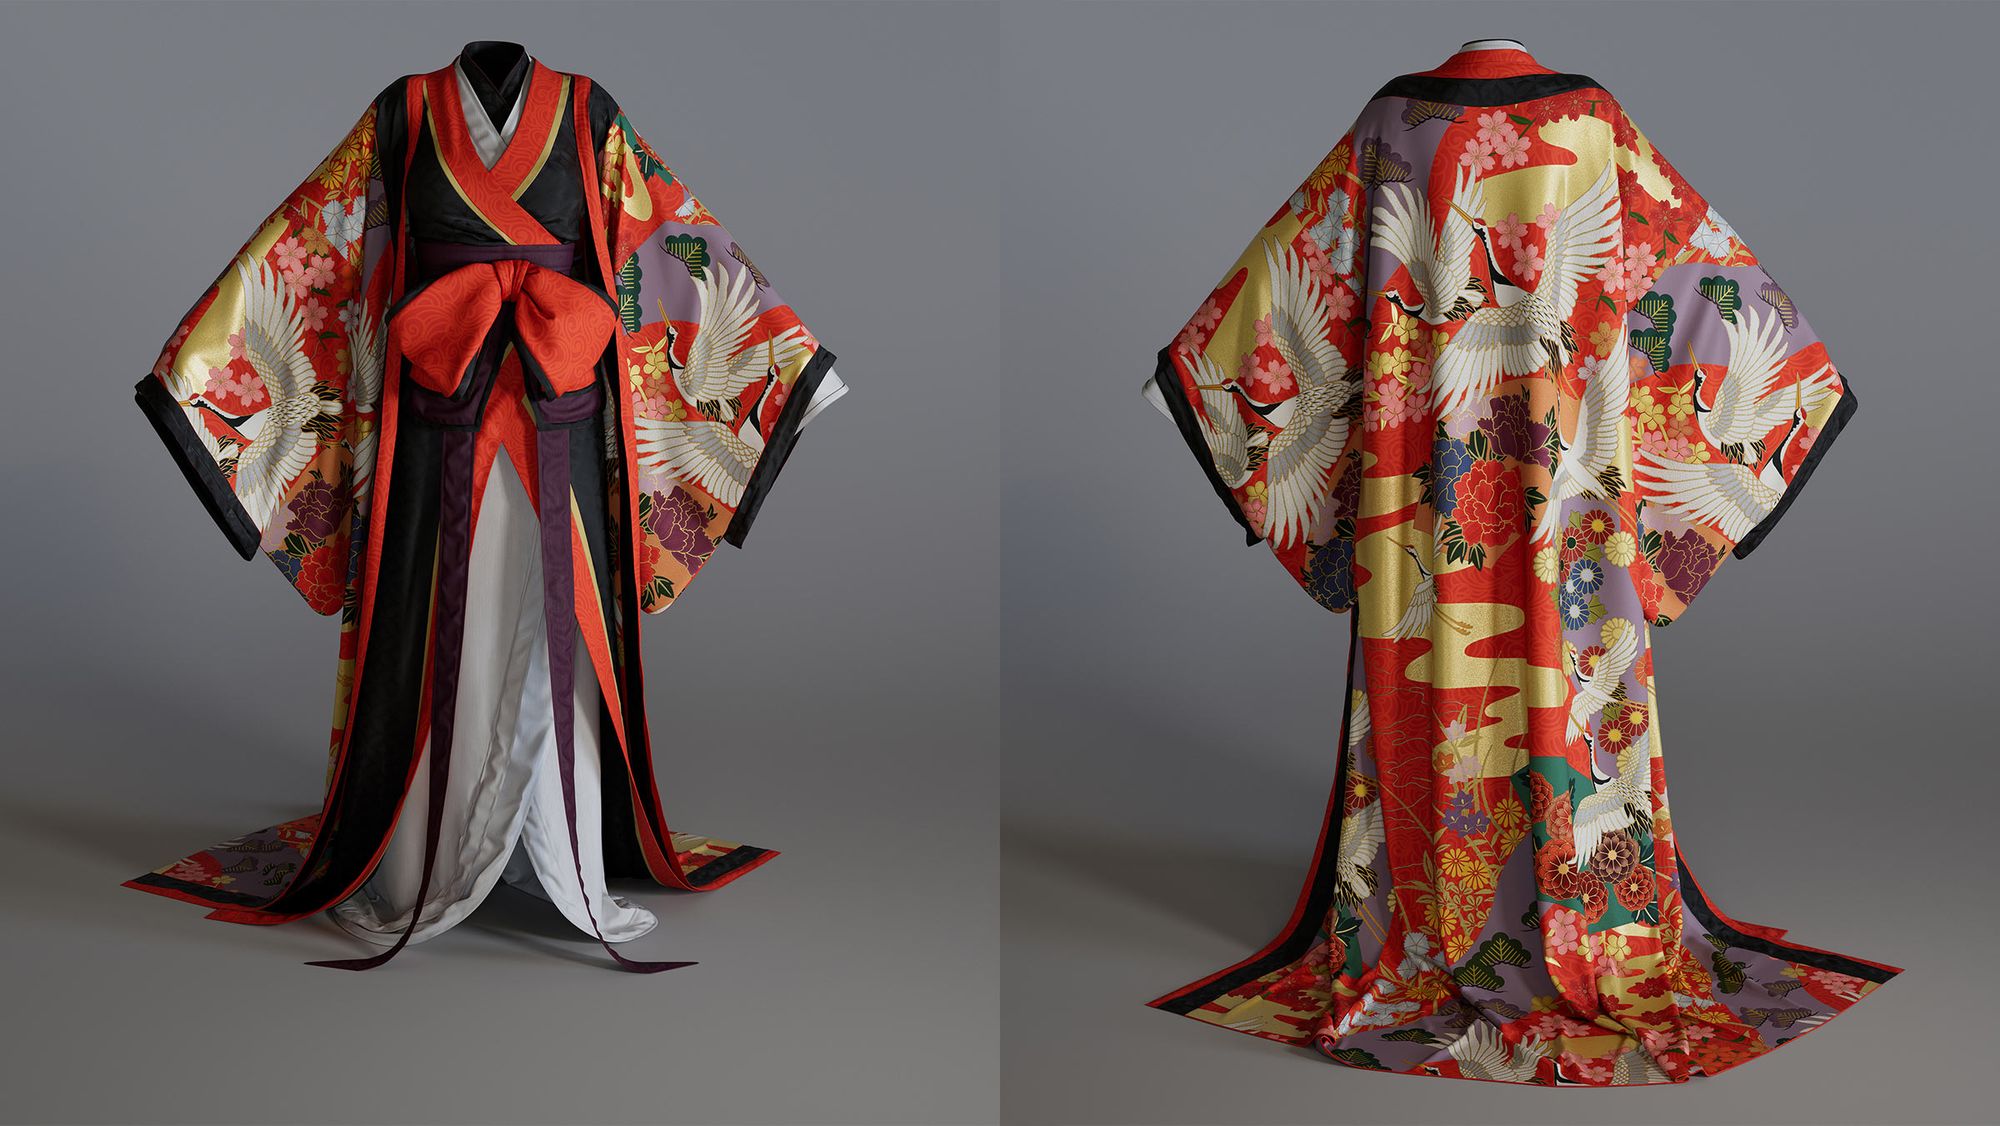
The last step was to apply the textures to the model. I created a scene in Maya and directly imported the textures into the Hypershade. This choice was made because, in my opinion, they lost quality at the moment of exporting them by applying the textures on the mesh using an external software. This way, I kept the resolution, while scaling the textures to make them match the different pieces of fabric. I used two separate shaders: a simple VRayMtl for the outermost part with the main pattern and a VRayBlendMtl to combine all the other fabrics together.
This was definitely the most complex project I've ever done with Substance 3D Designer and it had some problems with which I had to compromise. First of all, the issue of texture resolution: during the process, I realised that a large quantity of elements, their embroidery details and the fact that many of them (i.e. the flowers) were quite small in the final pattern, and this led me to the decision of increasing texture resolution from 4k to 8k. This absolutely personal choice allowed me to reach a great level of detail, but also created some complications, such as having to create multiple separate projects on Designer and then combine the individual exports in a separate project, since I otherwise would have saturated all the RAM.
Another aspect that should certainly be underlined is the coherence between the elements of the pattern: since in this case various embroidery effects were being created, it is important to take into account that the discrepancy between the embroideries of different elements cannot be too significant, since it would cause a disturbance in the perception of the final texture.
Despite some difficulties during the process, I am more than satisfied with the final result, especially because it was created in a relatively short time, and the whole project confirms the incredible freedom and infinite creative possibilities of software like Substance 3D Designer.
Reach out to Marco via his Rookies profile here.